DIY Chinese Checkers Board
This Chinese Checkers board is the perfect gift idea for anyone who loves to play the game! Chinese Checkers is such a fun game for the whole family and this DIY board is pretty enough to hang on the wall or use as tabletop decor when it is not being played which is such an improvement over the broken cardboard boxes of the cheap board games found in stores!
Chinese checkers is my all time favorite board game, I used to play the computer for hours growing up and now I enjoy when my kiddos give in and play with me! This board makes me want to play so much! I love how great it looks all the while being so fun to play!
***All links in this post are AFFILIATE LINKS! Affiliate links are links that I earn a small commission off of, at no extra cost to you, should you make a purchase! I always appreciate you shopping at my links as it helps me keep bringing you this fabulous content! 😉

I will be honest, I saw a board like this in a high end retail store, it rhymes with smottery farn! Lol! And I wanted to make myself one from the moment my eyes caught the 400 dollar price tag! I didn’t know how I could make a jig or something to ever get my holes lined up the way they would need to be though, and then when I got my xTool M1, it all became so clear to me how I would be able to make my favorite game…with a freakin’ laser beam!

If you haven’t checked out my xTool M1 review, you should do that if you are thinking of purchasing a laser cutter/engraver! It is in depth and will help you decide whether the M1 is right for you or not! I have several other projects that I have made with it and I plan on making SO MANY MORE! Check out my block print shirts, my Velvet ornaments, or my Christmas light box! There will be so many others in the coming weeks as well!
Hear me out okay, you order yourself an xTool M1 for Christmas, but you order it a little early so you can make gifts for everyone else with it! Like this Chinese Checkers board, you could gift this to all your game loving friends and family and it only cost you a few bucks, but they feel like you spent hundreds on them!🤭
Even if you don’t have a laser cutter, you can download the cut file and print it as a template instead and drill all the holes yourself if you are more talented than I am, or more patient I should say! Lol!
Alright, you want to make yourself an awesome Chinese Checkers board, let’s do it!
Gathering Supplies for the Chinese Checkers Board
Download the CUT file for the Chinese Checkers Board for a limited time for free, after the holidays it will be listed in my shop for a small fee so make sure to download it now! I hate charging for any of my plans or files but unfortunately I have to pay to use the software that used to be free! Boooo!
You can make this game in only a few hours, and even less time if you have someone who can keep an eye on the laser while you get the board ready! I feel like it would make a really great item to sell at a craft fair, I have seen way less intricate boards selling for 150 bucks and they didn’t look nearly this good!
The total cost to make this in supplies was only $22 for the 1/4″ plywood, I already had a scrap piece of 3/4″ plywood and I did purchase all the spray paint which was $36 but I will use it on multiple projects so I will say 4 bucks added to the 22 as I only used a little bit of the paint so the cost is around 30 bucks! I also already had the router bit from when I built this dining table! If you have to purchase the router bit, it is an additional $35! I use my flush trim router bit all the time so it is a worthy little investment!
Materials Needed for Chinese Checkers
- 1 – scrap piece of 3/4″ plywood 16″x16″ (it’s okay to be slightly larger or smaller)
- 1 – 1/4″ – 2×4 birch sheet
- 1 – scrap piece of any 1x material you can rip down to size – I used a 1×2
- xTool M1
- router and flush trim bit
- super glue
- paint or stain of your choice – I used these spray paints for the dowels: French Blue, Vintage Teal, Wildflower Blue, Ink Blue, Oasis Blue, Lagoon
- 60 – 3/8″ dowel pins or 60 pieces of 3/8″ dowel cut down – I used the dowel pins, but I think I am going to change them out with flat dowels since the flutes aren’t sanded well and I don’t like the way they took the paint!
Cut List
- 4 – pieces of 1x cut down to 10″
- 4 – 1/4″ plywood 12″x12″
- 3/4″ plywood cut to 16″x16″
Making the Chinese Checkers Game Board
So this project is a team effort between the xTool M1 and you! The M1 does all the intricate tedious stuff and you just have to do the heavy lifting! Lol! Since there are limits to this machine and its abilities, we are able to layer the 1/4″ plywood to create the look of 3/4″ wood, and then we are able to use the curves as templates to cut the 3/4″ plywood! It will all make sense soon!😉
Cutting the Star for Chinese Checkers
Alright, so first things first, you will want to to download you files and start up your machine! My machine was taking its time to connect so I went ahead and imported the image first! You can import by File, import image…

Or the image button, either one will work!

Then your files will show up and you will need to select the Chinese Checkers file from wherever you saved it!

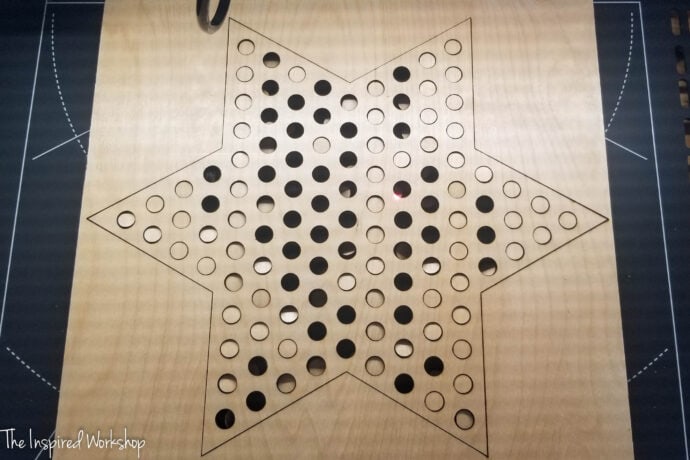
Click on the Chinese Checkers Cut file and you will see the star appear on your screen!

Place your 1/4″ plywood inside the machine making sure the red light hits the board! If the camera doesn’t refresh automatically, click the refresh button so you can line up your star on your board!
Click anywhere on the screen off of your star!
This will give you the panel below! You will leave the material set to user defined material since there isn’t a preset for 1/4″ plywood, make sure to auto-measure by clicking the small ruler to the right of the thickness box! Also make sure that triangular prism is set on the height raised! It is always good to use the triangular prisms to get less charring on the back of your wood!

You will click both layers (one at a time) and set the processing settings to CUT with the settings of power – 100, speed – 2, and pass – 1 for both layers!

Once you have set these settings on BOTH layer 1 and layer 2, you can hit process!

Make sure and hit the Start button in the top right so that it will send the file to the machine!

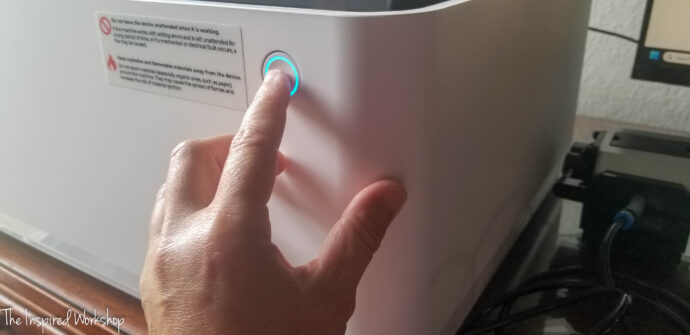
Now you will have to press the white button on the front of the xTool M1 to actually start the cutting!
Make sure and turn on air assist!

Now sit back, relax, and let the machine do its thang!!!

You will then cut two more…no changing settings or anything unless you notice an issue such as not cutting all the way through somewhere or extra charring somewhere, you will want to adjust speed up or down depending! Otherwise, set the next piece of plywood in there and start the cutting all over again!
Once you have all three stars cut you will need to glue them together, make sure and line them up perfectly or else your pegs will stick a little in the holes! Lol…ask me how I freaking know?!🥴

First two glued together!


All three glued together!

Once I had all three stars glued together, I had burned one pretty bad because I accidentally had it set for 3mm wood and so it didn’t cut all the way through, I realized this before I removed the star from the machine so I was able to just cut it again without wasting the star! But, I then proceeded to change the settings to the cut settings for the 1/4″ plywood even though it was already over halfway cut through, so it caused some burning on the underside! Lol!
Anyway, not sure why that was important to share but I thought it was! Lol!
Since you are gluing multiple pieces together the edges may have the ever so slightest ridges in them and since I was painting it I wanted to smooth the edges out as much as possible! I used joint compound to smooth them!

I just used a plastic putty knife to smooth it over the edges!

Once I let the joint compound dry I lightly sanded it with 220 grit sand paper, if you have a higher grit you can use that, joint compound it very easy to sand! It is ready for paint!

Making the Board for the Chinese Checkers Game
After completing the star of the board, pun intended, lol, you can make the rest of the Chinese Checkers game board for the star to be attached to! I started by finding a scrap piece of 3/4″ plywood that was roughly 15 3/4″ wide and so I cut it down to 15 3/4″ long to make a square!
The measurements in the cut list are for a perfect 16″x16″ square so if your board is slightly smaller as mine is, you will need to adjust the cuts on the small frame boards! I’ll show you later when we get there!

Once you have your square, I marked the corners at 2 3/4″ and cut them at a diagonal to get rid of as much of the corner material as I could so that it would be safer when I route it later!


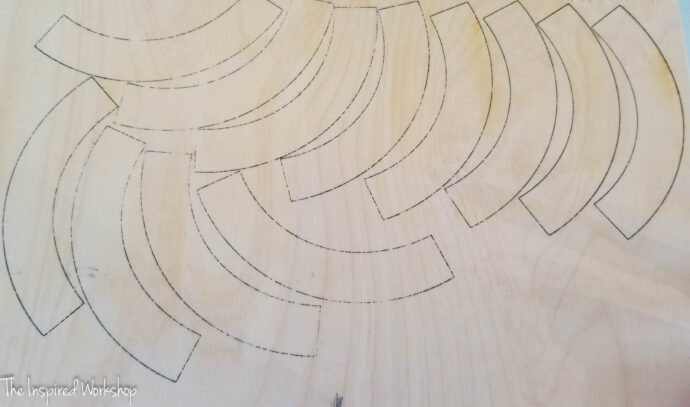
Once I prepared the plywood, it was time to cut the curved corners! The curved corners also involve the laser because I can not, for the life of me, manage to cut straight cuts on my scroll saw!
I have watched Lizzy (@thehouseoftimber on Instagram) for years now and she never ceases to AMAZE me at what she can cut on that dang scroll saw, but alas with all her tips and tricks some of us are just NOT that talented! LOL!
Anyway, enter the xTool M1 and viola, I can now make all the projects that I once couldn’t because of intricate cuts! So I designed this curve in Illustrator and glued them together just like the star and then used that as my template to use the router to cut the 3/4″ plywood I was using as my solid base! That may sound crazy before you see it in action, it was so easy!
I used the same settings to cut the curves as I did the Stars, 100/2/1, and also used the same 1/4″ plywood!
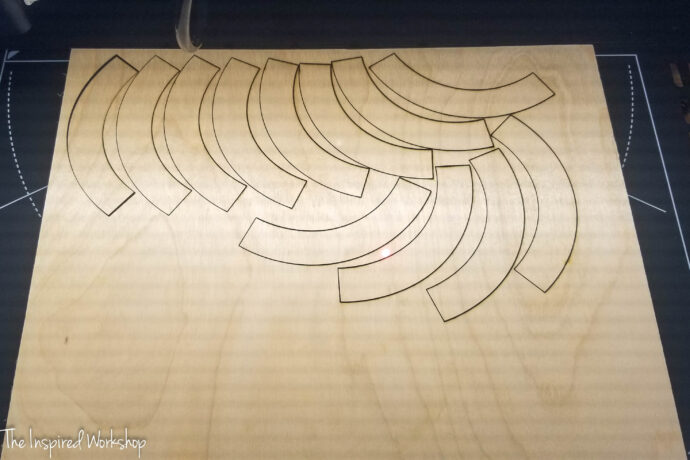
This piece of 1/4″ plywood I used was slightly bowed in the middle and it didn’t cut all the way through, I was able to use an Xacto knife to cut the places that had small wood still attached, and luckily it doesn’t affect the look of the cut! If you have strong magnets you can use them to hold it down to you base plate!
Once all the curves are cut, you will need to rip down the scrap pieces of 1x to the same height as your 3 pieces of curves stacked! It should be right around 3/4″, which would make your frame pieces 3/4″ x 3/4 x 10″! Mine were slightly thinner than a full 3/4″ and only measure 9 9/16″ since my board is only 15 3/4″x15 3/4″!

I laid it all out and then glued down one layer of curves and the frame boards!


I just kept gluing the rest of the curves!

Check it out! It looks so cool already! EEK!

Now it is time to remove all that extra plywood on the bottom! I went ahead and cut it with a jigsaw just to thin the plywood out a little and make it easier to route! I don’t have a router table or else this would be a piece of cake even without removing the extra wood!

Now it is time to route that ugly edge flush with the curve we cut on the laser!

Check out that curve!!!


I went ahead and used the joint compound around the base as well just in case there were any spots in the plywood that would show through the white paint! White paint shows all imperfections! Lol!

Now the base is complete and the star is complete, they need that nice finish!
Finishing the Chinese Checkers Board
To make a nice smooth finish when spray painting wood, it is best to use a filler primer to fill in the wood grain, plus it is sandable so it creates a flawless finish when you are patient…I should note that I am exceptionally impatient! Lol!

Also, note my very sophisticated spray paint set up! Lol

I used Rust-oleum Blossom White satin spray paint to paint the star and board! I will say, I probably would have spray painted one or two coats with them separate, and then sprayed them with one more coat after I glued it all together! But it worked fine the way I did it!
Once the paint is done and dry, you just need to glue the star to the board!


Playing Pieces for the Chinese Checkers Board
Since I used pre-made dowels for the playing pieces, there really wasn’t anything to making them! If you were to cut your own from dowels, you will want to set up a stop block (a board clamped on the base of your miter saw) so they are all the same size and you can cut them quickly without measuring each one!
I primed them with the same filler primer and then used all the blue spray paint to paint them!


I didn’t get a pic of them them painted but luckily the after photos show them in all their blue glory! Lol!
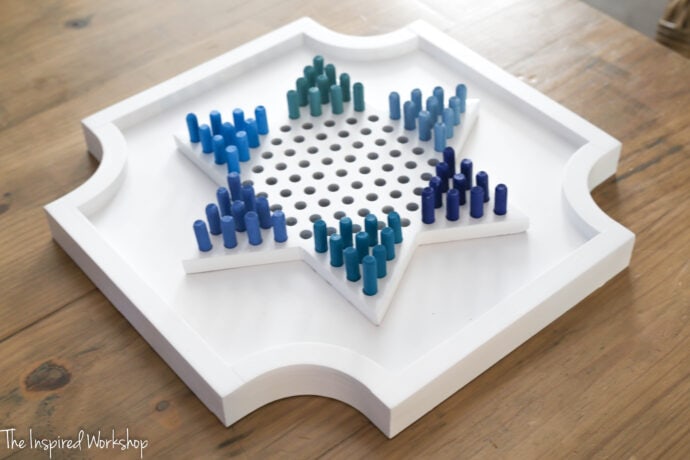
The Chinese Checkers board is DONE! Play a game, or two or three, and enjoy this beauty!

I LOVE this game board so much and I hope you all do too!
Have you ever made a game board of any kind? Let me know in the comments below! And then go get busy making this awesome Chinese Checkers board with your M1 now!
Thank you so much for stopping by! Have a wonderful holiday season!

Want to save this Chinese Checkers board post for later? PIN IT!


Smottery Farn 🤣 great project and the end result looks amazing! Thanks for the cut files Cara!
🤭Thank you so much Toni, and you are so welcome!😘