DIY Christmas Light Box
Christmas lights are a fundamental part of Christmas, and if it doesn’t light up, is it even Christmas decor?! This DIY Christmas light box is the simplest DIY way to light up an area that you may not be able to put string lights but you can still make it festive! Or and it to your mantle where you already have a bunch of other lights, it will fit right in!
This Christmas light box is slim enough to fit anywhere and it is such a soft way to add holiday cheer throughout the winter, no need to put this cutie away after Christmas Day!
***Links below are AFFILIATE links! Affiliate links pay me a small commission (should you make a purchase) at no extra cost to you! I always appreciate you shopping at my links as it helps me keep bringing you great content!***
I made this DIY Christmas light box with my xTool M1 laser cutter and it was the easiest craft ever thanks to my M1 doing all the work! Lol! If you haven’t read my review on the xTool M1, I suggest you go read it if you are interested in purchasing a laser cutter/engraver! I let you know all about the capabilities and limitations so you can pick the best machine for your wants and needs!

If you don’t have a laser cutter, you can still make this project if you are more skilled than me with a jig saw or scroll saw! LOL!
The cut file is available for FREE below! Y’all I have made so many CUTE decor items with my xTool M1 and I have only had it for a couple of weeks! It is so much fun! Check out my other projects I have made with it such as: DIY Block Print Shirts, you can quickly make the cutest t-shirts and sweatshirts by stamping them! Also, I made this beautiful Chinese Checkers board that I am making several more for some of my friends and family as gifts! I can’t wait to show you all my adorable Christmas Ornaments that are coming soon too!
Alright, alright enough about my new best friend the M1, let’s make this Christmas light box! 🤭
Gathering Supplies to Make the Christmas Light Box
Okay, okay, the M1 didn’t do all of the work! I did manage to design the file and do a little cutting and routing to help the acrylic (plexiglass) fit and that counts for something, right?! This was so much fun to make, it’s not too large so it can fit in many places that need that holiday glow, and it can easily be customized to fit your decor!
Materials for the Christmas Light Box:
- 2 – 12″x12″ pieces of white oak plywood
- 1 – 1x2x6
- Super glue
- fairy lights
- tape
- 1/4″ rabbiting router bit – this is my favorite set that you can pick up at your local Home Depot
- 1/4″ drill bit
- 11×14 clear acrylic sheet
- frosted glass spray paint
Cut List for the Christmas Light Box:
- 2 – 1×2 @ 10 1/2″ – top and bottom boards – both are rabbited along one edge
- 2 – 1×2 @ 12″ side boards
- 1 – 10 1/4″ x 10 3/4″ piece of acrylic
Making the Christmas Light Box
Once you have gathered your supplies, you can get busy making this cute little piece of Christmas decor! Here is the FREE SVG file to download to cut the tree!
Using the xTool M1 to cut the Christmas Tree
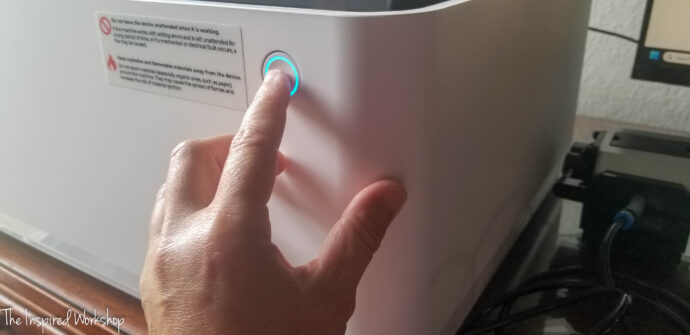
You will want to turn your machine on, and using the triangular prisms and air assist if you have it, set your 12×12 piece of plywood inside!


Once you have your cut file downloaded, you will want to open xTool Creative Space, and click image, and find the file wherever you downloaded it on your computer!

Your image is then displayed!

Now you will want to click off of the tree, anywhere on the screen, and this will allow you to choose your material!

Oddly enough, all the xTool Selected materials are preset in the materials list except for the White oak plywood! Lol! But I used the settings for the 3mm Mahogany plywood and they worked perfectly!

Make sure and change the height raised to ‘triangular prisms’ instead of ‘no’.

Then auto measure by clicking the small ruler to the right of the thickness box!
Click anywhere on the image to get the box around the tree, this will bring up the processing settings so you can adjust them!

Score will automatically be selected and the settings preset for the material you selected earlier! You will want to click on CUT instead! The preset settings work perfect to cut the tree and so you don’t need to change any of them!

Hit process, you will see the tree come up on a different screen!


You can just barely see the tree in the photo above but I hope you can make it out!
Then you must click the start button in the top right corner!
Then go click the start button on the machine!
And it is ready to go! It will start cutting!
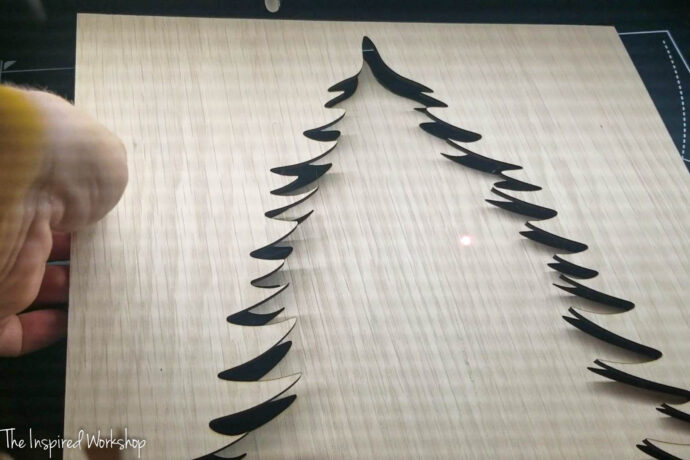
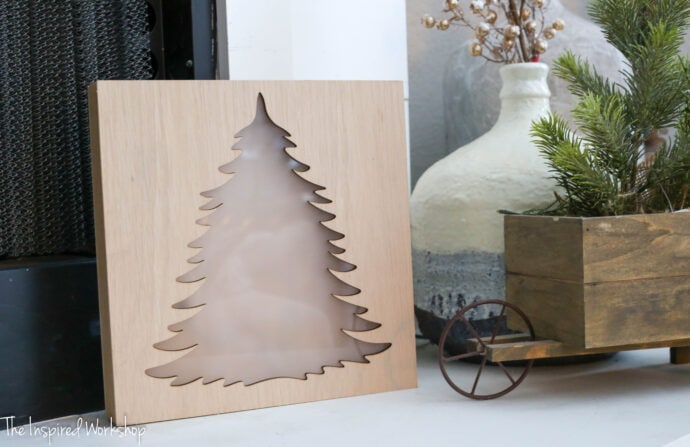
Ooh la la that cut is so nice and that white oak is so gorgeous! You can paint it or stain it, I left mine natural but I may change it once I see it with all my Christmas decor out!
Now you just need to build the box and add the lights, and heck yeah you will have such a cute Christmas light box!
Cutting Wood and Acrylic for the Light Box
Once you have the tree cut, that will be the front of the box, but we will need to cut a couple of boards to create the box to house the lights!
The 2 boards cut at 12″ will be the side boards and will just be glued in place along the edges of the plywood! The 10 1/2″ boards will be the top and bottom boards and they will need to be rabbited along one edge so that the acrylic will cover the tree! I used my router and routed one edge of each board!


Now that the top and bottom boards are ready to go, you will need to cut the acrylic down to size! I would have used my laser if I had a CO2 laser that could cut clear acrylic but the xTool M1 is a diode laser and diode lasers cannot cut clear acrylic, unfortunately! But the table saw works just fine since the edges are going to be hidden!

Once everything is cut and ready to assemble, the clear acrylic needs to be spray painted with frosted glass spray paint to give the lights ambiance as it shines through!
Here’s a picture of the acrylic before the frosted glass spray paint!

I know, I know, I have a very sophisticated spray paint set up! 🤣 Here’s the after!

That looks great! We are now ready to assemble this baby!
Assembling the Christmas Light Box
Using super glue, attach the side boards to the backside of the Christmas tree cutout! Just line them up with the top, bottom, and sides!

Next, add the bottom board with the cutout, face the cutout towards the Christmas tree, and towards the top! Just use super glue to attach! You cannot see the rabbit when it is in place from the angle I am recording!


Do NOT add the top board yet, you must add the acrylic FIRST! I just used super glue to attach the acrylic as well! Then add the top board!

Now that the frame is completed all you need is the other 12×12 piece of plywood for the back! I drilled a 1/4″ hole in the back to push the lights through!
I super glued the battery box for the lights to the back of the plywood!


Now, flip this piece of plywood over and tape the lights in place!

Now super glue this piece of plywood to the frame with the lights to the inside and the battery box on the outside!
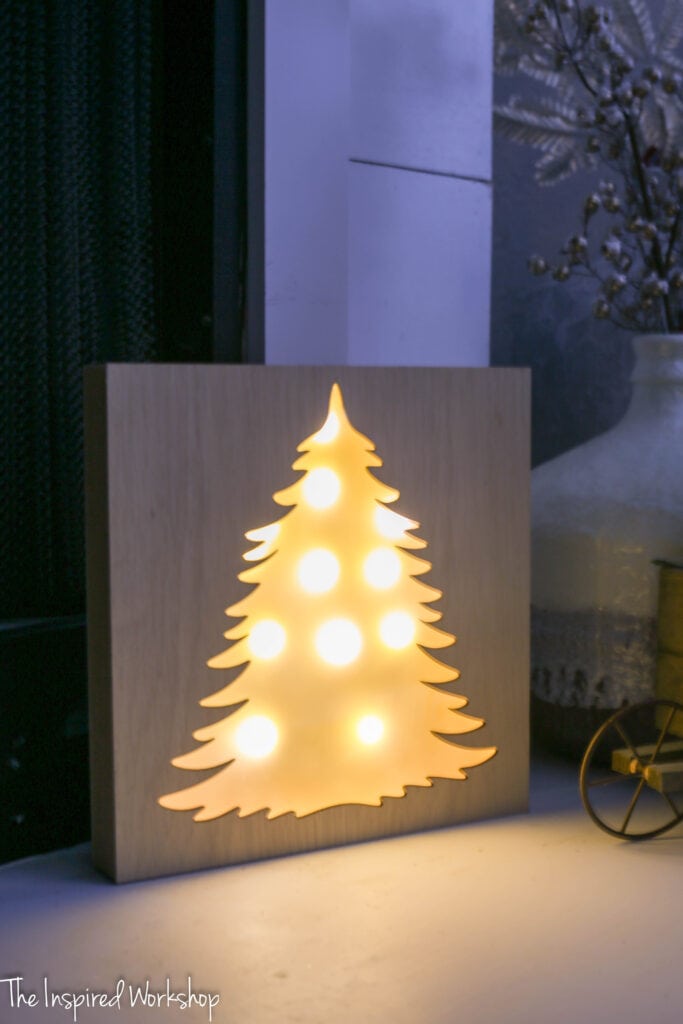
AND, it is DONE!!!
Turn on those lights and enjoy the glow! Christmas light box glow!
I love this light box and cannot help myself as I am already dreaming up so many more ideas using this same design, like a gingerbread house, and for times other than holidays you could make any design for a kids bedroom to use as a night light!
Make sure and check out my review of the xTool M1 laser engraver/cutter if you haven’t already! Or if you know you need one, or have someone in mind to gift one too, grab one at my link! xTool M1
Are you decorating for Christmas yet? I can’t wait to start getting all my decor out!
Thanks for stopping by! Have a good one!

Want to save this post for later? PIN IT!


