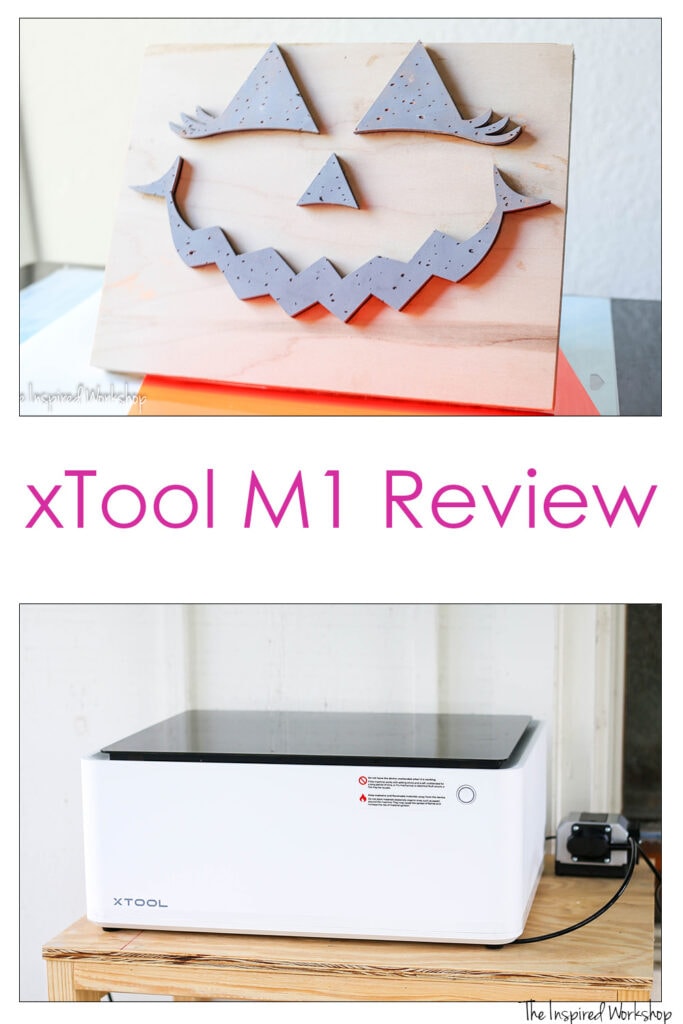
xTool M1 Review

The xTool M1 is the world’s first laser engraver and vinyl cutter together in one tabletop machine! This little gem is a beast of a machine that sits right on top of your desk! The xTool M1 can be used to create crafts for your own home, gifts for your friends and family, or even make unique creations for your online store and/or market days! The M1 was not only created with space saving and affordability in mind, but also the ease of use so even the most novice of users can quickly be up and running!
***Disclaimer: I was provided an xTool M1 for free to test out for this review! All opinions are my own, and this is an HONEST review! I think it is important to note here that I had been researching laser cutter/engravers and was 100% ready to purchase this machine or the xTool D1 on my own before being offered this in exchange for my review!
***Links in this post (above and below) are affiliate links which means if you click a link and make a purchase, I make a small commission at no extra cost to you! I ALWAYS appreciate your support in purchasing from my links as it helps me keep bringing you new and exciting projects!***
I am going to keep this simple, if you just want to know whether or not I love, hate, or am impartial to the machine, here it is…I LOVE this machine and now that I have had a taste of laser cutting and engraving, I have SO MANY PROJECTS in mind that I want to test and try! I have already crafted 4 projects to share over the next couple of weeks and I am not stopping there, I am overwhelmed with project ideas!
If you want to know if I think that the xTool M1 is worth the money, which is $1500 MSRP, but you can catch it on sale right now for $1099, the answer is YES, I absolutely do! This little machine opens so many doors to projects that I never would have been able to create with my skill alone, I cannot make smooth intricate cuts on a scroll saw to save my life! Lol! I can however create them in Adobe Illustrator and then have this device help me out by making the cuts and then use those cuts as templates in addition to creating fun things just from the machine as well!
Depending on what you are interested in creating, you may want something a little more powerful, or a laser cutter without the vinyl cutter if you already have a blade cutting machine (such as Cricut or Silhouette) although it is really nice to have both in one machine especially if space is an issue as it is in my house! Lol! xTool has many options and the quality (so far) has proven itself to be amazing! I hope to update this review periodically since I have only had the machine a couple of weeks but so far I haven’t had any issues to share!

If you are interested in a more in depth discussion of what the xTool M1 is capable of, what it’s limitations are, and where the ease of use lies, and what may frustrate some, make sure and read all that I have prepared below! Fair warning, it is a lot of information, but I hope to be helpful in your decision as to whether or not this machine fits what you are wanting to create and save you a headache of a return and restocking fee if it isn’t!
Types of Lasers
The one thing I want to make note of as I did not realize this when I was looking at laser cutters, as I stated earlier, I was looking to purchase this M1 or the D1, the main thing I wanted a laser cutter for was cutting acrylic! You *can* cut acrylic on the M1 and D1 but in all my research somehow I completely missed the fact that there are different types of lasers, there is diode, infrared, which include CO2 lasers and fiber lasers, and even others… and they are not the same! Lol!
Knowing what you want to make/do is imperative to your being happy with your purchase! So make sure and do a little research based on what you want to do with your laser to find out which machine will fit your needs and wants! For instance, if you really want to laser engrave precious metals and jewelry, you are going to want to look more at infrared lasers, even though a diode and CO2 lasers can engrave metal, they are not good at engraving precious metals! xTool makes the F1 (a type of infrared laser referred to as a fiber laser) laser that fits this need best!
As I stated, I wanted to cut acrylic, the M1 and/or D1 are diode lasers and they work perfectly fine if you are okay with only cutting certain colors of opaque acrylic (black, green, red, yellow, orange, and brown), but I would like to cut all colors and clear acrylic which the M1 and D1 just cannot do! The xTool P2 is a CO2 laser which can cut any acrylic, all day long but it comes with a significantly larger price tag and is a much larger machine in size, and something new I just learned, they don’t typically last as long as a diode laser!! So many things to consider!!
So make sure and take all the aspects into consideration when deciding on which machine to purchase such as what do you want to make or do with your laser, what is your budget, how much space do you have to house the laser?
Ultimately, my thinking is something like this…I would have had to wait another year or more before purchasing the P2 over the M1 or D1 so I would have grabbed this machine anyway more than likely because I know that I could be learning the ropes of laser cutting, and I have always wanted a vinyl cutter as well! I plan to sell items made with my M1 to make the money to pay for the P2 eventually, but in the meantime there are SO MANY projects to be crafted with my M1!
BUT wait, there’s more…sounds like an AS SEEN ON TV ad, right?! Lol! Well, I just had to update to share that xTool just came out with their newest laser and it is a 40w diode enclosed laser, the S1 and now I am really stumped as to whether I want the P2 or the new S1! Oy! So many options…I guess that is such a great problem to have!😉
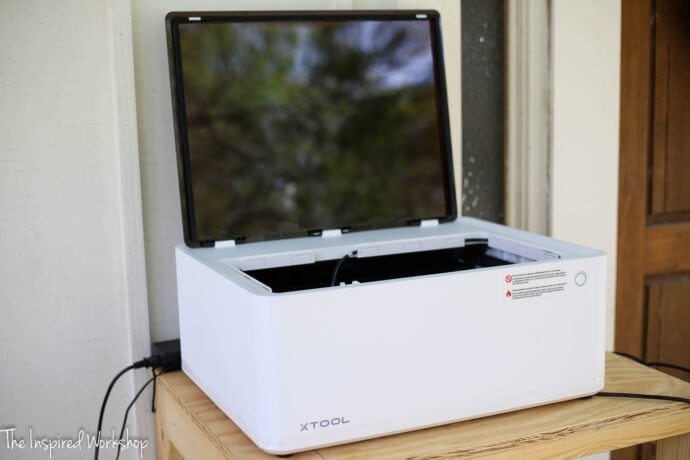
Opening the Box of the xTool M1
Let me preface this with the fact that I have never operated any kind of cutting machine, no Cricut, Silhouette, or laser cutter/engraver of any kind. I will say I was a little intimidated when I took it out of the box and had to set it up a little bit, but the instructions were so clear and easy to follow, it was unbelievably simple to set up! I had never used an SVG file or any of the software that can read an SVG file! I was a COMPLETE beginner, and yet I was able to quickly set up my M1 and get cutting within an hour!
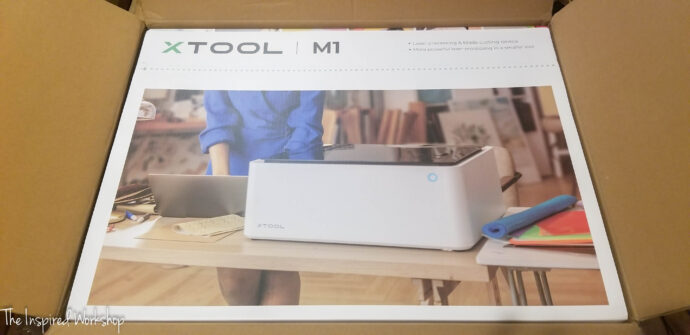
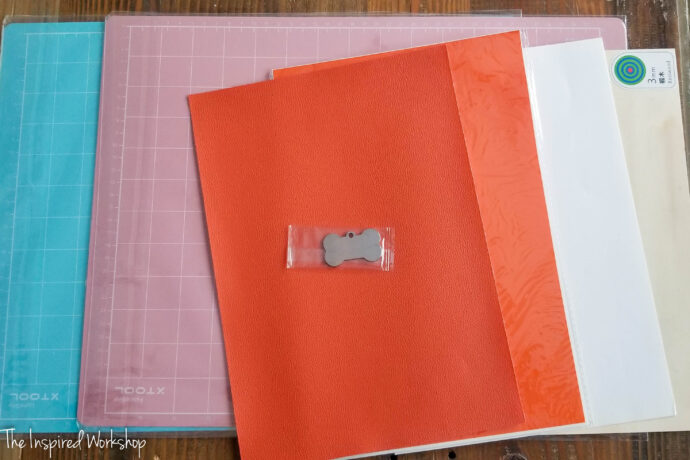
In the box of the M1 you have the machine, exhaust hose and clip, blades, and triangle prisms, two cutting mats, and a small pack of test materials so you can use your machine right away (sorry, I was too excited and forgot to take a picture of the inside of the box as soon as I opened it)! The provided test materials include a sheet of faux leather, vinyl sheet, 1/8″ piece of basswood, a dog tag, and engraving paper!
Setting Up the xTool M1
Once I had everything out of the box, I couldn’t resist setting it up to try it out! If you only purchased the machine, you easily can attach the exhaust hose and put a blade in and get started, if you purchased the optional air assist, this will take a little more time! Let me straight up say, GET THE AIR ASSIST! Without the air assist there is a lot of burning on the front of the material you are cutting. The air assist blows the debris and smoke so that the top is clean and char free! I think they need to raise the price a tad and put the air assist in the box with the M1 because it is that important!
Let me show you how simple it is to set this baby up!
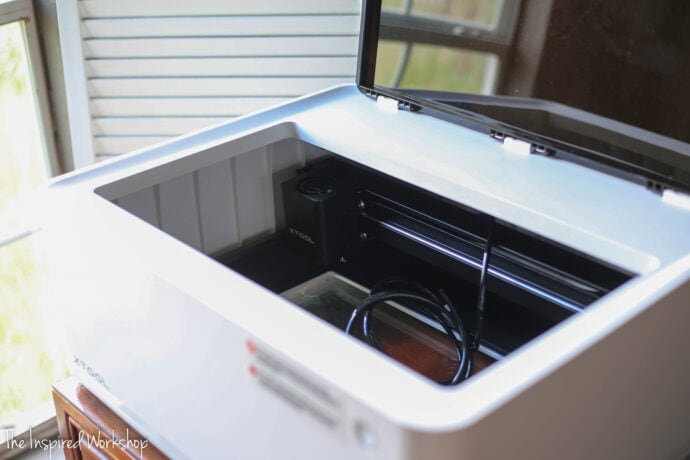
If you are only using the blade cutting, you do not need the exhaust hose, but if you are using the laser you will want to vent it out the window because there is a smell when cutting or engraving!
It is super easy to clip the hose in place on the back side of the M1, it is also easy to remove if needed!
If you did get the air assist, you will have to do a couple extra steps in set-up, but they are so worth it! First you will need to remove the base plate. There are five small screws holding it in place, you will need a Phillips-head screw driver for this!
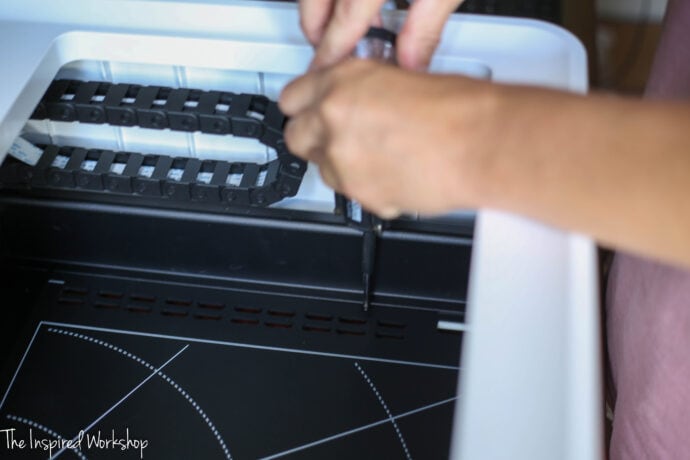
Once the screws are out, lift the base plate out of the machine!
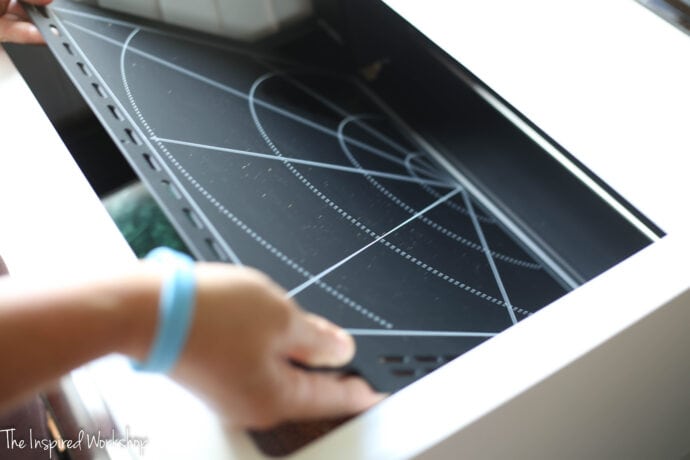
Now you will need to flip the machine over, I know, this can be nerve racking but it’s okay, it won’t hurt it, just be careful with it!

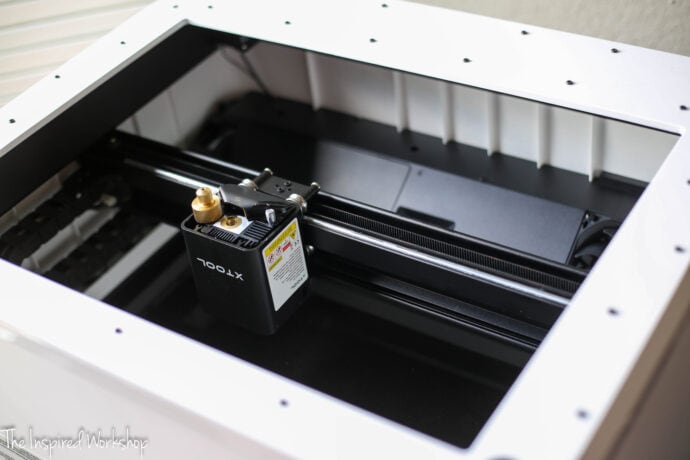
Next you will take that blade cartridge back out if you put it in already! The blade has to stay out while using air assist! Make sure and place the blade cartridge somewhere you won’t lose it! When you want to use the blade, you will see there is a place to store the air assist hose!
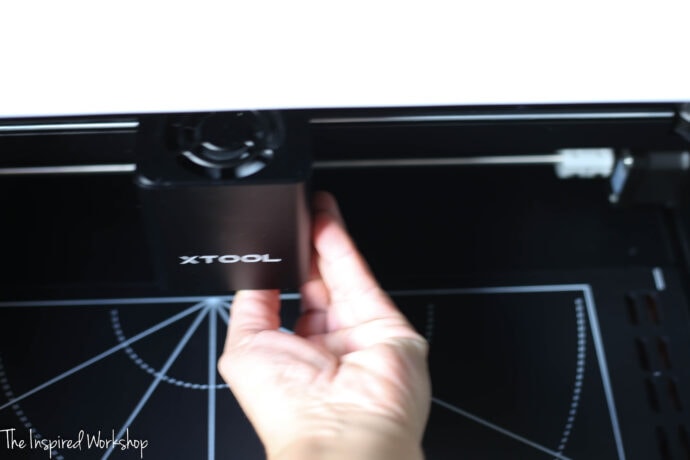
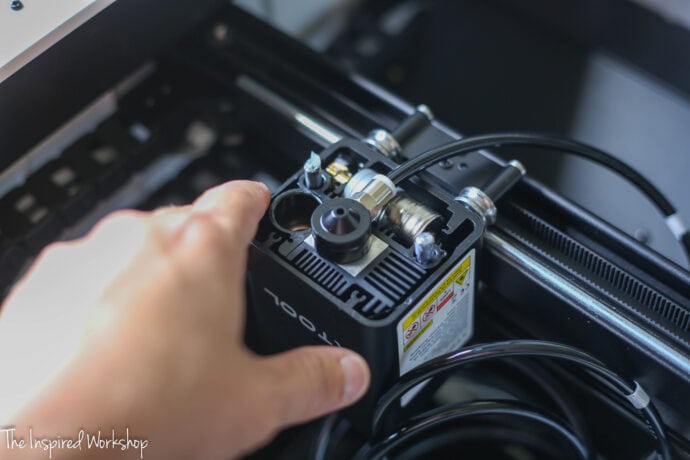
You will just slide the laser housing over and out with your hands, it glides ever so smoothly and easily!
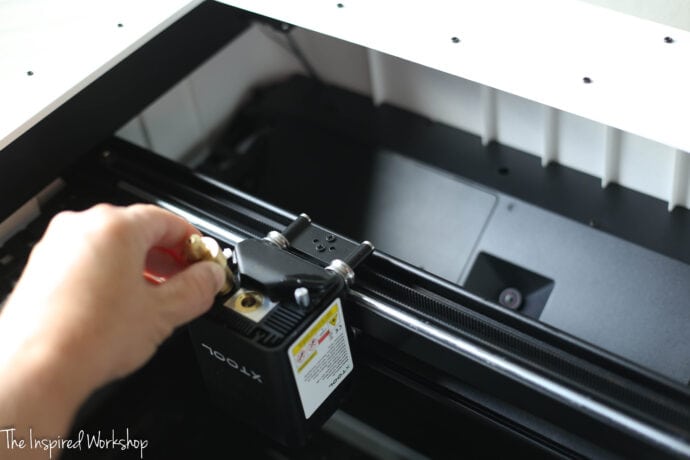
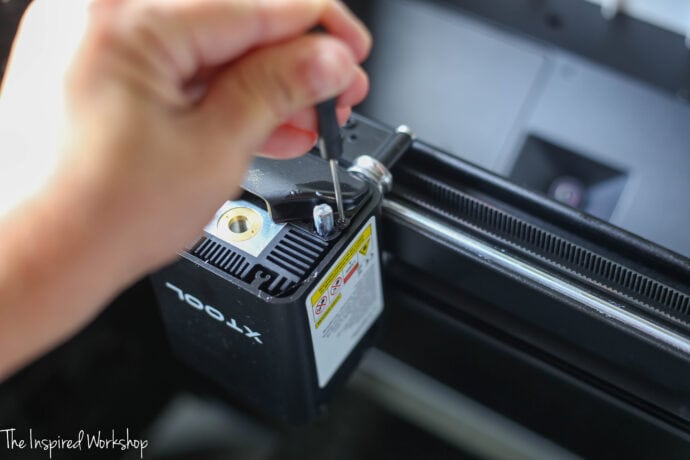
Unscrew the small cover plate, there are two screws and the screw driver needed to unscrew the tiny screws is included with your air assist!
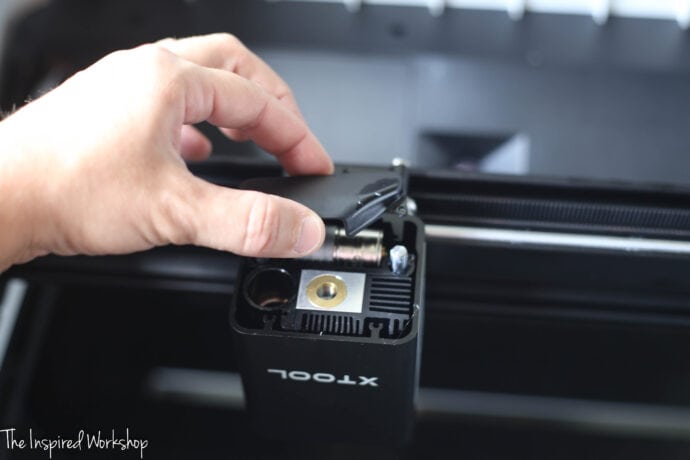
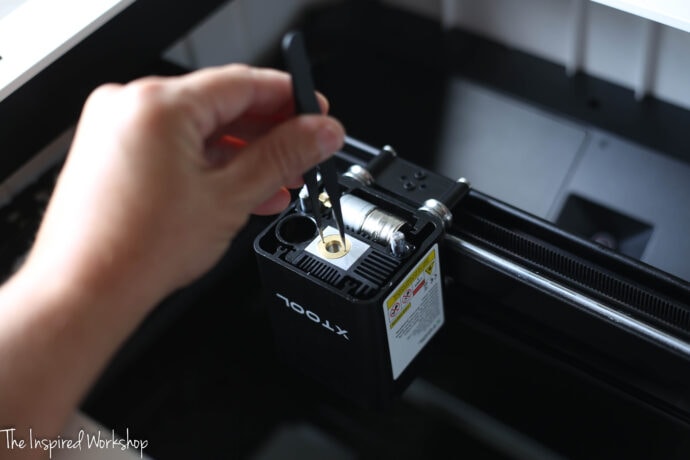
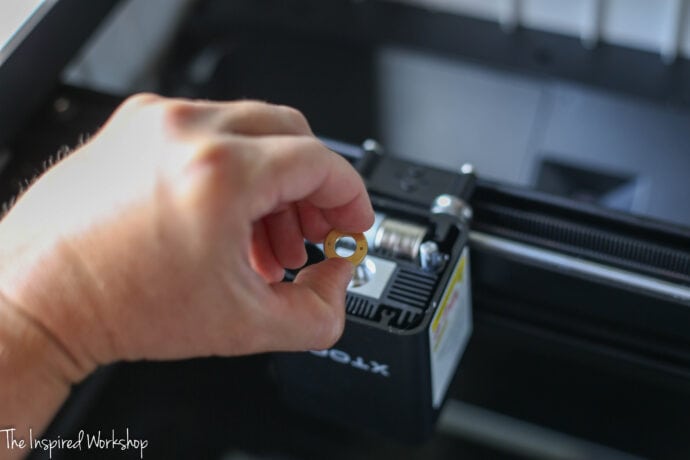
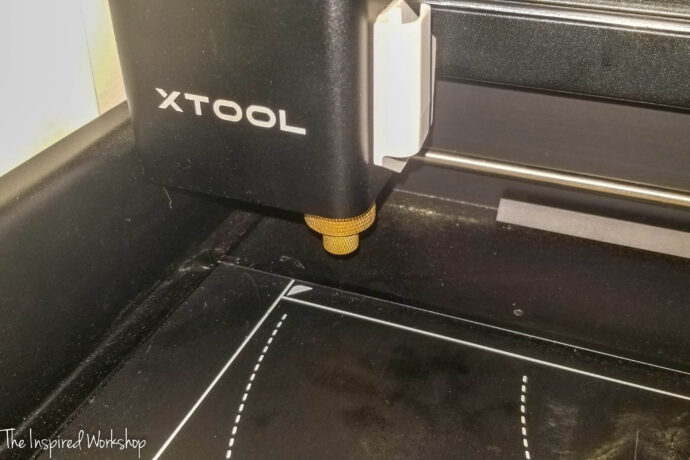
Next, remove the gold ring, you will unscrew it with the provided tweezers!
I was so scared to be messing with what seemed to be the internal parts of my machine, but once it was all done, I realized it was not bad at all, and I was no where near messing with the insides of my machine! Lol!
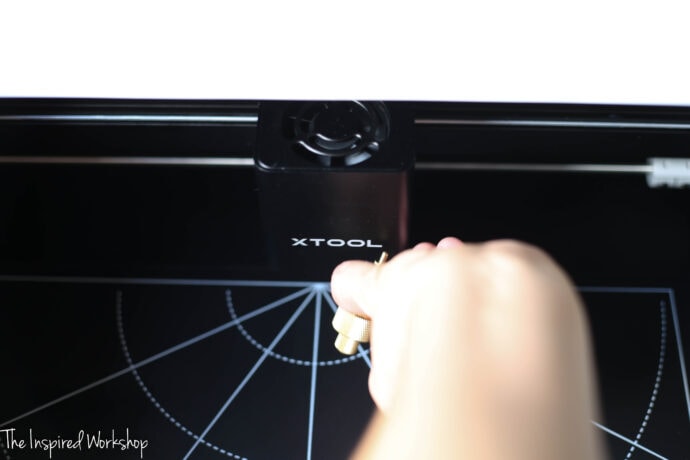
You will now screw this little black ring into place and make sure the “protruding tiny arms” (not the technical term) are parallel to the front of the laser, as shown below!

Next you will attach the air assist hose, it is a magnet so when you have the hose lined up, it will pop into place!
Slide the laser back over into the corner and flip the M1 right side up!
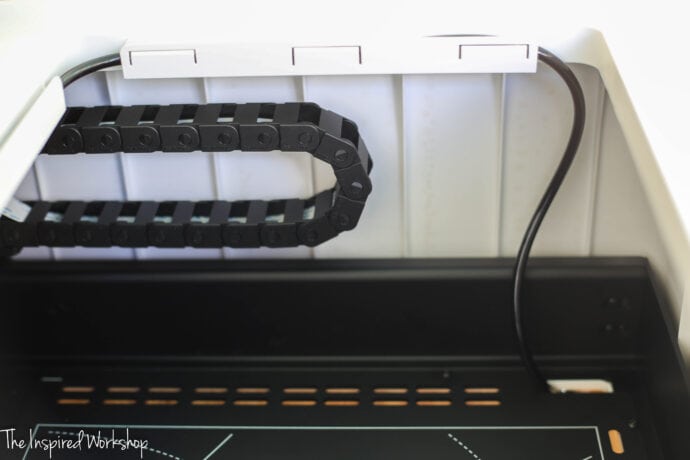
Attach the hose holders to the top rim! They have 3m sticky tape on them already! I placed the longest one on the back in the WRONG spot, it should be far closer to the corner than mine is and it causes my hose to crimp, I need to move it over but I feel like I am going to break it if I pull it off! EEk!
The two tape lines on the air hose show where the hose should sit on the laser housing and where it should enter the clips on the top! This picture is kinda blurry, but you can see the tape if you look closely!
Here you can see it a little more clearly where the actual hose clips go! Now remember, my top long one should be moved over about an inch! It should be pretty dang close to the corner!
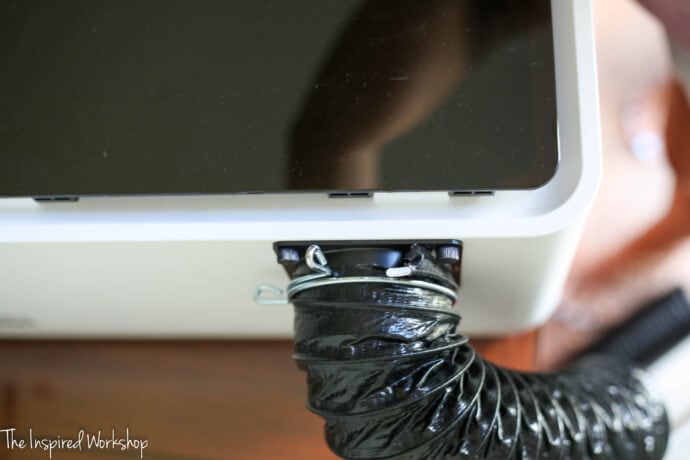
After replacing the base plate, you will send the hose down through the bottom right, there are small open spaces! It goes through those holes and out the side!
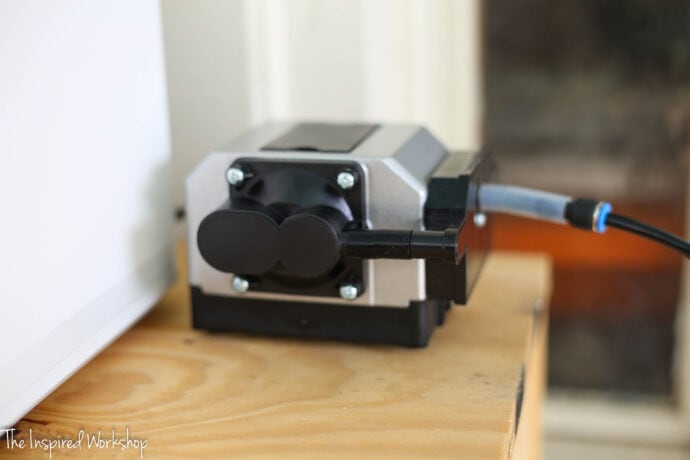
You will attach the clear silicone piece to the end of the hose, and then attach the silicone piece to the air assist machine and he is ready to attack all the smoke and debris from getting on your project!
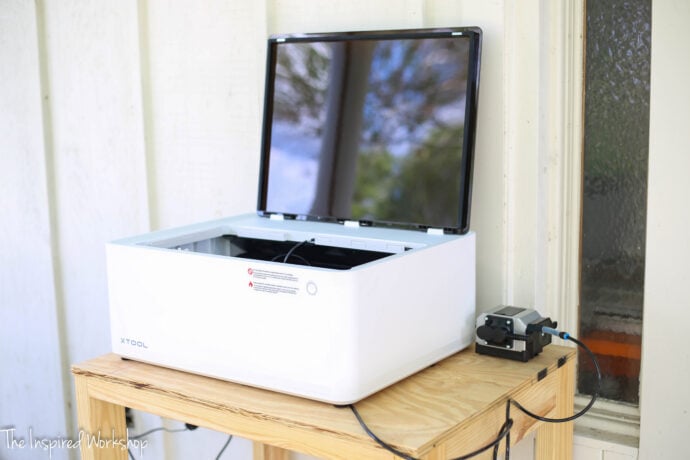
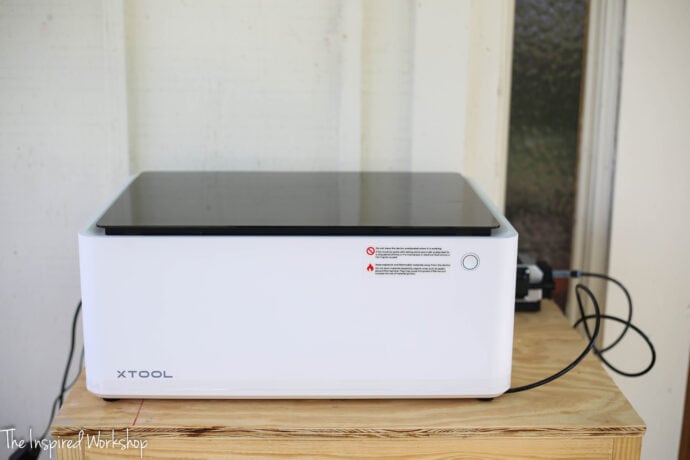
The physical machine is set up and ready to go!
xTool Creative Space
You will need to download xTool’s software to use the xTool m1! This is a free download and comes stocked with quite a few shapes and will have all the fonts available that you have on your computer! Again, I have never used any type of cutting software, and I was able to figure out how to cut a shape without watching a YouTube video or anything, just looking around and clicking on stuff!
The XCS as most people refer to it is pretty straight forward and easy to use, I watched a couple of videos later where they were using Lightburn (a popular software for laser cutting) and it was more like using Photoshop as opposed to your phones camera editing features! I am glad XCS is as straightforward and simple as it is so that I did not have to completely learn a new software just to use this new machine!
When I was looking for vinyl, wood, rubber, and acrylic to use for my projects, I found that xTool actually has a store that is called xTool Selected on Amazon and it has all of the materials that they have tested on their machines! I ordered their puff vinyl, gold acrylic sheets ( I don’t think the M1 can cut these but I am going to try…update I tried and it did not cut but I am going to try a couple more times, LOL), rubber sheets, and the 6 piece set of white oak plywood! Anything purchased from the xTool Select Store has the settings pre-set in xTool Creative Space (the software used to cut on the xTool) which is incredibly helpful when you are just starting out, as I was!
First Cut with the M1
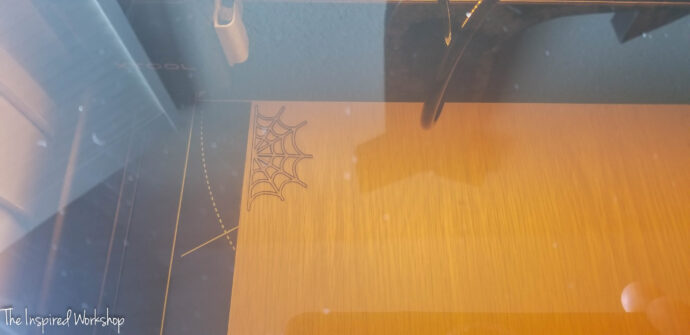
I just grabbed a shape from the xTool Creative Space just to see how it works and check out all the settings. I grabbed the spiderweb shape and cut it at the size it was! I was using the 1/8″ white oak plywood from the xTool select store! Oddly enough, this was the one item that for some reason did not have the settings stored! I have no idea why this is, but I chose 3mm mahogany for my materials setting since they would be pretty close t to the same!
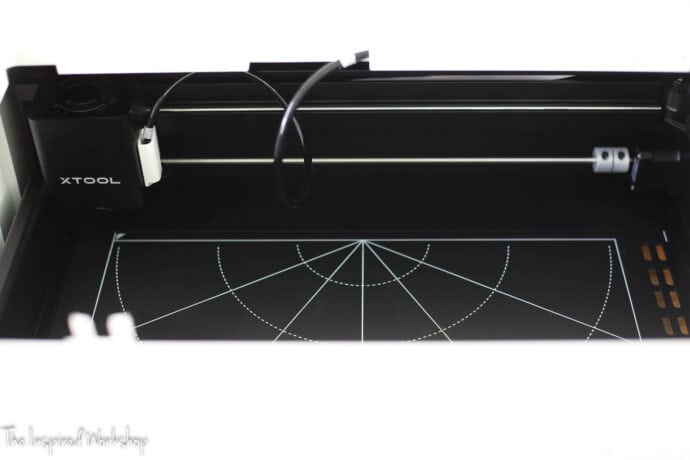
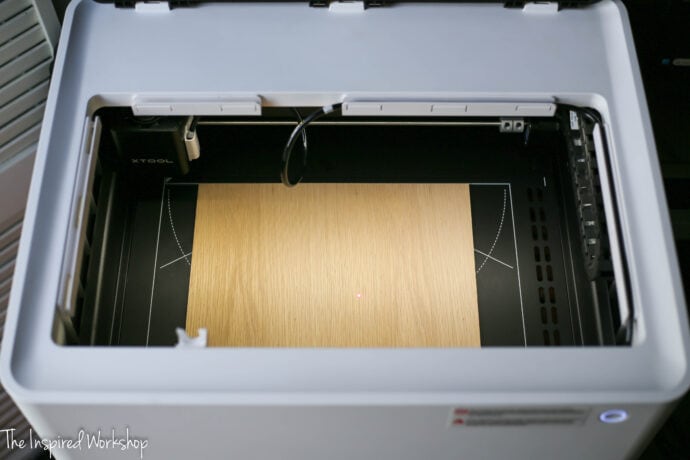
I placed my plywood in the bottom of the machine on the base place…I didn’t know what the triangular prisms were even for at this point so I didn’t use them! Lol! Anytime you are cutting wood, it is best to use the triangular prisms to keep the back from burning!

Close the lid and reset the camera on your computer screen, you will then see the wood on your screen with the spiderweb on it, if it is not on the wood, move it onto the wood where you want it cut!
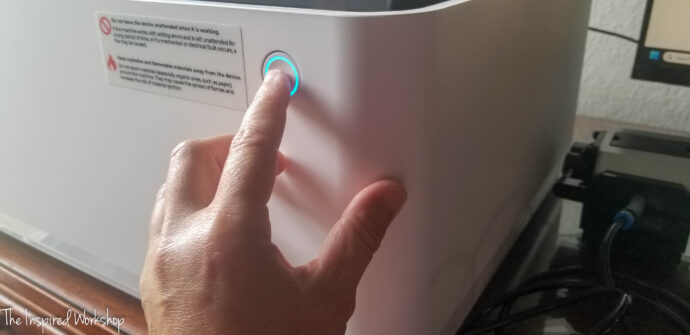
Once you click process on your computer screen, it will take you to another screen where you will need to press start! Once you click start on the computer screen, you will then have to press the start button on the actual M1! It is the big white button on the front!
The laser head covered the spider web pretty much the whole time it was cutting so I didn’t get an in progress pic! Lol!
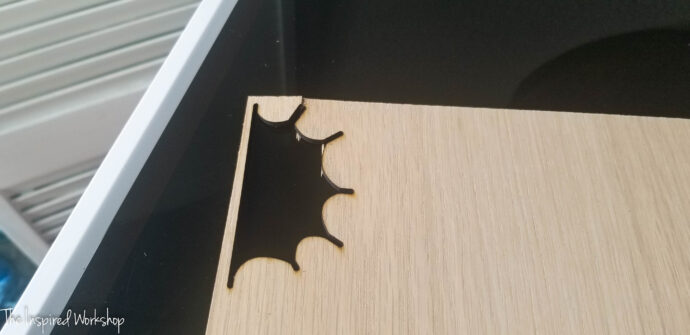
Open the lid and check out your work…ahem, the M1’s work!🤭
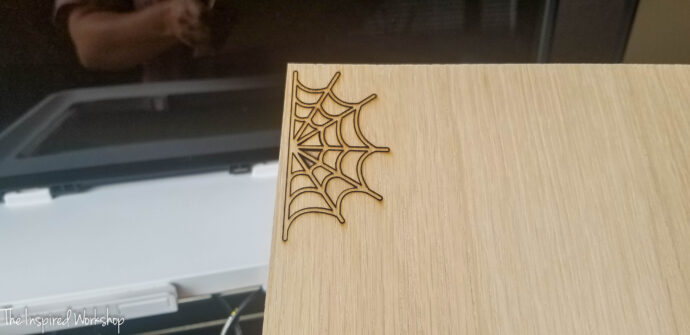
It was almost cut all the way through every where but there were three places at the top that weren’t quite cut all the way through! This is where playing around with the settings can be fun if you are someone who loves to figure stuff out, or it can be incredibly frustrating when you may waste materials because you don’t have the settings correct! ***This is also why they include triangular prisms in your box! I feel like they help tremendously with cutting all the way through and not charring the wood on the back side of the plywood!
I also forgot to turn my air assist on for the first half of the cut, and the sir assist is adjustable and I had no idea how high or low to run it! Turns out, you can run it on high for wood cutting!
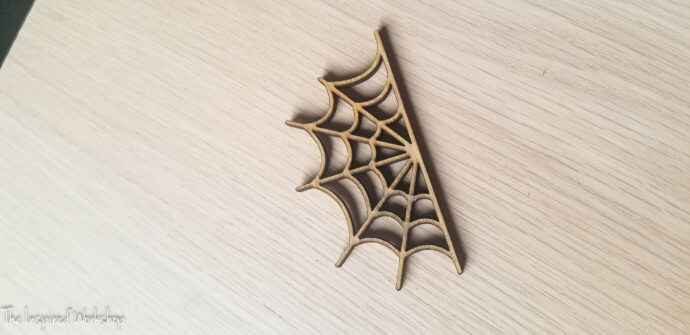
It was in this moment looking at the finished cut piece that I was SOLD on this machine! Like I just sat here and this beautiful little machine did all the work, and in 2 minutes 48 seconds, and it came out BETTER than if I had worked for 4 hours at the scroll saw trying to cut it myself! I don’t even know what magic it is they use to “laser cut” stuff and I don’t care! It is FABULOUS!!🤣
After completing my first cut, there was no more hesitation, I was rocking and rolling, and NO ONE was going to stop me! Lol! I was test cutting everything!
Is the xTool M1 right for you?
Now that we all know how much I am in love with my xTool M1, let me help you decide if it is the machine to add to your creative arsenal!
There are three separate features that make the xTool M1 the machine that it is and I want to take a minute to show each one of them in detail because it is important to understand the capabilities and limitations of each before you decide if this is the right machine for you!
XTool M1 Vinyl Cutter
The vinyl cutting feature is going to look a lot like the common vinyl cutters such as Cricut and Silhouette, but this baby has a backup for when the materials get too thick to cut with the blade, they can be cut with the laser! You can cut things like vinyl for t-shirts, home decor, and tumblers, and leather for jewelry and hats! You can cut paper for all sorts of cards and paper crafts, and even fabric for sewing projects!
The cut area of the M1 is 11.75″ x 15″, this does limit your design space if you are wanting to create large home decor as you cannot feed material through the machine, you can however, break up your design and still cut it all in sections which will work just as well for MOST designs! There will be some that won’t though!
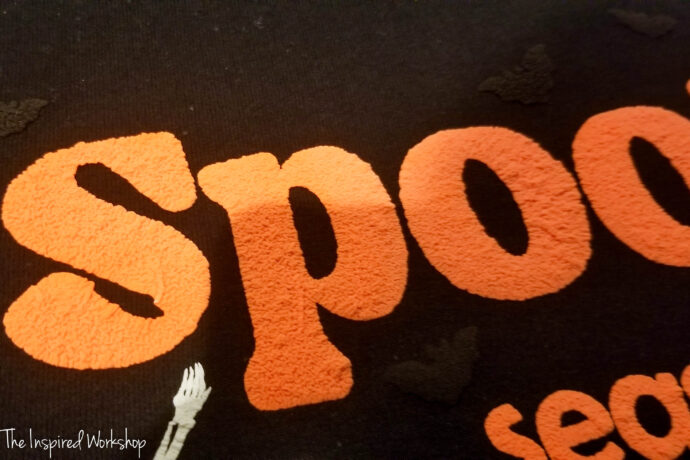
I created this spooky season sweatshirt simply because I needed to try out this feature since I have watched for years while everyone has made cute tees and sweatshirts with their Cricut machines, but I am not a big fan of vinyl on shirts because of how it looks when it is stretched! But the xTool selected store had this PUFF vinyl and I knew instantly, that was what I was using for my sweatshirt!

Just an FYI I overheated my puff vinyl and I share more about that below! Lol!
Let me quickly show you how easy it is to cut the vinyl! I wish I had used a Cricut before to be able to compare this for you all, my sister has had three versions of the Cricut and she really feels like it is a lot of work to use. I am not sure how they differ, but I did not feel like the xTool M1 was hard or took long to use at all! I came up with my design, which took the longest time, but bringing it into XCS and cutting was so fast! I had my shirt completed in about 25 minutes!
Note: If you have air assist, you will need to take the hose off and store it in the clips, and put the blade cartridge back in place to do your cutting!
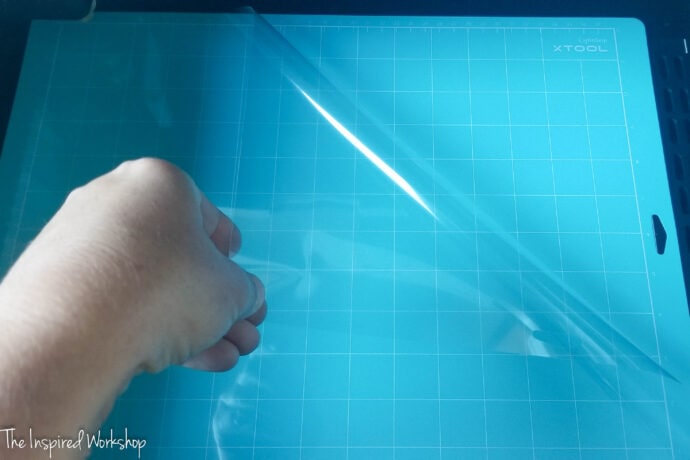
Grab the blue cutting mat for this! The mat is sticky on both sides but has plastic protecting both sides, make sure and remove both of the pieces of plastic so you can feel the tack on both sides but keep the plastic to place back on the cutting mat when you are done!
Set the cutting mat on top of your base plate!
I did the blade calibration which is found in the settings, you will need a blank piece of paper to do it with and I think it is important so you don’t waste any supplies!
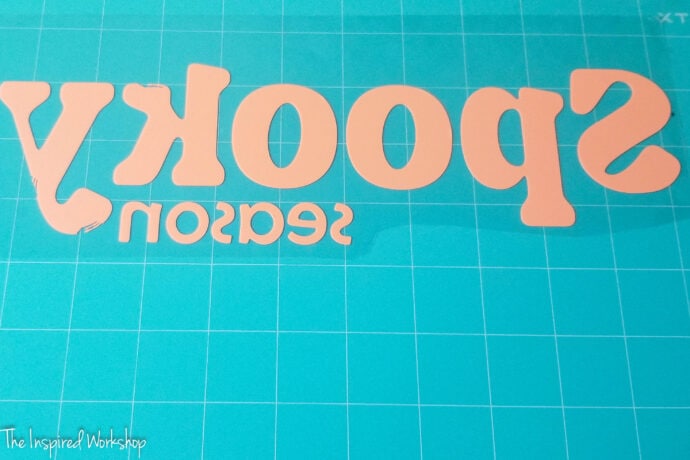
Next you will place the PUFF vinyl (which is a heat transfer vinyl usually abbreviated as HTV and any HTV will be placed face down) shiny colorful side face down! I was really confused by this at first, but the instructions said to do it, so I did it…and then I completely understood why…the transfer vinyl is already on the top! Anyway so place your vinyl face down!
I will share an in depth tutorial on how I cut all the different colors of vinyl with one file, it is super easy but will need it’s own post!
Here’s the Spooky and season cut, it’s hard to photograph because it is so shiny! Always make sure to reflect your image when you are cutting with it face down!
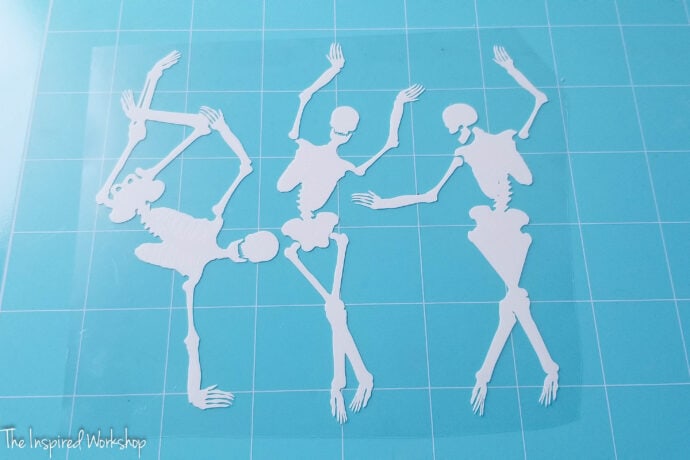
Here’s the skellys all cut out! They aren’t weeded yet but let me tell you, I was IMPRESSED that the finger bones and toe bones cut as well as they did! No problem whatsoever getting them to stay on the clear transfer sheet! Weeding them was so much easier than I thought it would be as well and I used the tweezers from my air assist as my tool!
Missed taking a picture of the bats after they were cut, I was too excited to slow down and take a picture!
I will say, I was able to use an iron, I did not need a fancy heat press, BUT I over heated my puff vinyl and ruined this sweatshirt! Lol! I will still wear it for a pajama sweatshirt though, but the cotton setting was a little too high, the polyester setting worked perfectly though!
Check out the difference between cotton and polyester, the word spooky and the skeletons were on the cotton setting and they extra shriveled up! Lol!

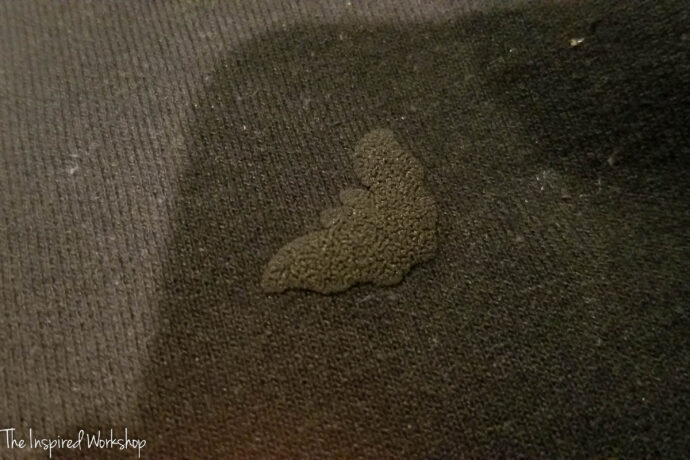
But when I changed the setting this bat was perfectly done!
So that was user error on my part overheating the vinyl, but the vinyl was such a great quality and was cut so well! I will definitely be buying tons of the puff vinyl!

The blade cutting feature is one of the biggest assets of the M1 machine and would cost you $300-500 to get a machine that cuts vinyl alone! This is the main difference between whether or not you want to purchase the M1 or the D1, you can get a more powerful laser in the D1 for the same price as the M1, so if you don’t need/want the vinyl cutting feature, you may want to go with the D1! One other thing to note though, the D1 is not an enclosed laser like the M1 so you will have to wear glasses any time it is running!
I love that I can have it all in this one machine and I don’t have to store two machines! Storage is something we do not have much of in our home, and I don’t have a separate craft room or office to use either! So this being two in one and not taking up much more space than a printer is a HUGE selling point for me!
xTool M1 Laser Engraver
Y’all I’m going to be honest, I wasn’t really interested in the laser engraving function much, except if you get the RA2 Pro, I wanted to engrave some tumblers to be like all the cool kids on social media! 😜 Well, I have to tell you, after engraving just to try it out, I may love this feature the most! Okay, I don’t know, it’s a toss up but this is so much cooler than I thought!
Most important thing to establish is what can be engraved with this machine! You can engrave wood, rubber, metal (stainless steel, electroplated metal, and painted metal), stone, glass, ceramic, cement, brick, felt, fabric, and leather. The things you CANNOT engrave are precious metals, and vinyl! So the engrave feature is incredibly versatile and the most broadly available function!
The xTool M1 has a workspace of 11.75″ x 15″ but the really great thing about this is that when engraving, it can be raised up to accommodate larger objects so you can still engrave a skate board even though the machine cannot house a skate board! I found this really impressive! You can also raise the machine so you can engrave taller items as well, such as those Stanley tumblers for instance! There is a riser set sold by xTool to do this, but most people just use wood blocks or tuna cans!
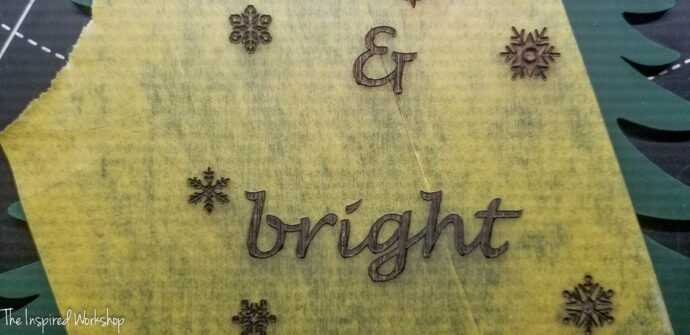
I took the inside of the tree cutout I used for the shadow box, you can see it down below, I painted it green and then just for testing purposes, engraved Merry & Bright on it along with some snow flakes, all thrown on the tree in 5 minutes within the xTool Creative Space! Oh my goodness, so stinking cute, now I don’t want to laser cut everything, I want to laser engrave everything!😂

The detail of the little snowflakes are so adorable! Don’t mind that I left tiny gaps between my painter’s tape when I covered the tree! Lol!
I ran it through at the presets that came up for engraving the 3mm mahogany plywood, changing the lines per centimeter to 240 on some of them and leaving it at 100 on some to see the difference! If you plan on painting the engraving, don’t waste the extra time doing 240 on the lines, just go with the 100 it is set to automatically! I also used painter’s tape over the areas I was engraving so I could easily spray paint it afterward!
Merry is engraved at 240 lines per centimeter!
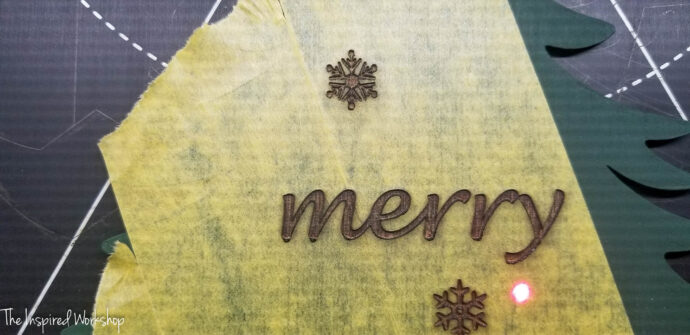
& Bright is cut at 100 lines per centimeter, you can see the difference before they were painted, but after you can not tell at all! So if you are leaving it as it is engraved, go with 240 or even more lines per centimeter.
I legit did this from start to finish in about 15 minutes just to try out the engrave feature! It was so easy to do, and I LOVE the outcome, if I would have paid attention to where I put my painter’s tape…it would have been perfect! Lol!
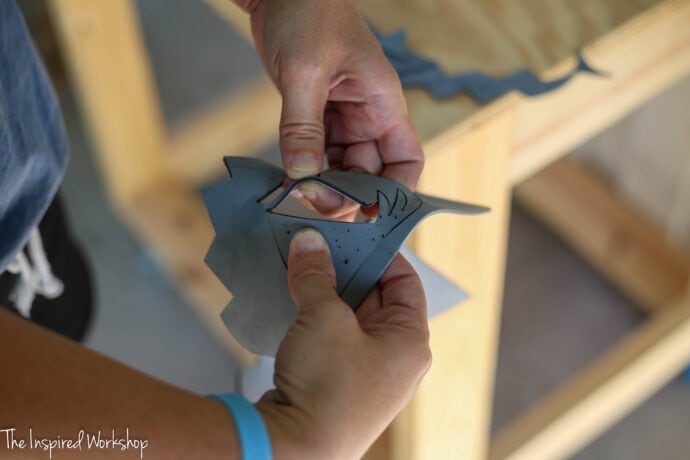
I also cut some rubber and engraved the rubber to make a t-shirt stamp! Check out the tutorial for block print shirts! (Ignore the orange ink on the stamp, I’ve already used it! Lol!)
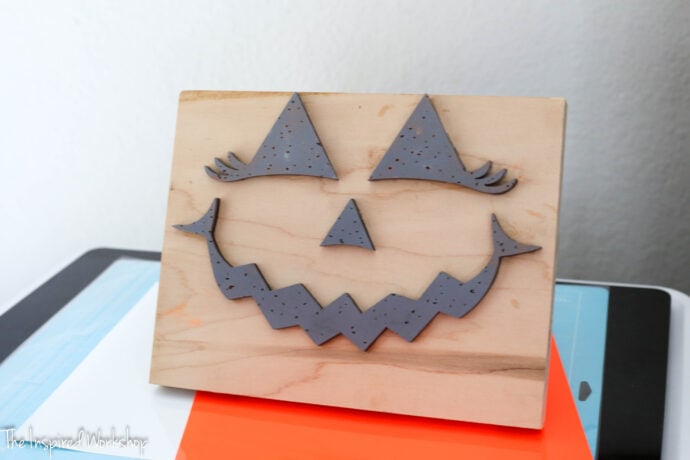
The distressed features are engraved and I used the preset settings for the rubber sheet in XCS to make the engravings! Worked so quickly, although the rubber cutting took some adjusting!
This was one of the first items I cut besides the 1/8″ plywood and the laser engraving settings for the rubber sheet was 100% power, 45 mm/s, and 2 passes, to cut it I thought, “oh I will slow the speed down a little and up the passes. I went with 100/36/4…that didn’t cut through it, so I ran it again at this speed! Lol!
I didn’t even realize at this point, one the preset measurement for thickness it thinner than the material, and I should have lowered the speed quite a bit for cutting more like, maybe 12 mm/s is what I will try next! But I was able to easily to peel it apart, so it seems like it was cut all the way through, maybe rubber just doens’t do like wood and “fall” out?! Lol!
xTool M1 Laser Cutter
The laser cutter *may* be my favorite part of the xTool M1! I have already created so many projects with this machine because I have wanted a laser cutter for AGES and had so many projects stored in the ‘when I have a laser cutter’ bank that I got straight to work to test it out!
Obviously the laser cutter has the ability to cut up to 8mm wood, 3mm acrylic, leather, foam, fabric, and cardboard! Some things you CANNOT cut with this laser are certain acrylic colors, wood thicker than 8mm, stone, metal, and vinyl!
Again, the workspace of the xTool M1 is 11.75″ x 15″ and there is not a feed through option when cutting with the laser cutter. So your project has to stay within those parameters! If you want to make cuts larger than this, you will want to look at the D1 or the P2!
I made a Christmas light box with some acrylic and and fairy lights! I’ll have the tutorial for you on that next week!
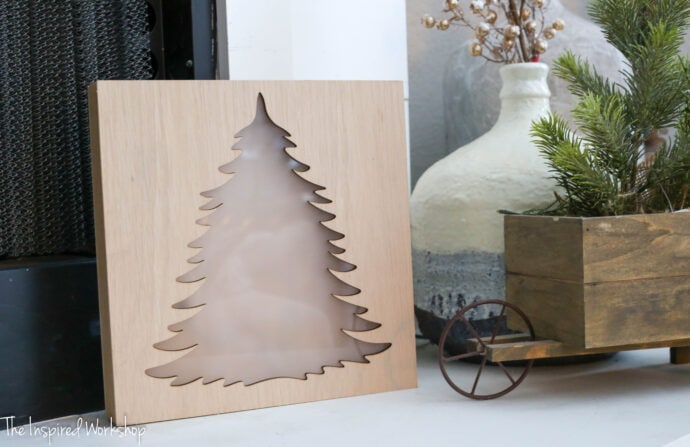
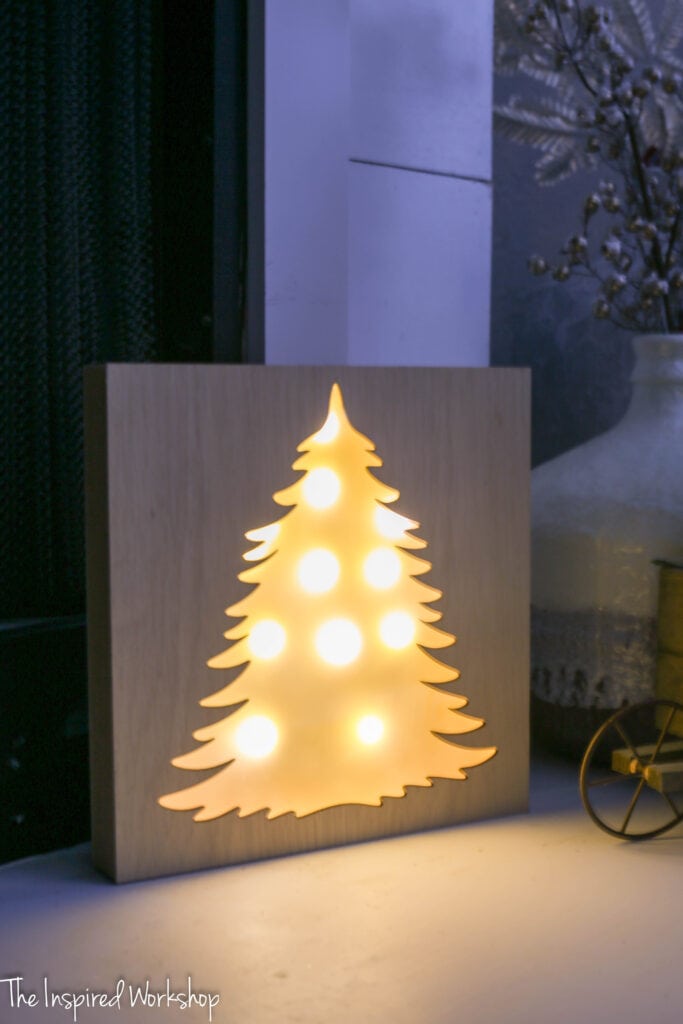
How cute is that?! I love it, and how easy it was to make thanks to the laser cutter! It would have taken me forever and never would have looked this good if I would have cut it myself! Plus for anyone who does craft fairs and market days a laser cutter/engraver makes reproducibility possible and easy!
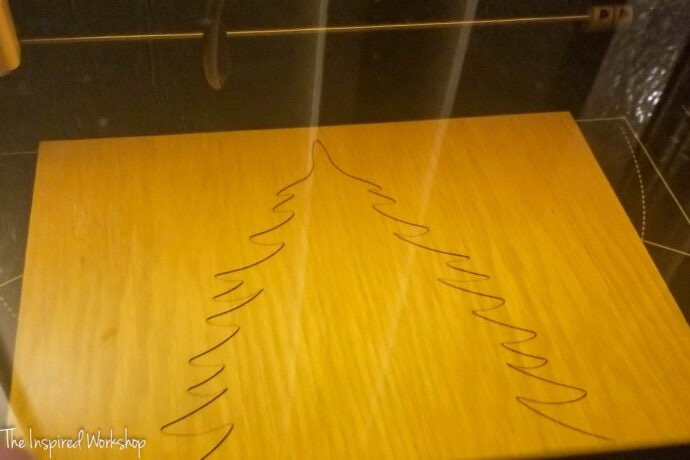
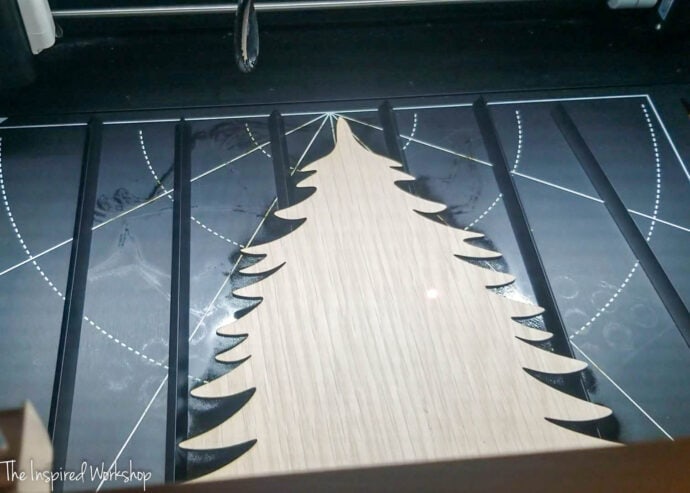
This tree was cut from one of the 1/8″ white oak plywood pieces, again I used the same settings as I did before since white oak isn’t in the preset settings! I selected 3mm mahogany plywood, and cut it at 100% power, 5mm per second, 1 pass. Abbreviated it reads 100/5/1. When using the triangular prisms, it cut perfectly with no charring on the back, it could be used either way I wanted which was really cool!
When I cut the first test tree, I left it flat on the mat and it was pretty charred and also had a couple places that weren’t cut all the way through on the same settings!
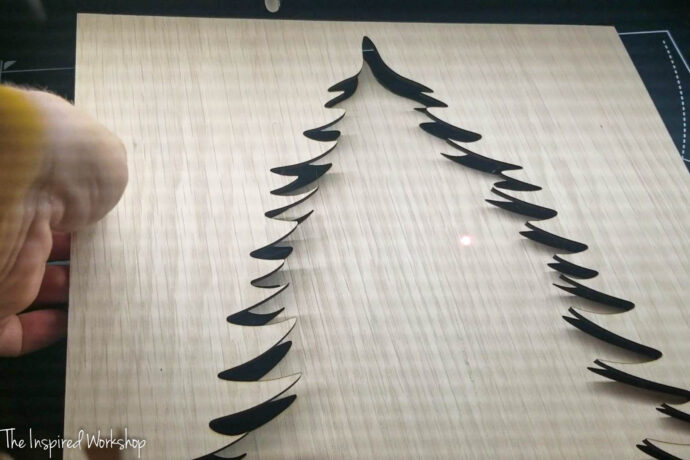
Look how great that looks, so CLEAN and lines so CRISP!
The tree that was left behind was the tree I engraved earlier!
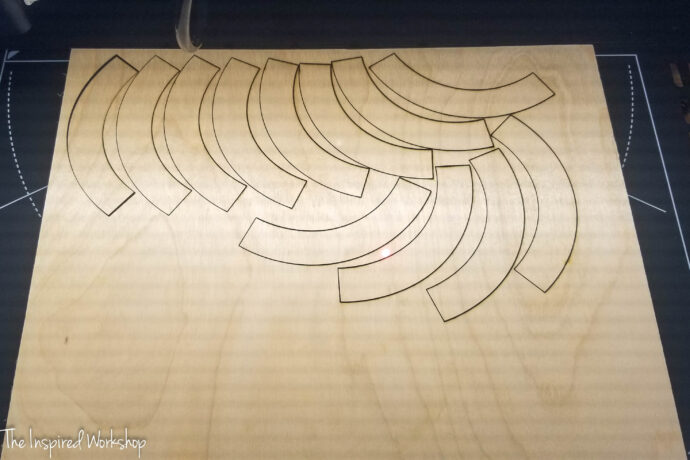
And my last and FAVORITE project so far with my xTool M1 is this Chinese Checker Board! I was able to cut three 1/4″ plywood stars and layer them to create the playing board, and then I was able to cut the curves and use them as a router template for the corners so they could be curved! That one simple step that I was able to do with the laser cutter is what makes this whole board look so good!
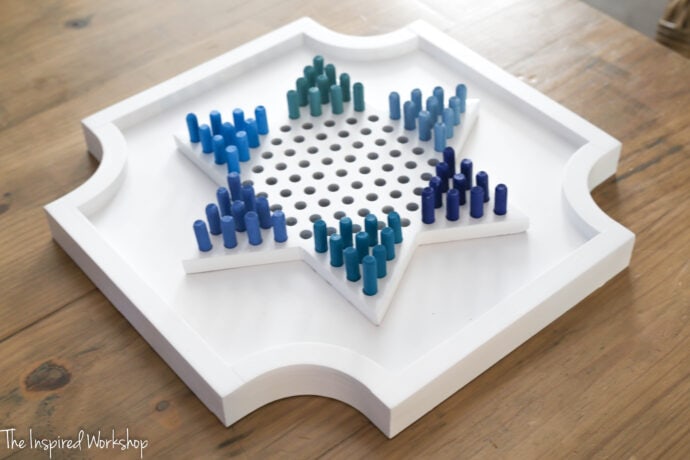
I used dowel pins for the play pieces but I am going to cut dowel rods down, I thought the fluting would look cute, but since you really can’t sand them, they didn’t take the paint very well, it isn’t smooth! But I love using this instead of marbles because I can hang this art piece on the wall when we aren’t using it!
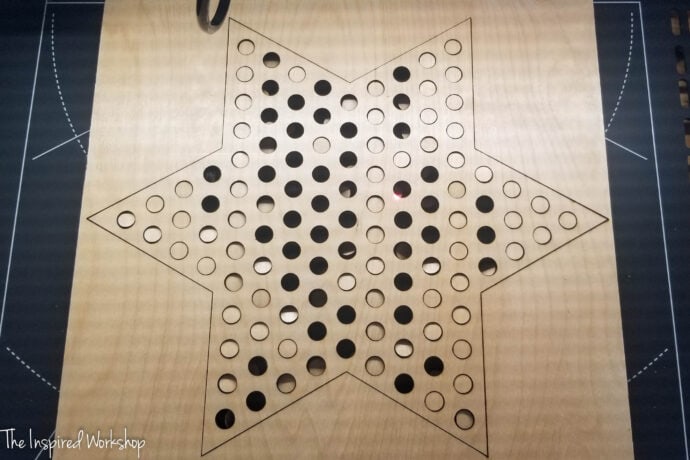
There isn’t any preset settings for 1/4″ plywood, this was normal birch ply I picked up at Home Depot! The three plywood stars were a little tricky to cut at first, I charred the first one big time when I used 100/1/1 after accidentally cutting it at 3mm thickness the first time around! OY! That was way too slow since I already cut over half way through it…and that really gave my star a good burn in some places, so I tried 100/3/1 and that was a little too fast and left a couple spots to cut with my Xacto knife! But 100/2/1 worked just right!
Oy, I thought I had a picture to share of the charred one! On the bottom, it was pretty bad, looked like it was pretty close to catching fire! I was still able to use it though!
Also, something to note here, the auto measure works really well on presets, but this 1/4″ sheet was actual true measurement of 3/16″ and it auto measured at .411 mm which is thinner than it actually is, and that will affect how well it cuts as well! It cut best when I set it to .575 mm even though that is slightly thicker than it actually is! See what people mean when they say you have to play around with the settings! It is a ton of fun for me to try and dial it in, but I understand people’s frustration as well!
One thing to note is settings are affected by so many things, warped wood can even throw off the cut, but this is with laser cutters/engravers in general, not just the M1, I just wanted to clarify that!
Here’s the back of the 1/4″ plywood when I cut it at 100/3/1…same plywood, auto measured, but this was the curves instead of the star! See how they didn’t get cut all the way through. I cut them with the Xacto knife easily because they are such tiny pieces hanging on, but it is so much better when they all just fall out as you pick it up from the machine!
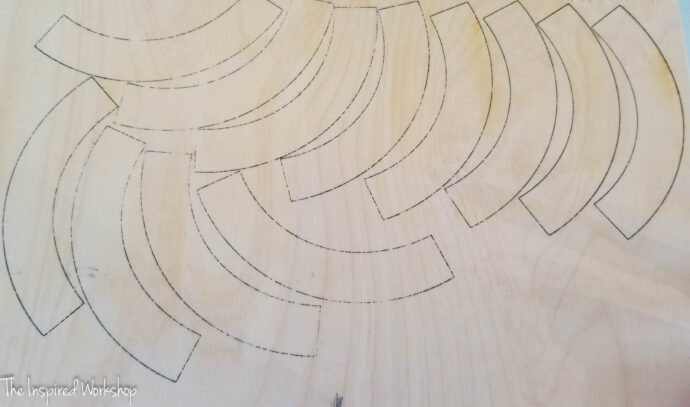
Front looked great though!
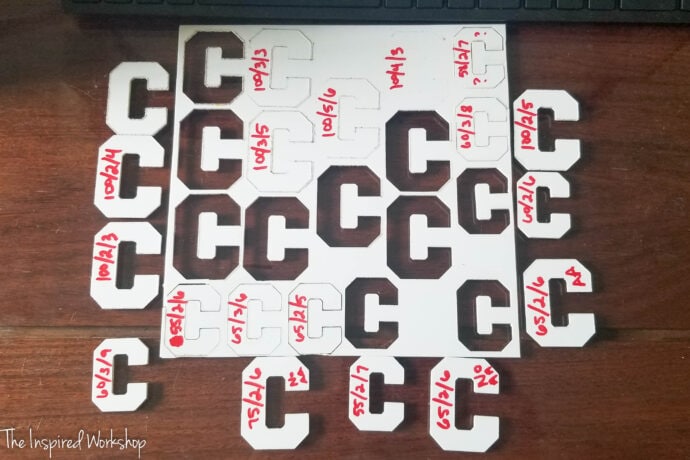
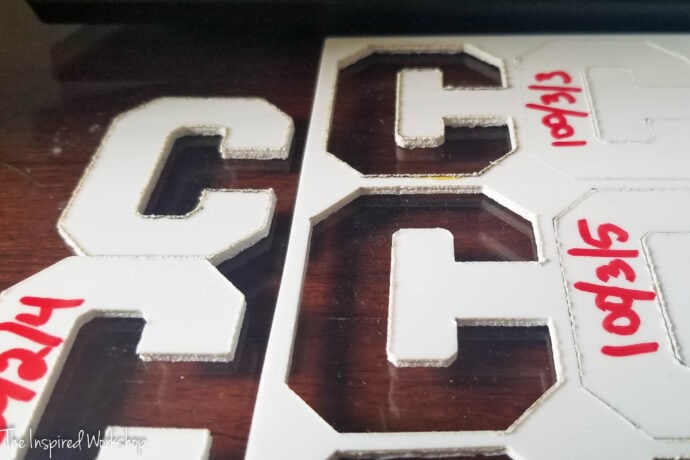
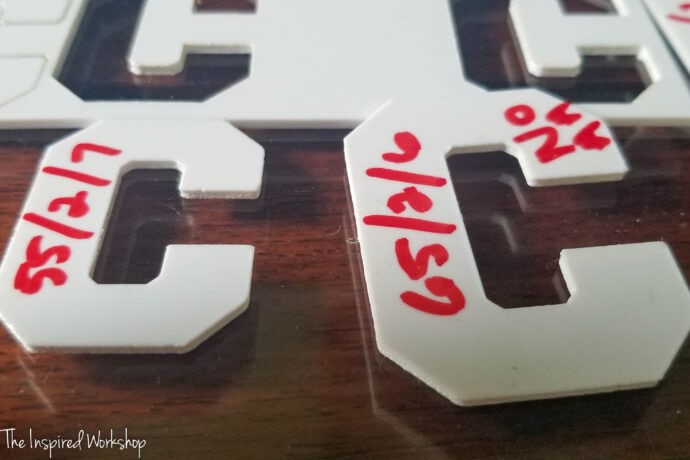
Understanding there are so many factors at play and ALWAYS run tests on your materials first! I made the mistake of cutting an entire Chinese Checkers star only to find out the holes were in between sizes of dowels and wouldn’t work, plus I felt like there wasn’t enough empty space between the holes! Next time I got smart and created my circle, took it into XCS alone, just the circle, cut it out on a scrap piece and made sure it worked with the dowels I wanted to use! Plus, this gave me another opportunity to test settings for cutting as well!
I plan on making full posts on how I created the projects I created along with the files for you can make the same projects if you would like over the next few weeks!
Cutting Acrylic with the M1
I feel this is an important one that needed a separate section from all the rest because it baffles my mind that certain acrylic purchased from certain places will cut fine, but other brands of the same color won’t cut! As I stated above, I was most interested in cutting acrylic with the laser! This is really a funny thing, and oh so frustrating at times as well! I will say this AGAIN, if you are wanting to cut mainly acrylic with your laser, GET the P2!
Rule number one when cutting acrylic, do NOT use air assist! It makes it far more bubbly around the edges than when not used! The one that says no AA is no air assist, the one with AA air assist was used! Crazy the difference when air assist works so well on wood, I would have never thought this would be the results! Lol!
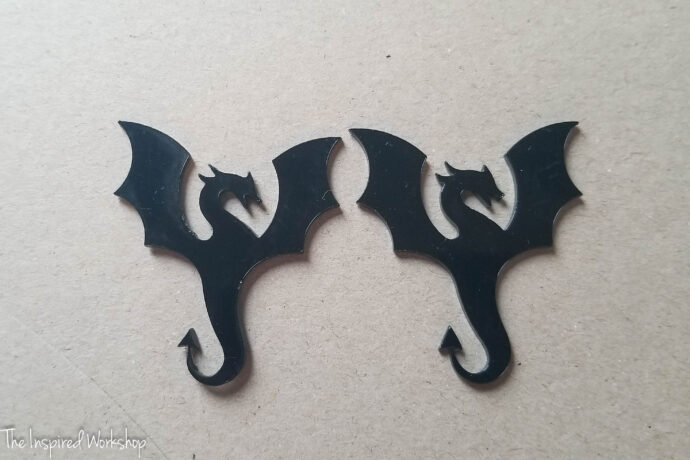
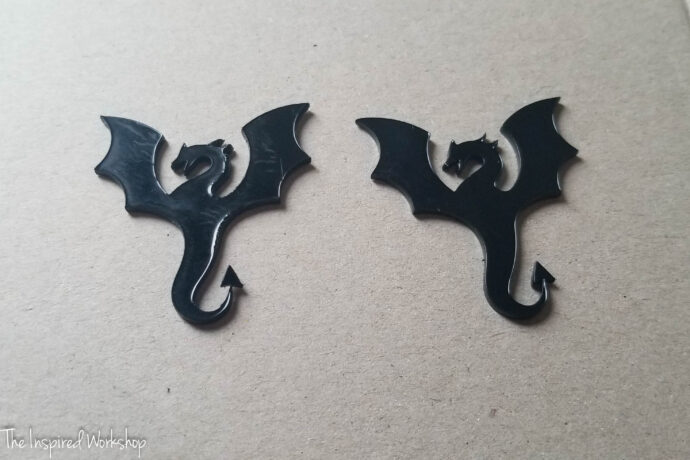
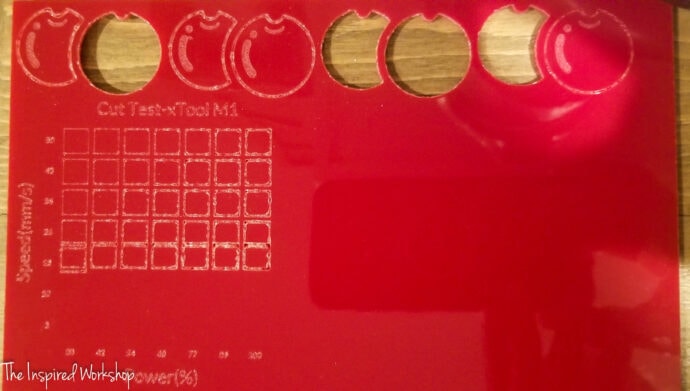
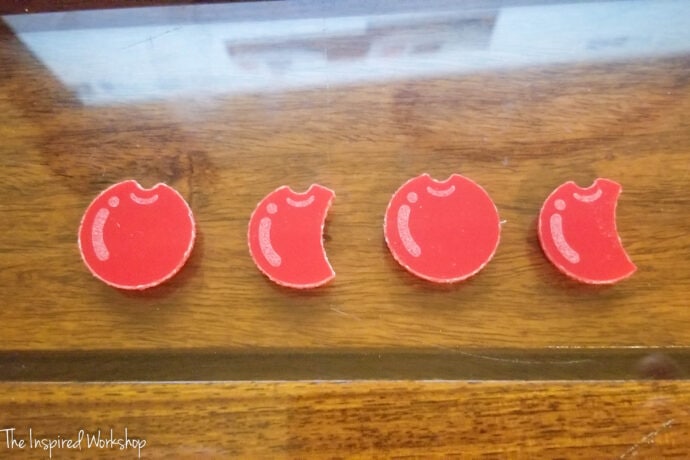
Let’s start with black acrylic, black acrylic across the board can be cut by the xTool M1 machine! It cuts nice and smoothly! Left side I tried the settings of 65/3/3 and it slightly melted the tiny parts of it, so I did the next test at 60/3/2 and the right one came out perfect! The black lines are so incredibly smooth, I can’t wait to get an xTool P2 or get quality acrylics that I can cut more colors this good! It is so satisfying to get those perfect cuts!
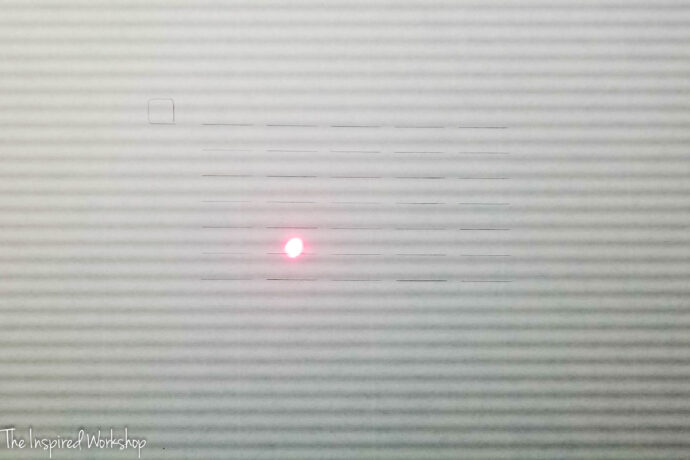
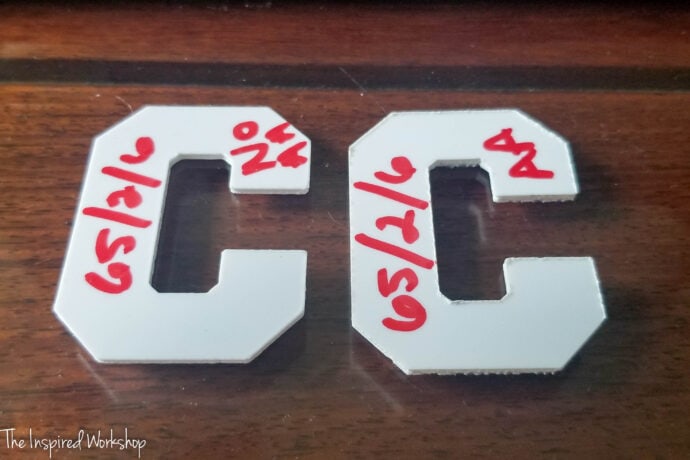
White is said to be a color that this machine cannot cut! I saw in the M1 official Facebook group, a lady was able to flawlessly cut white acrylic from CMB acrylics with the settings of 100/2/6! I was EXCITED when I saw the post, and I had some cheap white acrylic from Amazon that was going to go to waste if I didn’t at least test some cutting on it! So I fired up my machine and started cutting!
Needless to say, her settings were far too high for my thinner acrylic (hers was 3mm and mine is 1.5mm). The white cut at those settings but NOT pretty! Lol!
But after continuously trying different power, speed, and passes, I got it to where even this cheap Amazon acrylic was able to cut, but as awful as this is to admit, I don’t feel like the cuts were always reproducible! For instance, I felt like 65/2/6 cut really well, 58/2/7 cut well, and 60/2/6 and 7 cut well! It was hard to pick a favorite out of those as they all seemed pretty close to the same!
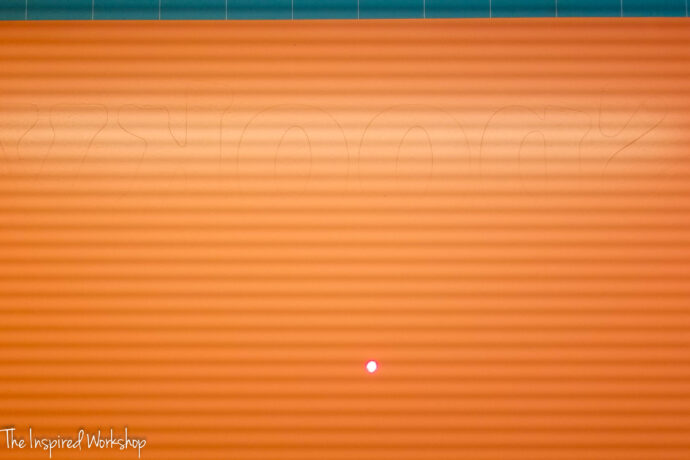
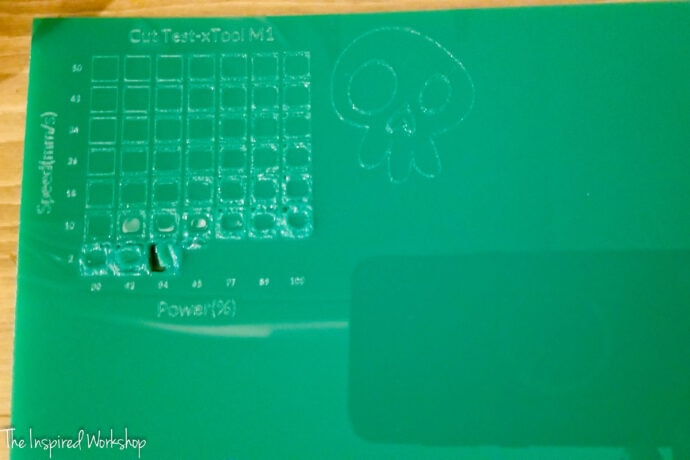
Red, green, and yellow are said to cut when purchasing xTool select acrylic, but all I had on hand to test was my cheap acrylic and as crazy as it was, I could not get my red or green to cut well! If I keep working at the red, maybe I can manage to get a clean cut but I am not sure! I did however figure out how to do a test grid so that I don’t have to waste as much time cutting individual pieces, I can cut a bunch of settings at once! So freaking fun…even if it didn’t cut! Lol! I haven’t tried the yellow yet either!
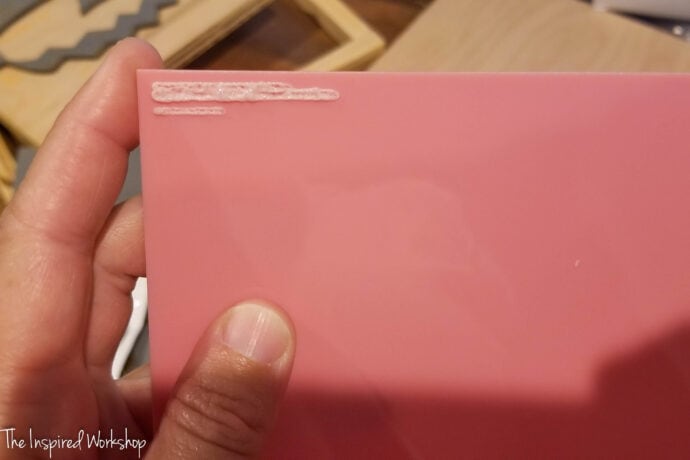
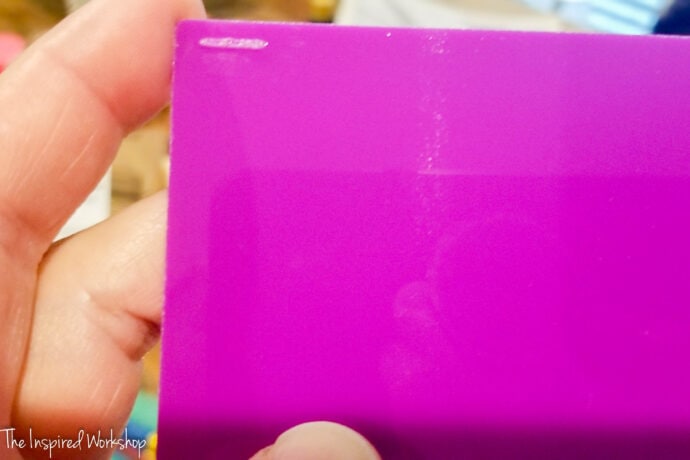
And last but not least, I went ahead and tried pink and purple just for the fun of it and canceled the cuts when it was bubbling straight out of the gate! Lol! I will wait for my new order of acrylics and update once I have tried them!
Troubleshooting
As I have learned with all technology, there are times it just has a mind of it’s own! Lol! I ran into this problem last weekend and wanted to update the post to share this simply because it does happen, and it hadn’t happened to me until about 15 projects into owning it!
I created these personalized ornaments that I will be sharing with you soon, because they are adorable and everyone needs one! Lol! Anyway, so I had a problem with the engraving being off from the cutting! It looked great on my computer screen!

But this is how it cut them! (and this was a scrap test because it had already done it to me two other times when I decided to grab pictures and post it in the Facebook group to see if anyone could help!)
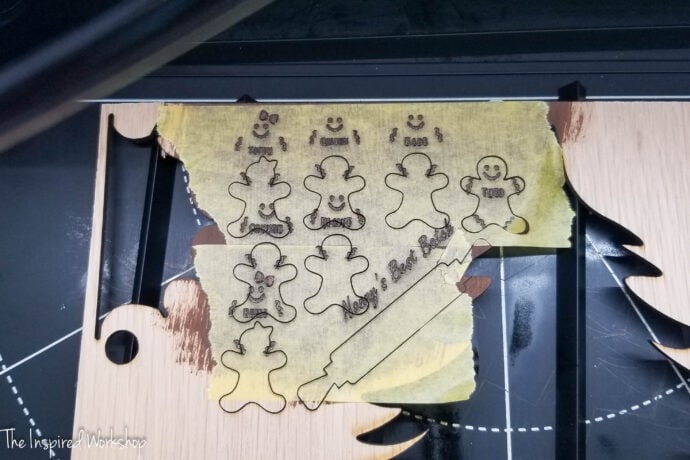
I received so many helpful responses in the group, which I tried them all, to no avail! Well, guess what, turns out as weird as it is, my file seemed to be the problem. If I separated the gingerbread kids, and rearranged them in XCS to fit my piece I was cutting on, this happened! If I brought them straight into XCS and moved them as a group and didn’t move any individually, they cut and engraved perfectly fine! So now I am investigating my SVG file that I made to see if I did anything funny that may create this!
I share this only to help you see that technology is NOT perfect and there is such a learning curve for all of us in it and you have to be up for that learning curve or else this may not be a path for you to adventure on! These machines are so incredibly complex but also simple at the same time, and for someone who is a novice (like me) it can be overwhelming and we want to blame the machine immediately! Lol! Just know that you will waste a little material figuring out settings and cut files and that is just a part of it!
Final Thoughts on the xTool M1
I truly and honestly enjoyed testing and working with the xTool M1 and am so excited for all the coming projects that I want to make! This tool embellishes my creativity in ways that I am not able to one my own! I have thoroughly enjoyed learning how to create SVG files and what I can and can’t do in XCS with those files! Overall it is a learning curve but I have a passion for learning and trying new things, and if you are the same, I suggest grabbing yourself an xTool M1 or another machine that may fit your needs better!
I have to give praise to xTool as I feel they go above and beyond to try to help you utilize your machine! If you decide to purchase an M1 make sure and join their Facebook group as there are so many active users in that group ready to help you with any questions you have, and there is an xTool support person ready to help in the group as well! I do not have any other brands of machines to compare this to, but I have to say from trying this one out, I am comfortable purchasing other machines from them without the need to try any other brands!
So if you are looking for a laser engraver/cutter I highly suggest checking out xTool machines because no matter what you are looking for, they pretty much have a machine for you and I honestly feel you will be happy with their products and support! Let me know if you have any questions in the comments below!
Thanks for stopping by!

Want to save this post for later? PIN IT!