DIY Block Print Shirts
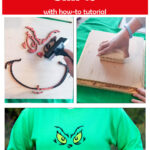
Have you ever heard of block print shirts? Imagine an oversized stamp to quickly and easily apply the same designs to multiple shirts! You can simply change out the shirt color or ink color and create unique customized shirts without ever having to go back to the computer to cut vinyl or stencils! Welcome to the fun world of block printing fabric!

This adorable Halloween shirt was made in just a few minutes and you can make one too so you don’t have to feel left out of the festivities but you also don’t have to go full blown costume either! Lol!
I created a Grinch face file for you to create Christmas block print shirts as well!

How cute is that?! I had so much fun making these shirts and I took the guess work out of all of it for you! I created the files and wasted the materials getting them just right so you wouldn’t have to! Lol! And if you aren’t interested in block printing but you enjoy making shirts with stencils or vinyl, the cut files will work just the same!
I was able to make these block print shirts using my xTool M1 laser cutter/engraver to create the stamp that was used to make the shirt! If you haven’t seen my review on the M1, take a moment to hop over and check it out! As you will see in this post, the M1 is a pretty cool machine that can not only cut and engrave using a laser on wood and some acrylics, but also cut with a blade on things like vinyl and leather! Such an amazing tool to have in any DIYers arsonal!
Look at how cute the stamps are too! Everything about this project is fun to create and when it is useful as well, I can’t help but love it!


Gathering Supplies to Block Print Shirts
Ok, take a minute and picture this, you rent a space at a local craft fair/market days and you bring along a couple block printing stamps like the lady jack-o-lantern (if the event is near Halloween), a multitude of shirts in a variety of sizes and colors, and a couple colors of block printing ink! Right in front of the person you are able to make them a shirt in the size they need and the colors they want in only a few minutes! You would be the talk of the town and everyone would want one!
Let me show you how you can make these shirts so you can get busy making yourself some today!
Materials Needed to Make Block Print Shirts:
- tshirt, sweatshirt, or top of your choice
- Cut file of your choice – Lady Jack-o-lantern, Jack-o-lantern, and Grinch are available below for FREE download
- Rubber sheet
- block printing ink
- roller
- smooth plastic surface such as a small piece of acrylic
- xTool M1 or other cutting machine
- 2 – Scrap pieces of plywood roughly 12″ x 12″ each
- 1 – 1x2x8
- scrap piece of 2×4
CUT List for Block Print Shirts:
- 2 – pieces of 3/4″ or 1/2″ plywood cut at 11 3/4″x11 3/4″
- 2×4 @ 5″
Sweatshirt:
- 2 – 1×1 @ 13 7/16″ (I created the 1x1s by ripping down a 1×2 to 1″ wide, but you can leave it as a 1×2 though if you would like because I feel like it may be easier to center the stamp with the higher edges)
- 2 – 1×1 @ 11 15/16″
T-Shirt
- 2 – 1×1 @ 13 3/8″
- 2 – 1×1 @ 11 7/8″
Making the Block Print Shirts
So just in case you haven’t ever heard of block printing shirts, let me quickly share a little about how it is done so you will understand why we are making the shirt stretcher in the next few steps! You in essence are stamping your shirt! The shirt stretcher holds your shirt taut so the stamp can firmly press down without any wrinkles or pull up with the stamp and smashing ink into each other while it is wet!

You will only have to make the shirt stretcher once and then you can use it over and over again, same with the stamp, so although it may seem like a lot in the beginning, I promise it is so quick and easy thereafter!
Building the Shirt Stretcher for Block Print Shirts
I built two different sizes after thinking that one would work okay for both t-shirts and sweatshirts…spoiler alert, it is not okay to use the same one! Lol! I mean, it didn’t ruin the shirt or anything but it was loose and so wrinkles were slightly affecting the stamp, I’ll show you later what I mean! The base 11 3/4″x11 3/4″ doesn’t change so you only have to make one of those!
You will notice it says 2 – 11 3/4″x11 3/4″ pieces of plywood, only one is for your shirt stretcher, the other is for your stamp, I did make my stamp closer to 11 7/8″x 11 7/8″ I just realized after I measured it! Lol!
So first for the bottom part of the shirt stretcher, I routed the top of the plywood with a round-over bit so that it wouldn’t create sharp creases in the shirt when I put it in the stretcher to stamp it!


You will want to lightly sand this plywood after routing it as well so that it will not snag your shirts!
This piece of plywood will go underneath your shirt! Next you just need to build the frame to go over the shirt! Sweatshirt inside dimensions are 11 15/16″x 11 15/16″ and t-shirt dimensions are 11 7/8″x 11 7/8″.

Yes I did gouge my board with the router!🤭
Cutting the Rubber for Block Printing Shirts
I am going to share how to cut this rubber sheet as I did on my xTool M1, if you have another type of cutting machine, your software will be different than this but the cut files will work for you! The Jack-o-lantern face can even be cut with scissors if you wanted since it is super simple lines if you have some sharp scissors but it is so much easier to let the machine do the work for you! Lol!
Download the cut files! The cut files are provided for FREE for a limited time only and will be added to my store for a small fee once the holidays are over so don’t wait, DOWNLOAD them NOW!
Turn on the power switch on your machine, and open the lid and place the rubber sheet flat down on the base plate.

This does not have to be in any specific spot, the red dot just needs to be hitting the rubber sheet so it can auto measure it for you! Close the lid and then head to your computer!
Alright, once you have your files downloaded, you will open the xTool Creative Space (or whichever software you are using for your machine) and you will import the SVG file! You will notice there are two different cut files for each design, one is the completed design in case you want to score the face on your stamp board so you make sure you place them correctly, and the other design is best for cutting to save materials!
Once you have it imported, you will see this on your computer screen:

You will want to click off of the image anywhere on the screen and then the right hand of the screen will change and will look like it does above!
This is where you will choose which method you are using, for this it is ‘laser flat’.
The material is ‘Laser Engraved Rubber Mat’.
Click the ruler to the right of the thickness entry line and it will auto-measure for you!
Height raised is ‘no’ because we laid the rubber sheet flat on the base board, if we would have used the triangle prisms as we will with the 3mm basswood in a minute you would change that here!
Processing Path is set to ‘auto planning’.
You will notice there are two layers in the left hand corner of the screen, red is one layer, the outline cut layer, and the black layer is the engrave layer, all those little distress spots!

So on the first Jack-o-lantern that I cut, I engraved the distressed spots into the rubber and then cut the main lines, but on the larger one, I deleted the distressed spots because they really didn’t show up on the shirt and the design was worn enough looking to be the way I wanted it anyway without the spots! So you can remove them or keep them, totally up to you! They are saved in two separate layers so you can easily delete one or change the settings for one!
If you want to delete the distress spots, just click on the black layer in the bottom left corner and backspace! Boom, it is gone!

The settings to engrave (if you do want the spots) are the pre-programmed settings – 100/40/2 – 200 lpcm What those numbers are the 100 is power, the 40 is speed, and the 2 is number of passes, the 200 is lines per centimeter! The settings are abbreviated as I did above just so you know if you ask for help and someone says this is the settings I used, 100/4/1…now you know how to input that in XCS (xTool Creative Space).

It is crazy, I can’t really read the computer screen above but when I was editing, I could read it all clearly! Hmm, not sure what happened!
Anyway, settings to cut are not available as a pre-programmed settings because it is considered a laser engraved rubber sheet/mat! The gray rubber was cut at 100/12/4 and it didn’t seem to cut ALL the way through so I would say do another 1 or 2 passes if you want to go with those settings, or you can try 100/8/3 as I did on the red rubber and it cut really well! You may have to adjust these slightly if you have a different machine than I do! I have the xTool M1 10watt machine!

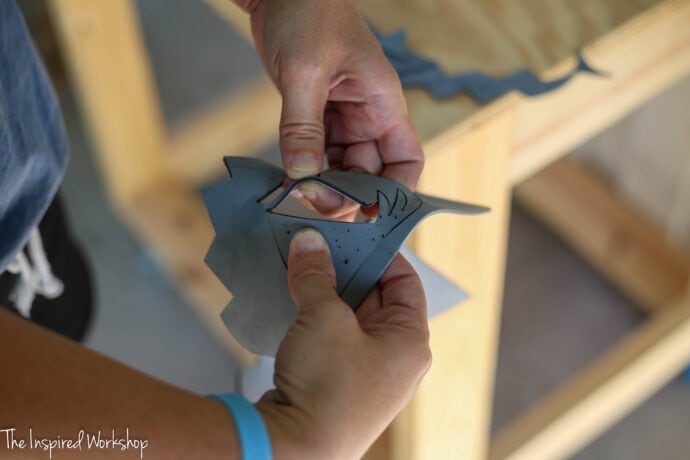
Here’s the lady jack-o-lantern face rubber!

And here’s the Grinch face rubber cut! Well this one is already made into a stamp apparently I never took a picture of just the rubber cut! Lol!
Cutting the Wood for the Block Print Shirts
Once you have the rubber cut, you will then cut another set of the same file on wood! I used 3mm basswood because it is super easy to cut with the M1 machine!
This time you will set the sheet of 3mm basswood into the machine, before placing the wood though, you will use the triangular prisms to lift the wood up slightly!

Make sure that the red light hits the basswood!

Now back to the computer! You will delete the black layer or ignore it for this cut! Change material to 3mm basswood, make sure and change the height raised to ‘triangle prisms’ and THEN auto measure!

Click on the red layer on the left side, which will highlight all the red and the cut settings will already be set! You will not change any settings as they work great as they are preset!

Process the cut and start the machine!
Now that all the pieces are cut, you can assemble your stamp to make the block print shirts! I don’t know why it’s called block printing instead of stamping but they tell me it is! Lol!
Making the Stamps
Alright, now it is time to glue all the wood pieces to your plywood! You can score the wood on your xTool M1 as well if you would like so that you get your pieces lined up exactly as they are in the completed file! I didn’t do this and just placed them where I thought they looked good because you have to remove your base plate to score on 3/4″ plywood!
I just used super glue and glued them all in place!

Then super glued the rubber right on top of the wood!

Viola! The stamp is ALMOST done! Flip it over and add a handle to apply the stamp! I used a scrap piece of 2×4 cut to about 5″! I just super glued this as well!

Stamping the Block Print Shirts
Now you will use your shirt stretcher and use it on your shirt! I will show you both the lady jack-o-lantern and the Grinch face shirts as I go through the steps!
The shirt stretcher is pretty self explanatory, but place the piece of plywood on the table or whatever hard surface you are using! Place the shirt on top of it where you want the design to be placed, and then place the frame over the shirt!


Once you have the shirts in the stretcher where you want them, grab your roller and ink!
I used florescent orange by Speedball for the Jack-o-lantern face!

I used black for the Grinch face, also by speedball! But apparently didn’t get a picture of rolling my roller in it! I did however get this great picture of the tube! Lol!

Apply the block printing ink to your stamp now! Make sure and do this as FAST AS YOU CAN!! This ink dries really fast…ask me how I know! I’ll show you!


Now flip that stamp over and stamp that shirt, baby!

Now nervously lift your stamp! Just note, the great thing about stamping the shirts is that perfection is not what you are going for, stamps are naturally lighter in some areas, if you do not like this then it will probably be best for you to use vinyl or try screen printing!

Now, I am all for the stamp effect but this was a little too much variation for me because I took too long to stamp it and some ink was dried out!

I took a paintbrush and lightly dabbed it in the block printing ink and dabbed it around to get the excess off, and then touched up the shirt that way! I actually had to do this on both of them but ended up loving how they turned out!

Make sure and dab the paint brush, don’t drag it like you are painting a picture, push it down more so! Hope that makes sense!


I did love the Grinch face without his eyes colored but I wanted to try stamping his eyes separately to see if it would work! I would not advise trying to do two different colors on one large stamp, but I did think about making two different stamps that perfectly fit inside the stretcher frame and that could be used one first with one color and then another with another color, almost like layers! But this worked pretty well!

Make sure you roll the block print ink on the correct side so it matched up perfectly with the other picture!
I used yellow Speedball block printing ink for the eyes!

The first eye was slightly off but luckily I could touch up the black and no one would ever know, except I am showing you so you all know! Lol!

The second eye was in the spot it was supposed to be but I didn’t get it as thick in one area so it needed touched up too! With practice I feel like you could easily get this down to where it doesn’t happen like this!

Here it is all touched up and ready to wear!

You will need to use the iron to set the ink before wearing or washing!
Aren’t they so cute! I love them and look forward to creating so many more block printing shirts with my xTool M1!
Have you ever block printed shirts or other fabric before? Let me know in the comments below!
Thanks for stopping by, I can’t wait to see all the block printing shirts you all create! Have a good one!

Want to save this post for later? PIN IT!


