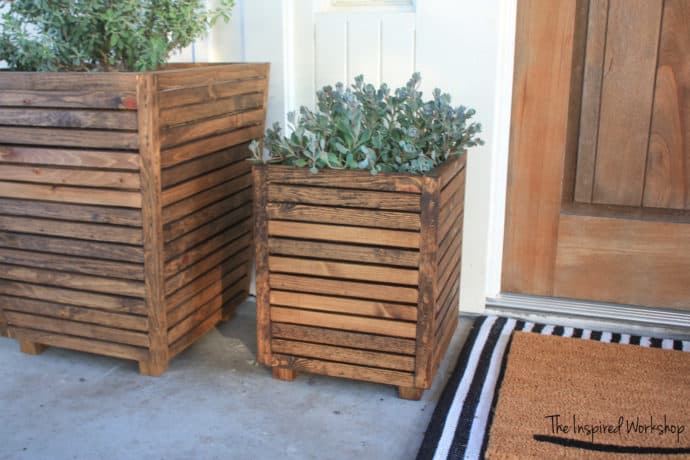
DIY Outdoor Planter from Scrap Wood
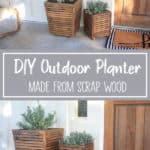
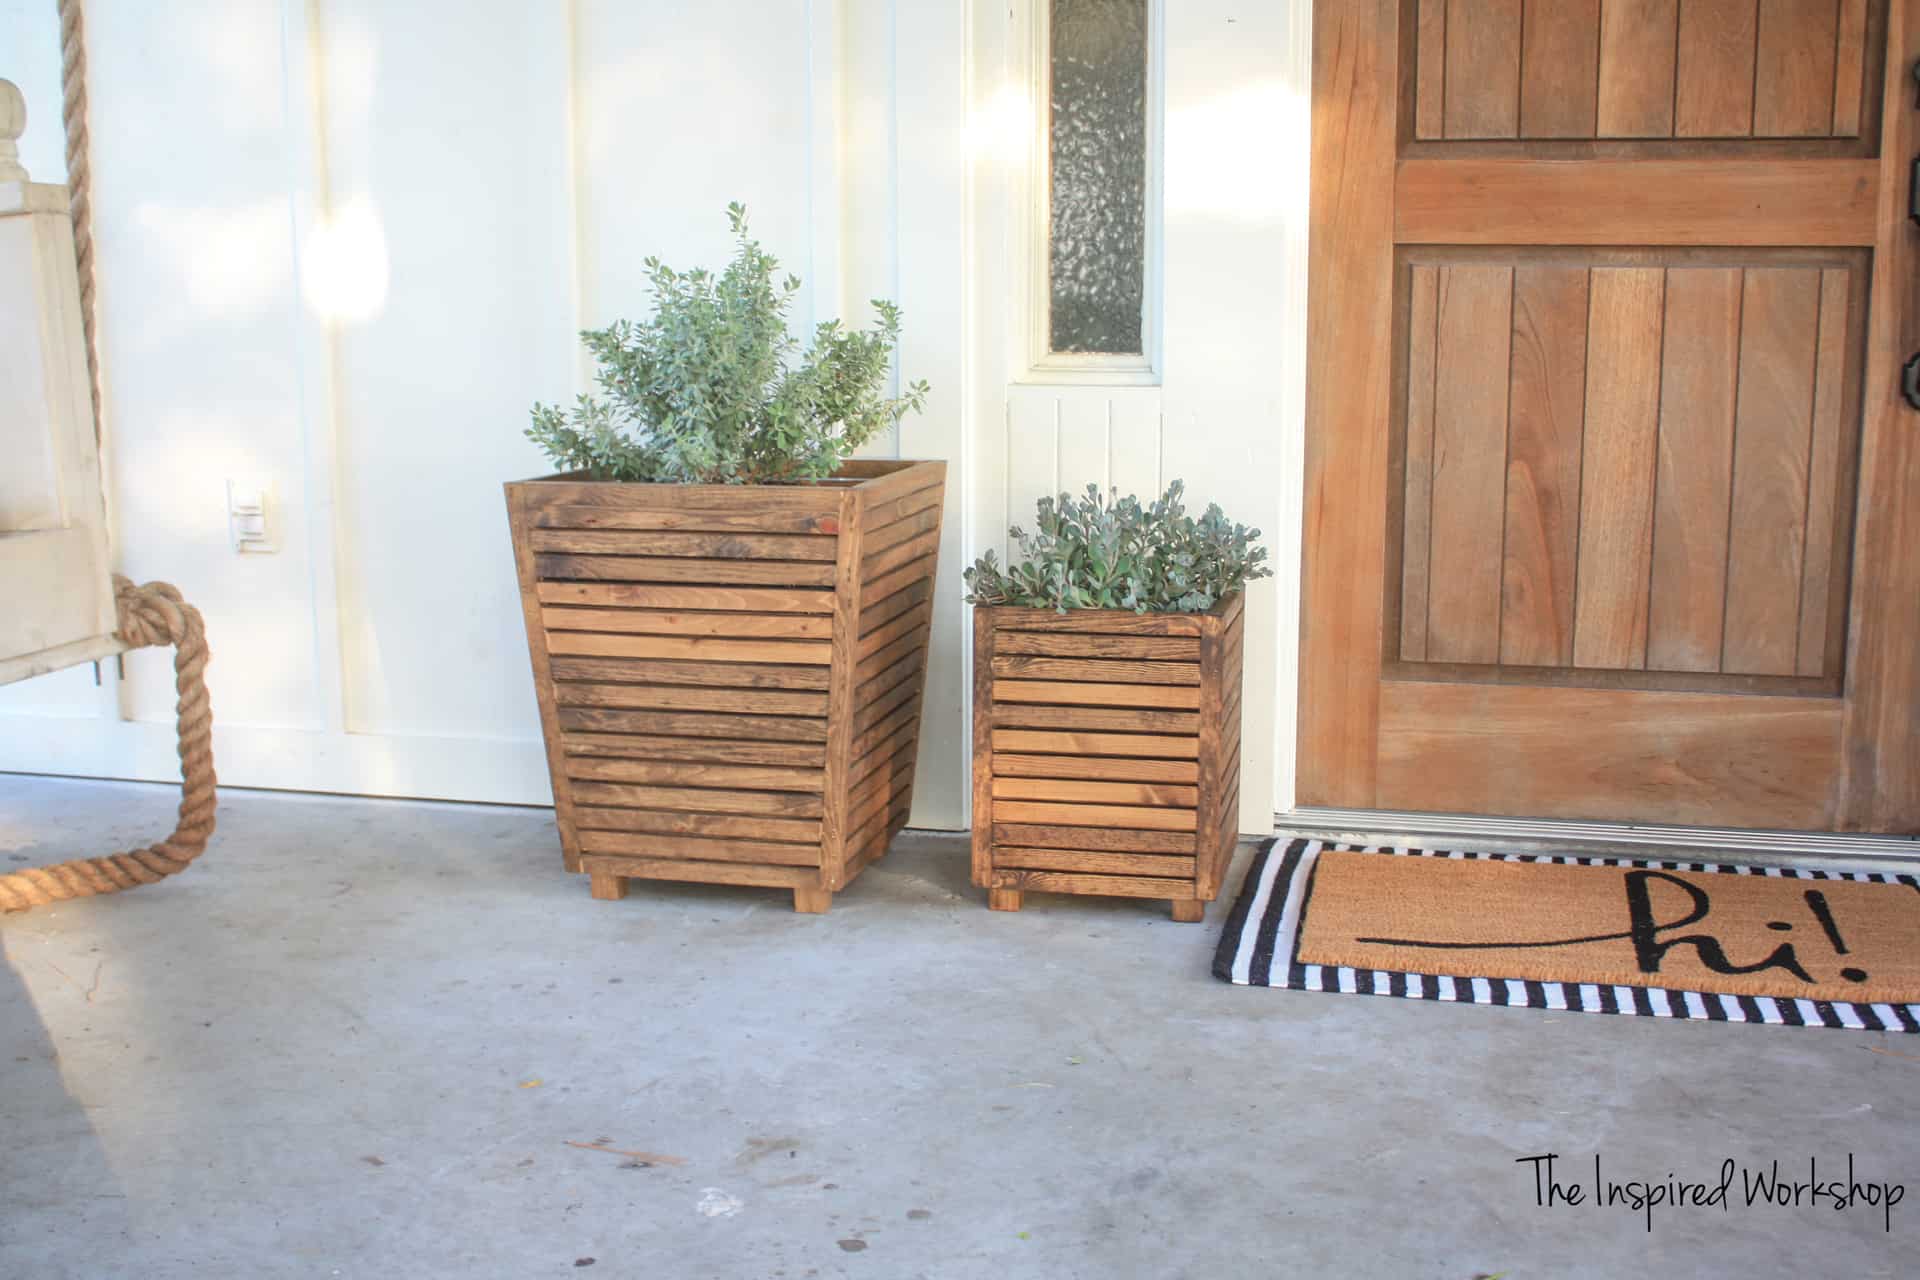
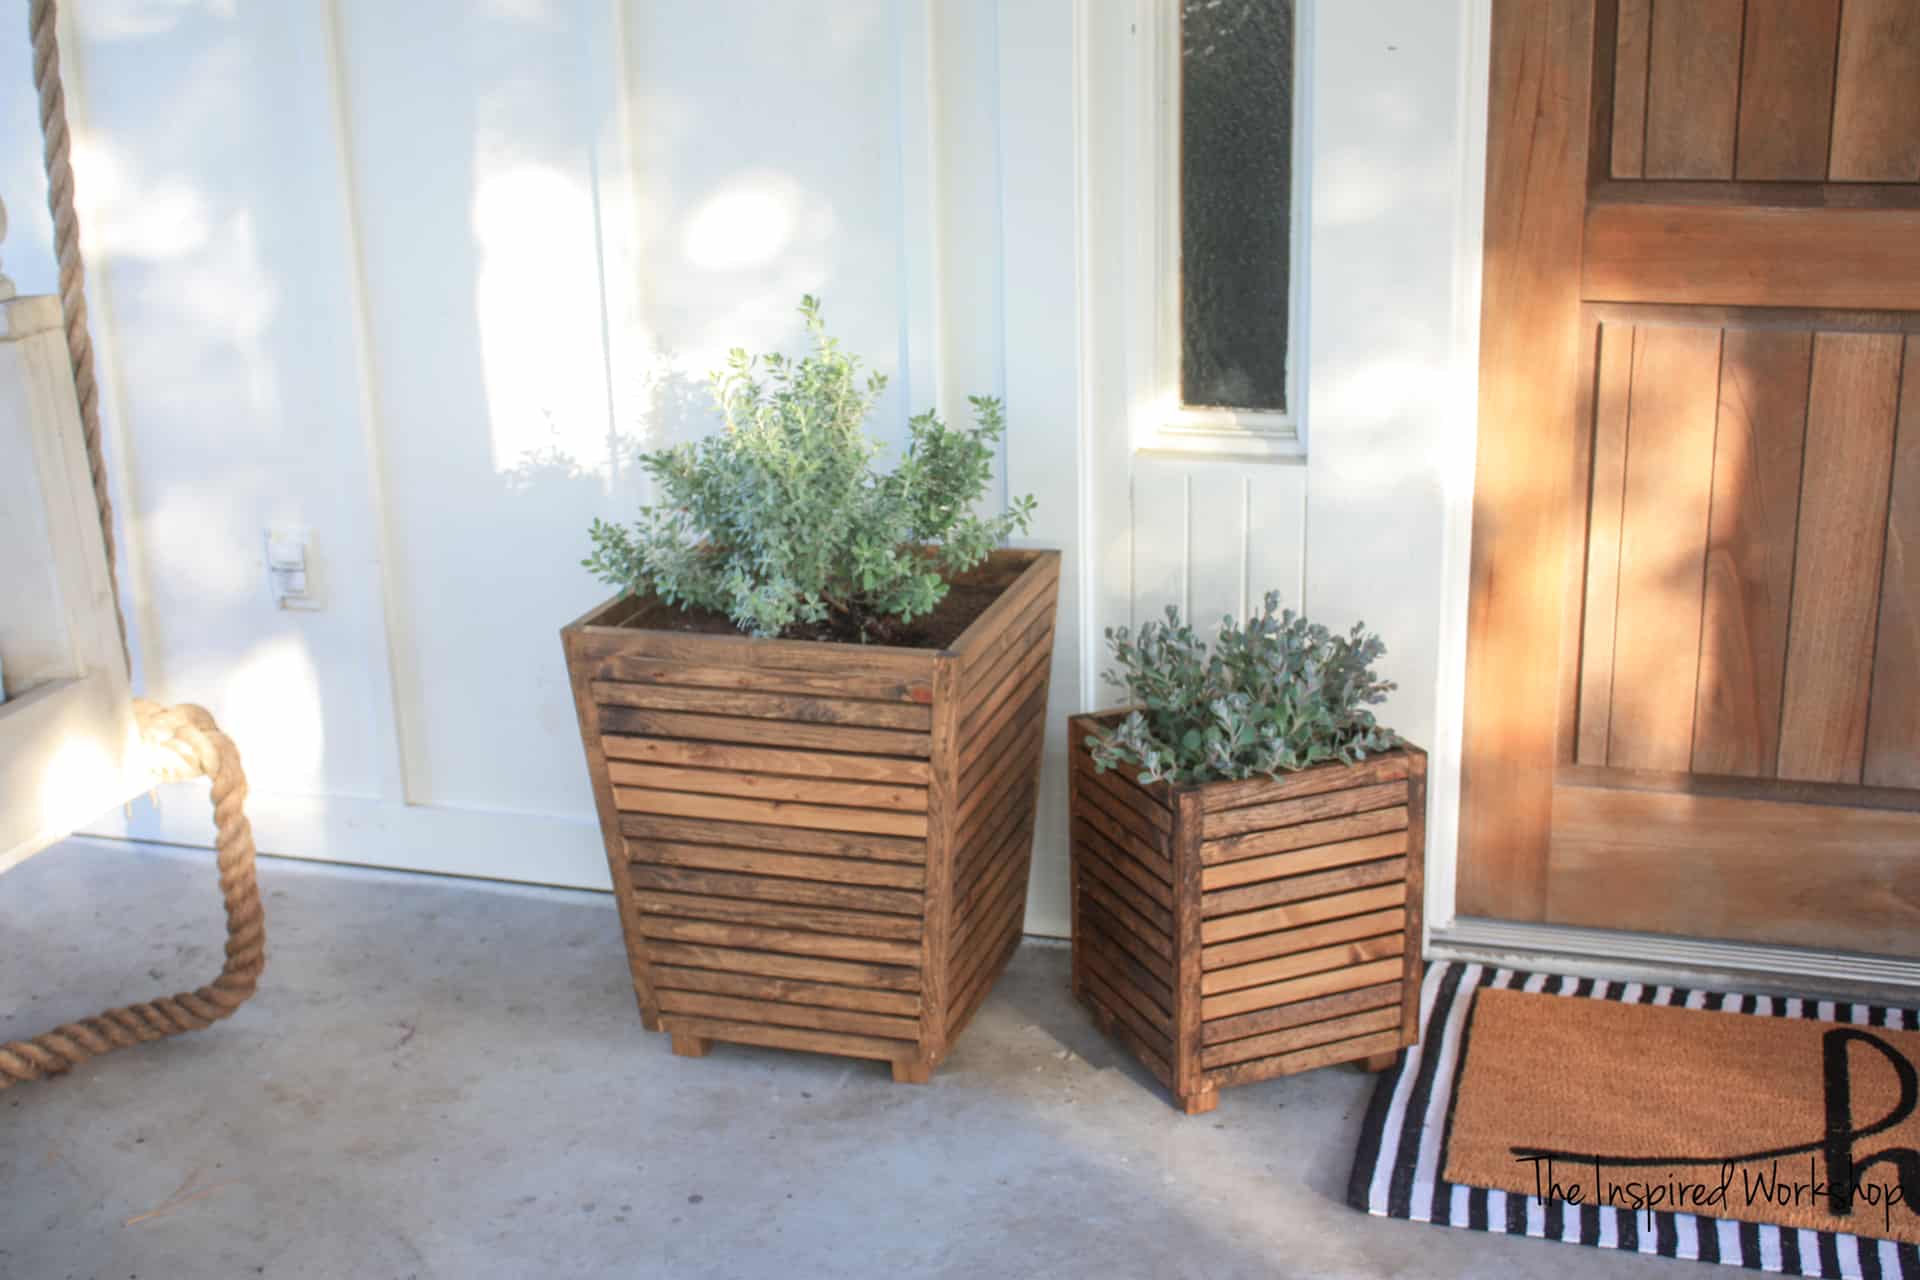
These beautiful DIY outdoor planters can be built from your leftover scrap wood pile! They don’t have to cost you a thing but yet, they look so good on your front porch or back patio! These outdoor planters are sure to get compliments from all your guests thinking you spent a lot of money on them from a fancy store!!
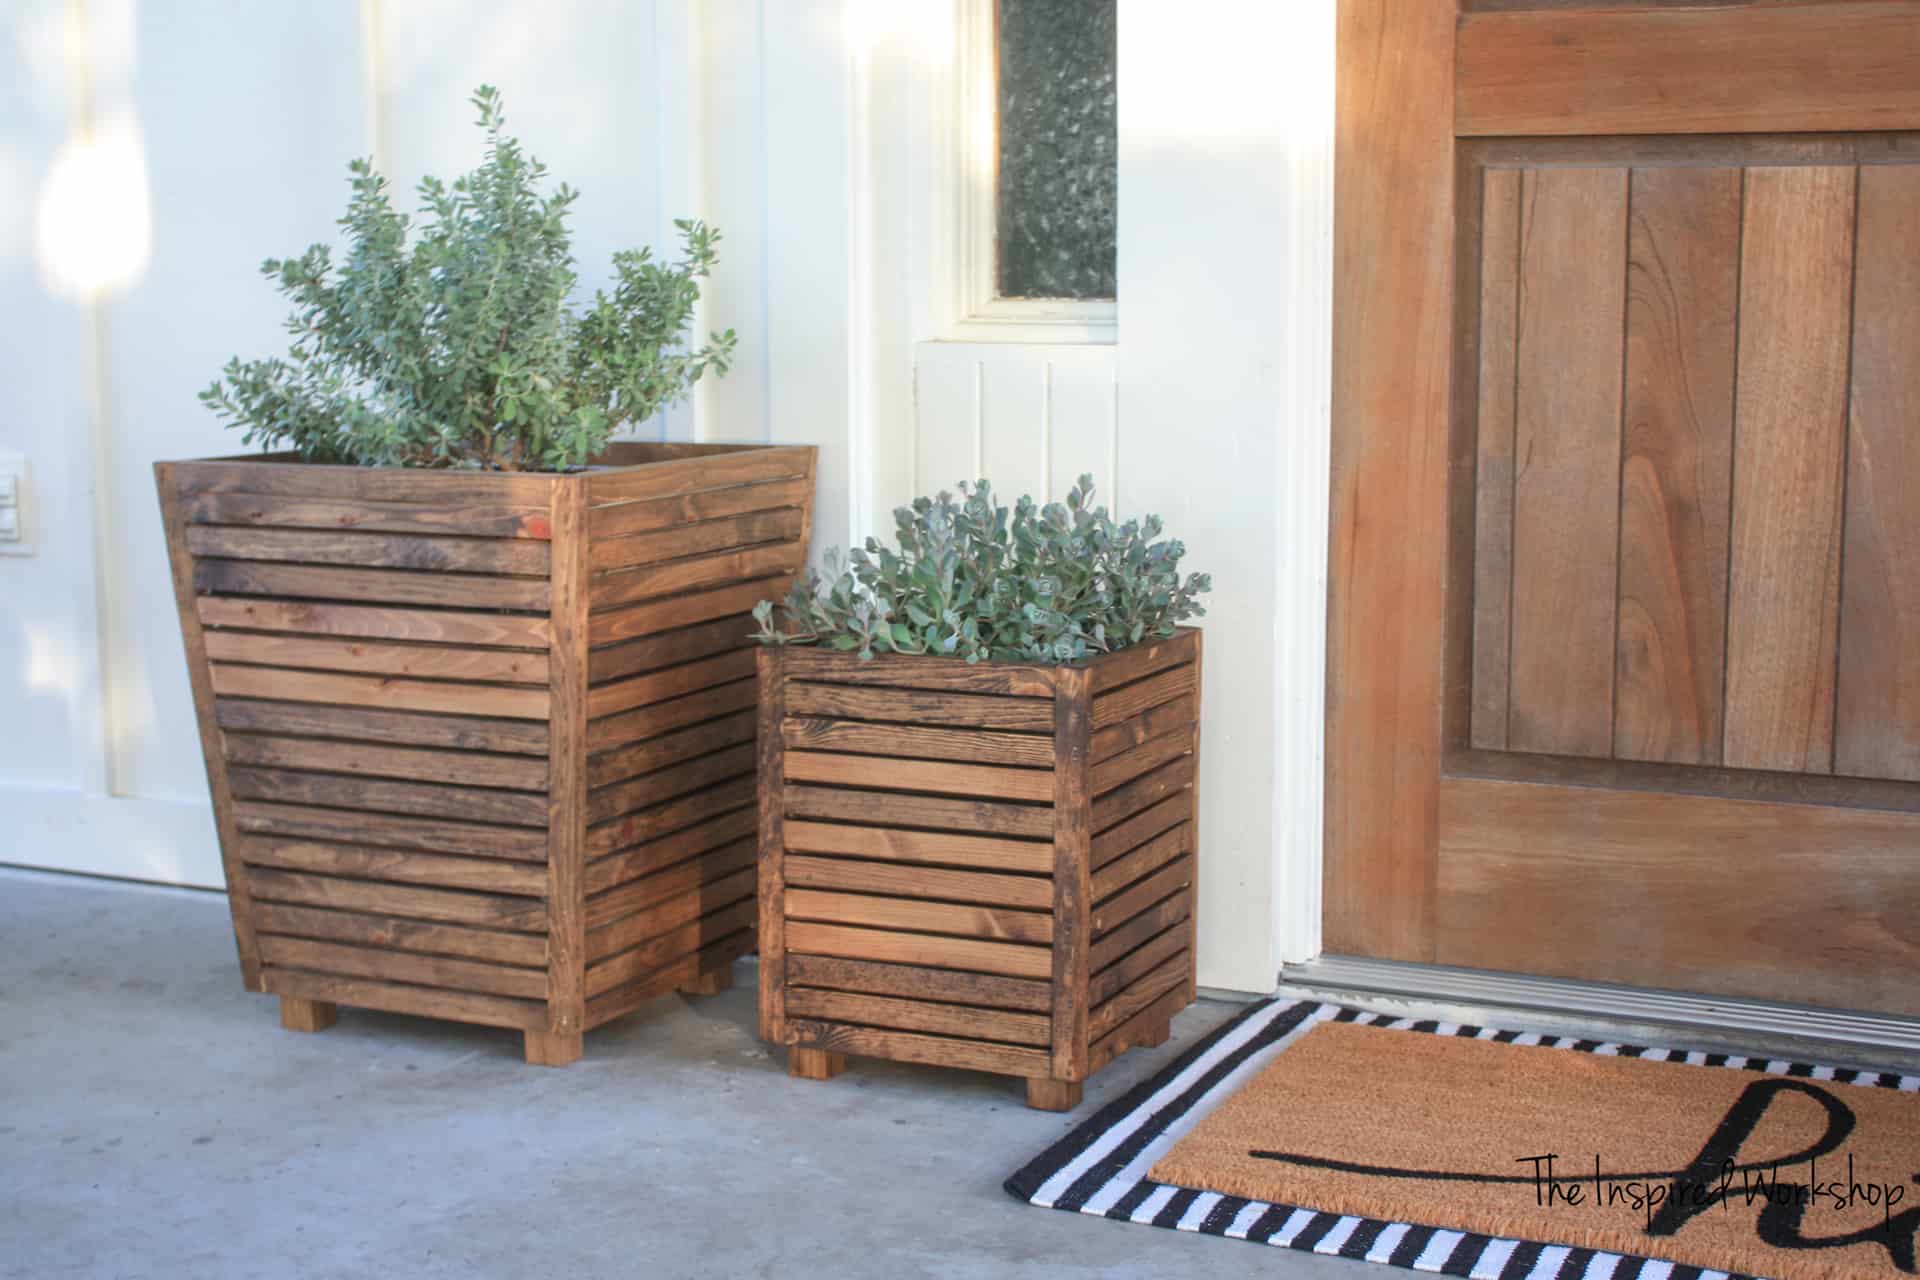
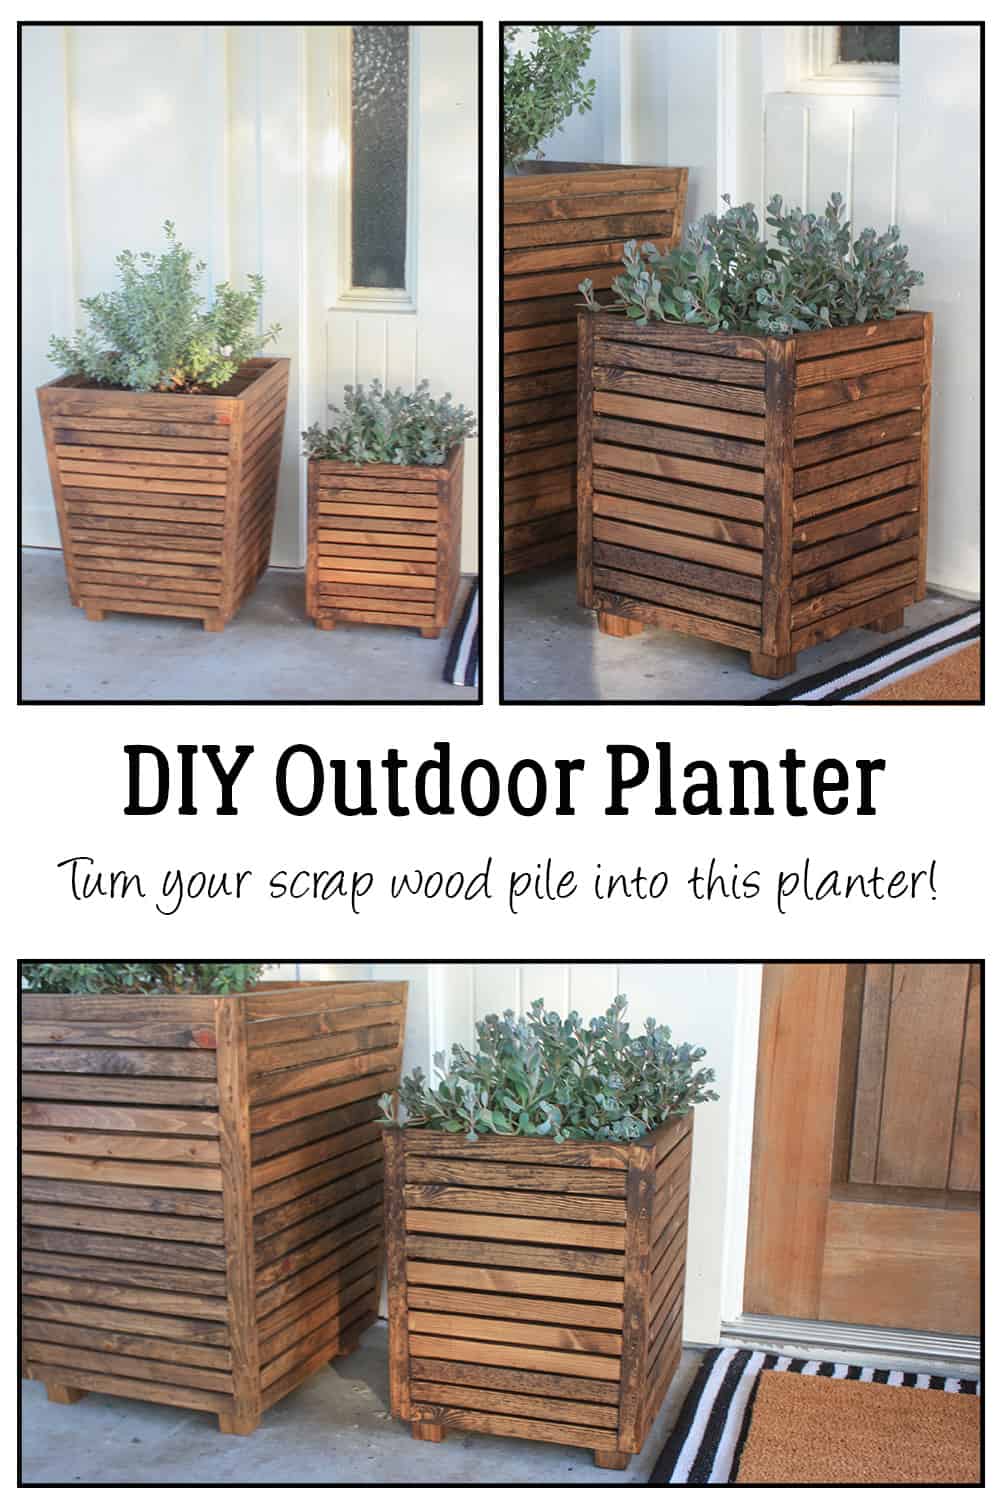
I am happy to be back today for our monthly DIY challenge! This month it is a scrap wood challenge…which I am a borderline hoarder when it comes to scrap wood, there really isn’t a piece too small to keep! Lol! I built this scrap wood DIY outdoor planter and I am in love!
I built the smaller outdoor planter from scrap wood but the larger outdoor planter is what gave me the idea! The larger planter is a contributor post I did for Ashley and she will have plans up soon on Handmade-Haven! I wanted to try a smaller version that was simplified without angles so you could bust it out in a few minutes vs hours! And it was a complete success if I do say so myself!
Make sure and check out ALL the awesome scrap projects that the other bloggers built for this challenge!
The great thing about the planter is that it doesn’t really take that many scraps since you are ripping them down to 1″ strips! If you have a 1×12 scrap at 10″-14″ long, you pretty much have a whole side! And worst-case scenario, if you JUST cleaned out your scrap bin, you can purchase two brand new 1x4x8s and build it just the same! Hooray for everyone!😉
You can have the craziest scrap pile and it will be perfect! I wish I would have taken a picture of the pile I used, it was a mixture of 1x8s, 1x6s, and 1x4s that were so short-looking, you would have thought they were trash! But they don’t look like trash now, do they?! Lol!
I sent the pile with my hubby to be ripped…he piled a bunch of plywood on my table saw, so he has to take all my table saw jobs and do them for me over at my Grandpa’s shop! Lol! It’s his punishment for not finding a better place for them, I mean, there are so many options in my floor-to-ceiling mess of a shop, I just don’t know why he couldn’t find a better place!?
Enough about me and my 49 issues, let’s get a beautiful DIY outdoor planter built with all your trash, er I mean scraps!😅
Love DIY outdoor planters as much as I do and want to see more? Here are a couple of other planters I have built!
DIY Raised Planter Bed with Trellis
Gathering the Supplies for the DIY Outdoor Planter
*This post contains affiliate links! That means when you click a link and make a purchase at that link, I make a small commission at no extra cost to you! It’s really a win-win and I appreciate it when you do! It helps me bring this free content to you!
Materials for the outdoor planter:
- A bunch of 1x (1×4, 1×6, etc) scrap boards at least 10″ long and 1 board that is 14″ long…or you can just buy 2 – 1x4x8 if you don’t have a scrap pile and 1 – 2×2 furring strip or 6″ piece!
- brad nailer
- 1 1/2″ brad nails
- wood glue
- table saw
- miter saw
- plastic liner if you prefer
- a few rocks
Cut List for the Outdoor Planter:
*Note: I refer to the ripped down boards as 1x1s in the cut list – they will need to be ripped on a table saw to 1″, their actual measurement will be 3/4″ x 1″… or you can purchase the precut strips at a lumber yard but they can be pricey!
- 48 – 1×1 @ 10″
- 4 – 1×1 @ 14″ 2 – 1x4s or other size scrap boards of your choice (at least 1 1/2″ wide) @ 10 1/2″
- 3 – 1x4s or other size scrap boards of your choice @ 10 1/2″
- 4 – 2×2 @ 1 1/2″
Building the DIY Scrap Wood Outdoor Planter
Ripping the scrap wood down to size for the planters
First, you must rip all your scraps down into 1″ strips! Ripping boards on a table saw can be very dangerous. Make sure you know how to properly use a table saw before attempting to rip 1″ strips. You may want to use a feather board or other jig to make it safer to rip the boards! Rip boards at your own risk!
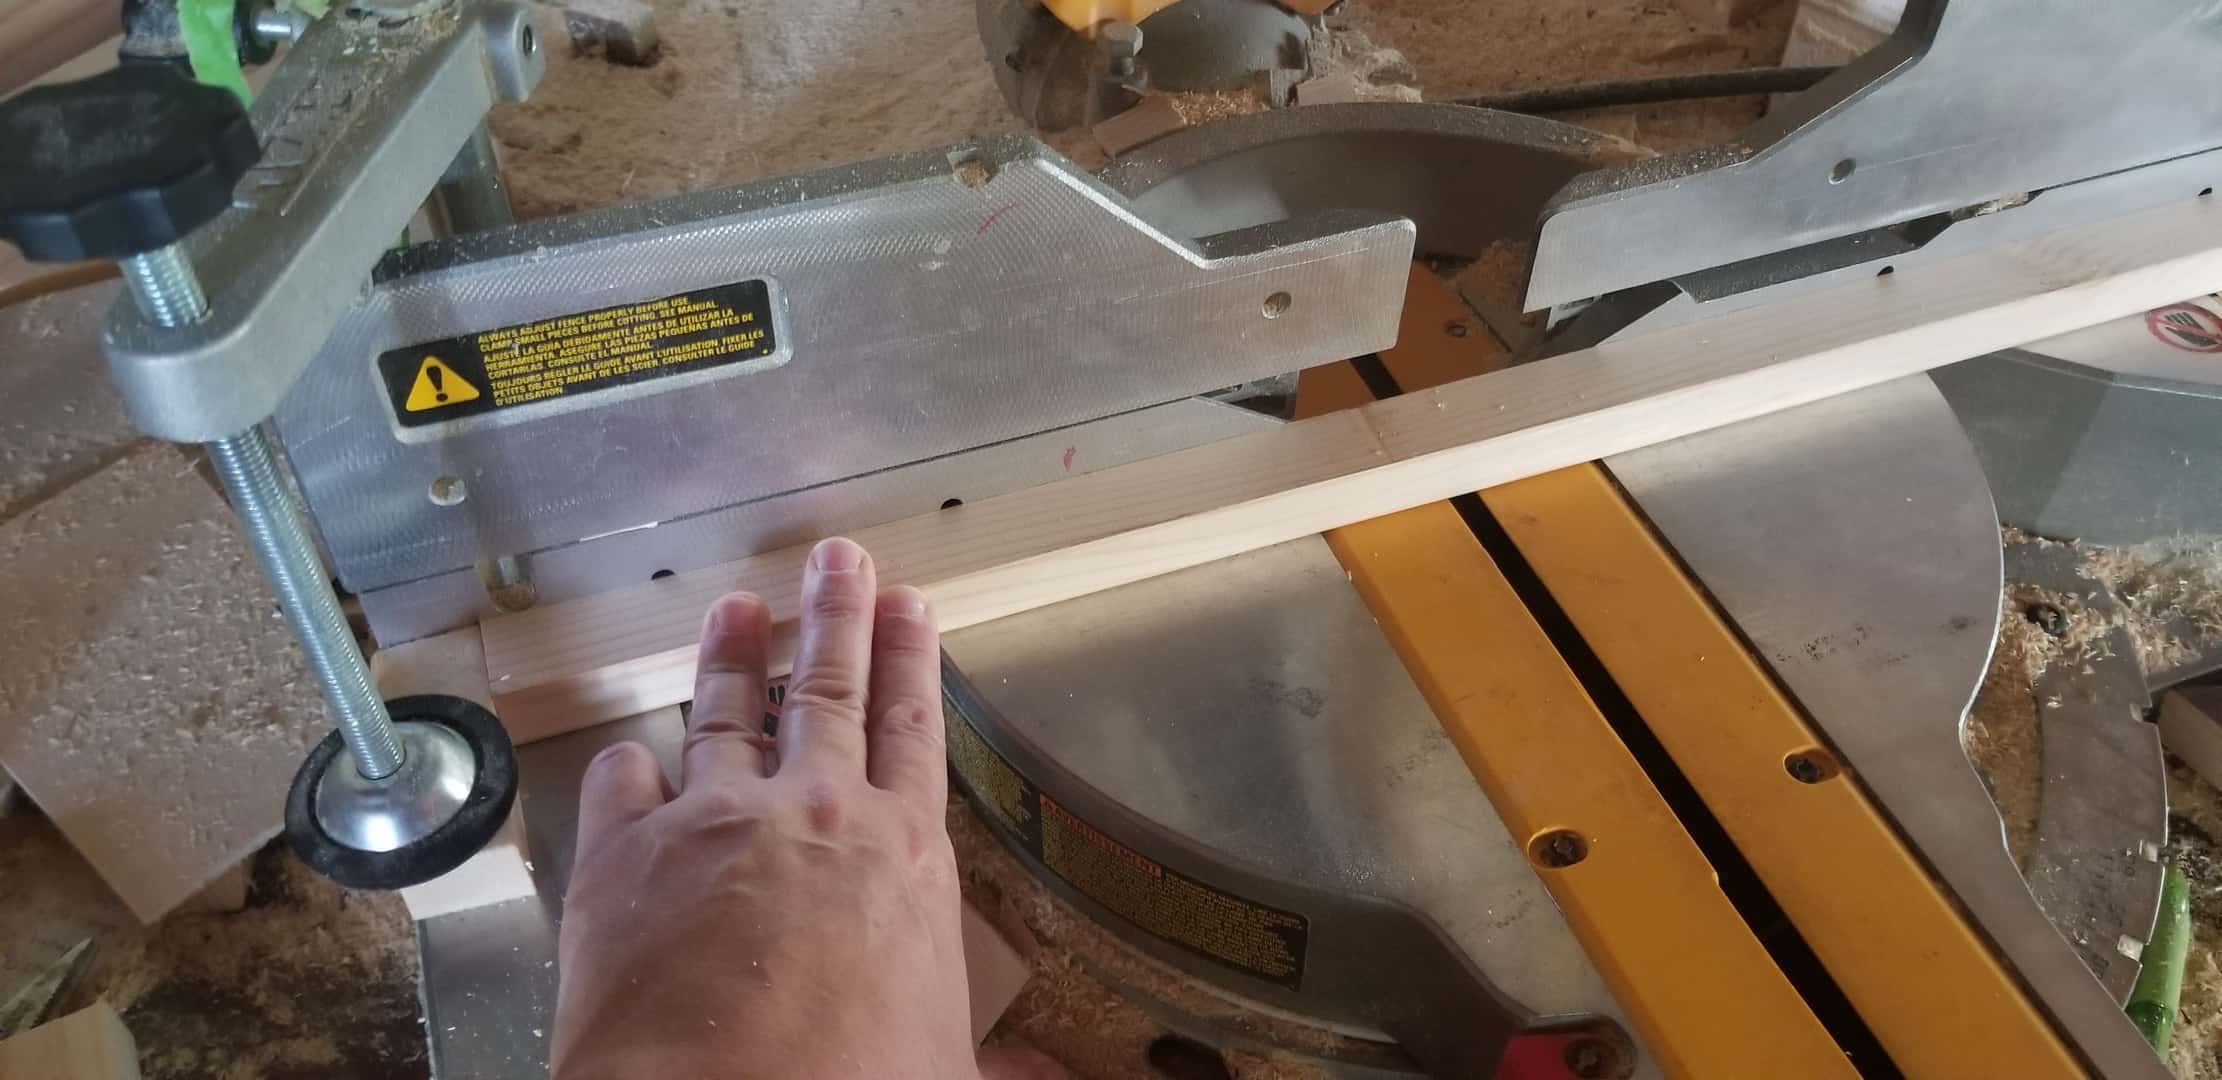
Cutting the boards for the planters
Once you have all your small boards ripped down for your DIY outdoor planter, you will need to cut them down to size on the miter saw. I set up a stop block at 10″ so I could just slide the board and cut, without having to measure each time! It only took me 12 minutes to cut all 52 boards! It was amazing and I wish all my cutting could be done that quickly! Lol!
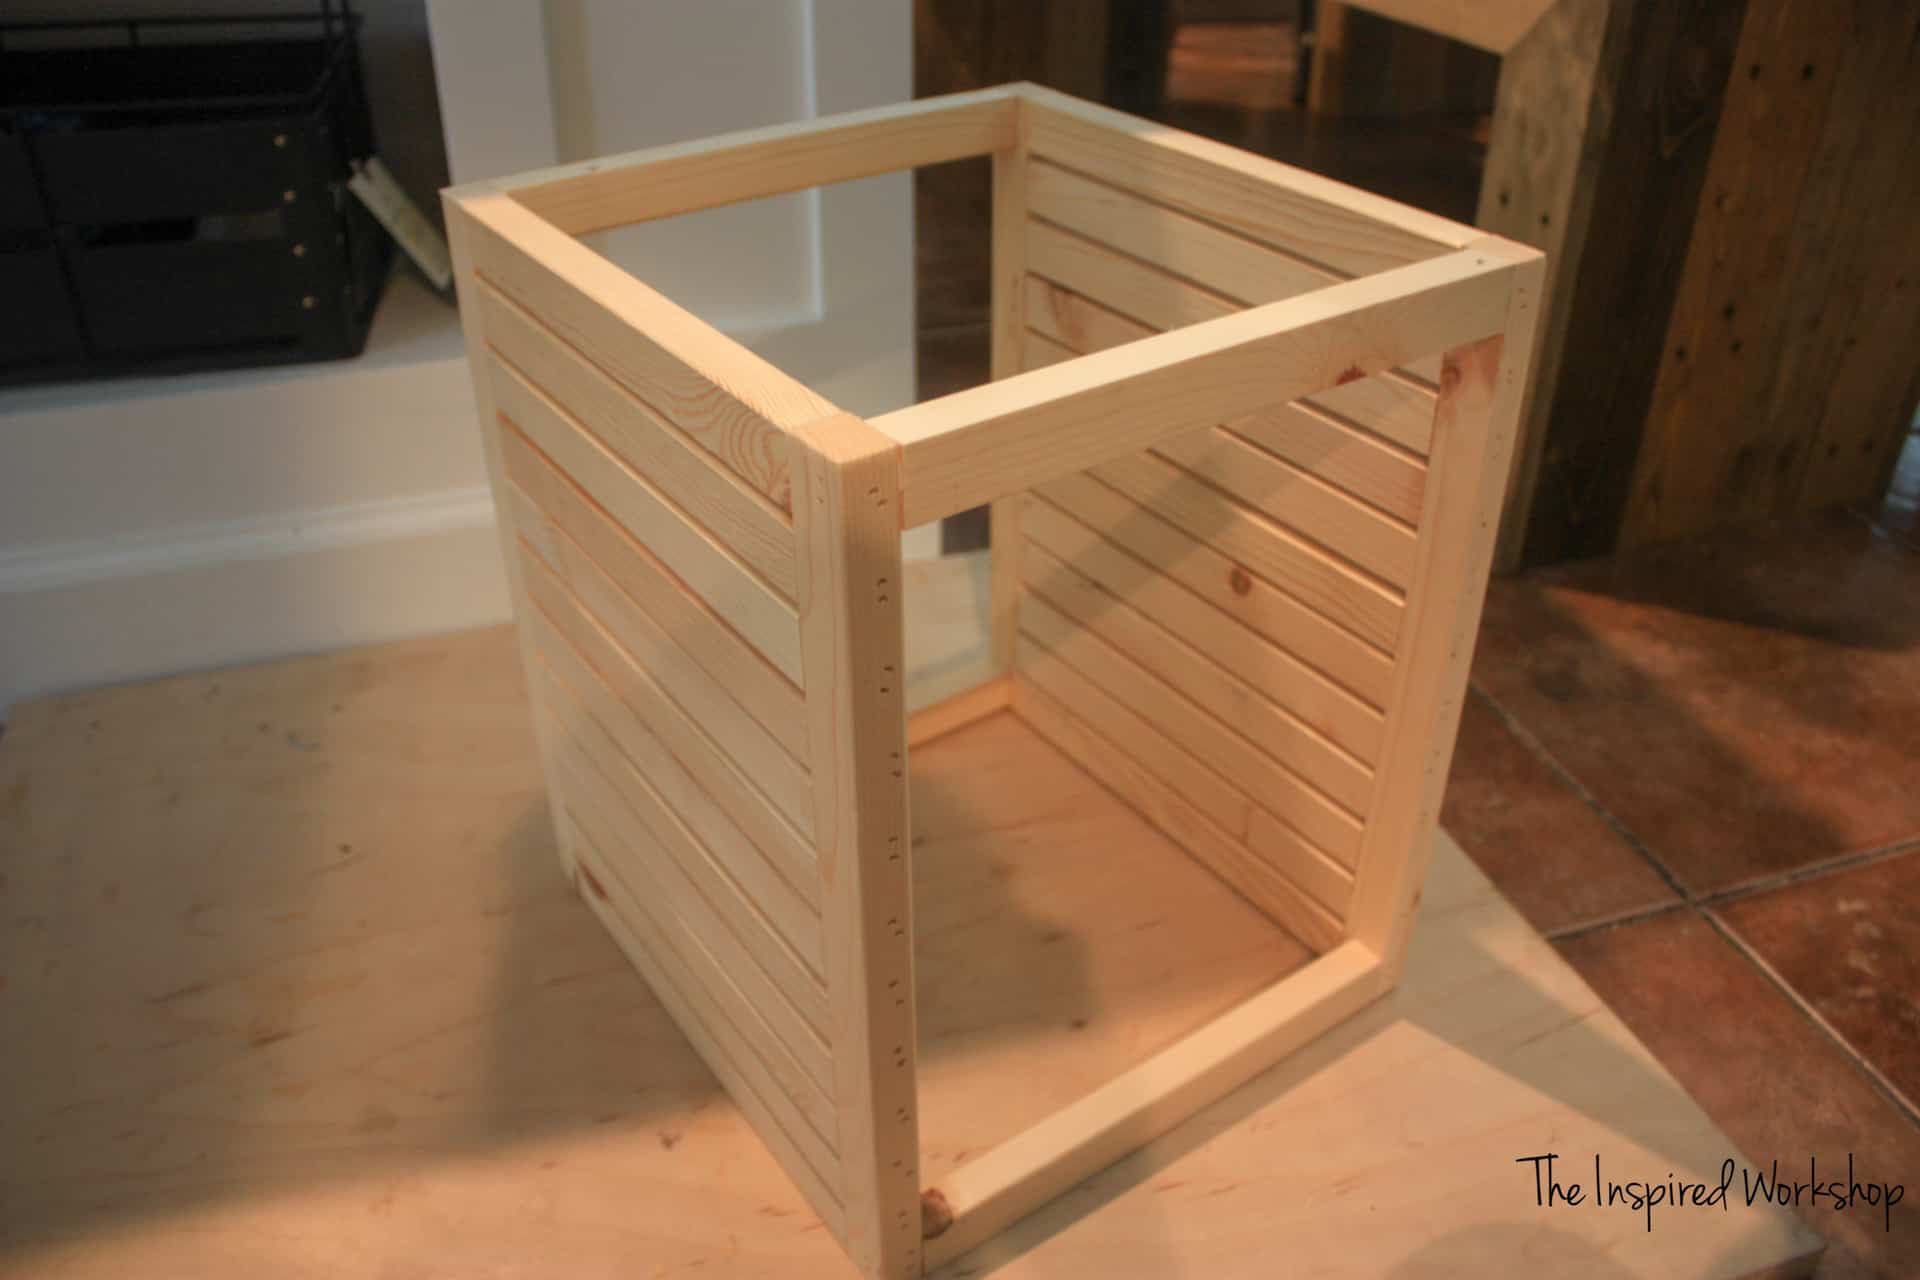
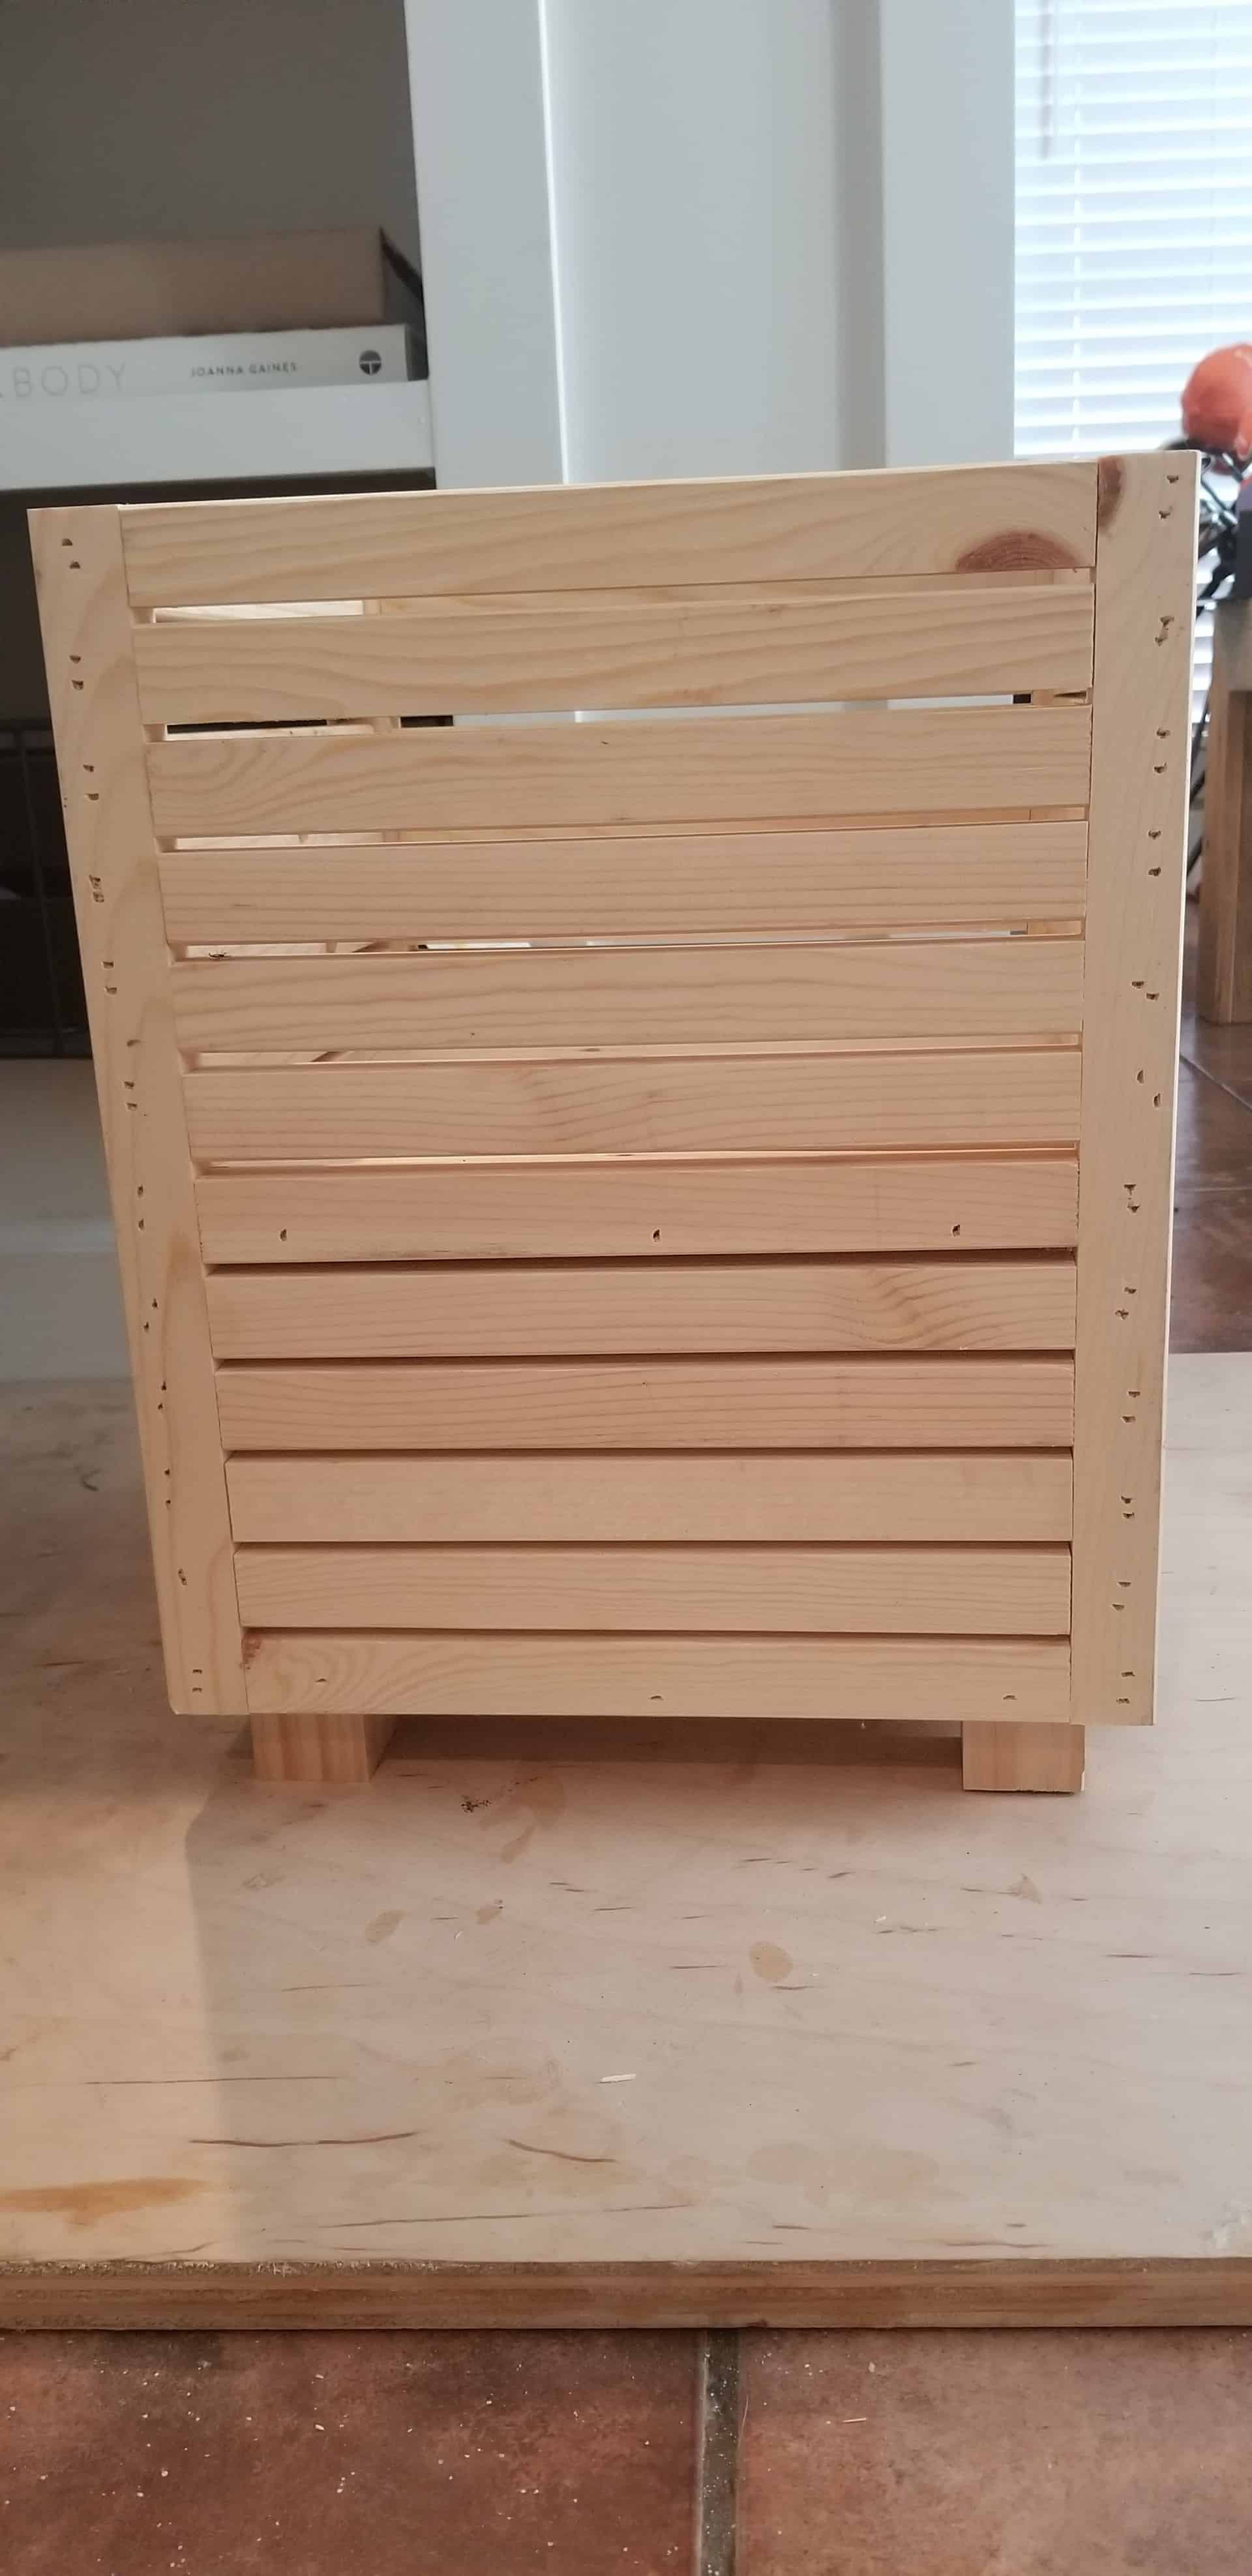
Building the sides of the planters
Once they are all cut to size, 48 at 10″ and 4 at 14″, you can start building the planter. The 14″ are the vertical boards, and the 10″ are the horizontal slats. I attached them with ample wood and just brad nails. It makes for a ton of holes to fill once the planter is complete, but it also makes for a really quick and easy build! If you would rather dowel rod each one or Kreg screw them, you are more than welcome!
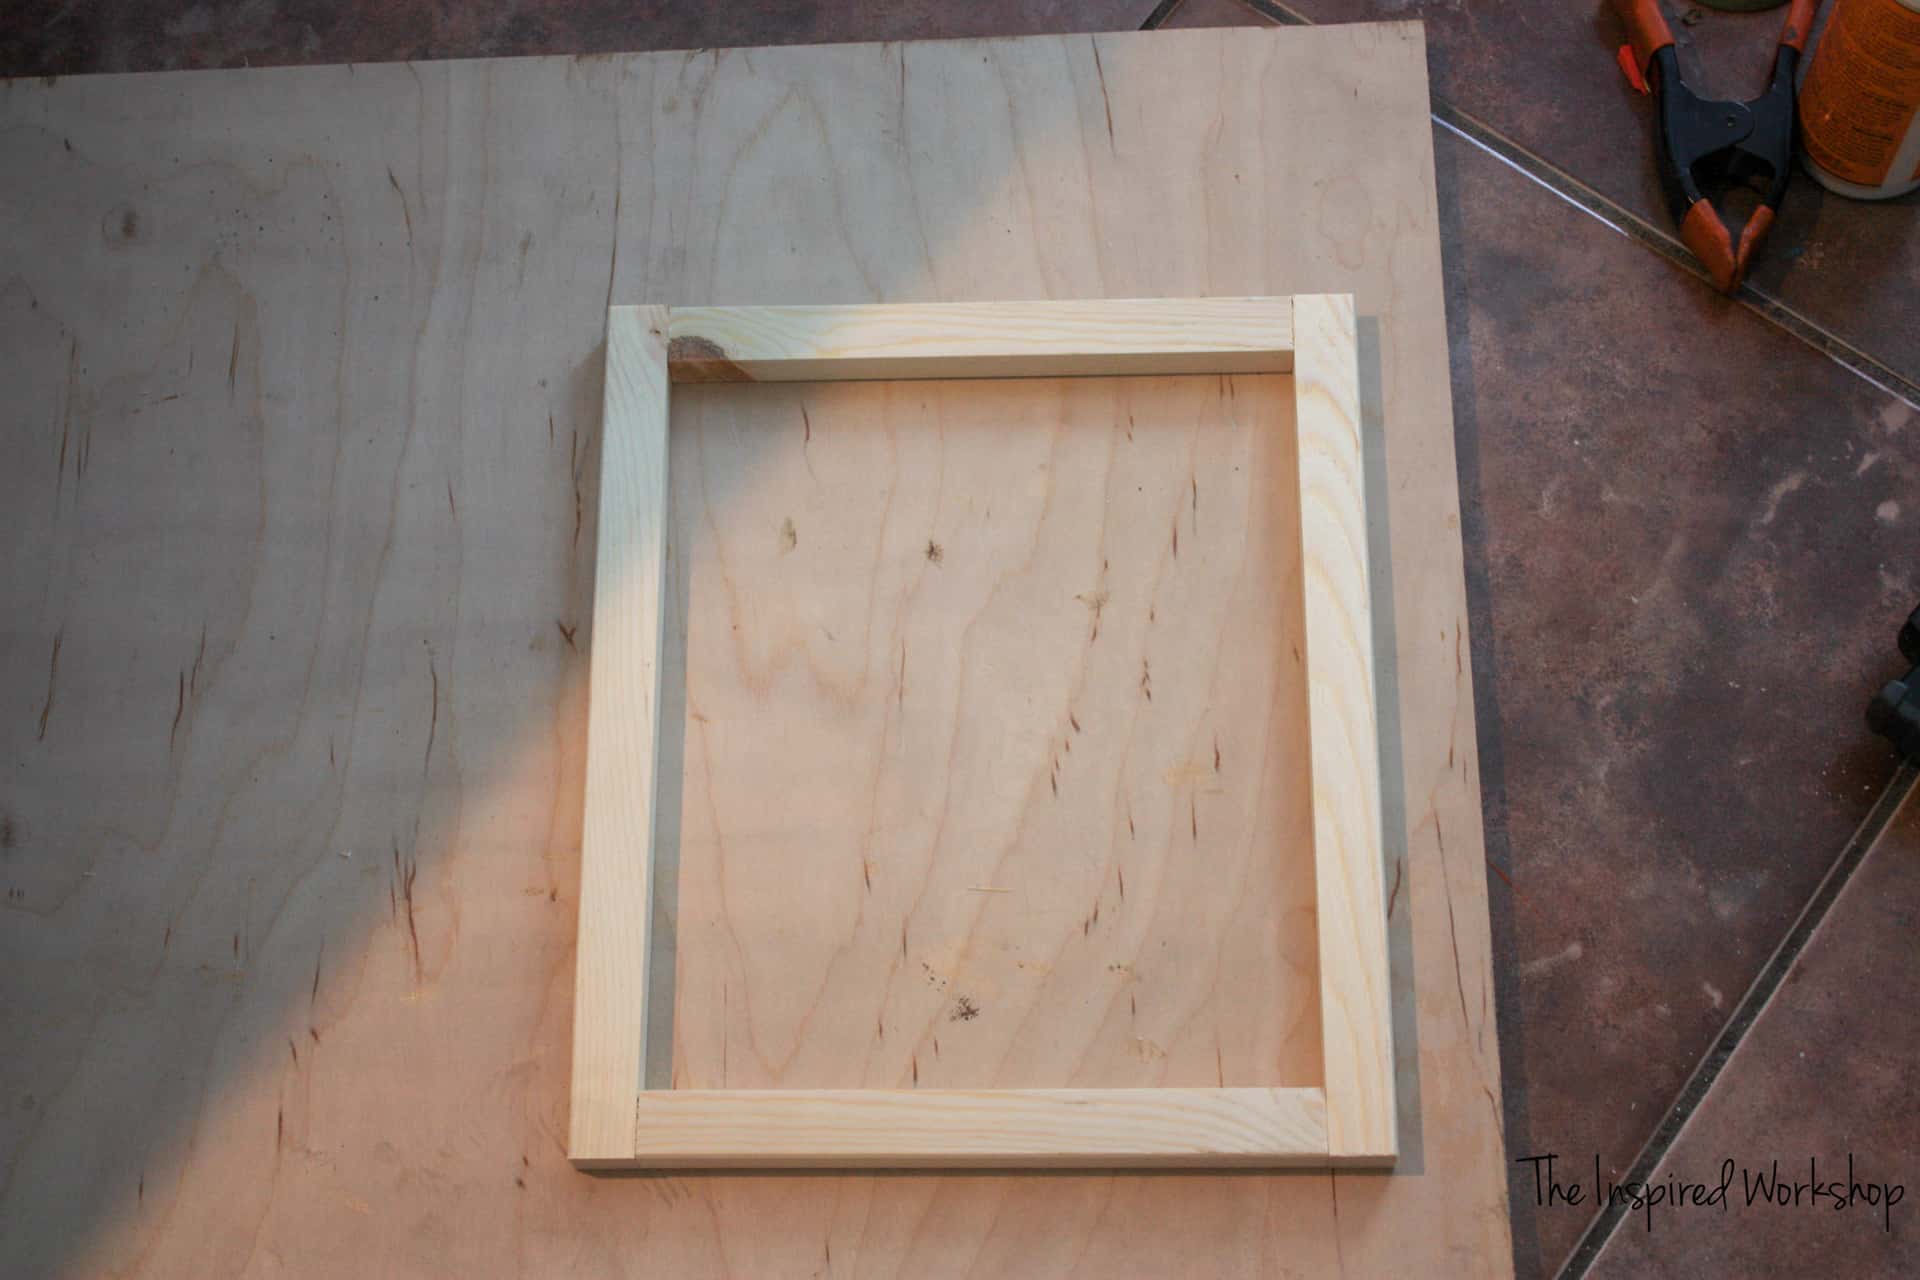
I place my boards on a piece of plywood since I was building inside on the tile, and that is uneven. I also like the plywood because I can put the pieces I am stapling right along the edge and then my brad nailer has enough room to shoot straight. Just a little tip!
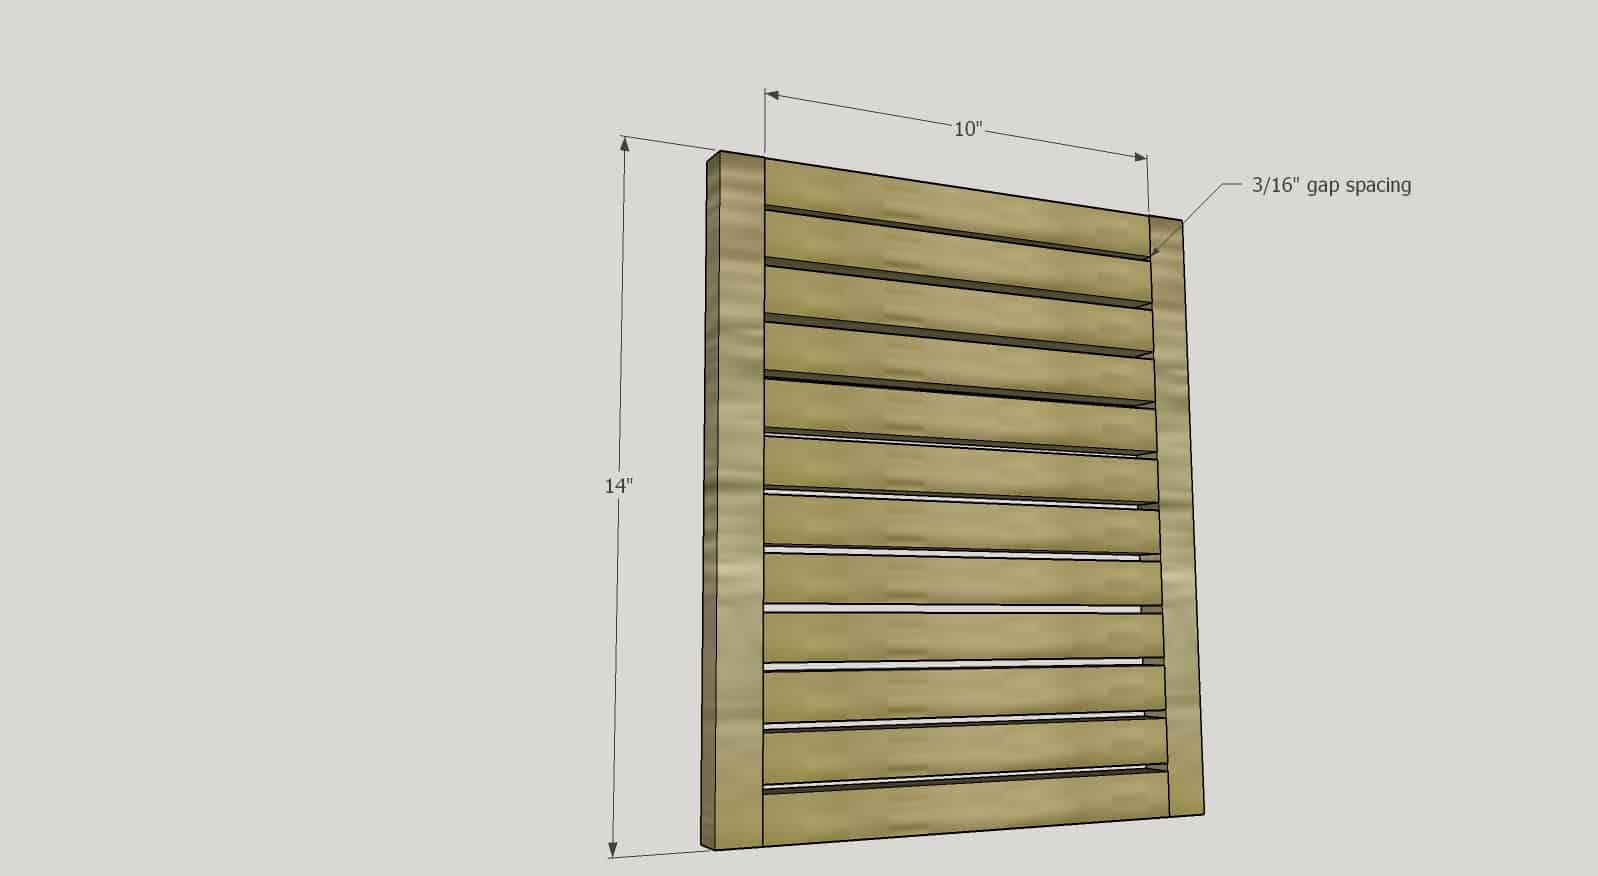
Next, I filled it up with the slats. They are spaced at an almost perfect 3/16″! I didn’t take a picture for some reason at this step so here is the Sketchup pic!
Then you get to repeat that step to make another side just like it!
Attaching the two sides together to make the DIY Outdoor Planters
Once you have both sides built, you will just attach a top and bottom board to the two sides you just built!
Again, just fill in the slats every 3/16″ and it is so close to done already!
Add a bottom to the planter
Now the bottom needs something to attach those cute little feet to! Using scraps of whatever size you have laying around, cut them down to 10 1/2″ and I just brad nailed them as well with plenty of wood glue! Look at my scraps, I had a 2×2 and a 1×4 furring strip! No one will ever know!
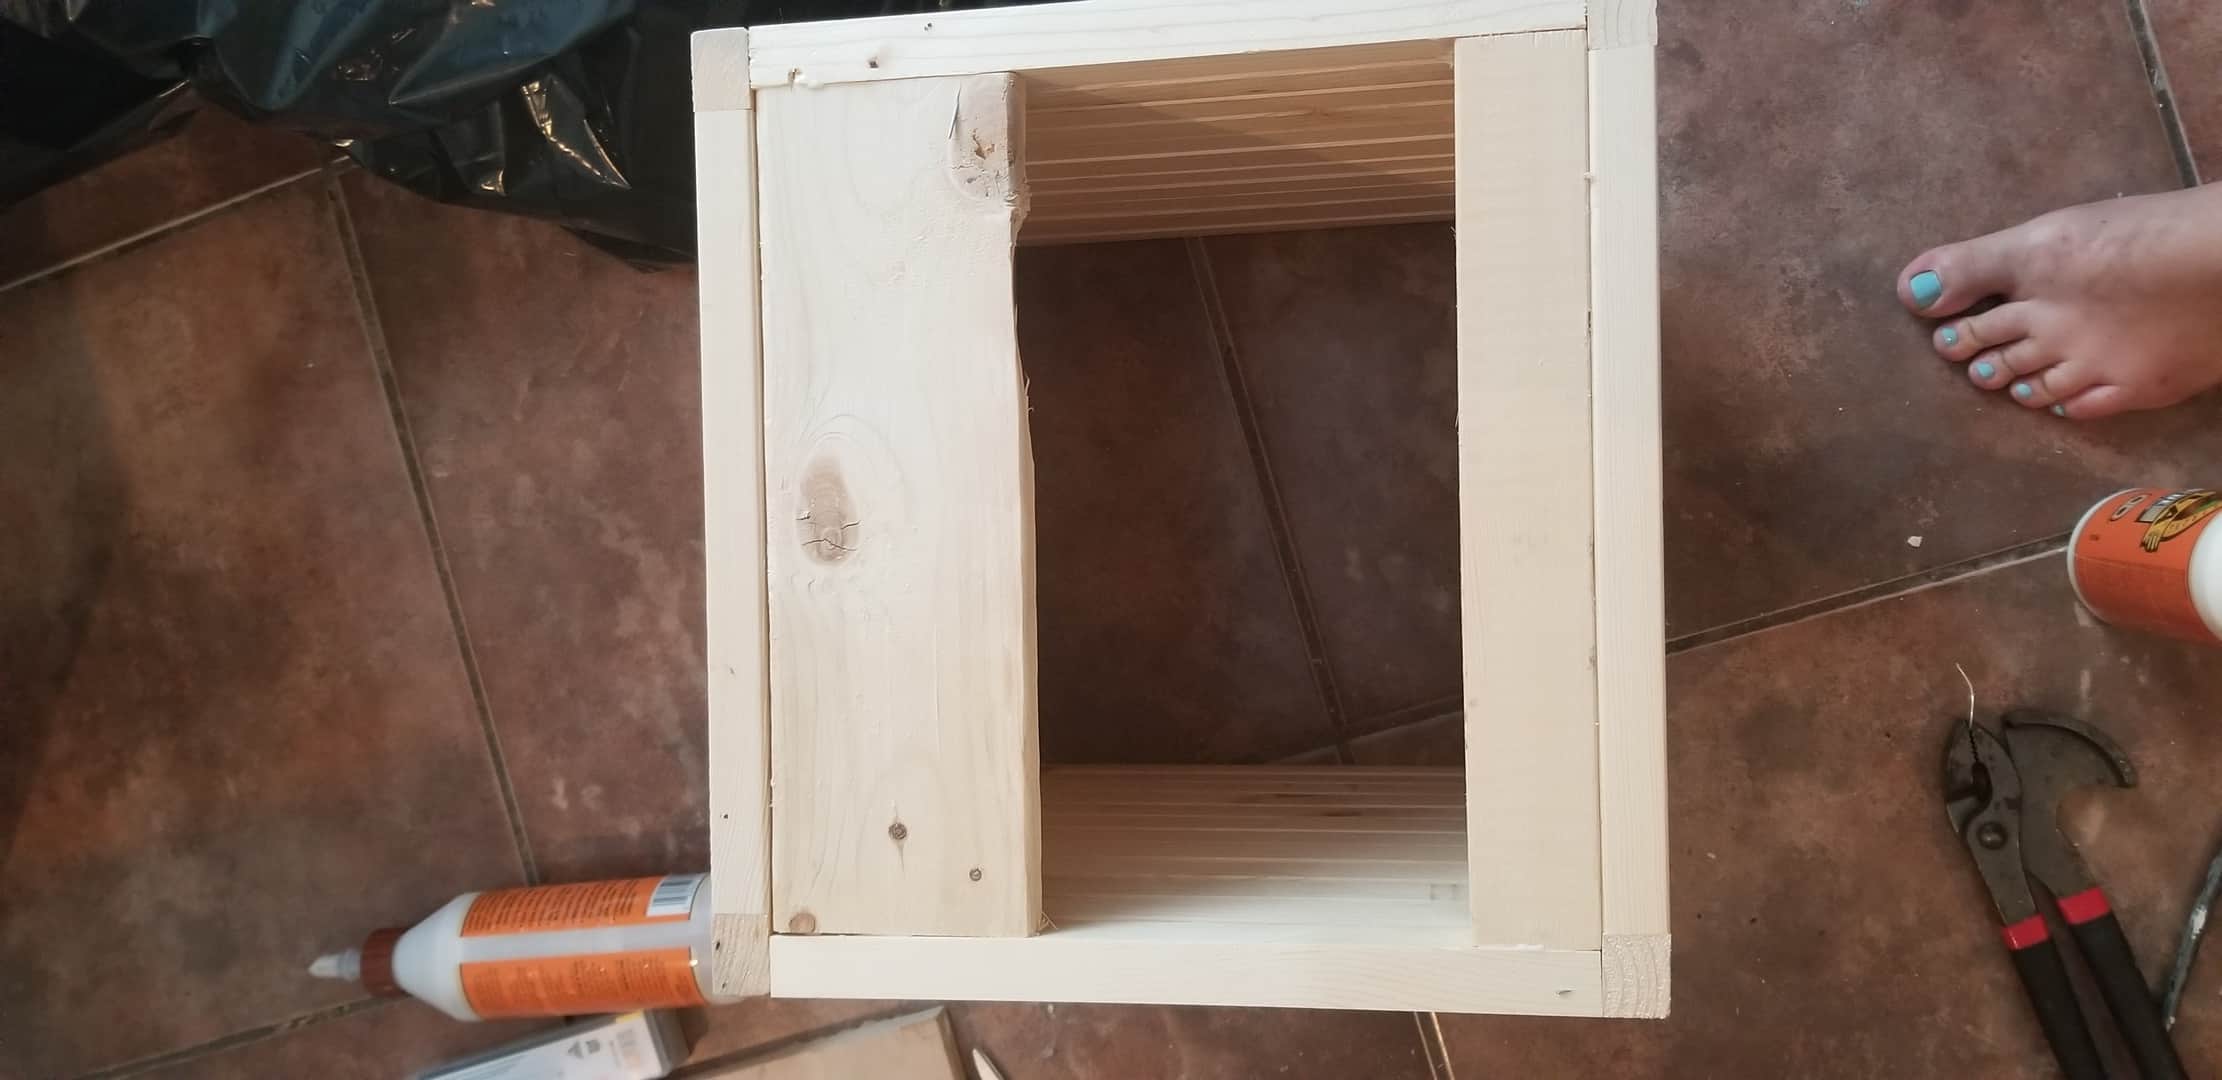
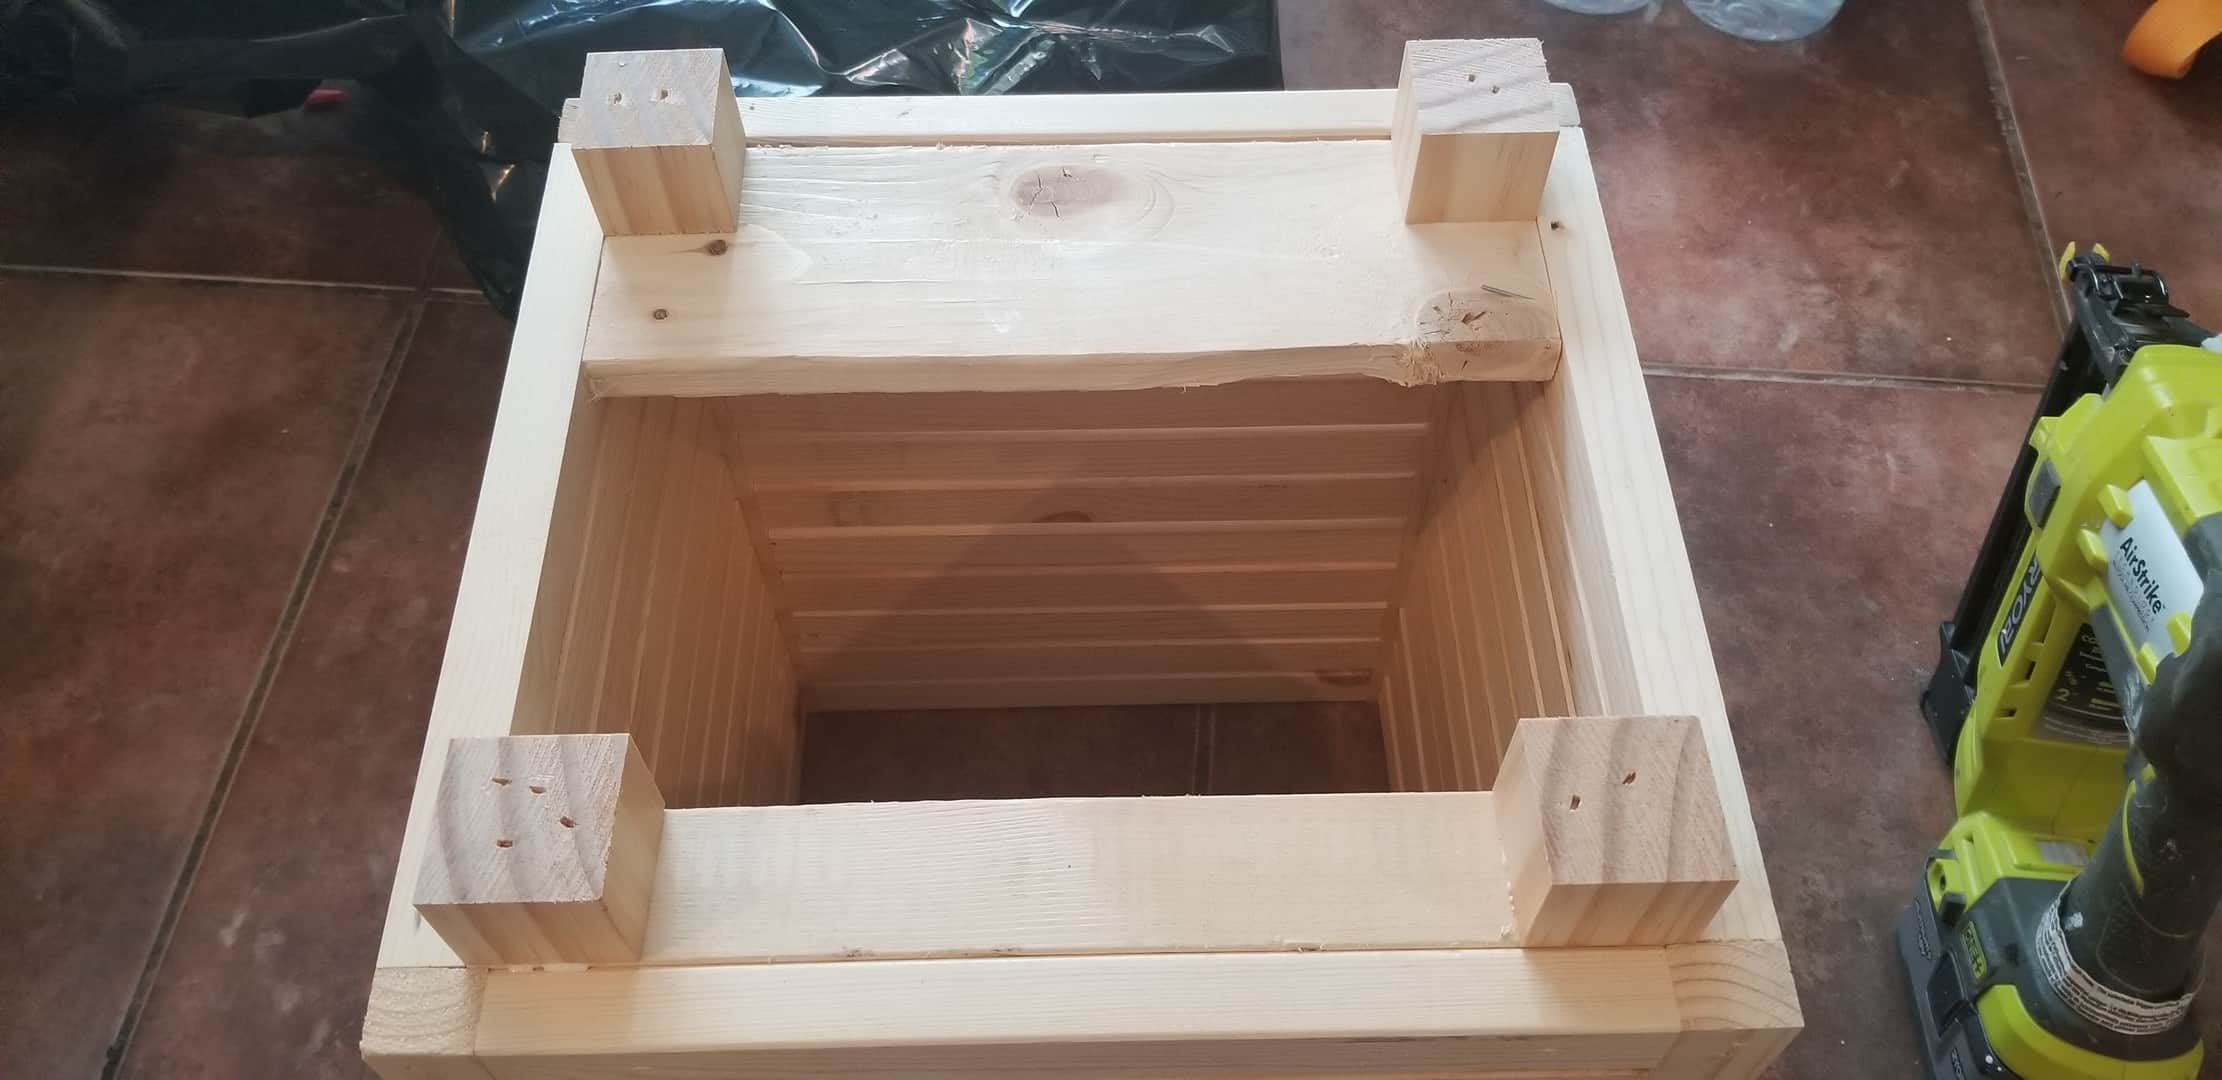
Add the feet to the outdoor planter
That allows us something to attach the feet to, so attach them feet! Again, maybe not the sturdiest way to attach the feet, but I used glue and brad nails! I nailed it from the bottom and then flipped it over and nailed it from the top as well!
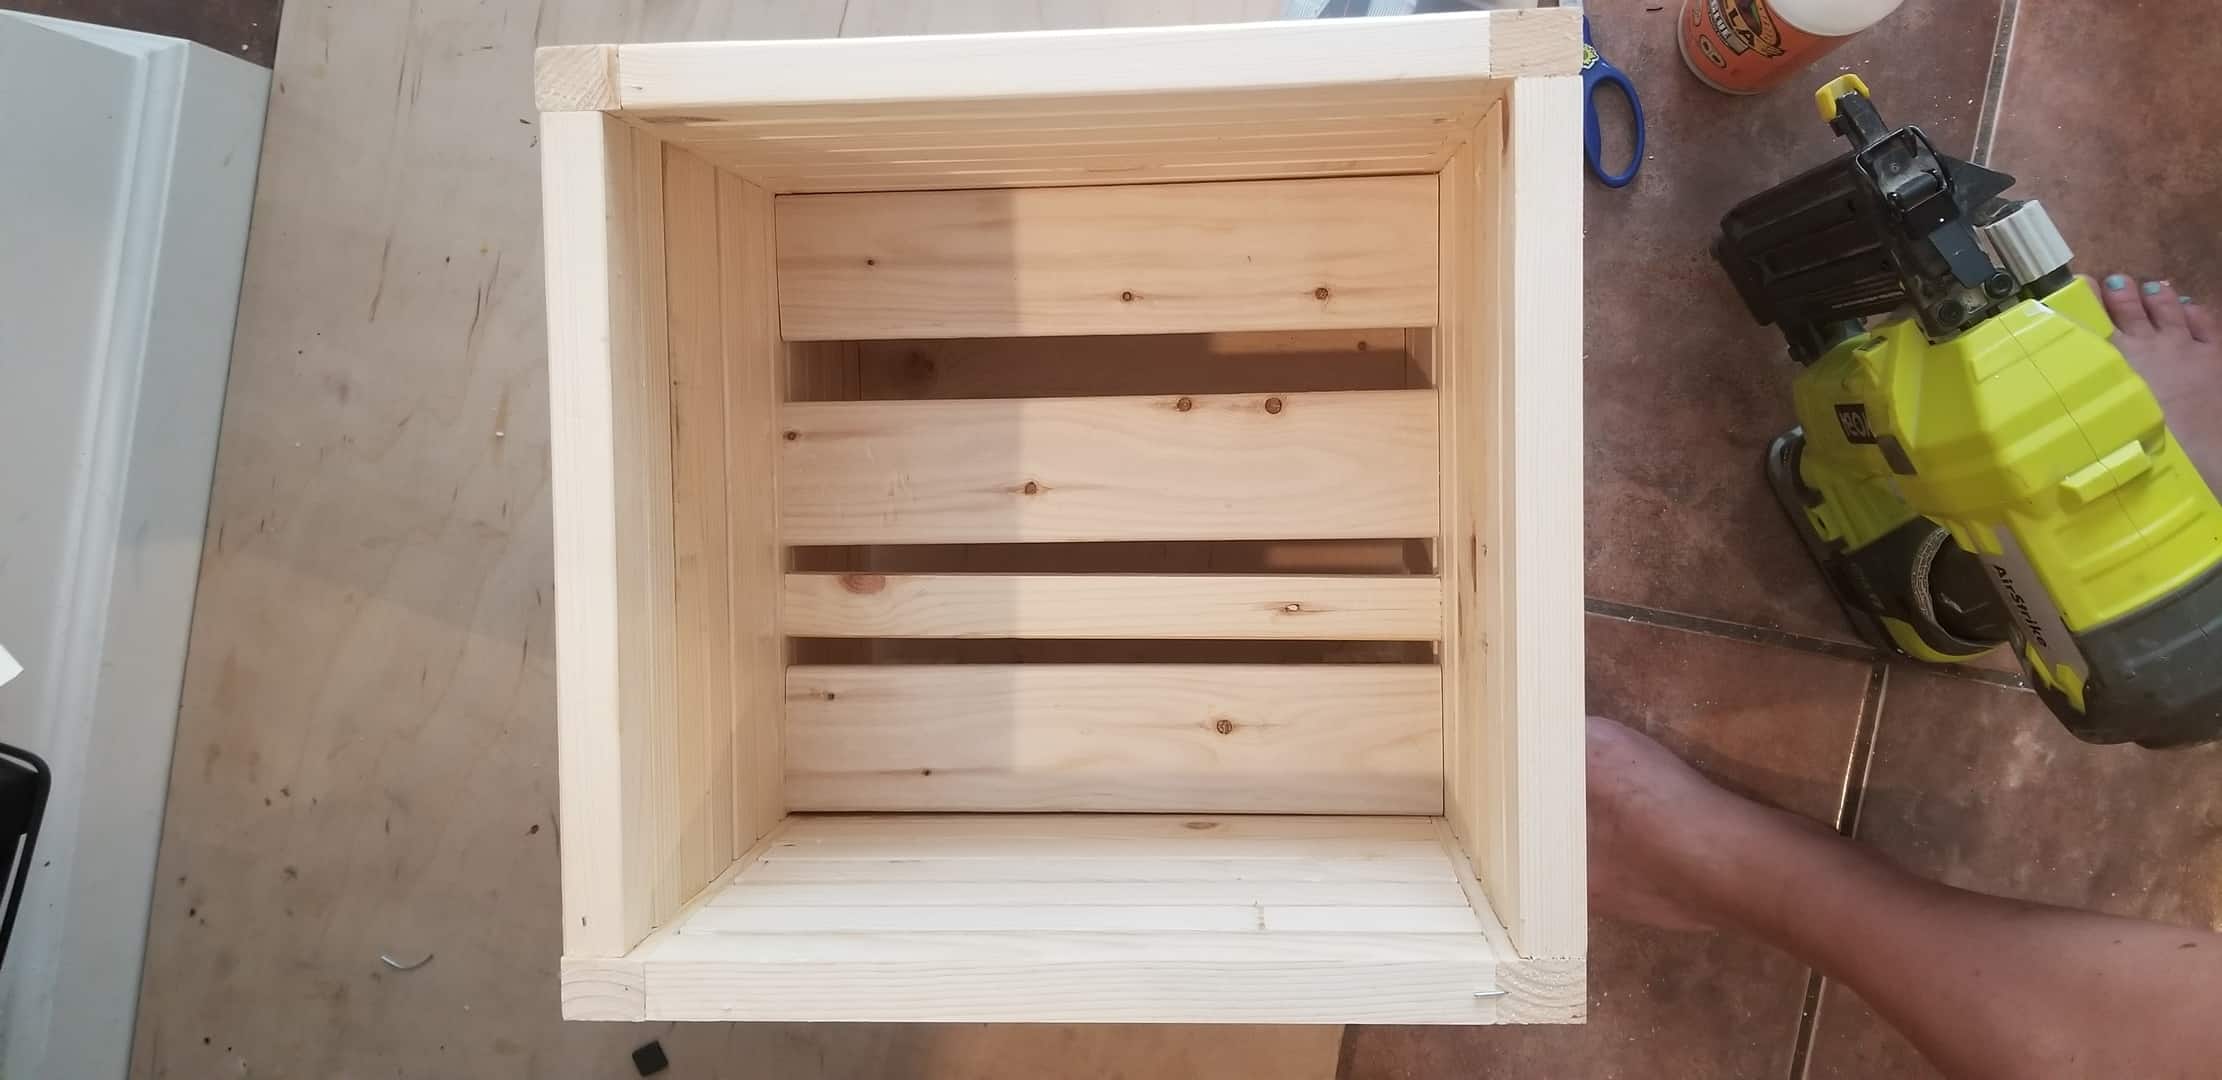
Add a shelf to save on potting soil
Last we need a shelf inside so we don’t have to fill the entire planter up with soil! Now I am not a gardener so this may not be the best idea, but so far both my plants have survived just fine planting them this way!
Again, I used random scrap wood, so they were not all the same width! And they are brad nailed from the ends and the side (for the ones that are against the side) with tons of wood glue and a little more than halfway down inside.
*You will need to line the planter if you want to plant in dirt, sometimes I leave the plant in the plastic tub it comes in instead! If I line it, I just use a black heavy-duty trash bag and staple it inside as I did in this planter box post and I talk more about it below!
Finishing touches on the Outdoor Planter
Now, all it needs is the finishing touches…a whole lotta wood filler, the stain of your choice, and a good polyurethane!
Sand it down after the wood filler dries and boom…DONE! Beautiful planter was born just like that! I used Minwax Provincial stain just in case you want the same color!
I placed a liner of plastic and then threw a few rocks down in the bottom to help with drainage, you can cut a couple of holes in the plastic liner if you would like as well. I didn’t attach it in any way, just stuck it in there and poured rocks in, threw a little potting soil, then the plant, then more soil!
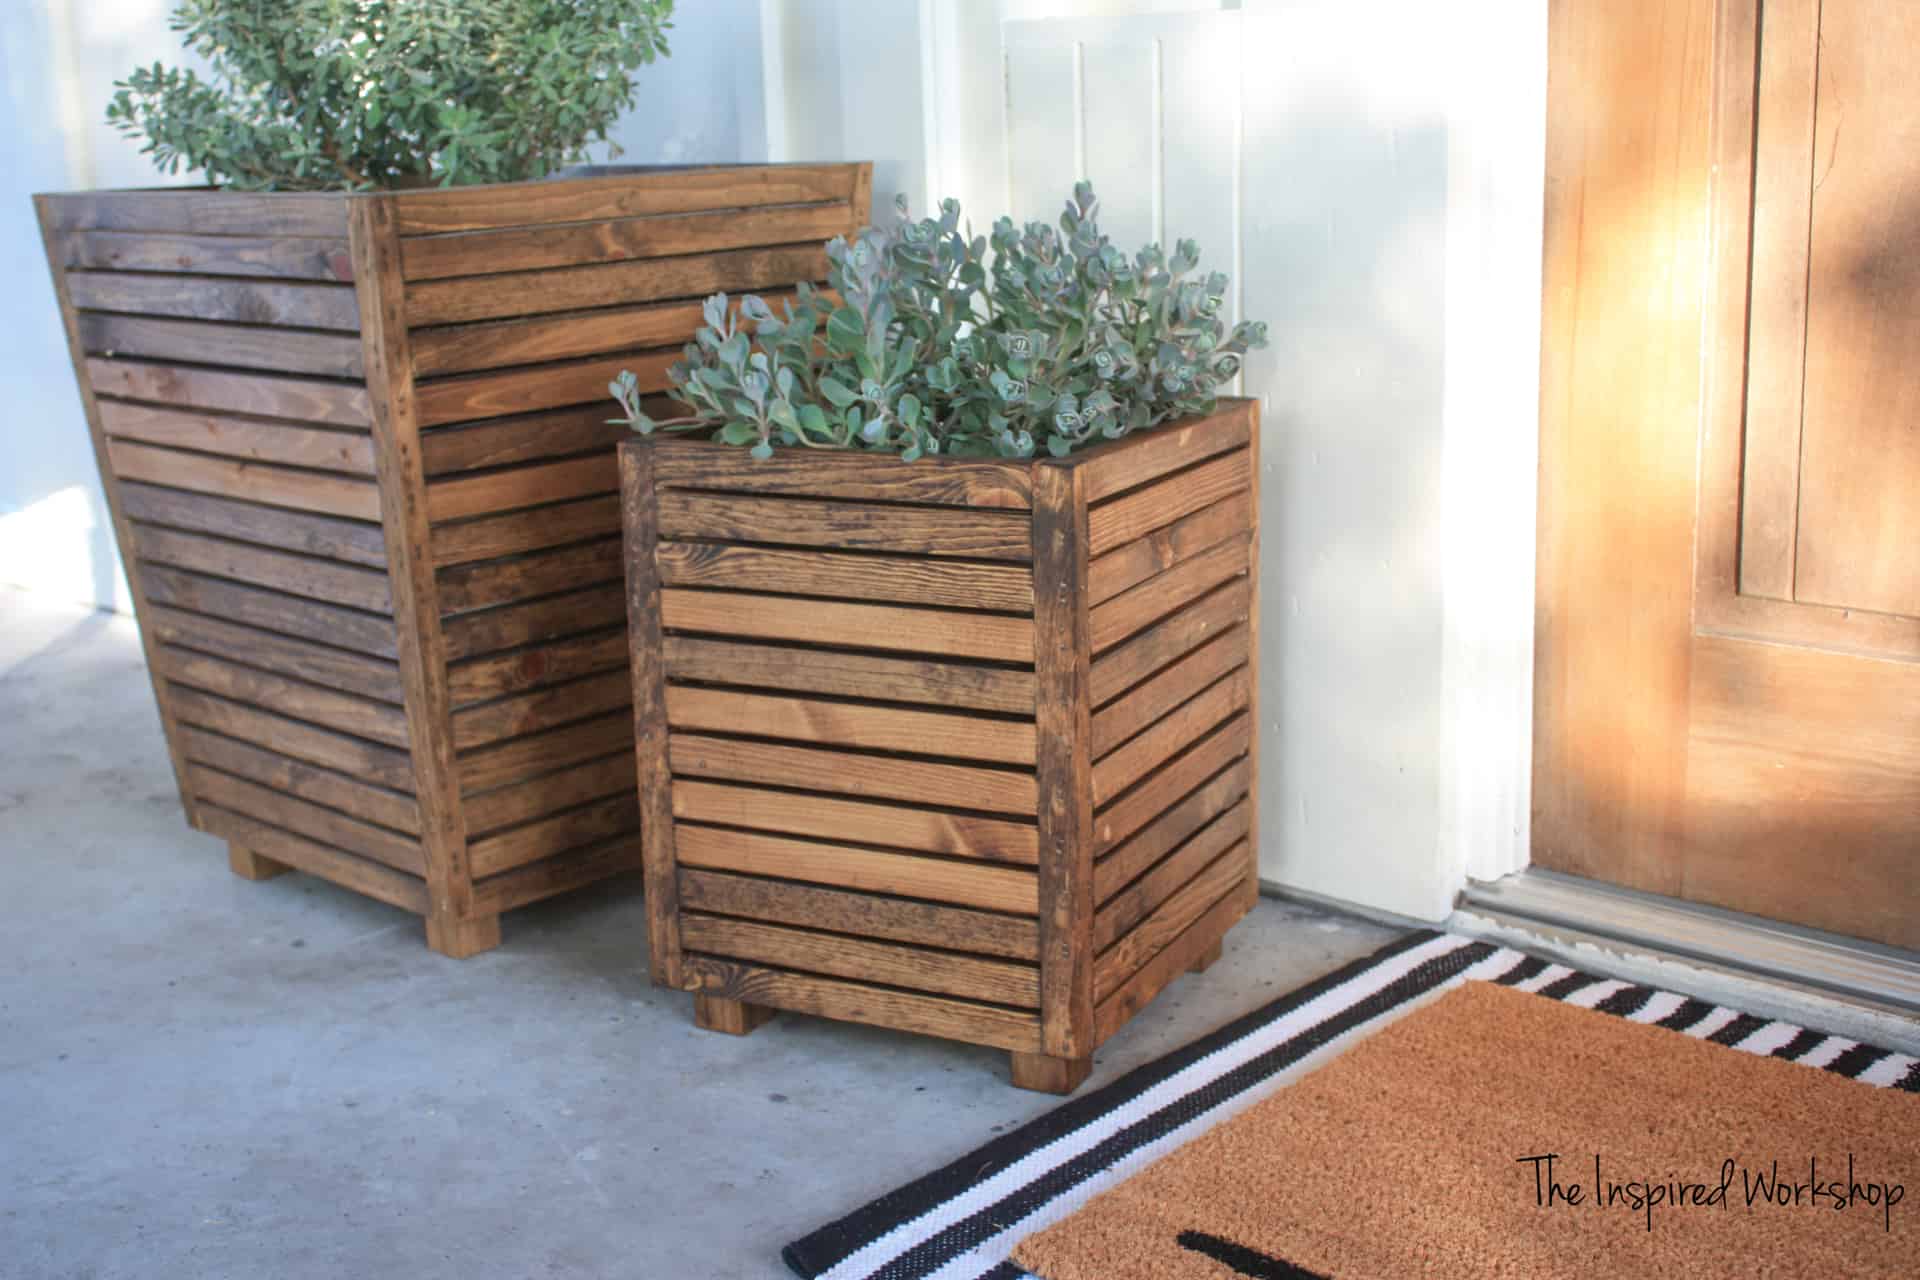
And it’s official, I LOVE them both!
Now make sure and go check out everyone else’s posts and see the oh-so-many things you can do with scrap wood!
Other Blogger’s Scrap Wood Projects
Addicted 2 DIY
RemodelaCasa
Jaime Costiglio
The Created Home
My Love 2 Create
Ugly Duckling House
Hazel and Gold Designs
Joyful Derivatives
House Becoming Home
Thank you so much for following along and as always if you have any questions or comments I would love for you to leave them below!
Happy Building!

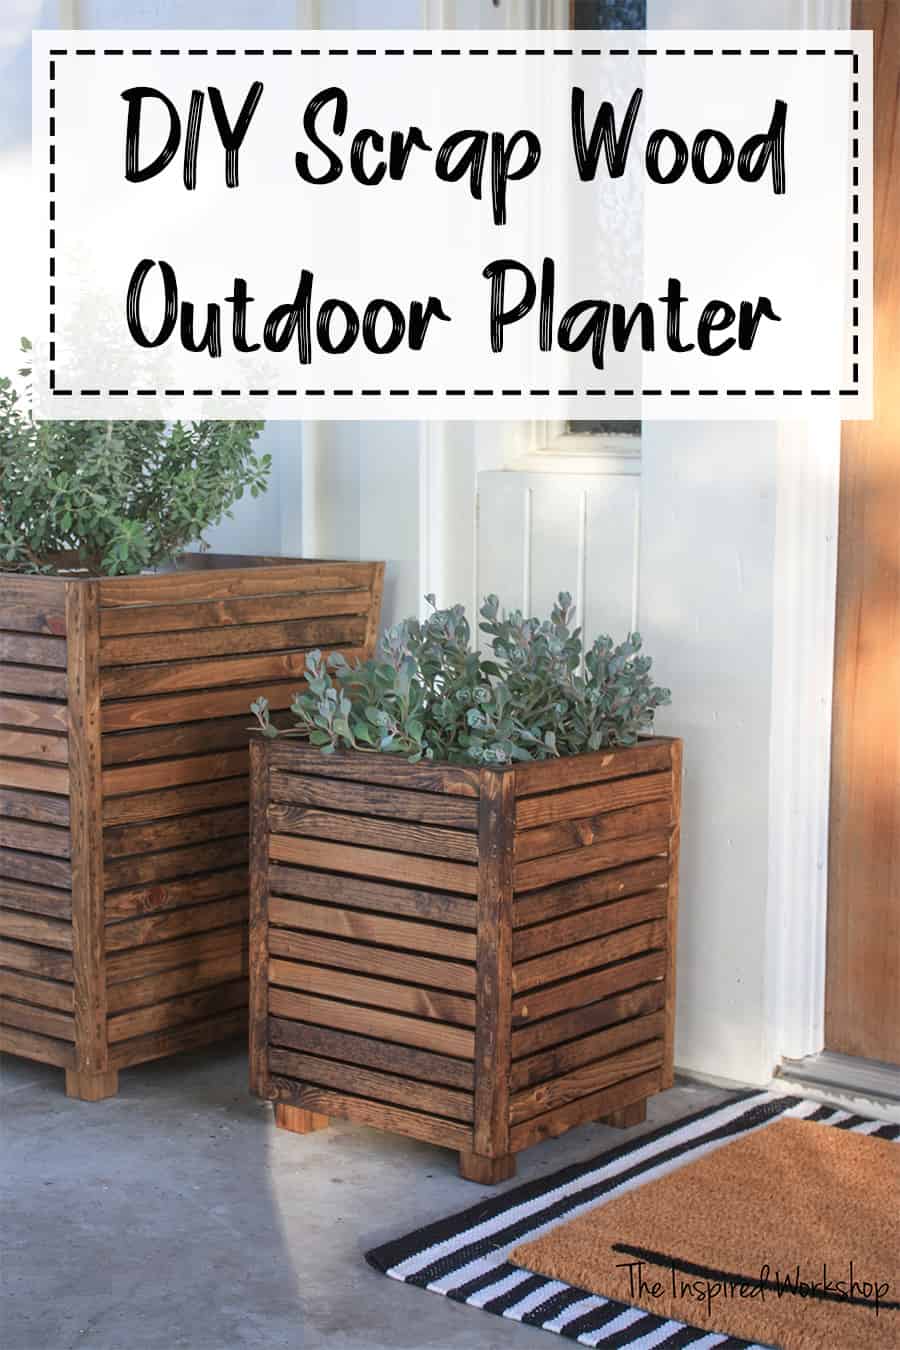
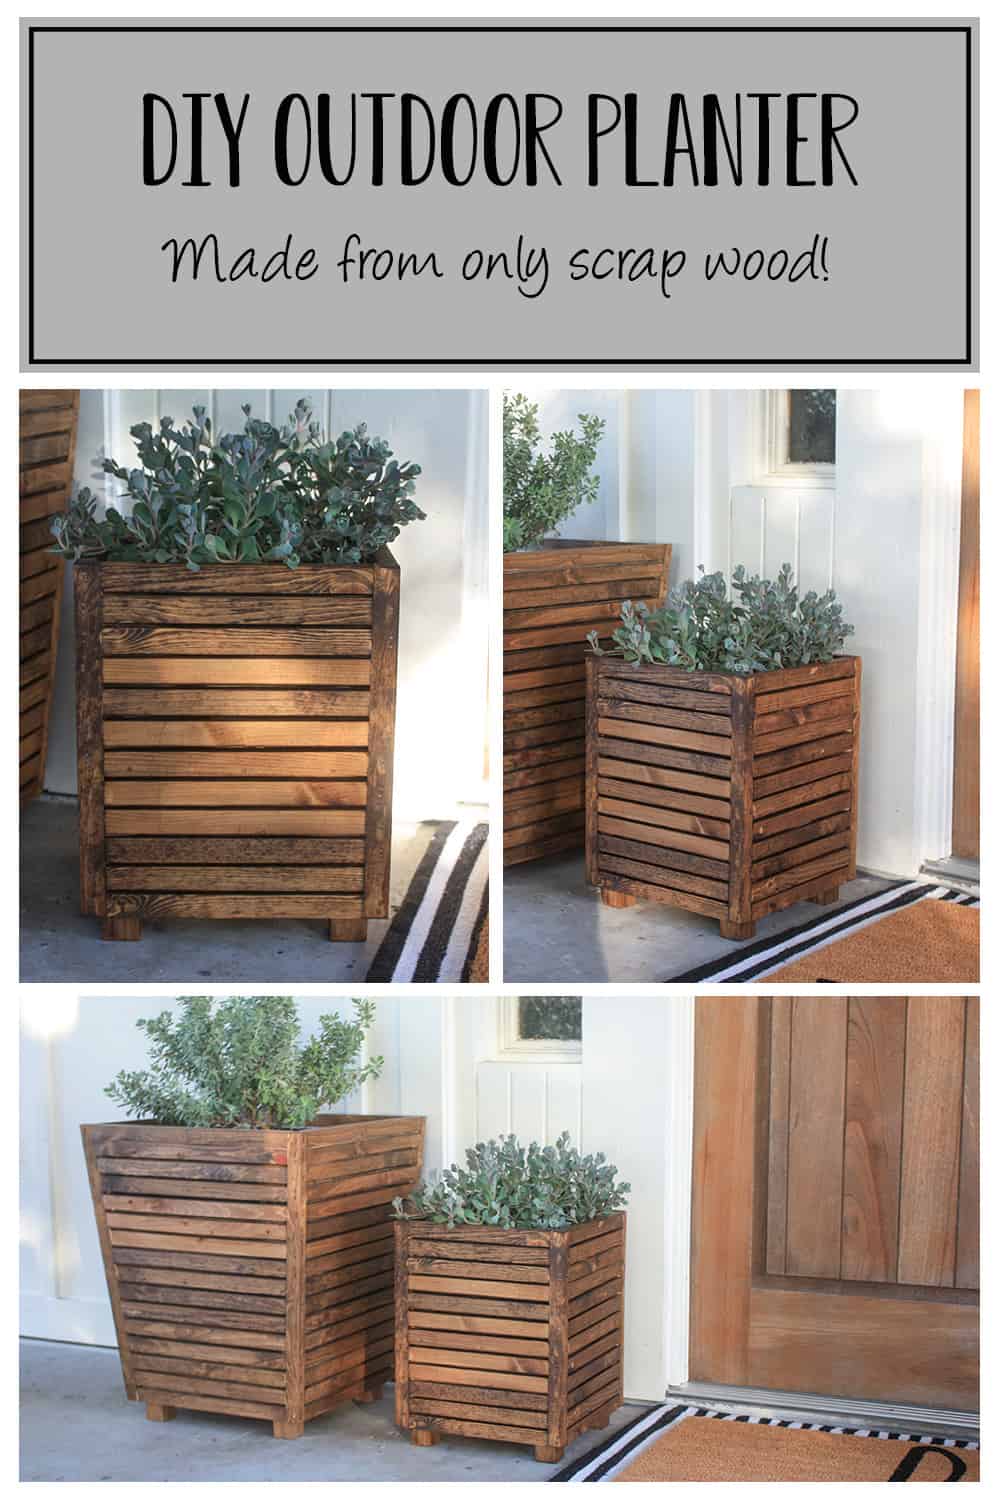
Wanna save this awesome DIY Outdoor Planter from Scrap Wood for later? Pin it now!
These are so so cute!! Thanks for the inspiration!
Cheers,
Jenn
Thanks so much Jenn! Have a good one!
Cara
Can I ask what plants you have in these containers? I love the simplicity!
Hey Amber!
Thank you so much Amber! I think I emailed you the plants but I will answer here as well just in case others want to know! Lol! The large planter has Texas sage, I’m pretty certain! And the smaller one, I believe after some research is a type of purslane! I could be wrong on that because it didn’t have a tag and my dog ate it right after I took the pictures so I couldn’t get verification from a nursery on what plant it was! He really enjoyed the plant though so purslane would make sense! 😂 Hope that helps!
Thanks so much for stopping by! Have a great day!
Cara
These are sooo gorgeous. Can you just make me some so I can buy them from you?! DIY is not my strong suit 😂😂 But seriously.
Hey Ashley!
Thank you so much for your sweet words! I swear they are super easy to make, no matter how little experience you have, you can make them! If you live somewhere close to me, I will absolutely build you some though! Email me cara.theinspiredworkshop(at)gmail.com and let me know where you are located! Thanks for stopping by, have a good one!
Cara
These planters turned out so cute!!! They are the perfect finishing touch on your porch. This would be such a fun summer project. We are doing some kitchen cabinet refinishing next week so maybe after that this will be next on our to-do list. Thanks so much for sharing!!!
This was so much fun! Thank you so much for sharing. We did a lot of projects last summer to improve the look of our home. From small things like bringing in a professional rug cleaning service, to big and extensive wood working projects, it’s been a crazy couple of months. Your planter box was quite possibly our favorite project that made the biggest impact.
Thank you so much Alicia for your kind words! Sounds like y’all were really busy last summer, congrats on all that y’all accomplished! That’s pretty awesome!
Thank you so much for sharing! Have a good one!
Cara
Cara, another small project you can embark on is a noodle board with the extra scrap wood you have
You made it look like easy task but I know it’s not. You have done a very good job. Keep it up!
Thank you so much for your kind words! I appreciate it! Have a good one!