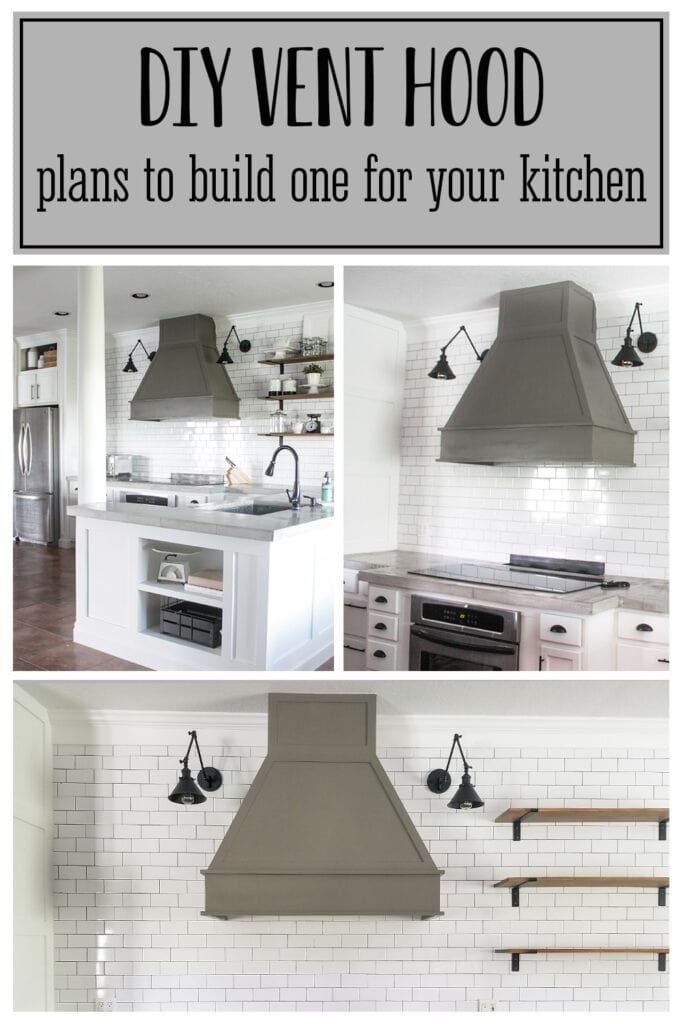
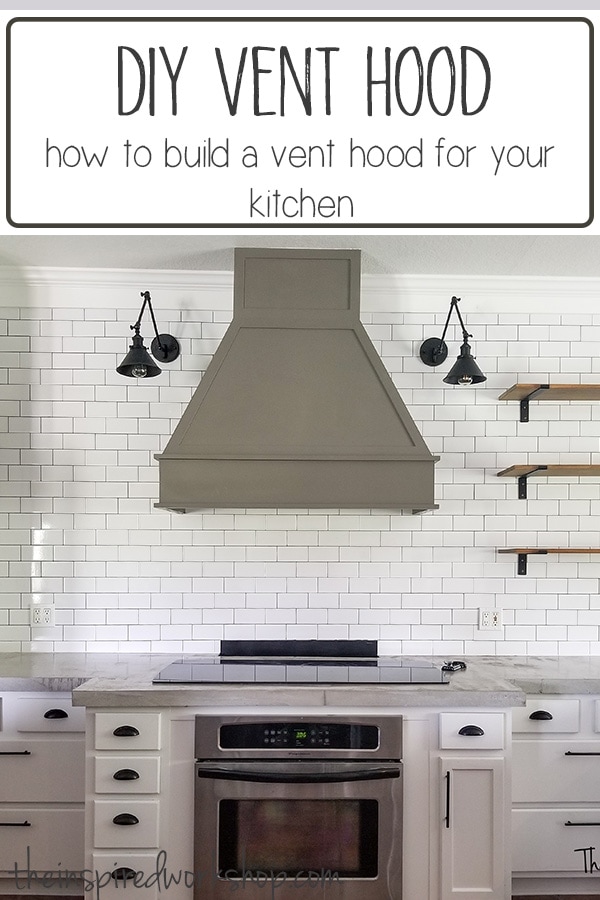
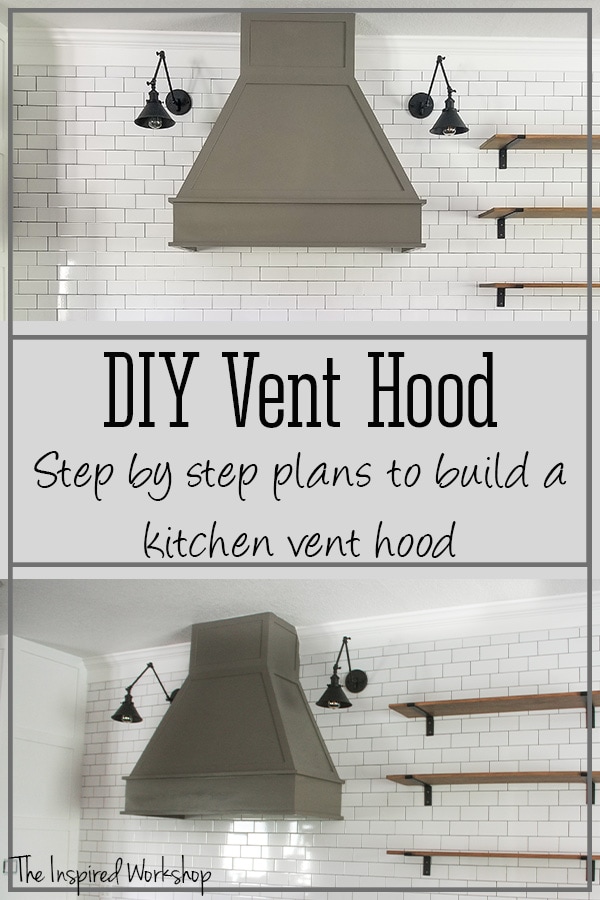
DIY Vent Hood for Kitchen
A vent hood in the kitchen is for function, but there is no reason it can’t also be a work of art since it is usually the focal point of the main wall! This DIY vent hood for the kitchen is just that, a beautiful focal point to really enhance the overall look of your space! Customize it with paint or stain to match your kitchen!

Okay, so I feel like the laziest and worst DIYer in the history of ever! Everyone keeps asking me…in real life and online if my kitchen is completed yet. The answer is NO…but I am REALLY trying to finish it up over the next week or two, and I did complete the build of this beautiful DIY vent hood for kitchen!
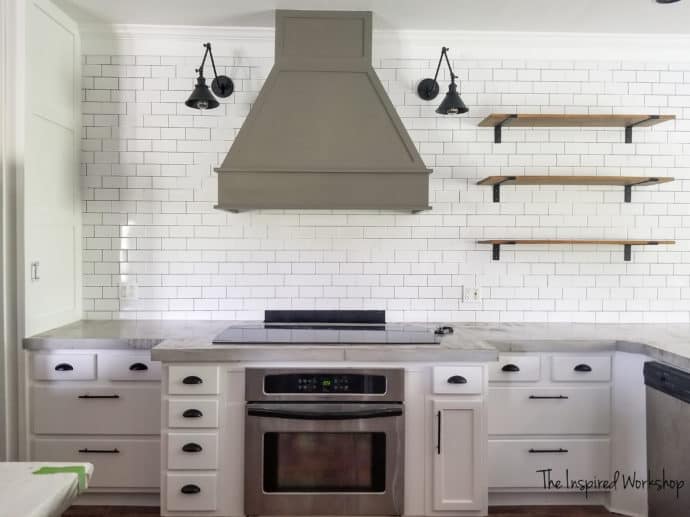
UPDATE: I finished the kitchen and wanted to share updated pics…look at how beautiful she is all painted gray!
A lot has changed in here since the last Kitchen Update if you missed where I left off in November! I have included the DIY vent hood plans with the kitchen update, so just skip on through the update if you’d like to get to the plans!
It is still a mess in here of course but if I cleaned it up, I wouldn’t have gotten back to work for a while because I wouldn’t want to make it a mess again! LoL!
Kitchen Update
I’ve come a long way since that last post but it is still nowhere near done! I’m going to get a little deep for a minute here so just scroll on through to the pics and info if you’d like!
I started working on my kitchen back in October, I was excited about it and everything was going great! Then about two weeks into the reno, my grandma took a turn in her liver cancer for the worst…we of course knew she would be passing but she was such a strong woman and managed to defy the Dr’s at every turn, so maybe in the back of our minds we thought she was going to survive like she did every other time!
Anyway, she ended up passing away right as the kitchen should have been finished but of course, we had spent time with her in the hospital and such so I didn’t get to work on it as I should have! Then she passed away, and it was like everything in the kitchen was a reminder of her!
I literally finished pouring the countertop and threw on clean clothes to run to the hospital to visit her, she kept telling me she was coming over as soon as I finished to eat with me! I was brad nailing MDF on the back of the sink there when my mom knocked on my door to give me the bad news! It seemed everything kept reminding me of her and I just needed a break from it! It sounds silly as I type it, but emotionally I’m not all that well developed! Lol!
Anyway, so I stayed out of the kitchen for several months and then reasoned with myself on how ridiculous I was being and worked a little on it here and there, and now I’m slowly feeling like I am getting somewhere!
The cabinets are almost ready for paint, a little more caulking and final sand and I can start painting! I cannot wait to see them come to life with a fresh coat of paint!

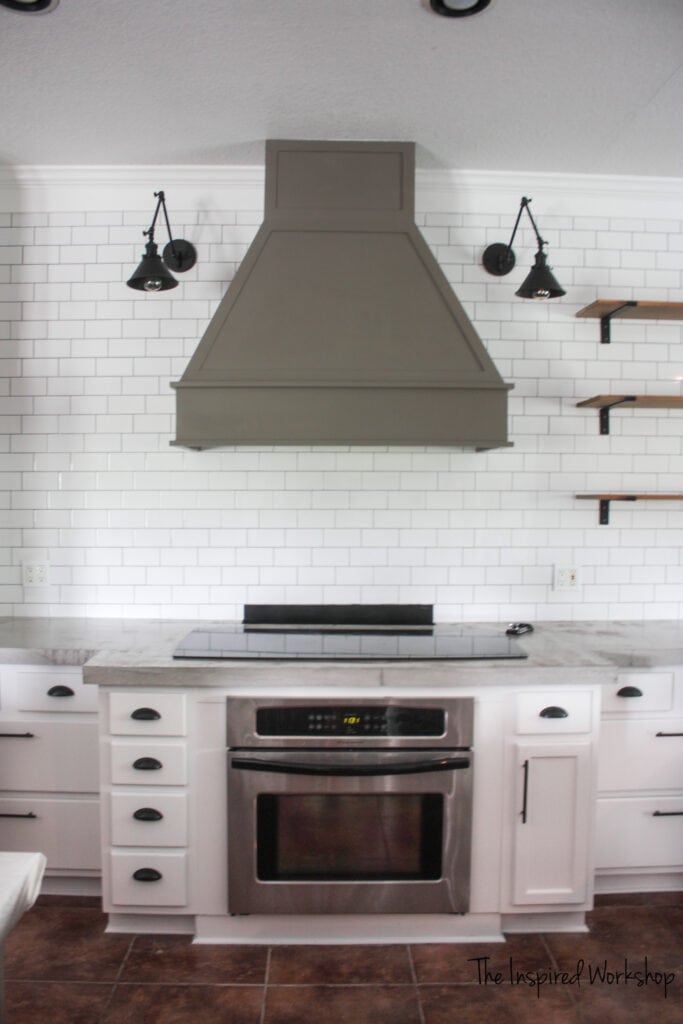
That kitchen vent hood is the stuff my dreams are made of! I have wanted a vent hood for a few years and decided even though the vent is actually a pop-up vent hood or whatever you call them, behind the stove, I could still fake it if I wanted! 🤭
The plans for the vent hood for kitchen are down below if you are interested! I created two sets of plans because my stove was 44″ wide and so my vent hood had to be 46″ wide but I know that most people don’t have that large of a stove, so I provided the plans for a standard 33″ stove vent hood as well! And let’s not talk about the lights! Lol!
When we originally placed the electric boxes, I was going to put the shelves back up on the wall, but now that the vent hood is so big, I can’t put the shelves back up to the left. So now the lights are way closer than they need to be to the vent hood but hubby says, he isn’t changing them….so either I risk tearing up all the tile and hard work I already put in to make it ‘right’ or I leave it alone!
I cannot decide what to do…so for now, I think I am going to order slightly different lights and see if that helps! If you have any suggestions I would LOVE to hear them!
Moving on, we had a nasty moldy mess underneath the drink station! That area still needs a ton of work, but a couple of days in the garage, and I should have a new drink station and awesome plans for you all, so it’s kinda a win-win! But look at the gapping hole I have to stare at until then!😲

Don’t mind the mess in that storage closet that you can see through the nonexistent wall! Lol! Keeping it real here folks! It’s not always pretty!
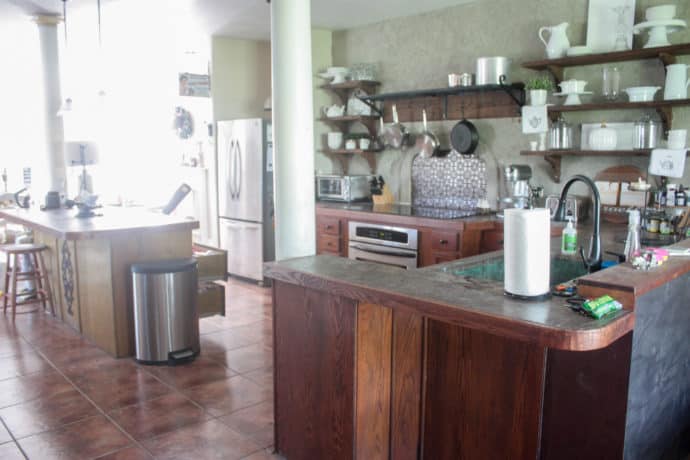
Let me show you a before of this wall so I can explain the demo!

See that sink there…the water had been turned off since we moved in and I didn’t care to use it so we had left it alone. Well, the pipe was leaking in the wall the whole time, and my aunt knew about a leak, because there were a bunch of rags on the floor as we pulled everything out, but they obviously thought that the leak was from the faucet and not the pipe inside the wall!
The 2x4s and sheetrock were rotten with mold! Let me show you what we saw as soon as we pulled the old concrete counter off! 😲

This scared me…and that was nothing compared to what came when we pulled this out! Lol! I of course was running to grab the air purifier and looking for my mold spray…and quit taking pictures, but the 2×4 that sat below the pipe was completely rotten!
We replaced that 2×4 and added the extra supports back in! Now I just need to build a beautiful drink station to replace it! Update: I did rebuild the drink station and now it is my coffee station! Lol!
So, when I left off the last update, the wall wasn’t tiled, the vent hood wasn’t built, the back of the sink panel wasn’t this beautiful…and the concrete countertops weren’t even poured! So I do have to give myself a little credit because I have at least done some work in here! Let me show you the overall kitchen again!
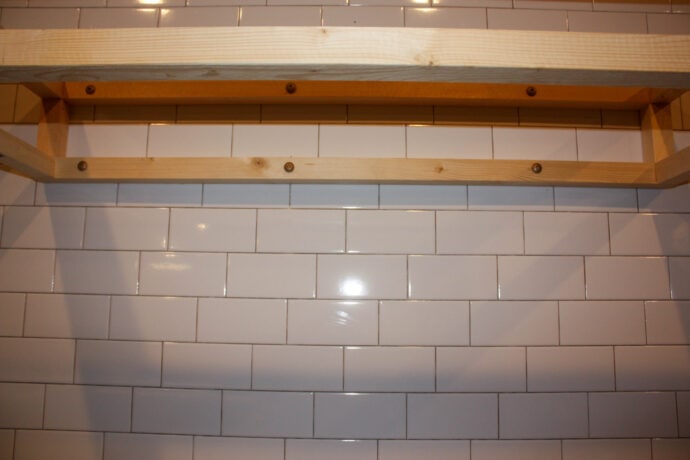
Don’t mind the plastic drop cloth on top of the island counter…we haven’t sealed that counter yet so I can’t leave it uncovered, not even for a minute to take the picture! Lol! I also built those shelves where there was an odd empty space…remember this…
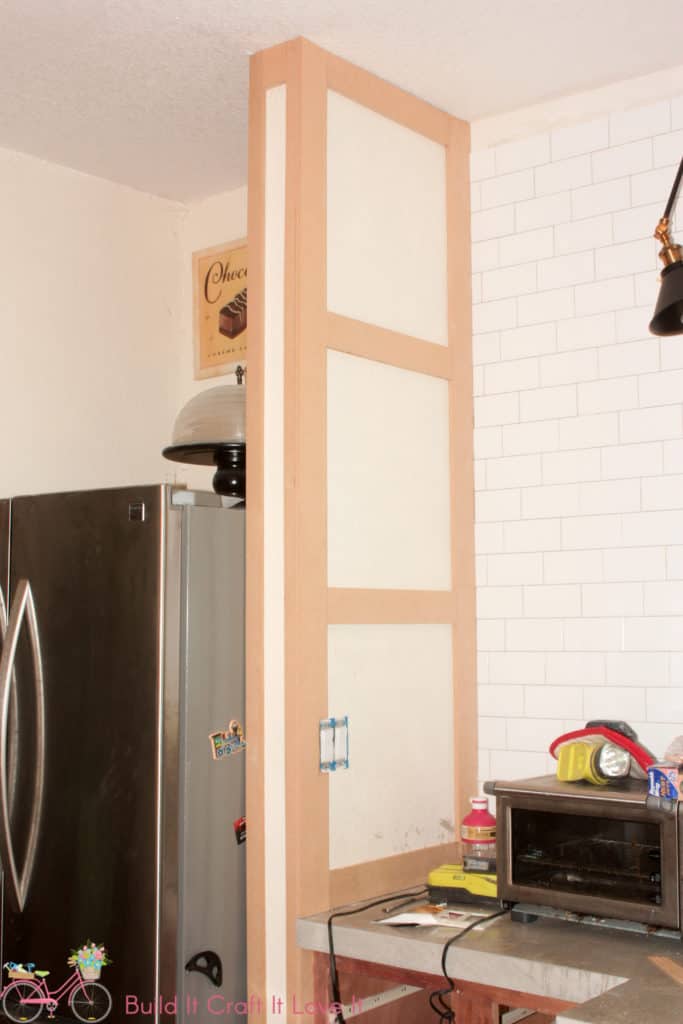
And to make this wall not look as out of place between the counter and the fridge, I added the same MDF molding pattern, so it looks like it was meant to be there! I mean, you don’t typically find a WALL between your fridge and counters…correct me if I’m wrong! Lol!!
Check out how I made it all look cohesive where the fridge goes, I built this cabinet above the fridge!
It’s come a long way! It’s always great to go back and see how far you have come to inspire yourself to keep going…even when it may seem like you aren’t getting anywhere! Update: See the entire reveal of the kitchen remodel and complete cost breakdown!
Alright, now that I have caught you up to speed on most of the updates, we can get started on showing you how to build a DIY vent hood for kitchen!
Gathering Supplies for the Vent Hood for Kitchen
The plans for a 30″ insert which makes for an overall 36″ vent hood. I created the plans around this 30″ vent hood insert (affiliate link) and if you have a different one or order a different one, make sure and adjust for any size discrepancies! I made it pretty easy to adjust, there is one piece of 3/4″ plywood that has room for a slightly larger or smaller cutout without changing anything with the actual vent hood frame!
The plans for a 36″ insert which makes for an overall 42″ vent hood. I created the plans around this 36″ vent hood insert (affiliate link). The plans are made the same as the 30″ as far as easily being able to adjust for a different 36″ insert!
Entering your email below will get you all three sizes sent in an email! Please check your spam folder if you don’t see the email in your inbox!
The total cost of the 47″ vent hood is 160 bucks if you are able to find decent 2×2 furring strips, otherwise, it will cost around 250 if you have to buy select pine 2x2s! The sad part is when I built it, I only paid around 60 bucks! Man, how nice it would be to go back in time a couple of years I would buy one heck of a lumber stockpile! Lol!
*Note: Amazon links below are affiliate links! Affiliate links allow me to share products that I love with you and make a small amount of money off of your purchase… at no extra cost to you! So thank you in advance if you make any purchases from my links!
Materials for Kitchen Vent Hood:
***This tutorial is for the 47″ option…all info for the 36″ option will be included in the plans (COMING SOON)…follow the tutorial below if you need help but don’t use any measurements unless you are building the 47″!
- 6 – 2x2x10
- 1 – 1x8x8
- 2 – 1x2x8
- 5 – 1/4″x 1 3/4″x8′ lattice strips
- 1 -4×8 sheet of 1/4″ plywood
- large screws to hang on the wall
- 1/4″ tile/glass drill bit
- kreg jig
- pocket hole screws
- wood glue
- brad nailer
- 1/2″ brad nails
- 1 3/4″ brad nails
- 1 1/4″ brad nails
Cut List for the kitchen vent hood:
- 4 – 2×2 @ 44″ – bottom frame front and back horizontal boards
- 4 – 2×2 @ 4 1/4″ – bottom frame vertical boards
- 4 – 2×2 @ 16″ – bottom frame side horizontal boards
- 4 – 2×2 @ 21″ – top frame front and back horizontal boards
- 8 – 2×2 @ 10″ – top frame vertical boards and side horizontal boards
- 2 – 2×2 @ 26 5/8″ both ends mitered at 25.6 degrees off square…ends parallel. Make sure and measure this one…if you hang on the wall as you go…this will possibly be different for your vent hood!
- 2 – 2×2 @ roughly 27 5/8″ **COMPOUND ANGLE on front boards! Both ends mitered at 25.6 and beveled at about 14 degrees off square make sure and measure yours on this step as they may be slightly different!
- 1 – 2×2 @ 24 7/8″ beveled (or mitered) @14 degrees off square, ends parallel (make sure and measure)
- 4 – 1×2 @ 19″ shortest side, mitered at 45 degrees off square one end
- 2 – 1×2 @ 44″ shortest side, mitered on both ends at 45 degrees off square
- 2 – 1×8 @ 19″ shortest side, beveled at 45 degrees off square one end
- 1 – 1×8 @ 44″ shortest side, beveled both ends 45 degrees off square
- 2 – 1/4″ plywood pieces @ 13″x13″
- 1 – 1/4″ plywood piece @ 21 1/2″x13″
- 2 – 1/4″ plywood pieces @ 13″ at top and angle down on one side to 19″ see below for clarification
- 1 – 1/4″ plywood piece @ 21 1/2″ at the top centered, and sides both angle down to 44 1/2″
***Make sure and measure your lattice pieces based on your vent hood…some plywood is not actually 1/4″ and other things may affect your measurements…make sure and measure your own project and only use these measurements as guidelines! Just a note, I did not bevel the edges of the lattice…there was such a small gap that I just caulked it!
- 6 – lattice pieces cut @ 13″
- 4 – lattice strips cut @ 9 3/4″
- 2 – lattice strips cut @ 18 1/2″
Woah that was one heck of a cut list I tell you! Such a small seeming project has a lot of parts! Lol!
Building the Vent Hood for Kitchen
To start off you want to use up all of the 2x2s and build a nice solid frame! If your vent hood needs a different size other than 47″ or 36″ email me if you need help on changing up the angles and such, I’ll be glad to help if I have the time!
***NOTE: You will need to measure your vent hood, the bottom frame may need to be adjusted based on your vent hood, or you may need to omit the top board of the bottom frame so that it will work for yours! You can always place your actual vent hood higher than the bottom frame if need be as well. Mine is completely empty inside and you can’t even tell unless you lean all the way up over the stove and twist to look up! LOL!
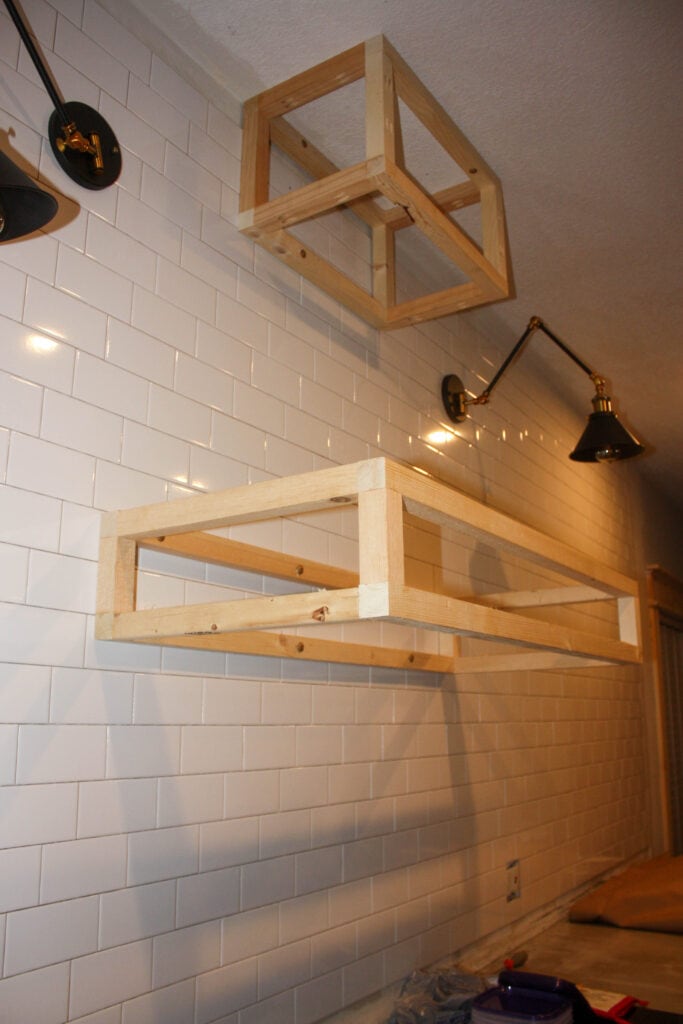
Building the Frame of the Vent Hood
I built the top and bottom separate, attached them to the wall, and then cut the joining angle boards to make sure they fit perfectly! I used rough-cut furring strips…not fancy 2x2s, all in all for the 6 of them I think I spent $15.00, and no one will ever see them!
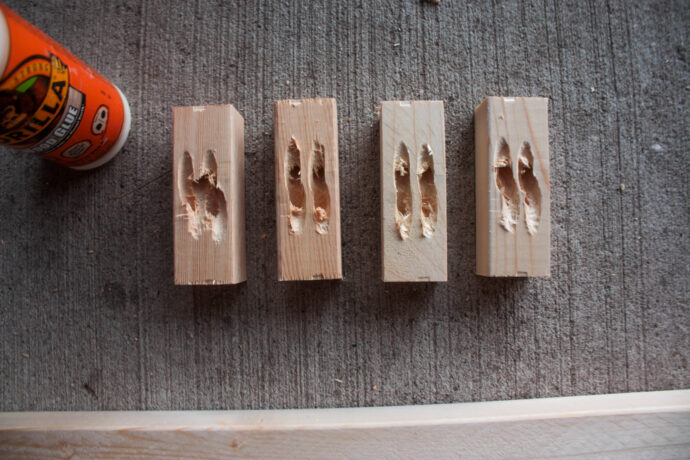
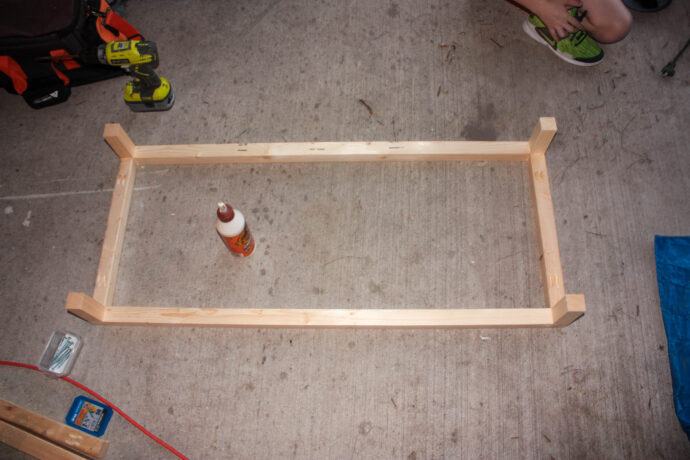
I basically just built two boxes out of 2x2s. On the top frame (box), you will use the 2x2s @ 10″ and 2x2s @ 21″ to build the top frame of the vent hood. You will need to drill 1 1/2″ pocket holes, in the vertical boards and the horizontal side boards. Make sure and use wood glue along with 2 1/2″ screws to attach the 2x2s.
Top frame
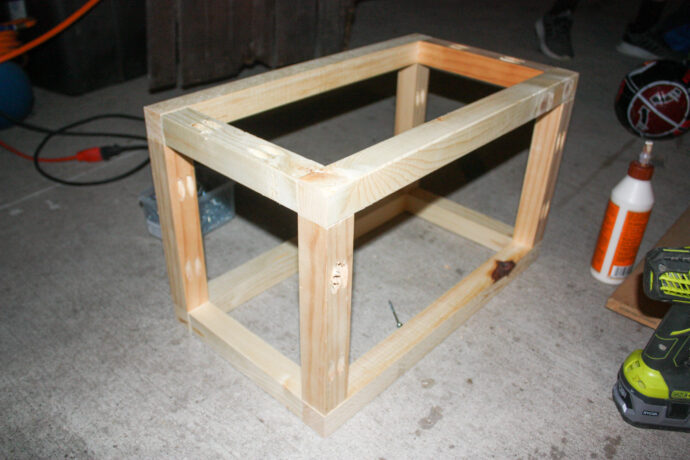
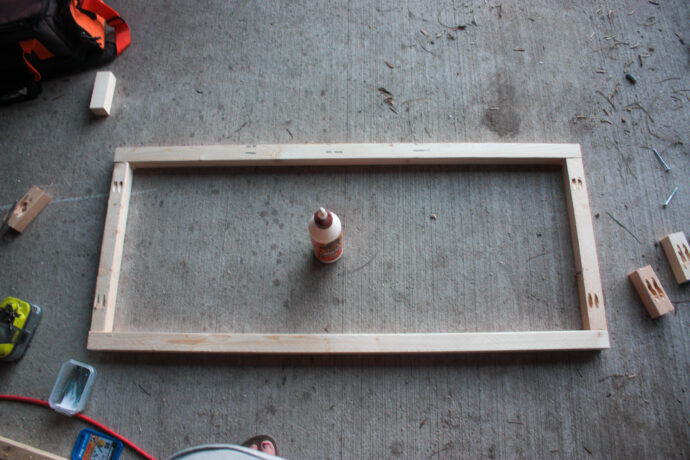
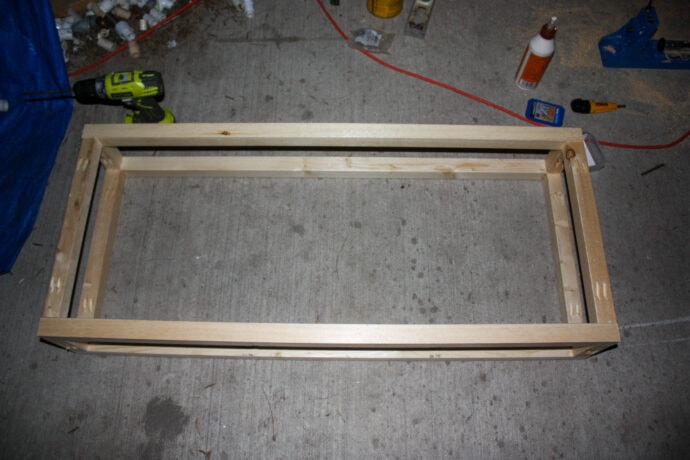
Build a larger version of the top frame to be the bottom frame of the kitchen vent hood! Use the 2x2s @ 44″, the 2x2s @ 16″, and 2x2s @ 4 1/4″. Drill pocket holes at 1 1/2″ depth, use wood glue and 2 1/2″ screws to attach! Make sure pocket holes are all to the top and back!
Bottom frame
We placed the vent hood over the tile, I know a lot of people don’t do that, they tile around it, but just in case in a year or two I change my mind and want a pot rack again, it’s not hard to go back since mine is actually a faux vent hood!
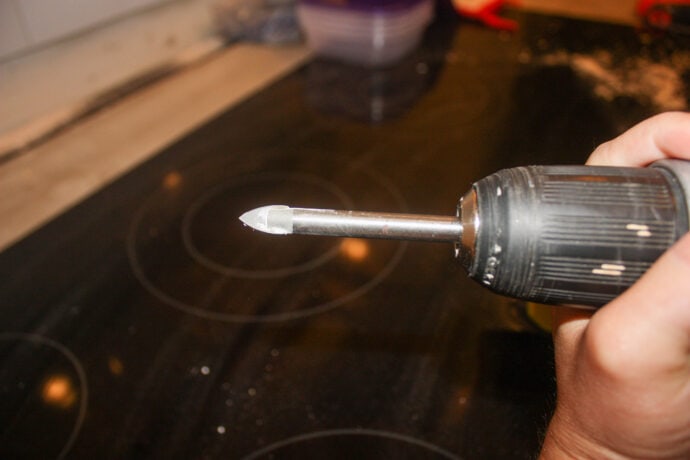
We used tile drill bits from Ryobi, they were inexpensive and drilled through the tile like it was nothing!
Make sure the holes are drilled into studs so that your screws are going to be capable of holding up your vent hood! It is best to use a laser level (⬅affiliate link) if you can handle the cost, it is soooo worth it to help with so many projects and when lining up the two boxes and finding the spots to drill your holes.
There is 24″ between the bottom of the top frame and the top of the bottom frame. Hope that makes sense!
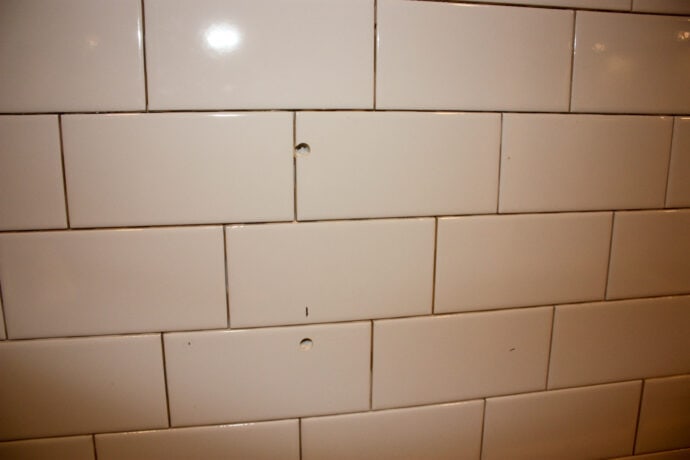
Hold the frames up to the wall and mark where the holes are drilled in your tile and drill holes into your vent hood frames as well using a regular 1/4″ drill bit!

I added the top frame first since it is easiest to hold in place! Lol!
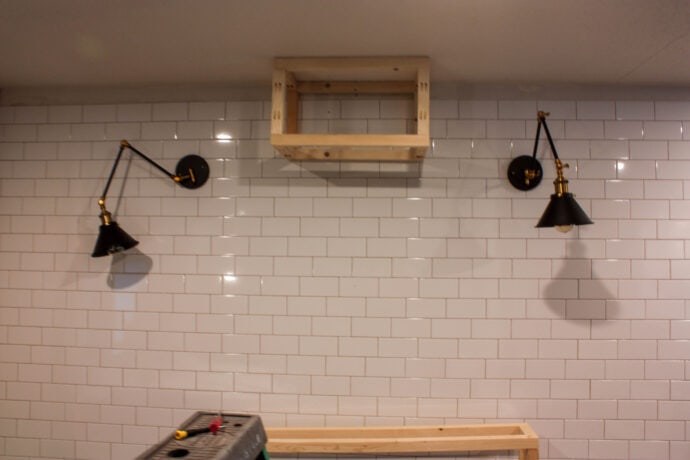
Next, I added the bottom frame to the wall. Make sure on this one that all pocket holes are facing upwards and towards the wall on the vertical ones just in case they could be visible!
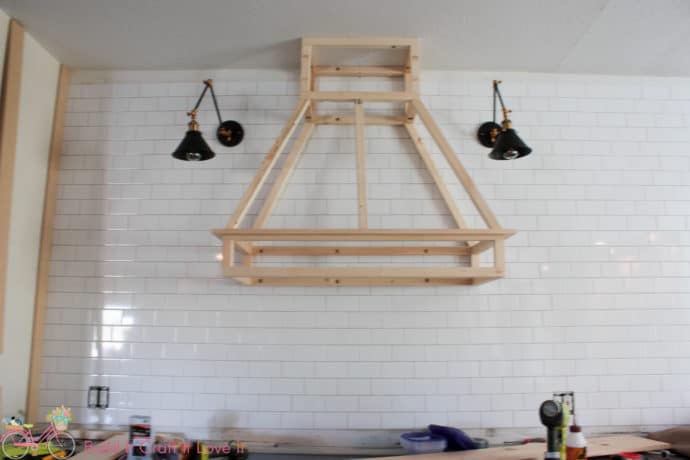
So here they are on the wall, the top is centered over the bottom and there is a 24″ span between them.
I started with the front boards to get them done and over with since they are the most complex to cut, they have compound angles because they angle inward and backward…but the great thing is, it really isn’t complex when you have a compound miter saw.

The front compound angle boards were attached with lots of glue and brad nails because I couldn’t manage to figure out which way to angle it to drill the pocket holes! Lol!
On the back ones, they are only mitered so I was able to use one pocket hole on each end drilled at 1 1/2″ deep, and wood glue with 2 1/2″ screws. I also added a few brad nails just in case!

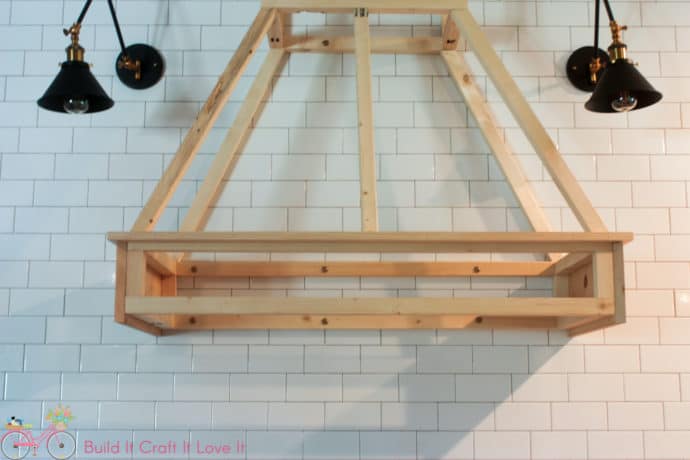
The compound angle on the front boards is supposed to be 25.6, but I found slightly under 25 to work best as seen in the pic above! The bevel is supposed to be 14, again it fits best at 13, so you may have to play around with it because when you figure out what the angle should be, that doesn’t include human error!
You know when you attach a board and it is supposed to be attached flush but it hangs over a little or sits back a bit, …yeah every little fraction of an inch matter when dealing with angles and so that can throw them off!
Anyway, I set the saw miter at 25 and the bevel at 13.

The back 2x2s are easier to cut because there is only one angle to cut, no bevel! They are mitered at the same as the front 25.6 with the ends parallel!

I placed an extra board in the front just to be safe…it would probably be fine without it, but I always like to be CERTAIN! Lol! This front board is only beveled…or you can miter it…either way will work! It will be beveled or mitered at 14 degrees off square or if your cuts are slightly off like mine…it will be 13!

The frame is already complete and now you can start making it come together! I started with the 1x2s around the bottom, only because I had to clean an area to cut a sheet of plywood! 🤭🤪
The 1x2s on the sides are cut at a normal 90 degree cut at the wall and mitered at 45 degrees off square on the end that faces the front. The front long 1×2 @ 44″ (measurement of the shortest ends) is mitered on both ends…not parallel, and just glued and brad nailed around the top 2×2…of the bottom frame as shown below!
Next, I added the 1×8 underneath the 1x2s. I beveled the ends at 45 degrees off square to make a pretty corner!
The sides are added!
See the side boards above? Well, somehow I forgot to take another one with just the front board attached, I took another one after the plywood was attached! Sorry!
Adding the Plywood and Molding to the Vent Hood

Pic is a little blurry! You can see how I just cut pieces of plywood though that is the same shape as each piece of the vent hood and attached with glue and brad nails!
To cut the plywood, measure the bottom measurement, then measure the top measurement, and draw a line to be the top and a line to be the bottom, then use a board or something to draw a straight line to connect the bottom measurement line and top measurement line.
Once all the plywood is cut, start cutting all the lattice strips to add the ‘molding’ to the vent hood to make your kitchen beautiful and the vent hood the centerpiece! Make sure and add the side lattice first so that the front lattice can overlap them and no seams are seen from the front!

I wish I would have taken more pictures of the progress, but this will have to do! I did not add the lattice to the cut list simply because my plywood was slightly under 1/4″ and threw off all the measurements that Sketchup said they should be, and Sketchup had been giving me so many problems, I couldn’t trust that their measurement wasn’t off!
So I am going to offer the angles to help ease you through that part, and you basically follow the frame and make the same cuts with the lattice. Pretty simple…only two boards on the sides and two boards on the front that we haven’t already cut!
I cut each board individually, I would measure tweak, trim…then manage to get it to fit! Lol!


Just remember the angles will follow the angles of your frame on these cuts so if your frame was slightly off like mine, the angles will be different than the ones above. Mine was the 24.6 roundabout!
Just caulk all the lattice edges, and voila, before you know it…it’s complete and stole your heart!
I added the bottom 1×2 the same way I added the other 1×2, mitered corners on the front, and straight cuts against the wall. Make the 1×2 flush with the 1×8 on the inside, attach with glue, and brad nails!
Caulk and sand to get her ready for paint! Don’t overlook the sanding part, that is what gives the paint a flawless finish! I can’t wait to show you the color I’m painting mine! Update: I painted mine Gauntlet Gray by Sherwin Williams!
If you have any questions feel free to ask below or email me! Thank you so much for reading and following along! Have a wonderful weekend!

Want to save this DIY Vent Hood for Kitchen? PIN IT!
Nice post
Hey Cara,
Thanks for all of the different size plans for the hood. We are remodeling our kitchen now and this is exactly what I was looking for. I do have a question…how tall are your ceilings? I only have 8ft ceilings and I don’t think I have room for the top piece. I may have to shorten it or remove it altogether and just use the frame. Do you think that would still work?
Hey Ashley!
My ceilings are 9ft ceilings! Depending on how you do it, if yours is smaller than mine then you can easily adjust it to fit the top piece and even being shorter, it will look perfectly proportioned! Or if you want to build it without the top piece you can do that as well if that is the look you want, it will definitely work either way, it just comes down to the look you want! Hope that helps! If you let me know what size you are going to be building I can try to adjust it to fit your 8ft ceilings so you can see it before you build it! Thanks so much for stopping by! Have a good one!
Cara
Is there no vent?? Just empty inside
We don’t have power so cants add a vent but love the look, so was curious what you did underneath?
Hey Kristy!
Yes, it is an empty space! Lol! I have the vent that raises from the back of the stove so I didn’t actually need a vent hood but I wanted it for the look! 😅 You can’t even tell it is empty unless you lean way up under it and look! Hope that helps!
Thanks for stopping by! Have a good one!
Cara
Hi Cara….
I am redoing my kitchen and am excited to get going on my range hood. When I try to download the 30 inch set it won’t download. Any way you could send them to me? I only have a 30” space above my range. Does the 30” plan give you a little room on each side? Also, I did not see a link for the actual inserts as I do lots of cooking. 😊. Any help would be greatly appreciated. Thank you lots! Pam
Hey Pam!
How exciting that you are redoing your kitchen! There is nothing better than a freshly renovated kitchen!😊
I have emailed the plans to you for the 30″ range hood, it is bigger than 30″…I believe in total the overall width ends up being 36″, the actual insert is what measures 30″! Here is the link to the 30″ insert, but you can find a smaller one to fit your space if you need, they do make them smaller!
Hope this helps! Thanks for stopping by! Have a wonderful day!
Cara
I would like the plans for the 30” one if you can. We are in the middle of a huge remodel and this is perfect
Hey Steven! If you click the turquoise button (close to the beginning of the post) that says Vent Hood Plans 30″, it will bring up the pdf file for the vent hood that is built for the 30″ insert! The vent hood (cover) itself is 36″ wide though! If you have something smaller than this to build a vent hood around, and you need the external vent hood (cover) to be no larger than 30″, shoot me an email at [email protected] and I’ll see if I can help! Thanks so much for stopping by! Have a wonderful day!
Cara
how would you attach the actual range hood fan unit to the wall?
Hey Patti!
The range hood inserts that I linked in the post are attached to the actual wood structure (that is built in this post) as opposed to the wall! There should be a piece of plywood listed in the printable plans that you make the cut out on to fit your exact range hood insert! I will go back and check because I made not have been very clear on that, and I apologize if I wasn’t! 😘 But if you want to buy a wall mount you can, you would just attach it as the instructions say for the range hood and add this as a cover around it, no boards would be behind it! I hope that makes sense!
Let me know if you have any other questions! Thank you so much for stopping by! Have a wonderful day!
Cara
Do you have the plans for a 30 inch hood. If so, could you please email them to me. Thanks. Your hood looks amazing
Hey Billy!
Thank you so much! I have emailed them to you, and the plans are now linked in the post above as well! Thanks for stopping by! Have a good one!
Cara
Thanks for this great tutorial! This is exactly what I am looking for. Can you tell me where I can find your 36″ plans?
So there’s actually no vent at all in there? Do you ever have problems with needing a fan, or is there so much of a gap that it doesn’t matter? I just found your blog and you’re pretty much doing all of the pieces that we’ll have to do to redo our kitchen and so I’m reading every post with crazy attention to detail. Thank you, thank you for documenting this as well as you have!
Hey Emma!
You are correct, I do not actually have a vent inside the vent hood! You can still build it the exact same way, leaving out the boards (2x2s) along the back of the large opening, since your vent hood would be attached to the wall there! I have one behind the stove that raises up, I have never actually used it though! Lol! I don’t ever fry anything…heck I am pretty boring in the kitchen and bake most things, so I really don’t have much of a use for one, but I do love the look of it! Lol!
Where can I find the 36” range hood plan??? I love it.
Do you happen to have plans for a 30″ vent hood? I would love to get them if you do.