DIY Custom Cornhole Boards
Cornhole boards are everywhere right now, every store carries them, and everybody wants them! It is a fun game that both men and women, adults and kids can enjoy so, of course, it is popular! Save yourself the money on buying a cheap set at the store and build yourself a custom cornhole board set made with oak wood and paint them to match any of your indoor or outdoor decor!
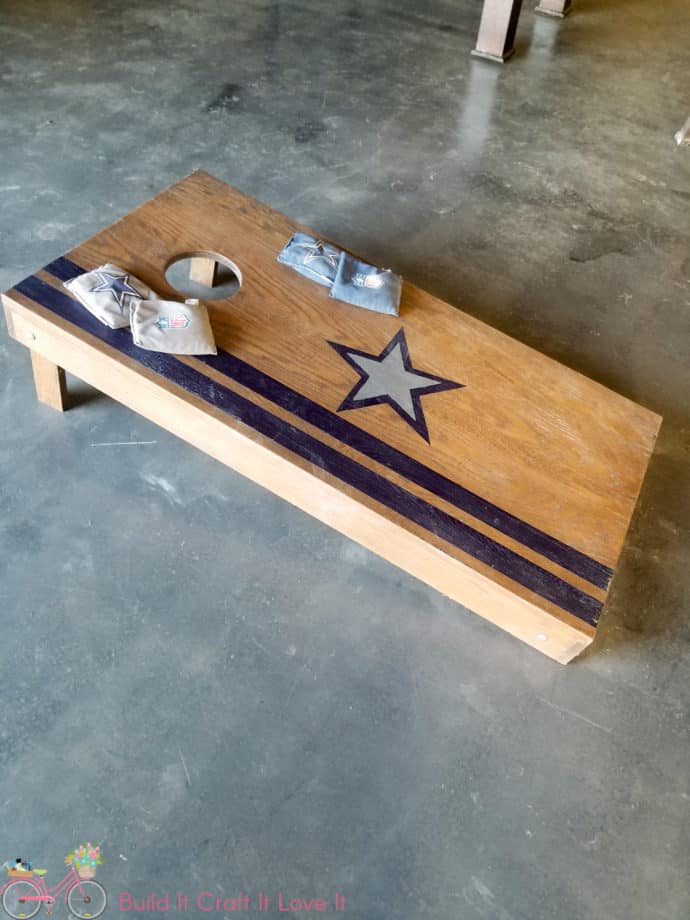
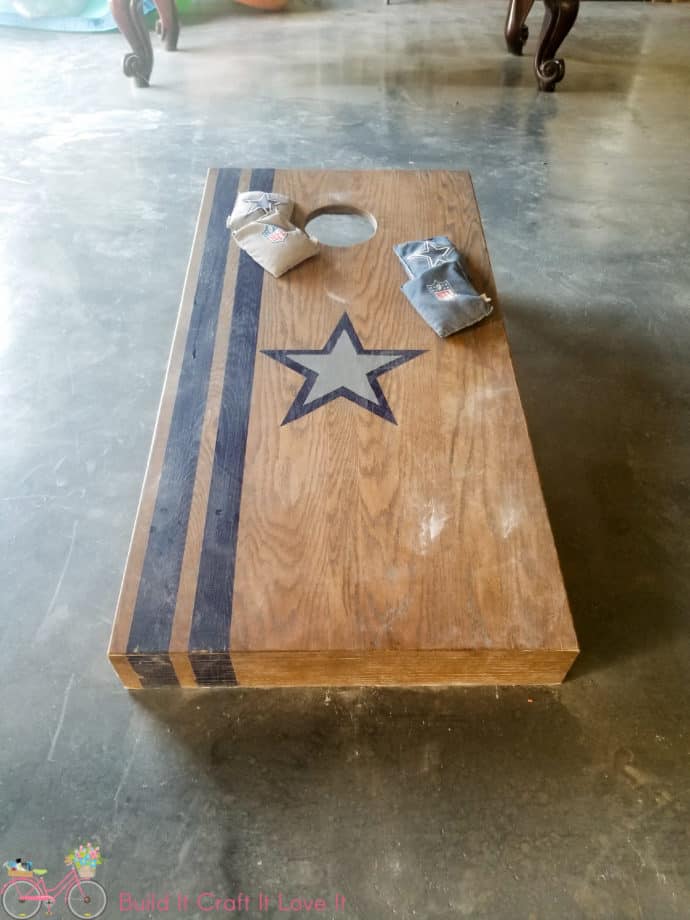
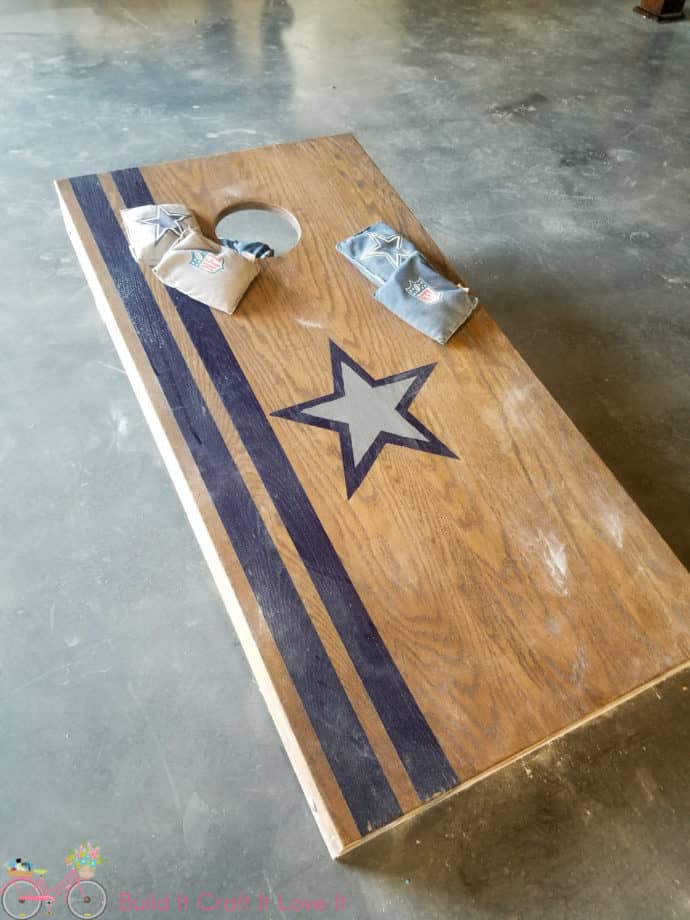
These custom cornhole boards have been heavily used…pretty much daily, so don’t mind the powder from the bean bags and the slight wear to them…I love the way they look!
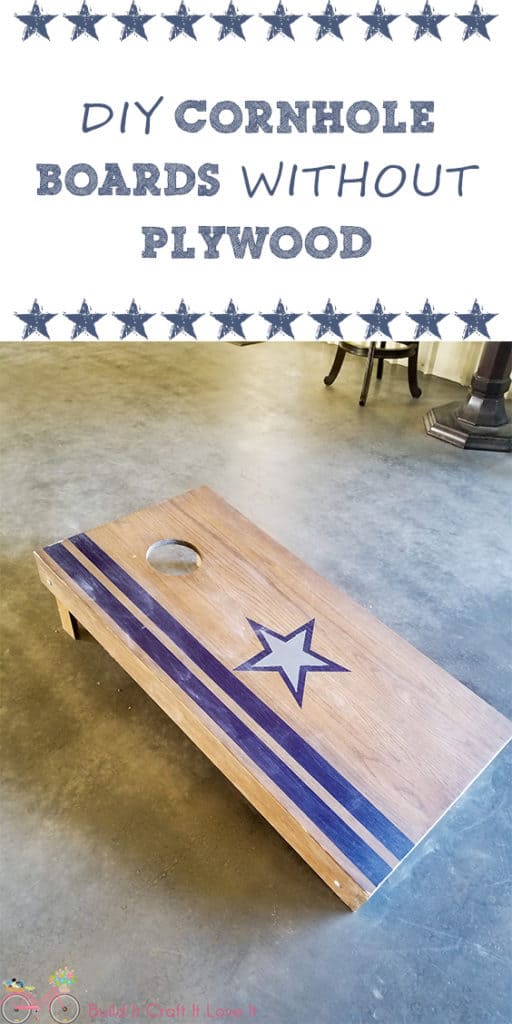
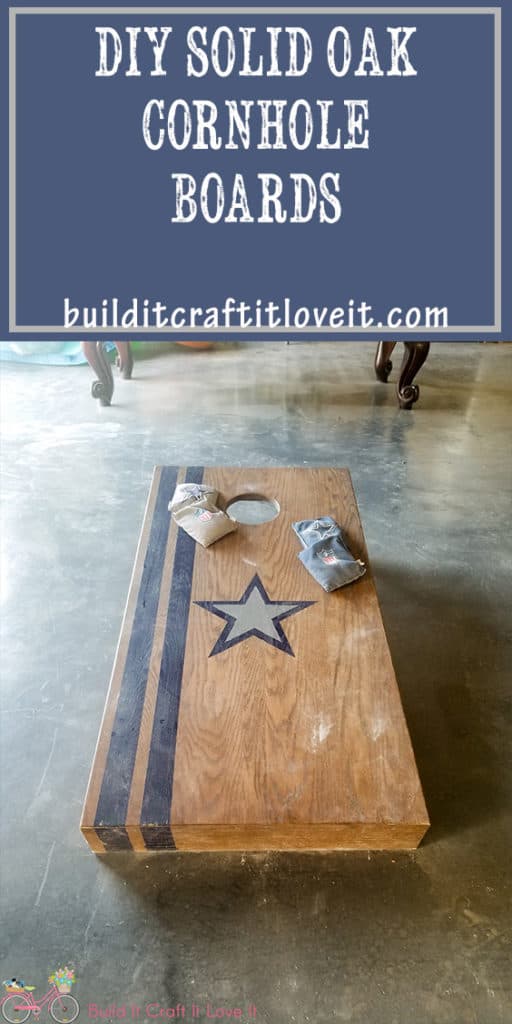
I recently visited my Aunt and was able to take pictures of a set of DIY cornhole boards I built for her last year! I was in such a hurry to have them ready for her boyfriend’s birthday that I did not have time to take pics! What, no time…not me!! Don’t you just love them and all their Dallas Cowboys glory?

She wanted something different than what she could pick up at her local Target or Academy, she thought the plywood just looked cheap and I have to agree, the store bought plywood sets just don’t look well made! Not that you can’t make them with plywood, because you absolutely can, and many many people do and they look great…but I also understood what she was saying, and once she saw the store bought ones, she couldn’t see past the plywood! And I am glad she couldn’t because I think these turned out FAR Better than any I have seen!
They are heavy-duty! She wanted a wood that would be able to withstand being outside…we priced Ipe and that came in at $1200 just to buy the wood, so we settled on oak! Durable yet inexpensive compared to Ipe! Lol!

Let’s jump in and get this tutorial started!
Gathering Supplies for Custom Cornhole Boards
The total cost to build the custom cornhole boards out of solid oak wood, including the purchase of the 6″ hole saw was $240! This wasn’t too bad considering buying any they are at least $200, and that is for the cheap looking ones! And the hole saw was 42 dollars of that amount (yes, they make some cheaper but I bought the DeWalt because I was going to have to drill through OAK), so if I make myself any, it will be less than 200 bucks since I already have the hole saw!
***Note: It may be cheaper or more expensive for you to build them, there are vast differences in wood cost based on region! One thing I want to try is planking the wood as I did, but with pine so that it would be WAY cheaper and still look nice! I priced it out and they would only cost around 40 bucks with pine! That is pretty awesome!
Materials List for Custom Cornhole Boards:
*Links included in this post may be AFFILIATE LINKS, affiliate links allow me to make a small percentage of a purchase you may make at a link I provide, at no extra cost to you! So thanks in advance if you purchase something I recommend!
- 4 – 1×6 @ 96” (oak ran slightly longer than so I was able to make the cuts without compromising size)
- 5 – 1×4 @ 96” (you can purchase 1 less 1×4 if you can find 1x3s where you live, you will need 1 – 1×3 if that’s the case)
- 6” hole saw
- pocket hole jig
- saw
- belt sander
- wood glue
- pocket hole screws
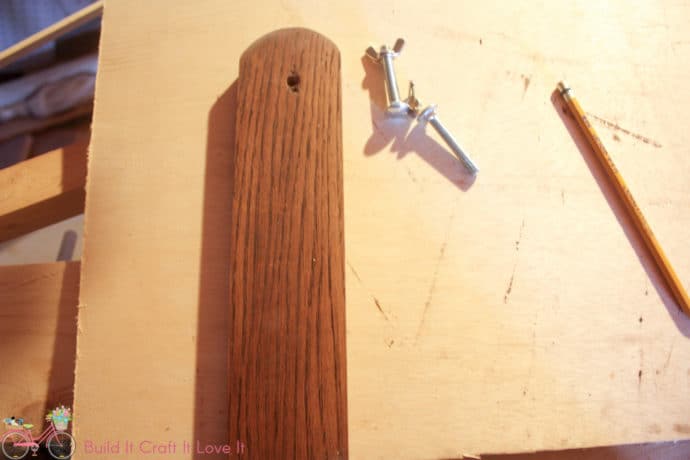
- 4 – carriage bolts with washers and wing nuts
- drill
- Clamps
The bean bags in the picture are from Target for $19.99…Amazon has them but they are like 40 bucks for the same thing so hit up Target if you want them!
Cut List for Custom Cornhole Boards:
- 8 – 1×6 @ 48″
- 2 – 1×4 (or 1×3) @ 48″ ripped down to 2″
- 4 – 1×4 @ 46 1/2″
- 4 – 1×4 @ 24″
- 2 – 1×4 @ 22 1/2″
- 4 – 1×4 (or 1×3) @ 11 1/4″ mitered at 10 degrees off square
The steps to build it are pretty much the same as every other tutorial you can find at the search on Google, but of course planking the top! But I will still give you the full rundown of how I built them, just in case you haven’t seen another tutorial…or you just want mine!!
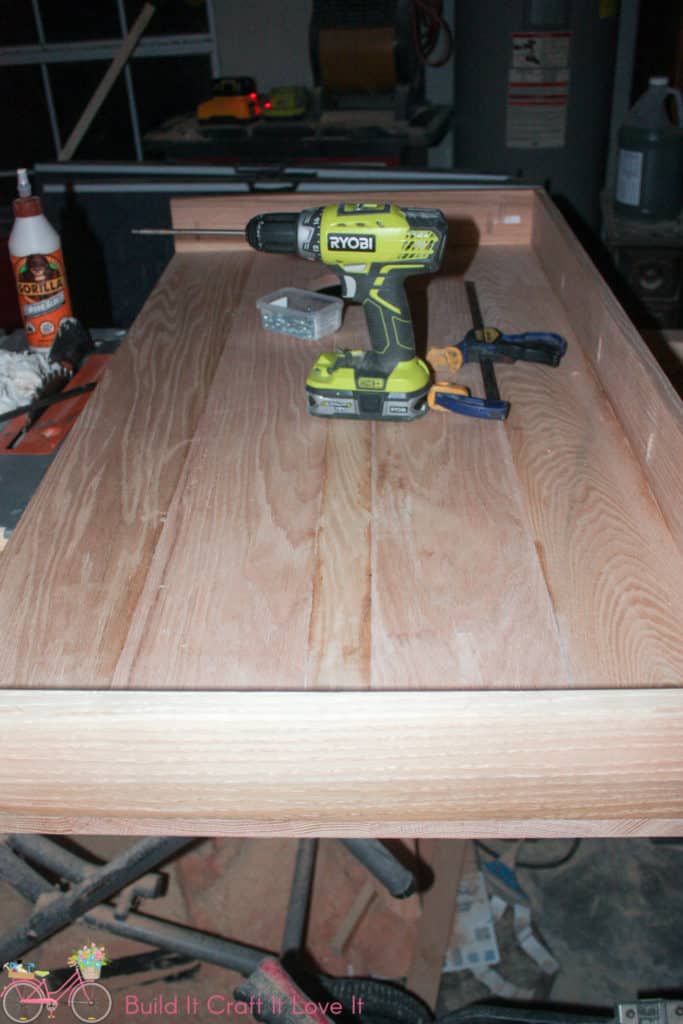
Starting off, I planked the boards as shown in the pic below! If you want even more detailed plans click and download the free plans above!
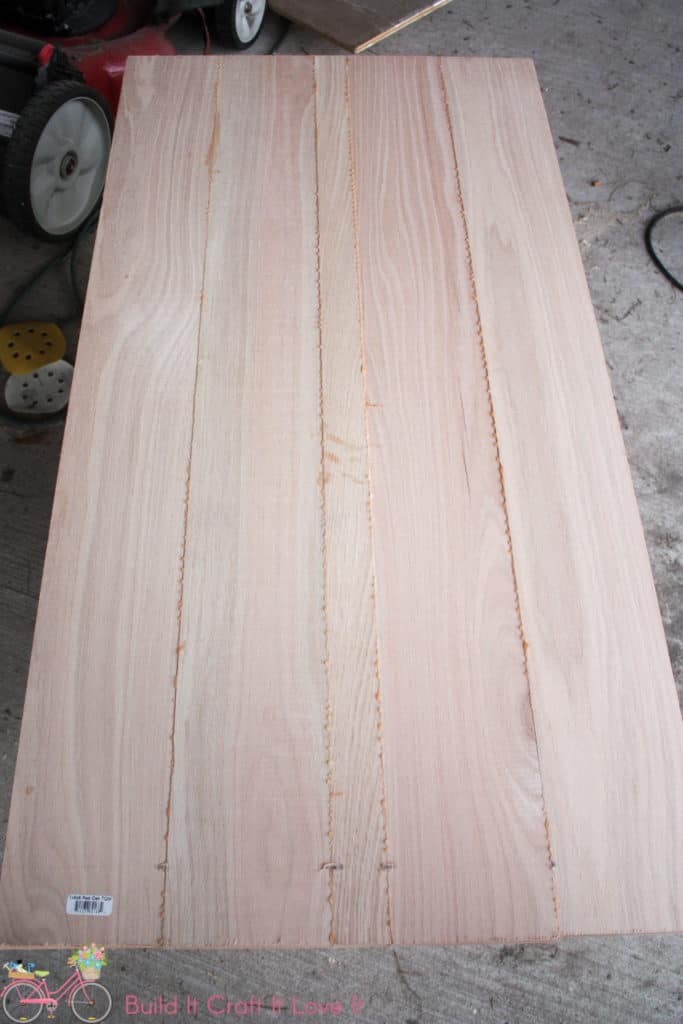
Nice glue eh? Haha!
It took a good run with the belt sander to make this smooth as butter!
The ends then needed to be trimmed down perfectly even! A nice guide makes this so easy, a guide can be something so simple as a straight scrap board clamped down!

Now I had my hubby actually drill the hole because I drilled one through plywood and was scared I was going to mess the oak up because that hole saw will throw you around!
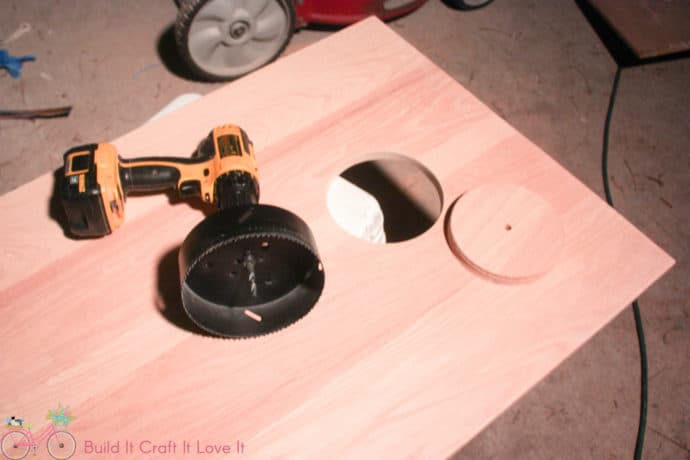
That hole saw makes my drill look a little childish! 😂
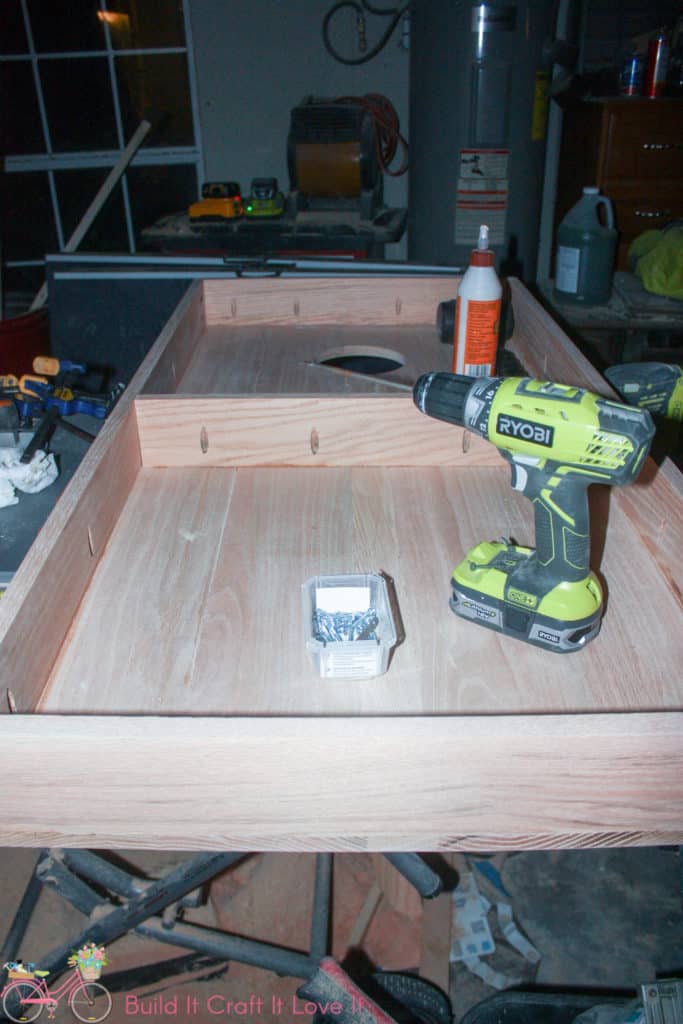
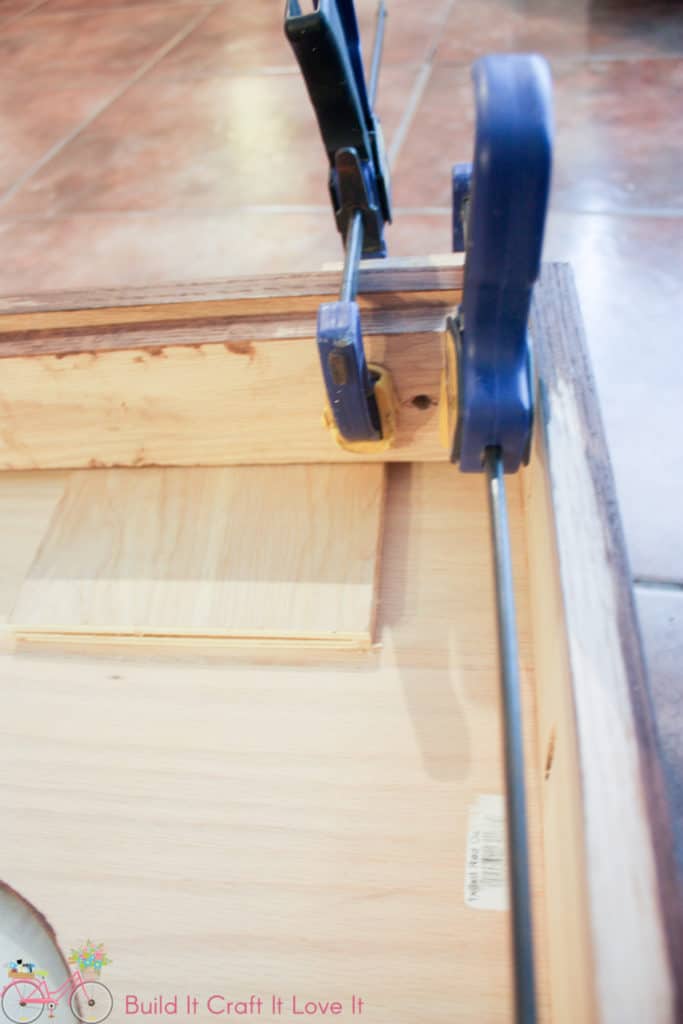
Now you just have to build the box of the frame! I started with the top and bottom boards. Attach them with pocket holes drilled at 3/4″ deep and use 1 1/4″ pocket hole screws with ample wood glue!
Finish the box with the sides!
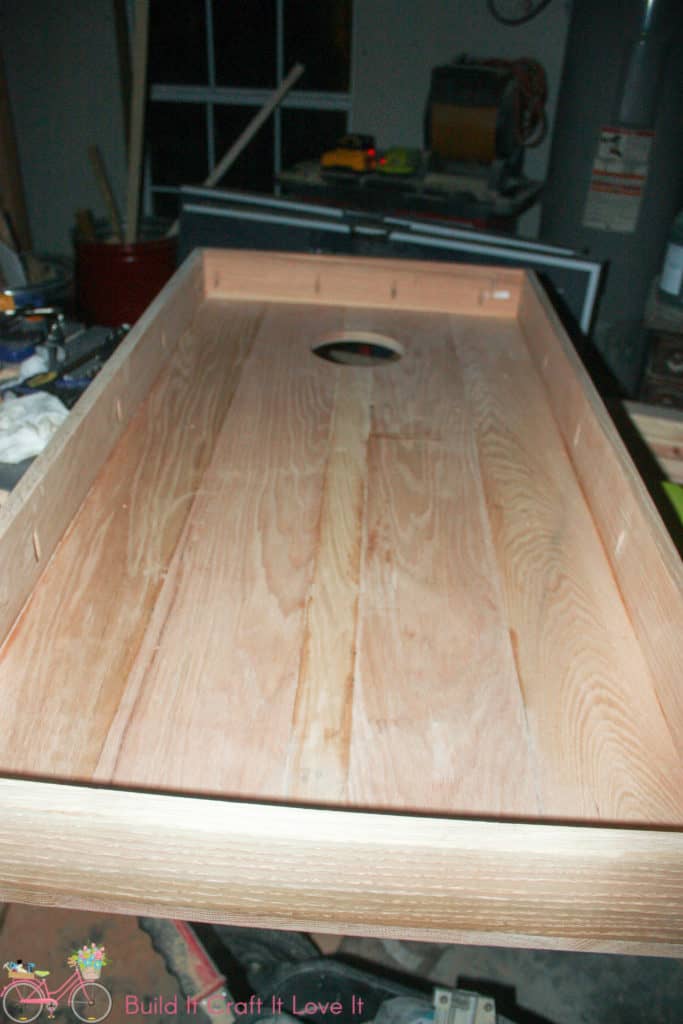
I added a middle brace to make sure my custom cornhole boards don’t end up warping in the middle!
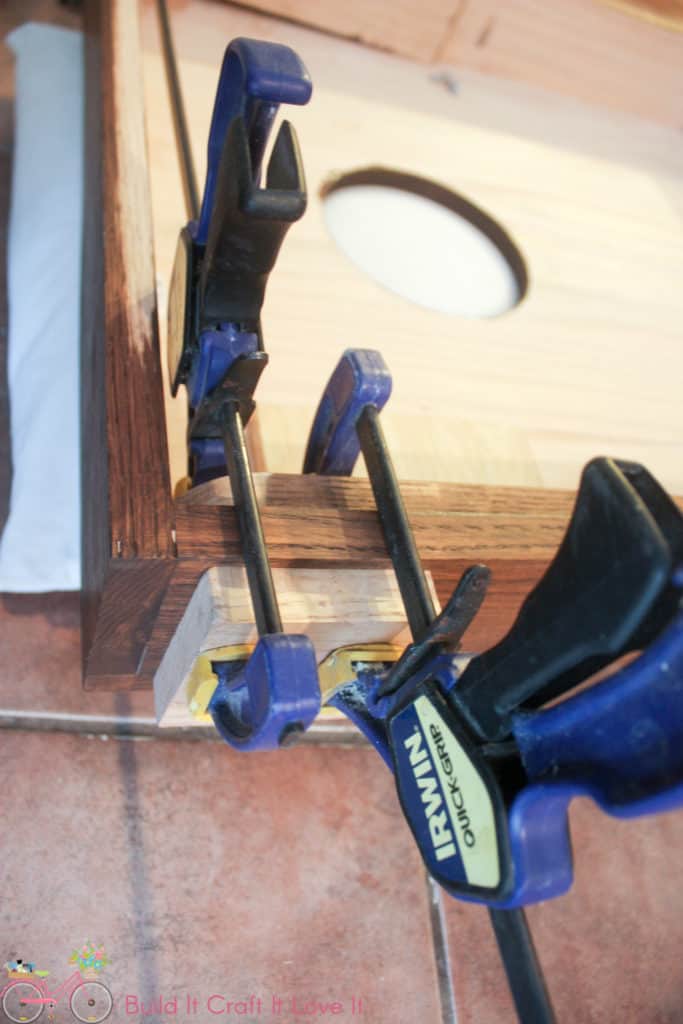
Now the legs are slightly tricky…everywhere online just says to prop it up on a table and cut them at the angle that makes them lay flat. I did this, and it happened to be exactly a 10 degree off square cut! Now the actual length was right around 11 3/8″ but I cannot guarantee that is the length so maybe cut them a hair long, check the height and then trim them down as needed!
I also drilled my hole a little higher than I think I should have…they work great but I read somewhere else, to drill them 1 3/4″ down from the top and mine are only 1 1/4″ so there isn’t a must drill length, as long as your board sits up 12″ off the ground that is the important part if you want them regulation size! And if it’s just for fun in your backyard you can make them any size you want!
You can sand and stain at any point, I did it before drilling all my holes, but you can at whatever point you would like! I used Dark Walnut by Varathane on them! My Aunt stenciled them after I gave them to her, she just got a star stencil and used painter’s tape for the lines!

The top has to be rounded so it can swing in and out for storage! I just traced a can about the right size, but if you have a compass it works much better! Lol! Use a jig saw or scroll saw to cut it!
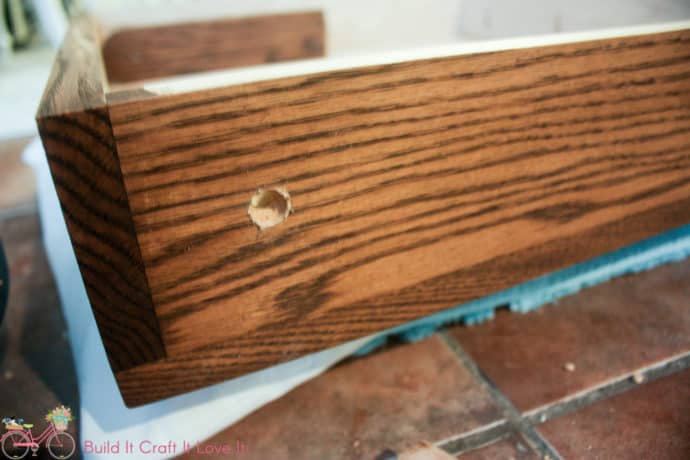
Find where they will swing open and close without rubbing and drill the hole in the base of the cornhole board, I drilled from the inside and placed a scrap wood block to keep from getting tear out on the outside of the board!
Grab your bolts and washers and wing nuts and put them together! Boom….DONE!
Use them every day for family fun! I can’t get enough of the game honestly, it’s a game the kids and adults can both enjoy, and to me, it doesn’t get any better than that! If you enjoy games with the family, you may also want to check out this DIY Ring Toss Game or this Dart Board Cabinet!
Hope you have a wonderful weekend!
Happy Building!

Want to save these Custom Cornhole Boards for later? Pin it!