DIY Concrete Countertops – Pour in Place
Concrete countertops are a beautiful way to update your kitchen! Whether you create a form and pour them, or you pour them in place, concrete offers an extremely durable, easy to work with material that is inexpensive when you DIY your concrete countertops!

You may remember, many months ago, ahem, maybe even a year ago, we poured our own DIY concrete countertops in the kitchen during our kitchen renovation and I wanted to share all about the process, what we did well, what we would NOT do again, and answer some questions I received!
Don’t mind that fancy copper patina in the sink!😕
Can anyone DIY concrete countertops?
Pour in place concrete countertops or building forms and pouring concrete countertops are absolutely a DIY solution to countertops if you are on a budget or just love the versatile look of concrete! I say after having poured them, as long as you can lift a full five-gallon bucket up to your head 15-20 times, you are good to go…or at least have someone handy who can! Lol!
***This post is sponsored by Concrete Countertop Solutions. I was given some concrete products to try out on my DIY concrete countertops in exchange for my post, but ALL opinions are my OWN. I would also like to note that I purchased some of the supplies in this post from them as well with my own money!
What to Know Before Pouring Concrete Countertops
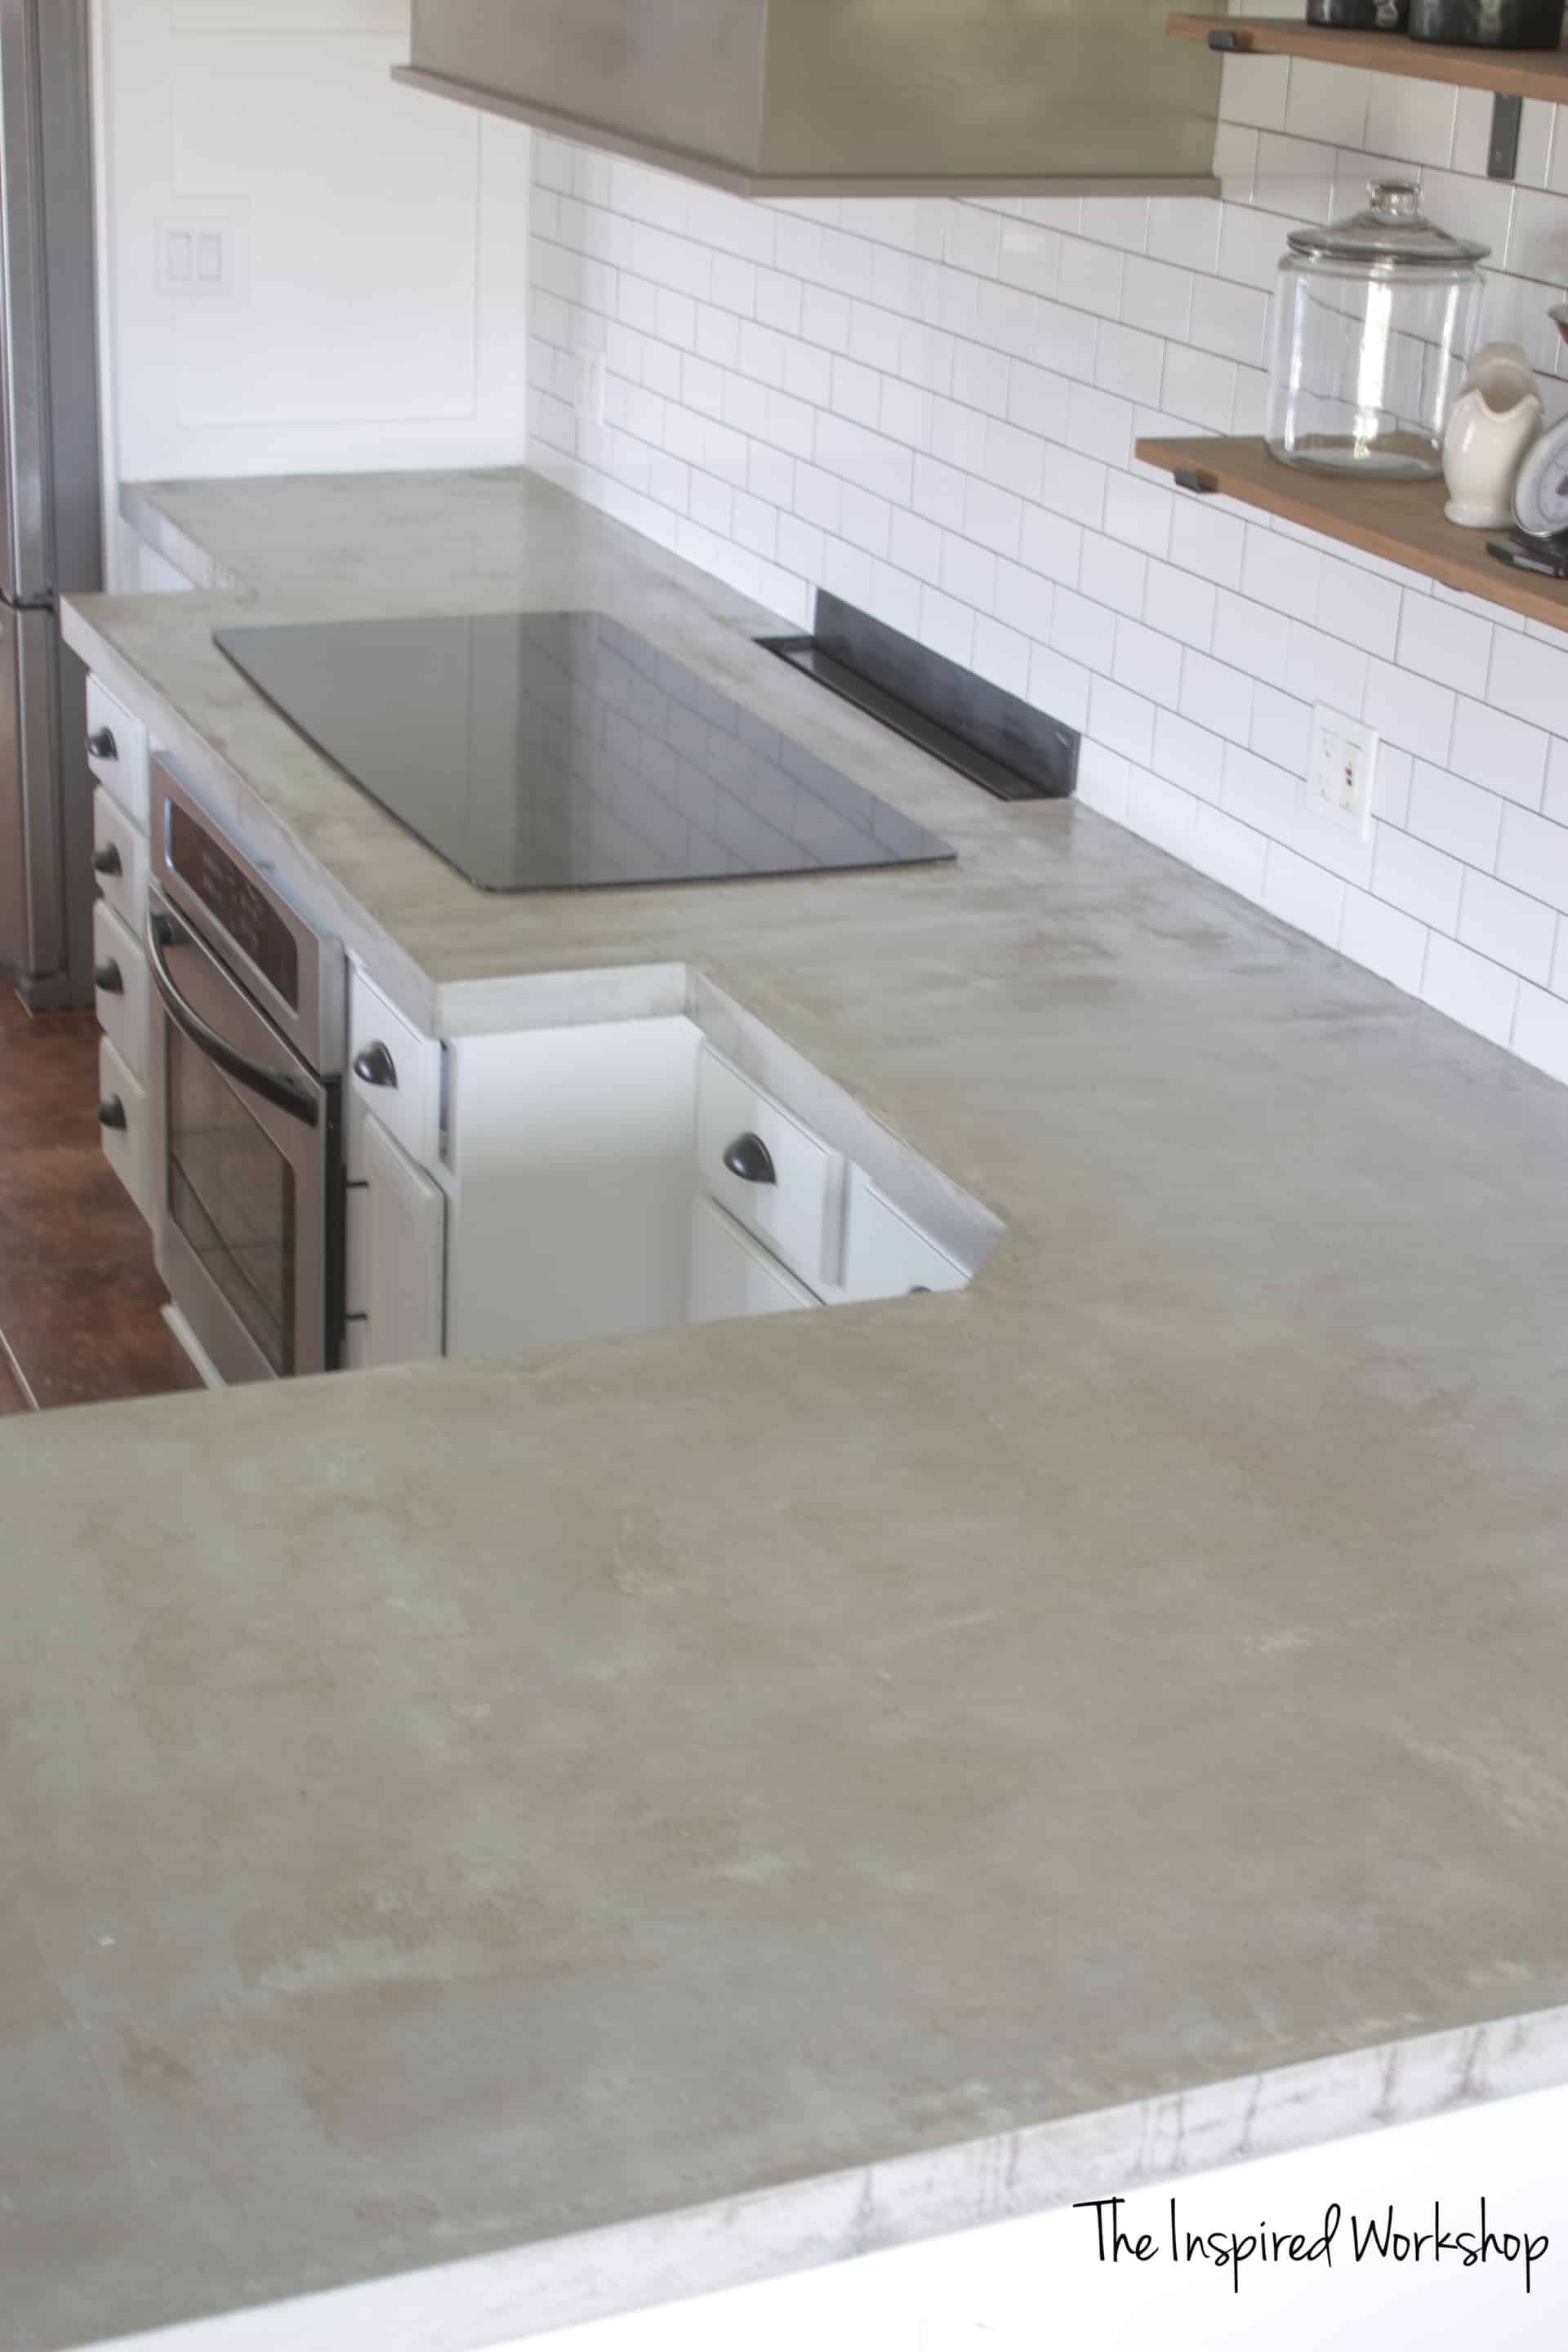
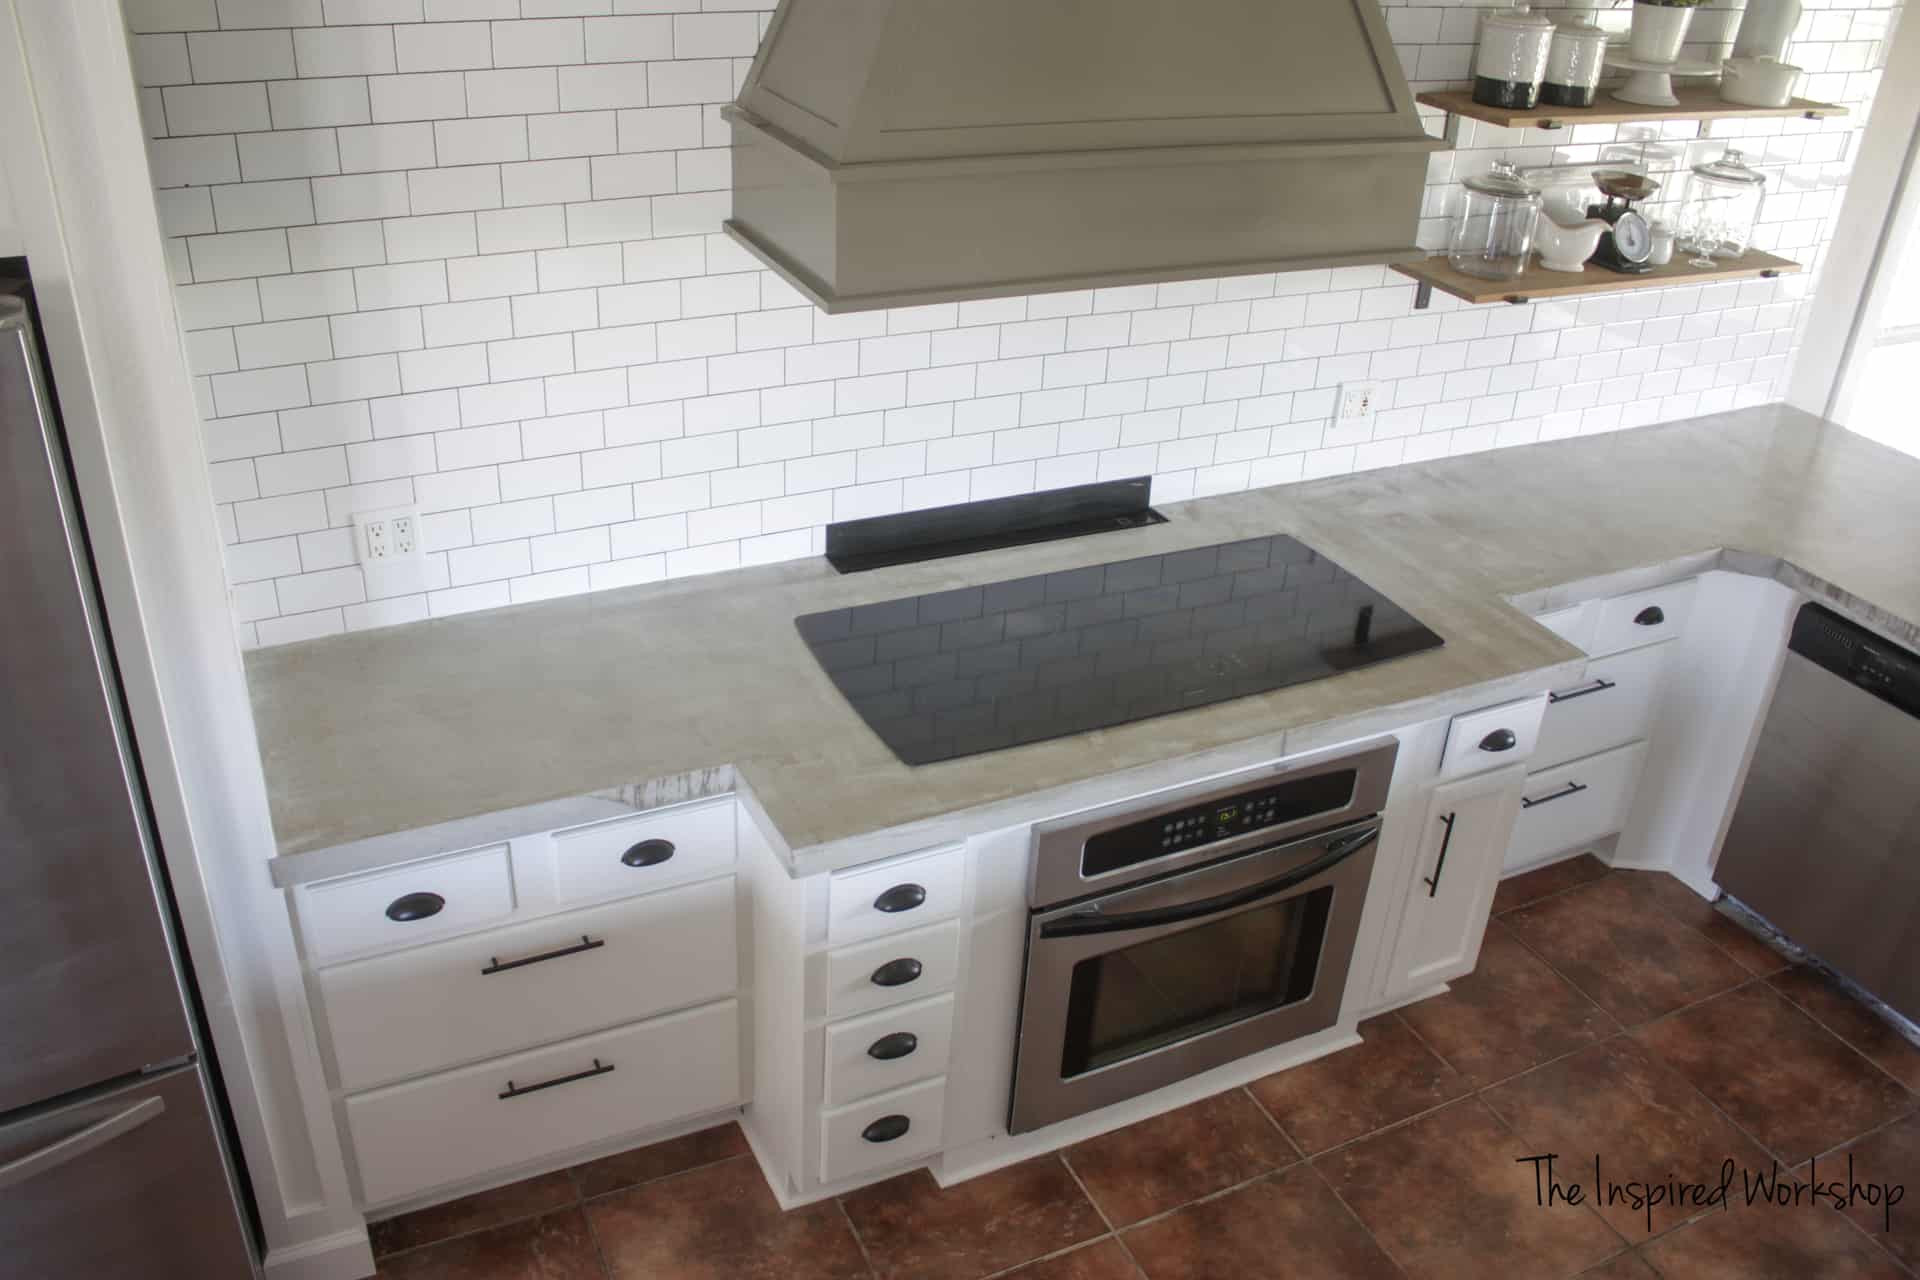
There are a few things you need to understand before deciding to DIY concrete countertops as your new counters though, and that is one, they are not a uniform color, there are variances and the more you need to sand on them after pouring, the more they have variation because of the aggregate that shows through!
Don’t think for one second that because you saw a far-off picture of some concrete counters, or a semi blurred close up, that they are solid gray or white! I didn’t know this going in, and though I LOVE the look, I understand that not everyone wants that look.
The only concrete projects I had done were poured into a form and flipped over, they had no aggregate showing through, they were more solid gray! If you are sold on concrete counters but want solid gray, maybe you will want to create forms and not pour them in place! I will go into more on this below!
And just in case you missed any of my previous posts on the kitchen renovation you can find them under Remodeling!
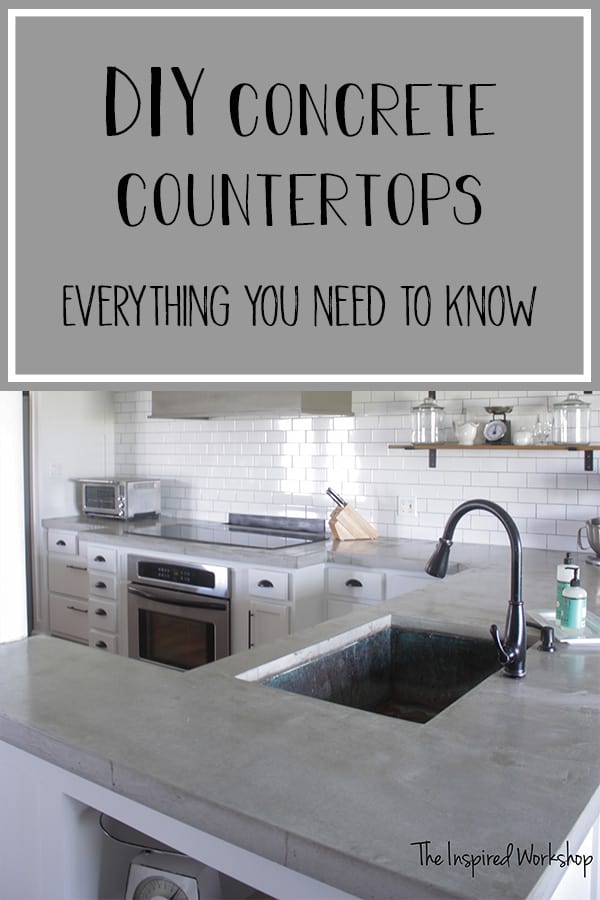
But first, I must show you more of the beauty shots! And just to let you know, I did not edit these photos at all…they are exactly what the camera picks up, some spots are actually more exaggerated in the photos than in real life, but I wanted you to get a REAL clear picture of what concrete countertops look like!
What is the Cost of DIY Concrete Countertops?
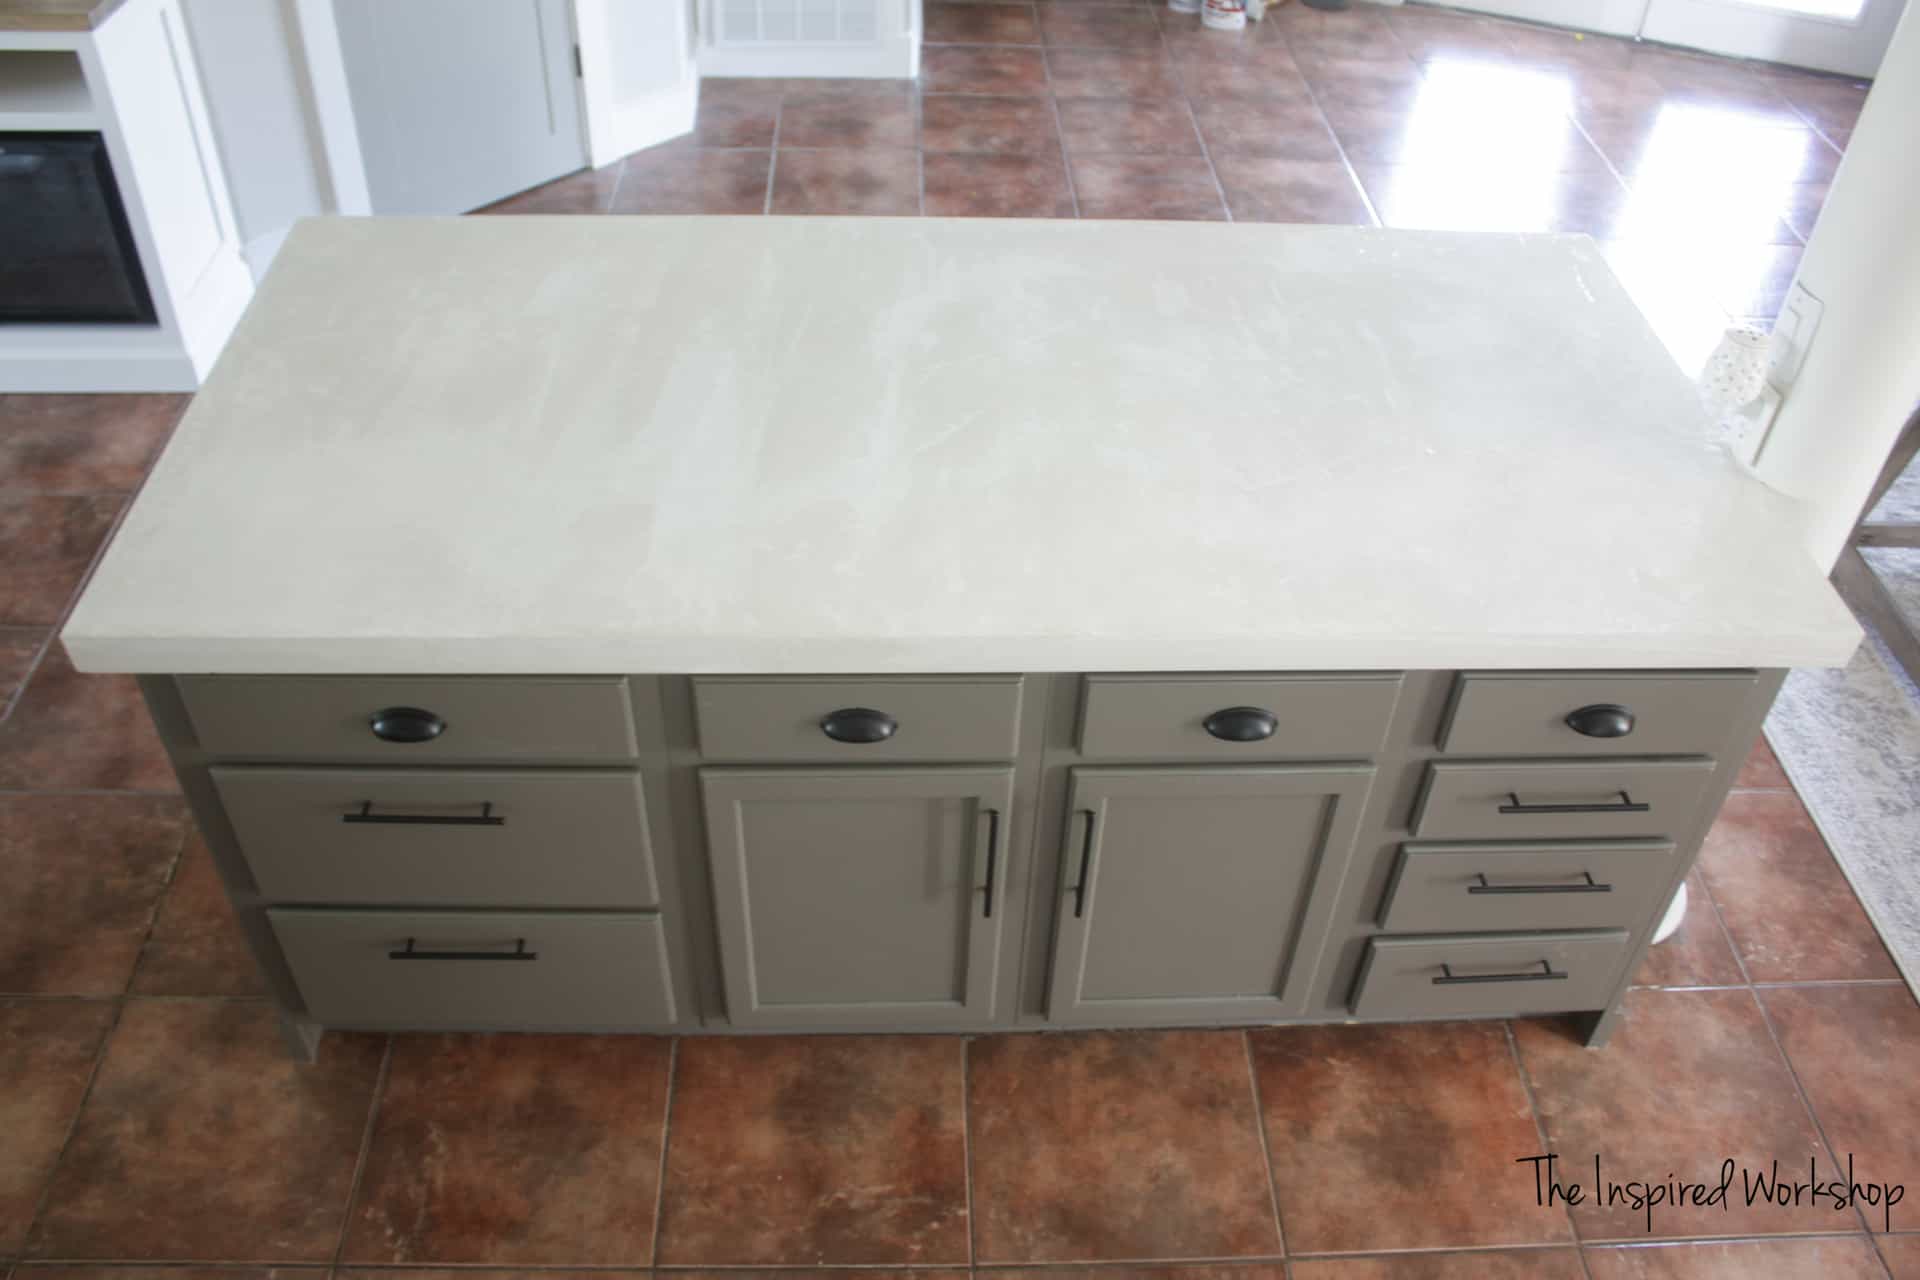
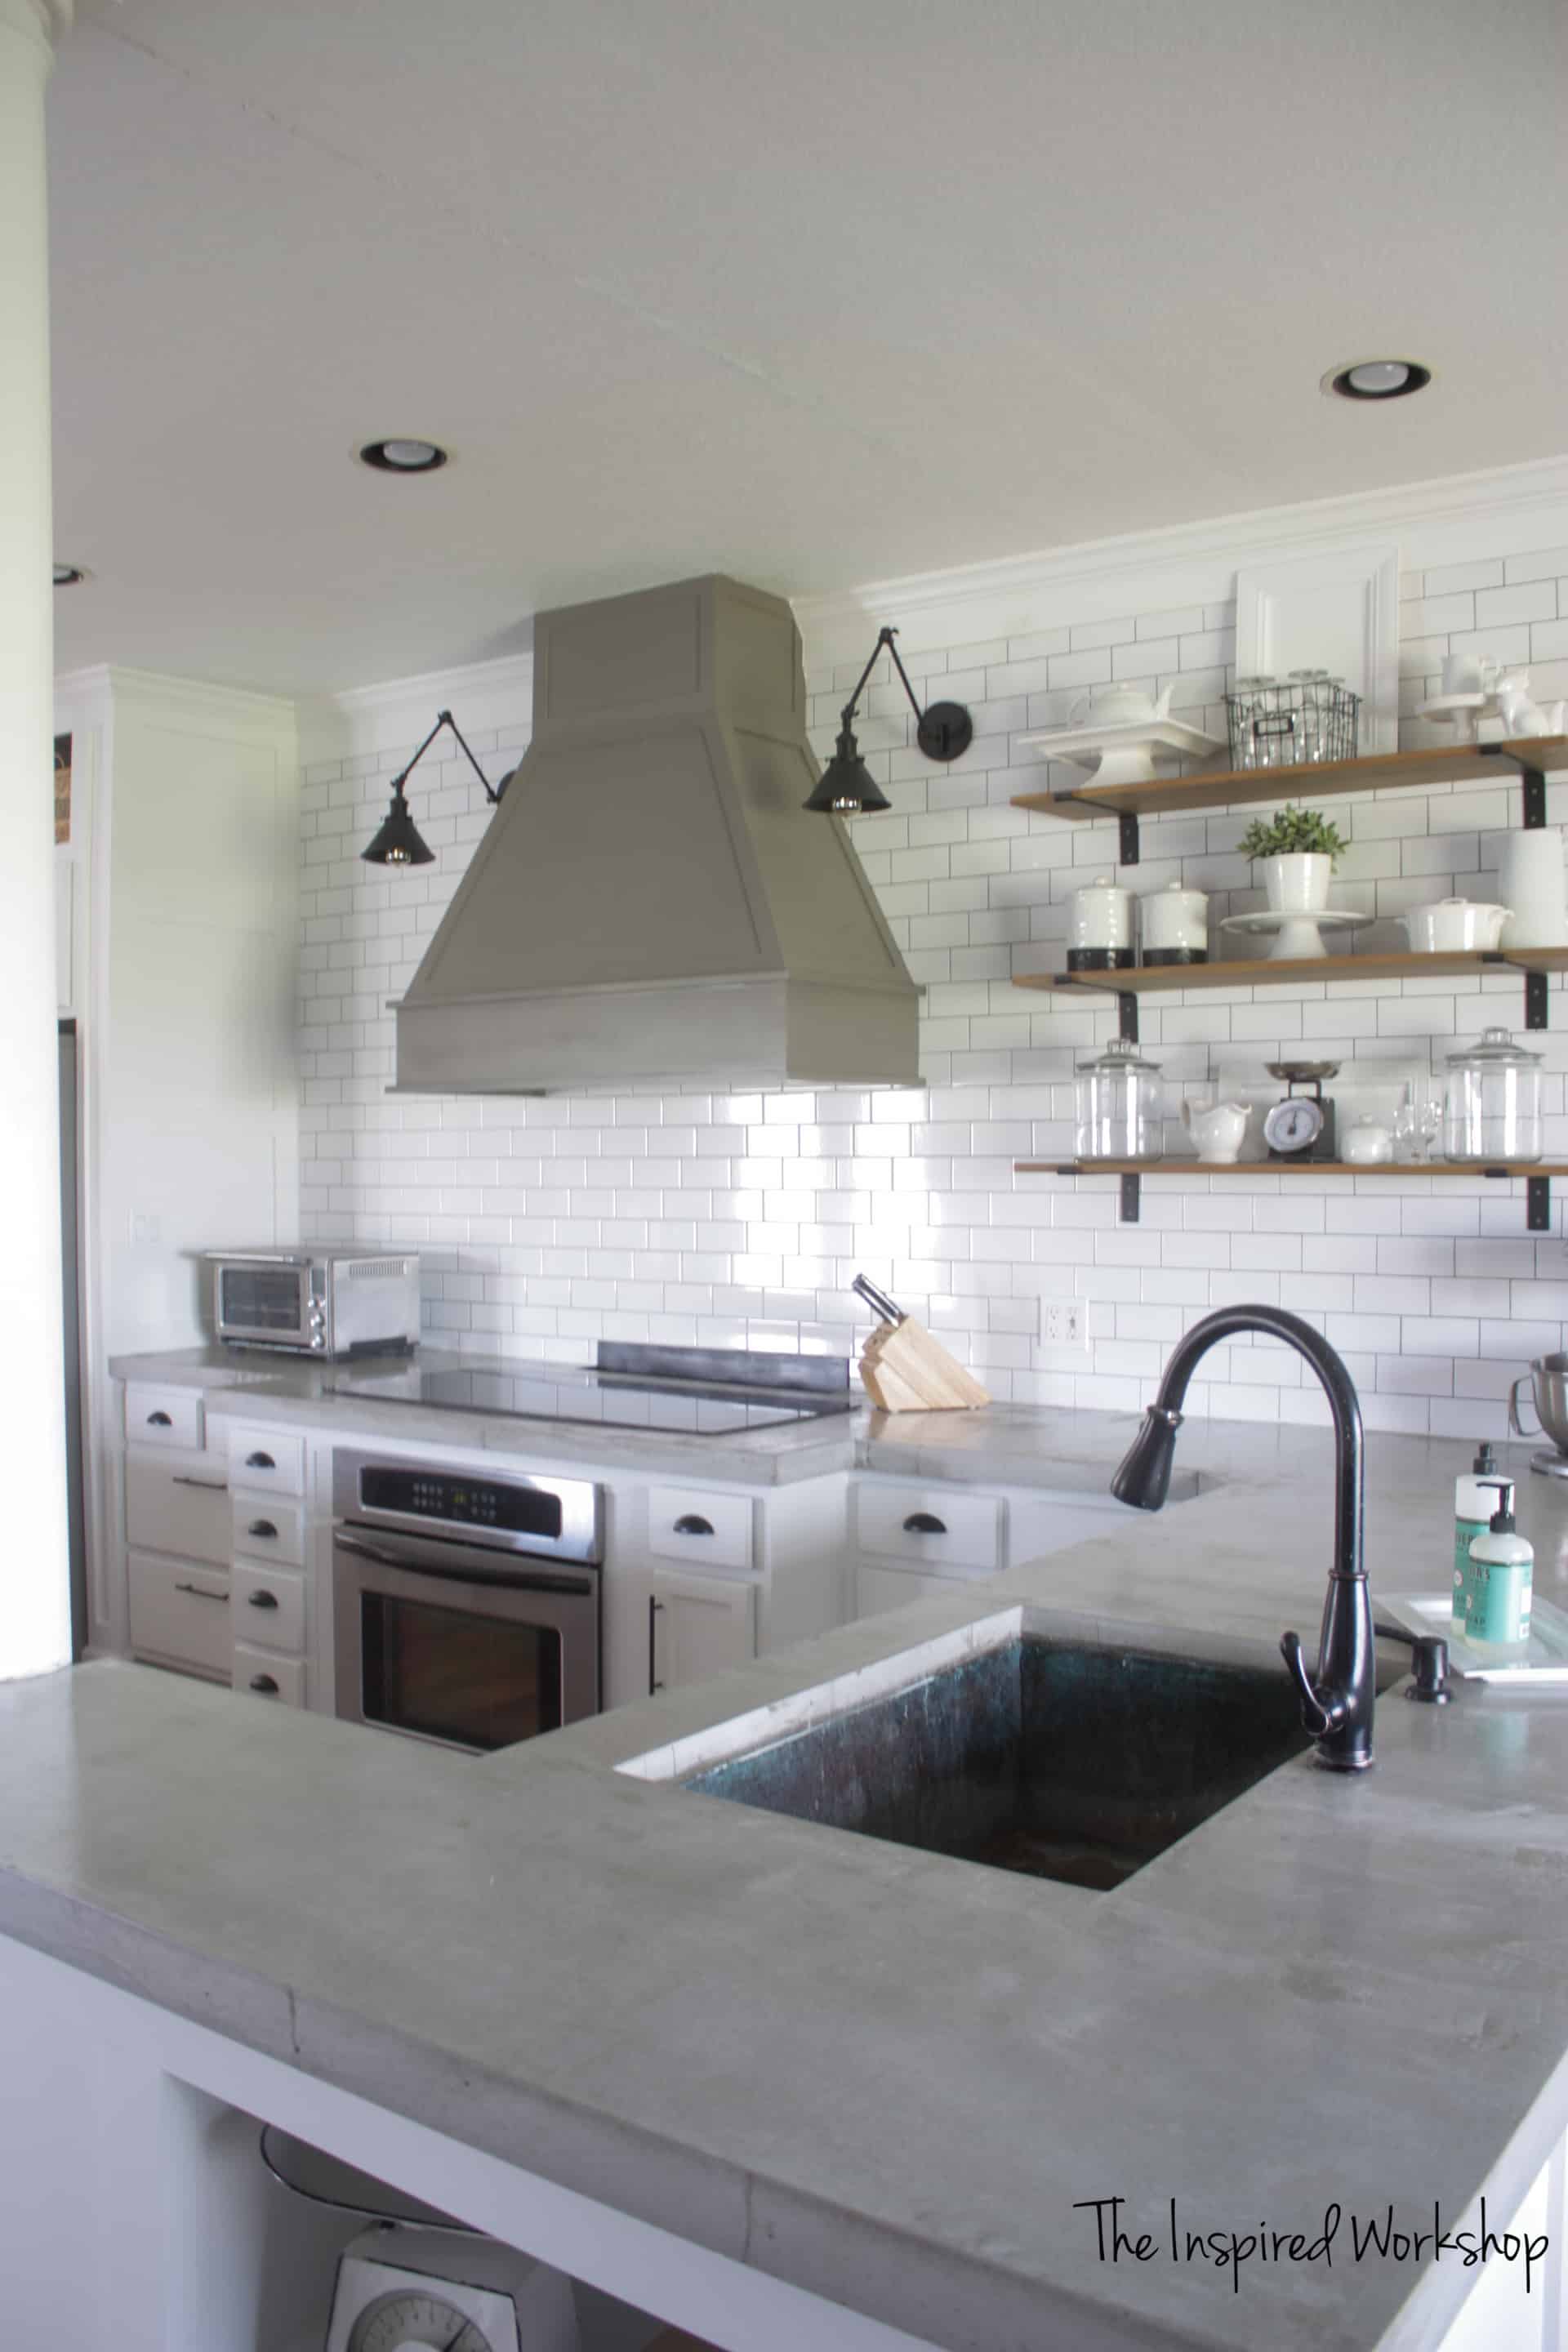
Aren’t they gorgeous? 😍 First off, my kitchen counter space could be a small bedroom, it came in around 80 square feet without the drink station. It makes for great space to cook, bake, and entertain…but it does not make for a budget-friendly renovation when you look at the prices on countertops! Lol!
I priced out laminate and it was going to cost me more for this space than the concrete did…and by a long shot! It was over double the cost! Marble, granite…out of the question. But concrete countertops, there was the solution to all my problems, I love the look of concrete, industrial yet sophisticated.
Wait, you are telling me there is a way I can pour them in place with absolute ease because the edge forms do all the work? Sign. Me. Up. (This was my thinking, but clearly, you need to know trowel work and such which…I didn’t exactly…but it worked well enough!😅)
Enter Concrete Countertop Solutions, I found them while searching and researching all I could about DIY concrete countertops. They had a system that made it so easy to DIY your concrete countertops, I practically begged them in an email to work with me on this post! Lol! I was using their white concrete and edge forms regardless of what their response was to my email, I was sold before contacting them that this was the ONLY way to do pour-in-place concrete countertops!
Now, let’s not forget, I had only worked with concrete a couple of times in the past, I made a few tabletops and benchtops, but they were created in forms and flipped over, so the top was essentially created by the form, not by my concrete work. This made me a little apprehensive about pouring the countertops in place, but if I didn’t even try, I would never know if I could or not! Lol! So I decided to give it a shot!
While not ‘perfect’ of course, they are perfect for our kitchen! They are an option that I do not have to worry about the kids spilling anything on or hot pans melting! They work great for us and look great as well, in my opinion! Down below is the tutorial showing you how we did our pour-in-place concrete countertops, and what we learned in the process!
What do you need to pour your own concrete countertops?
It really doesn’t take a lot of supplies to pour concrete countertops, it’s mainly the basics: concrete, some type of edge form, screed, trowel, and some type of metal/fiberglass mesh to keep the concrete from trying to crack!
Materials Needed for Pour in Place Concrete Countertops
**Note: Amazon Links below are affiliate links! Affiliate links are links that make me money when you shop from them! If you click an AMAZON link below and make a purchase, I make a small percentage of that purchase at no extra cost to you! I’ll say that is a pretty sweet deal!
And I always appreciate it when you shop from my links! Concrete Countertop Solutions links do not provide any monetary compensation, I just wanted to make sure you can easily find any of the products I used on my concrete countertops!
- cement board cut to cabinet layout
- heavy drop cloths/paper to protect cabinets and floors…it gets pretty messy, I prefer the brown paper I linked!
- White Countertop Mix (from CCS if doing white counters)
- Sand / Topping Mix (from the hardware store if doing gray counters)
- Z Liqui-Crete (if doing gray counters)
- counter edge forms
- Fiber Mesh Reinforcement
- Z Clips
- Screed
- Float
- Sanding Pads – Z Gem Pads are the ones I purchased and I am still using them on a multitude of projects, not just my counters…worth every penny!
- Sealer – This is the one I purchased from them (the owner recommended it for the white counters but it works great on all concrete)
- miter saw
- corded drill (you need one with low rpm – the link is to the cheap one I purchased and it worked great)
- paddle mixer
- duct tape
- small 1/2″ screws
- you will also need faucet knockouts and sink form if you have an under-mount sink
- utility knife to cut cement board
Preparing the Kitchen for the DIY Concrete Countertops
NOTE: Before starting this tutorial, I would just like to make sure you understand that I am NOT a concrete professional of any sort, I am just sharing my journey of how we poured our concrete countertops!😉
Before we could pour the concrete countertops we had to prep the cabinets, which in our case meant building them out in certain areas and adding support in other areas. Then we were ready to add the cement board to the tops of the cabinets to pour the concrete onto.
We had an abnormal situation because our cooktop was 49″ wide and left a span between cabinets that a 3×5 sheet of cement board couldn’t cover. We also have a vent that is inside the counter so you can’t put a support board across the back wall. This led us to have to find a larger 4×8 sheet of cement board. We could only find one brand, Perma Base at Lowe’s, and let me tell you…I would NOT use it again. I would special order the Durarock or Hardy brand!
The Perma Base was the only one I could get in-store, and I regret it…it did not cut easily with a utility knife like the other brands, and it had the strangest Styrofoam balls in it, which made it so much weaker than the other brands! No lie, it was awful! So do not make that mistake, use the other brands…okay!
Once all your cement board is cut to size, attach it to the cabinets! Our kitchen looked a little silly at this point!
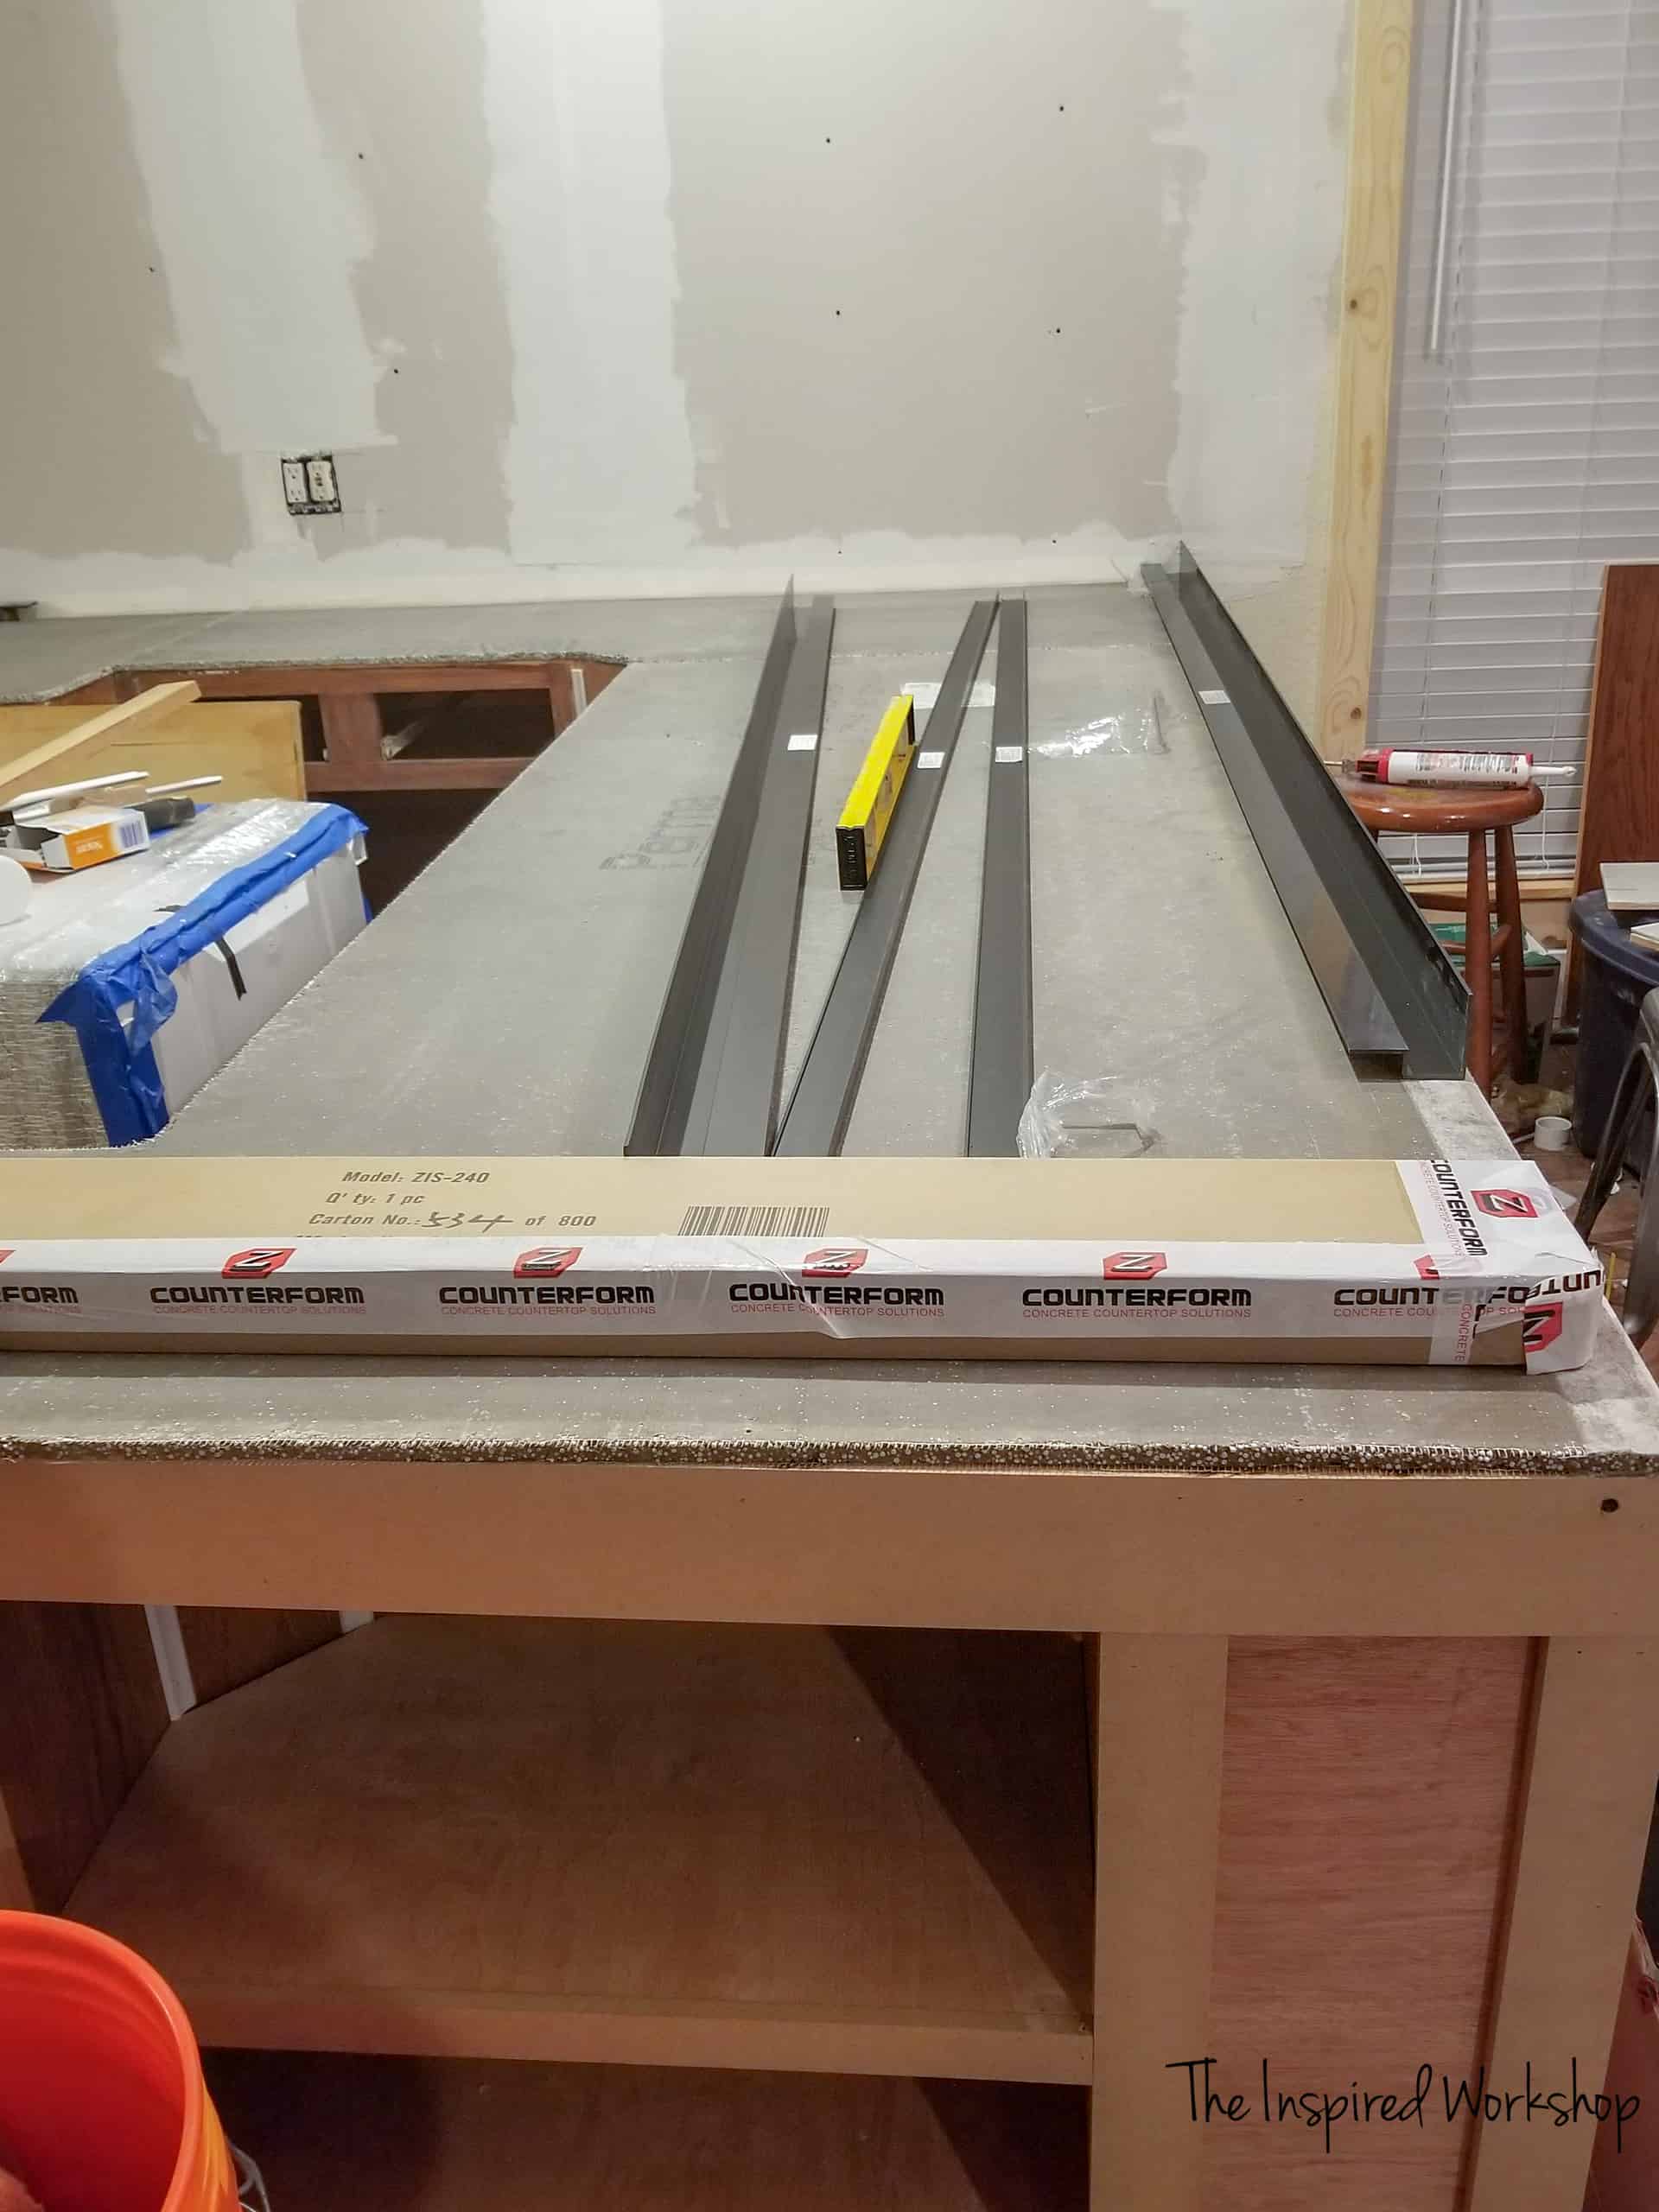
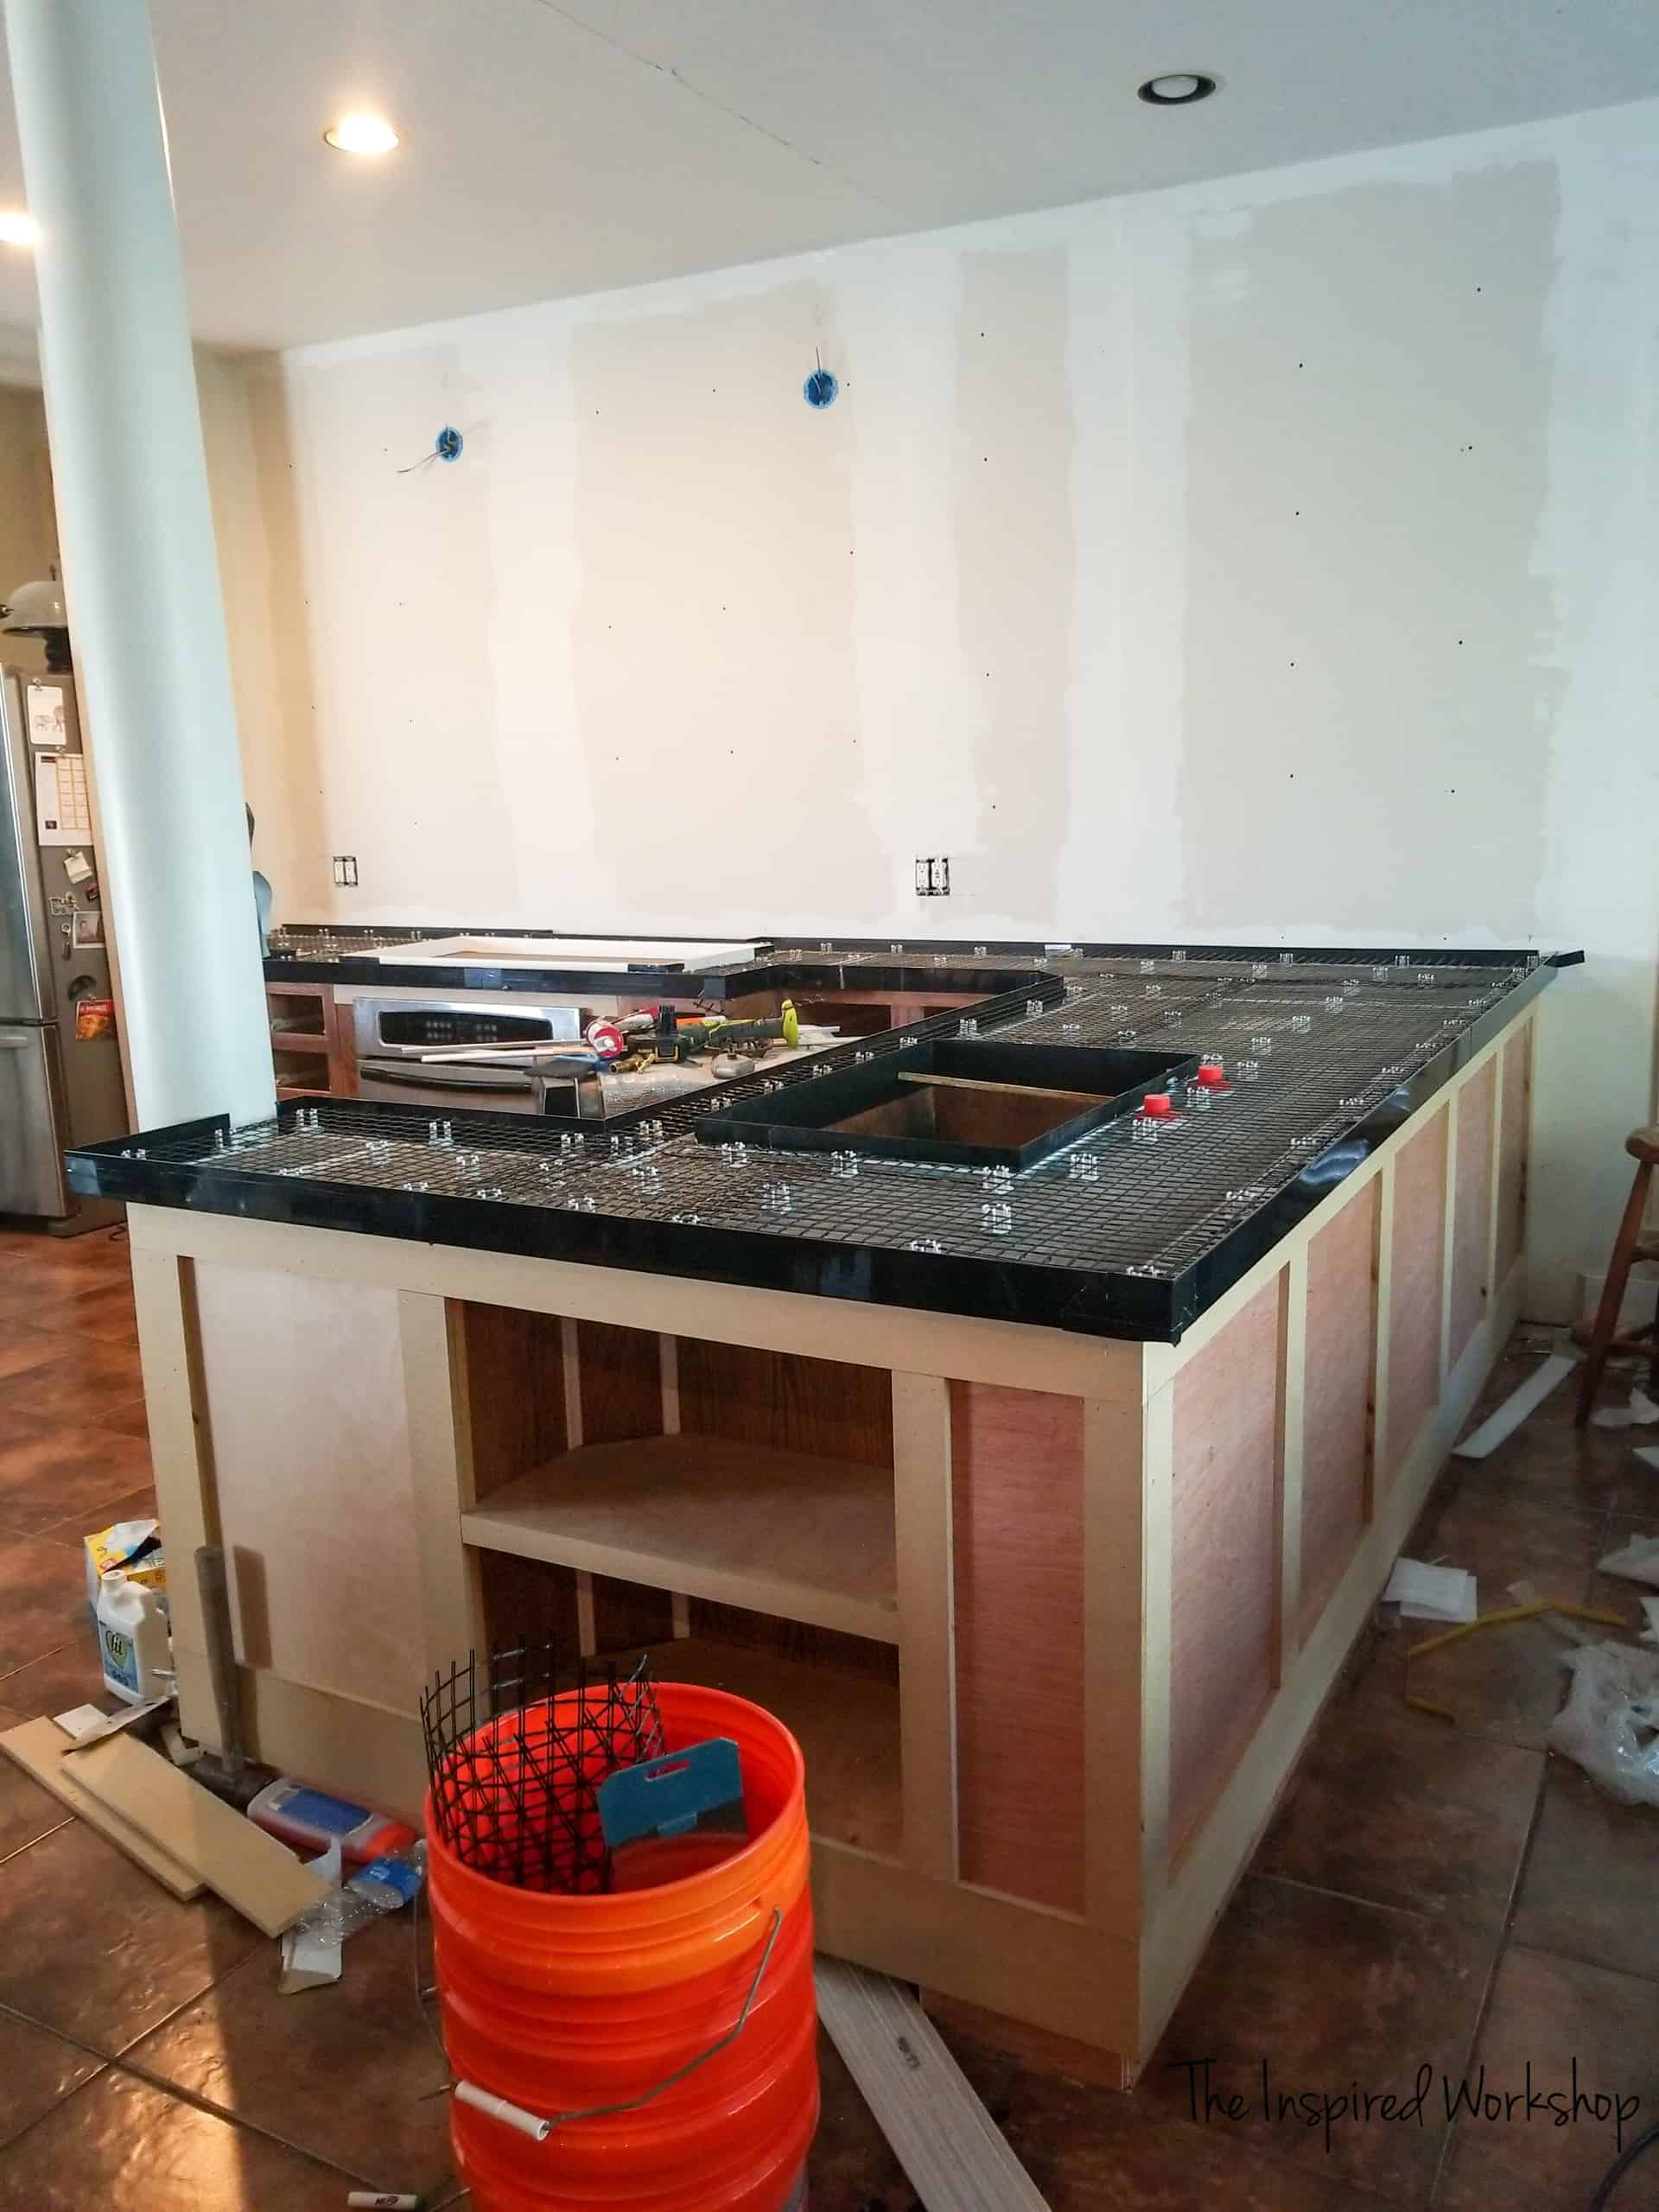
After attaching the cement board, I was able to start attaching the edge forms! The edge forms were lifesavers for this project!
I do not know what the outcome may have been without this special piece! Edge forms not only make the front…or should I say, the most important part of your counters look good, but the system is designed with edge forms that go up against the wall as well to give you two pieces to screed the concrete with to make sure they are level!
That is worth every penny, trust me on this one! I still managed to make a mistake that I will show you later but it was due to the awful cement board, not the edge forms!
The edge forms are super easy to install. You cut them to the length of your counters, mitering the corners at 45-degree angles! You will need to duct tape the corners as well just to keep the concrete from seeping or opening the corners. Small screws are used to hold the forms in place!
Concrete Countertop Solutions offers a vast selection of edge forms too, you don’t have to go with a straight square edge like I did, you can have a more fancy edge if you’d prefer! They even have a thinner square edge that I love…they didn’t offer that a year ago, but now they do! It is perfect!
This part did take me a full day to complete because I had a ton of corners to go around and concocting a way around the pillars wasn’t easy! Lol! I brought my miter saw inside because walking back and forth into the garage was wasting way too much time!
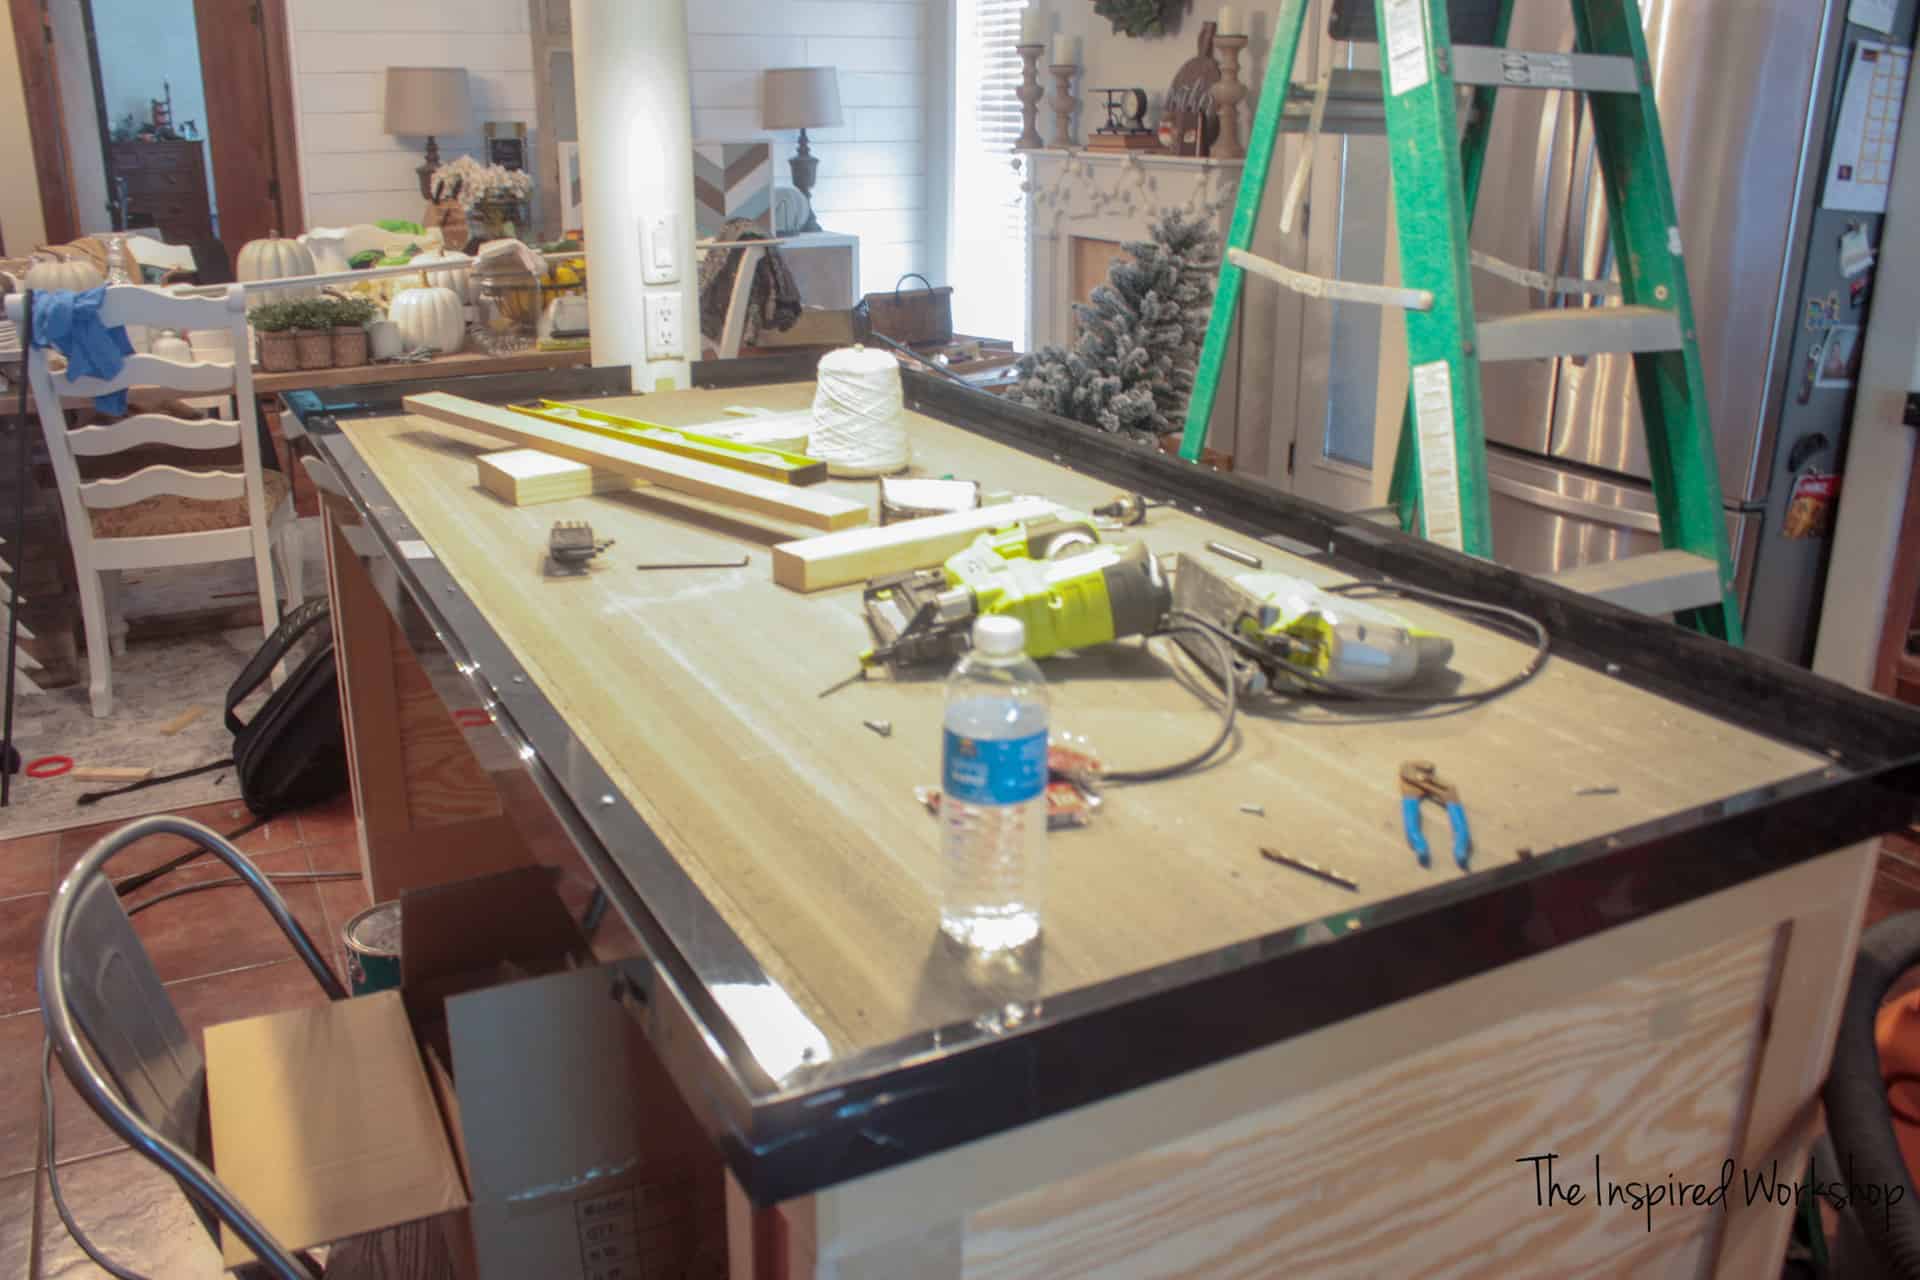
Can we say MESS? 😳 Wow, things can really get out of hand when I start projects!
At this point in the journey, I measured from the top of the edge form to the ceiling along the back wall, at both ends…they measured the same! I thought yes, great the cabinets are level! Muahahaha! Boy was I wrong! I sat a level along with the back edge forms…showed it to be perfectly level! Yesss! Muahahaha! Boy was I wrong!
One, it was a smaller level than I should have used…it was a 3 footer, should have been six! And, here’s where that Permabase board really bit me in the a**! It was sitting level but once the weight of the concrete was placed on top…it quickly sloped in the area where it wasn’t supported as well as we should have supported it. Now is that all the Permaboard’s fault, no.
I have a fault as well in that I should have made sure it was super supported and not moved forward until we came up with a way to do that. But Hardy board or Durarock would have been so much stronger than this stuff so it would have helped as well! Lesson learned!
You know how I measured from the top of the form to the ceiling, yeah, and the measurement was the SAME on both ends…well guess what?! The countertop was sloped in the opposite direction of the ceiling…neither one was level! Had I had had the laser level at that point in the journey I would have known that.😬 How does that manage to happen, I mean seriously…how?! So all the while I was WAY off, thinking I was golden! 💩 Lesson learned…laser level for the win!😁
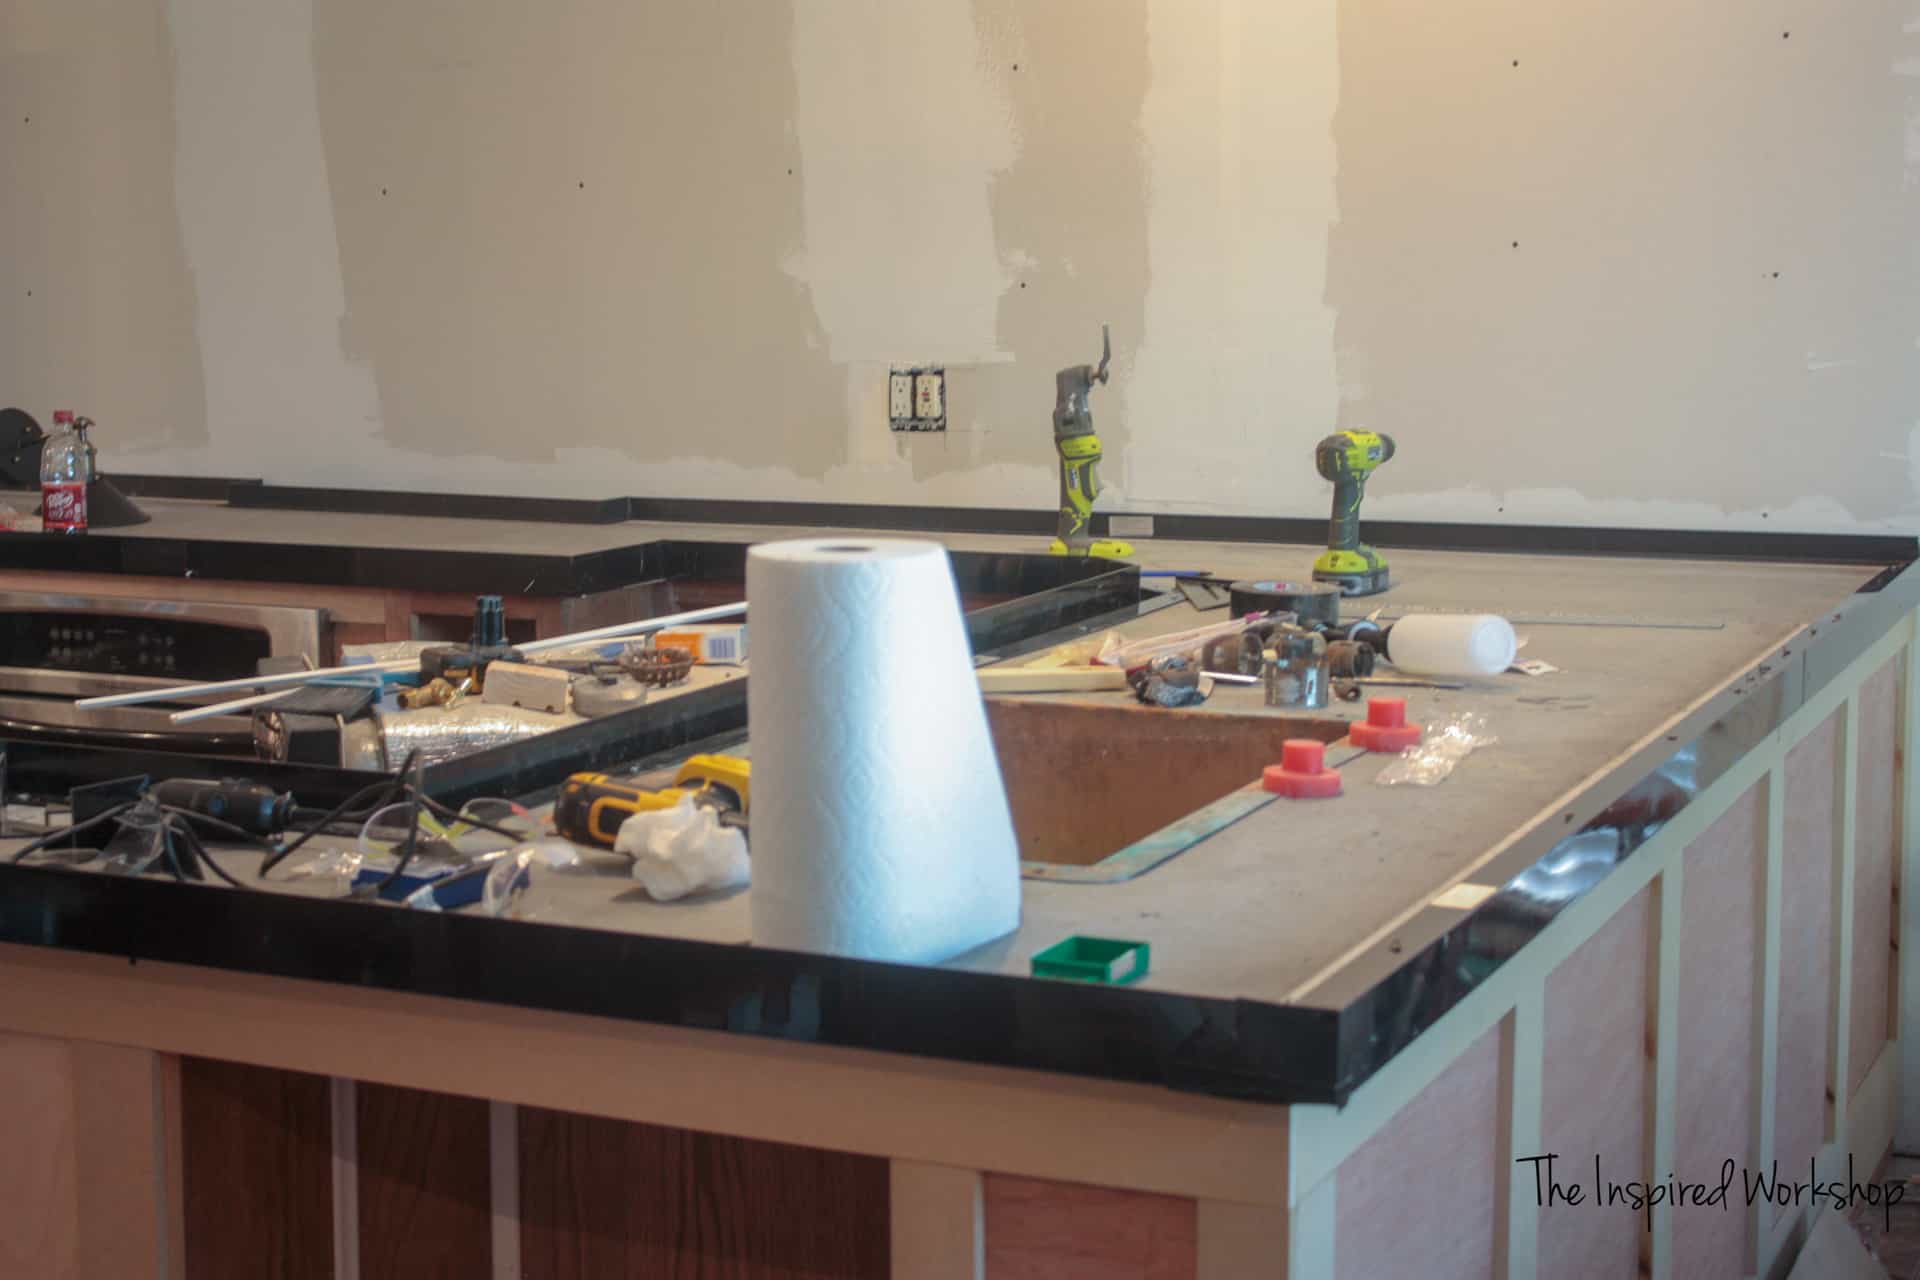
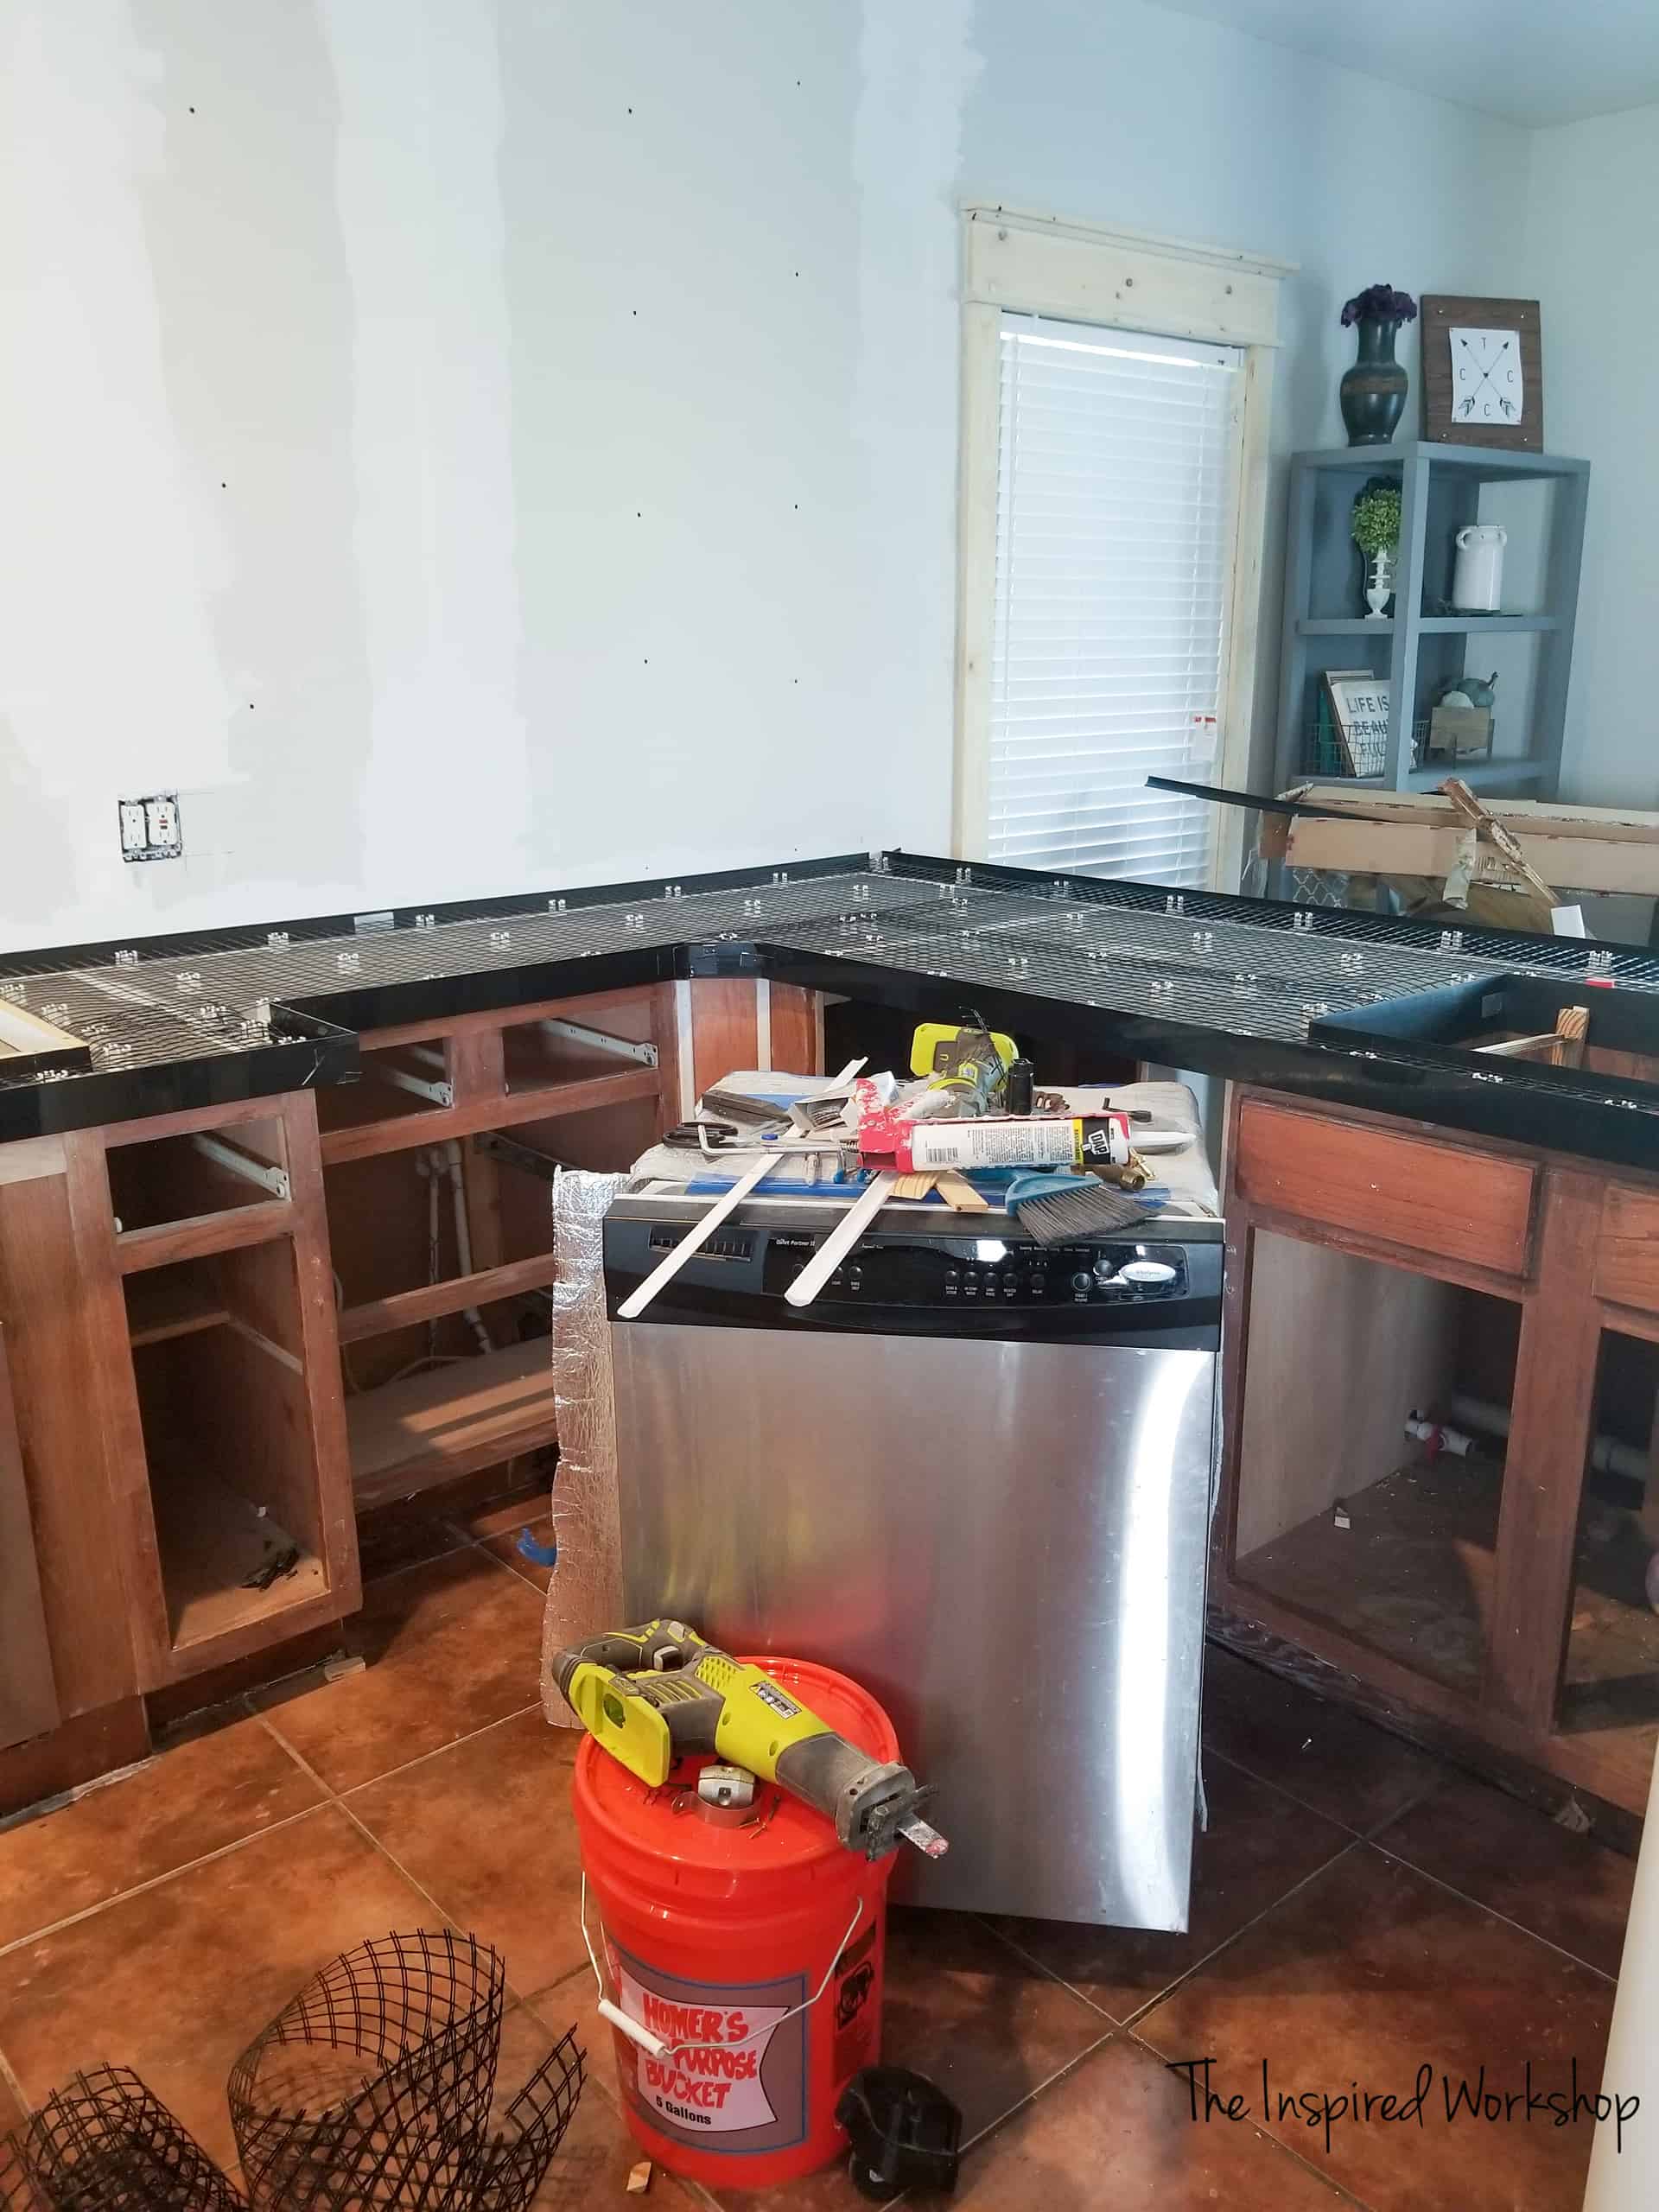
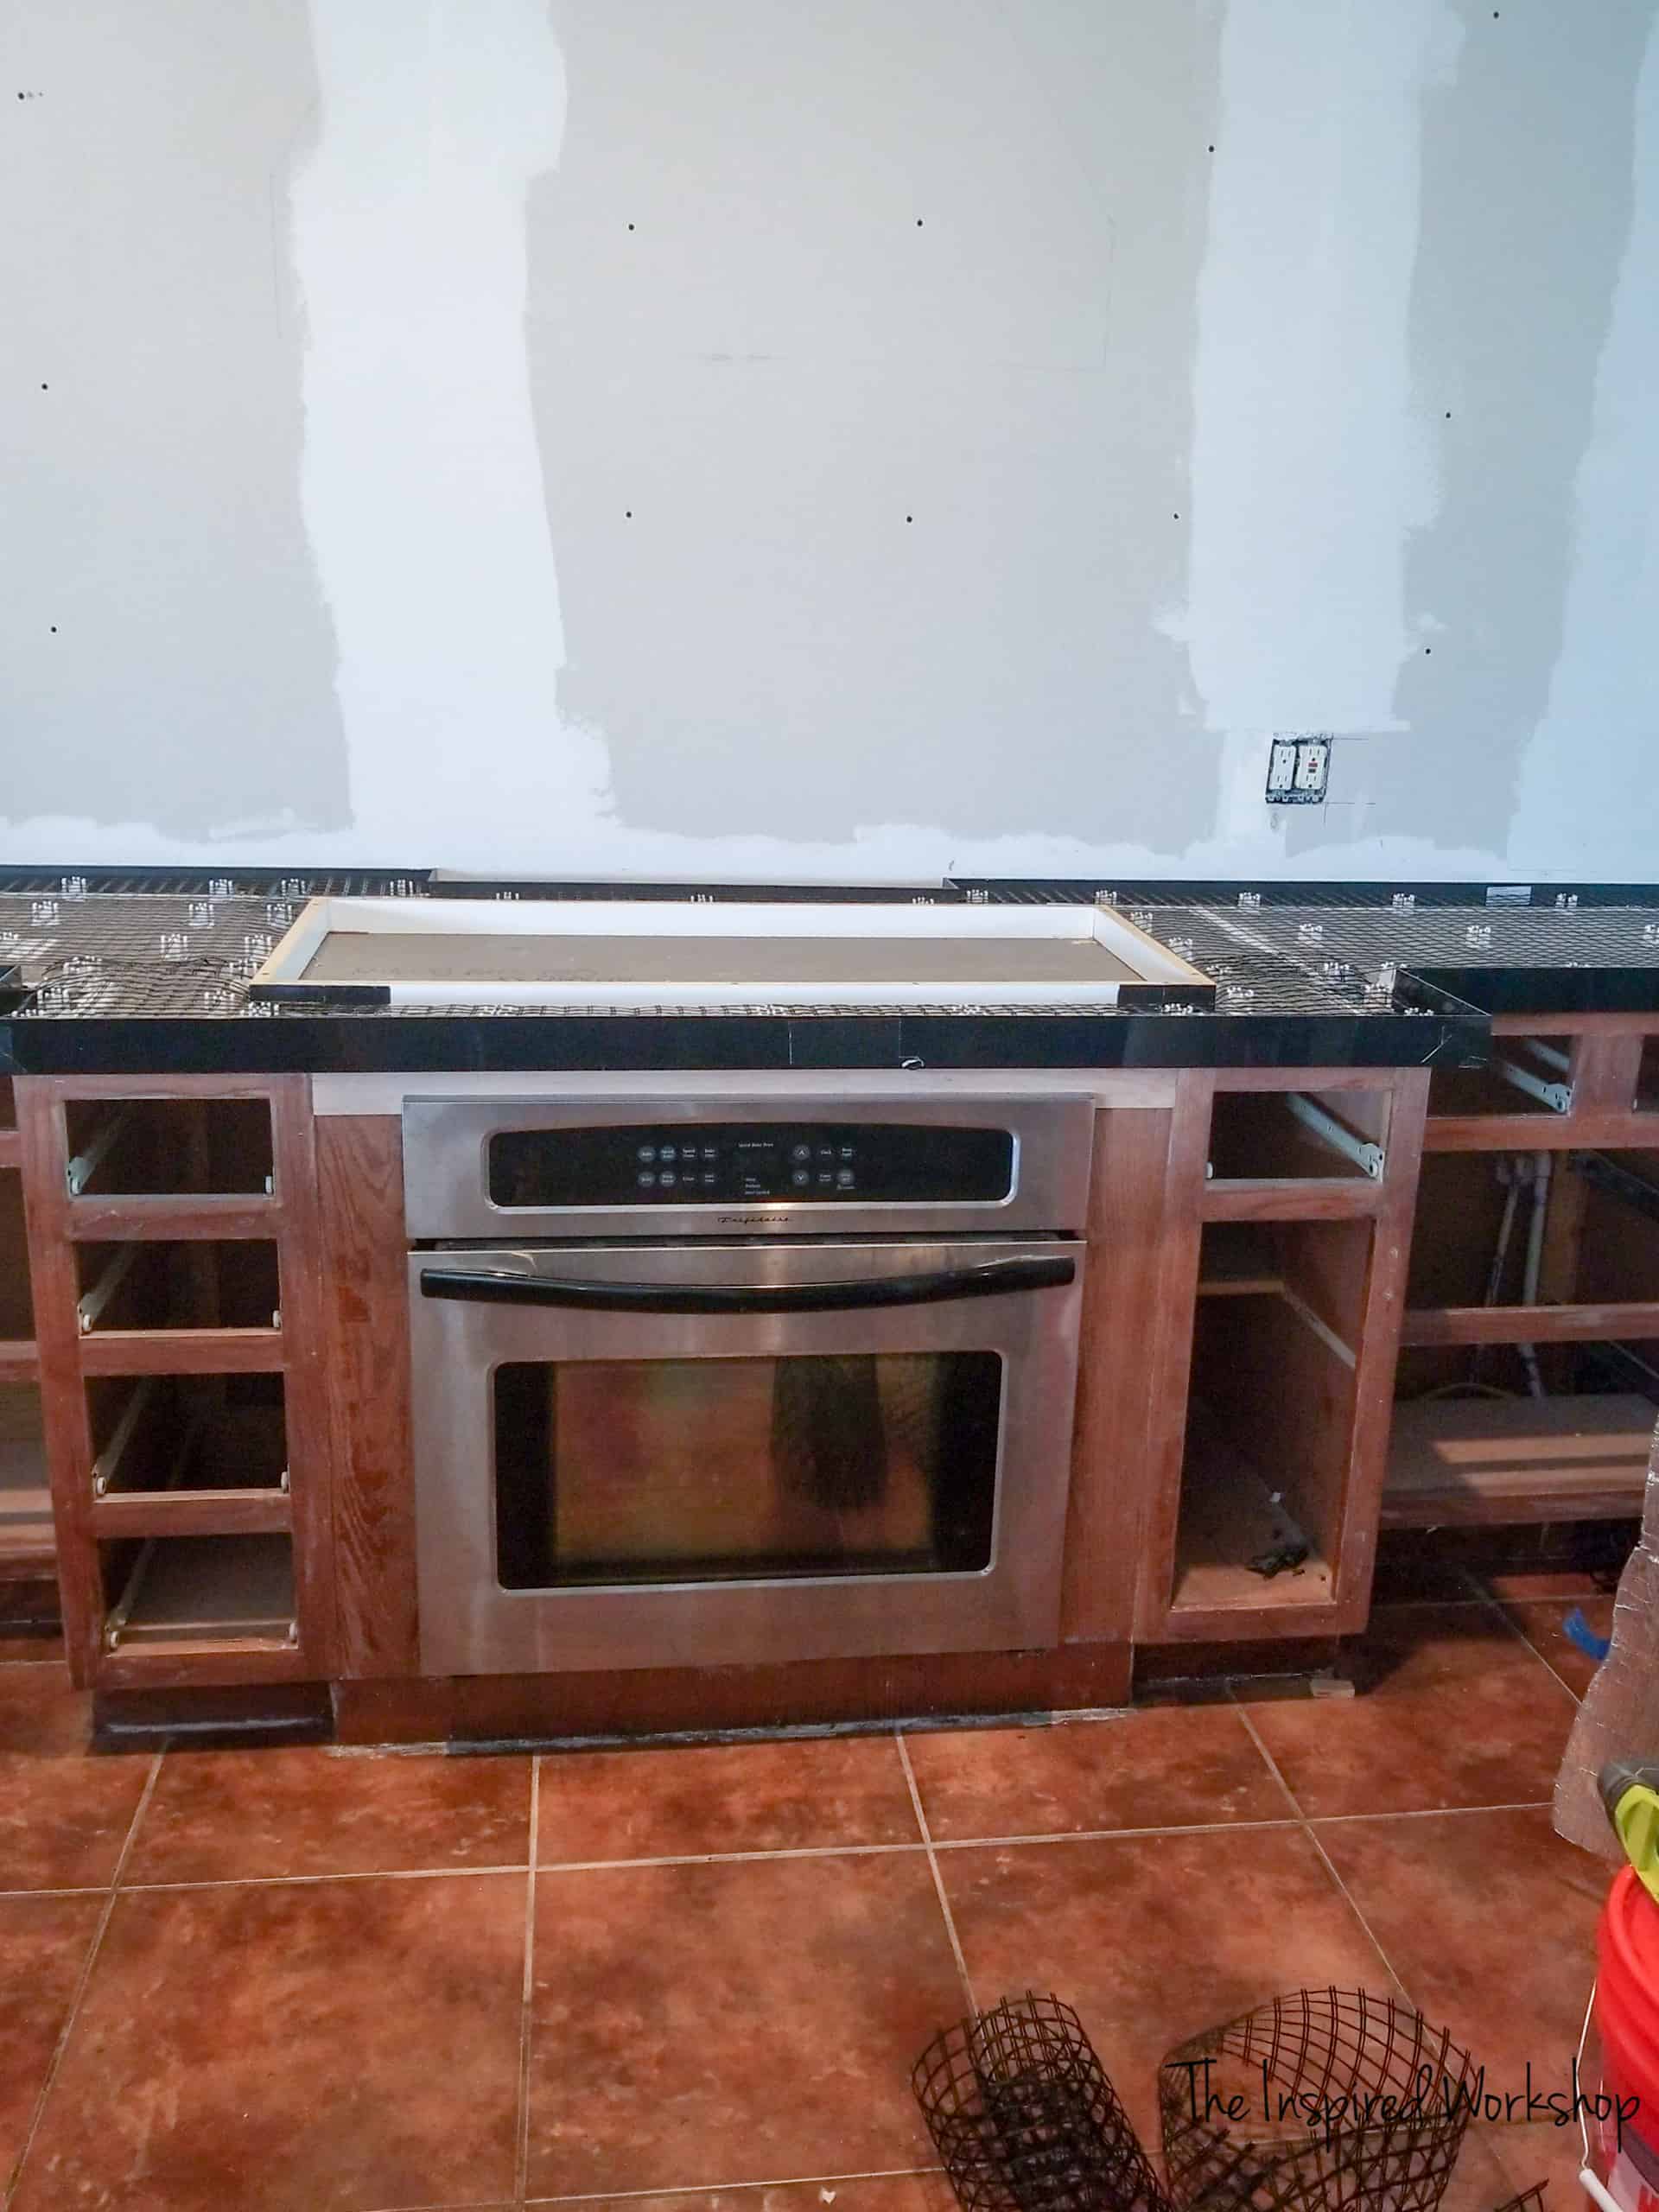
Anyway, once the edge forms are in, AND THE COUNTERS ARE LEVEL, another part of the Concrete Countertop Solutions system, is the fiberglass mesh and little clips to hold it in place. This keeps the fiberglass mesh right in the center of the concrete so it doesn’t float to the top or stick out anywhere.
And since the main goal of the mesh is to keep the concrete from crumbling and cracking, being held right in the center is best. There are also fiberglass fibers in their concrete mixture as well to help with this! I am telling you, this system is pretty awesome, and they have thought of everything!👌
Here’s the kitchen awaiting its pouring!
Mixing and Pouring the White Concrete for the DIY Concrete Countertops
So, my husband was heading out of town for over a week, and remember I was trying to complete the kitchen in 6 weeks for the One Room Challenge…so I had no time to lose! He had 4 hours before he had to leave, and so we were going to do the island together and then I was going to try the rest by myself. Well, that plan didn’t quite work out the way we planned…our corded drill I bought, yeah, it wasn’t made for mixing concrete!
It burnt up after less than 5 minutes of trying to mix that concrete!😵 My hubby finished mixing that batch by hand and we put it into the island form so it wouldn’t be wasted. But now I had to drive an hour to get to a store that sold a drill that was able to mix concrete! An hour there and an hour back…yeah my hubby was gone! On my own now, I had to mix the rest of the concrete and pour it myself! After that fiasco, I was a little worried!😰
Luckily, the new drill, even though it was from Harbor Freight, worked great! I was able to mix the concrete and throw them in the form in minutes…only I about died having to lift the 5 gallon bucket of concrete over the counter all 8 times I had to! Lol! That’s why I wanted to make sure and state that in the first paragraph!
The instructions from CCS are great and well written on the packaging materials! For the white concrete, you just mix it with water in a 5 gallon bucket, water first, then slowly add concrete.
*Note: My video directors were not the best in the business,😂 so they only caught parts of this and that…but I compiled the little footage that I did have to create snippets of video!
Mixing and Pouring the Gray Concrete for the Concrete Countertops
I decided after pouring the white concrete on the island that maybe it would be better to wait and not finish the kitchen on time, than mess up the whole main counter! Because once you get started, there really isn’t any stopping and the main counter is one solid, very large piece so if I started it, I had to finish it! Let me just say, a few extra hands are worth the wait! Yep, lesson #2 learned.😆
I purchased the island screed from CCS to make the island a breeze…ha ha ha… the joke was on me, the island was larger than the screed! 🤦♀️ I had to run into the garage and try to find the straightest board that I could. Talk about sweating!
This is typical of DIY projects around here, the faster you learn to roll with the punches, the faster you learn to enjoy the challenge… I think! There is always something new, something you didn’t think of, and something you have to quickly think on your toes to improvise! I think I enjoy that!🤔
Anyway, fast forward a week or so and my hubby returns home! Yay! Now we can do the BIG countertop! s Another problem, my grandma was in the hospital fighting for her life, if you have been following along for a while, here and there I have talked about her bout with liver cancer.
This happened to be the last bout she faced, as it did take her life shortly thereafter. We poured our counters on the Wednesday before Thanksgiving, I rushed out and left my hubby to smooth them at the hour mark and went to see her in the hospital. She bravely hung on until she was able to eat her thanksgiving meal and passed away the Sunday after Thanksgiving.
My countertops will forever remind me of her! She would have been so proud of them and my hard work in here, even though she wanted to see it finished and was never able to! I know she would have been! 😊
Let me dry up my tears! Back to pouring these babies! So with help, someone mixing and someone pouring, it was so. much. better. It was still a lot of work don’t get me wrong…but oh so much easier than the pressure of doing it without any help! Lol!
We worked and poured, mixed, and poured some more.
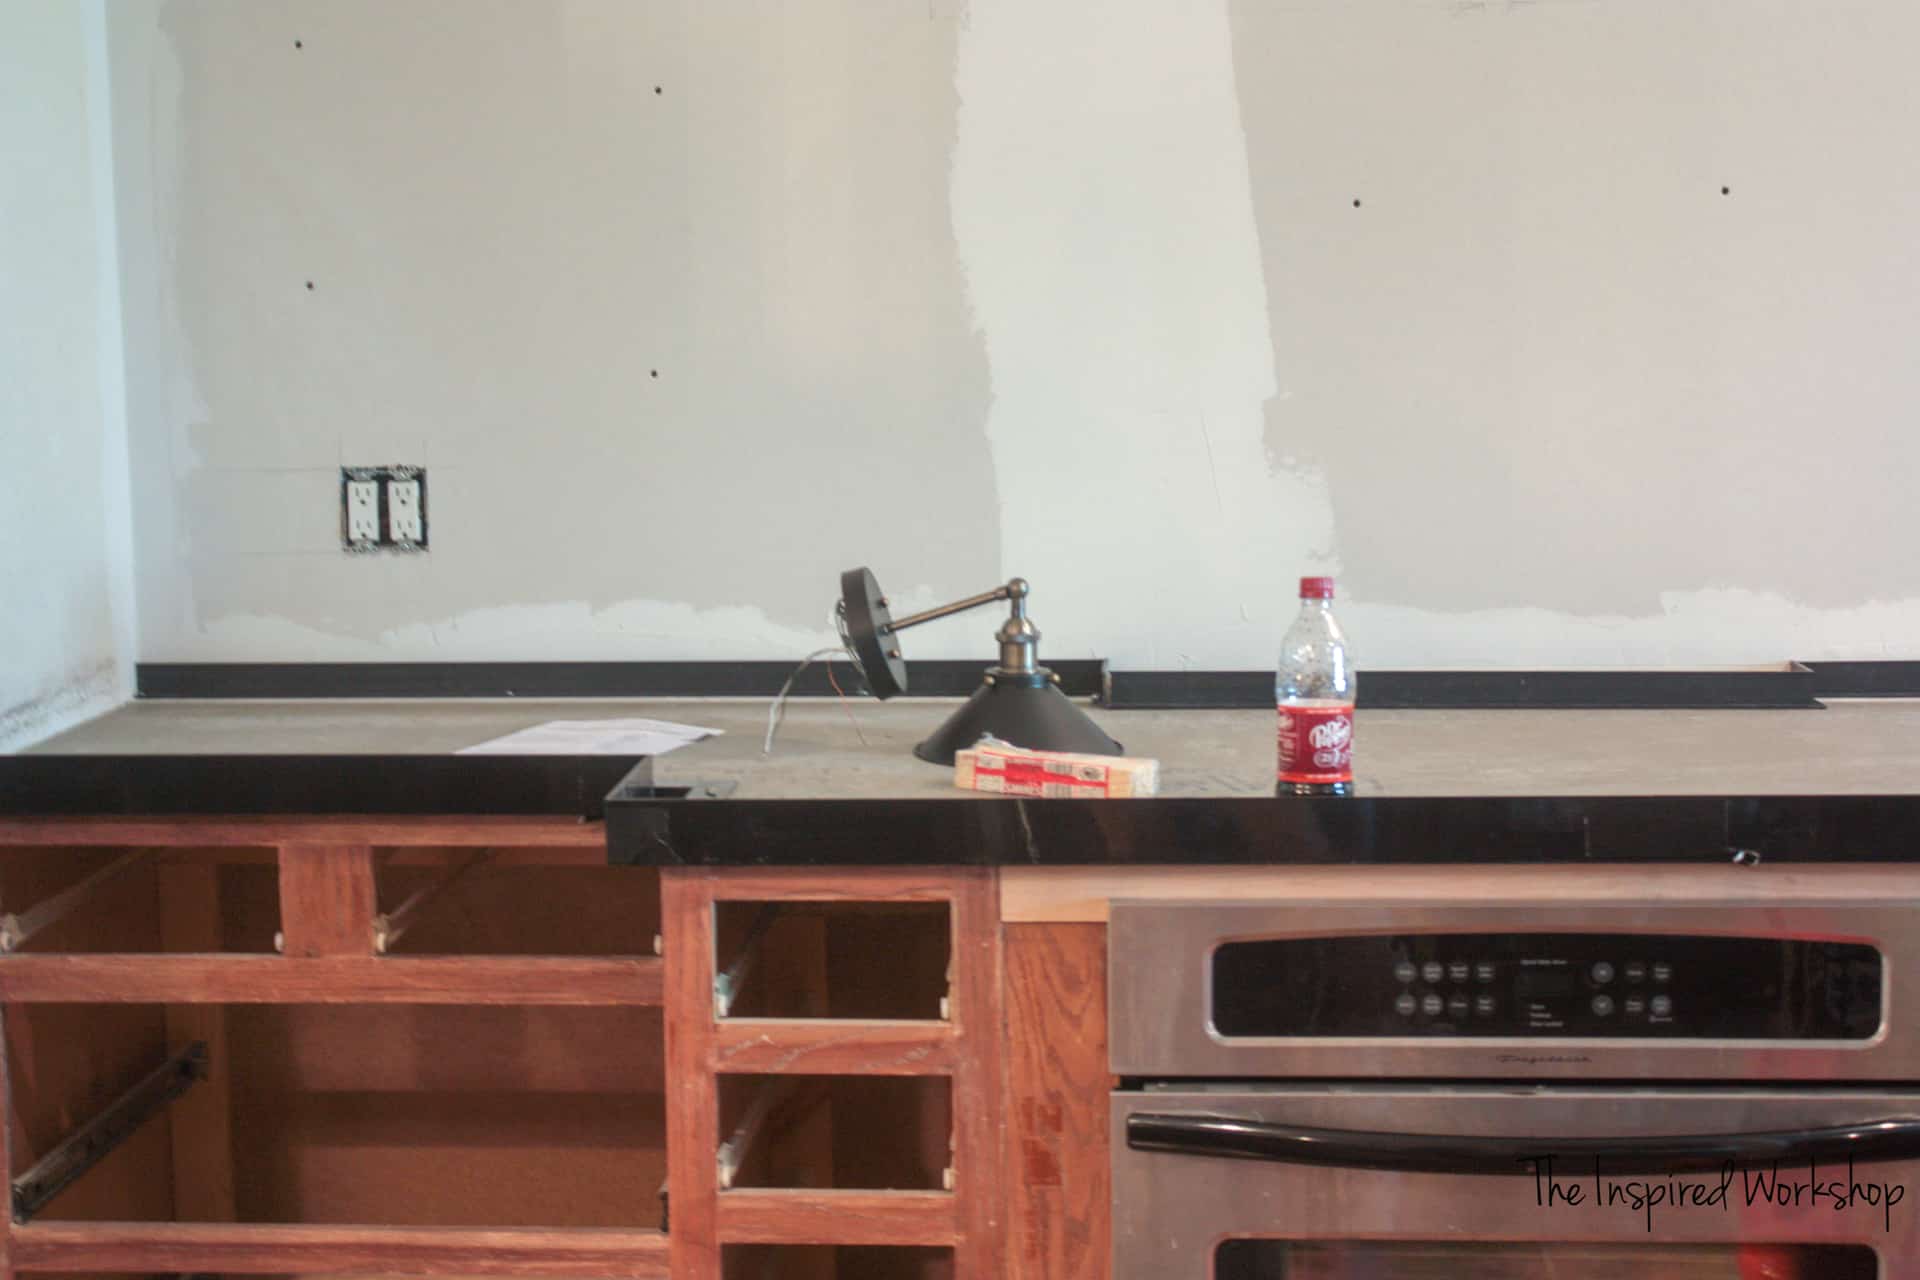
Once they set for a couple of days, we sanded the edges of the edge forms and popped them off!
Viola, the edges looked like some kind of glass or marble, it was crazy how smooth they were. Since we smoothed the top, of course, it wasn’t quite as smooth as the edges! We just used our orbital sander to sand the tops and one thing to note, once you sand down you expose small aggregate…it’s tiny flecks and you can’t see them unless you are right on top of it, but it is what creates the overall tones of the concrete!
The white mix, you had to sand down a lot farther to get to it. I think it’s because I mixed the white a lot thicker (drier) than the gray. So that is something to be leery of if you don’t want to see aggregate, they have to be perfectly done…and even then I’m not sure it’s possible! Lol!
So two things here…first, we didn’t have the trowel marks in the gray counters quite as bad as on the white counters…so I am thinking if you mixed the concrete a bit thinner than I did the white, but a hair thicker than we did the gray…they would be perfect! Wait, actually I think the white concrete with two people working it so that it doesn’t dry as fast would work the best! 😅 Then you would not have the trowel marks…I think that’s an experiment I need to try! Hey, I have a bathroom counter that could use a makeover! Lol!
Anyway, I don’t mind the aggregate or trowel marks, I love the handmade, organic look of them! You know my favorite mug is from Magnolia Market and is handmade and not at all perfect…but I love it! Perfectionism is overrated! (Ahem, says the DIYer that can’t manage to do anything perfectly!😂😏) Here are the imperfections best as I can capture them!

Sealing the Concrete Countertops
Once they are smoothed out to your liking, you seal them with the Aquapoxy! I love this stuff! It is so easy to apply, it is thin, not like I expected. I thought it was going to be thick and hard to apply, showing all imperfections, but nope, you roll it on with an epoxy roller and it dries beautifully! No talent is needed here, thank goodness! 😎 I thought I had pictures and a video of us applying the epoxy but I couldn’t find them anywhere! Sorry about that…but if you got this far, sealing is the easiest part!
Let it dry between coats and sit for three days I believe and they are DONE! Finished, ready to go, finito! The kitchen is back in working order! Yep!
All in all, it was not a bad experience and I can’t wait to try concrete countertops somewhere else in the house! I’d love to know what you think, would concrete countertops be something you would consider? Let me know below!
Like what you read? Make sure and share it as that totally makes my day! Thanks for stopping by!

Wanna save this awesome DIY Concrete Countertop post for later? Pin it!


Love all the details and photos!! They’re beautiful!! My question is on the epoxy. Is it food grade safe? Does it even need to be? Ty for your help!
Hey Megan!
Thank you so much! The technical data sheet states, “Z Aqua-Poxy is generally considered safe for countertops and food prep surfaces.” Now, I do not cut food directly on it because it can damage the epoxy, I also do not ever place any food directly on them, I am really weird and feel like my countertops are always dirty…and then when I have just cleaned them, I feel like the cleaner could be worse to come in contact with our food than a dirty countertop! Lol! So I always have something between my food and the countertop! Not sure if that is helpful or not! Lol! Let me know if you have any other questions! Have a good one!
Cara
Perfect imperfections! I love the look and would want it this way. Going to try in the summer.
Thanks!
Thank you so much Heather, I appreciate your kind words!
Good luck on your countertops this summer, let me know if you have any questions when you start preparing for them!
Thanks so much for stopping by! Have a good one!
Cara
Hi Cara!
Great post! I am wanting to tackle this project in my own house.
Question: What are the drips on the edges? Can that be avoided? I was wondering if stop sealer started leaking down?
The project looks great! I’m not sure if I saw the difference between the white bd gray colors. I have to go back up and see again!
Thanks for such a detailed how-to post! You killed it!
-Kalie
-top sealer …
-white and gray colors….
(Whoops! Typos 🤣)
Hey Kalie!
Thank you so much for your sweet comment! So, those areas that look like drips are not drips! Lol! What looks like drips is two different colors of gray concrete, when you pour the concrete with the black edge forms, you can’t see the edge until it is dry and you remove the edge forms! The only thing I can think would help this would maybe be to keep all your edge concrete out of the same batch so it would be a more consistent color?! I’m honestly not sure what caused the color variation, it only happened in three places and it is weird because I can’t think of anything other than the batch colors being different! Fuuny thing is, it really stands out in pictures but isn’t nearly as obvious in the kitchen! Anyway, hope that helps, wish I knew more about why it happened!🫤
Thanks for stopping by! If you pour concrete countertops, I would LOVE to see them! Best of luck on them as well, let me know if you have any other questions! Have a good one!
Cara
This post is so detailed. My family and I are about to move and I am thinking I am going to attempt this DIY. I was curious… obviously supply costs etc may very (probably increased) from when you did this but what was your total cost for this project?
Hey Jordan!
Okay, I went back and looked at the supply list and looked up the supplies on Concrete Countertop Solutions website, at current prices, I believe a kitchen of the size of mine would cost around $1500 (that price includes 400 for freight which I have no idea if that has increased, but that’s what my freight cost)! I am pretty sure I only spent $1200 total when I did mine so the cost has slightly increased…what hasn’t, right?! Lol! If you wanted to do all white concrete it will run a little more expensive! Hope that helps! Thanks for stopping by, have a good one!
Cara
Cara
Wonderful post it is very inspiring and informative content good work keep it up.
Thank you so much! I appreciate the kind words! Thanks for stopping by!
Cara
Great and very detailed post! Thanks so much for taking the time to put it all in for us newbies! I’m definitely considering concrete countertops for our kitchen re-model… 2 questions though… 1. How are they holding up considering the time you’ve had them? Cracks, stains, etc.? 2. Do they require any upkeep for maintaining the seal or special cleaner for day to day use?
Hey Lisa!
Thank you for your kind words on my post, I appreciate it!
I will say after having them for a little over 3 years, I still LOVE them! They did have one spot that they cracked shortly after pouring them, as I believe I mentioned this in the post, sorry to be redundant if I did, but it was the same spot the previous concrete countertops cracked as weird as that is…Lol! Anyway, we mixed a small amount of portland cement and rubbed it into the crack, sanded and sealed, you would never know there was a crack there!
As far as the sealer goes, I wipe them down daily and except for a couple places, like where my son superglued something to them (on accident I’m sure, LOL), it pulled the sealer off, and I accidently spilt some lemon essential oil and didn’t realize it…and it ate through the sealer! Oopsie! Lol! But other than that, user error, they have been great! Concrete Countertop Solutions has a new pour on epoxy sealer that I think I may try once I sand them down to reseal them, but I don’t feel like they need it yet just because of the two nickel size spots!
Hope this helps answer your questions and feel free to ask any others you may have! Thanks for stopping by! Have a good one!
Cara
Hi there! Love your breakdown of the step by step process! I am a total newb and have never diy’ed anything concrete! But we are gearing up for a kitchen remodel on a budget and I love the rustic yet “modern farmhouse” look of concrete counters! I find the rawness of concrete so beautiful! Did you choose to do the island in white concrete and the main countertops in the gray? Would you do it this way again in hindsight? Thanks!
Hey Heather!
Thank you so much for your kind words, I love sharing the process of all my projects so that even if you have never DIY’ed anything you will have the confidence to try…so your comment is much appreciated!🥰 Yes, I did purposely do white on the island and gray on the rest of the counters! Lol! There were two reasons for this, first, the white was double the cost of the gray so it fit my budget better to only accent with the white and do the remaining gray! And second, I wanted a dark color on the island and white cabinets everywhere else, white concrete countertops really wouldn’t look good on white cabinets, and the light gray of regular concrete wouldn’t look good on the dark gray that I chose, it has very brown undertones! And yes, I would still do it the same way if I were to do it again, I would just hope to get the white mixture poured a little better! Lol!
Thank you so much for stopping by! If you tackle concrete countertops I would LOVE to see them! Have a good one, and feel free to ask any other questions you may have!
Cara