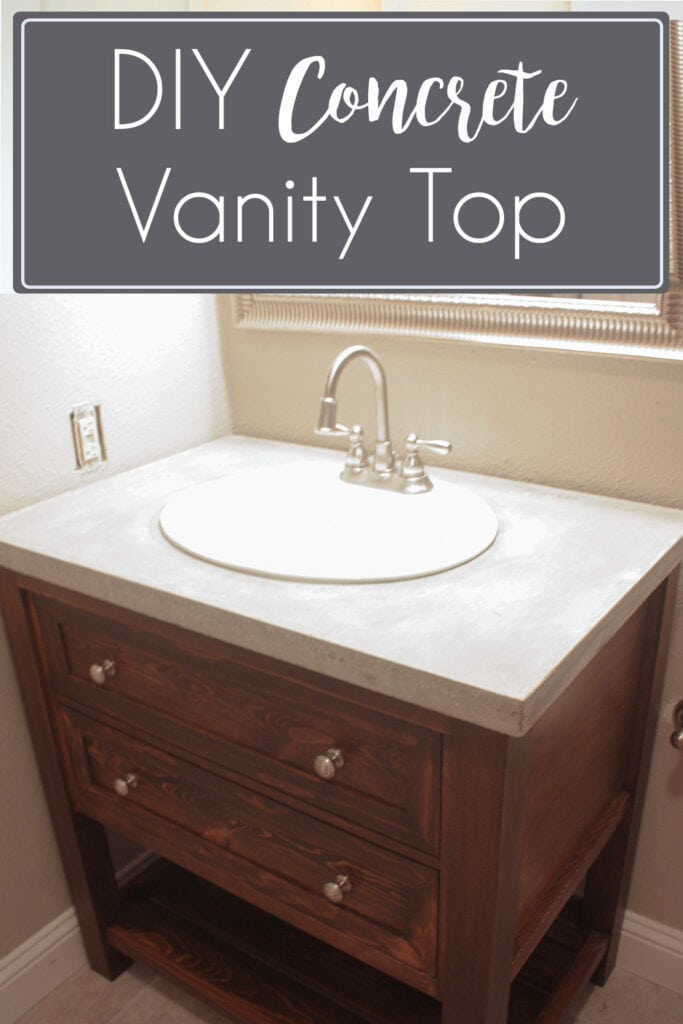
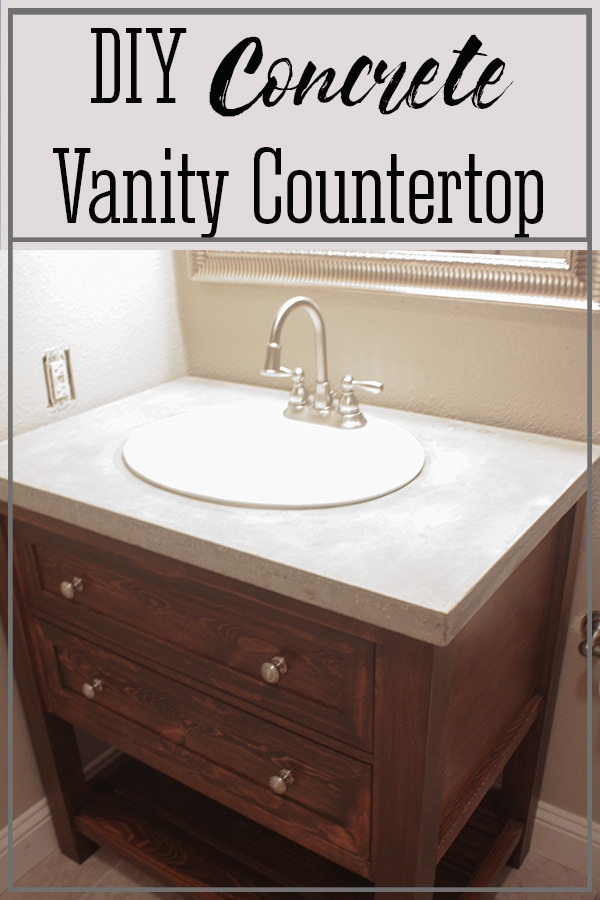
DIY Concrete Vanity Countertop

Need a beautiful top to adorn your newly built DIY bathroom vanity, how about a gorgeous and easy-to-make concrete vanity countertop? Concrete is a simple medium to work with even though it is a little messy, the finished product of a concrete vanity top is absolutely worth it!
Do you follow me on Instagram and Pinterest? Make sure to do so, that way you don’t miss the behind-the-scenes, in-betweens, and shenanigans of The Inspired Workshop!!
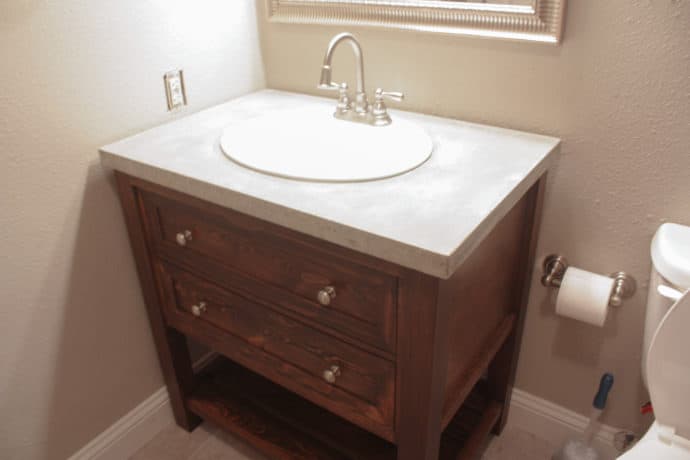
Alright, so you’ve built the vanity and she’s looking kinda naked, let’s put a top on her! 😏 Let me make you aware, that I was so scared to work with concrete! So scared in fact, I took 6 months to build the vanity just so I wouldn’t have to move on to the top! Lol! But, this also made me feel so stupid once I actually HAD to get it done, I could not believe that it was as easy as it was!! I’m telling you I want to put concrete countertops on EVERYTHING, and that means it was EASY! 😂
Update! Since making this concrete vanity countertop I have done many other concrete projects, if you would like to see this DIY outdoor dining table with concrete benches, this DIY round concrete pedestal table, or when I did my entire kitchen reno with concrete countertops! And if you want to start super small and try out a craft with concrete to see how easy it is to work with, you should try making these adorable concrete Christmas trees!
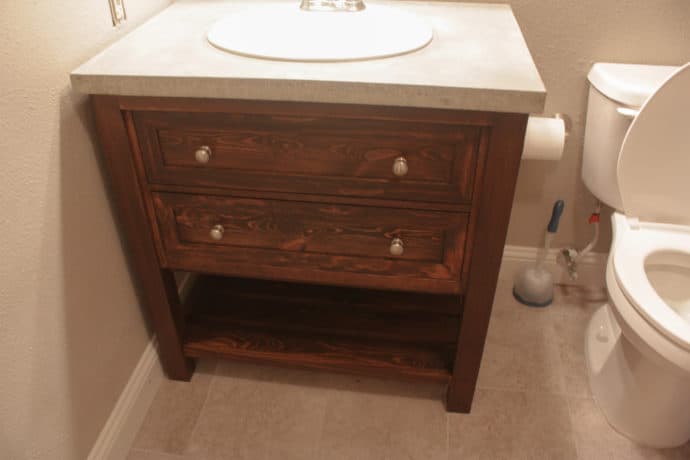
The tenant has repeated over and over to my sister that she wants the vanity when she moves out, she just loves it, which I can’t blame her! As of my typing this post it has been six months since we installed the vanity and she says it looks great, with no cracks or stains or anything!! That was another one of my fears put to rest thankfully!!
I didn’t get as many pictures of making the concrete vanity countertop as I wish I would have because you do have to work pretty fast once you get the concrete mixed! I didn’t want to mess it up trying to take pictures and then I realized a video would have been perfect, so the next concrete countertop I do, I’ll make my first video!! Woot Woot!! If you need more in-depth pictures diypete.com has some excellent concrete tutorials that helped me figure this all out!!
Gathering Supplies for the DIY Concrete Vanity Countertop
All in all this DIY concrete vanity countertop cost around $50 bucks for everything to make the countertop, then the sink was $40 and the faucet was $40! Not too shabby to have a complete concrete vanity top for less than you can get anything in a store!
Materials for the concrete vanity top:
**Note: Amazon links below are affiliate links! Affiliate links are links that pay me a small commission, at no extra cost to you, should you make a purchase after clicking a link! I always appreciate you shopping my links!
- 1 sheet of ¾” melamine (4×8)
- 1 bag Quickrete 5000
- 1 bag Portland cement
- Hardware cloth – grab this at your local hardware store – Amazon prices are crazy on the small rolls!
- Caulk and caulk gun
- 1 ¼” sheetrock screws
- Drill
- Drill bit
- Sink template (comes with whatever sink you buy)
- Jigsaw with knife blade
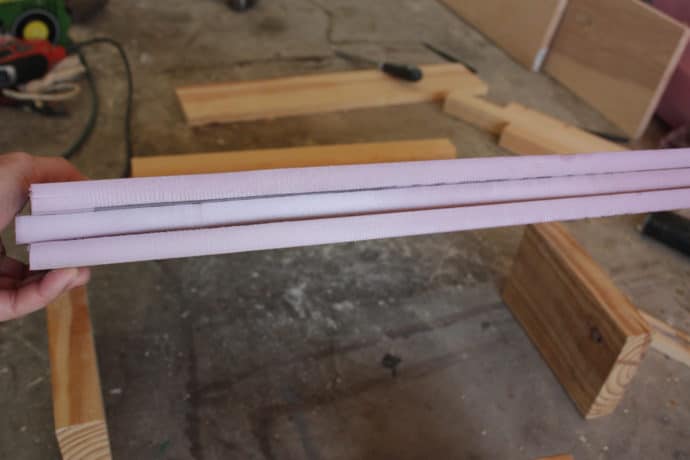
- 2×2 piece of 1 ½” foam insulation
- Water
- Container to mix concrete in
- Shovel to mix with
- Respirator
- Gloves
Cut List for the Concrete Vanity Top:
- 2 – Melamine pieces ripped to 2 ¼” x 36”
- 2 – Melamine pieces ripped to 2 ¼” x 27”
- 1 – Melamine piece ripped to 24” x 36”
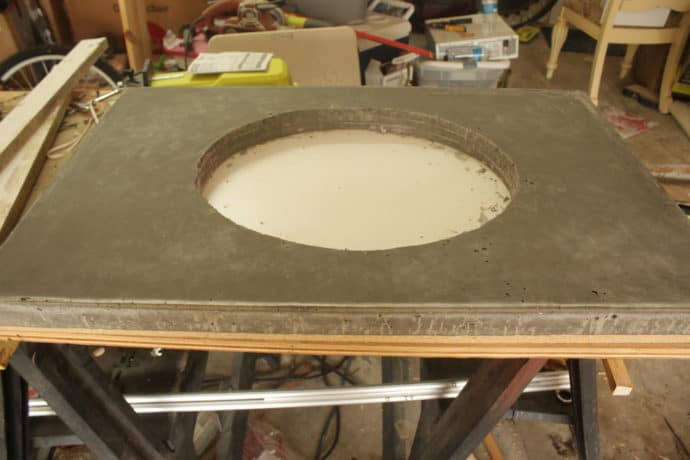
Building the Mold for the Concrete Vanity Top
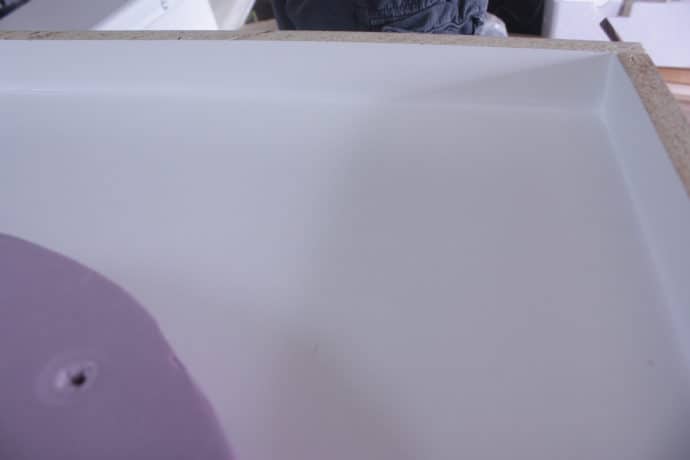
Once you have all your melamine ripped down to the sizes above to build the mold for the concrete vanity top, you will lay the 24” x 36” piece down flat! Attach the long sides first, predrill holes slightly smaller than your screws every six inches along with the side piece!
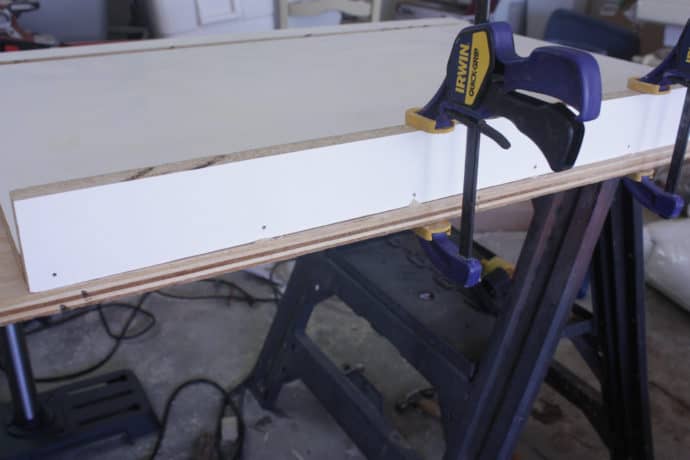
Then screw them in, do not use glue!!
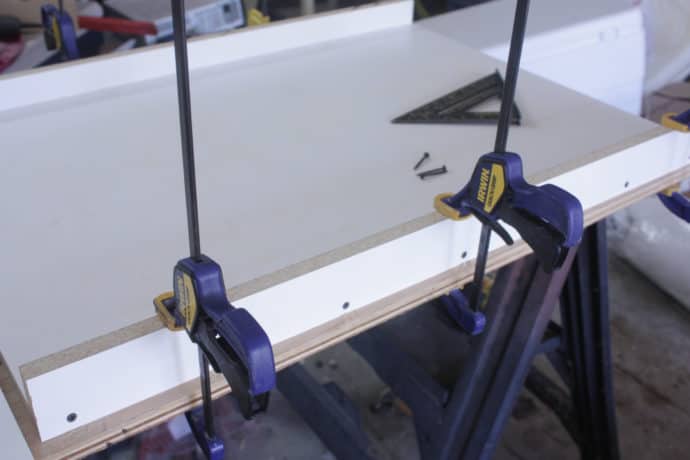
Next, attach the short sides the same way. Predrill holes and attach with screws and no glue!!
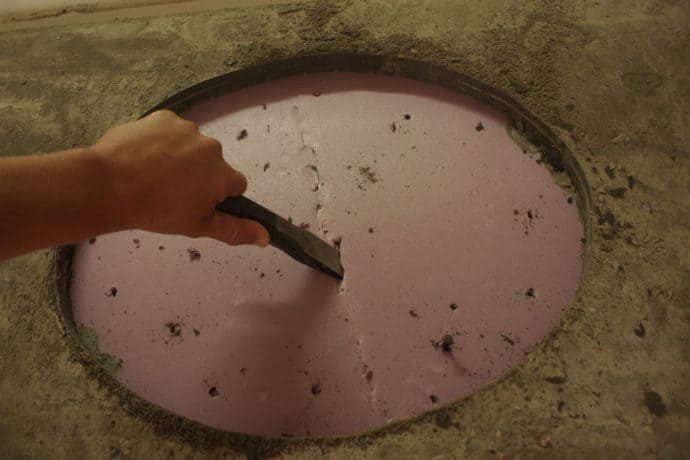
You need to purchase your sink ahead of time to make sure your cut-out will fit your sink! Then using the template included with your sink, trace the shape onto your foam insulation! I was not able to find the thick foam insulation in a 2×2 piece anywhere around me, so I opted to buy a full sheet of ½” insulation and cut three 2×2 pieces out of it, and glue them together! I just used a spray-on Elmer’s craft glue!
Using a knife blade for the jigsaw, just cut out the shape of your sink! Since the sink I am using is a drop-in sink, the edges didn’t have to be perfect, but if you want to use an under-mount sink, make sure the edges are perfectly smooth and I would use packaging tape around the edge to make it perfectly smooth!

Using 1 1/2″ or 2″ screws, screw down this oval foam right in the center of your melamine!
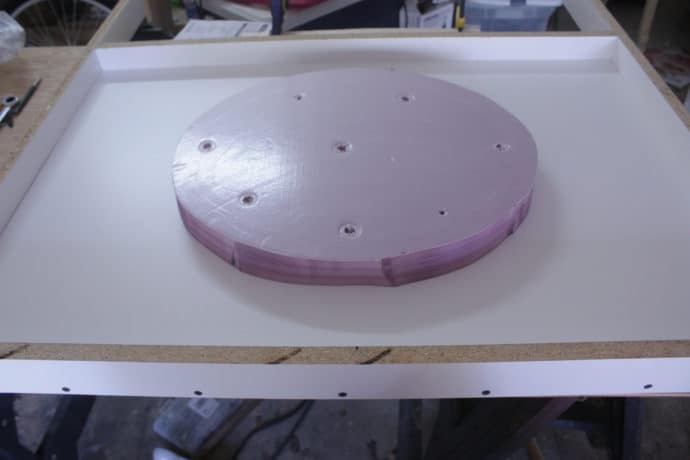
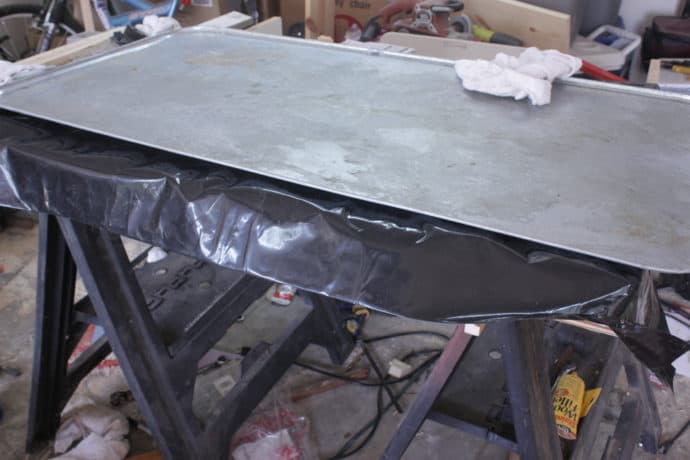
Caulk all around the edges of your mold to make sure there is no leaking of the concrete and it gives it a nice rounded edge!!
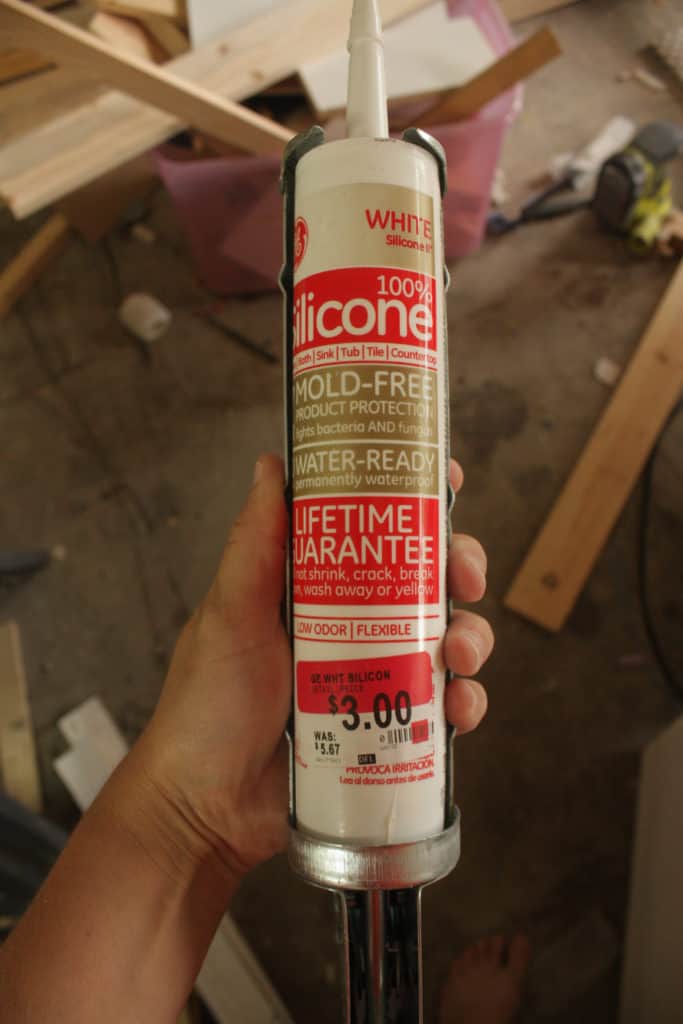
Got my caulk on clearance at Wal-Mart! LOL!
I would place some packaging tape over the exposed edges of melamine to keep it from swelling! I did not do this, and although it didn’t affect the countertop itself, I cannot use the melamine again, whereas if you seal it with the tape, you can use it over and over again!
The last thing, before mixing your concrete, cut and lay hardware cloth inside the mold! You will need metal shears to cut this, make sure and cut out the oval of the sink form! Also, leave a good ½” to an inch on each side, top, and bottom. You don’t want to go all the way to the edge and have metal sticking out of the sides!
Pouring the Concrete Vanity Countertop
Now mix up the concrete just as the instructions on the Quickrete 5000 bag states! I used one bag which was JUST enough to fill the mold so make sure not to spill or waste any!! I just used a shovel and mixed it together and shoveled it into the mold!
I had my husband get a shovel as well and help me just to make sure it was done quickly enough, remember I said I was scared of messing it up! But turns out, this really wouldn’t have been necessary! Lol!! It did make it easier though, so if you have someone to help out it is a time saver!! Taking a 2×4 across the top, we made sure it was all level and smooth, this probably took us 30 minutes from start to finish!!
Last, I took a back massager and vibrated my mold for an hour on the bottom, sides, and on top of the melamine edges!!
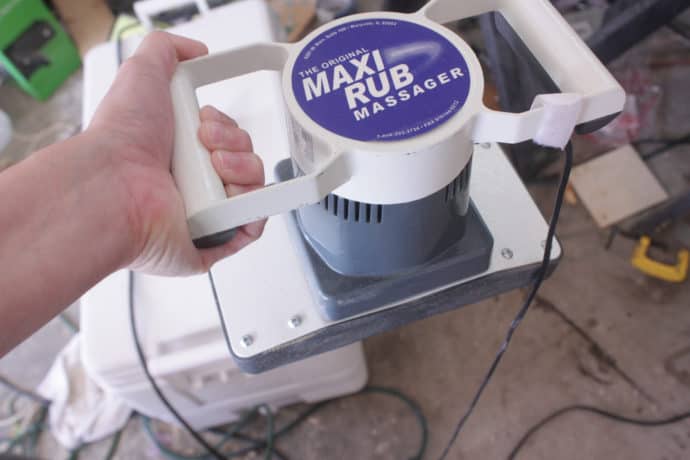
The area that had the most little air bubbles was the side that wasn’t messed with as much while we were putting the concrete into the mold so I am not sure if my vibrating had much to do with the outcome or if working the concrete more with the back of the shovel and “settling” the concrete (don’t think that’s a real concrete working term but it’s the best way I can think to describe it) Lol!
You know taking the shovel and gently vibrating the concrete as you are flattening and smoothing it!! I probably would try vibrating another hour or so maybe after letting it sit for a few hours to try and see if that helps eliminate all the air bubbles, but that may or may not even do any better!! Lol!! I was actually pretty happy with the few air bubbles I had…I guess I thought there would be a ton so when there were only a few it made me happy!!
Now it’s time to just wait, and wait, I only left it in the mold for 72 hours. I know some people say a week but others say 36-48 hours is fine!! So I figured, I couldn’t go wrong with somewhere in between!! And it did just fine! I kept it covered with a black contractor bag and a metal oil pan to help the water evaporate slowly!
The day then arrives to take to mold off of the countertop!!
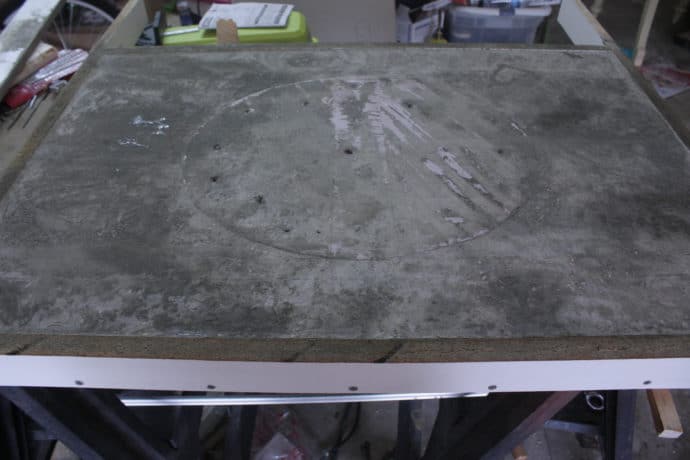
Remove the screws out of the sides of your mold and out of your foam insulation…then using a sharp object break out the insulation!
It’s ready to be revealed!! So you ask your handy hubby to help you flip it over because it is heavy as a mofo, and you hold your breath, and pray like heck… and…low and behold, it is beautiful!!! It was like when you push and push and then meet your baby for the first time…okay, maybe not quite like that…but the suspense about kills you!!😂🤣
Finishing the Concrete Vanity Countertop
After letting it sit for a few hours out of the mold, sand it down with an orbital sander…it may expose more air bubble holes but in a minute you are going to fill them all in any way!! I used 120 grit sandpaper. Like in the picture above…I had already sanded and it seemed like they were appearing everywhere!! Haha!!
Mix up your Portland cement, there really isn’t an exact way about this, just mix it and make it a little more watery than the concrete itself was when you poured it, and rub it into all the holes! Make sure and wear gloves for this! I basically rubbed the mix all over the whole countertop because there were tiny holes that you may not notice!

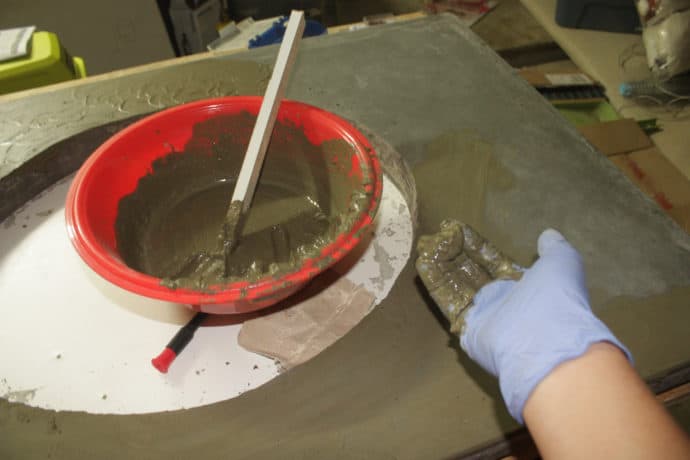
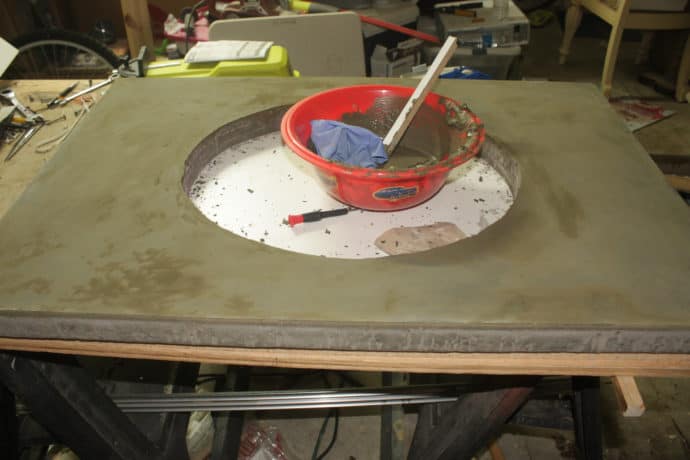
Once the Portland cement is dry, sand again! This time I used 220 grit sandpaper and it turned out buttery smooth!!
Moving on to sealing this baby! I used this tile, grout, and concrete sealer from Tile Lab! It was not my first option of course, but when you need something that day, and you live in a town that only offers two small hardware stores you try things you wouldn’t normally try!! Lol!!
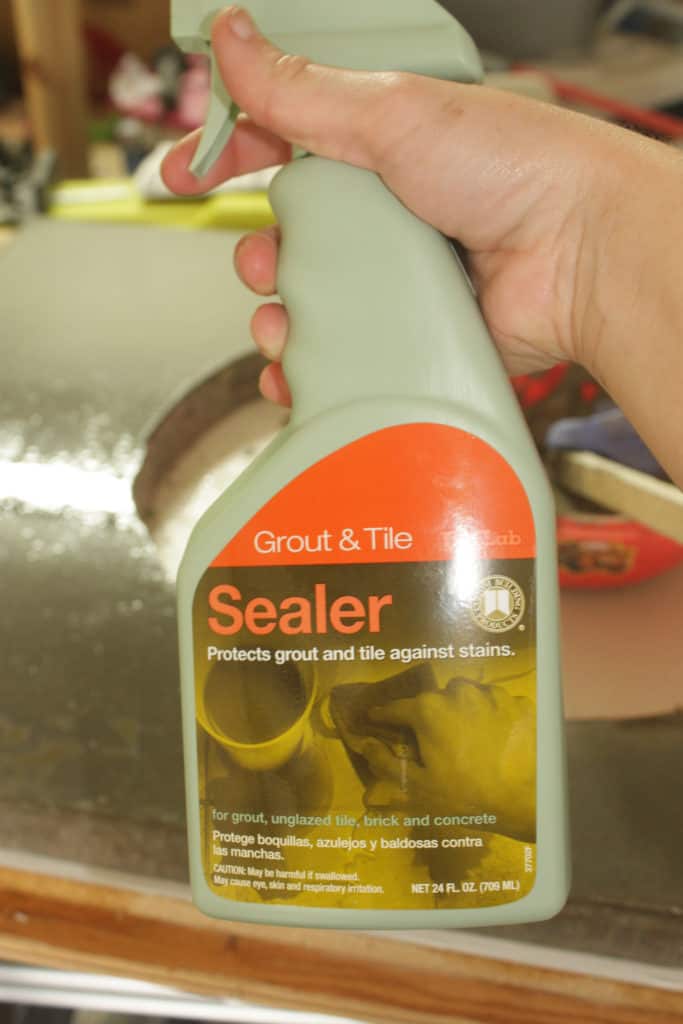
It was super easy to use, you just spray it on, wait 5 minutes and wipe off the excess…you keep repeating this process until nothing seems to absorb into the concrete after the five minutes! It took me about five rounds of this process until it was all staying on top! Although it wasn’t my first choice, it seems to be holding up well! Now, I wouldn’t use this on kitchen counters for sure because it is not food safe!
Once the sealer has sat for 24 hours, it is able to be used!! So go ahead and place the countertop on your vanity, epoxy little square scrap pieces of wood (any size 1x or 2x ) to the underside of the concrete in all four corners to keep it from moving and sliding! Place the sink in the opening and caulk around it! Connect the faucet and drain and attach the plumbing!! Woohoo!! The vanity is complete!! She is no longer looking naked!!
I really loved building this vanity and creating this concrete vanity countertop!! Any questions feel free to fire away below!! Make sure and sign up for emails so you don’t miss any new posts!!

Want to save this DIY Concrete Vanity Countertop for later? PIN it!
Hi, how did you turn the concrete color to white? The finished product looks like it has a marble finish.
Hey Leslie!
I am so sorry that I am so late seeing this comment!!! I just used Quikrete 5000 concrete and it is a very light gray! I recently did a table and bench with concrete tops, using the same Quikrete 5000 and it was even lighter than this vanity top, so I’m not sure what makes concrete dark or light gray, but my experience with this specific concrete is that it is very light!! I didn’t do anything to marble it, just filled in the hole with a slurry of Portland cement that was a slightly darker color!! Hope this helps and wasn’t too late!! Thanks for stopping by!! Have a good one!!