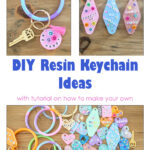
DIY Resin Keychain Ideas
Keychains make a great gift, they are one area you can really express yourself no matter how old, and they are fun little additions to spice up your keys! When it comes to using resin the ideas are absolutely endless, so match that with the fun of keychains and you have yourself the perfect afternoon craft! There are so many DIY resin keychain ideas for you and your friends, or you and your kids (or even grandkids) to make!

These keychains had me pouring resin for days and I still want to pour SO MANY MORE!!! I am telling you, I made my boys sit down and make some resin keychains with me the first day and they had a lot of fun…so much so that they were sitting down at the table to make more every time I did! Lol! They made keychains with their gamer tags, hence why you see some weird words in there like ‘Bulge’ and ‘Agent Pork’! 😂
My favorite resin keychain idea was pouring a resin wristlet and then adding a matching personalized keychain to it!

You can get as simple or as crazy as you want, you can personalize them, add glitter, opaque dye, transparent dye, add beads, any tiny item you can find, you can add! The DIY resin kechains ideas are seriously ENDLESS! Let me show some more of the resin keychains we made!
Another of my favs are the hotel tags that are personalized with cute sayings!

When I say the ideas are endless, I feel like that may be an understatement! LOL! I could make millions of these and still have ideas I want to try!
These are some that the boys made and I made trying out different pouring methods!

I have probably 20 more started already in the molds…and I haven’t even finished off the bottles of epoxy resin that I bought for these, I have only used about 2/3s of the bottles!

DIY Resin Keychain Ideas
Pouring resin to make all these keychain ideas may be the most rewarding art/craft you could ever do! Lol! I swear, it is almost fool proof and they turn out so good without having any real skill and they look great! Resin keychain ideas will just keep coming to you once you get started, and you just won’t be able to stop! 🤣

Do you love epoxy/resin projects and want to see other projects I have done with this fun medium? Check out my pumpkin chargers or my hexagon coasters! They were such fun projects to make, and they make great gifts as well!
Materials for Resin Keychains:
I purchased all my materials for the resin keychains at Amazon! The Amazon links below are AFFILIATE LINKS! Affiliate links are links that pay me a small commission (at no extra cost to you) should you make a purchase after clicking one! I always appreciate you shopping at my links!
- Resin
- mixing cups with measurements (I like these super small ones so I don’t feel like I am wasting cups) & cheap cups without measurements (cheapest from the grocery store)
- Popsicle sticks
- silicone molds – wristlet molds, jewelry molds, heart molds, hotel key tag molds, or whichever molds you want to make your keychains out of.
- keychains with jump rings
- glitter, transparent dye, opaque dye, or whatever you want to use to color your resin
- beads of your choice – letter beads, smiley faces, small confetti, clay slices, or whatever you want to use in your resin
- small pliers
- plastic of some kind to cover work surface (I used gallon ziploc bags)
Making the DIY Resin Keychains
Once you have decided which molds you want, what colors you want, and if you want beads or something else in the resin, you can start making your adorable keychains!

Prep for the Resin Keychains
First things first, you will want to cover your work space! The ONLY thing about resin is that it can be messy, and it is hard to clean when it does get messy! Lol! But trust me, the mess does NOT outweigh the fun so just make sure and cover your work surface and you won’t have any regrets!
Since the keychain molds we used were so small, we used gallon ziploc bags to cover our workspace! Normally when I do large resin projects like my side table with resin marble top, I will use a contractor bag to cover a really large area and you can if you want just to be safe!
Mixing the Resin for Keychains
Mixing your resin is one of the most important parts! You MUST mix equal parts of the A (resin) and B (hardener)! I have had times when I wasn’t precise in my measurements and guess what, they never hardened! I guess we can all figure what was wrong with my ratio, huh?! Lol!
That is why the cups with measurements on them are the best thing ever and make it so easy to get the perfect mixture! Unfortunately, these cups are pretty much trash after their one use! Some people will pull out the hardened epoxy and reuse them but I tend to have droplets all over the cup because I try to get out every last drop and so I don’t have one piece to pull out!

Also, certain colorants such as acrylic paint will keep your acrylic from fully hardening if you use over a certain amount to obtain opaque coloring, but it doesn’t ruin it, it will just stay flexible which is kinds cool to for some applications!
I usually mix about 2 oz of resin at a time, maybe three if I know that I am pouring some of the larger keychains! The resin I used has a work time of 40 minutes so you have some time but not all day so you don’t want to mix too much at once! The smaller keychain molds (which are actually jewelry molds) do not need much resin at all, very little!
Below I am only mixing 10 ml in each cup, for a total of 20 ml! I was able to pour two heart keychains and three of the larger jewelry shapes with this just for reference!


Make sure and clean out each measuring cup to the best of your ability, no reason to waste any and you want those ratios perfect! Both parts of the resin are thick so they don’t pour cleanly, you will have to use your popsicle stick to clean them out!

Make sure and follow the instructions that come with your epoxy resin! This particular one that I used, says to mix 3-5 minutes, I start to get a dang hand cramp by three minutes so that is all they are getting out of me! 😜

Adding Glitter, Color, or Other Items to the Resin
Once you have it mixed, I like to pour small mounts in multiple cups to make different colors, or mix glitter in some, whatever you want but unless you want a whole bunch of one color, I like to do small amounts of multiple! This time I was only mixing a small amount so I didn’t pour into other containers!

I usually added about 11-15 drops to make sure the color was as bright as I wanted and fully opaque! Obviously you will want to add a couple more drops than that if you are mixing a large amount!


Keep mixing until the color is uniform, of course I didn’t get any pictures of that, I was too excited to pour the epoxy, I told you I had so many resin keychain ideas swirling around in this head of mine! Lol!
Pouring the Resin for the Keychains
I poured most all of them in two pours, one solid color on the bottom, let it dry, and your letters and other characters, then a clear mix on top! This is how you keep the letters from showing through on the backside! We found this out the hard way! Lol!

If you aren’t using letters, it doesn’t matter as much if you do a solid layer or not, the letters are upside down on the back when you don’t do a solid layer first!
I would pour a bunch of base layers and let them dry and then come back the next day and figure out what I wanted to do with them!

Once you have the name or saying you want to add in letter beads, you can add it after the base layer has dried! On the keychain below, I used a base layer of light blue!

I added three layers to get the look of this blue keychain and I have to say that turned out to be my favorite method! I poured a blue glitter layer, not over the letters but around the letters!
I took so many pictures but yet had so many resin keychain ideas going at once that I didn’t do a good job of making sure to take pictures from start to finish, every mix and every pour on any of them! Lol!

Third and final pour over the beads was clear resin! I also like to make sure the mold is almost over full, not too full to cover the keychain hole, but full enough it doesn’t have any indention…I tell you this from my experience when I broke part of this keychain trying to re-drill the hole! (of course I didn’t manage to get a final shot of it in the mold, but keep pouring until it is filled!)
***Always make sure and run a lighter over the top a few times after pouring the resin if you see air bubbles***


Now look at the difference of using the solid blue layer under the blue glitter layer! The wristlet was made with the leftover blue glitter resin that I poured on this keychain, the keychain has the solid blue layer and then the blue glitter layer! They look really different in real life, it may not show well in these photos but there is a pretty bog difference!


Ways to Use Resin for Different Looks
Let me give you a few more examples of the different resin keychain ideas and which mix I used, there are so many ways you can layer the resin, and in an effort to save you time…and resin, I wanted to do all the experimenting and share the results to help reduce your waste!

Check out the cute little smiley faces! This is how they look if you place the smiley faces directly in the first layer and there is no clear layer over the smiley faces!
Front

Back

We say the smiley faces look like ghost smiley faces! Lol!
Here is the same smiley faces but with a solid color layer on the back and clear over the top!


I tried the tie-dye method where you just pour a little of one color and a little of another until you fill up the mold! I wasn’t crazy about this method but I feel like you could perfect this method with practice and it could be a lot of fun! Obviously I poured too much of one color at a time!

I tried this method on a small love keychain too! I mixed pink on top of purple!

This groovy keychain is done with the three layer method!
Solid pink layer, followed by a layer of glitter and smiley faces, groovy letters set in the glitter layer, then a top layer of clear!


This glitter and flowers hippy wristlet is almost my favorite! Lol! It was my favorite but then I made the gold and white!
This had no colorant just pink glitter and the flowers mixed into the whole batch(the glitter and flowers I used are linked in the materials)! The heart keychain was made with a solid layer of green! The glitter layer was poured over the letters and you can tell because there is a little bit of a haze over them!

Here are a couple of more examples of the glitter resin being poured over the letters or other beads so you can see if that is the look you are going for before trying it out! I like the look, it is more muted that plain clear which in some instances is great!

The white and gold is my favorite combination after all the experimenting, I fell in love with this look, but let me show you how different the methods are and which look you will get using each!

First time I used the gold glitter with white colorant, I placed the glitter in the bottom of the wristlet mold and then poured the white resin on top. This somehow left the small gold glitter on the bottom, but all the large chunks disappeared! I sprinkled a little glitter on top after pouring the white but this is the result! Far left is the wristet.

Middle wristlet in above photo was made mixing the gold glitter into the white resin, it really muted the gold glitter which I didn’t like!
Far right wristlet in above photo was made mixing the gold glitter into clear resin and pouring a base layer, then I added white over the clear after a few hours of letting it sit! This one turned out my favorite!
Looking at the back side of all of them, here is the same wristlets, other side!
I sprinkled gold glitter on the top of all of them after pouring!

Again, the far right turned out to be my favorite!
When I made the white and gold heart, I poured the white base layer, then sprinkled the gold glitter onto the white dry base, added the letters where I wanted them, and last poured the clear resin over the top of it all! I loved this method as well as it kept the glitter bright but it didn’t mix into my clear and rise above my letters as it will do it you mix it into the clear resin!

Mistakes with Resin Keychains
There are a couple of things we realized after pouring so many keychians that you do not really want to do! Lol!
So after our first keychain pour, we realized that if you set your beads into the first pour of resin, the beads sink and can be seen on backside of the keychain! Lol! It is fine if you are only using one word and it is placed to where it can’t be upside down, otherwise it is upside down!
Let me show you, here’s the front of the #soldAF keychain!

And here’s the back of the #soldAF keychain!

See how it is backwards and upside down! LOL!
Here’s one more just to show why you want to put down a layer and let it harden before adding the letters! Front of the #1 Bitch keychain!

And the backside!

The shape having a ‘top’ makes it look even worse! Lol!
You will also not want to pour your top layer before your bottom layer is dry! This is what happens if you do, you ruin your favorite keychain you had made! Lol! The bottom layer will mix with the top clear layer, this could create a really cool effect if you are wanting this look, but don’t ruin your keychain if you are not going for this look!

Another thing you don’t want to do is pour the resin, get up and forget about them, always come back and check for air bubbles! Look what happens when you don’t!😒

There was nothing I could do at this point, had I have come back, I could have easily used a lighter and popped those bubbles!
Adding the Keyrings to the Resin Keychains
Gather your keychain, two jump rings, and whichever resin shape you want to use! You will also need the needle nose pliers for this step! I purchased the keyrings that had the clips with them on Amazon for dirt cheap!

Using the pliers, insert the jump ring into the resin shape you made!

Once you have it through the hole, you can close that jump ring with the pliers!

The jumprings are pretty tight in the hole on these since they were jewelry molds and not keychain molds but I like that they fit tightly! Once I have the jump ring closed, I roll the ends inside the resin so that it isn’t as easy to come apart!

Take the other jump ring and slide the keychain onto it, then slide that jump ring around the jump ring we just put on our resin shape!

Close that jump ring! And your resin key chain is done!

We had such a good time being creative and coming up with all the resin keychain ideas! I swear using my hands and being creative in any way soothes my soul! I hope you have fun coming up with your own resin keychain ideas!
See you next time!

Want to save these resin keychain ideas for later? Pin It!

