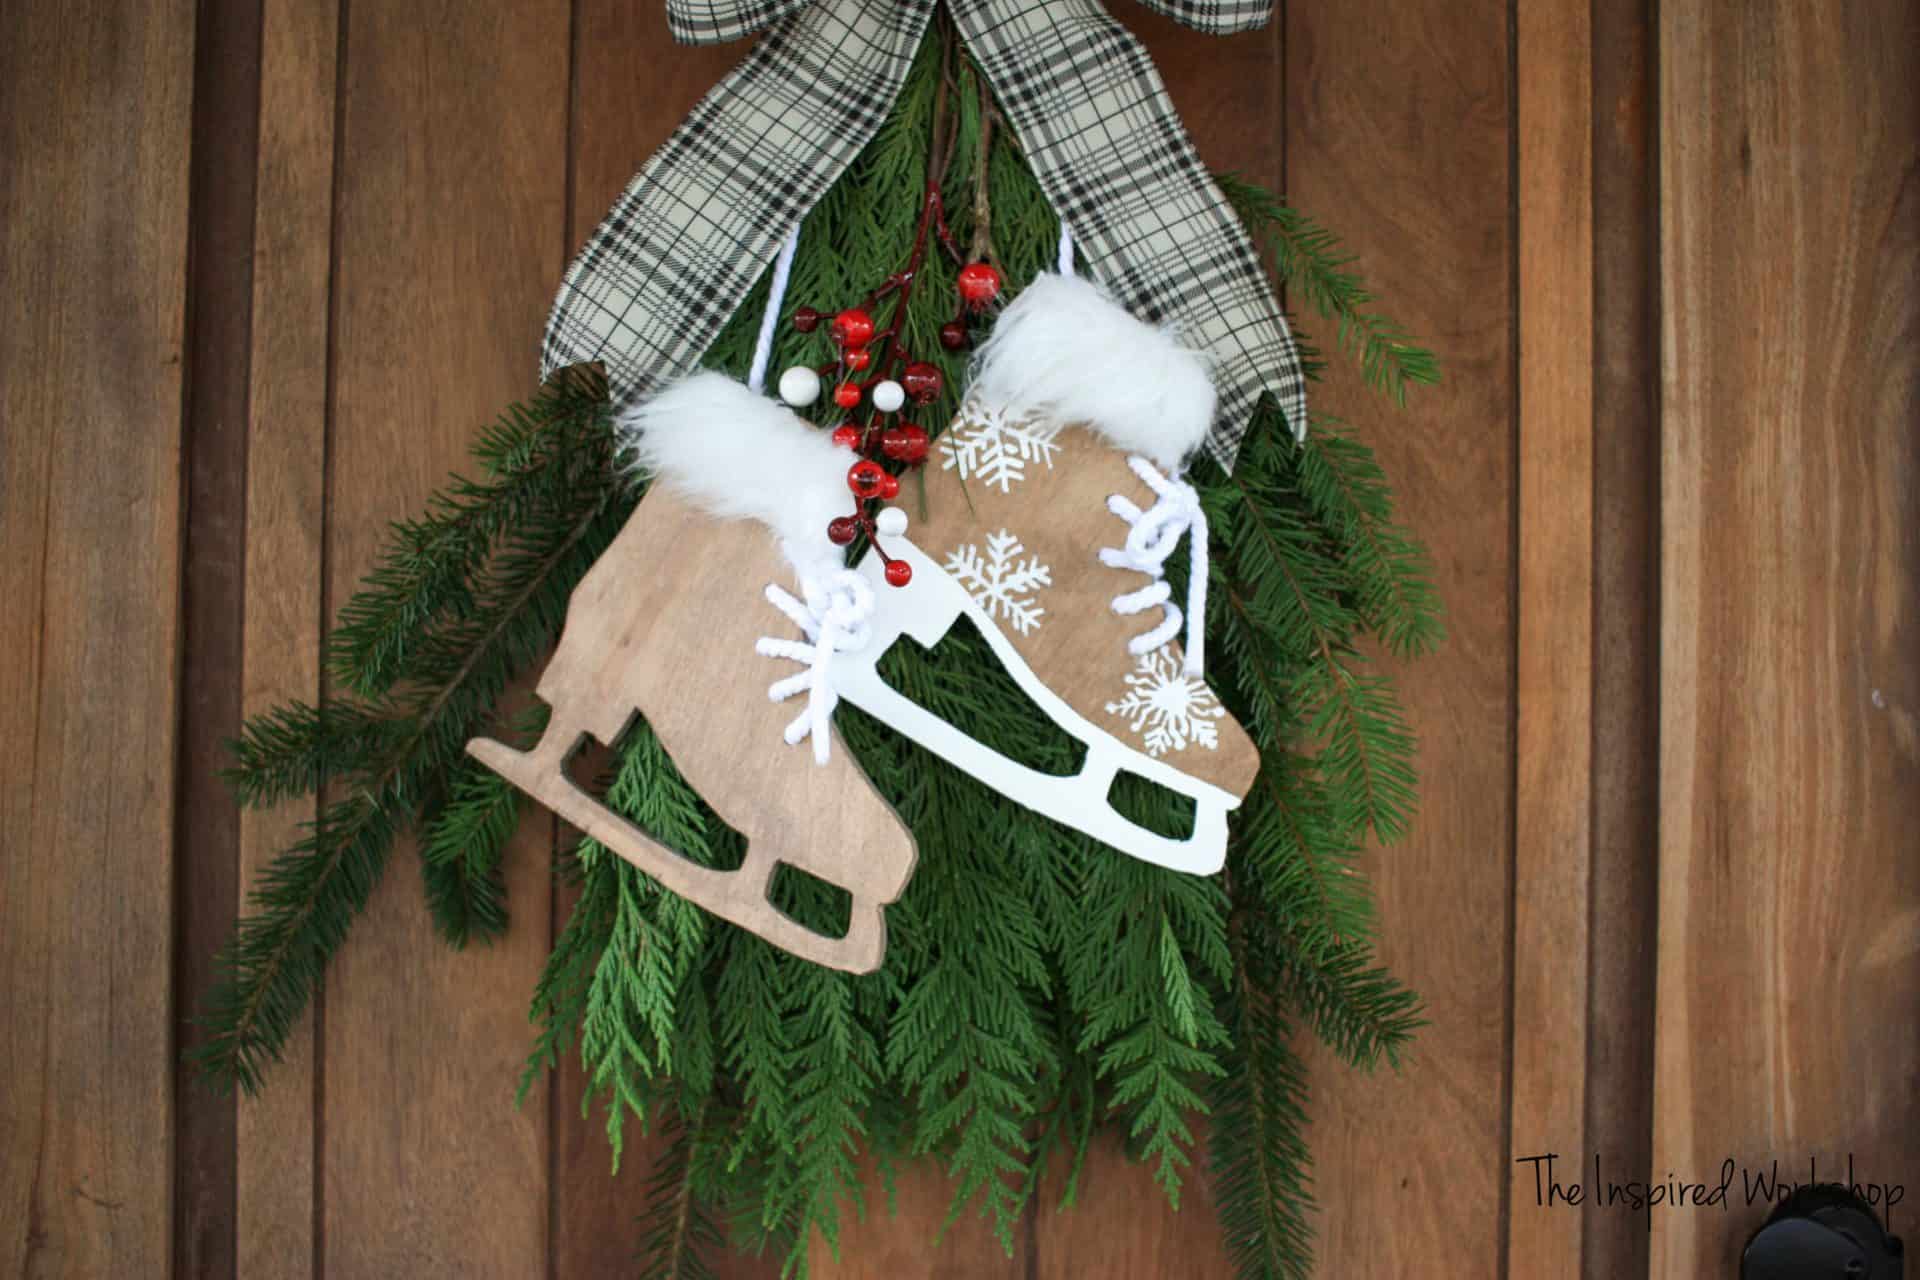
• Skip to secondary menu
  • Skip to main content
  • Skip to primary sidebar
  • Skip to footer
  • About
  • Blog
  • Contact Me

The Inspired Workshop

Inspiring you to Do-It-Yourself

  • Home
  • Furniture Plans
  • Remodeling
  • How To
  • Holiday
  • Crafts
  • Tools
  • Videos
You are here: Home / Holidays / DIY Ice Skate Decor

DIY Ice Skate Decor

December 22, 2019 by Cara Leave a Comment

101 Shares
Pin100
Tweet
Share1

Alright, I am still way behind on my 25 DIYs of Christmas! I am going to continue posting them right up through Christmas though because most of them can be made after Christmas to use as winter decor or they are gift ideas, and gifts can be given year-round! Lol! For instance, this DIY Ice Skate Decor can be used long after Christmas and through the winter!

DIY Ice Skate Decor

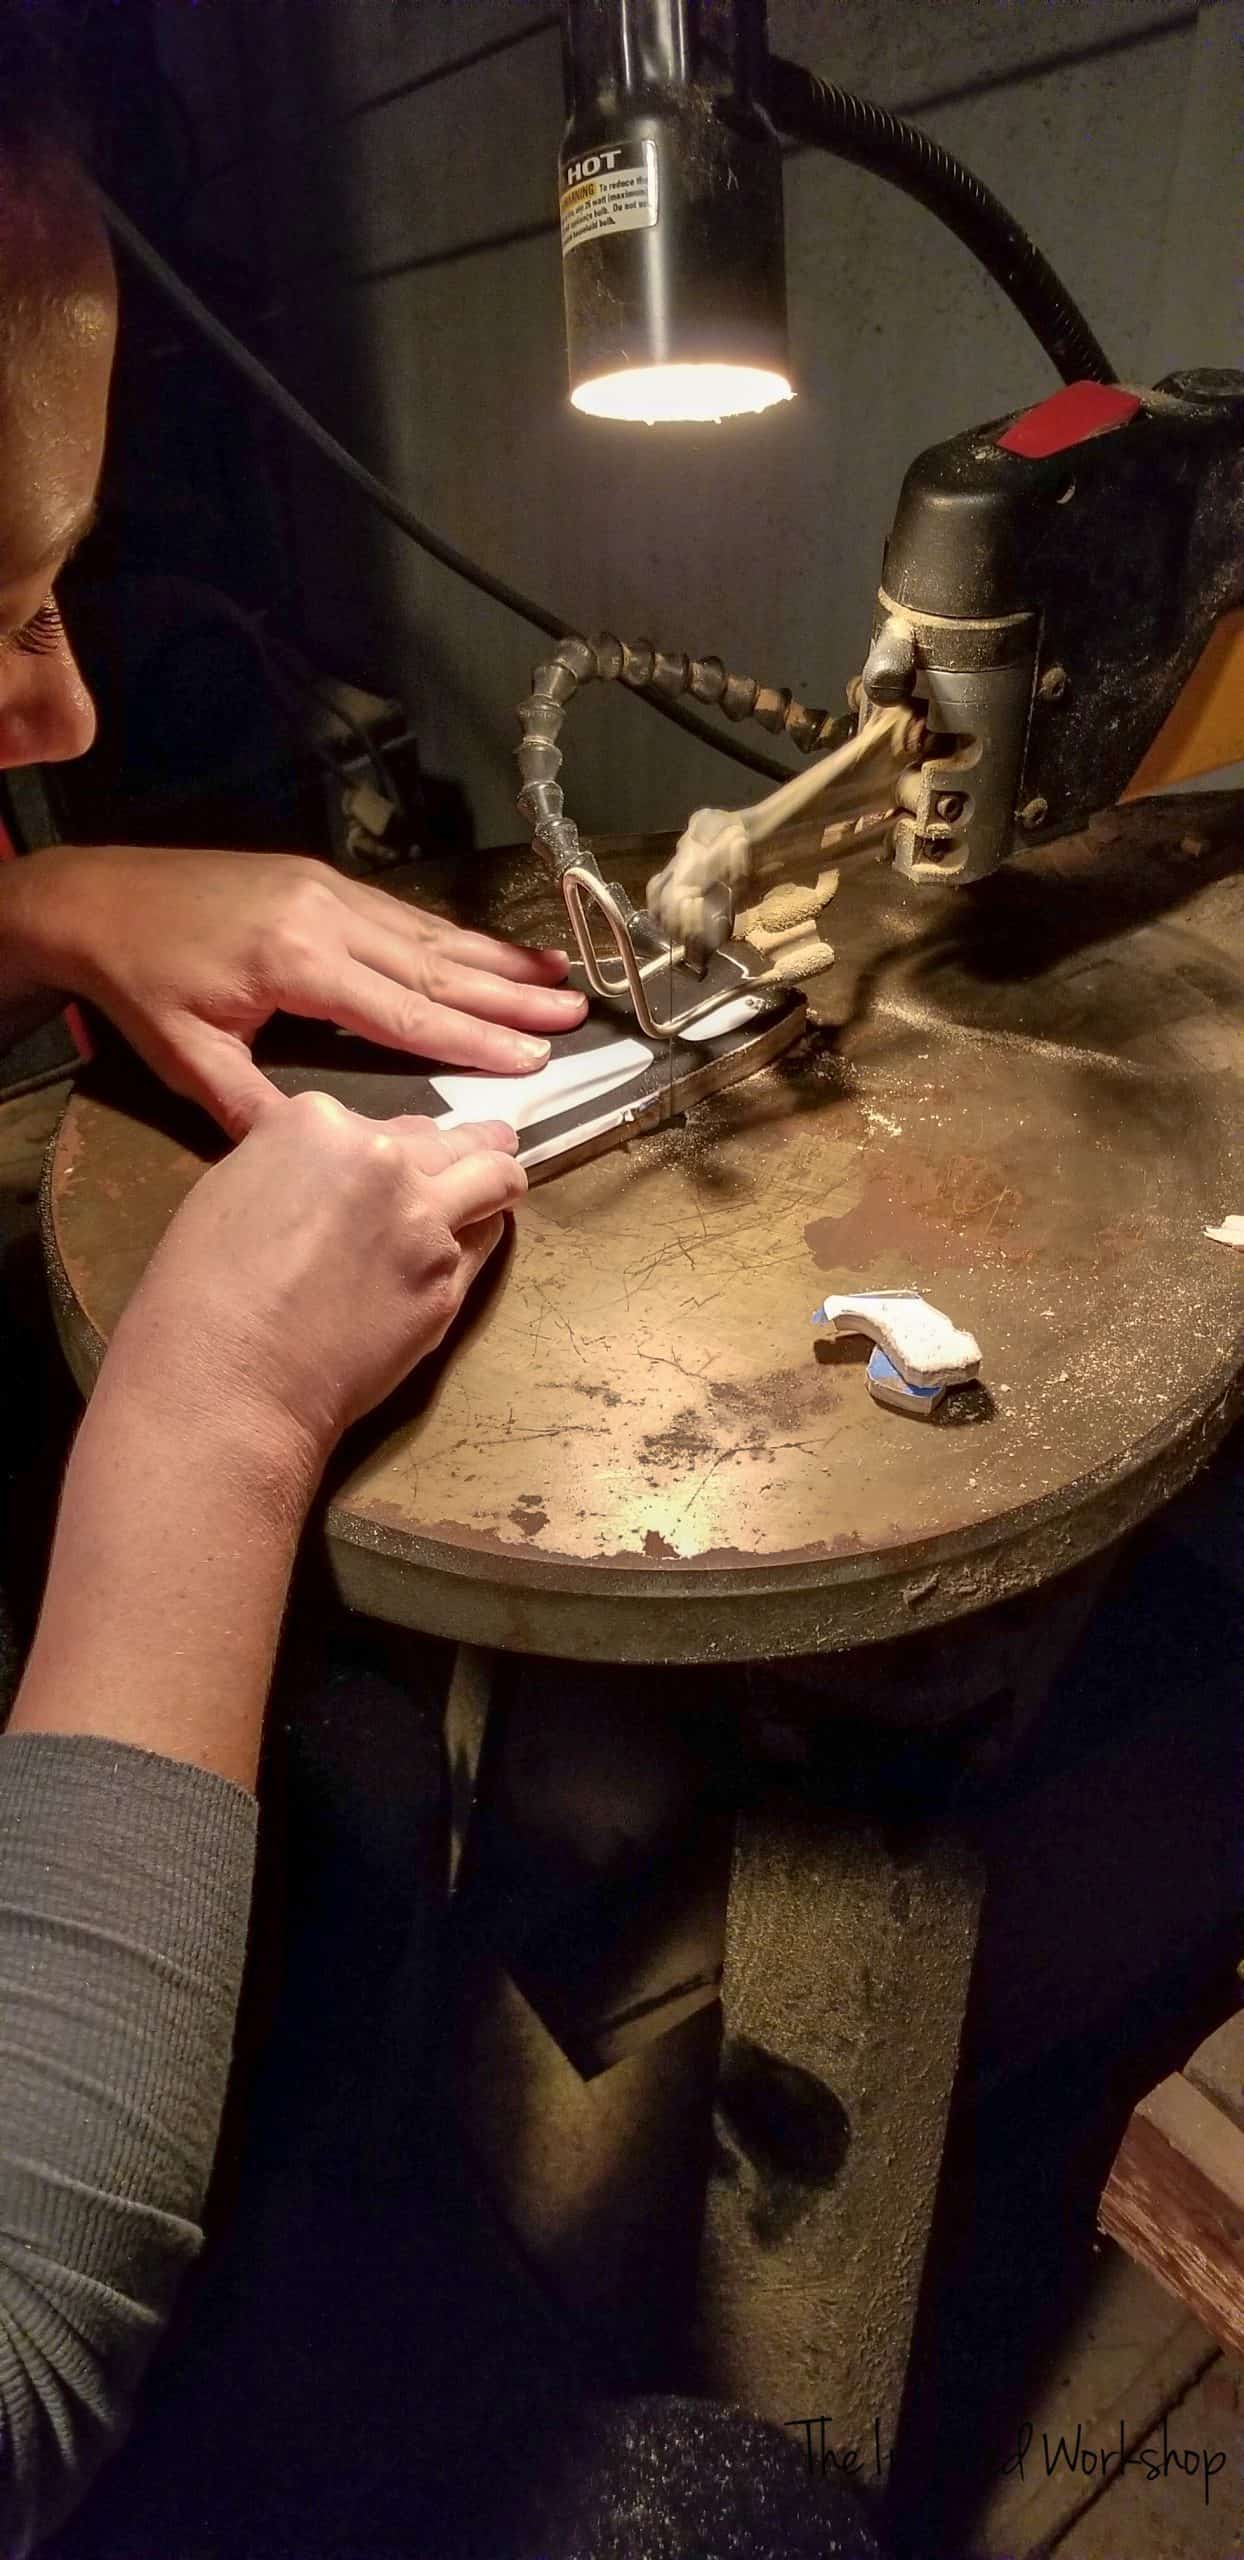
I learned with this project that it is absolutely my (non)skill and not the saw when it comes to scrolling work! Lol! I cut these ice skates on my grandad’s DeWalt scroll saw, which as you may or may not know, Lizzy from The House of Timber on Instagram worked absolute MAGIC on that Dewalt saw…but as it turns out, it is actually Lizzy’s skill, not the saw! ???? I tried though, so there’s that! And they don’t look THAT bad! If I would have sanded a little more, they would probably look really good!????

Ice Skate Decor

Even if they aren’t perfect, I LOVE the ice skates decorating the swag wreath, you know I picked up this fresh greenery at Walmart for 5 bucks! It was a bouquet in the floral section! It smells amazing of course!????

DIY Ice Skate Decor on front door wreath

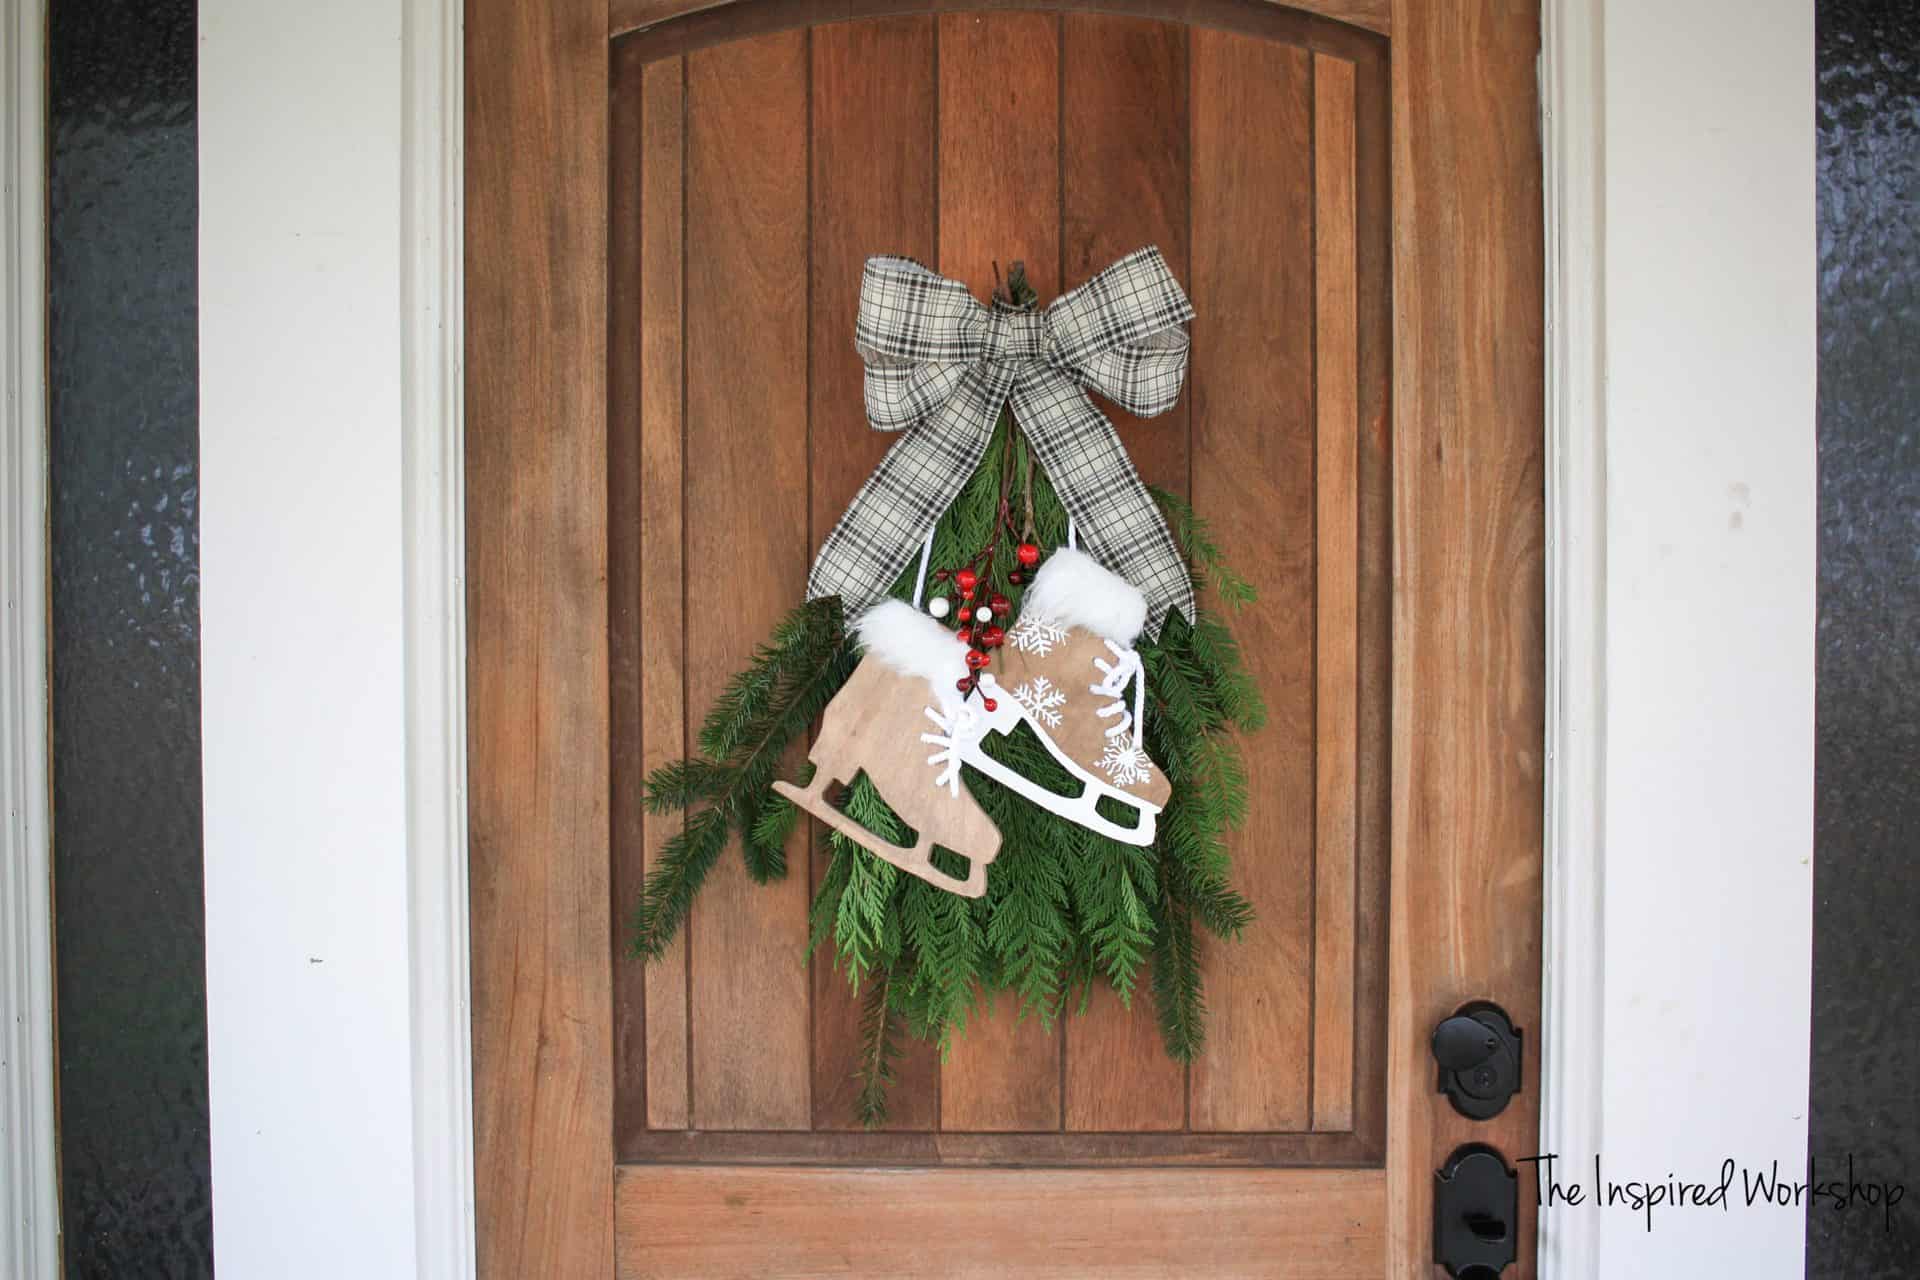
Don’t mind my door either that needs to be refinished! ???? It’s 303rd on the list of stuff that needs to be done around here! I’ll get to it…that’s my motto!????

It is a really fun craft that you can easily do, once you cut them out, you can adorn them while enjoying some family time because they really don’t take any effort! Just stain, paint, drill holes and attach fur and string! Boom, cutest wintery ice skates to accessorize any wreath, entryway hooks or wall decor!

I cannot help but smile every time I walk in my front door, and that is a successful project in my eyes! ????

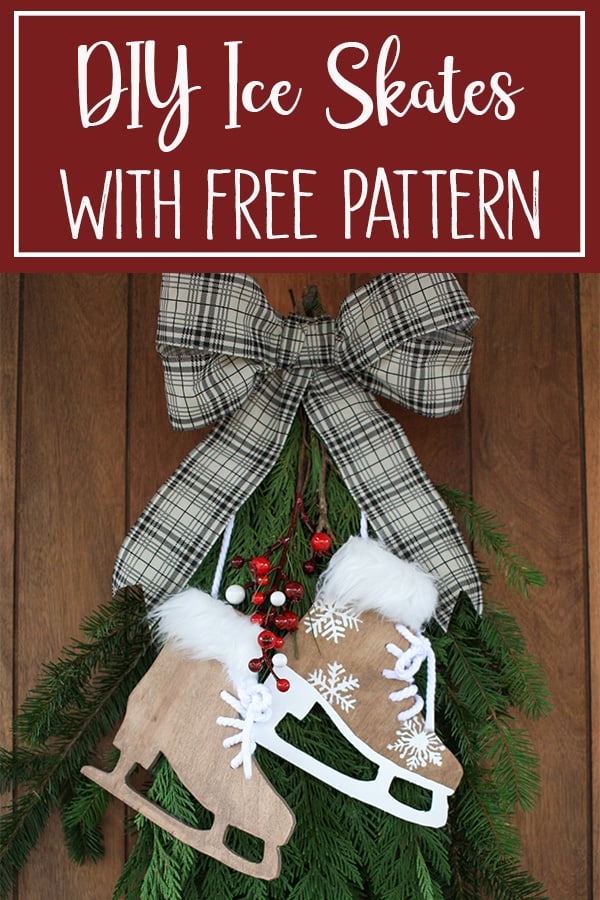
Want to make a set yourself but don’t have time? Save it for later! PIN IT!

DIY Ice Skate Decor for Wreath

Let’s get your’s made too!????

I have provided the THE PATTERN FOR THE ICE SKATES so you can make them too! If you are a patient person, you will have no problem cutting them out on the scroll saw! You can even use a jigsaw, I honestly think a jigsaw is easier than a scroll saw…well in some ways! Lol!
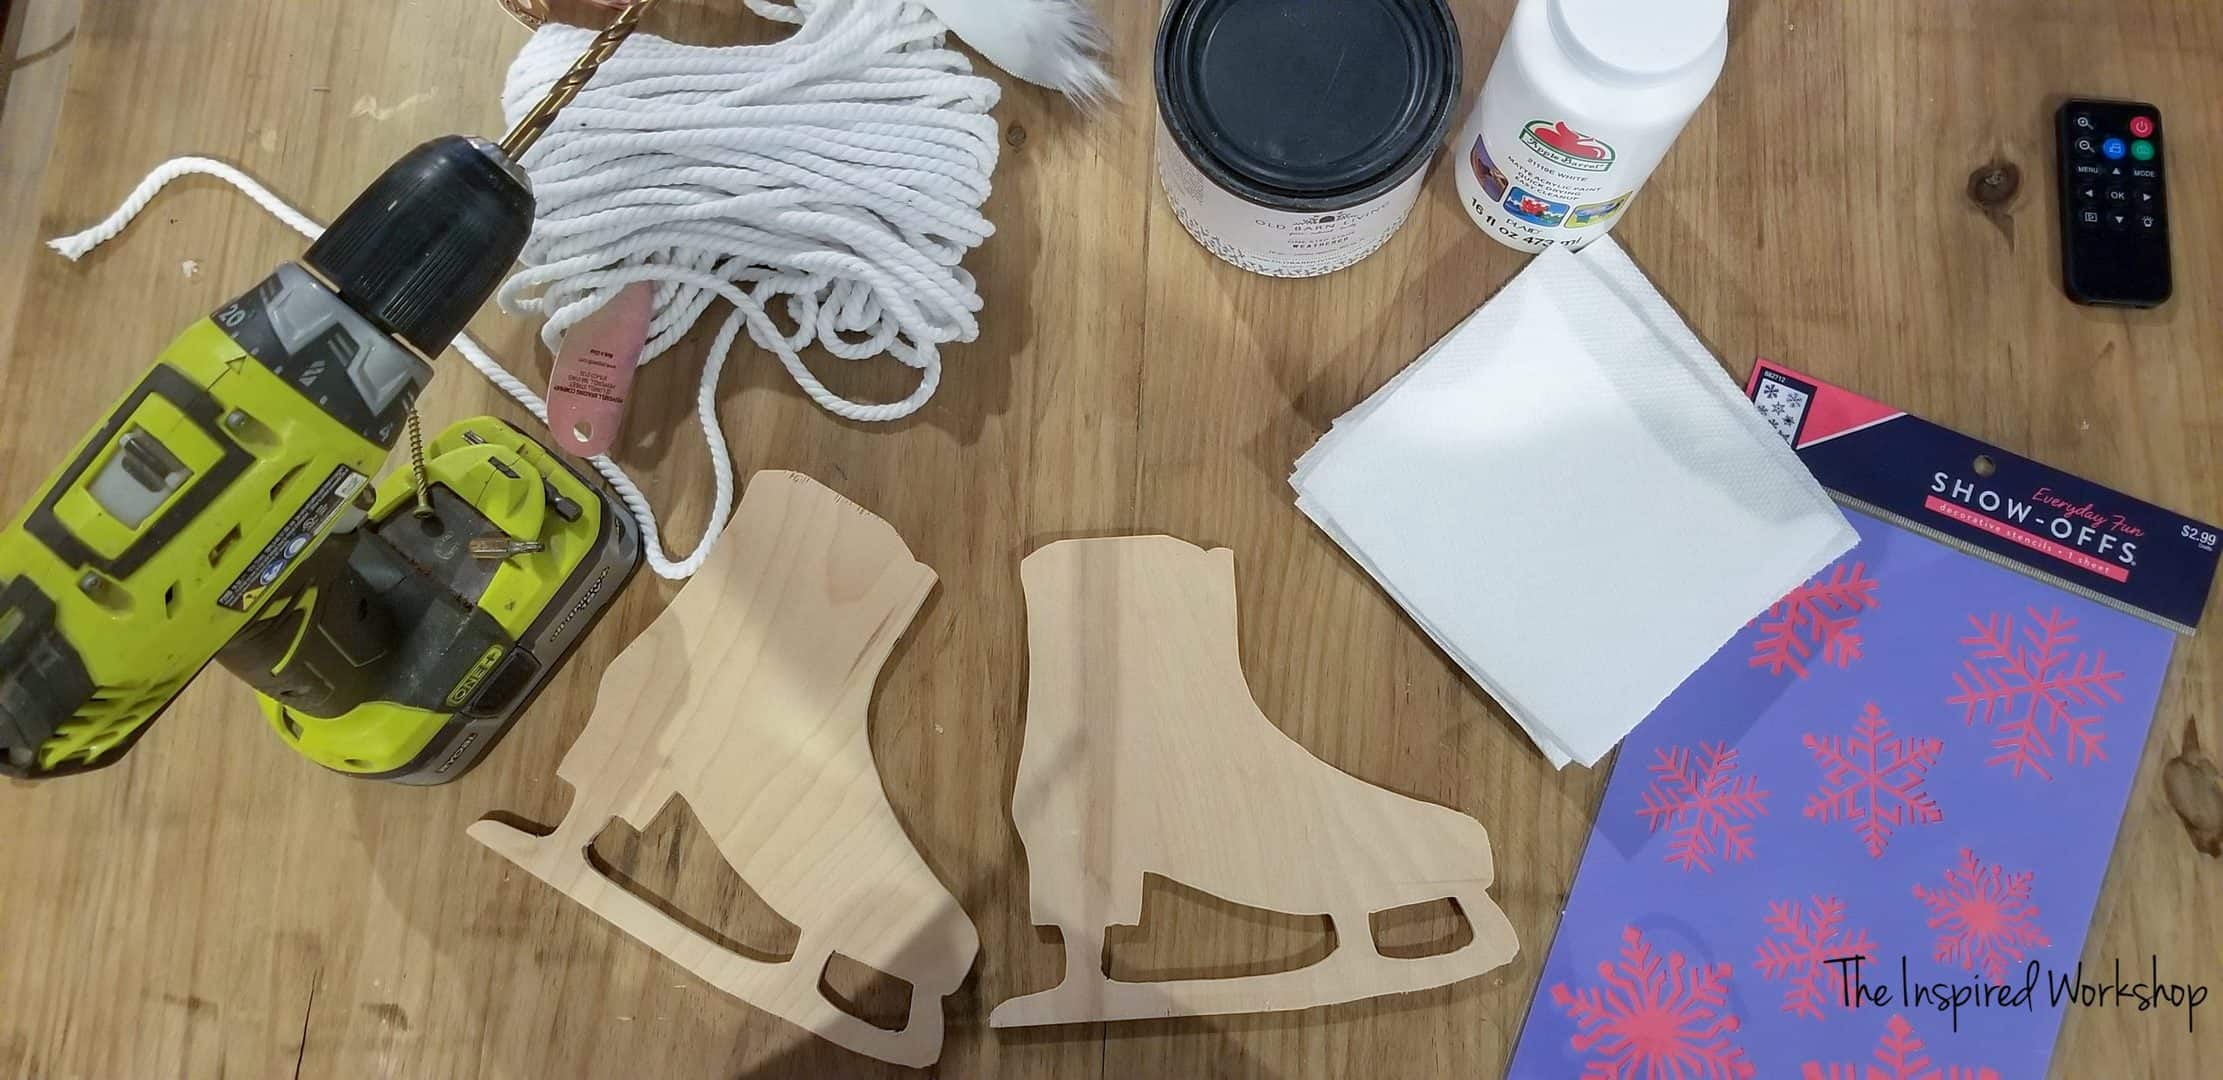
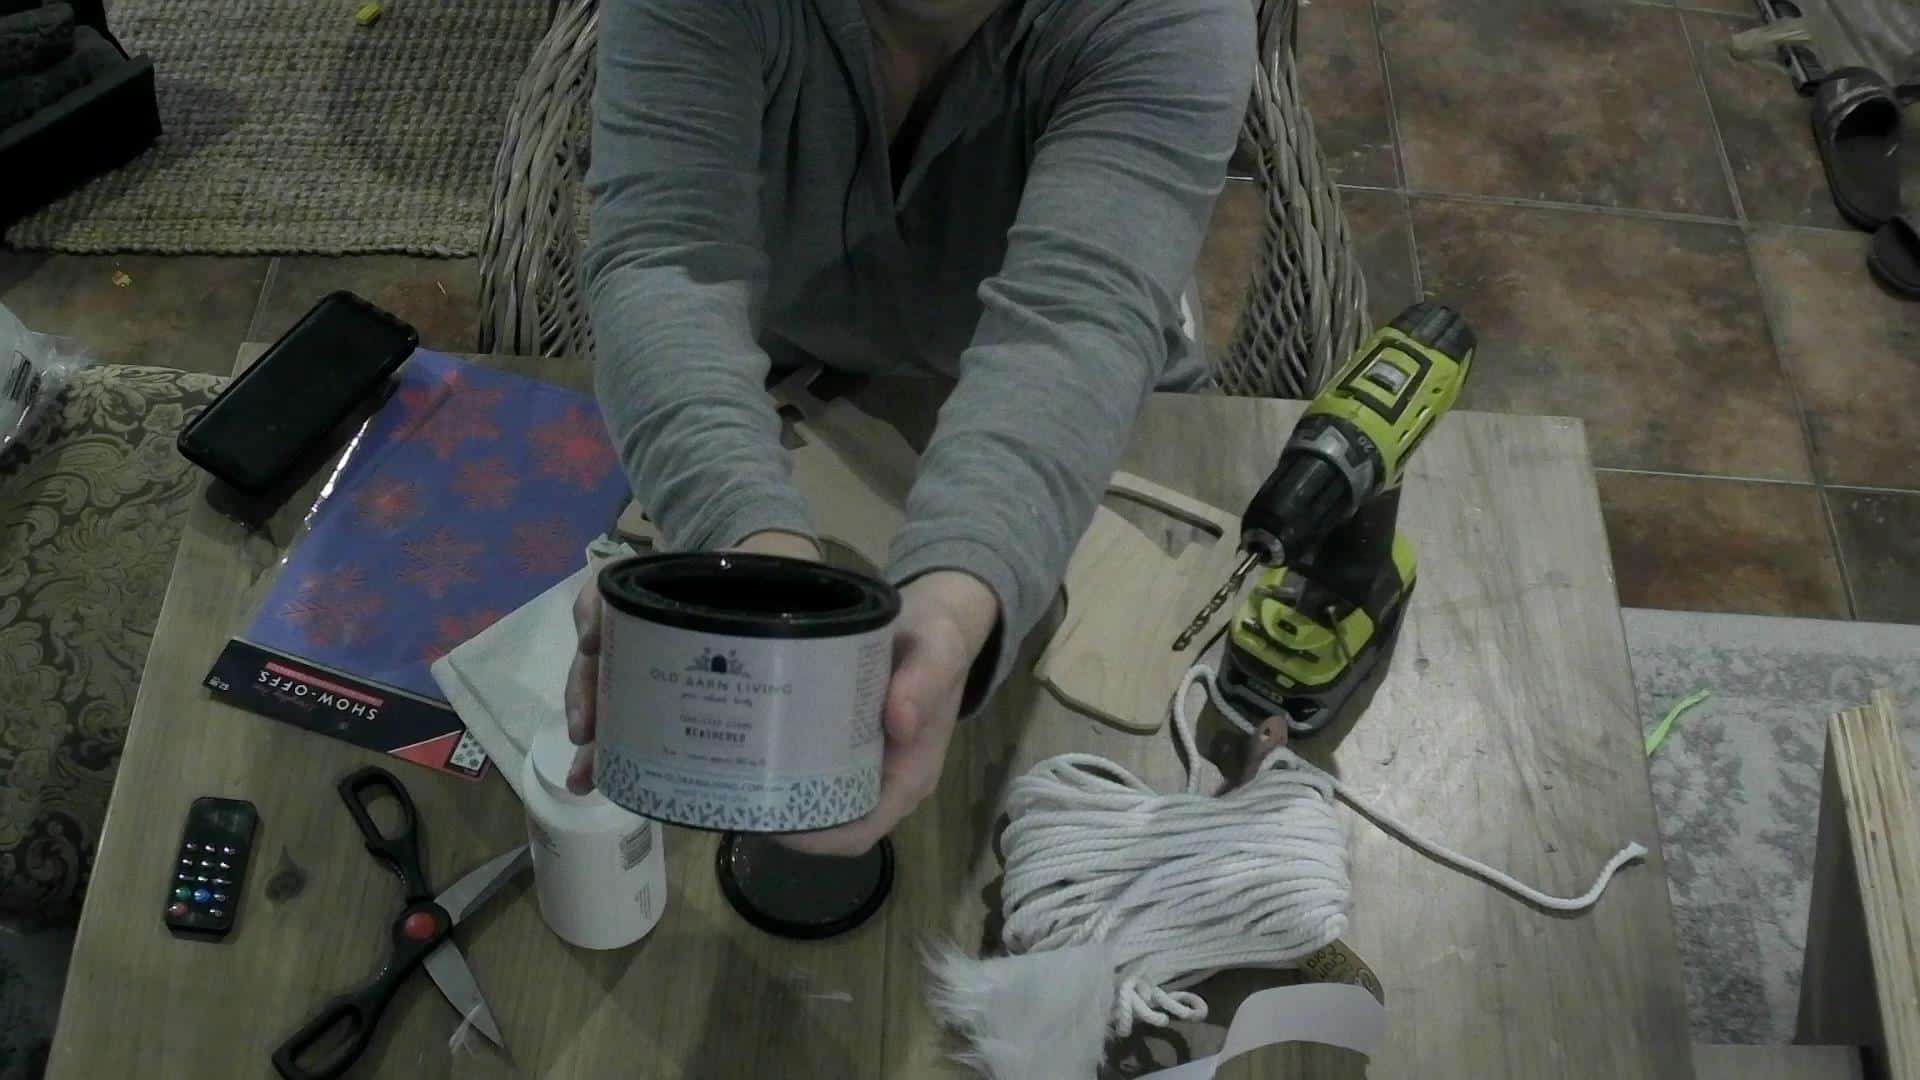
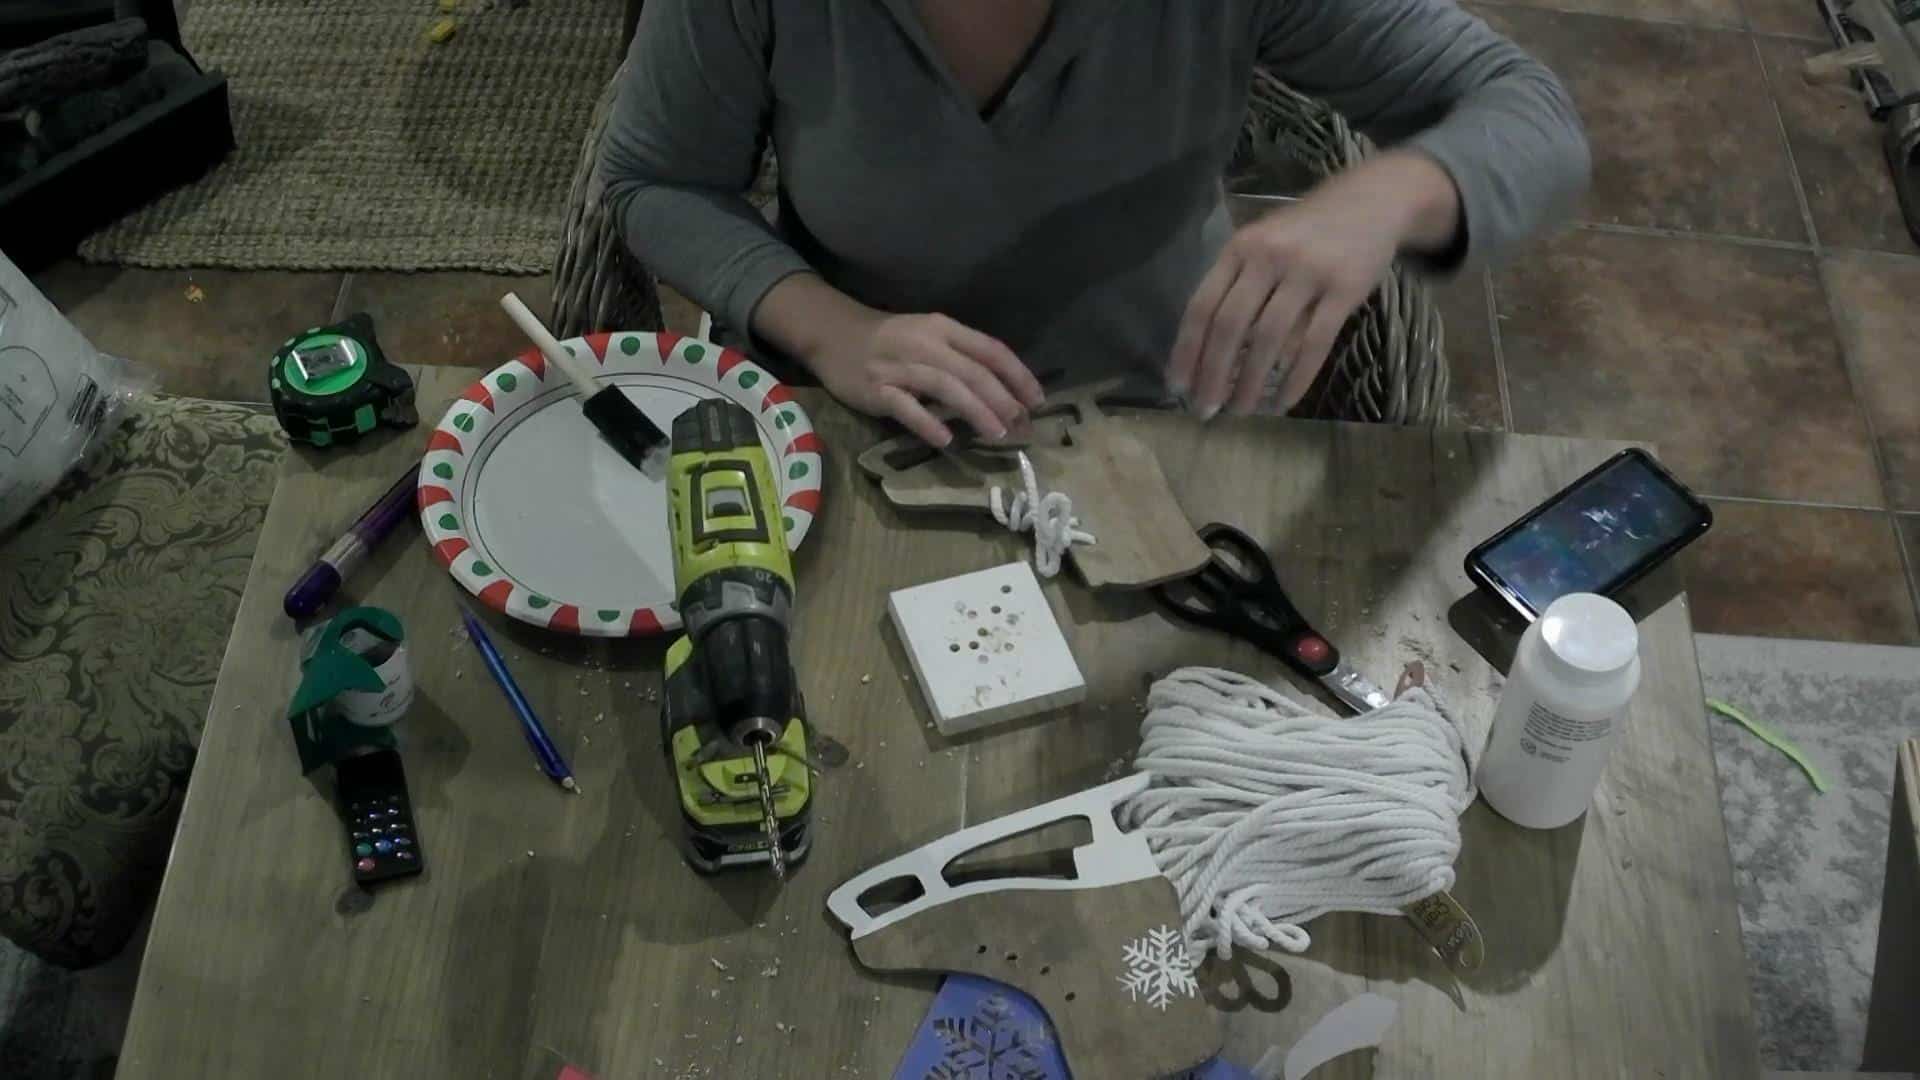
Materials:

***Amazon links are affiliate links! What does that mean, you ask? If you click an Amazon link below and make a purchase…I make a small percentage of that purchase at no extra cost to you! I always appreciate your support through affiliate purchases!????

-2 scrap pieces of 1/4″ plywood (8×8) or if this is the first project you are doing, you can purchase a 1/4″x 2’x2′ project panel at your local hardware store.

– Drill and 5/16″ drill bit

–faux fur fabric or ribbon

–1/4″ cotton cord – I purchased mine at Hobby Lobby but can’t find it on their website – it was from the area with the jute rope and cotton rope but the cost was only 4.99 and I was able to use a 40% off coupon on it!

-stain/paint of your choice

–scroll saw or jigsaw

–stencil if you want to paint snowflakes

–spray adhesive – I found it cheapest in-store at Walmart!

–painter’s tape

Making your DIY Ice Skate Decor

Ice Skate Christmas Decor

Step 1

Print out your pattern for the ice skates! Get it above if you haven’t already!

Step 2

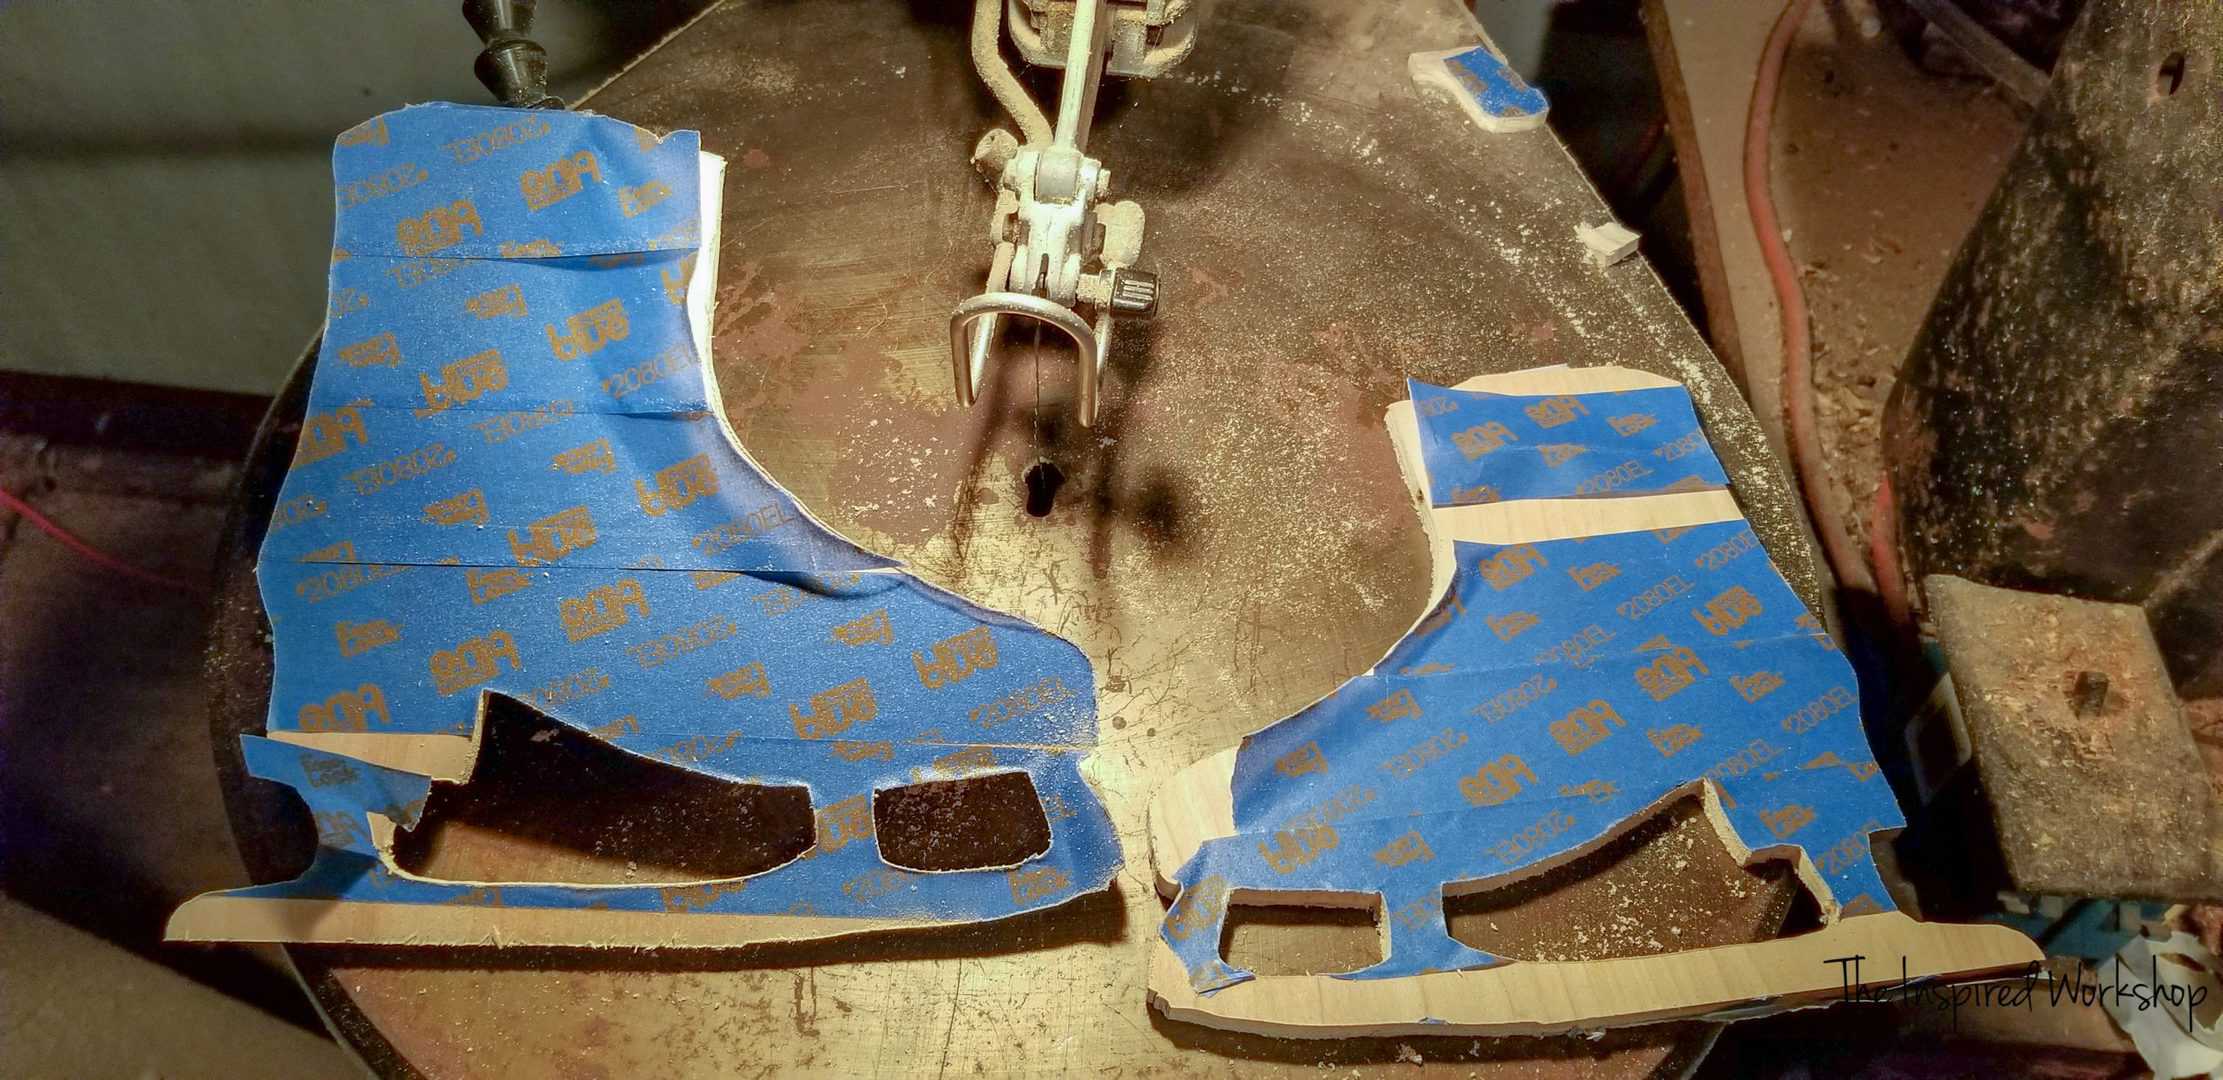
Use painter’s tape to cover both sides of one of the scrap pieces of 1/4″ plywood, and on only one side of the other piece! Then use the spray adhesive to ‘glue’ two painter’s taped sides together and then use the spray adhesive again on the one other painter’s taped side to attach your pattern to that piece of plywood. You are going to cut the two skates at the same time so they will be identical!

I was working on like 5 crafts at the same time, so when I threw the pattern on the wood and got it ready to cut, I totally forgot to take a picture or video this step! I apologize, but hope you understand the concept!????

I actually forgot to tape the front of mine, and when I peeled my pattern off the top, it didn’t leave a residue! I was shocked, but I wouldn’t risk it if I were you…just use the painter’s tape to be sure!

Step 3

Cut your ice skates out!

DIY Ice skate decor - cutting the ice skates on the scroll saw

DIY Ice skate Decor

Ice Skate Decor - cutting the ice skates on the scroll saw

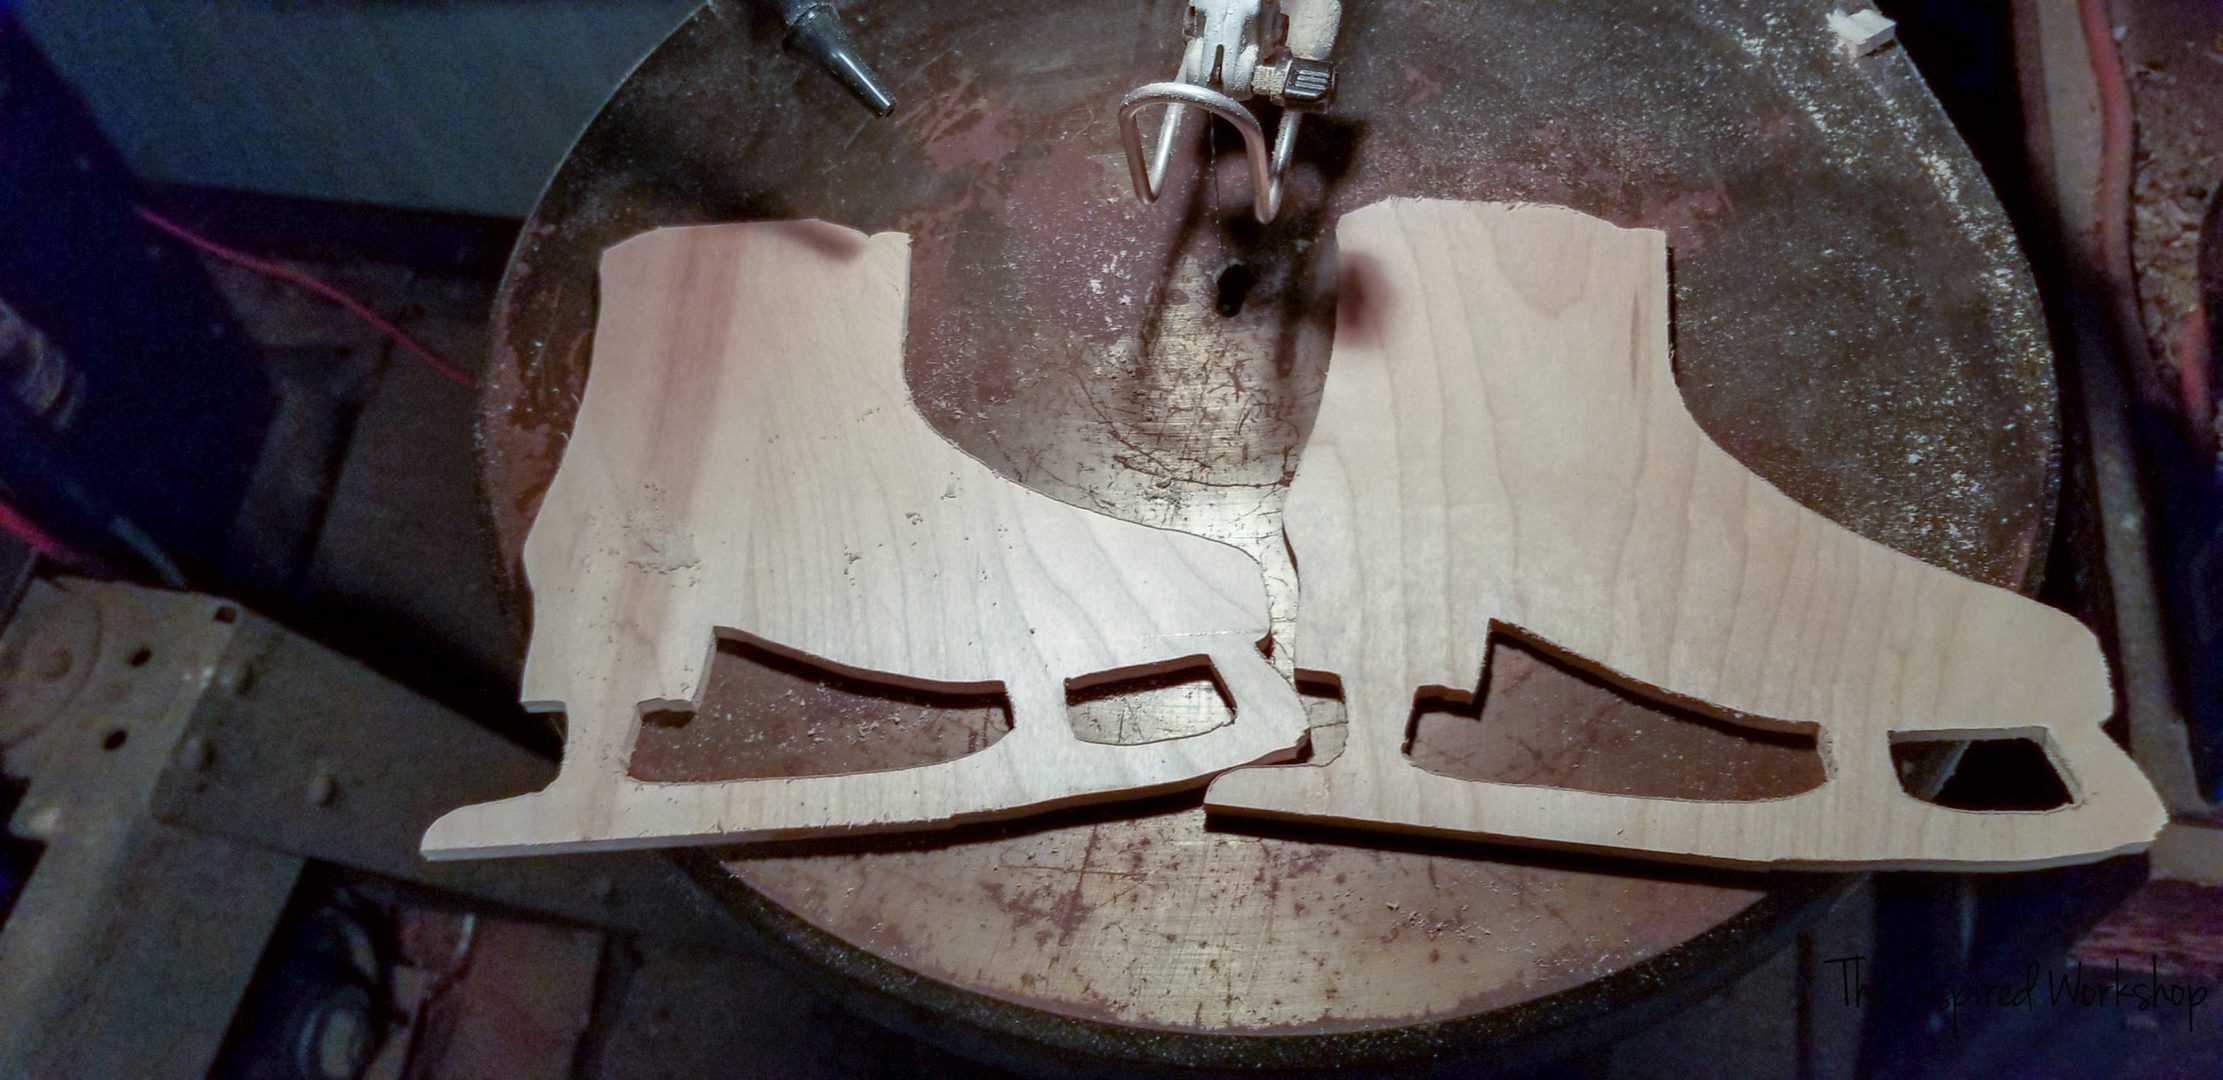
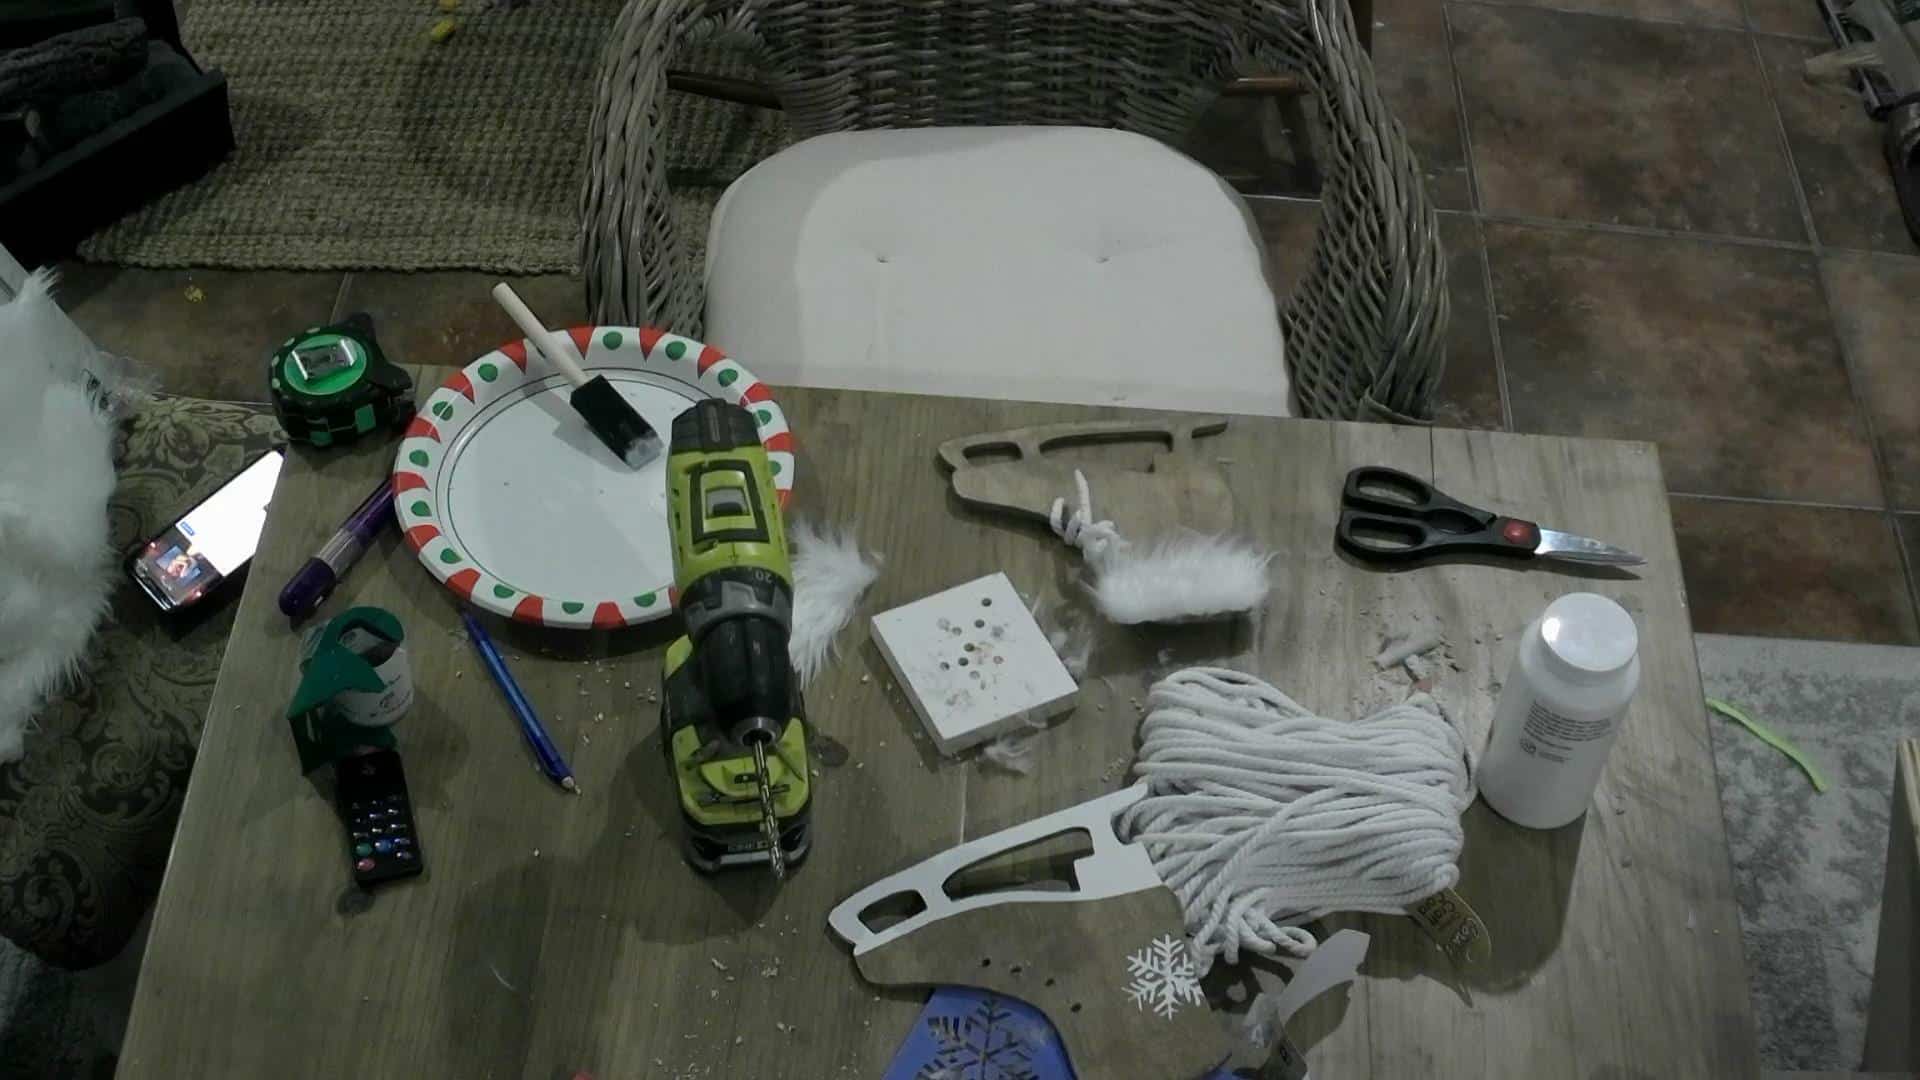
Now that you have the base of your ice skate decor, gather the rest of your supplies!


DIY Ice Skate Decor - The supplies

Step 4

Stain or paint the skates! I did my skates in this order, but you should probably drill the holes very first!????

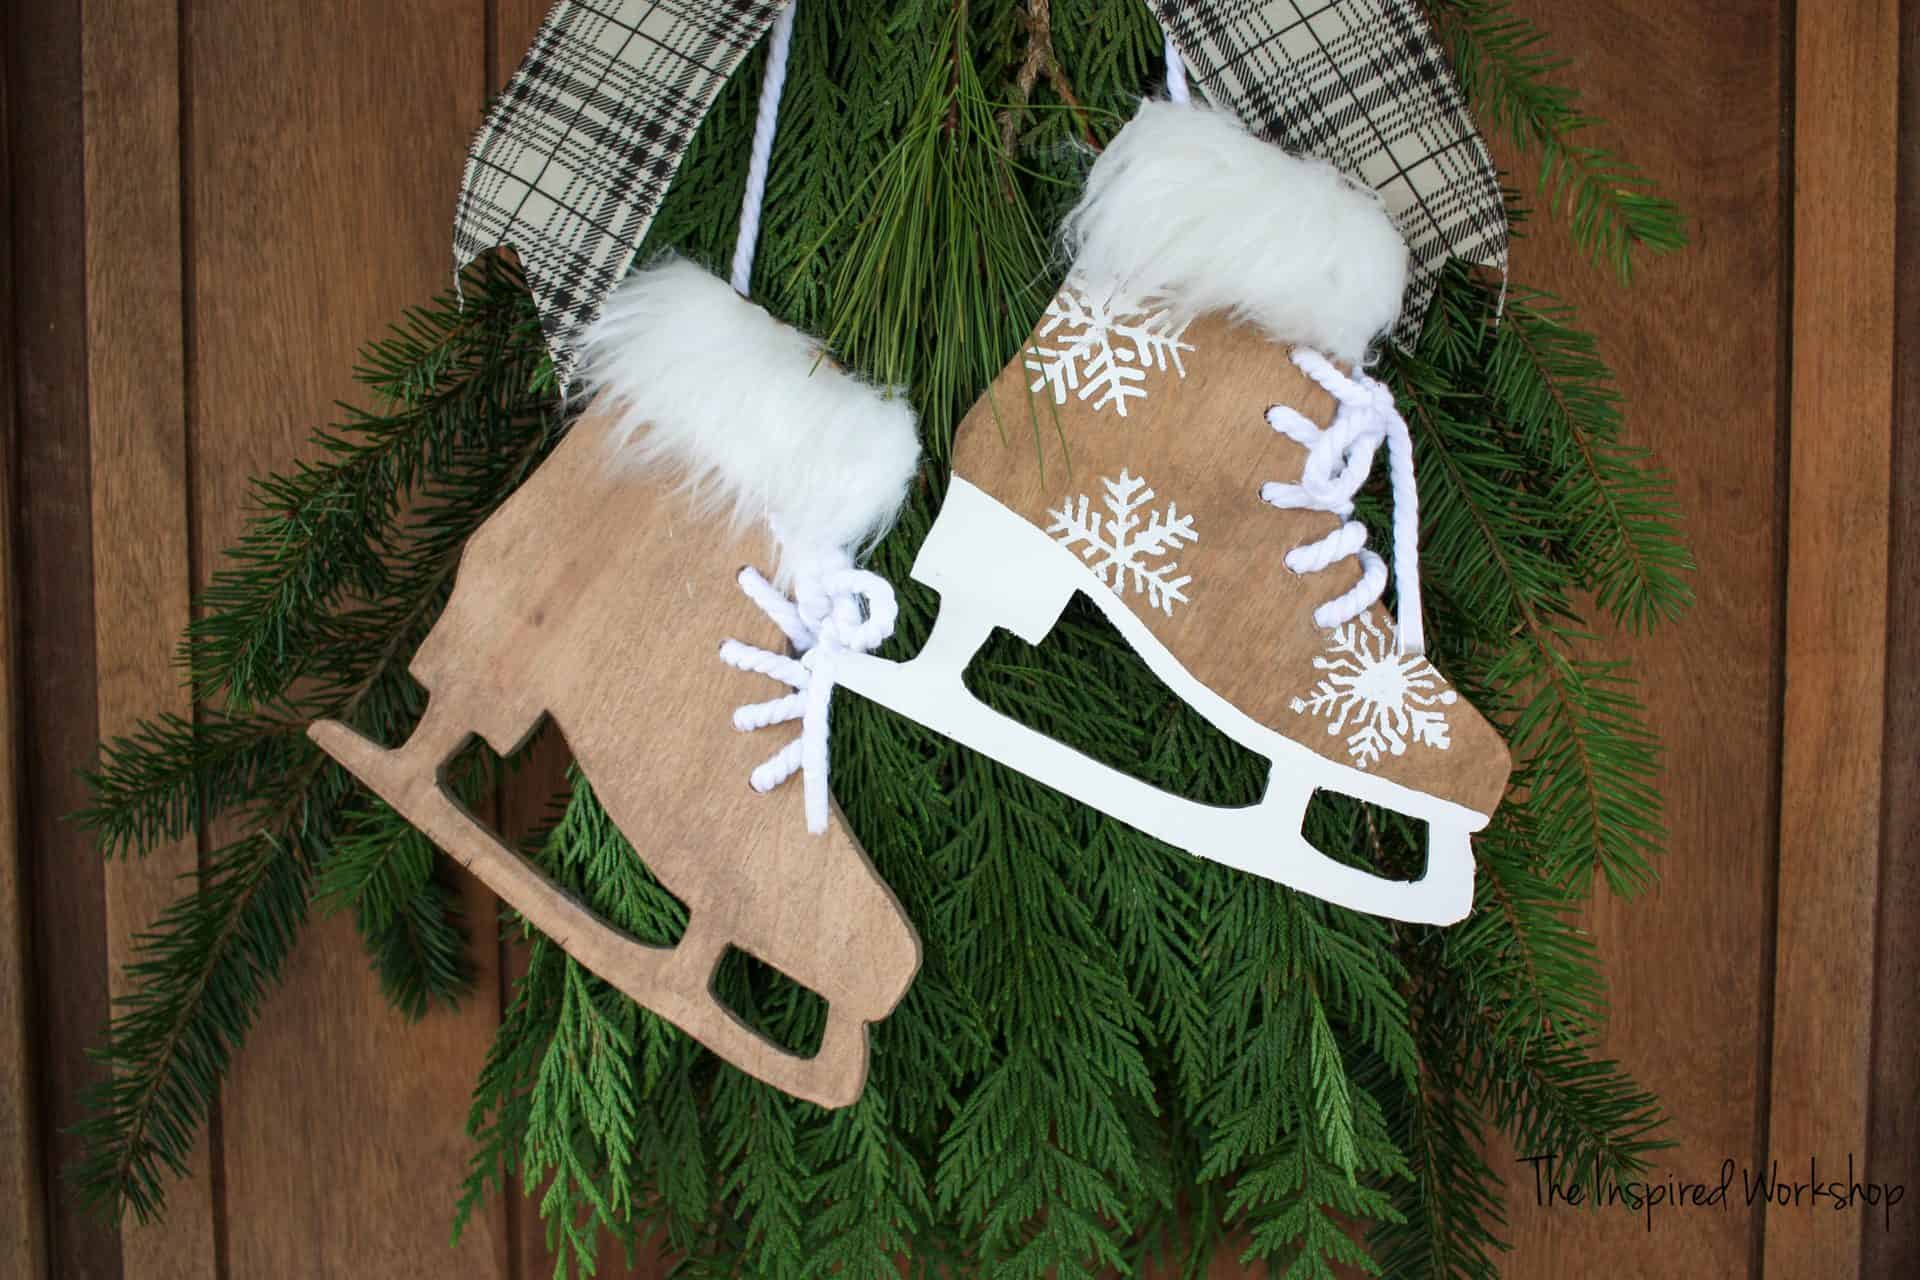
I used Weathered Stain by Old Barn Living, it may be MY FAVORITE STAIN of all time!!
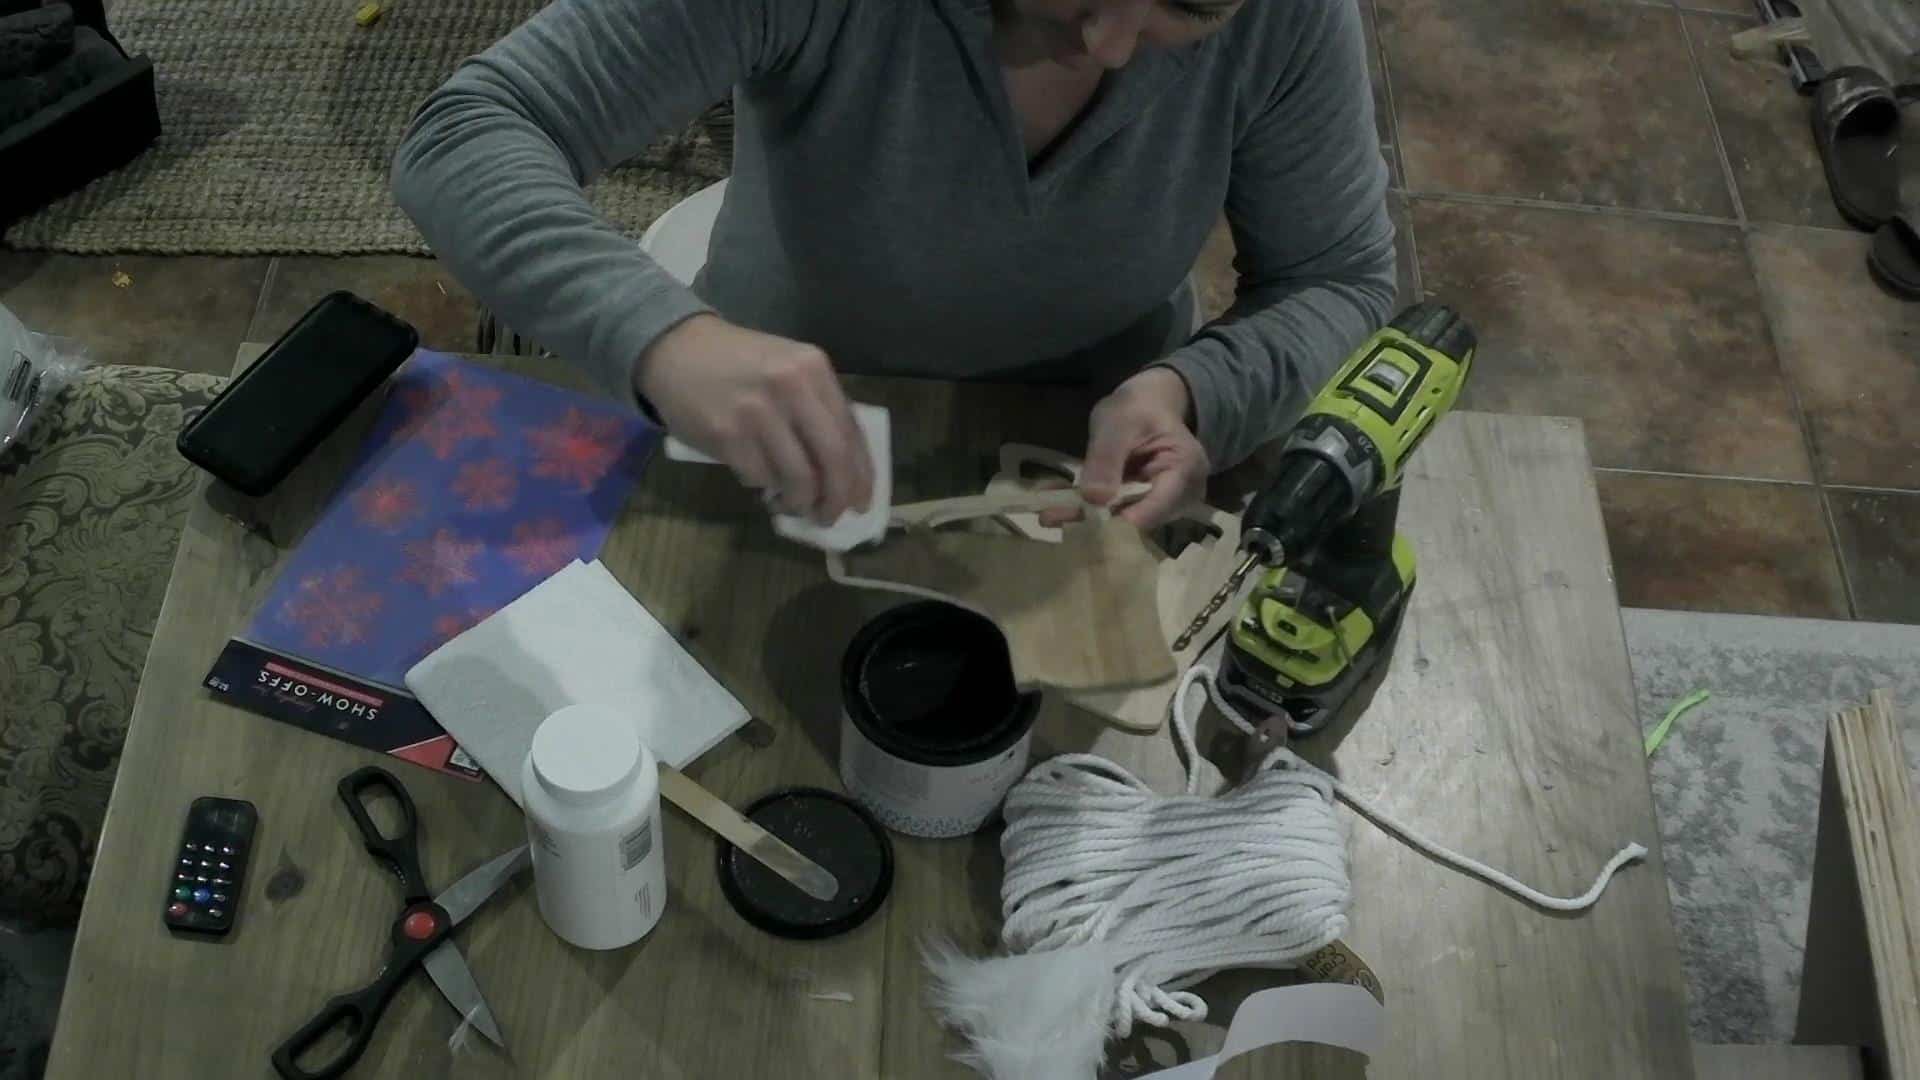
DIY Ice skate decor - staining the skates

Staining the Ice Skate Decor

Step 5

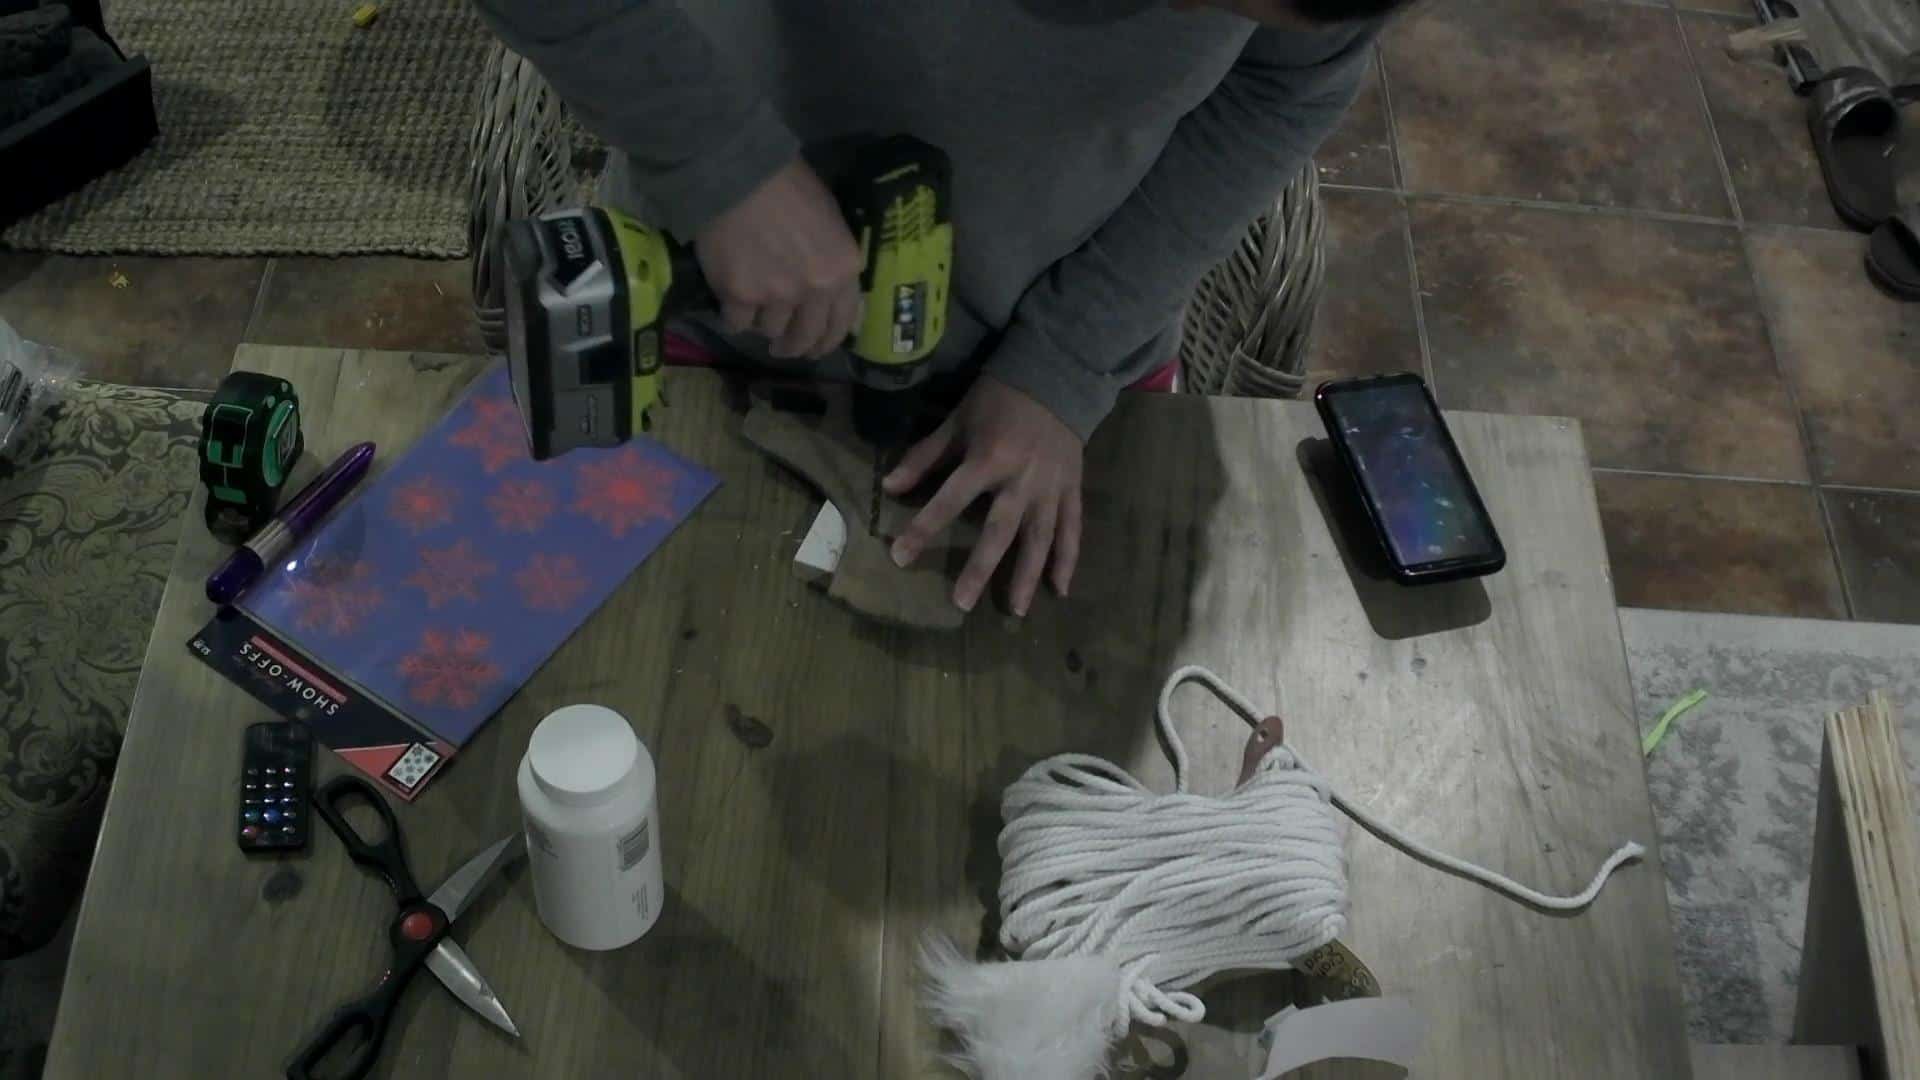
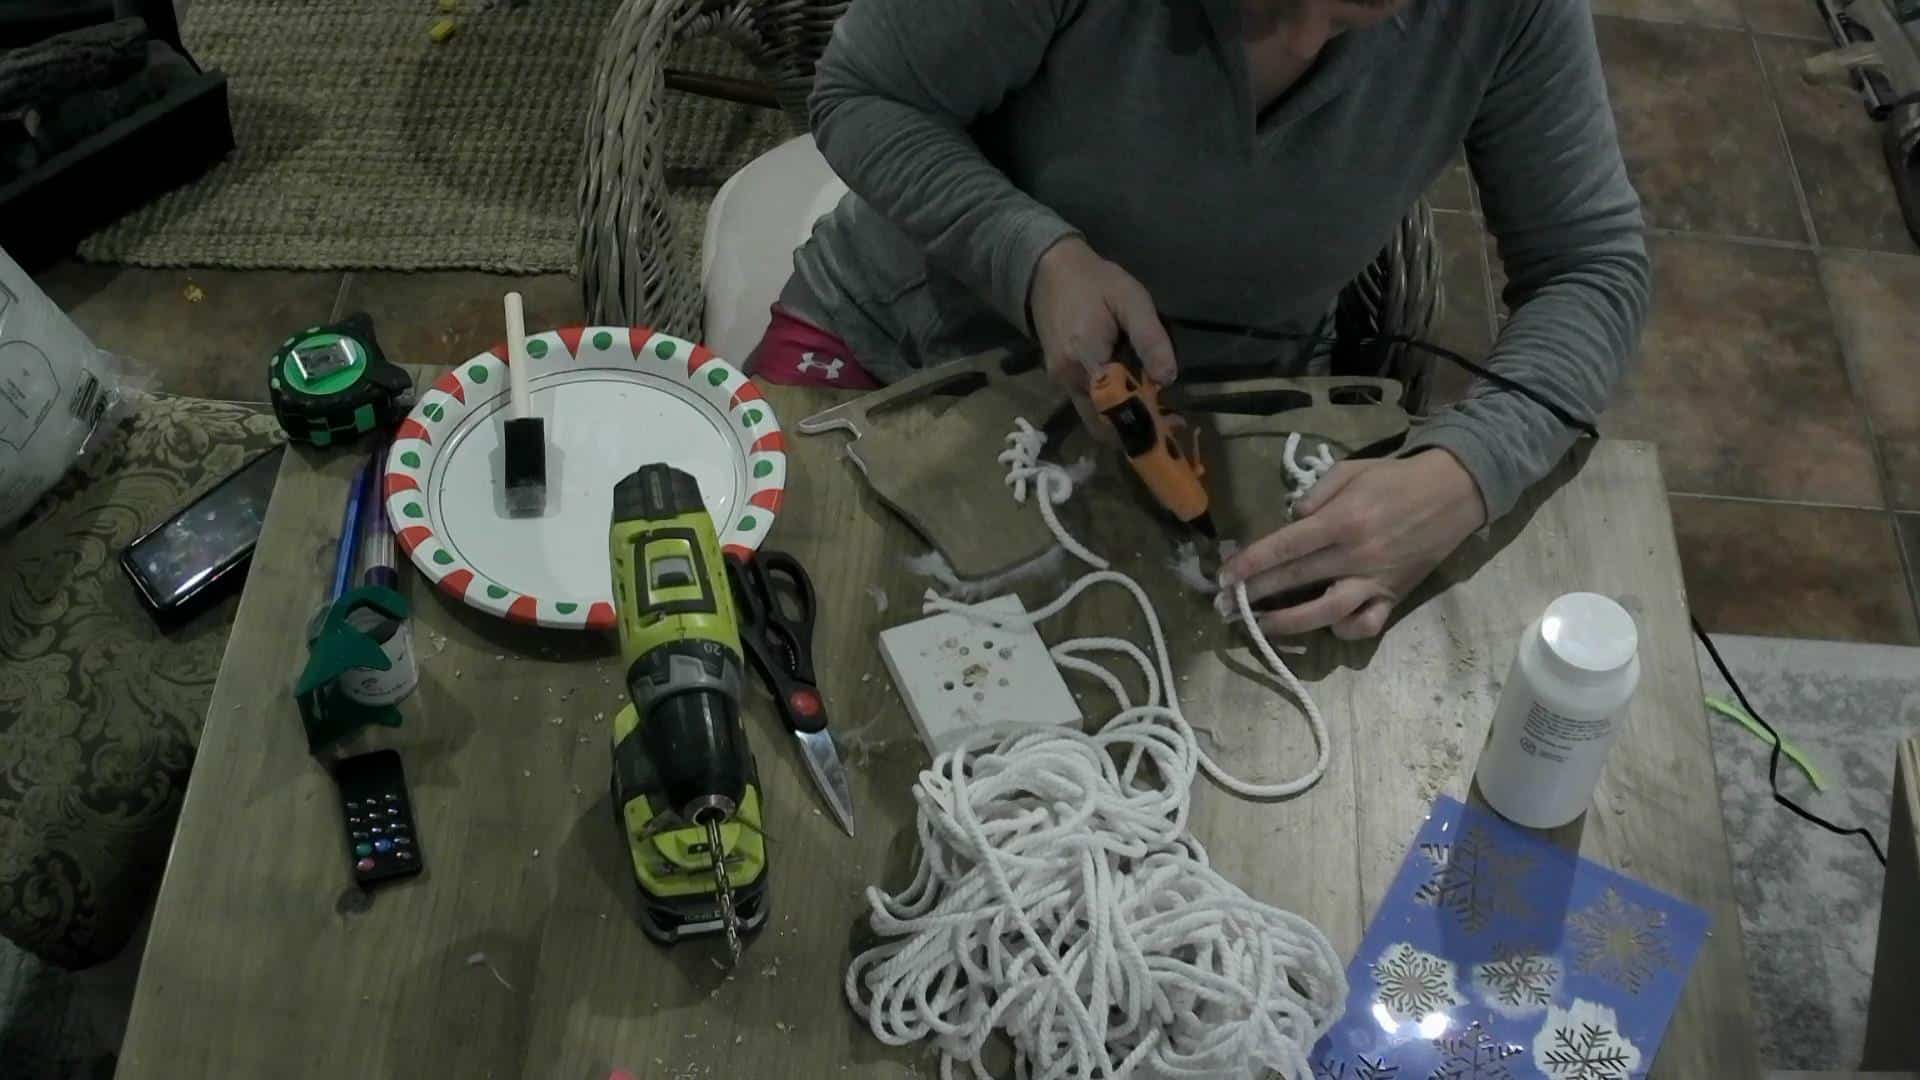
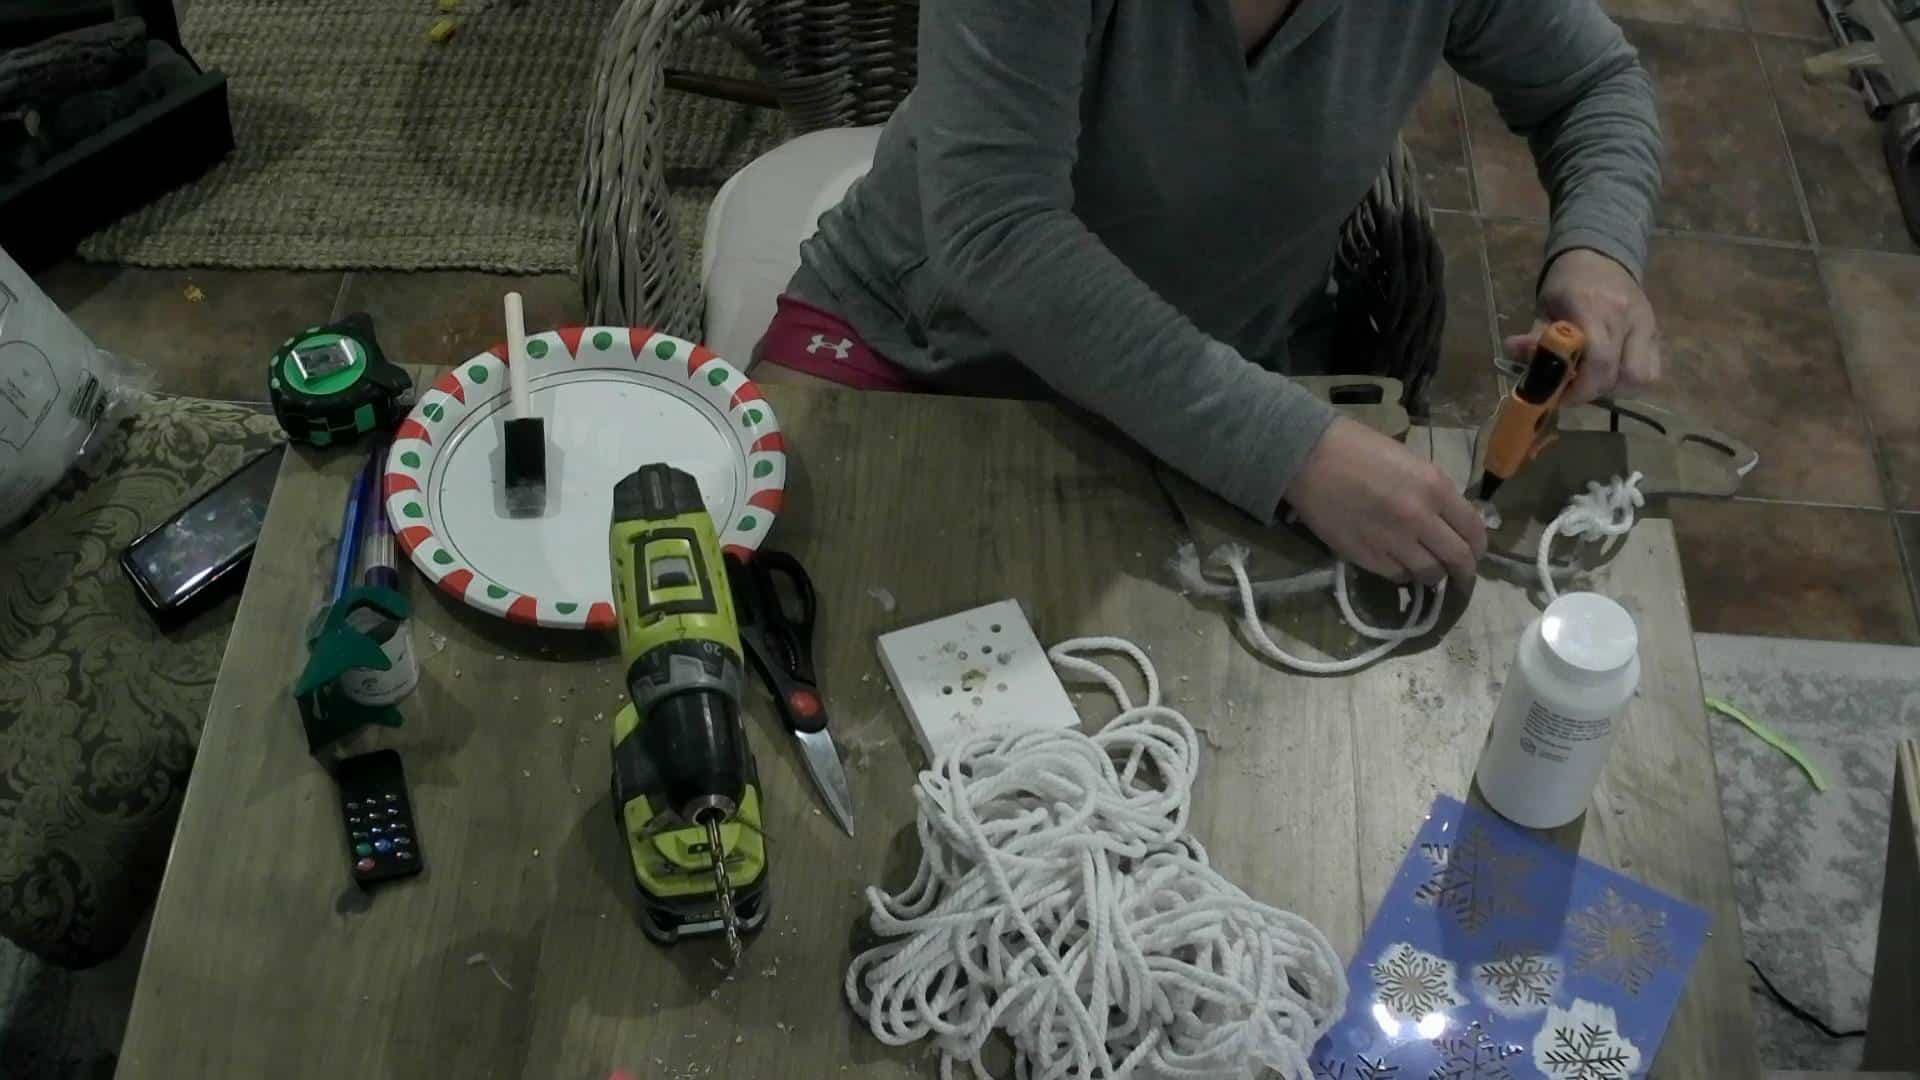
Drill the holes for the laces!

Using a scrap piece of wood to keep from drilling into my table, I just measured and drilled 4 holes along the ice skates. I then realized there needed to be another, and came back and drilled an extra one at the top!

The first hole is drilled at 1 5/8″ from the top of the skate and all the holes are 1/2″ from the front of the skate, and then they were 3/4″ apart.

Drilling the holes for the shoe laces on the Ice skate decor

Step 6

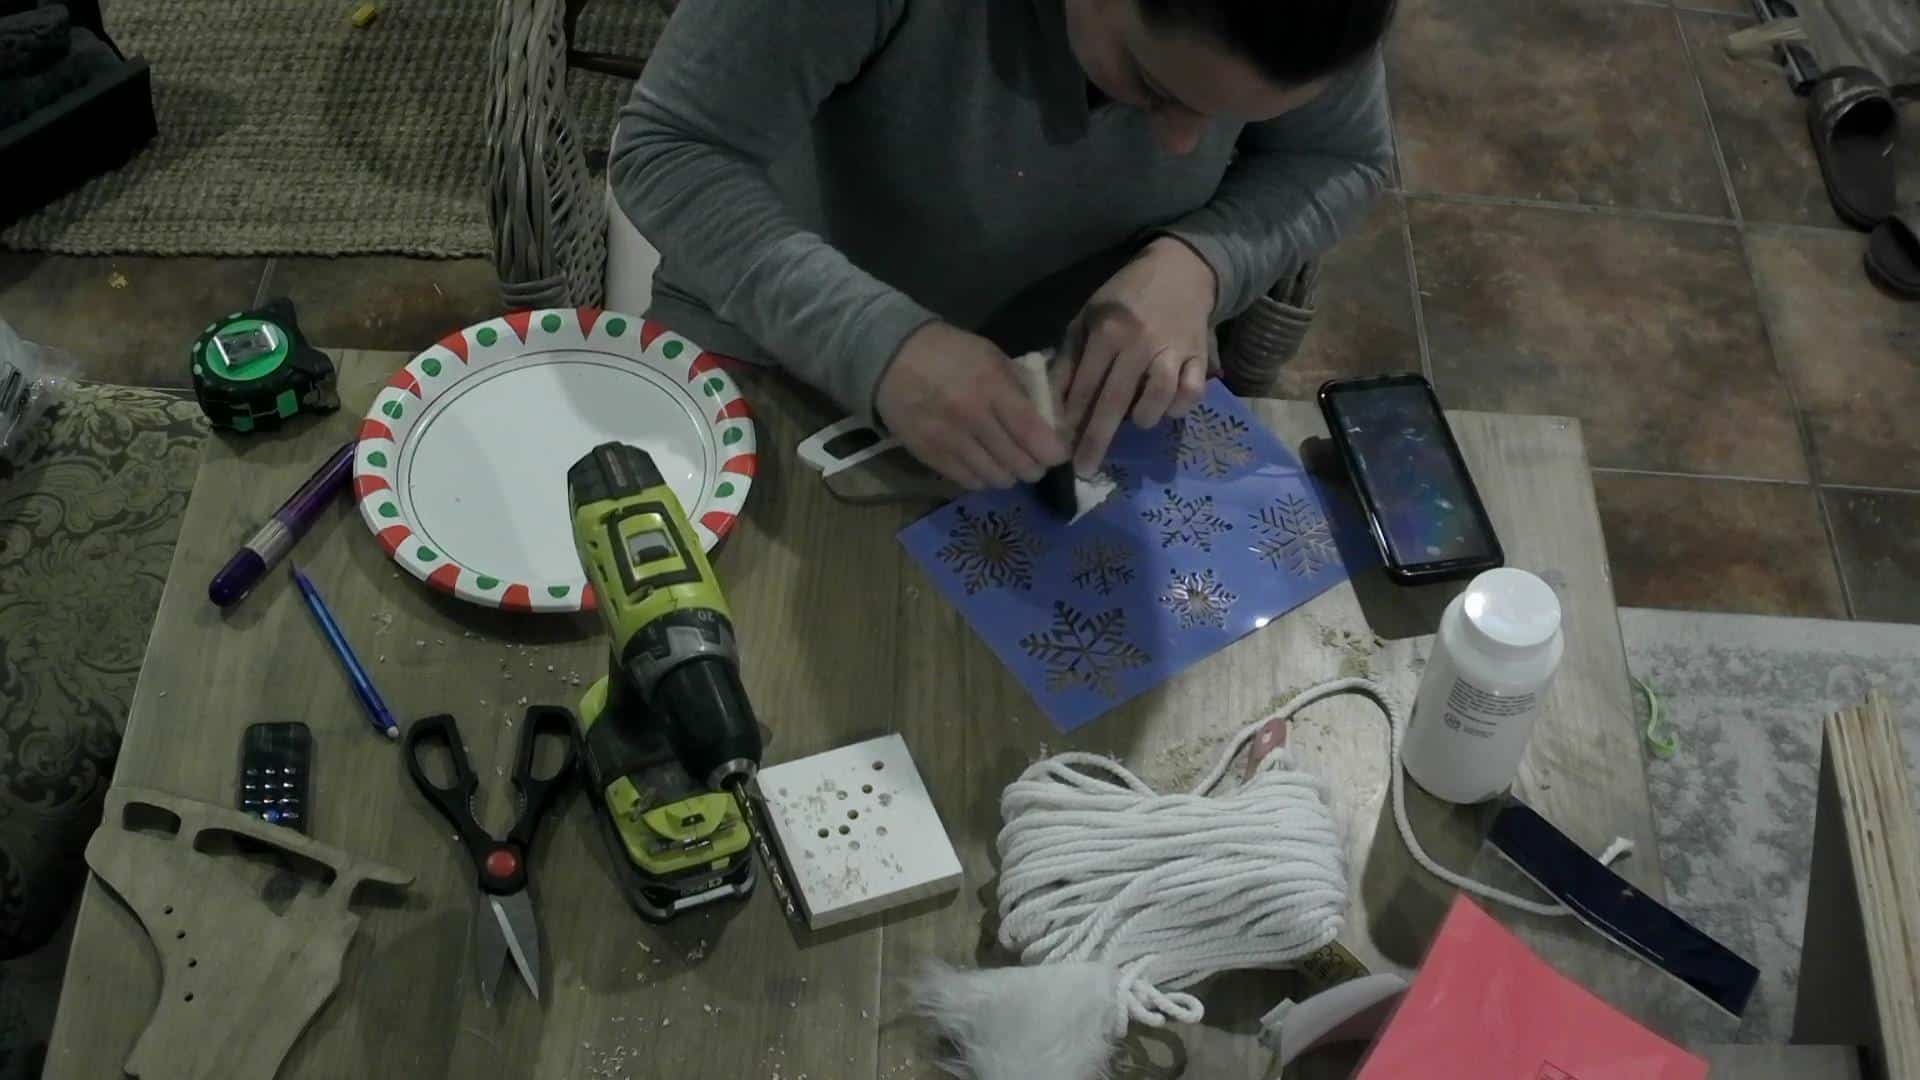
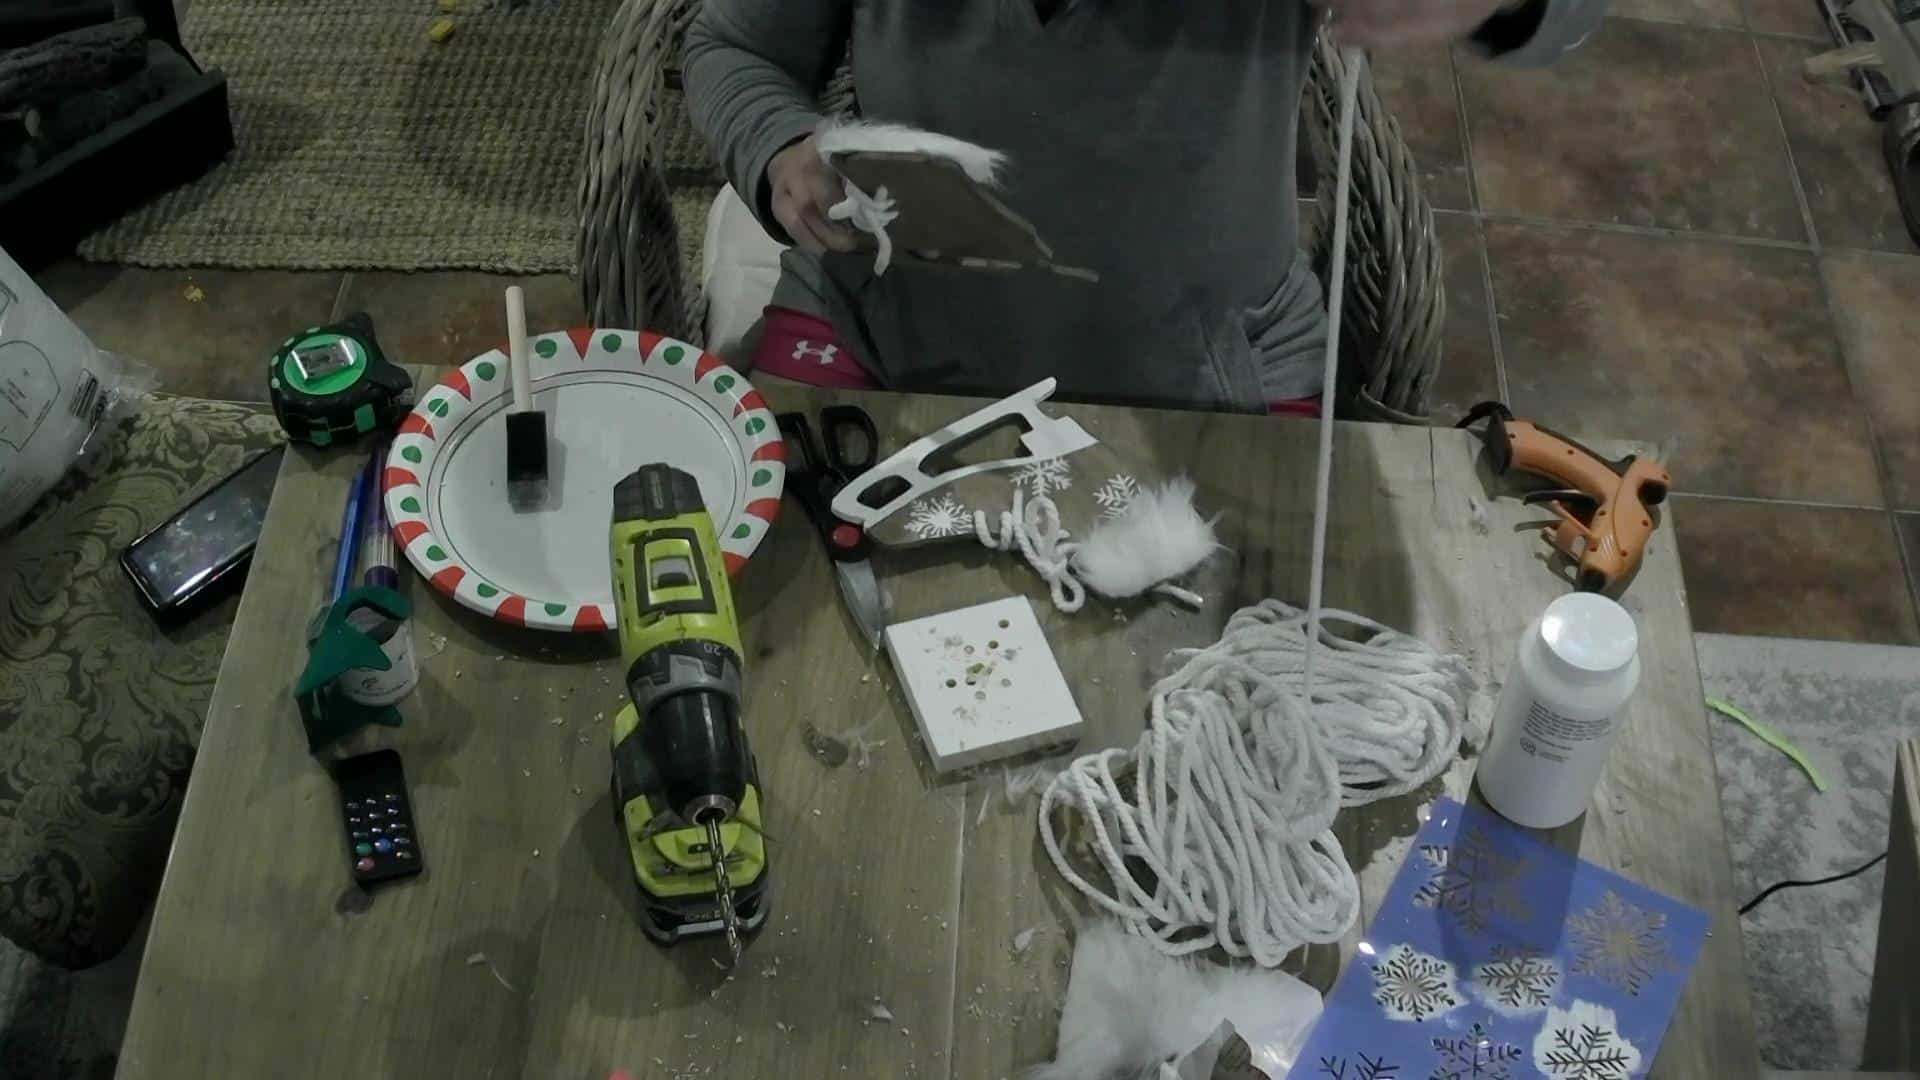
Paint the white accents on the one skate, or both if you like that look better!

DIY Ice skate Decor - painting the white accents on the skates

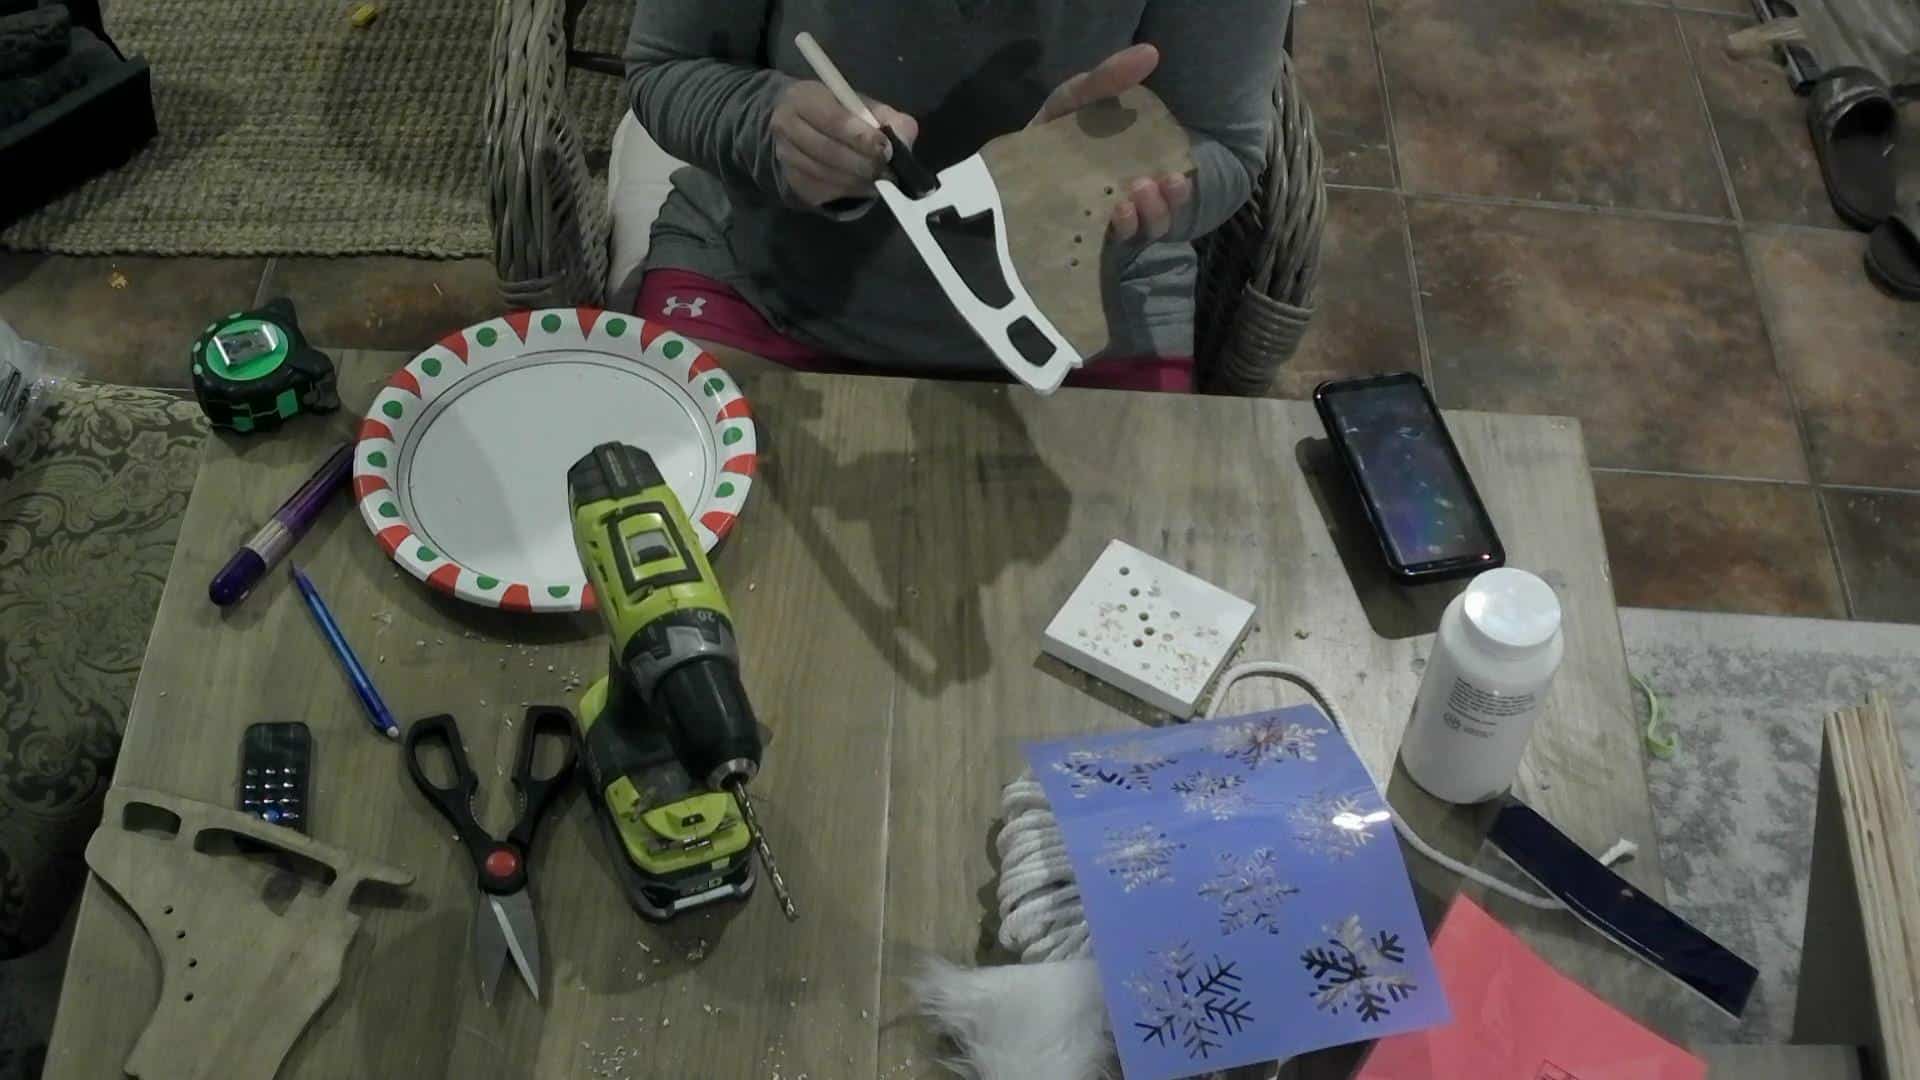
Using a stencil paint the snowflakes…the trick to a stencil is to have VERY LITTLE paint on your paintbrush and slowly build up the color! I went too heavy on my first snowflake! Oops!

DIY Ice skate decor - painting the snowflakes on the ice skates

Step 7

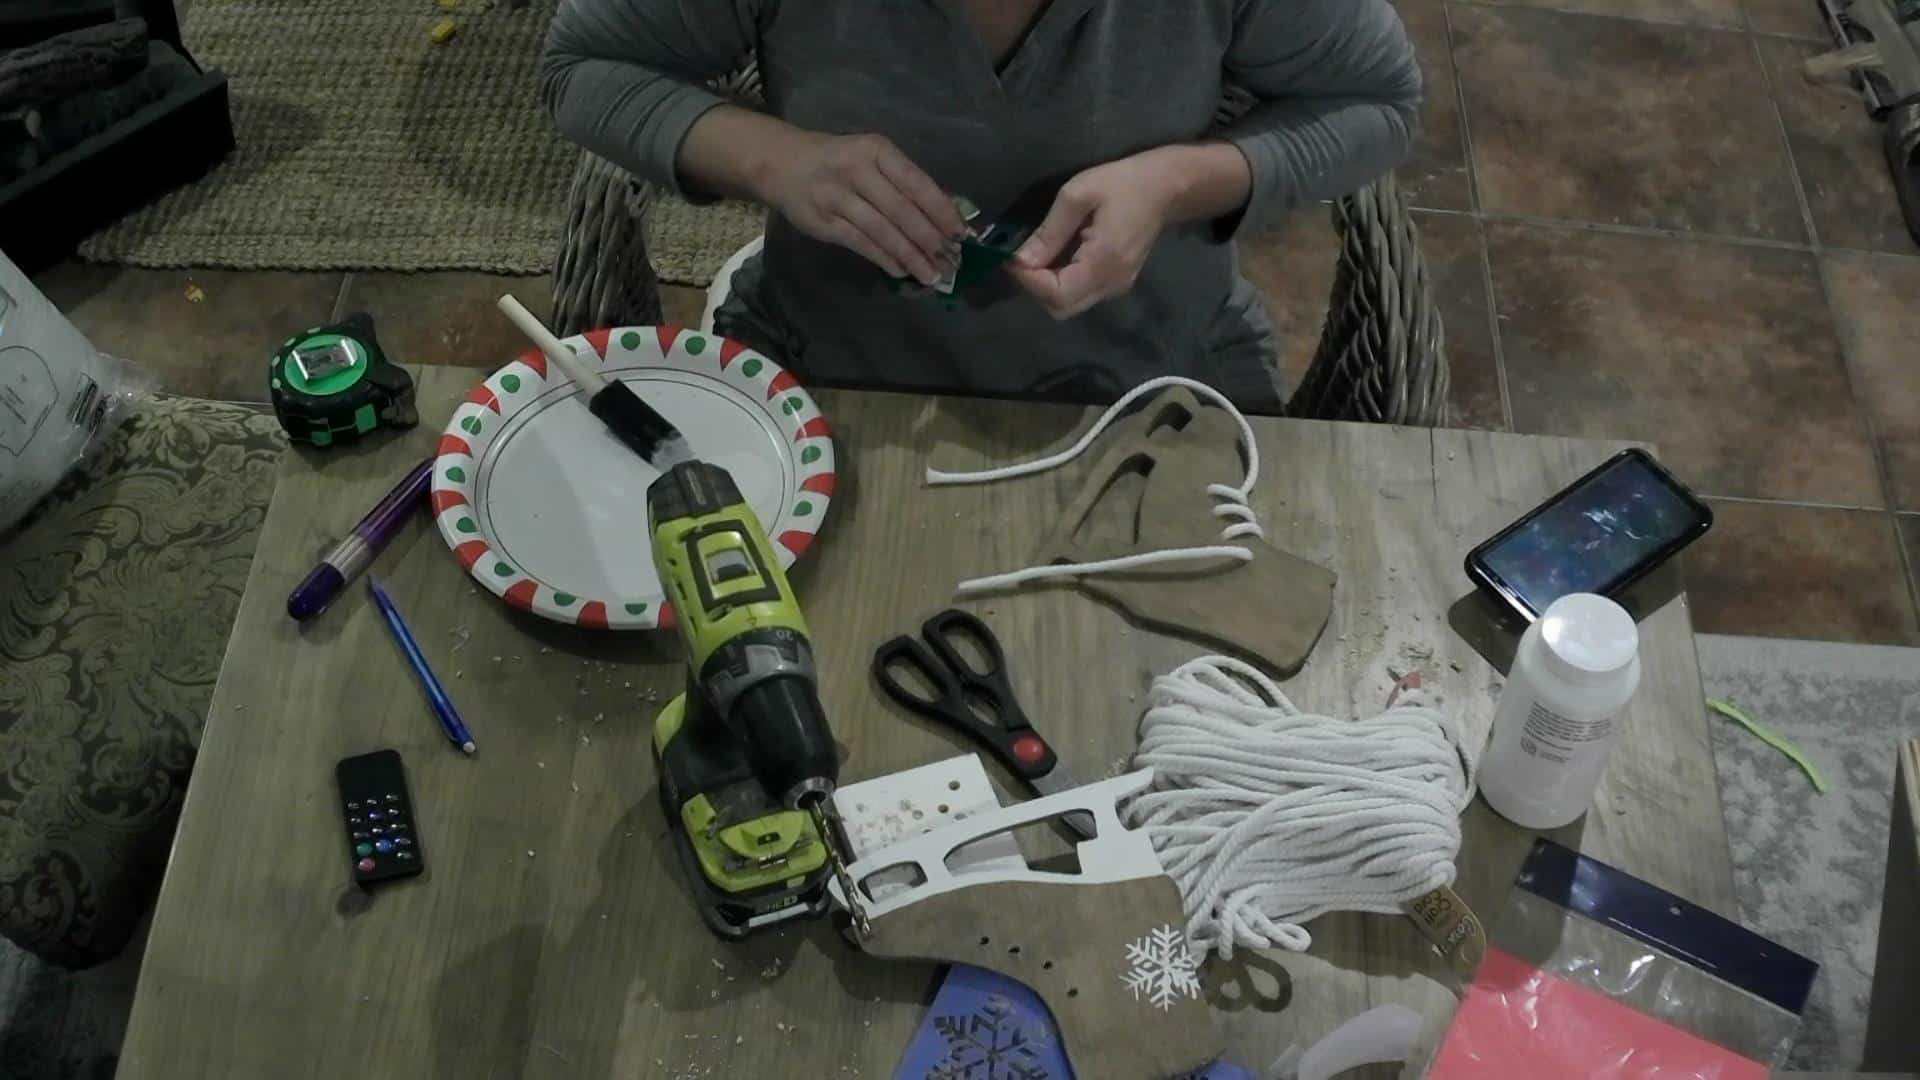
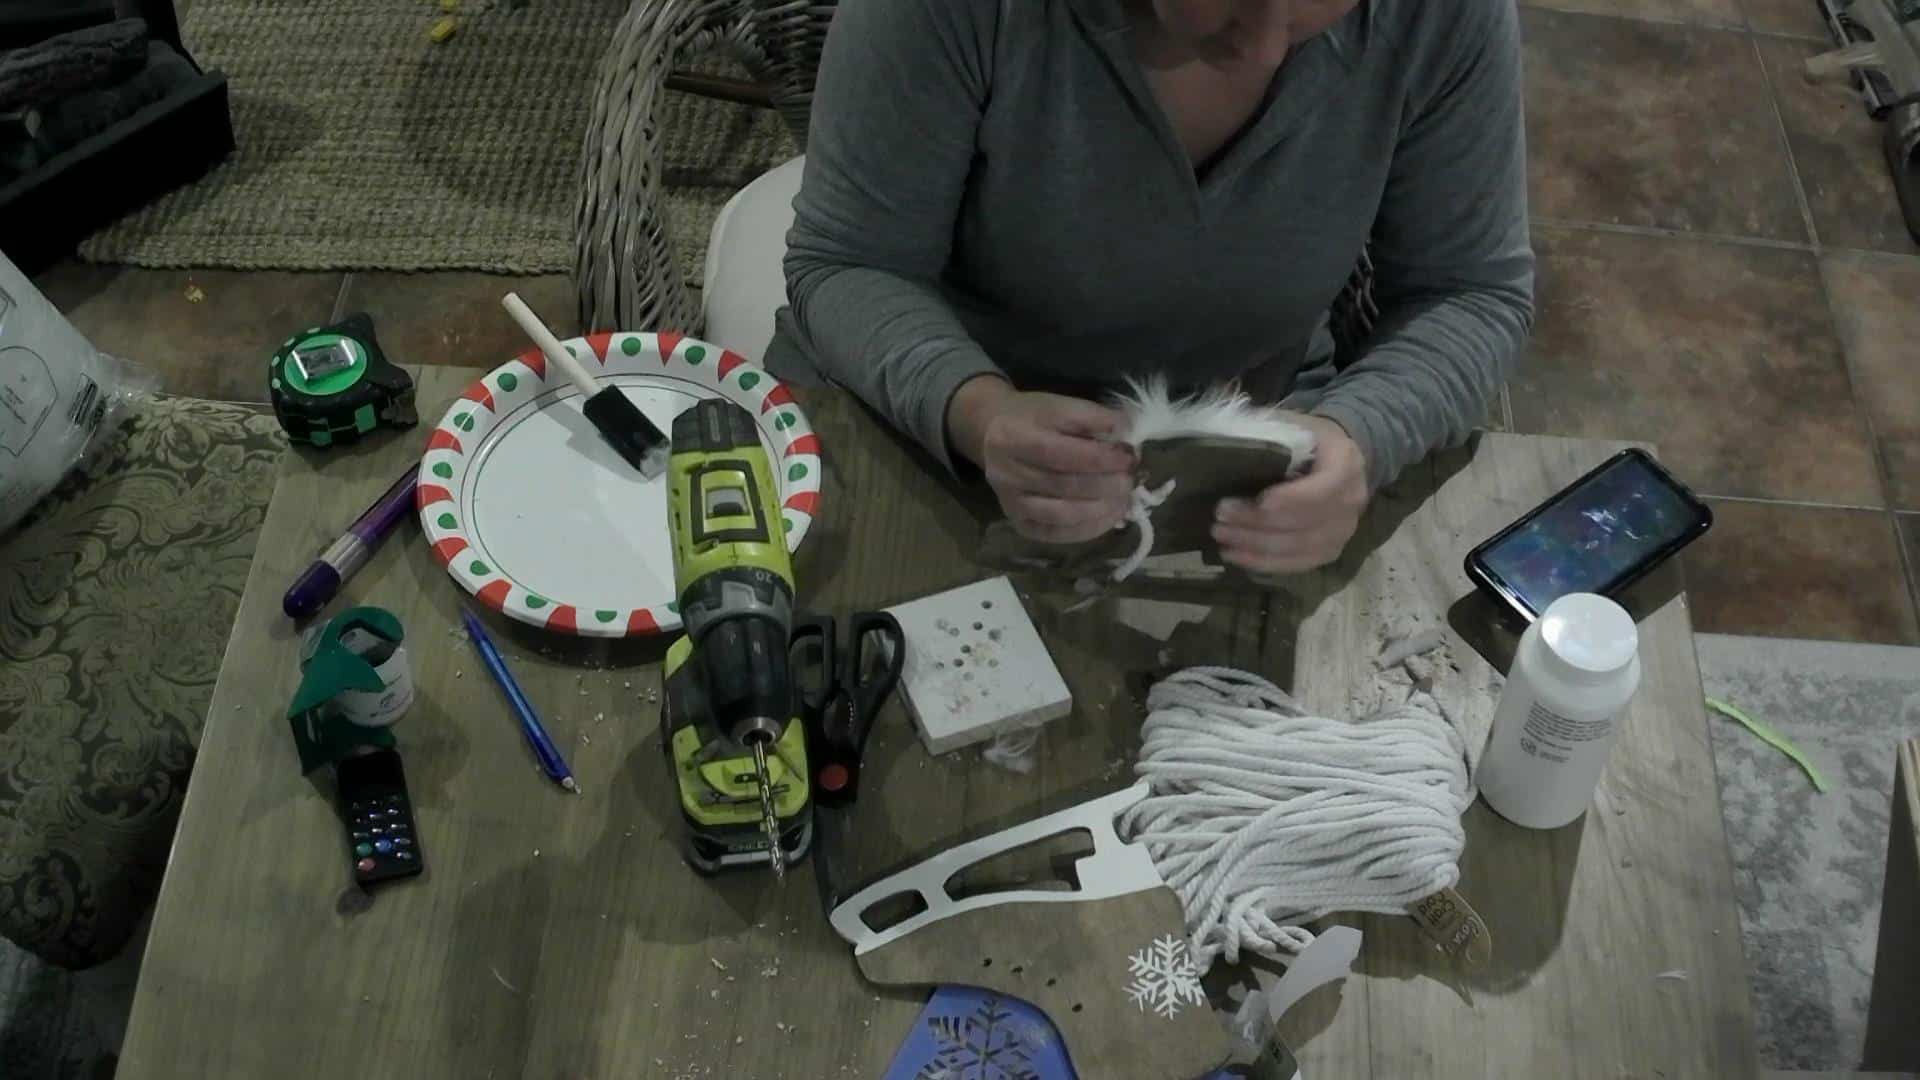
Once I painted the first snowflake I set it aside to let it dry, and started lacing the stained skate!

Start at the bottom and only pull half of your string through the lace holes. Leave the string longer on the bottom! (Remember how I drilled 4 holes at first and then decided I needed the 5th hole, this is when I only had 4 holes!) But don’t feed your string through the 5th hole, stop at the 4th!

Lacing the DIY Ice Skates

Step 8

Bring the long string from the bottom up through the laces to the top.

DIY Ice Skate Decor - lacing the ice skate

Ice skate decor

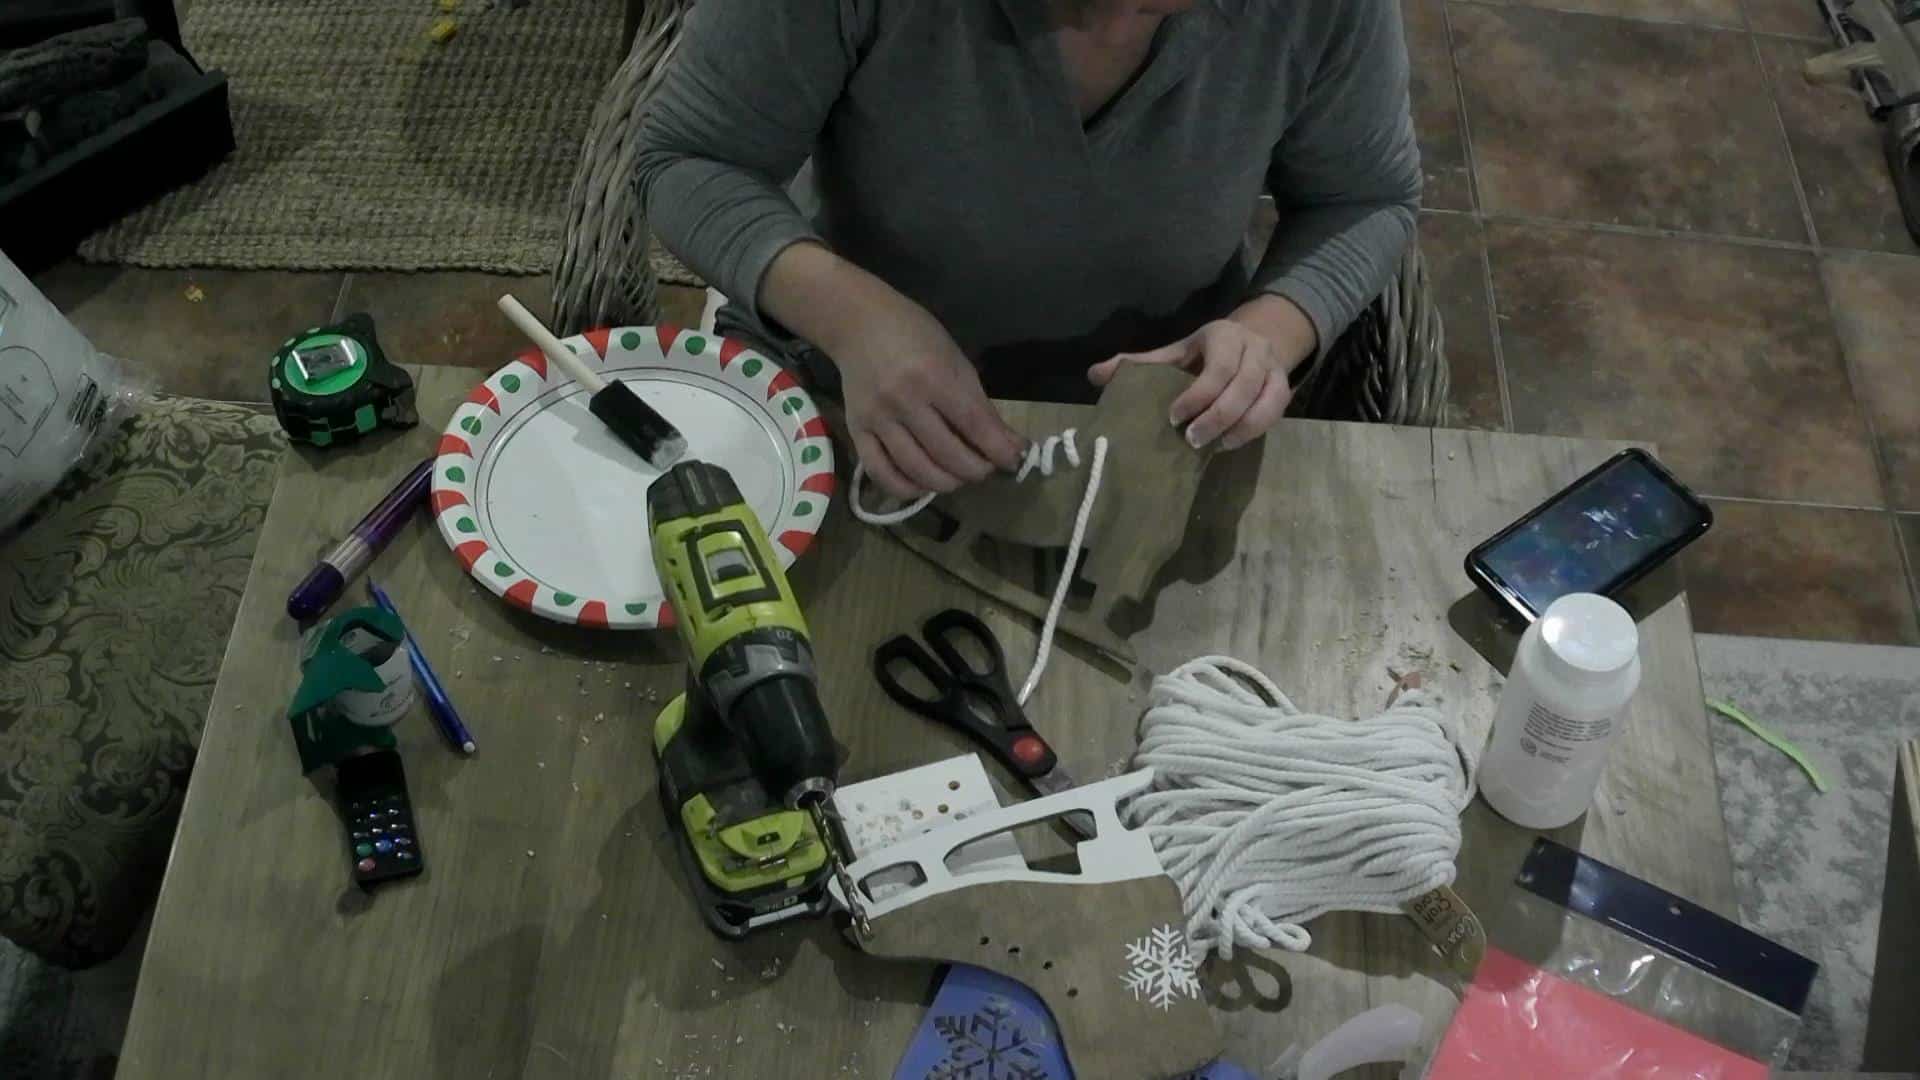
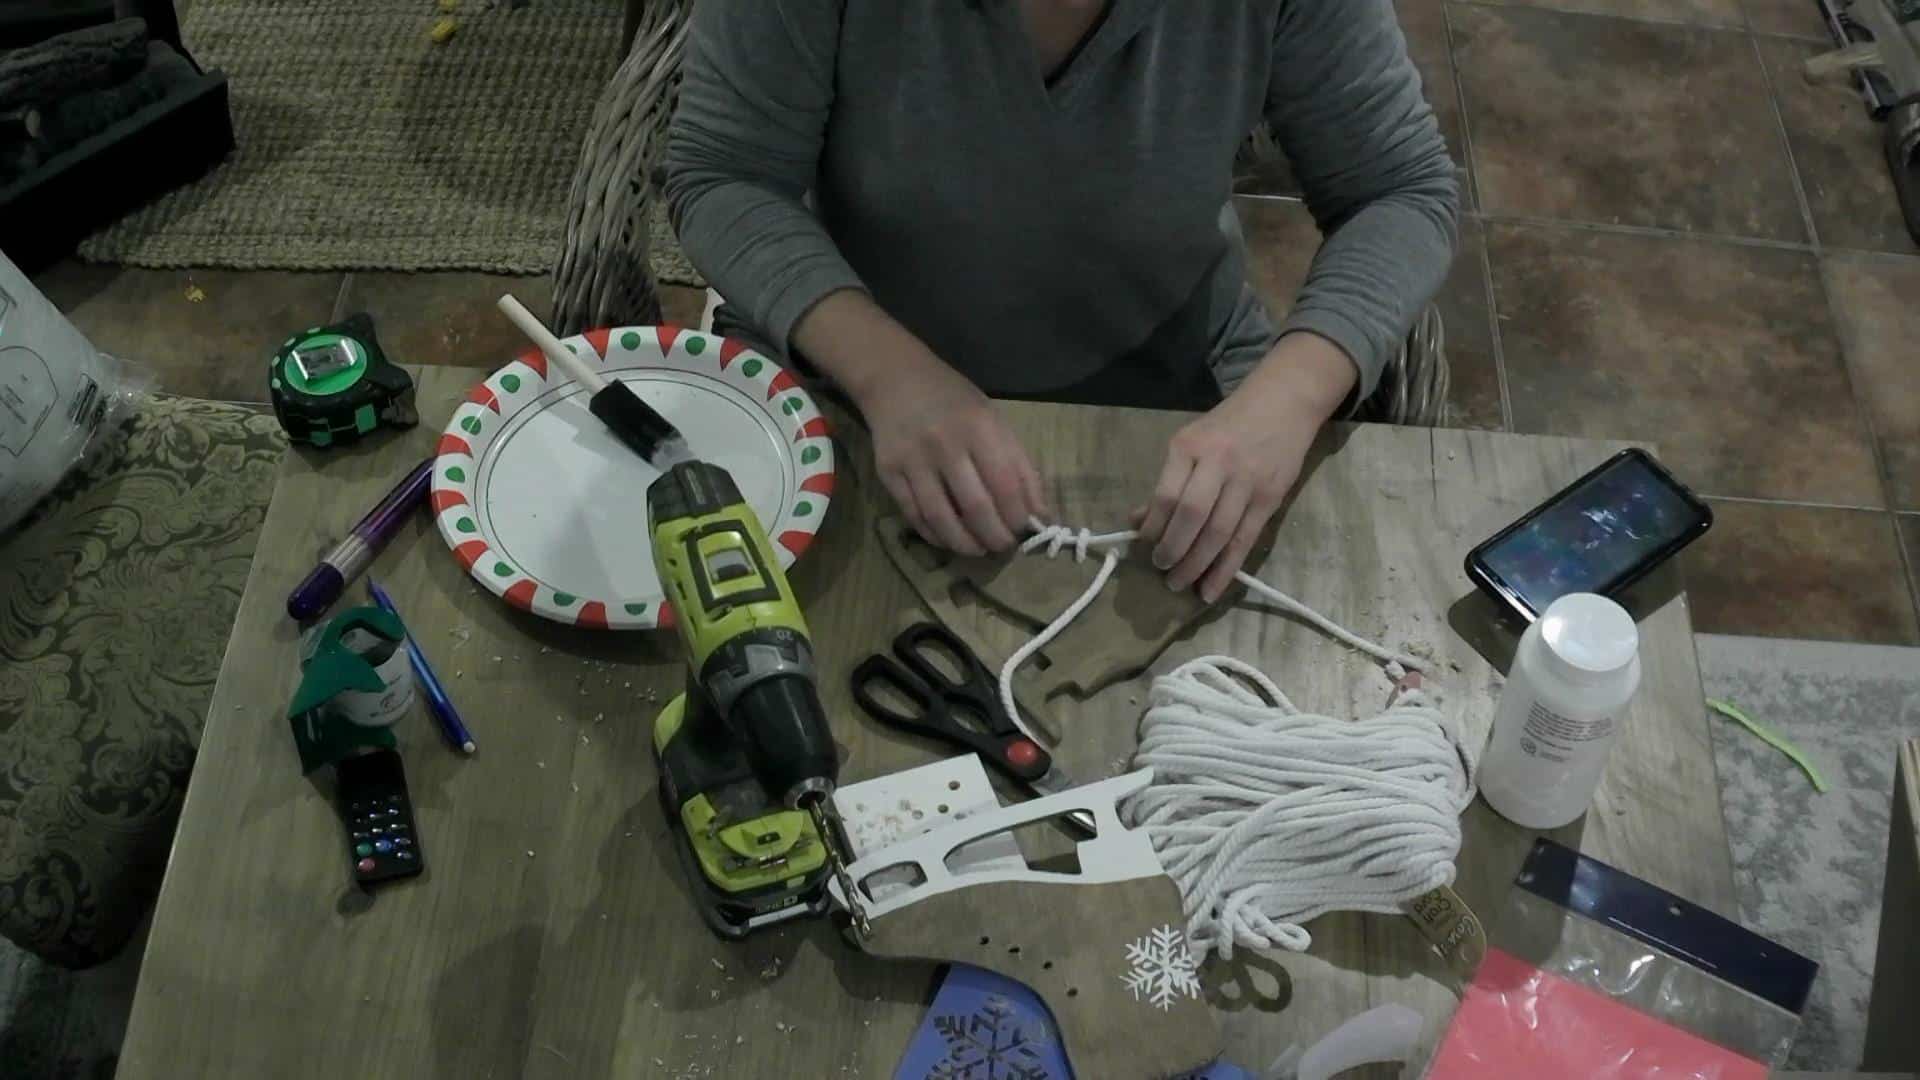
Bring that lace from the backside through the last (5th) hole, and tie the two strings together on the front of the skate!

Tying the laces on the DIY Ice Skate Decor

Step 9

Add the fur to the top of the skate with hot glue! I have used this faux fur a lot this holiday season and one trick I have learned is to cut your fur about an inch larger than you need and then along the bottom, push the fur upwards when you cut it down to size. Then when you flip the fur back down, it is uneven and realistic looking instead of being bluntly cut!

Adding the fur to the top of the ice skate!

DIY Christmas Ice Skates

Step 10

Repeat to finish the other ice skate!

DIY Snowflake Ice Skate

Step 11

Using a long piece of your string, cut it to the size that you want and hot glue it to the back of both skates!

DIY Ice Skate Decor for winter wreath

Ice Skate Decor

Let it dry and hang it wherever your heart desires to add some wintery / holiday cheer!

DIY Christmas Ice Skate Decor

DIY Ice Skate Christmas Decor

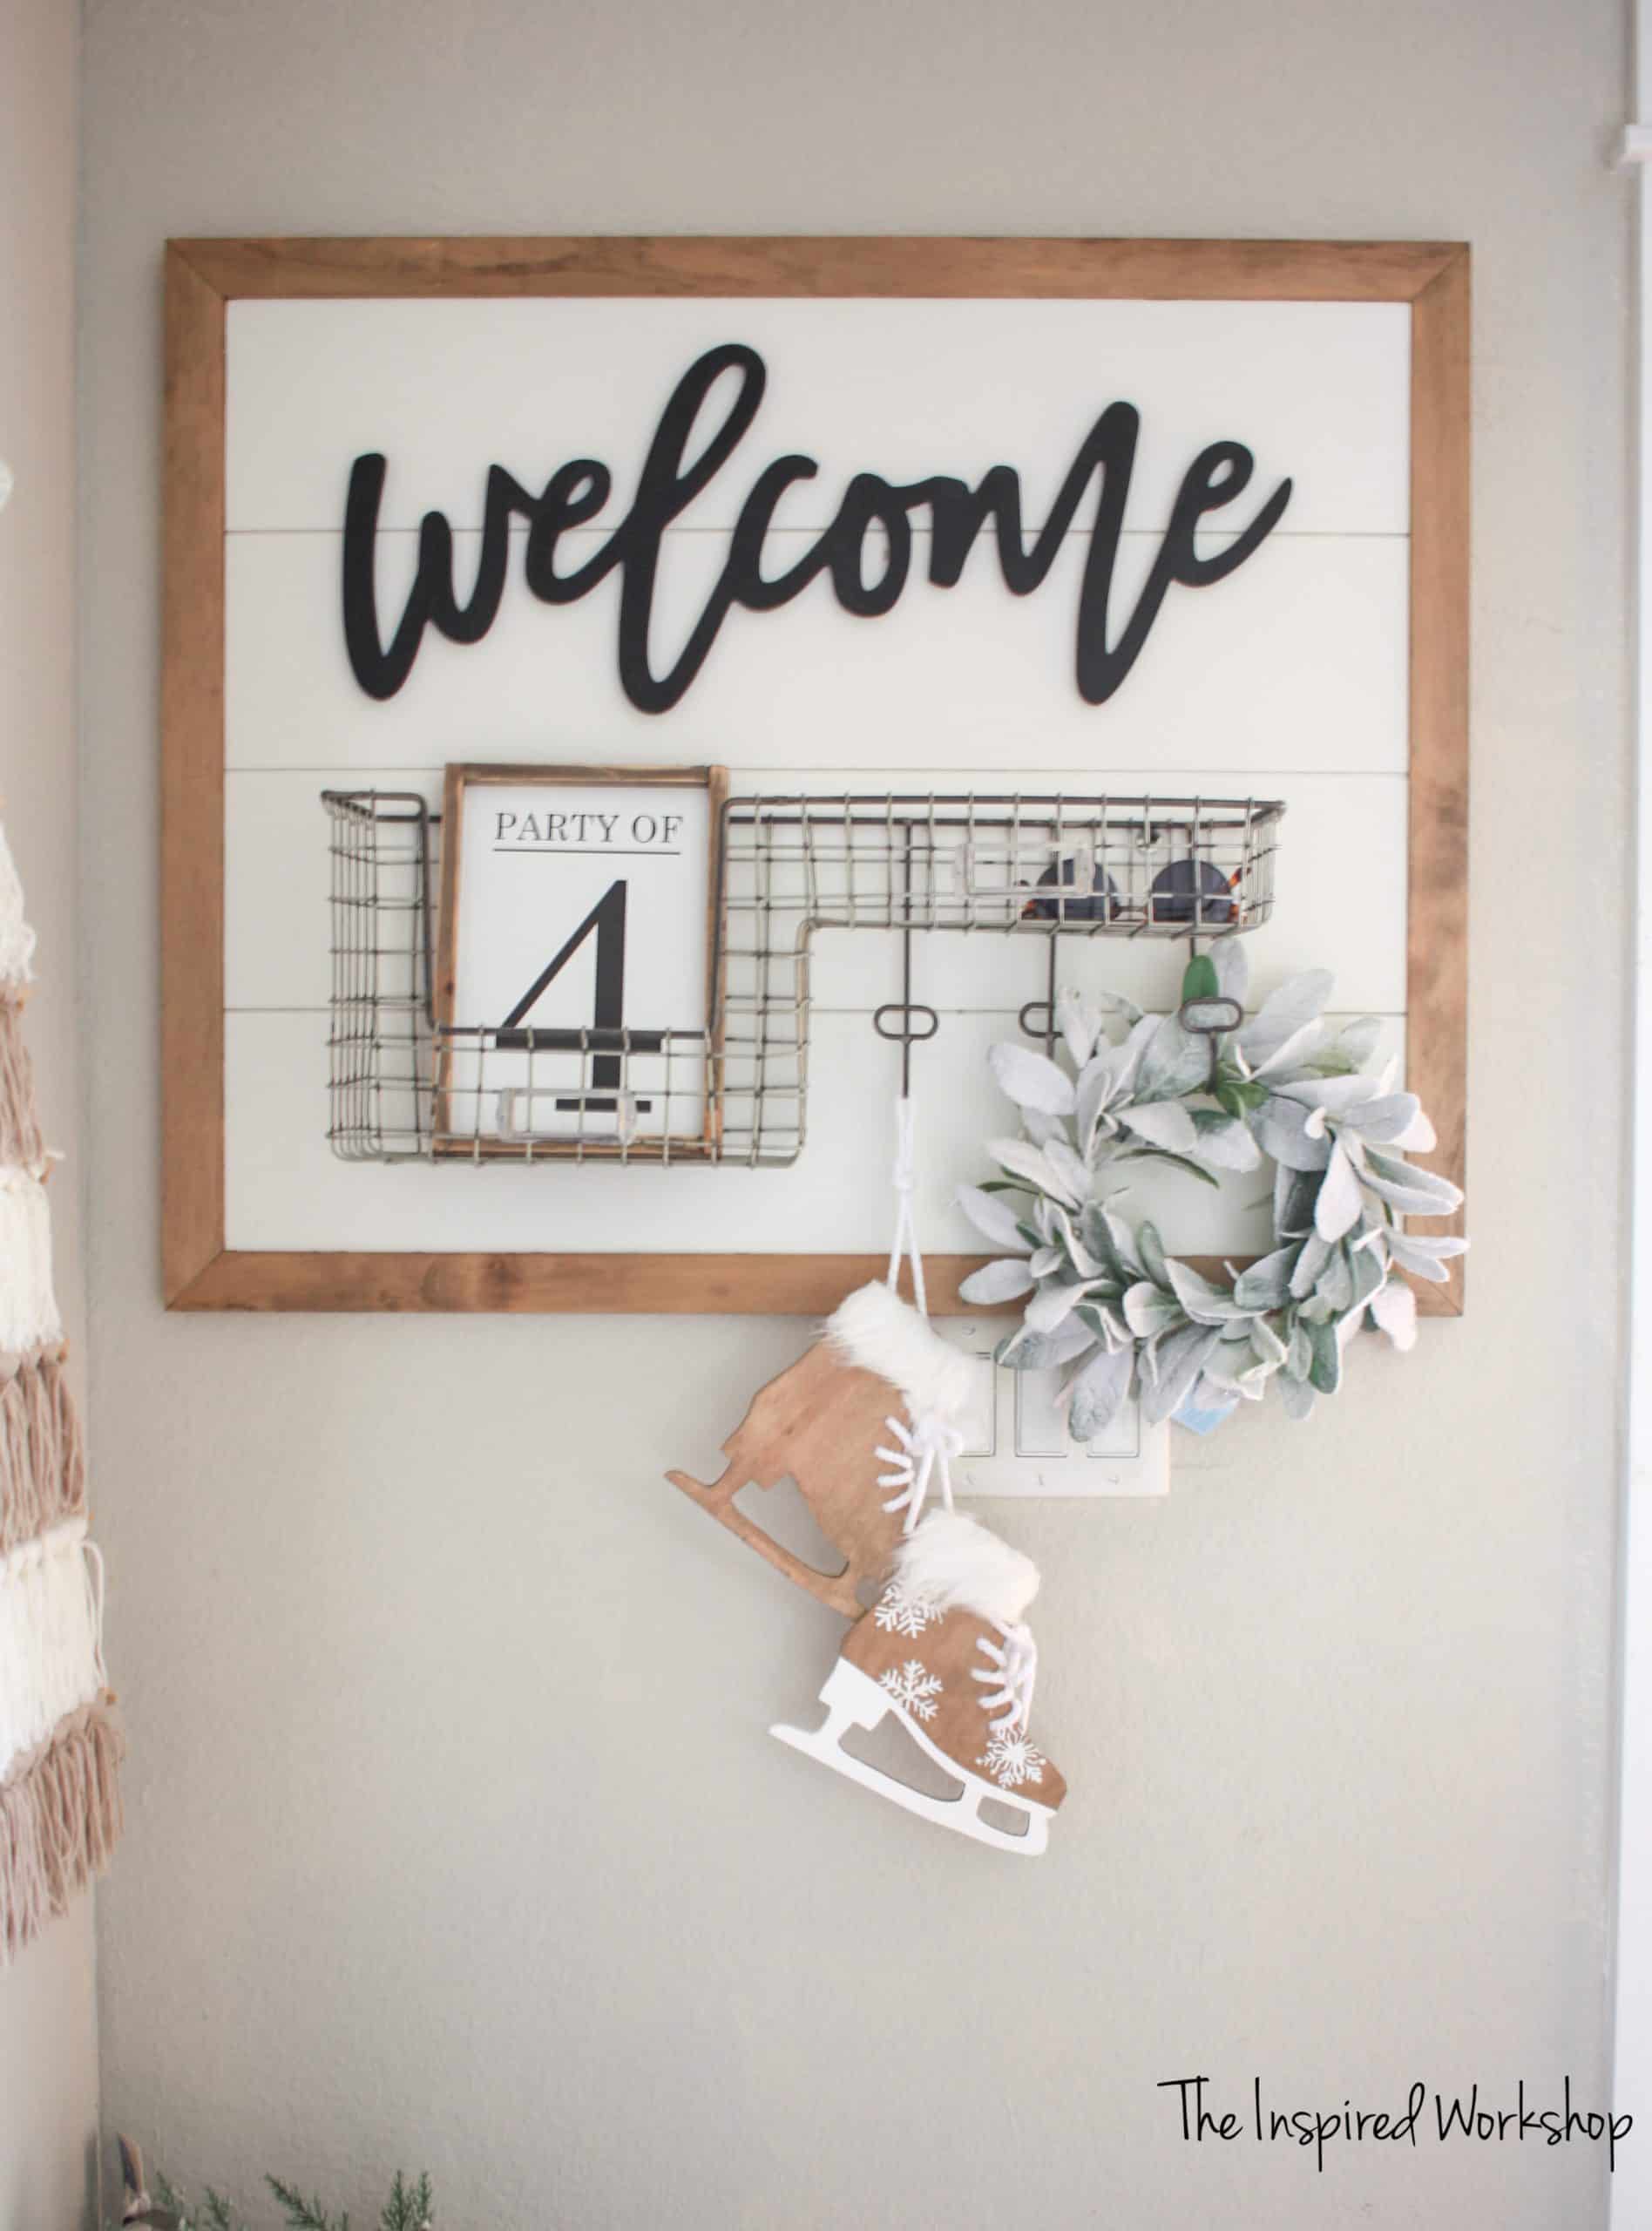
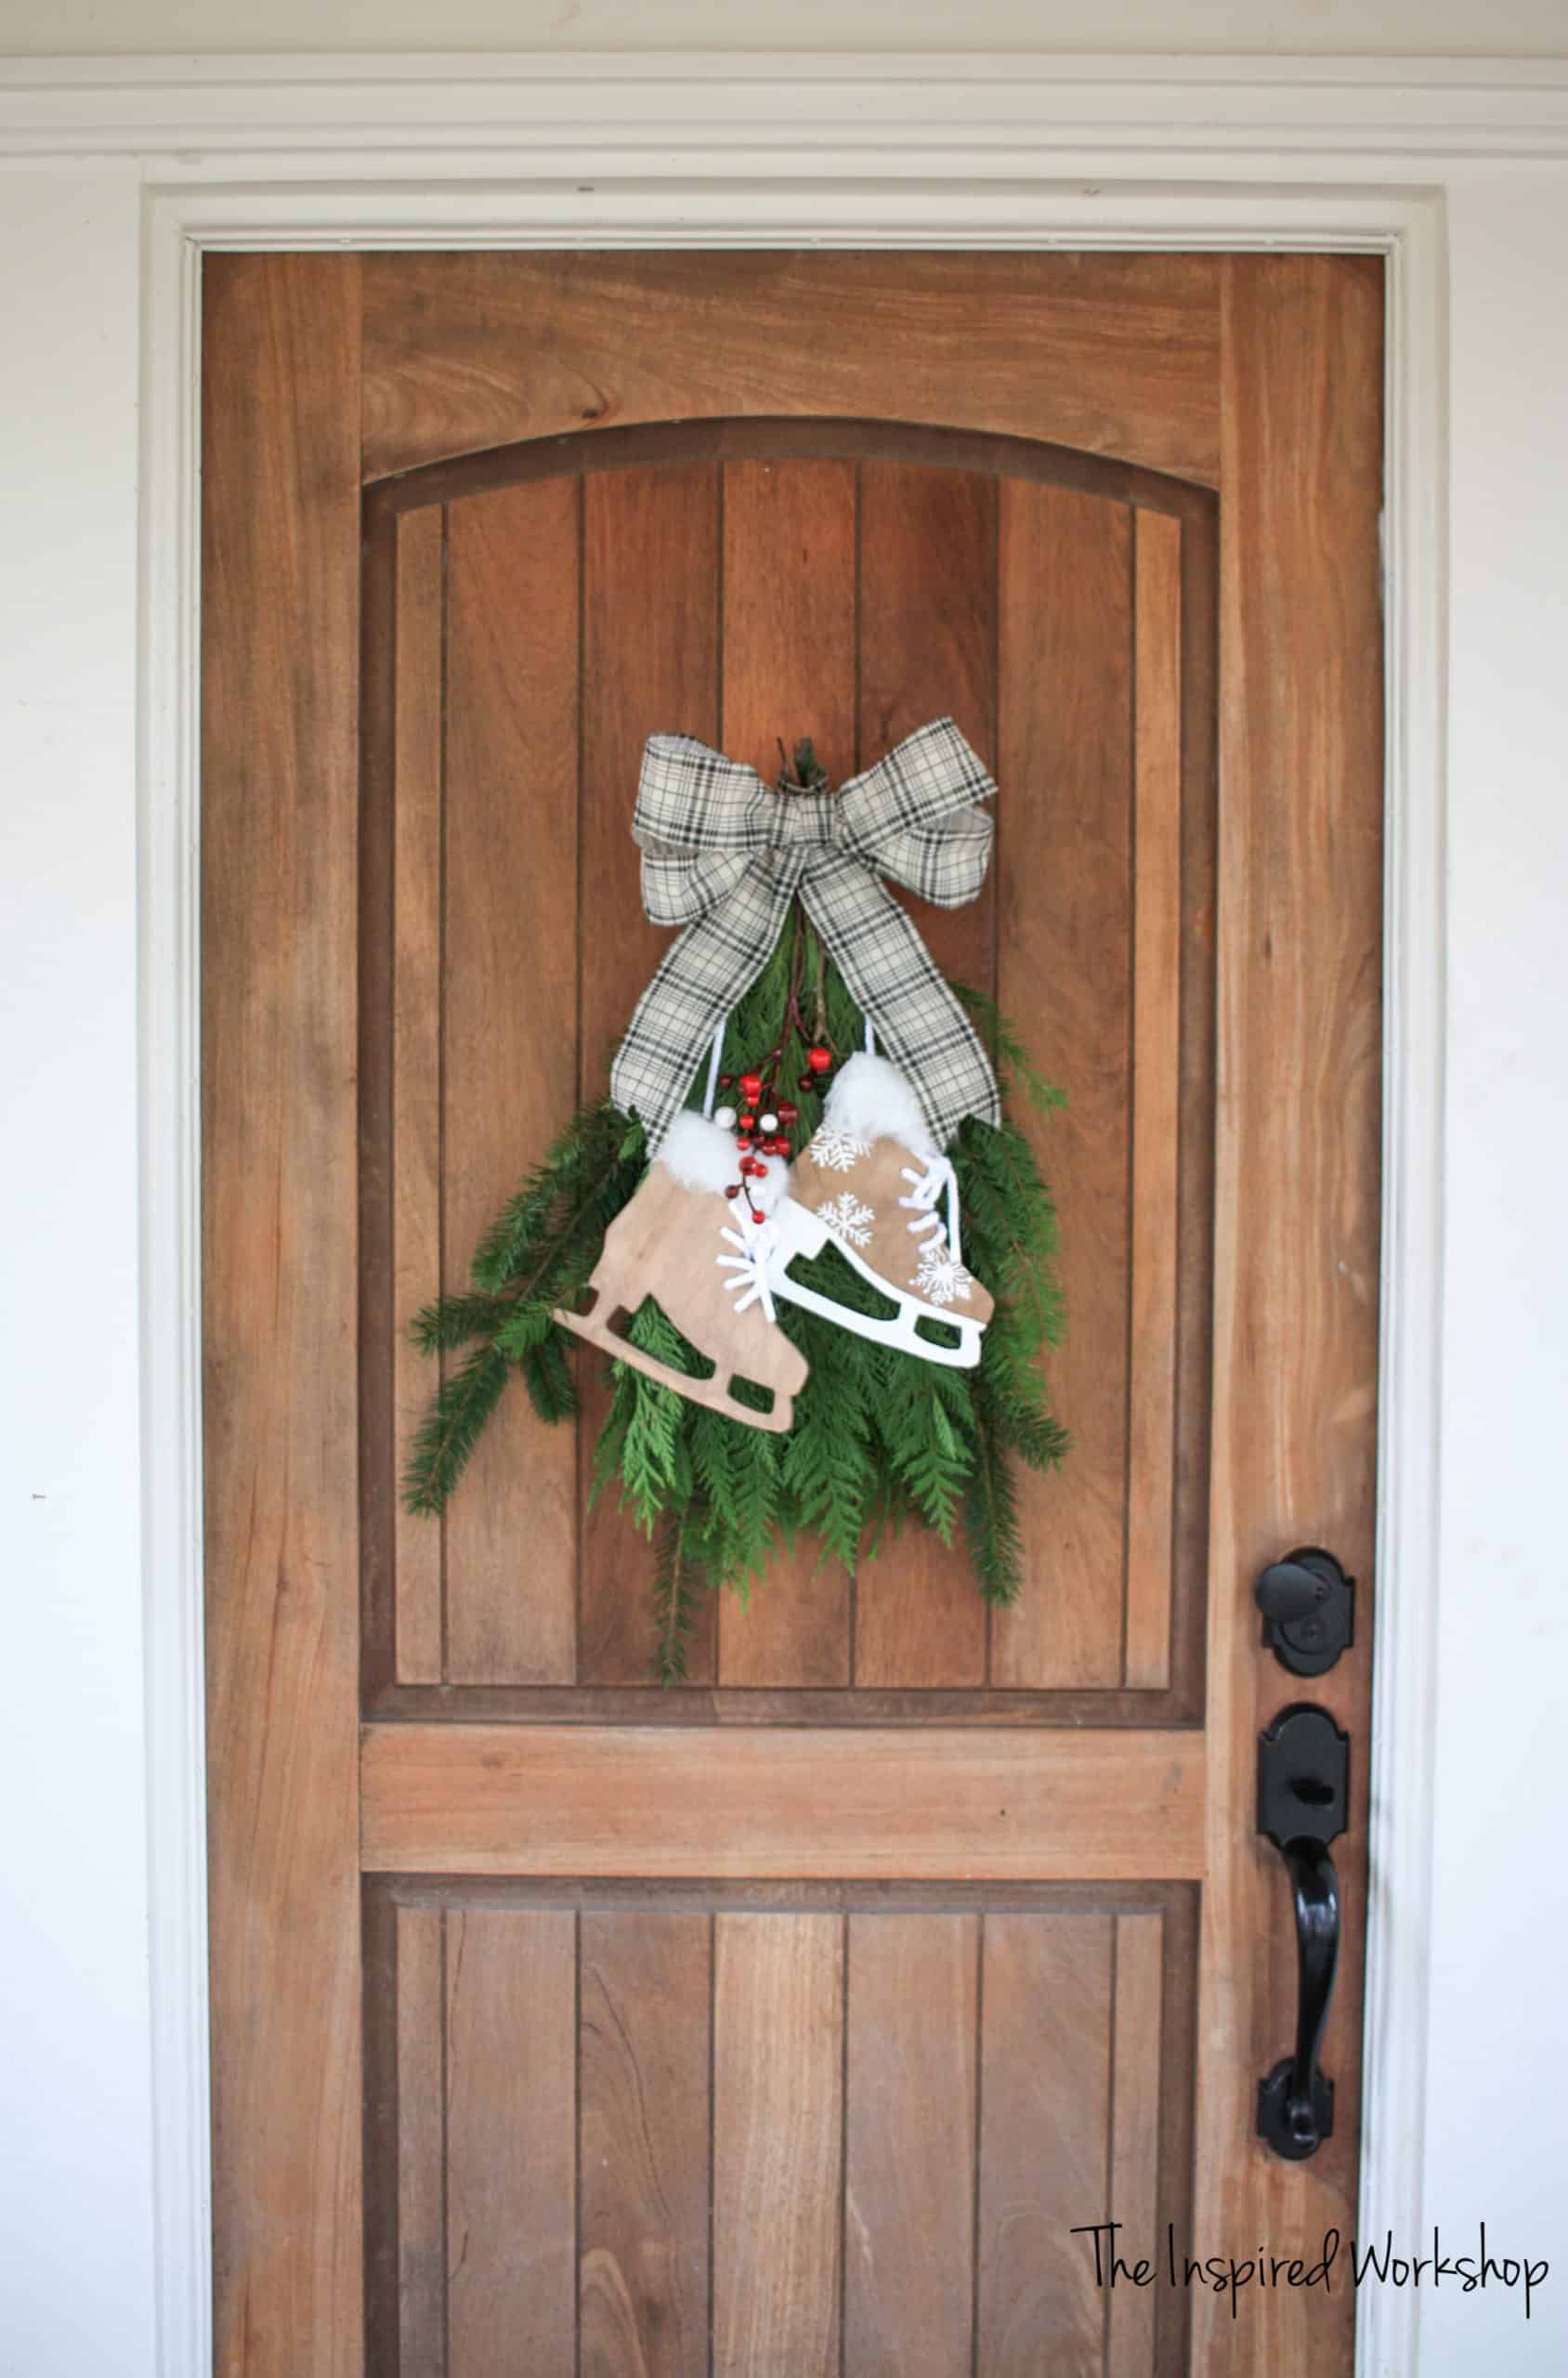
I LOVE mine! How will you use them this Christmas or winter? I would love to see!

Have a WONDERFUL Christmas everyone! I should be back with 3 or 4 more projects before then, but just in case we miss each other…Merry Christmas!

Think your family and friends would like to try this project? Share it with them!

101 Shares
Pin100
Tweet
Share1

Want to save the DIY Ice Skate Decor for later? PIN IT!

DIY Ice Skate Winter Decor

Related Posts

  • DIY Neutral Fall WreathDIY Neutral Fall Wreath
  • DIY Winter Christmas WreathDIY Winter Christmas Wreath
  • Spring Wreath Including All My Favorite Things!Spring Wreath Including All My Favorite Things!
  • DIY Simple Wooden Boxes for Party DecorDIY Simple Wooden Boxes for Party Decor
  • Bathroom Reno – One Room Challenge – Week 2Bathroom Reno – One Room Challenge – Week 2
  • DIY Dartboard CabinetDIY Dartboard Cabinet

Filed Under: Holidays, Crafts, Gift Ideas, Wall Decor Tagged With: hanging decor, winter decor, wreath

Affiliate Links

Note: some posts may contain affiliate links! An affiliate link means that when you click a link from my site and make a purchase, I may receive a small compensation from that purchase! It's a real win-win for the two of us since it doesn't cost you any extra and helps me bring you and everyone else more free plans!! Thank you in advance for any affiliate purchases that may be made!!

Reader Interactions

Leave a Reply Cancel reply

Your email address will not be published. Required fields are marked *

Primary Sidebar

Connect with me!

  • Email
  • Facebook
  • Instagram
  • Pinterest
  • Twitter
  • YouTube

Search

Welcome

Hey there! Welcome to the place I share all my diy adventures in hopes of inspiring you to pick up a hammer or drill and get to work building, crafting or renovating your dreams! I will show you step by step instructions on every project to help you see how easy it can be! I’m so glad to have you here! Look around, hopefully you will enjoy what you see!

New Posts Sent Straight to Your Inbox!

Sign up to receive new posts directly in your inbox! Don't miss a single post or FREE plans!

Please wait...

Thank you for signing up! Can't wait to keep in touch!

Recent Posts

  • DIY Gold Hexagon Napkin Rings
  • DIY Marble Epoxy Pumpkin Chargers
  • DIY Hinges Made From Dowel and Pipe
  • DIY TV Stand / Media Console
  • DIY Neutral Fall Wreath

Latest Pins

  • This DIY ziploc bag storage organizer is the solution to all those pesky baggie boxes that fall to the floor or take up space in your kitchen drawers and cabinets! Make them in a few hours and have all the organization you need! Make 3 or make 6, it's easily customizable to your needs. #diypantrysolution #diybaggiestorage #kitchenorganization via @theinspiredworkshop
  • This diy outdoor planter can be built out of your scrap wood laying around the shop! An inexpensive way to get a beautiful high end look on your front porch, back patio or out by the pool! It bodes well with traditional decor, modern decor or even eclectic vintage decor! It is so versatile! Build yourself a DIY wooden outdoor planter today! #frontporchdecor #diyoutdoorplanter #diyplanter #diyscrapwoodproject via @theinspiredworkshop
  • How to make your own barn door hardware - Full tutorial to show you how to diy barn door hardware! Looks just like what you would pay 100s of dollars for but yet it only costs a little over 20 bucks! #diybarndoor #diyhardware #diymeatalworking
  • Whether you are serving wine at a holiday gathering, your wedding or just every night when you watch Netflix, this DIY Wine Dispenser is the perfect way to dispense boxed wine but make it look great! No one will even care that it was out of a box! The modern design can lend itself to any decor style. Perfect for giving as a gift to all the wine lovers in your life! #boxedwine #winestorageideas #winerack #winedispenser #giftforwinelover via @theinspiredworkshop
Follow Me on Pinterest

I have been featured at

Archives

Copyright

It makes me happy when we all share… but please keep in mind that all images & text on this site are property of The Inspired Workshop. I love seeing my photos on other websites, just as long as there are no more than two per post, and they are linked back to my site! Please do not remove any watermarks, crop or edit any photos, or copy text off of this site without obtaining written permission from me first! Pinning is always welcome and appreciated! Thanks!

SiteLock

Popular Posts

DIY Scrap Wood Outdoor PlanterDIY Scrap Wood Outdoor Planter
DIY Ring Toss GameDIY Ring Toss Game
DIY Plans for Chicken CoopDIY Plans for Chicken Coop
DIY Concrete Countertops – Pour in PlaceDIY Concrete Countertops – Pour in Place
DIY Dog Bed – Pottery Barn KnockoffDIY Dog Bed – Pottery Barn Knockoff

Footer

Privacy Policy

Rest assured that The Inspired Workshop will never sell or distribute your name or email address! Please be aware though that we do offer advertisements and in order to place relevant ads for your viewing, tracking cookies are used. Tracking cookies are small text files that are stored on your computer, which are only used to analyze your viewing preferences while on this site! You do not have to allow tracking cookies to enjoy this site and you may disable them in your web browser! Thanks!

Disclosure

Although I am sometimes given free product to review or am paid to help promote certain products/websites, all opinions on this website are 100% my OWN!! I only work with brands that I truly use and LOVE, and I have no problem turning down offers from brands that I do not feel are great quality, or would not use!! I promote many brands without incentive as well, I just enjoy sharing anything and everything I have found in hopes of make building/crafting simple enough everyone can do it!! You can be certain that if I am promoting it, I truly LOVE it!!

Tags

barn door bathroom bench chevron Christmas Decor concrete console table countertops dining bench dining table distressed finish diy fall decor farmhouse bench fireplace gift ideas holiday decor Home Depot industrial kitchen reno kitchen renovation knockoff makeover mantle media cabinet one room challenge outdoor furniture painting cabinets pallet wood playroom pottery barn Restoration Hardware review rope storage table table settings vanity wall art wall decor wall hanging wardrobe west elm winter decor wreath

Copyright © 2021 · Lifestyle Pro on Genesis Framework · WordPress · Log in

We use cookies to ensure that we give you the best experience on our website. If you continue to use this site we will assume that you are happy with it.OkNo