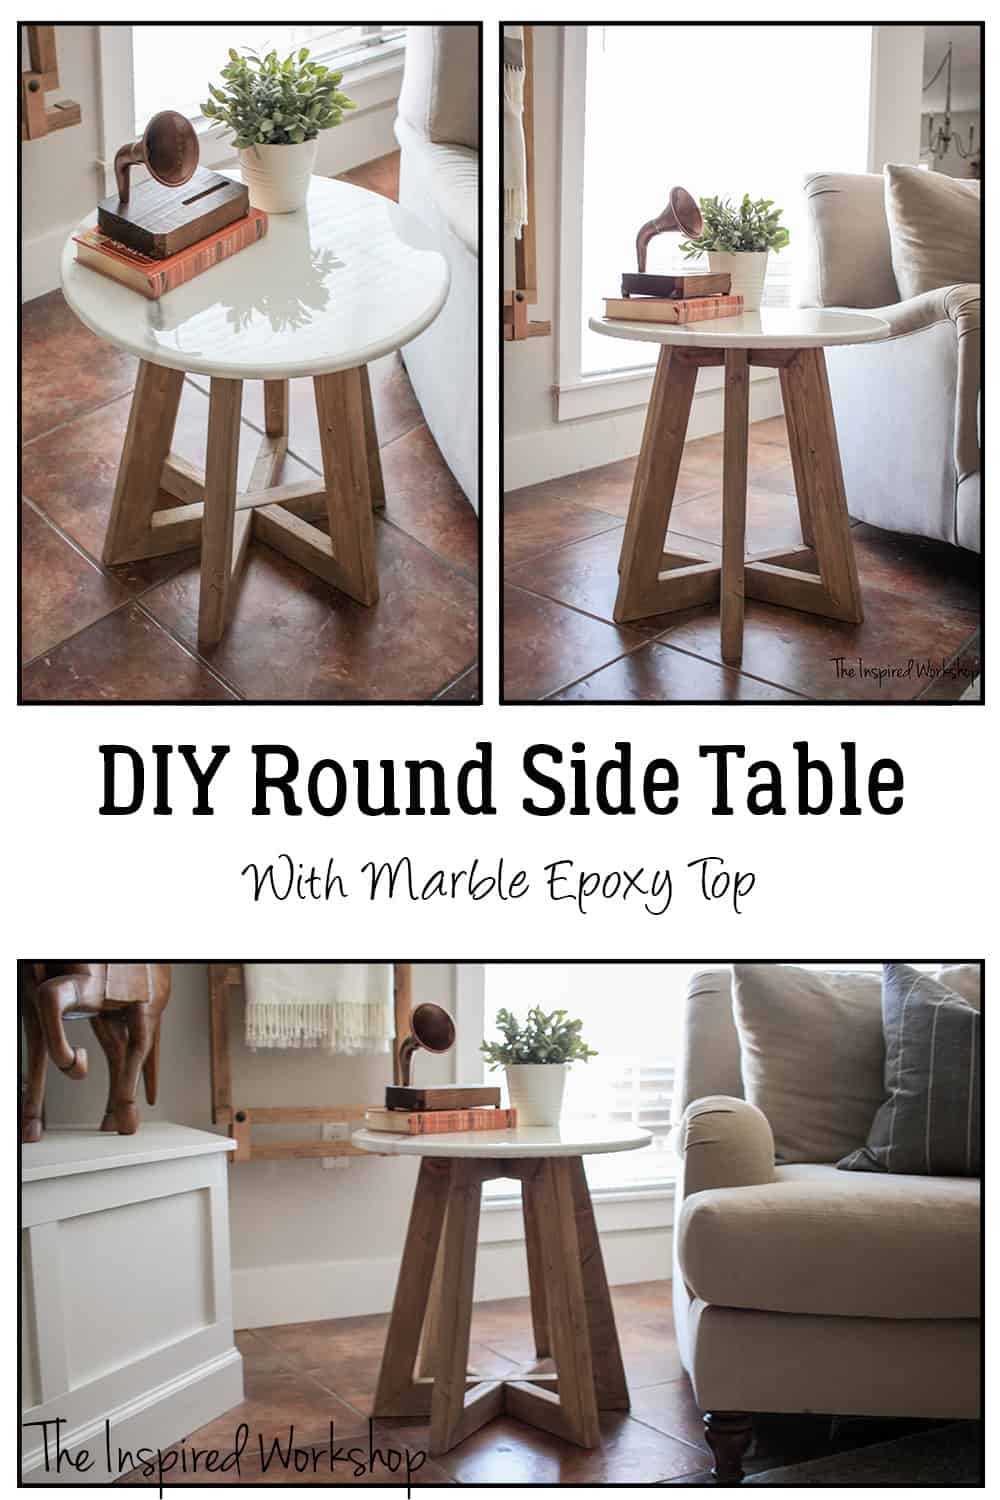
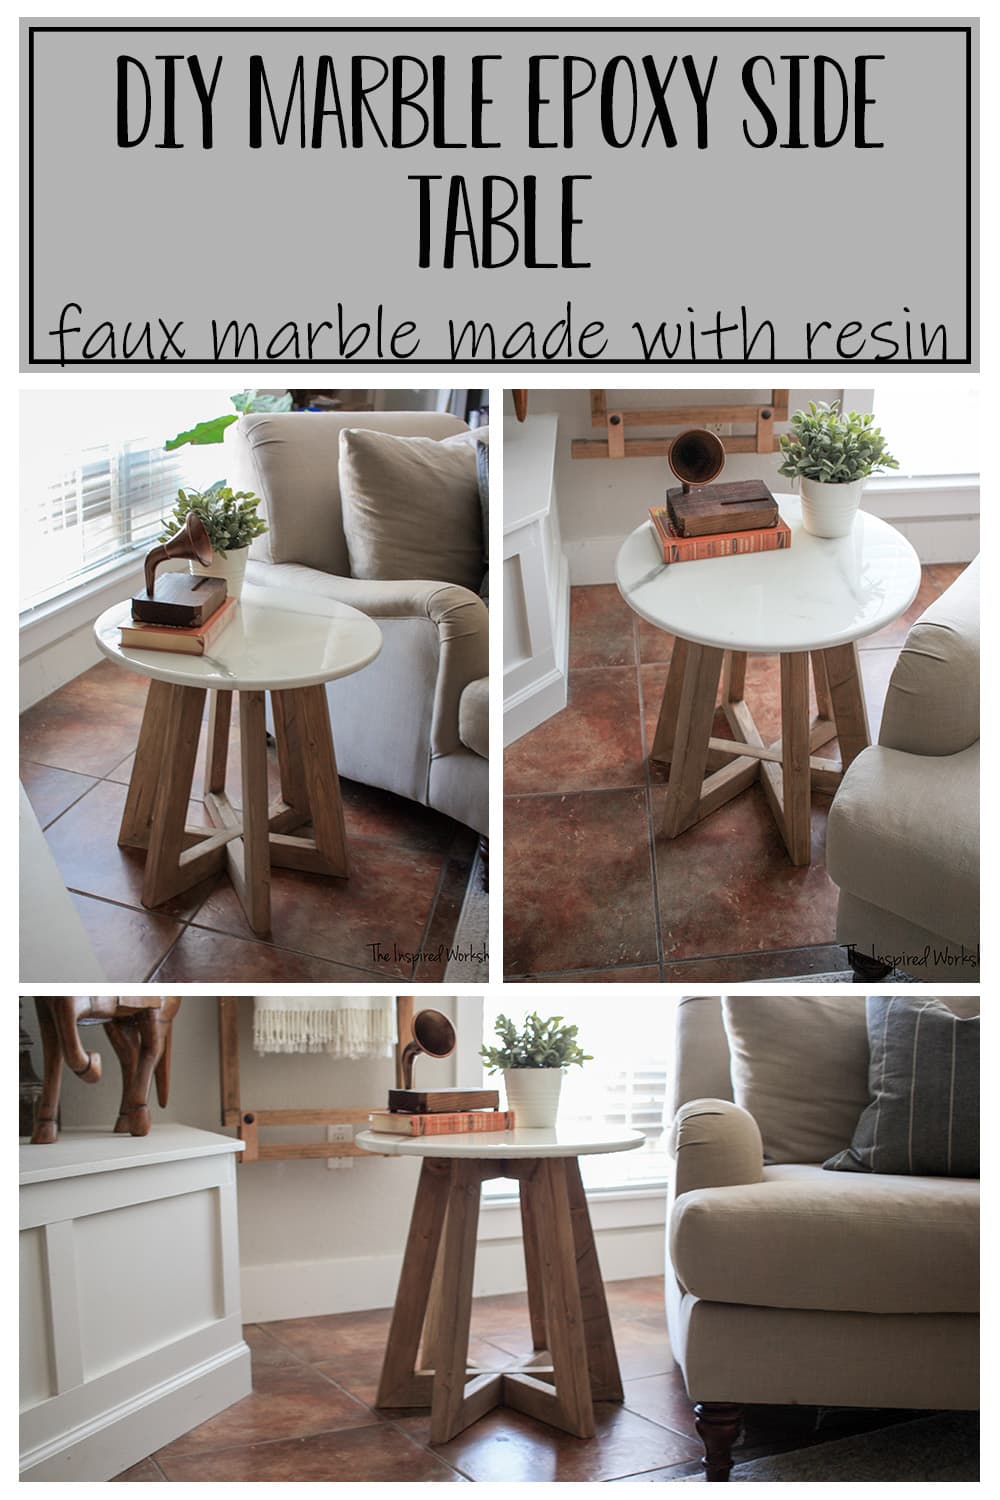
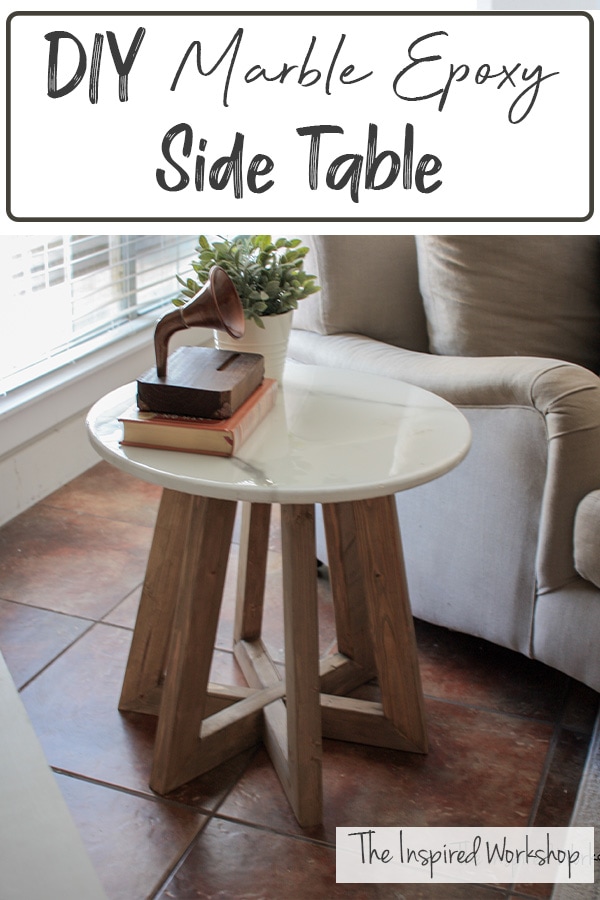
DIY Marble Epoxy Top Round Side Table
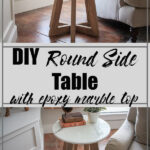
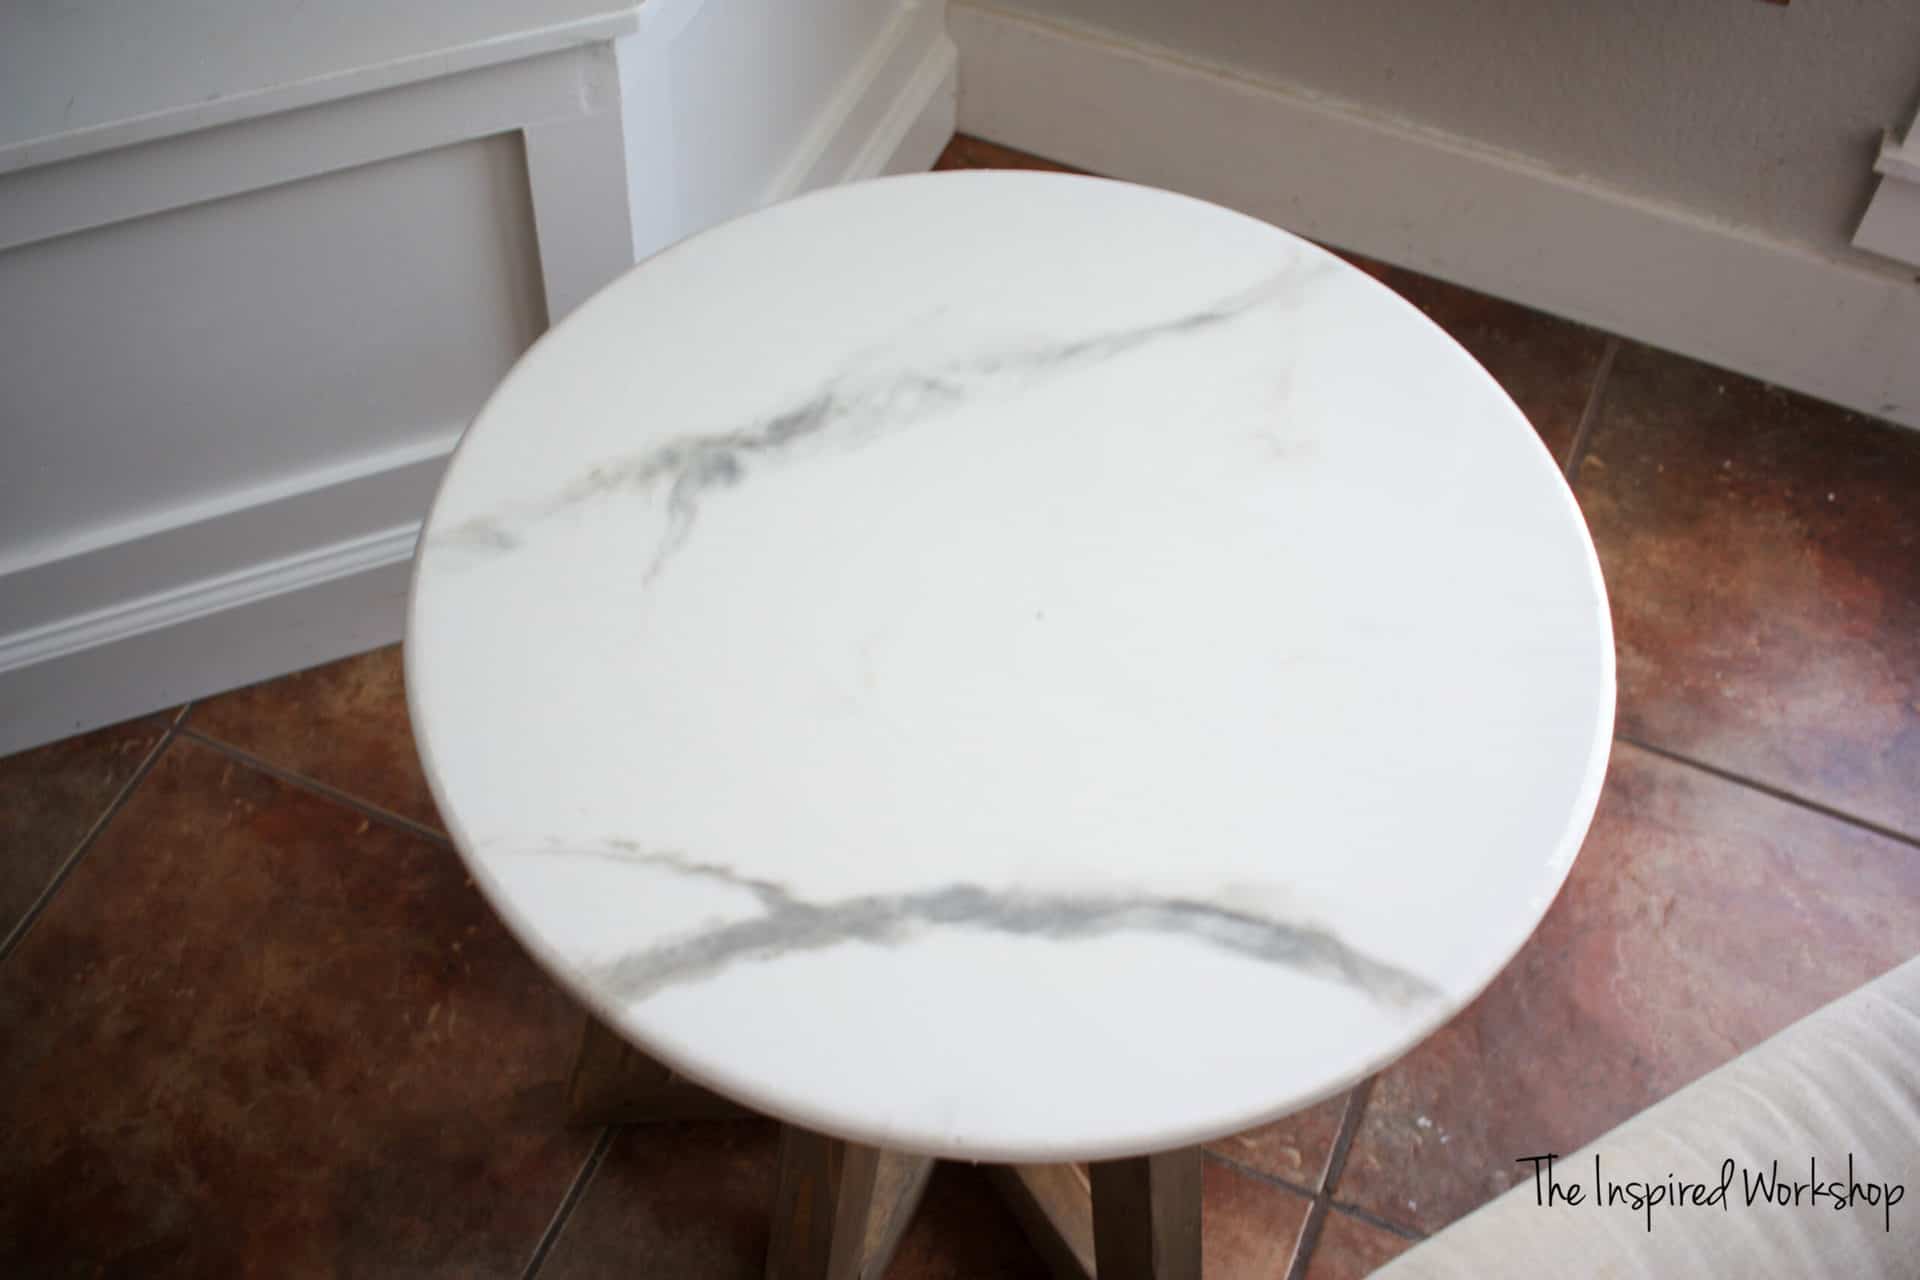
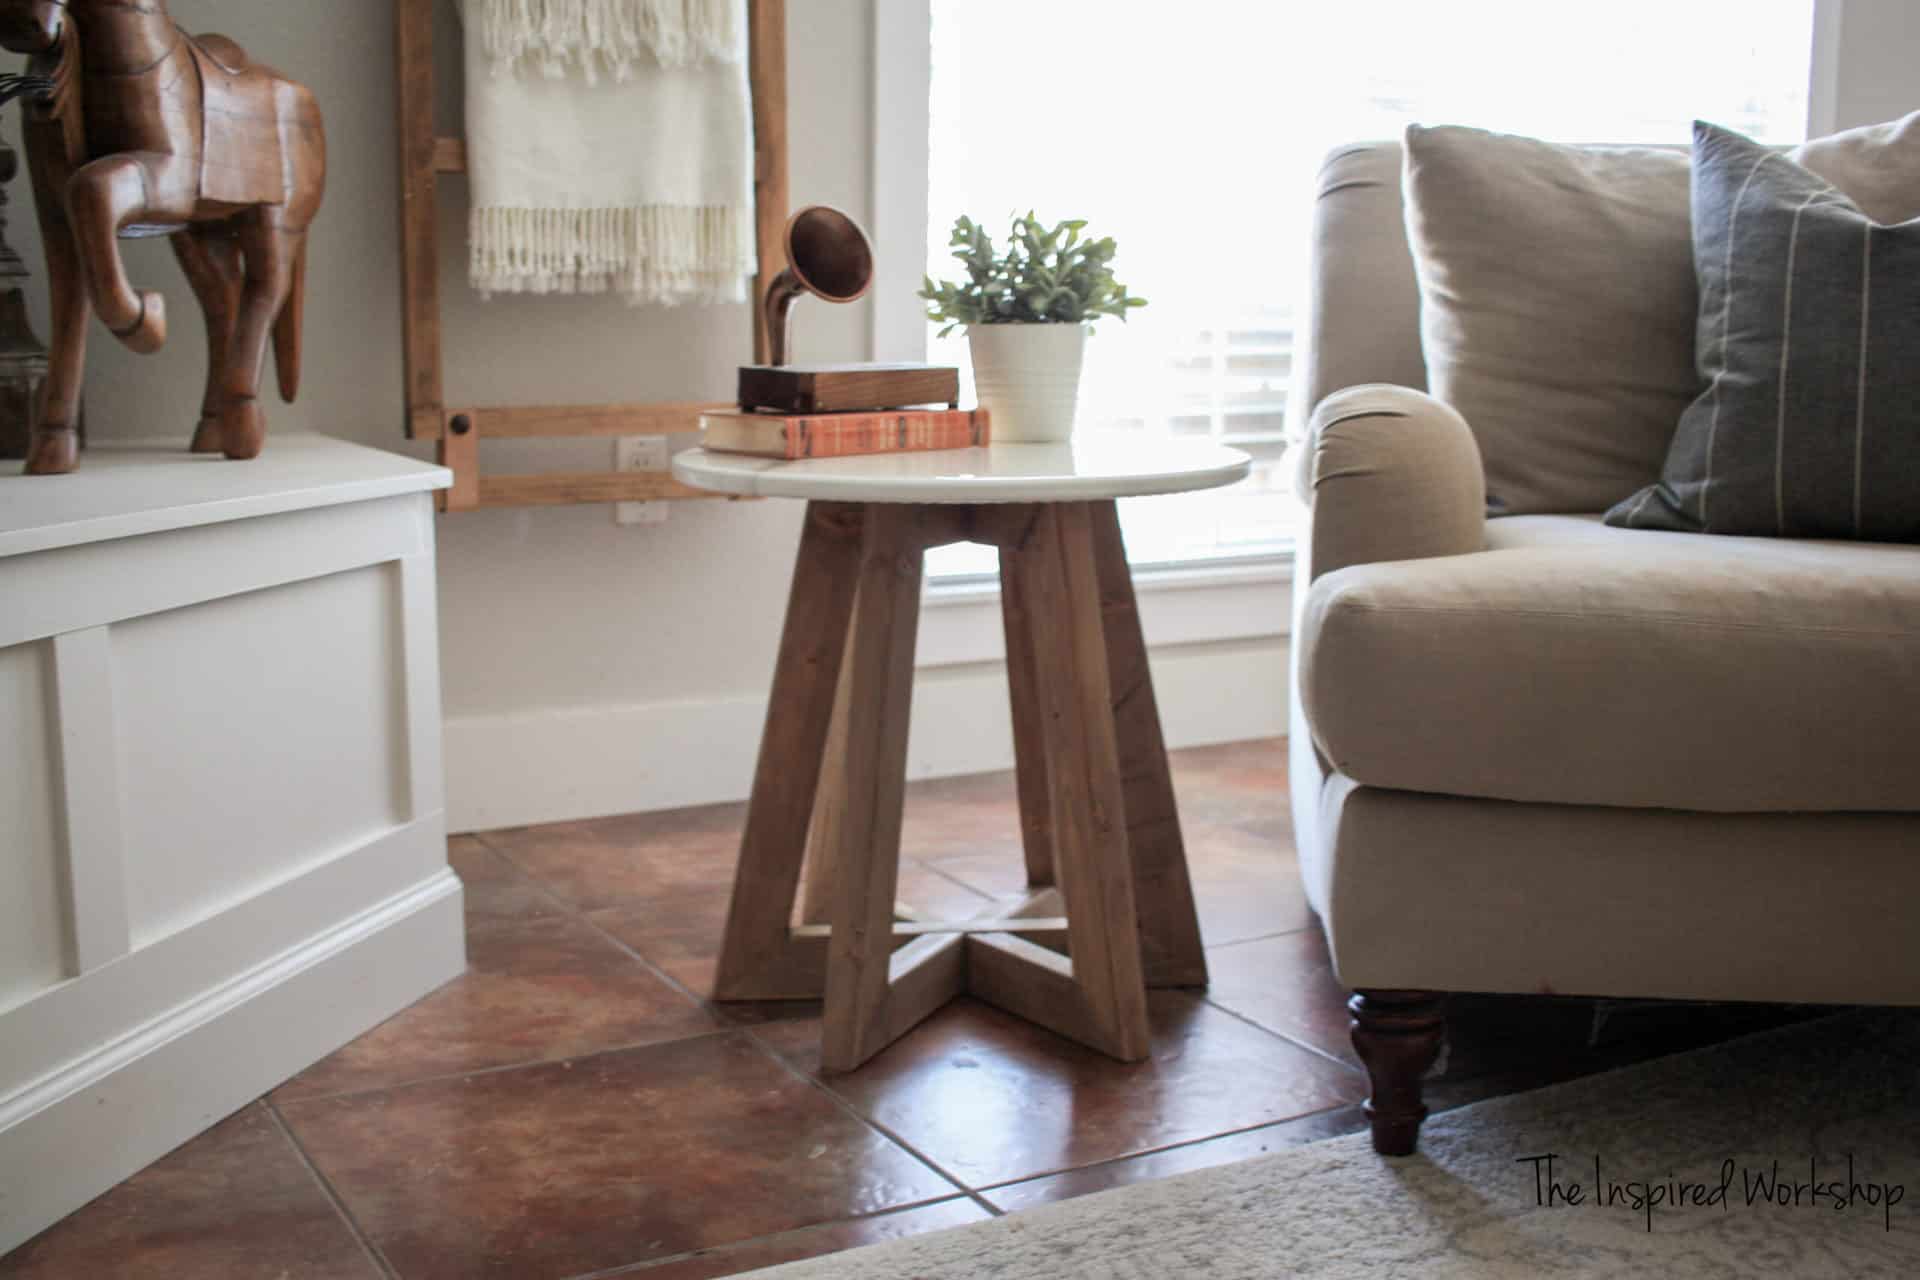
This DIY round side table featuring a faux marble top made from epoxy resin is a compliment to any space that is in need of a small side table! Place it next to a chair, couch, or this table can even be used as a nightstand by your bed! This side table is the perfect accessory to add to your home for very little cost!
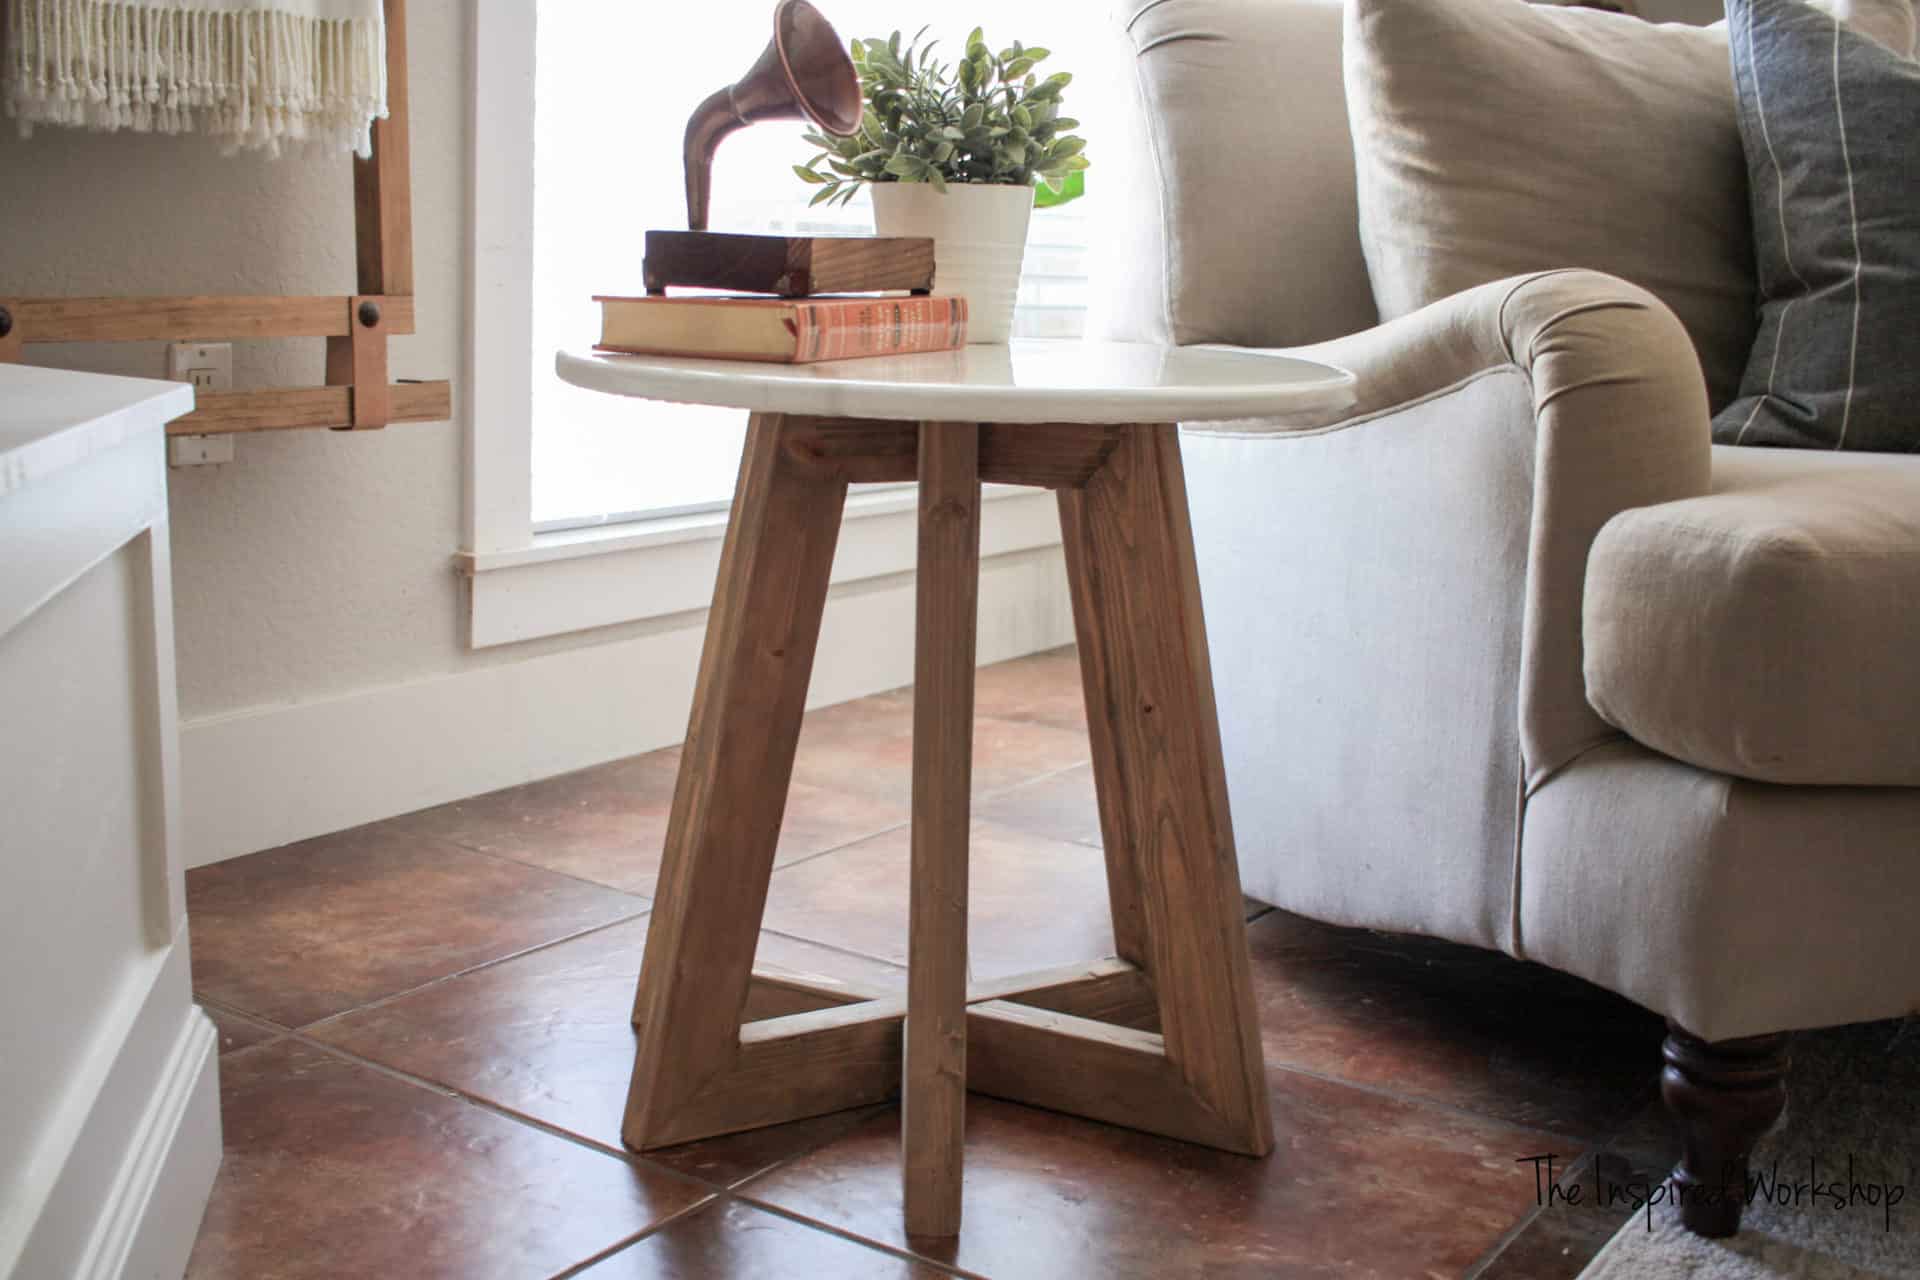
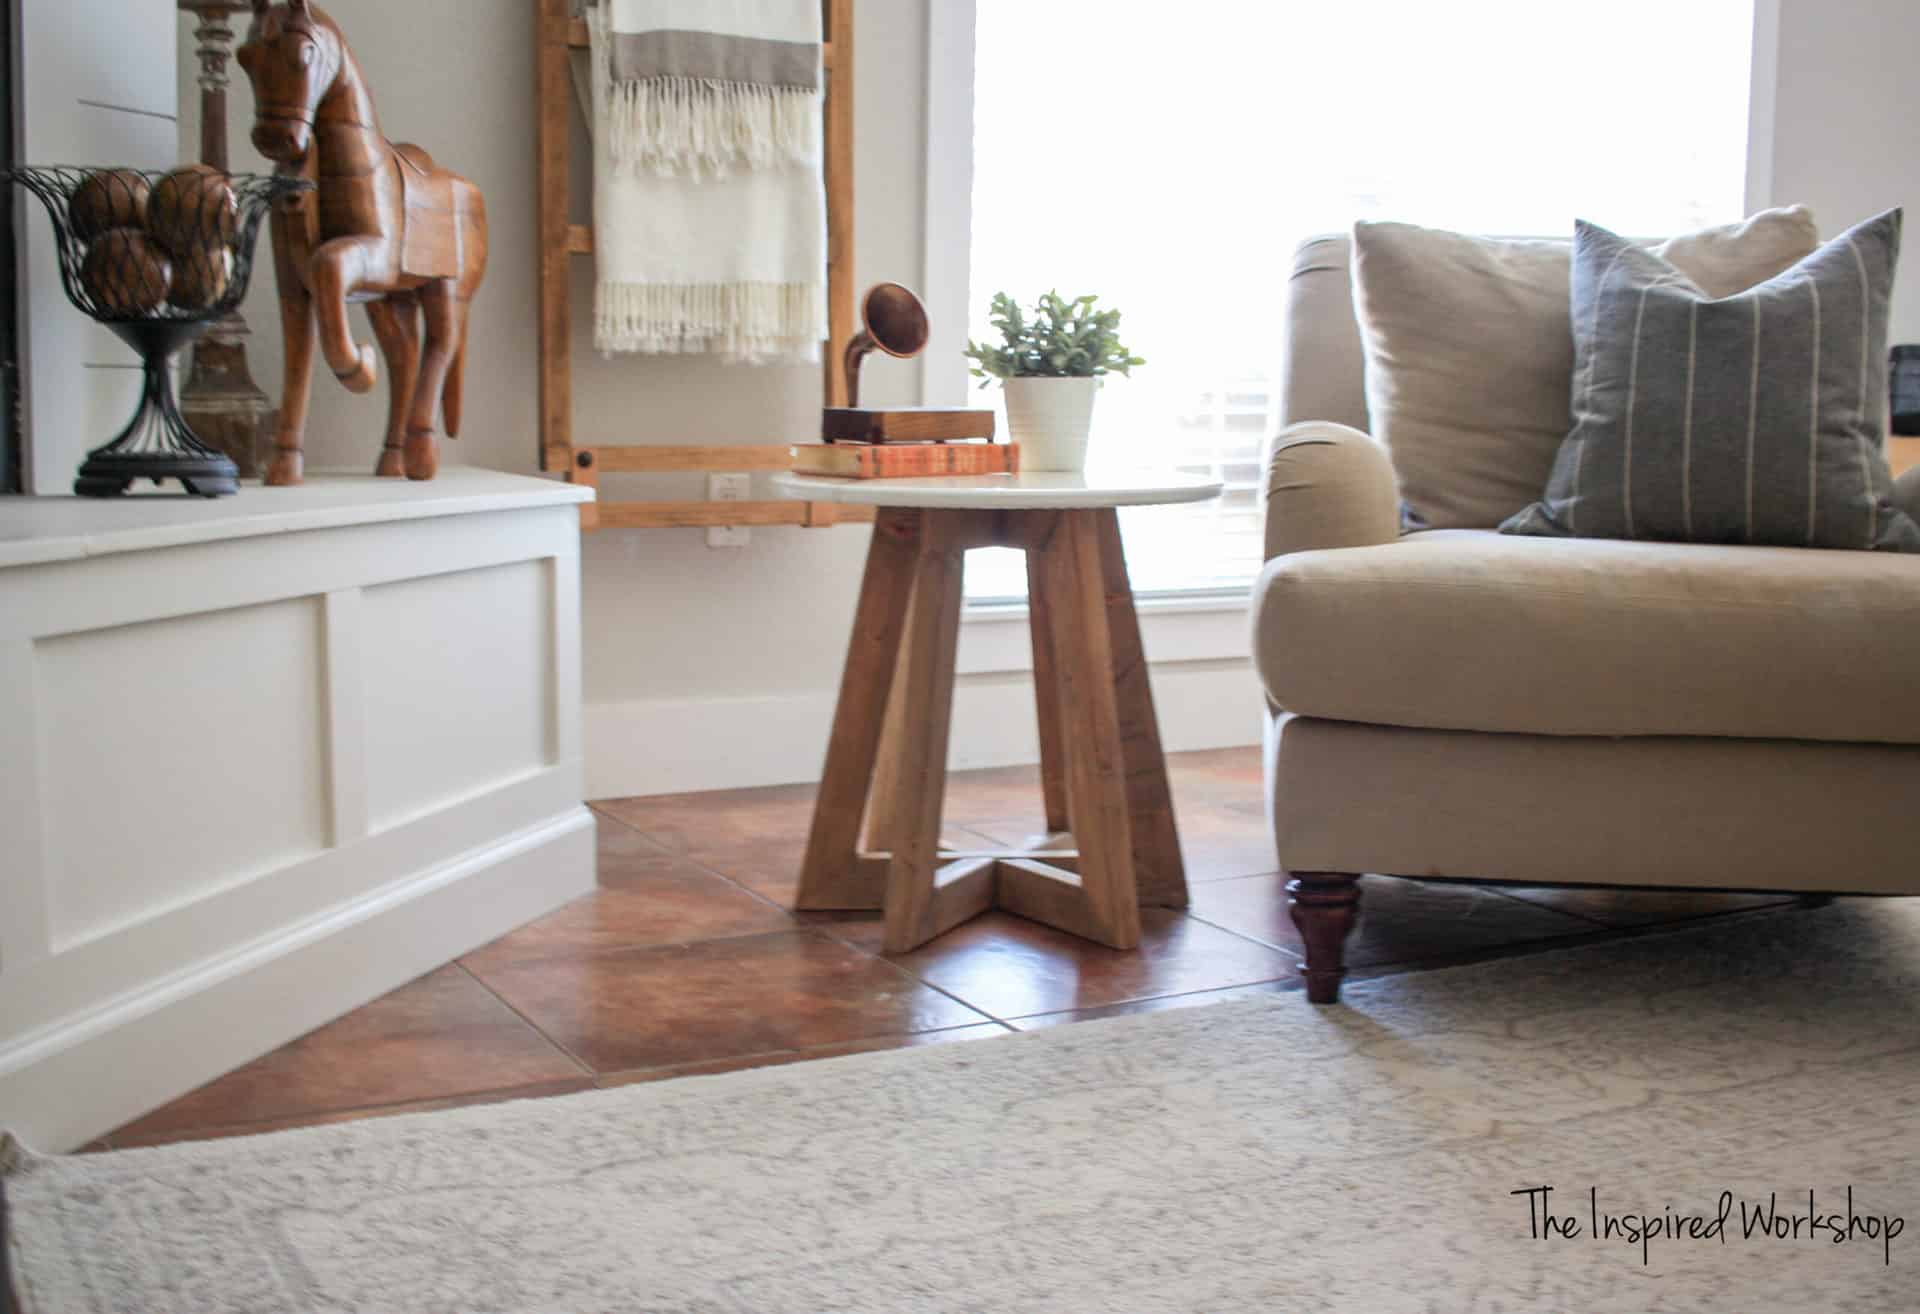
Have you ever seen a really cool piece of furniture that you just had to try to recreate? Is that just me, I look at everything that is for sale, not to buy, but to make?! Lol! Well, when I saw this gorgeous round side table from McGee & Co, I had to at least try to build it! And guess what, it worked! Mine has a marble epoxy top that I created with plywood and epoxy, and hers is real marble I believe, but hey, I like my fake marble epoxy pour just as much!😉
I needed a little side table by the chair in the living room, and with limited space, I wanted a round side table, a marble top was just icing on the cake!
Have you ever worked with epoxy before? If you haven’t you are MISSING OUT! Lol! I LOVE the stuff and I seriously had to stop myself from using it because I was wanting to epoxy EVERYTHING! I told my hubby and kids to hide it from me!😂 Making faux marble from epoxy is ADDICTING! Check out the Marble Epoxy Pumpkin Chargers I made last year for my Thanksgiving table! I also made some Hexagon Epoxy and Wood chargers, with napkin rings and coasters to match! I’m telling you, it is hard to stop once you start! 😂🙈
The best part of this side table is the cost…wait for it…$20 if you leave a wood top, or $55 if you add the faux marble top! Or make it with scrap wood you have laying around your garage, and epoxy your kids hid from you that you recently found, and it costs ZERO dollars!😂
If you don’t want to spend the 30 bucks on epoxy, you could always paint it to look like marble as well or use contact paper (Anika’s DIY Life has a roundup of cool marble contact paper projects to show you how to use it)…but the 30 bucks are totally worth it for the ease of the project and the results you get! The gallon epoxy set is only 90 bucks and then you can make lots of epoxy projects, while also saving a little money on this project…that’s how I like to convince myself of things! Lol!
So, do you want to build one? I’ll help you out and show you how to build this DIY side table in an afternoon!
Getting Ready to Build the Round Side Table
Get the printable plans to build your side table!
Materials for Round Side Table with Faux Marble Epoxy Top:
**NOTE: Amazon links below are affiliate links. Affiliate links pay me a small percentage of your purchase (if you make one) at no extra cost to you! Affiliate links help me keep the free plans coming, so I greatly appreciate any purchases made from one of my links!
- 3 – 2x3x8
- 1 – 3/4″ – 2’x2′ plywood project panel
- 32 oz epoxy kit
- white acrylic paint
- gray spray paint
- 3 1/8″ wood screws
- wood glue
- drill
- compound miter saw
- router with a circle jig – this circle jig is AWESOME! A jigsaw will work as well!
Cut List for the Round Side Table with Faux Epoxy Marble Top:
- 1 – 2×3 @ 20″ ends mitered at 51 degrees off square, ends not parallel
- 1 – 2×3 @ 11 1/2″ ends mitered @ 39.3 degrees off square, ends not parallel
- 6 – 2×3 @ 21 11/16″ ends mitered on one end @ 51 degrees off square, and opposite end mitered @ 39.3 degrees off square…ends not parallel (measurement of the longest end)
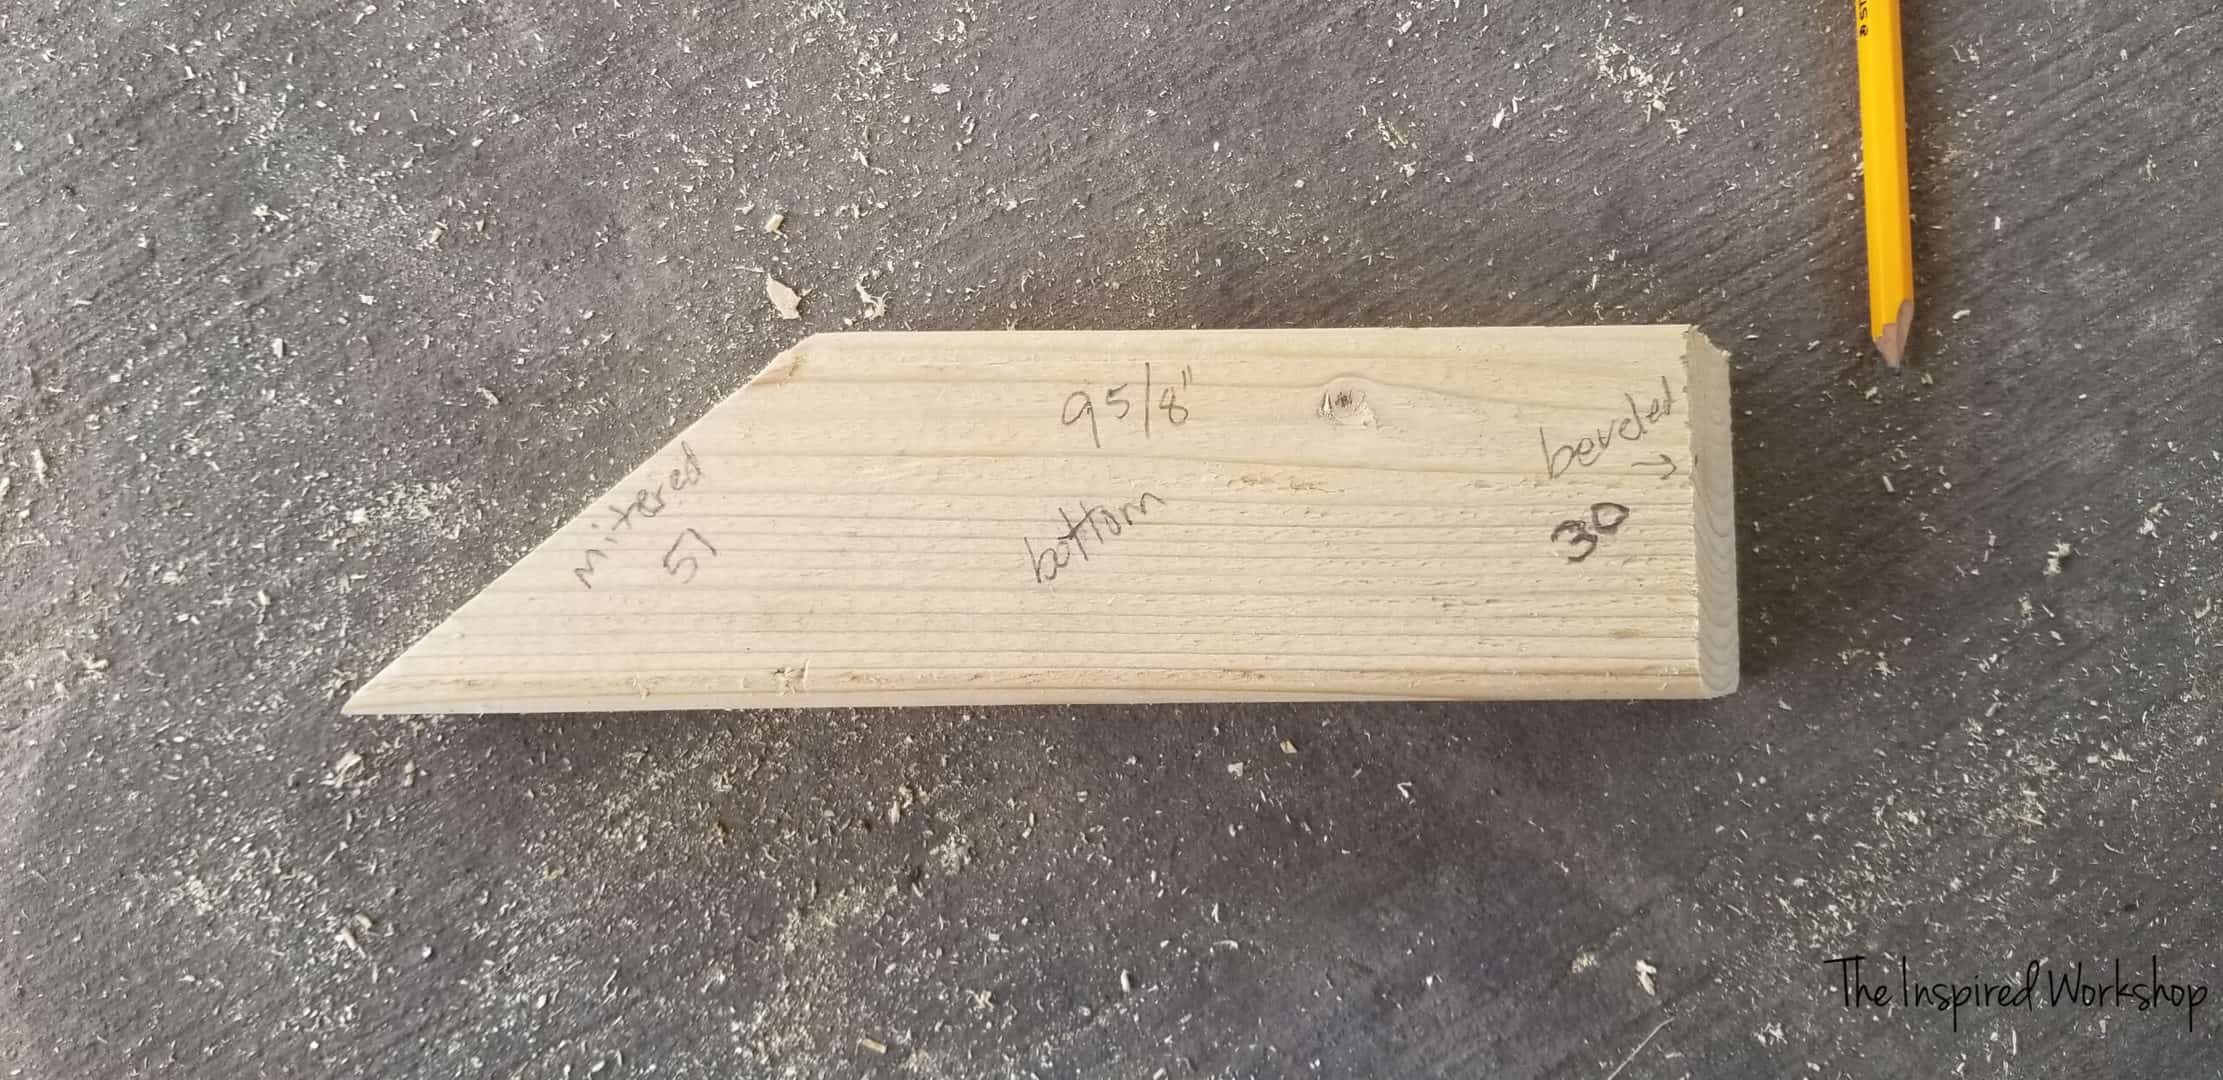
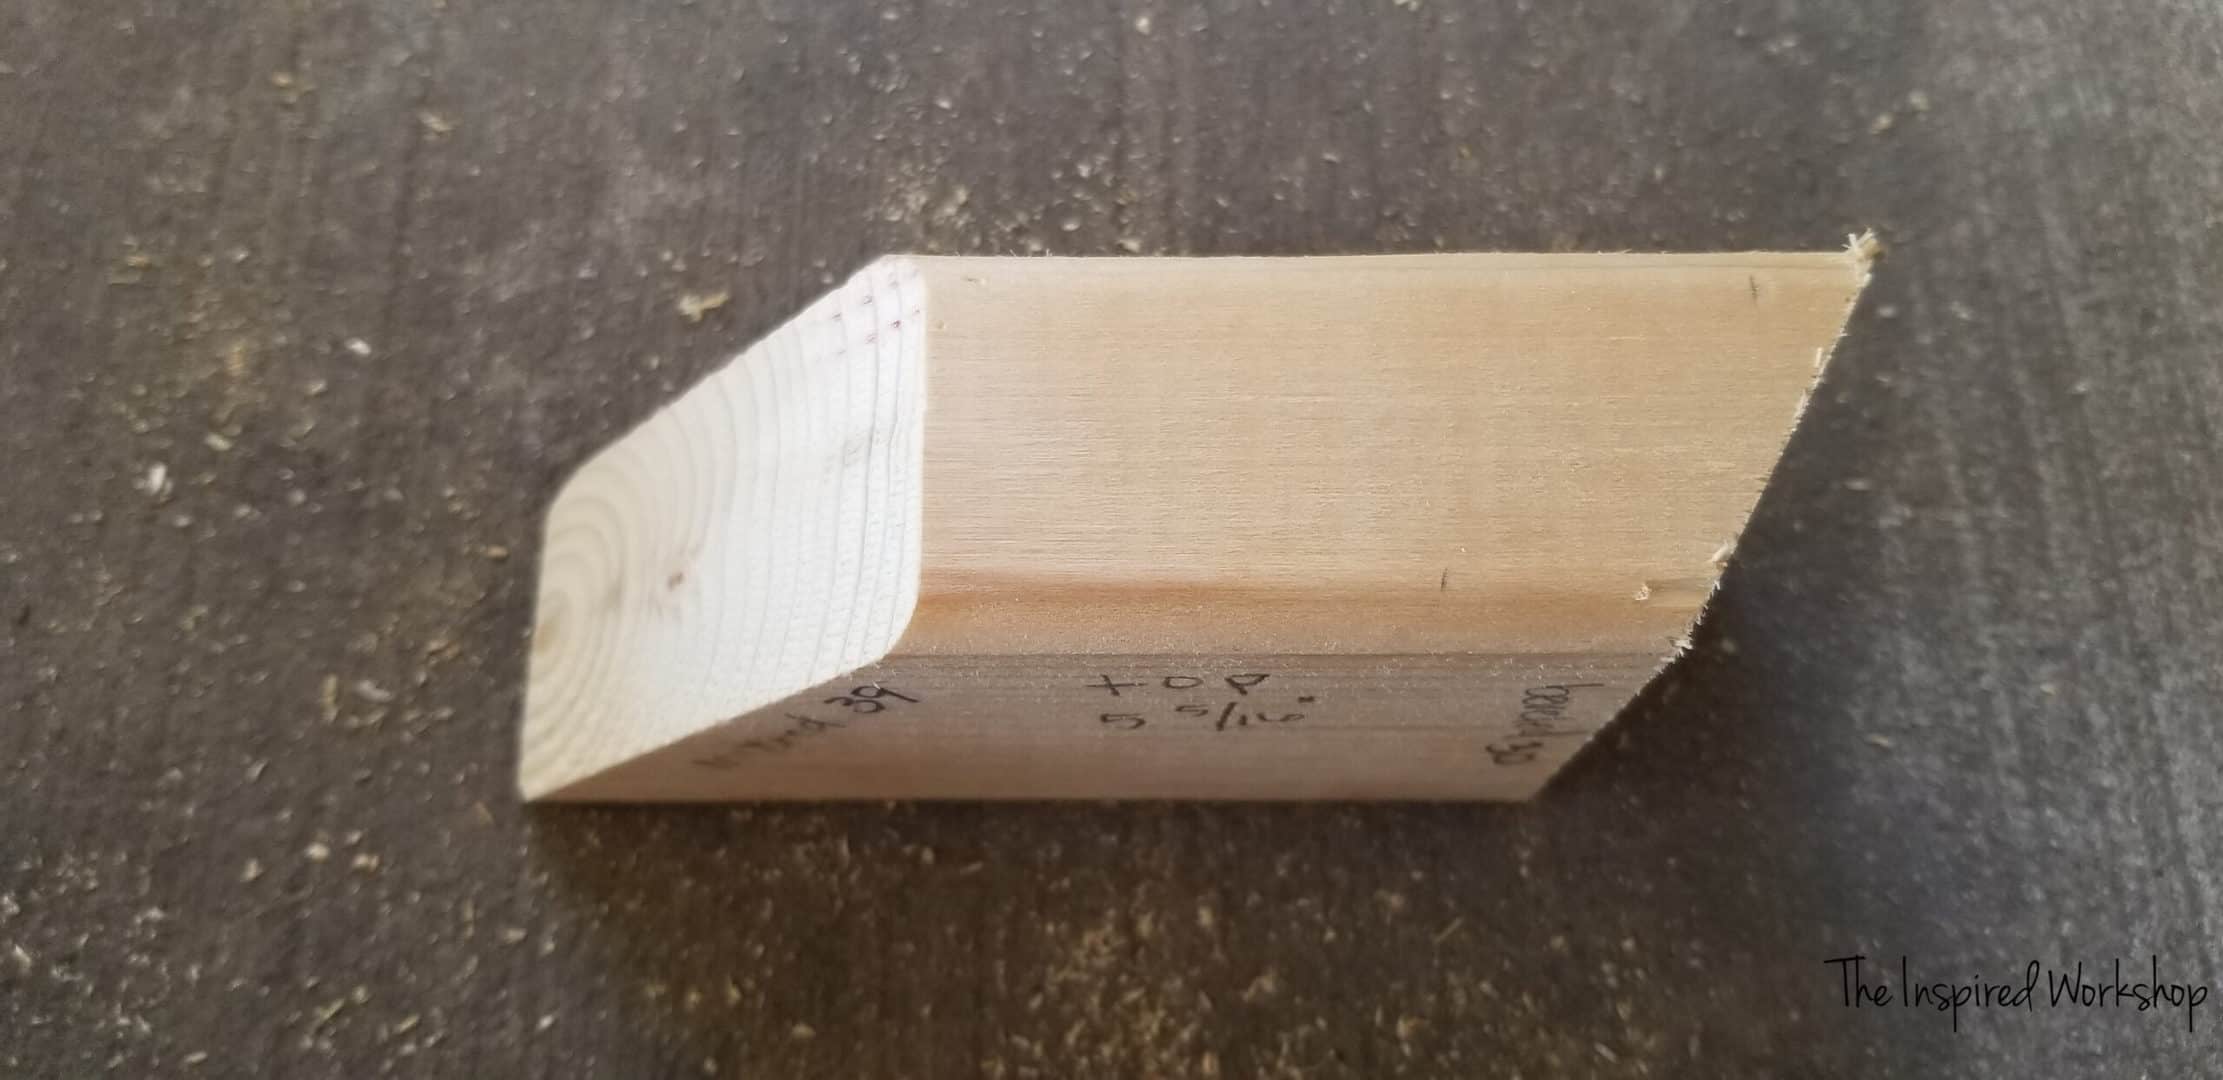
- 4 – 2×3 @ 9 5/8″ one end mitered @ 51 degrees off square, and one end beveled @ 30 degrees off square (measurement of the longest end)
- 4 – 2×3 @ 5 1/2″ one end mitered @ 39.3 degrees off square, and one end beveled @ 30 degrees off square (measurement of the longest end)
- 3/4″ plywood cut in a 22″ circle
Building the DIY Round Side Table
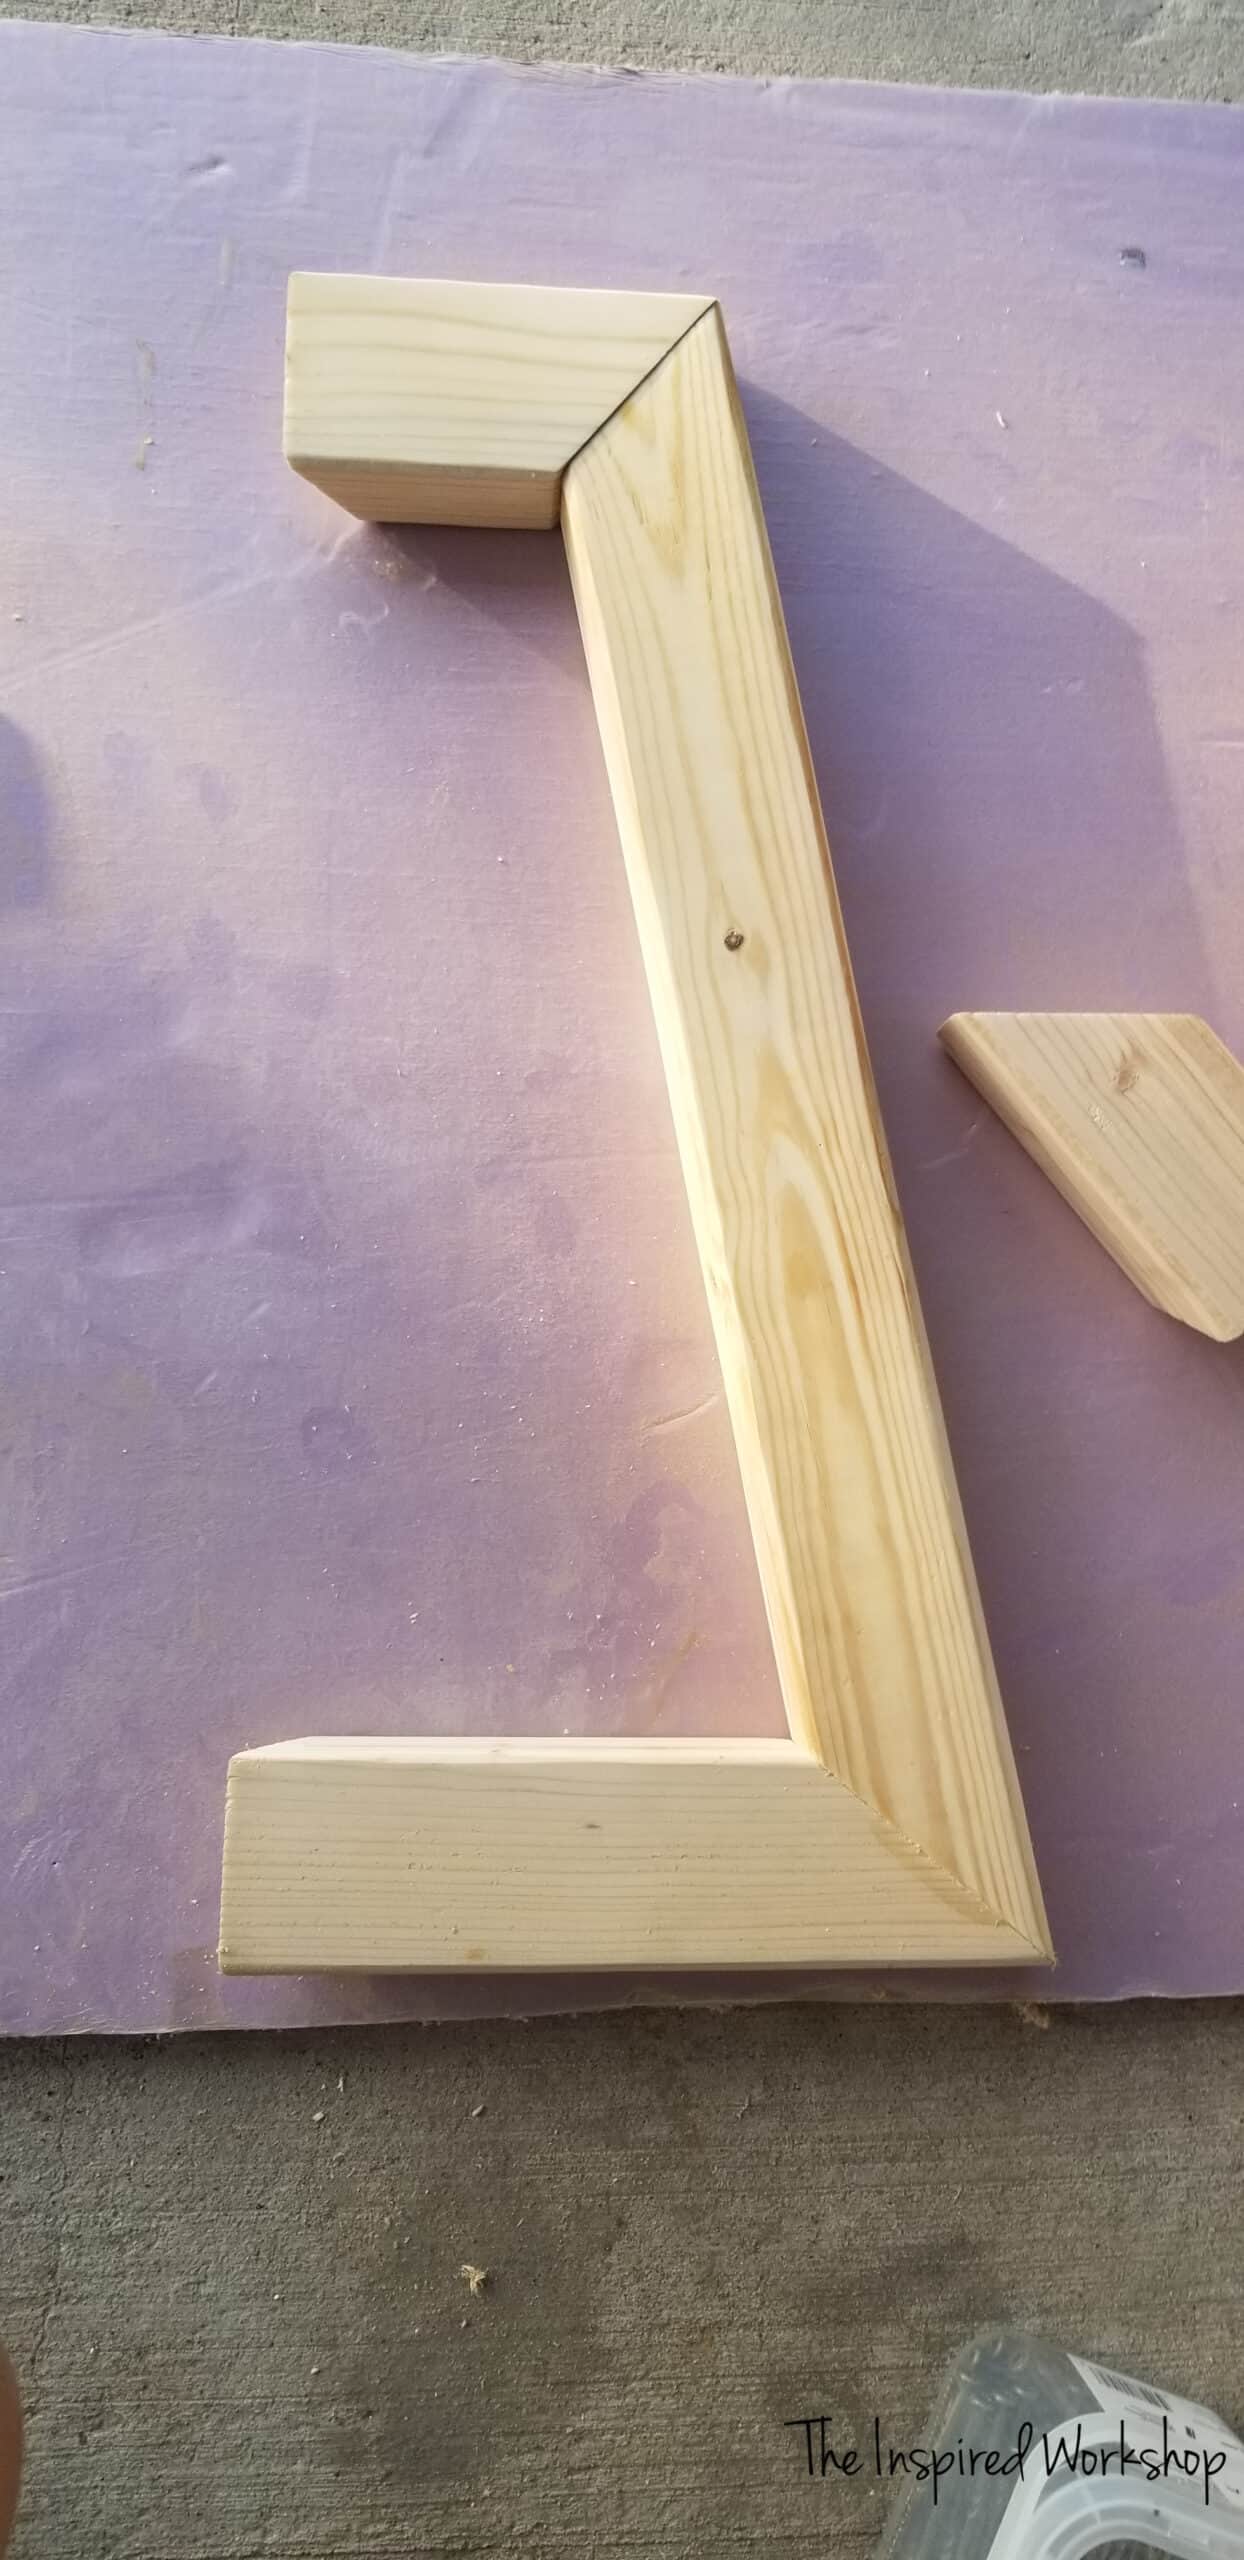
Step 1 – Build the main leg of the round side table.
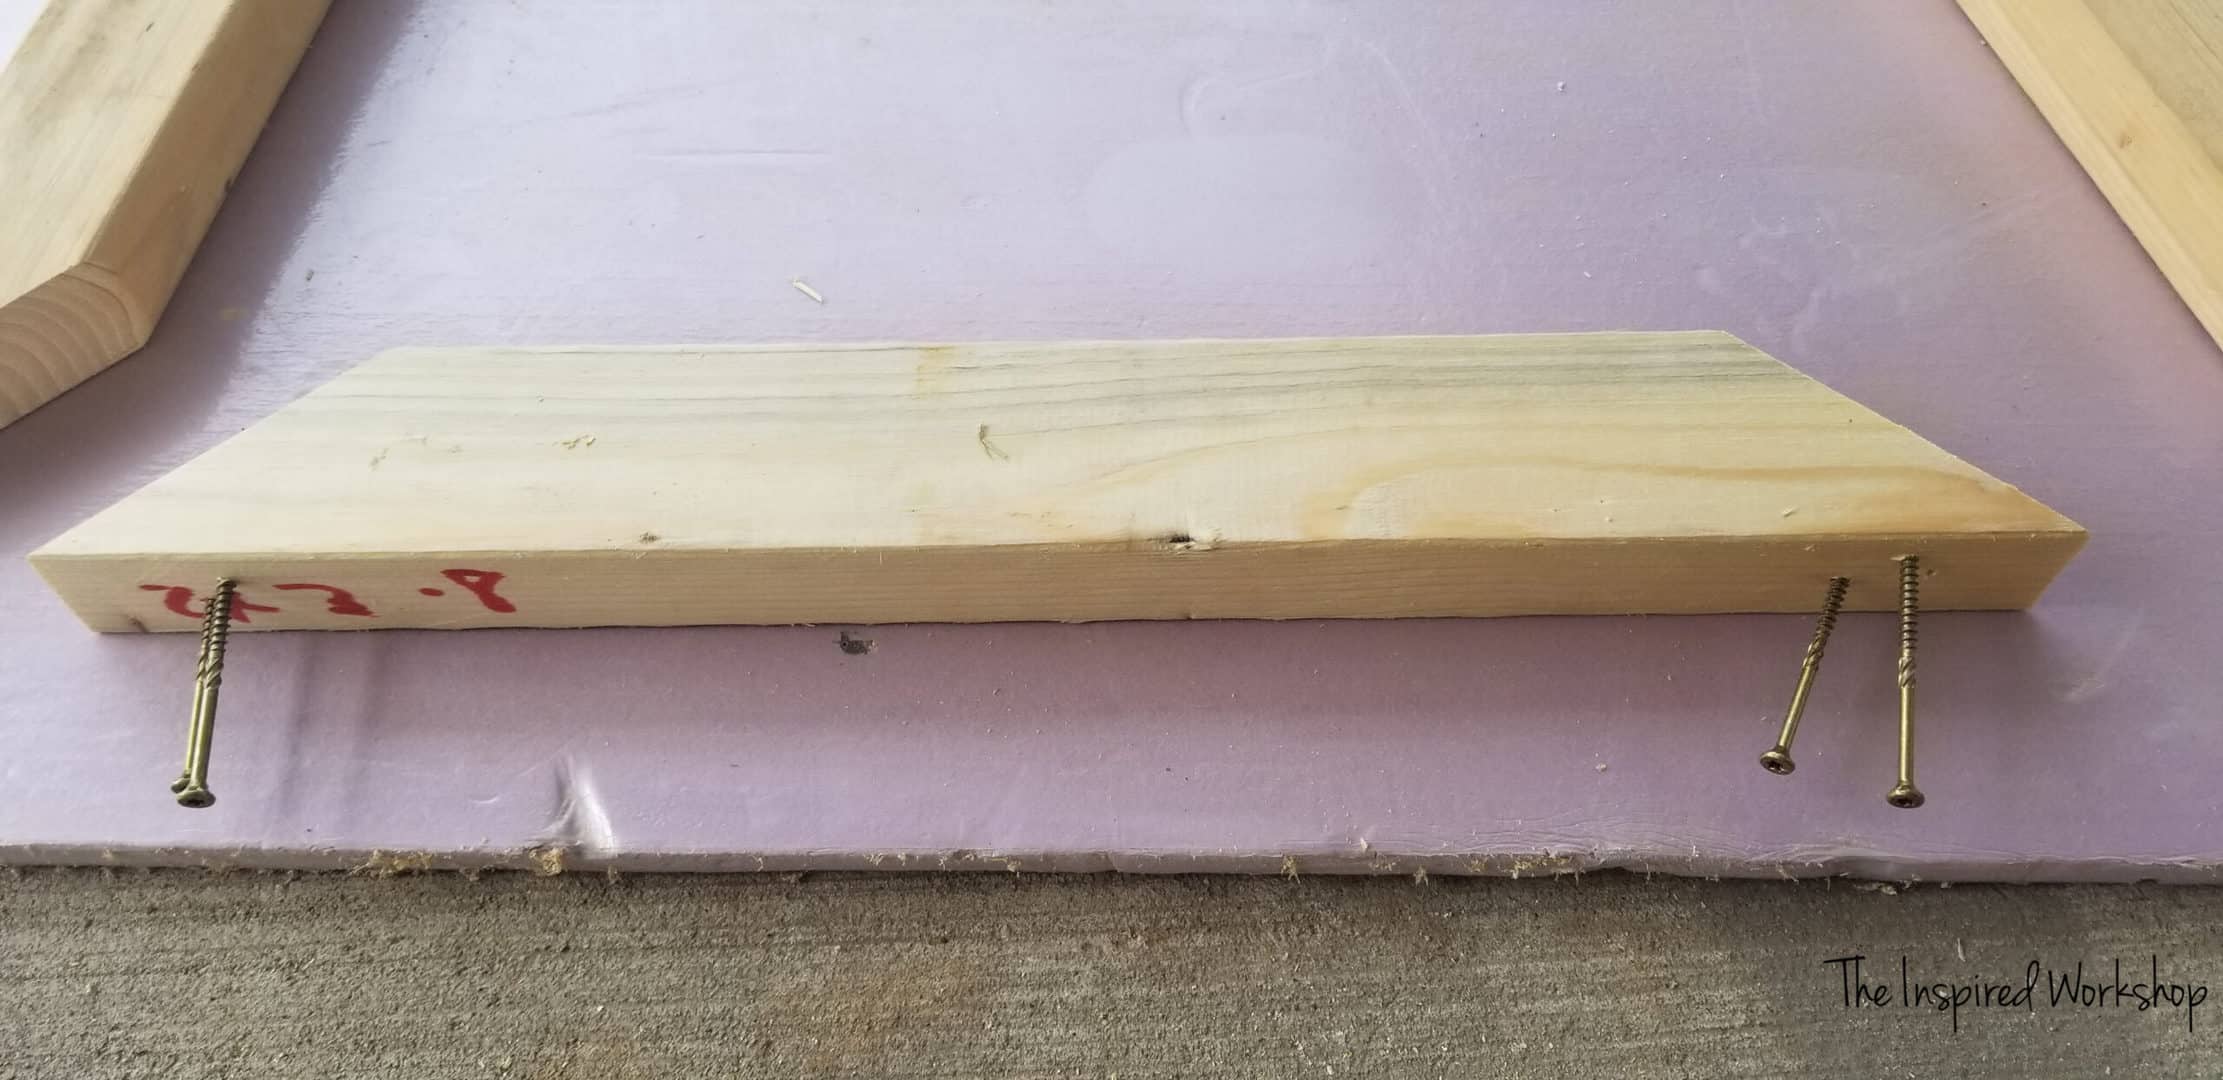
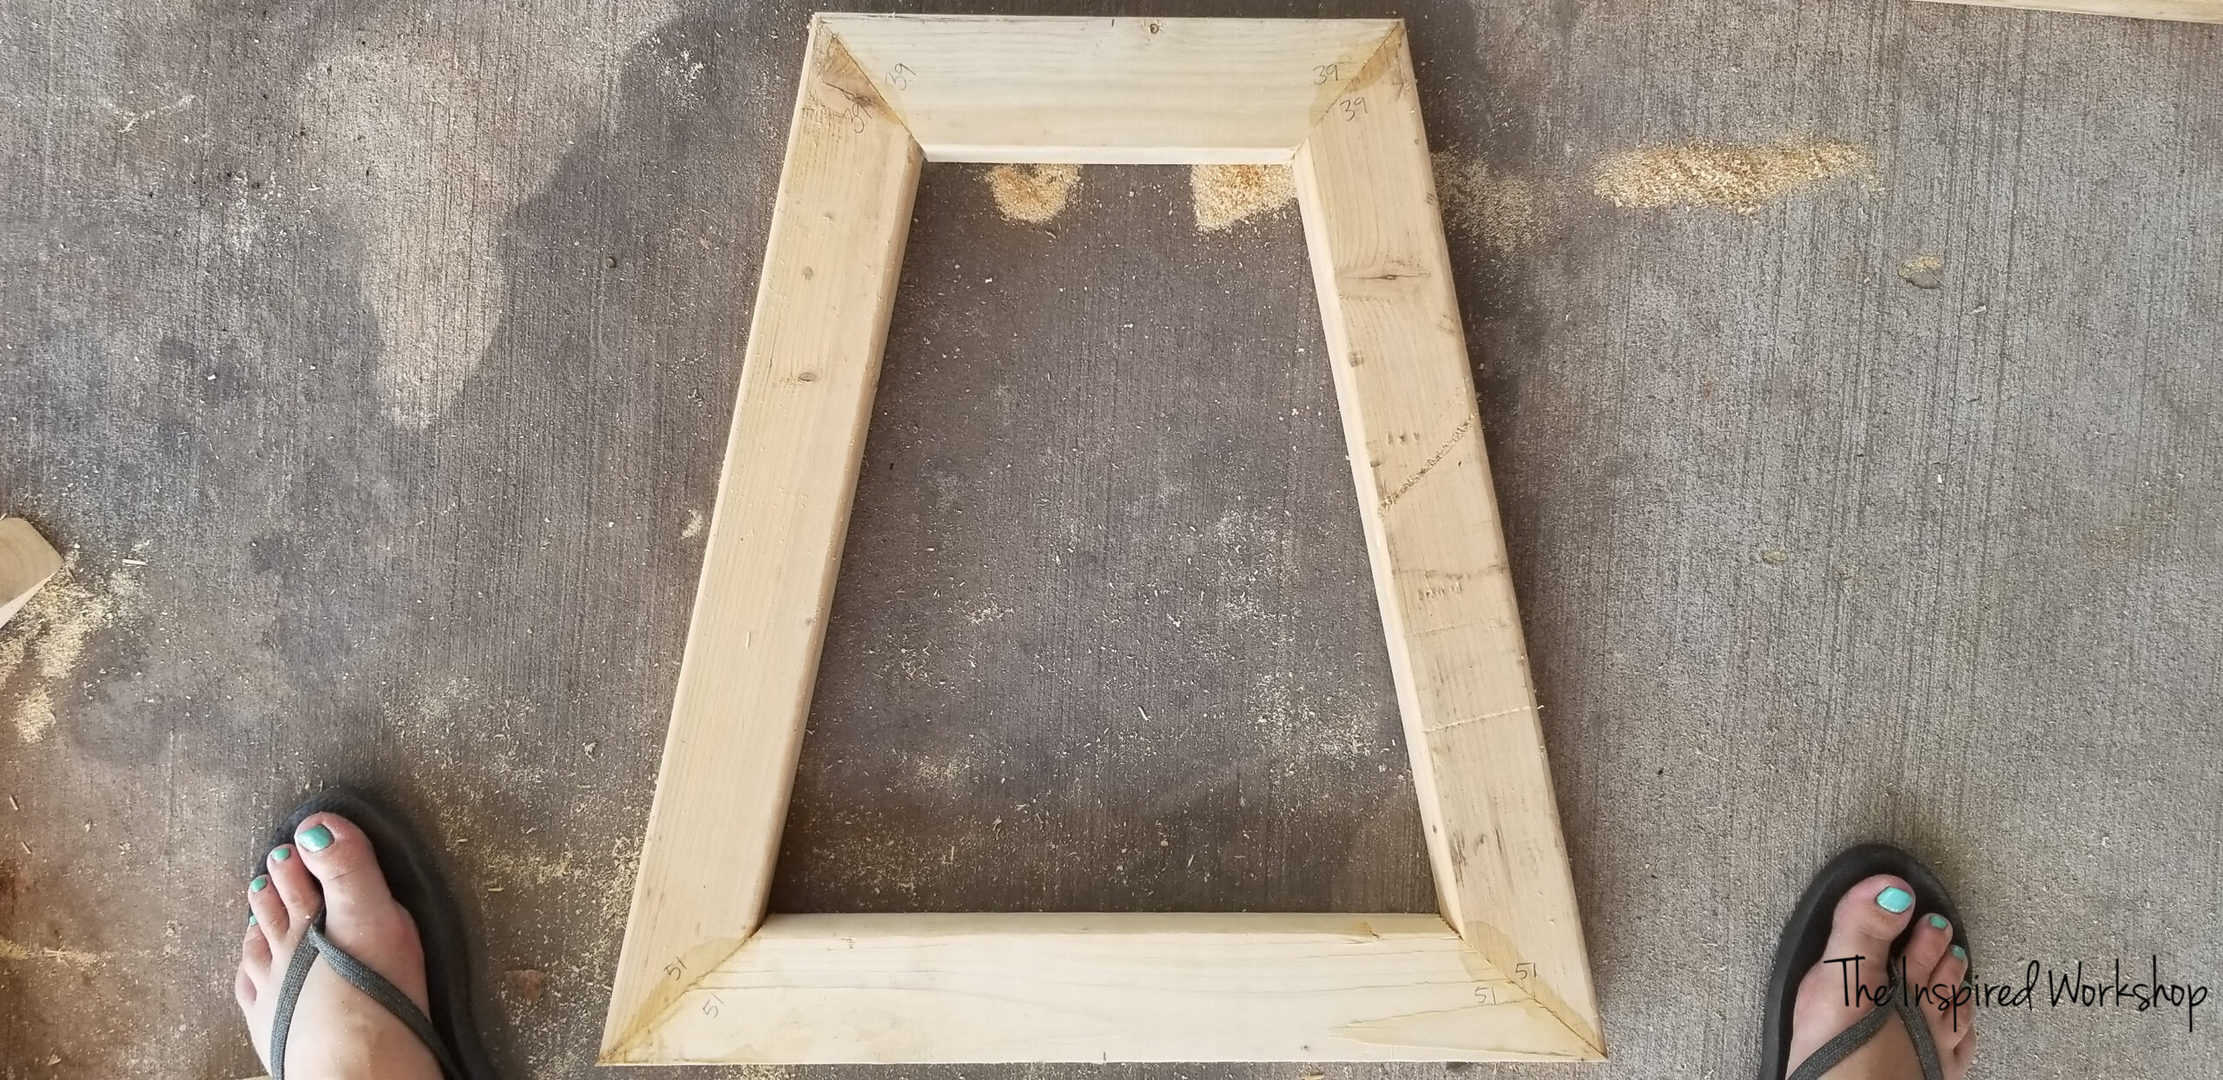
Start building the side table by making the main leg. The main leg of the table is composed of the 2×3 @ 20″ ends mitered at 51 off square, ends not parallel. This is the bottom of the leg. I used screws screwed straight into the bottom of all the legs at an angle, the screw holes are concealed on the bottom without any special jig needed!
This is not the method I thought I was going to use, I originally thought I was going to use dowels to join everything, but my brain just couldn’t handle all the angles! Lol! I think it would have actually been easier than I thought if I would have broken out my drill press, so you can always use that method if you cringe at the thought of using screws in this way…I mean, it’s a REALLY good thing my Dad doesn’t read my blog, he would have already disowned me for some of the woodworking I do!😂😅
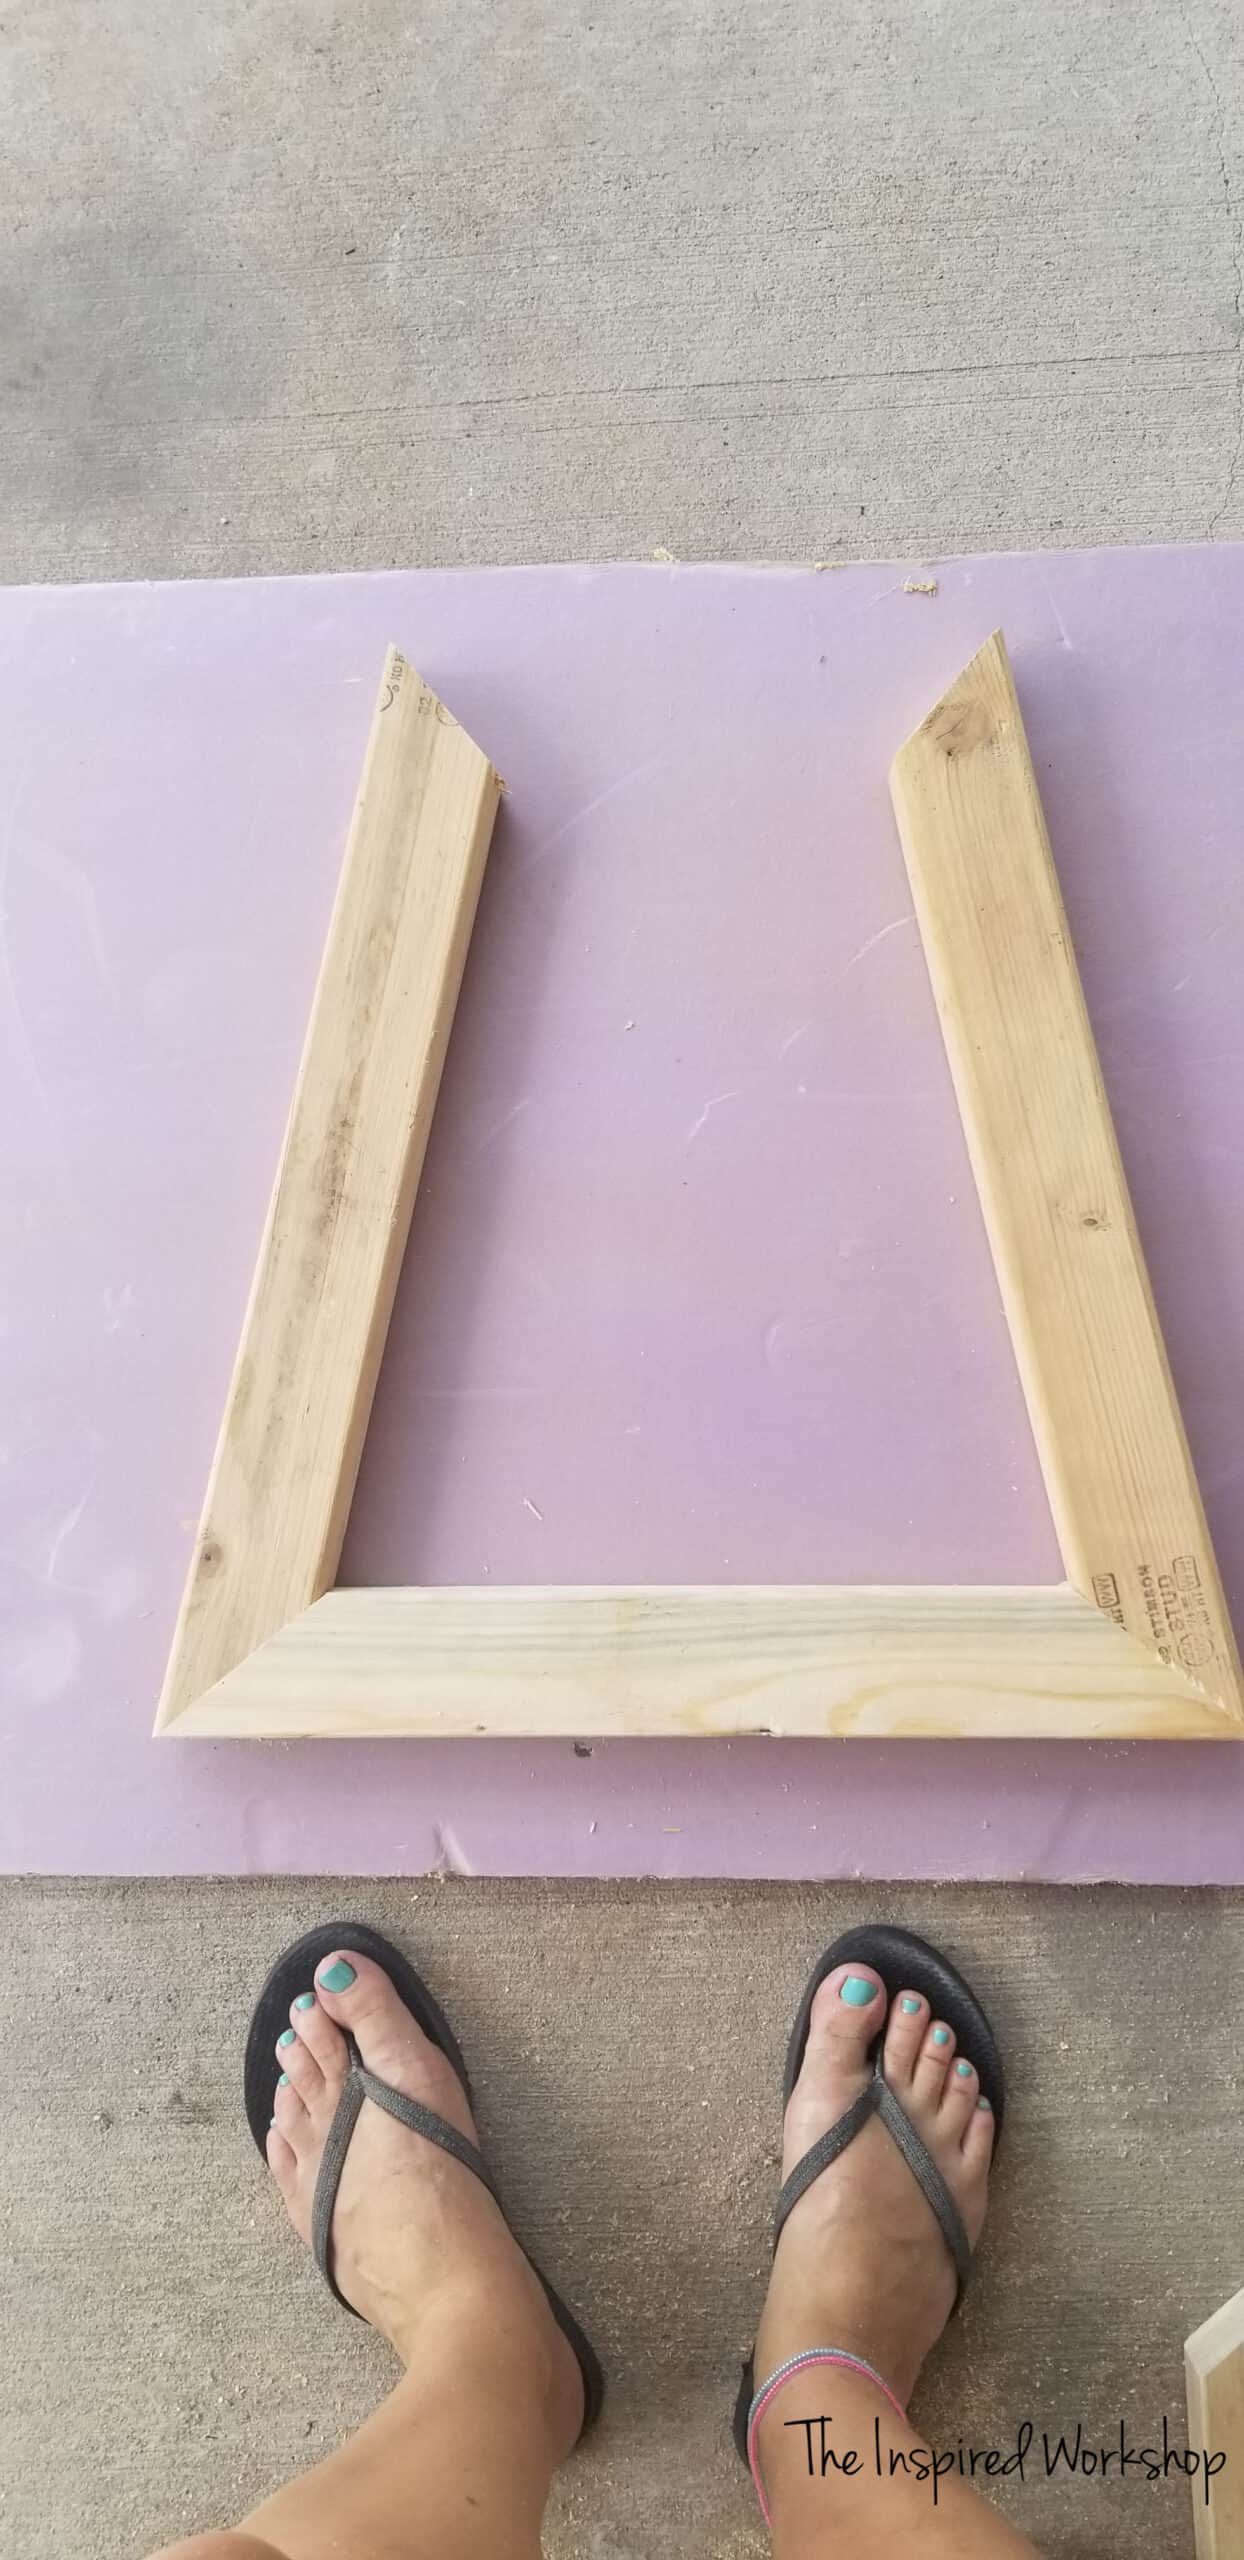
Now, where was I? Oh yes, you will attach the 20″ board pictured above to two of the 2×3 @ 21 11/16″ boards, matching the 51 degree off square ends with the 51 degree ends of the bottom of the leg. The 39.3 degree off square ends are left open at the top. Make sure and use wood glue on the joint before you screw it together.
Don’t mind my dirty feet! Lol!
Here are the hidden screws from the bottom.
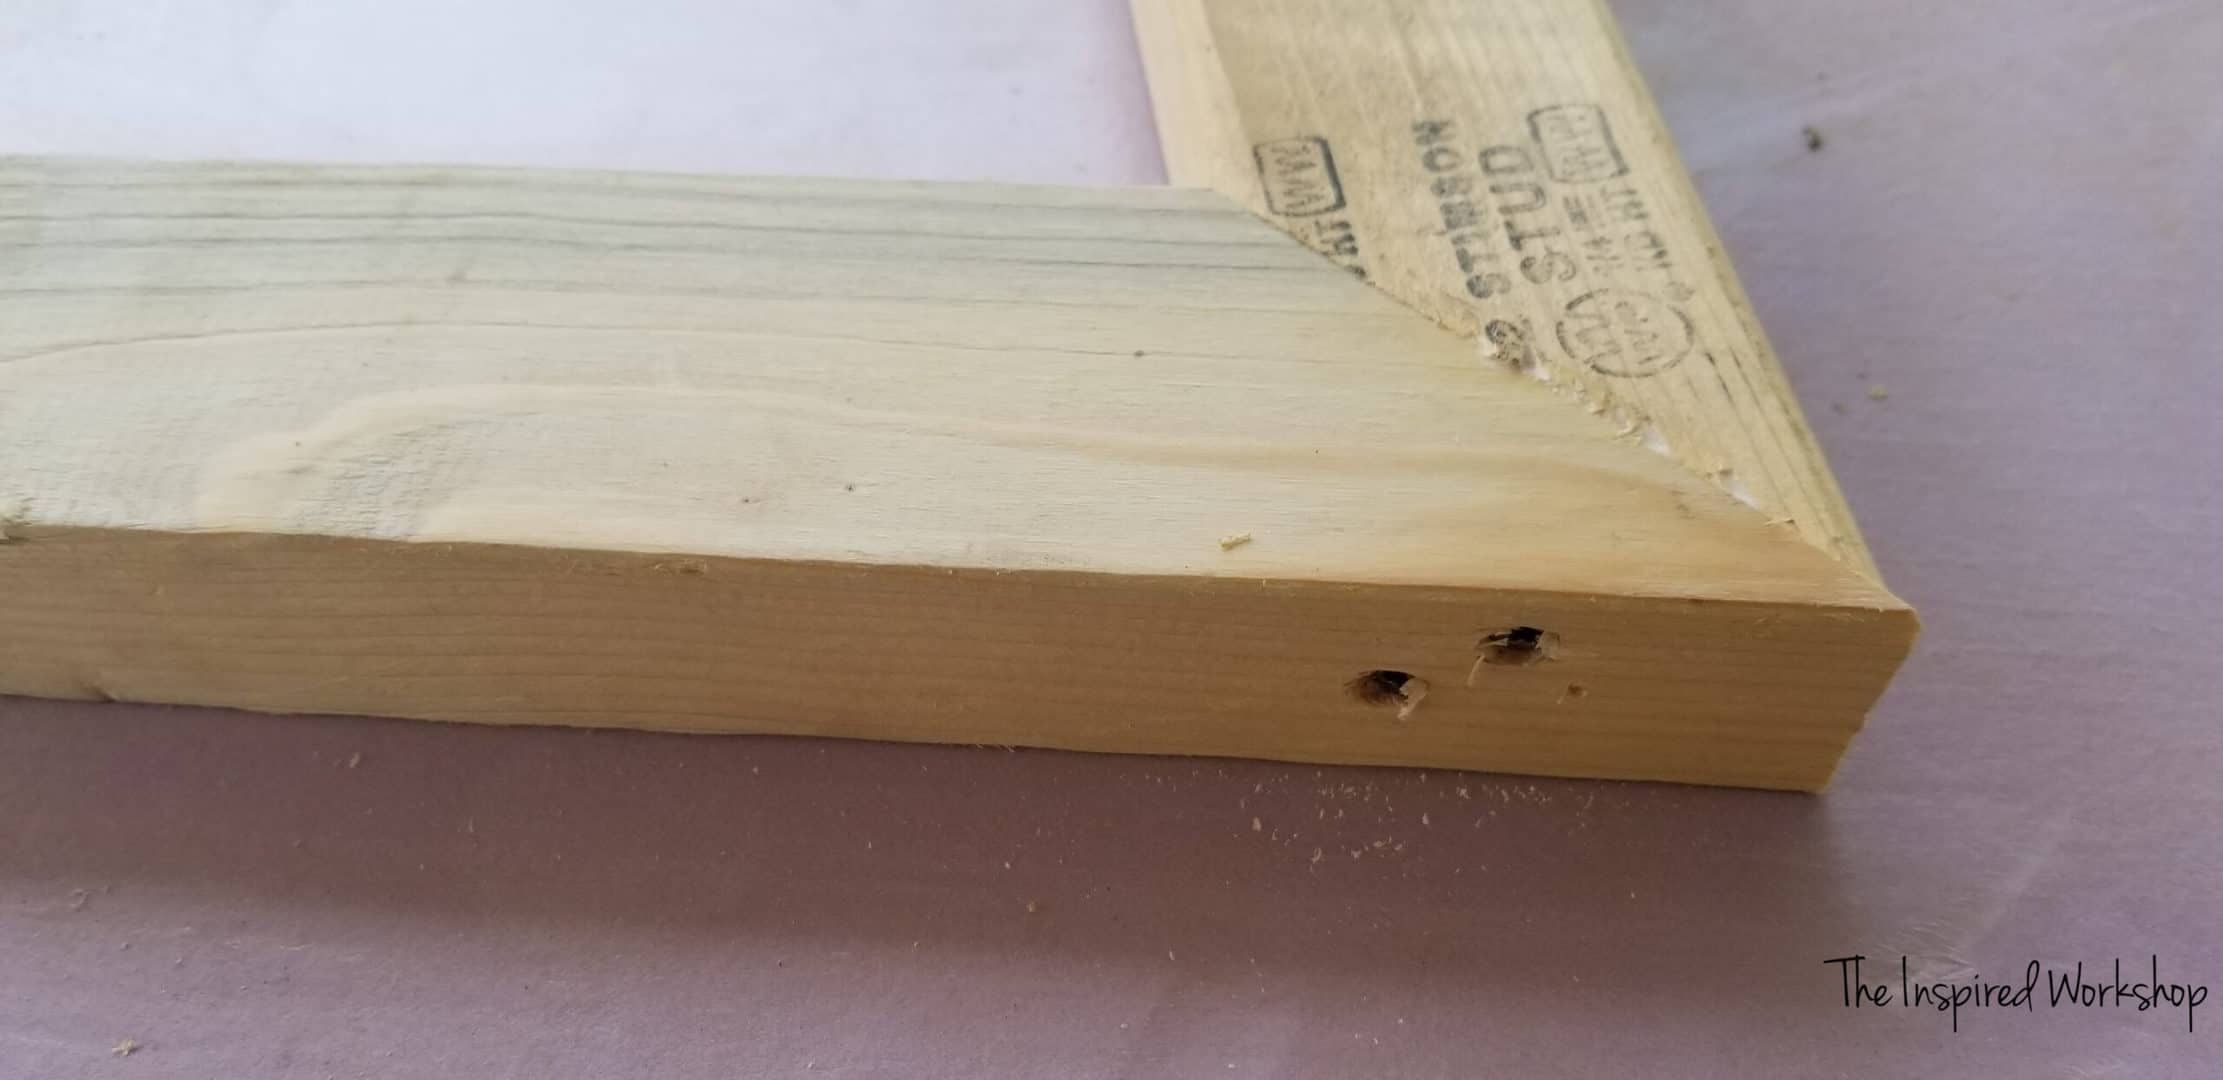
Attach the 2×3 @ 11 1/2″ ends mitered at 39.3 degrees off square, ends not parallel to the rest of the leg, screwing the screws down through the top board into the leg boards, just as the bottom. Make sure and use wood glue!
The main leg is BUILT! Woot woot! Already almost done…okay, not really! Lol!
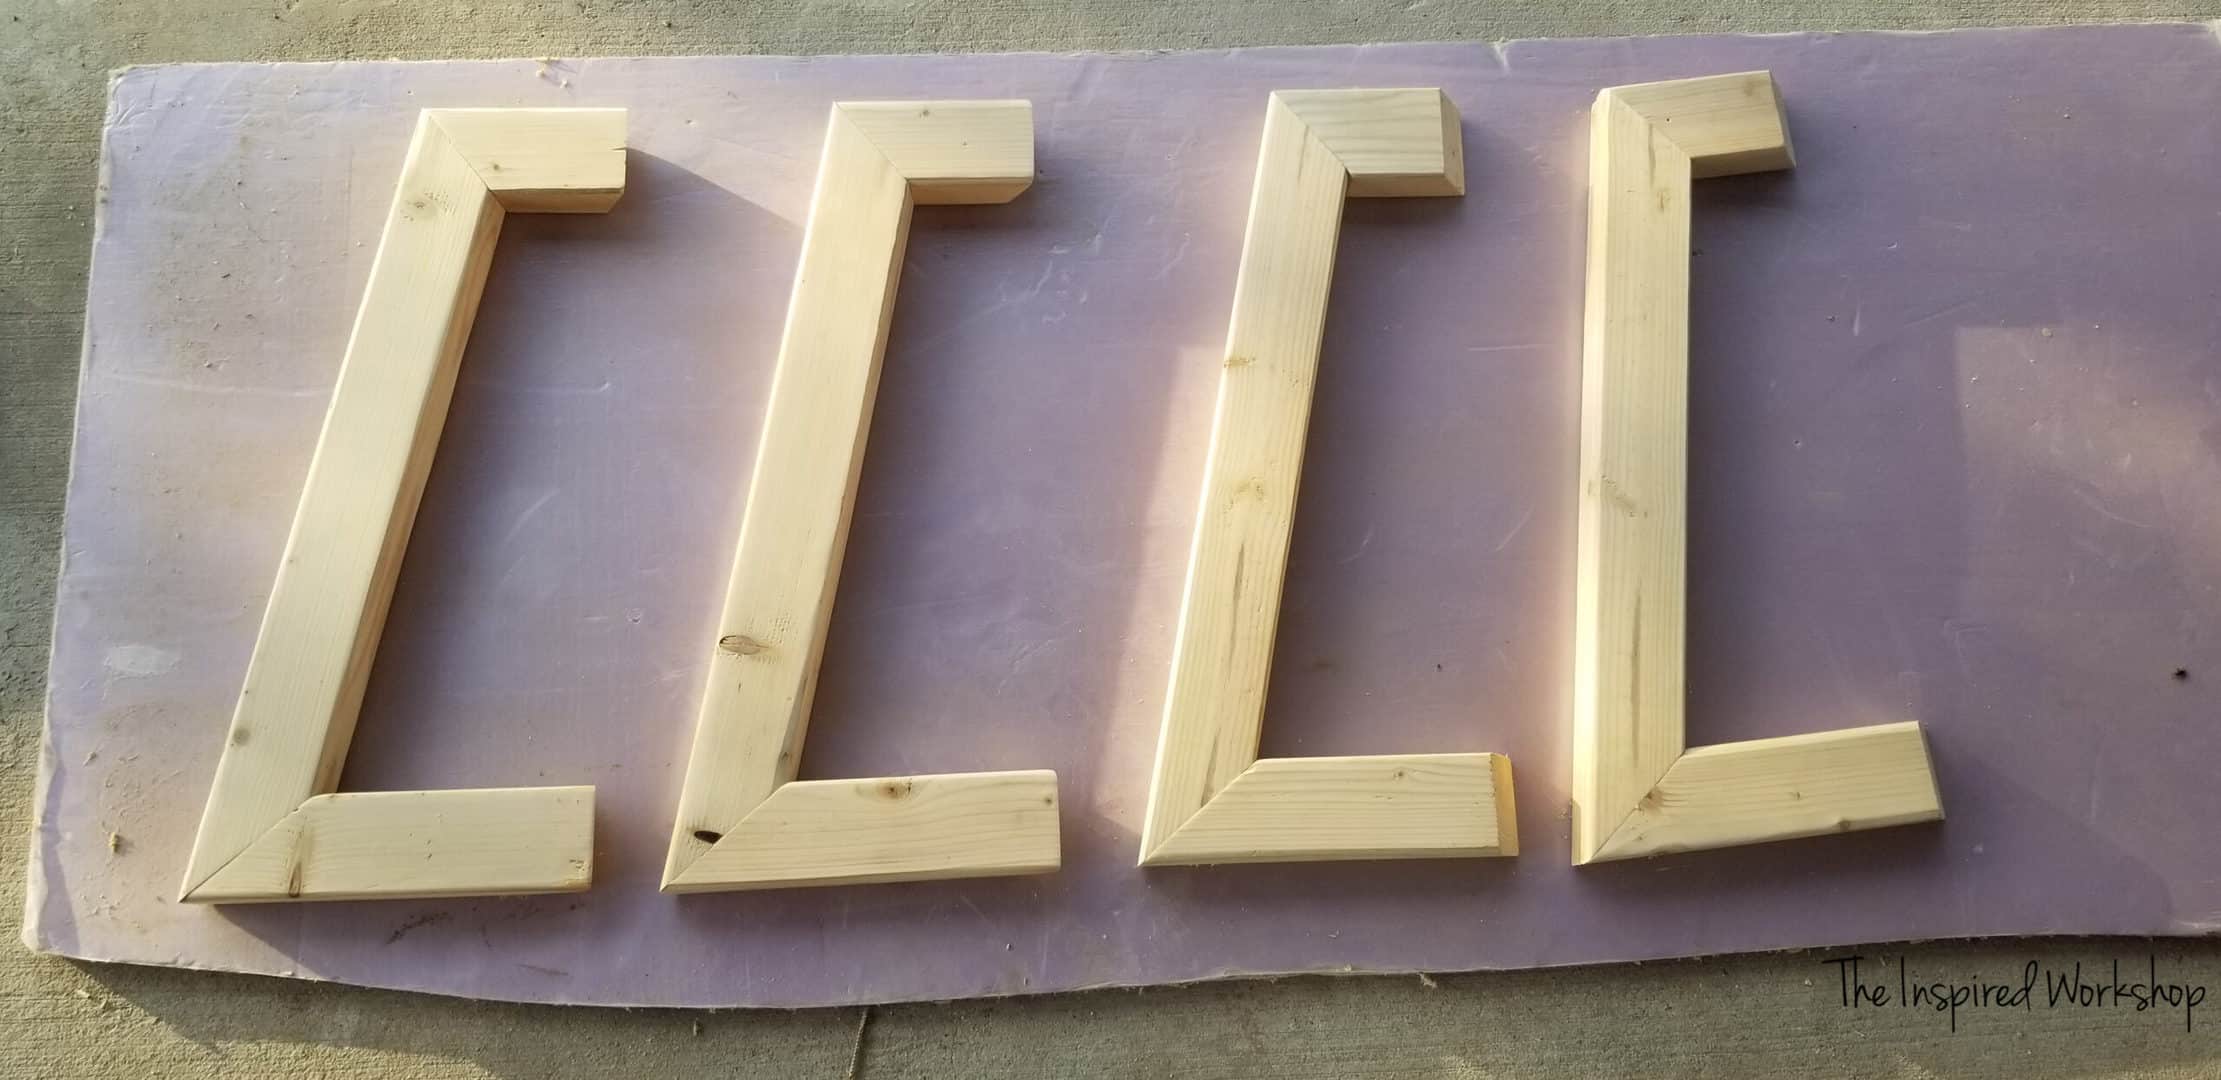
Step 2: Building the additional four legs of the round side table
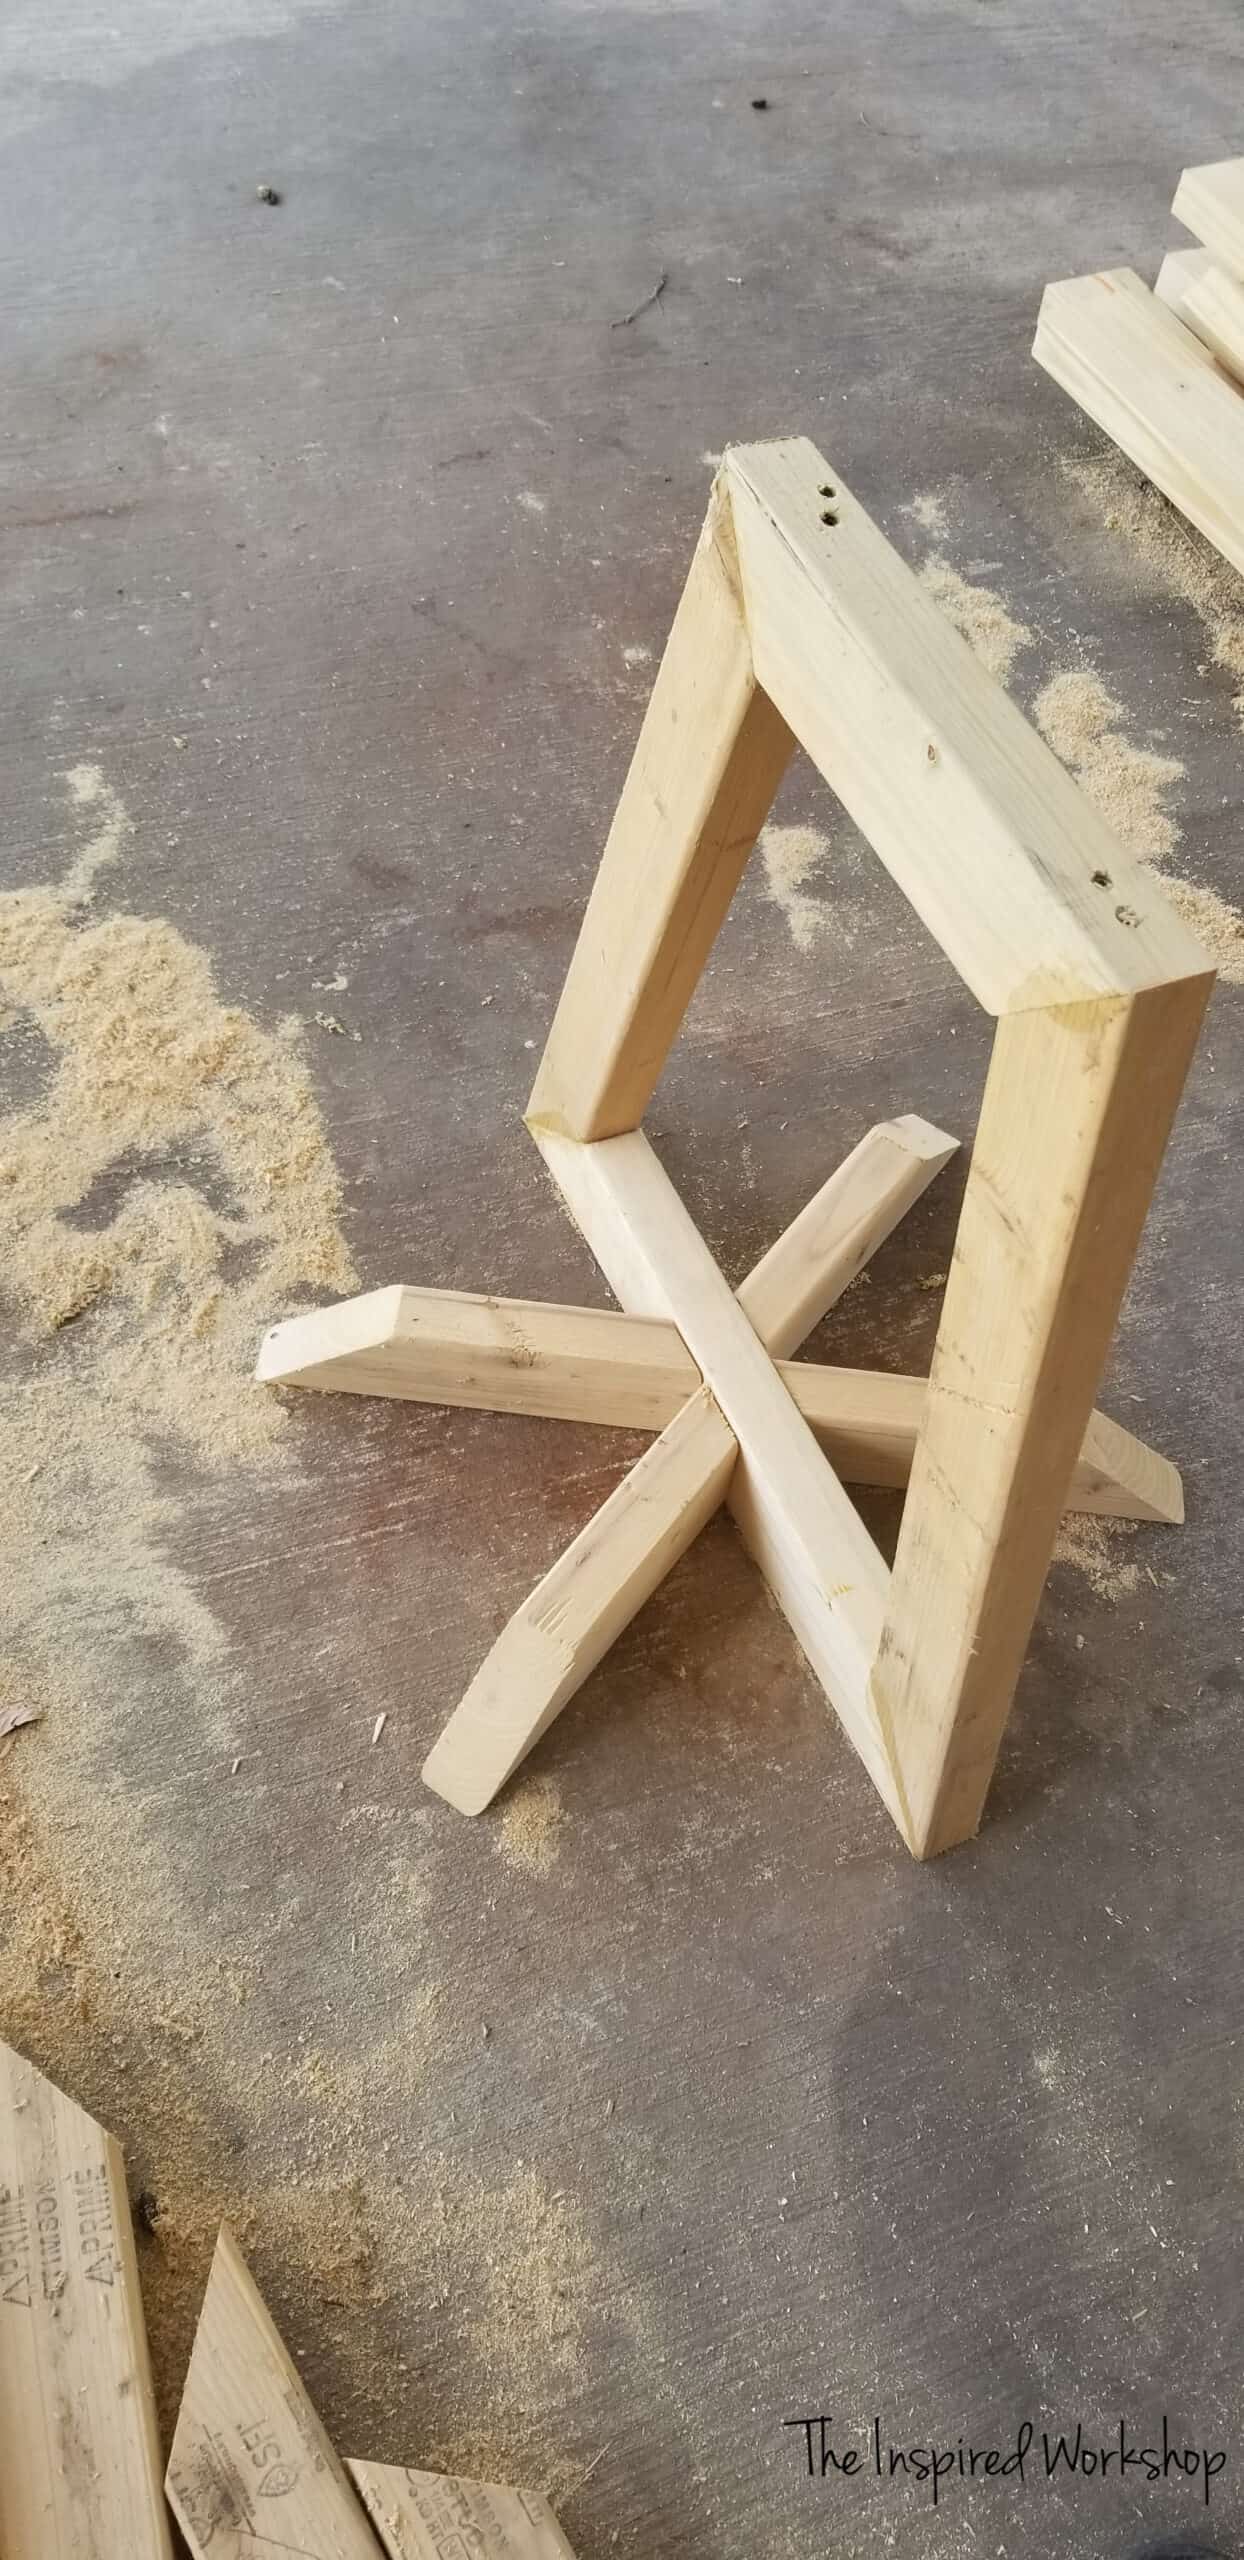
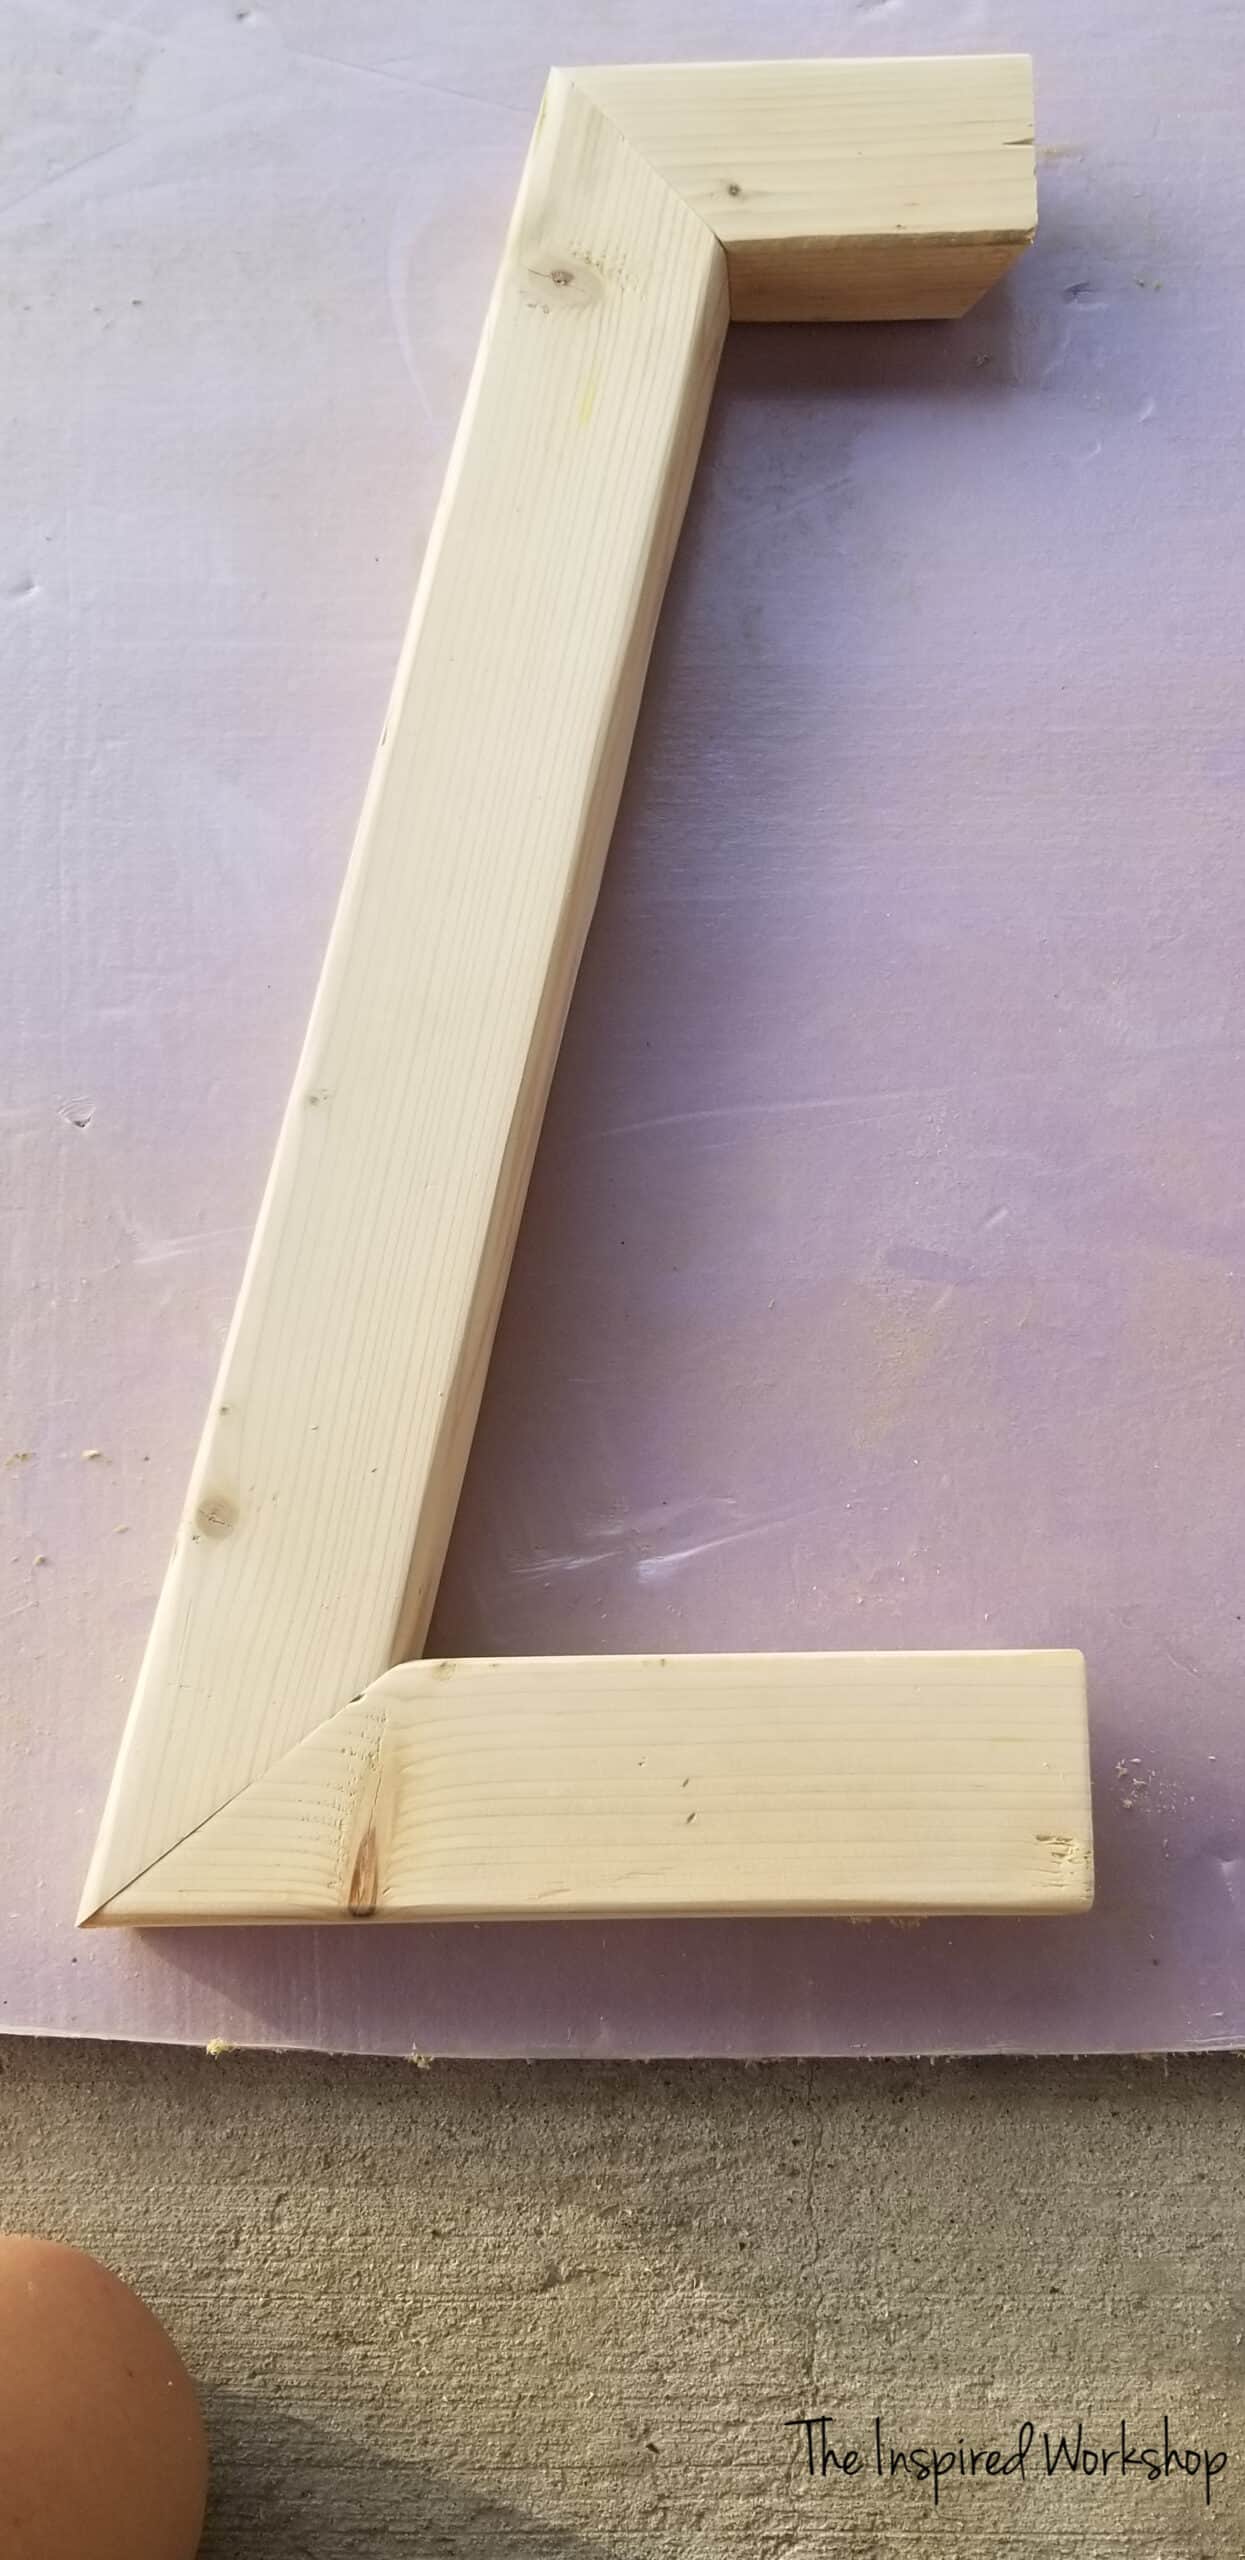
Using the other four 21 11/16″ boards, you will make four more legs that will attach to the main leg.
The bottom will have one end mitered at 51 degrees off square, and one end beveled at 30 degrees off square, when measuring the longest end of the miter, to the longest end of the bevel, it will measure 9 5/8″. It looks a little silly too when you are cutting them, but it turns out in the end! Lol!
Two bevels will go this way, and two bevels will go in the opposite direction.
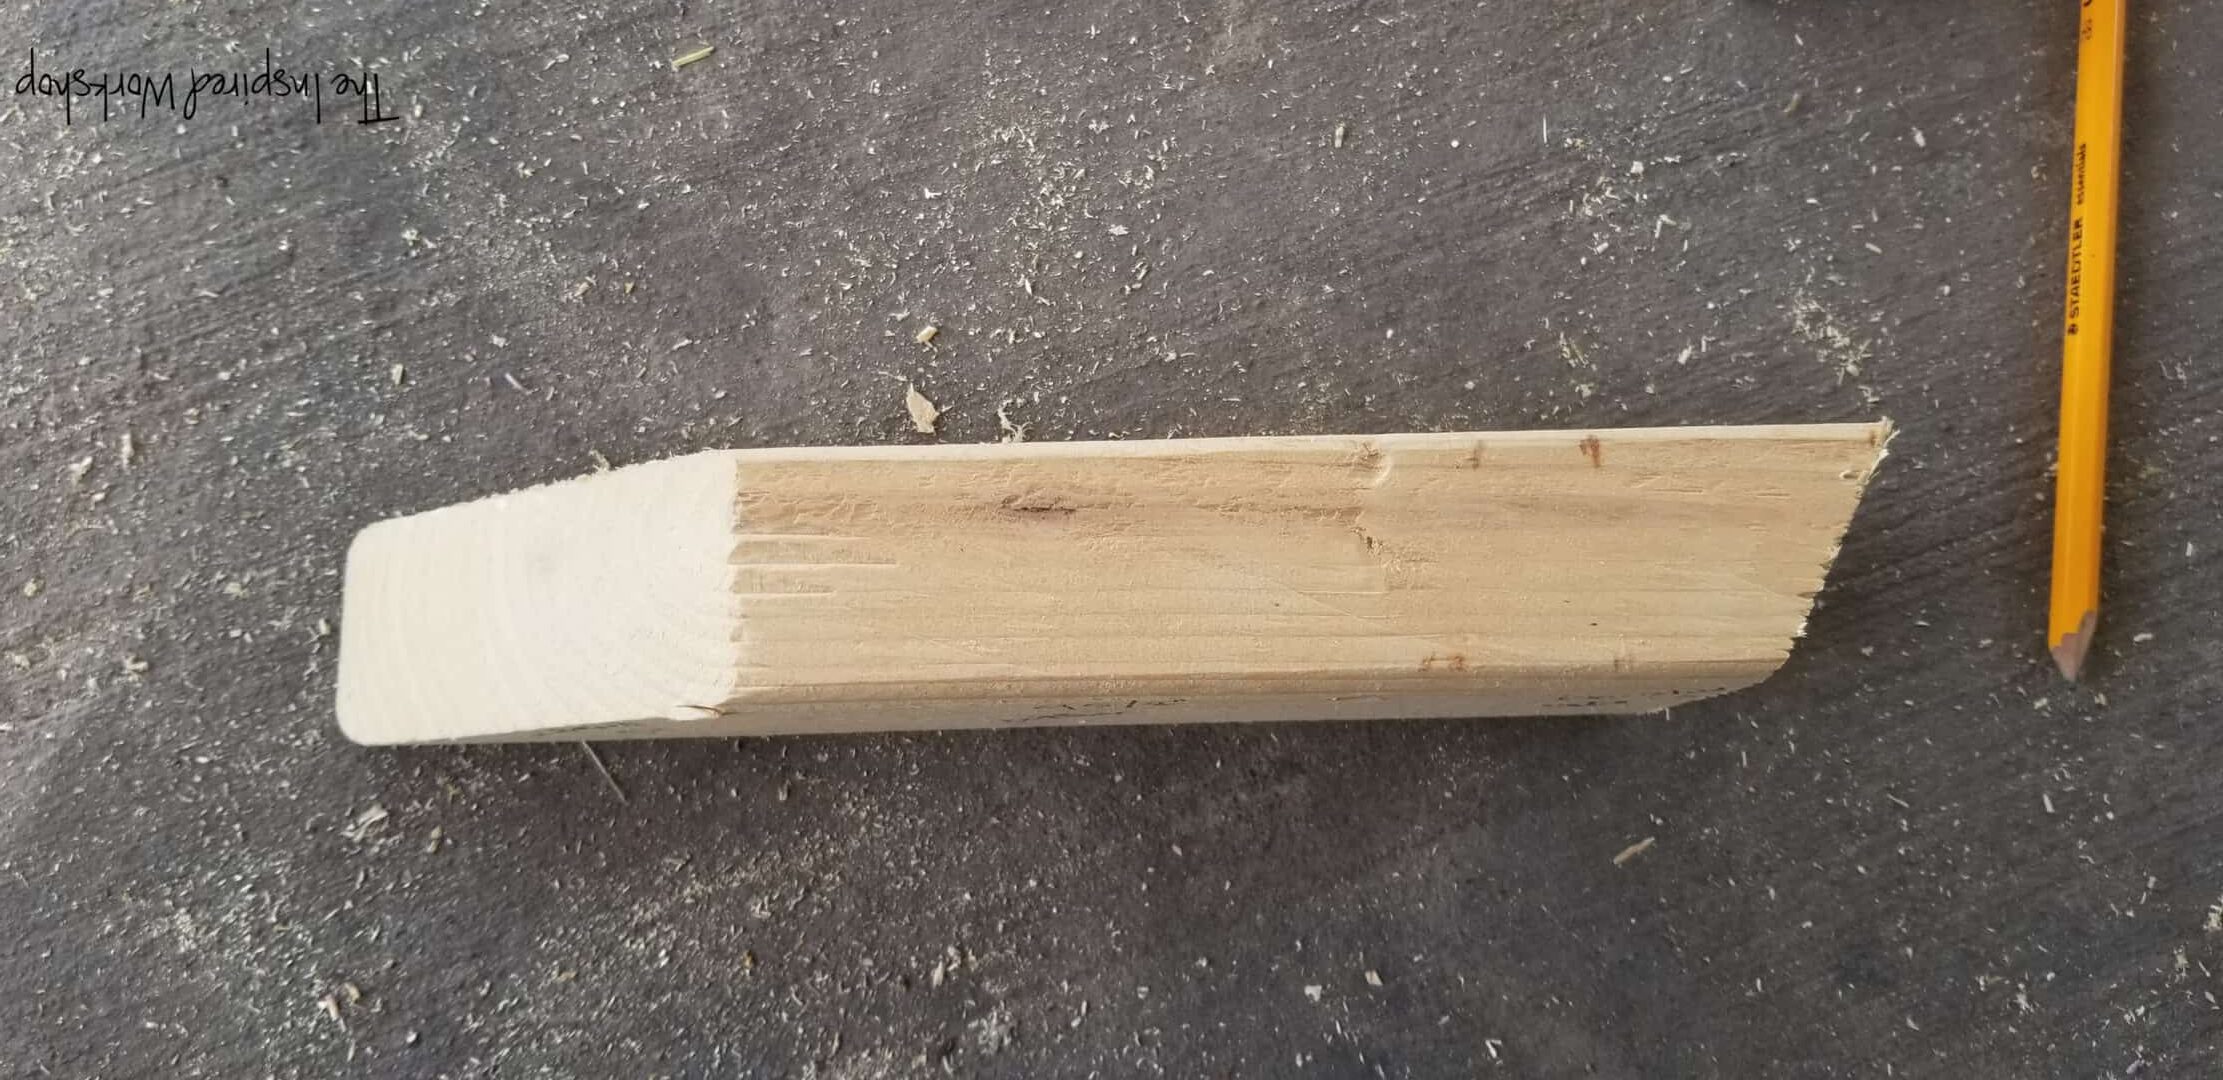
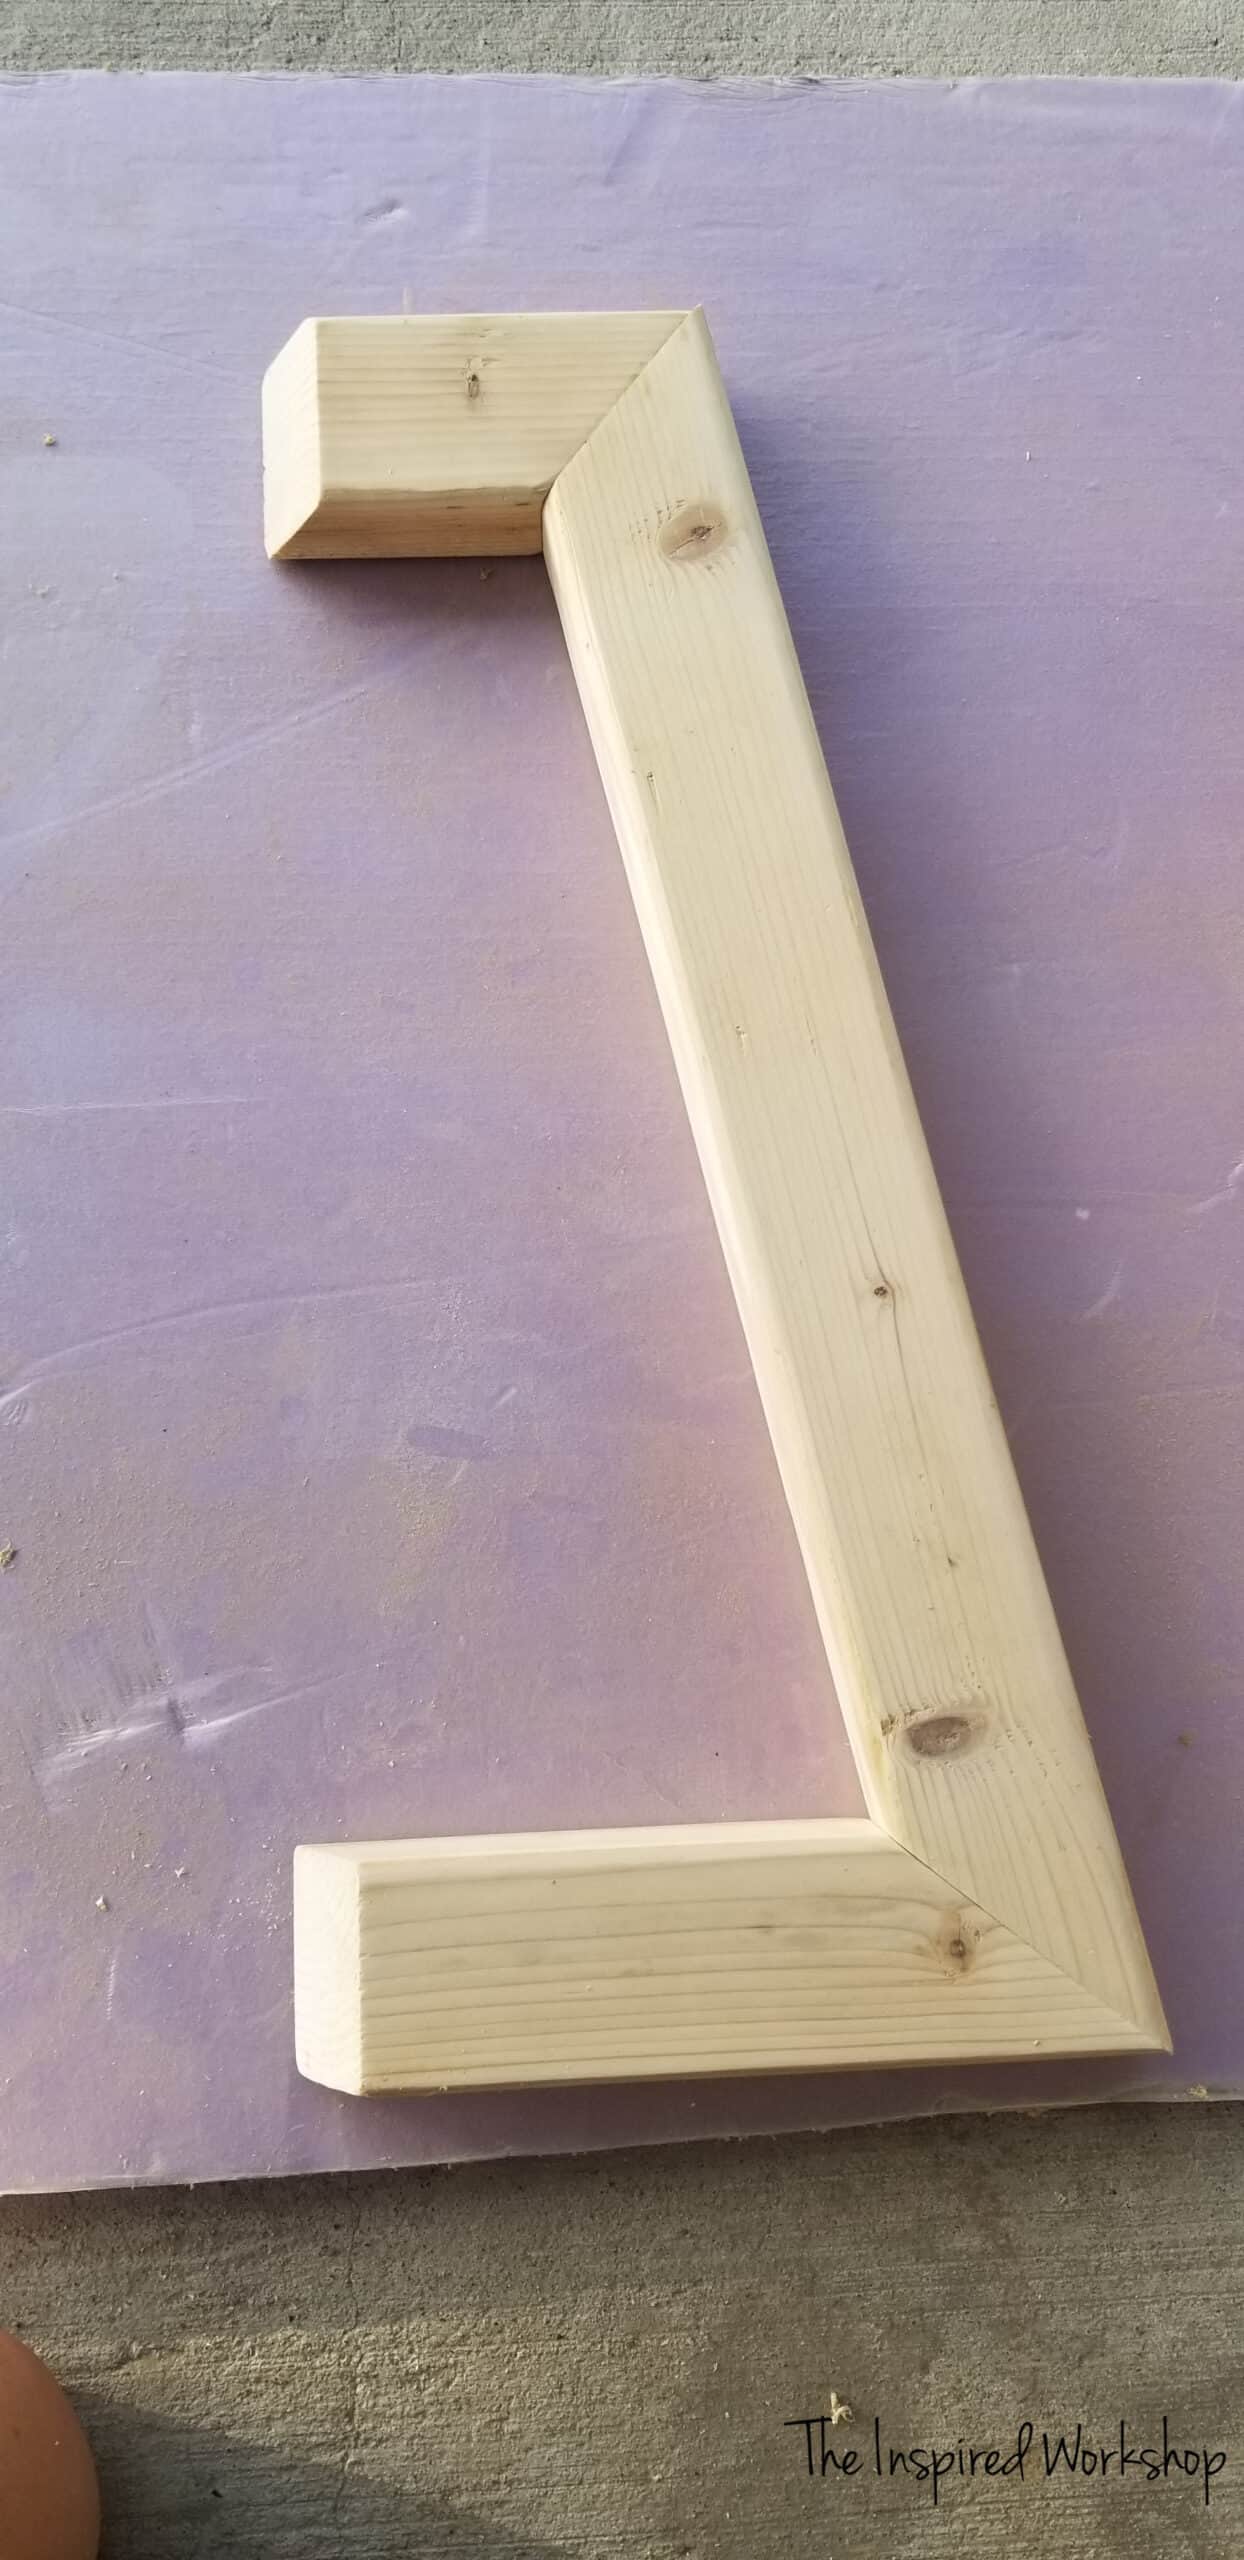
After cutting the bottom boards, you will cut the top boards as well. They will be cut with a 39.3 degree off square miter on one end, and a 30 degree bevel on the other end. But the length is shortened to 5 1/2″ longest measurement. My actual measurement was 5 5/16″…which means I must have cut my bottom boards slightly short as well! Oopsie! My bad!
Yours will be 5 1/2″…as long as your bottom is 9 5/8″! Lol!

Once you have all your pieces cut, you can build the legs and attach them to the main leg. I used the same awesome method of screwing straight through the top and bottom boards to attach!😜 Use wood glue here as well!
Same leg, flipped over.
The other two legs will be exactly like this, they have an opposite bevel than the other two above.
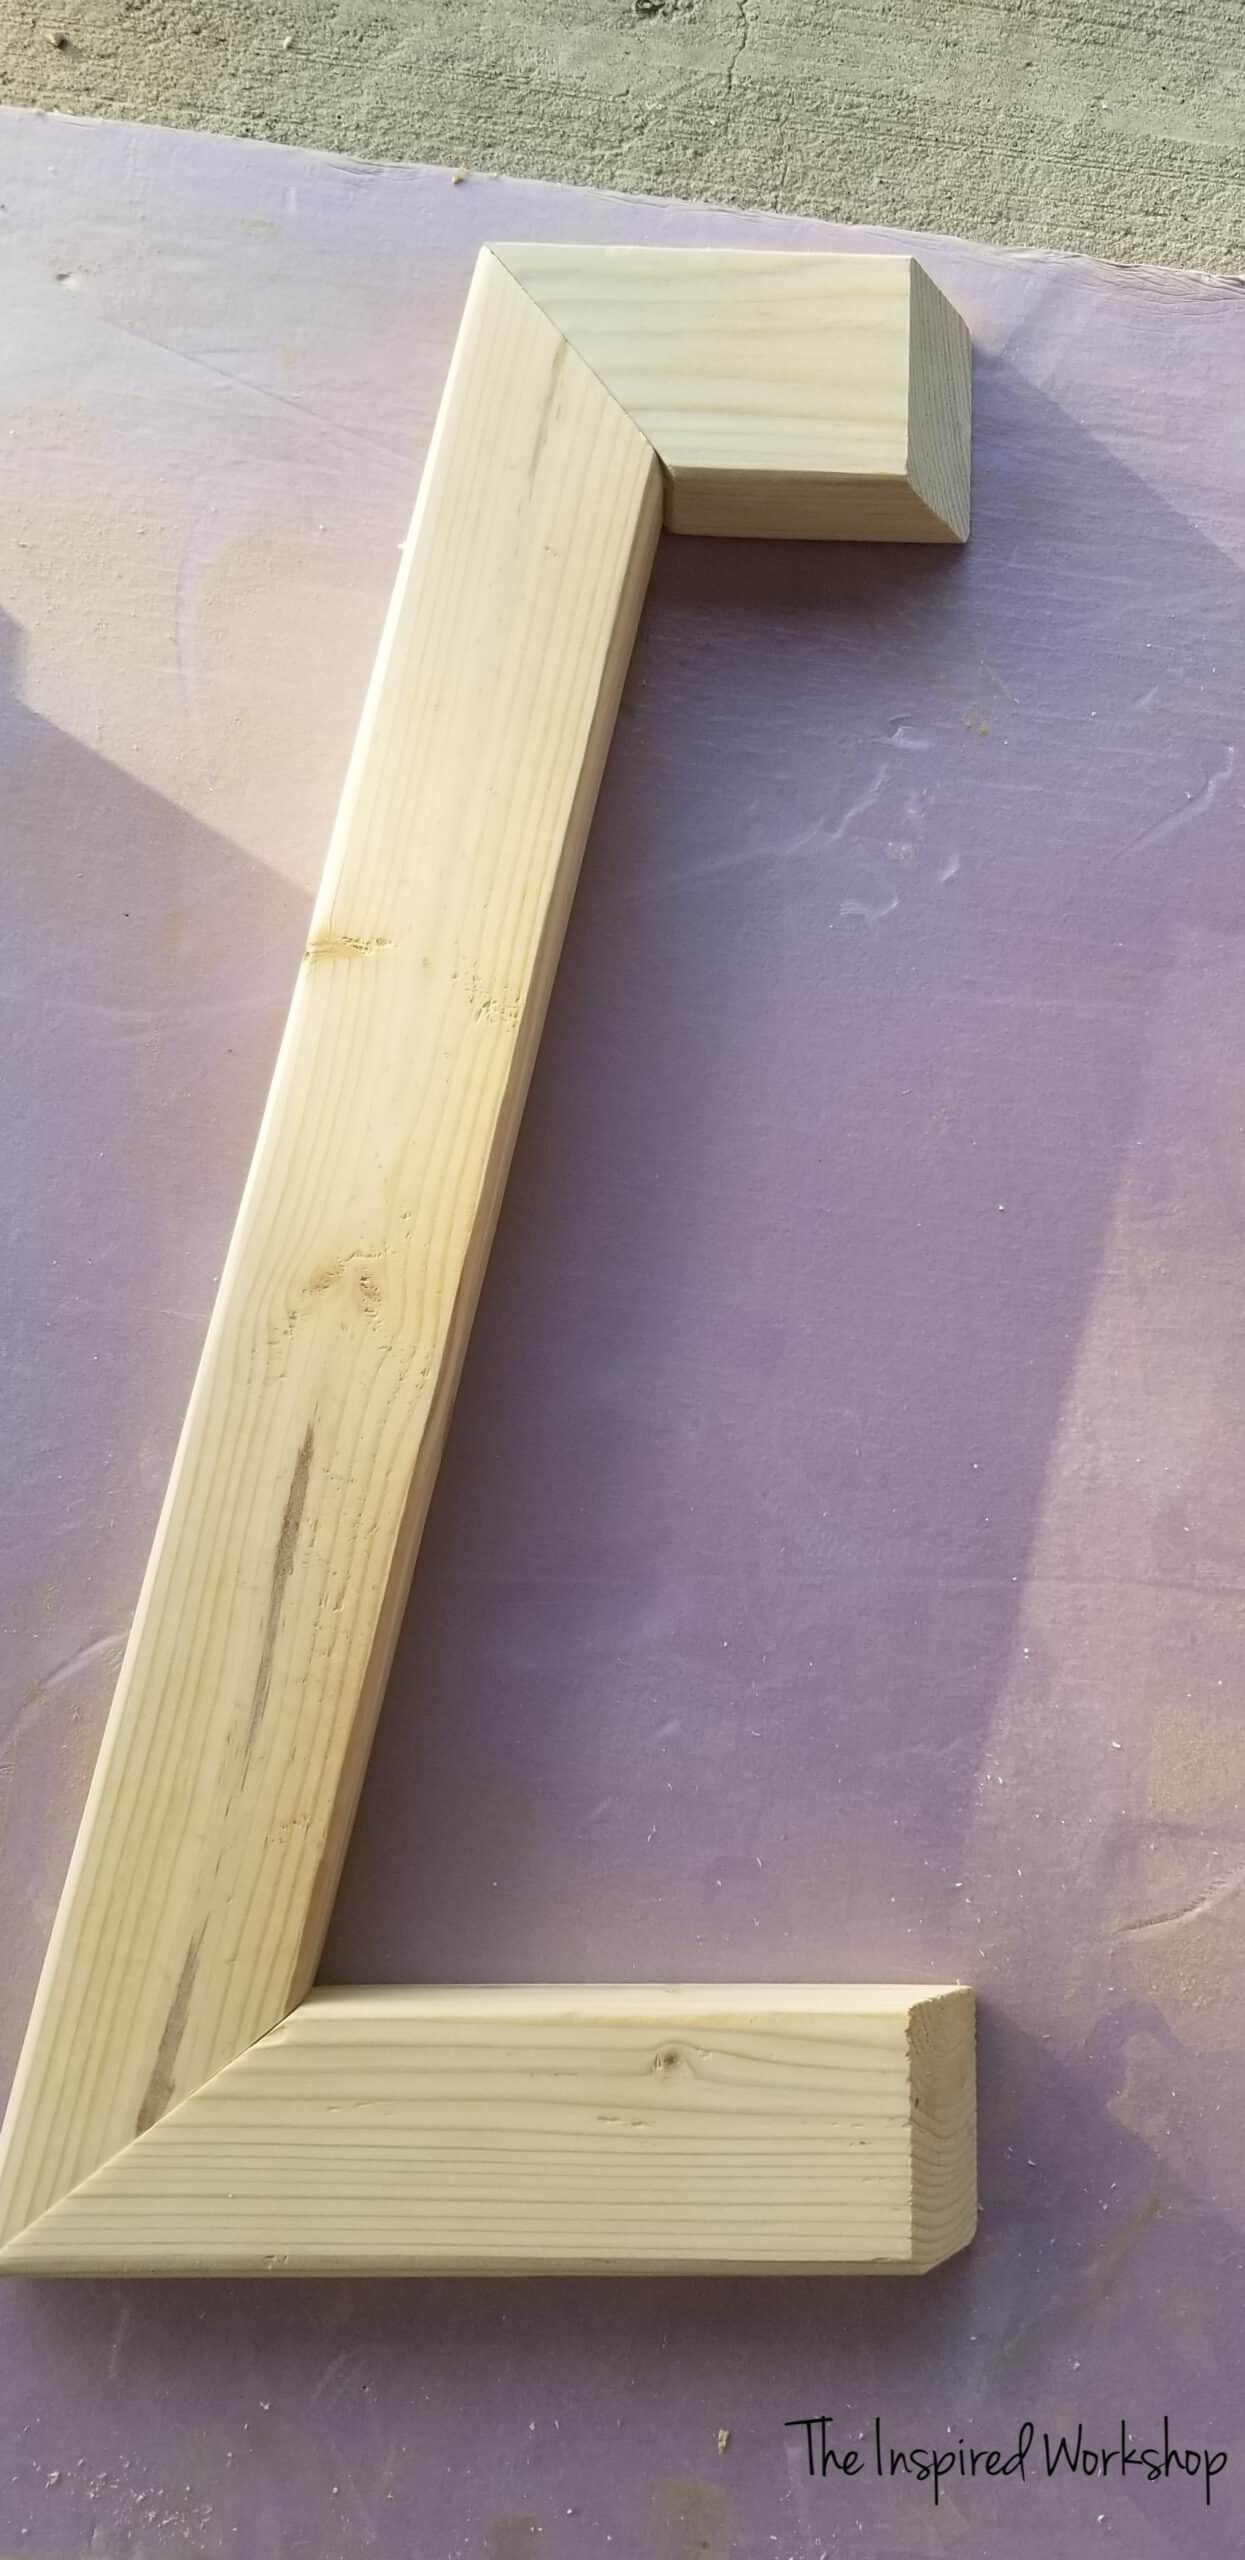
The same leg flipped over.
All the legs!
After building all four of the additional legs, I sanded everything before attaching it all to the main leg. The angles make for some really tight spaces that you won’t be able to get a sander into once put together! So I suggest sanding first and then attaching them. Again, I used that fancy schmancy method of angling my screws from the top and bottom. 😁
Measure and lightly mark the middle of both the top and bottom of the main leg, as that is where you will attach the legs, bumped up against each other directly in the middle of the main leg.
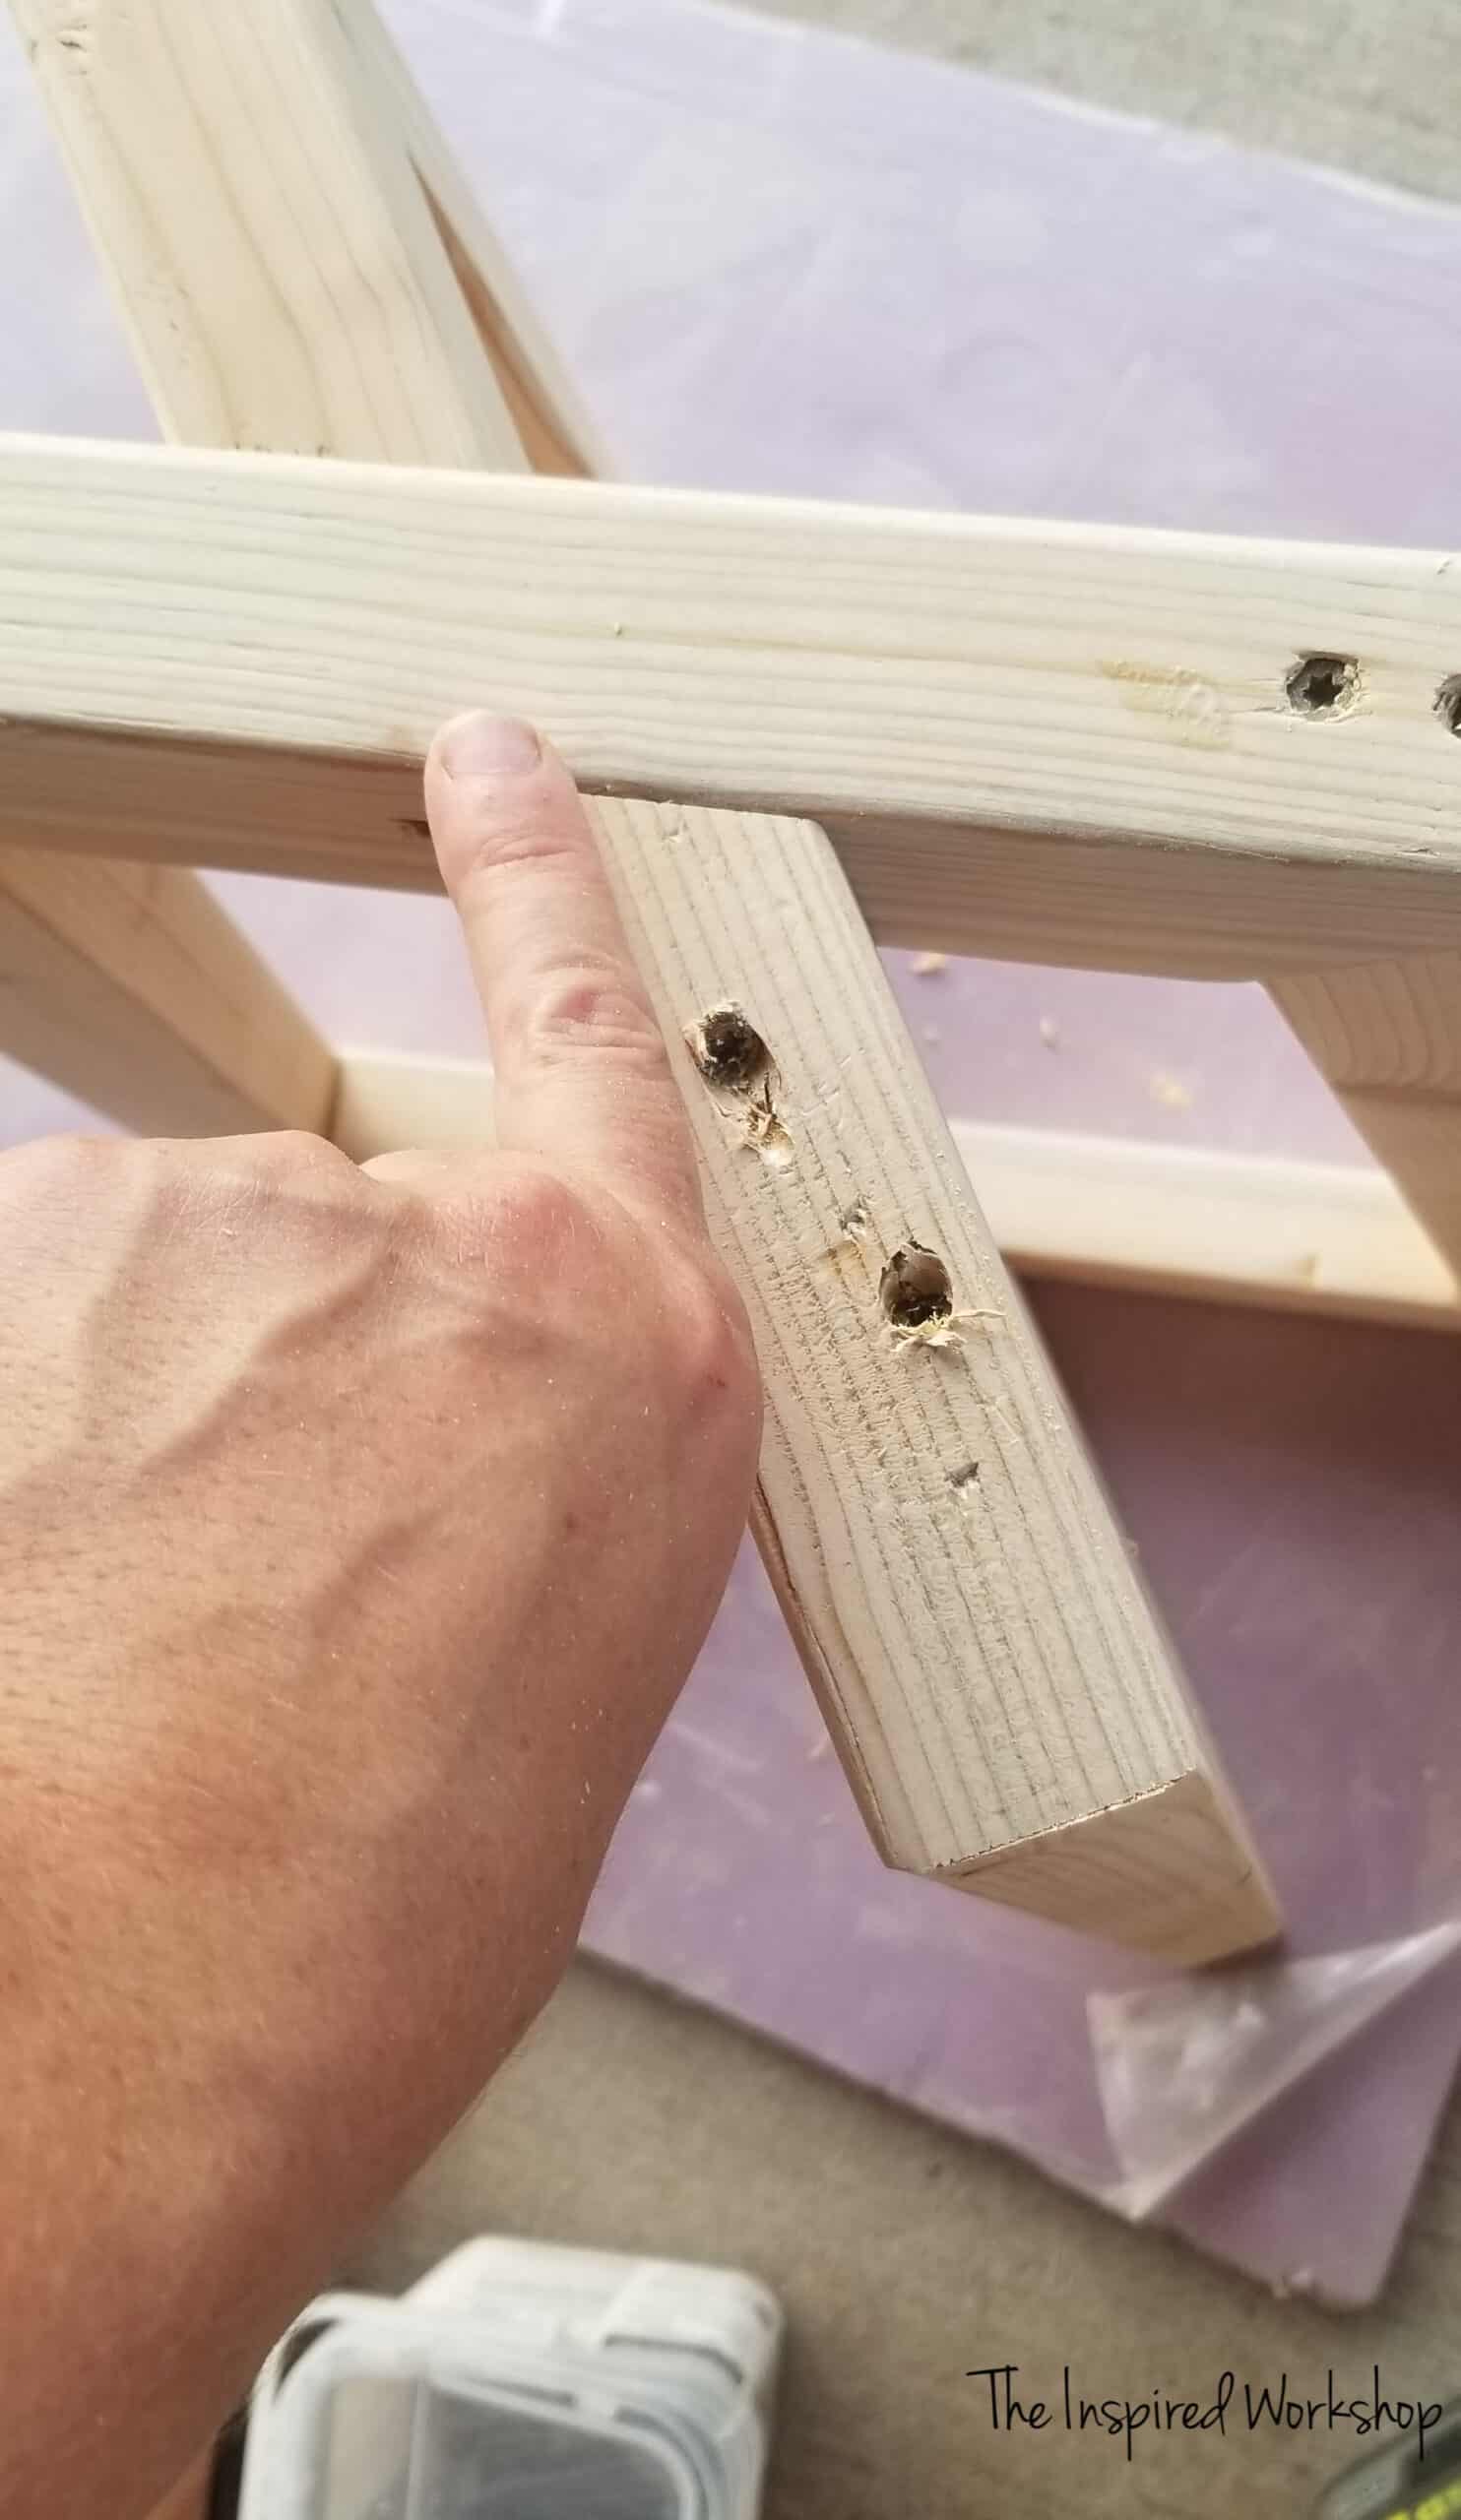
The one screw pointed in the direction of my finger is the screw attaching the leg to the table, the screw in the opposite direction is attaching the top board to the leg. Make sure and use ample wood glue when attaching, but wipe off any excess with a damp rag since you have already sanded everything!
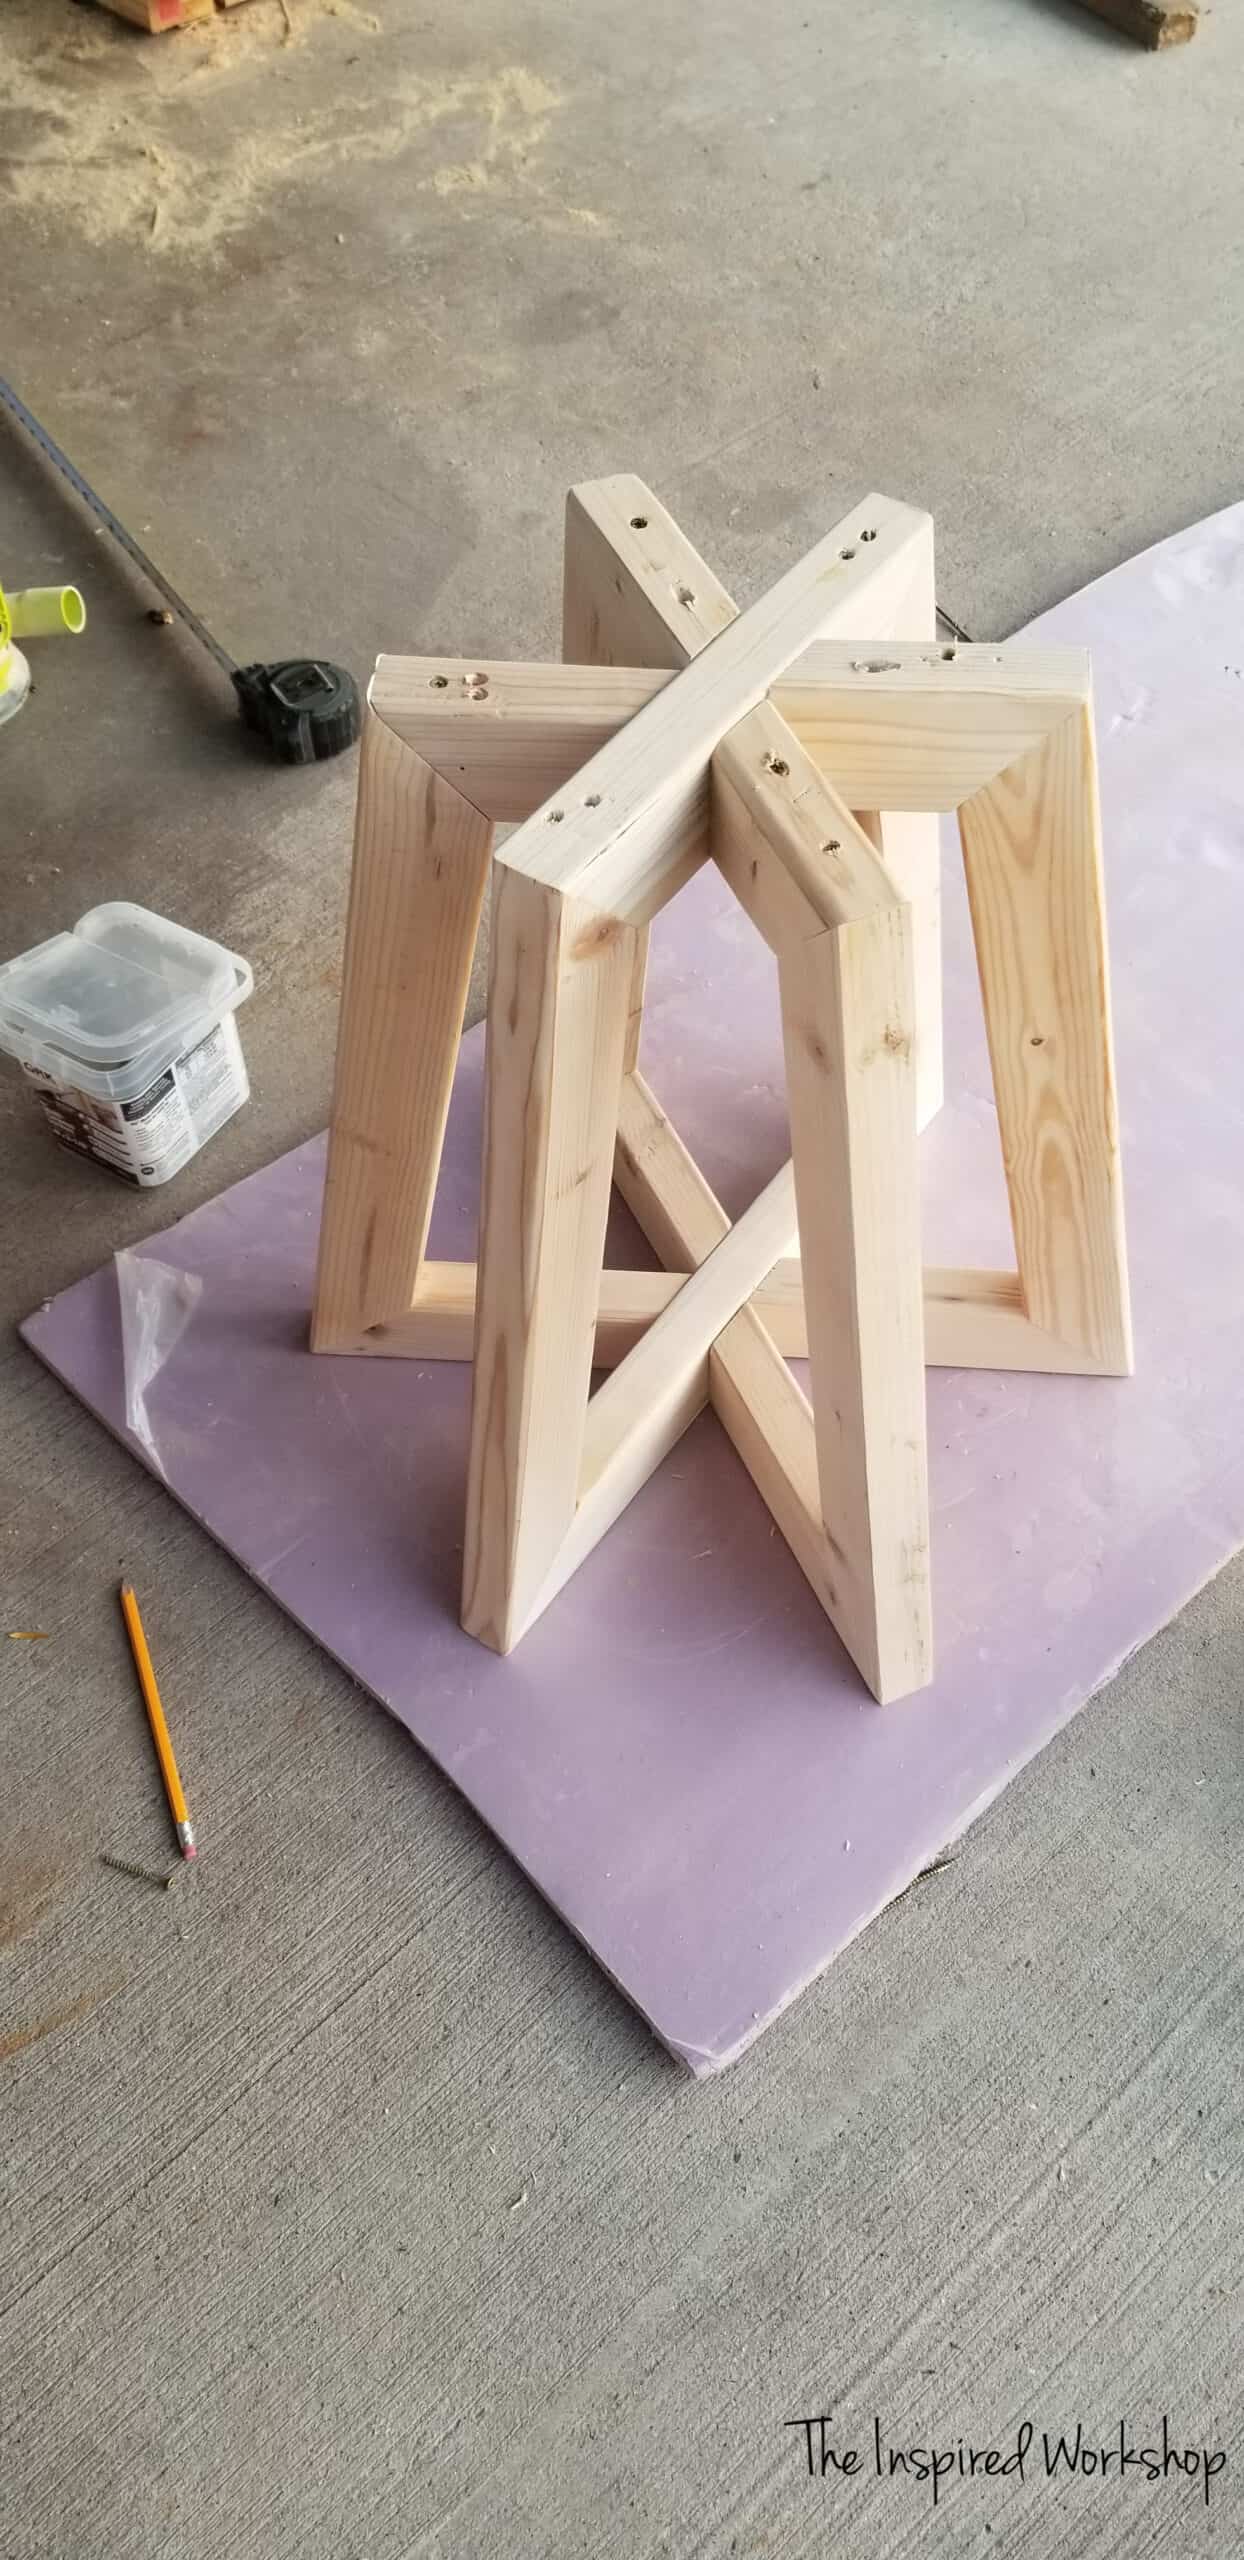
Don’t worry all those UGLY screws will be covered by the tabletop!
The base is ready for stain! I used Old Barn Living stain in Weathered, I LOVE this stuff because I can use it inside my house with NO SMELL whatsoever since it’s a natural stain! Makes me so happy I could dance!💃💃💃
Making the Marble Epoxy Table Top
Alright, the base is built and awaiting its final piece of jewelry, the marble epoxy top that is going to complete it perfectly!
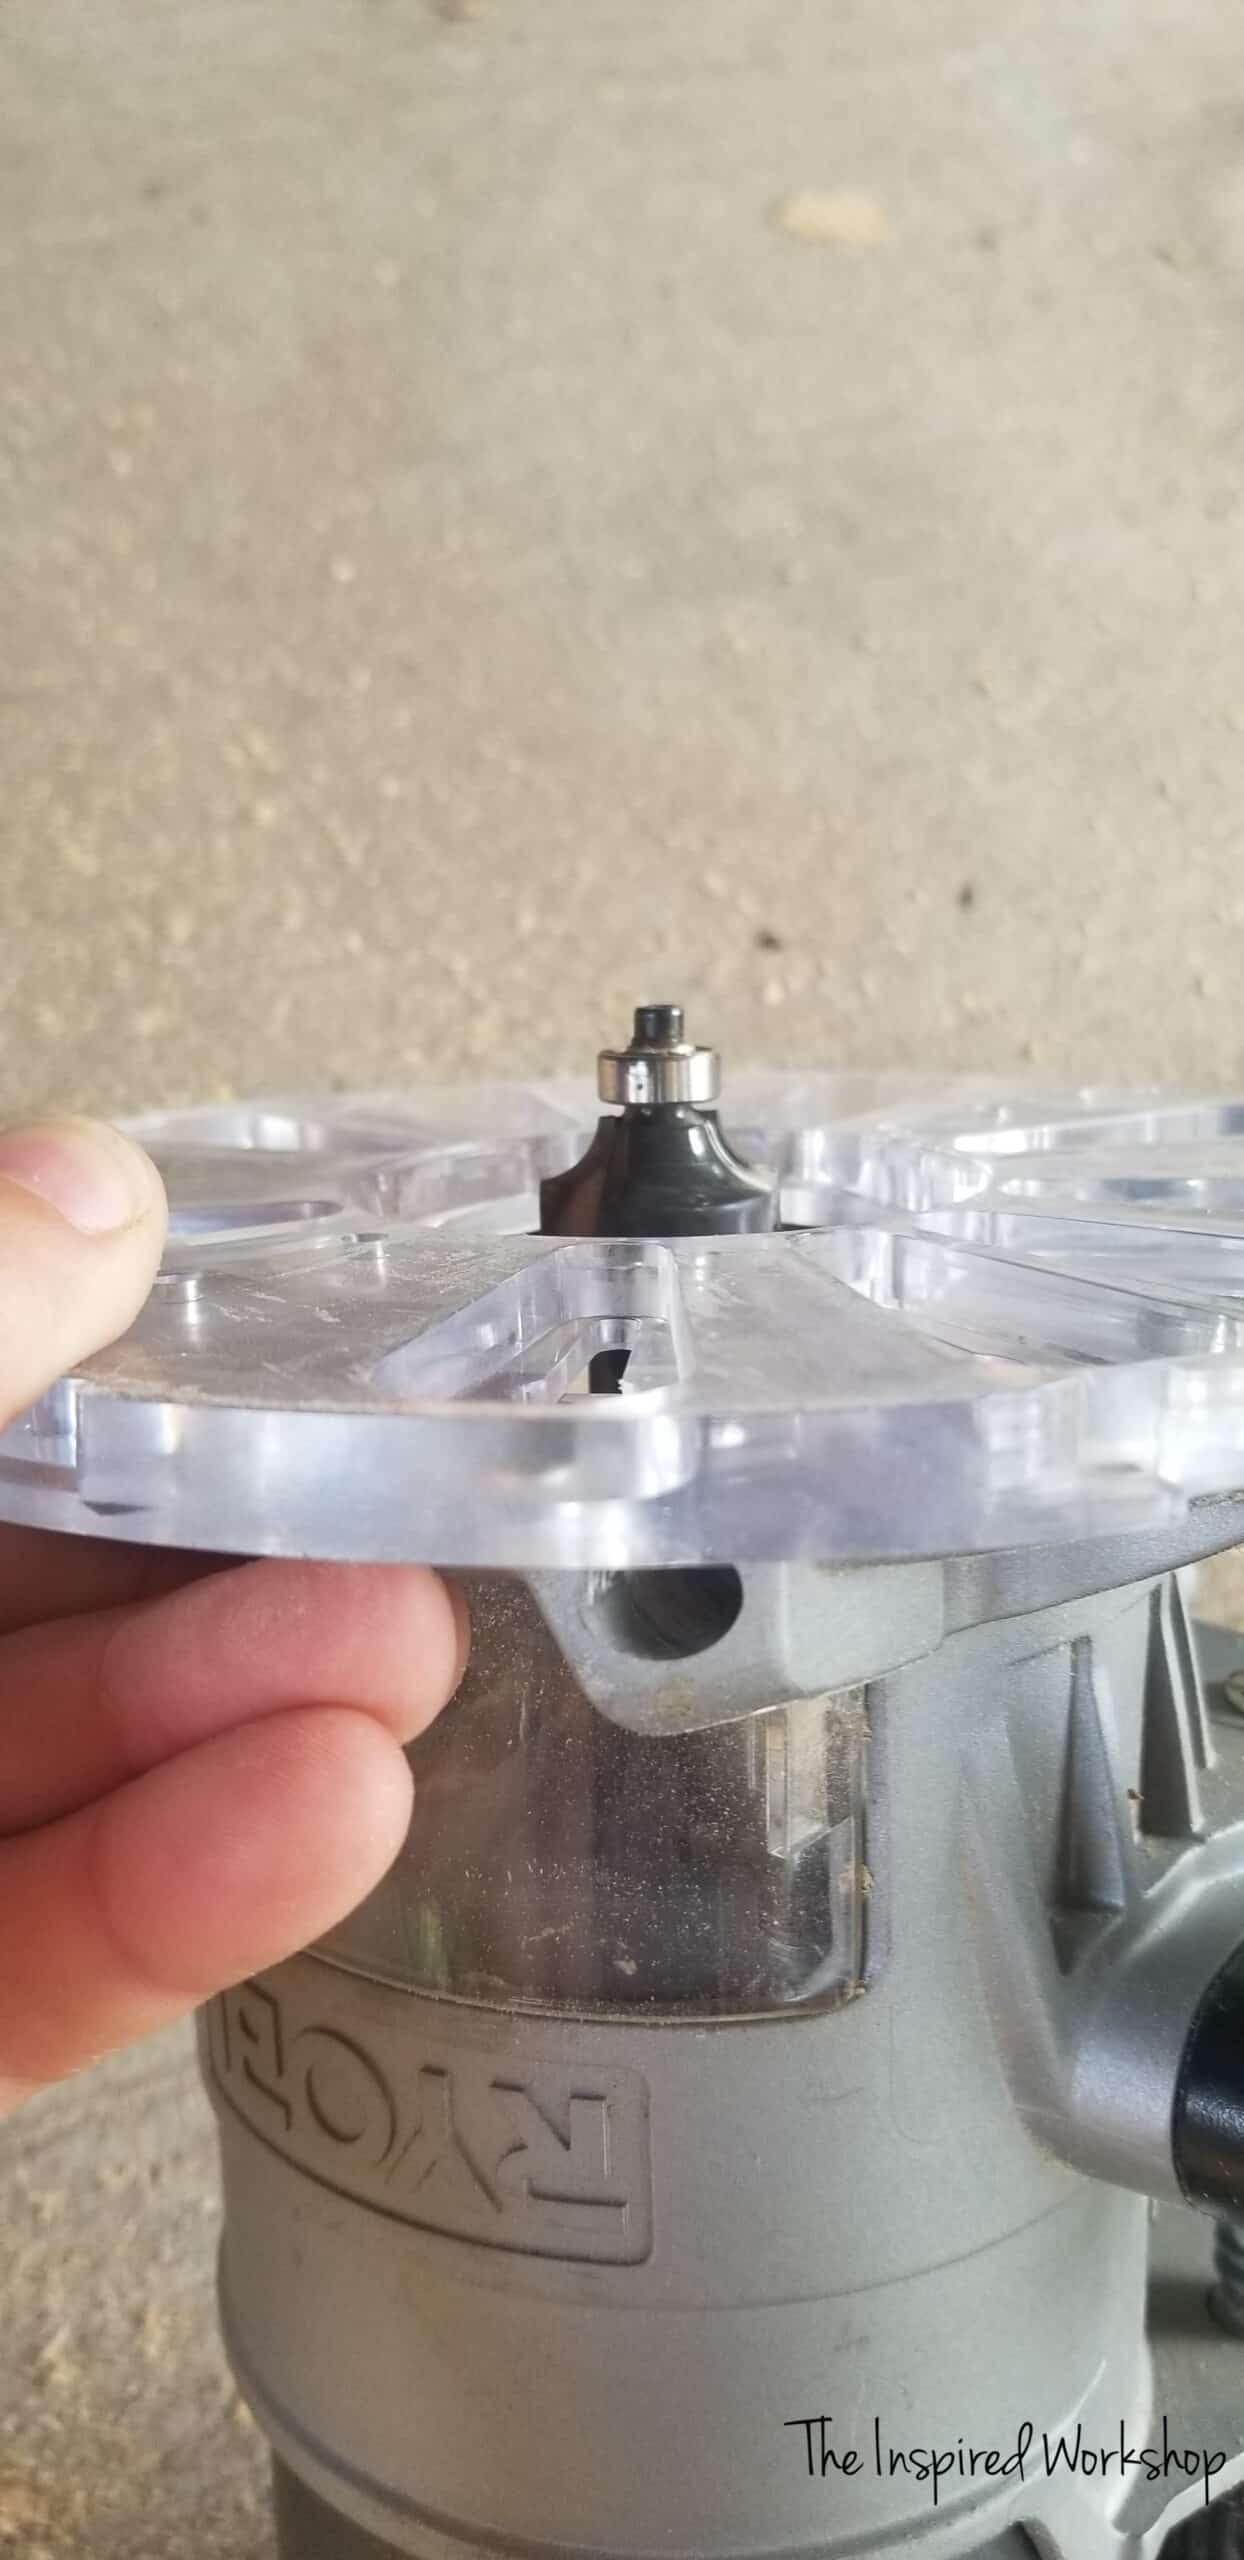
I used a router and the coolest circle jig to make the cut…and I can tell you, that now I want to cut EVERYTHING into a freaking circle because it was so much fun…and SO stinking easy to use!
You change out the base plate of your router with the one in the kit, and then set the jig to the size circle you need to cut! Then let your router do all the hard work!
Boom, CIRCLE CUT!
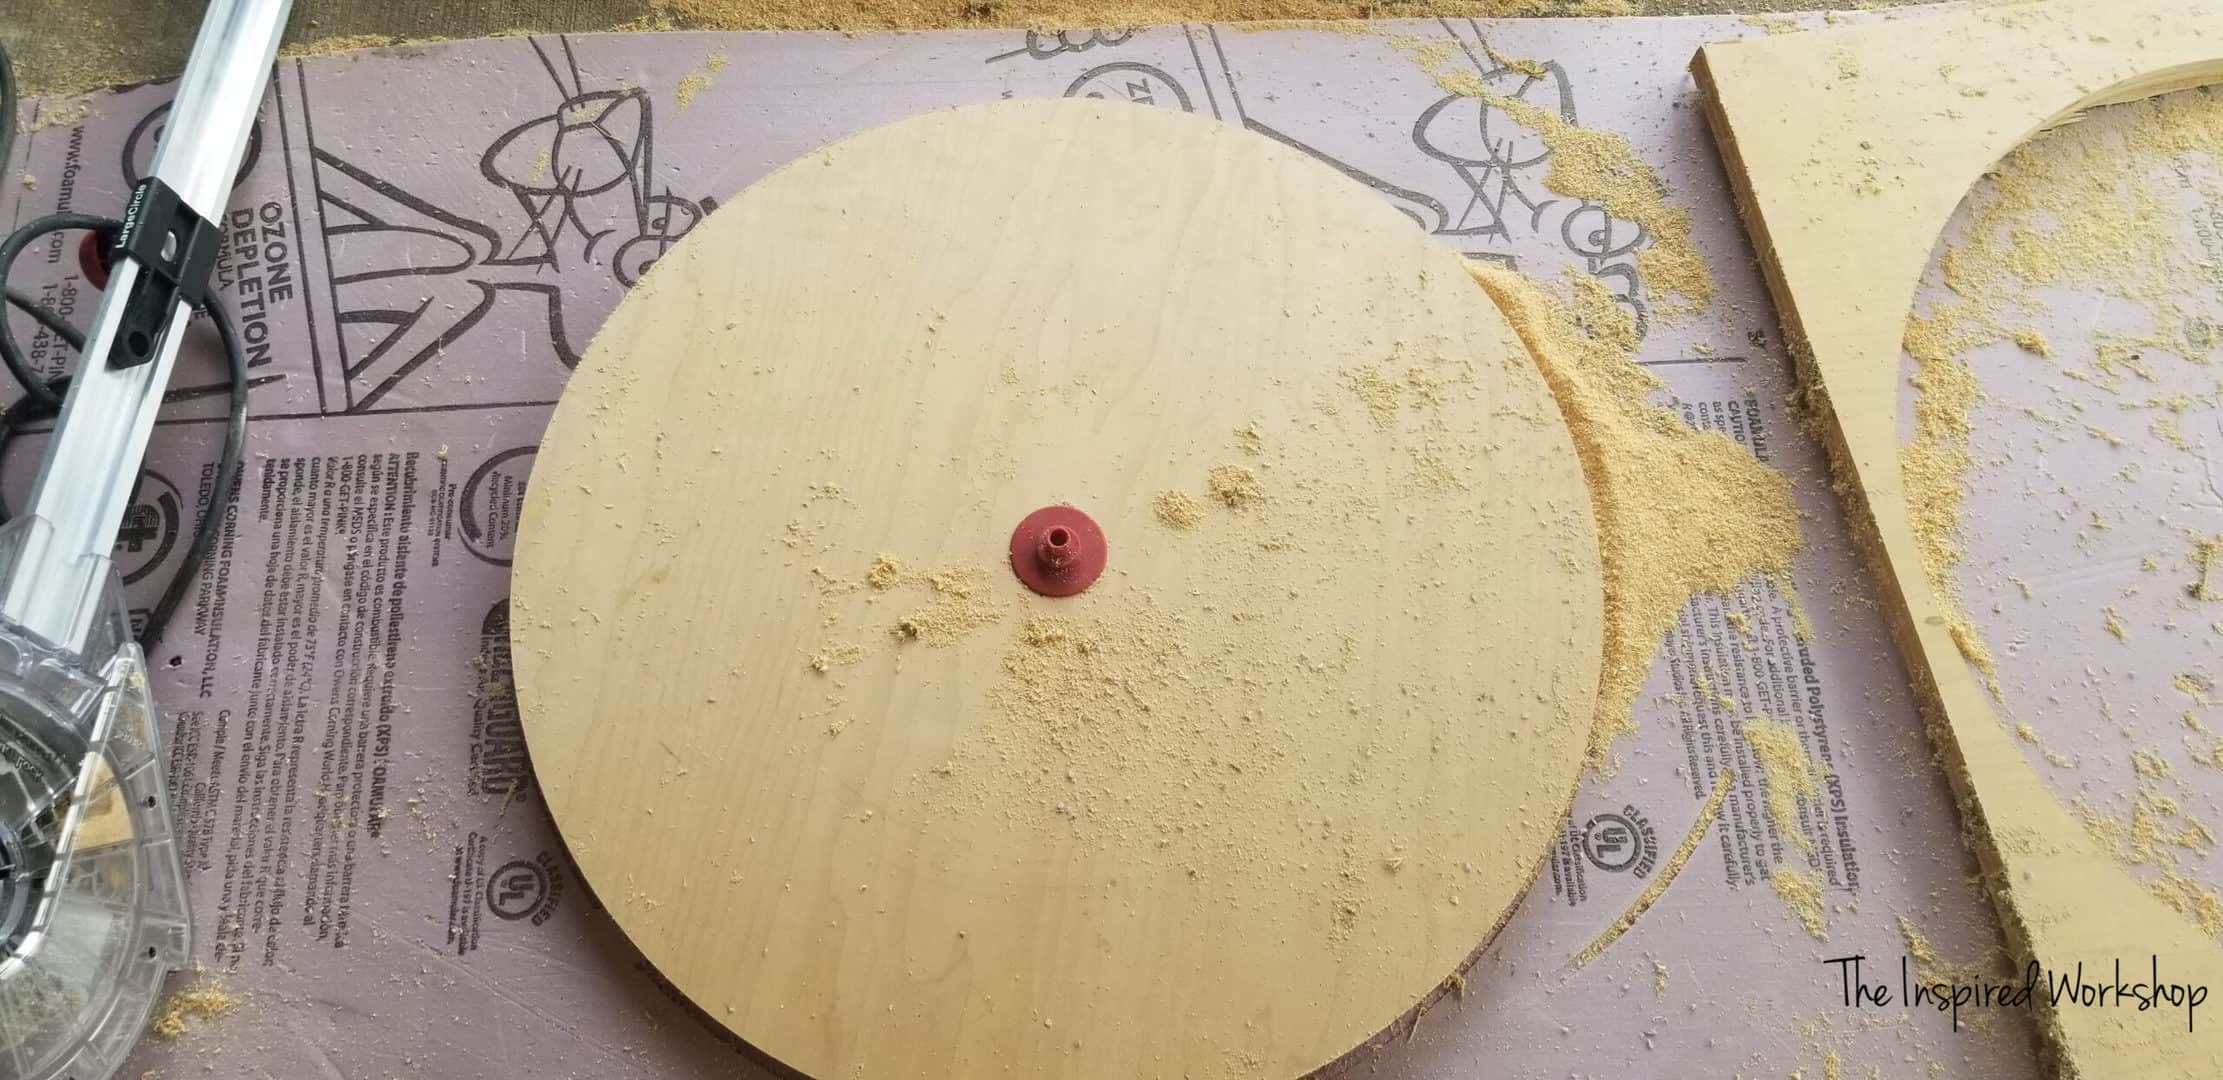
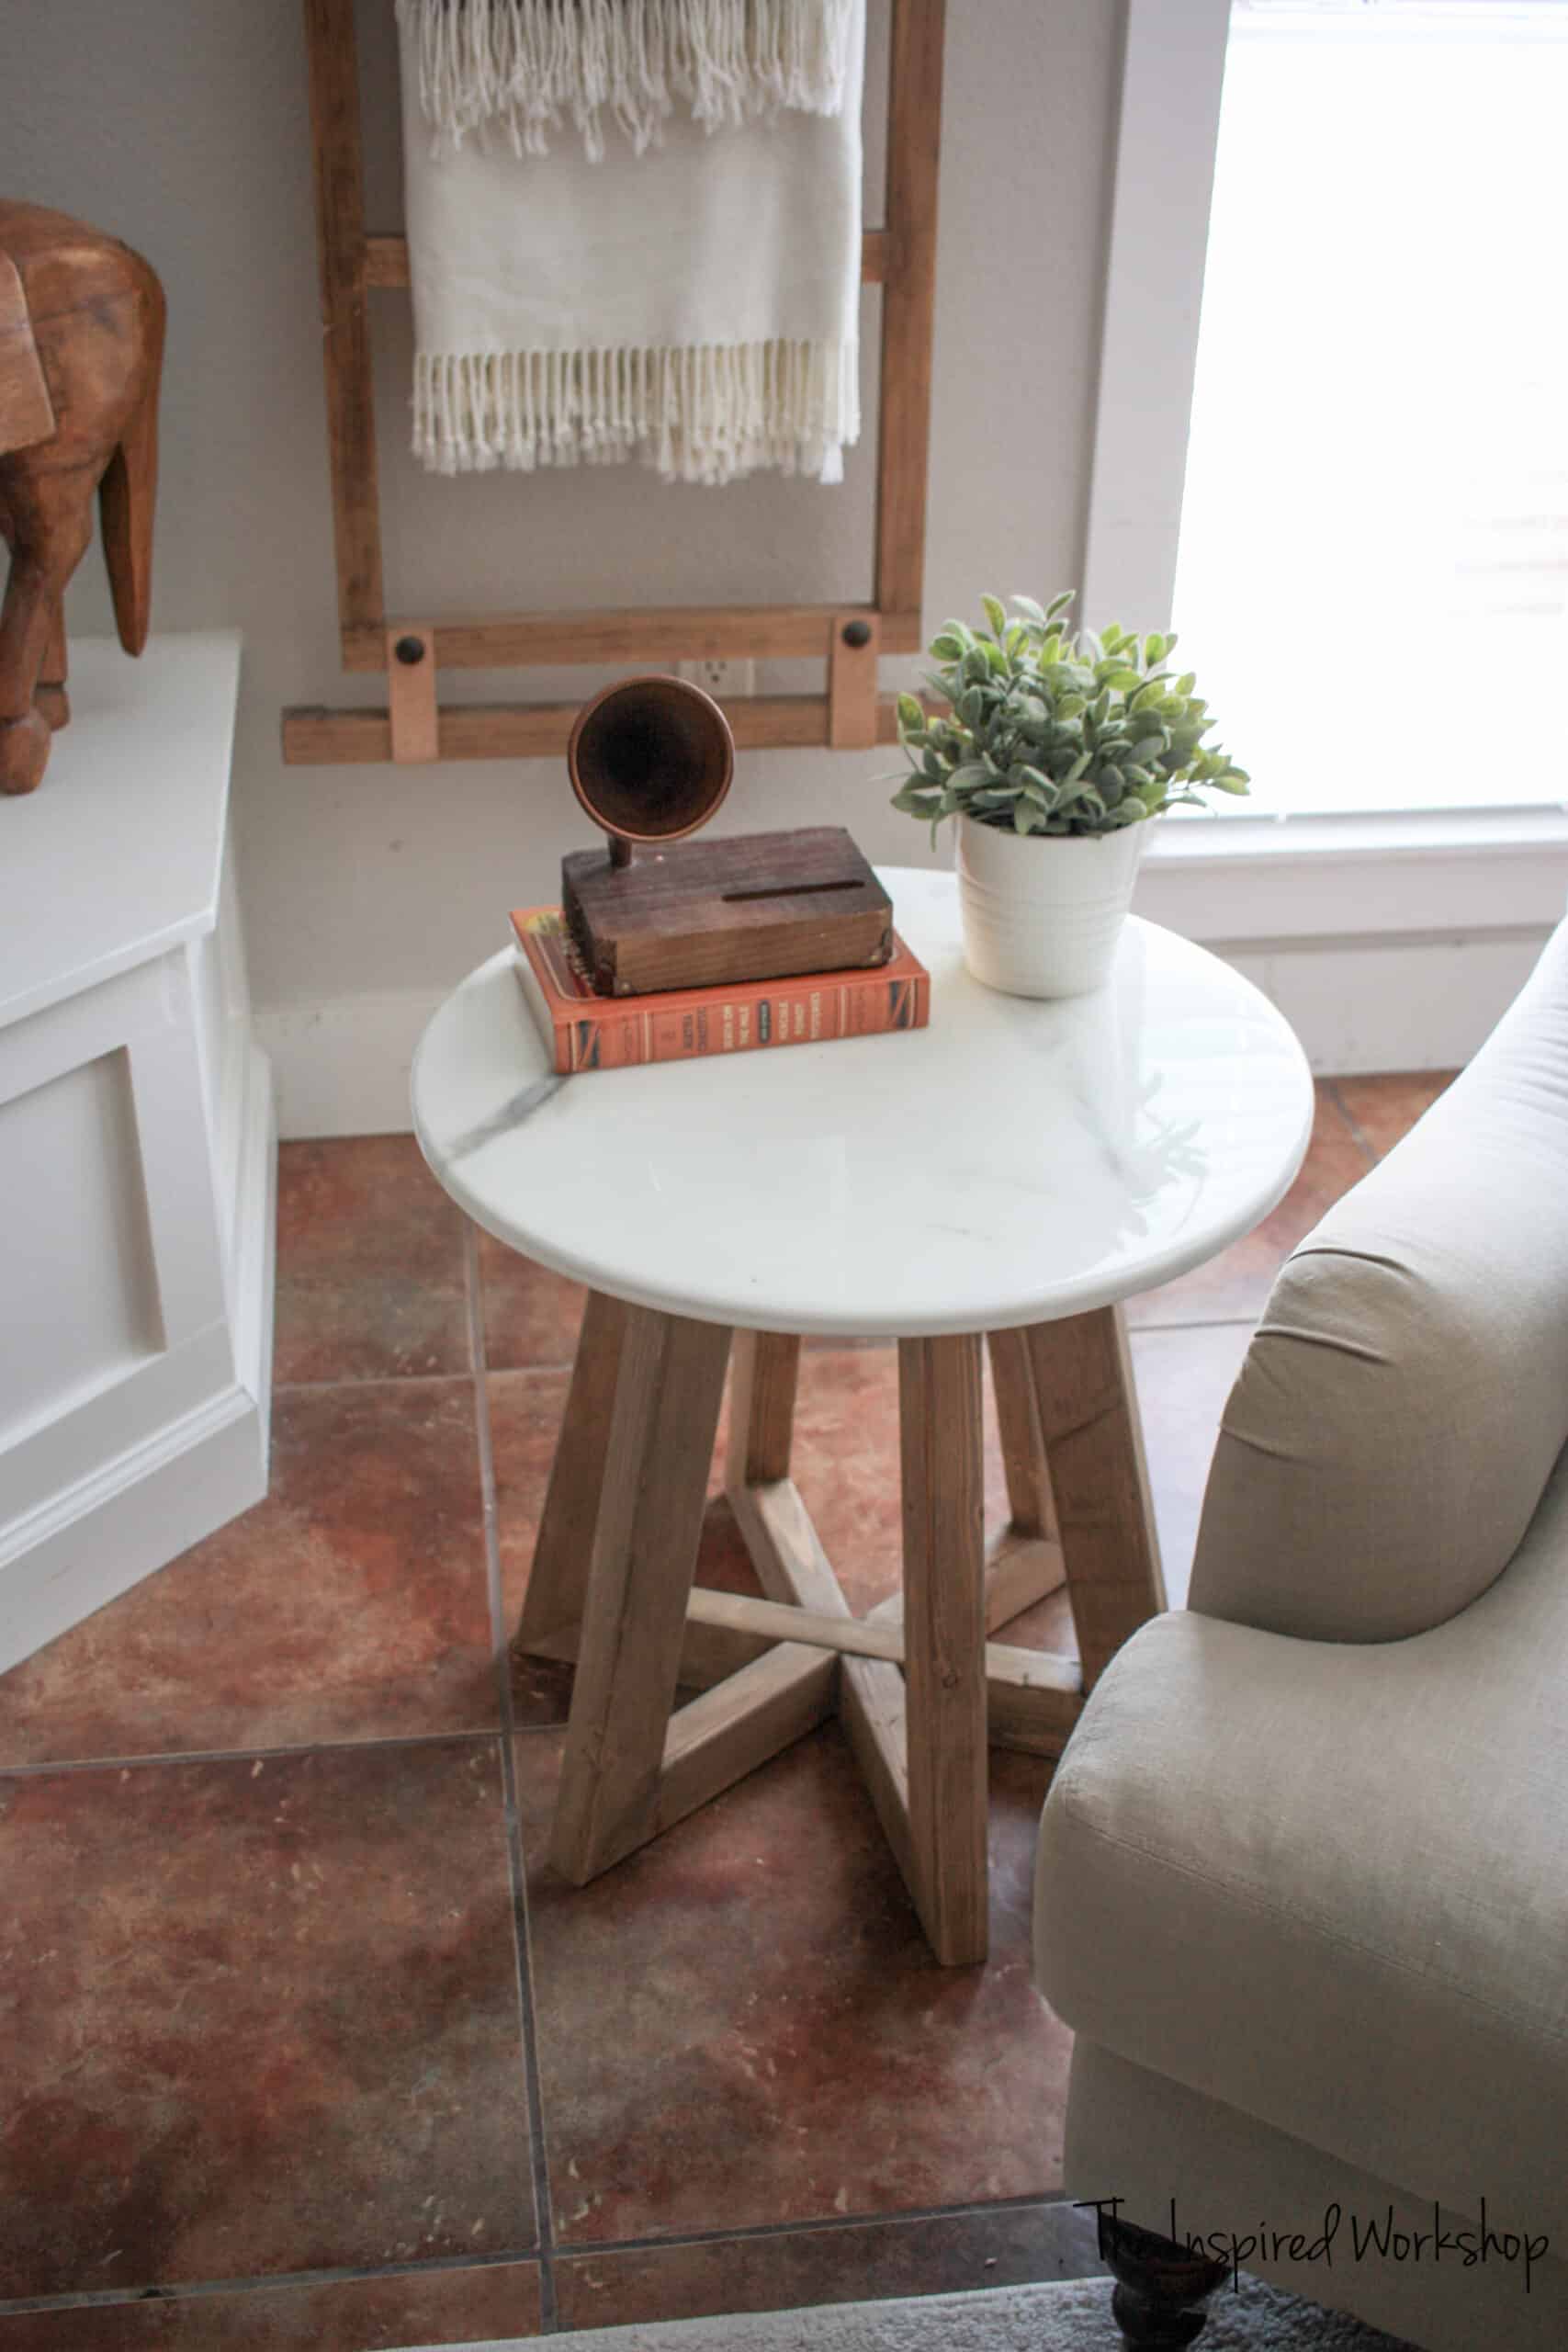
I then used my router again with my 1/4″ round-over bit to round over the top and bottom of the circle! If there is one thing I have learned in all of my epoxy pouring, the more rounded the edge, the better the epoxy flows to make the edge look good!
Not sure what happened after I took this photo, lol, never took a picture of the tabletop once it was cut! I did however get a video of the epoxy pouring, which was really shaky because I hired my son so I wouldn’t have to find my tripod and set it all up…lesson learned!😬😅 At least I could pull still photos from the shaky video! Phew!
Alright, to get started, make sure that you cover your work surface well, and you will need something to prop your circle tabletop on so the epoxy can run over the edge, I used my painter’s pyramids.
You will want to paint your circle white before pouring the epoxy, make it two heavy coats with no wood showing around the edges for sure!
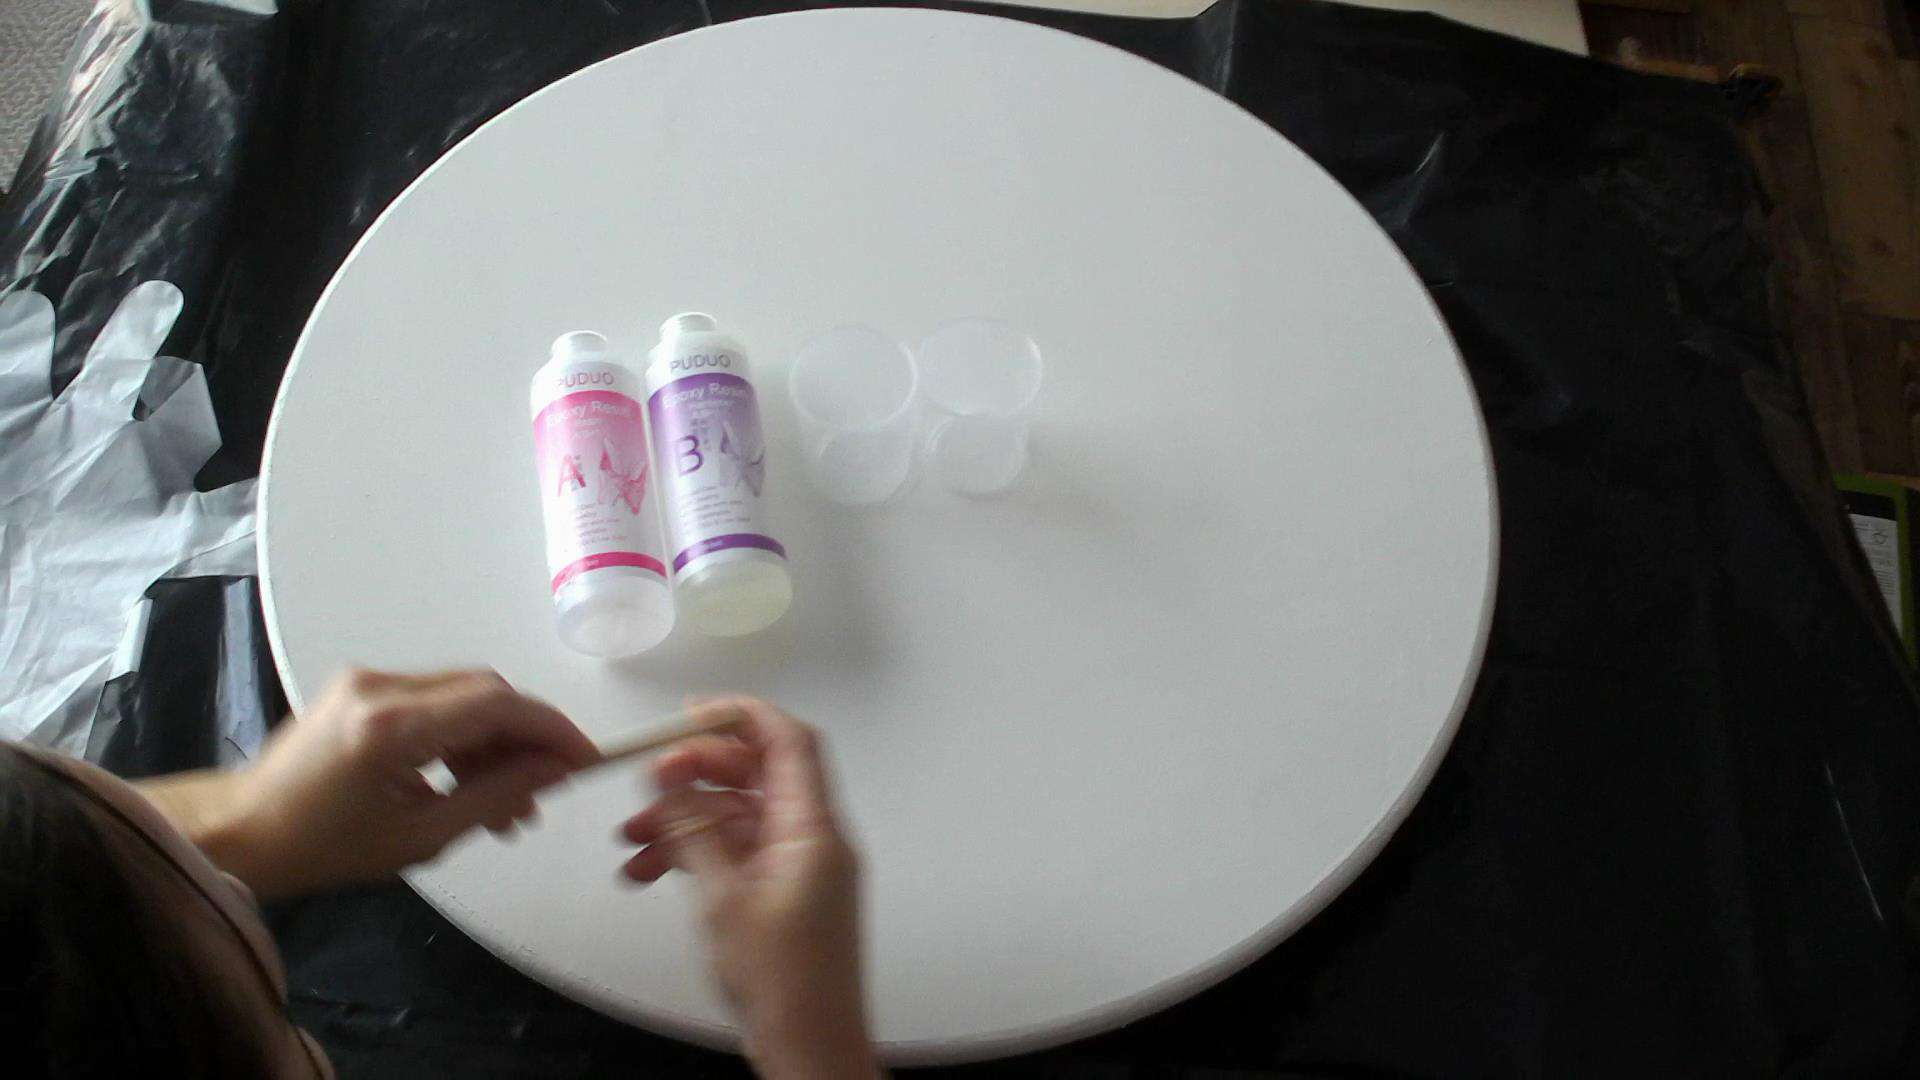
Once your circle is painted and dry, you will mix the epoxy just as the instructions say, 1:1 ratio.
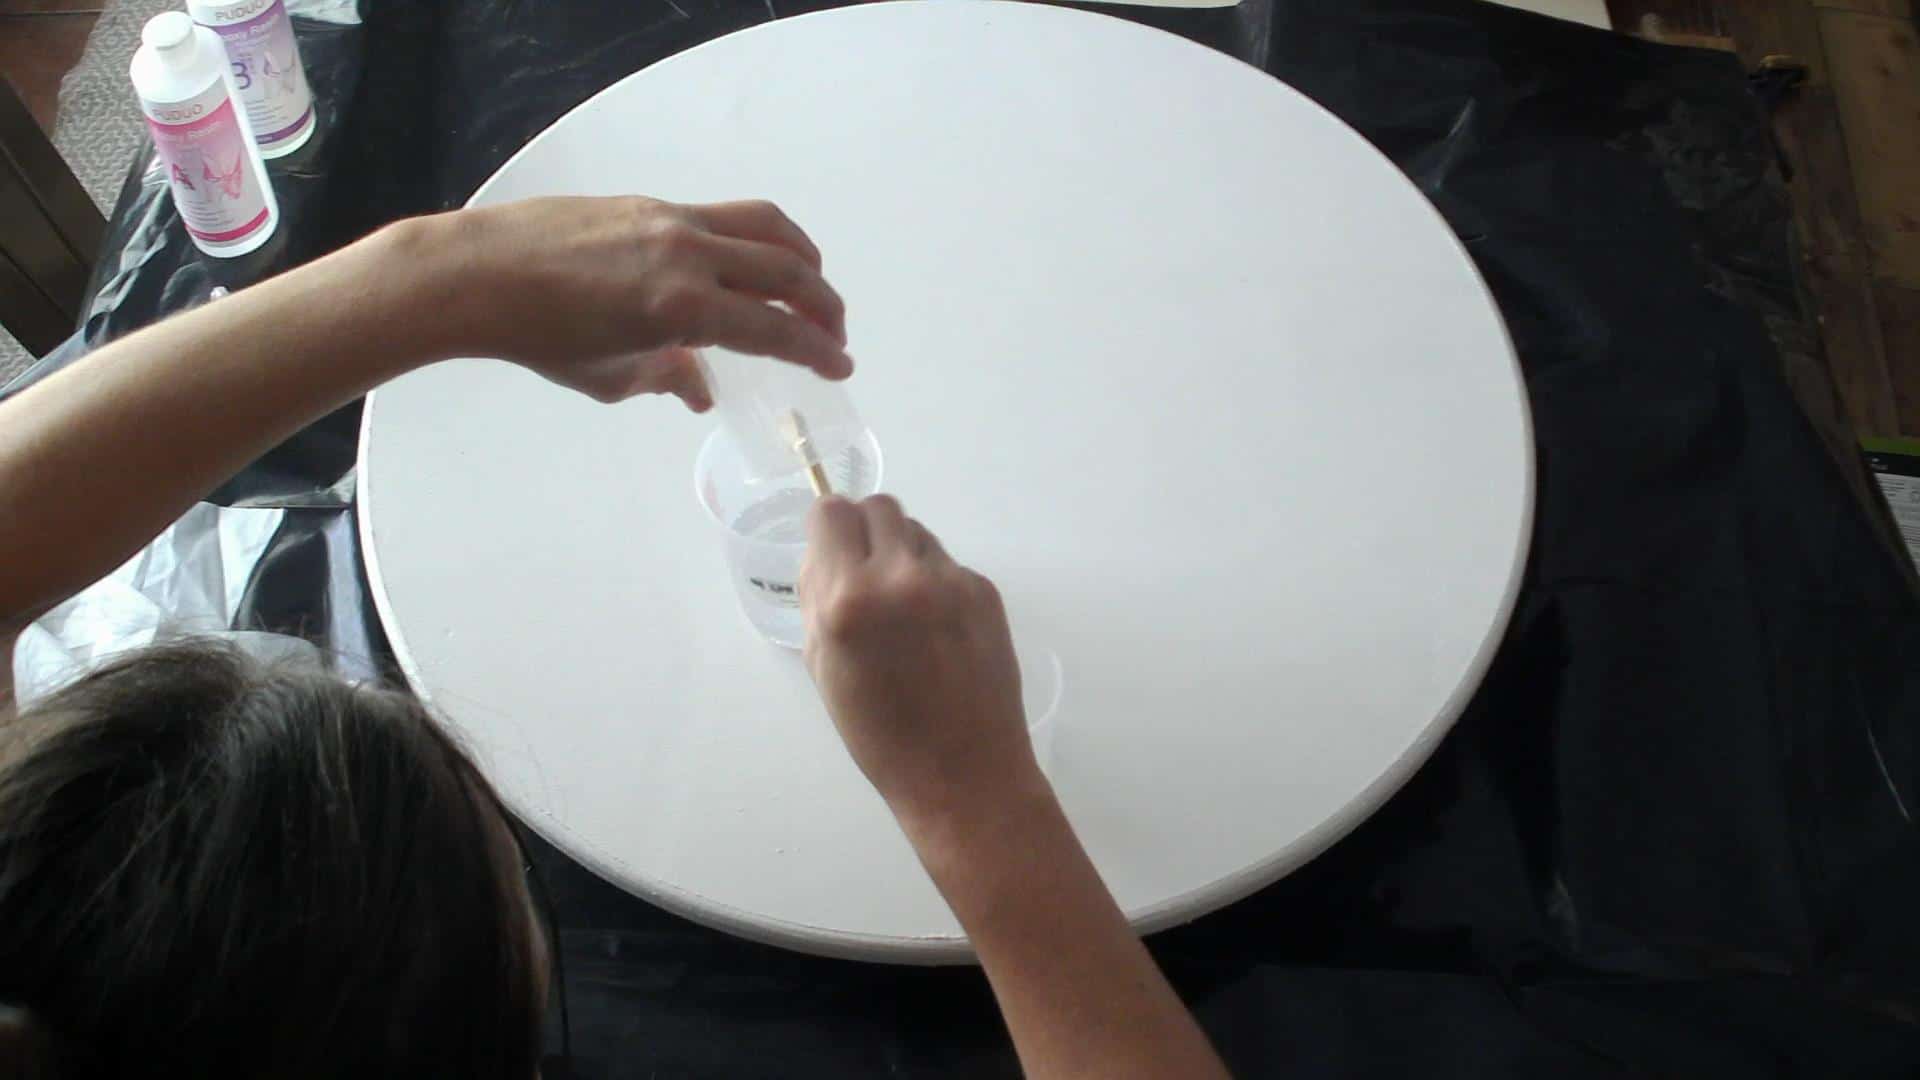
Mix in a couple of drops of white paint and pour over the circle!
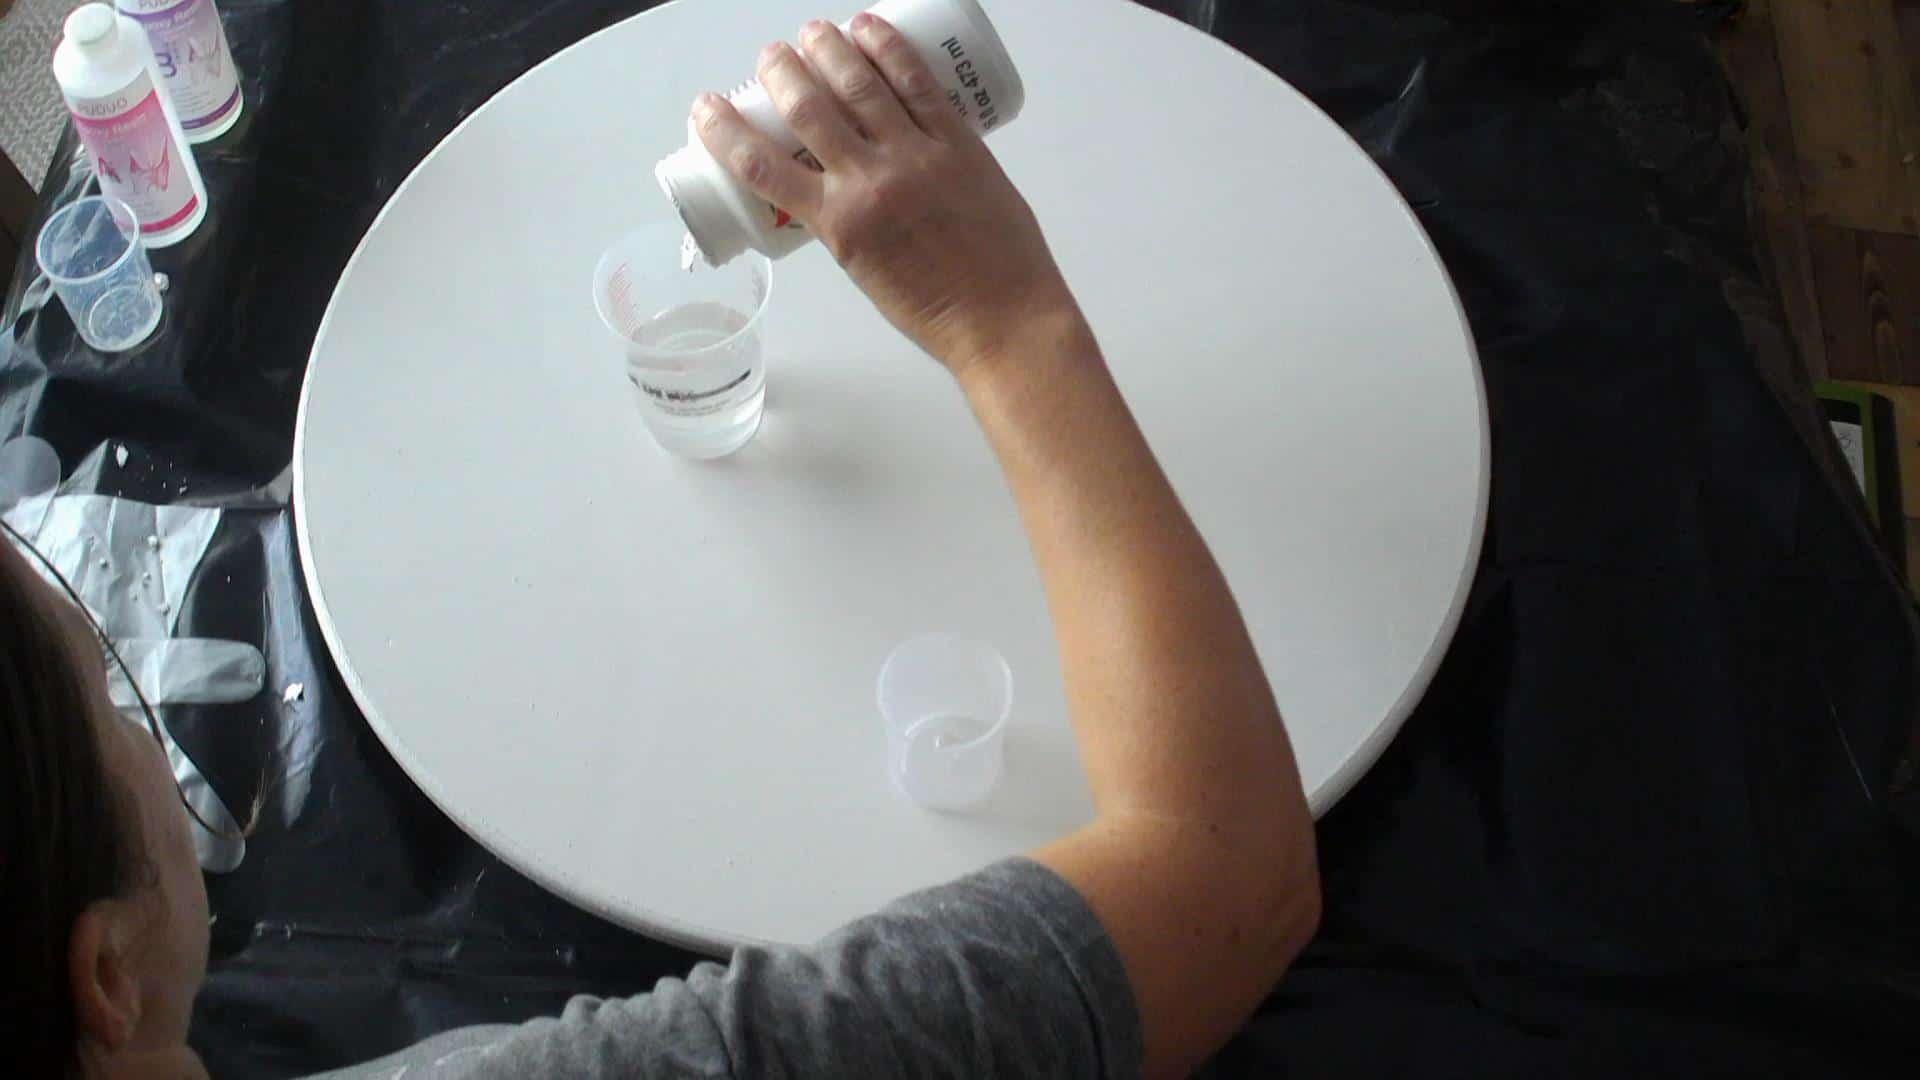
I didn’t nearly mix enough on my first batch, which in this case is fine, but if you need uniform color, you will want to make sure you mix plenty for the pour with a little extra! I actually love the look when I have a couple different shades of white mixed into my marble because it gives it a more genuine look!
You will want to help it out and make sure it is spread well all over the surface of the table top.
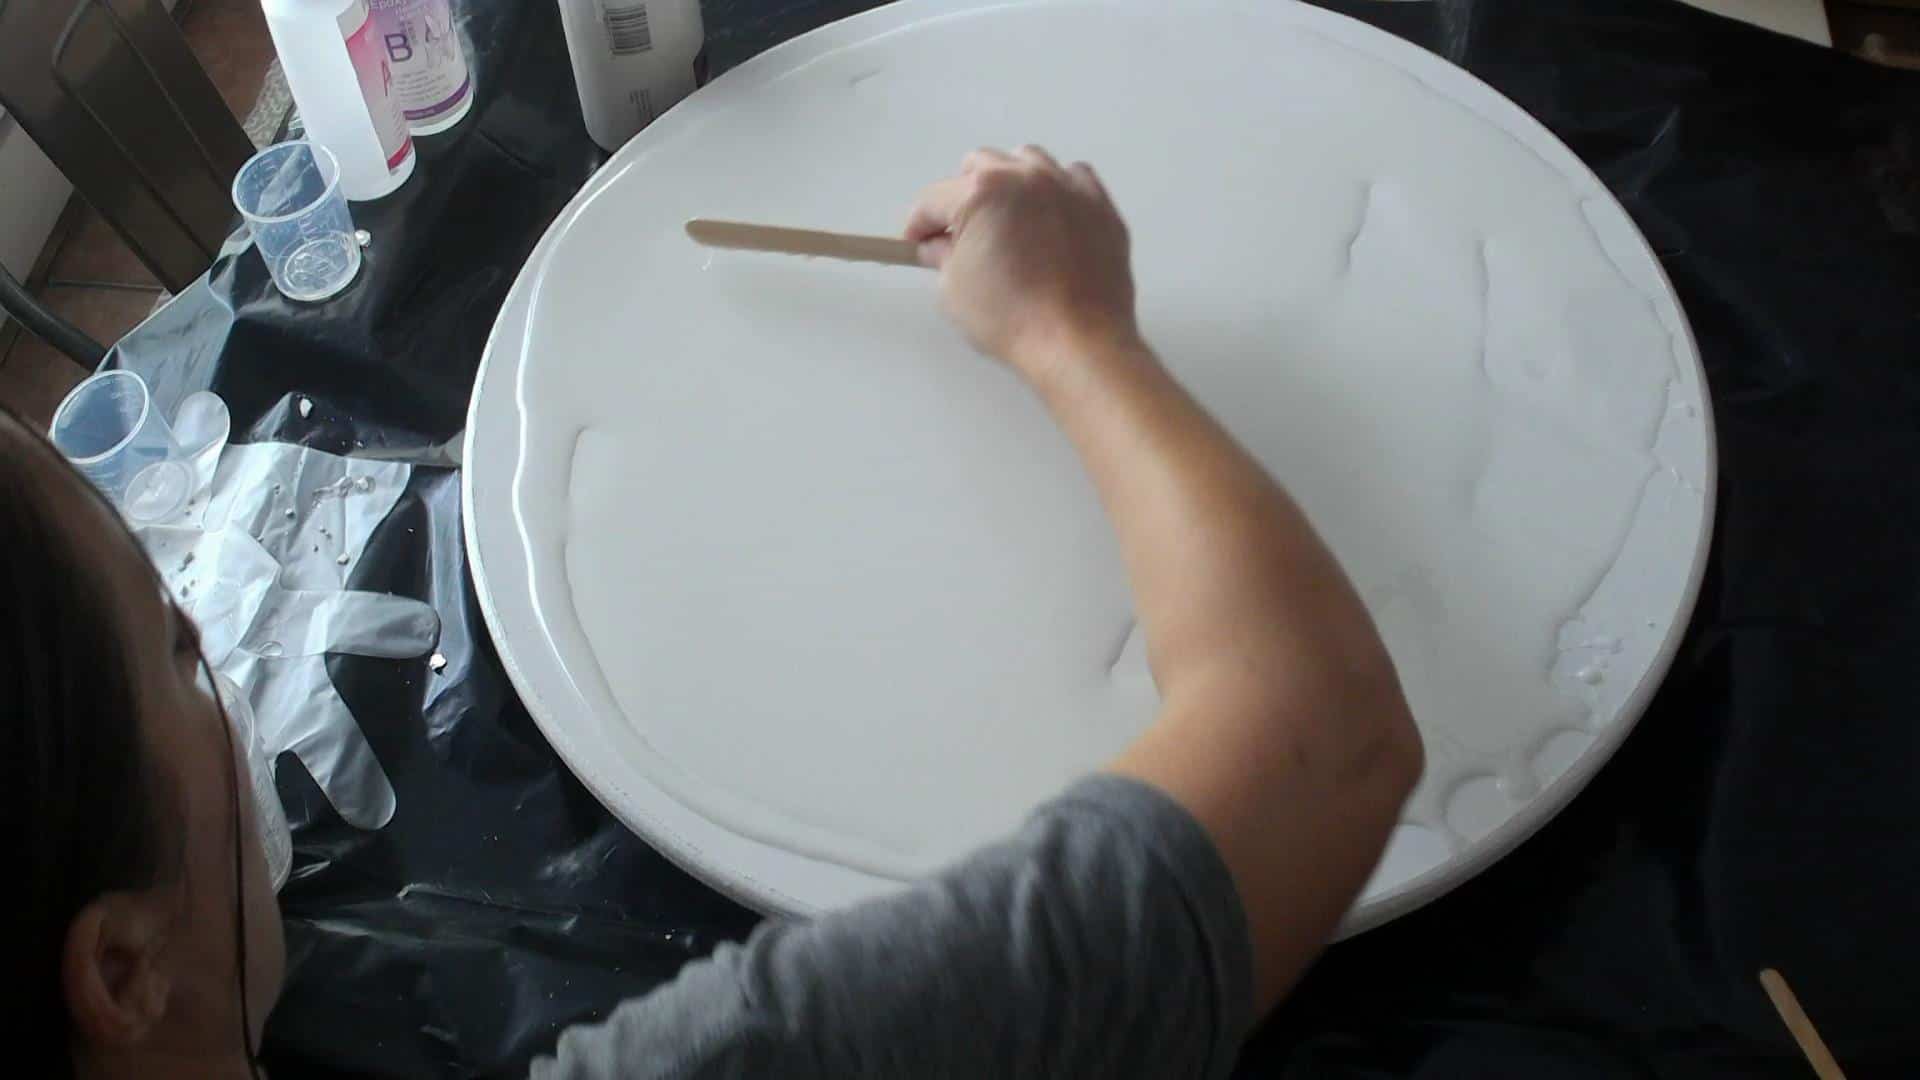
Rub your hand around the edges of the circle a couple of times once it starts running over the edges.
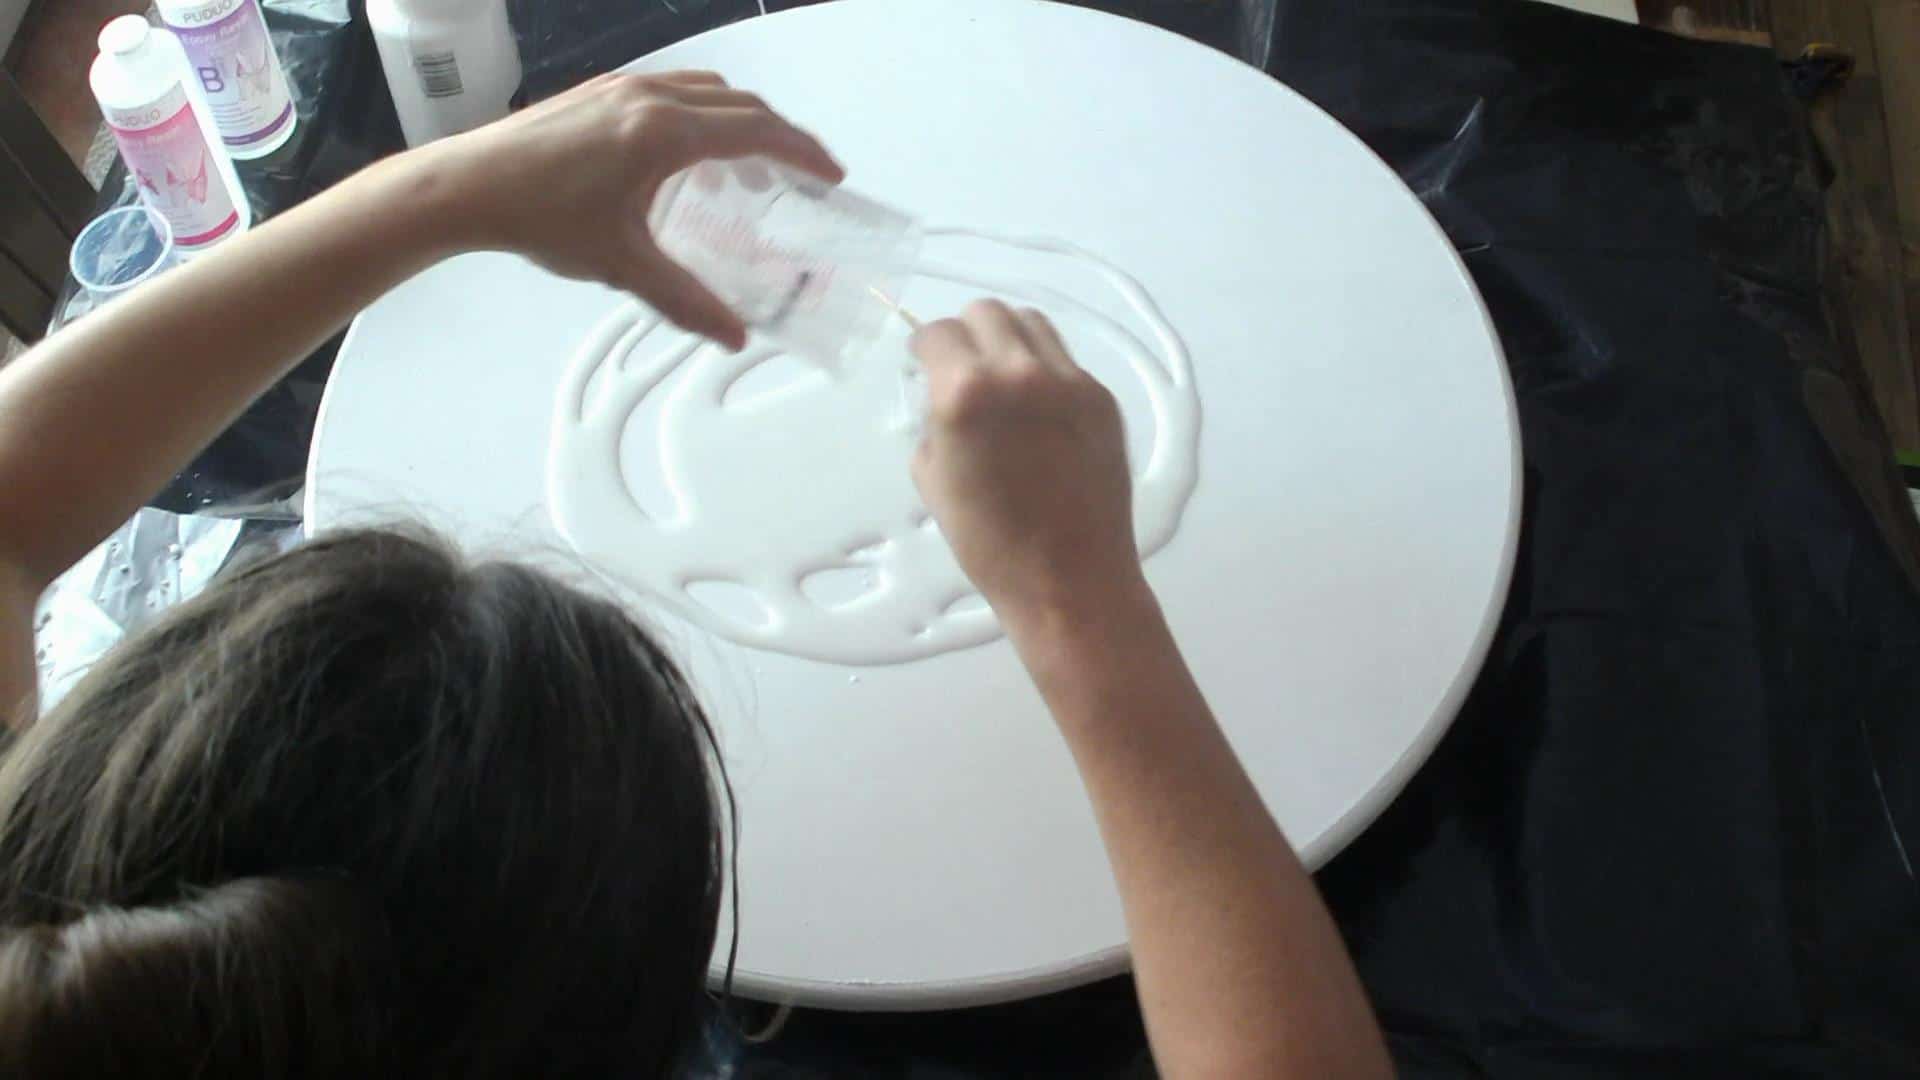
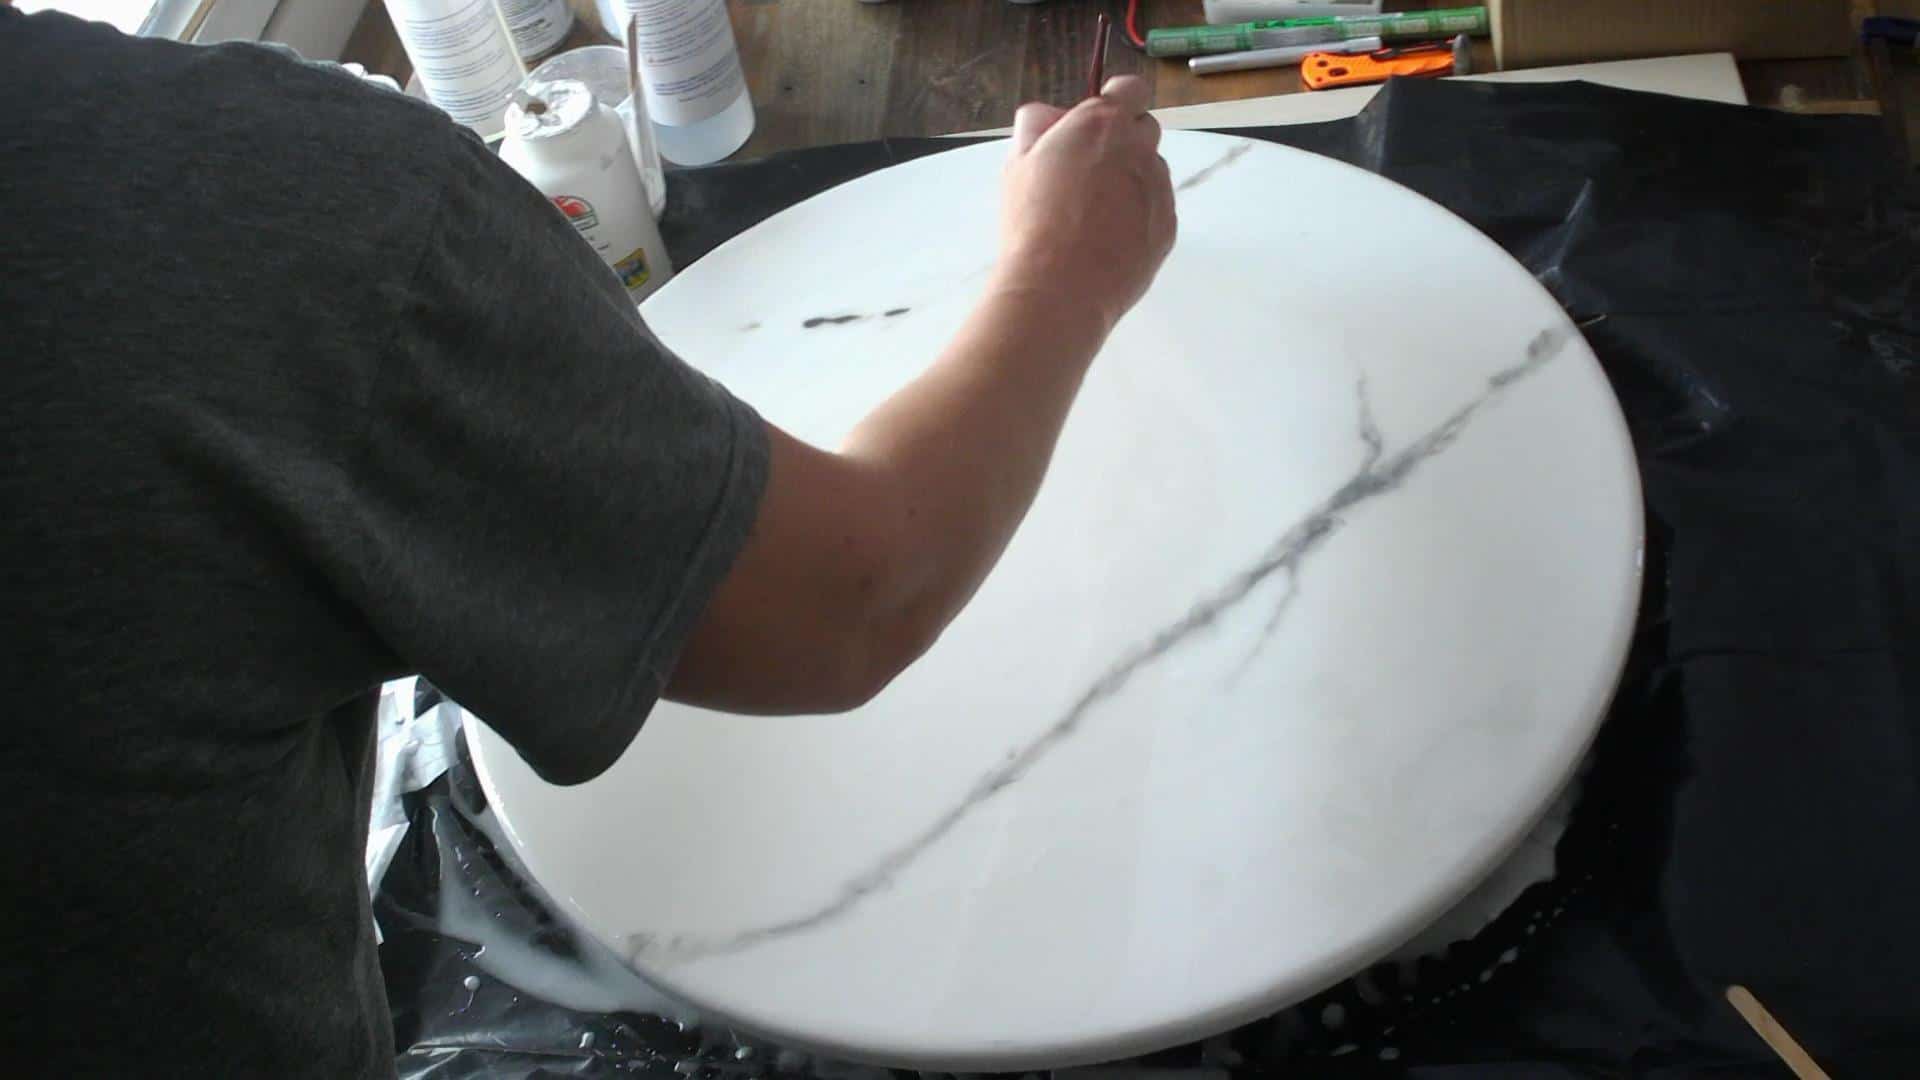
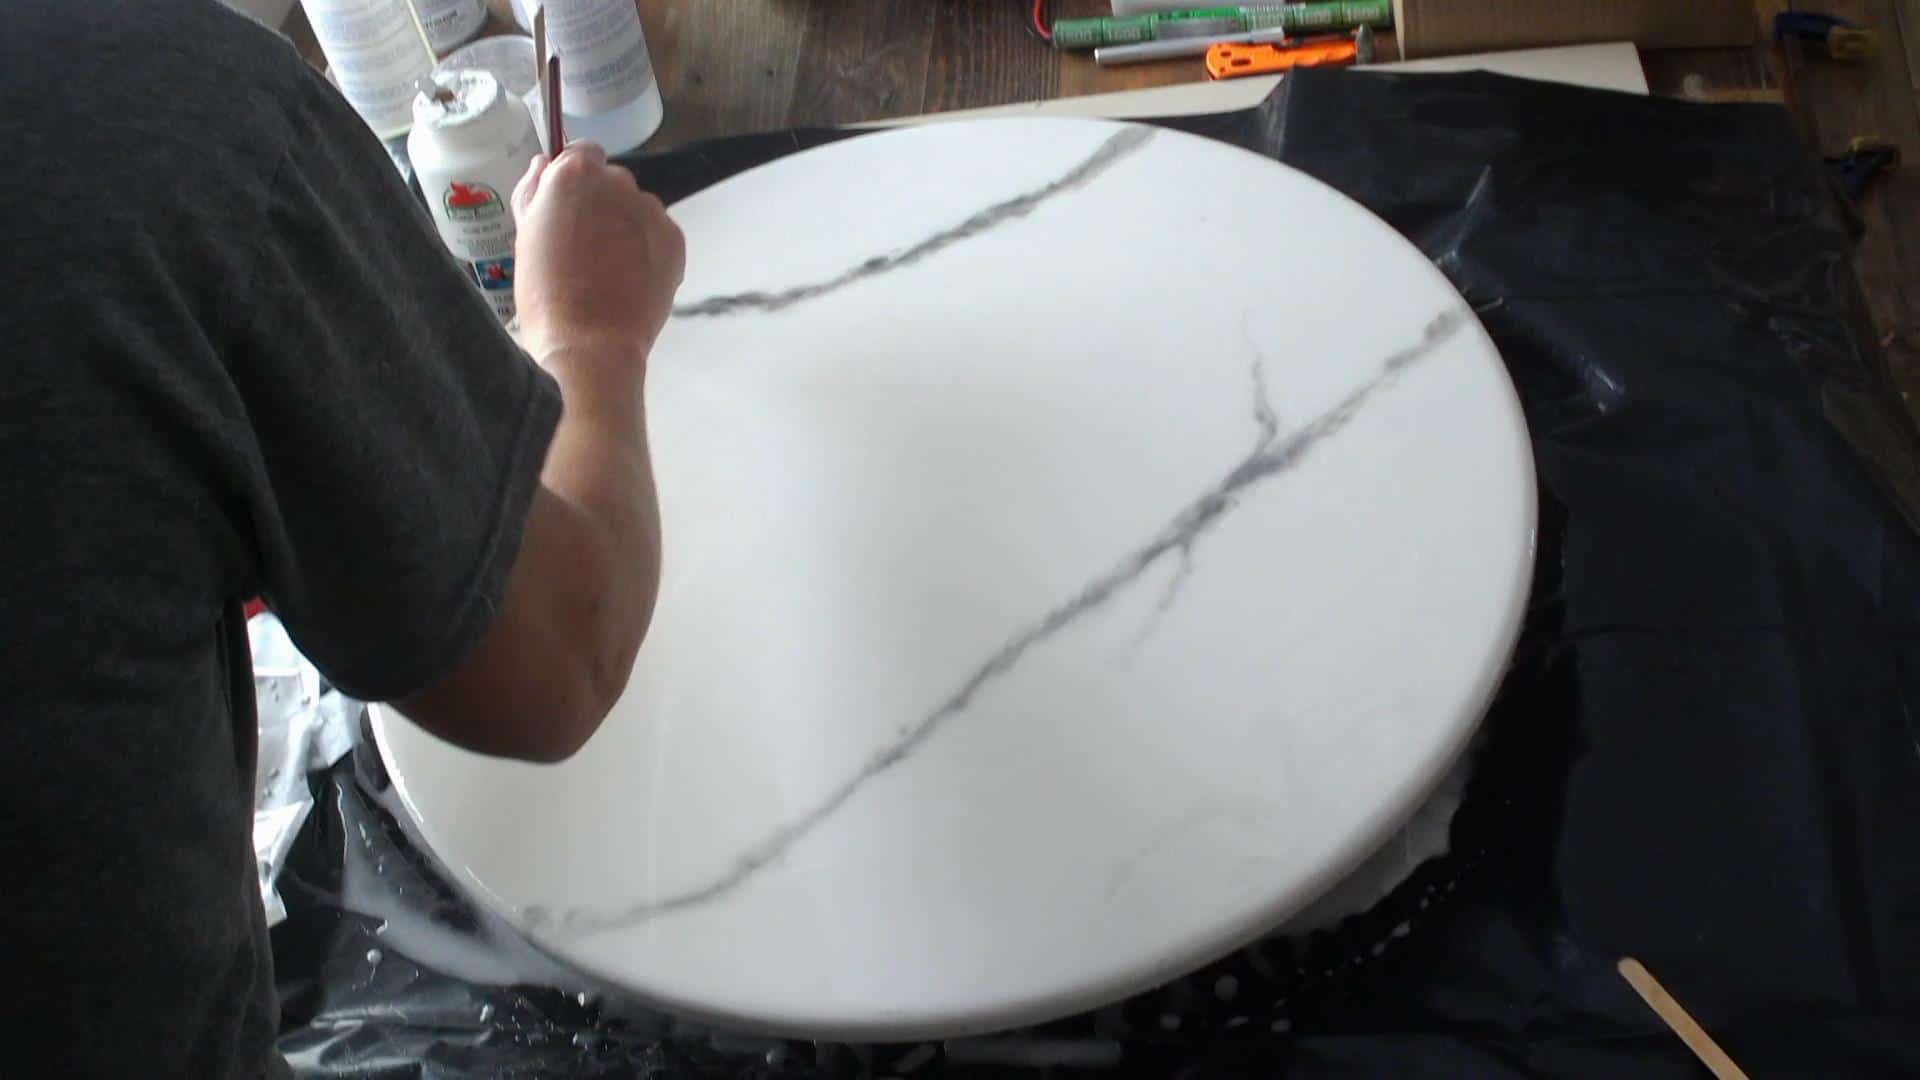
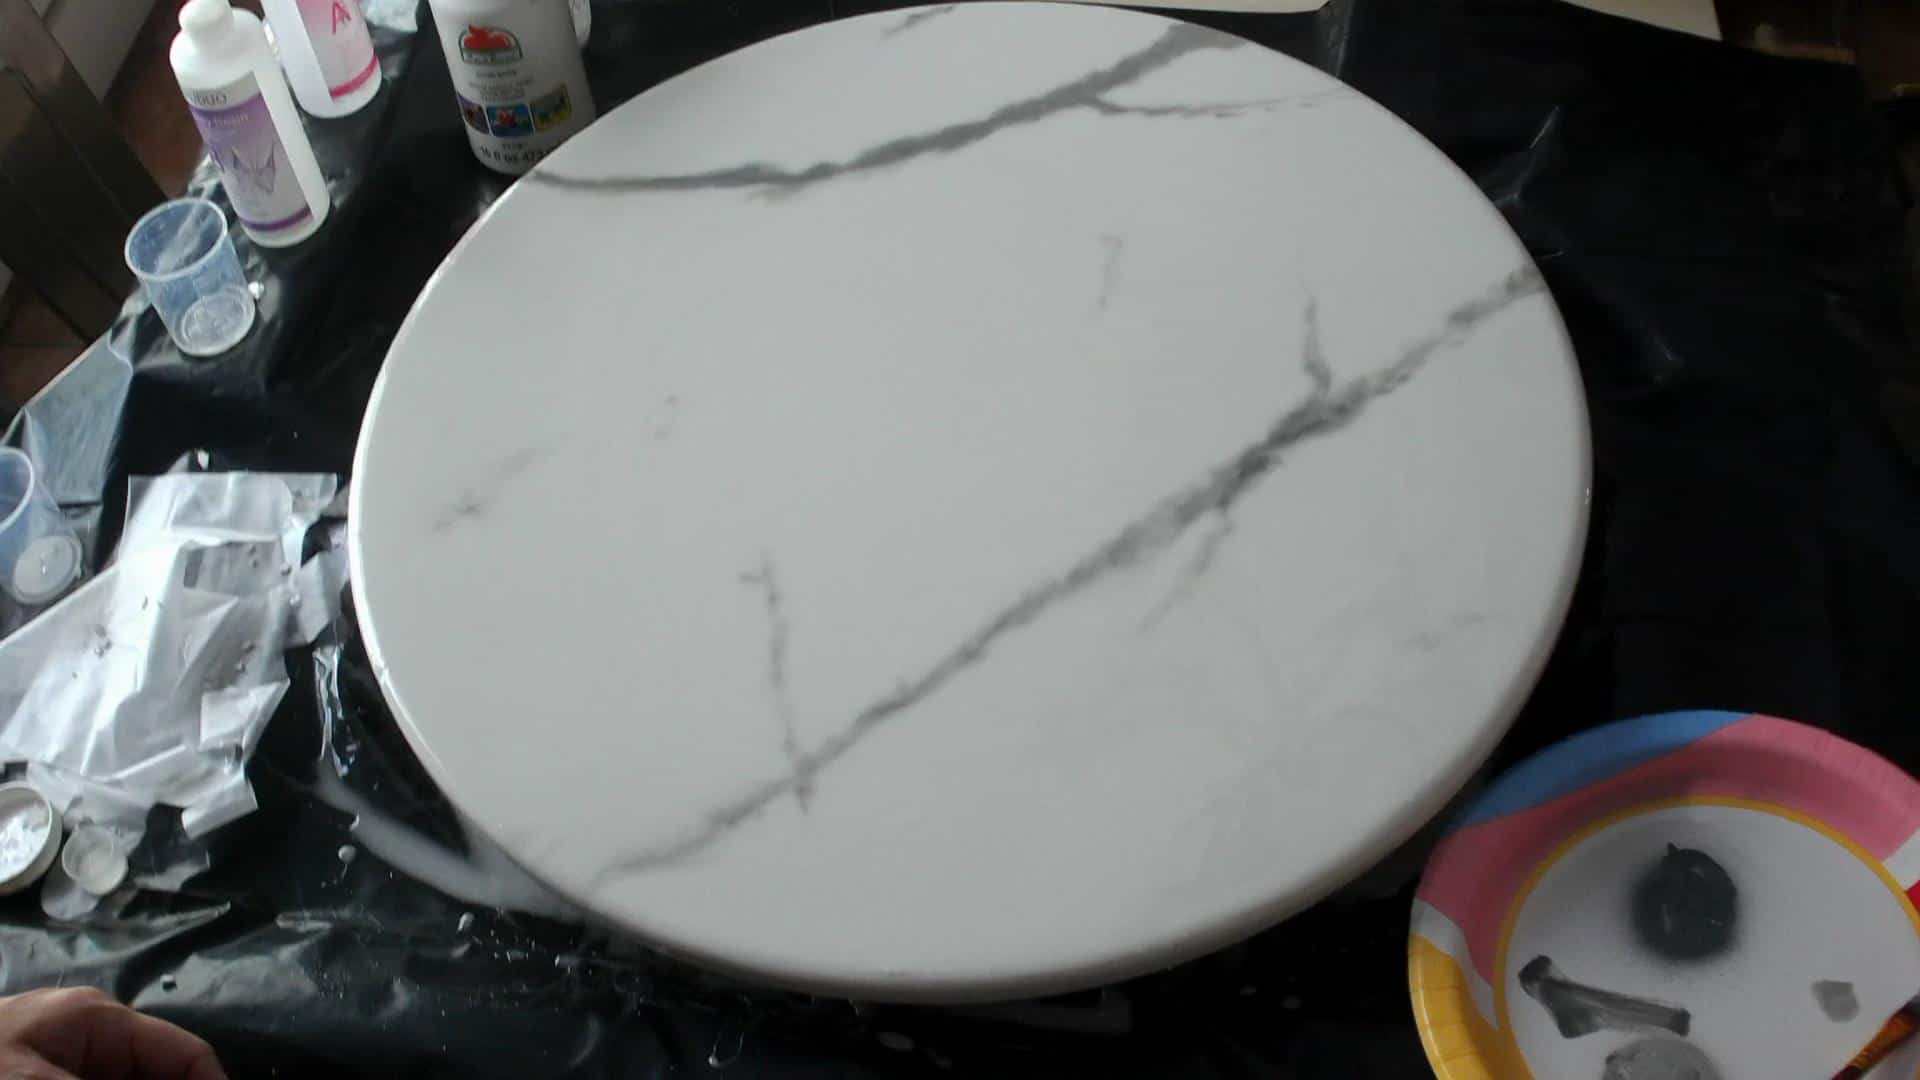
Spray some spray paint on a paper plate and using a small paintbrush, dab some paint wherever you want to make veins in the marble. Try to make it look natural, I accidentally made mine look like a baseball! Lol!
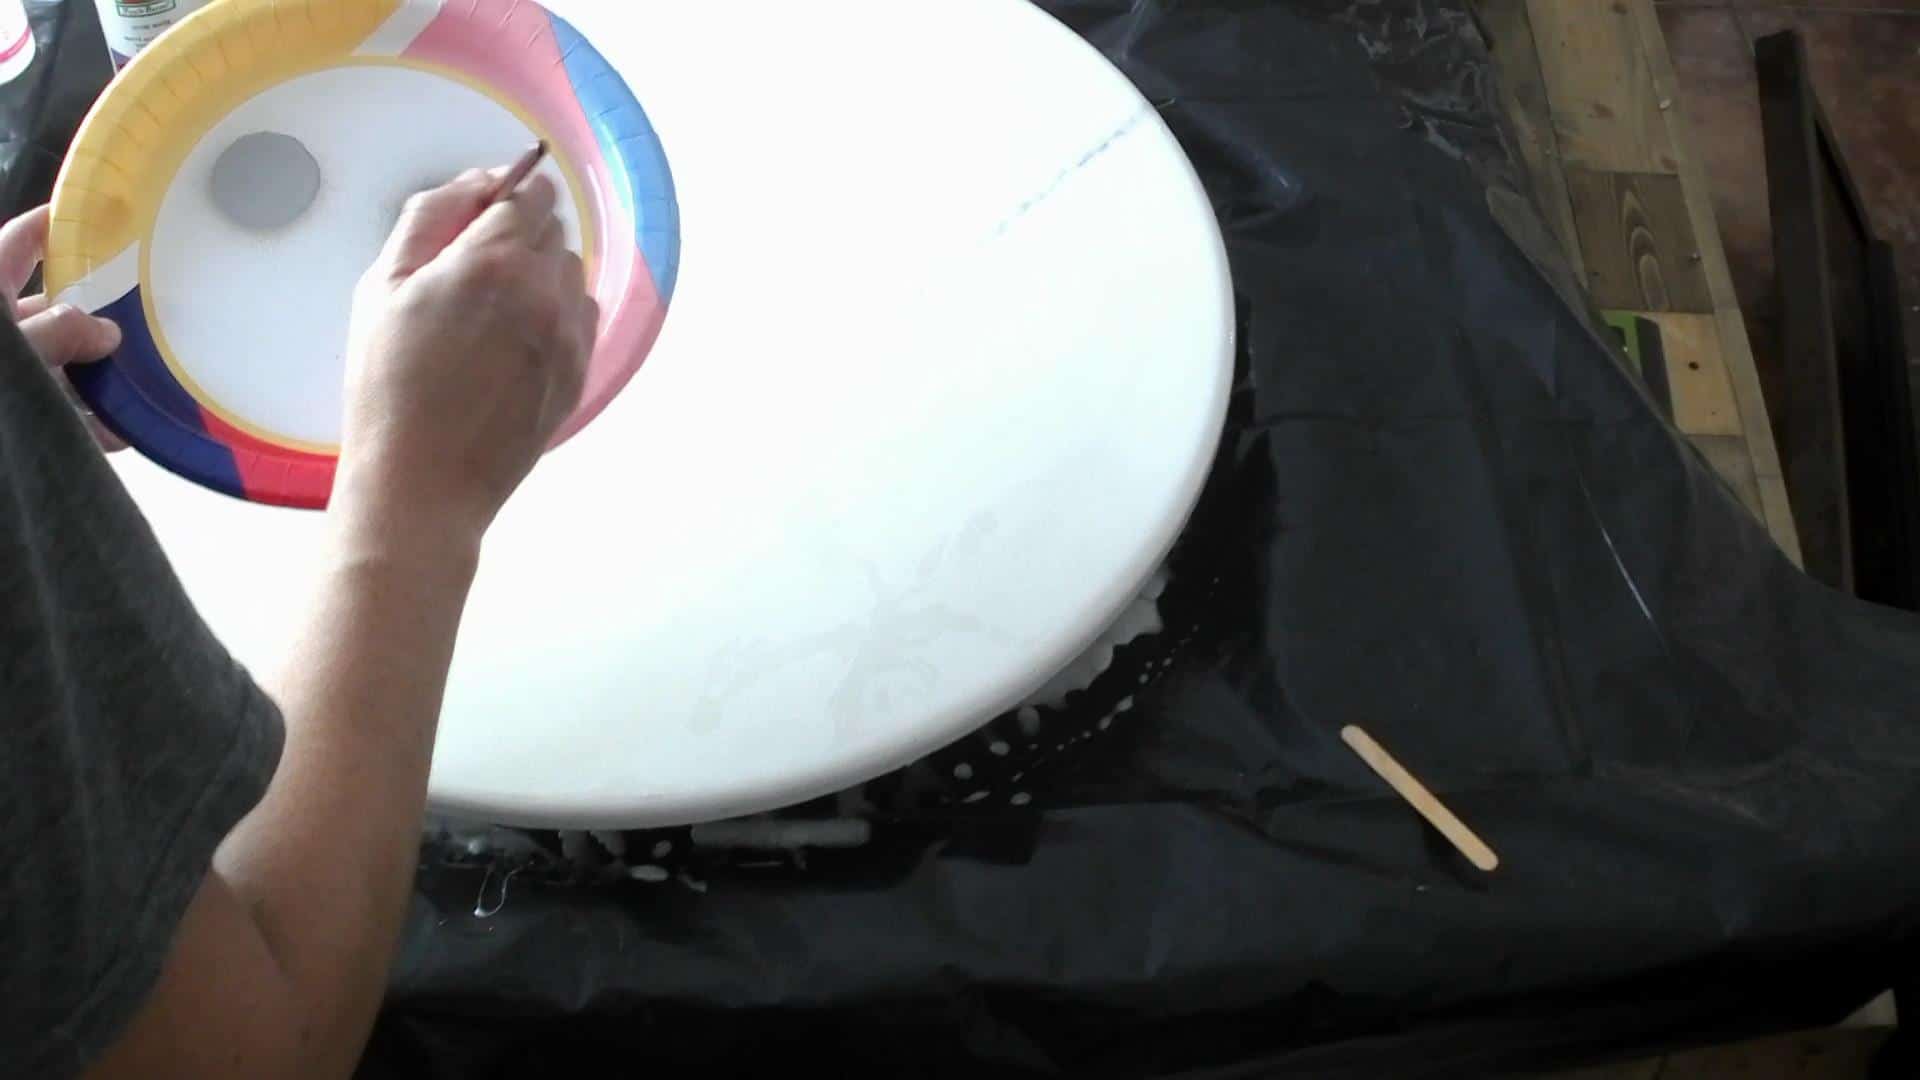
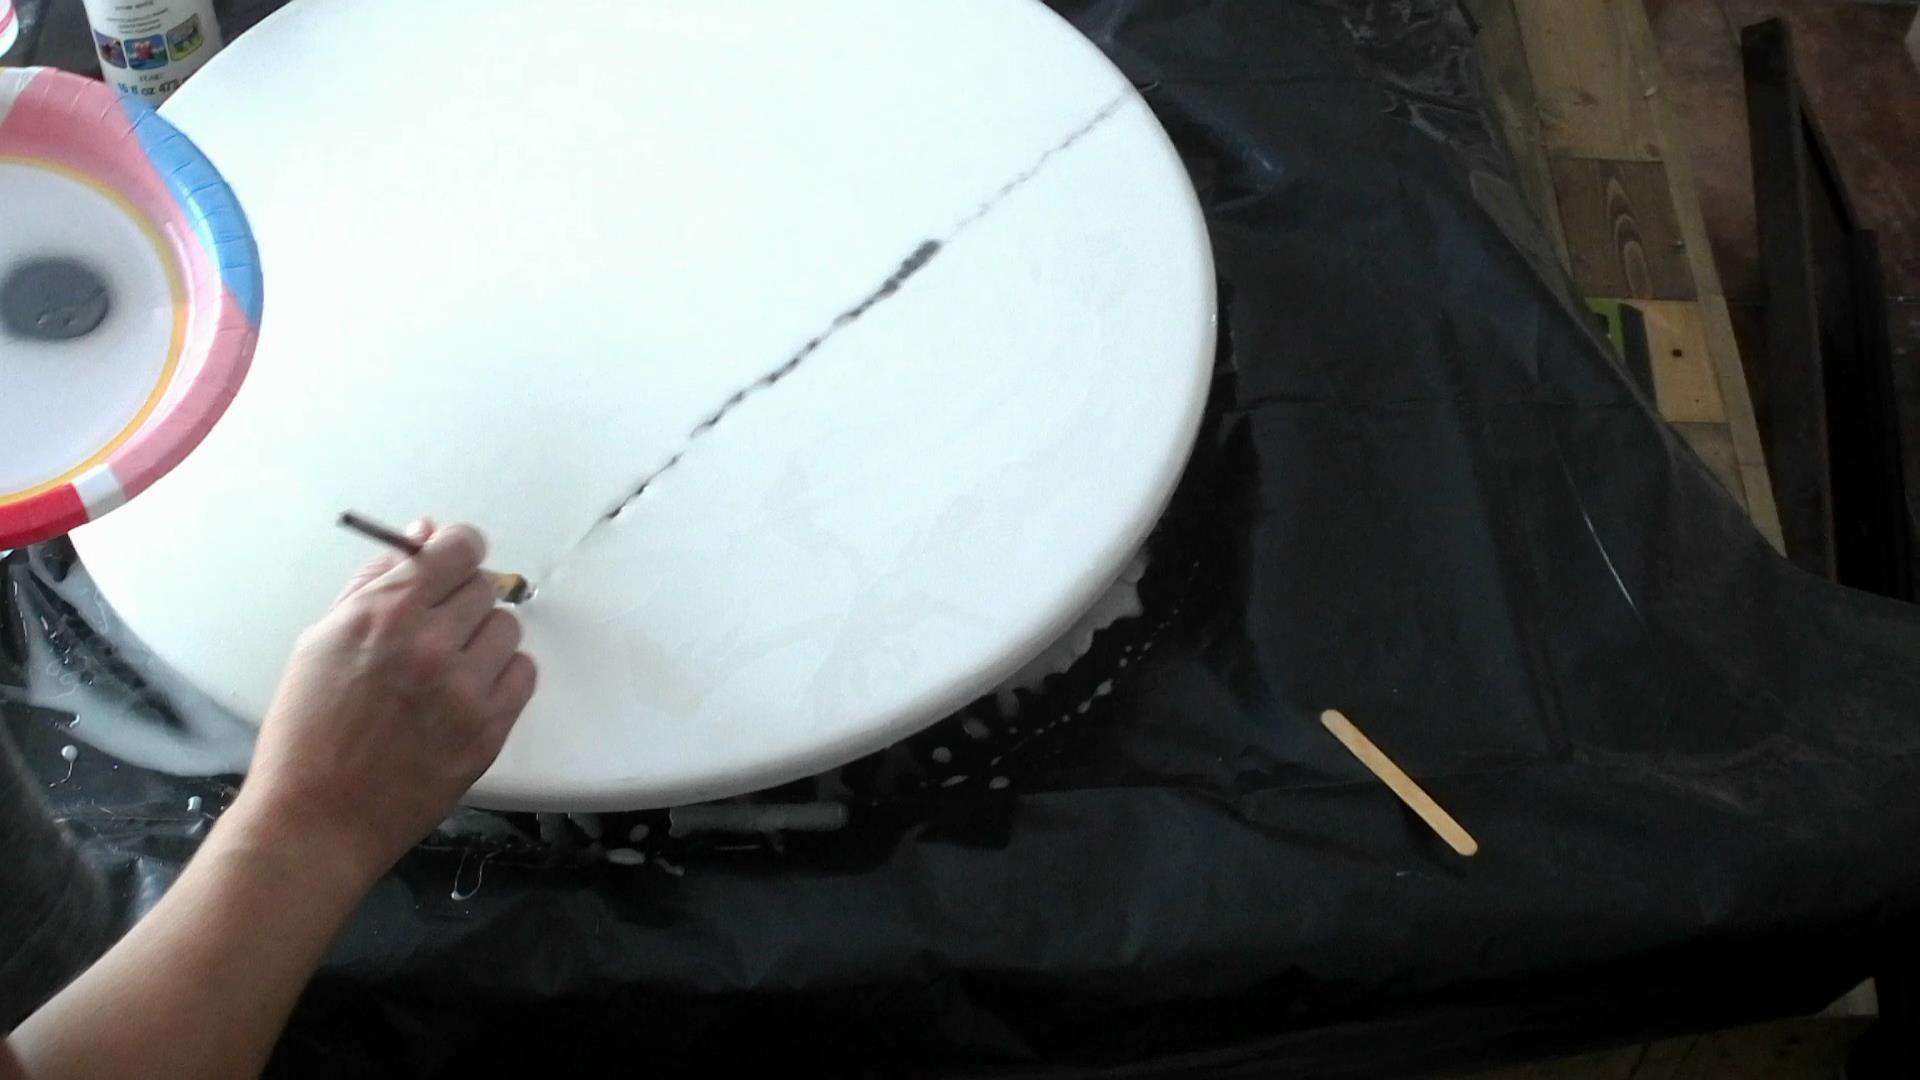
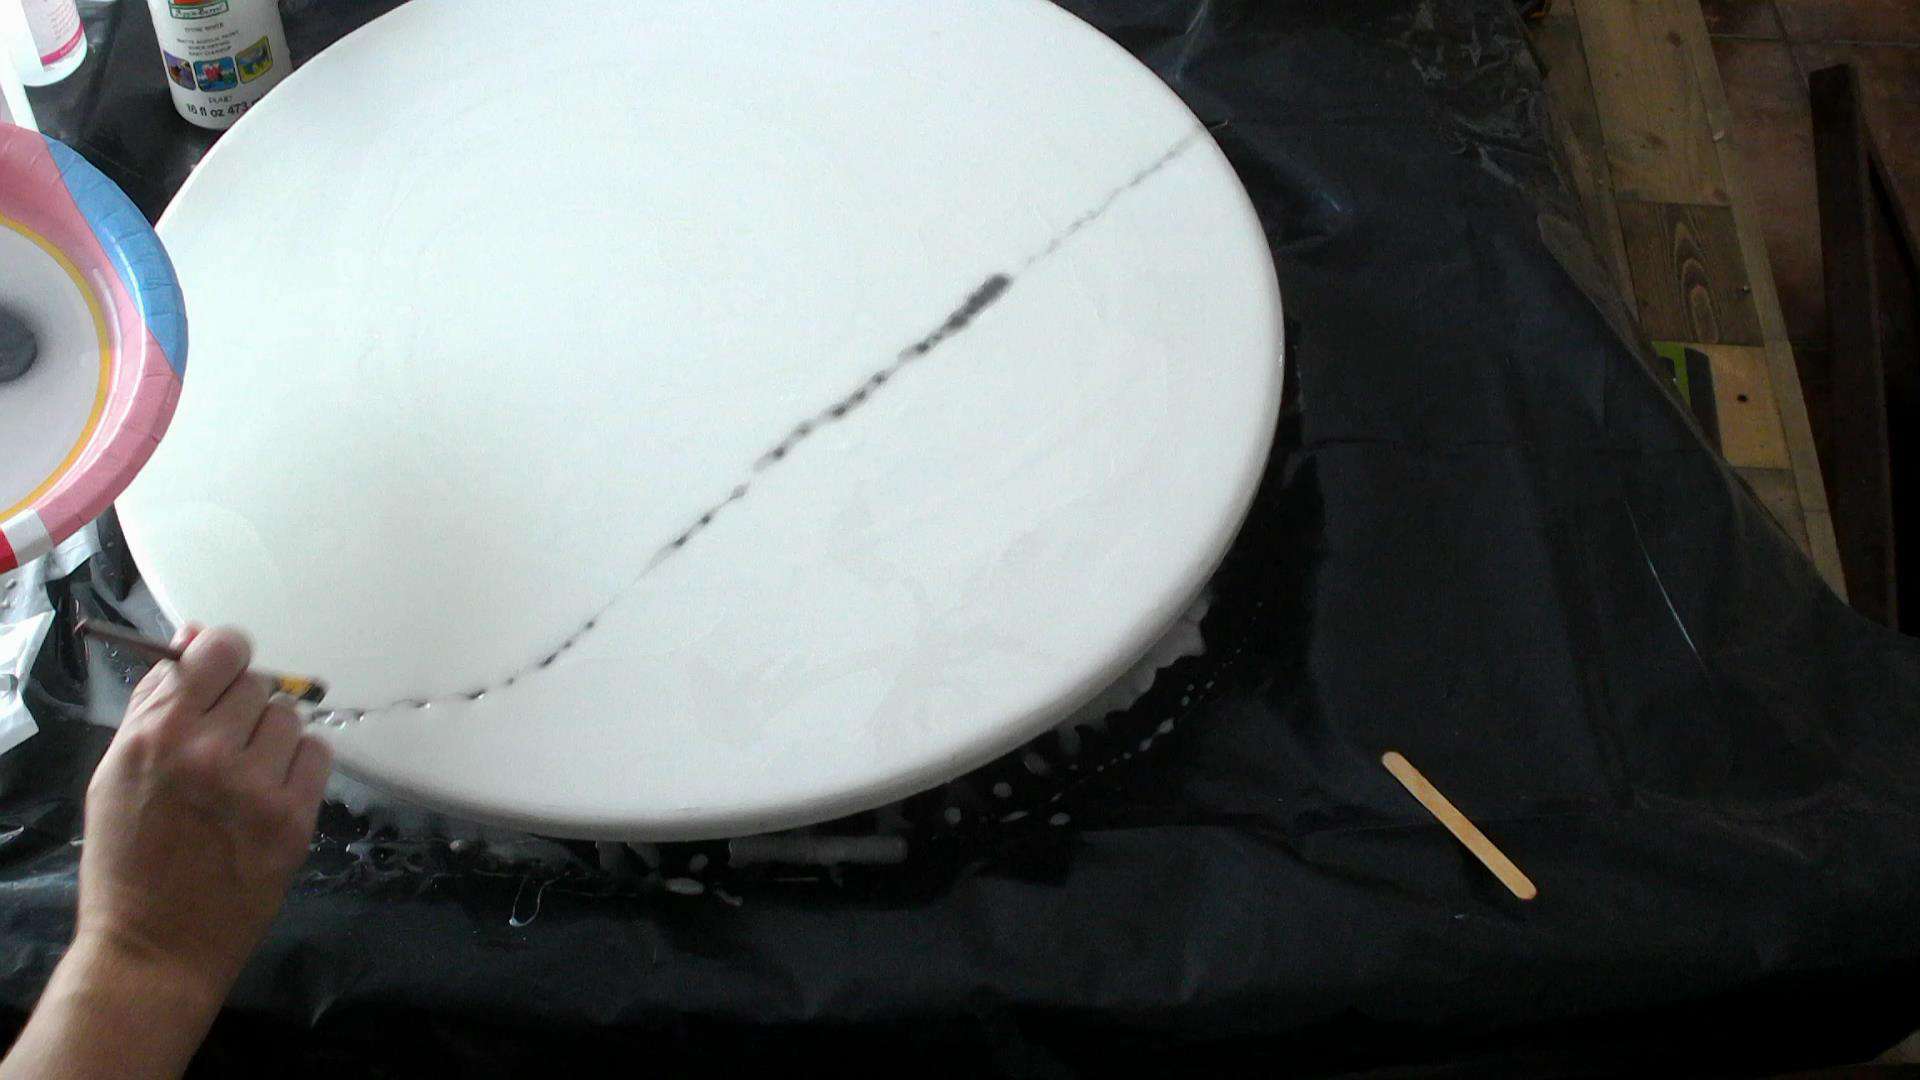
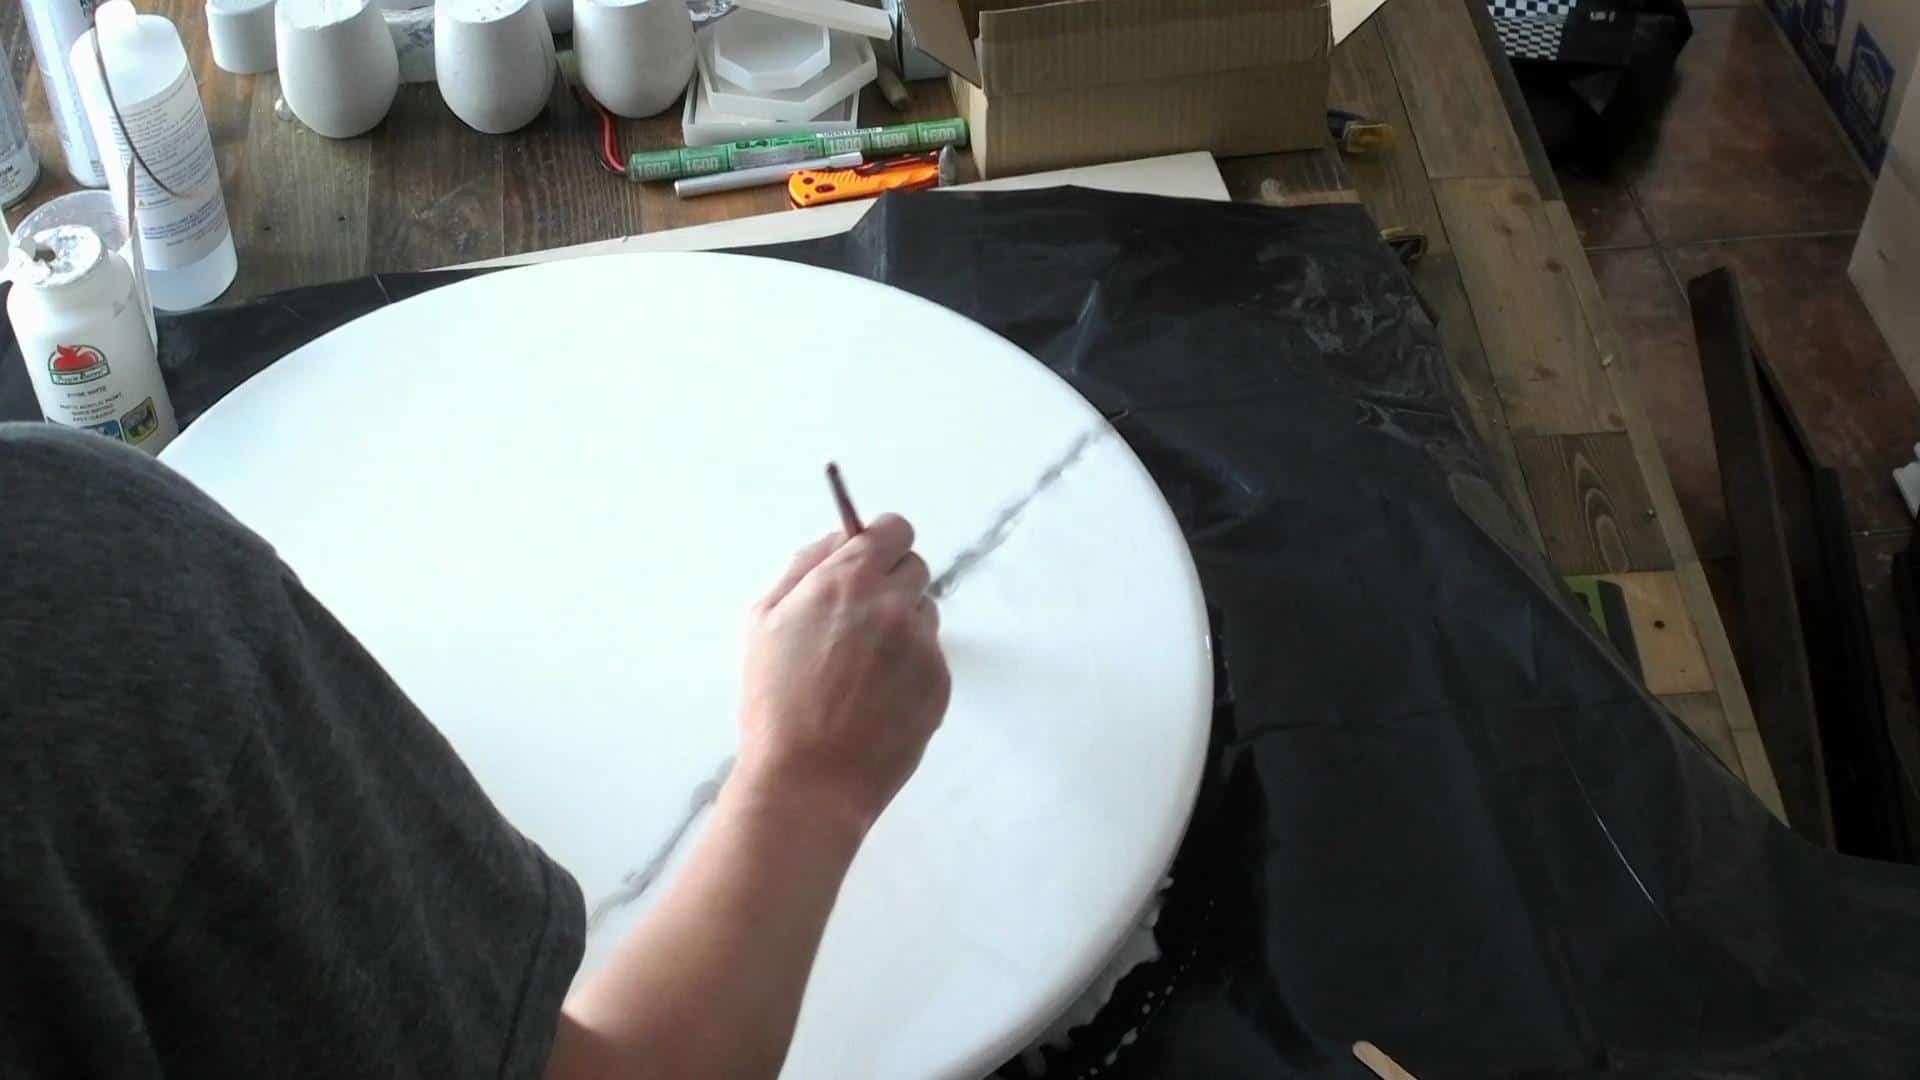
Keep working on the paint until you get it as thick or thin, dark or light as you want.
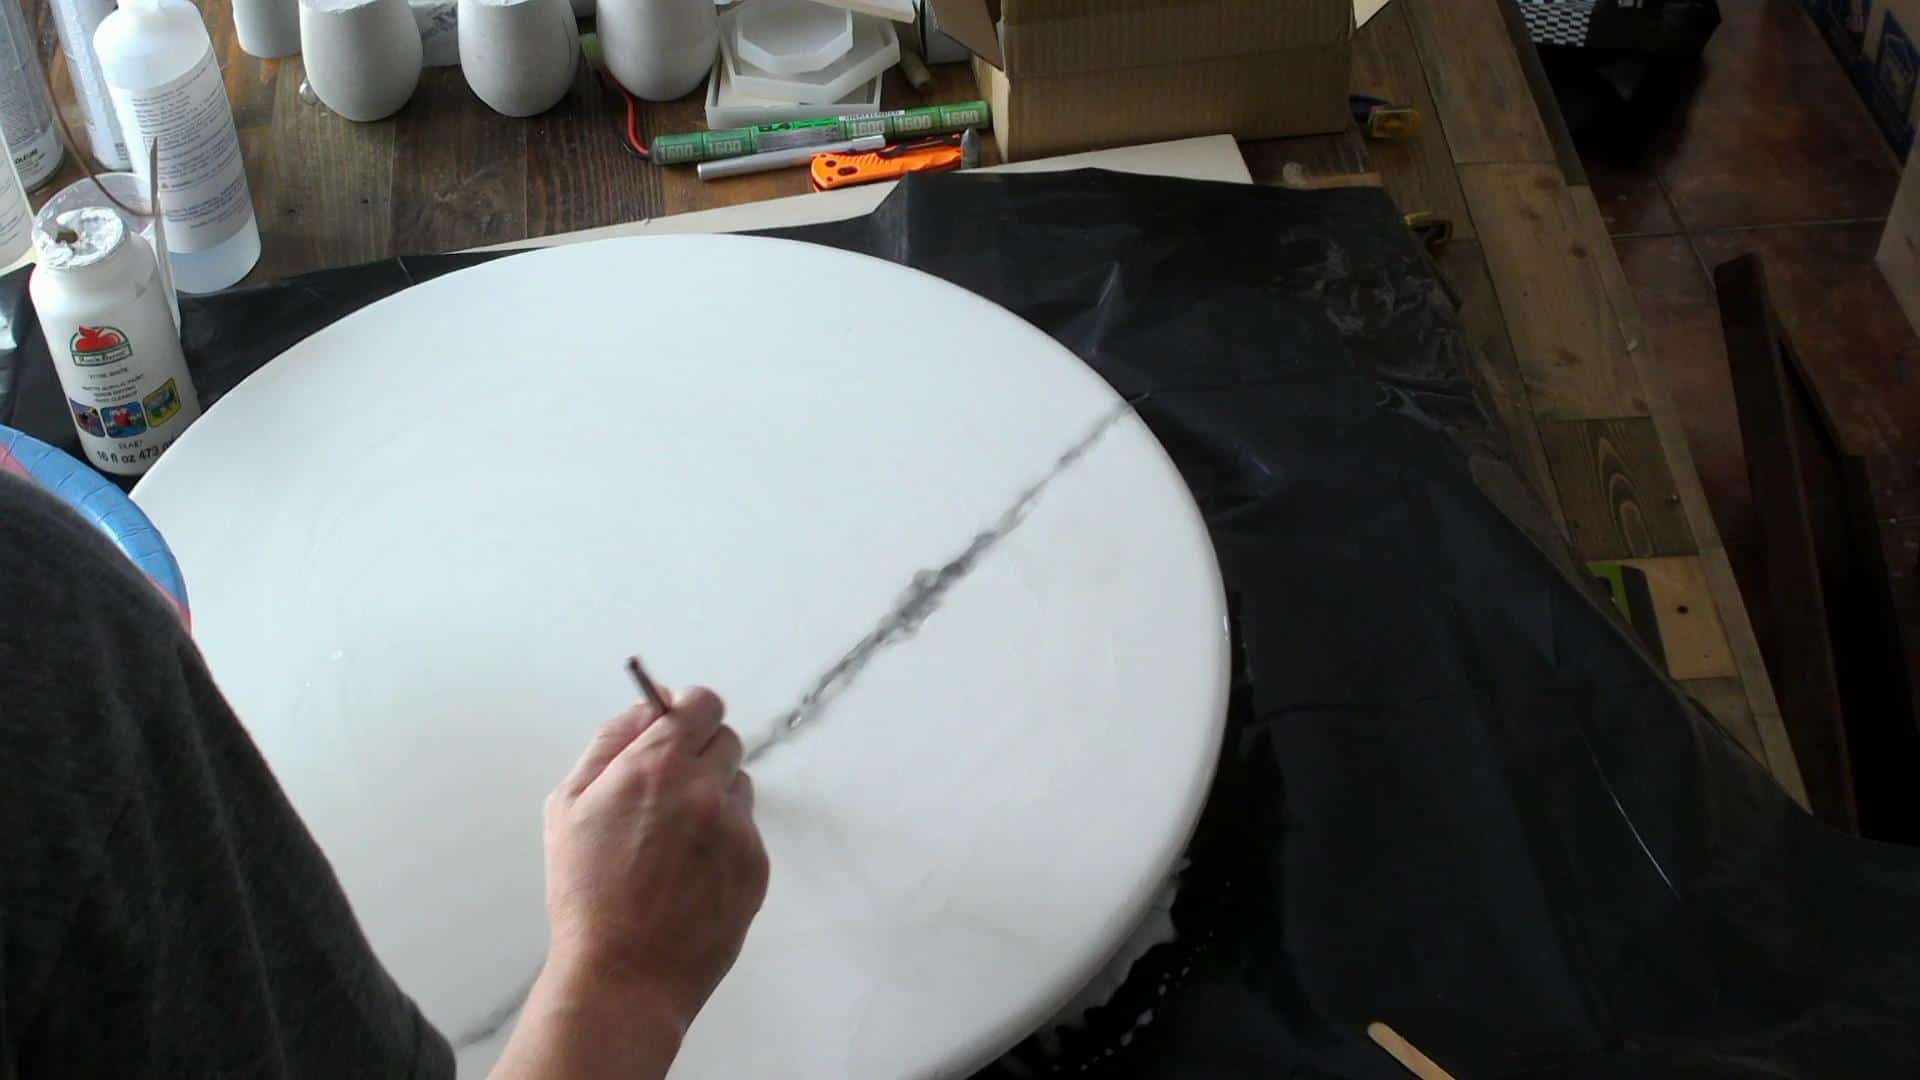
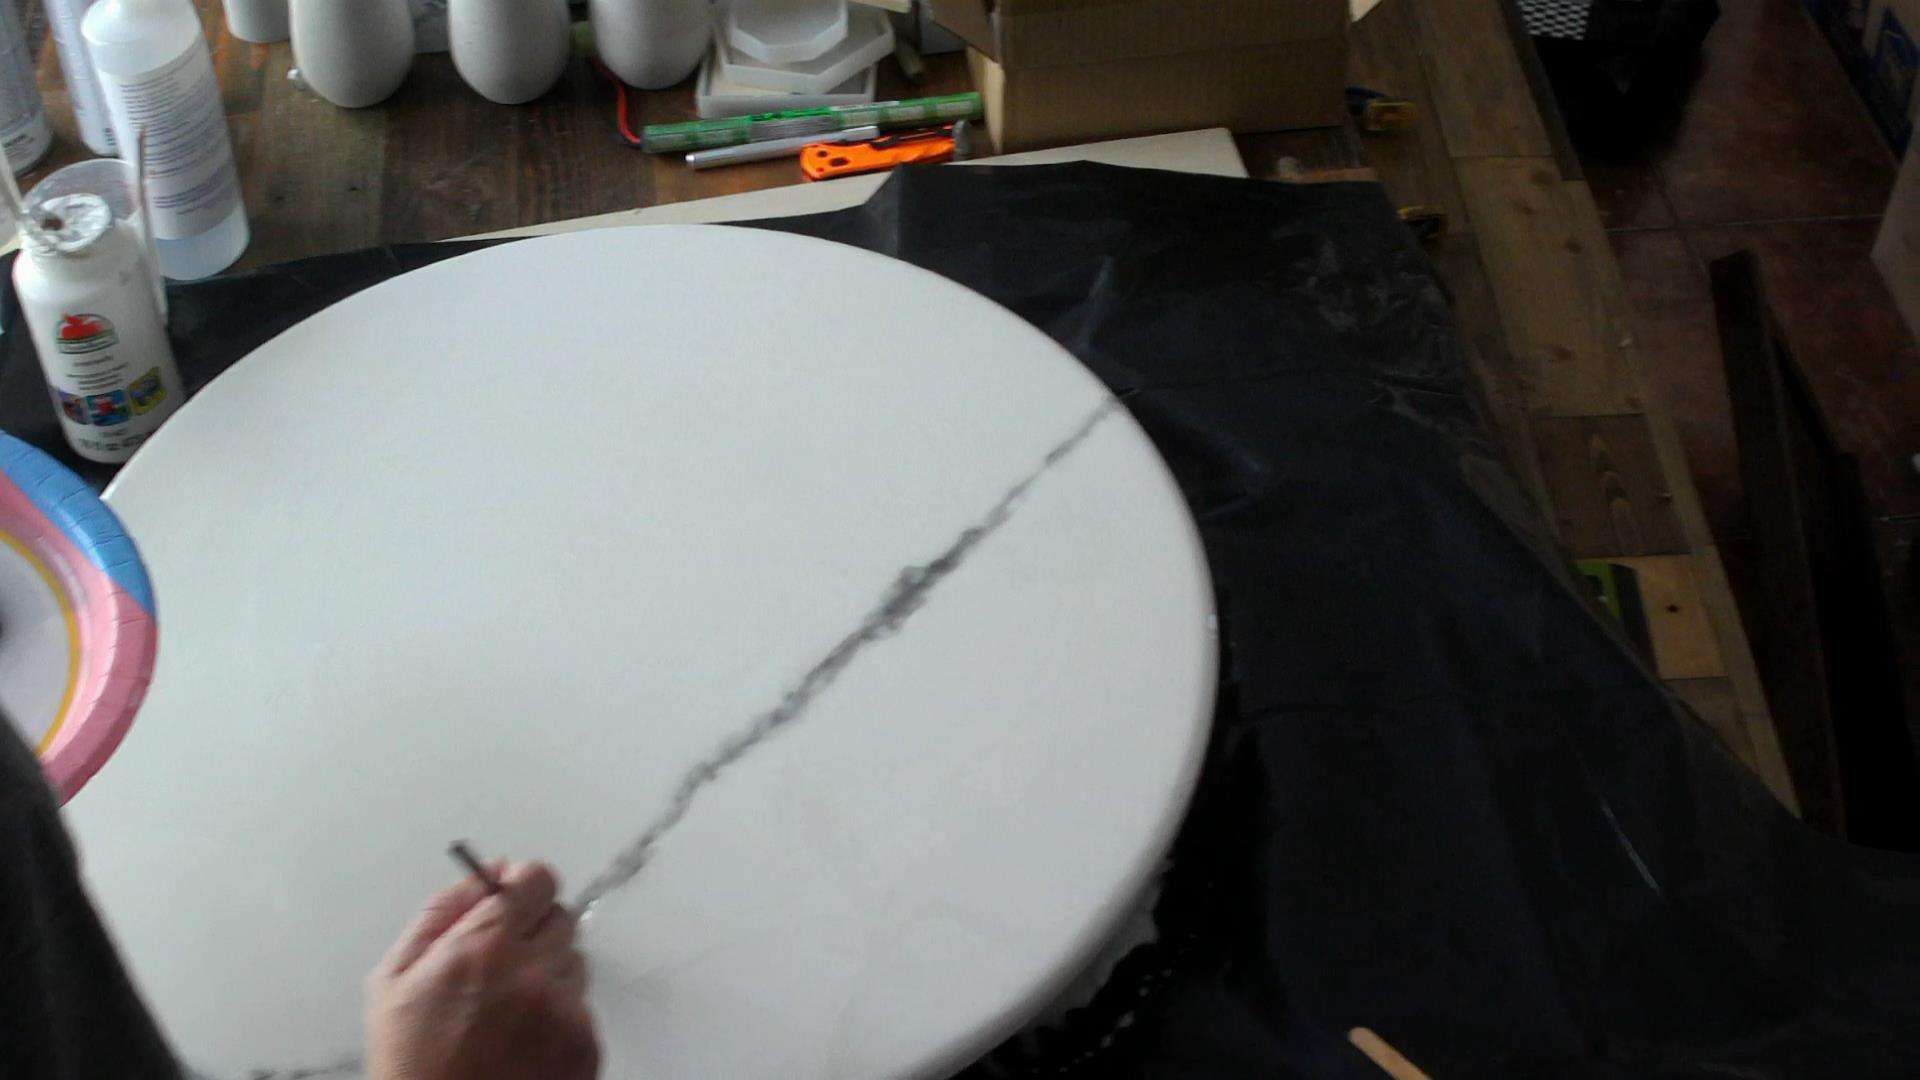
Add more veins!
That is literally it, wait 8-12 hours and then repeat the steps but just add a layer of clear epoxy over the whole thing. No need to make veins or anything, just adding an extra layer to make sure everything is level and covered! Once that dries for 24 hours, VIOLA…tabletop DONE!
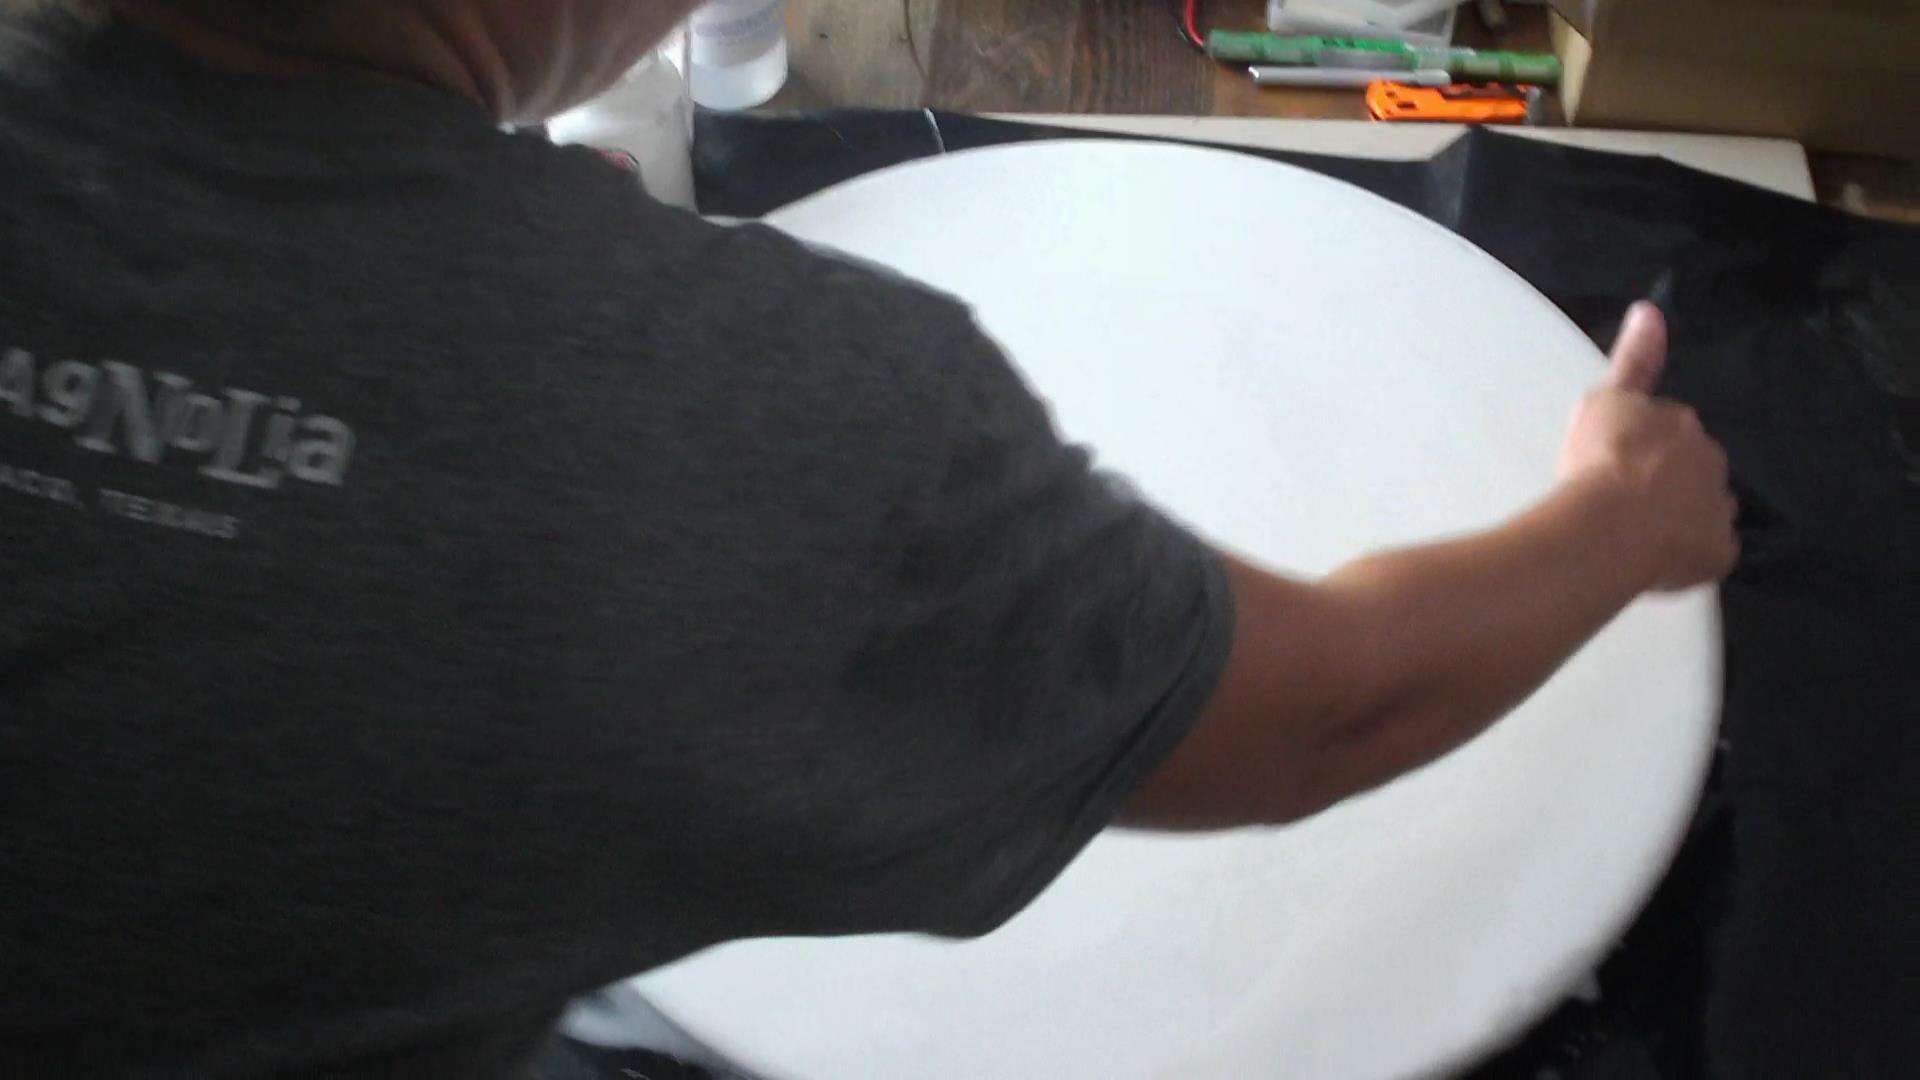
Once it is dry, lay something like a towel down so the tabletop doesn’t get scratched, then flip it upside down to sand the drips off of the bottom.
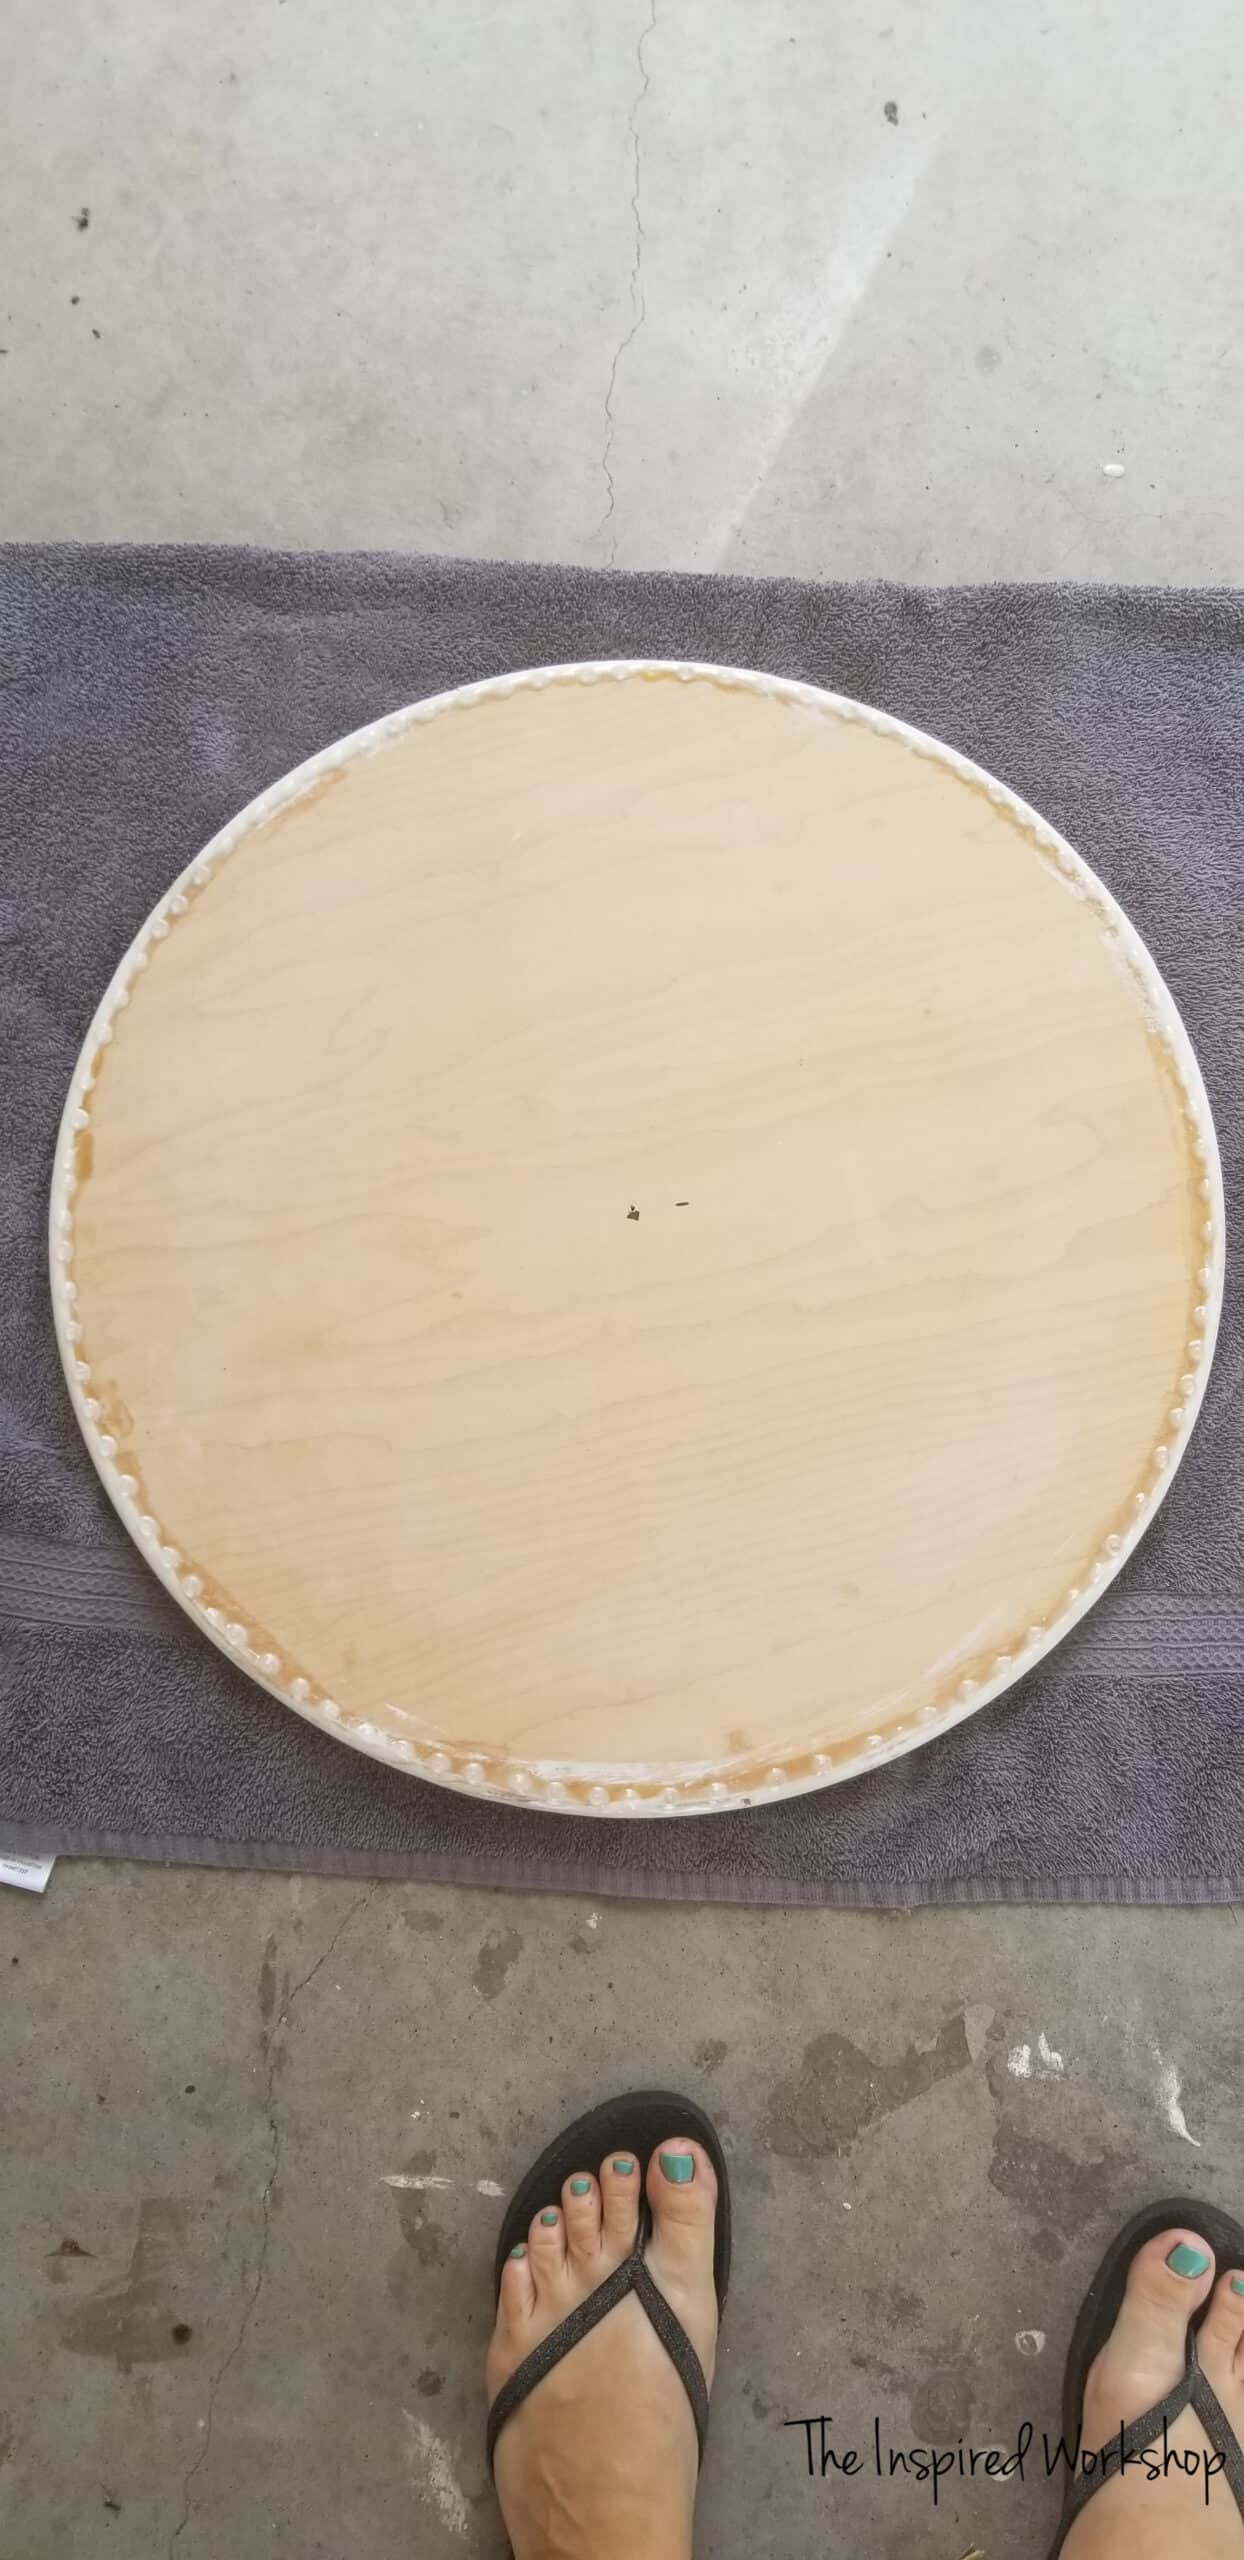
OMG! I’m sorry that my dirty, gnarly feet are in so many pictures! 😂😂😝Oy!
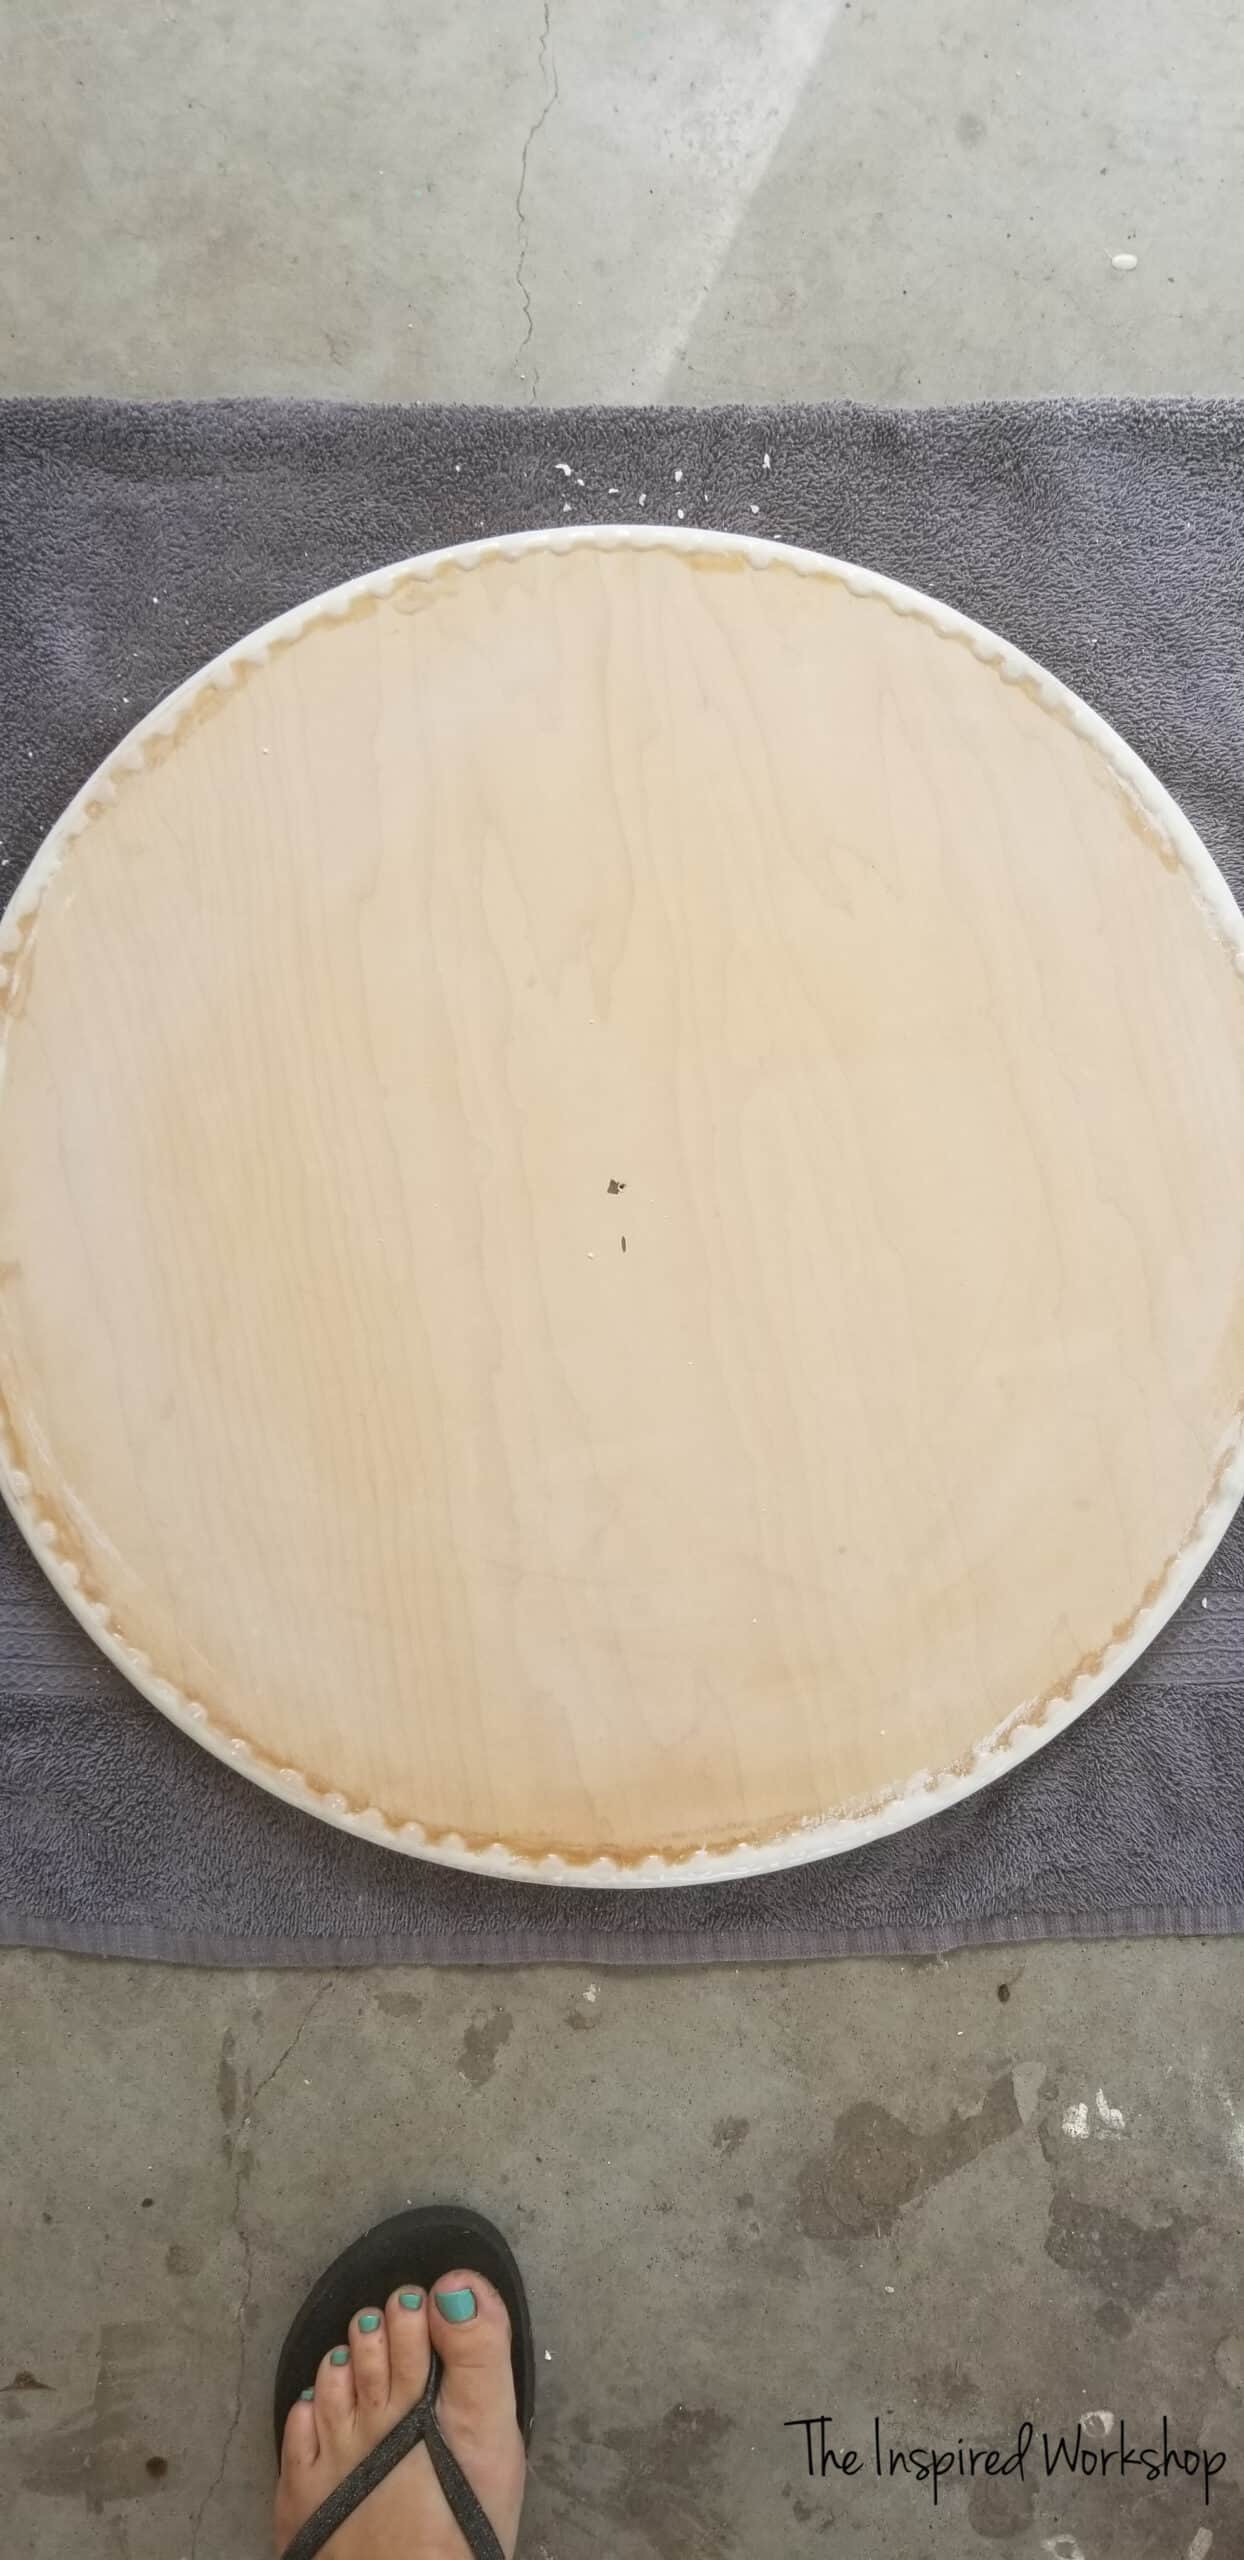
I went back and sanded a little more off after seeing the after photos in this post, but it sands really quickly, I only went around twice with 180 sandpaper, and they were almost gone…I went back around twice and they are completely gone!
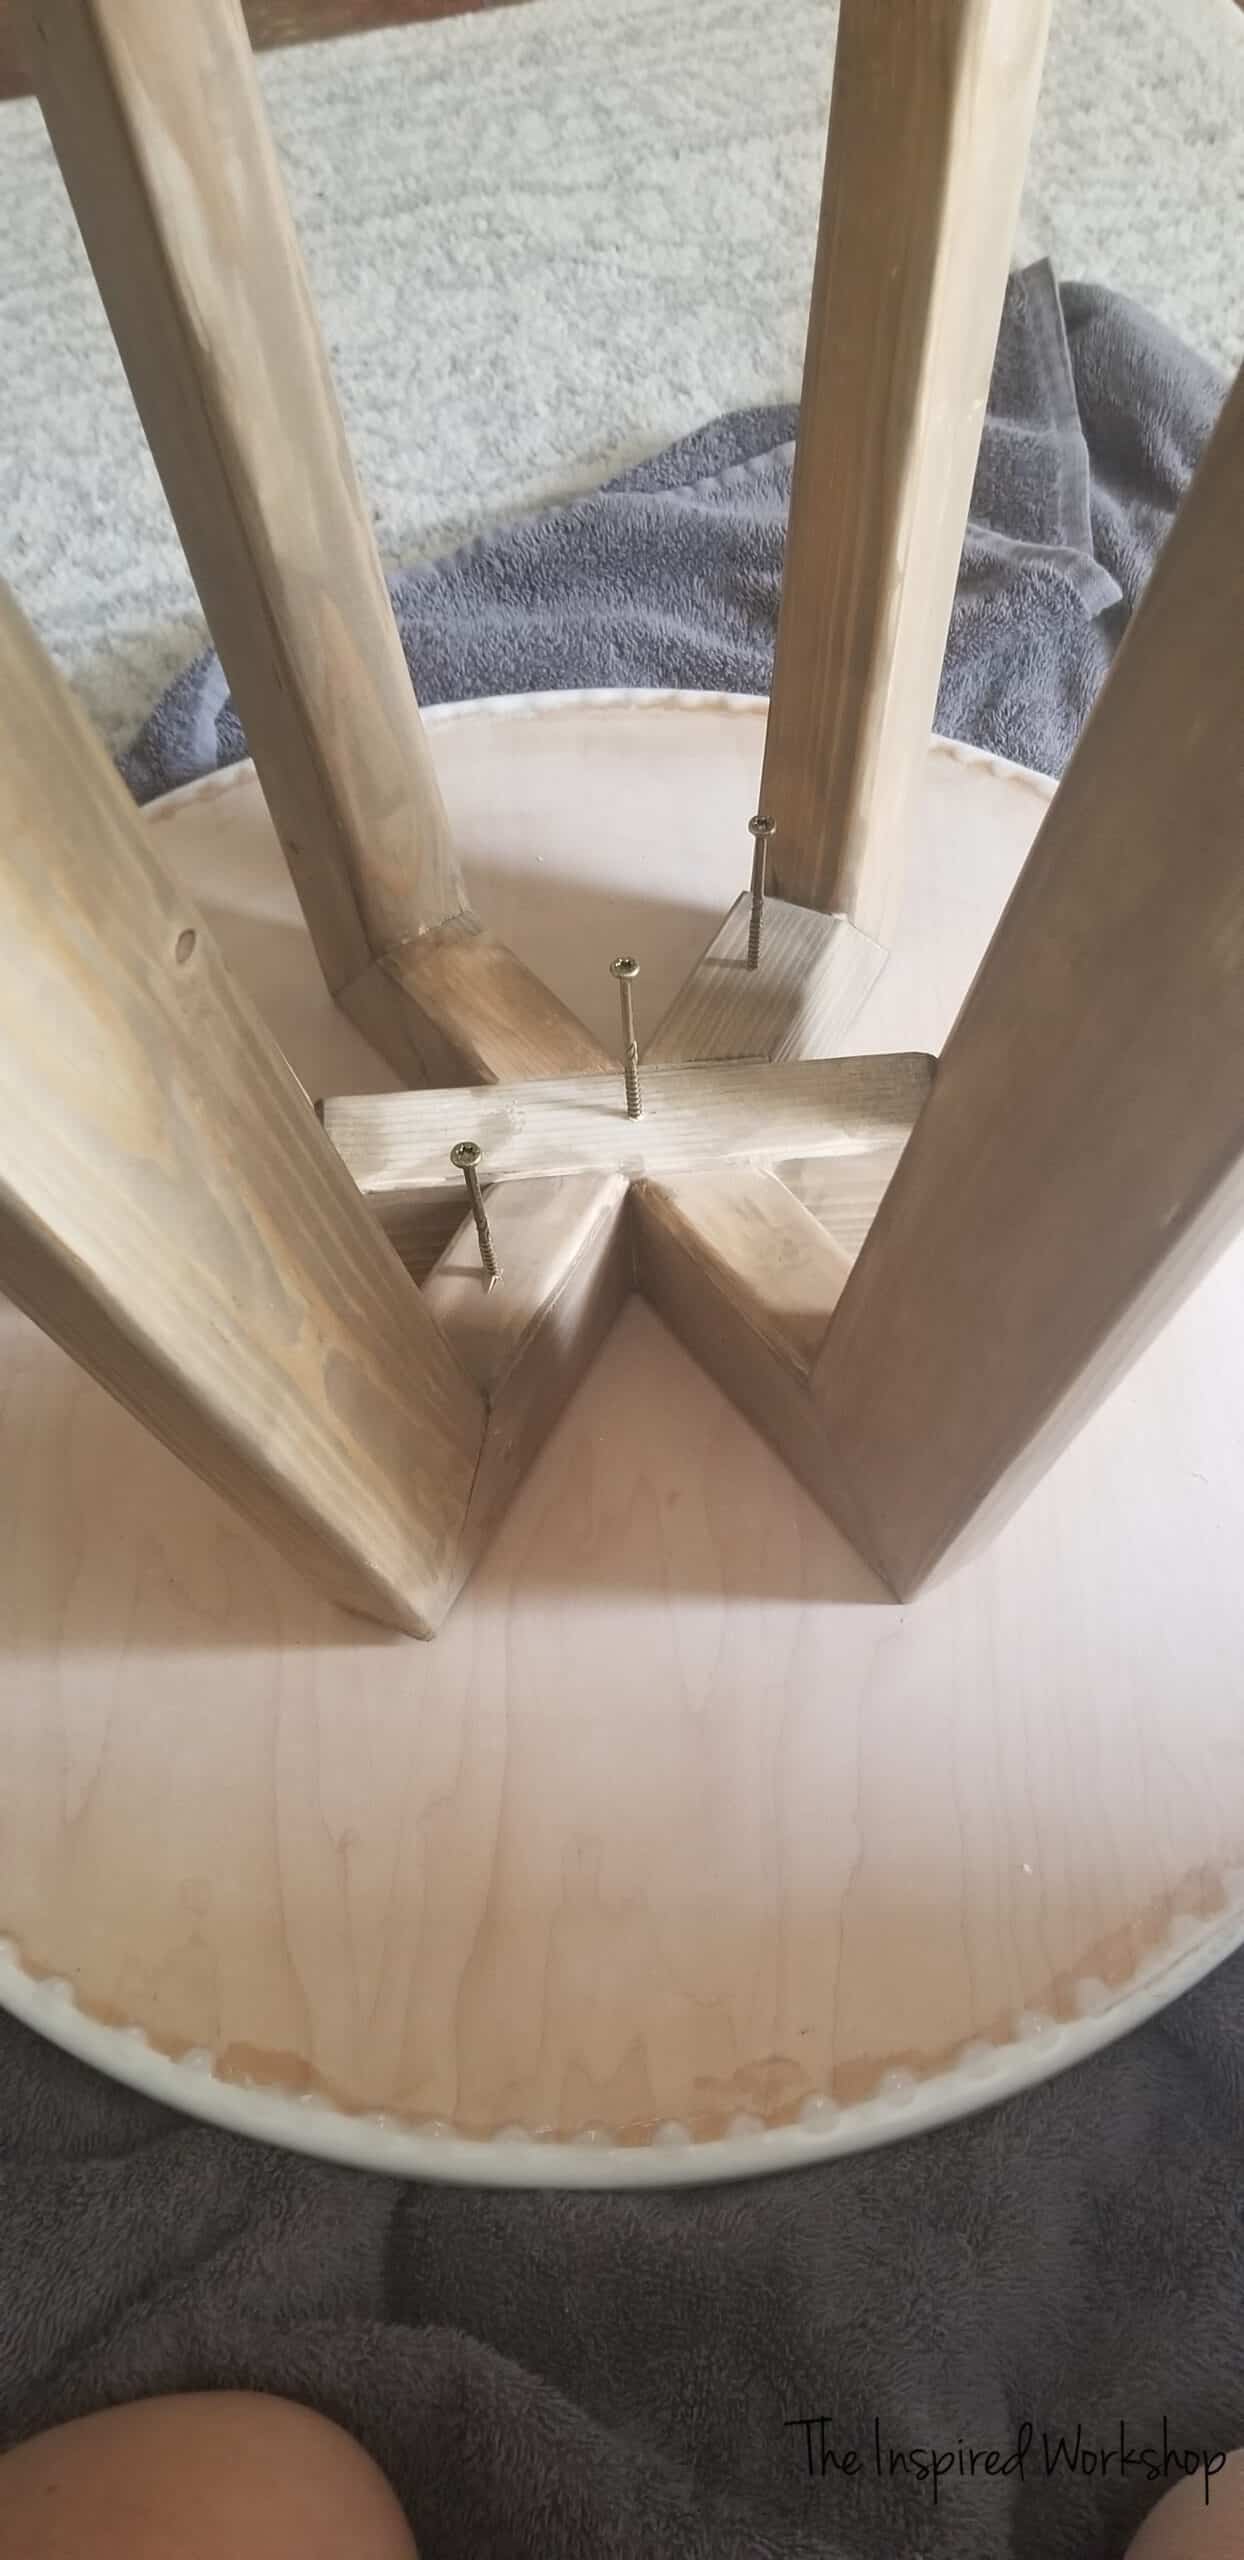
Flip it all upside down and screw the base to the tabletop!
YESSSSSS!!! I LOVE IT!!!
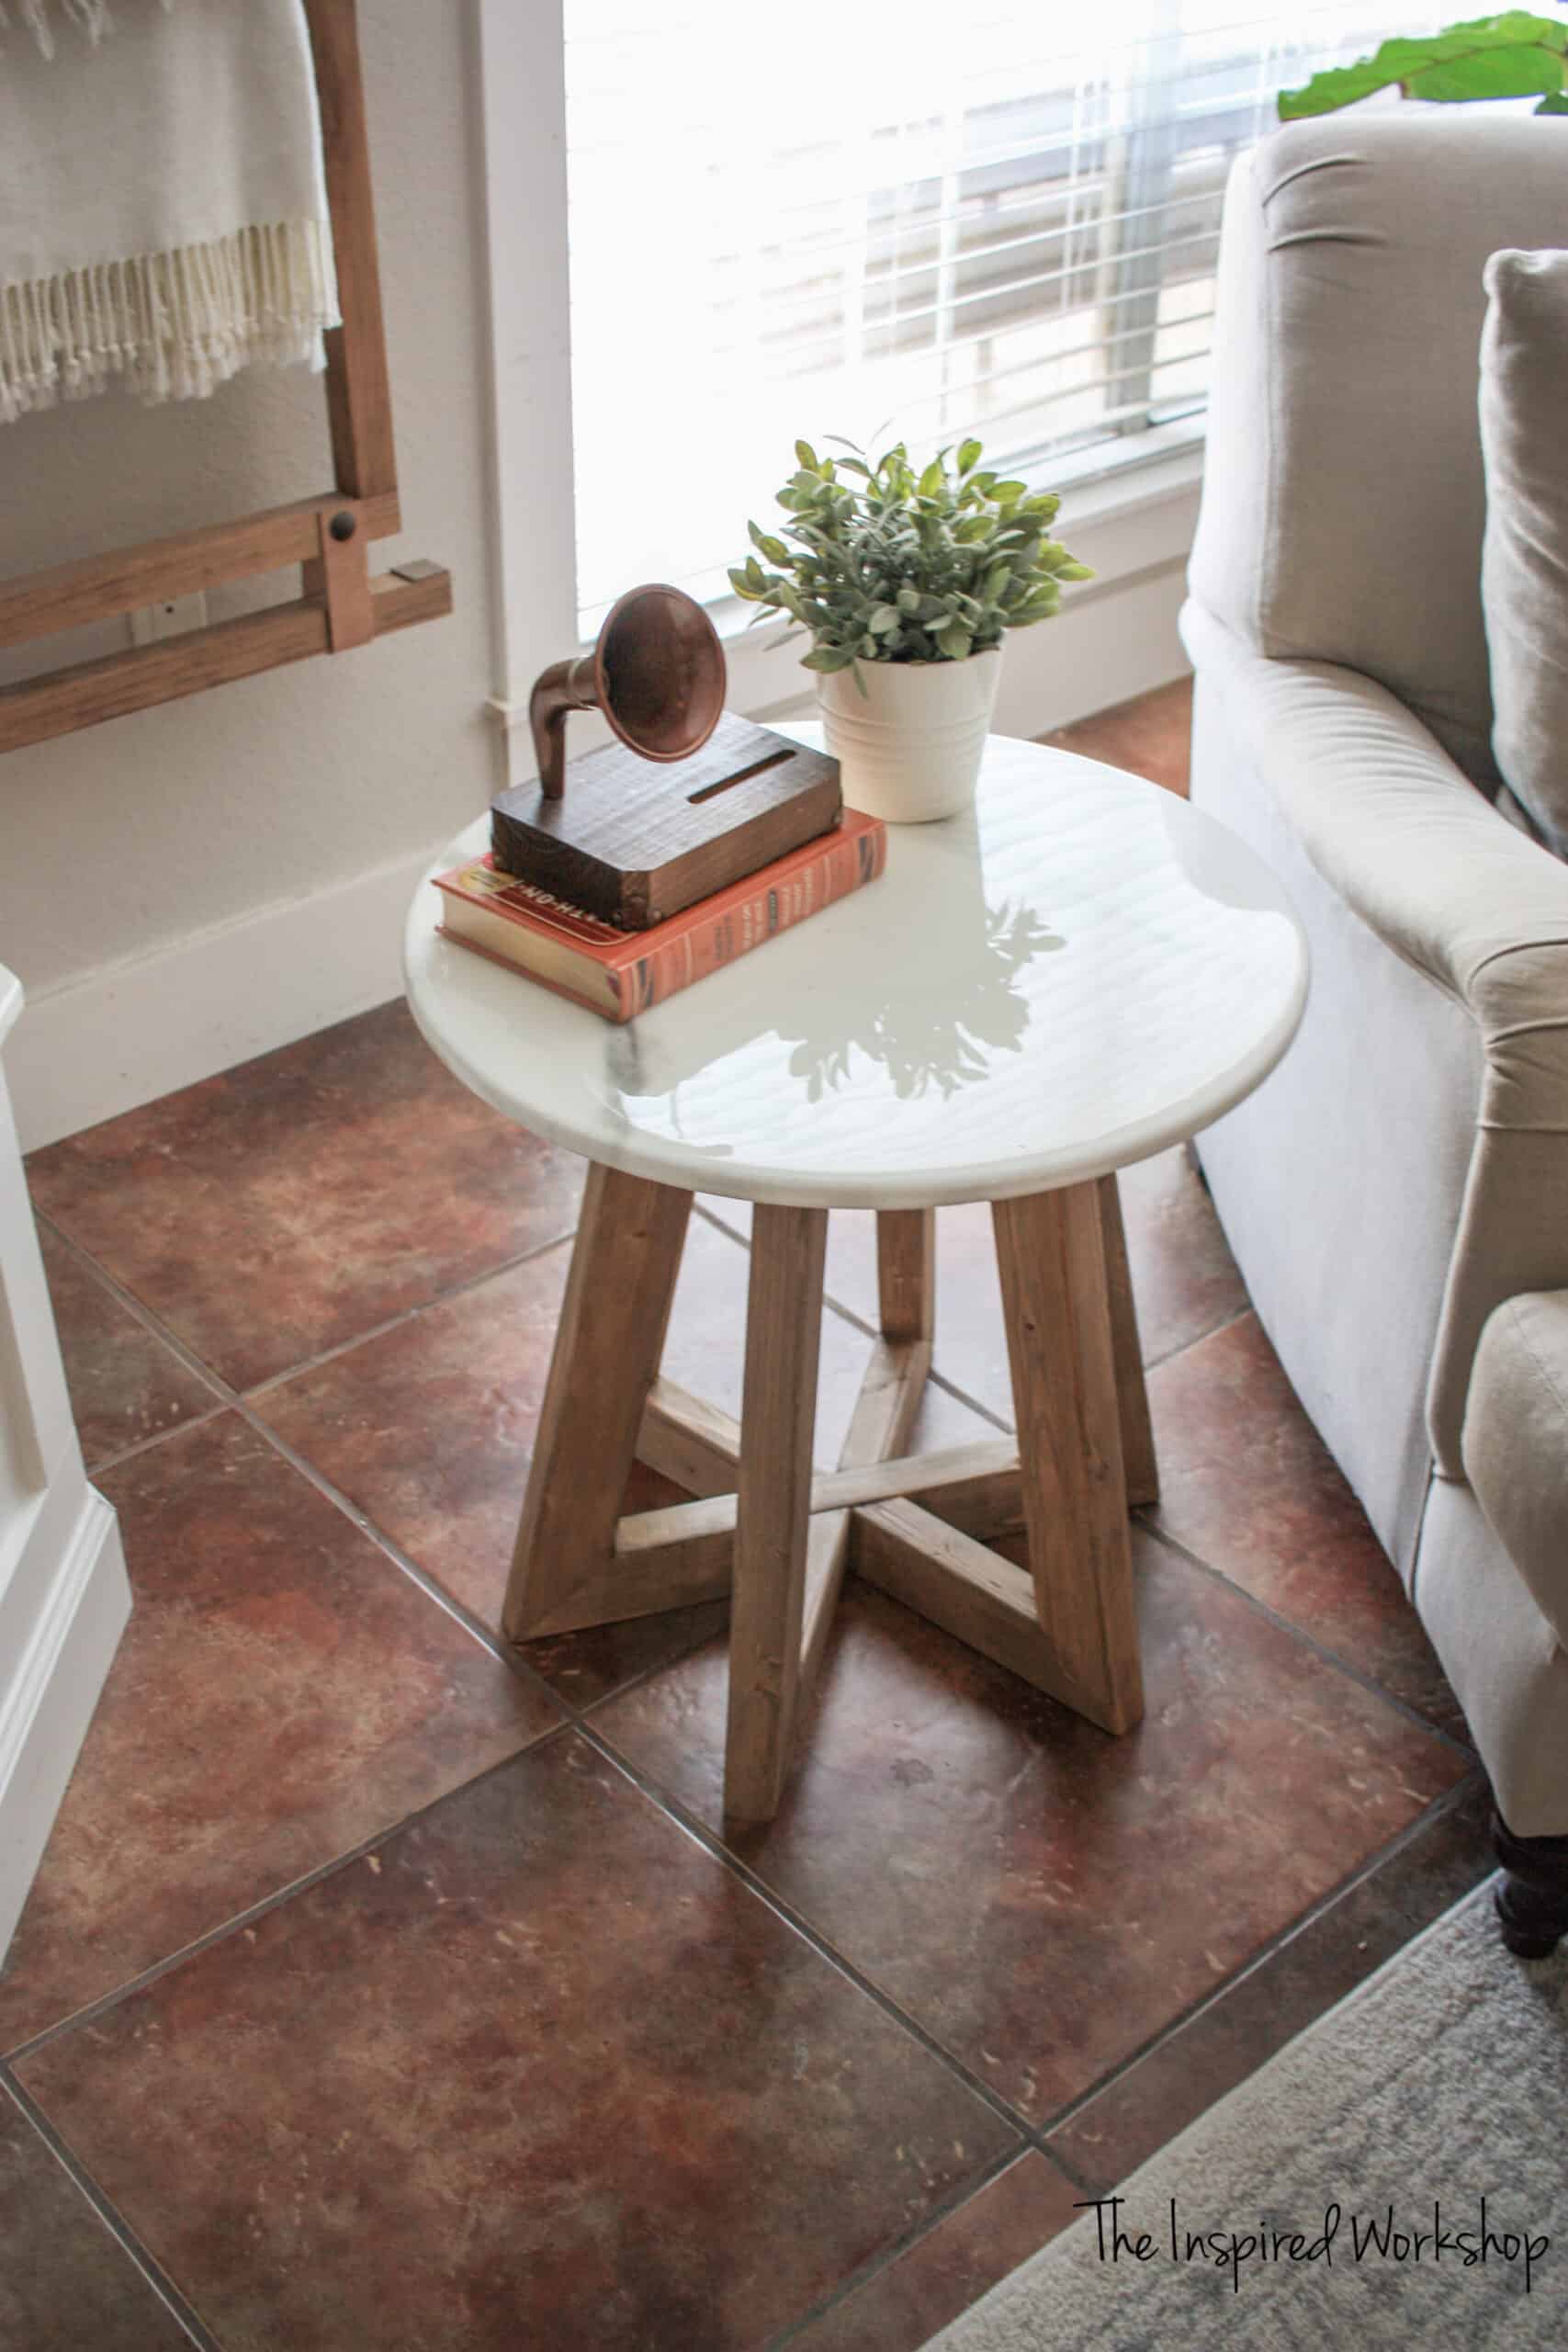
It’s exactly what I needed to sip my coffee by the fireplace!
I hope you enjoyed the tutorial and the building of your own Marble Epoxy Top Round Side Table! Any questions feel free to ask below, or email me directly at cara.theinspiredworkshop(at)gmail.com!
Have someone you think would enjoy this tutorial? SHARE it with your friends and family!
[social_warfare]
Have a good one!

Wanna save this Marble Epoxy Round Side Table for later?! PIN IT!
First of all, I LOVE this!!! Can you advise on adjustments to make it 25″ tall? I’ve done several DIY projects but angles are my nemesis and this one has several lol.
Thanks!
Hey K!
Thank you so much for your kind words, I appreciate them! I feel ya, angles are tough! Lol! I’ll have to give it a go in Sketchup which will take me a wee bit before I have the chance, but I’ll email it to you when I have it done!
Thanks for stopping by! Have a good one!!
Cara
Thank you so much, Erin! It really is a lot of fun to work with, it’s so easy and the options and ideas are endless! Hope you try it soon, you won’t regret it!😊
I love how this table turned out! It is elegant and looks amazing. I have wanted to try my hand at epoxy and now I am definitely adding it to the list. Great tutorial!