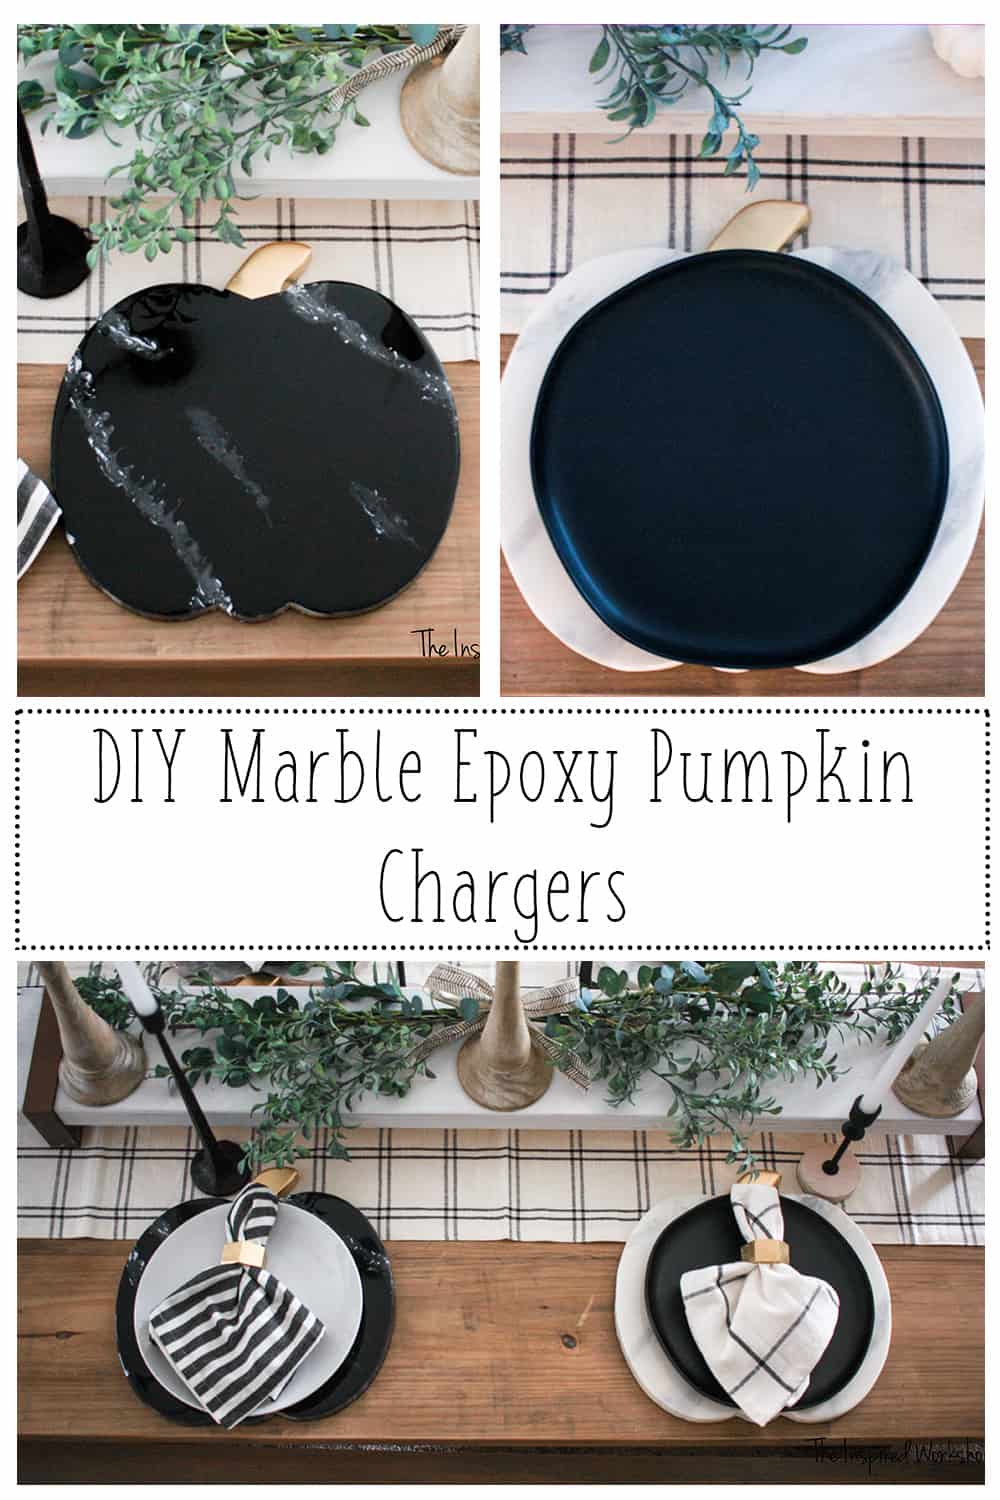
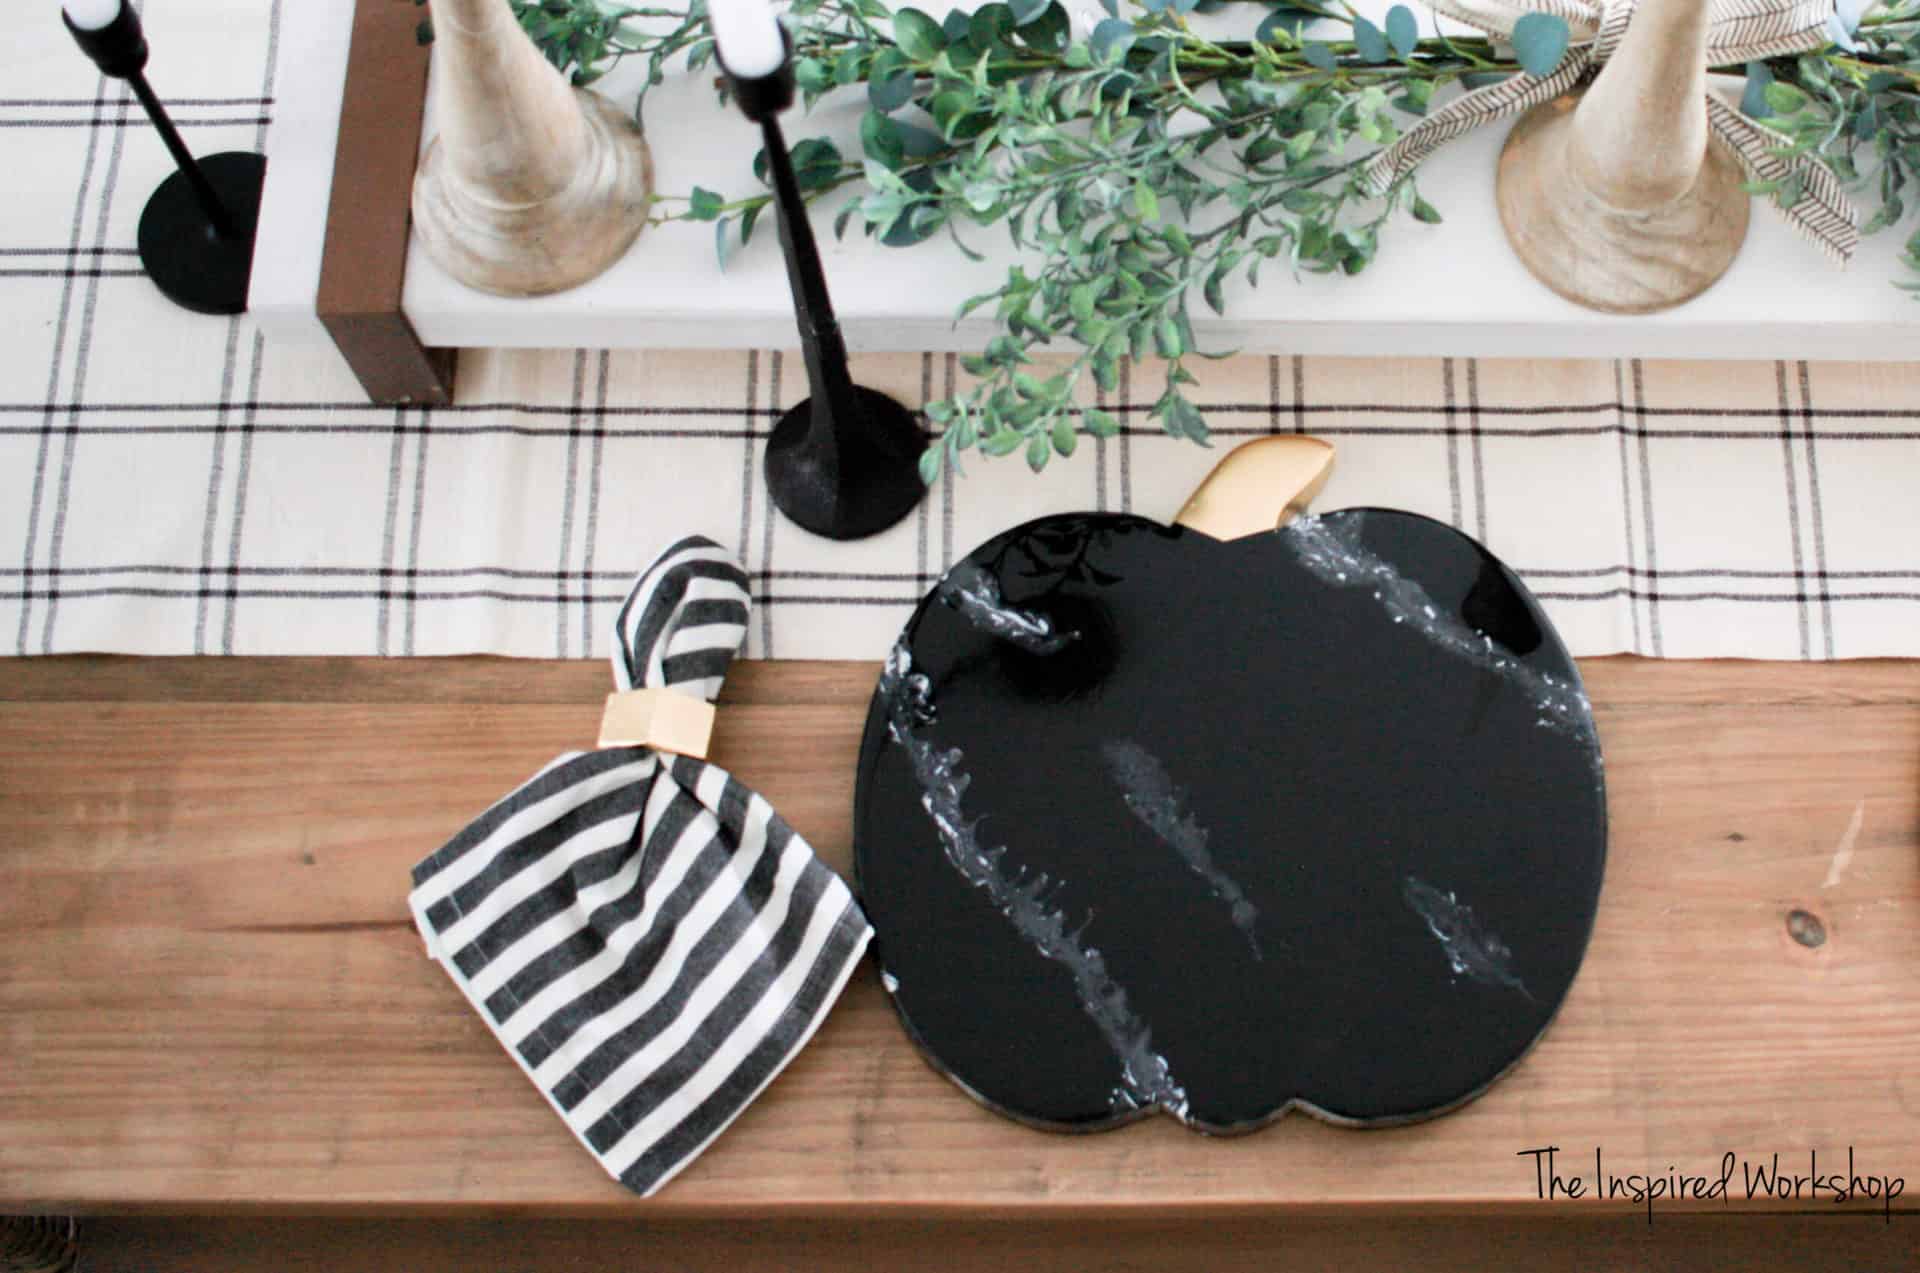
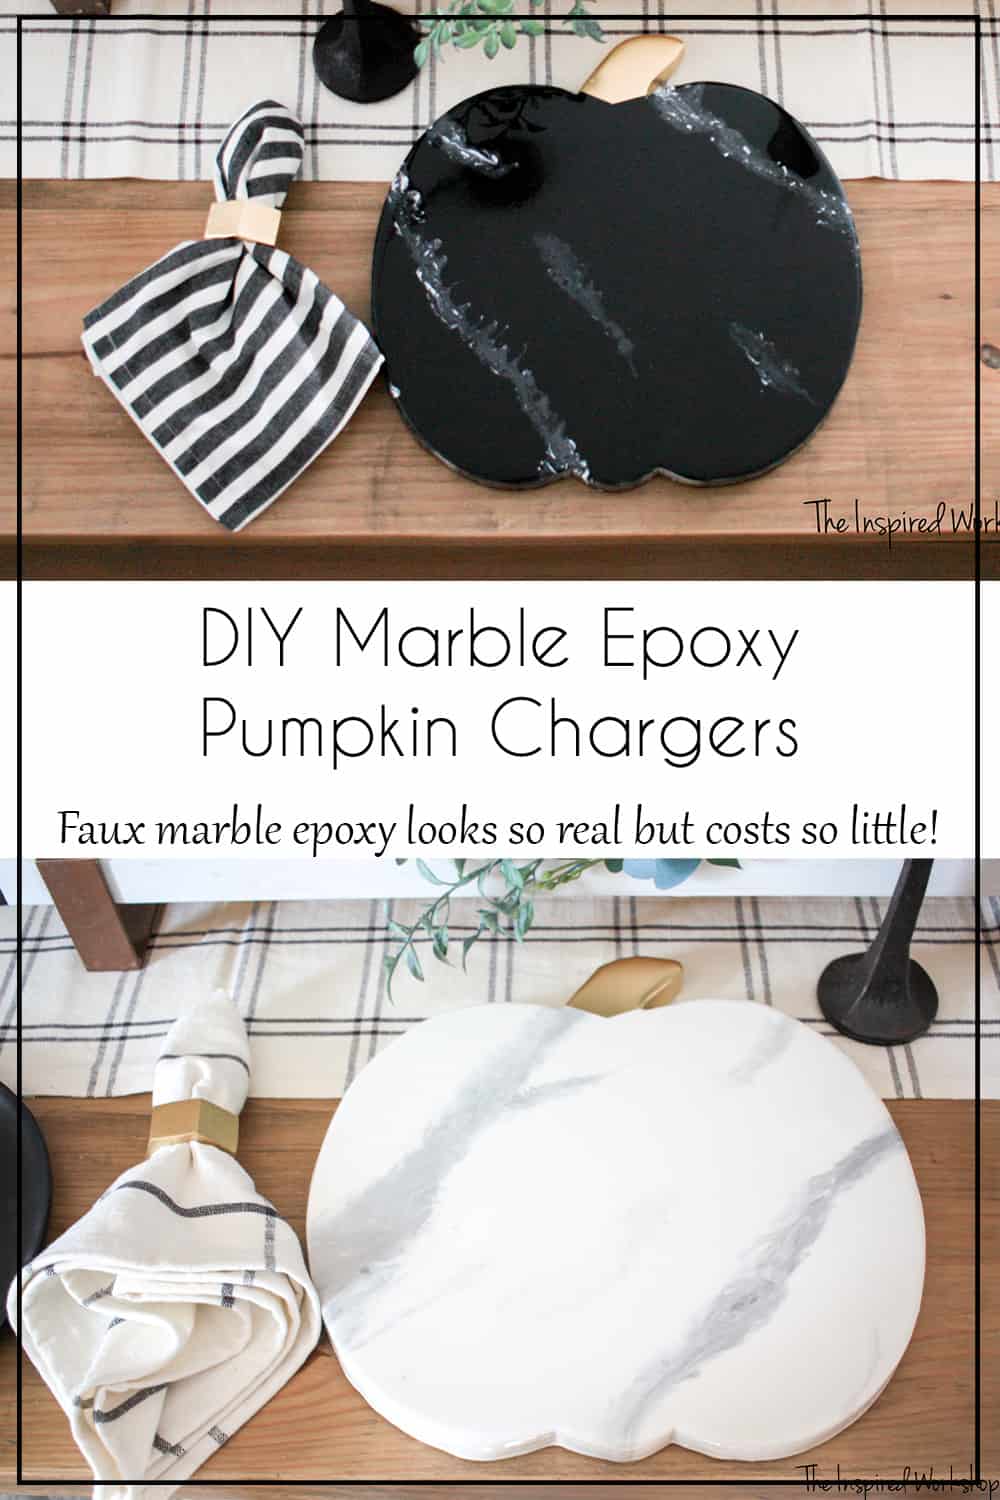
DIY Marble Epoxy Pumpkin Chargers
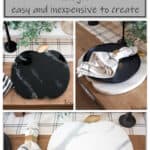
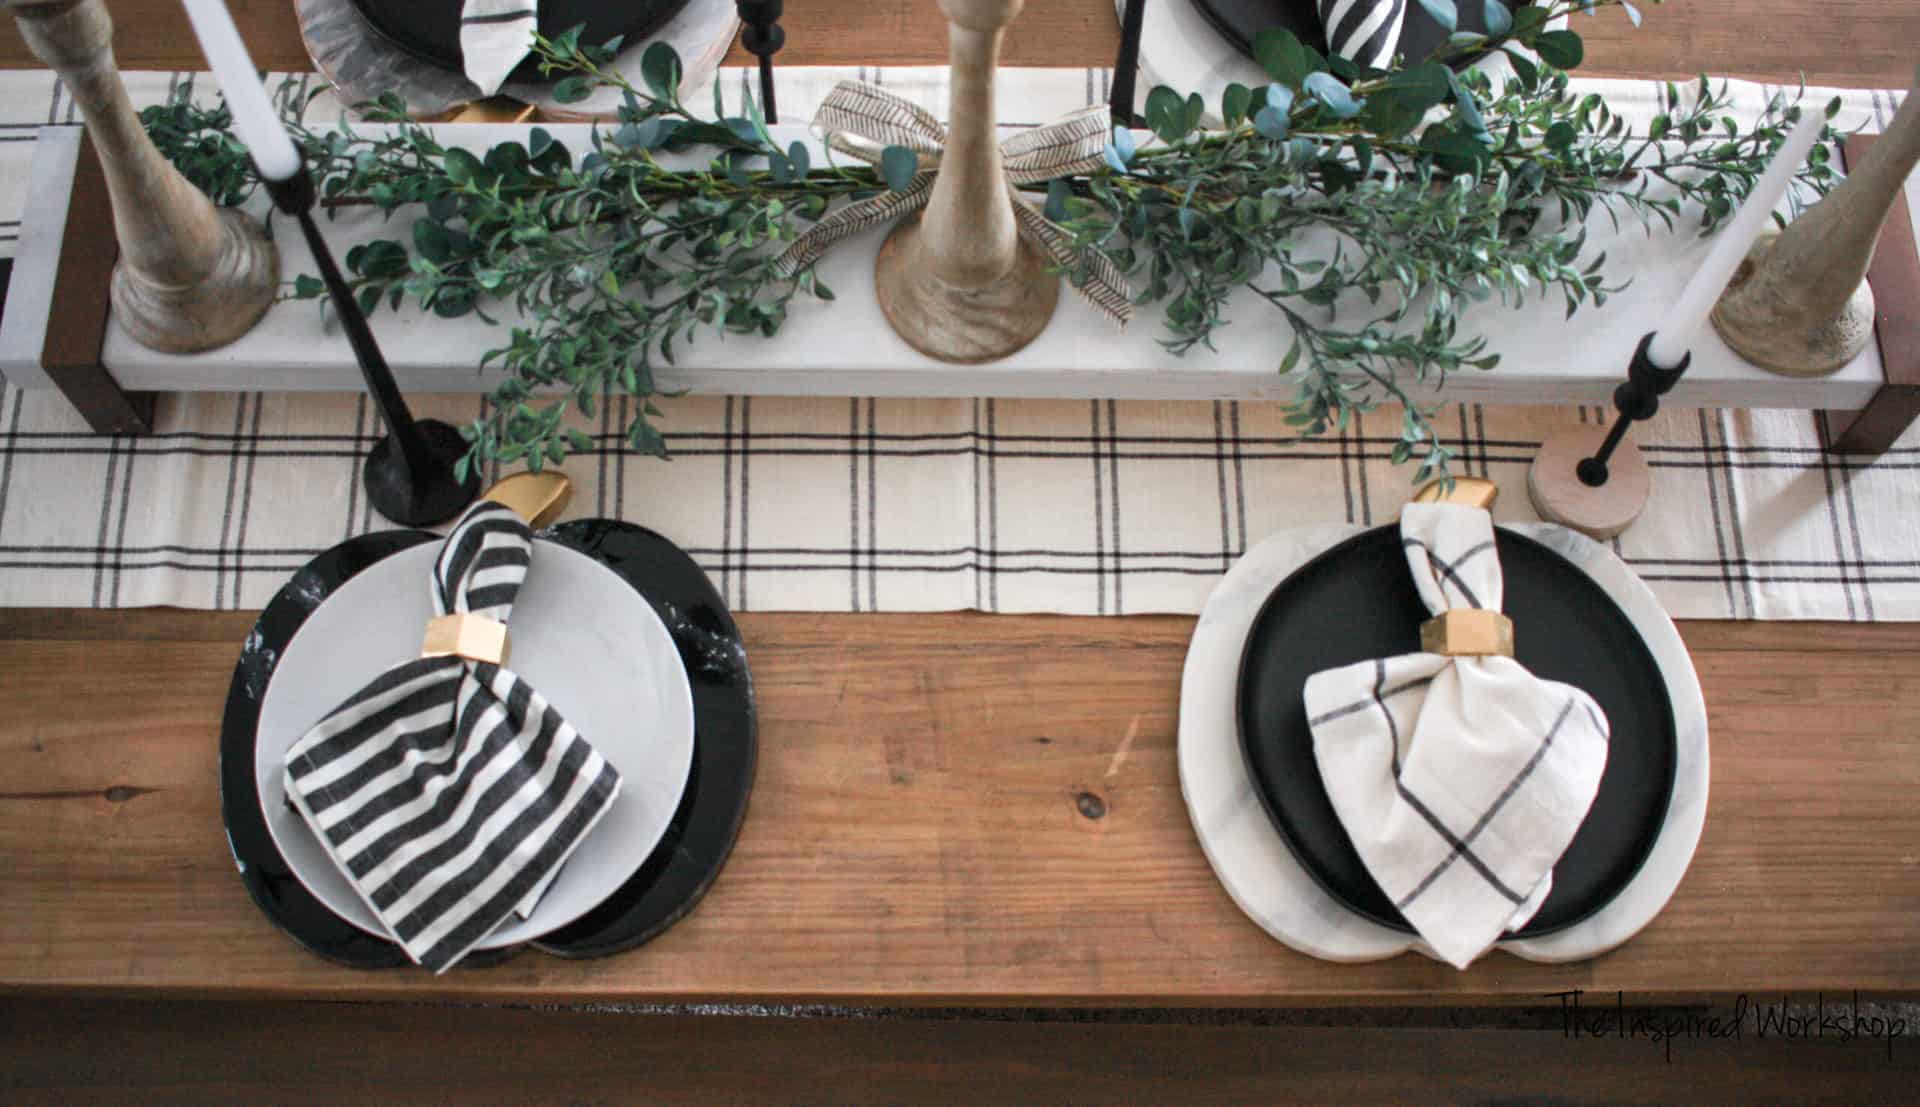
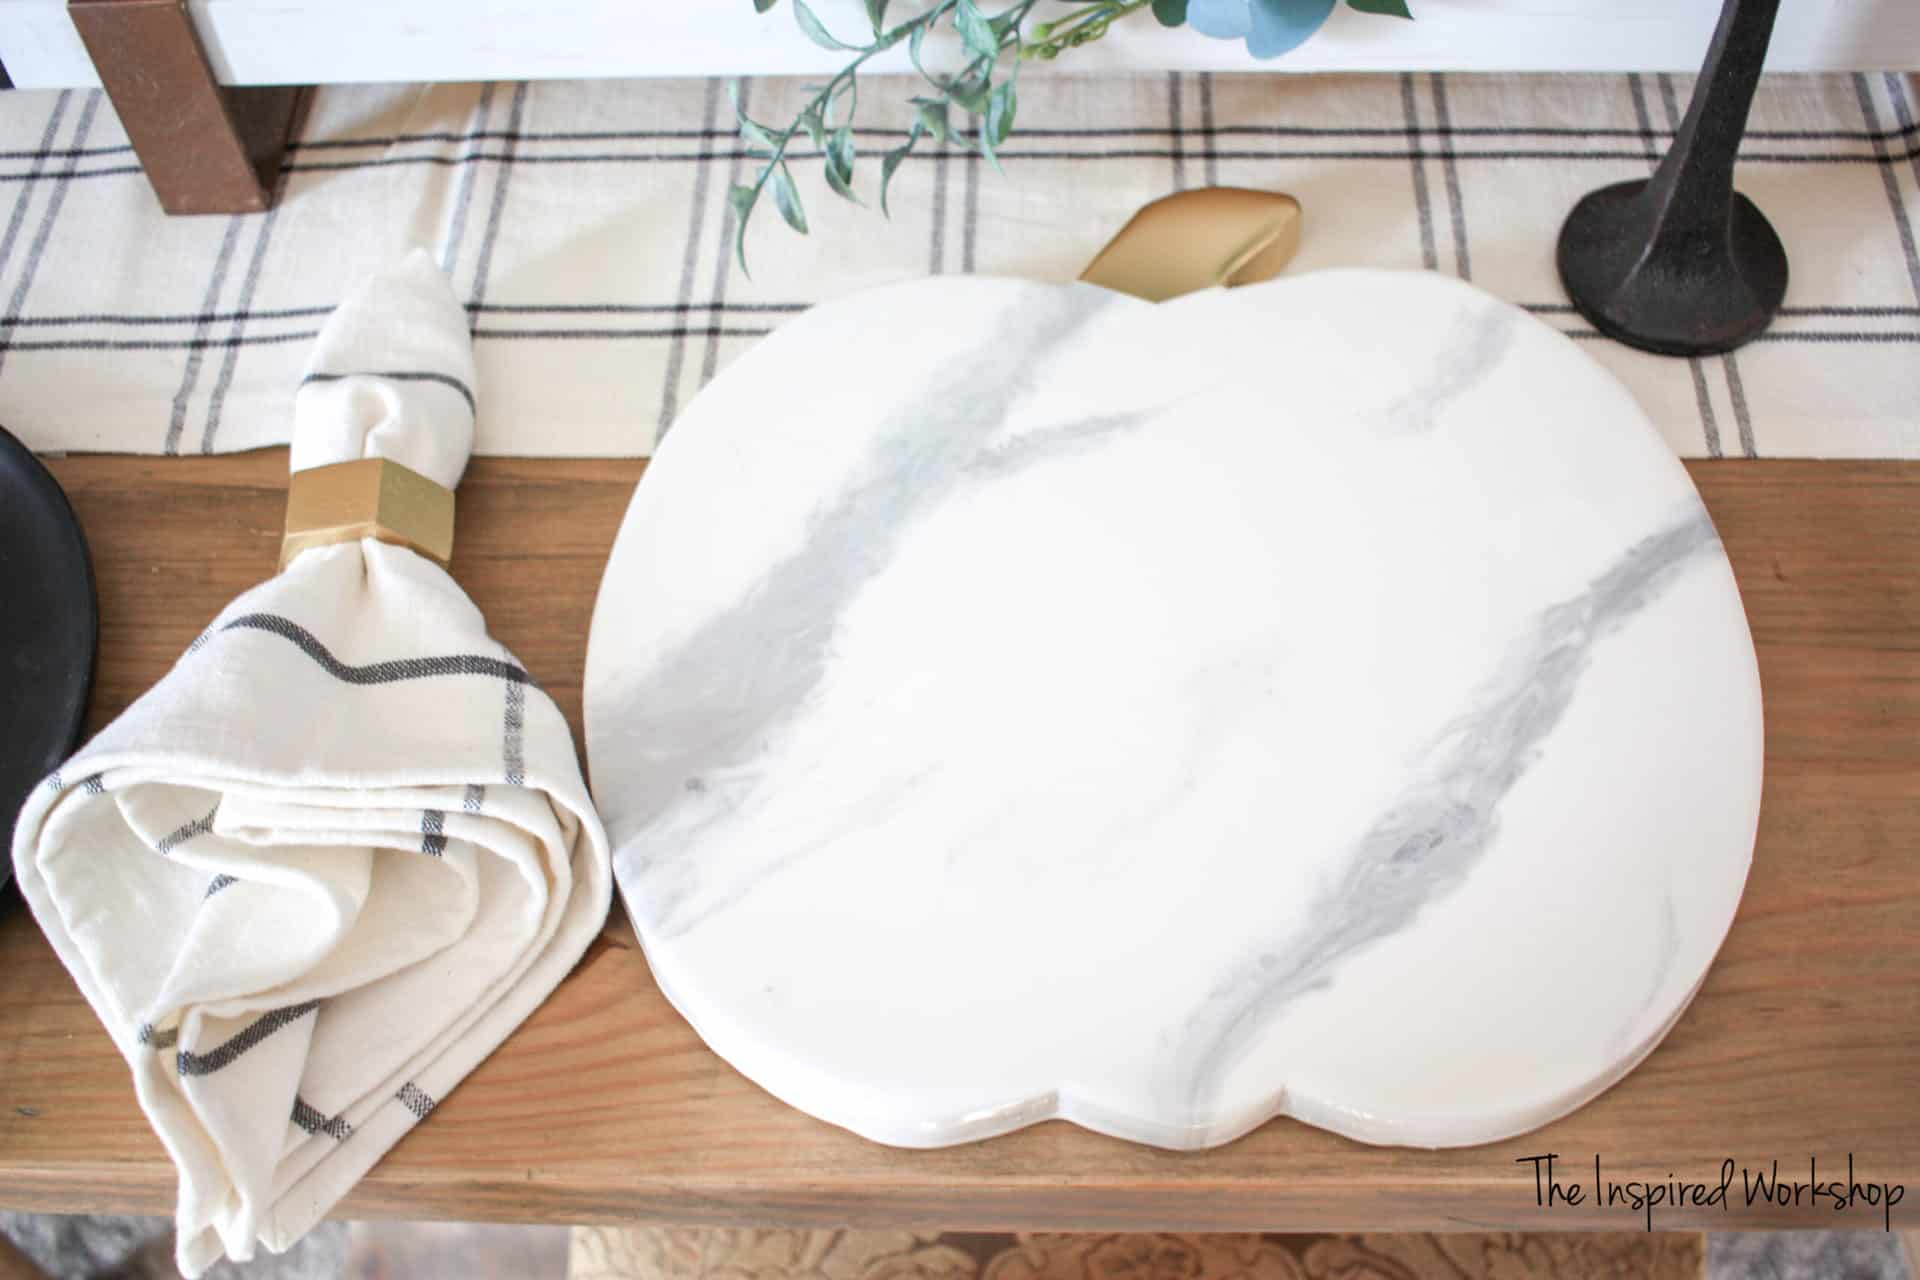
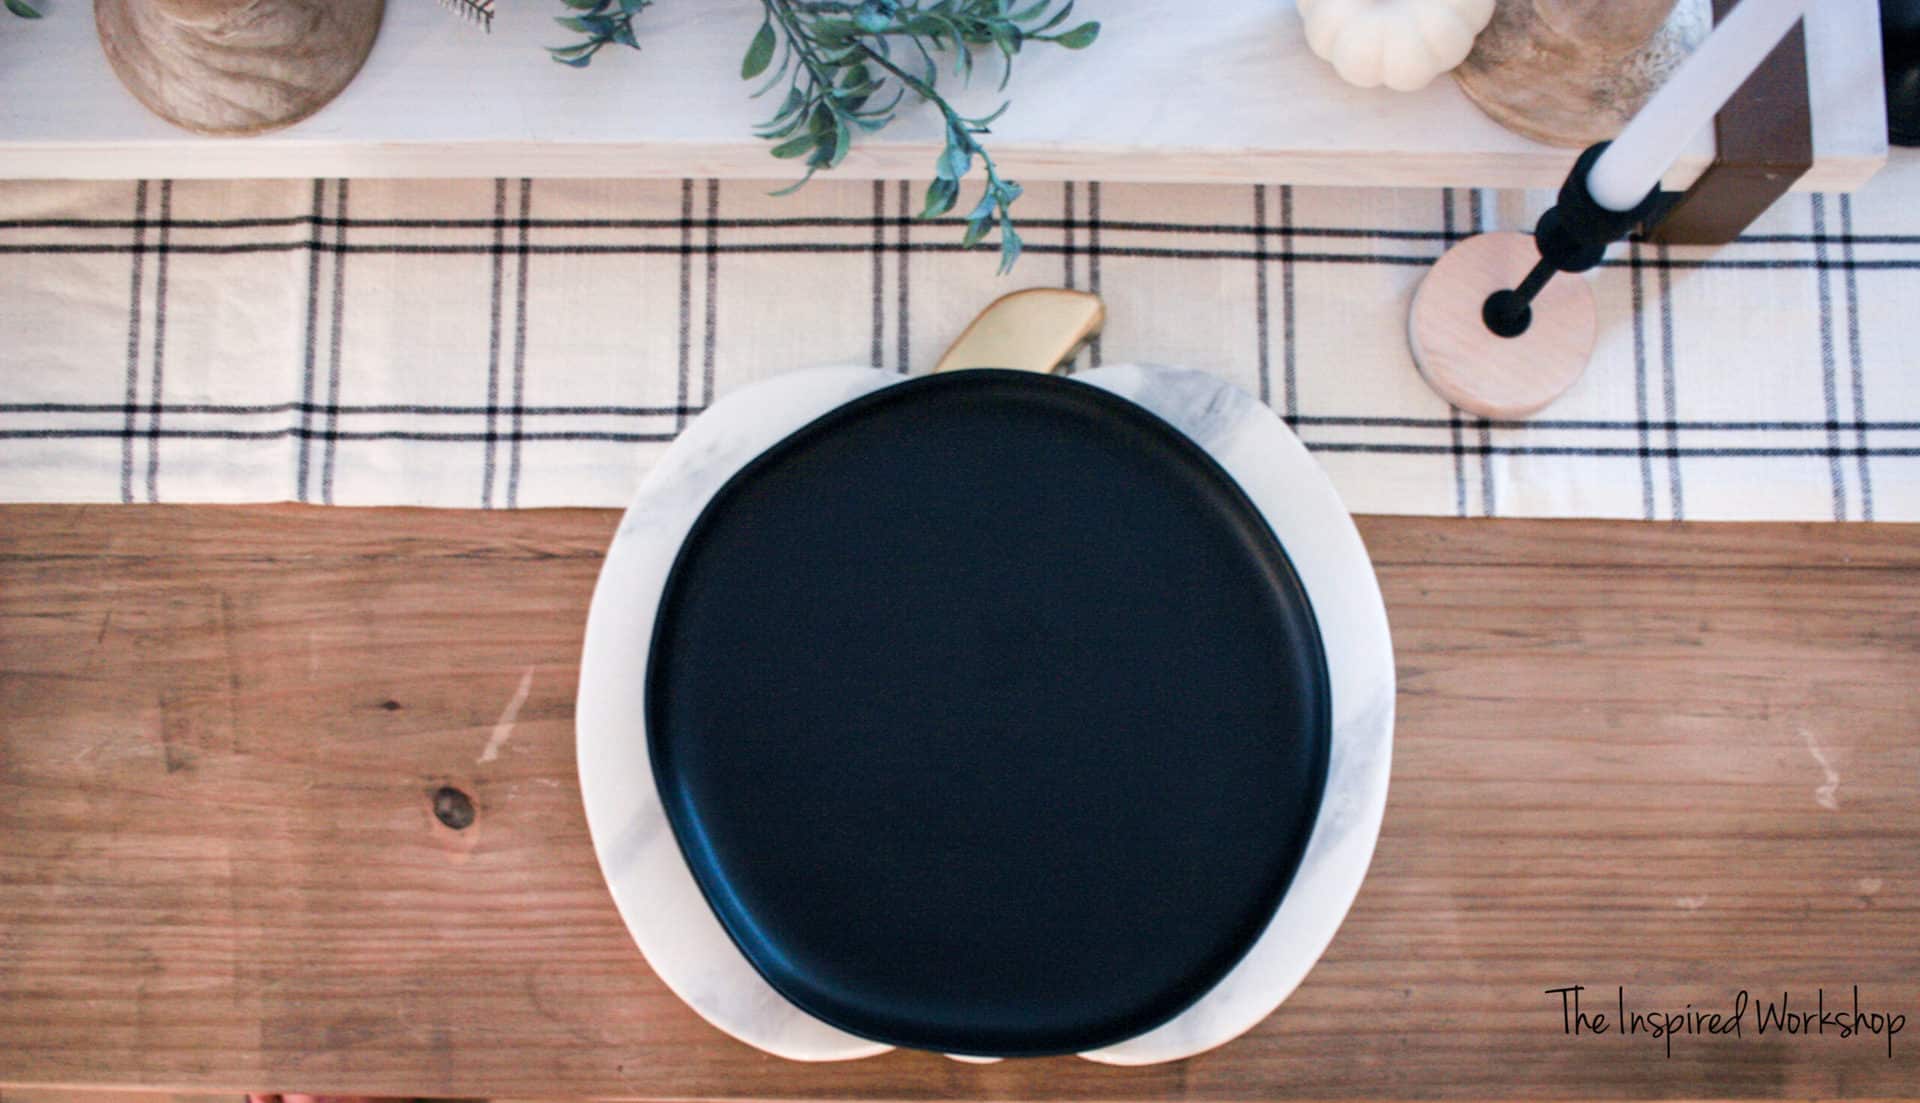
Plate chargers are an easy way to dress up the table for any celebration. A Thanksgiving feast or Fall feast needs some pumpkins, and what better way to add pumpkins to your tablescape than with some DIY marble epoxy pumpkin chargers! Classy marble with a touch of fall with the pumpkins makes the perfect tablescape!
Aren’t they the most beautiful thing you have ever seen?! 😜
Well let me tell you, I need someone to come take the epoxy away from me! Lol! I am making ALL the marble epoxy projects this week! And hexagons, someone come take the 30-degree marker off my saw to keep me from making any more hexagon projects! 😂😂
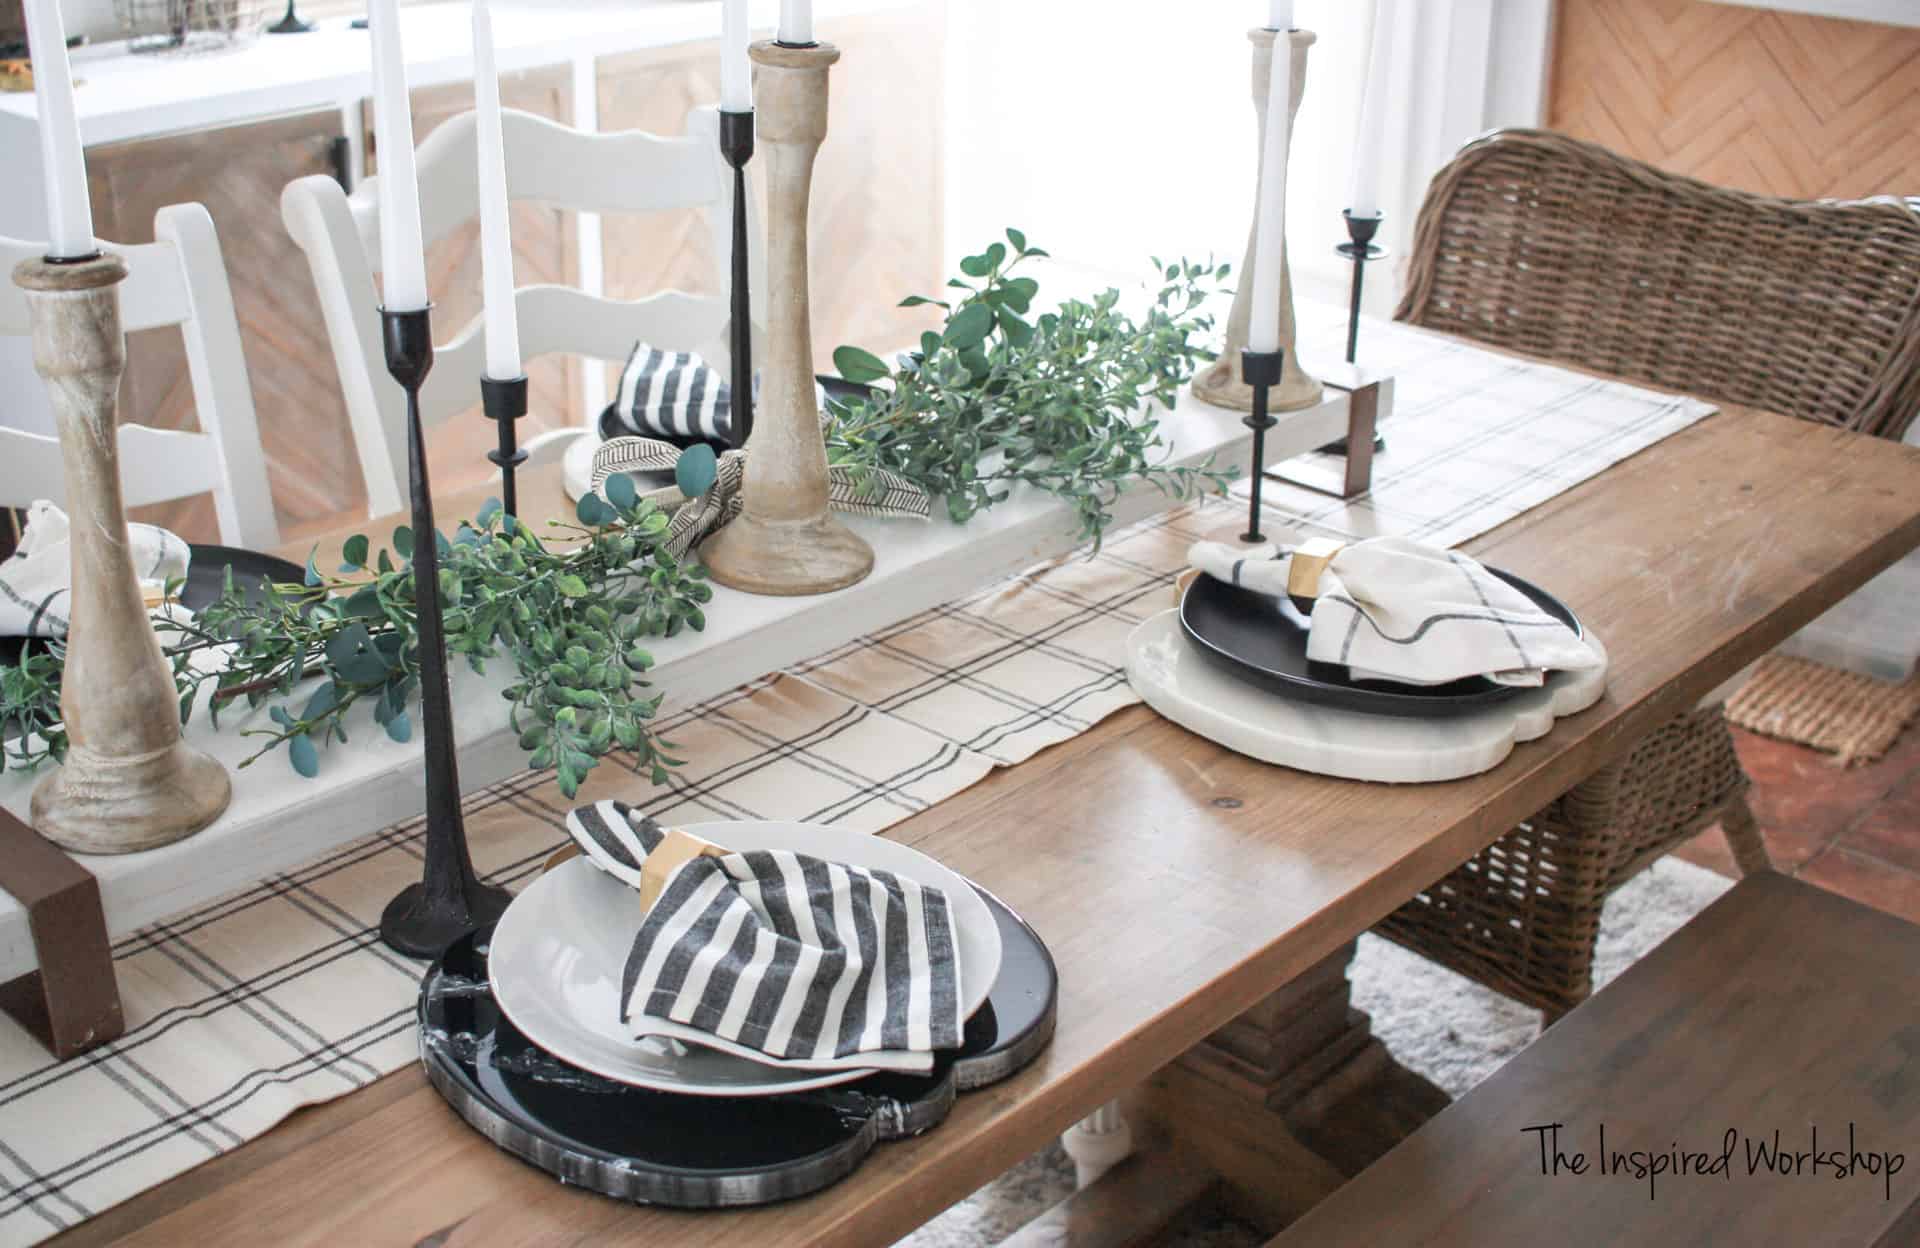
See the hexagon napkin rings in the photos?!
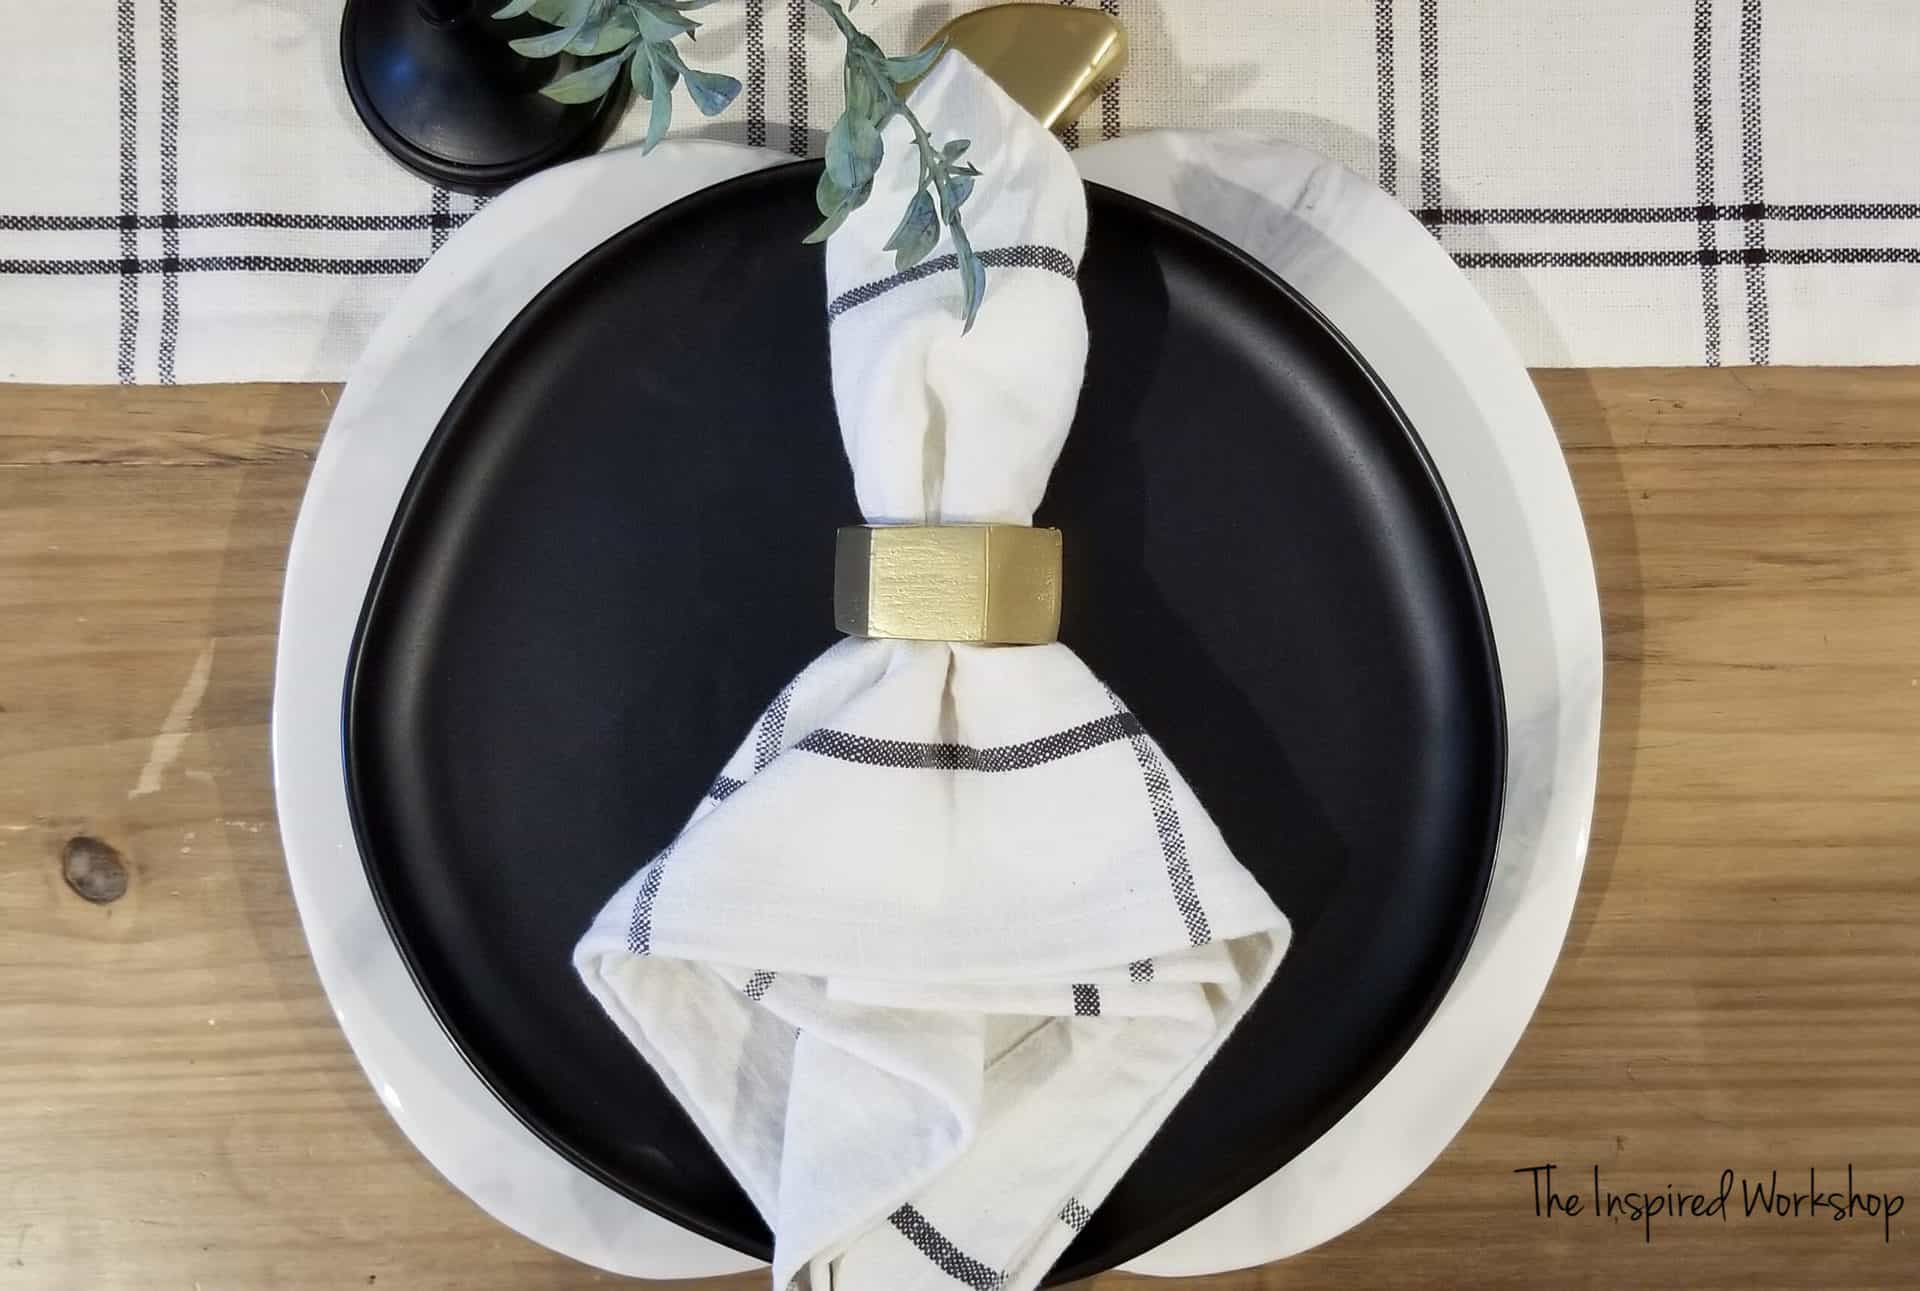
They are so inexpensive, easy to make, and can go with ANY table setting you create!
If you follow me on Instagram or Facebook, you saw a year or so ago, I shared making a marble epoxy countertop pour that I was INTRIGUED by! I have been wanting to create faux marble epoxy projects of all kinds ever since, and in the last few days, I have fulfilled this desire! 😅 Wanna see all the marble epoxy projects?
I made this awesome set of epoxy coasters, and this amazing marble epoxy top round table, I have a few others coming soon as well!
I LOVE all the marble epoxy and would be happy to receive any of these projects as a gift! Not only is it a handmade gift, but it looks REALLY good too! And marble is so expensive that this is a WONDERFUL alternative! From hostess gifts to actual Christmas gifts, you will want to grab a couple of bottles of epoxy resin and get busy!!😍
Could you imagine an ornament just like this for a Christmas table setting, they could be red and green marble, or solid red and solid green…the ideas just run amuck in my mind!! SO. MANY. IDEAS.😂🤓
Wanna save this for next fall?! Make sure and PIN IT!
Okay back to the tutorial for the DIY marble epoxy pumpkin chargers! Here’s the PUMPKIN PATTERN if you want to cut your own! But you could also make squares, circles, hexagons (as I did), or any other shape you can cut! Dream up something amazing, just make sure to share it with me!😊 I LOVE seeing your ideas and projects!

Materials for DIY Marble Epoxy Pumpkin Chargers:
-3/4″x4’x4′ project panel plywood (easily makes 9-10 pumpkin chargers)
–scroll saw or jigsaw
–epoxy resin – this is the one I used, this is a great deal on Amazon as I paid the same at Hobby Lobby but had to pay an additional 12 dollars for the mixing measure cups! Also if you want to make more than 6 you can buy 2 sets, but I think I would just order a larger set, you can get 2 gallons for 70 bucks…you know how many epoxy pours you can do with that?!😍
–white matte acrylic paint (or whatever color you want as your base color)
–gray spray paint (or whatever color you want to accent with)
-paper plate
-paintbrush – cheap…does NOT need to be quality, the cheaper the better so you can trash it when done!
-plastic drop cloth (I used an outdoor trash bag)
Making DIY Marble Epoxy Pumpkin Chargers
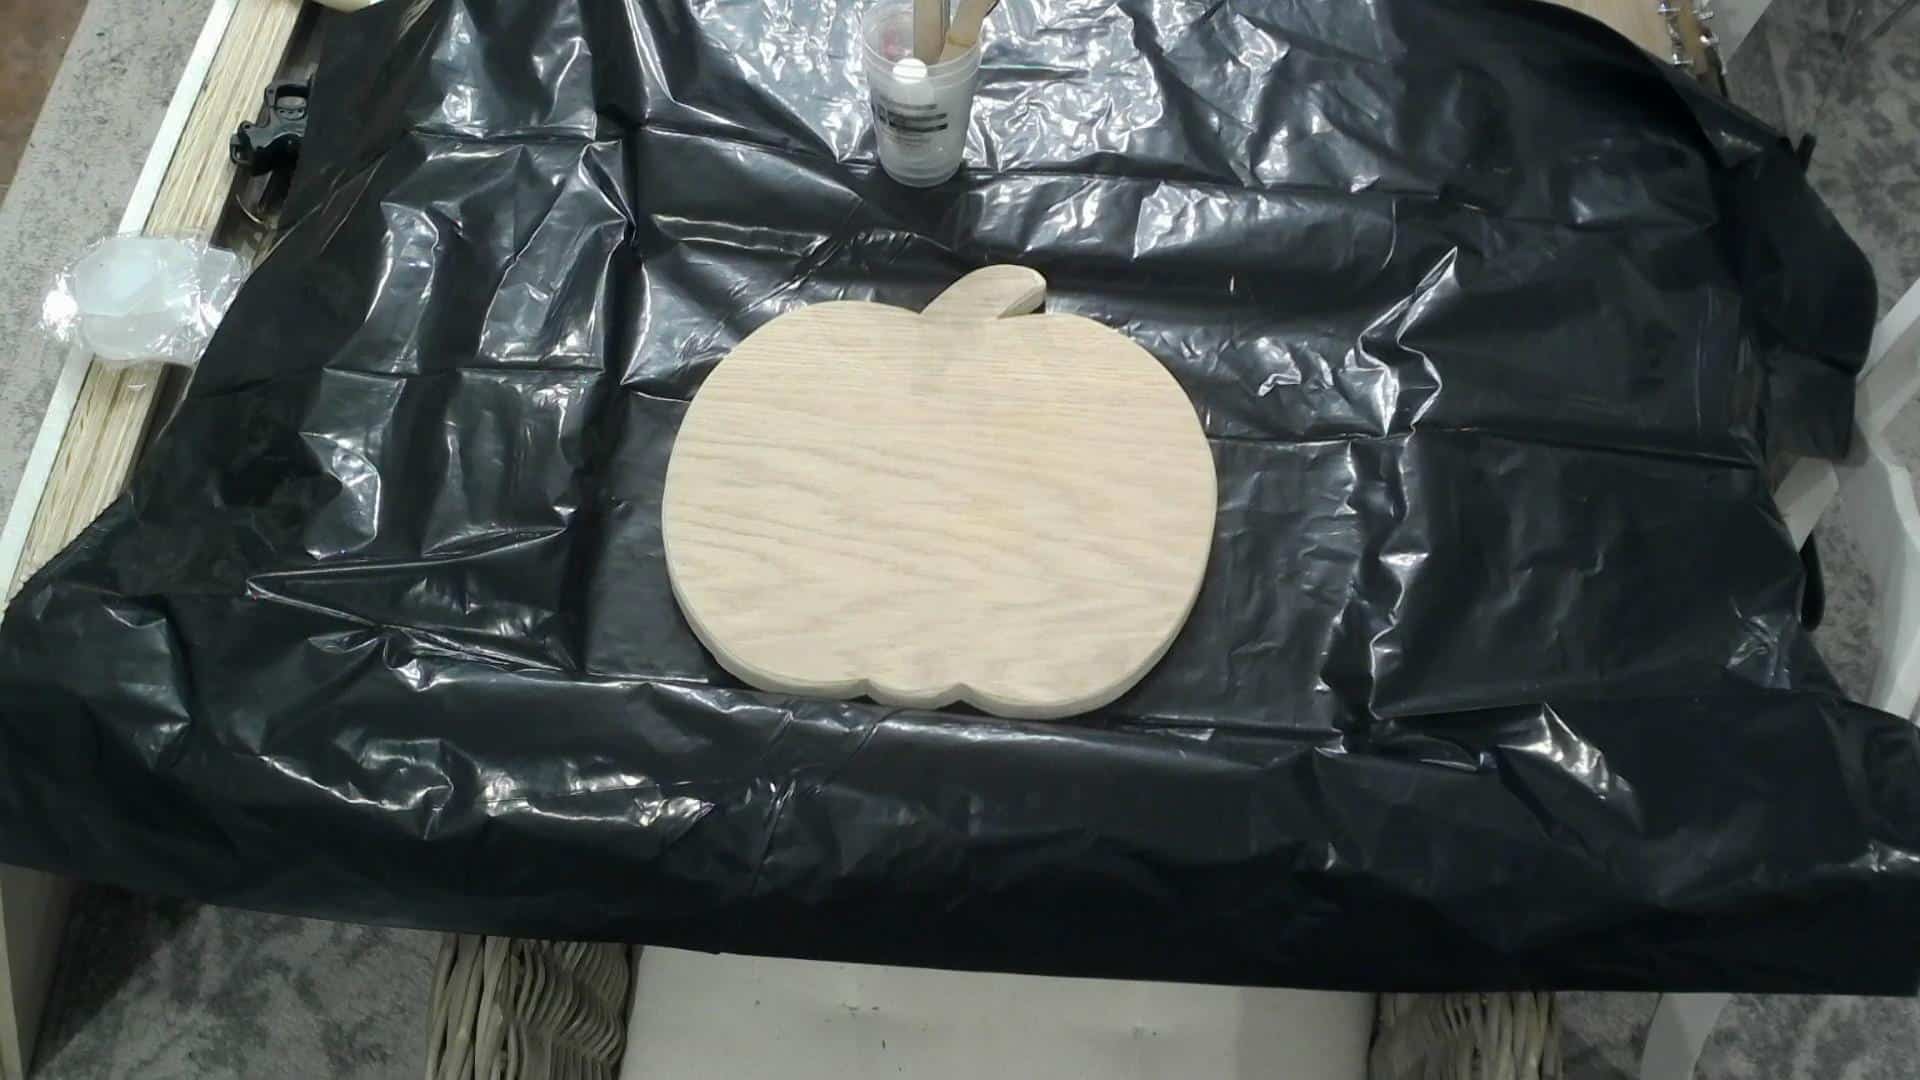
Cutting the Pumpkin Shape out of Plywood
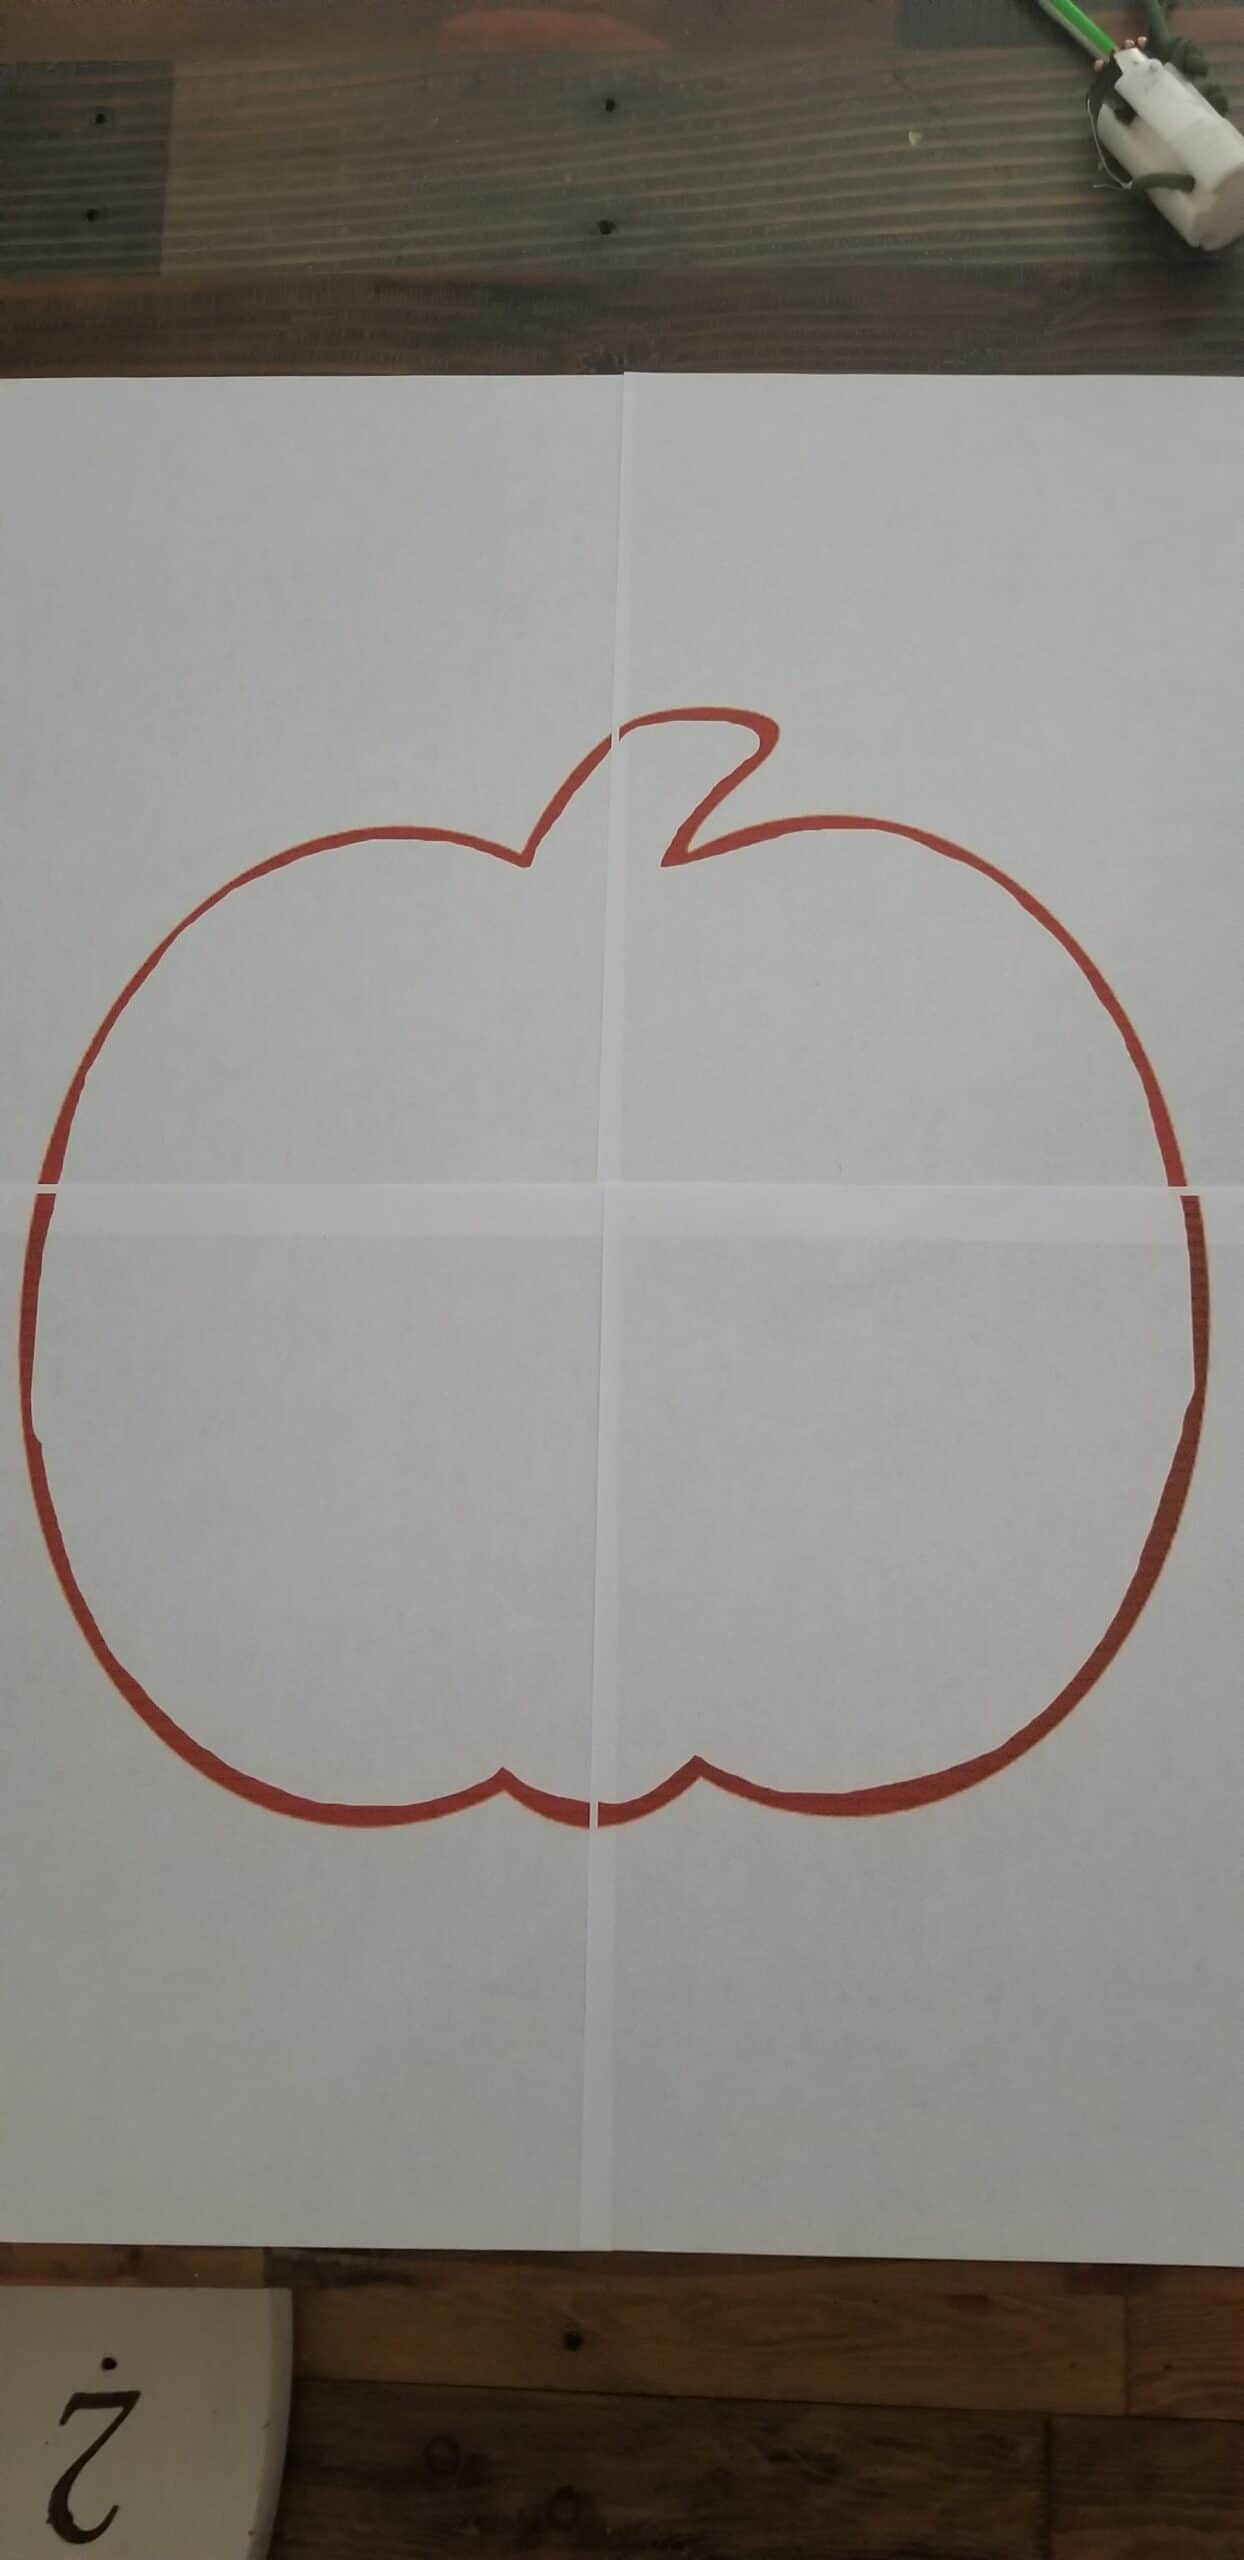
I used plywood simply because I had a lot of smaller pieces that were scrap, and the pumpkin pattern is about 14″x14″ so there isn’t any off-the-shelf lumber that will accommodate the pattern!
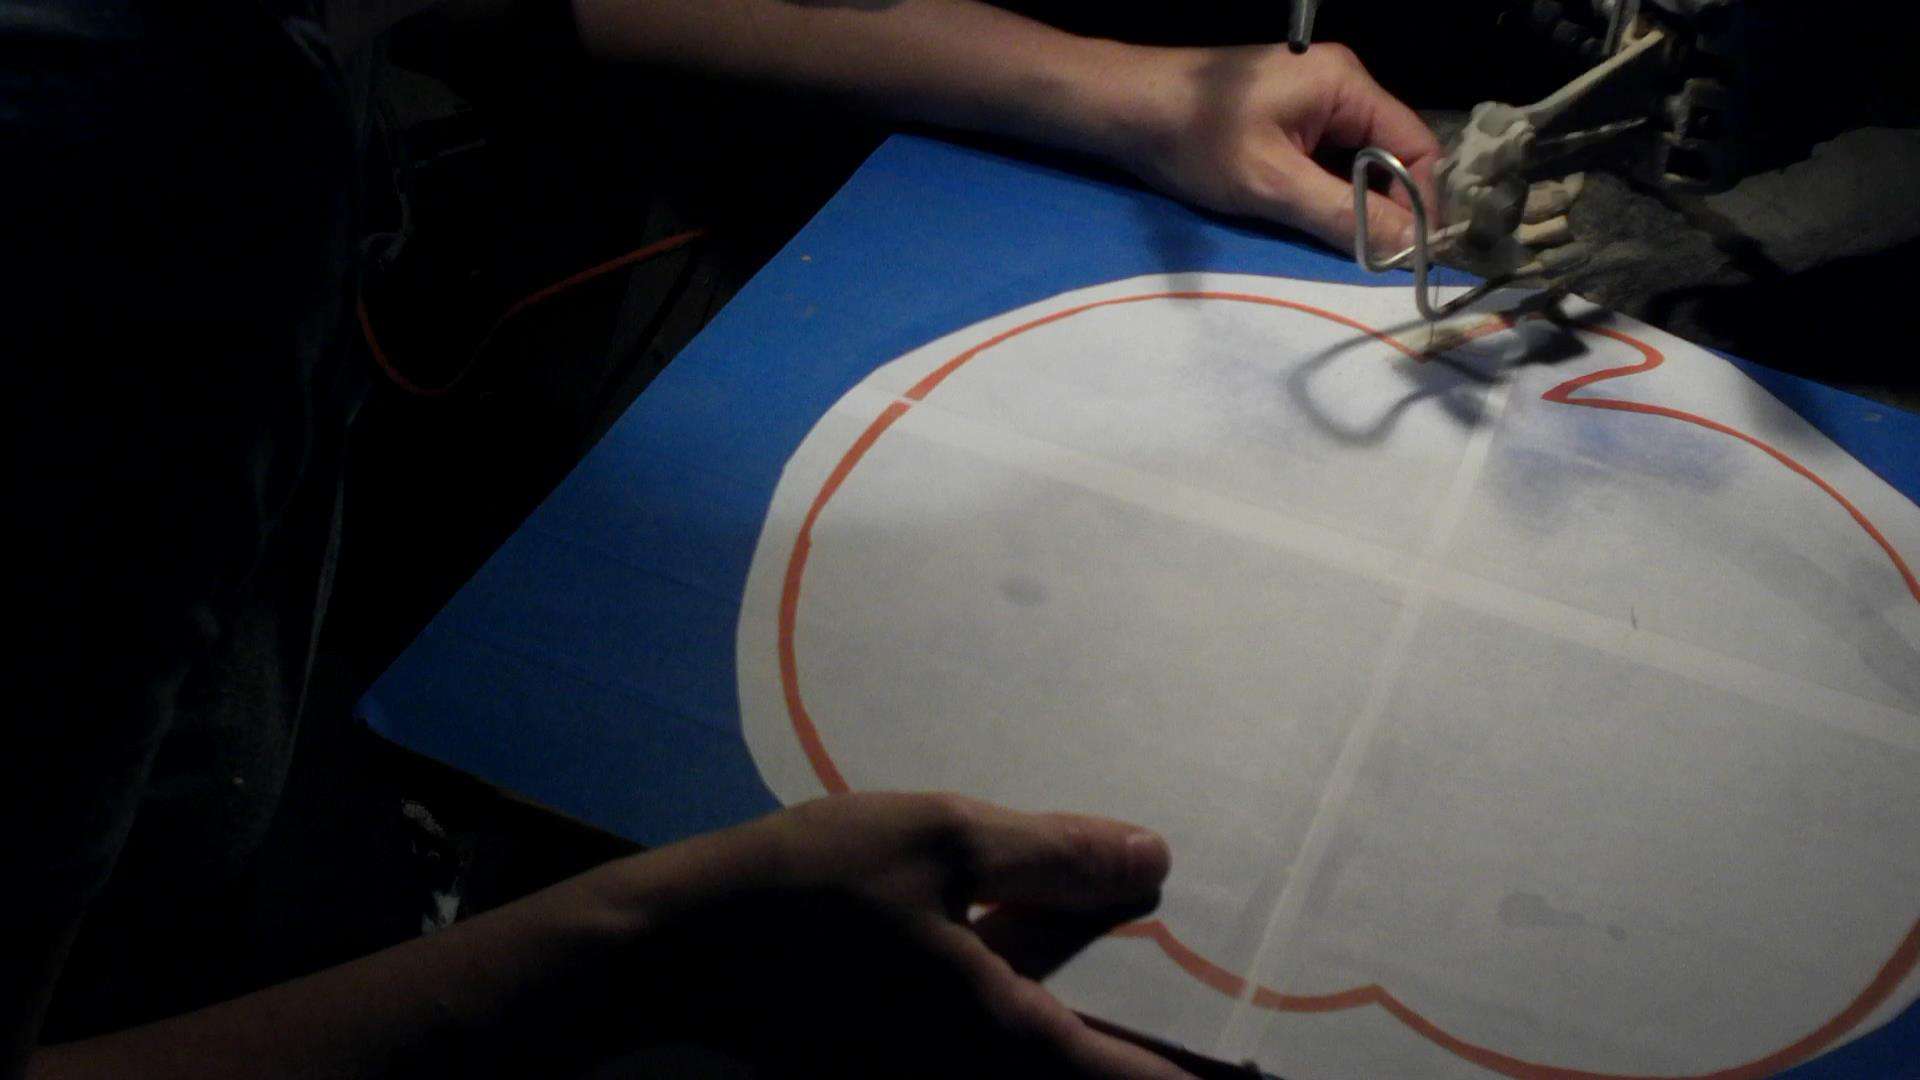
You will need to print the pumpkin as a poster, this will tile the pumpkin on multiple pages so that it will be the correct size! If you haven’t downloaded the pattern yet, here it is! PUMPKIN CHARGER PATTERN
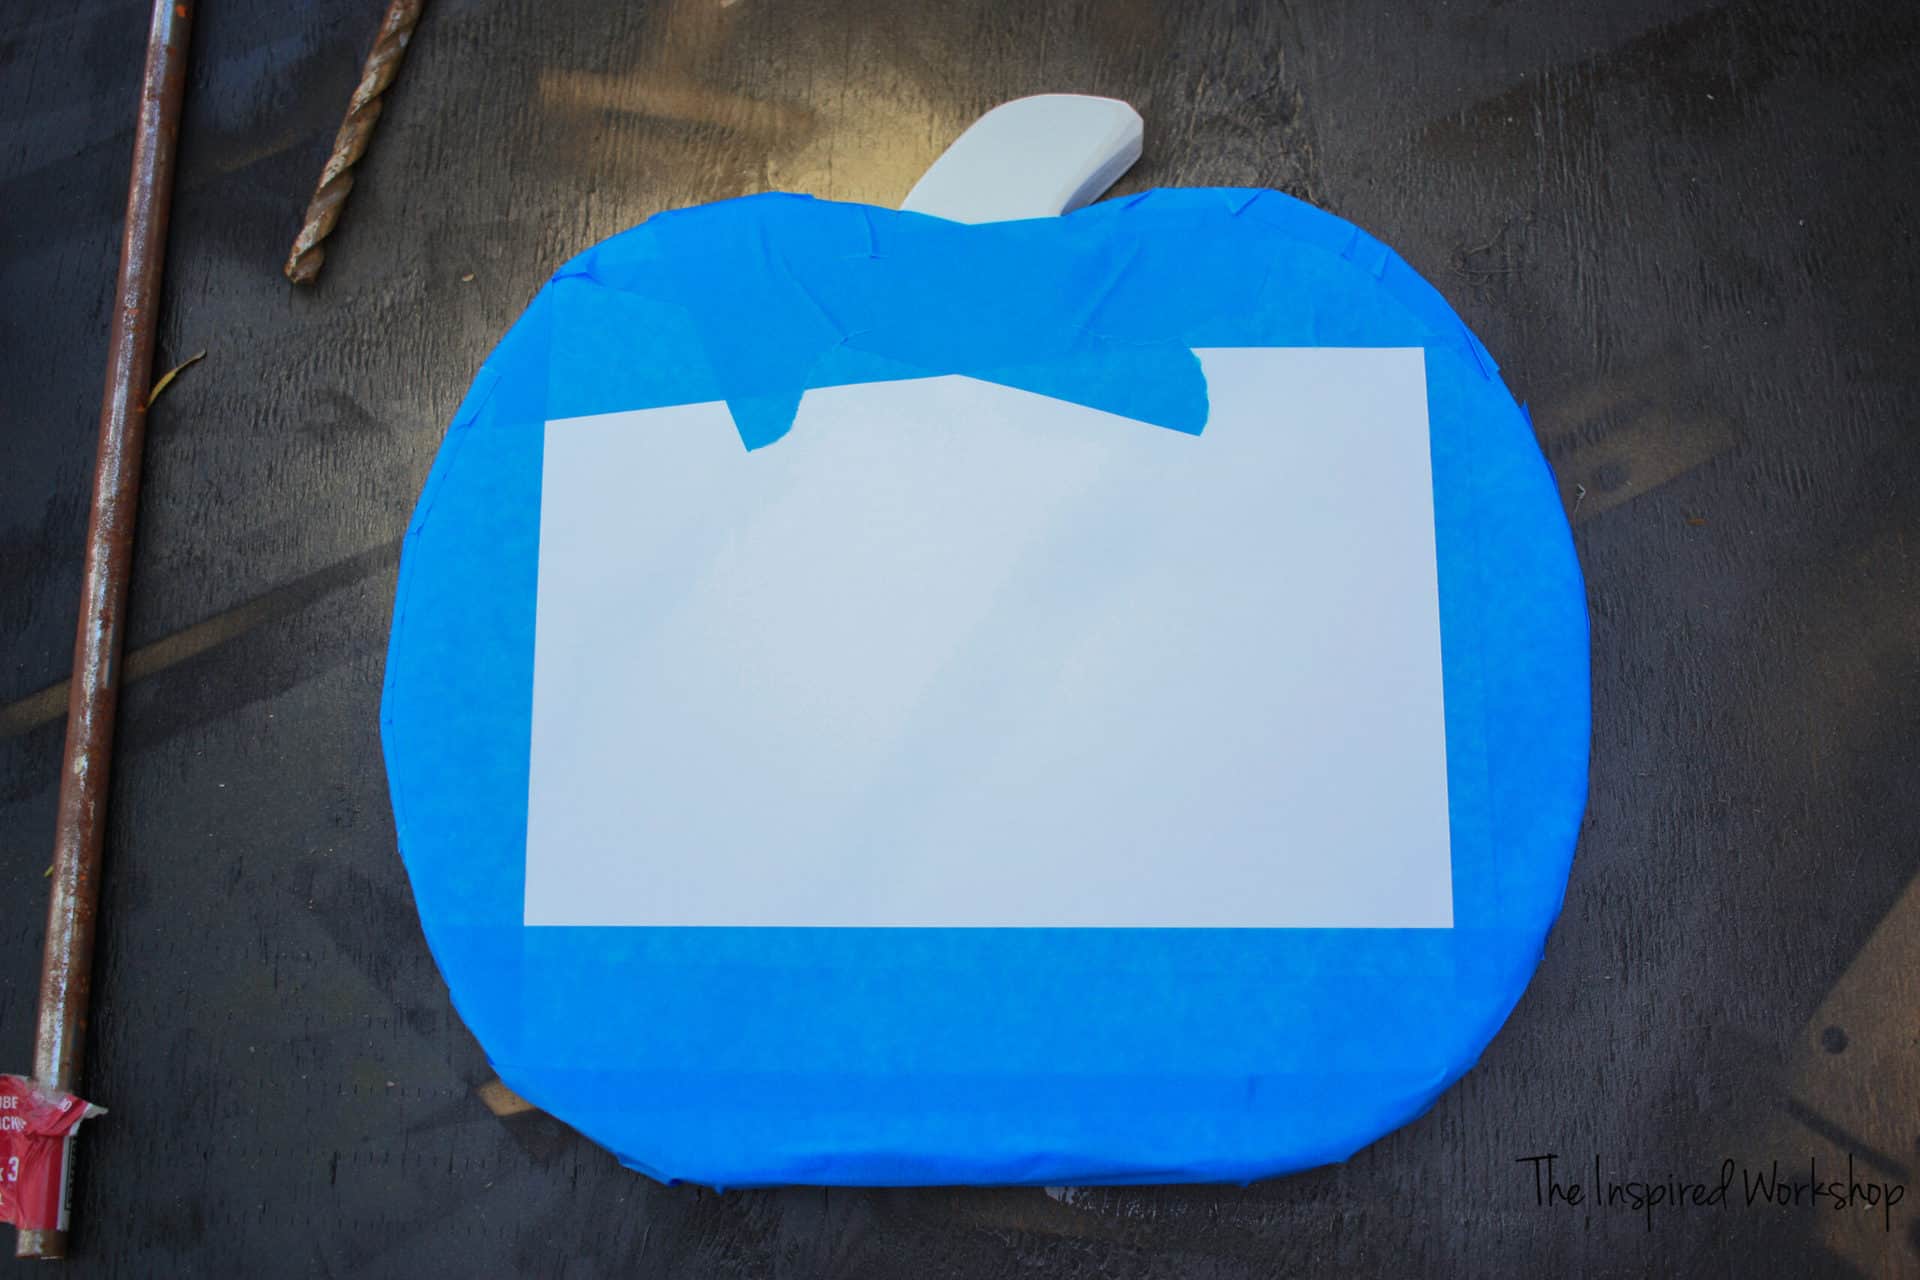
You will then tape the pumpkin pages together.
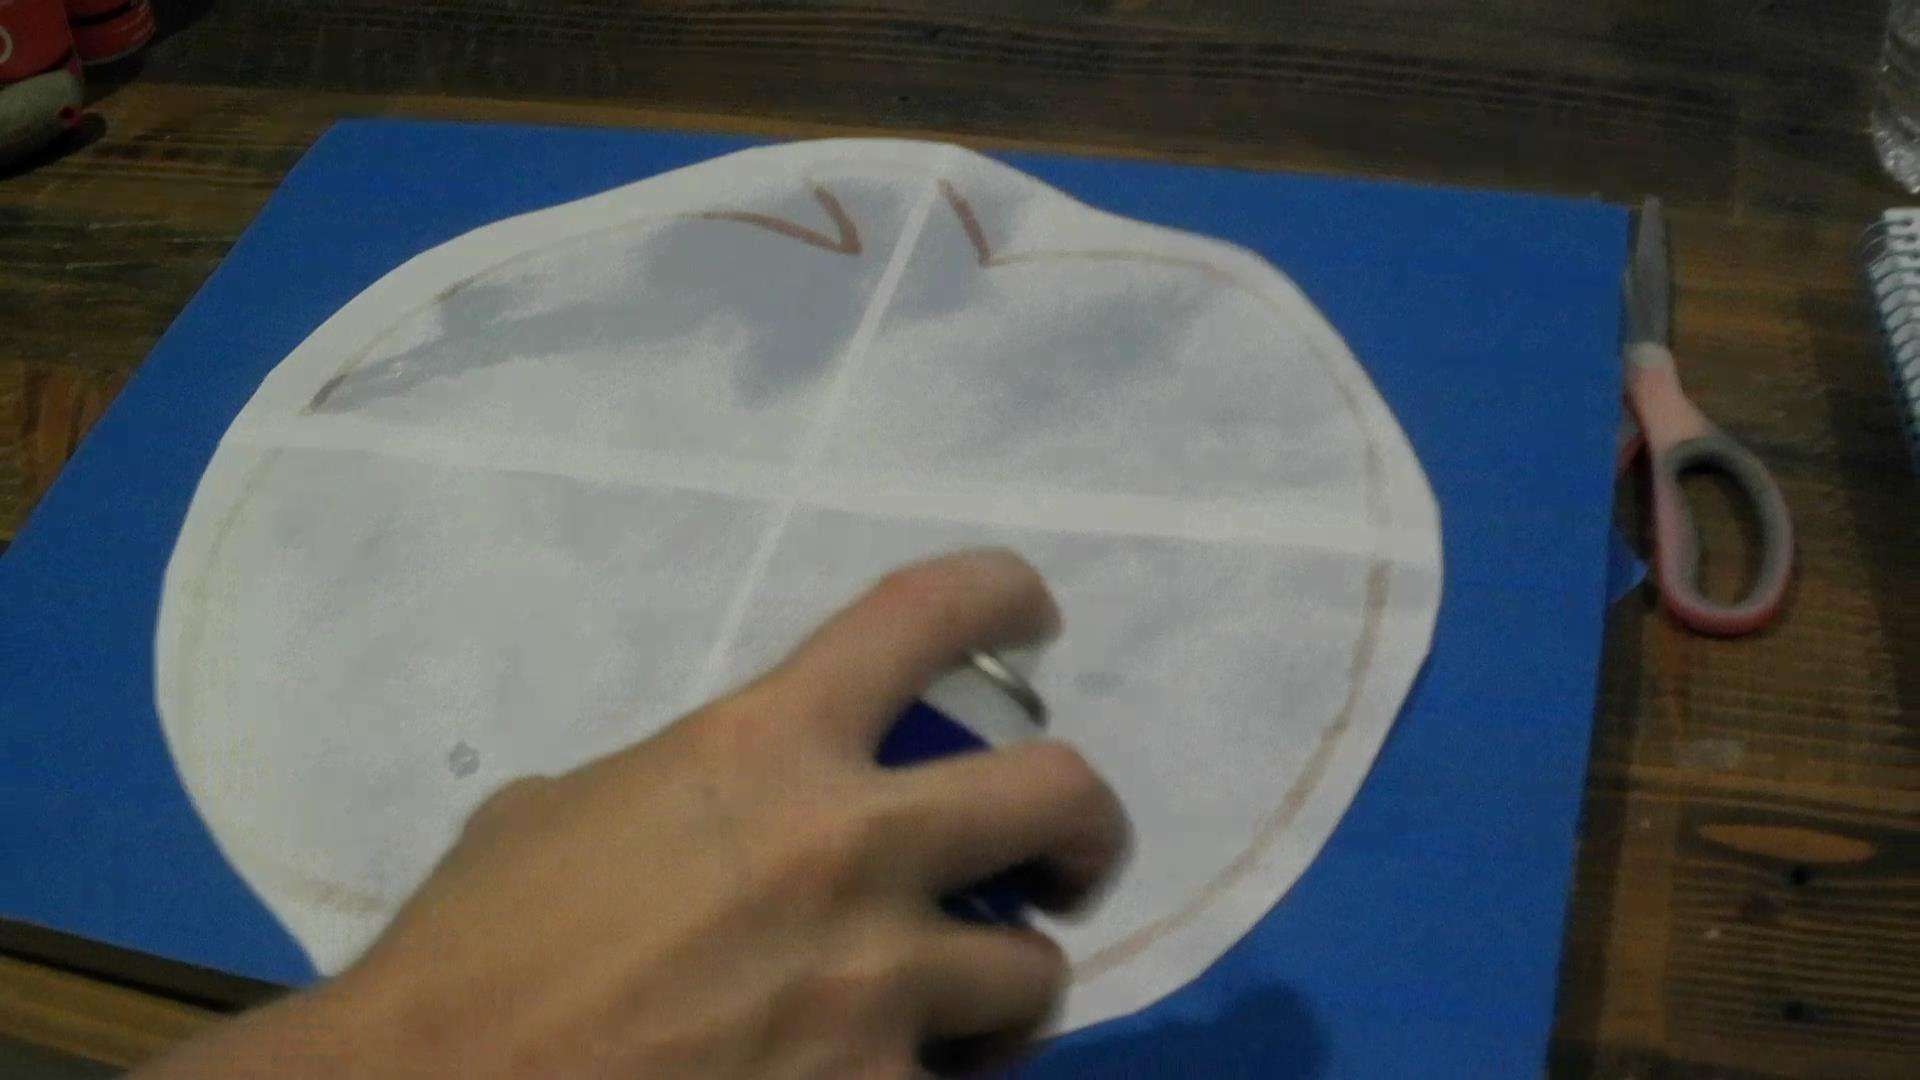
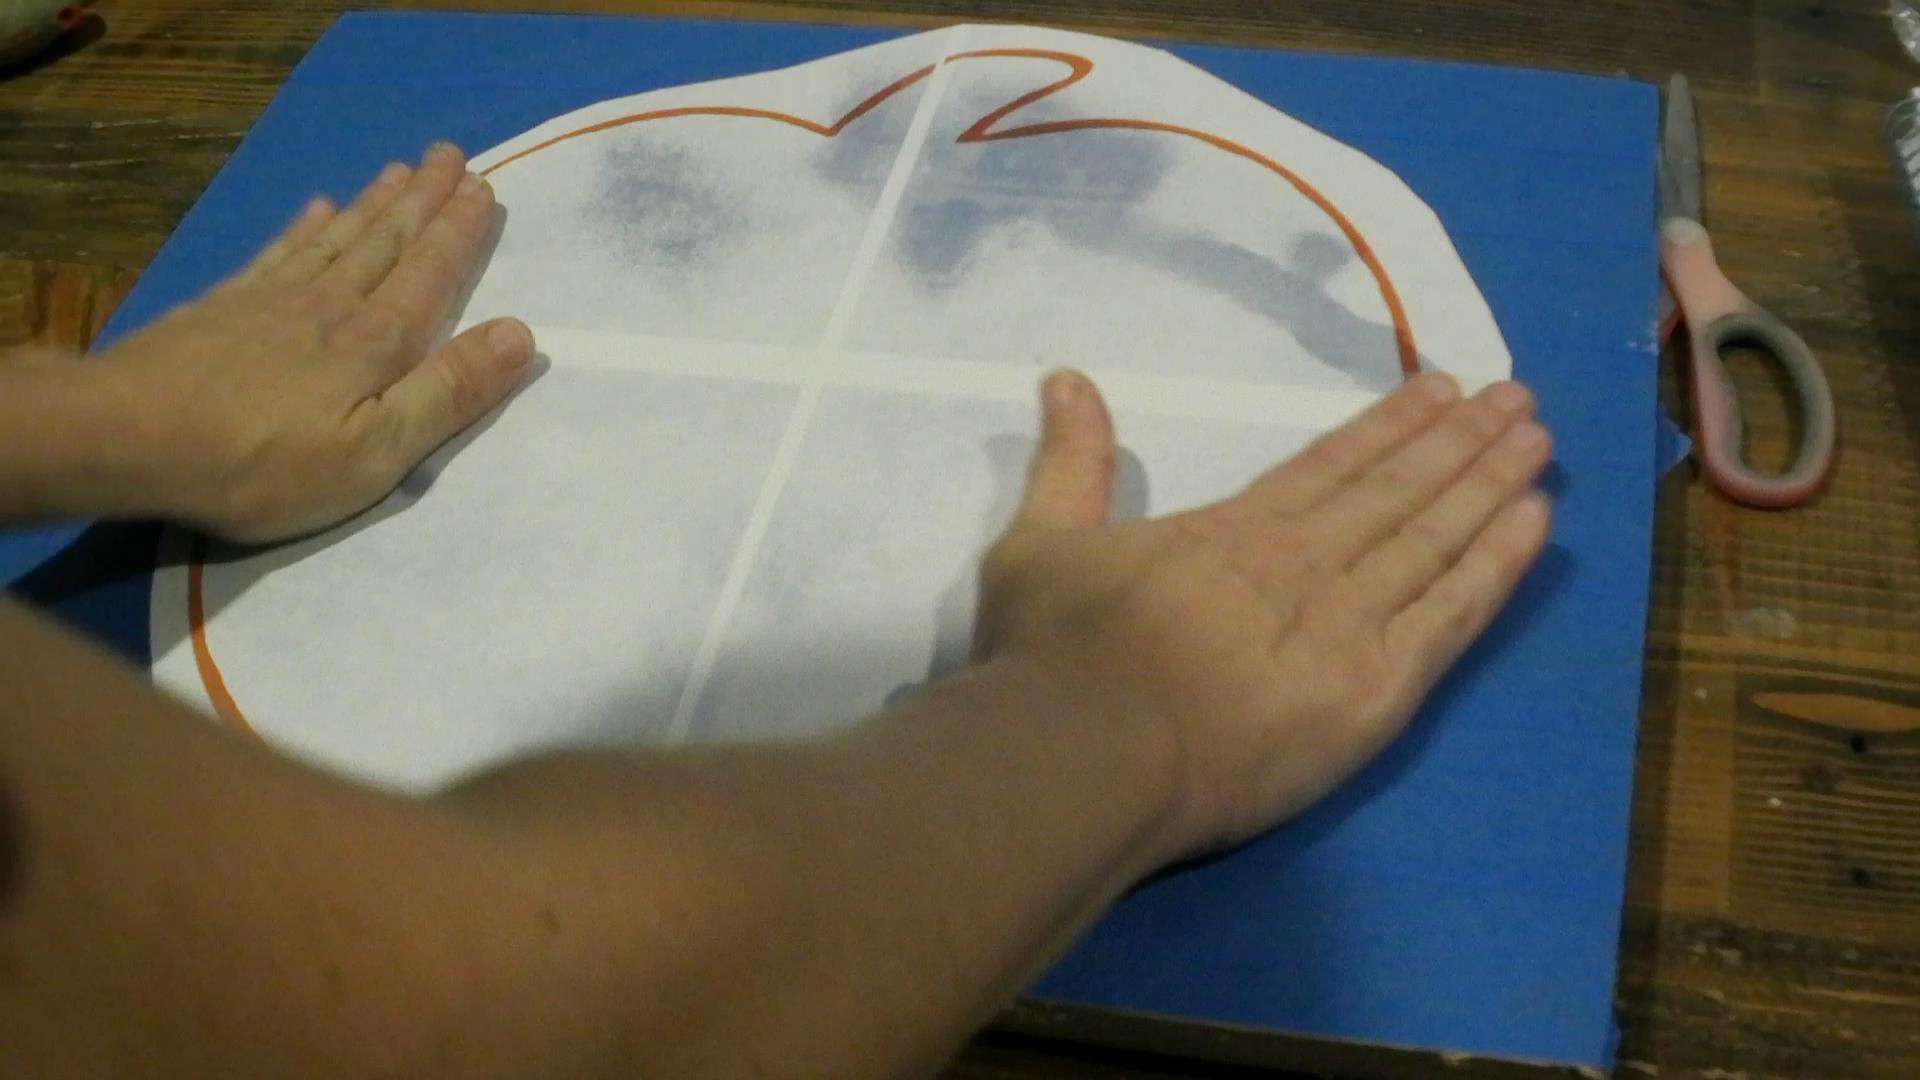
Using painter’s tape, cover the plywood where the pumpkin pattern is going to be placed. Then spray the back of the pumpkin pattern with adhesive, and stick it to the painter’s tape! This keeps the plywood from becoming sticky from the pattern!
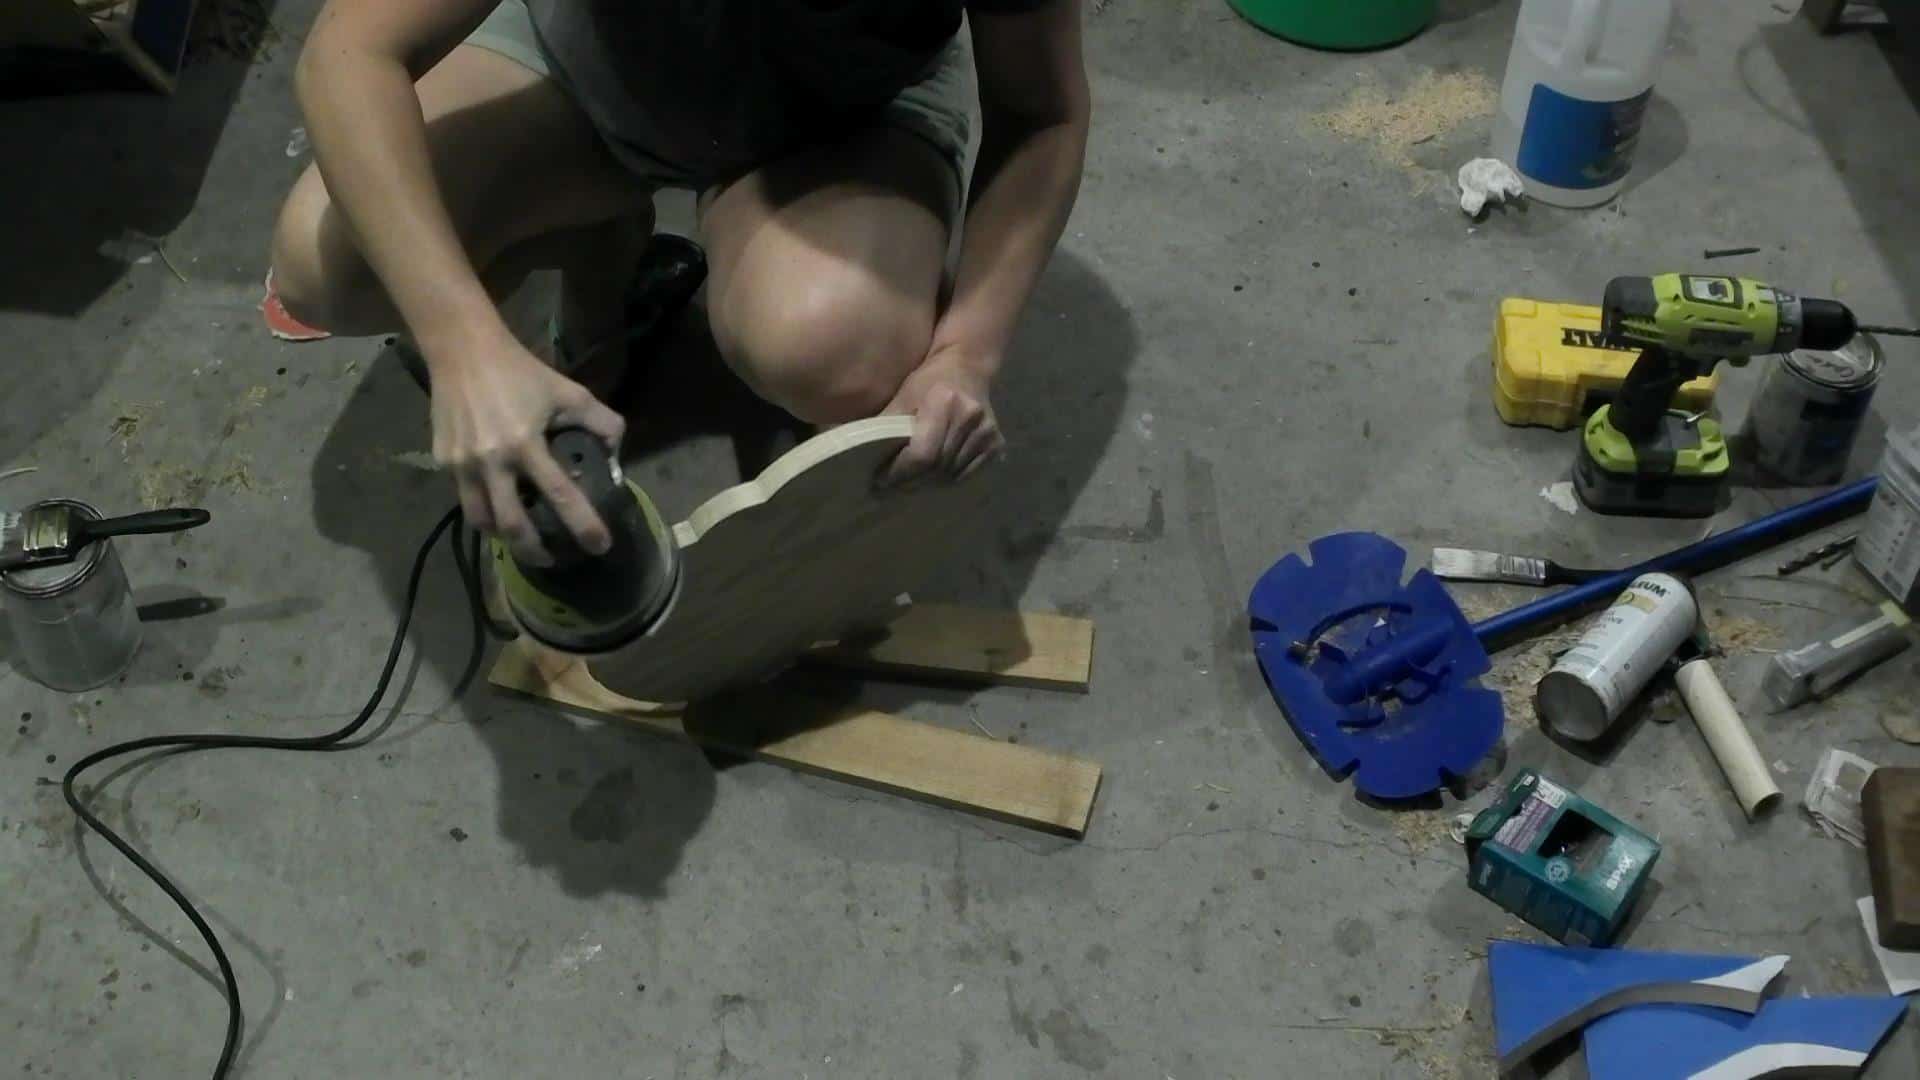
Using a scroll saw or jigsaw, cut out the pumpkin shape!
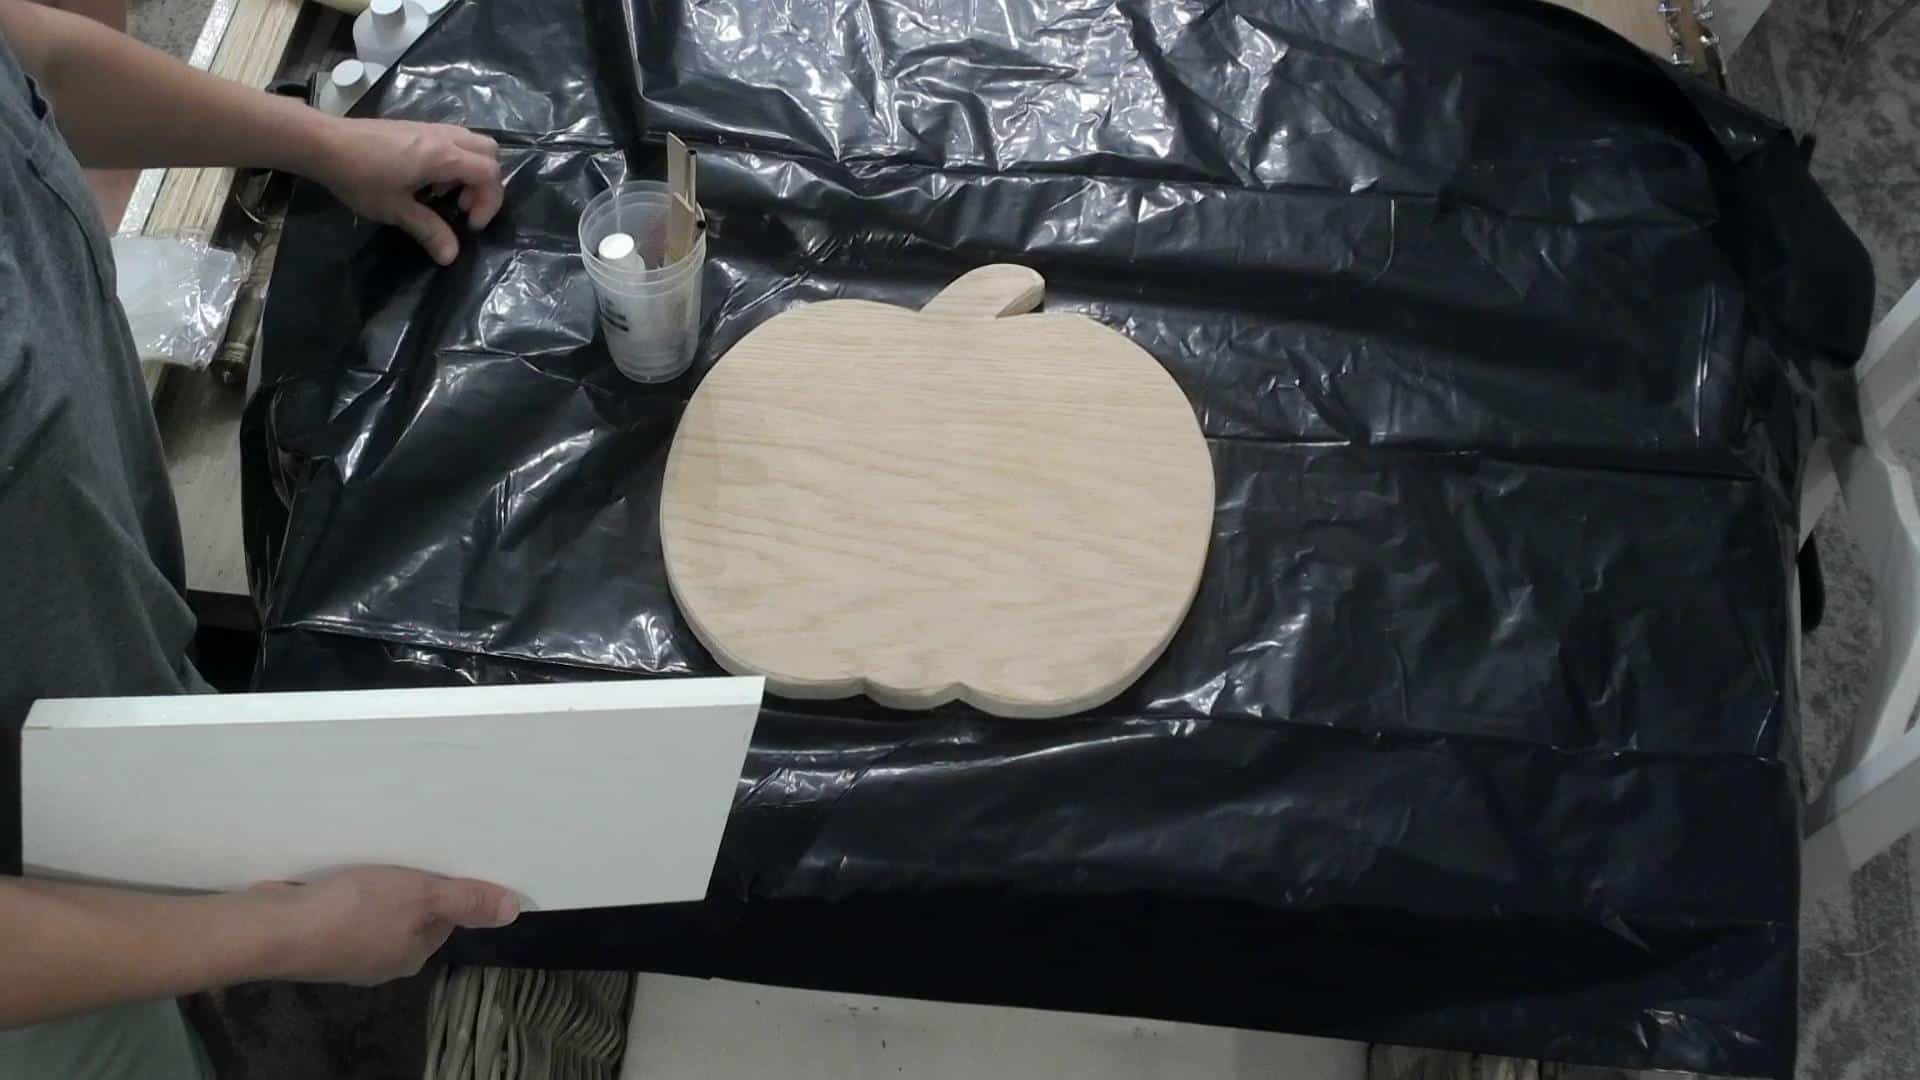
Sand the edges to make it smooth, also try and lightly round over the edges of the pumpkin to help the epoxy flow over the edge!
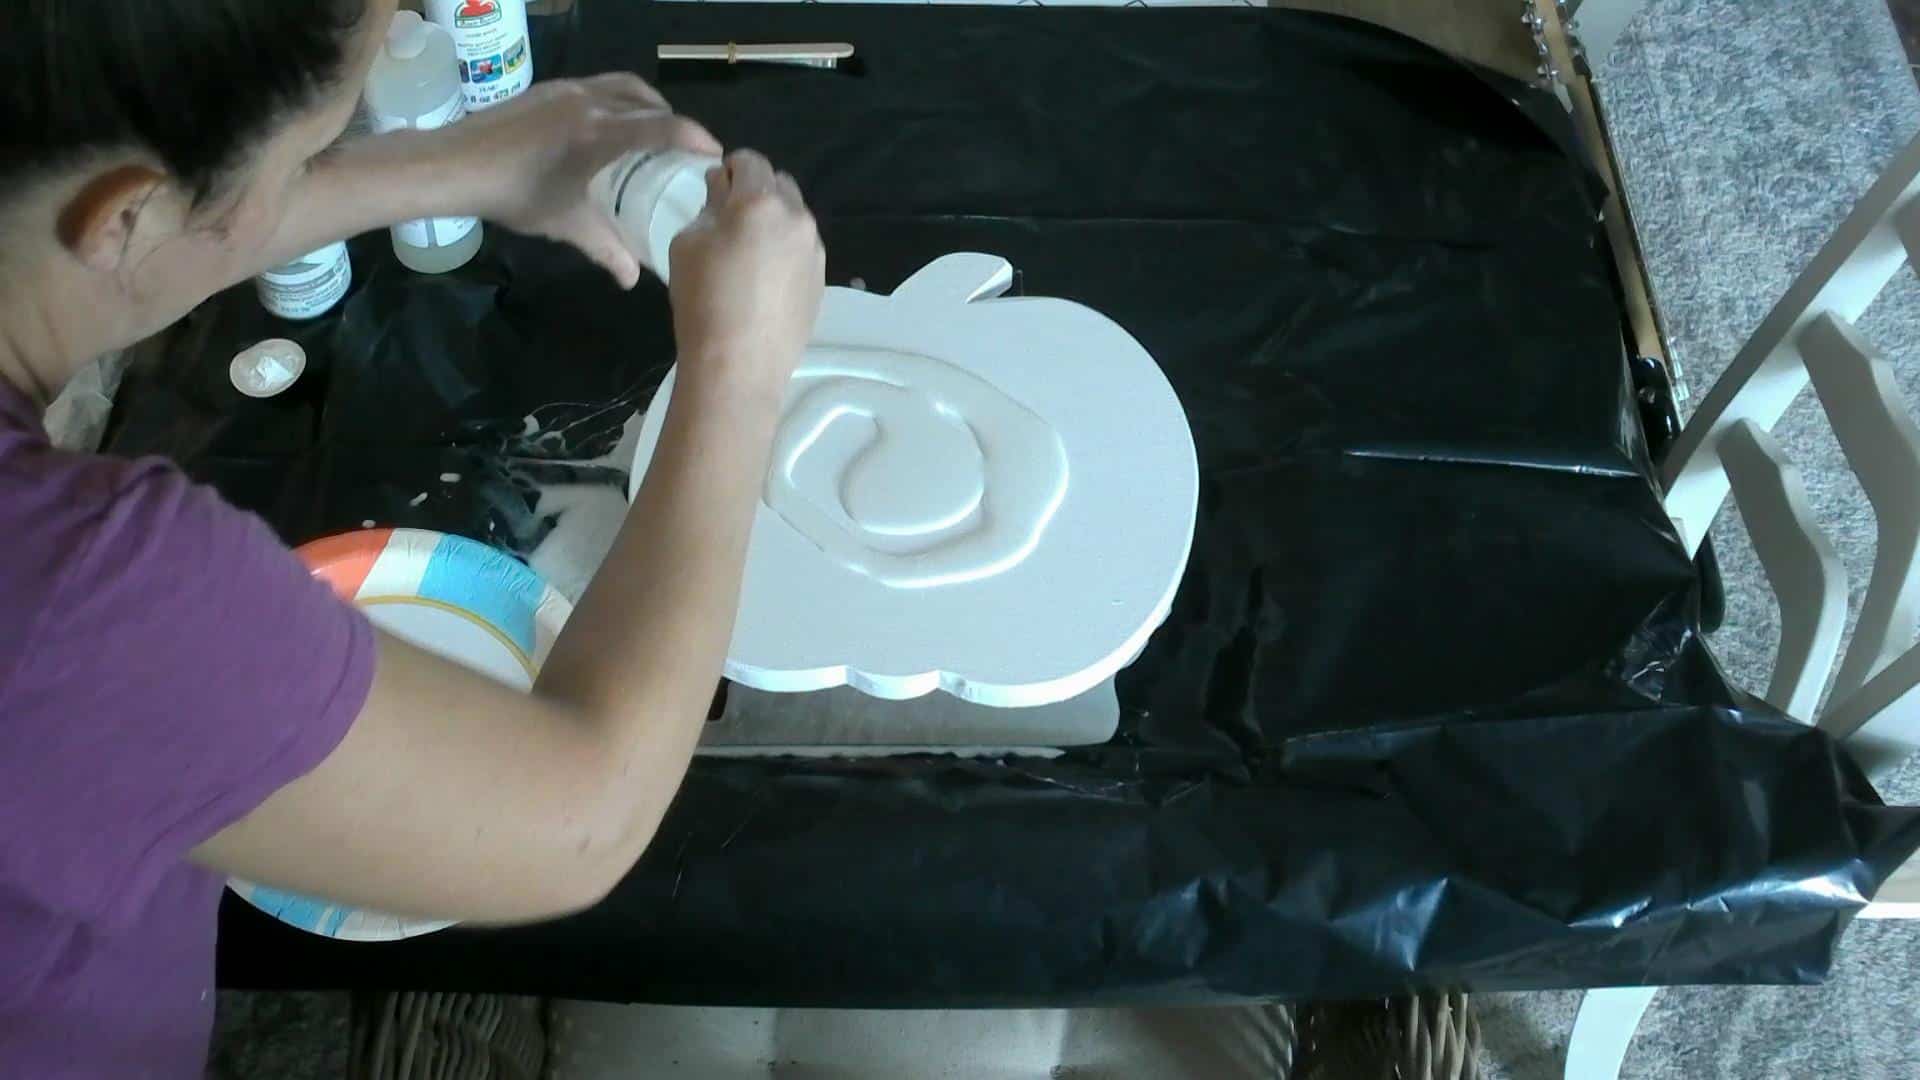
Paint your pumpkin edges or the whole thing, whatever color you plan on pouring over your pumpkin. I painted mine white because I was pouring white over it! Make sure you paint the edges well if you don’t want to see the plywood through the epoxy! Lol! Again, just ask me how I know?!😬
Setting Up to Pour Epoxy
You will need to set up your space to keep from making a huge mess! I used a contractor bag instead of a drop cloth, because crazy as it is, the epoxy comes straight off and I can still use the bag! Lol!
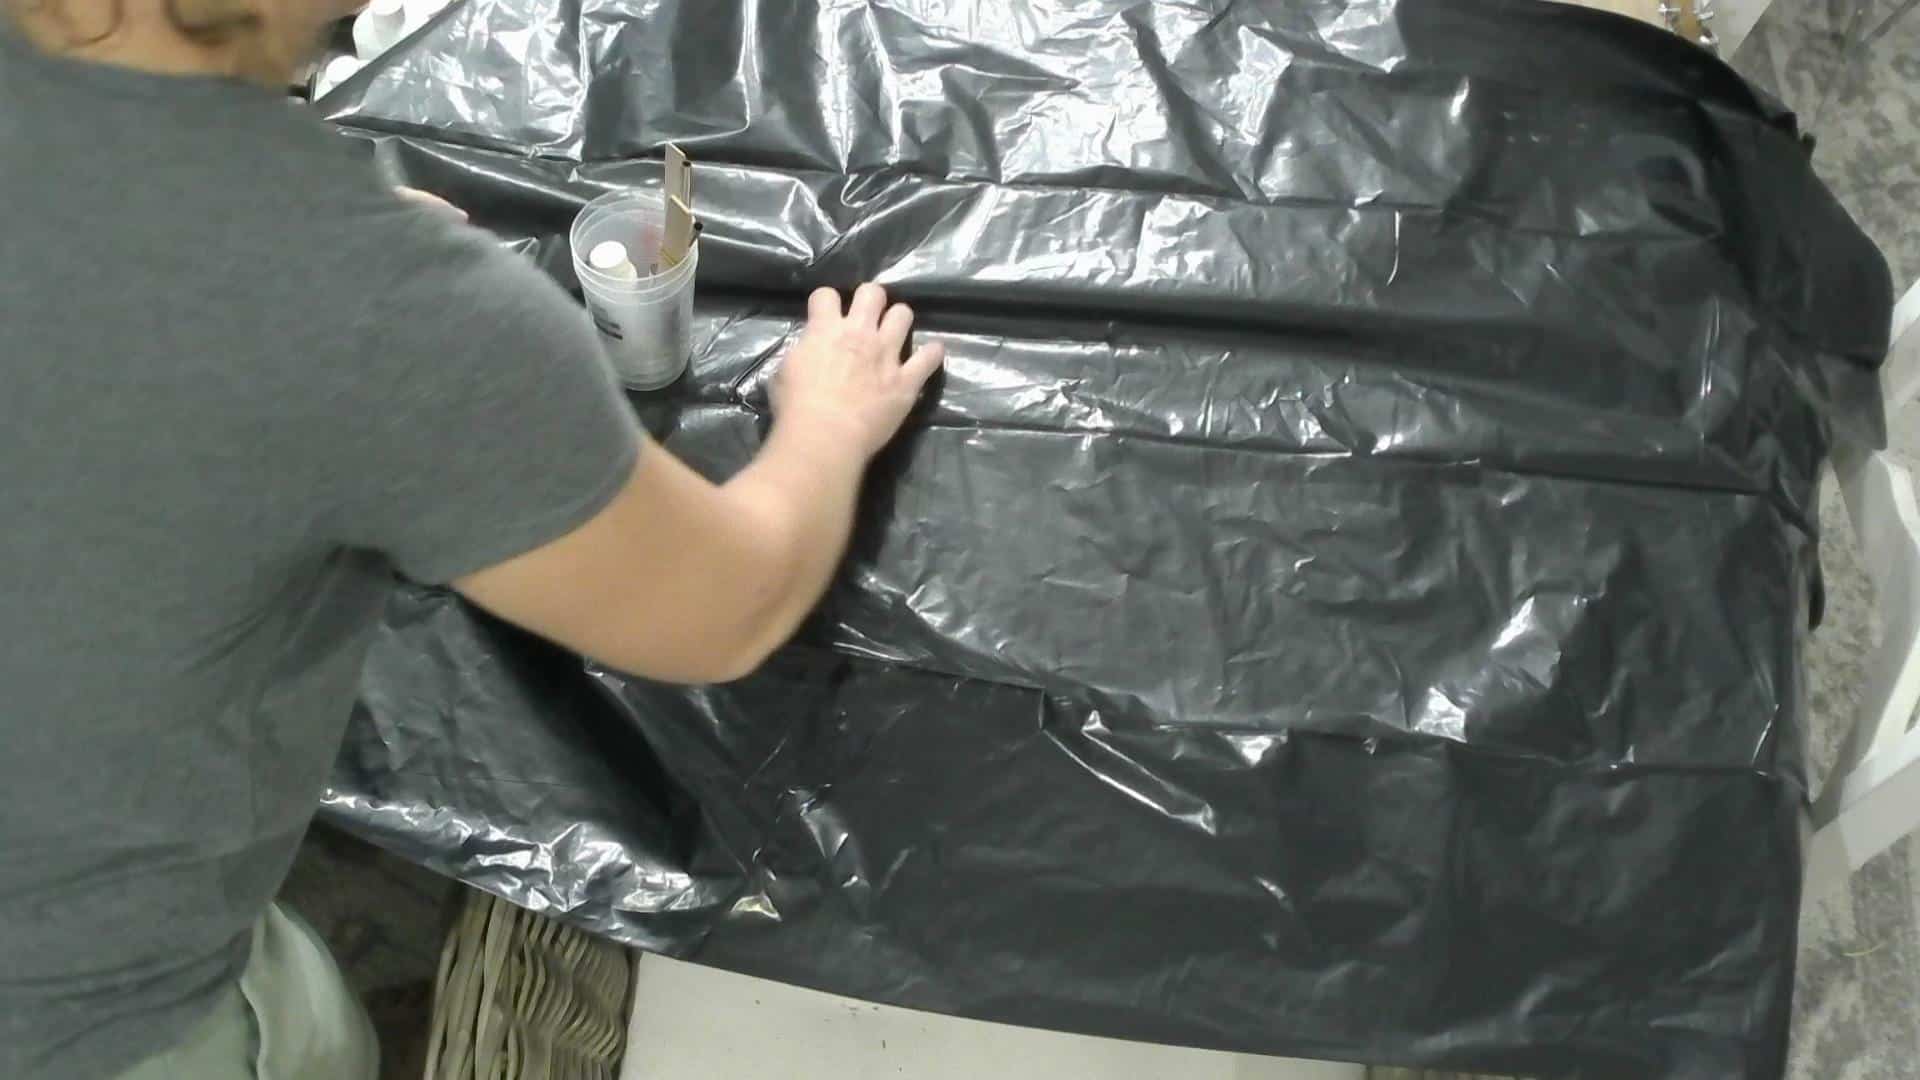
Set scrap boards or anything really to create a dam to keep the epoxy from running off the table. Place them under the drop cloth or trash bag!
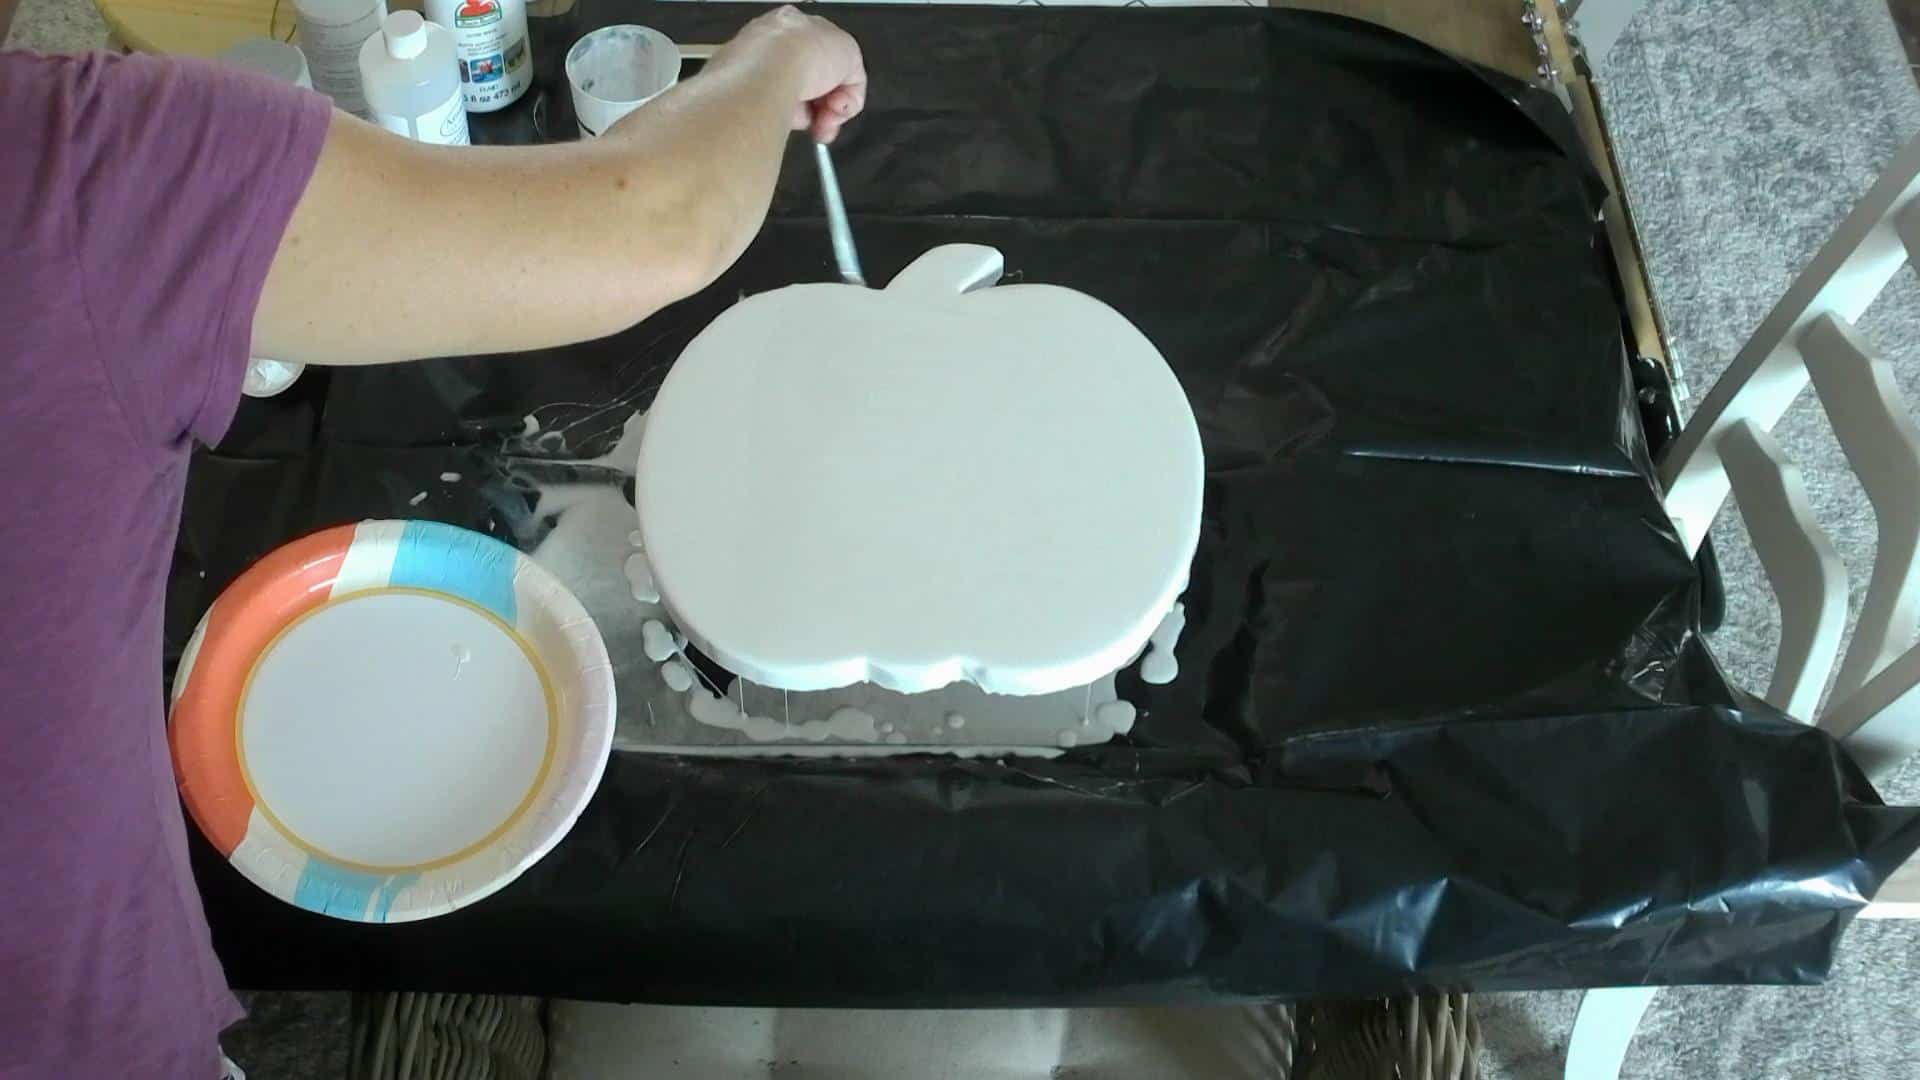
Set your pumpkin up on something, I used painter’s triangles for some and also just quart paint cans…they both work great! You just want the epoxy to be able to run off the edges, if you don’t lift it up, it will dry looking like your pumpkin melted 😂 and that is not the look we are going for!
Pouring the Marble Epoxy Over the Pumpkin
Mix the epoxy just as the directions tell you, usually a 1:1 ratio…basically, however much you pour of part A, you match with part B, it’s pretty simple! For each pumpkin it will take 5 oz. so you will mix 2 1/2″ ounces of A and 2 1/2″ ounces of B. If you are doing all your pumpkins at once, you can use a measuring bucket instead of the little cups and mix enough for all of them at once!
Add the acrylic paint to your mixed epoxy resin and stir the paint until it’s all white or whatever color you are going for. Then…drumroll, please…POUR THE EPOXY!!
It is sooooo satisfying!! Start in the middle and only pour a little, so you can see how fast…or slow it flows. Depending on the speed, you may want to pour around the edges, but no matter where you pour it, you can use a popsicle stick to spread it around, or a gloved hand, paintbrush, etc.
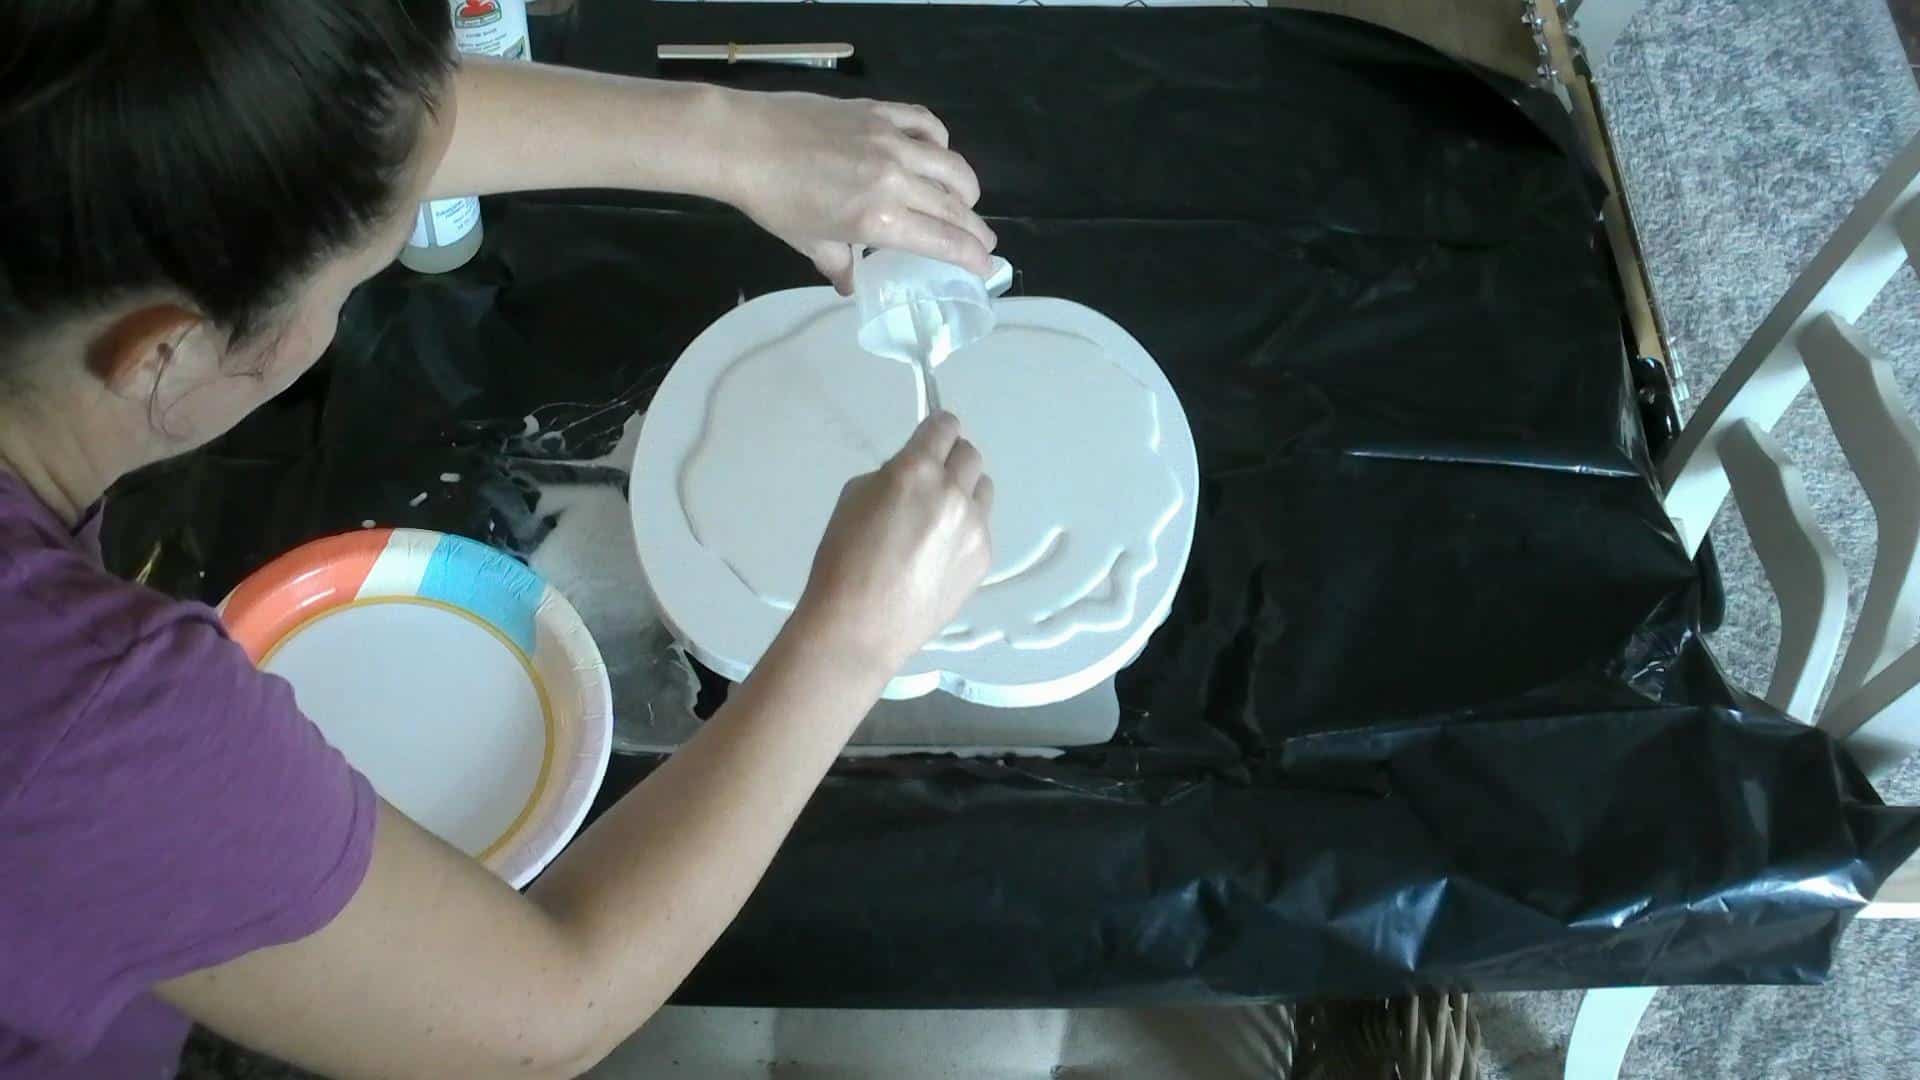
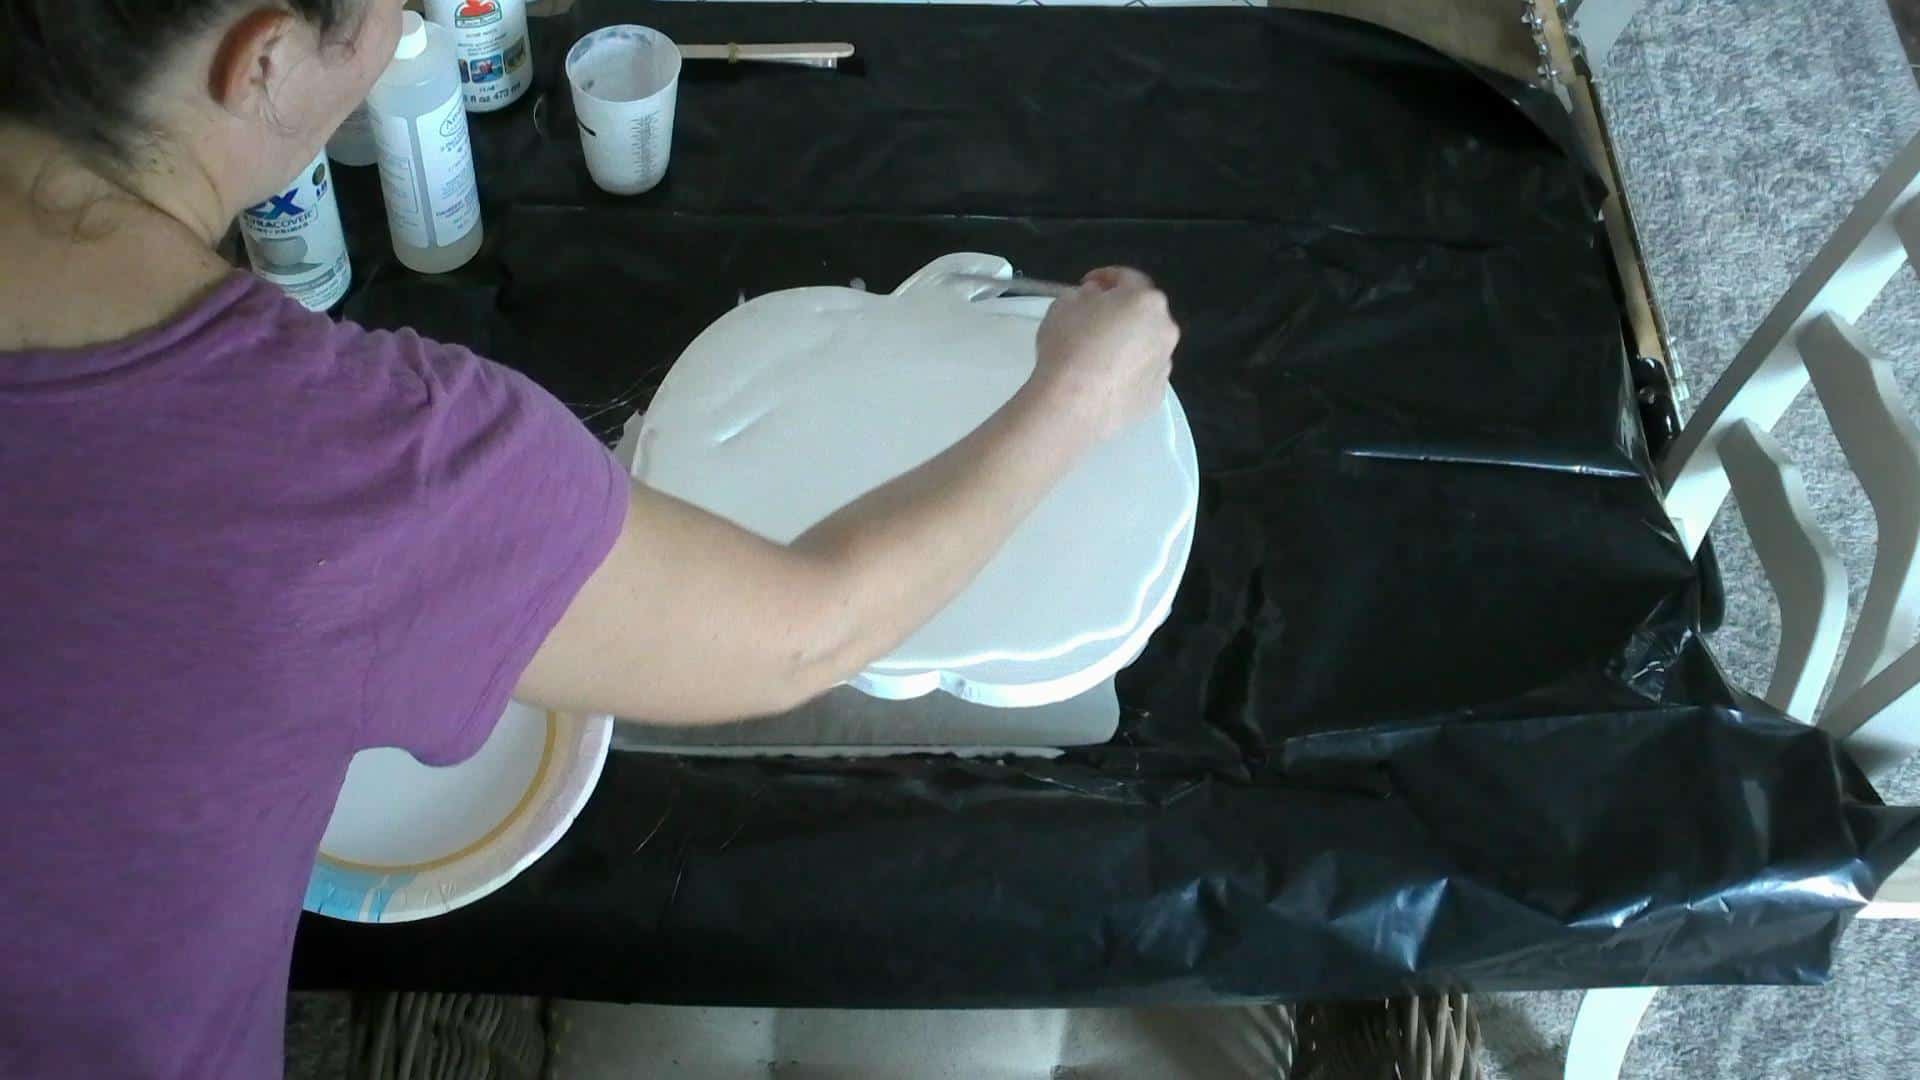
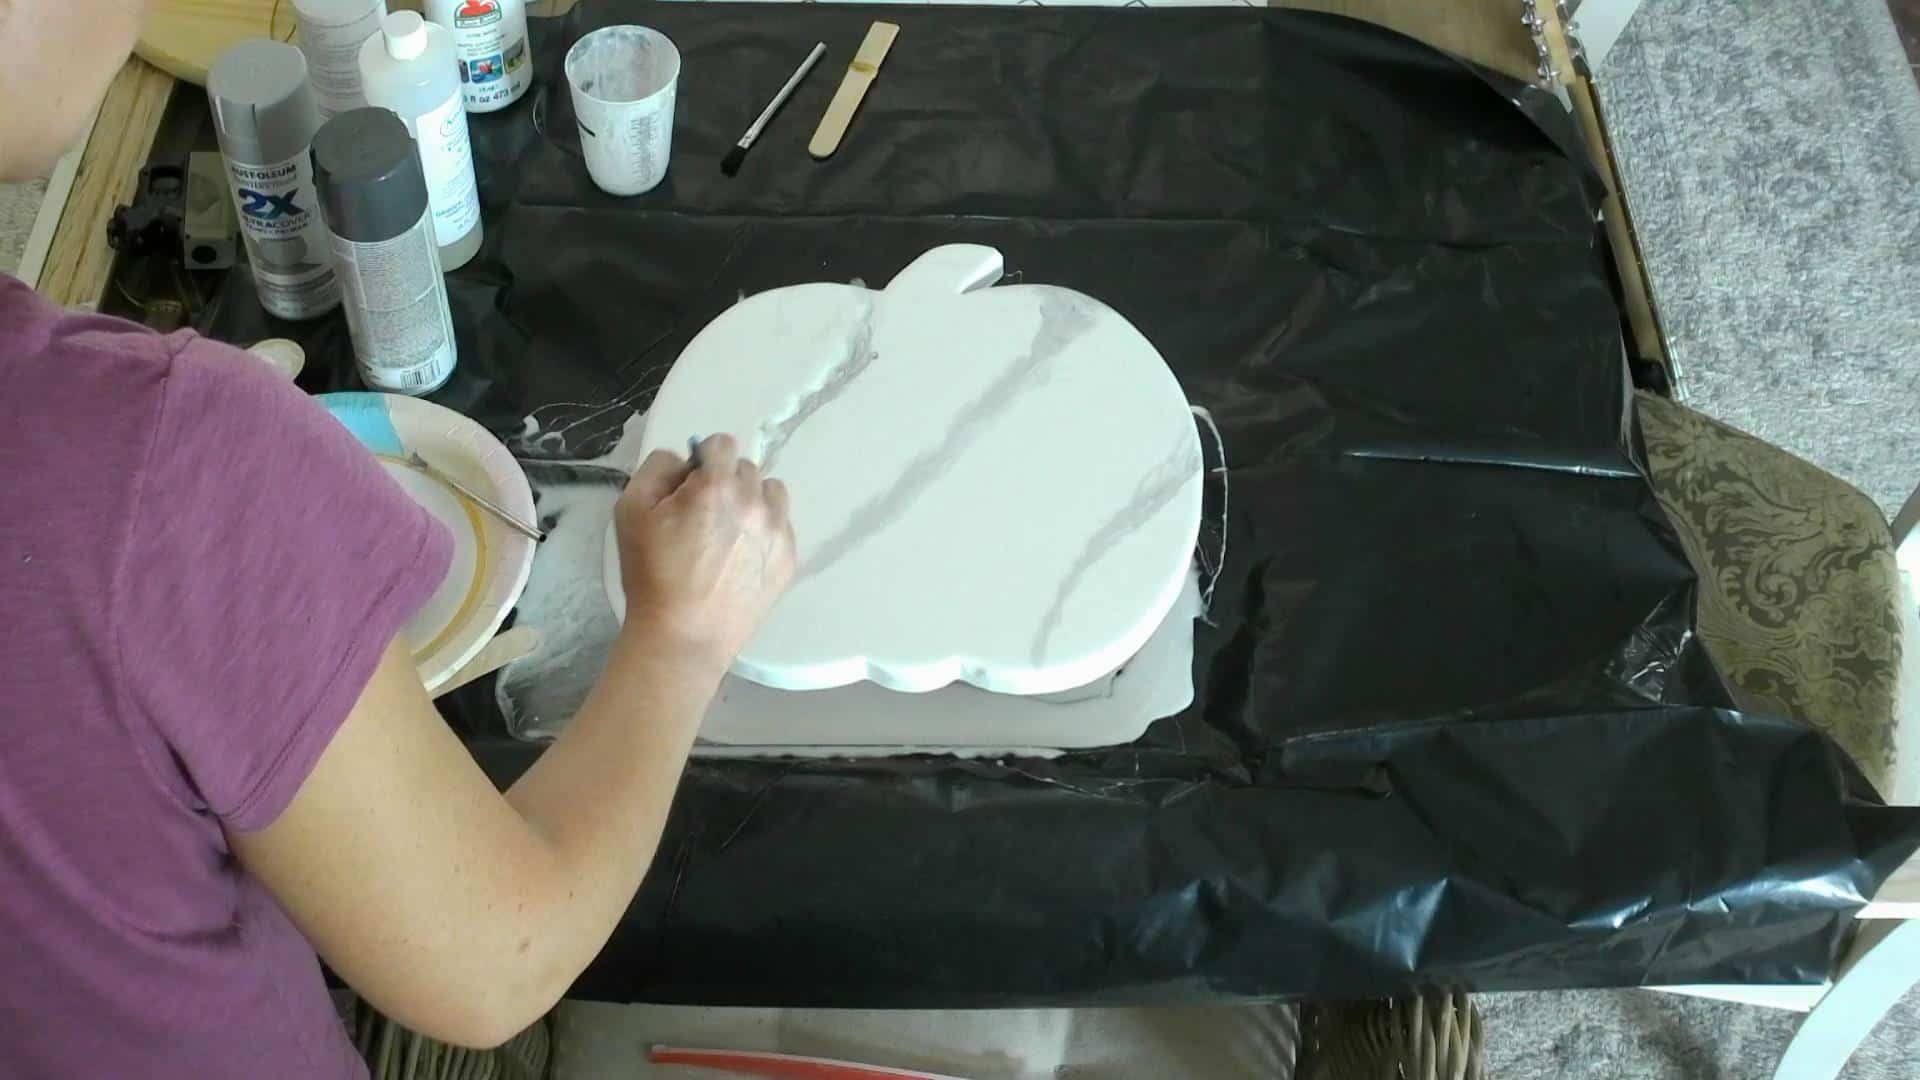
Once the pumpkin is covered with epoxy and flowing over the edges, rub around the edges making sure to cover all of it. You will notice it drips in certain areas but not others, that is why you rub around the edge to make sure it flows over everywhere and covers.
Creating the Marble Veins in the Epoxy
Next, you will spray a little spray paint onto the paper plate and use your paintbrush to create the marbling in the epoxy. This will take just messing with it to find the pattern you like most. Marble comes in so many variations, you really can’t mess it up!
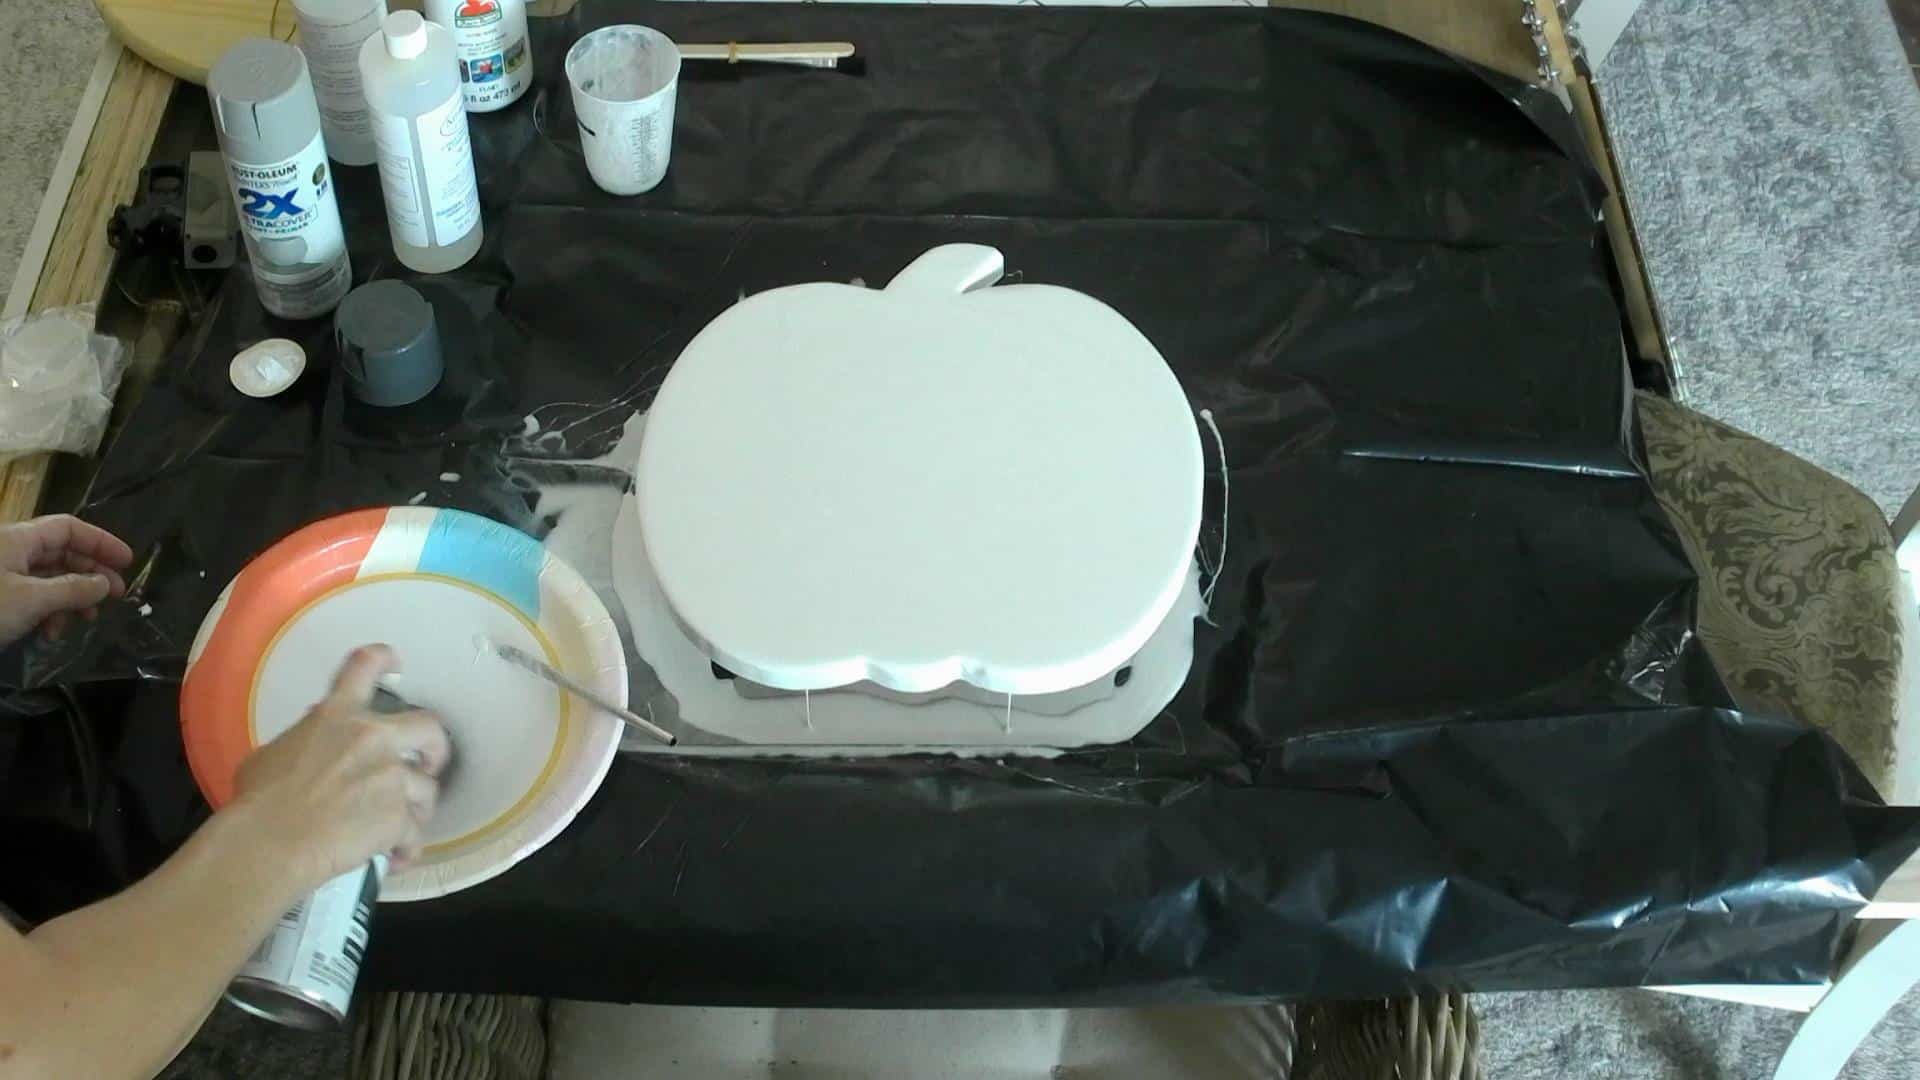
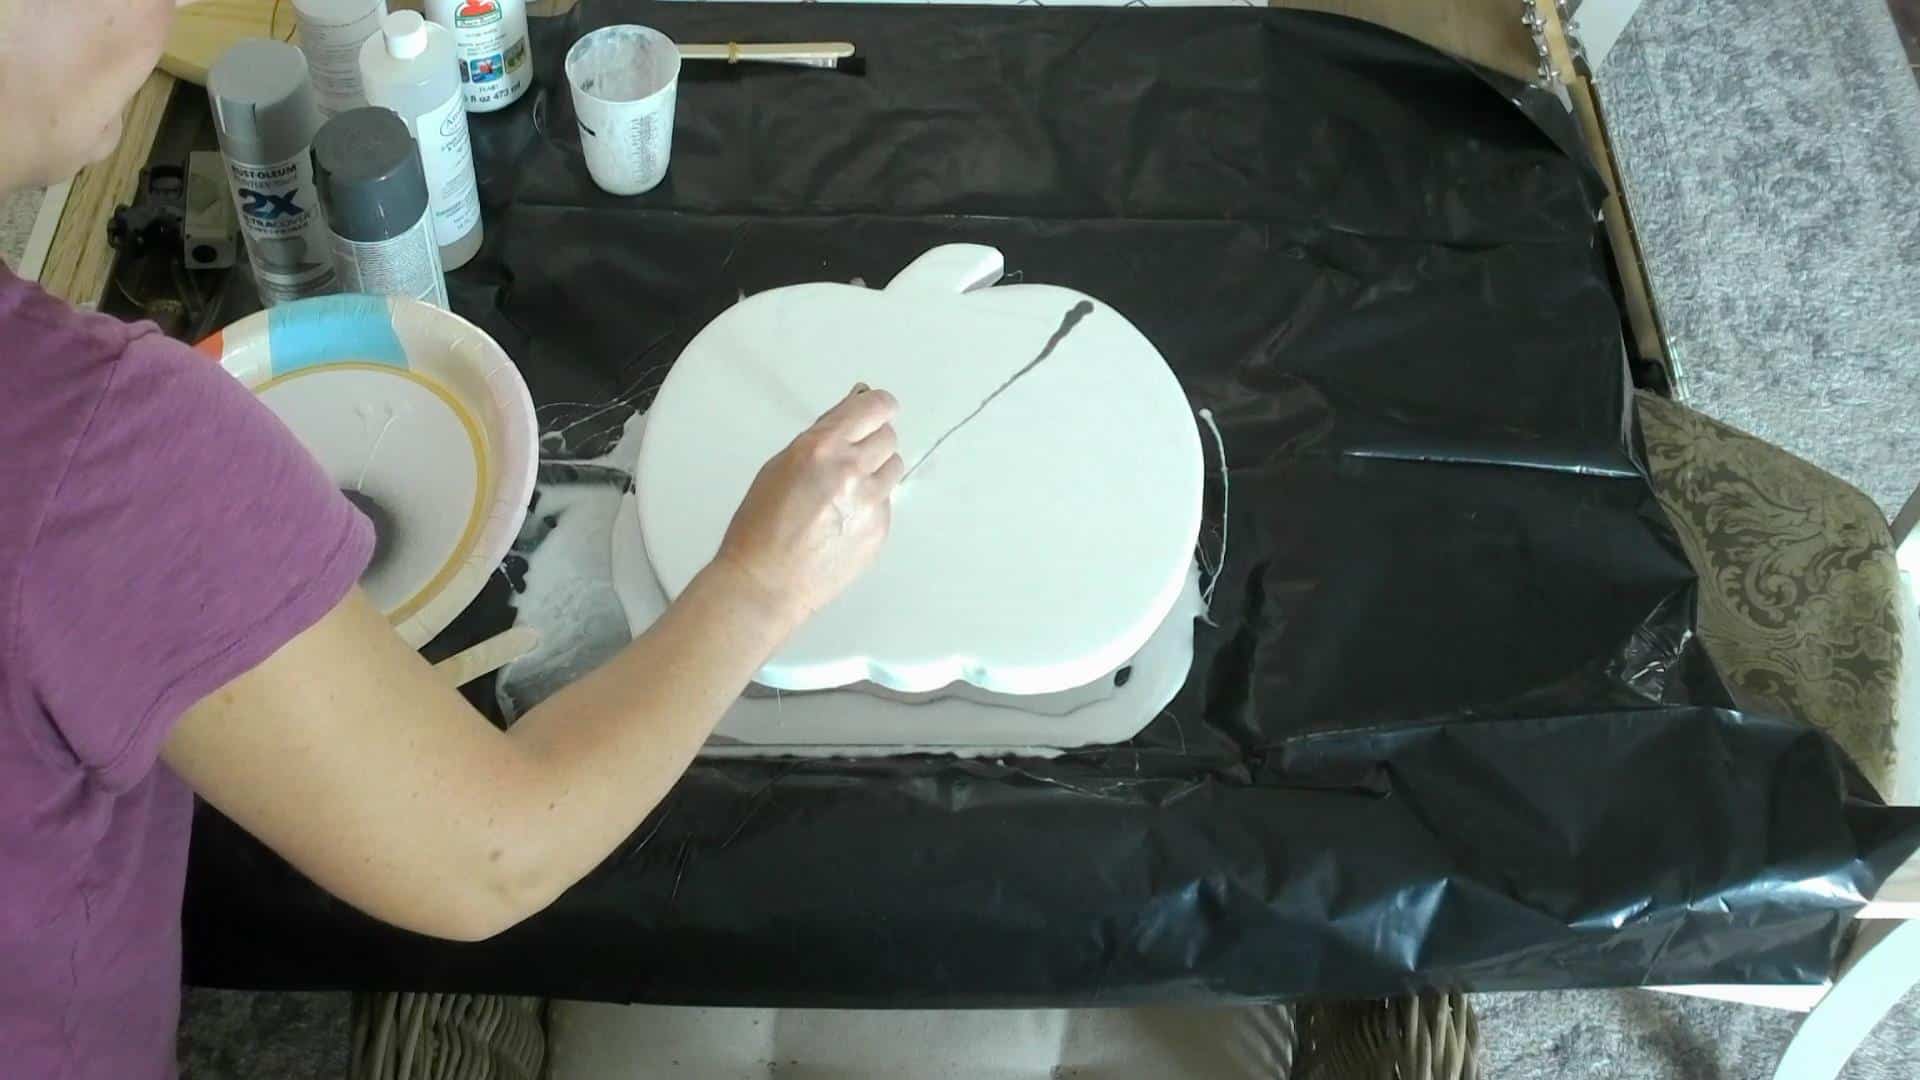
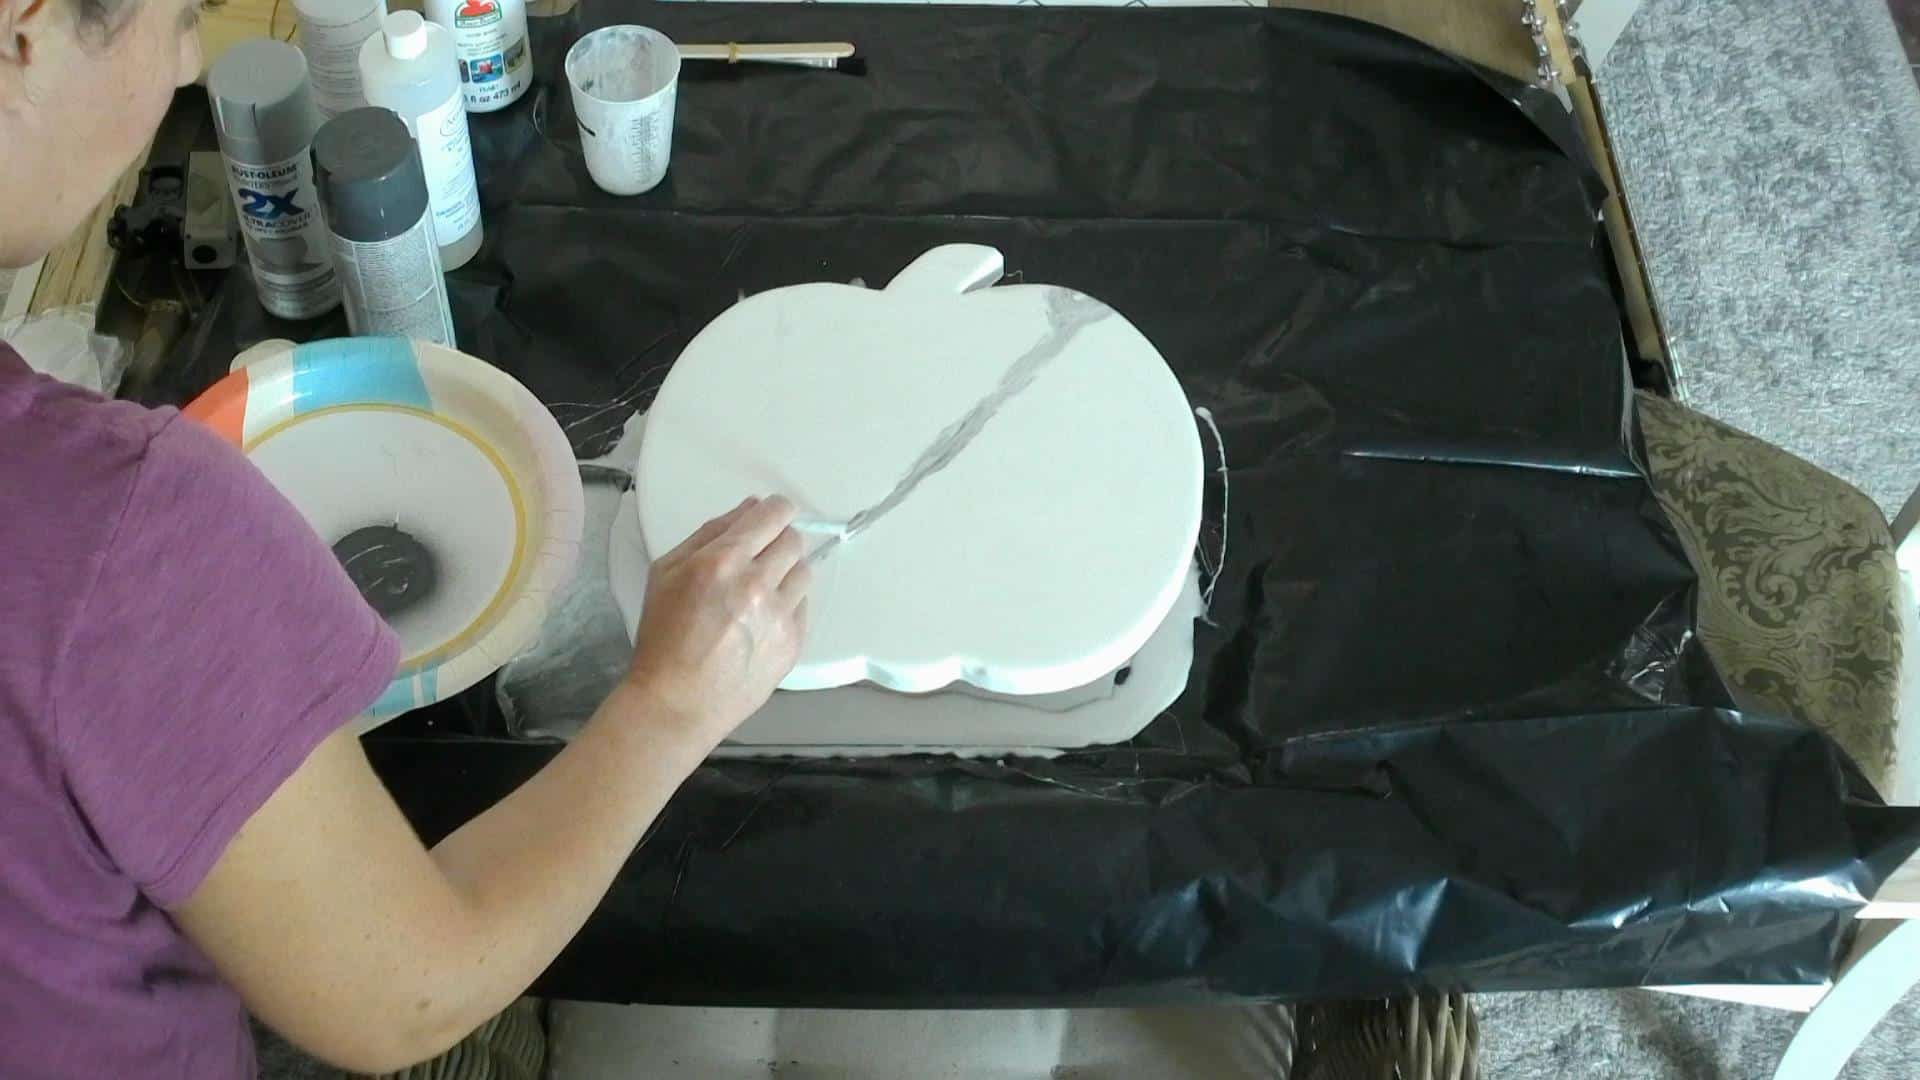
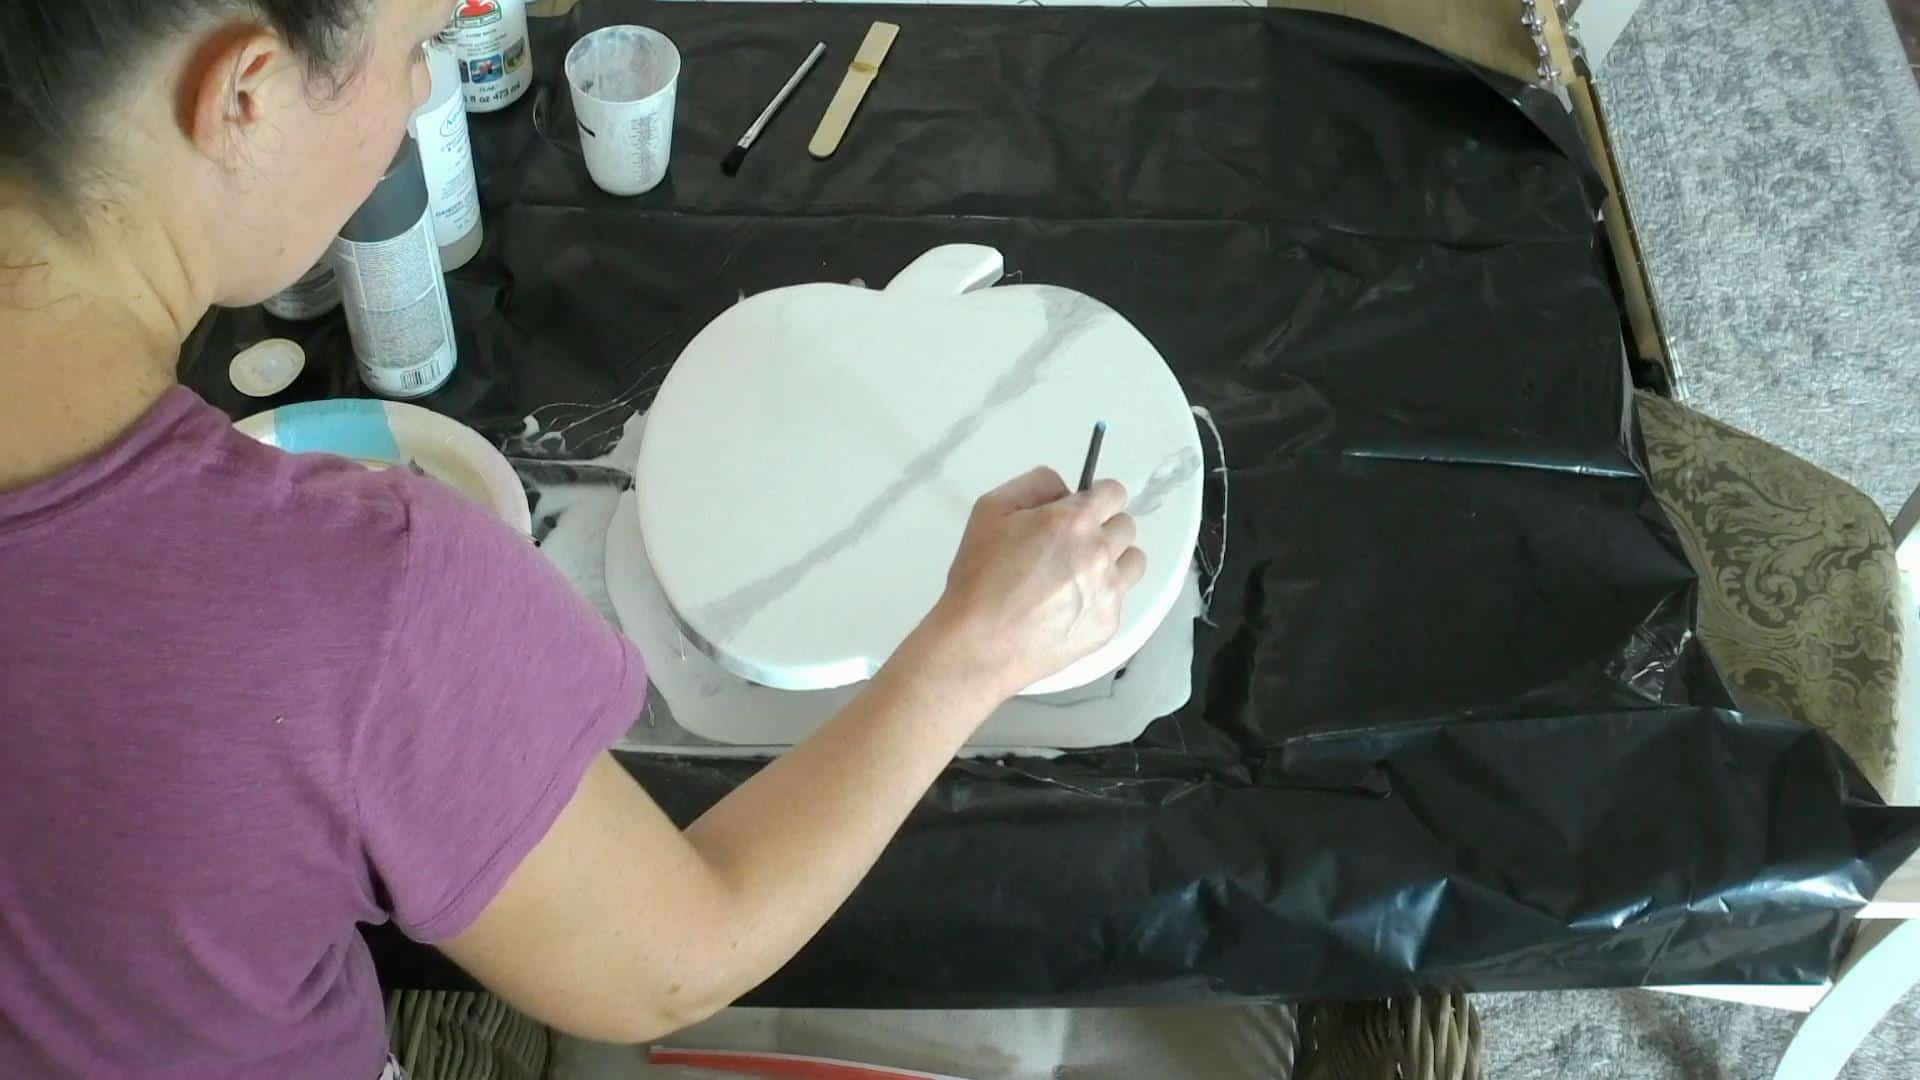
I just keep working the gray and adding more streaks where I want them!
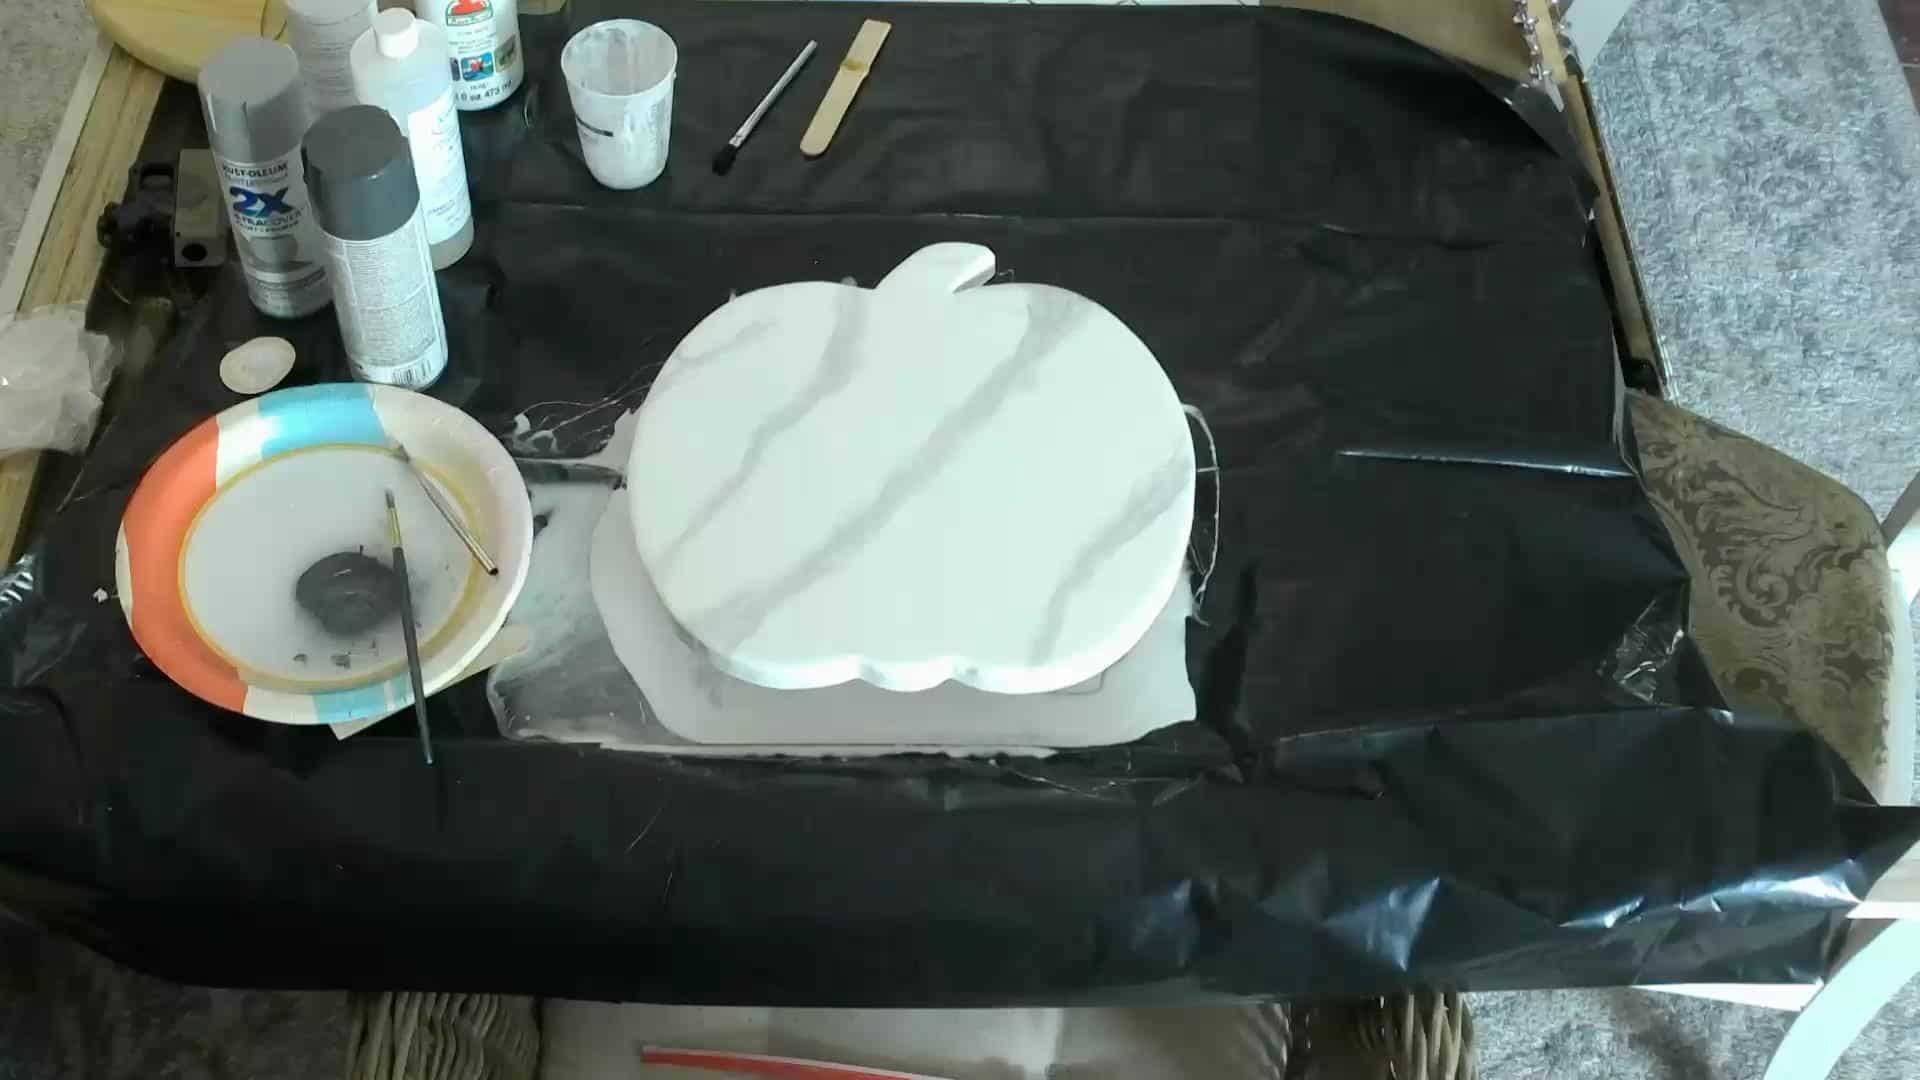
You have about 15 minutes to play with the marble veins and then you risk divets in the finish. Don’t overthink it! And what you see when you walk away, will not be the exact finished project, the paint will settle and lighten slightly!
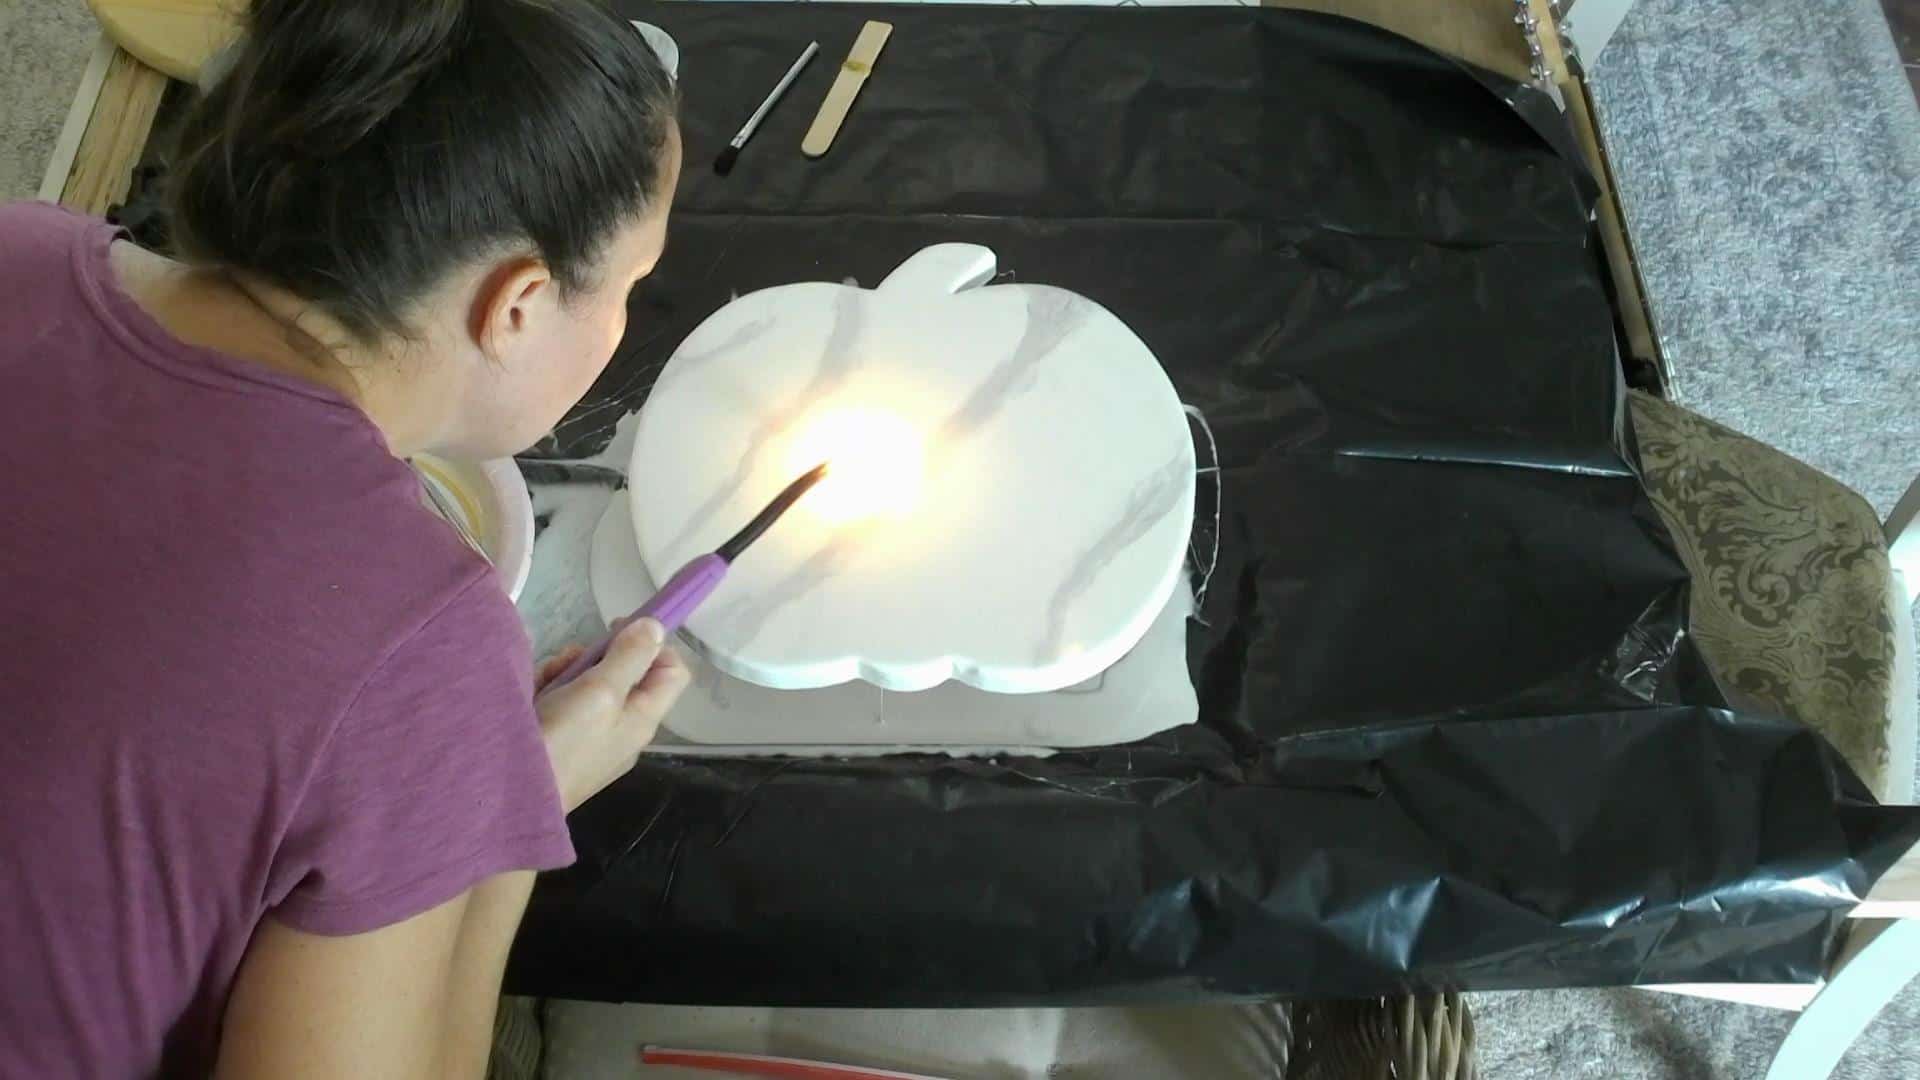
Lightly run a torch or lighter (torch works best) over the top of the epoxy after you have it how you like it just to get out any air bubbles! Don’t get too close with a torch or stay in one spot too long or it will create a bunch of tiny air bubbles where it pretty much boils the epoxy! Lol!
Let it sit overnight and in the morning, come check your masterpiece! Make sure you keep your pets away from the area and ask the bugs to stay away as they can ruin a project real quick! Oy!
Finishing the Marble Epoxy Pumpkins
There will be drips on the bottom of the pumpkins, you can sand them off or just leave them as I did! They weren’t noticeable so I left them, if I were giving them as a gift I would probably try to wipe the bottom at the hour mark to try to keep from creating them, or sand them off…but I am not worried about them for me!
Last, I covered my pumpkin and used painter’s tape to tape off the stem, then spray painted it gold just to give it that little touch to match the other gold in my table setting!

And they are DONE! Set the table, break out the fine china…it looks like you have MARBLE PLATE CHARGERS…you FANCY!!!😉
The ideas are absolutely ENDLESS when it comes to what you can make with the marble epoxy!! I mean, I could marble epoxy EVERYTHING…and I just might if someone doesn’t take it away from me!😂😂
What ideas do you have for DIY marble epoxy projects? Let me know in the comments below! Hope you all have a wonderful Thanksgiving!! Thanks for stopping by!

Know someone who would love this project? Share it with them!
[social_warfare]
Want to PIN these Epoxy Pumpkin Chargers for later? I always love a PIN!