DIY House Number Sign
Displaying your address numbers clearly on your home is important, especially in times of an emergency! This DIY house number sign is the perfect way to do that with large numbers to make your address numbers visible even from the street, and then of course make it pretty, add character, and style with a little tile!

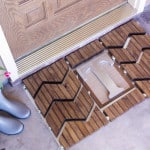
I love this addition to our front porch, not only is it useful as I mentioned above in helping find our home, it’s adorable and I can’t help but smile every time I walk in the door! I thought the tile and grout was going to be a little too busy, but it turns out, it is just right, even though it still looks busy in the photos! You could always change the grout or number color if it bothers you though!

Ignore the empty planters and the dirty rugs, it has been a nasty, cold, rainy winter, but it’s almost spring time, baby! Woohoo!
This house number sign is the perfect introduction to tiling if you have a shower or floor that you would love to replace but are scared to DIY tile! This DIY house number sign is small and removes the intimidation to show you how easy tiling can be! Penny tile is one of the hardest tiles to work with in my opinion, so if you can do it on this small scale, it makes it manageable!

Like this DIY house number sign and want to see other simple home projects like it? Check out this awesome set of front porch DIY planters to go with your new address sign, or this cute DIY welcome organizer to hang by the front door! And if you are as excited for spring as I am, check out this cute spring wreath to hang on the front door!
Ready to make your own DIY address sign? Read everything you need to know below!
Gathering Supplies to Make a DIY House Number Sign
This DIY house address sign cost around 35-50 bucks if you don’t have any tiling supplies on hand! I will say, it is completely worth it to spend if you have ever wanted to try tiling without the commitment to a larger project! I was able to complete this project for 18 dollars for the house numbers, and 8 bucks for the tile!
Materials Needed for the House Number Sign
NOTE: AMAZON links are affiliate links! Affiliate links are links that when clicked generate a small commission for me at no extra cost to you should you make a purchase! I always appreciate you shopping at my links as this is a way to help me keep bringing content to you all!
- 1 – 1x2x8
- 1/2″ cement board
- House Numbers
- penny tile or other small format tile – I wish I would have used a colored tile so my numbers could stay black and my grout could have been white but my Home Depot was out of every last penny tile that I liked besides this white one! Lol!
- grout/adhesive combo
- super glue
Cut List for the Address Sign
- 1/2″ cement board cut @ 7 1/2″ x 20 1/2″ (adjust this length based on how many numbers you have in your house number see below)
- 2 – 1×2 @ 7 1/2″ shortest end measurement, mitered on both ends at 45 degrees off square, ends not parallel
- 2 – 1×2 @ 20 1/2″ shortest end measurement, mitered on both ends at 45 degrees off square, ends not parallel
Making the DIY House Number Sign
Once you have all your supplies gathered to make you DIY house number sign, you will cut down a piece of cement board to 7 1/2″ x 20 1/2″! You can use a circular saw to cut this down or you can use a razor and snap method! I prefer to use a circular saw only because when you want to frame it later, you want a clean cut edge to attach the frame to and sometimes with the razor method it will not be that clean of a cut!
I have to tell you a little story about me being really dumb and not thinking before I did something! Lol! So, when I had the idea to make a house number sign, I went into the garage and grabbed a scrap 1×8, cut it to size, and tiled the board, and grouted the tile…only to walk outside to frame the board and all the tile had popped off the board! Face in palm moment for sure!!! Wood moves too much to ever tile on! DUH! I knew this but yet it never crossed my mind the whole time I was making the sign!😂🤣🤦♀️
So as you watch the steps below and you see my tile already grouted as I am laying it on the cement board, now you know why! 😅
Back to making this one that worked! Lol!

Once you have your cement board cut to size, which you will want to adjust depending on how many numbers you have in your address! The numbers I used are 5 inch numbers so you want to make sure and add around 7 inches per number you add!
Lay out and cut your tiles! There are two ways you can do this, if you have a tile saw, you can use it to cut it down to size, but penny tile can be cut with scissors to get the basic shape, but then you will need to fill in the cut tiles, which again you can do this with a tile saw or tile nippers.

Use thinset or a grout/adhesive mix to attach the tile to the cement board! Use a small v-notch trowel to spread the thinset! Imagine this board shown below is the cement board because I forgot to take a picture of the cement board!

Lay your tiles on the cement board and press down firmly to make sure it adheres to the board! Notice the difference between the top and bottom tiles!

I did the ends both ways and of course, I like the cut end on the tile saw because it was straight across as opposed to slight variations in size from cutting them with tile nippers individually! But both work just fine!

Cut the 1x2s for the frame! The boards are mitered at 45 degrees off square to make the frame, you do not have to do this though, you can do flat ends and it will look just as good! Dry fit the frame to make sure it is a good fit!

I went ahead and stained it before actually attaching it! I used Provincial by Minwax as the stain (don’t mind the beat to heck can, Lol)!


After the frame boards dried, I attached them to the sign! I just used some fancy old super glue to attach it! The hanging hardware will be attached to the cement board so there will not be any stress on the frame, and it is small so super glue will work just fine!
I used a scrap piece of 1/2″ plywood on the floor under the sign to lift the sign up and center it in the frame!


Now that the frame is on, it is time for the grout, it needs to have been 24 hours since you applied the thinset!
Now, again, I did this two different ways, the first time, I grouted it before adding the frame and that was kind of a waste of time because the edges weren’t built up as I needed them to be and I was going to have to grout it again. So the second time, I grouted it with the frame already on it!
Painter’s tape the frame so that grout doesn’t get on the frame!

Now grout that baby! I used charcoal grout, but you can use another color, if I had it to do over again, if I was going to use black numbers, I would have used white grout or light gray! They even have some really cool colors of grout you could use such as red! Anyway, mix a small amount of grout and grout this baby!

In essence when you are grouting, you are using the grout float to push all the grout into the small spaces and then using the grout float to wipe away as much of the excess as you can!

Use a grouting sponge, or in this case, I didn’t want too much water since my wood frame was already attached, so I used a lightly damp napkin to remove as much grout as possible!

It took about four times of getting new paper towels until I felt it was good to go!

I did clean the bottom of it, I didn’t leave it like that! Lol!
Once it was clean enough, I took off the painter’s tape! It isn’t done at this point, I still came back one more time two hours later and give it one last cleaning!

Now that it is actually fully cleaned, you can apply the numbers to the address sign! I scuffed the back of the numbers up slightly with a scrap piece of sand paper and just super glued them in place, I’m not sure if this will hold long, if it doesn’t, I will use mounting tape!


I think it turned out pretty cute! It also gave me the confidence to grout my penny tile in my shower! Lol!
Have you made a house number sign before? I’d love to hear about it, tell me in the comments below! Thank you so much for stopping by!
Happy Building!

Want to save this DIY House Number Sign for later? Pin It!

Related Posts


