DIY Wood Planter Boxes for Table Decor
Hey there! Sorry I have been away for so long! I thought with my little one going off to Kindergarten I would have so much time on my hands, but as it turns out, I very rarely seem to be able to find time to build or craft, let alone blog about it afterward!! Lol! In my very little spare time, my sister and I have also been busy planning my grandparents a surprise 60th Anniversary party…yea I know, 60 years, how DID they do it? Maybe I can have my Grandmother do a post on her tricks of staying married that long because boy, I sure could use some advice in that department…heck we all probably could…AMIRIGHT! HAHA!!
So as a very quick, simple, and inexpensive décor idea for the dinner table, we made these plain DIY wood planter boxes and dressed them up with some nice fake flowers! Since my sister and I were planning the party together, she and even my dad joined in making the boxes…simplest project ever and I get the most help from my family…that figures!!😂 Check out the prettiest little wood planter boxes for table decor!
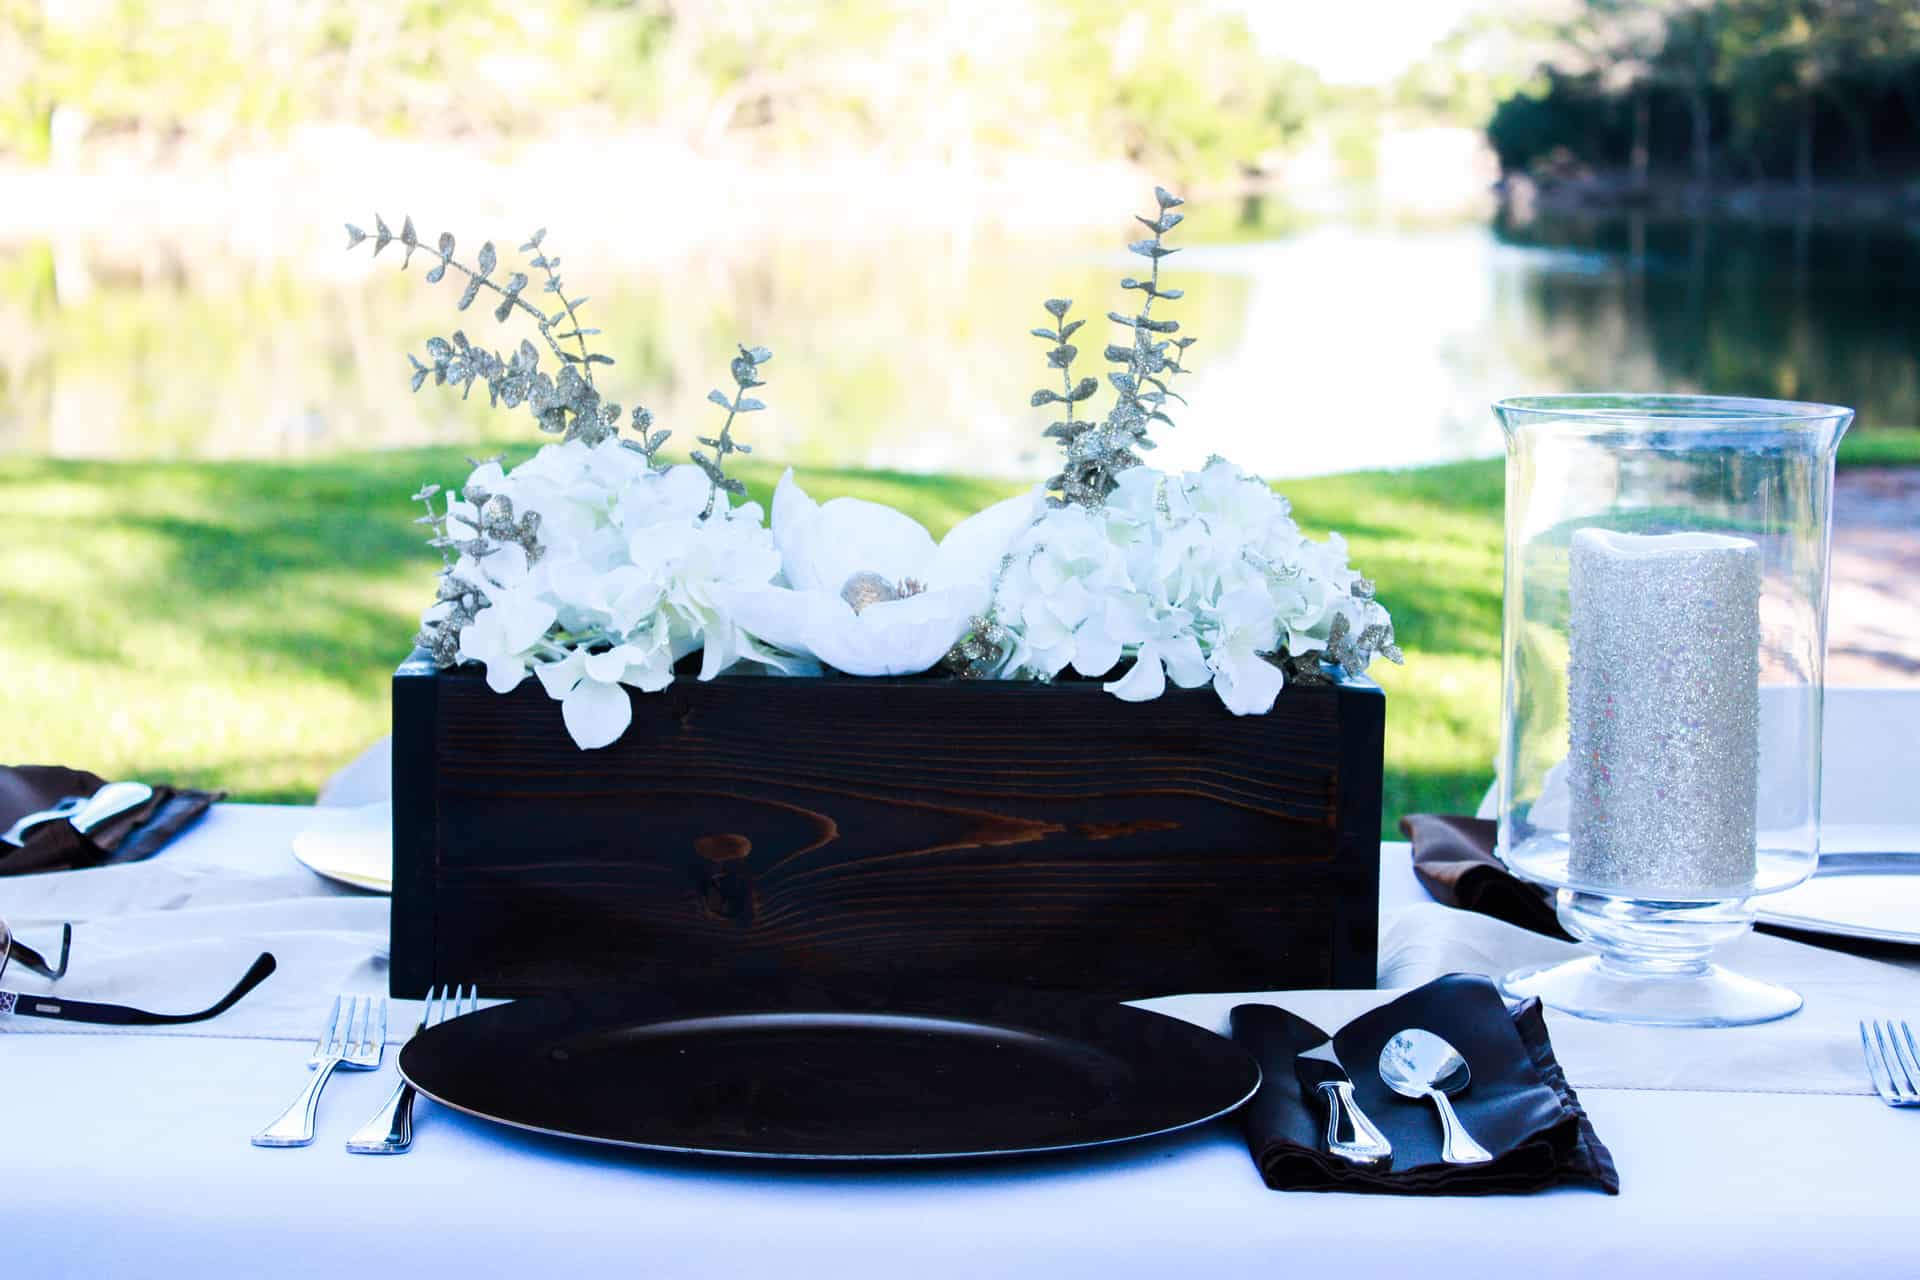
The weather turned out to be so beautiful for the party and our decorations even more beautiful…okay, okay, so I really liked the little flower boxes we made, I couldn’t help myself!😉 So our family stayed the weekend at this ranch, which was amazing, they had so many options of things to do, a boat to ride around the lake, a swimming pool, a cabana with a pool table and poker table, a jukebox to play some good tunes while playing pool or poker, cabins to house all of us, hunting, arrow head hunting, and so much more! We had such a good time but stayed up late and had a little too much fun, you always know you did when you have to rest the whole next week after getting back home!
We had a lovely catered dinner Friday evening to celebrate their anniversary and then we were able to relax and spend the rest of the weekend enjoying all that the ranch had to offer! Our family has never gone away for a weekend together, so it was new to us, and a load of fun! It turned out to just be a small group of us, we were saddened that not everyone was able to make it, but those of us who were abel to had a really good time! The dinner table on Friday night was so simple but elegant with our wood planter boxes!
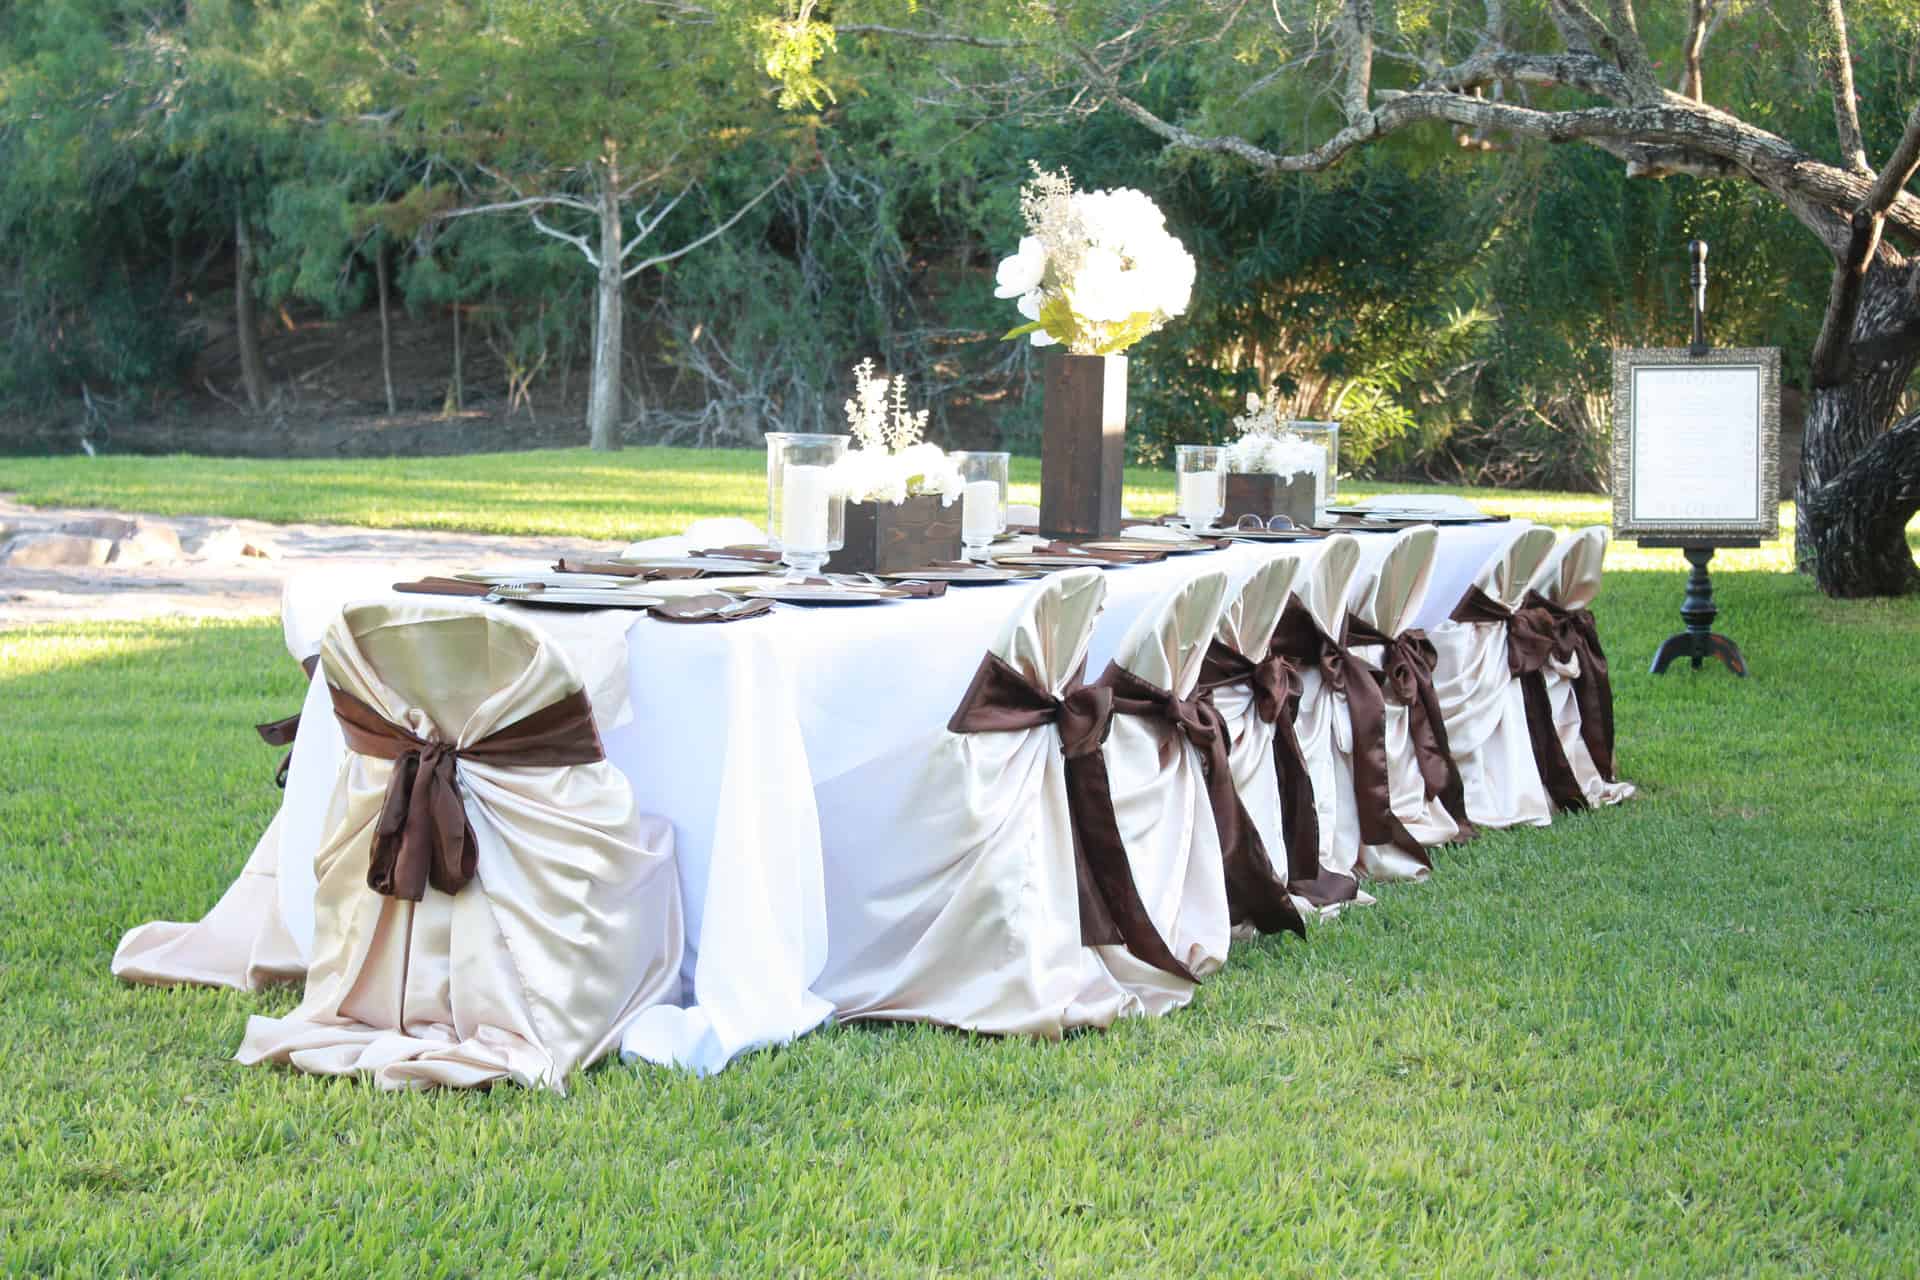 Now, as you can see in the picture, my sister and I along with my sister-n-law made the mistake of asking all the men (my brother, uncle, and dad) standing around doing nothing to tie chair covers and sashes! What a horrible idea that was! We went around in the few minutes we had before my grandparents arrived, and quickly tried to fix the unmistakably bad ones but while editing the photos I realized right away that we missed quite a few! So note to self, in the future, just let the men stand around- they do that A LOT better than tying chair covers! LOL!
Here are a few more photos just for the fun of it!
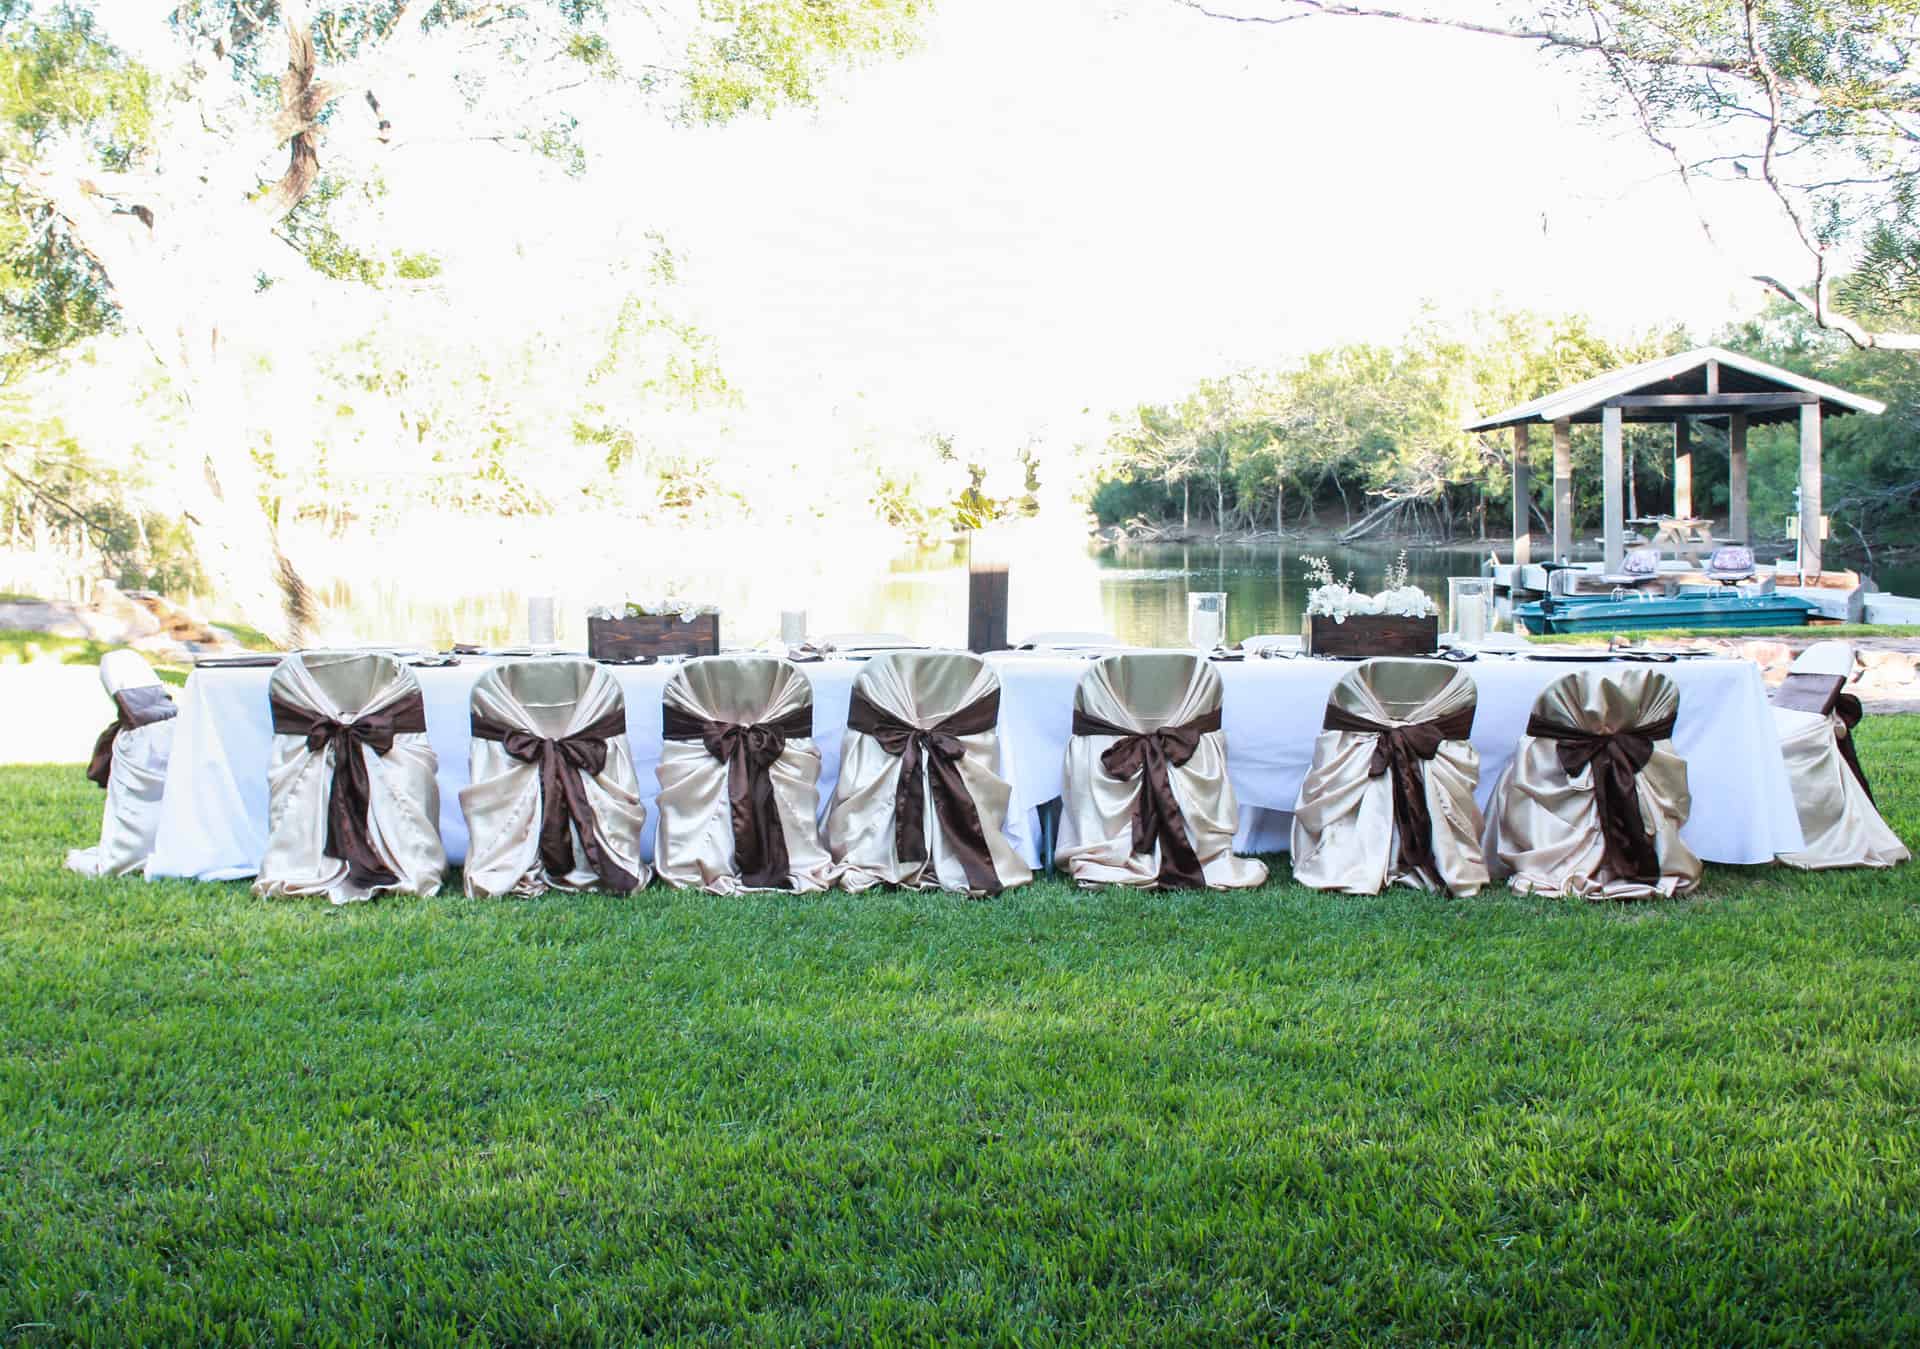 See what I mean about the bows! Shameful! LOL!
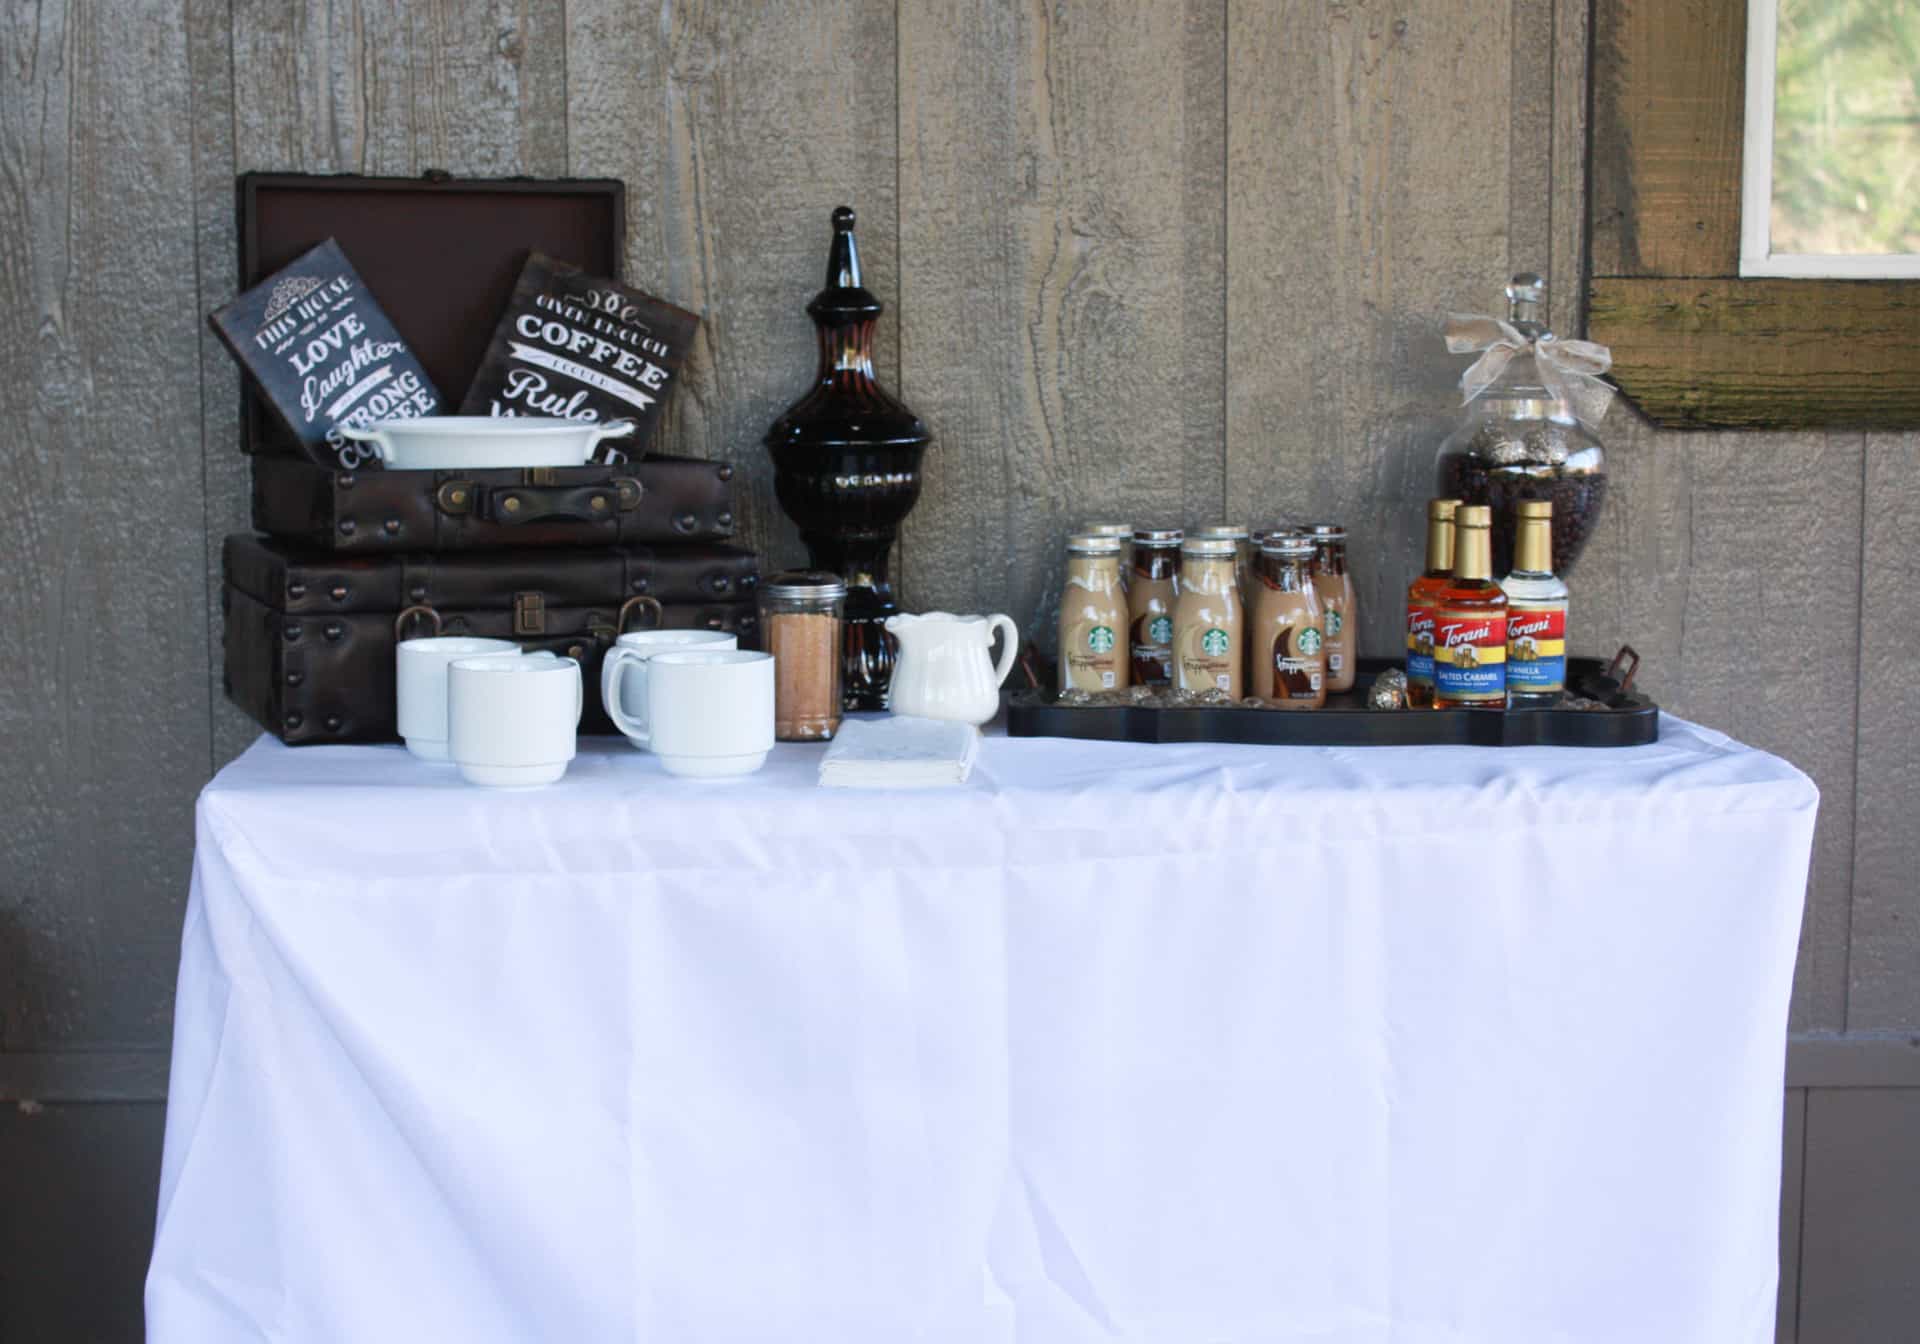
Just to give you a little tour of the 60th-anniversary party!
A small coffee bar because my Grandparents drink coffee all day long…and apparently I took pictures before it was all the way ready because the coffee isn’t even on the table yet! HA! Cut me some slack, we were in a rush and I wanted to make sure I didn’t forget to take pictures… I’ve been known to do that as well! HAHA!
This is a poem that my Grandpa wrote for my Grandma for their 60th anniversary…worked out perfect, he wrote this a few days before the event and we were able to snag a copy without them thinking anything suspicious and we were able to make this print… and they loved it!

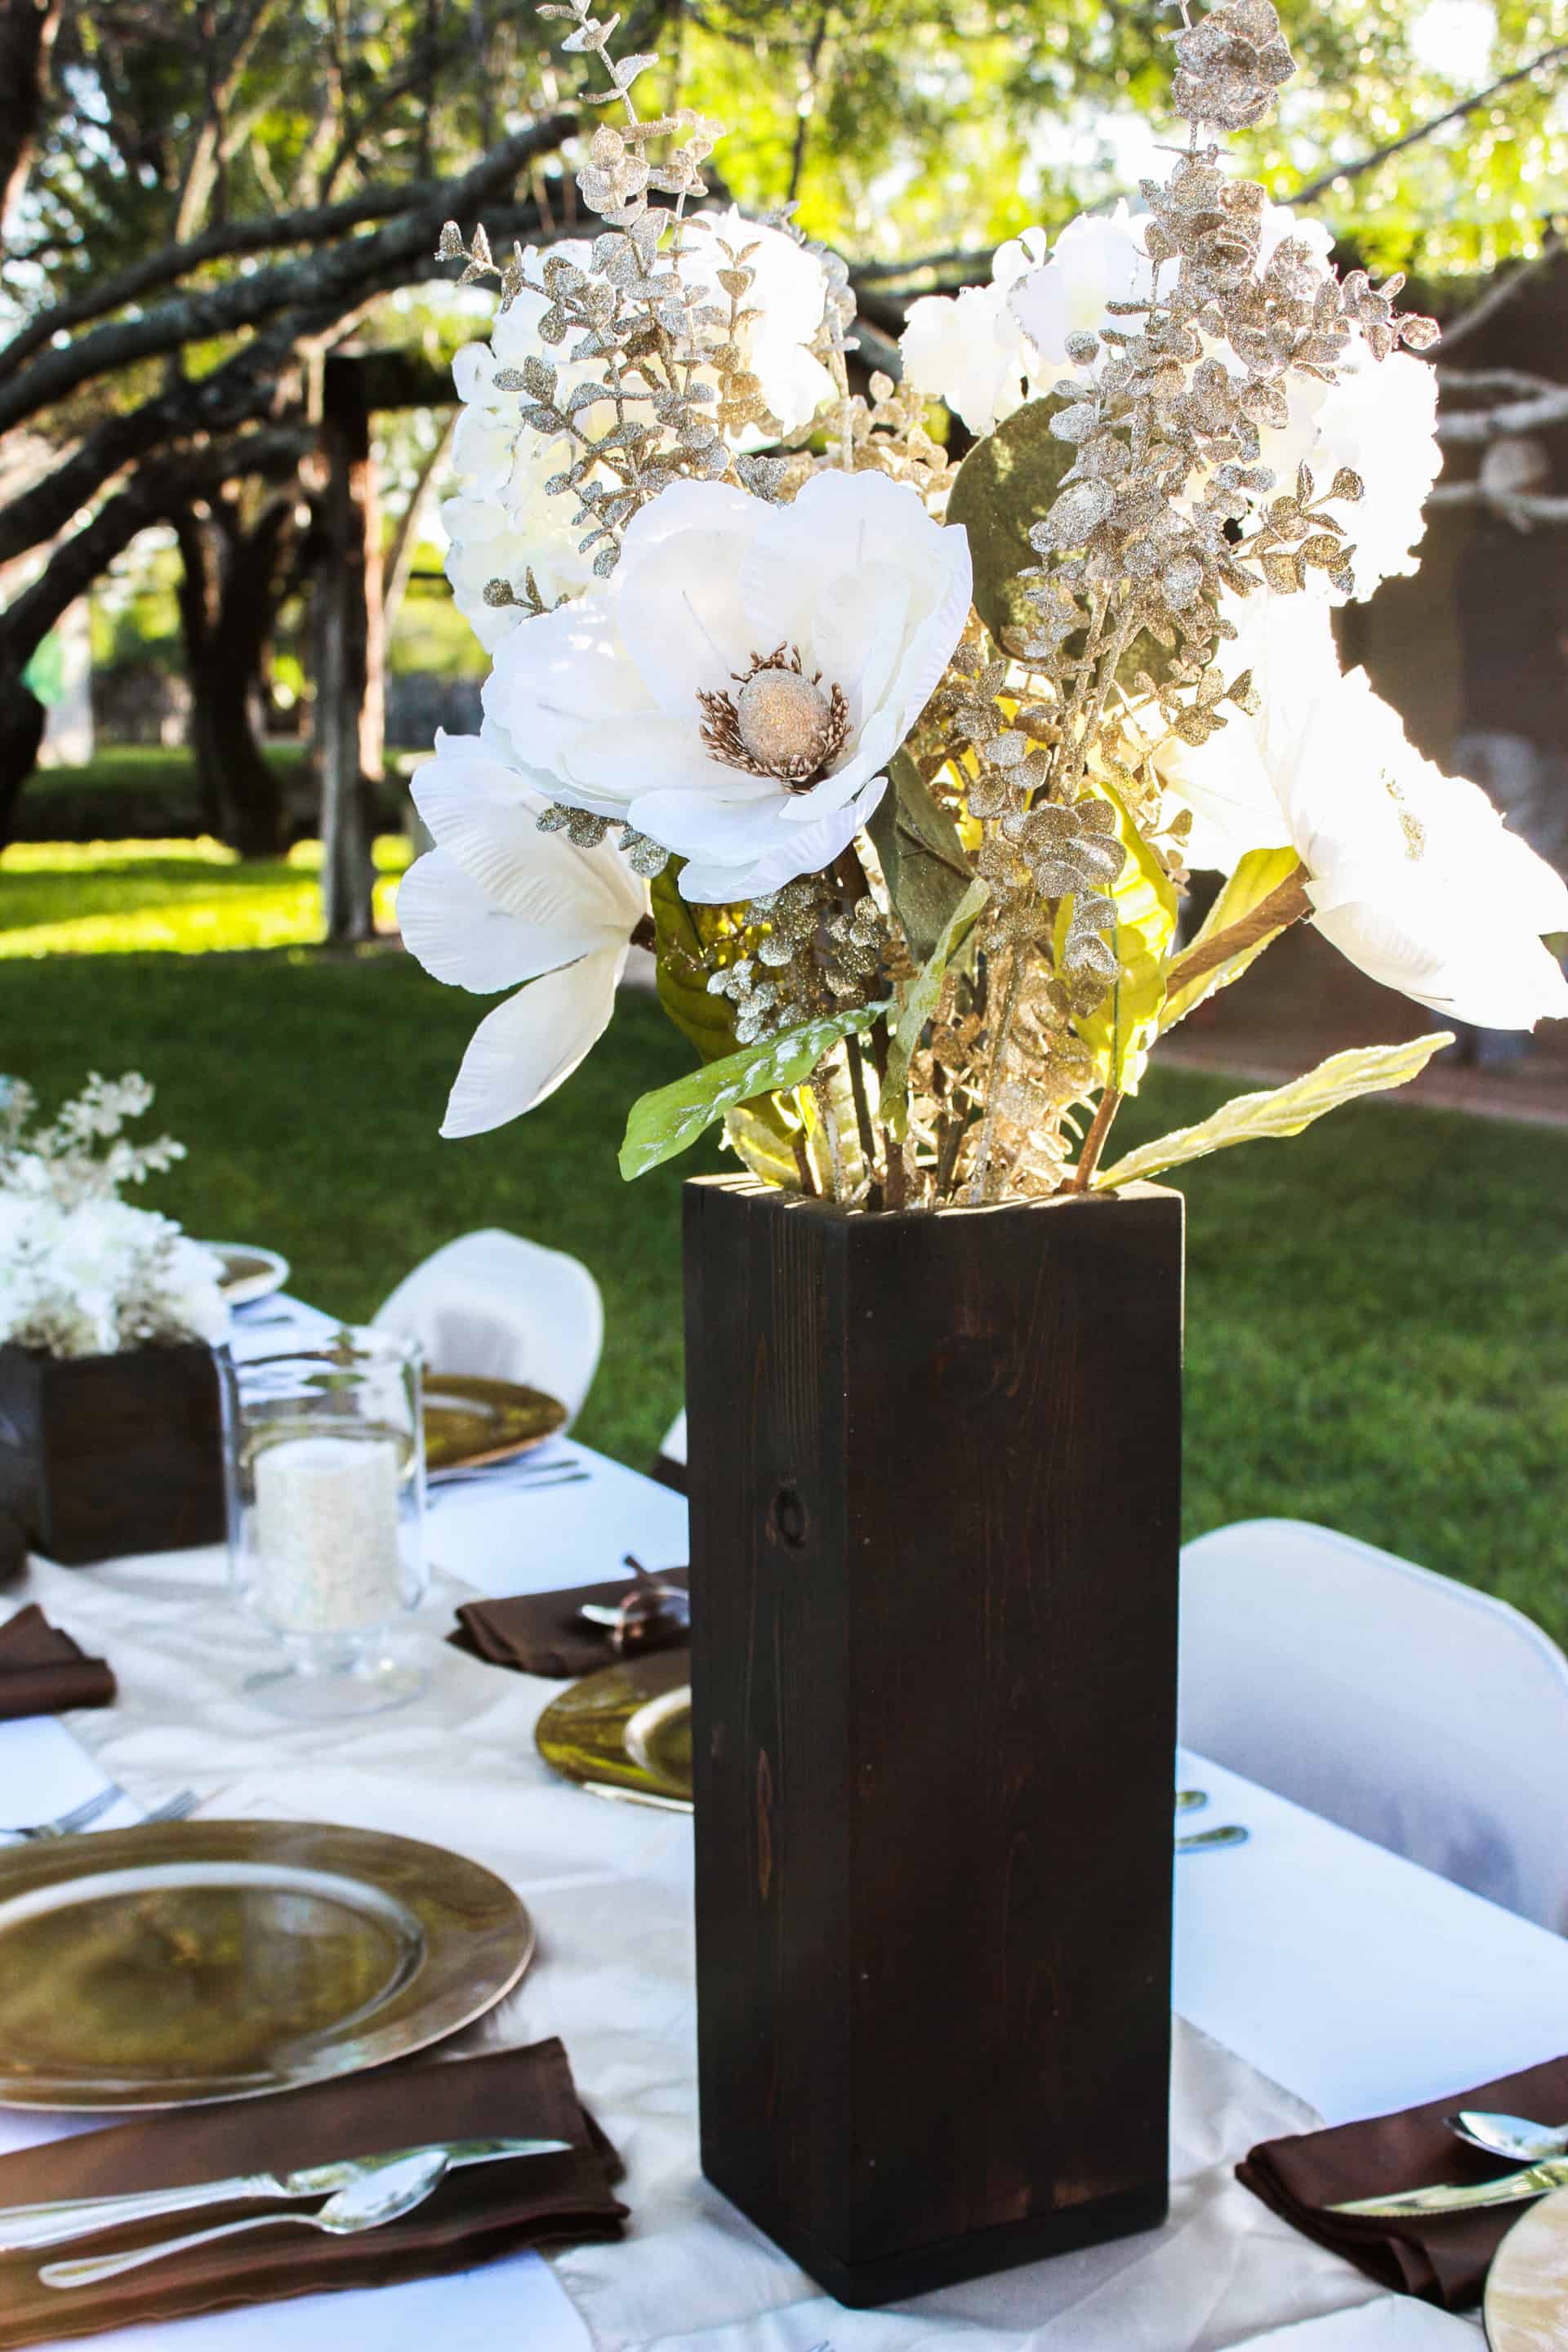
Look at the tall wooden box for the flowers, this one is included in the tutorial as well! Isn’t it pretty?!
In our family, sweet tea is more important than alcohol! Lol!

Awww! That’s so pretty, right?! This DIY wood planter box table decor is included in the tutorial as well!
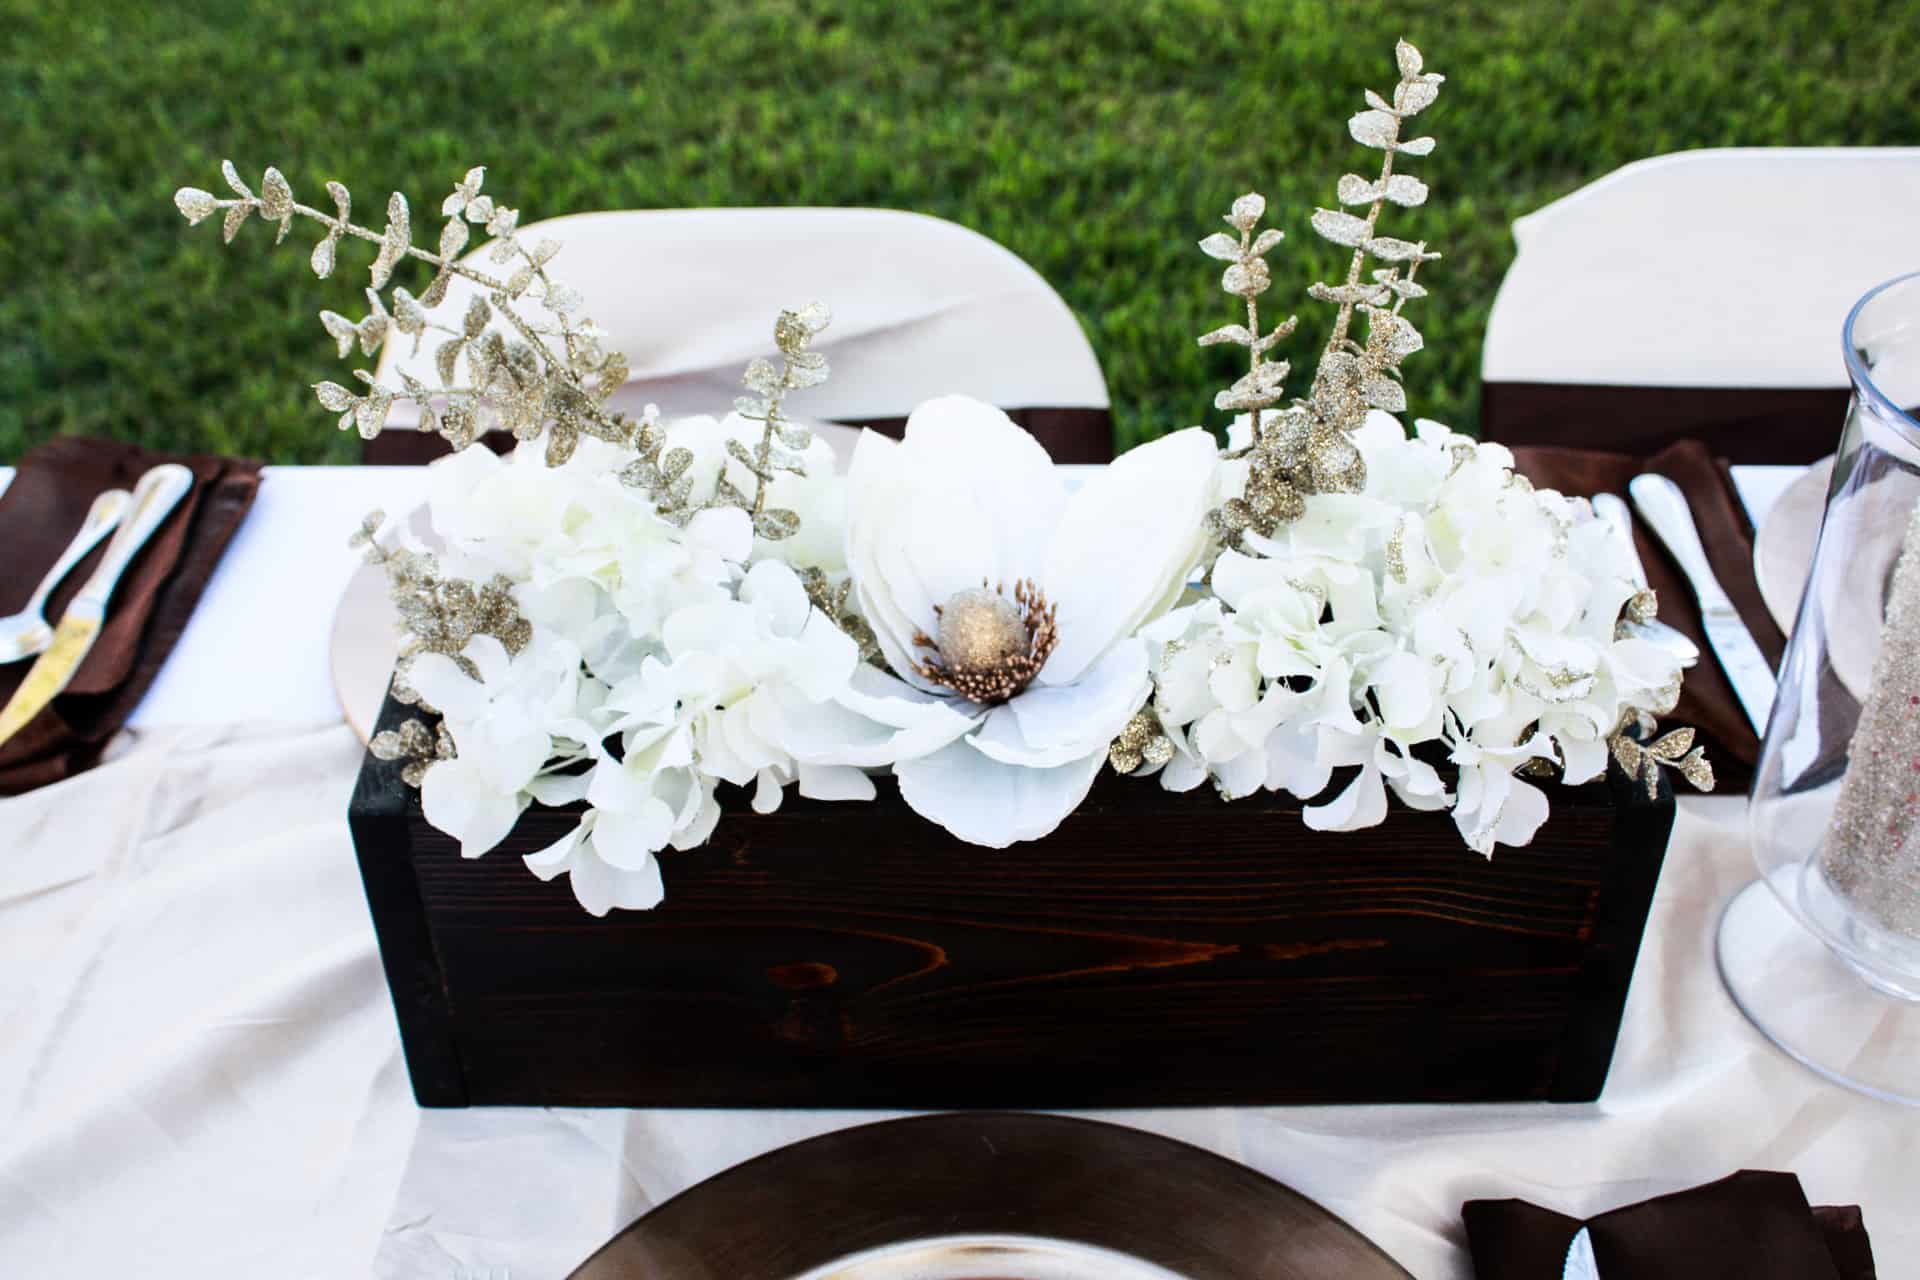
You can use these planter boxes for flowers on any table, dress them up with the flowers you put inside or dress them down with just some greenery. Use them for the holidays or any special occasion!
Okay, want to make your own? Let’s start cutting some wood and getting these babies made!
Materials for the DIY wood planter boxes for table decor:
Materials: (materials listed are to make two horizontal and one vertical box)
2- 1x6x8 (if you are really careful with your cuts, you can get by with 1-1x6x10)
1- 1x4x8
some sort of Styrofoam
sanding and staining supplies
brad gun/hammer and small nails
wood glue
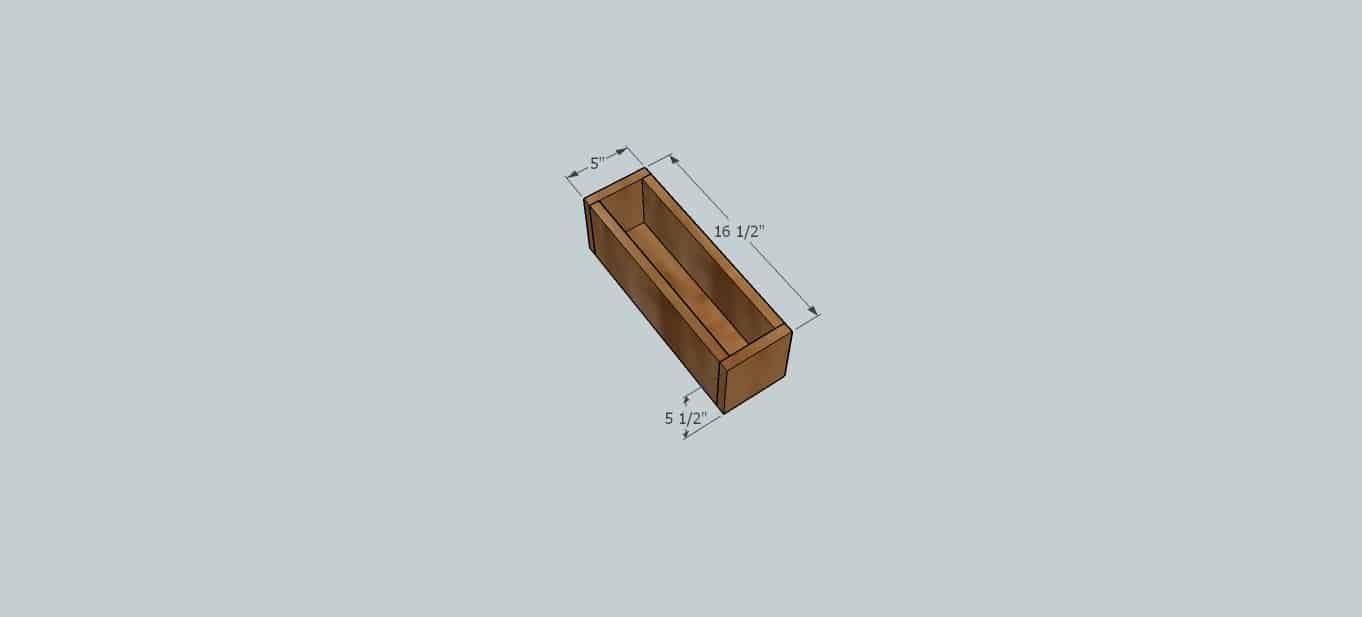
Cut List:
6 – 1×6’s cut at 15″
5 – 1×6’s cut at 5″
4 – 1×4’s cut at 15″
Alright, normally on a big project I cut as I go, but this one was an exception because they do not have to be perfect, and one slightly off-cut won’t create a failed project, just a little more “shanty” one! So, I cut everything in the beginning and then grouped them as I needed them!
For each of the horizontal boxes you will need:
2 – 1×6 @ 15″
2- 1×6 @ 5″
1- 1×4 @ 15″
For the vertical box you will need:
2- 1×6 @ 15″
2- 1×4 @ 15″
1- 1×6 @ 5″
Building the DIY wood planter boxes for table decor
Okay, one thing I am so excited about is that this box project was simple enough I was able to create it in Google Sketchup, which is perfect because I didn’t get to take very thorough pictures while building!
Here is the horizontal box. This box is pretty self-explanatory but in case you need step by step (I am normally one of those) I have broken it down for you. You will just glue and either use a brad gun to nail the boards together or if you do not have a brad gun, you can easily hammer small nails into the box just use painter’s tape to hold the boards in place while the glue dries.
Start by attaching the 1x6s of 1 long side and the two ends.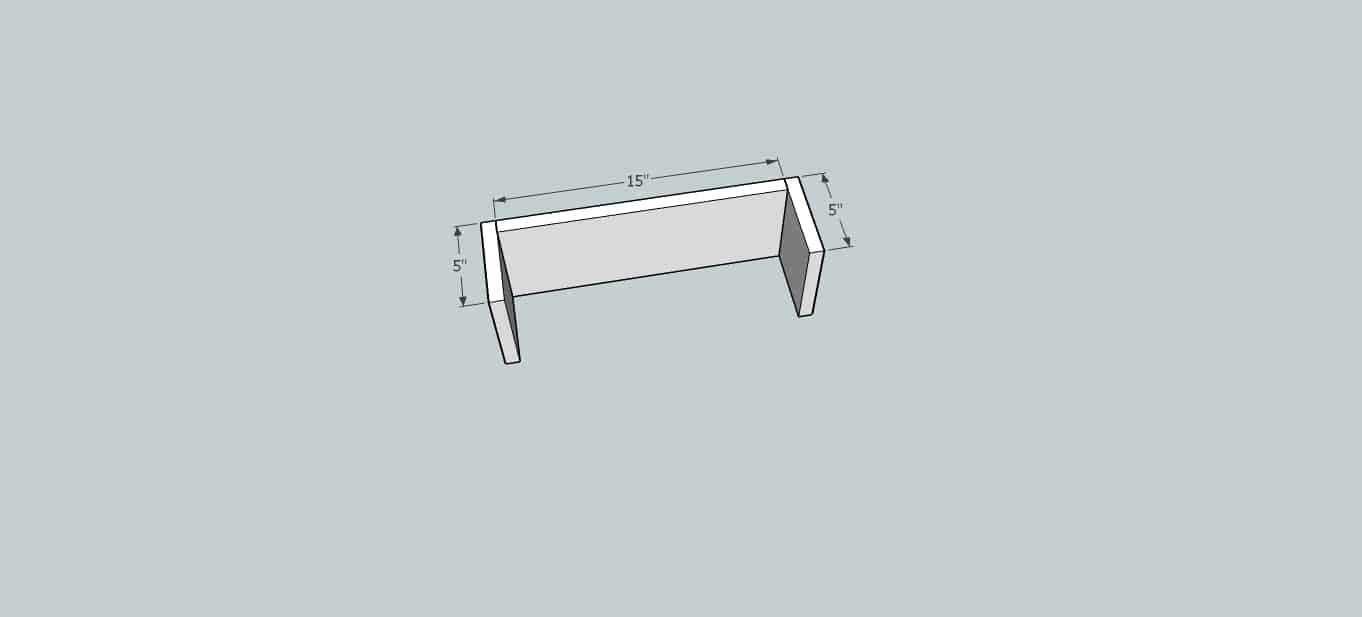
Add the 1×4 bottom.

Last, add the other long side and brad nail in place just as you did the other boards!
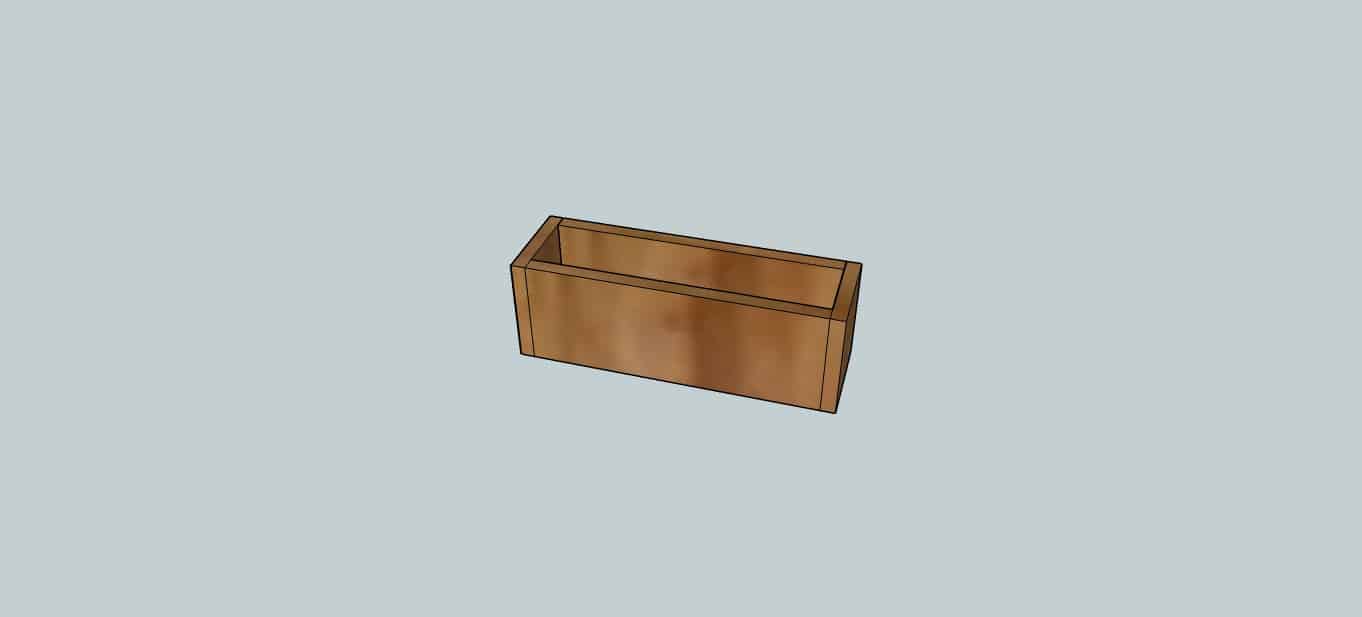
Your horizontal boxes are built!
Now we can start the vertical box, which is, in essence, the same as the horizontal box, you are just going to close in the long sides and leave a short end open!
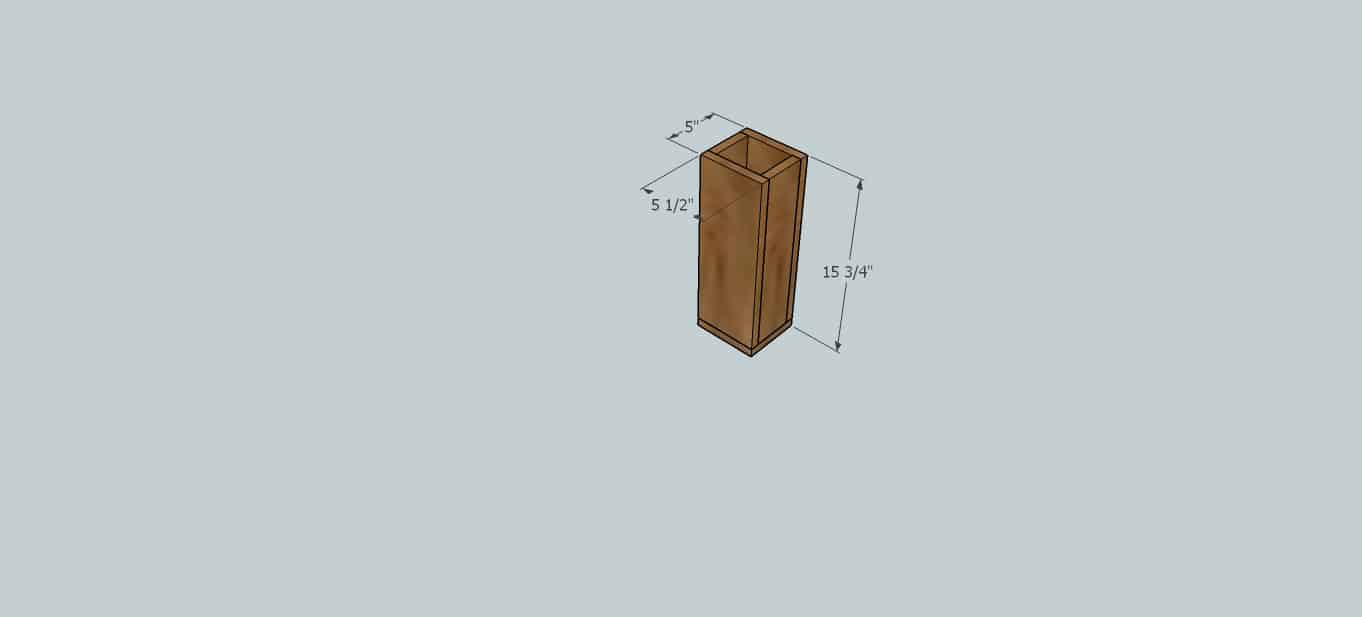
Pretty self explanatory as well, but we’ll break it down…

Attach the 1×6’s like as below!

Now, just work your way around nailing a 1×4 and then another 1×6 and then your last 1×4!

Tada!!! That’s it!
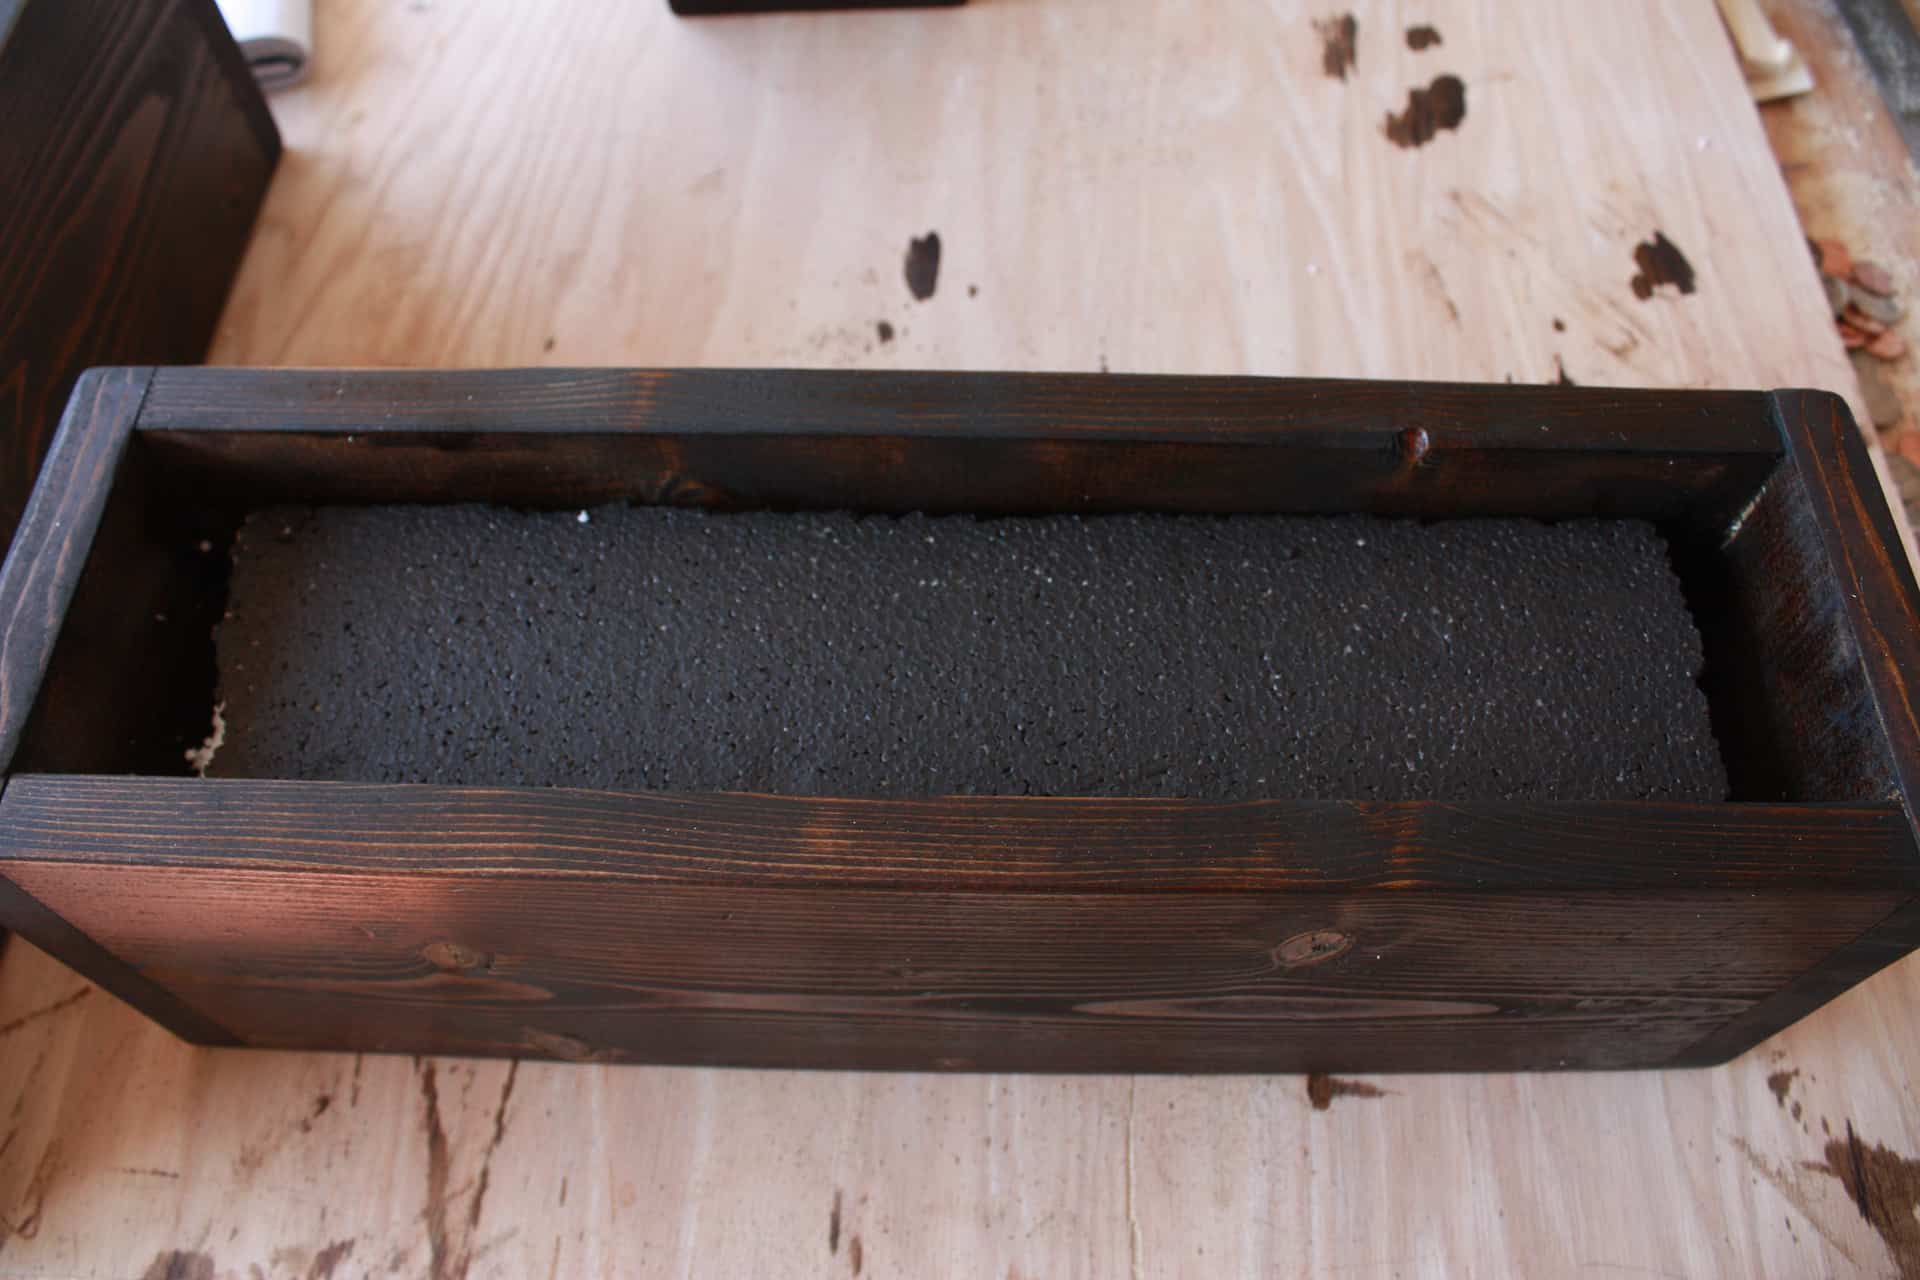
Now to keep the flowers in place, I didn’t buy expensive floral foam, I just took some Styrofoam I had laying around and cut them using a 1×4 as a guide, I just laid the board on top of my styrofoam and cut with a screwdriver, this doesn’t have to be perfect! Lol!
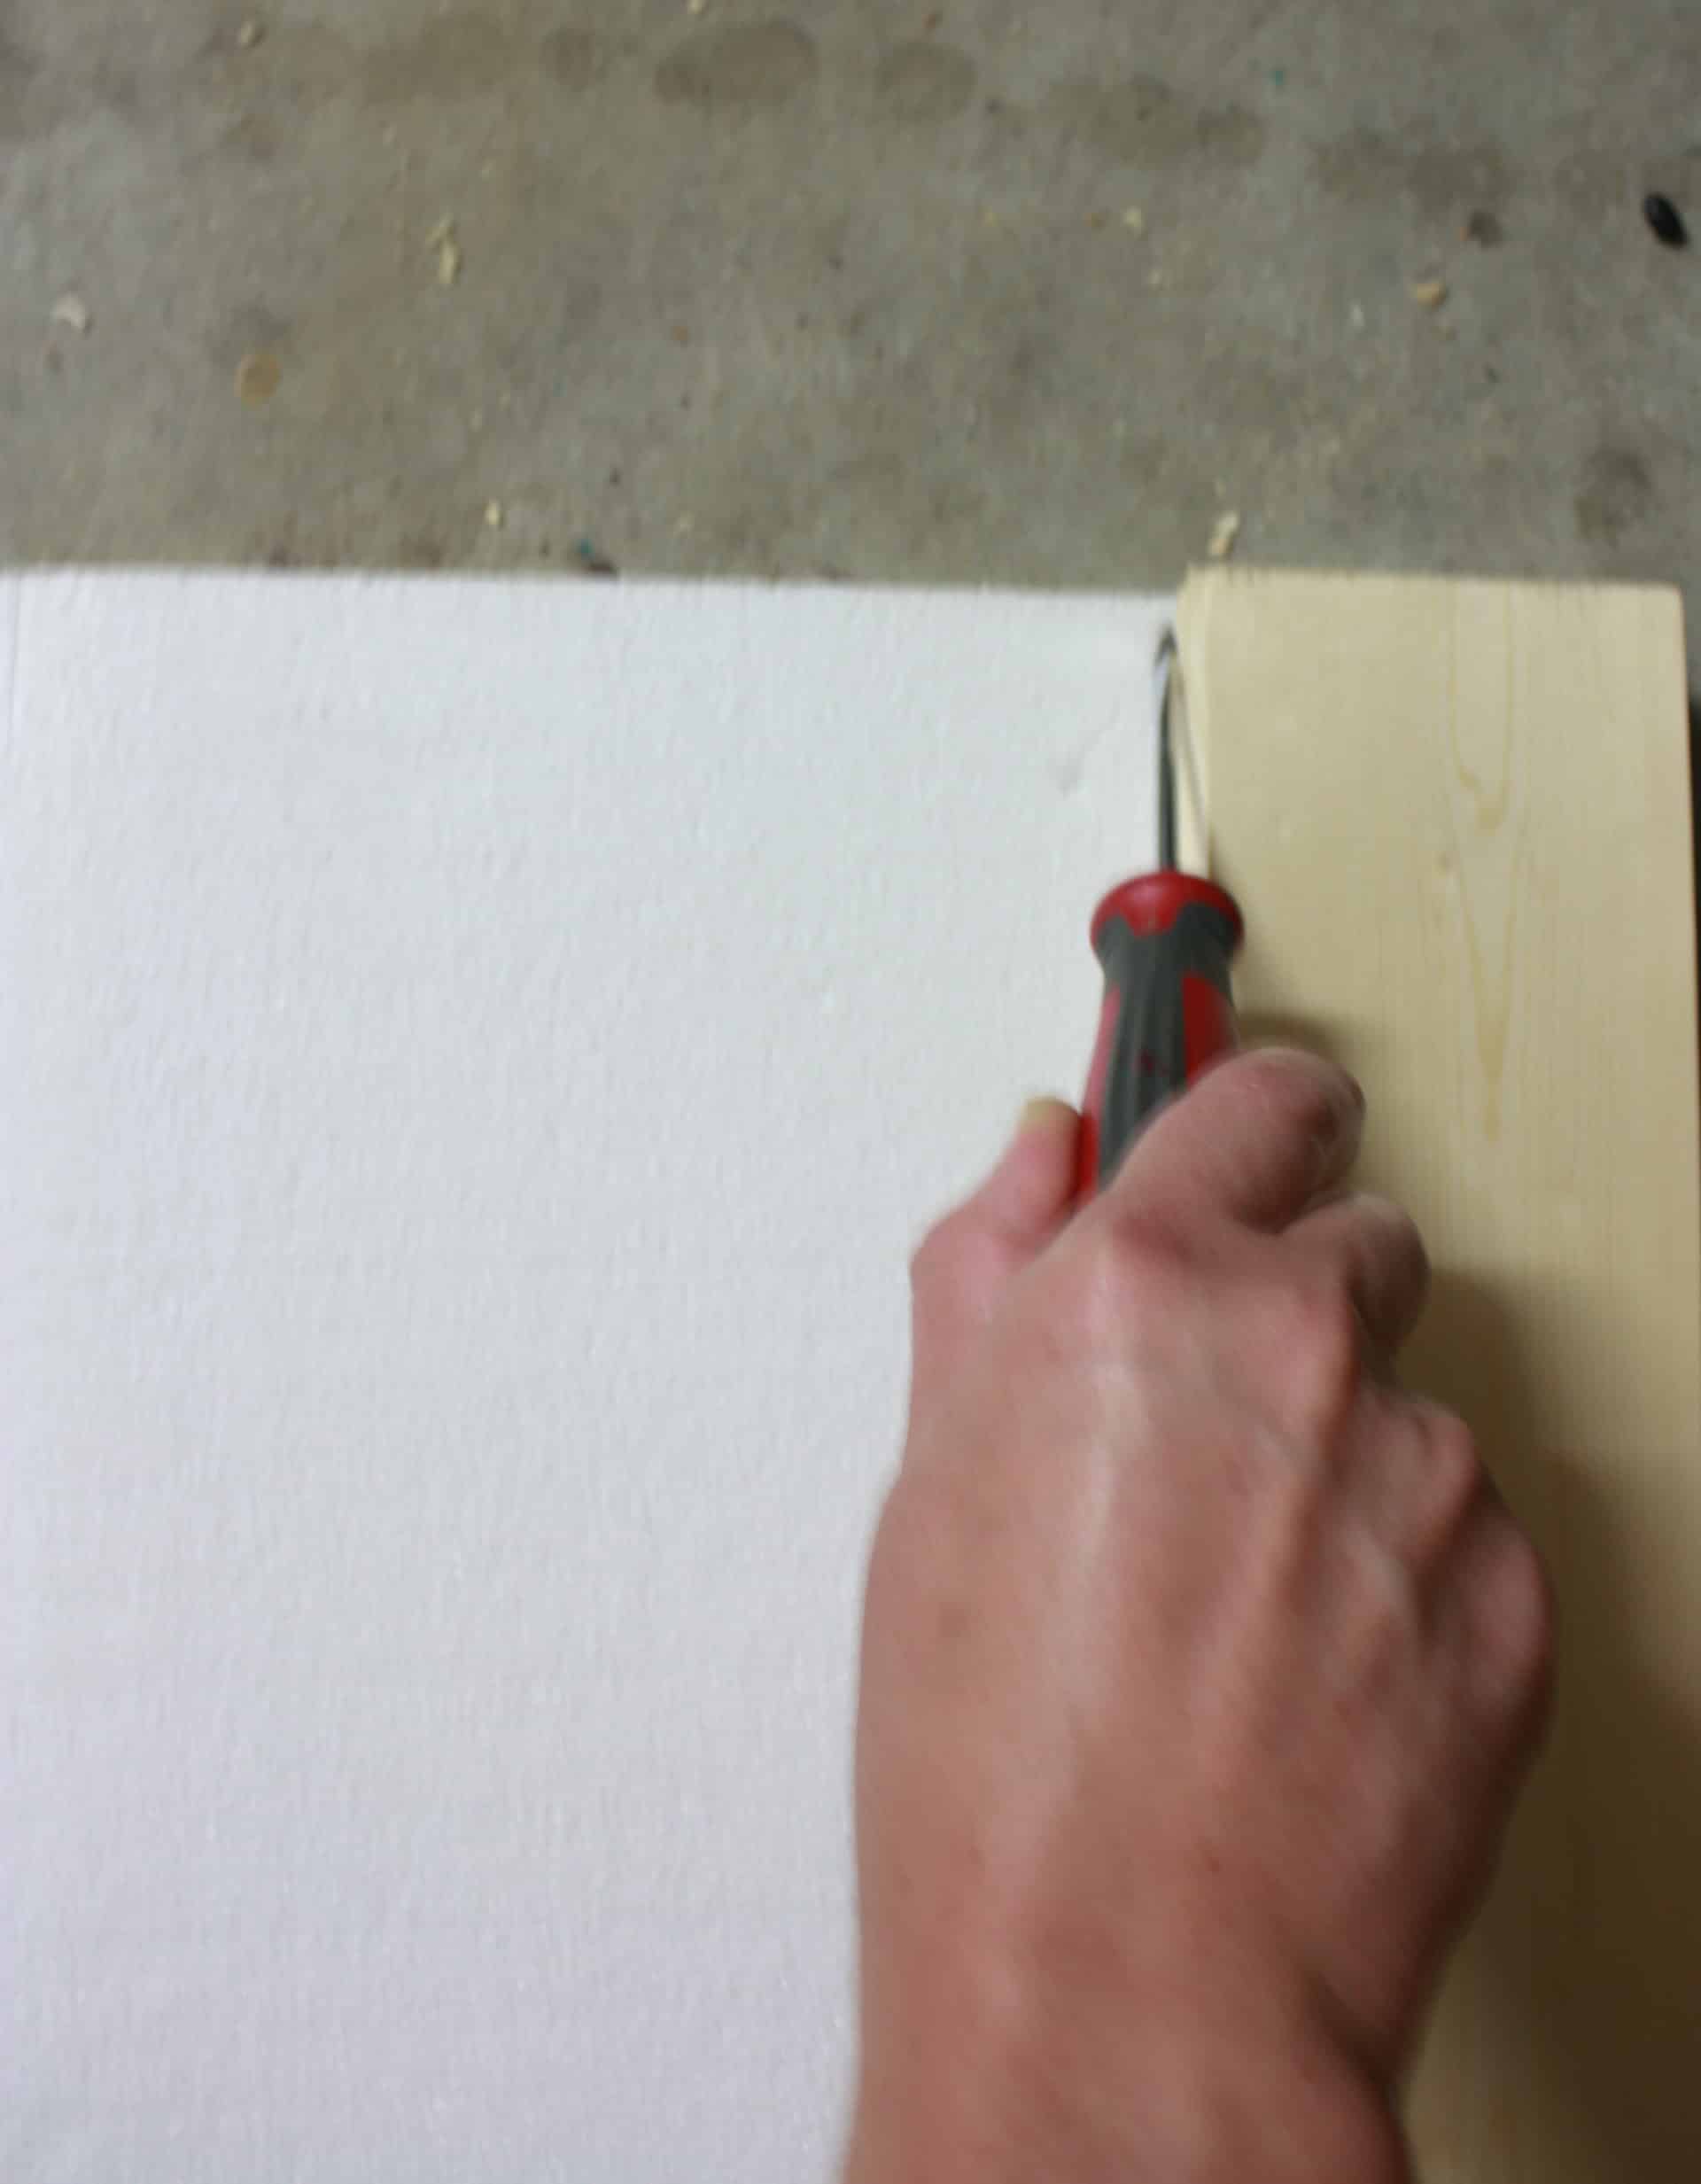
Sorry for the blurry picture, it’s not your eyes, it’s my picture! Ha!
After cutting your foam along the 1×4 you then will need to go back and use the screwdriver to cut them 15″ long…again doesn’t need to be perfect! So after cutting your foam very professionally…lol…they will look like this!
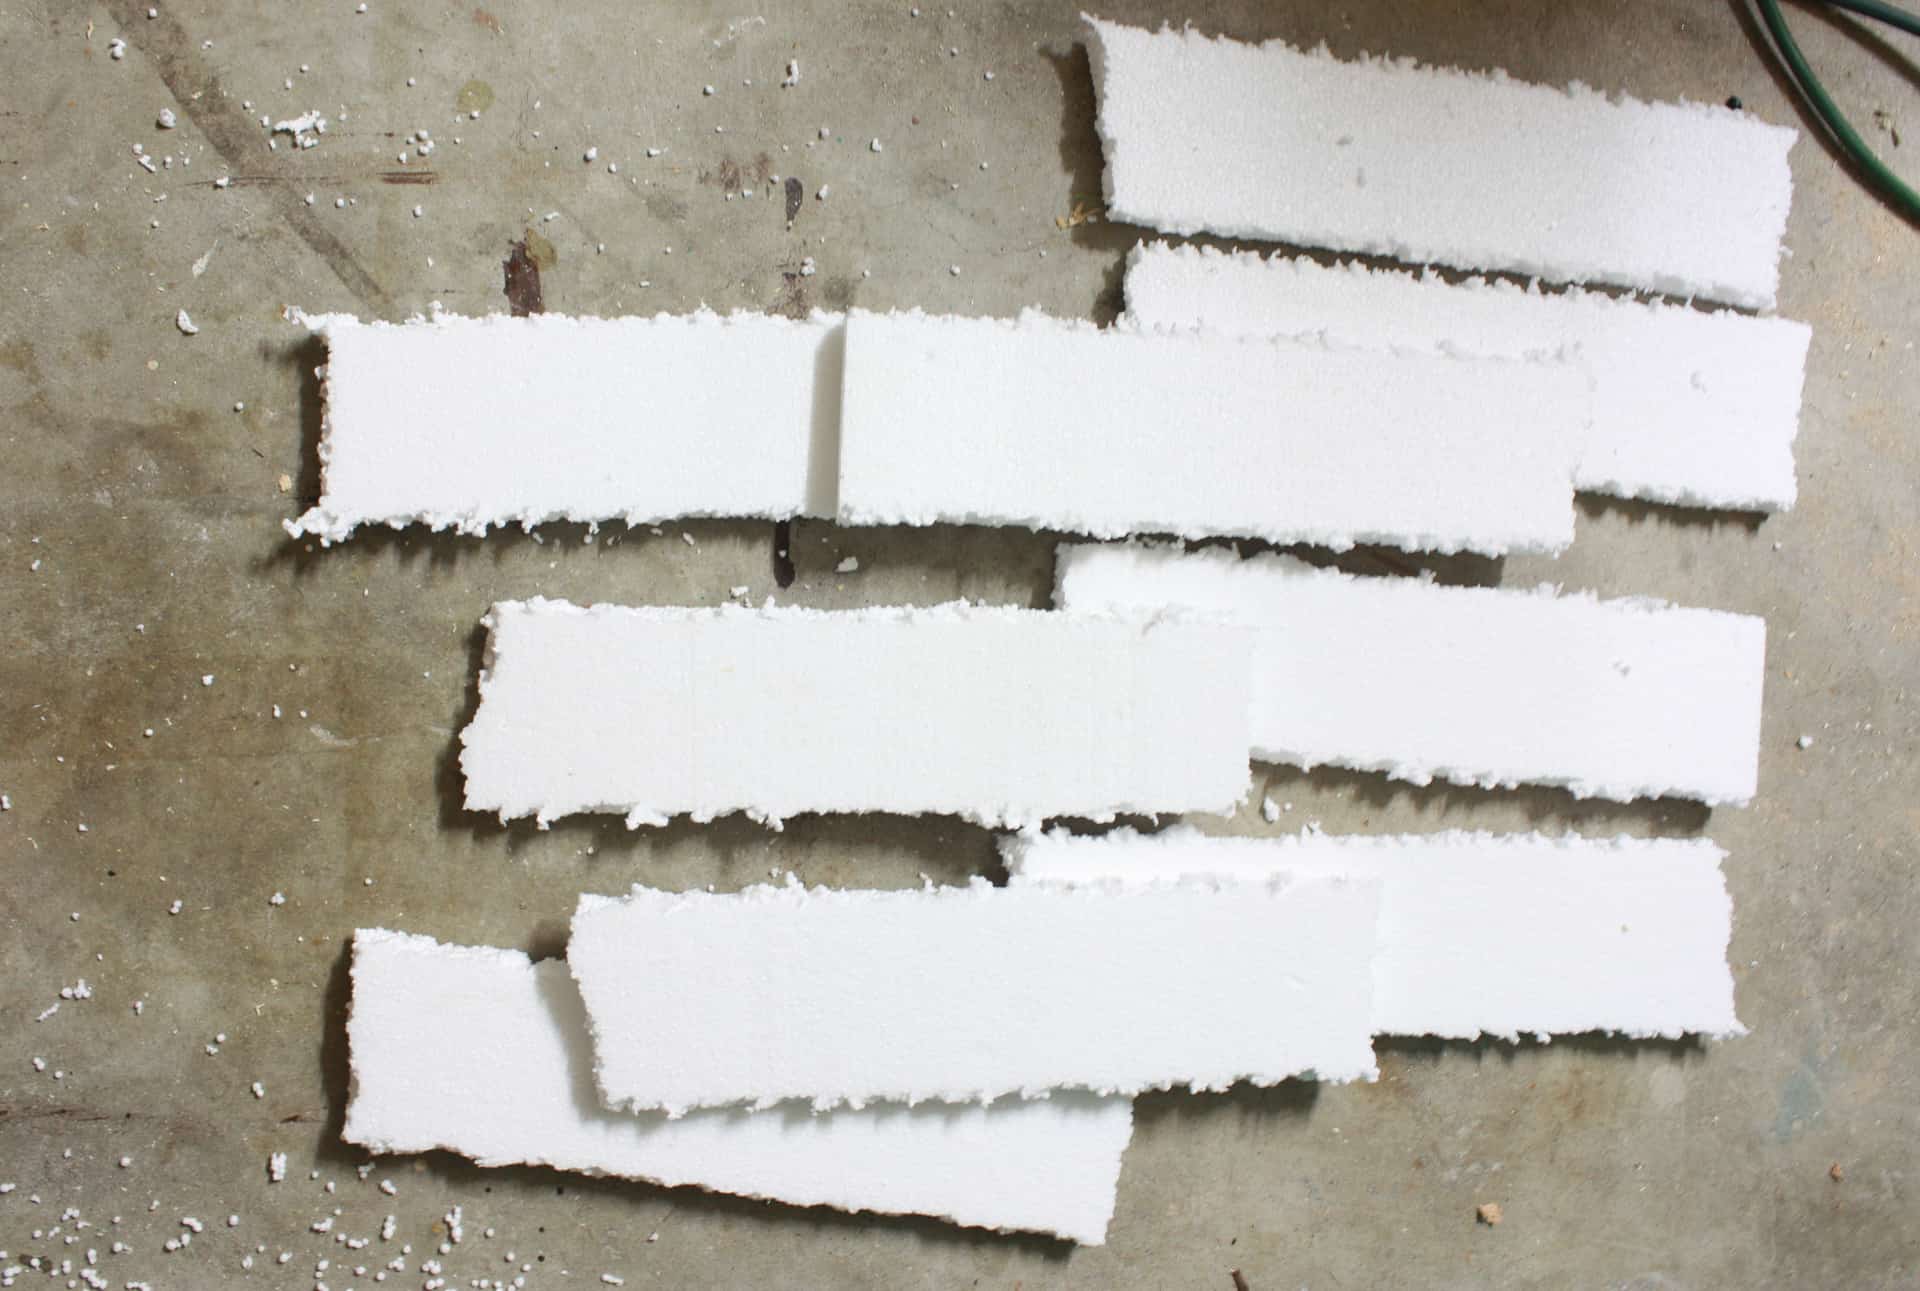
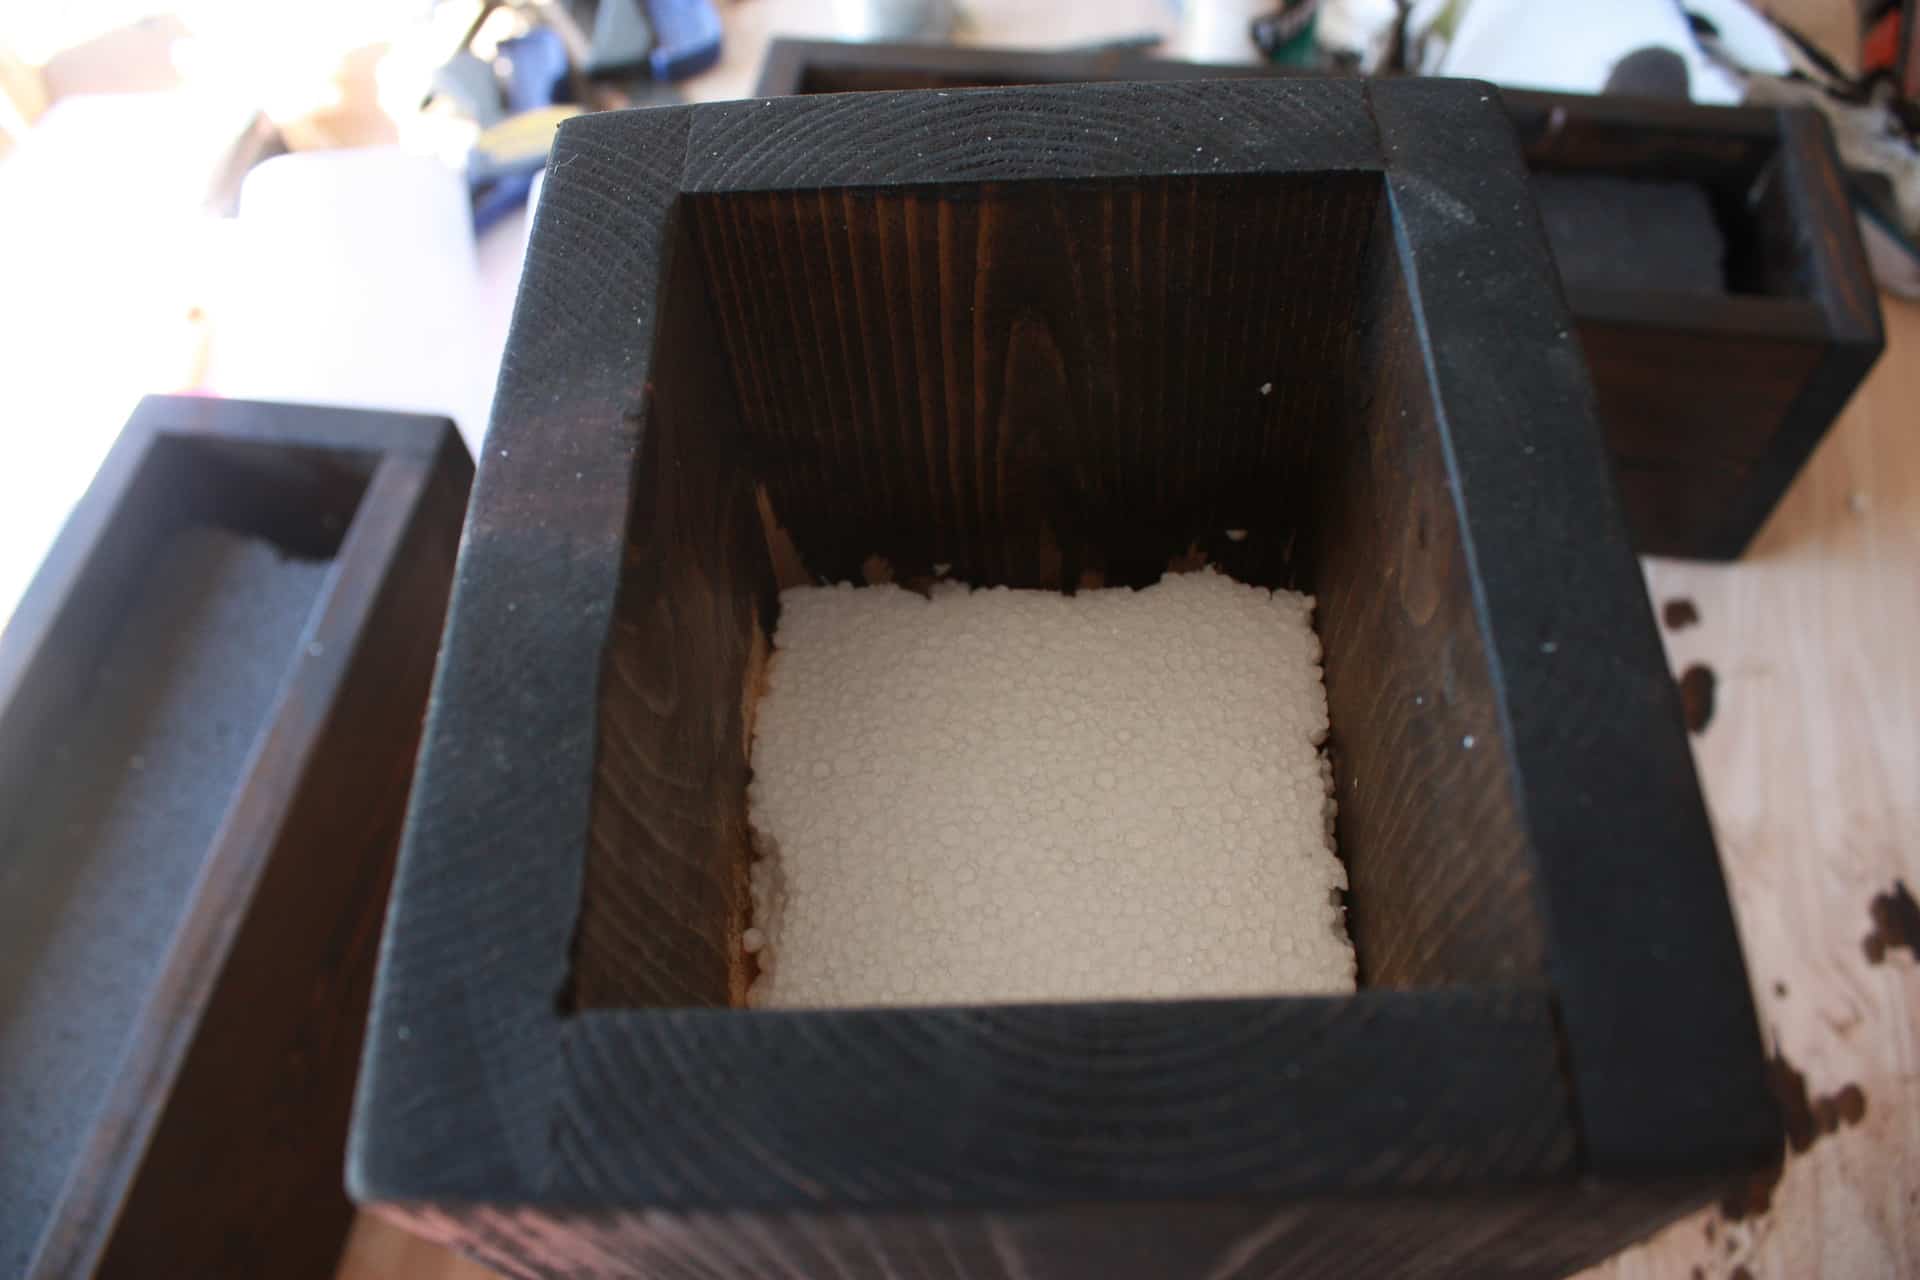
You will have to cut some small 3 in. pieces for the tall wooden vase.

Another blurry pic, sorry it was late at night, I was probably half asleep while taking these!😅
I did take my hand and rub it along the edges of the foam until I smoothed it out enough that I could get them to fit in the box, my Styrofoam was very thin so I layered 5 or 6 pieces in each box and a whole lot of them in the tall one…I lost count after 8…Once the foam was in the boxes I painted the top of the foam a dark brown so it wouldn’t be so obvious!
I didn’t worry about the foam in the tall one, I left it white because it was tall enough to hide it!
So there we have it, you can pick your flowers and cut them down to size, stick them in the foam and have a very inexpensive décor item for your party or home!

There you have it! Completed wood flower vases or boxes for table decor for whatever event you may have next! I hope you enjoy building the boxes for your next event, but I hope you have even more fun spending time with friends and family celebrating! Any questions feel free to ask below!
Have a good one!
