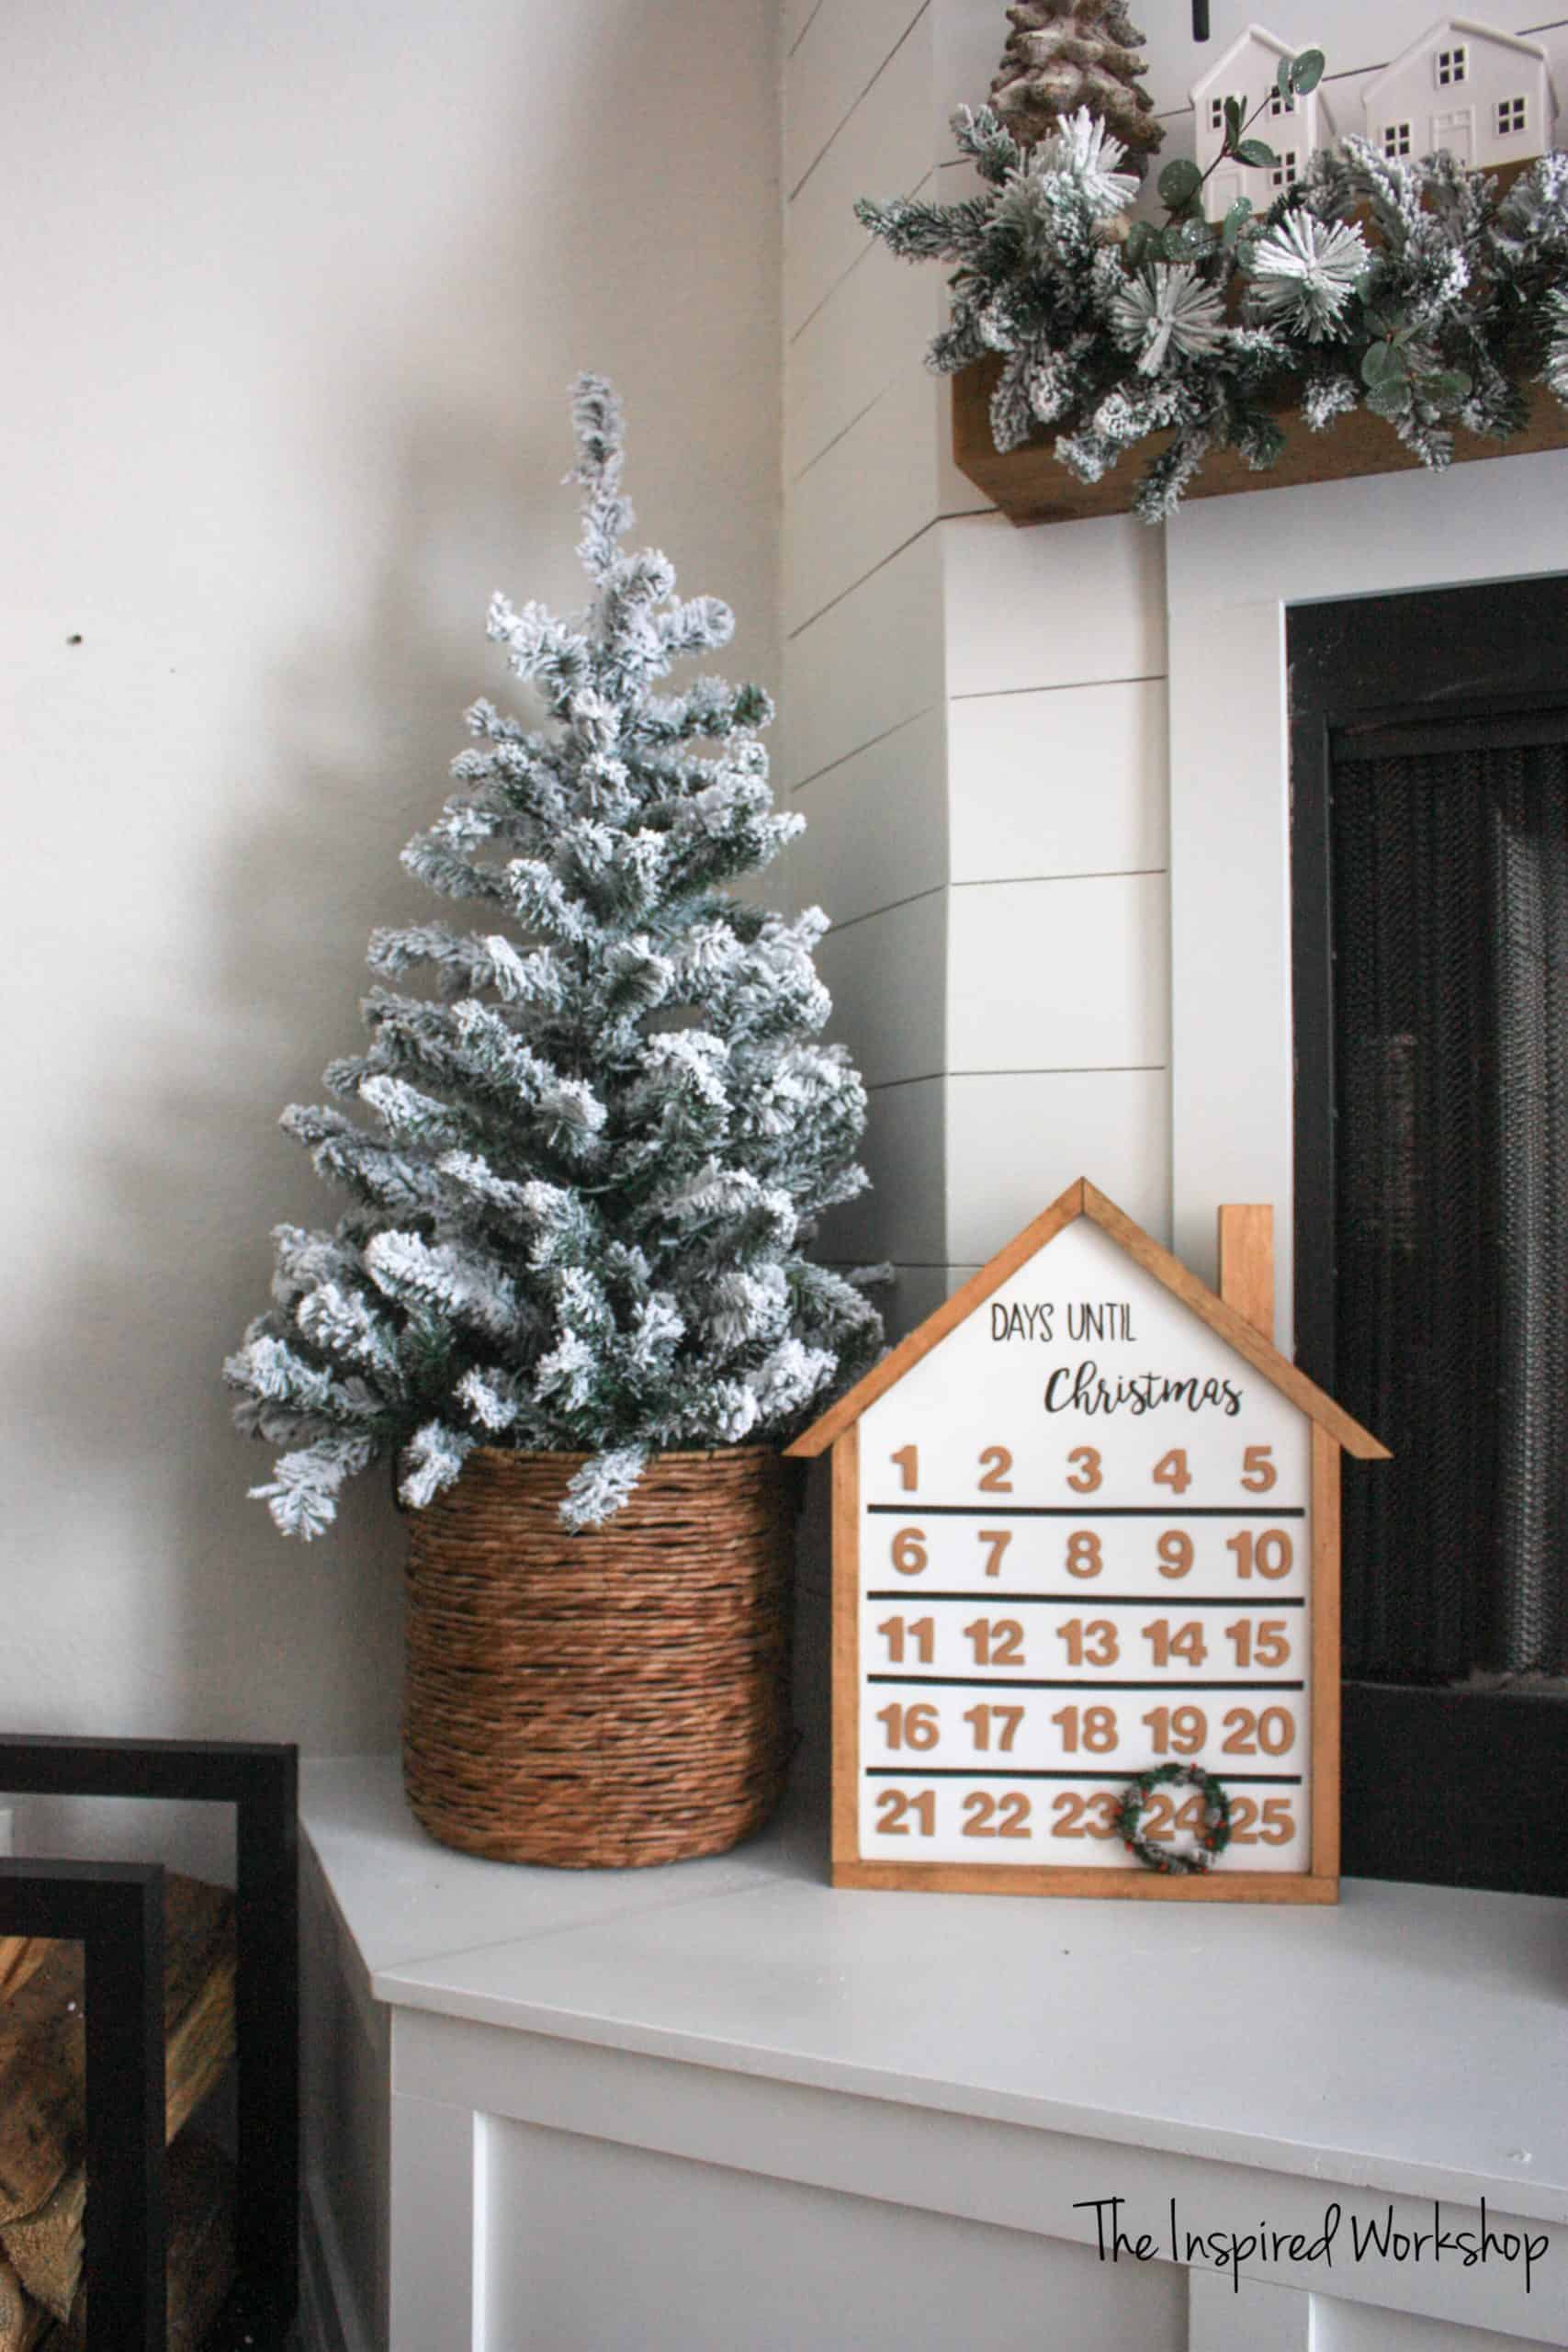
• Skip to secondary menu
  • Skip to main content
  • Skip to primary sidebar
  • Skip to footer
  • About
  • Blog
  • Contact Me

The Inspired Workshop

Inspiring you to Do-It-Yourself

  • Home
  • Furniture Plans
  • Remodeling
  • How To
  • Holiday
  • Crafts
  • Tools
  • Videos
You are here: Home / Crafts / DIY Advent Calendar

DIY Advent Calendar

December 3, 2019 by Cara 1 Comment

136 Shares
Pin136
Tweet
Share

Hey there! I would like to welcome you to the 1st day of my 25 Days of a DIY Christmas!! I am so excited to bring you a new project every day this December, until Christmas Day! There will be gift ideas and decor items galore, I hope it helps you in some way this Holiday Season! The first project is a DIY Advent Calendar! It is easy enough, you can start it and finish it today and not miss but a couple of days in the countdown because, update, I have had technical difficulties and now, my 25 days are running LATE!🙈

DIY Wooden House Advent Calendar

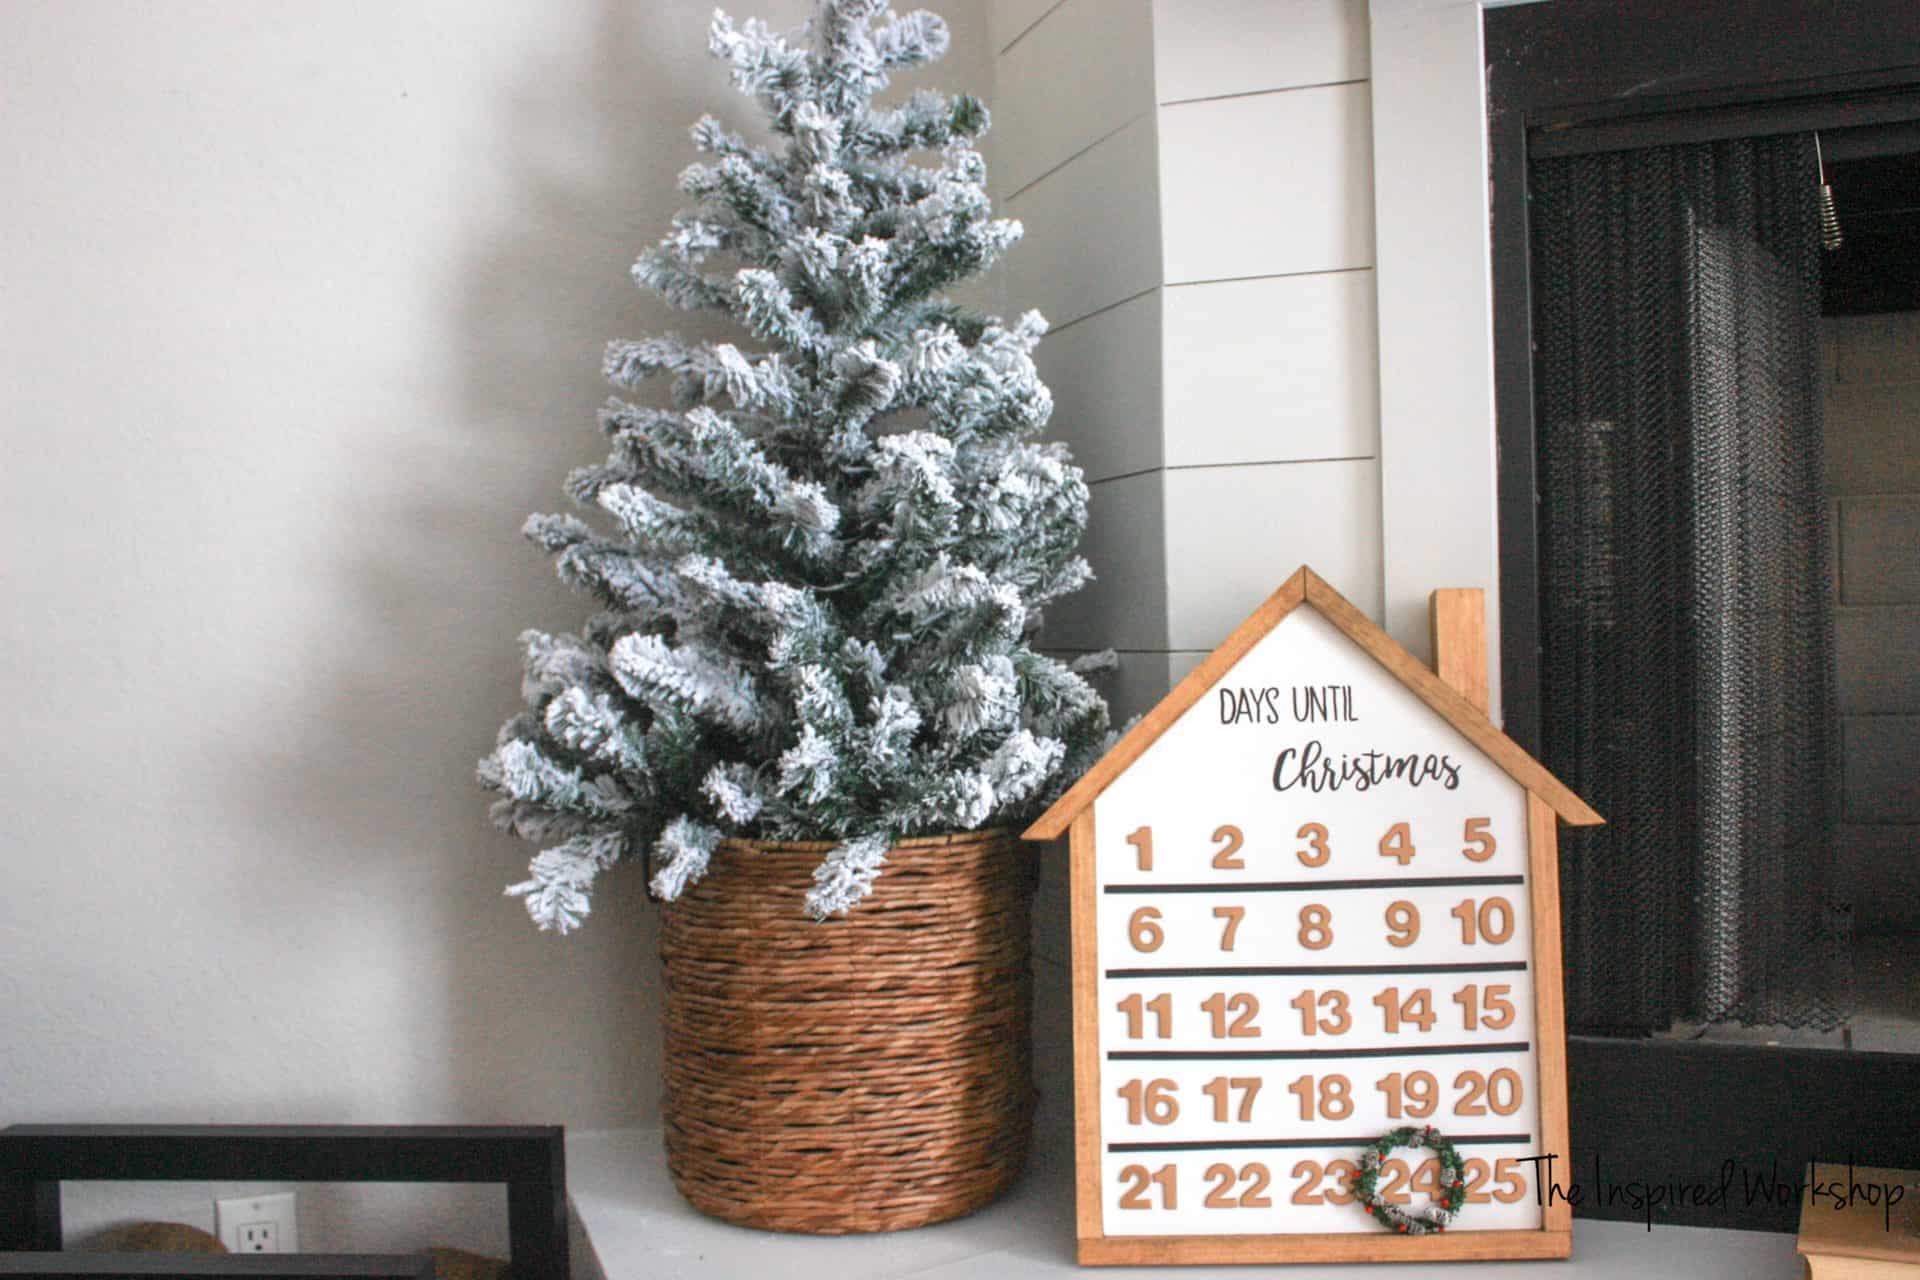
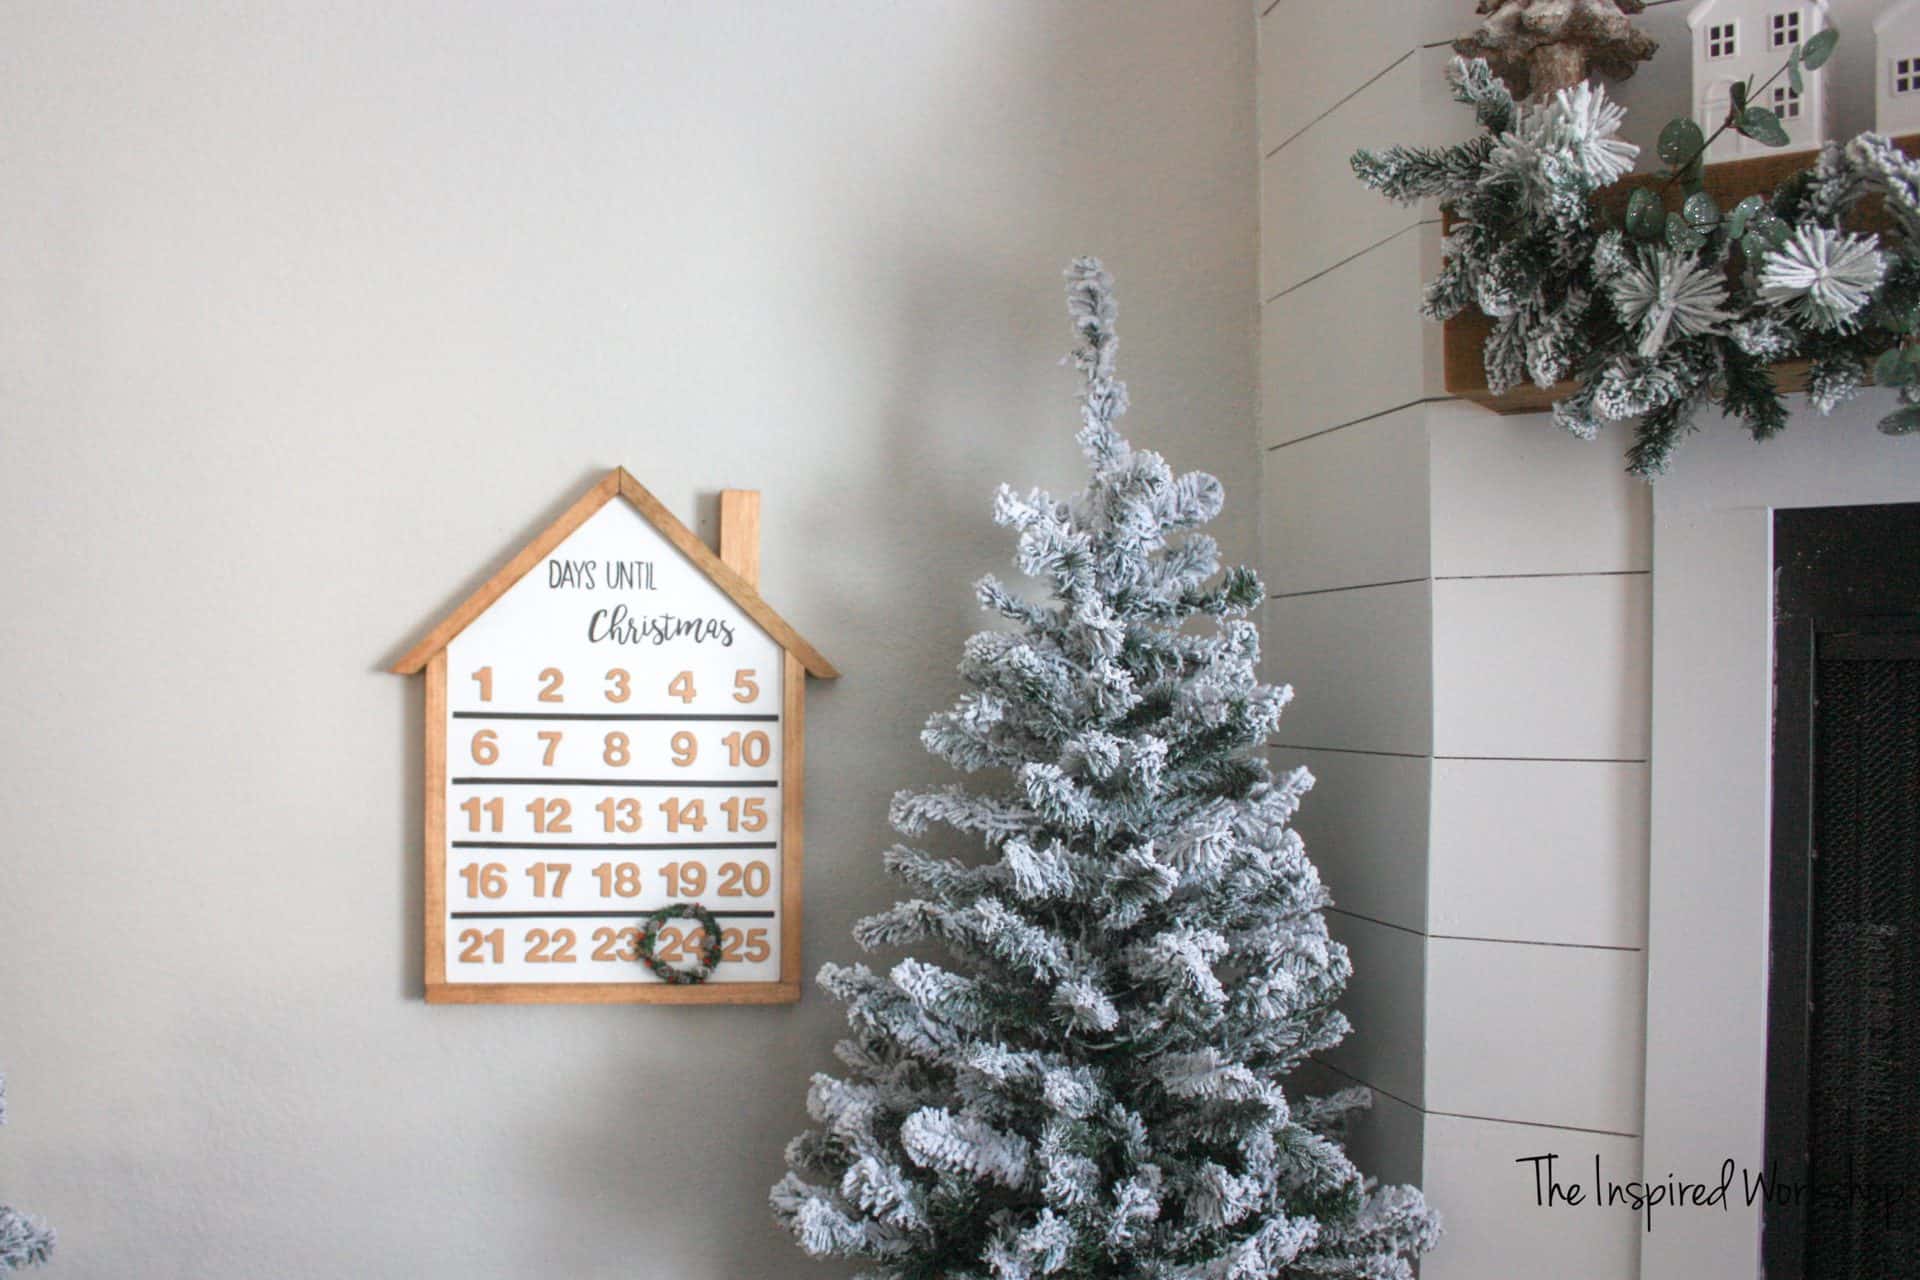
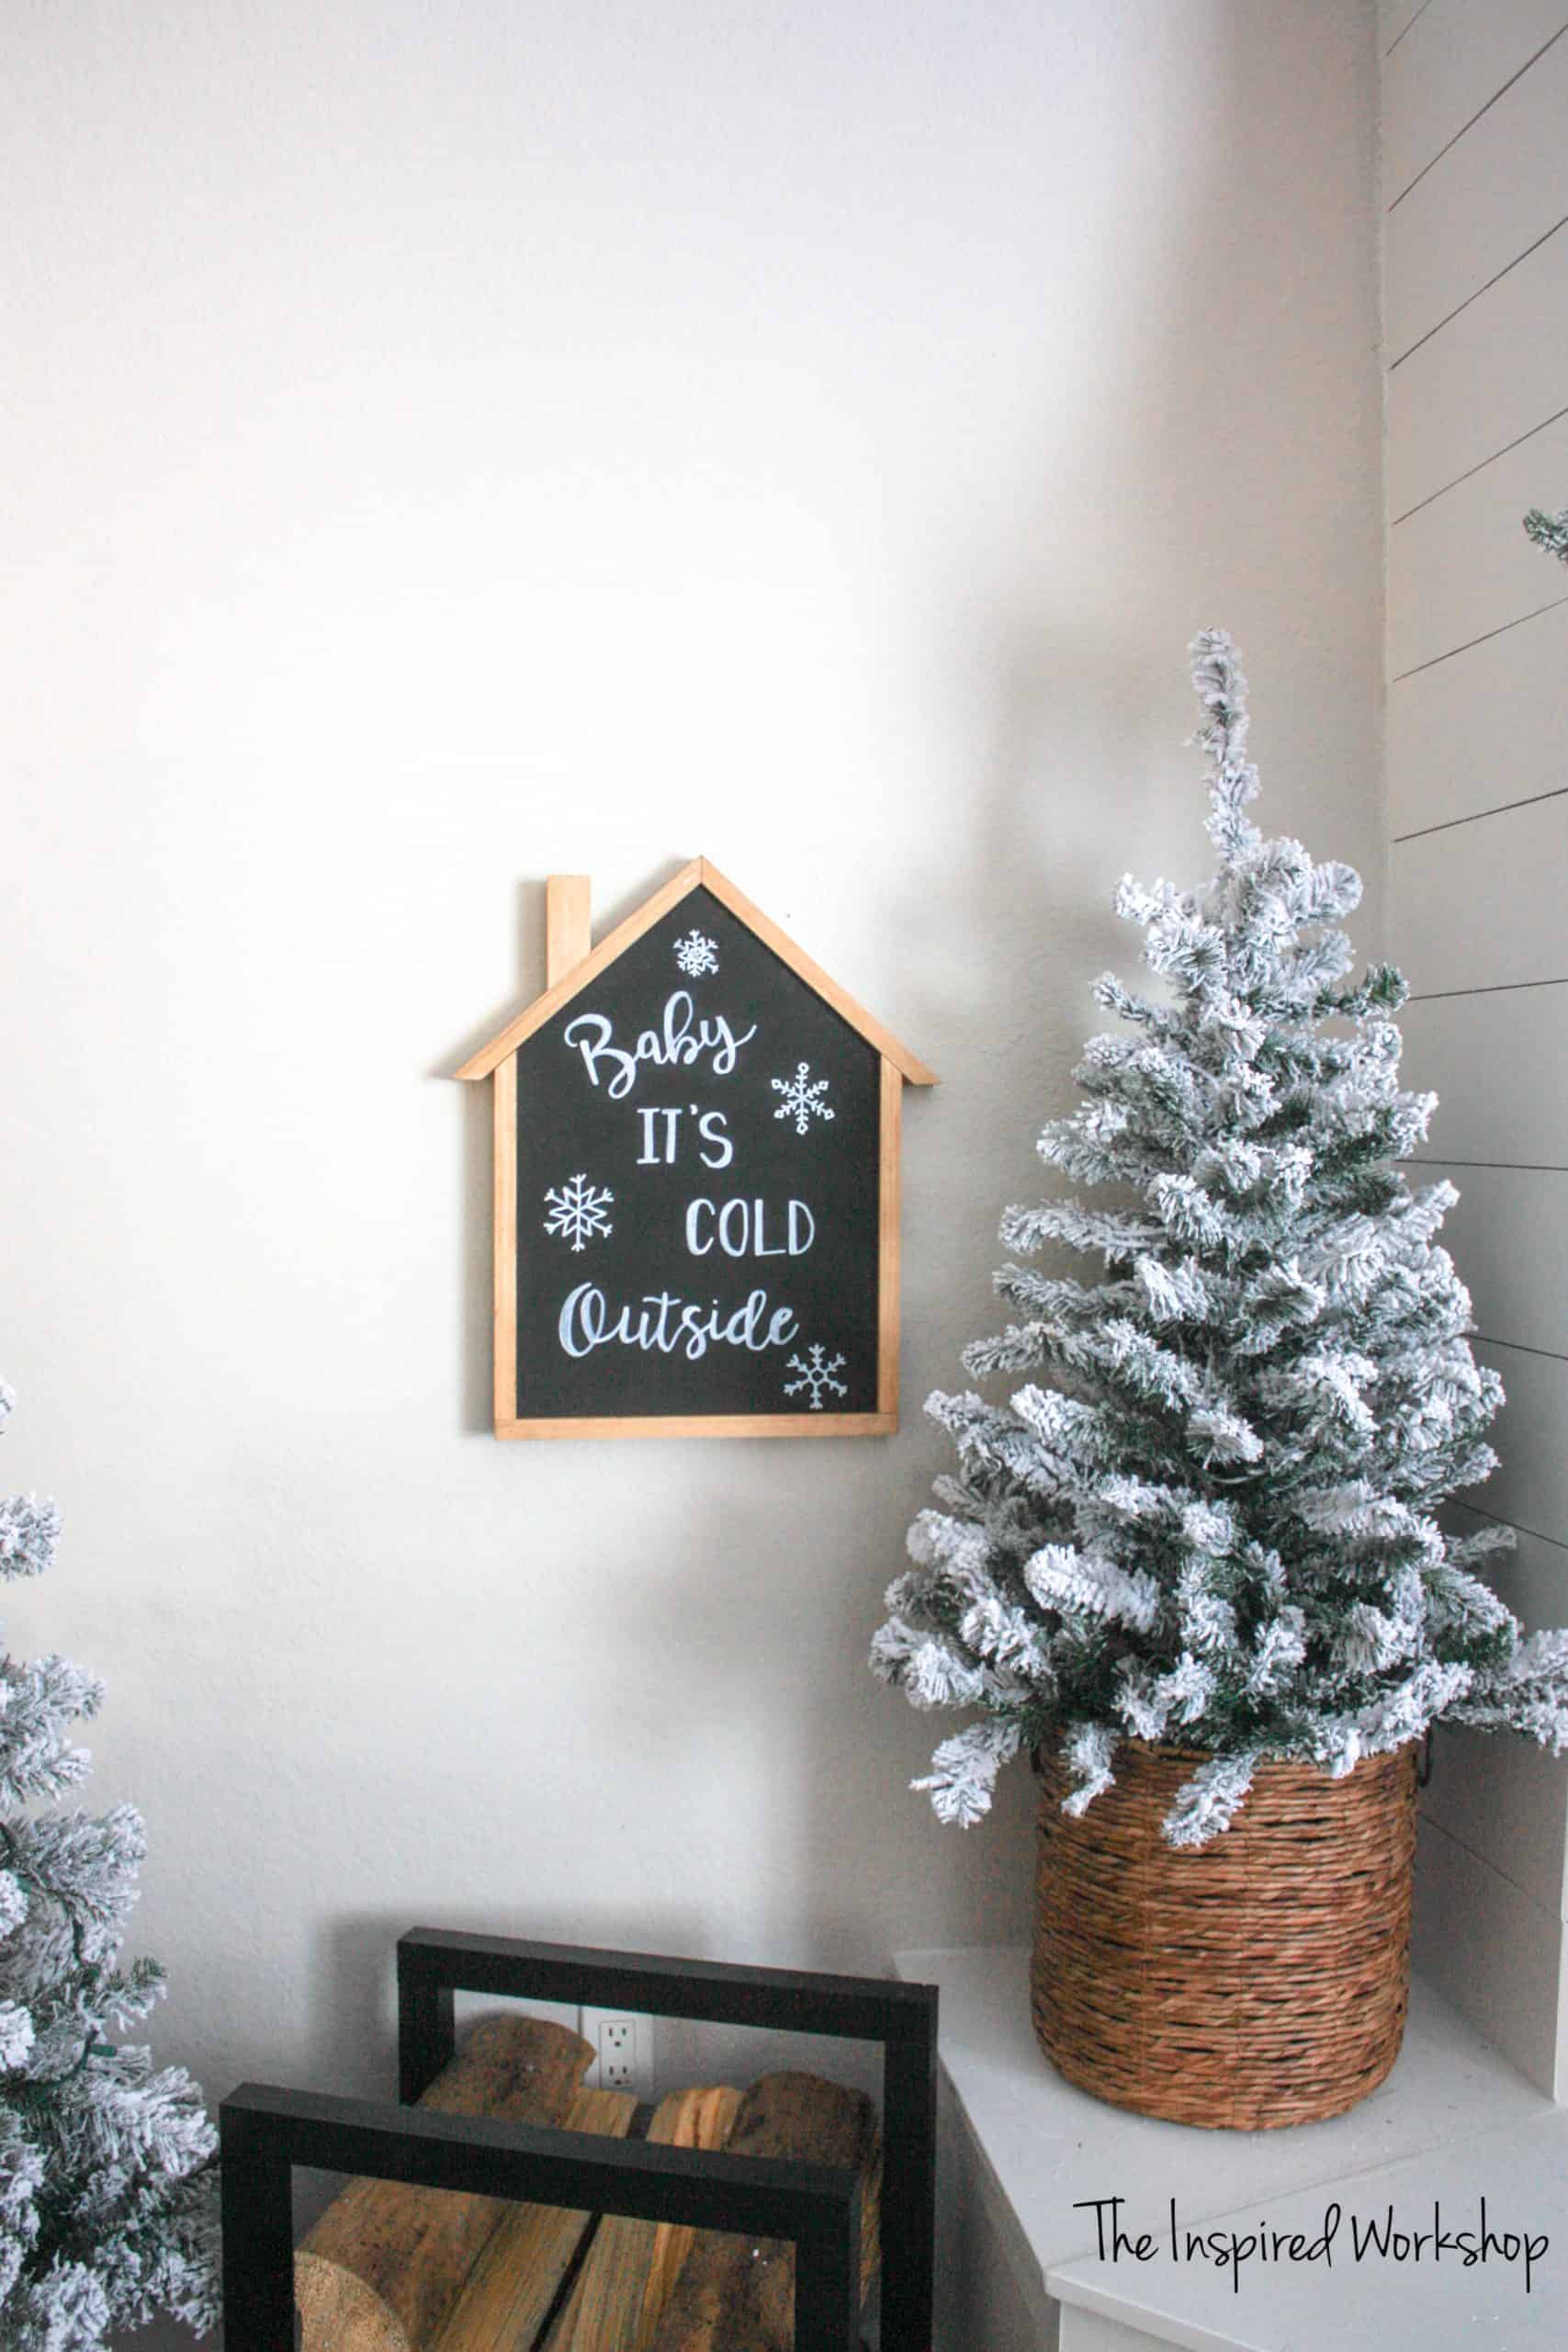
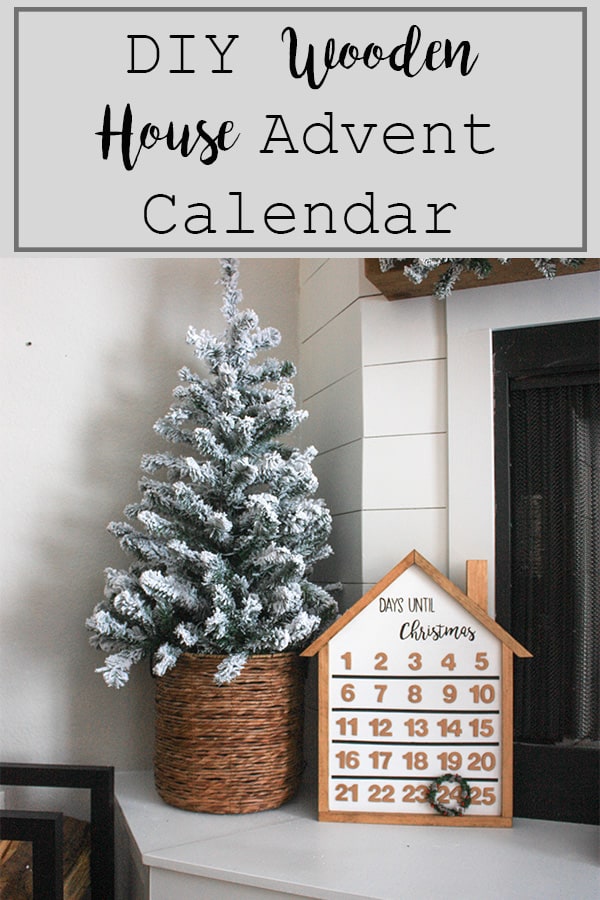
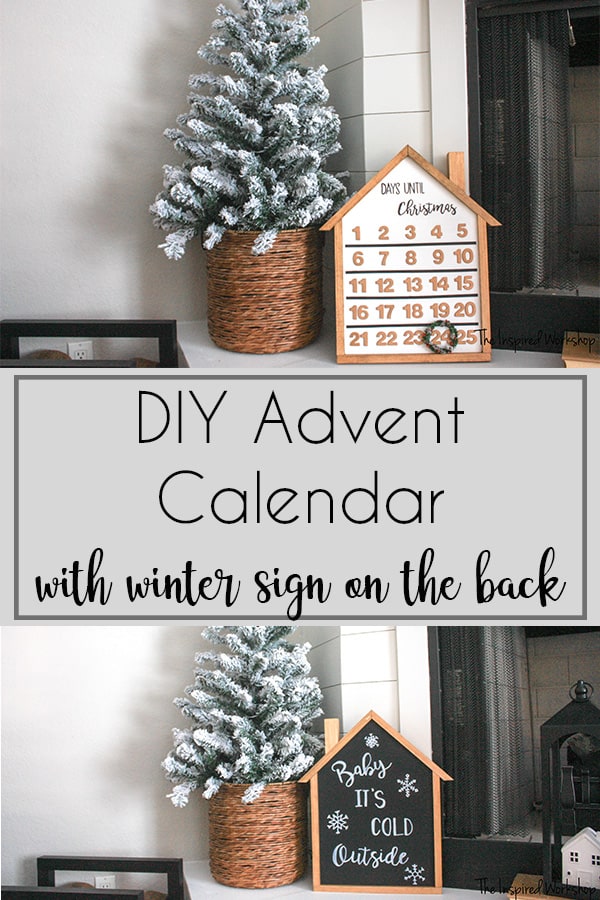
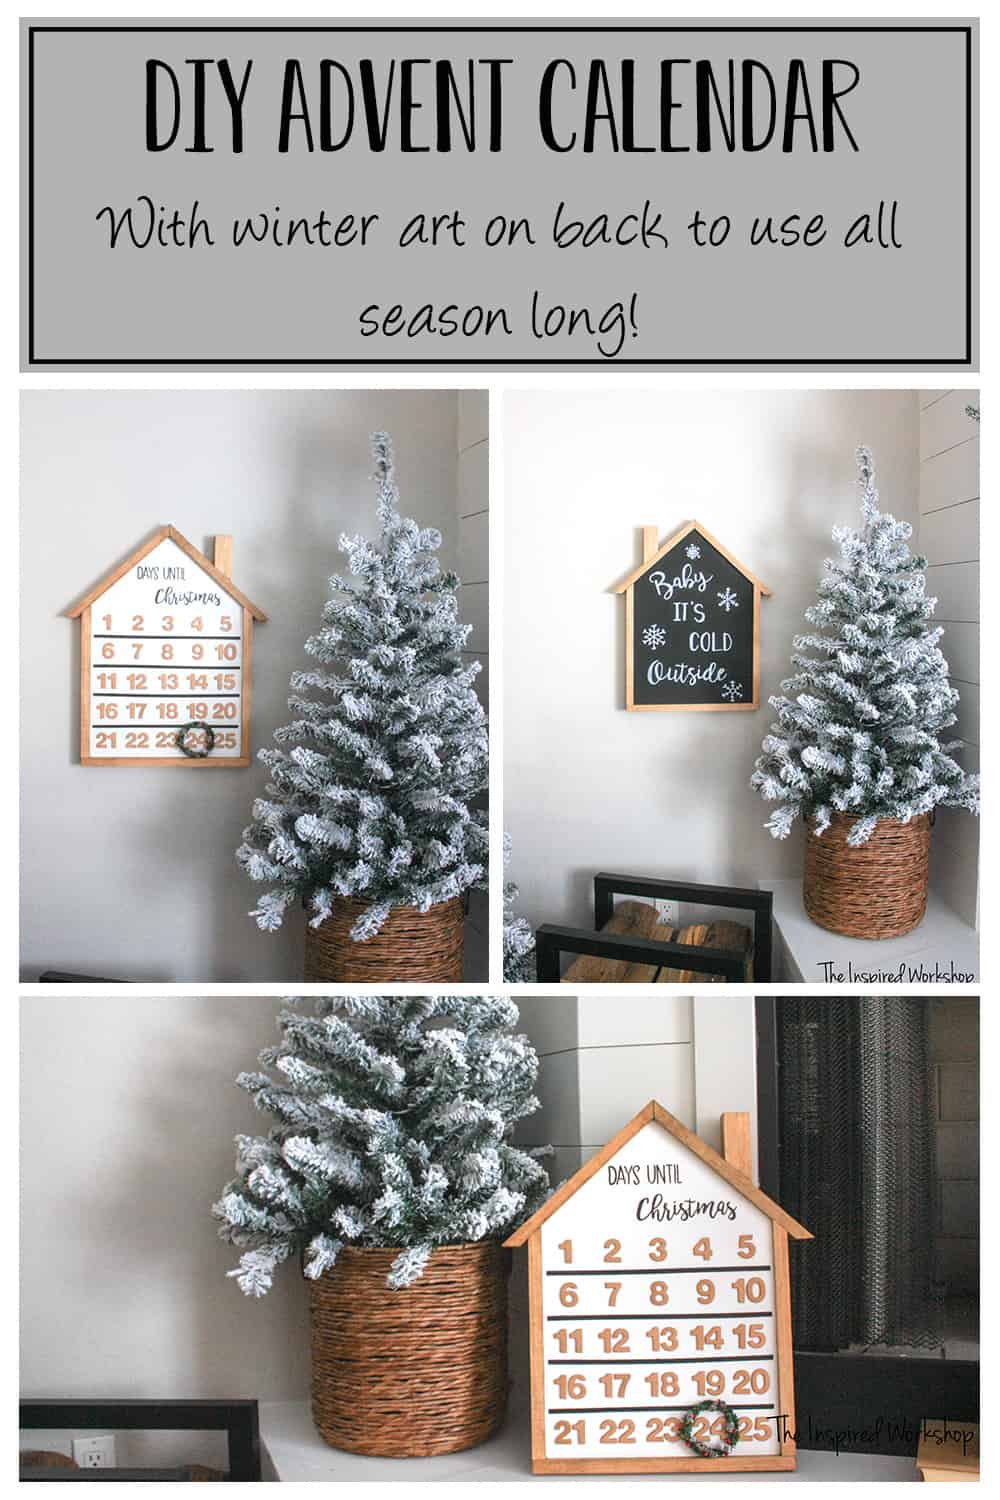
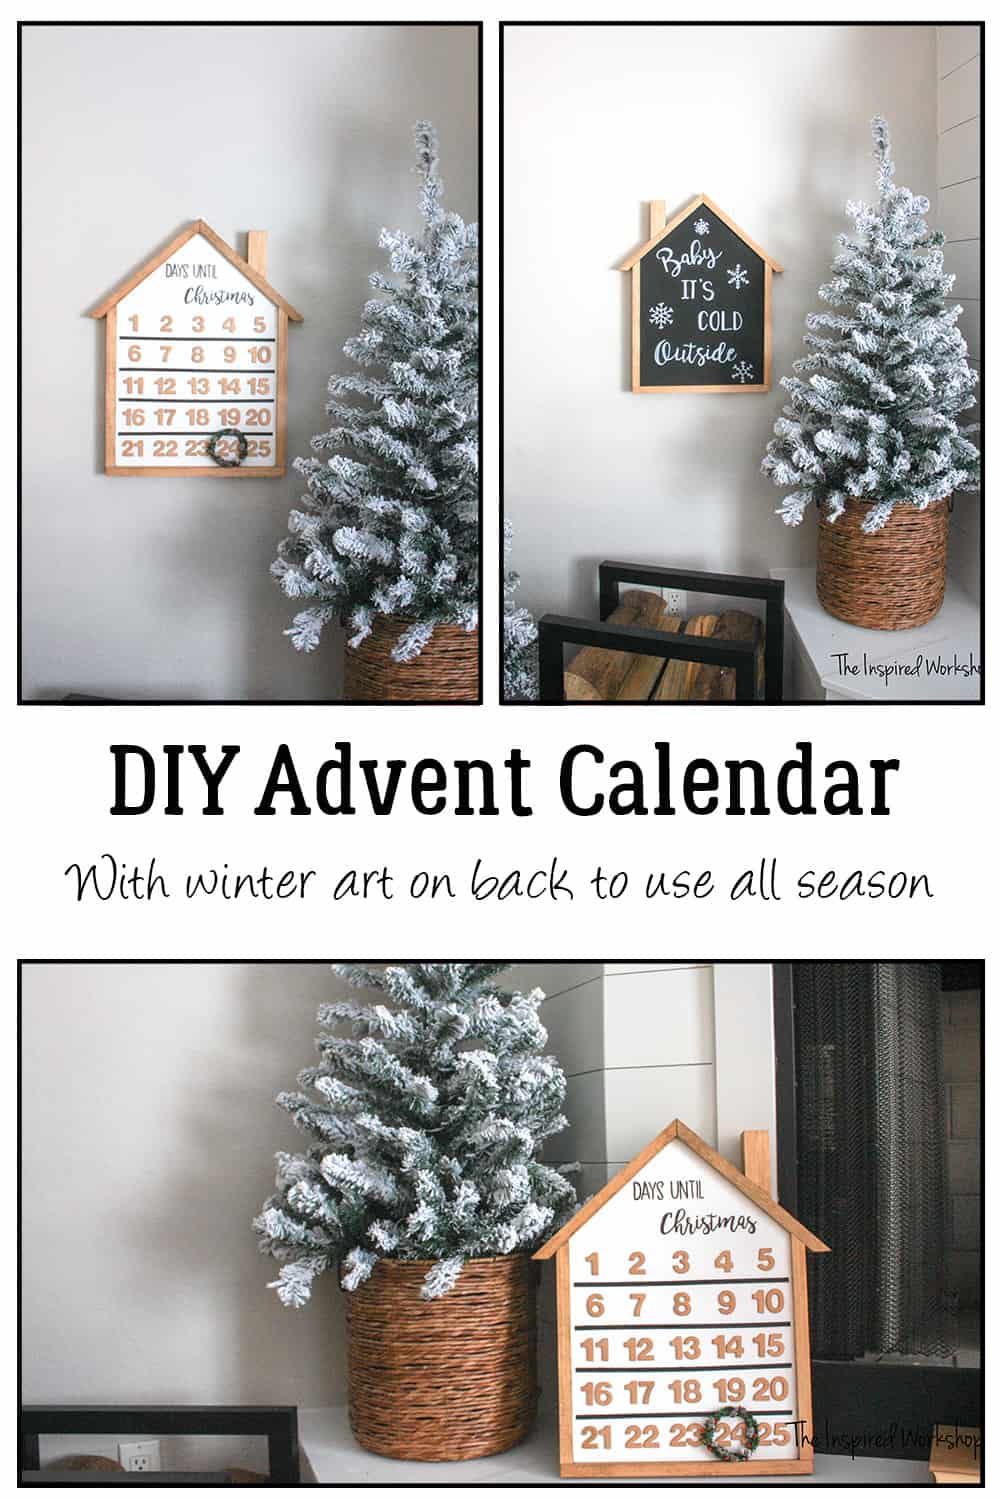
I saw a similar one at Target and fell in love, but guess what, by the time I went to purchase one, they were long gone at all the Target stores somewhat close by. Dang, it! I knew I should have bought it when I saw it! That was okay though because I wanted to make it a little different, and I could even make it cheaper, so why not?! Plus, I made the back a totally different sign so I can flip it over once we hit Christmas, and boom, a winter sign! Lol!

DIY Advent Calendar with Baby It's Cold Outside sign on the back

All the projects for my 25 days will be projects that you can complete in a few hours, not days because we all know time seems like it is in short supply this time of year! Make sure and PIN any projects you like because you know you can always build the gifts for Birthdays or Mother/Father’s Day as well and next year you may have more time to build that perfect decor piece!

You can hang it on the wall as well.

DIY wooden advent calendar

DIY Baby It's Cold Outside Sign

Let’s dig right in! I have created videos as well for all the projects to help you see how easy they are! But that’s where my technical difficulties have surfaced and so the video will be late for the show! Lol!

Making Your Own DIY Advent Calendar

Materials:

1 – 1/2″ x 2’x2′ piece of plywood – or scrap piece of plywood 13″x19″

1 – 1x2x8

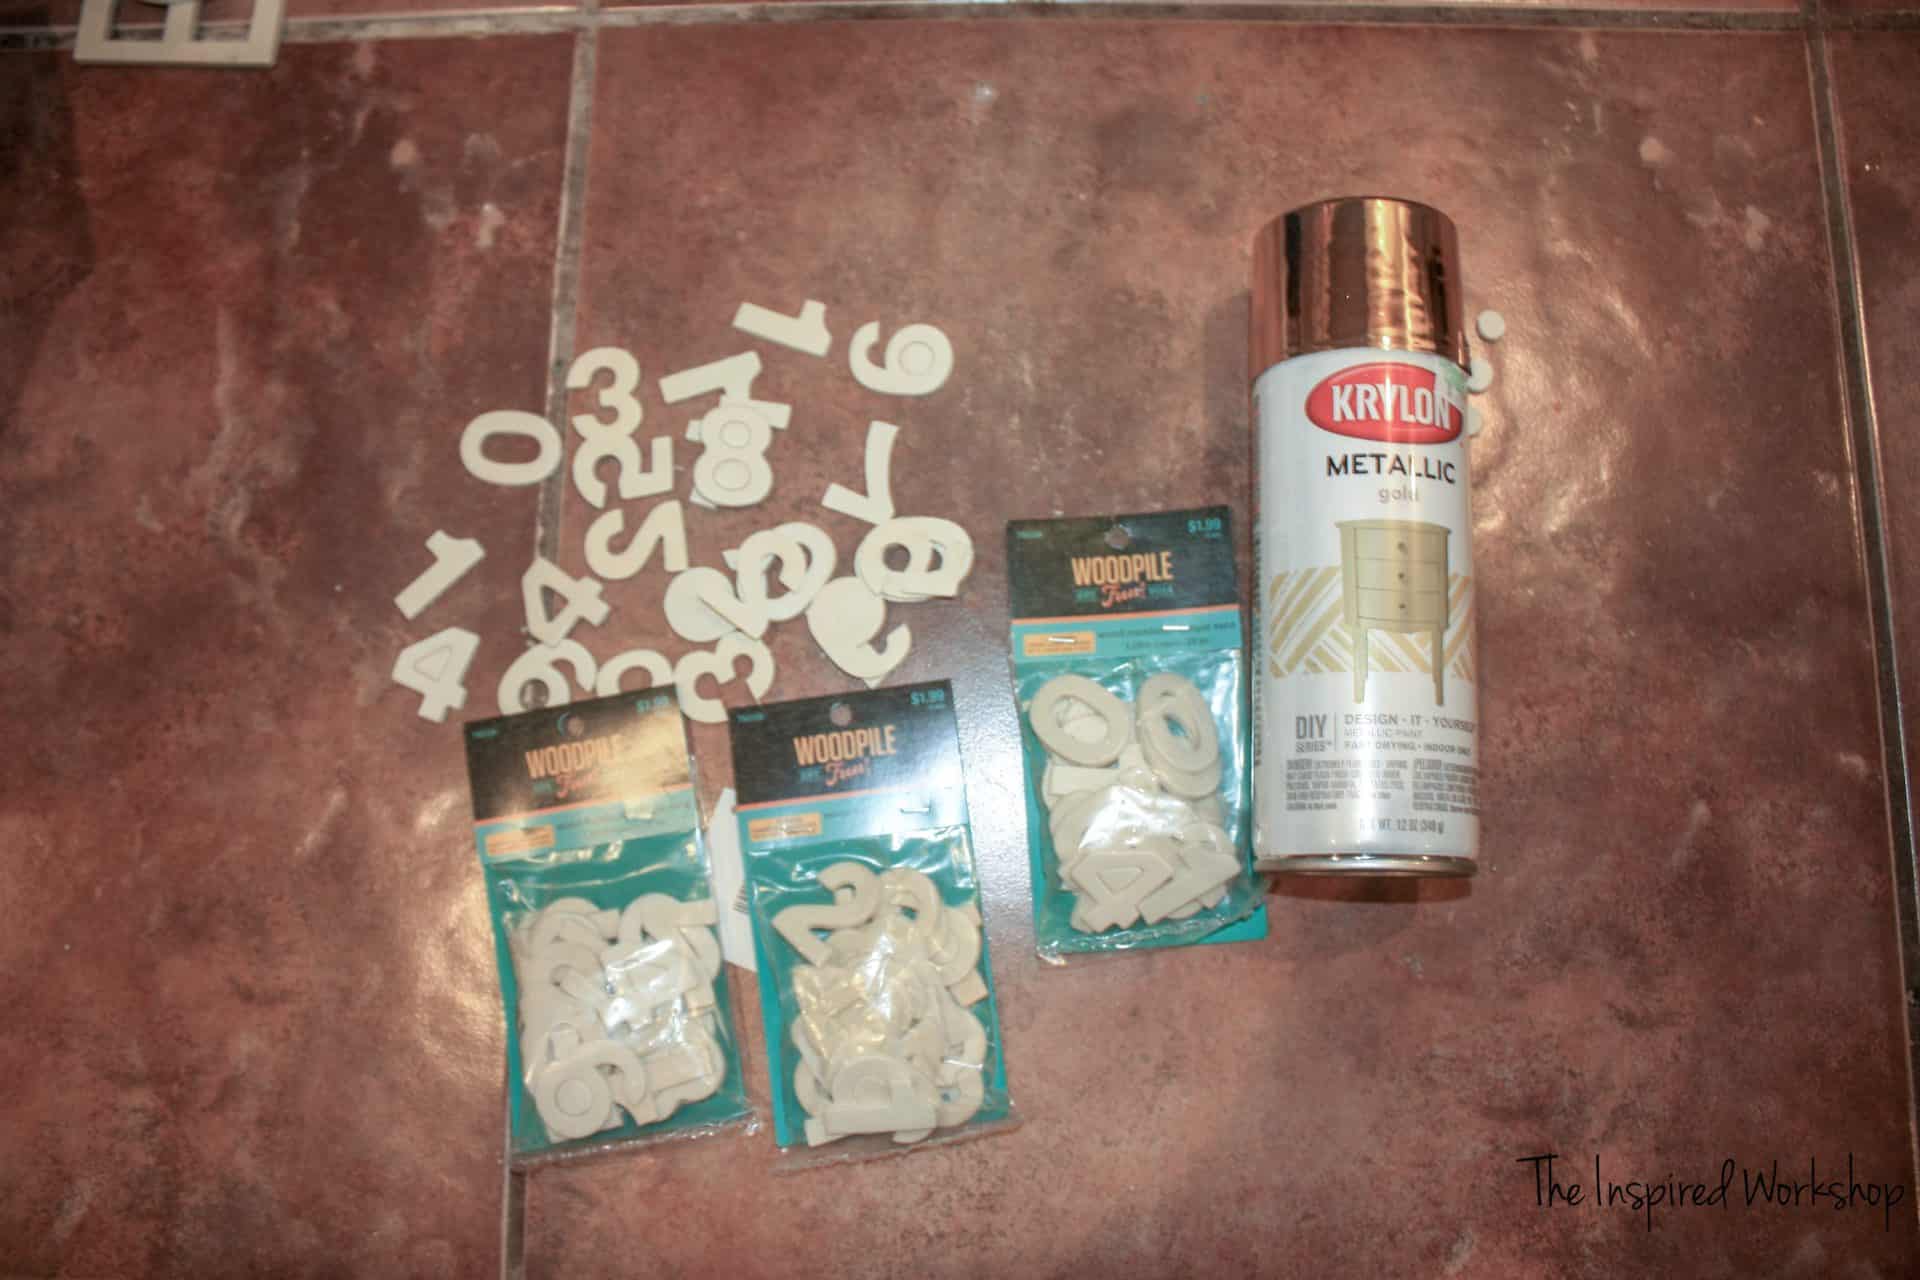
wooden numbers from 1 – 25 or you can paint them on – I had to buy 5 packages to get all the number 2s that I needed from Hobby Lobby. I was able to get them 40% off but it took two trips.

small greenery to make a wreath

paint/stain of your choice – I used acrylic craft paint in white and black for painted backgrounds. I used Rustoleum stain in Natural Oak for the frame.

small magnet

metal strip – I used a recoil spring off of our lawnmower that the dogs tore up! Lol!

Get the GET THE FREE ARTWORK files emailed to you to create the same artwork as I have!

Cut List:

-1 – 1/2″ piece of plywood at 13″x19″

-2 – 1×2 @ 11 3/4″ longest side; mitered at 43 degrees off square on one end and 45 degrees off square on the other, ends not parallel (roof)

-2 – 1×2 @ 13″ – longest side; mitered at 43 degrees off square on one end (sides)

-1 – 1×2 @ 14 1/2″ (bottom)

-1 – 1×2 @ 4″ longest side; one end mitered at 43 degrees off square (chimney)

-1 – 1×2 @ 3 1/4″ longest side; one end mitered at 43 degrees off square (chimney)

The video will be HERE once I finish it! The video creates a quick run-through of how to make the DIY advent calendar, below will be the step by step instructions!

Also, pay NO attention to the dates on the camera, I have NO IDEA why they say 2/24/2018…absolutely no clue!😂

Step 1

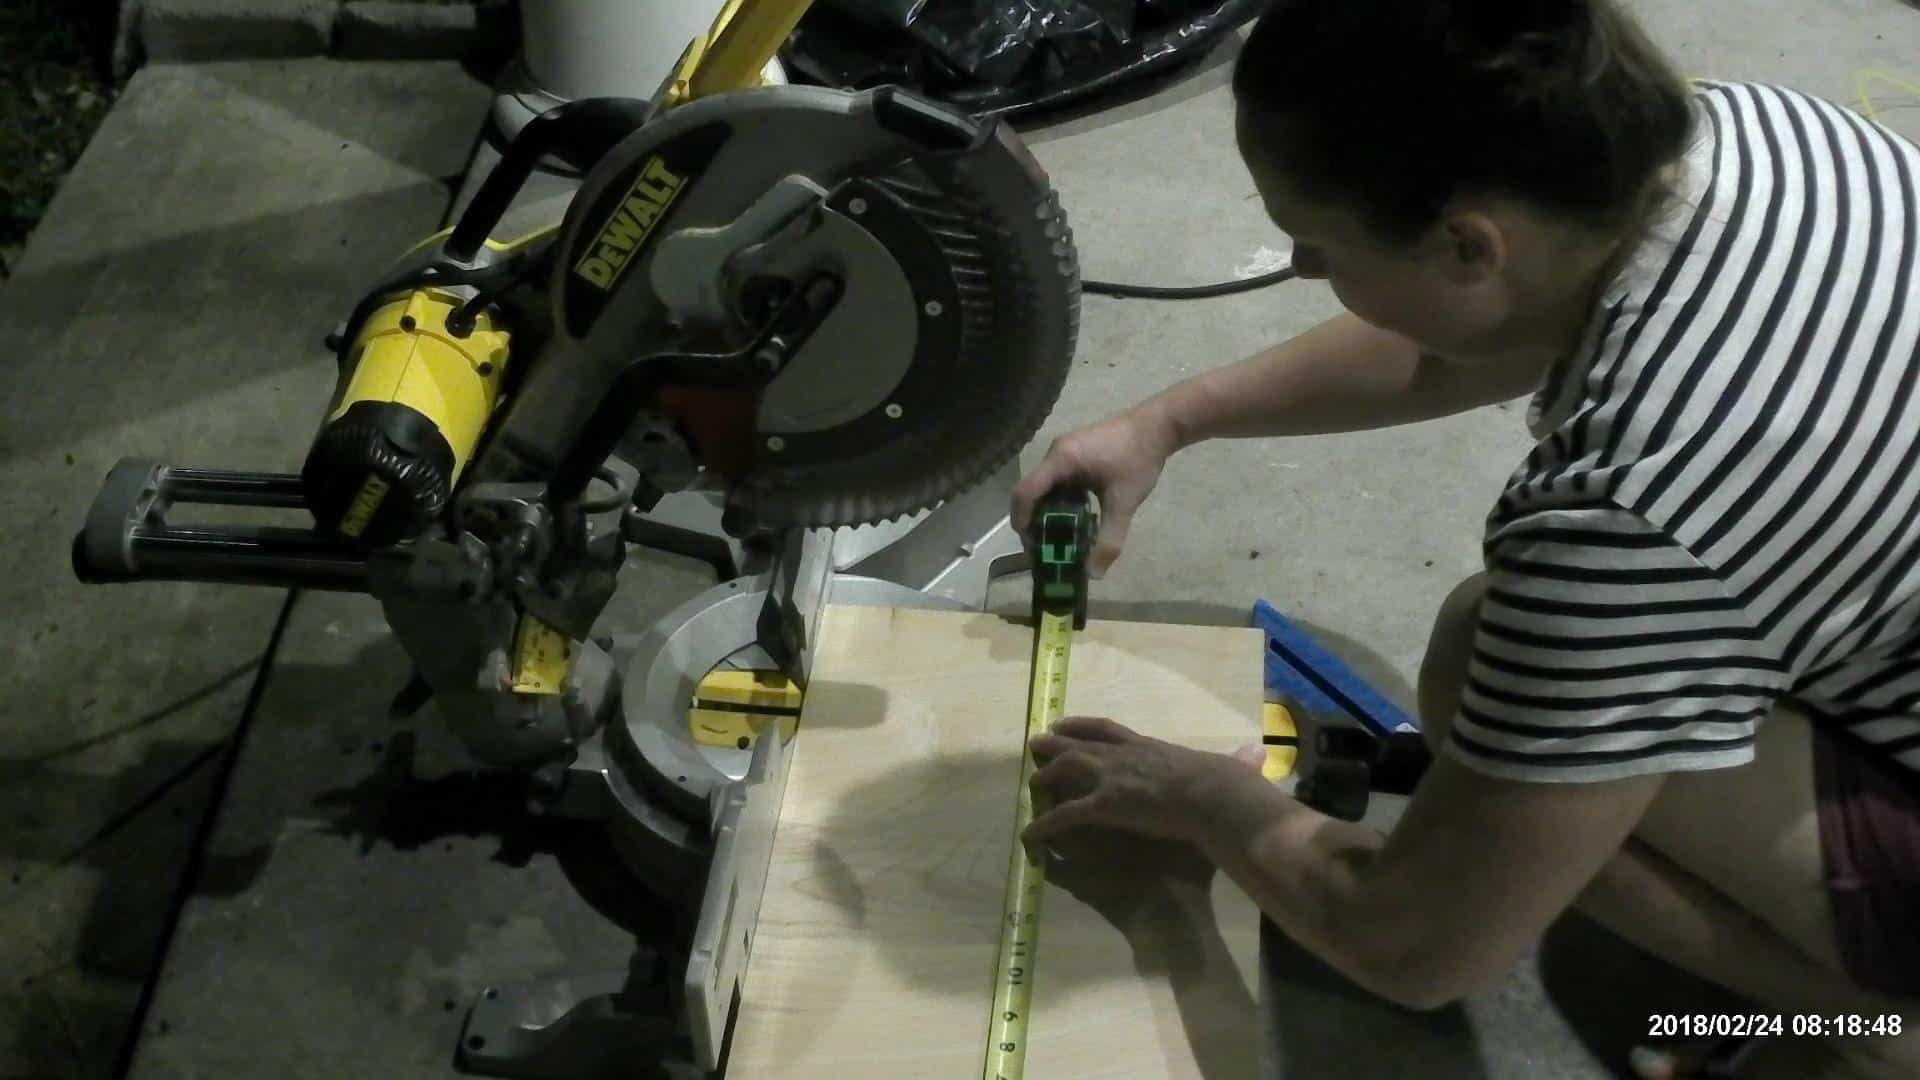
Cut your piece of plywood down to 13″x19″. I ripped it to width on the table saw and then cut it down to 19″ on the miter saw.

cutting the plywood for the advent calendar

Step 2

Mark your board for the roof. Measure up 13 inches from the bottom on each side and mark 13″. Then find the center of the board, 6 1/2″, at the very top of the board. Draw a line from the side to the center mark on both sides. This creates your roof.

drawing the lines for the roof of the advent calendar

Using the miter saw, cut on the lines you drew. It should be right around 43 degrees off square.
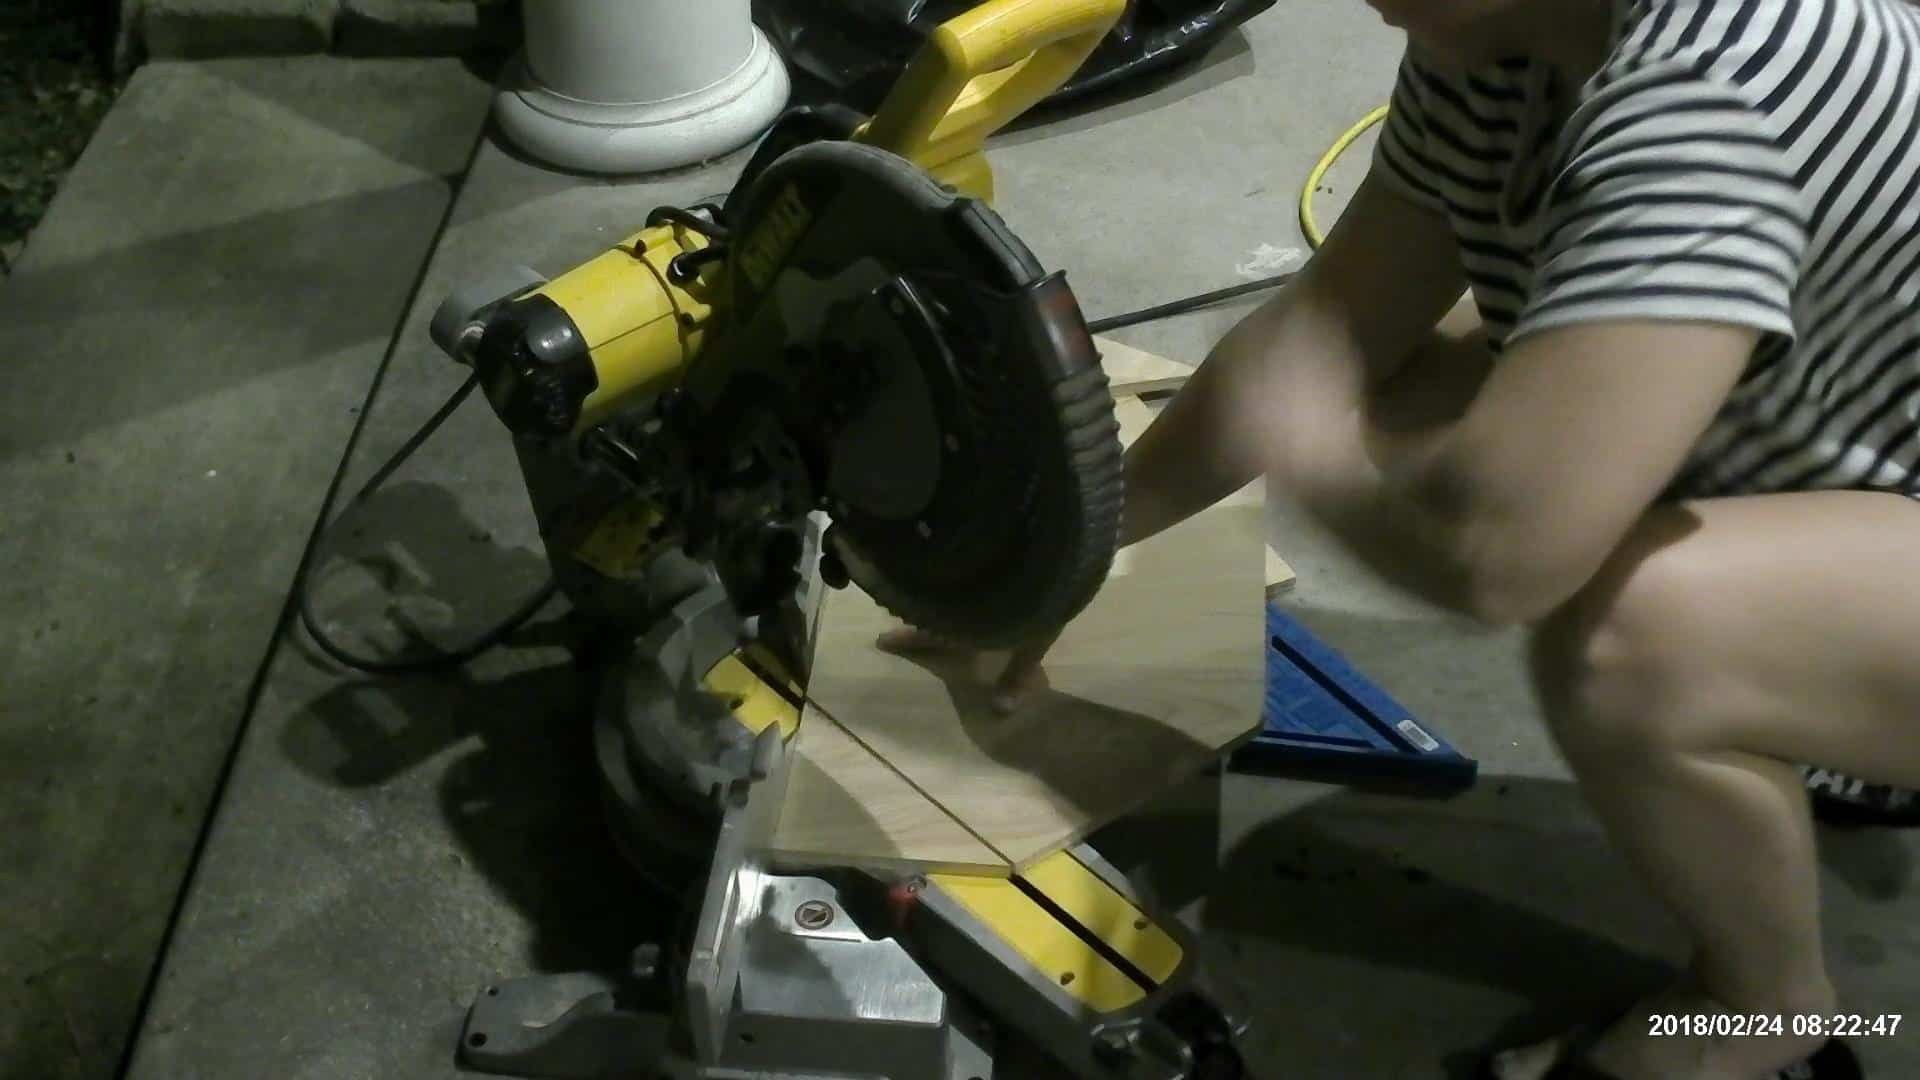
DIY Advent Calendar

Step 3

Cut the frame for the house out of 1x2s. I cut sides, bottom, roof, and then chimney. The tops of the side pieces are cut at 43 degrees off square but the bottom is just a normal 90 degree cut.

Cutting the frame for the house of the advent calendar

The bottom is cut with both 90 degree cuts.

Bottom frame board for the advent calendar

The top is cut with both ends 43 degrees off square, and ends are NOT parallel.

Adding the roof boards to the advent calendar house

DIY Wooden House Advent Calendar

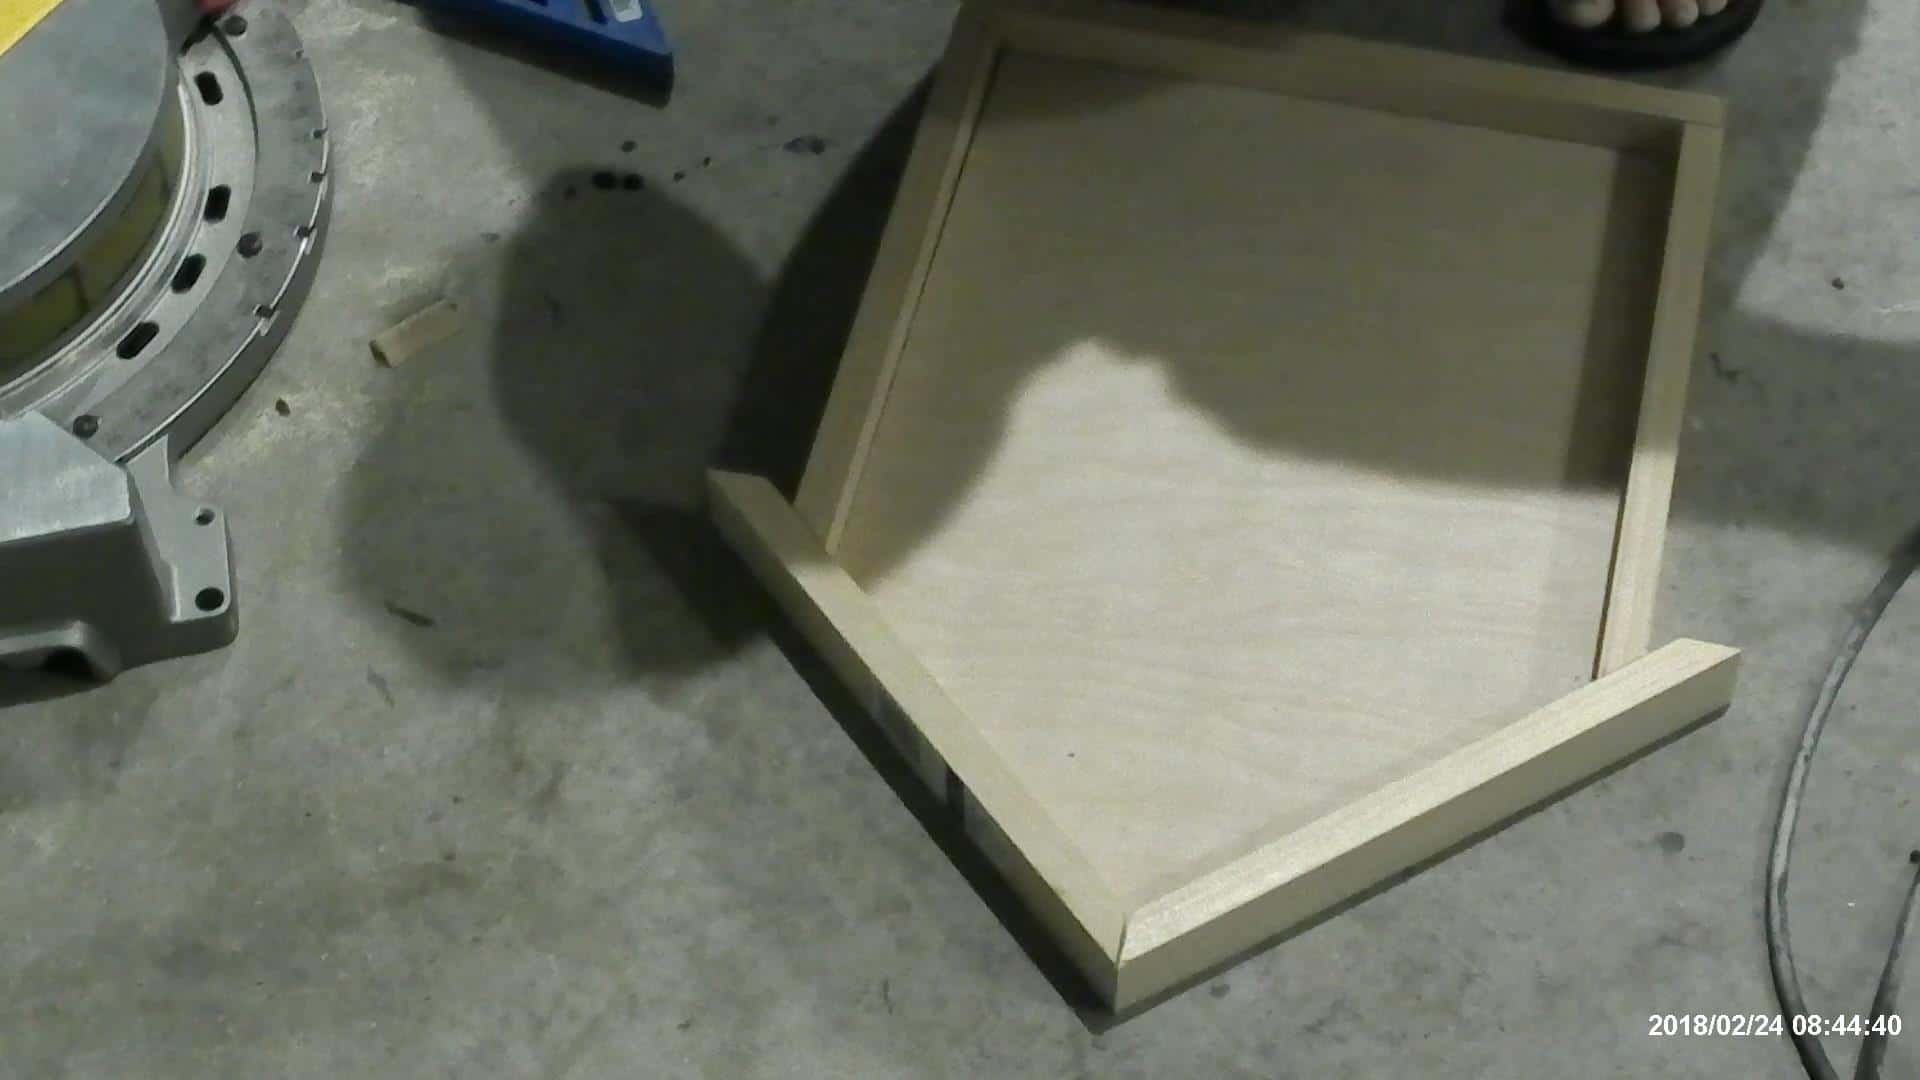
I did not attach the frame at this point, I went ahead and stained them (golden oak by Rustoleum).

Step 4

I painted the board at this point while I had a flat surface to work on.

Painting the advent calendar

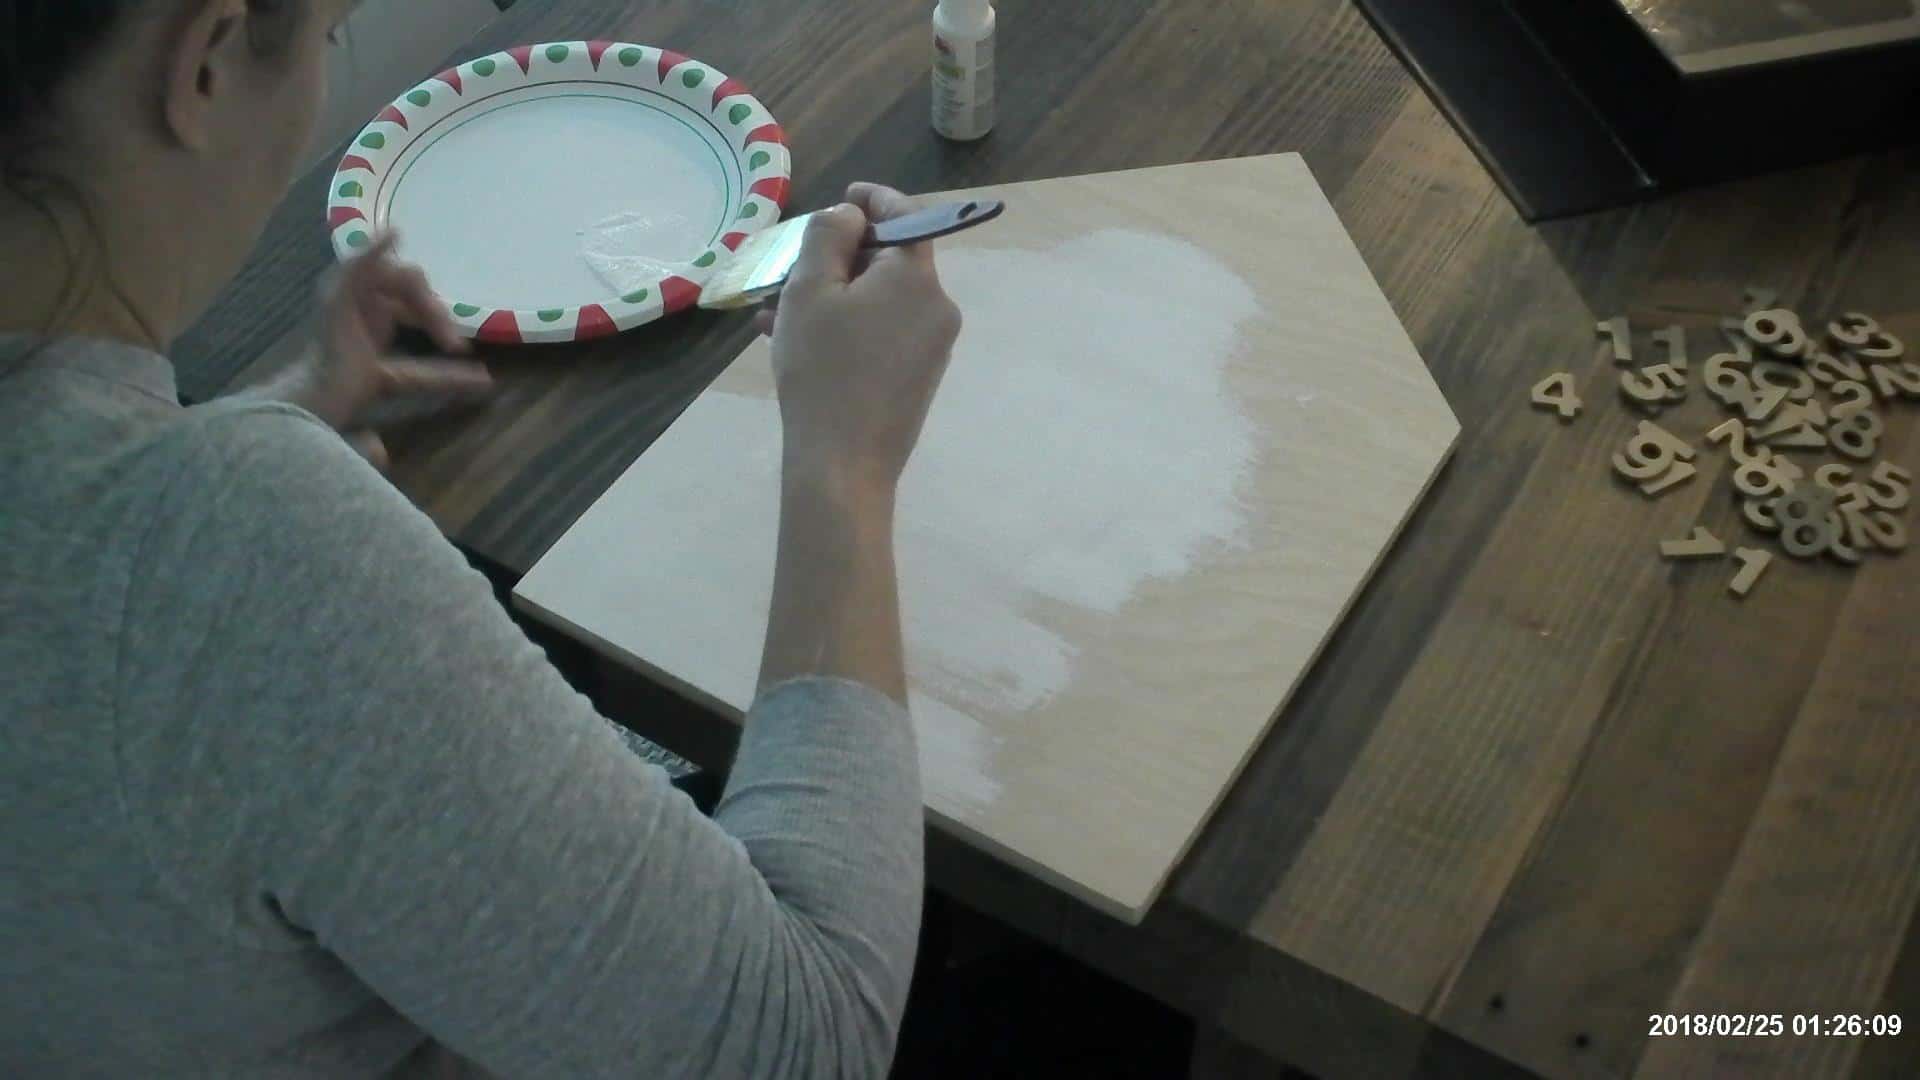
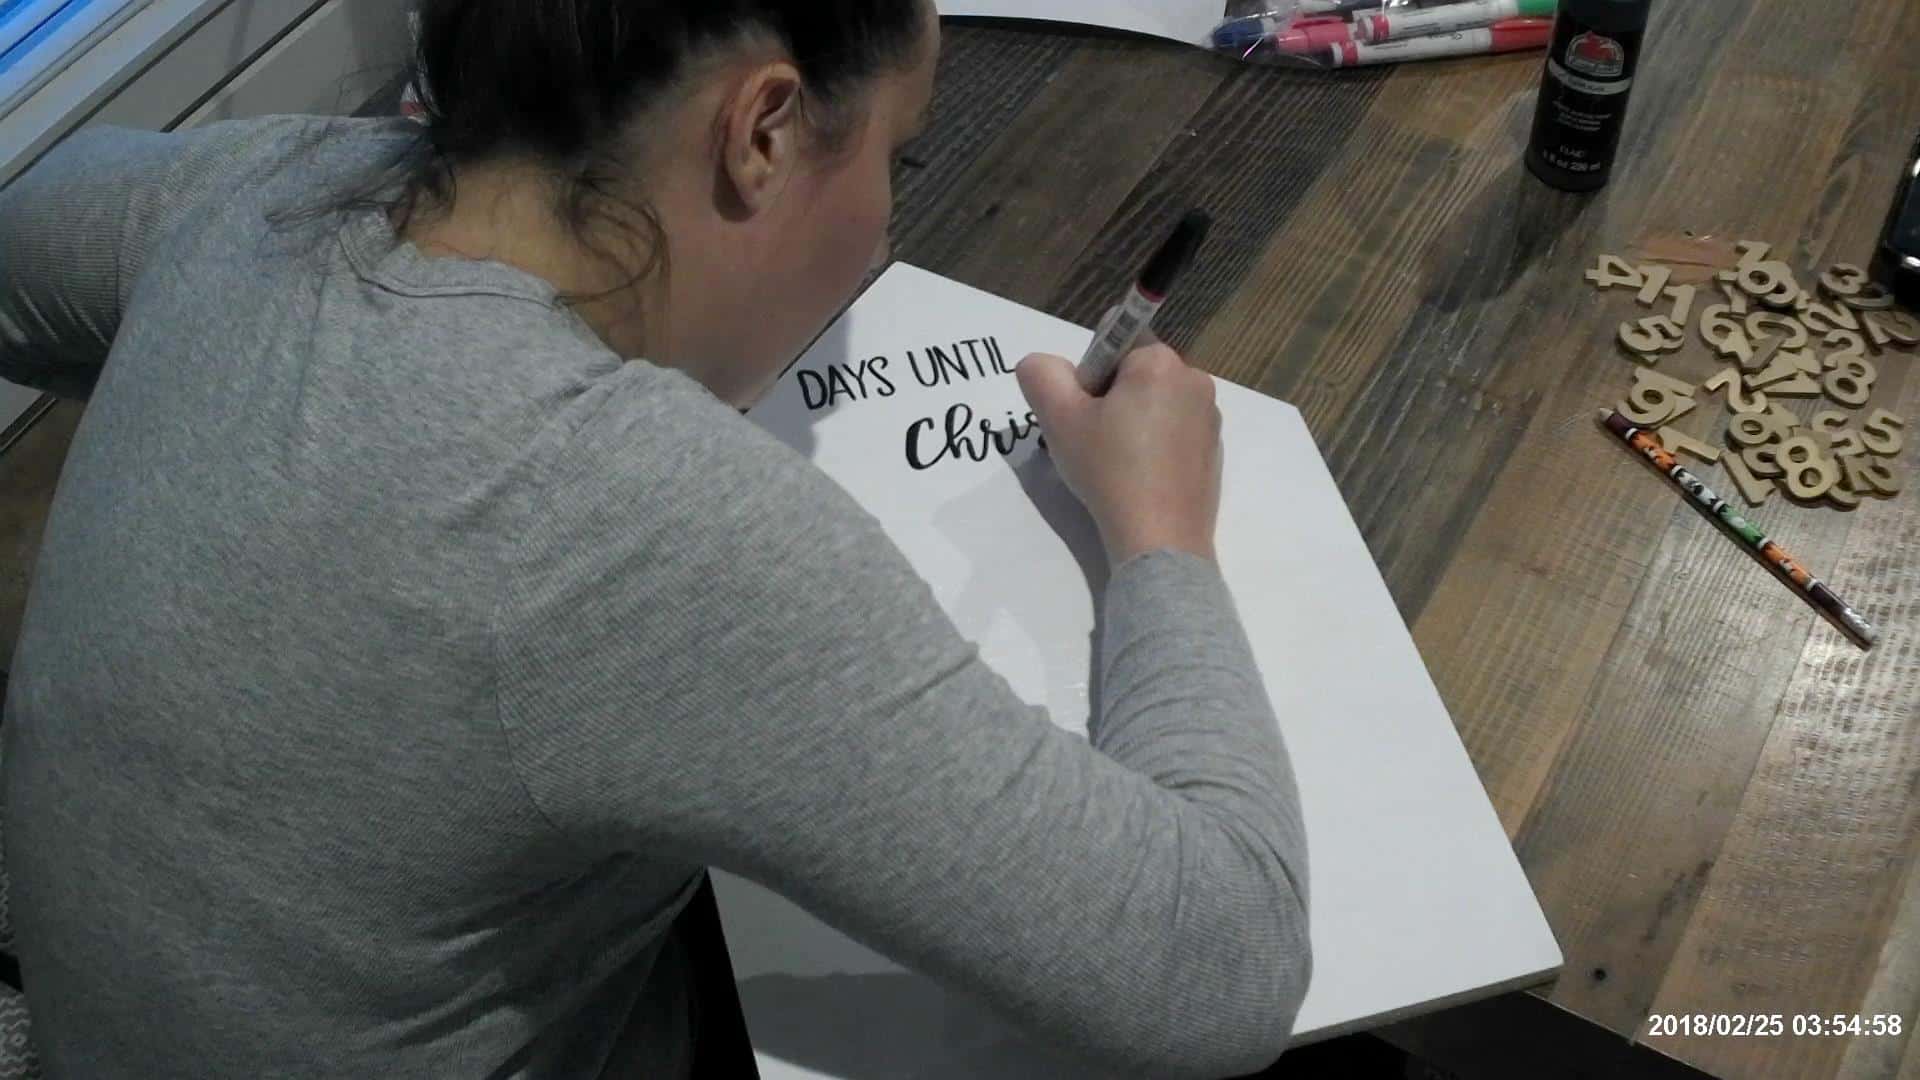
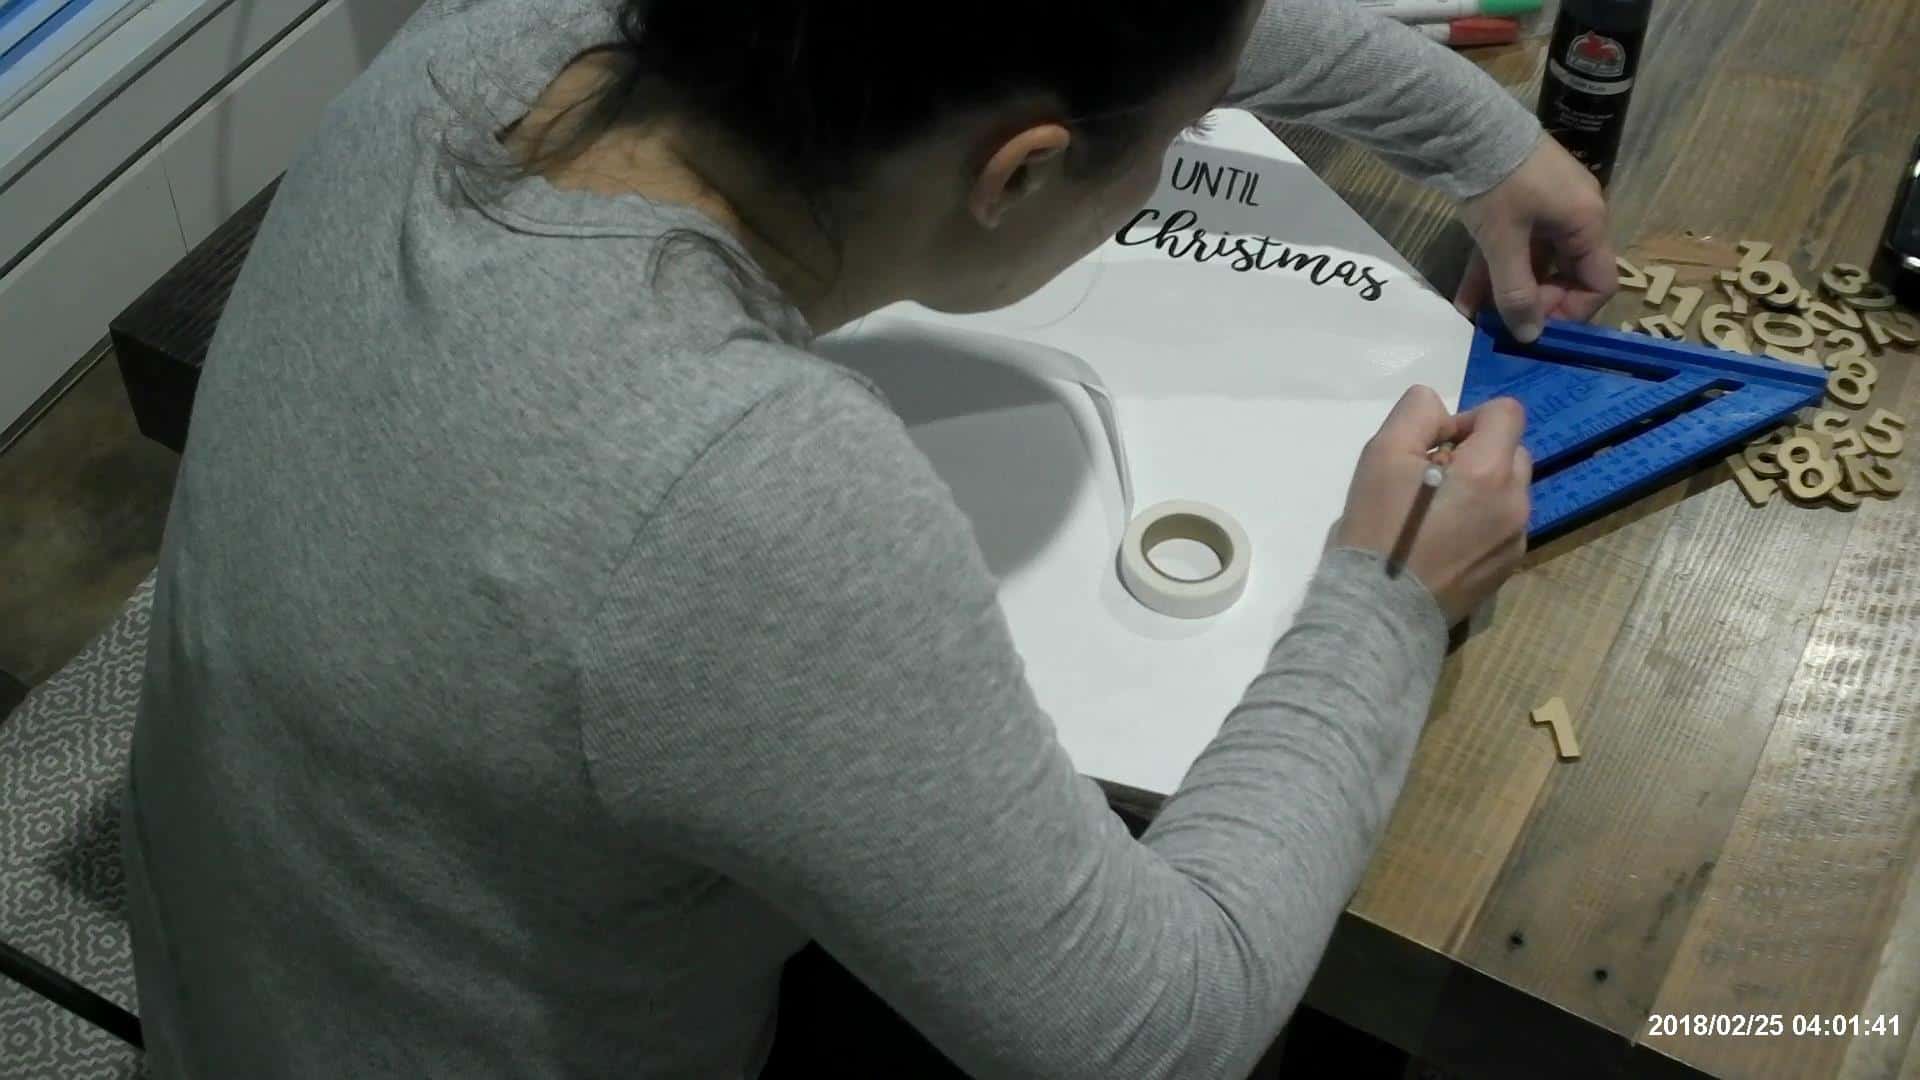
To paint the days until Christmas at the top, I used the old print in mirror method, and scratch the back with a pencil. I have the free download available for you as well if you aren’t able to freehand draw it like me! Lol!

Drawing the design on the advent calendar

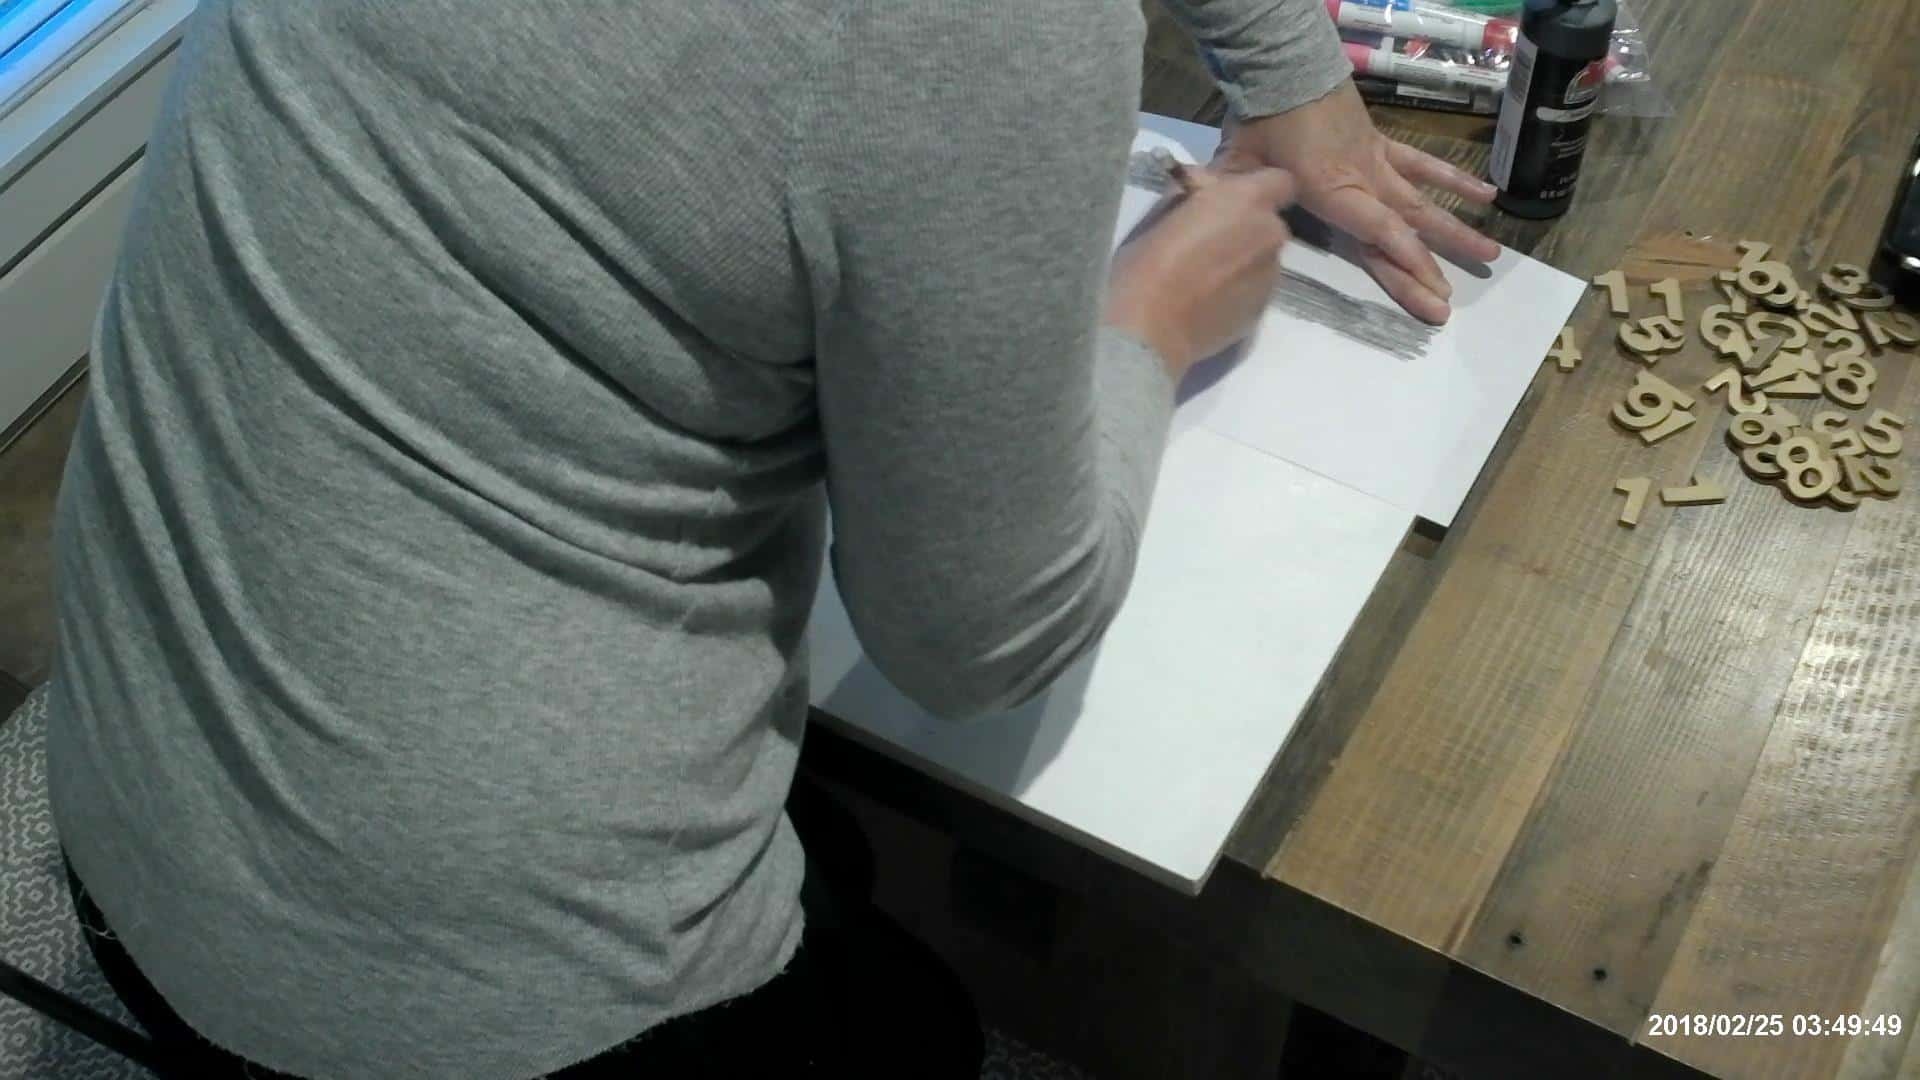
Then you just draw over the letters with a paint marker. It’s the only way I can make art, I don’t have a fancy Cricut or Silouhette…and I am not talented enough to freehand anything!🙄

Drawing the art on the advent calendar

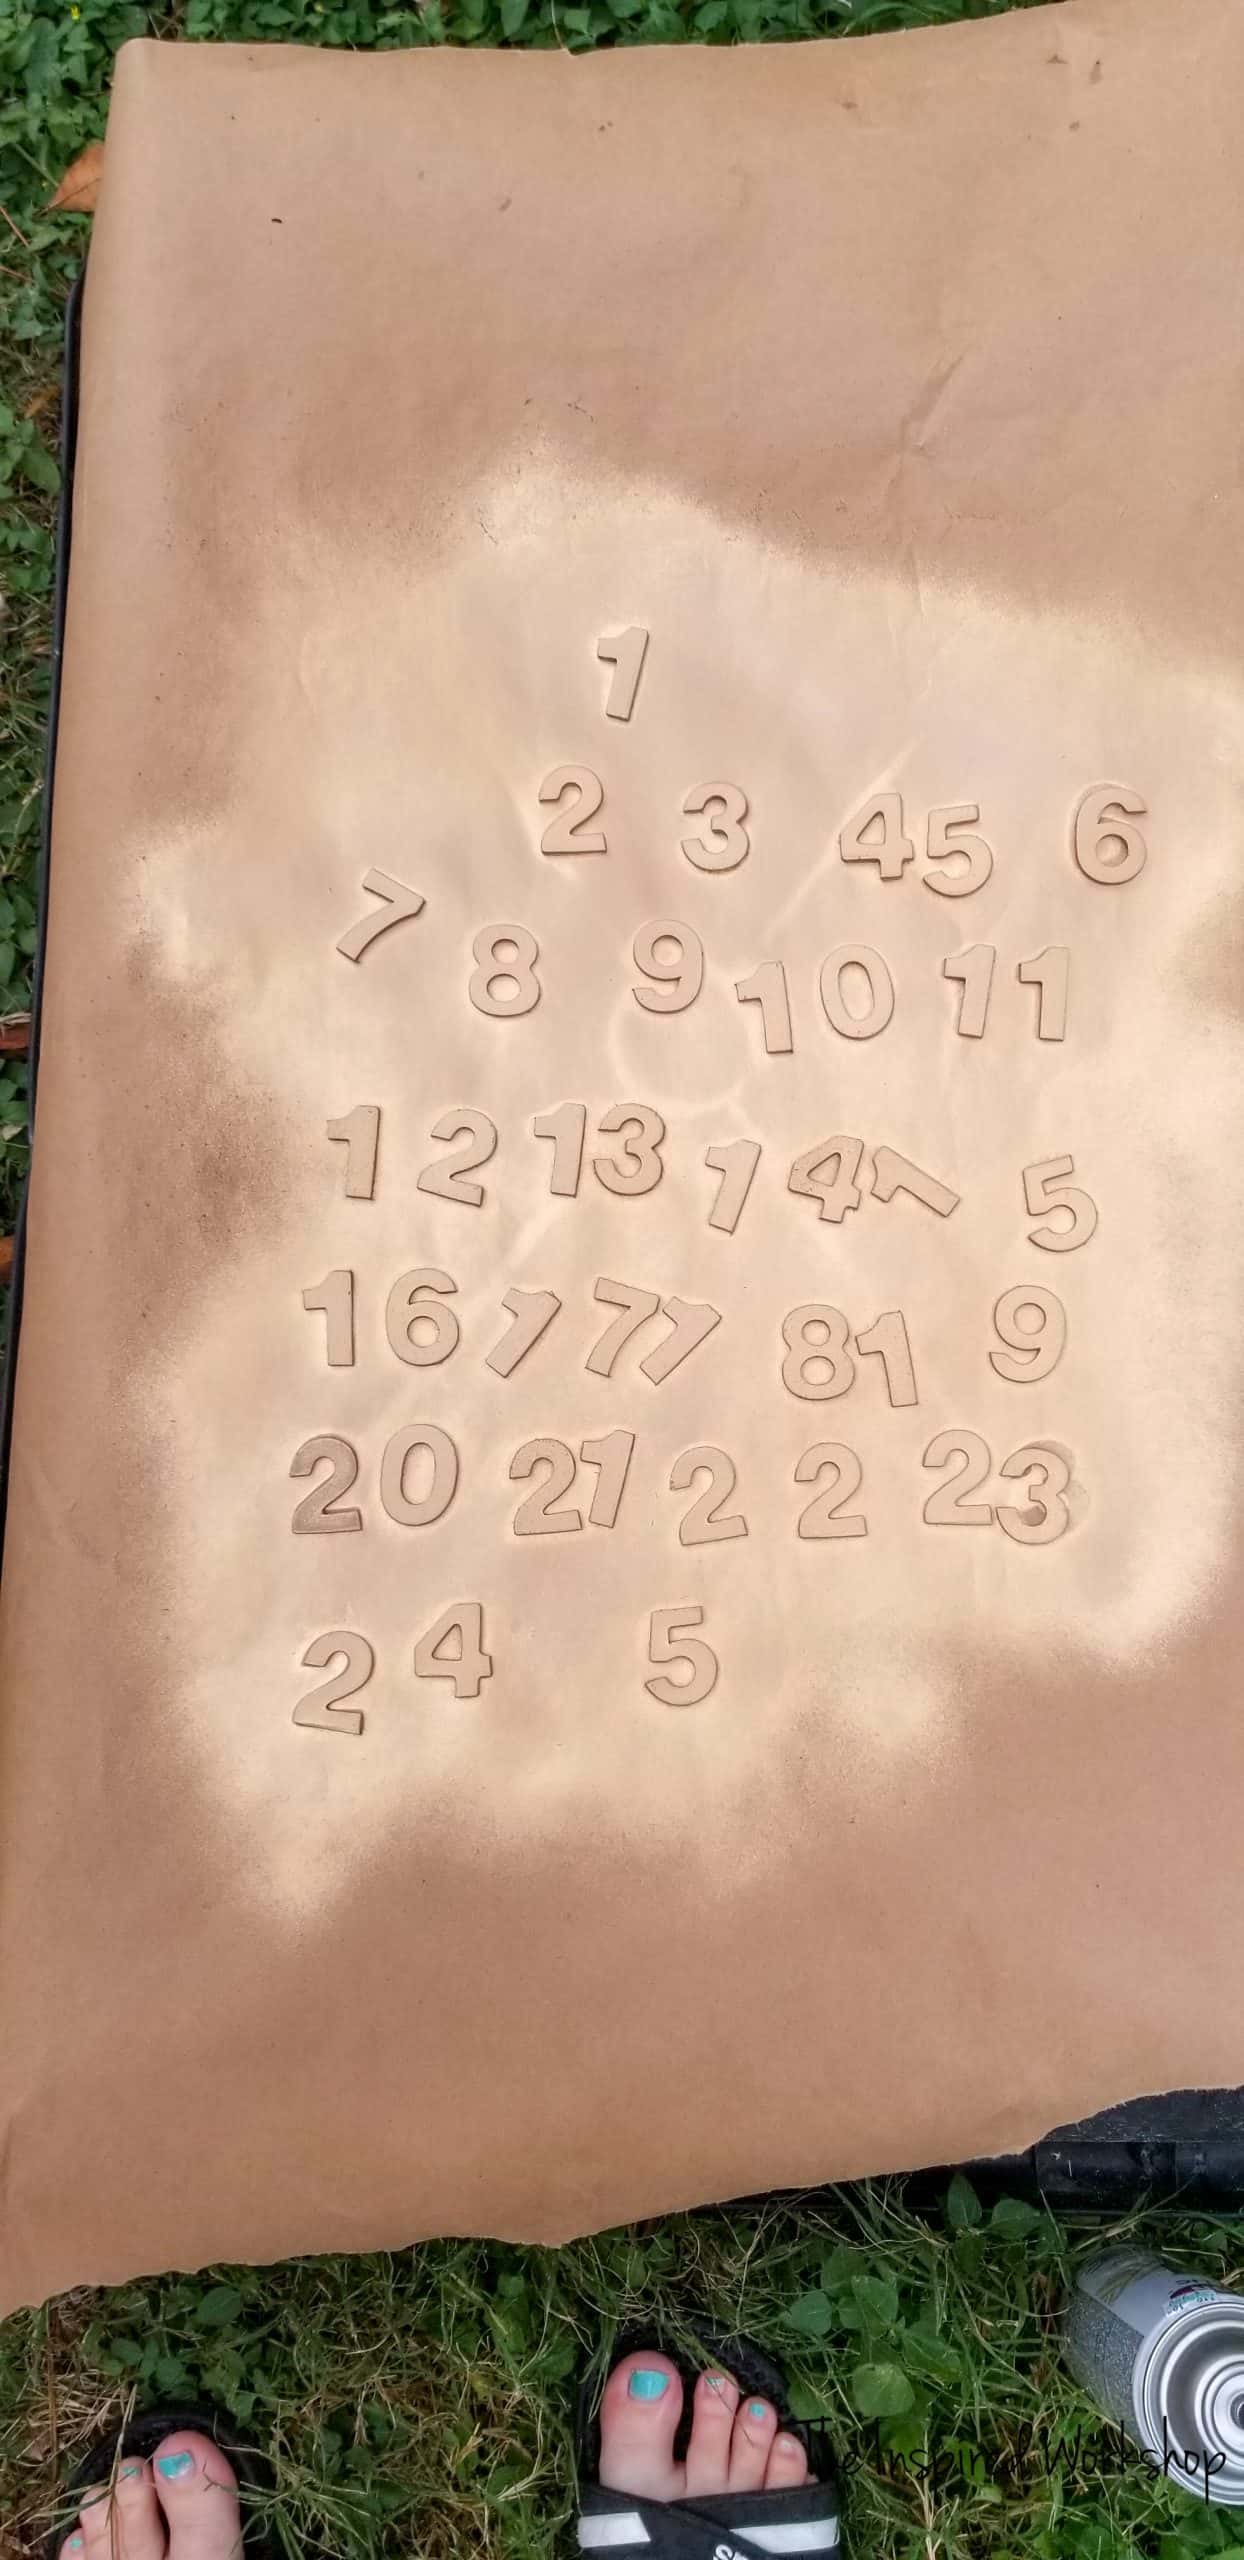
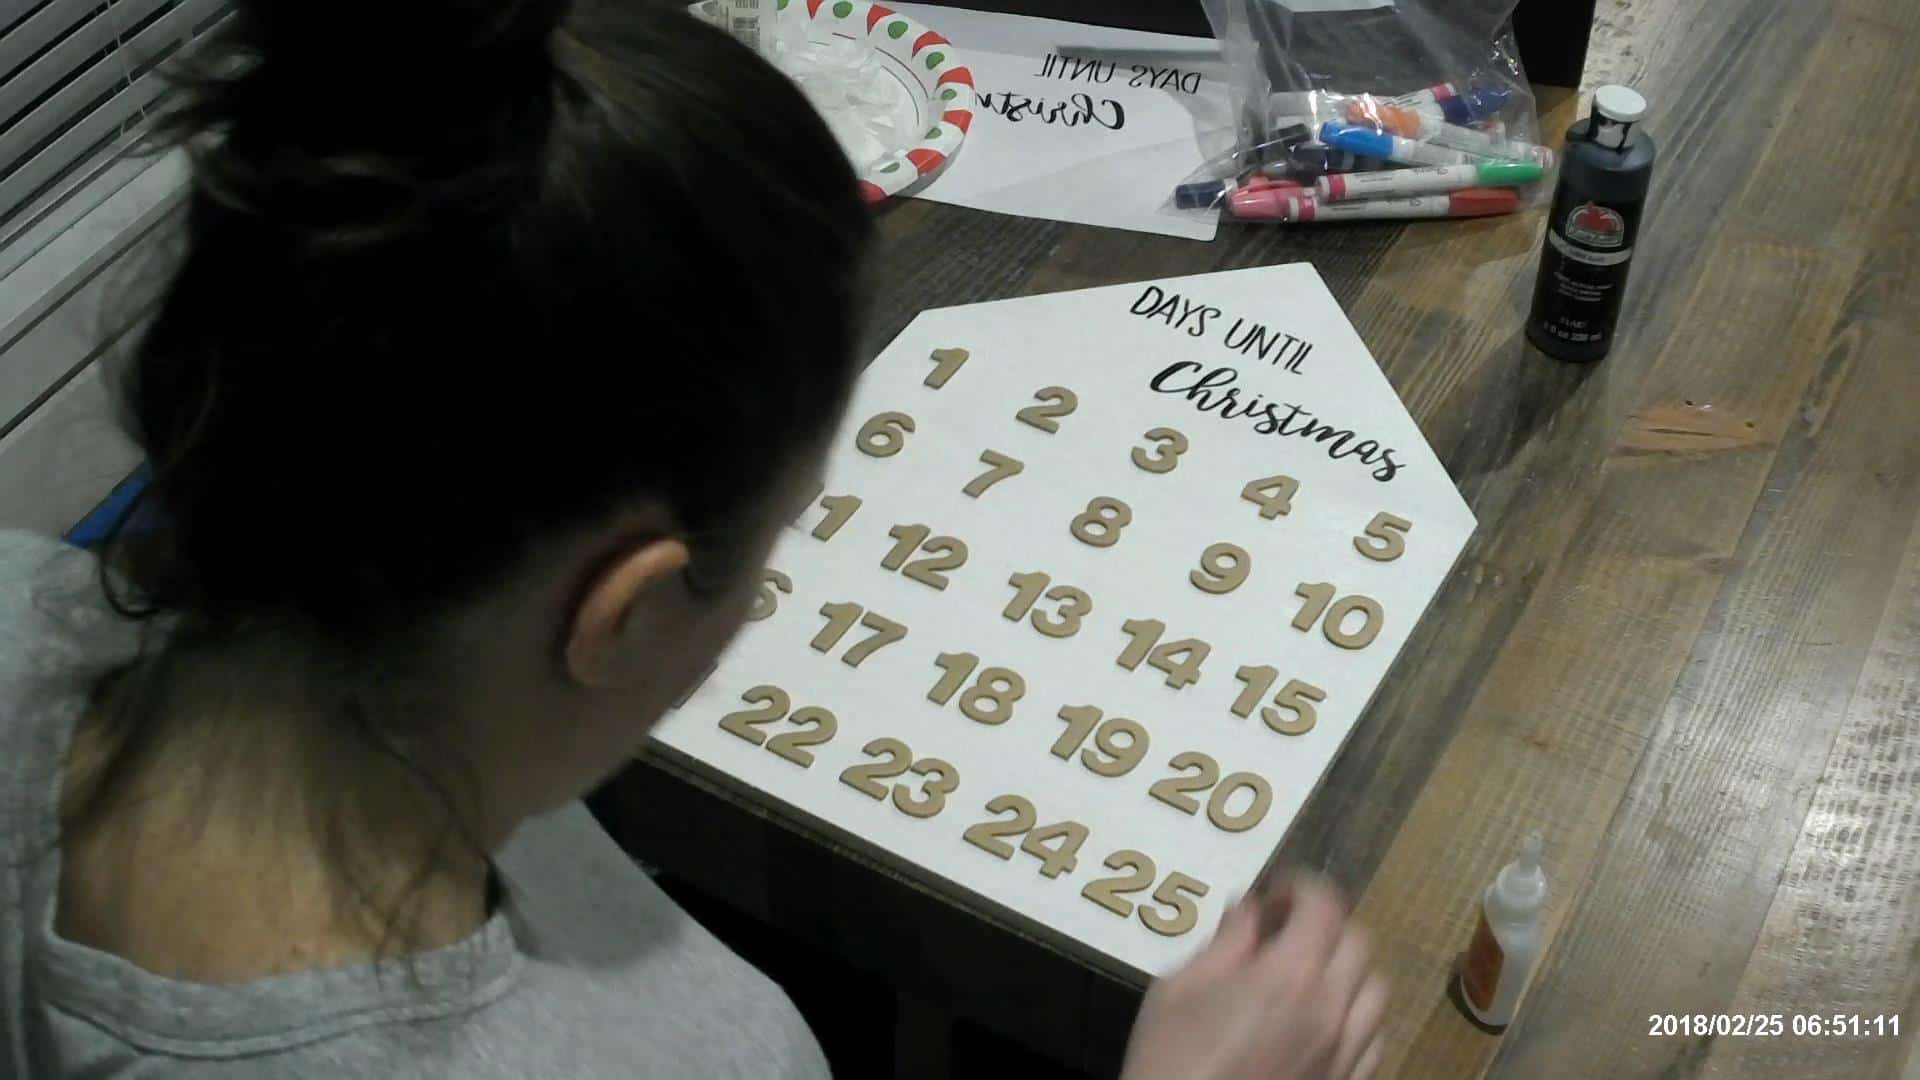
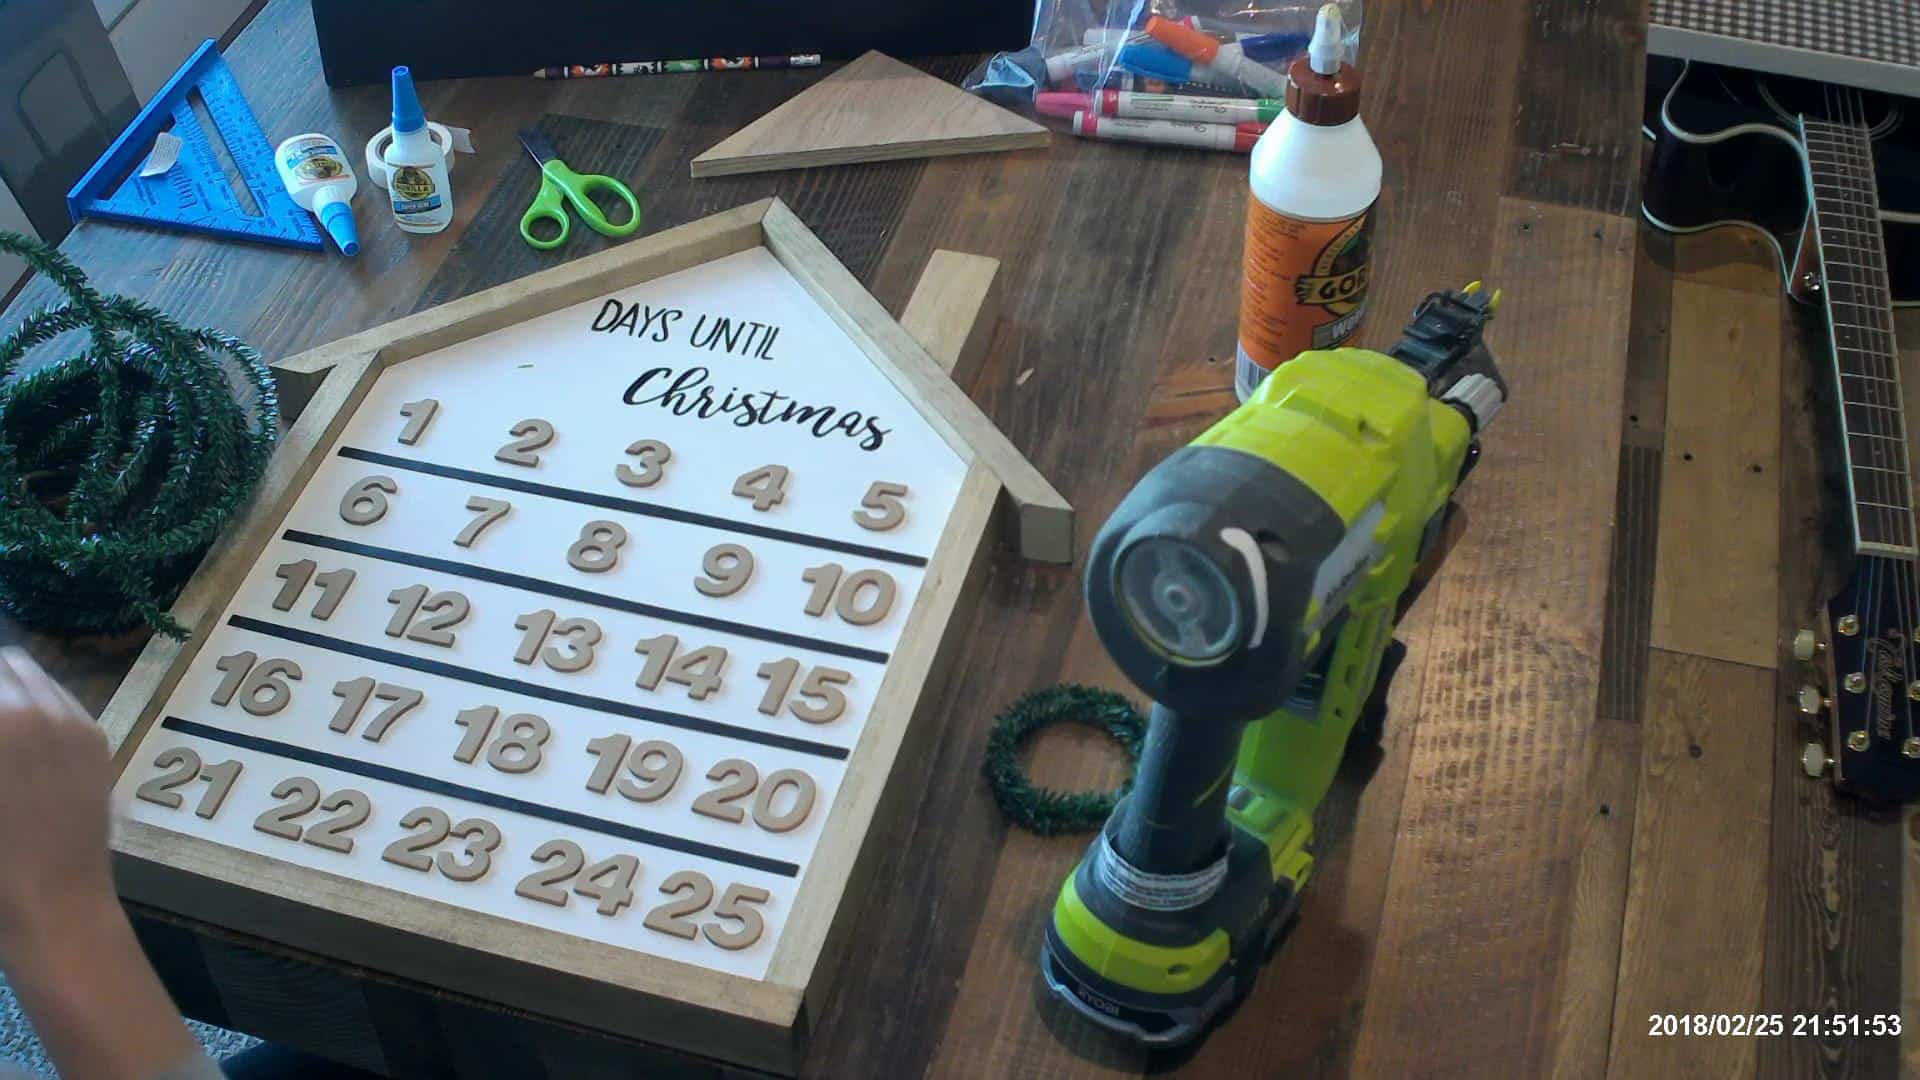
I went ahead and spray painted the numbers as well, they started as regular ole wooden numbers, I sprayed them with metallic gold, and they came out looking almost like I stained them in the photos! Lol!

Numbers for advent calendar

Spray Painted Numbers for advent calendar

Oh, how embarrassing…those toes!😅😅 I had a shovel scrape that polish off my big toe just in case you were wondering! Lol!🙈
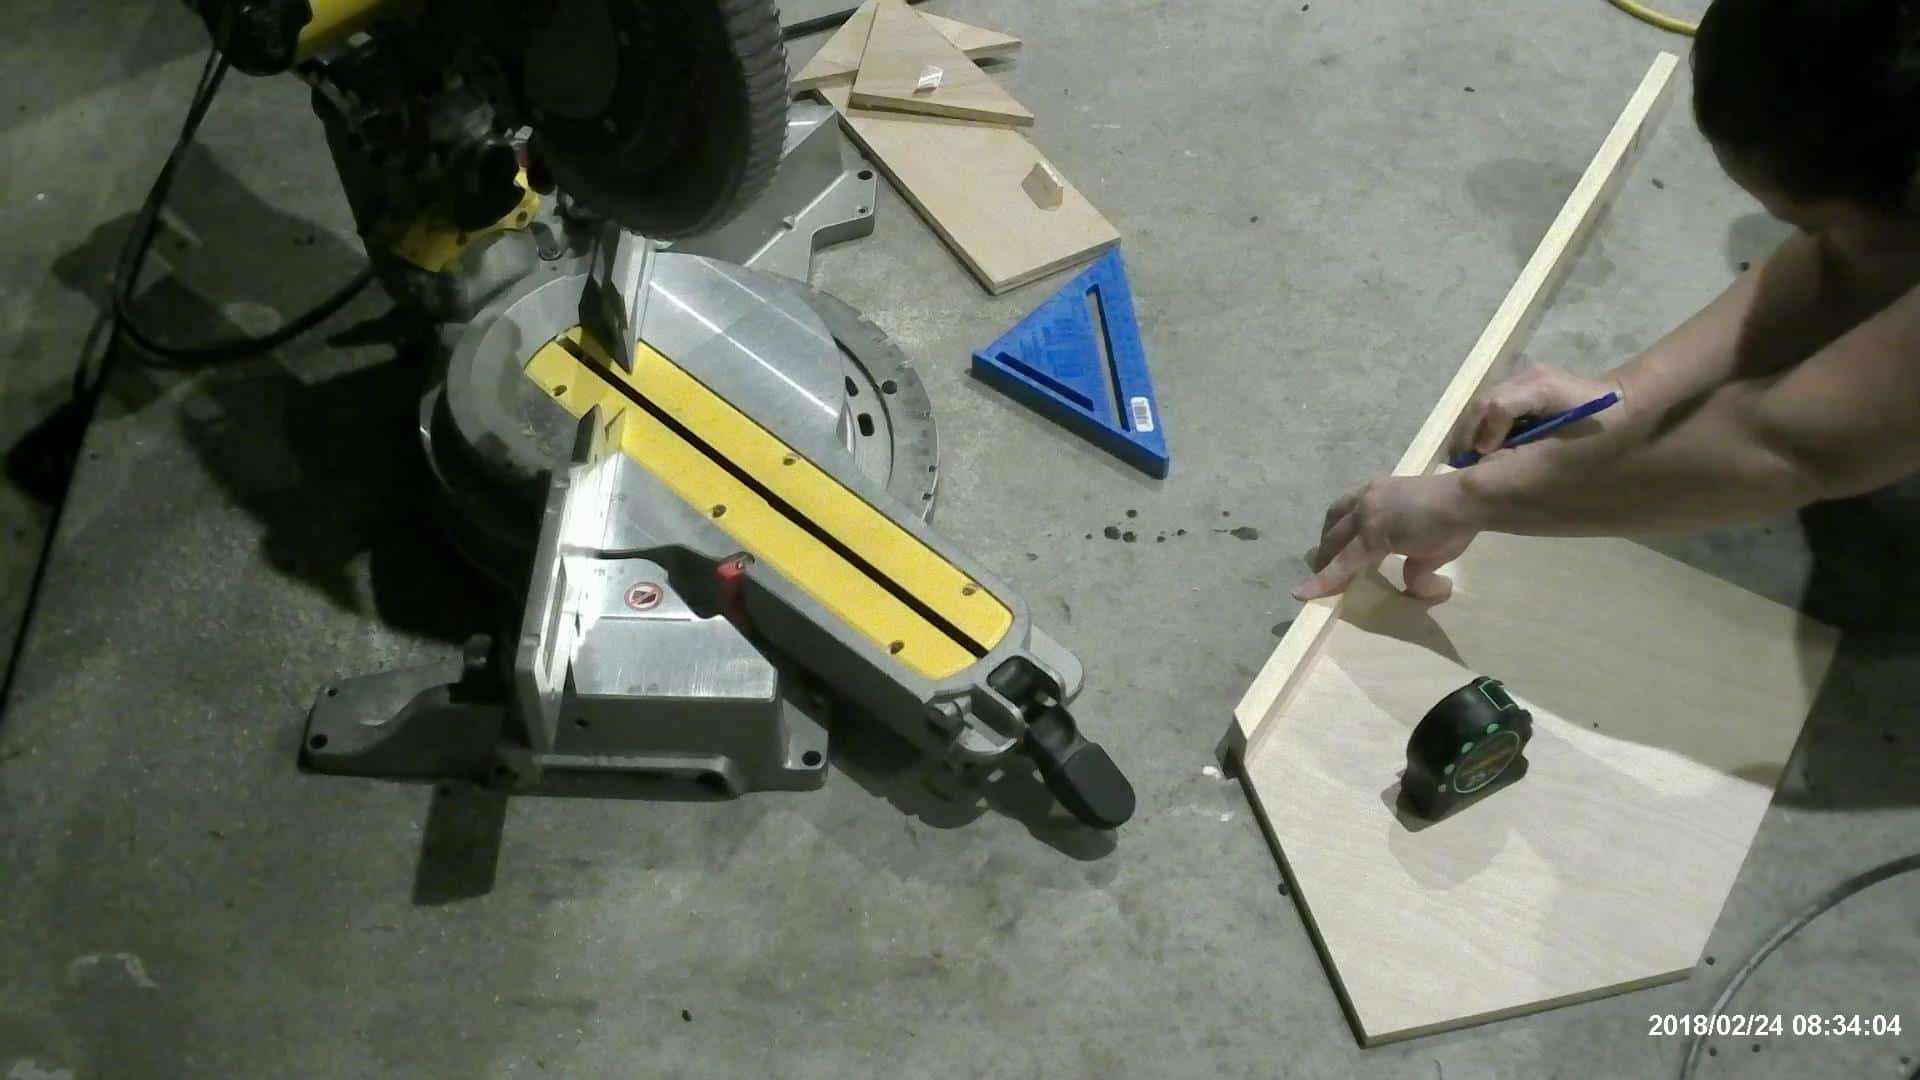
Step 5

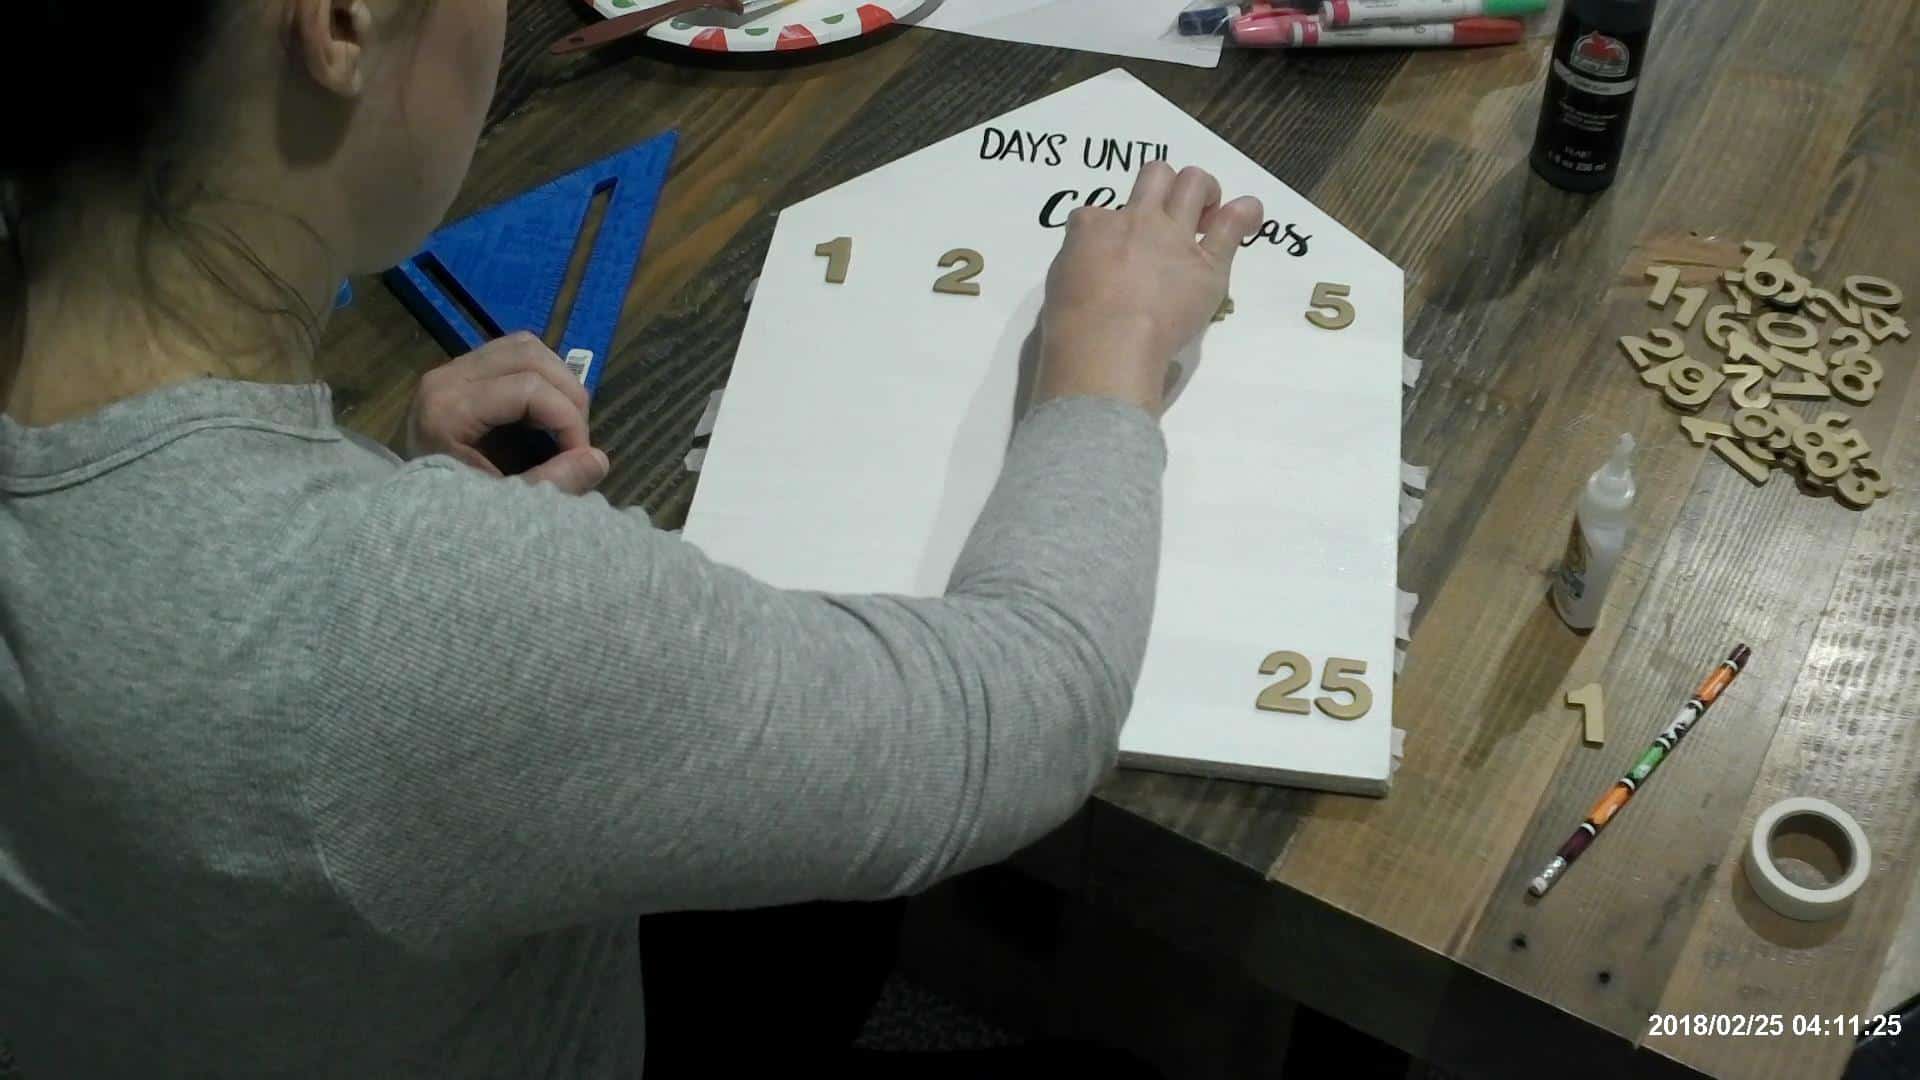
Adding the numbers. I measured the space in between the numbers, which there is 13″ to work with that isn’t part of the roof, and there are 5 rows of numbers, so if you divide 13 by 5, you get 2.6. Each row will be 2.6″ wide, I used this tape that is like painter’s tape to mark the spaces.

Marking the numbers

Then using super glue, glued them to the board just eyeing the space between each number in the row.

Adding the numbers to the advent calendar board

All the numbers glued to the advent calendar

Then I went ahead and did the artwork on the backside, the same way I did the front. Paint it, use your mirror image print out and scratch the back of it to apply your ‘stencil’. Using paint markers fill in the letters! It was much harder to see on the black but any other color seems to work well with this method. Get the free files for the artwork ADVENT CALENDAR ARTWORK!
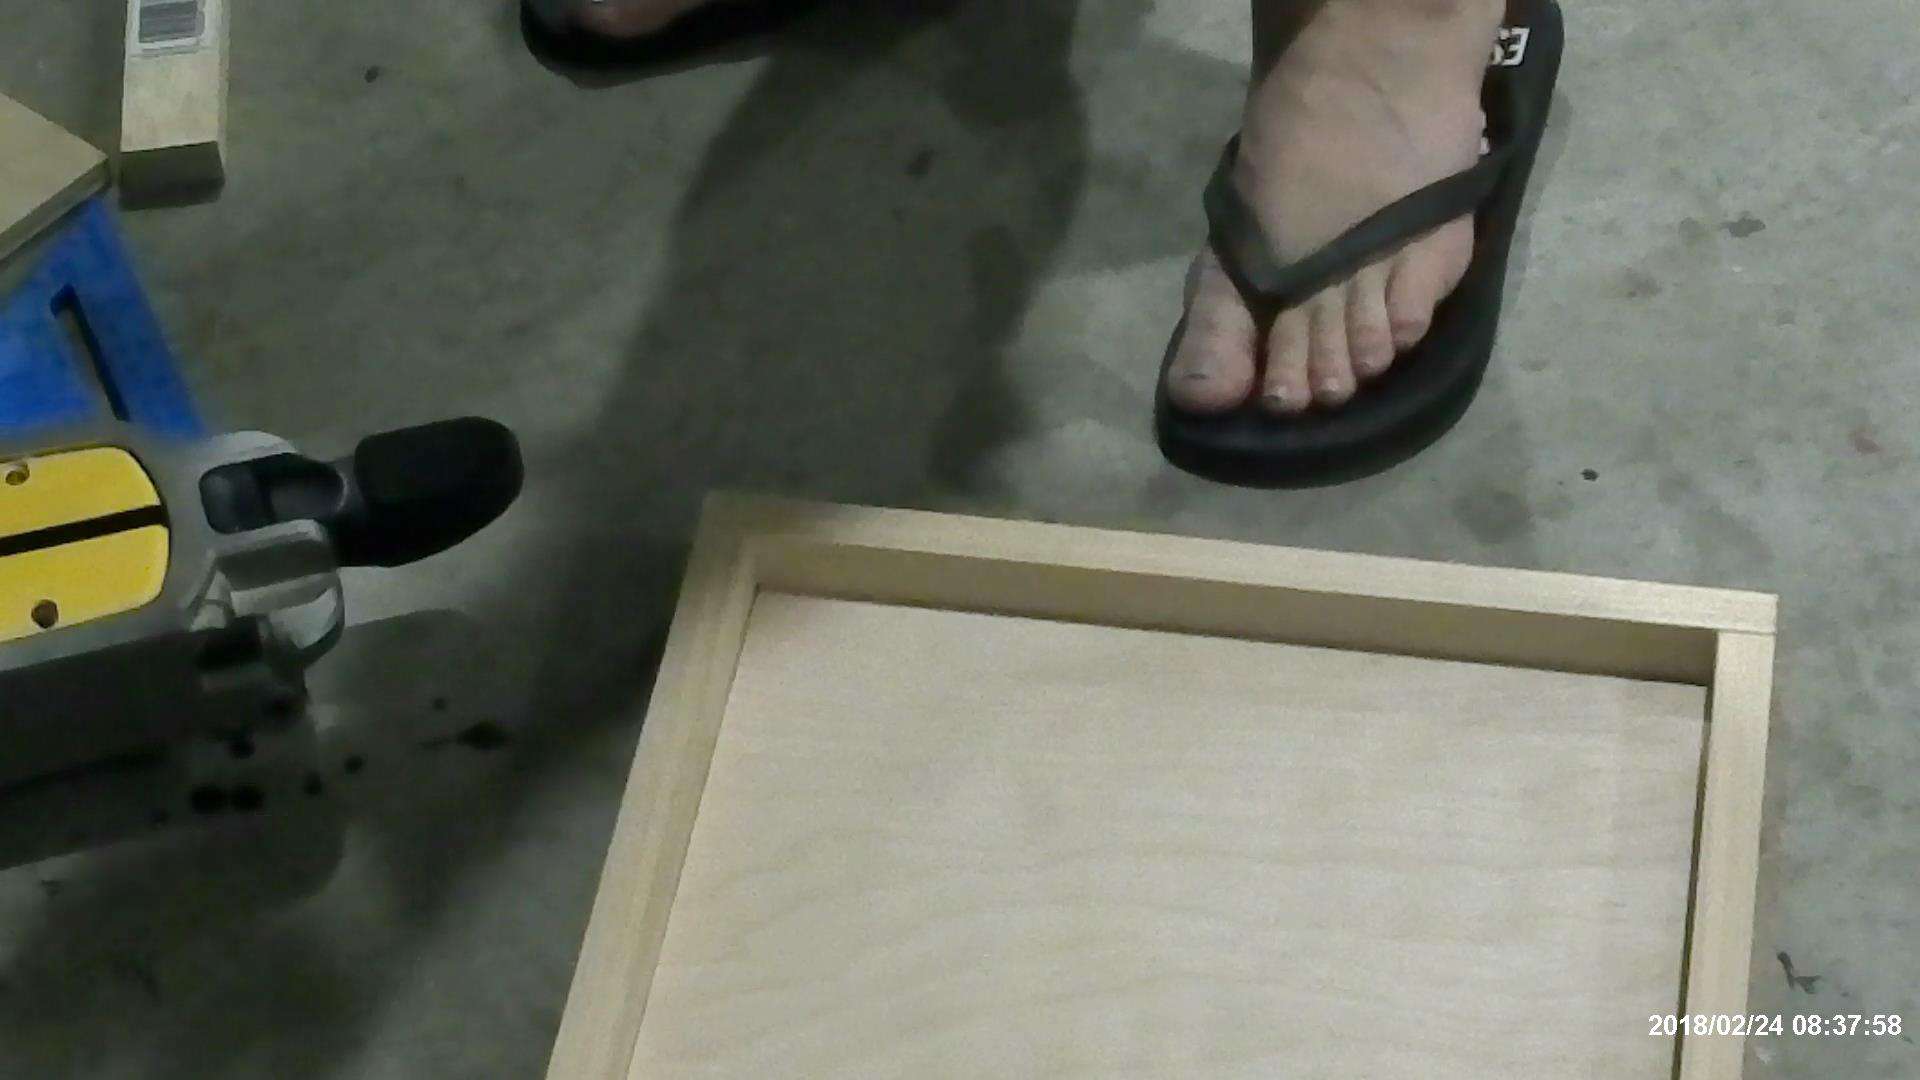
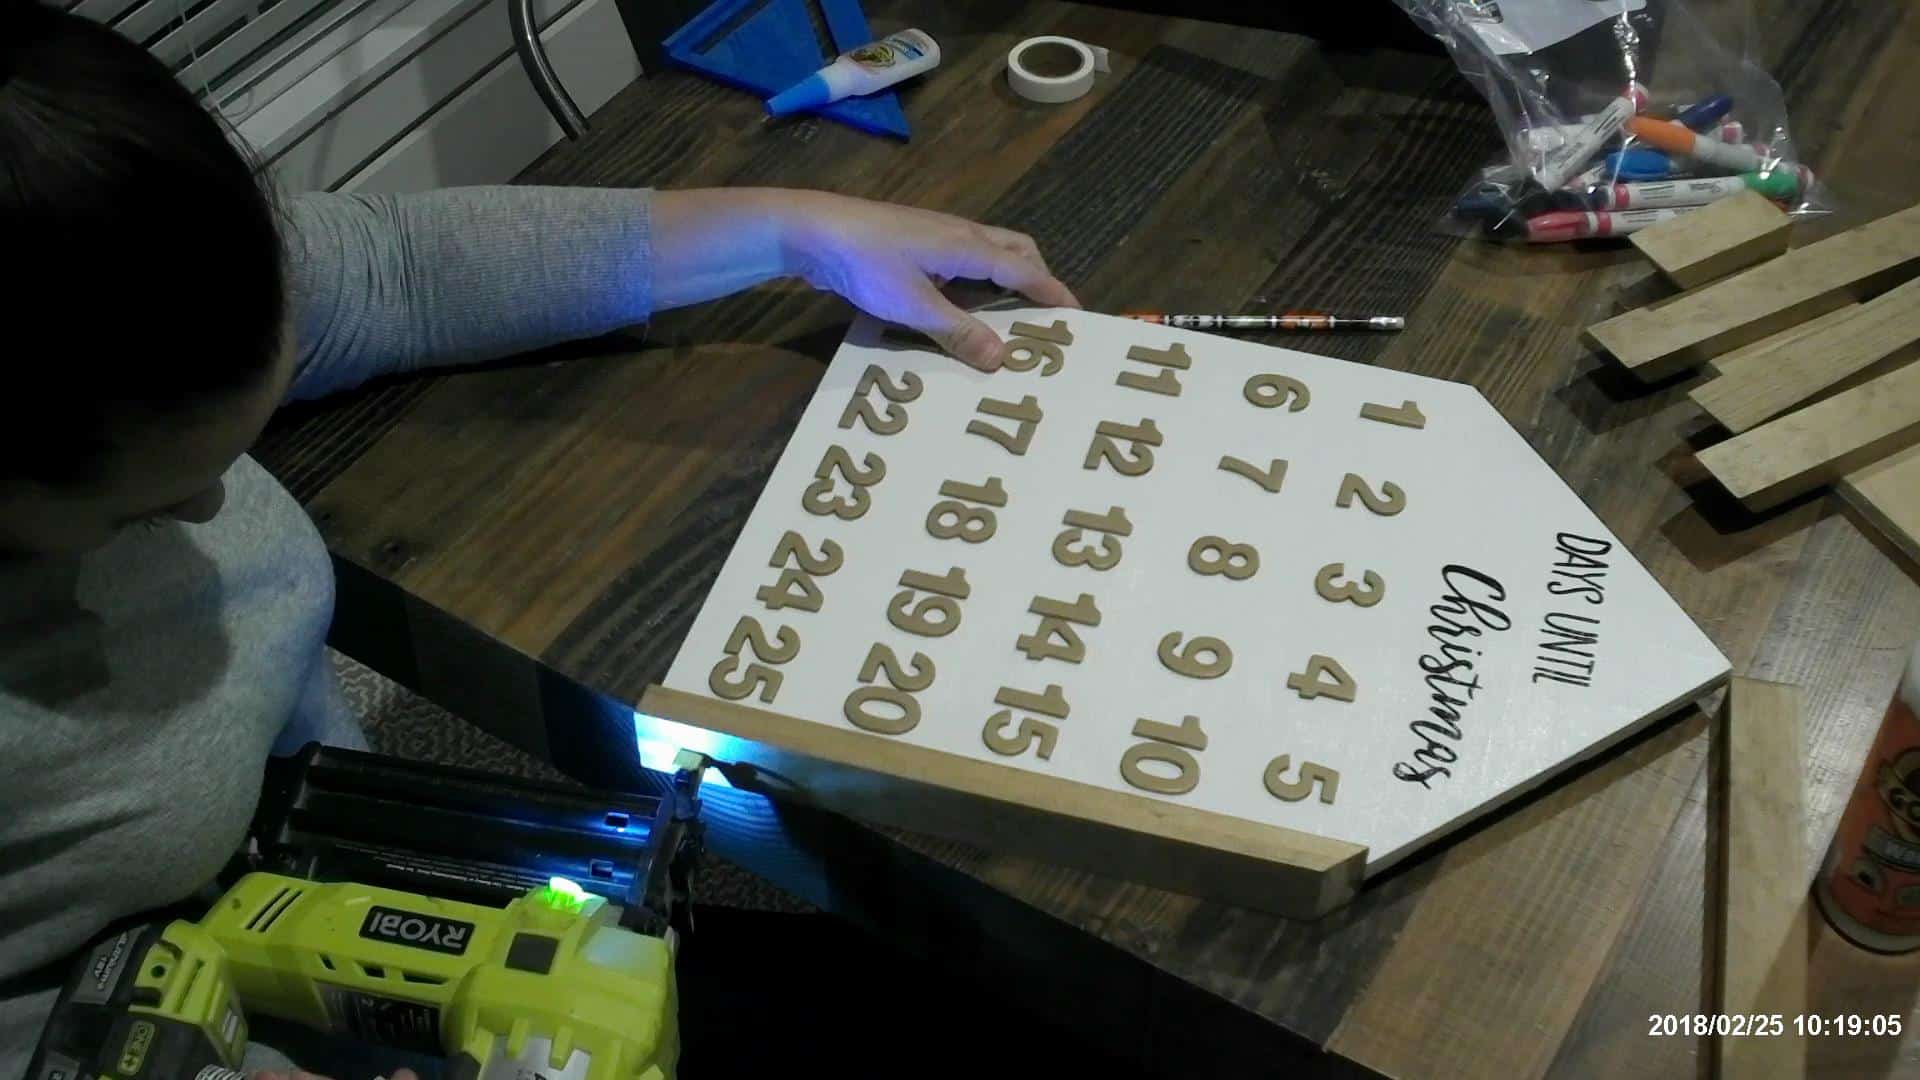
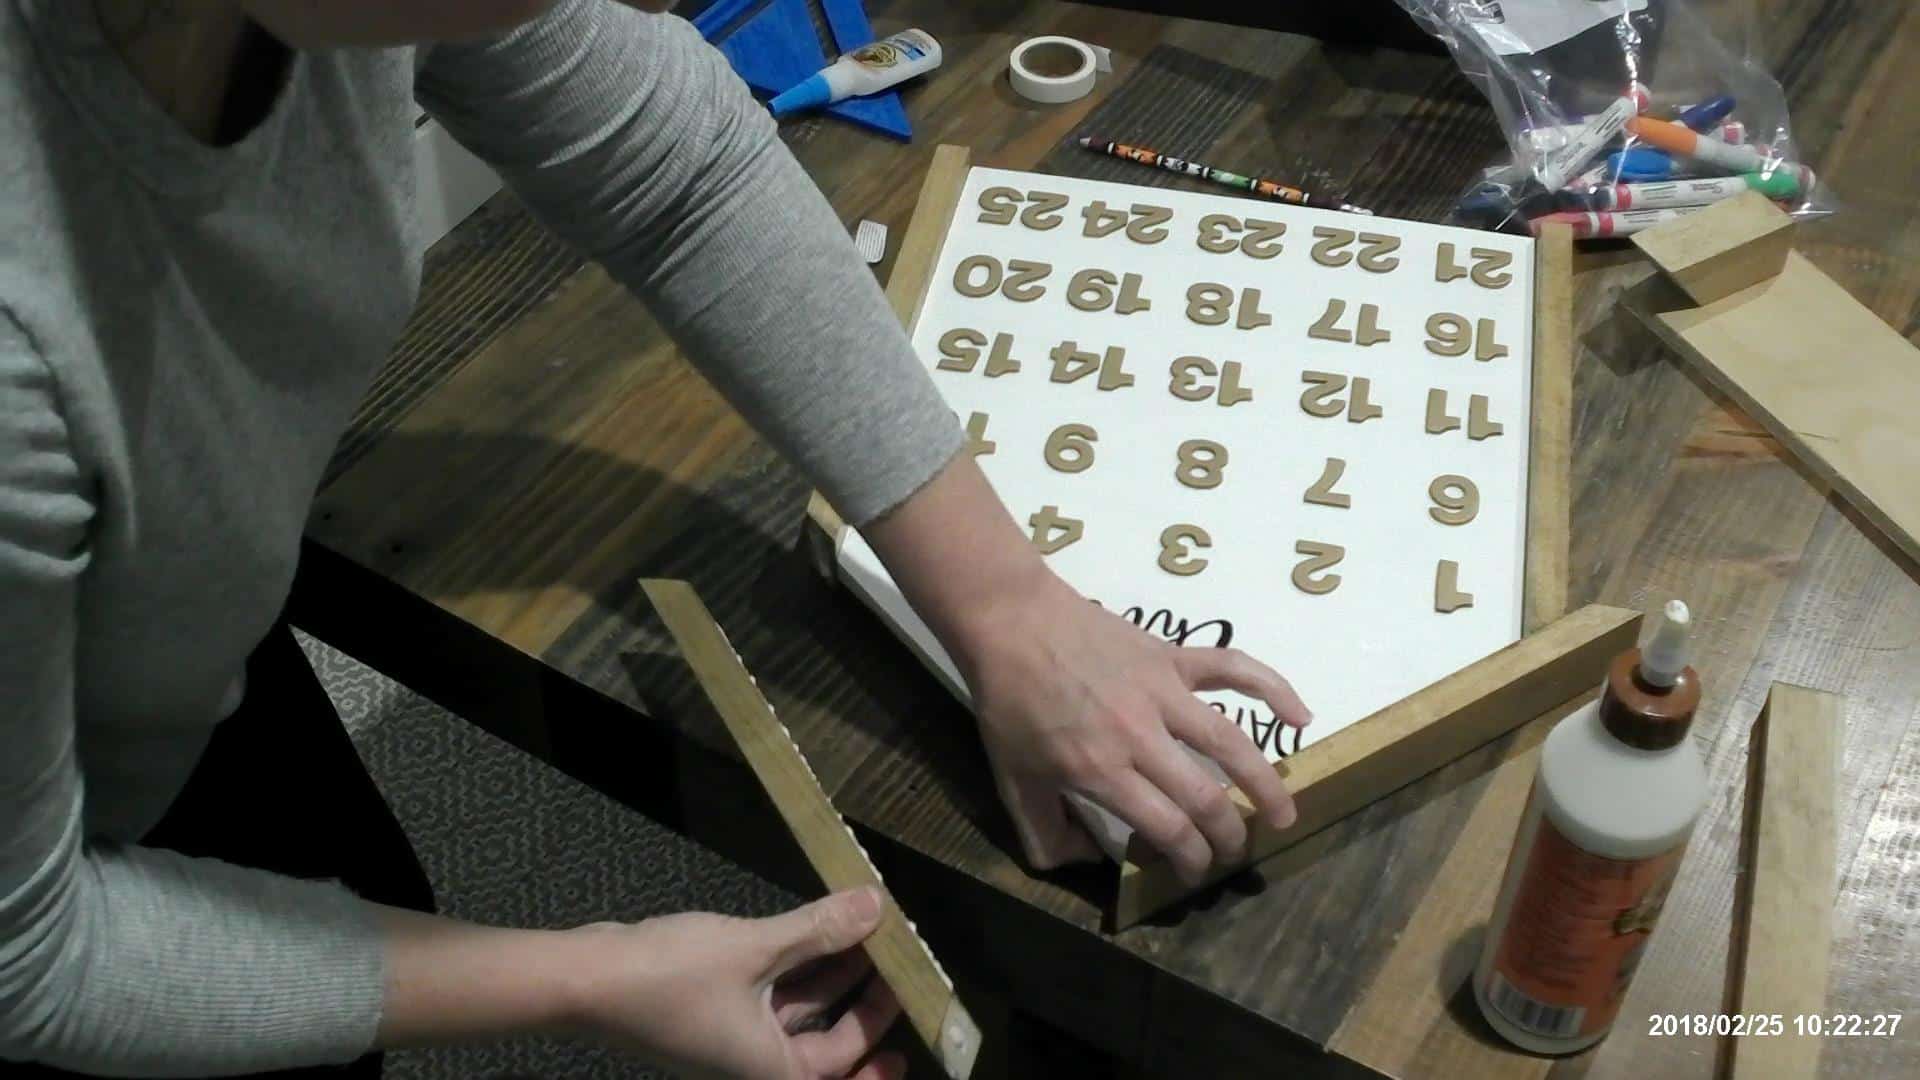
Step 6

Glue and brad nail the frame to the plywood.
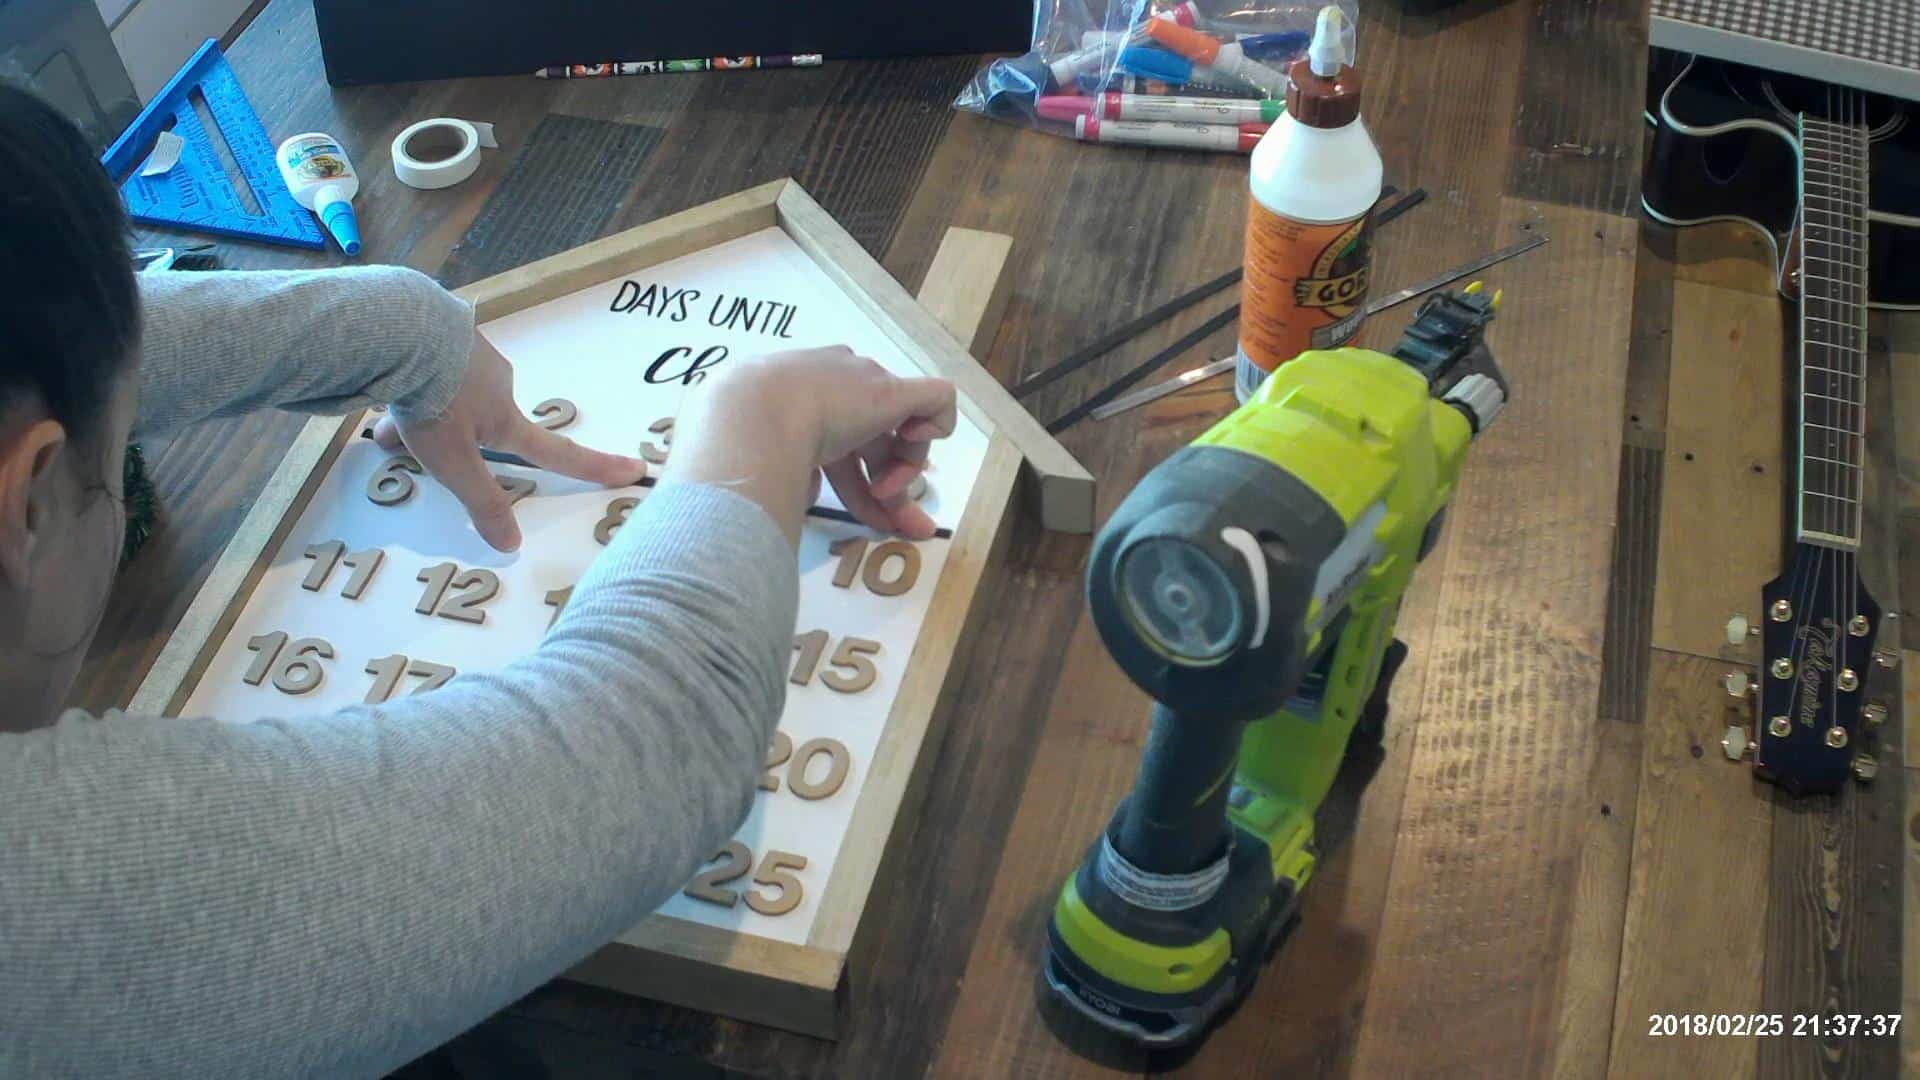
Brad nailing the frame to the house of the advent calendar

Finishing up the frame on the house advent calendar

Step 7

Add the metal strips in between the numbers, this will give the small magnet on the wreath a way to attach. I made the small strips of metal by cutting a recoil spring off of our lawnmower…don’t laugh, I saw it laying on the ground in our back yard, the dog’s somehow had destroyed our push mower and I sent a picture to my hubby and was like, “Hey, while you are in town, can you grab another of whatever this is?” He was like, “No, you know that’s off the lawnmower?” Ugh, who cares where it came from, I only care where it’s going to go! 😂😂 Anyway, they do have new ones on amazon for 4 bucks, or you can look around Hobby Lobby, they may have something similar. I just cut it with tin snips and spray painted it black. My hubby had to get the rust off of mine first though! 😏

Adding the metal strips to the house advent calendar

Step 8

Make the wreath, using green rope garland I just wrapped it around twice and made it big enough for the number to show through.

Making the wreath for the DIY advent calendar

Making the wreath for the diy advent calendar

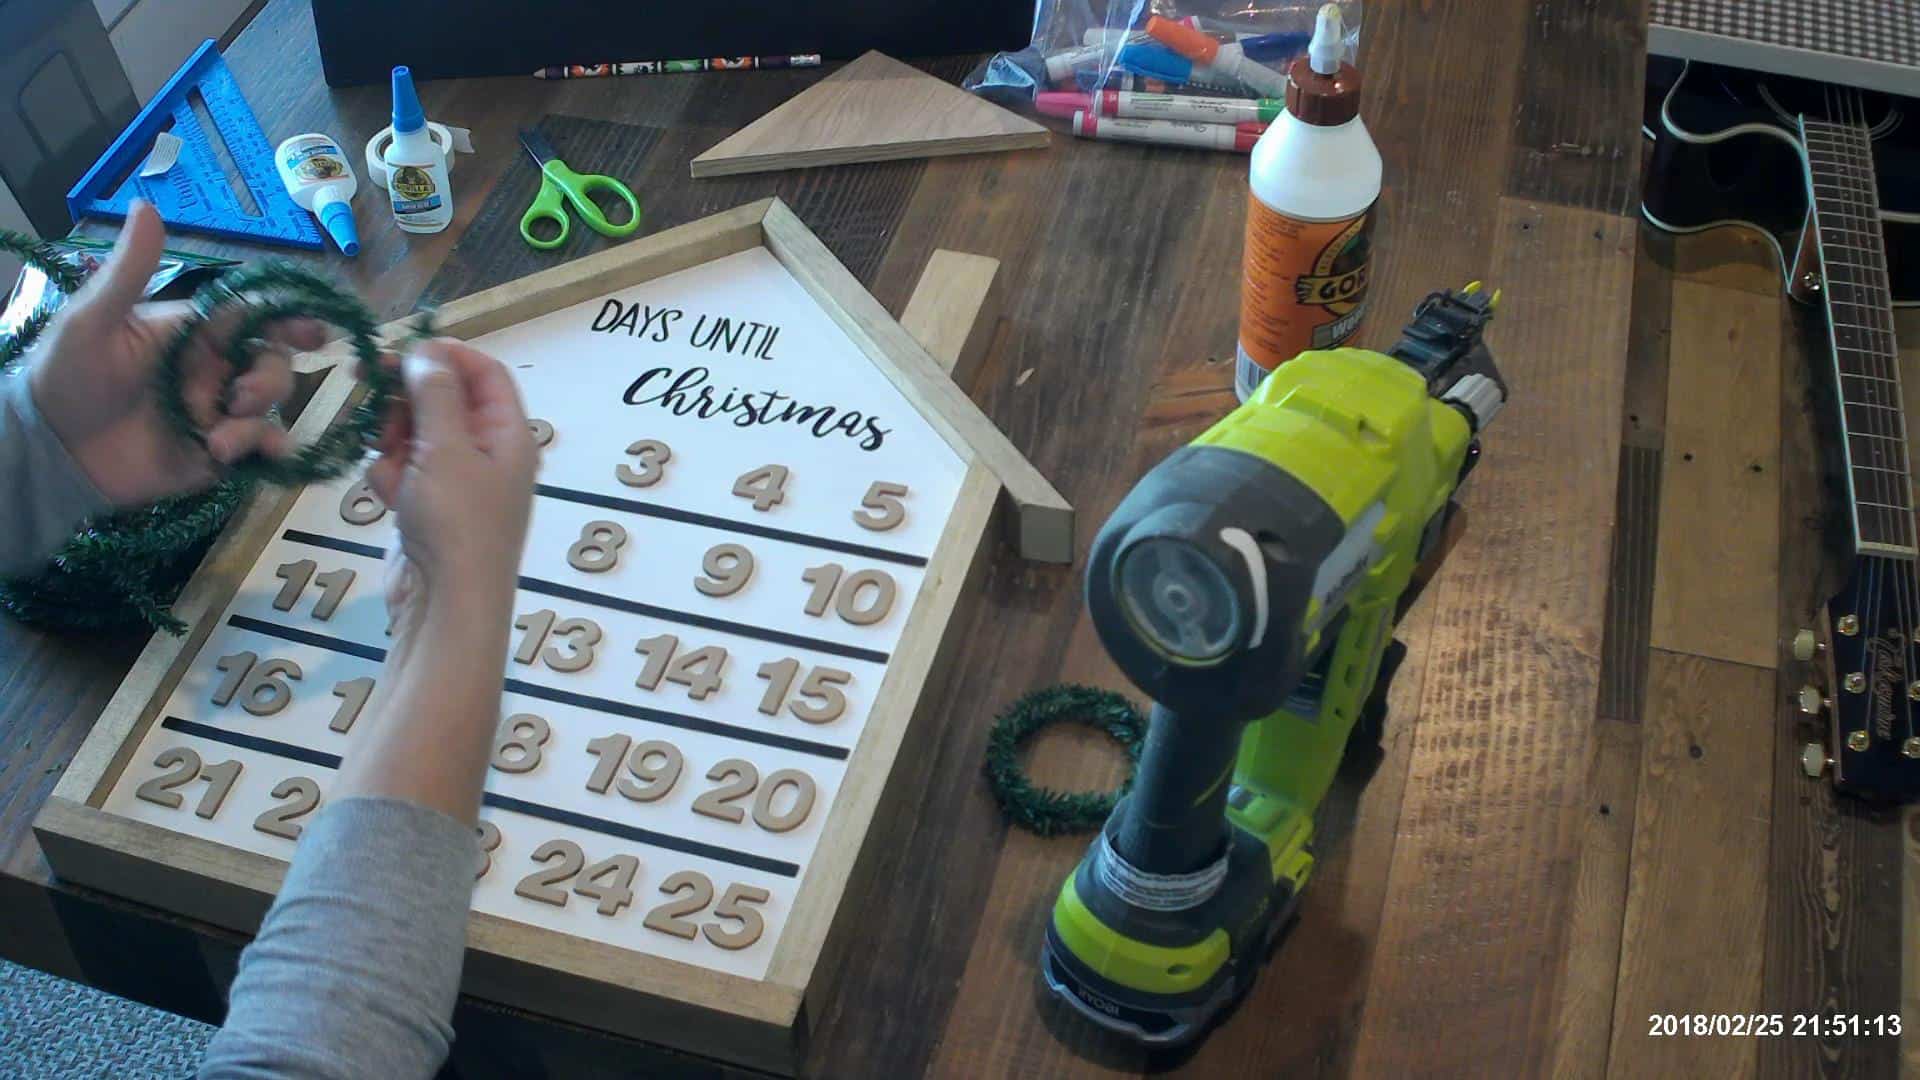
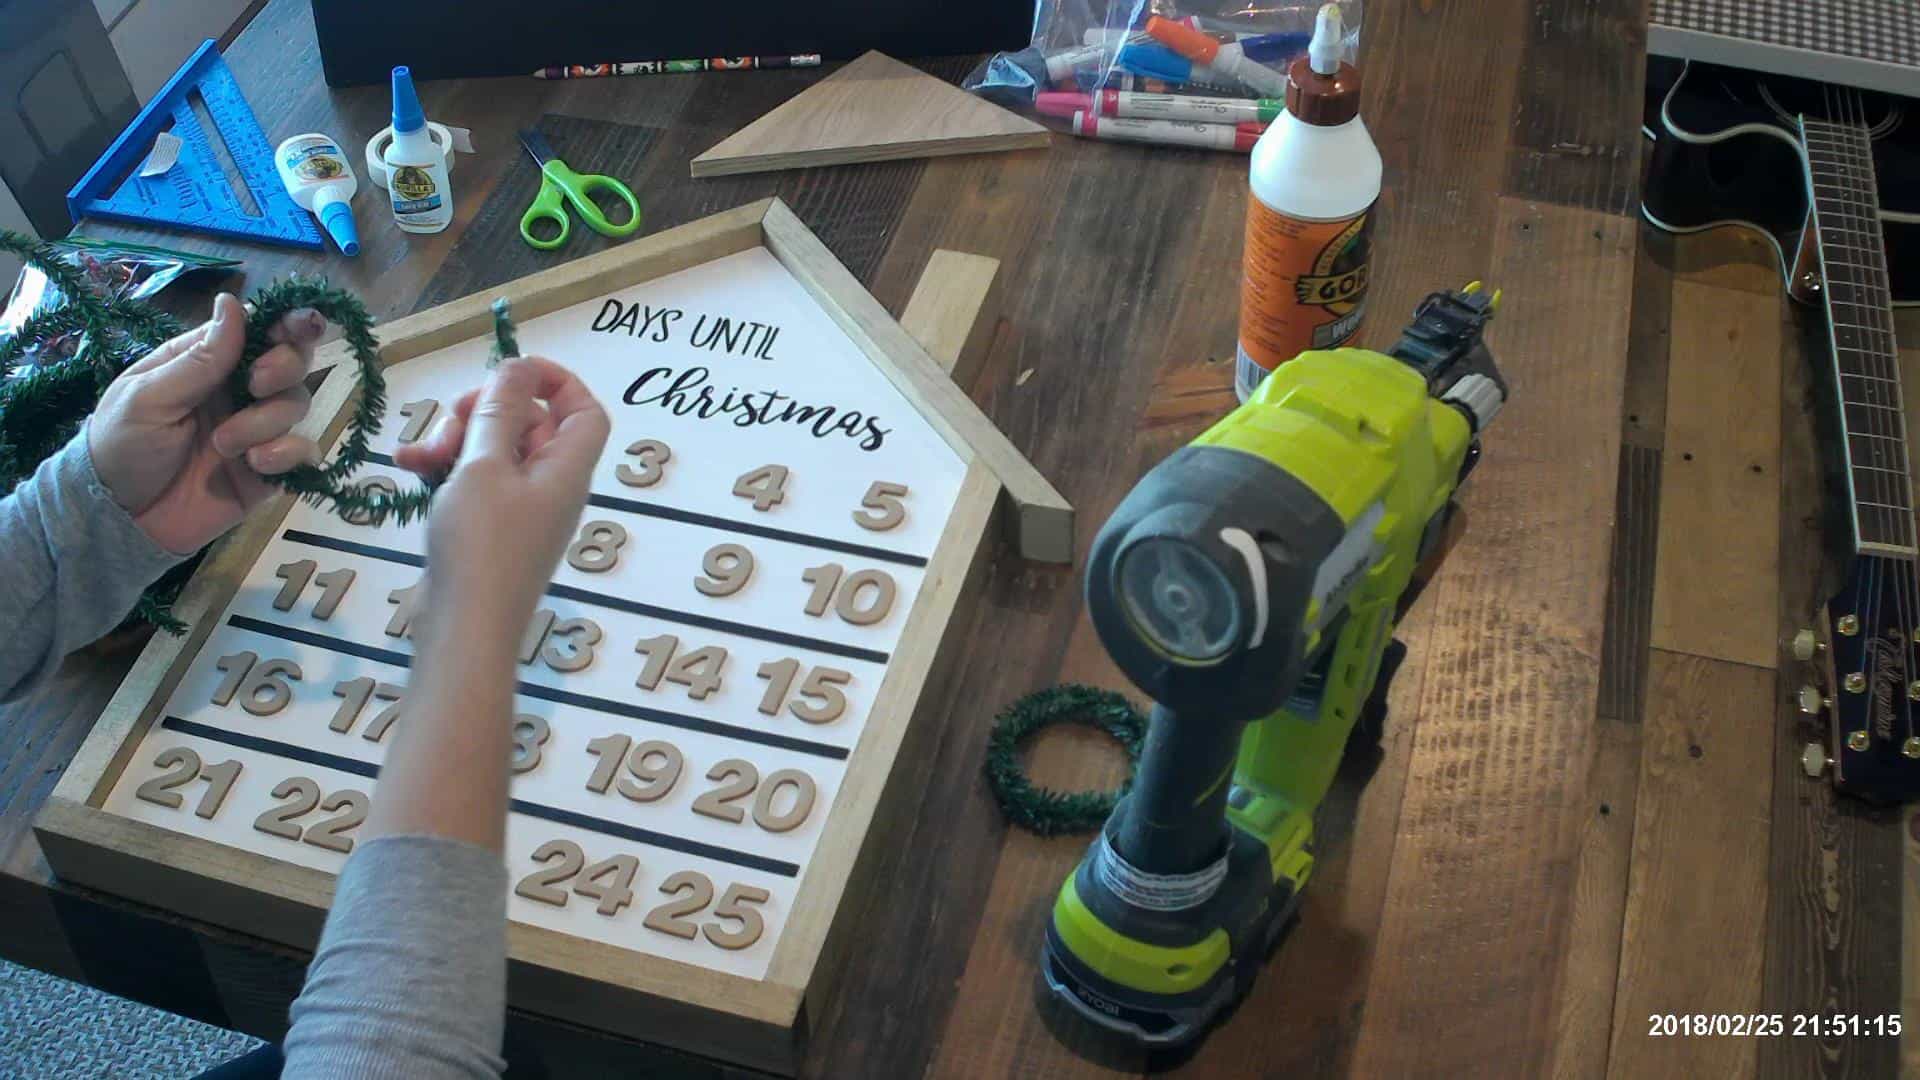
Then I added some small pinecones and berries I got from Hobby Lobby in the Christmas section. I just wrapped them around the wreath using the wires they came on.

Glue on a magnet and… there you have it! Such a cute way to countdown the days to Christmas! And after Christmas has come and gone, flip it over and use it as wall art!

DIY House Shaped Advent Calendar

DIY Advent Calendar with Baby It's Cold Outside sign on the back

See you tomorrow with another day of a DIY Christmas!

Happy Building!

Enjoyed the post and want to save it for later? PIN IT!

DIY Advent Calendar

DIY Advent Calendar

DIY Advent Calendar - With winter artwork on back to use all season long!DIY Advent Calendar - Winter Baby It's Cold Outside Sign

Related Posts

  • DIY Tree Card Holder Made of TasselsDIY Tree Card Holder Made of Tassels
  • Faux Pallet Wood TutorialFaux Pallet Wood Tutorial
  • DIY Porch Bed SwingDIY Porch Bed Swing
  • Chalkboard Initial Wall ArtChalkboard Initial Wall Art
  • Faux Shiplap Welcome Sign and OrganizerFaux Shiplap Welcome Sign and Organizer
  • How to Paint Kitchen CabinetsHow to Paint Kitchen Cabinets

Filed Under: Crafts, Holidays, Wall Decor Tagged With: Christmas, countdown, kids crafts

Affiliate Links

Note: some posts may contain affiliate links! An affiliate link means that when you click a link from my site and make a purchase, I may receive a small compensation from that purchase! It's a real win-win for the two of us since it doesn't cost you any extra and helps me bring you and everyone else more free plans!! Thank you in advance for any affiliate purchases that may be made!!

Reader Interactions

Trackbacks

  1. Advent Calendar – Free Woodworking Plan.com says:
    December 30, 2019 at 4:01 am

    […] this advent calendar and begin your countdown for Christmas. Complete instructions on building and finishing your […]

    Reply

Leave a Reply Cancel reply

Your email address will not be published. Required fields are marked *

Primary Sidebar

Connect with me!

  • Email
  • Facebook
  • Instagram
  • Pinterest
  • Twitter
  • YouTube

Search

Welcome

Hey there! Welcome to the place I share all my diy adventures in hopes of inspiring you to pick up a hammer or drill and get to work building, crafting or renovating your dreams! I will show you step by step instructions on every project to help you see how easy it can be! I’m so glad to have you here! Look around, hopefully you will enjoy what you see!

New Posts Sent Straight to Your Inbox!

Sign up to receive new posts directly in your inbox! Don't miss a single post or FREE plans!

Please wait...

Thank you for signing up! Can't wait to keep in touch!

Recent Posts

  • DIY Gold Hexagon Napkin Rings
  • DIY Marble Epoxy Pumpkin Chargers
  • DIY Hinges Made From Dowel and Pipe
  • DIY TV Stand / Media Console
  • DIY Neutral Fall Wreath

Latest Pins

  • This DIY ziploc bag storage organizer is the solution to all those pesky baggie boxes that fall to the floor or take up space in your kitchen drawers and cabinets! Make them in a few hours and have all the organization you need! Make 3 or make 6, it's easily customizable to your needs. #diypantrysolution #diybaggiestorage #kitchenorganization via @theinspiredworkshop
  • This diy outdoor planter can be built out of your scrap wood laying around the shop! An inexpensive way to get a beautiful high end look on your front porch, back patio or out by the pool! It bodes well with traditional decor, modern decor or even eclectic vintage decor! It is so versatile! Build yourself a DIY wooden outdoor planter today! #frontporchdecor #diyoutdoorplanter #diyplanter #diyscrapwoodproject via @theinspiredworkshop
  • How to make your own barn door hardware - Full tutorial to show you how to diy barn door hardware! Looks just like what you would pay 100s of dollars for but yet it only costs a little over 20 bucks! #diybarndoor #diyhardware #diymeatalworking
  • Whether you are serving wine at a holiday gathering, your wedding or just every night when you watch Netflix, this DIY Wine Dispenser is the perfect way to dispense boxed wine but make it look great! No one will even care that it was out of a box! The modern design can lend itself to any decor style. Perfect for giving as a gift to all the wine lovers in your life! #boxedwine #winestorageideas #winerack #winedispenser #giftforwinelover via @theinspiredworkshop
Follow Me on Pinterest

I have been featured at

Archives

Copyright

It makes me happy when we all share… but please keep in mind that all images & text on this site are property of The Inspired Workshop. I love seeing my photos on other websites, just as long as there are no more than two per post, and they are linked back to my site! Please do not remove any watermarks, crop or edit any photos, or copy text off of this site without obtaining written permission from me first! Pinning is always welcome and appreciated! Thanks!

SiteLock

Popular Posts

DIY Scrap Wood Outdoor PlanterDIY Scrap Wood Outdoor Planter
DIY Ring Toss GameDIY Ring Toss Game
DIY Plans for Chicken CoopDIY Plans for Chicken Coop
DIY Concrete Countertops – Pour in PlaceDIY Concrete Countertops – Pour in Place
DIY Dog Bed – Pottery Barn KnockoffDIY Dog Bed – Pottery Barn Knockoff

Footer

Privacy Policy

Rest assured that The Inspired Workshop will never sell or distribute your name or email address! Please be aware though that we do offer advertisements and in order to place relevant ads for your viewing, tracking cookies are used. Tracking cookies are small text files that are stored on your computer, which are only used to analyze your viewing preferences while on this site! You do not have to allow tracking cookies to enjoy this site and you may disable them in your web browser! Thanks!

Disclosure

Although I am sometimes given free product to review or am paid to help promote certain products/websites, all opinions on this website are 100% my OWN!! I only work with brands that I truly use and LOVE, and I have no problem turning down offers from brands that I do not feel are great quality, or would not use!! I promote many brands without incentive as well, I just enjoy sharing anything and everything I have found in hopes of make building/crafting simple enough everyone can do it!! You can be certain that if I am promoting it, I truly LOVE it!!

Tags

barn door bathroom bench chevron Christmas Decor concrete console table countertops dining bench dining table distressed finish diy fall decor farmhouse bench fireplace gift ideas holiday decor Home Depot industrial kitchen reno kitchen renovation knockoff makeover mantle media cabinet one room challenge outdoor furniture painting cabinets pallet wood playroom pottery barn Restoration Hardware review rope storage table table settings vanity wall art wall decor wall hanging wardrobe west elm winter decor wreath

Copyright © 2021 · Lifestyle Pro on Genesis Framework · WordPress · Log in

We use cookies to ensure that we give you the best experience on our website. If you continue to use this site we will assume that you are happy with it.OkNo