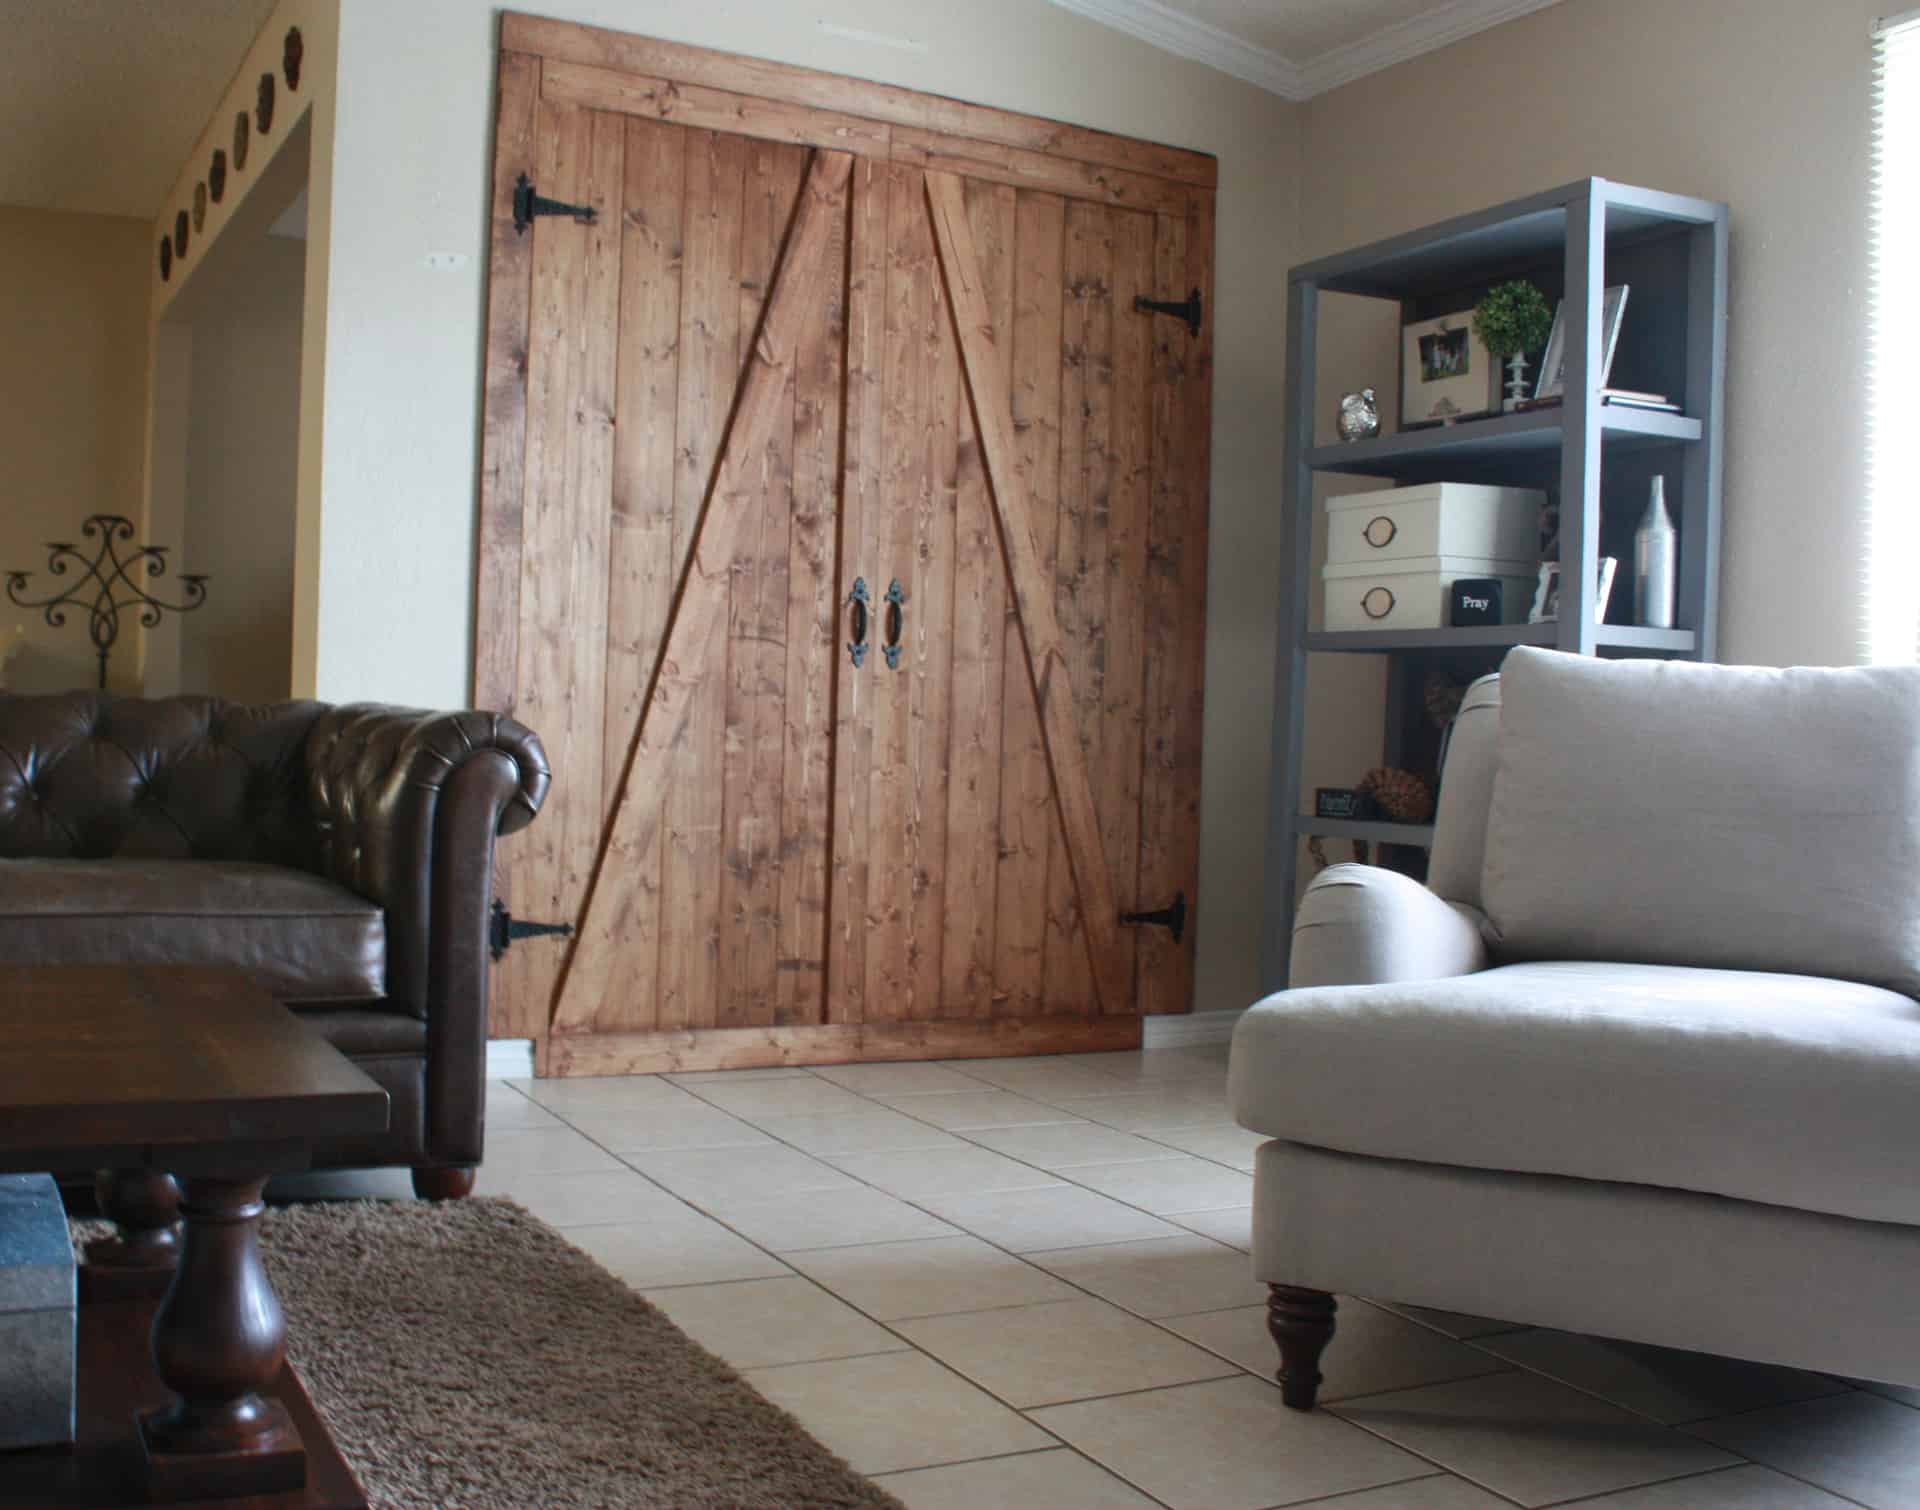
DIY Barn Door Room Divider
Sometimes there is a space in your home that really doesn’t make sense, and you would like to change it! Whether you are renting your home or you own your home, this DIY barn door room divider is the perfect solution for an awkward opening that disrupts the flow of a room!
This project is dear to my heart because we are renting right now and if you have ever rented you know how that goes…your inner decorating goddess is screaming at the top of her lungs about things that make her insanely crazy because she hates them but yet can’t change them because…well, you’re just renting and it is not your home! LOL!!!
Well, that has been going on in me for a long time, but this last weekend I tackled one of these problems! I built this faux barn door room divider to close the weird opening!

In our rental there is was no real defined “living room”, it was all open, and although I love open floor plans, I do not like AWKWARD open floor plans, which is what this is was! Lol!
So, the previous owner decided to close in a patio… great because this is a small house…and also, not great because it created a very strange small room, although I don’t know if you can even call it a room! It makes for a little extra space in the house, but at the expense of the living room always looking a mess because your eye is very distracted! Anyway, to make this long story short…I closed in this space in a very temporary way, or it could stay forever if we wanted to buy the house with this barn door room divider…PERFECTION!
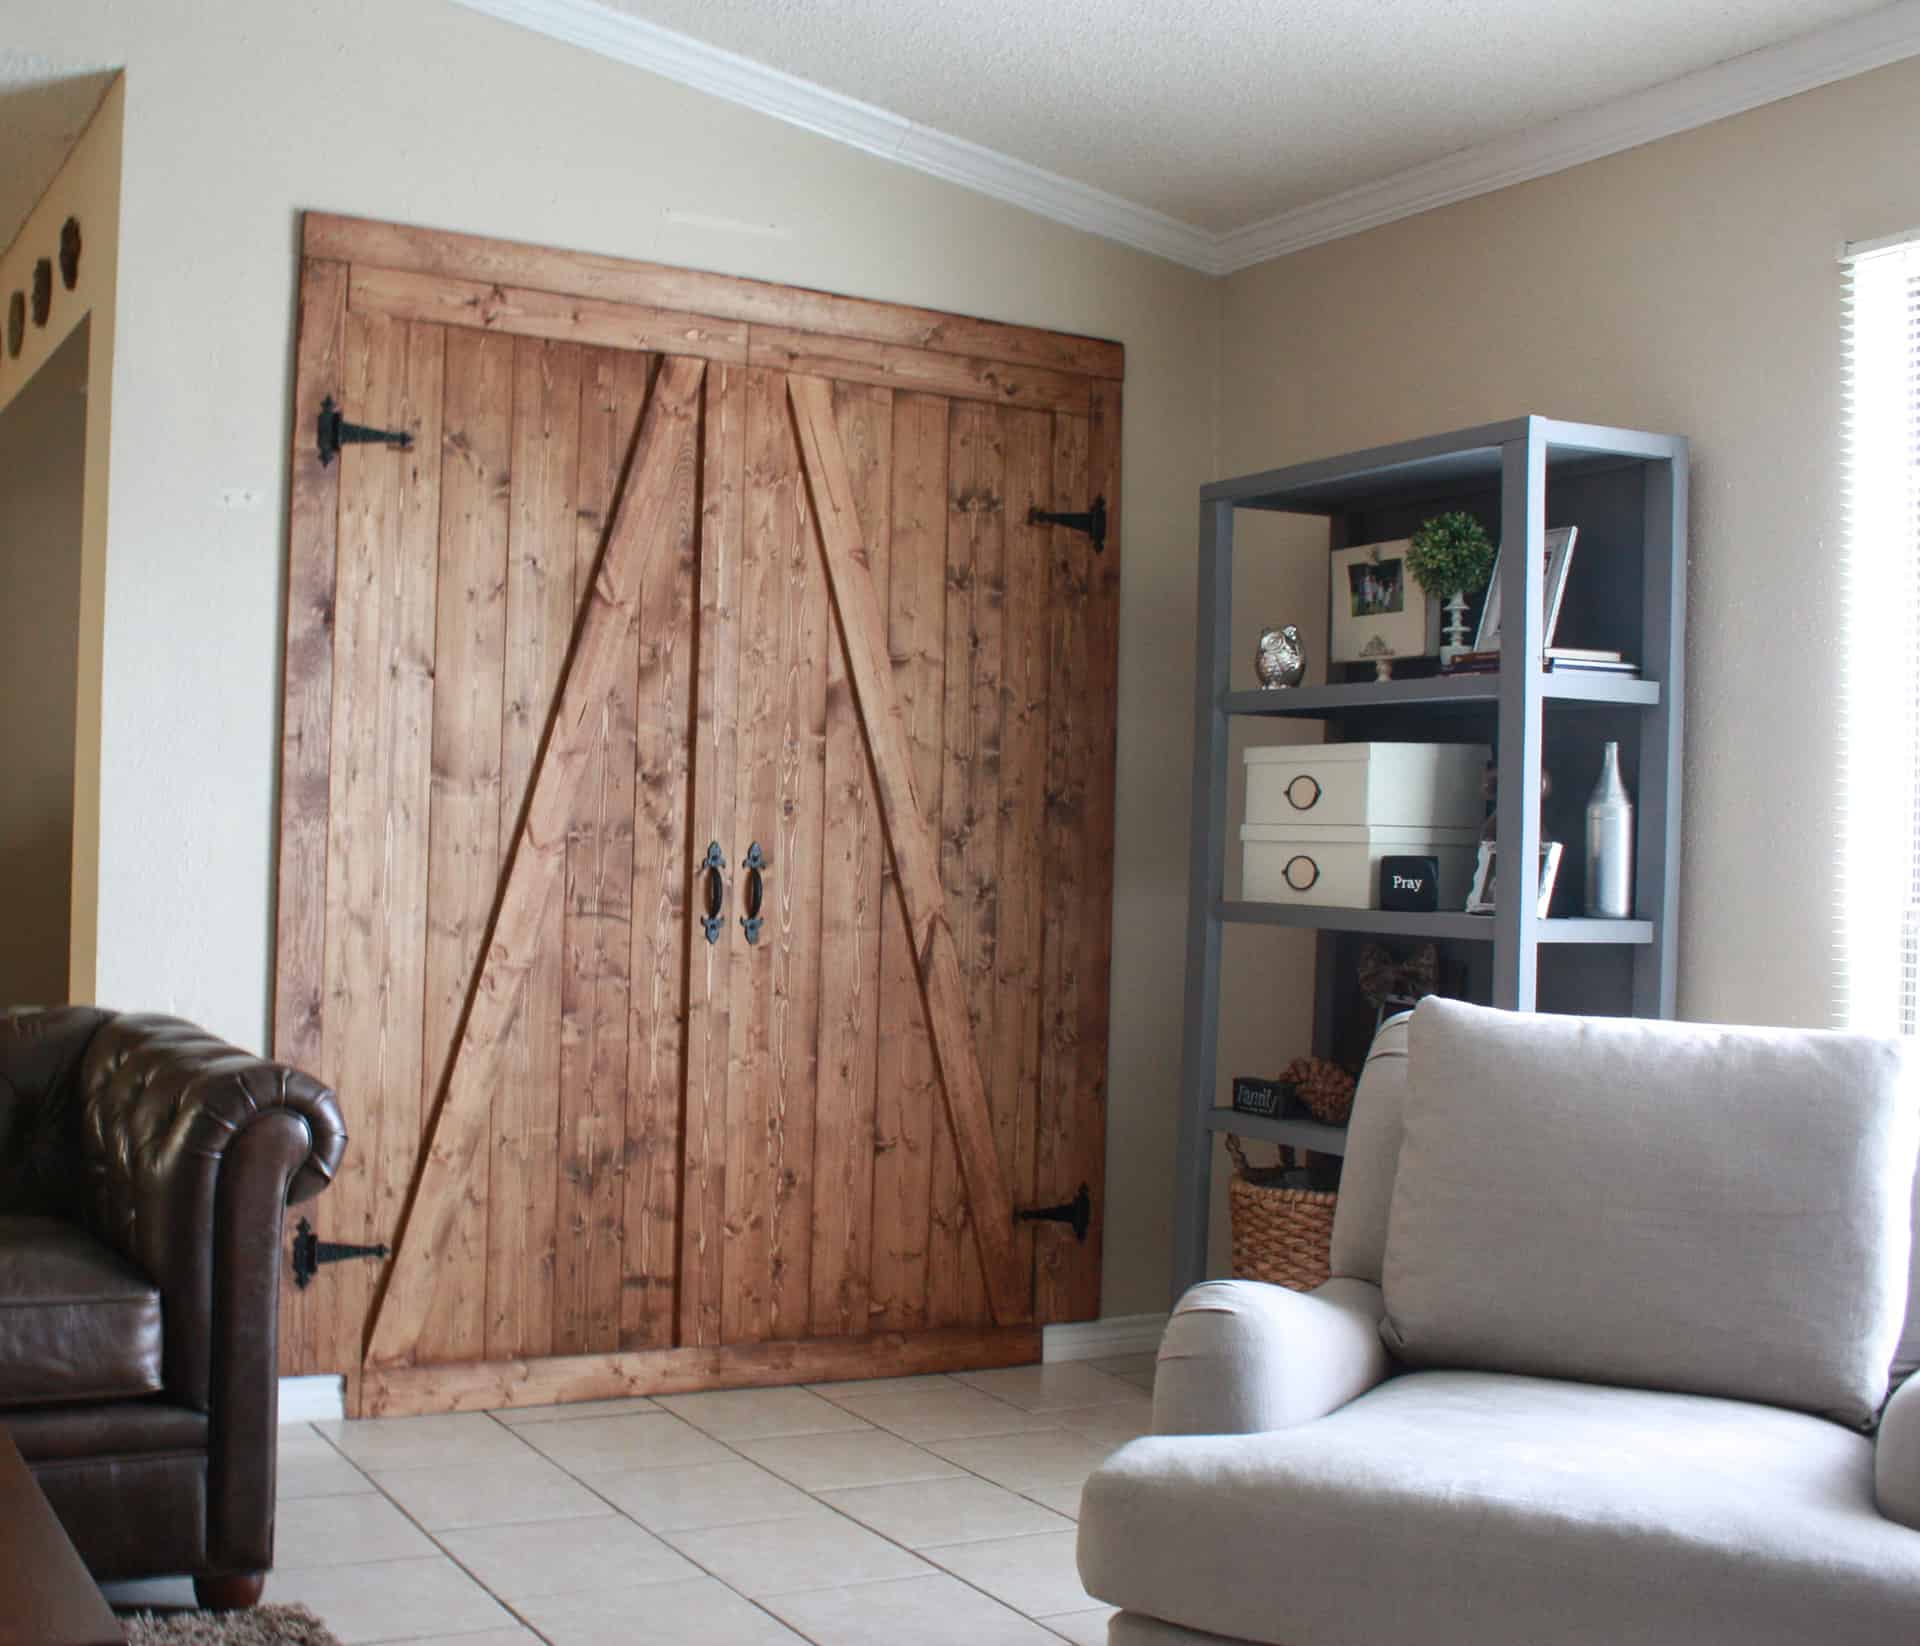
The small sliver of wall you see to the left…that is the only “wall” on that side of the living room and it ends right there where the picture ends!! So are you envisioning this properly?! Scary right?! Let’s refresh our mind with the new one! Lol! Anyway, I LOVE sliding barn doors and every room in my home would have one…but…it’s not my home, and in this rental, there is NO PLACE for a sliding barn door! The solution, a faux barn door room divider!
So, yes this project helps with my problem but it still gets BETTER! On the backside of the fake door, I made a huge chalkboard for my boys to draw me beautiful, nearly life-size pics of wooly mammoths and fire trucks, or anything else their wild imaginations can dream up! Cha-ching! This just solved another problem I had… the little easel we had sitting in this area, my little guys loved it and didn’t want me to get rid of it, but now they are completely fine with giving the easel away! Yea!!!
I am still on cloud nine over this whole project! Check out the DIY chalk and eraser holders I made as well!
I guess I should stop dancing on cloud nine and come back to help you solve the world’s problems as I did! OKAY, maybe not the world’s problems…that is a BIT of a stretch… but sometimes it just feels so good to fix something that has been bothering you for so long!
Gathering Supplies to Build a Barn Door Room Divider
The materials you will need for your barn door room divider will probably be different than mine because your opening will probably be of a different size than mine, but I will give you the list and you will just have to alter it based on your measurements!
My measurements were 61.5″ x 81″ and because of the measurements, I chose 1×6’s as my size of boards. If you have a smaller opening, you may want to go with a smaller board, such as a 1×4 or you can still use 1×6’s depending on what works to fit the space. Don’t forget when trying to figure out what size board you need, your boards measure smaller than their stated size, for instance, a 1×6 when actually measured is 3/4″ x 5.5″.
Materials Needed for Barn Door Room Divider:
- 11 – 1x6x8
- 11 – 1x4x8
- Kreg Jig
- 1 1/4″ kreg screws
- 2″ screws
- wood glue
- 4 – 6 in. decorative T hinges
- 2 – garage door pulls
I will not supply a cut list as every list will be different; not all of my boards were cut to the same length anyway because this “hole” was not square at all, which is why I had to go with the design plan that I did!
Building the DIY Barn Door Room Divider
I started out by cutting the 1×6 boards down to fit the opening for the barn door room divider, the opening actually ended up being only 80 1/2″ on one end…so it was very hard to just cut all the boards to one size. I ended up cutting my very first board to fit the end that measured 81″ and so I cut it just shy of that, I believe I went with 80.75″ and before I moved on to the next board I brought it inside and checked to make sure it would fit inside the opening, and I did so with EVERY board.
I would move down roughly 6 inches in the opening and make sure the board fit before I moved on to the next because with a catty-wumpus opening like I was working with I was worried in the beginning that when I pocket holed them all together it wasn’t going to work…but it did! Yea!
So after cutting all the boards and making sure they all fit, I took them back to the garage and I had a 4×4 that I used to line the bottom of all of them against…if I had a clean garage, I would have just used the wall, but in my garage, good luck even finding a wall! LOL!
This picture shows my pocket holes already drilled because the other picture I had taken before I drilled pocket holes was blurry…not sure what I did…lol! But see how the boards are lined up against the 4×4!

Next, I made sure they fit together well and made sure of which side I wanted to be the front, the boards I bought were actually really straight…unbelievable, I know! I spend hours looking for boards and it seems like they bow and cup on my way home…I swear sometimes they have to!
Anyway, if your boards are really straight and the edges really sharp like 1×6’s usually are, they look like one solid piece when you lay them all together, and I wanted it to be obvious that my barn door room divider was planked wood! Lol! I took my sander and sanded the front edges of all of the boards to round the corners so you could tell that they were boards planked together!
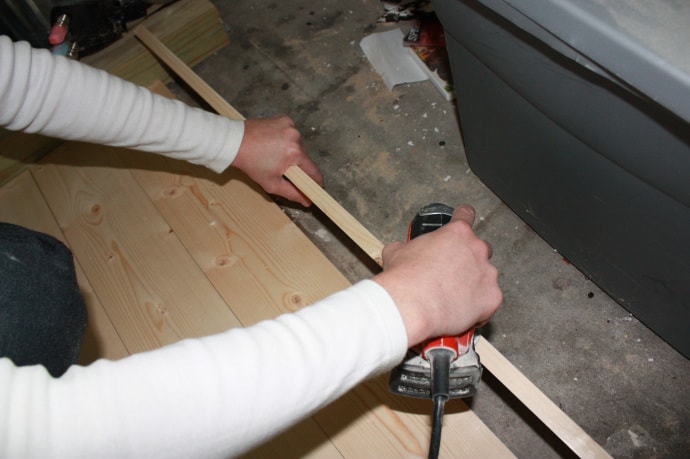
After dusting myself off, I drilled a BUNCH of pocket holes! I used my Kreg Jig R3 (affiliate link) to do my pocket holes and if you don’t have one already…you MUST get yourself one ASAP!!! But seriously if you have a Home Depot or Lowe’s gift card laying around that you got for Christmas and you are not sure what to buy with it…get your keys and leave right now to pick one up!
Okay but really it made this project so simple and I wouldn’t have attempted this project without one, because I don’t know how I would have planked the boards together any other way! I bought the most inexpensive model they made because I really wasn’t sure if I was going to be able to use it…well, I may have to upgrade soon, but I can’t talk myself into it because the little R3 does everything I need!
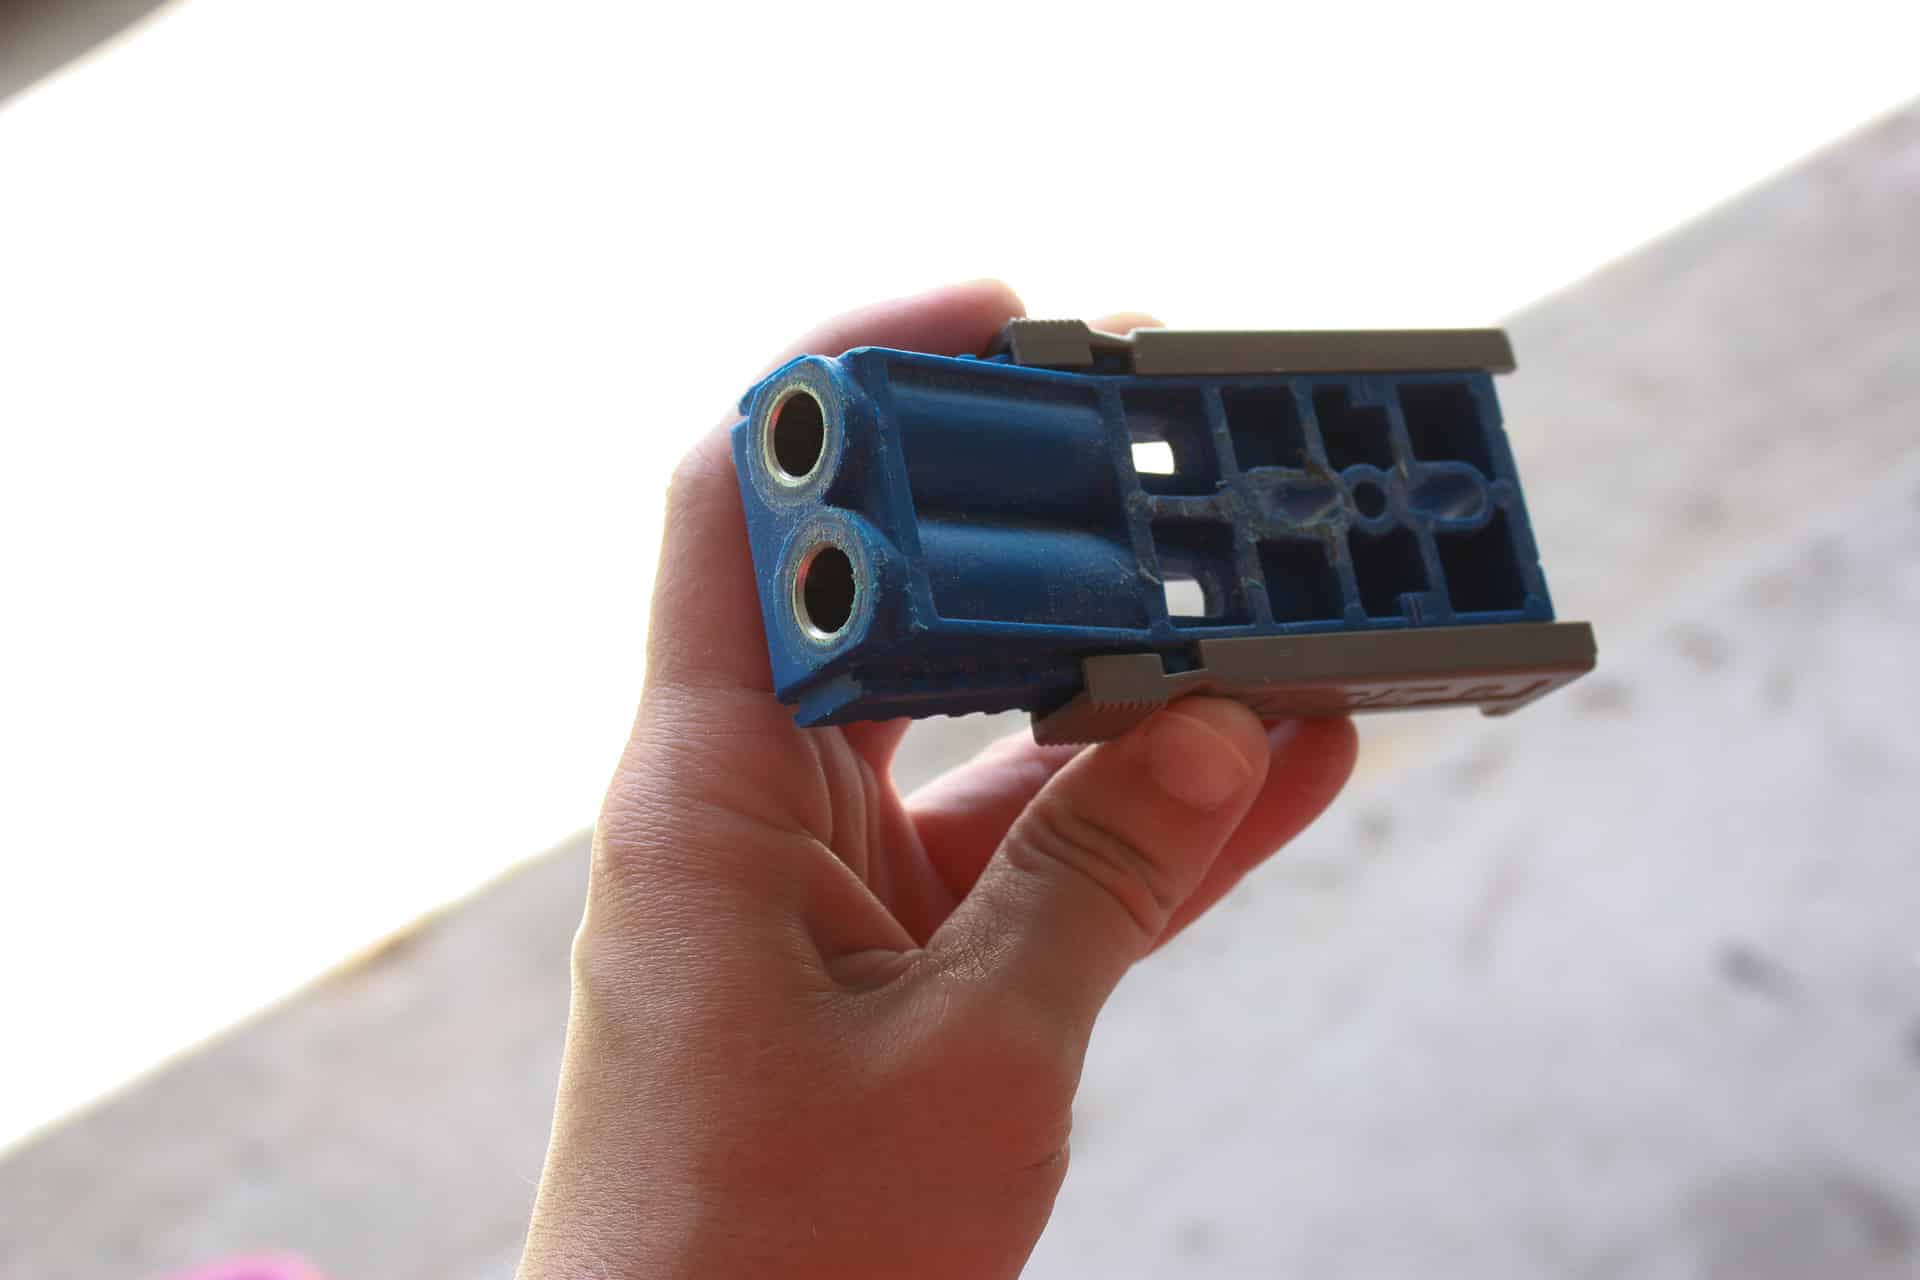
Just a quick overview for anyone who doesn’t know what a Kreg Jig is, or how it works: So you take your jig, that’s what I’m holding here:
and you set the guides on it for the depth of wood you are drilling into, like so:
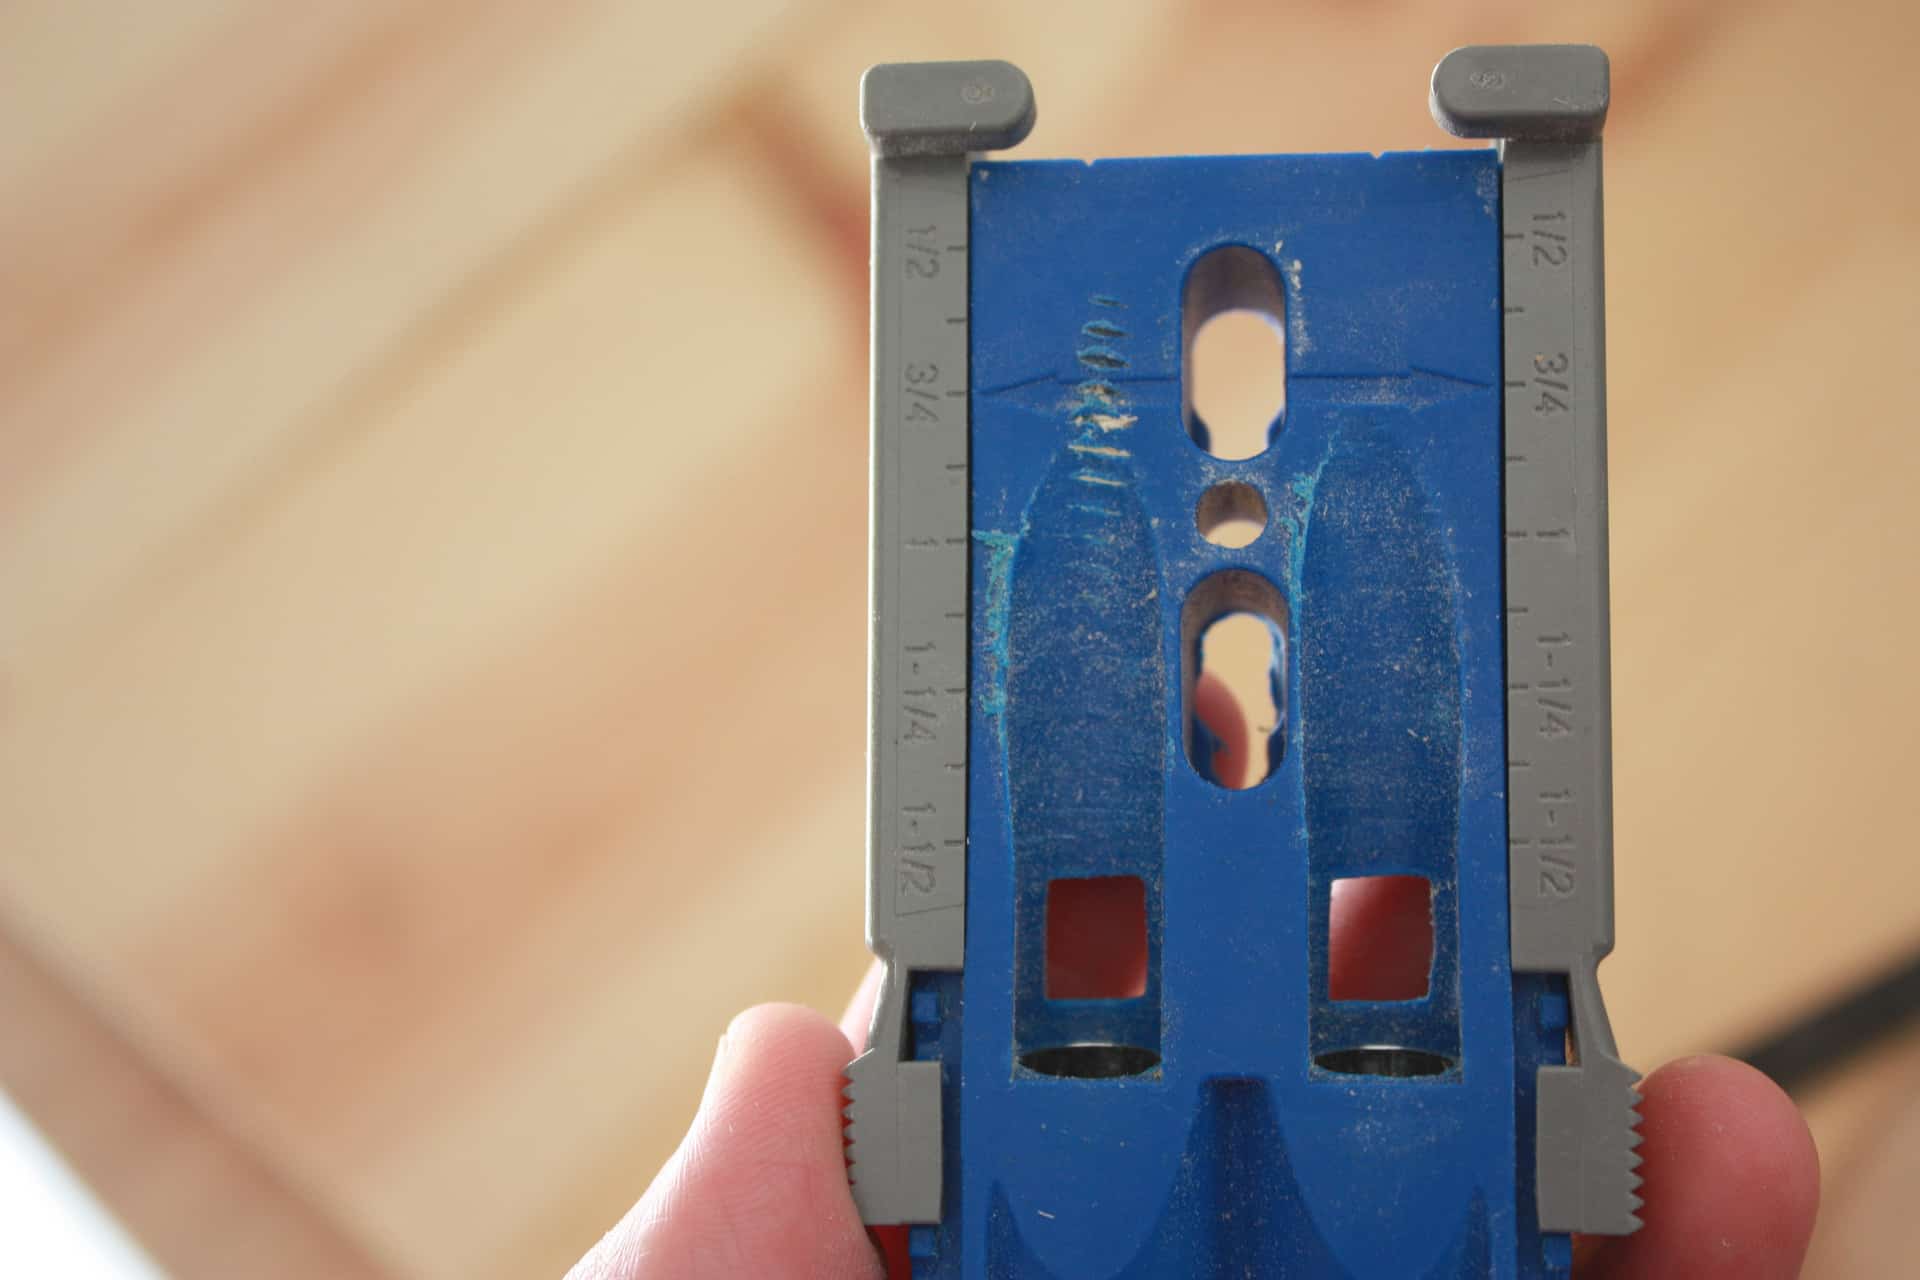
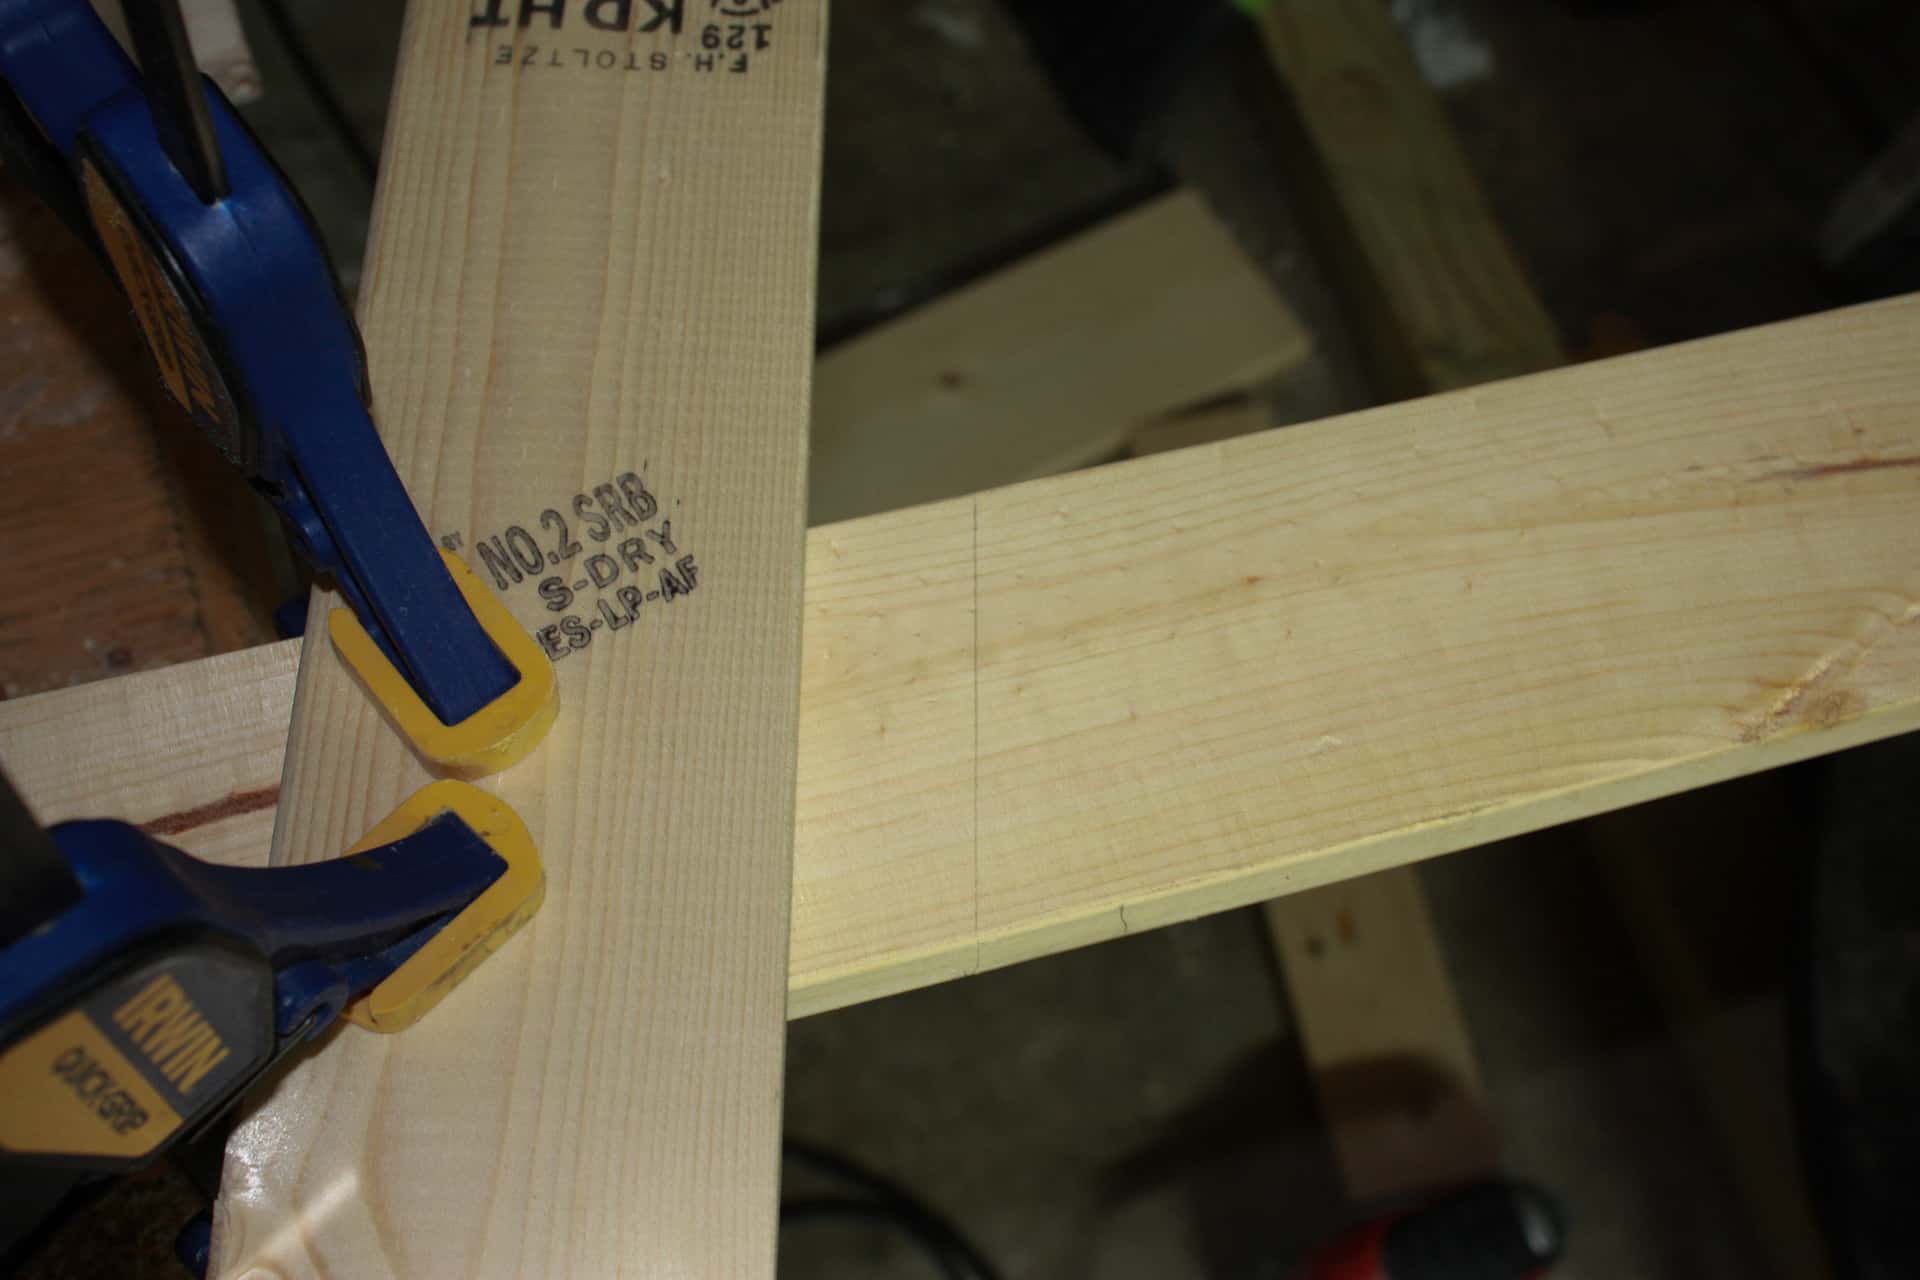
you can barely see it there, but it says 3/4, and our board is 3/4 in, so that’s perfect! And you just clamp it to your board that you need holes in like so:

(this picture is just for a sample, this is not a board I used on this project)
The drill bit itself that comes with your Kreg will have a band around the top that you can move as well depending on the depth of wood you are drilling into, so you need to make sure and adjust it like so:

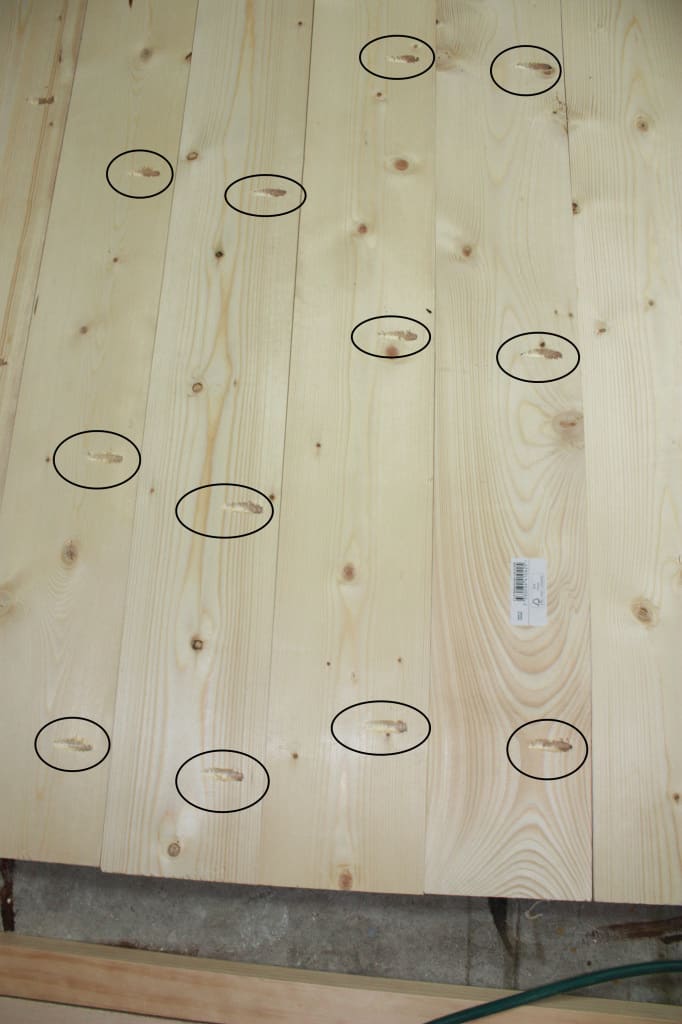
Ever so slightly you can see the band around the bit is at 3/4″ which is right where we need it since our wood is 3/4″ thick! Now you just put the bit into your drill and, yep, drill baby!!! Now you have the first of like 60 holes to drill done! Oy! Sounds daunting but I had them all drilled and the cramp in my hand massaged out in like 30 minutes! LOL! The holes need to be drilled into the sides of the boards, not the ends like in the sample pic I displayed a minute ago, so your boards up close should look like this:
See how simple that was! We have almost closed in the space that has been making me/you crazy! Ha! Okay, maybe not that quick but there isn’t too much more to it to have a completed barn door room divider!
Now that all the boards are planked together, we need to add all of the framing pieces to make it start looking like a barn door!
You will need to stand it up at this point, and grab all those 1x4s.
Trim Boards for the Barn Door Room Divider
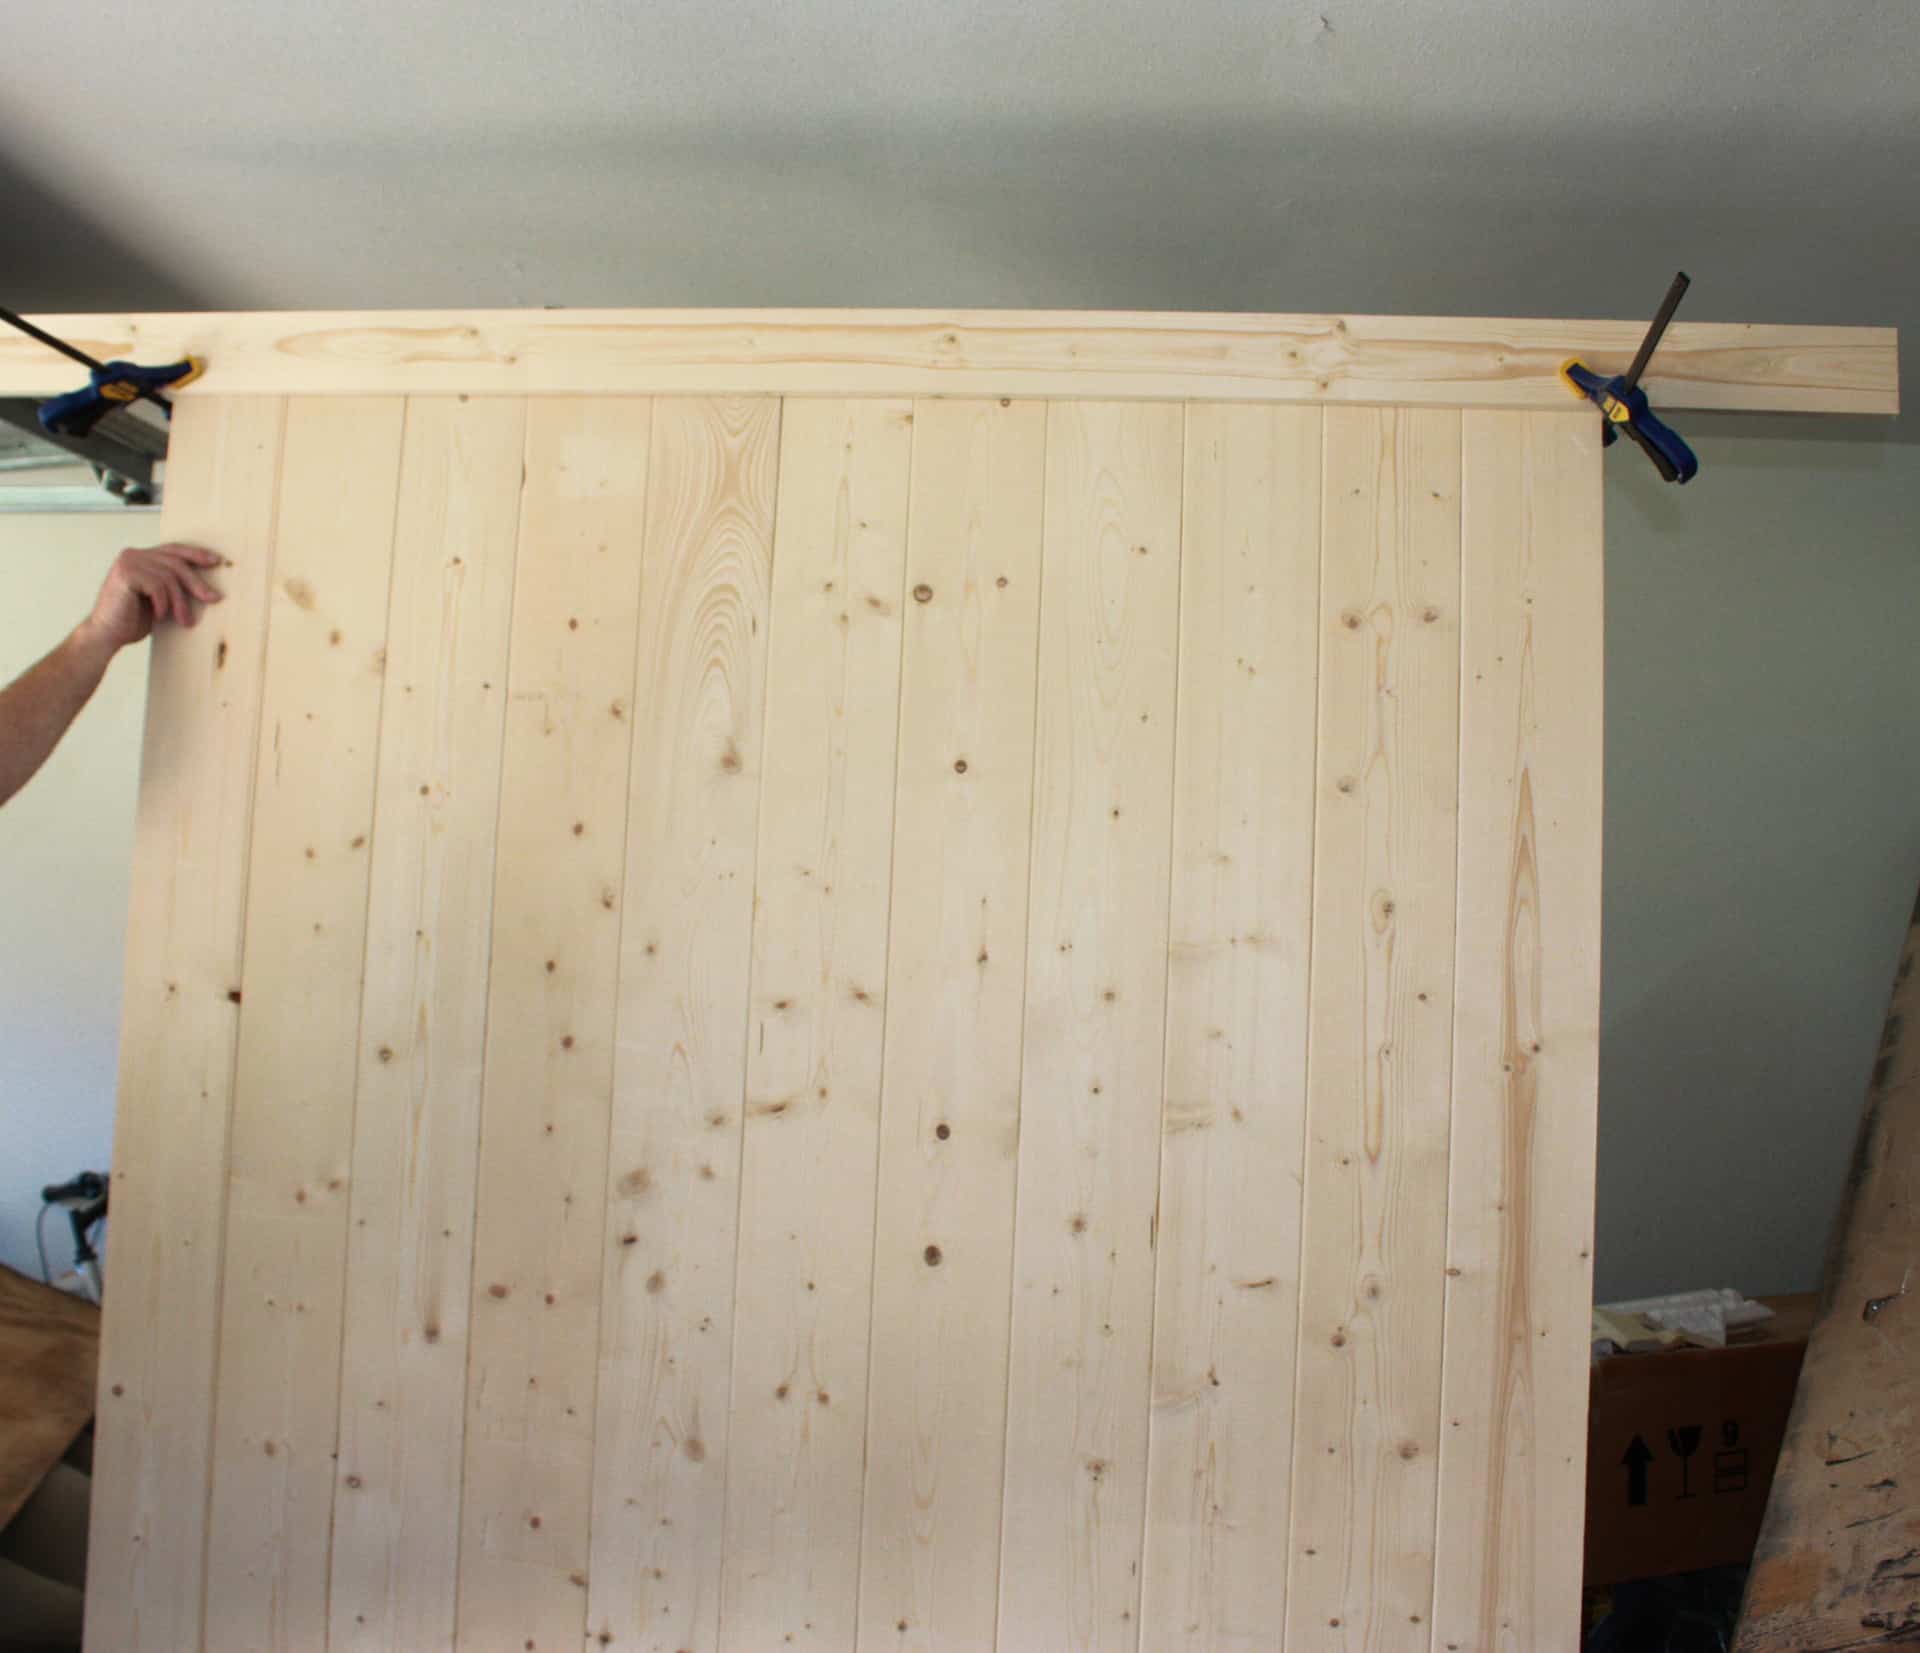
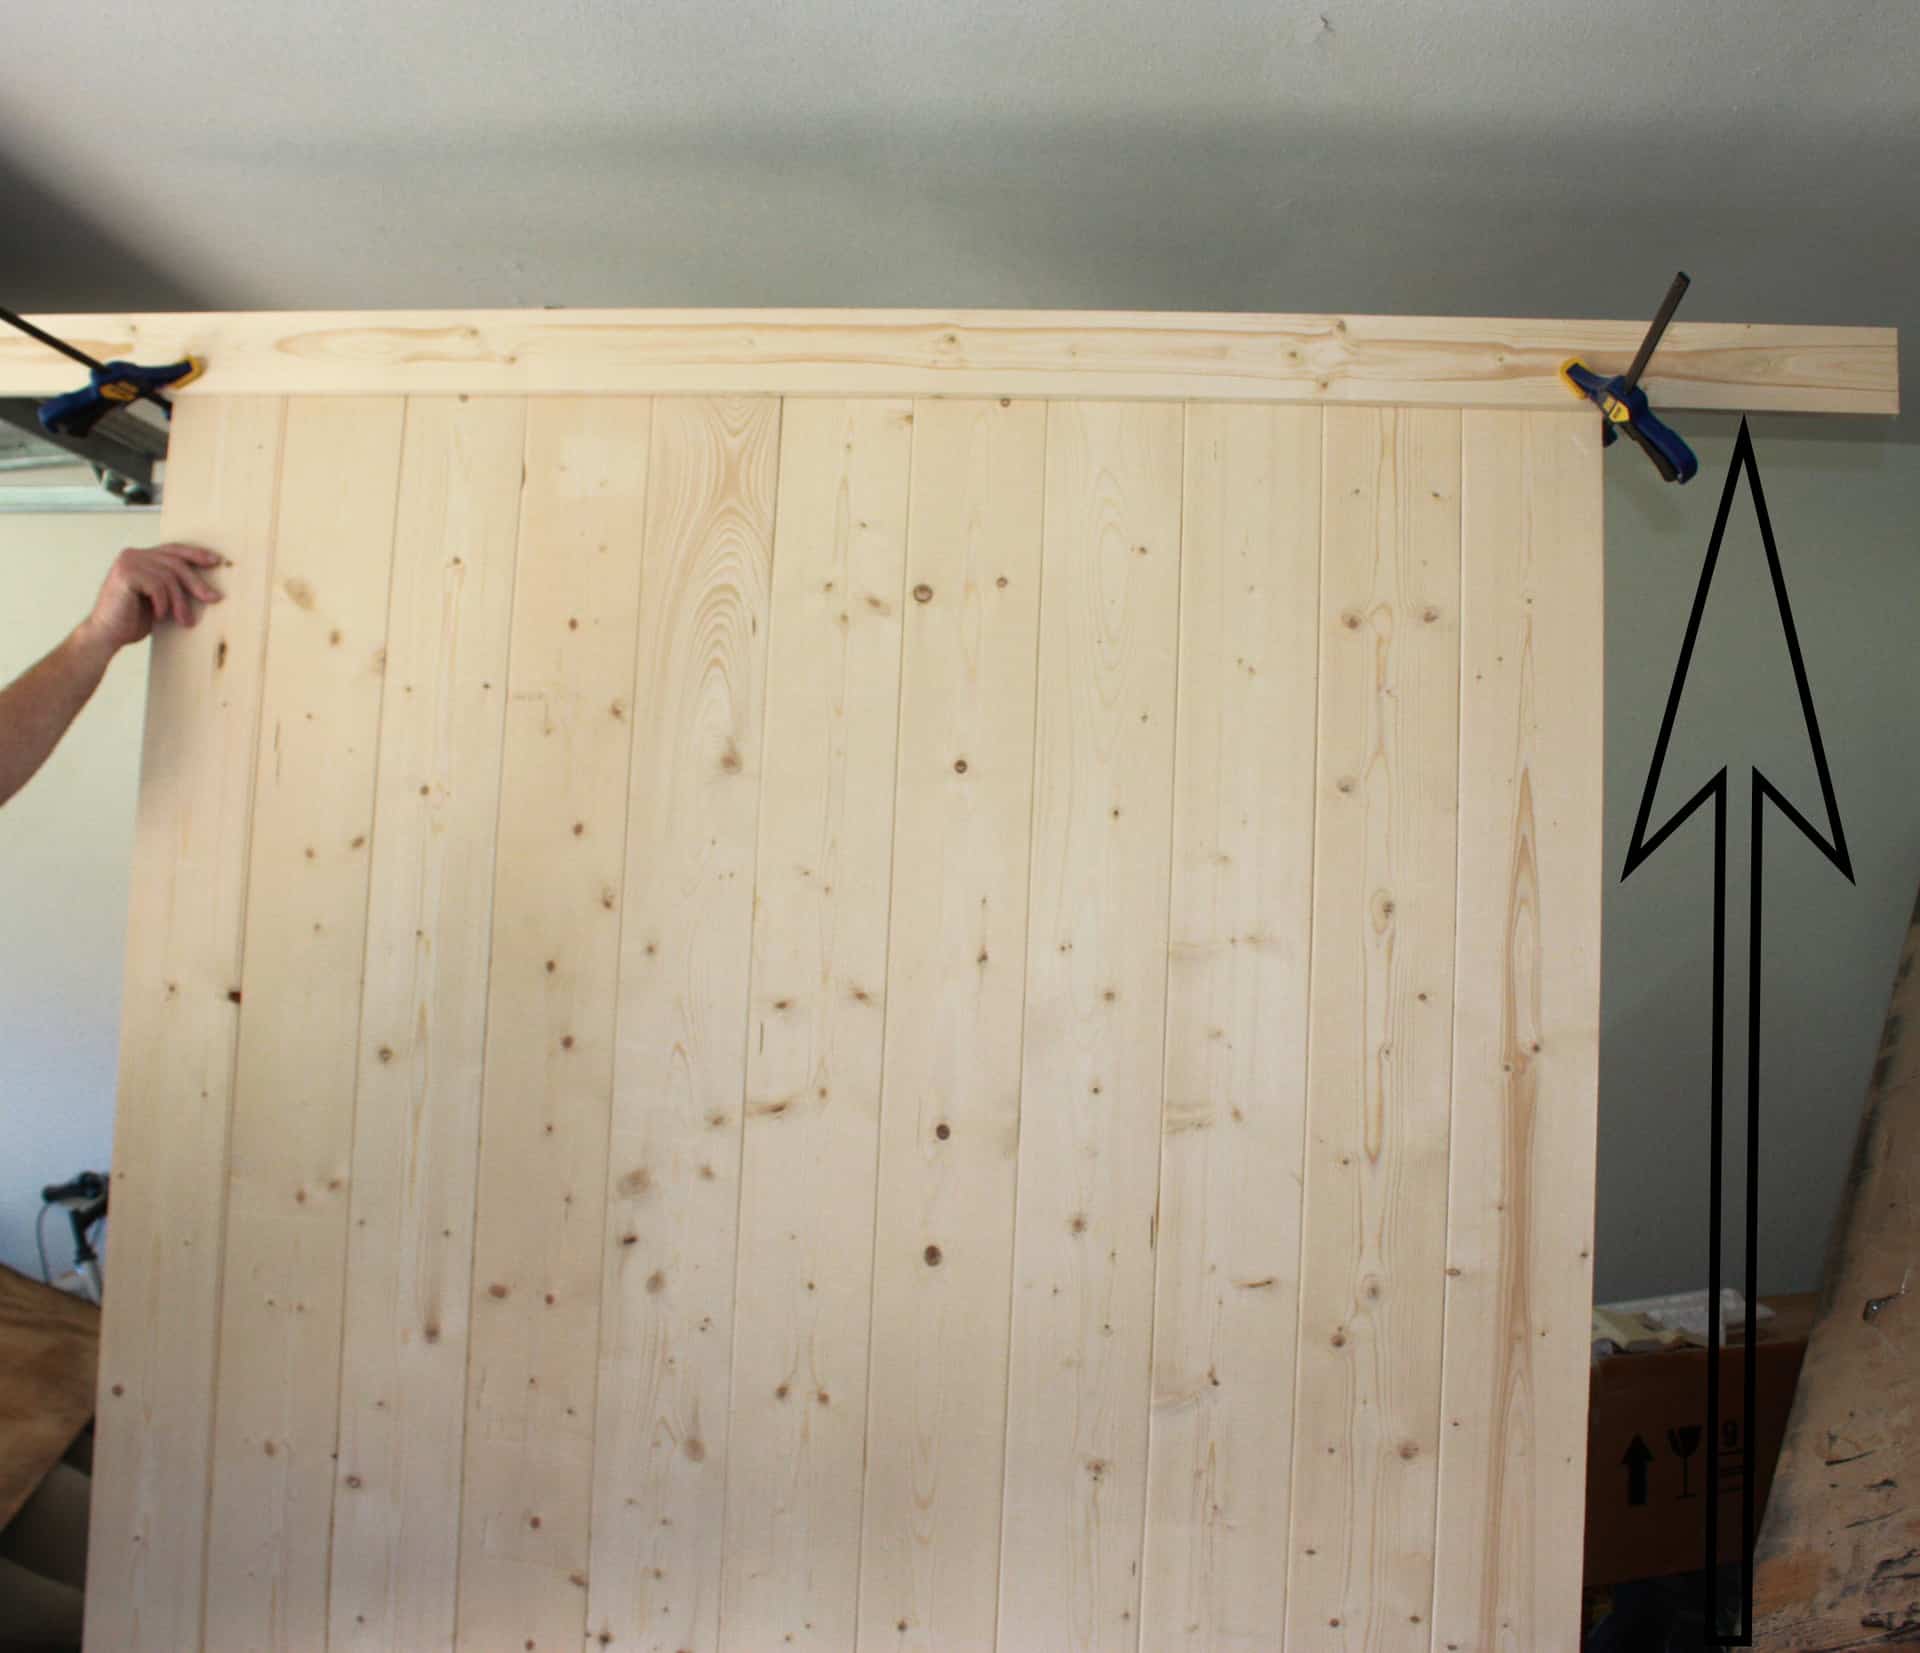
I needed to make sure my board across the top was straight even though the boards were fitting into an opening that wasn’t straight! The top 1×4 will be attached to the door only by about an inch and a half, the rest will overhang and attach to the wall so you can’t just align this board flush with the top of the planked boards.
I used a laser level across the top of the boards about 1 1/2″ down from the top of the planked boards to make sure the line that I was using as a guide to attach my top board was straight So I then clamped the board to the top along the laser line!
Believe it or not, that is straight across the top…my camera just wasn’t! LOL! Okay, so now you can’t attach this board because we need to cut it, but you can’t cut it until we know how wide it will be with the sideboards attached…you can’t just add the 3.5″ of a 1×4 because the 1×4’s will be attached to the top of the end boards, that will create the illusion of being on top of the door but yet it will be hanging over the edge to give you a lip to screw into the wall! Blah!
That sounds confusing…it’s not once we see pictures and keep talking! 😅 So keeping the top board clamped, take another 1×4 that you are using on the side and measure it from the ground to the top board you have clamped, and draw a line for you to cut.
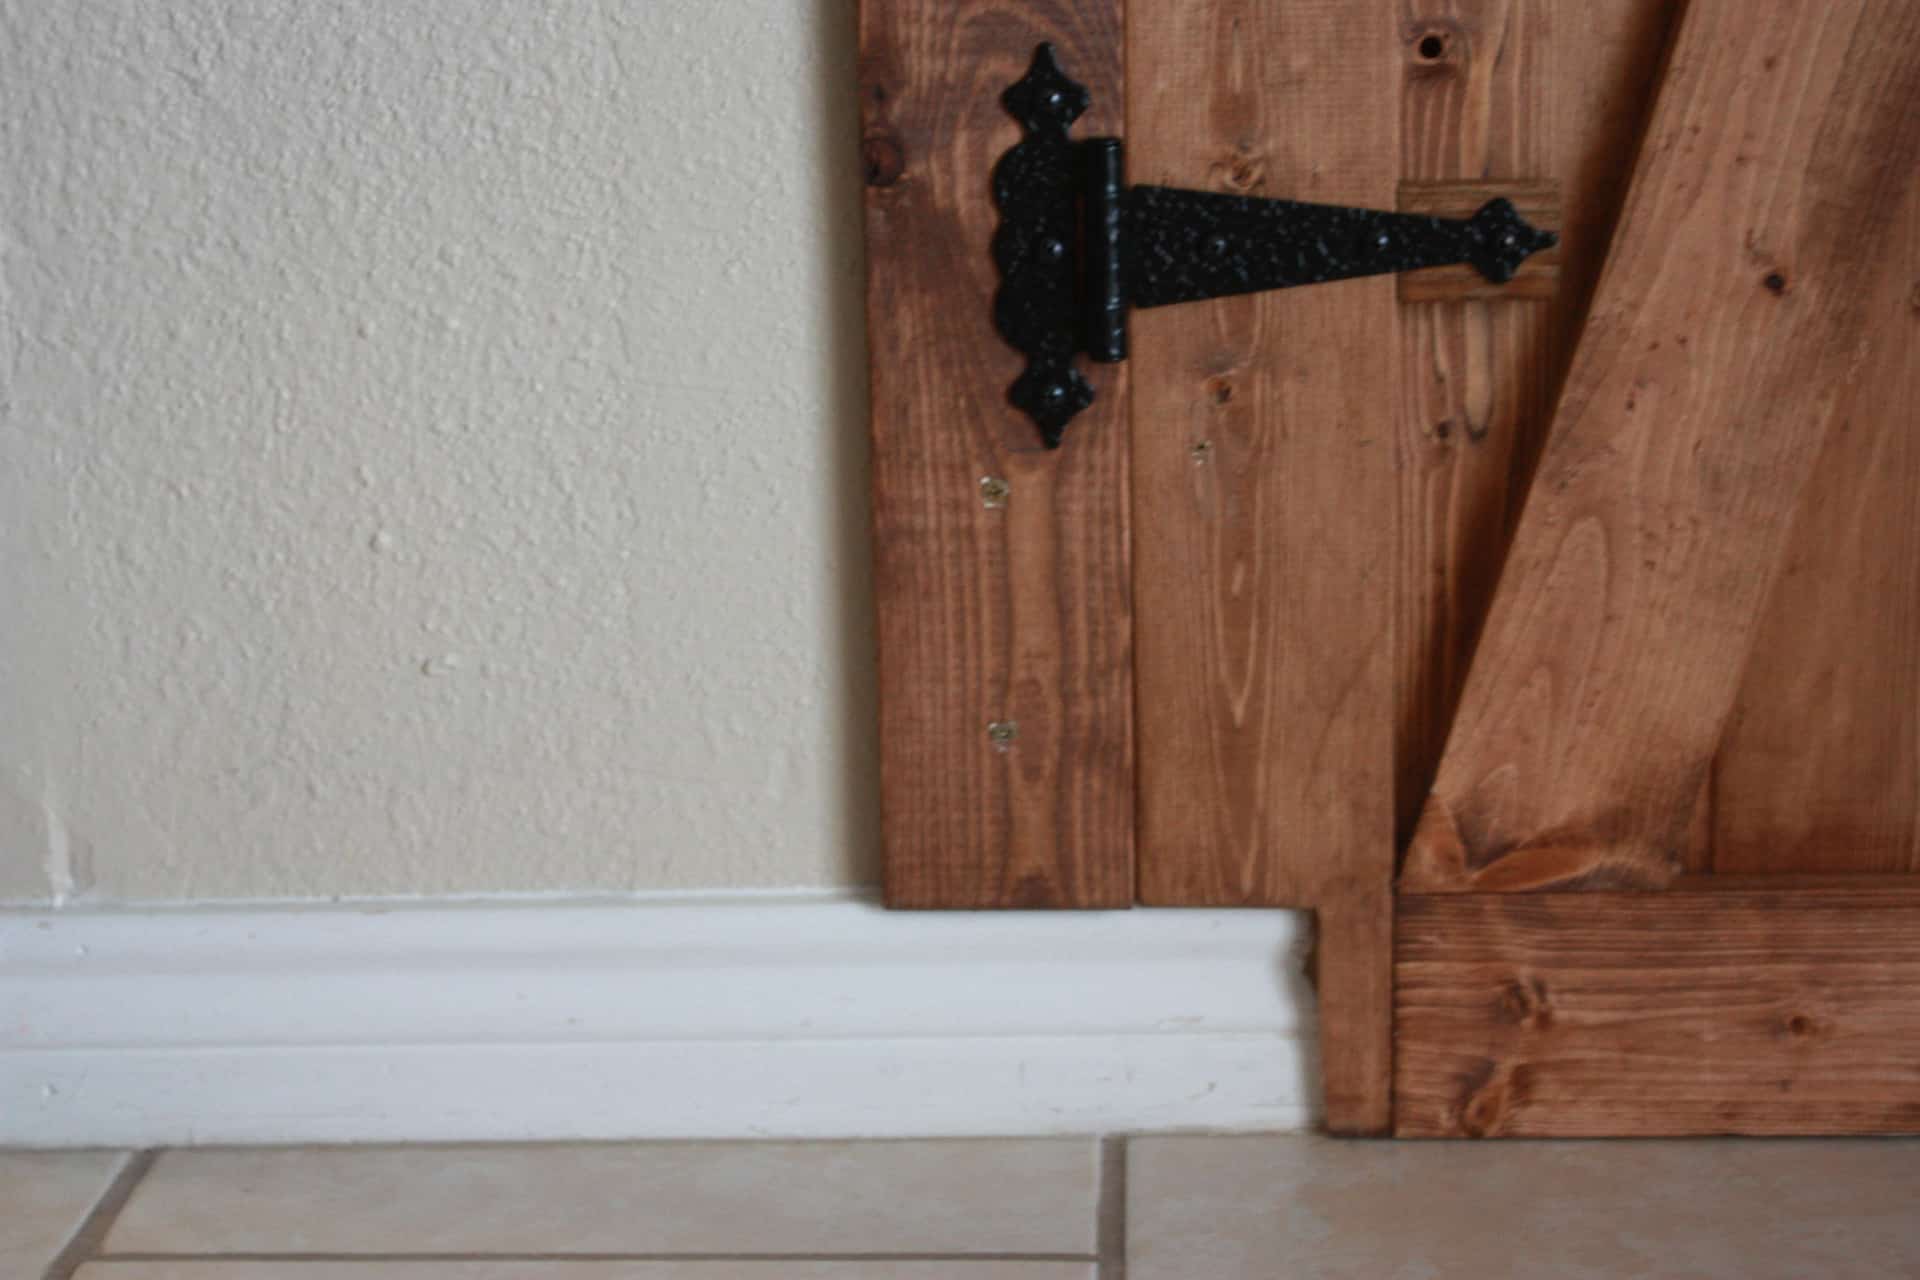
Once you have marked your boards for the side of the barn door room divider, you can cut them, and at this point, you will need someone to help… and pretty much the rest of the project because it is so big and not very steady while standing up! I cut small sections out of the bottom of the two sides of the 1×4’s just before attaching them to fit around the base molding, since it is a rental, I couldn’t remove the base molding to make it lay flat against the wall, so this was the next best thing!
If it is your own home you can take an oscillating saw (affiliate link) and cut the baseboard out very easily!

I simply measured the height of the molding and cut out a section on my board, leaving a small piece behind to attach to the planked boards! Check out the finished pictures if this doesn’t make sense! After gluing and clamping the side board on as best we could, I predrilled holes and then used 1 1/4″ screws screwed in from the backside while my husband gave resistance from the front side! Repeat the same with the other side, all the while keeping the top board clamped on still!
Now you can mark your top boards where the side board ends and you can cut your top board to length, I drew a pencil line under the top board before I removed it so that it would be easy to realign this board once it’s cut!
Now, to give it the appearance of a real door, you cut the top board in half to create the illusion of two doors (the blade width is perfect size for the gap, that’s why I cut it in half after cutting it to the correct length) you can then attach the two pieces across the top, making sure to line up the ends of the boards with the ends of your door, to leave the gap in the middle of the two boards! Then we did the same with the top pieces as we did with the side- glued and clamped as best we could, predrilled holes, and screwed from the back with 1 1/4″ screws!
Okay, so grab another 1×4 for the bottom, this one will be slightly different in that it will be completely flush with the bottom boards, you don’t need an overhang here! So just measure in between the two side pieces and cut the board, then like we did the top board, cut it directly in half, and when attaching to the door make sure to leave the small gap in between the two boards, again to give the illusion of real doors! I had to prop mine up all crazy to be able to drill from the back and line them up flush but you can see my gap here in the middle!

Also, this is a good pic to try and explain what I was meaning a minute ago about the cutouts and overhang. In the pic at the bottom of the door, you can see where the cutouts are, the part that is cut out is completely overhanging (sticks out past) the planked boards, and the small sliver that is not cut out is attached to the planked boards – this planked section will fit directly into the opening in my living room and the overhang will stand on the outside of the opening and be screwed into the wall!
Hopefully, that sort of helps to clarify, if not feel free to ask questions in the comments below or on the contact page! I know when I would describe what I was needing to do, even my husband was a little confused at first, until he actually physically saw me placing the boards and explaining at the same time, so obviously, I don’t explain something right that my brain sees! LOL! What is new, right? It’s craziness in my head, but I hope you can make sense of it!
Make sure to glue, pre-drill, and screw those boards on just the same as the others!
Almost there! Now you just need to measure to cut your two pieces in the middle that really split the planked wood and make it look more like two doors!
Just measure in between your bottom and top boards right in the middle, cut them, and these two are a little harder to attach because you can’t clamp them and they are in the middle of the planked wood so you really aren’t sure where you are drilling from the backside! It is a mystery until your board either sucks up to the planked boards or you see a screw come through the planked boards somewhere!!! Ok, really you can just count the boards over in the front and then count the same number over in the back and screw them in! No biggy!
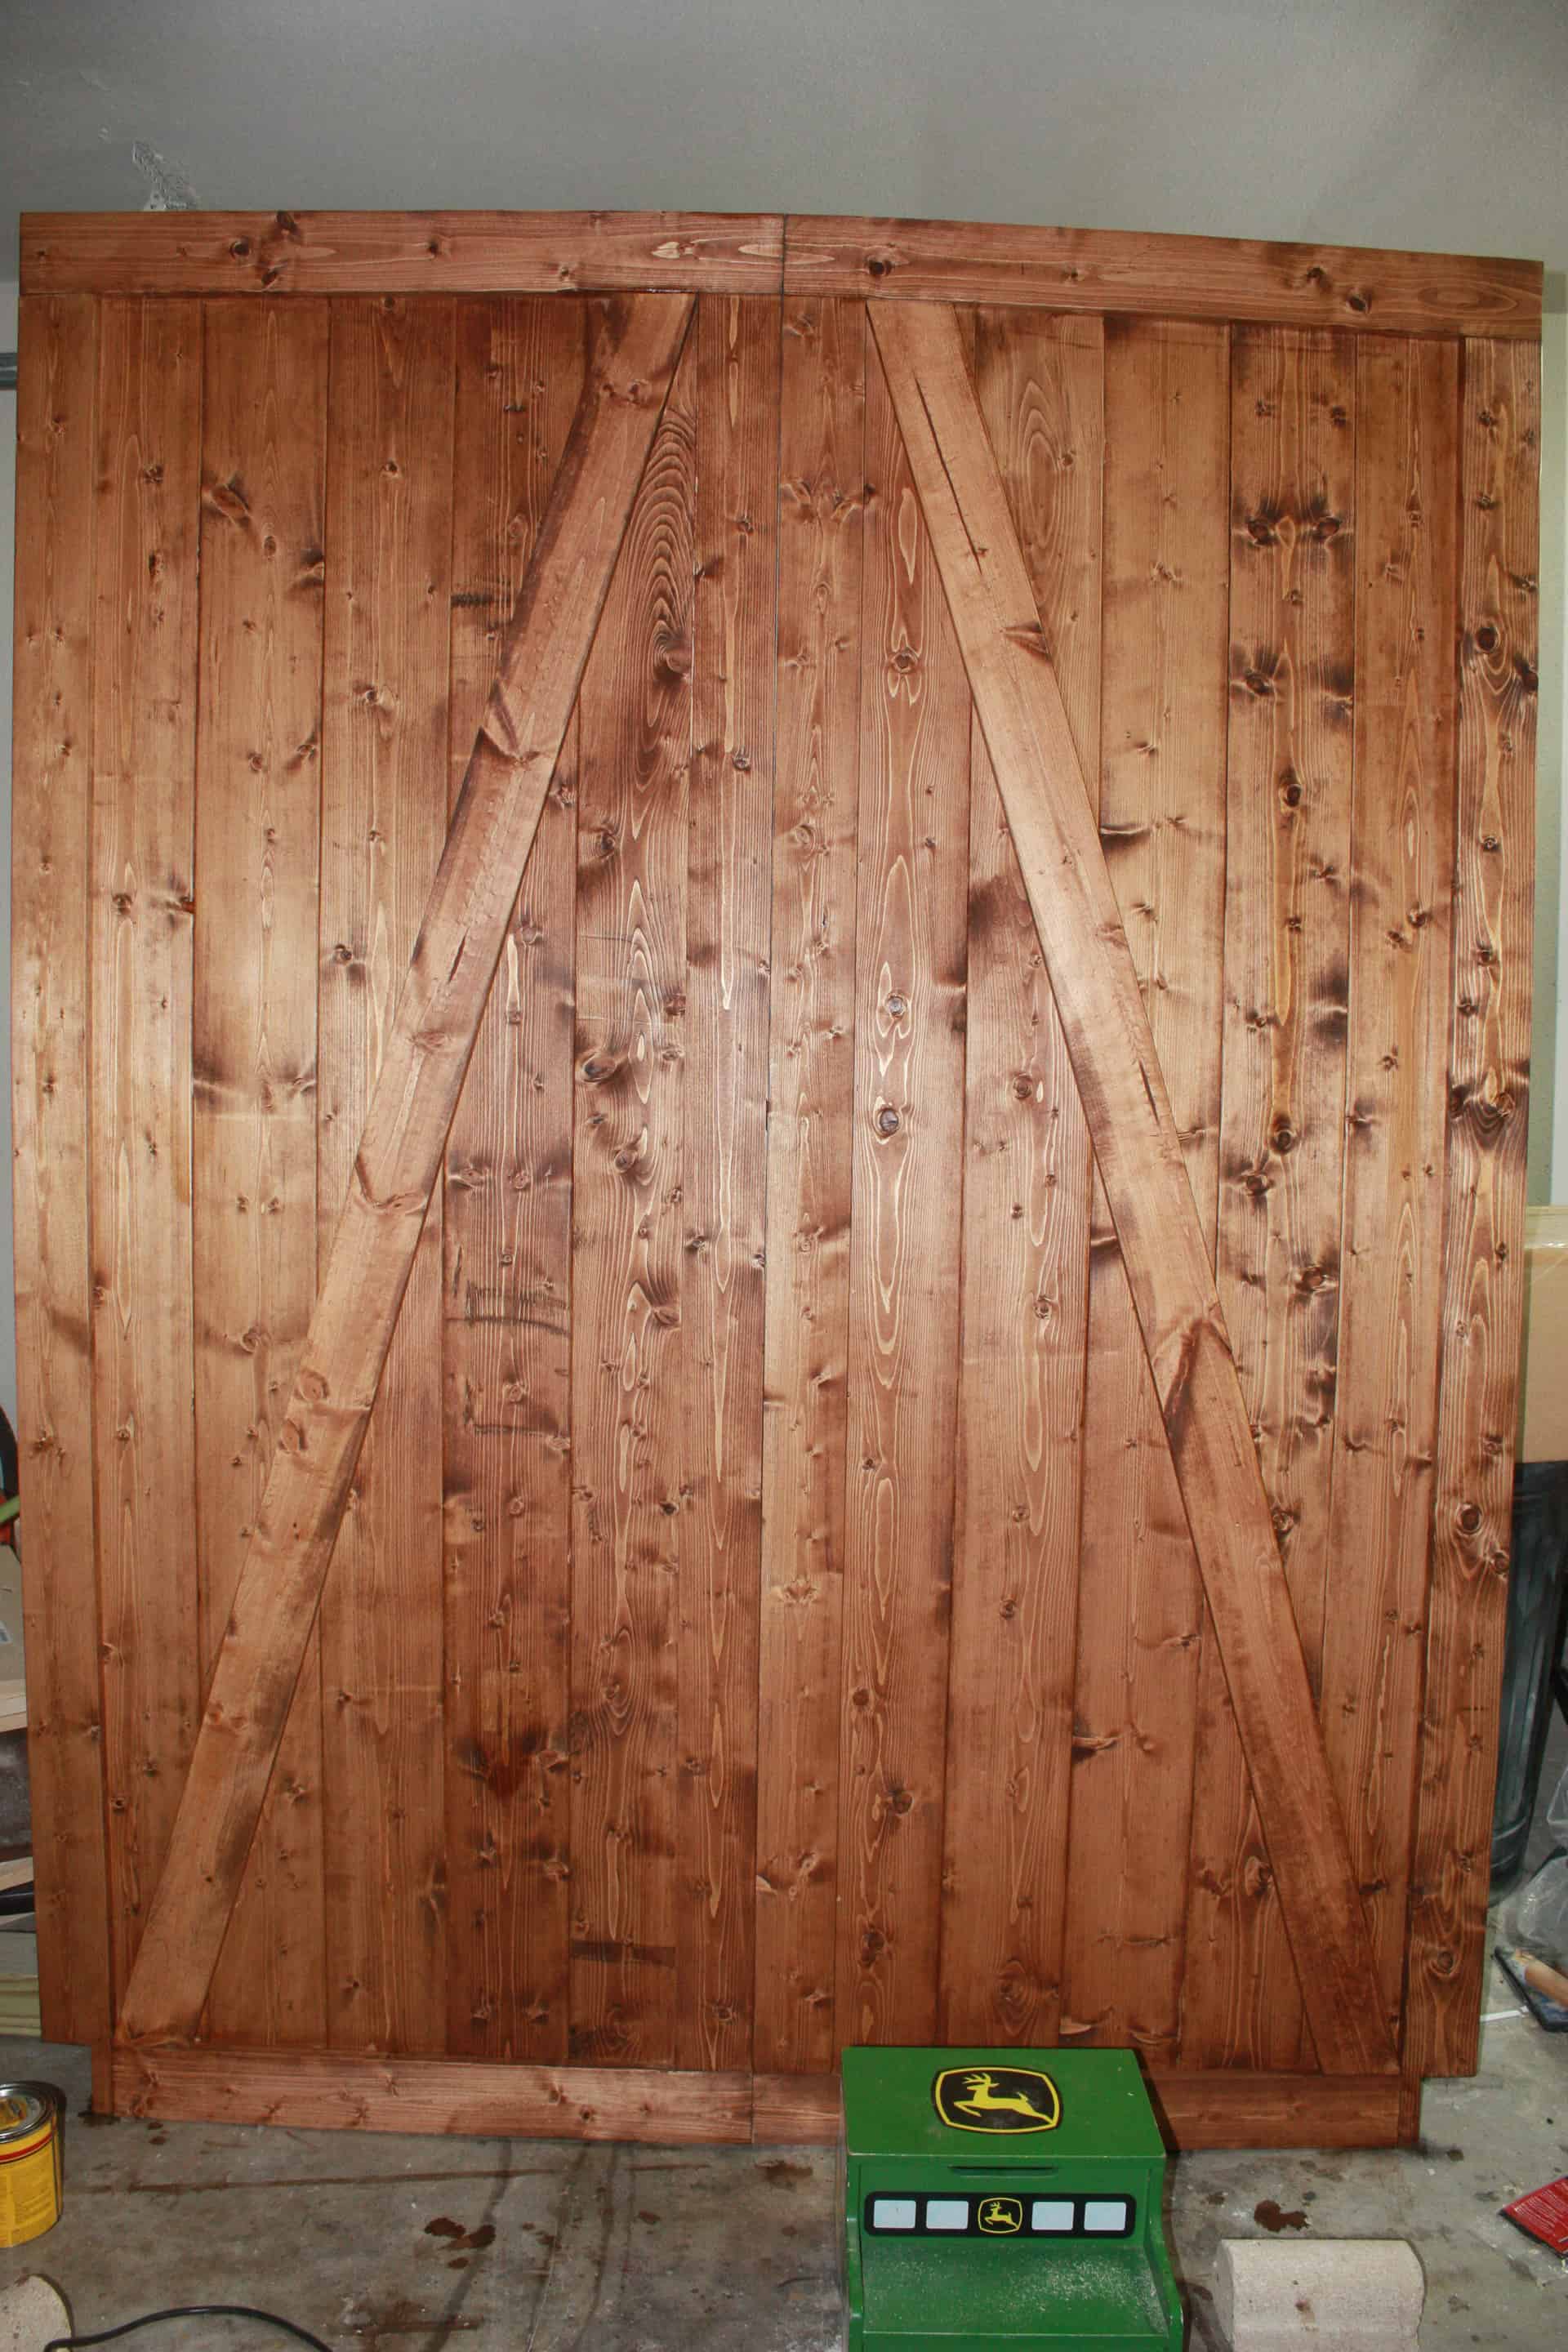
But now when you add the diagonal boards, that can be tricky, but I stuck with a really simple design and I actually wish I would have tried a more complicated one…too late now! AW MAN!
So, to cut the angles, I just laid my 1×4 on top of the door (lay it down) and place it from top to bottom how you want it, then mark on the sides best you can where you need to cut. Then use a square to mark from one small mark to the other and this should be the perfect angle…I should have taken a pic of this step but I didn’t! Oy! Once I drew the line I used a scrap piece of wood as a guide at the same angle and cut it with my jigsaw!
You can easily use your miter saw to cut this as well! Just line up the board as if you are going to cut it, then start turning your miter sled until it lines up perfectly with your line and make the cut!
So, now you just repeat this same process with the top of the board and the top and bottom of the next board, glue them, and screw them from the back! Boom! Done! Well almost! I was definitely celebrating and happy dancing because I was really worried that my angles weren’t going to work but AMAZINGLY enough…they DID! Hallelujah!
Then it is the tedious, no fun part! The sanding and staining…yuck! Lol!
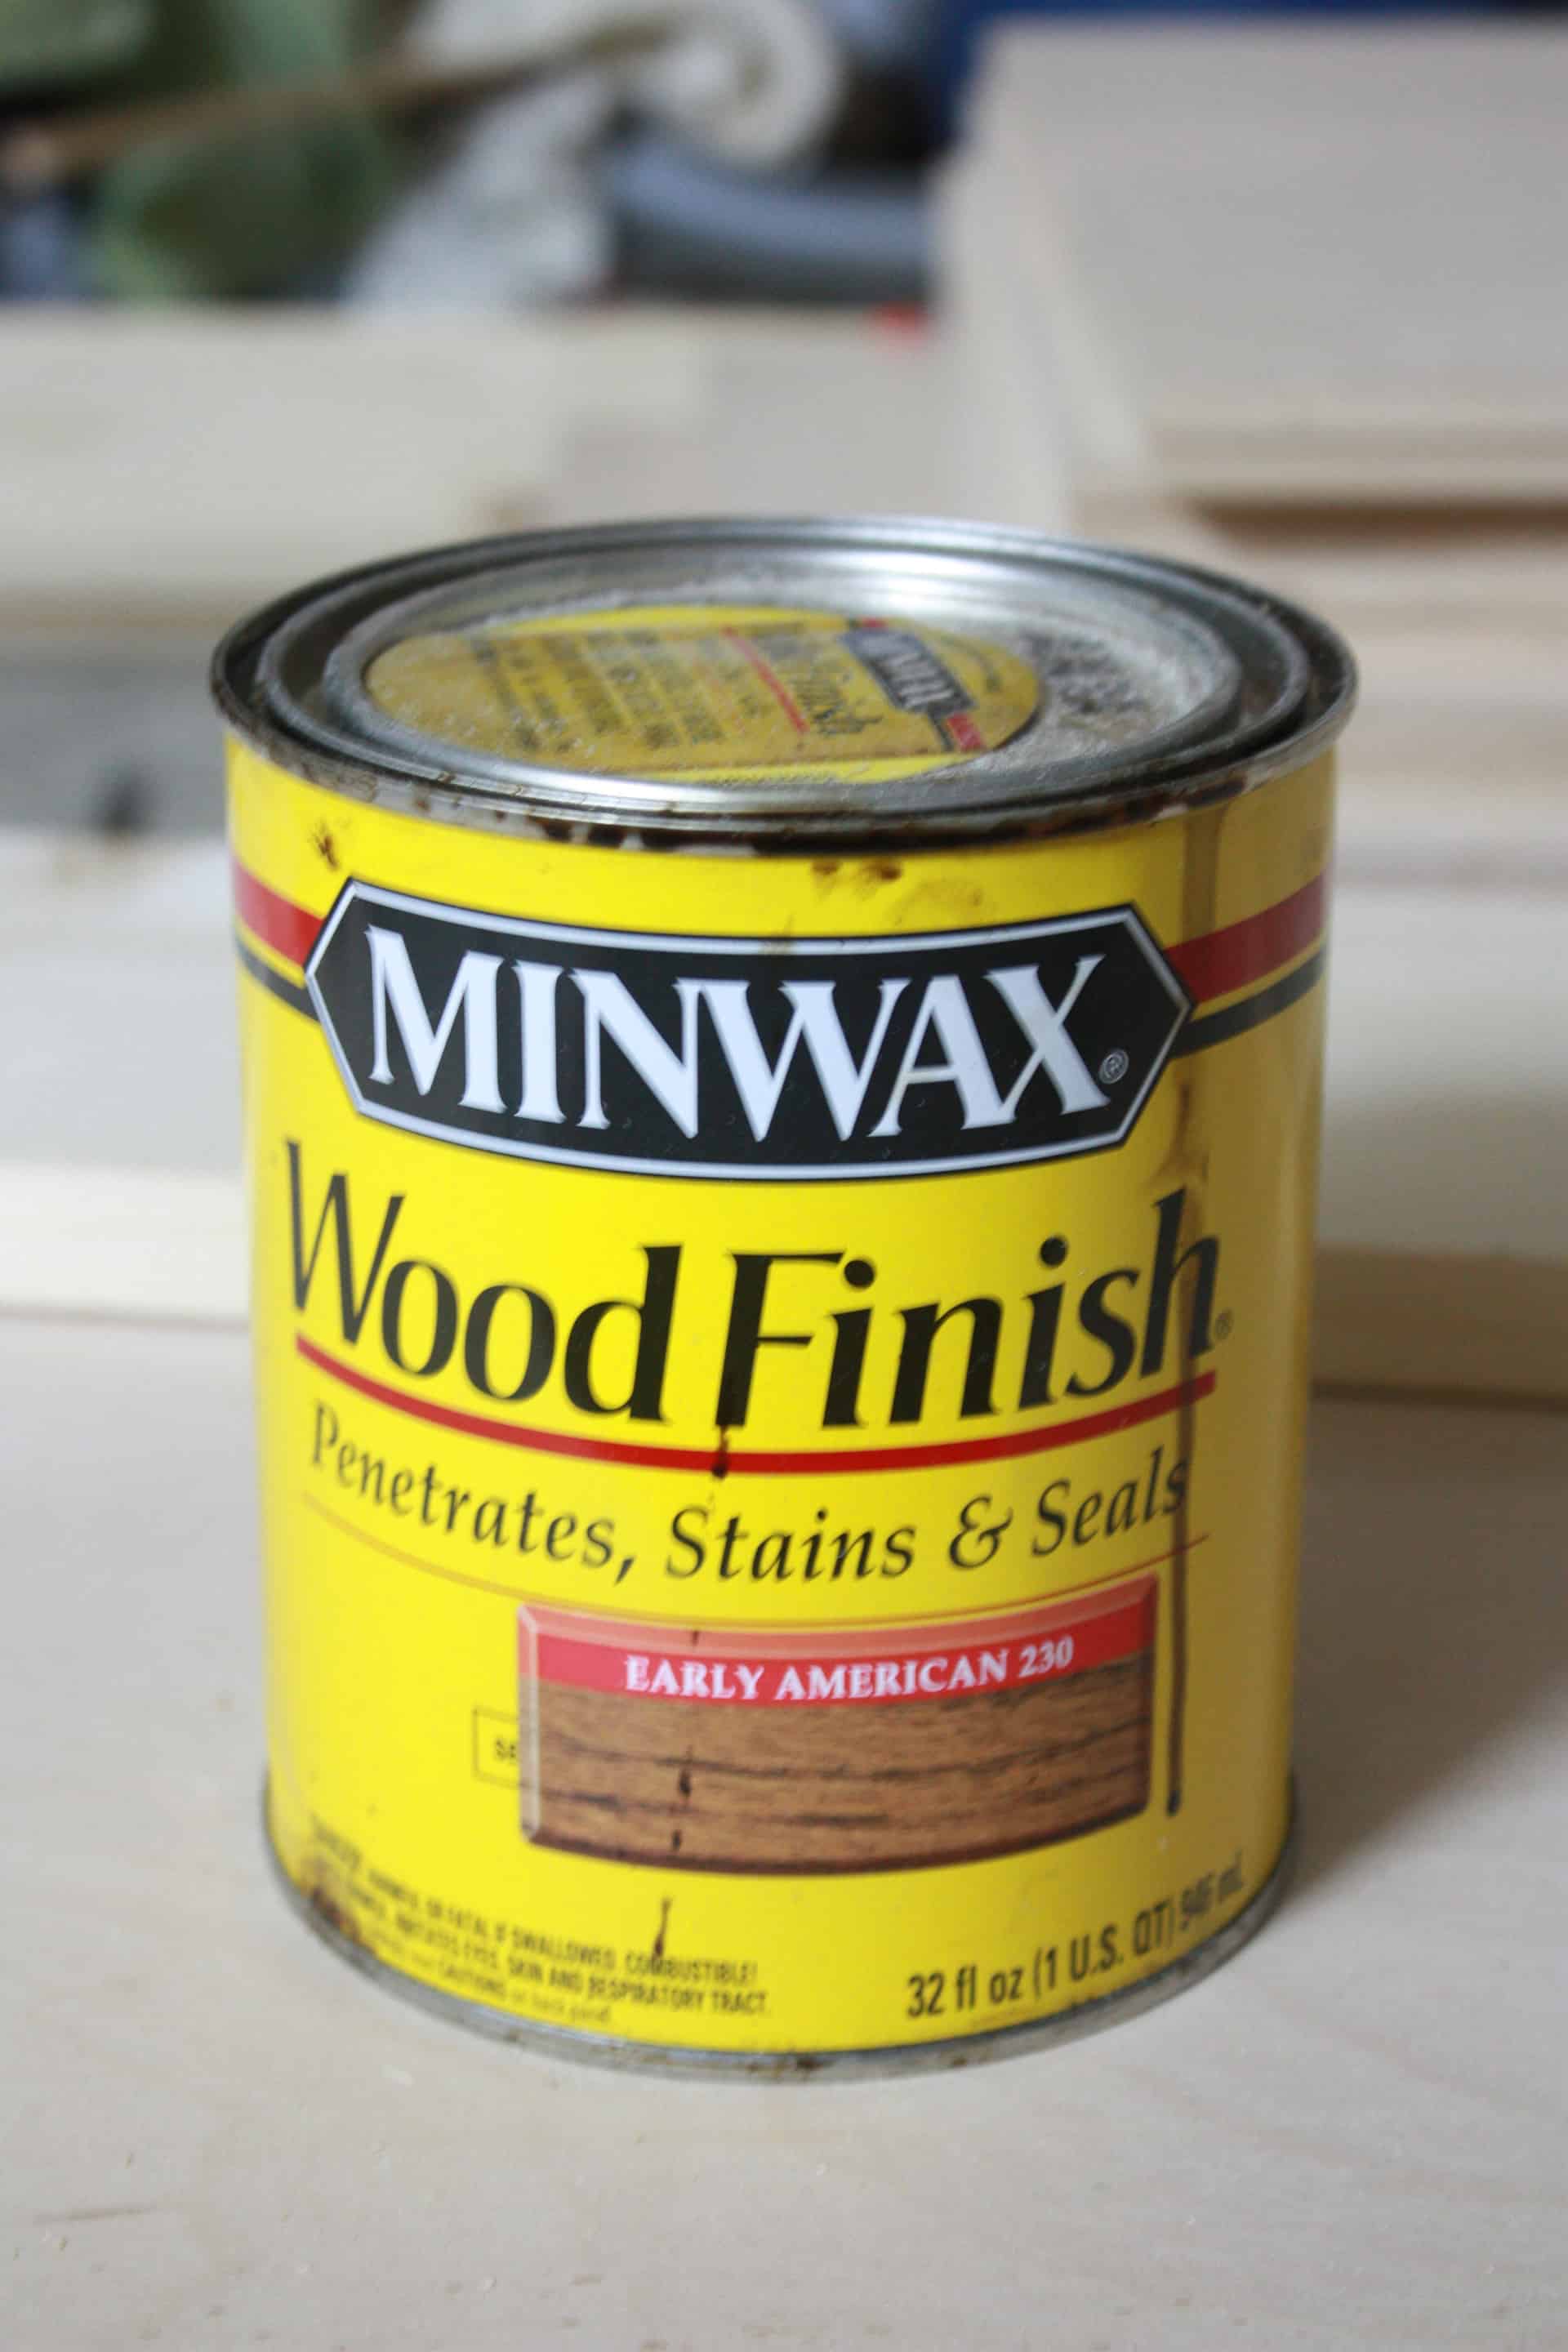
Okay, well I spilled a whole can of stain and had to wait for my hubs to run to Wal-Mart and grab a new can…and luckily I was using Minwax stain on this project, normally I only use Rust-oleum stains because they are so much quicker to dry and are awesome with just one coat… but they quit making Early American and that is the color I wanted to use on this project! I bought their new Wheat but it wasn’t the same as Early American, it was more orangey than I like, so I went with Minwax on this one! I used this stain here.
Here she is all stained and waiting to dry!
Hanging the DIY Barn Door Room Divider
Lastly, you will need to lay it face down after it’s dry of course, or before staining it at all…totally up to you, to measure another 1×4 for each of the sides and a 1×4 for the top to be your frame to your faux door! I cut the sideboards to fit inside the (new) top board and stained them separate from the door.
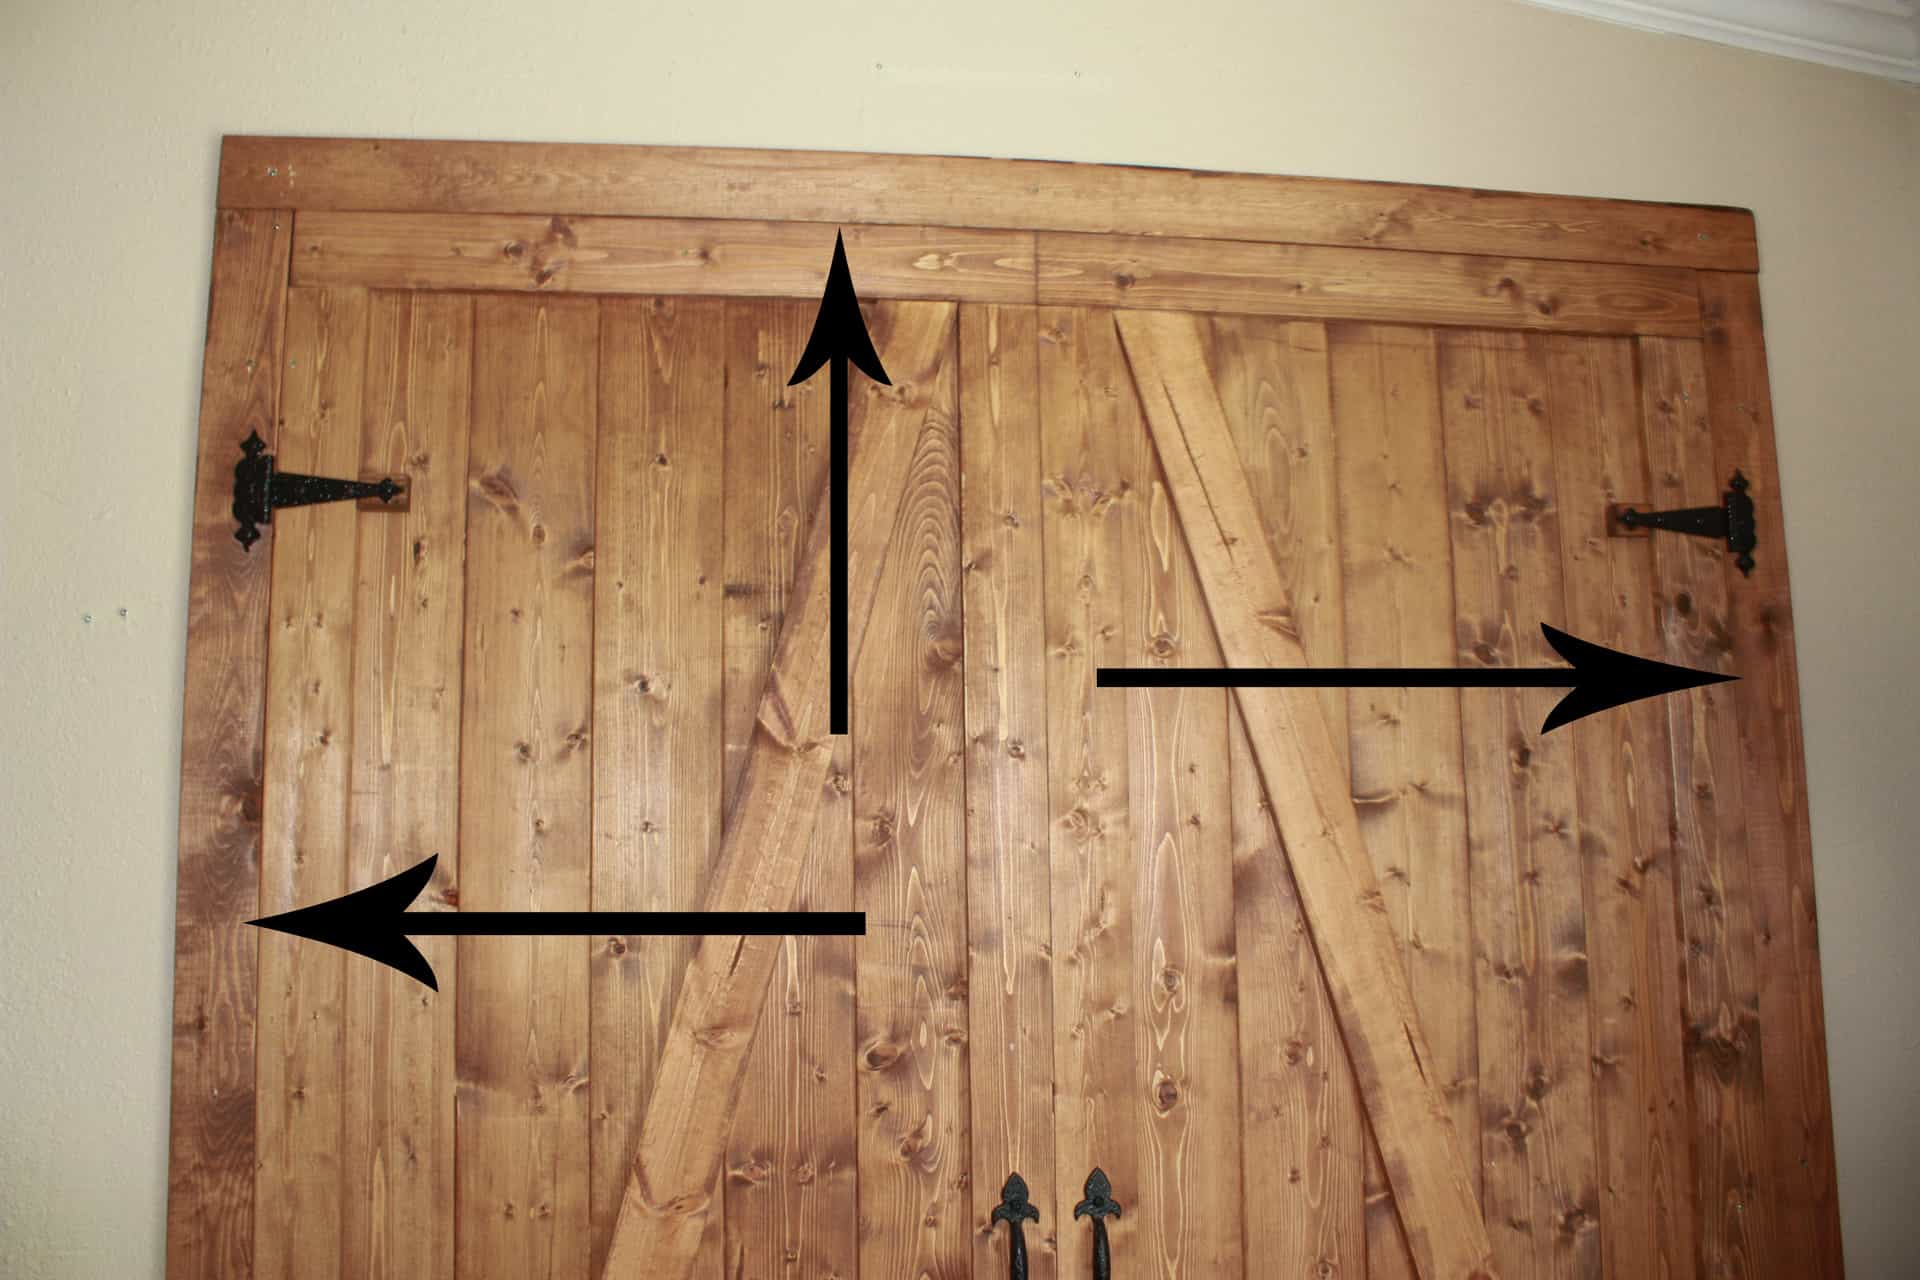
The boards that the arrows are pointing to are the “frame boards”.
Once it all dries, you bring it in and screw it into the wall!! Buh Bam! I used 2-inch screws into the framing stud in the wall, held perfectly! I did not attach the frame boards to the door in any way, I just screwed them into the wall around the door using the same 2 in. screws and the hinges technically connect the side boards to the barn door room divider!

Then you can pick handles and hinges that you like! Mine are from Home Depot but you can actually get them cheaper at Amazon! Here are some links to different hinges and handles! (affiliate links)
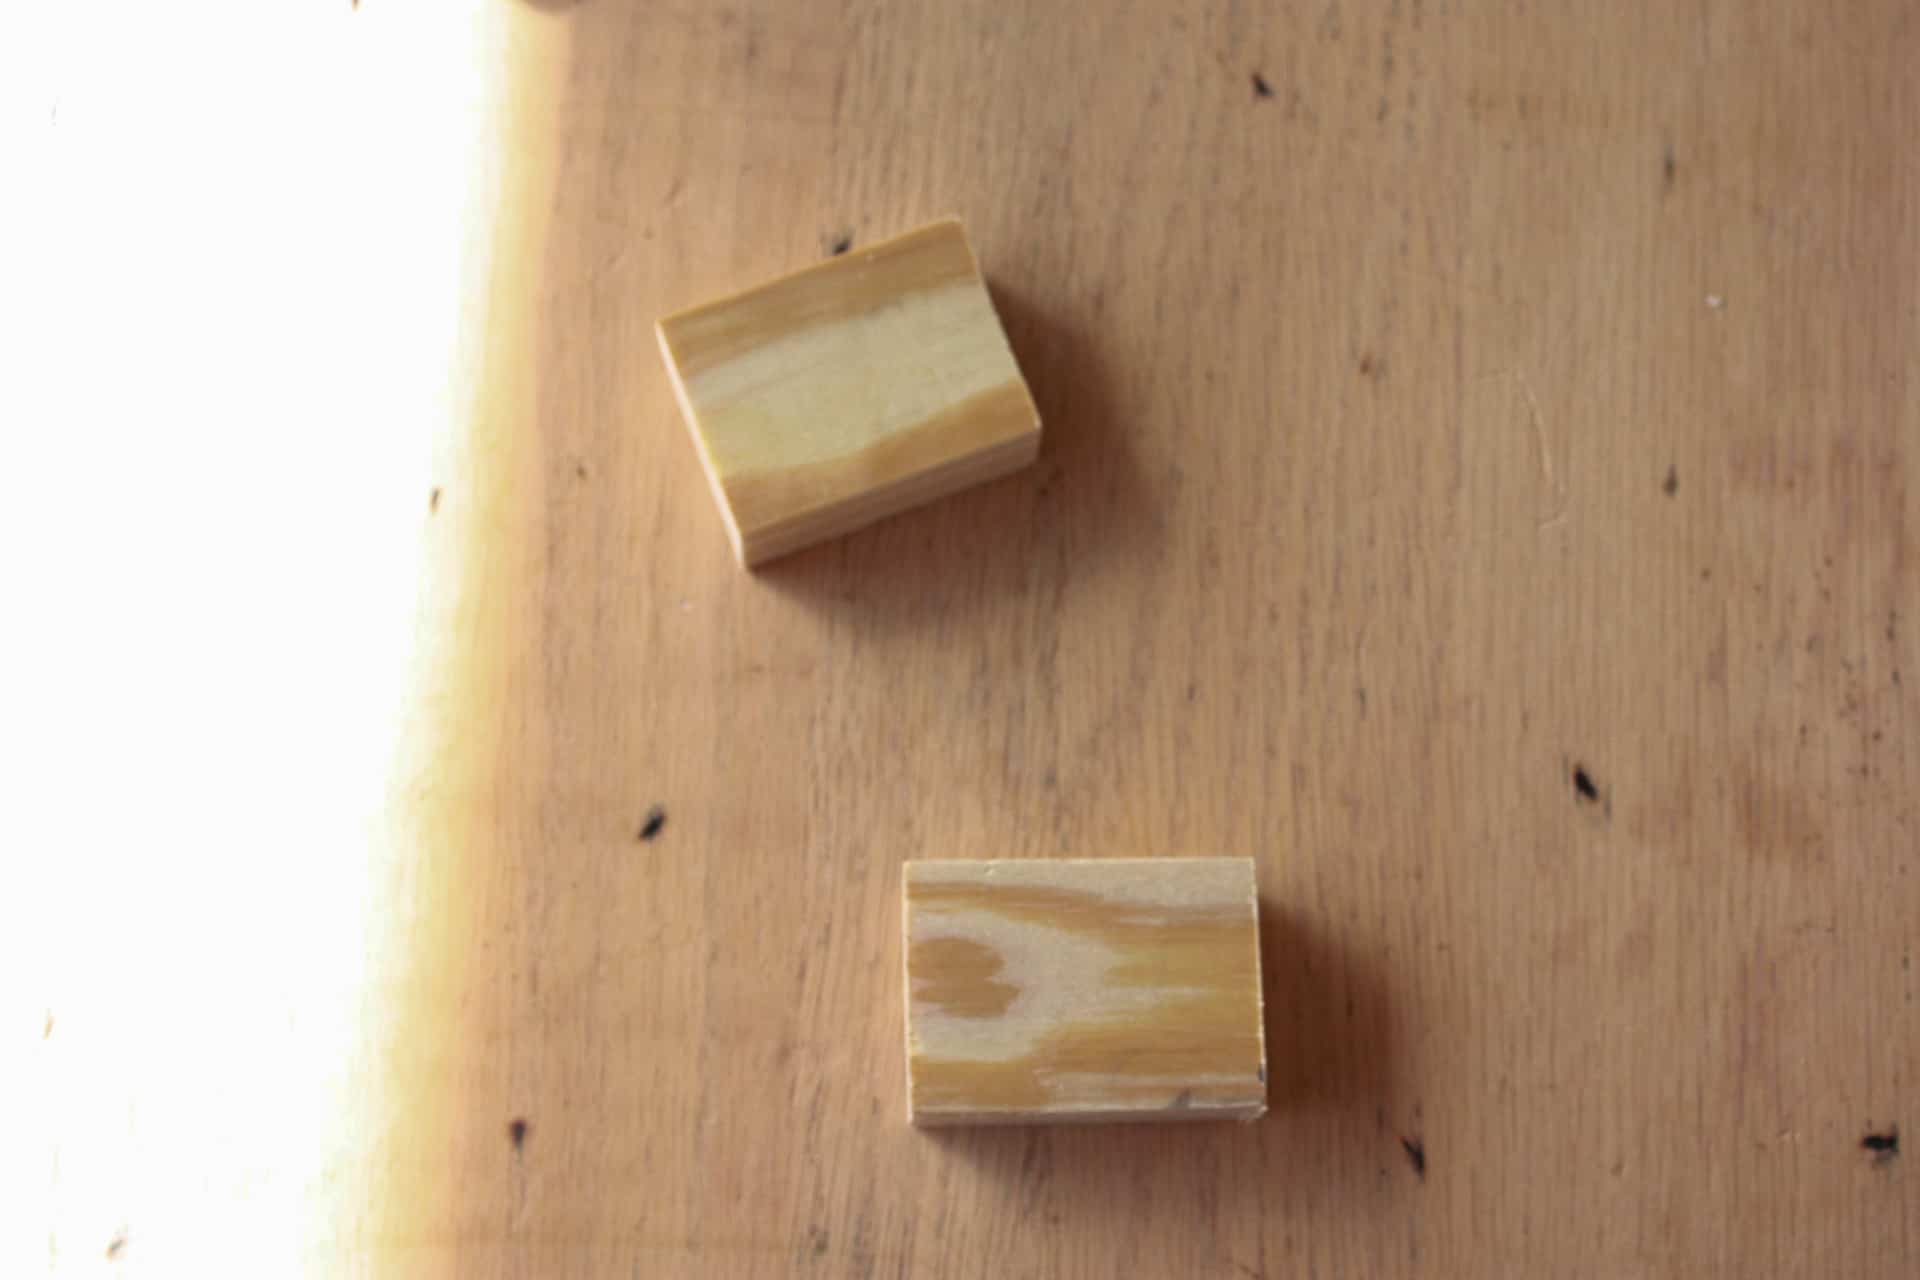
I picked my hinges after having the door completed, and the hinges were longer than my board, and it left a space like this…

but I STILL liked them, so I cut small scraps of 1×2 to go under the part of the hinge than was sticking out past the board!
I just stained them and then predrilled holes and screwed them into the door with the screws that came with the hinges! Bata Bing!
Done on ONE side! Well, I still need to cover my screw heads (as seen in the pic above)! LOL!!! Make sure and check out the backside of the barn door here!
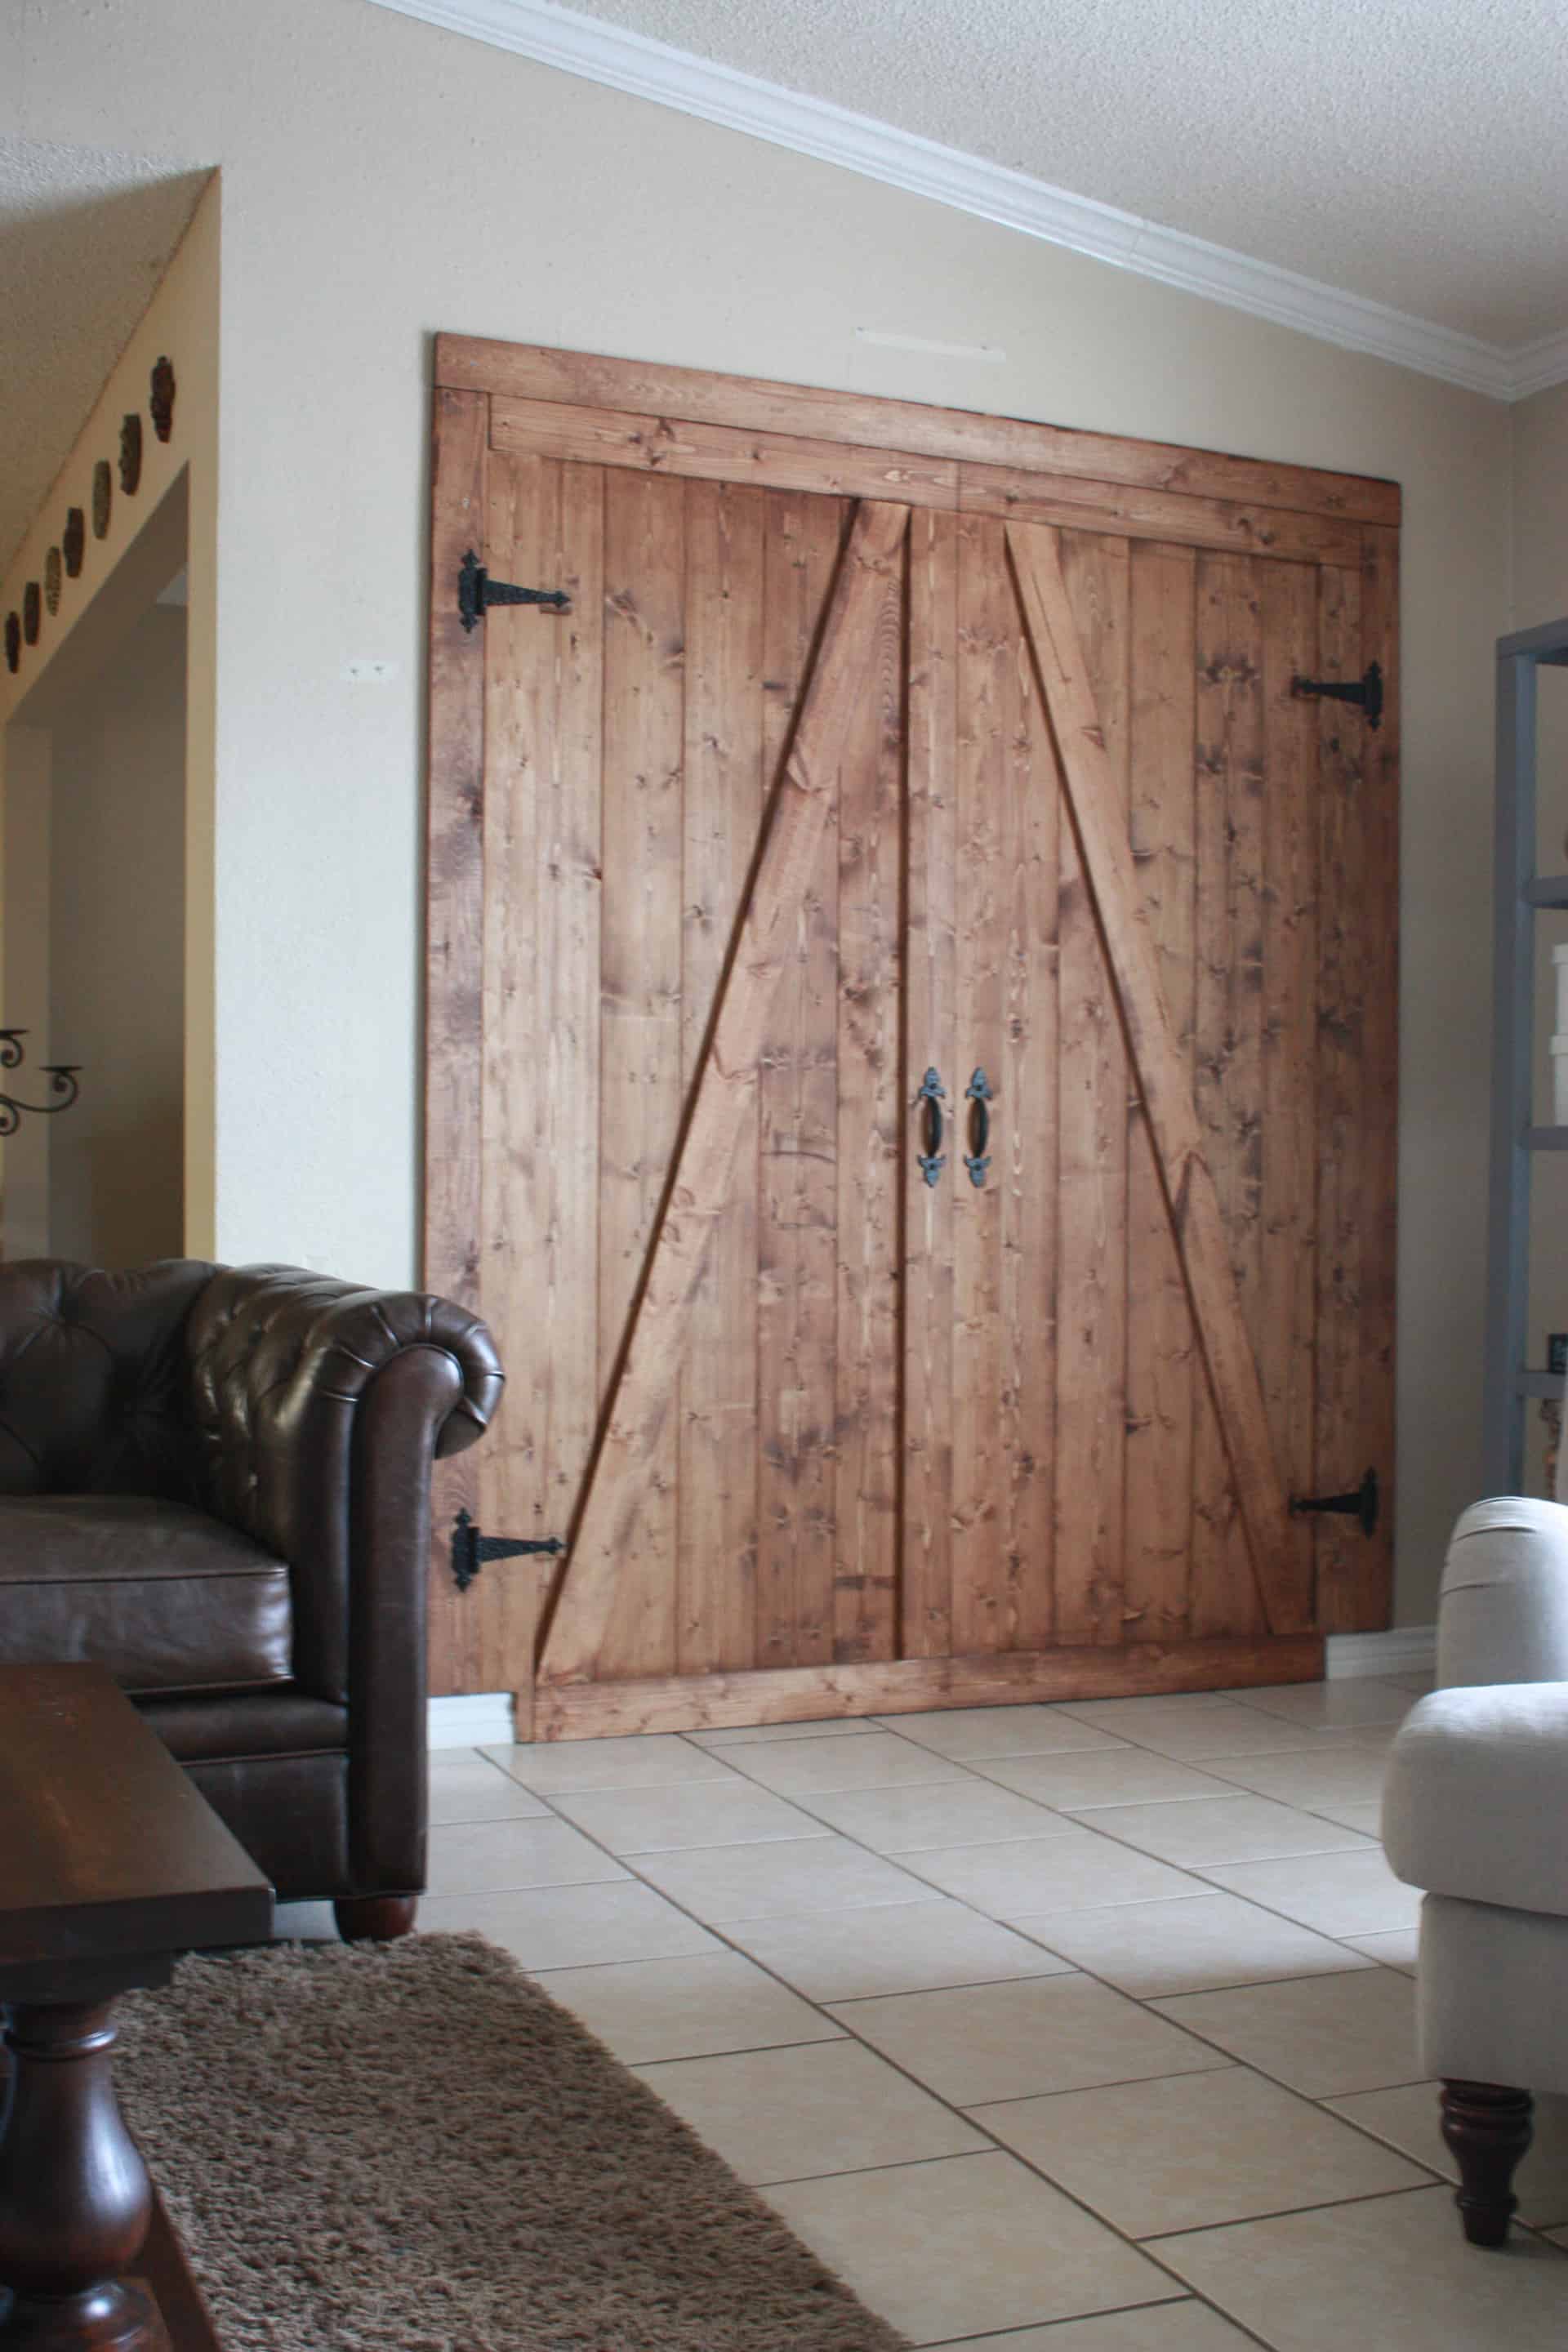
I hope you agree that this is so much better than it was before!
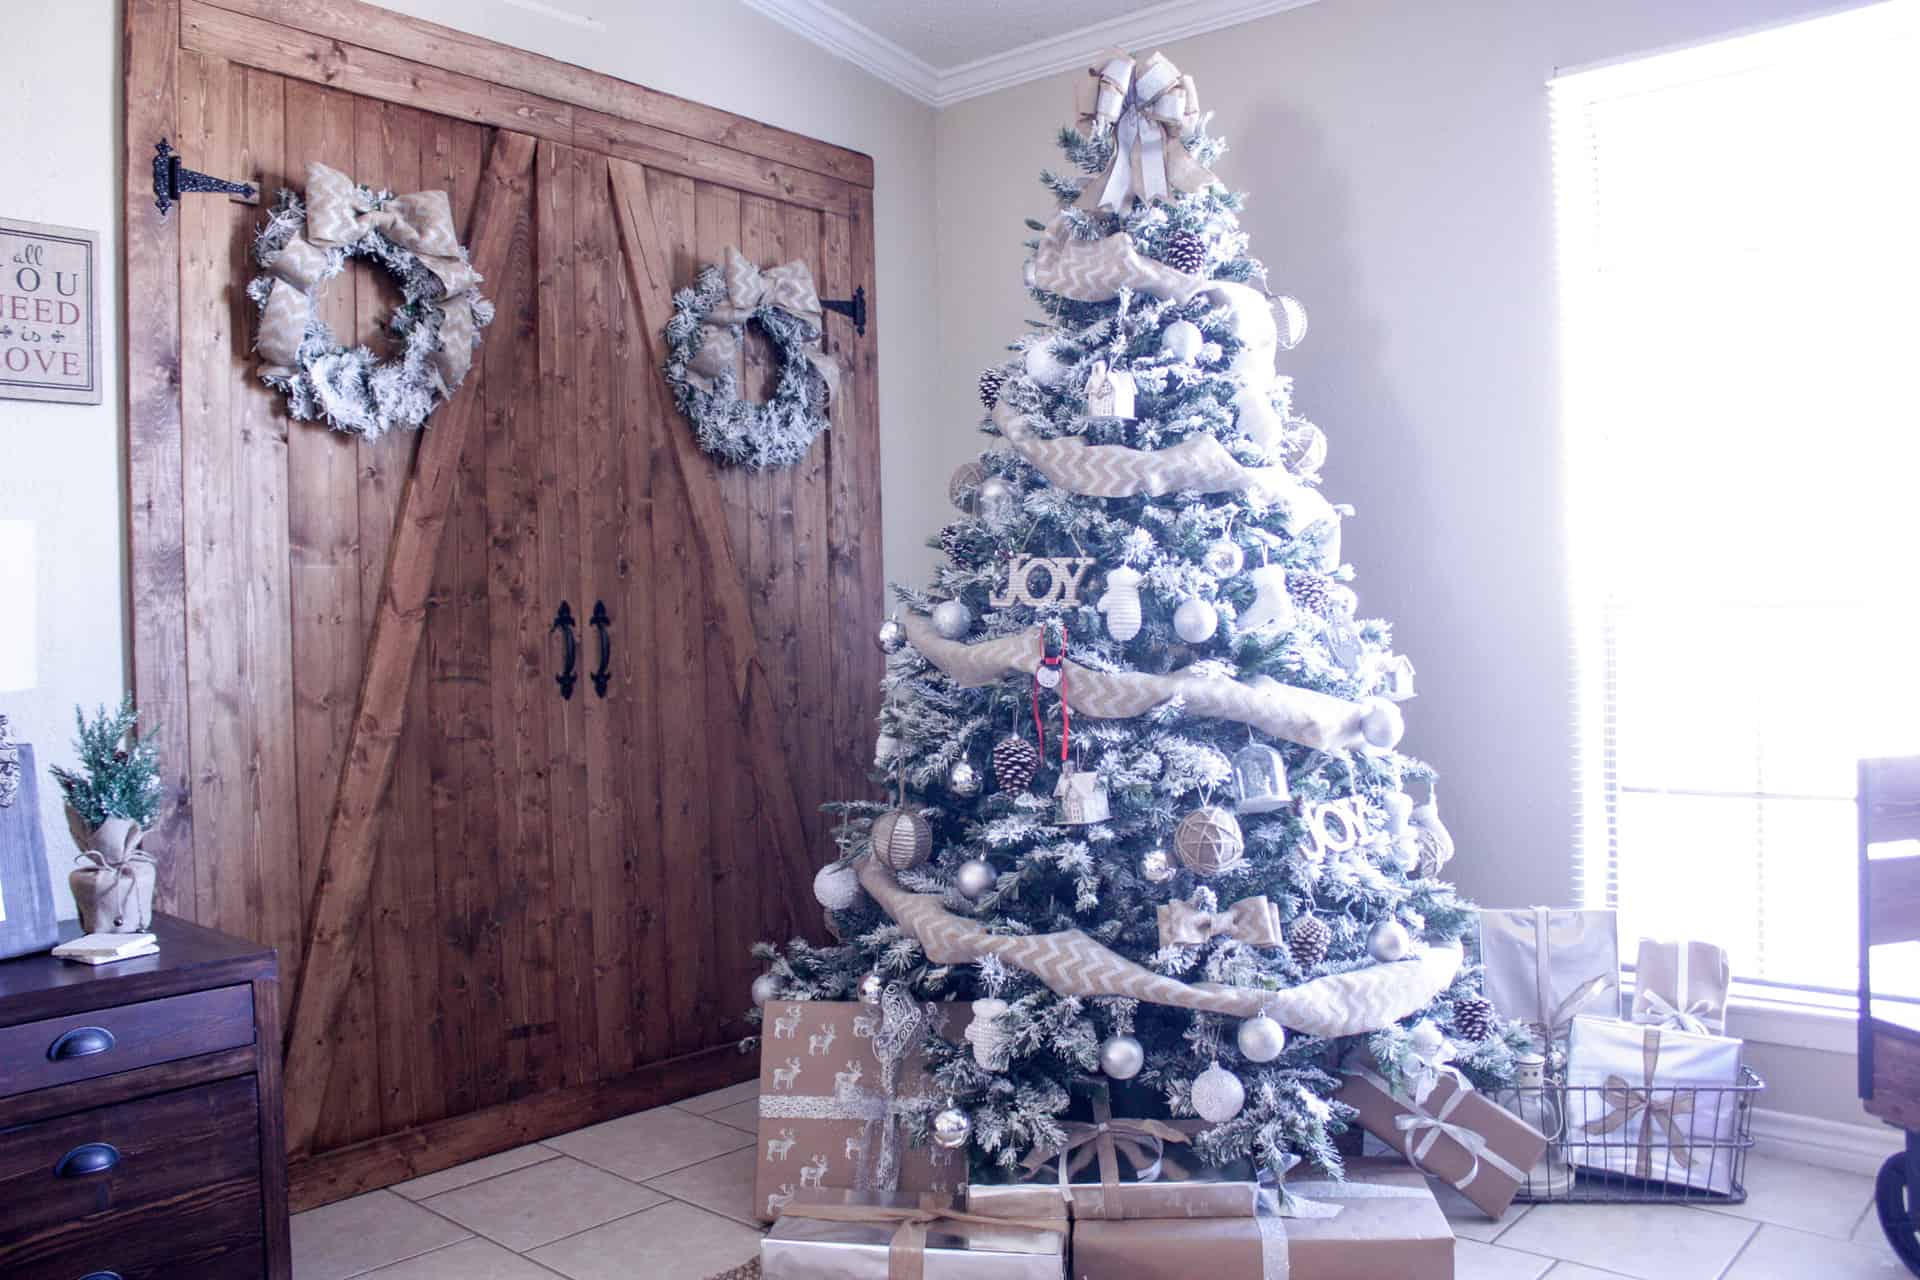
Check out my faux barn door later that year all beautiful and ready for Christmas!
Well there you have it, I solved my problem! Any questions or comments feel free to post them down below!
Don’t you just love my barn door room divider? If you do, I sure would love for you to share it!
Hopefully, this may inspire you to tackle something driving you crazy in your home! Have a great week!

Want to save this DIY Barn Door Room Divider for later? PIN it!

These barn doors turned out so amazing! I love them so much. I would love to try and recreate this in my home. We are doing some kitchen cabinet painting this week so maybe once we are finished with that project! Thanks so much for sharing!!!
Hey Laurin!
Thank you so much for your kind words! Good luck with your kitchen cabinets, hope they turn out perfectly!😉 Thanks for stopping by, have a good one!
Cara
I love these!!!! Are these functional doors? I’m wanting to replace some of the doors in my home; such as to the utility room and possibly the bedroom doors. It will probably be cheaper to make them than to buy them and still have to stain them. What kind of lumber did you use? My local Home Depot and Lowe’s told me they only sell treated lumber and suggested I not use that for anything I would put inside our home.
Wow. Those are beautiful!