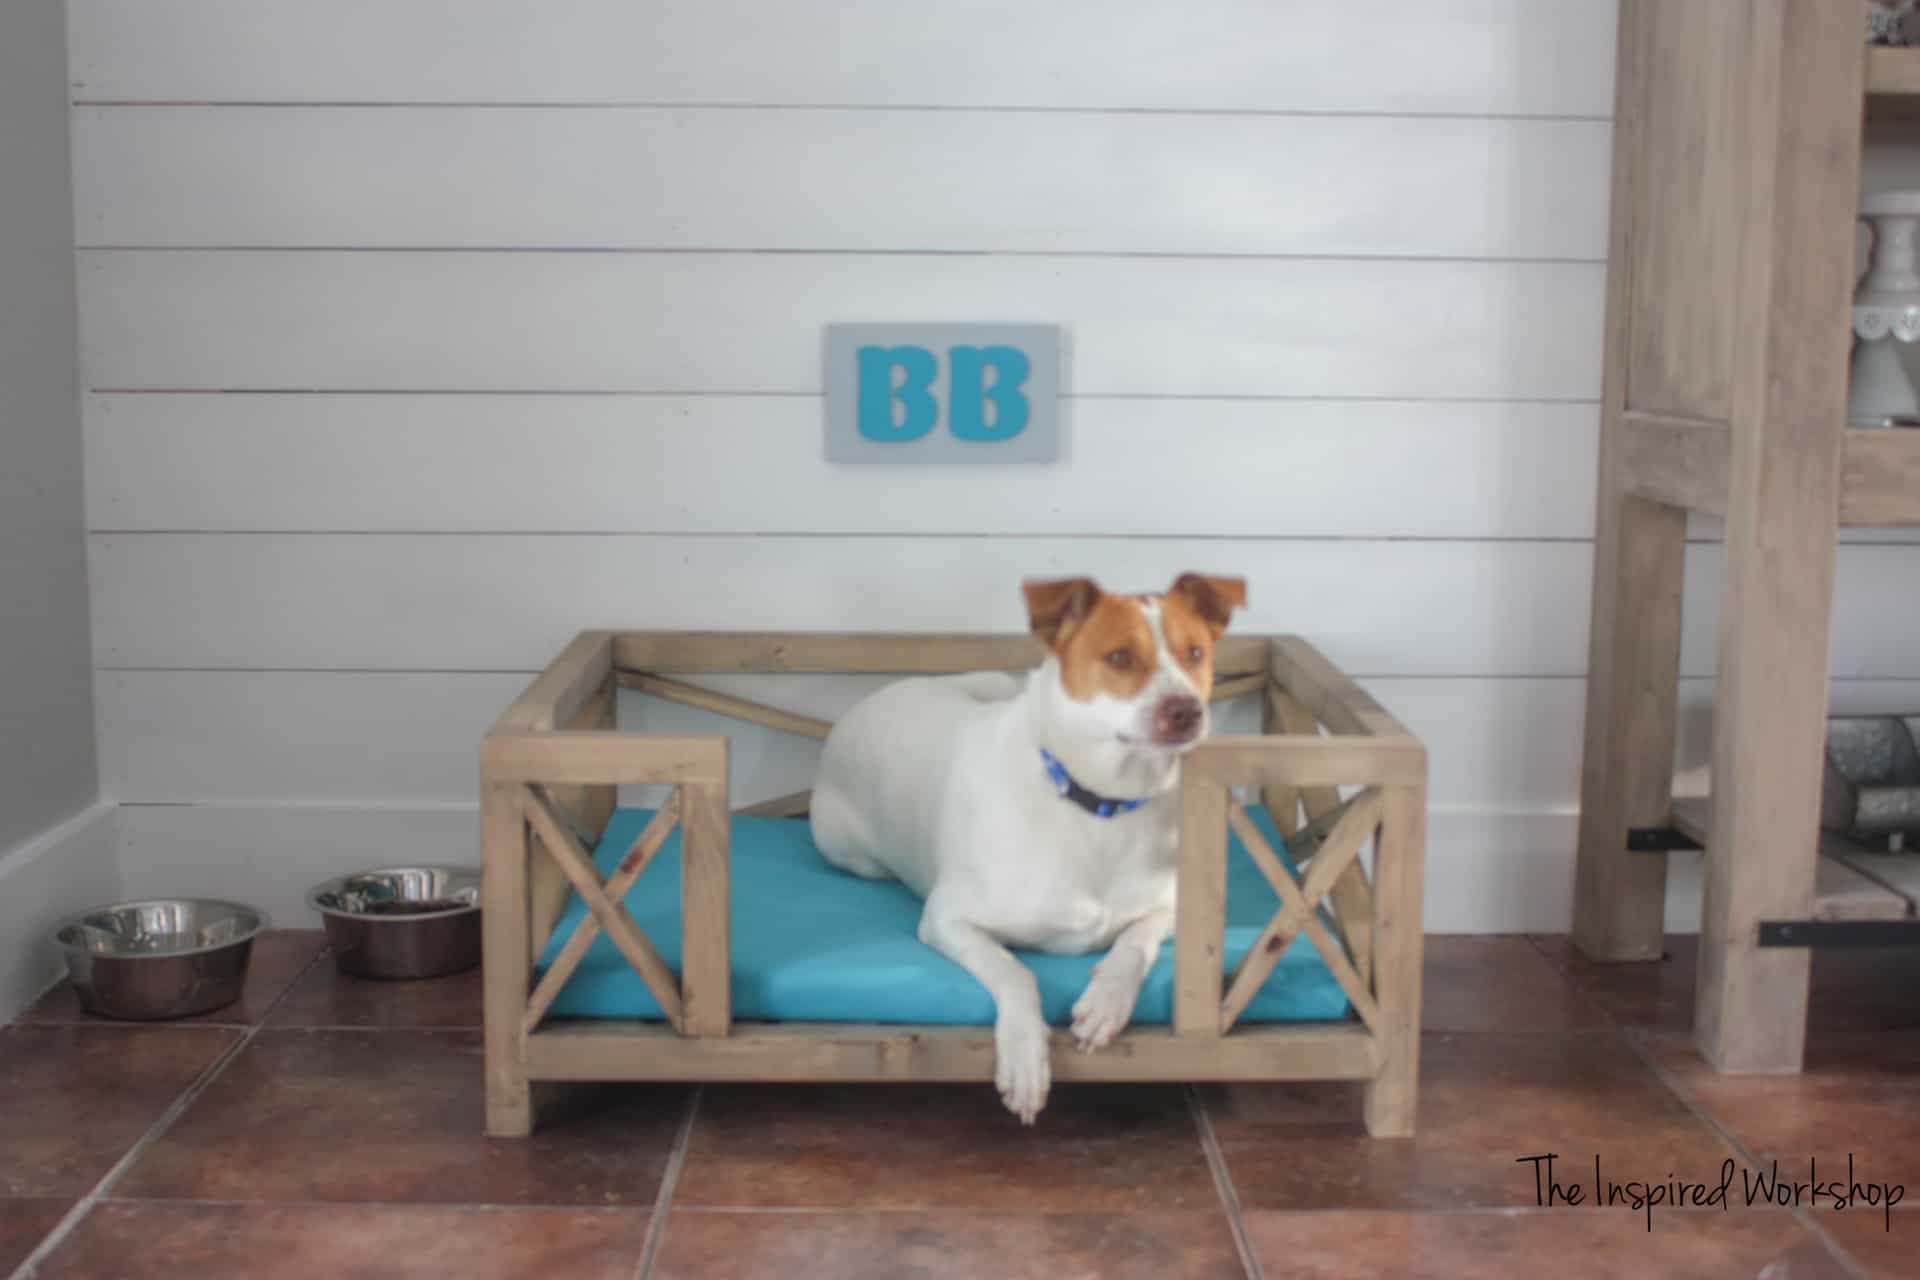
DIY Dog Bed – Pottery Barn Knockoff

Some DIY friends and I have come together to do a monthly post to share more content with all of you! This month is all about knockoffs from famous expensive brands like Pottery Barn and Restoration Hardware. We will show you how to get the same look of a high-dollar item, for a whole lot less with a little time and elbow grease! My project is a DIY dog bed that happens to be a Pottery Barn knockoff!
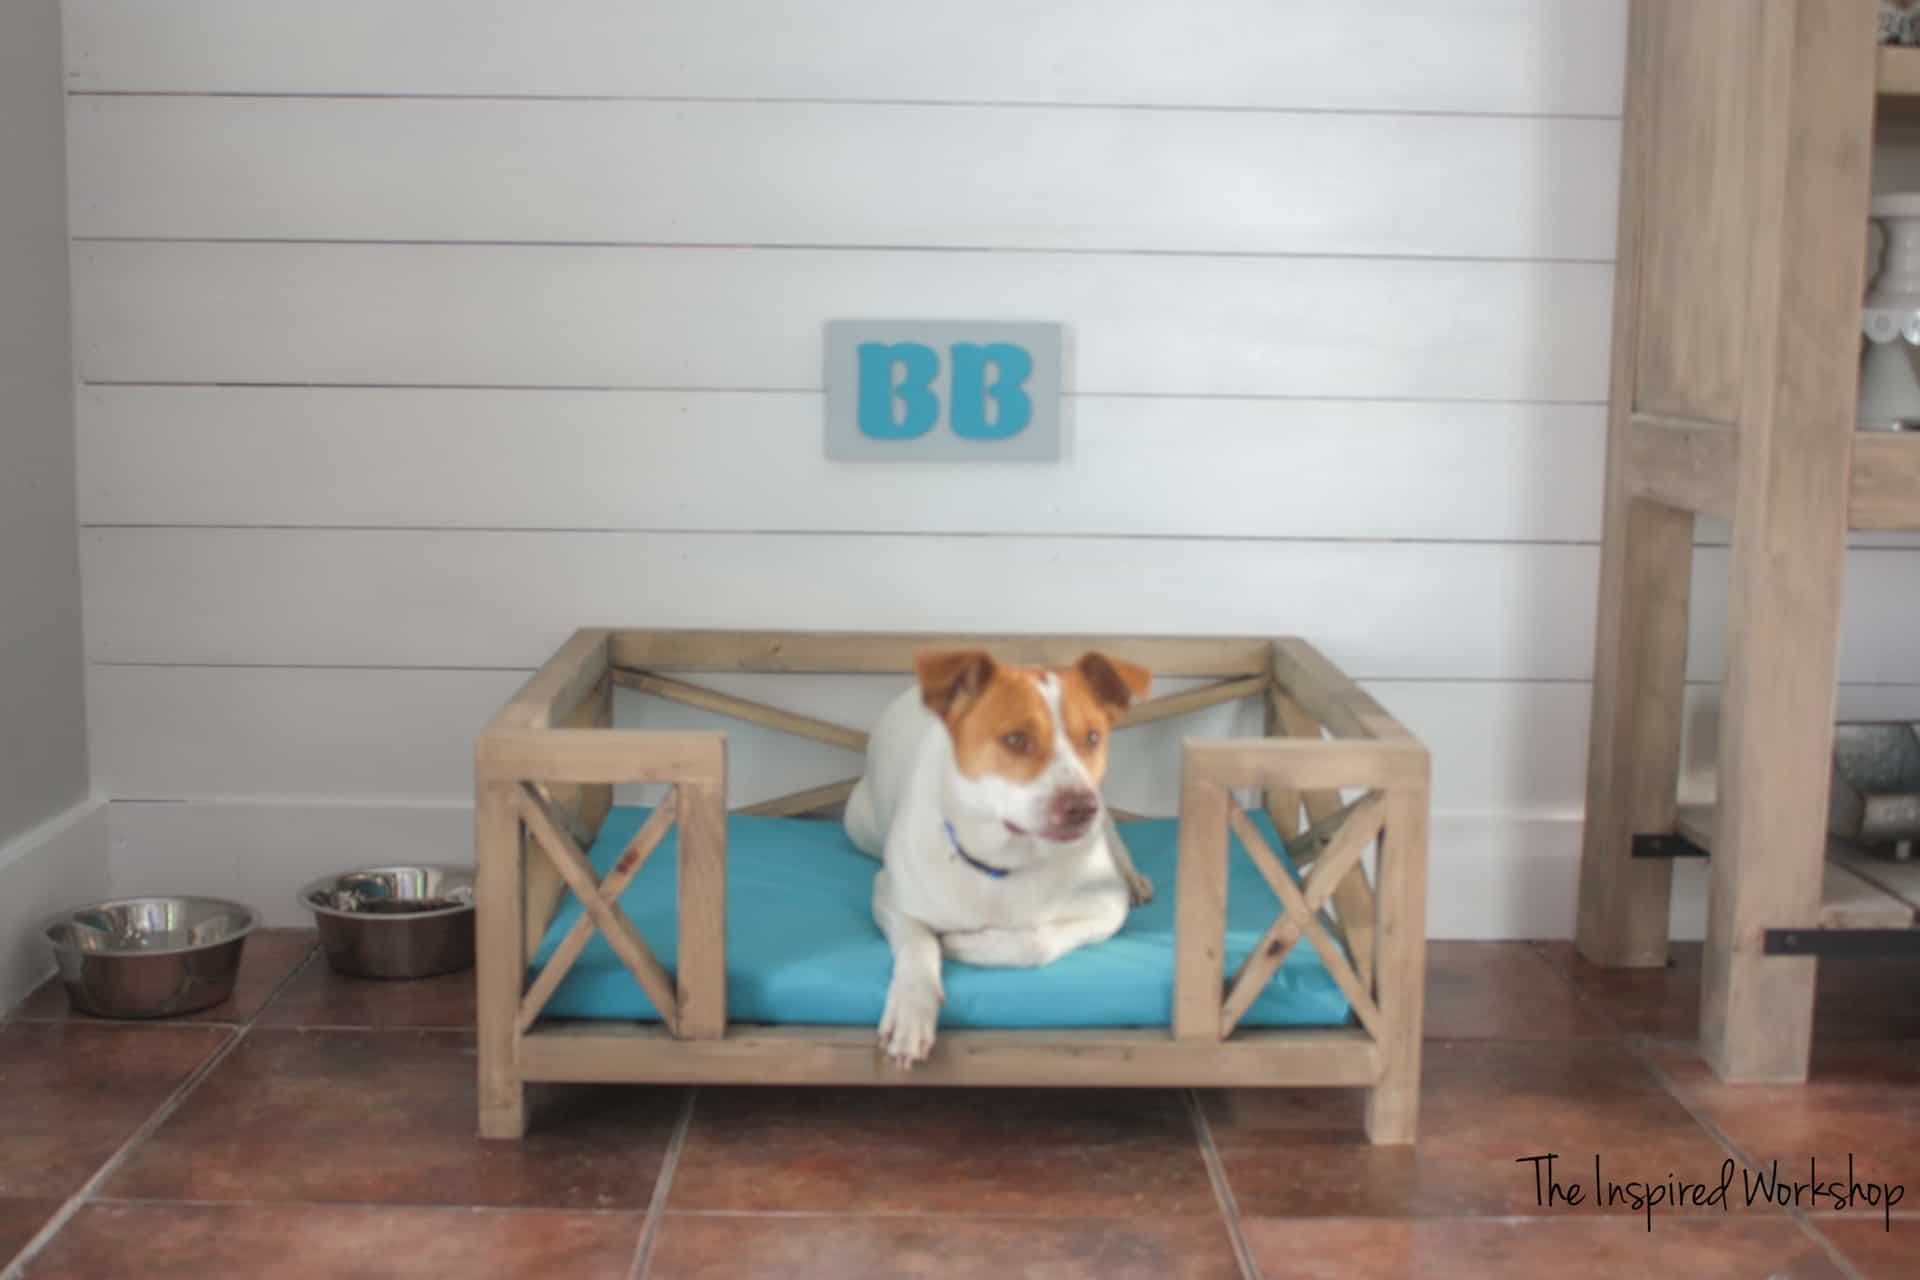
Disclaimer: Clearly I am not a pet photographer…I mean how do you get them to stay still? Plus, he is NOT allowed in the house, this was his first and only time to come in, so of course, he was all excited and nervous! Lol! My son is severely allergic to dogs…and cats, so no indoor pets for us!
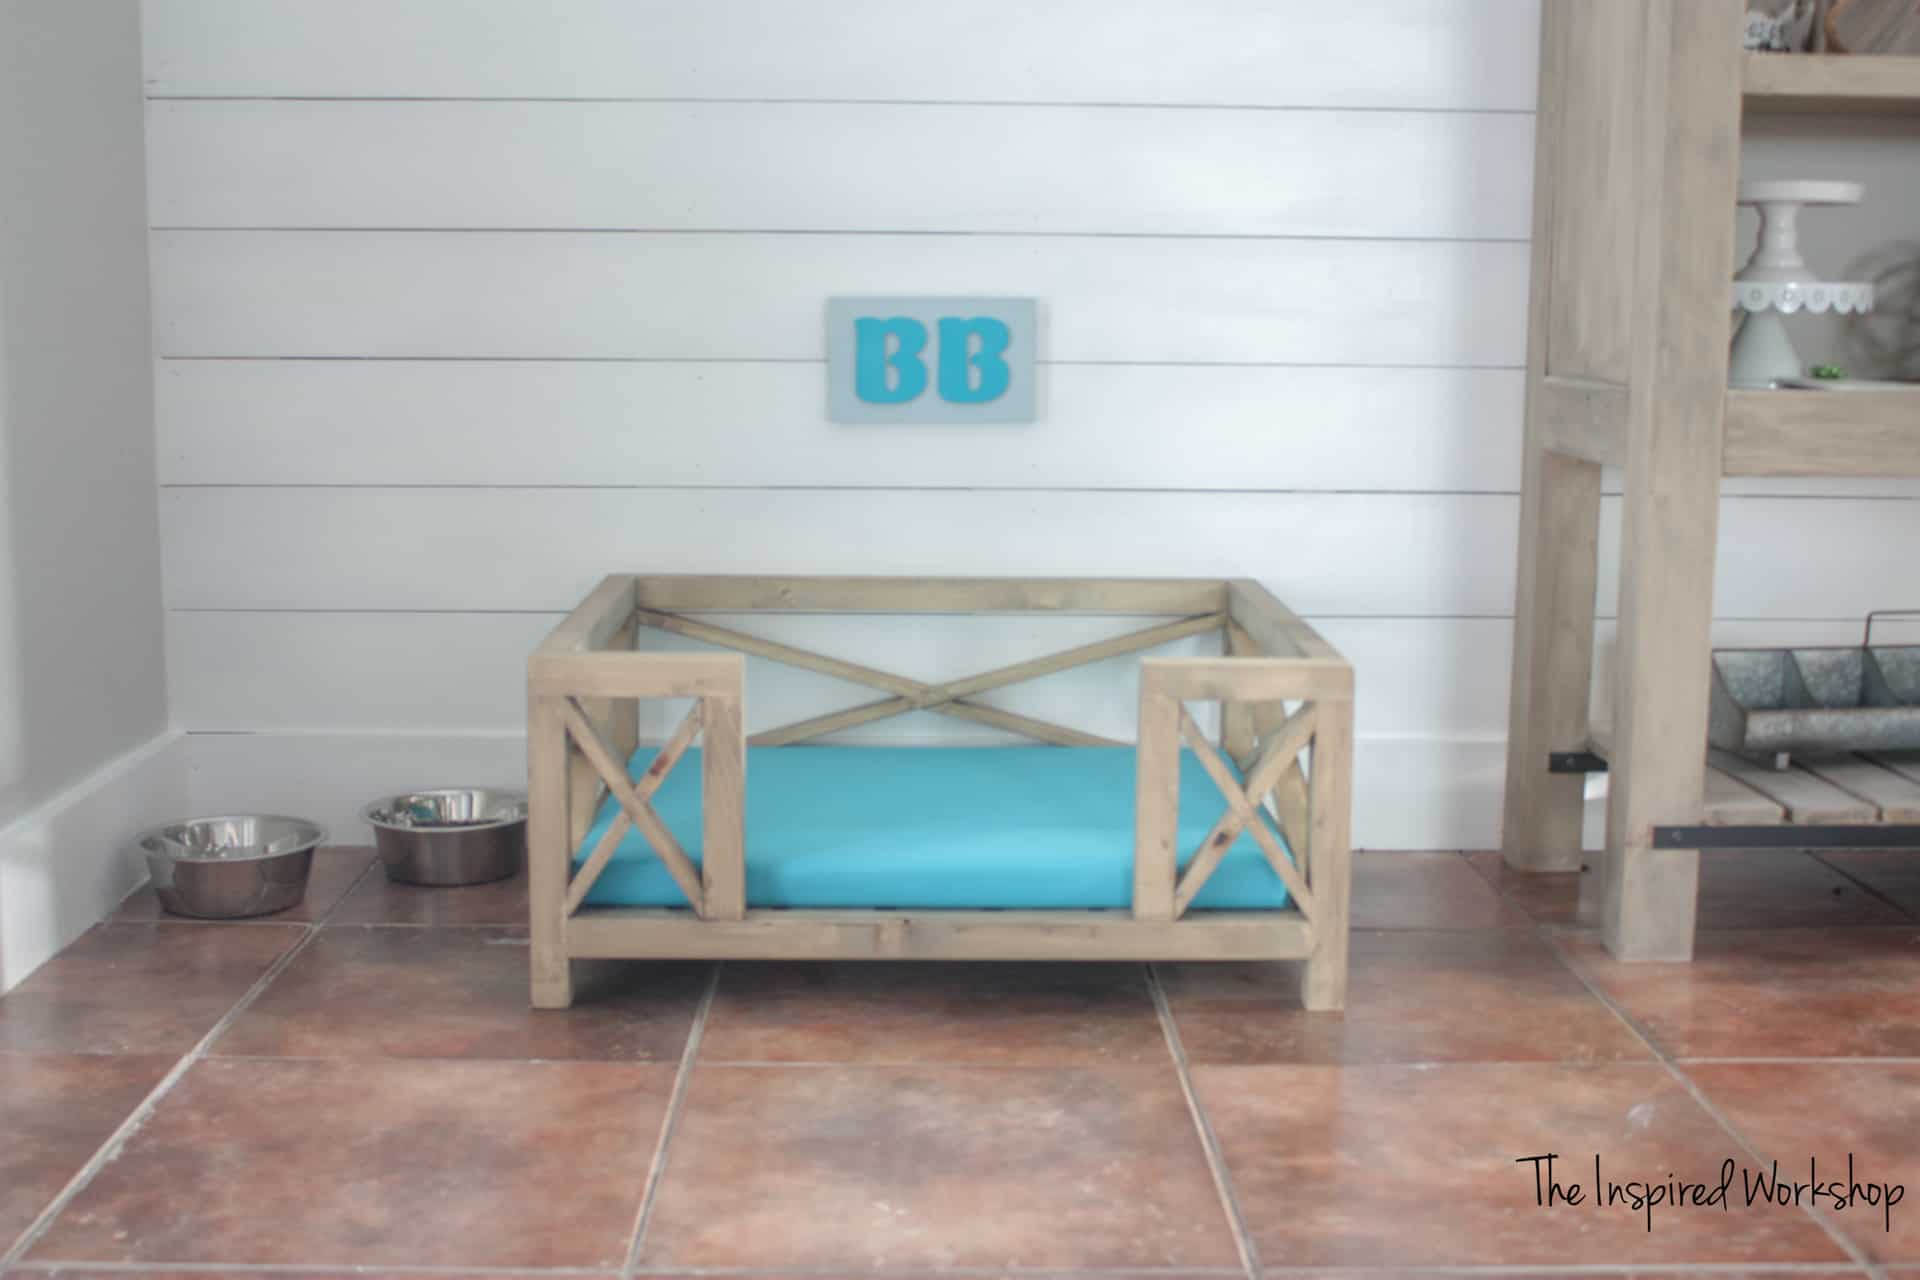
Anyway, I must be honest…I am not a photographer at all, and I really reassured myself of that when I took an entire series of pictures of this dog bed, sat down to edit them, and realized I forgot to take the camera focus out of manual mode! Yep, all the pictures are slightly out of focus!
I apologize because I was going to set the dog bed up and take them again but looked out the window and he had already torn the cushion up! Oy! Darn dog tears EVERYTHING up! UGH! It is so frustrating, but that is why he received a ‘homemade’ cushion vs an expensive store-bought one! Lol!
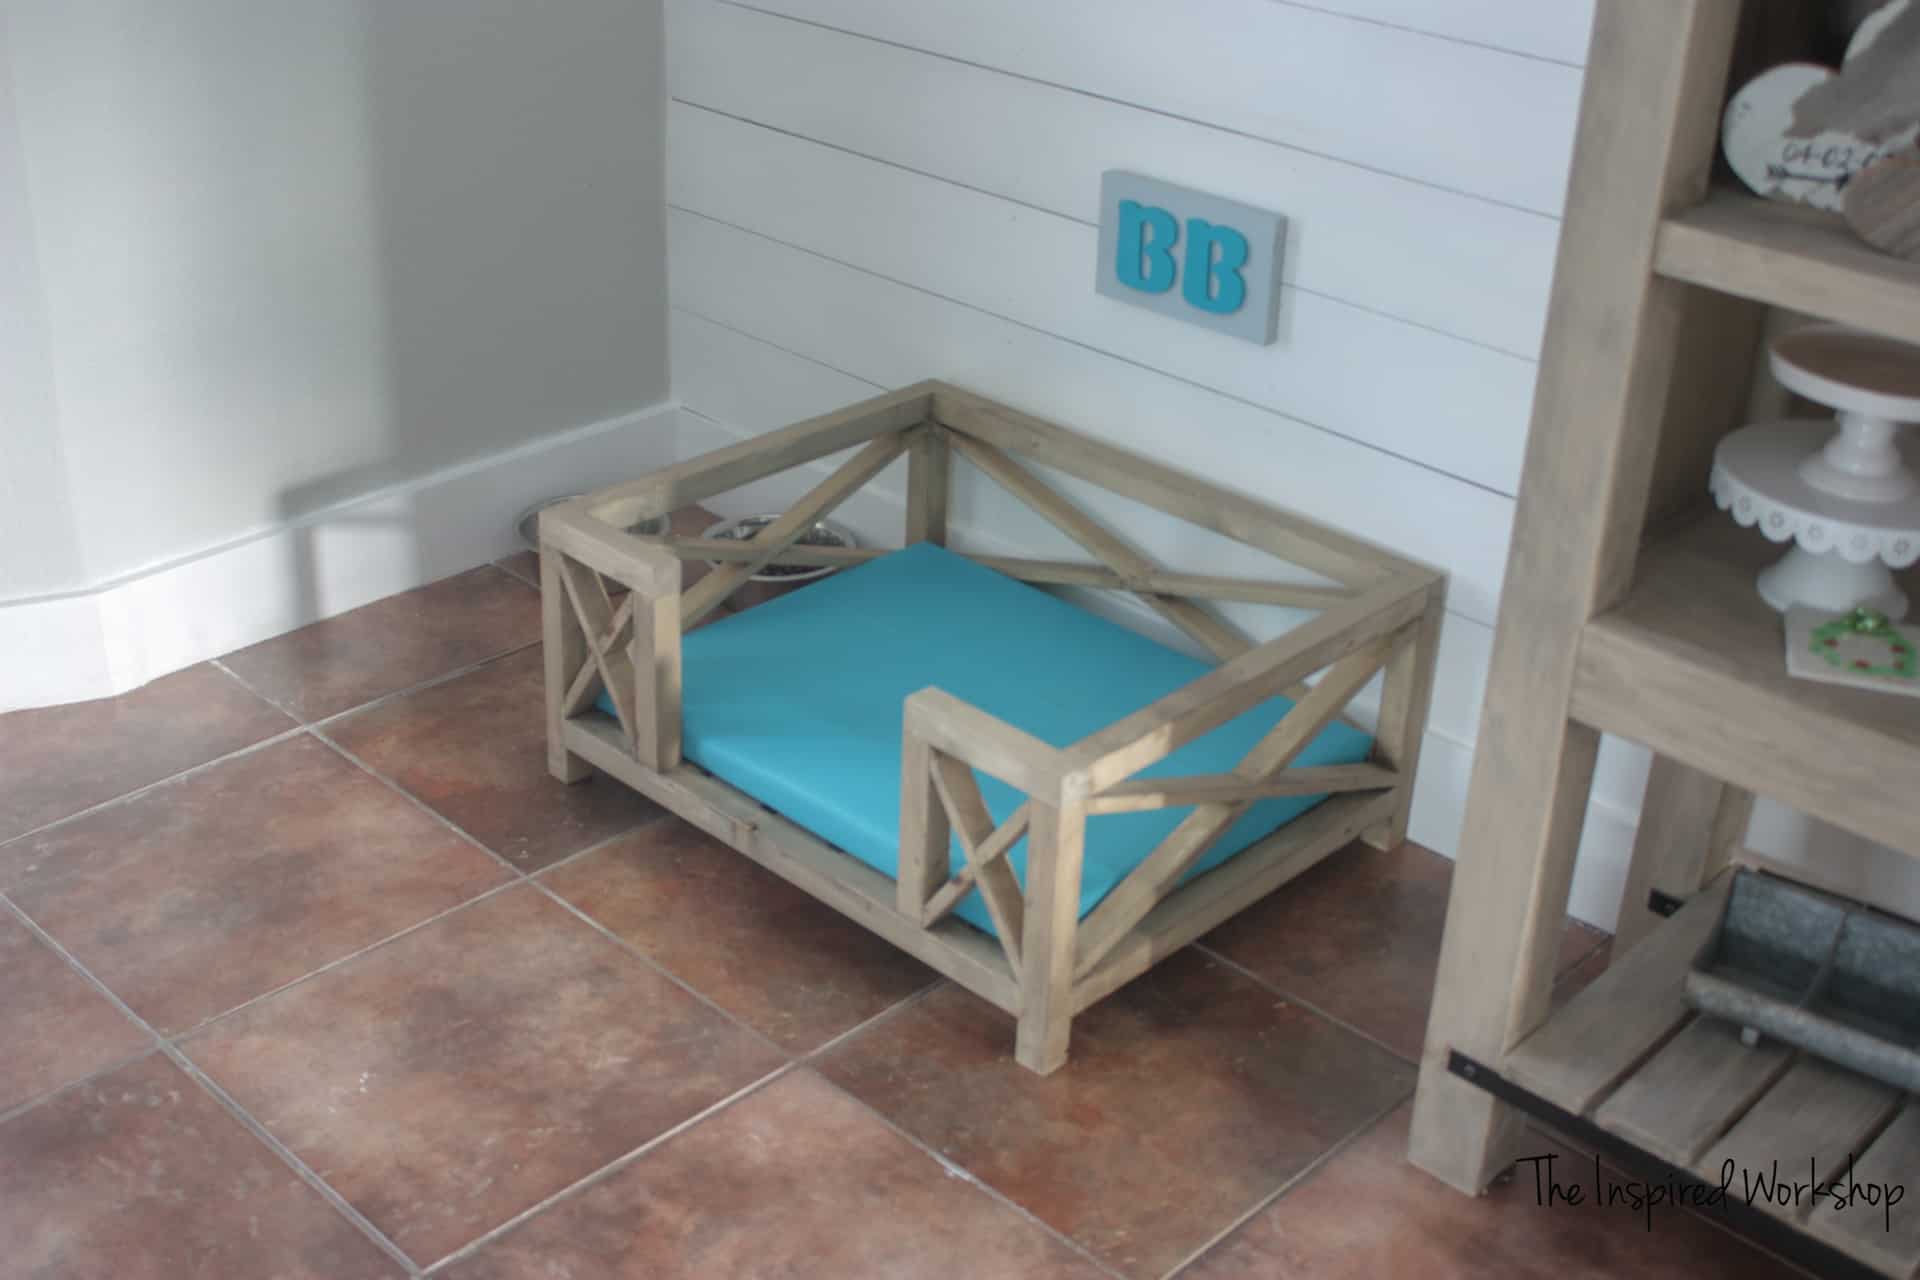
Anyway, I still think it’s sooooo cute, even after he chewed the cushion…but can you believe that Pottery Barn charges 300-350 for this? I built it for 20 dollars and then spent an additional 20 dollars on the cushion!
All the projects that you will see from any of the bloggers today will be able to be recreated by you for less than 100 dollars! Yes, I am sharing 7 other projects, from 7 other bloggers that are all able to be built for less than 100 bucks! That sounds like fun right?! Make sure and check out their builds at the links below!
Gathering Supplies to Build the DIY Dog Bed
Alright, let’s cut the chit-chat and start building this dog bed! Here are the downloadable plans for the dog bed I built in the medium 28″x22″ (interior) size!

Smaller dog bed plans are available as well! 23″x18″ (interior cushion size). *Note: I have not personally built this size, so there could be slight discrepancies with the measurements!
Materials Needed to Build the DIY Dog Bed:
**Amazon links below are affiliate links! Affiliate links are links that make me a small commission (at no extra cost to you) should you make a purchase after clicking one! I always appreciate you shopping at my links as it helps me keep bringing free content to you!
- 3 – 2x2x8
- 2 – 1x4x8 furring strips
- 2 – 1x2x8 furring strips
- dog bed cushion – Optional – make your own! I did! All you need is foam (note it was only 15.97 in store) and outdoor fabric and some hot glue! Lol!
- wood glue
- kreg jig
- 2 1/2″ pocket hole screws (blue coated if using dog bed outside)
- 1″ pocket hole screws (blue coated if using outside)
- miter saw
CUT LIST for the DIY Dog Bed:
- 1 – 2×2 @ 31″
- 1 – 2×2 @ 28″
- 4 – 2×2 @ 22″
- 4 – 2×2 @ 12″
- 4 – 2×2 @ 8 1/2″
- 7 – 1×4 @ 22″
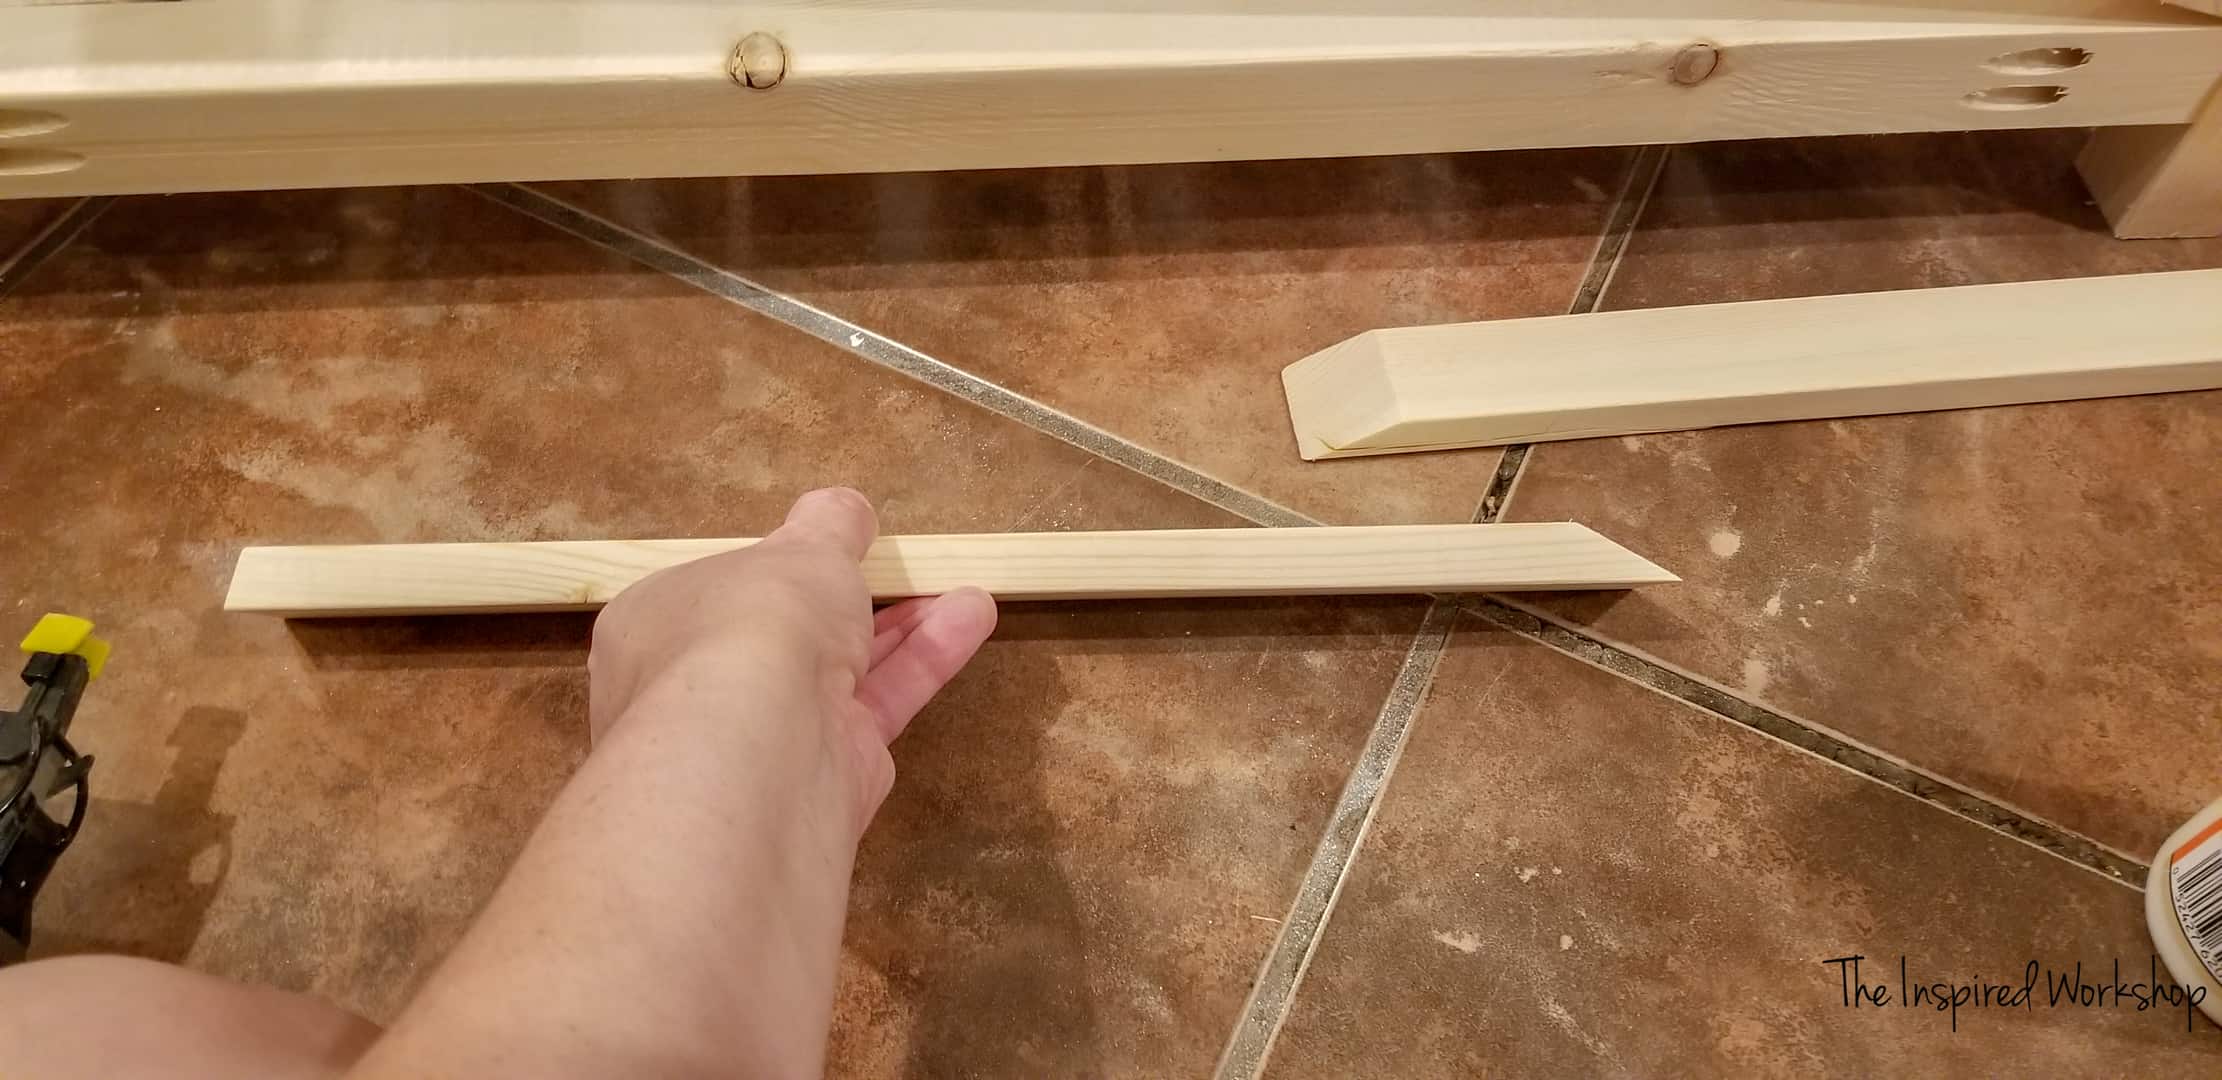
- 1 – 1×2 @ 29 3/64″ mitered at 15.5 degrees off square, ends parallel
- 2 – 1×2 @ 14 33/64″ mitered on one end at 15.5 degrees off square and 59 degrees off square on the other, ends not parallel
- 2 – 1×2 @ 23 5/16″ mitered at 19.3 degrees off square, ends parallel
- 4 – 1×2 @ 11 21/32″ mitered on one end at 19.3 degrees off square and 51.3 degrees off square on the other end, ends not parallel
- 2 – 1×2 @ 9″ mitered at 52.2 degrees off square, ends parallel
- 4 – 1×2 @ 4 1/2″ mitered on one end at 14. degrees off square and 52.2 degrees off square on the other, ends ARE parallel
Not too many supplies are needed to build this dog bed, but sheesh that cut list looks intimidating, huh?! Well don’t be fooled, I was able to make all the angled cuts in a couple of hours…and that was with all my mess-ups! Lol! I need to pay far more attention! Luckily, it all works out in the end, as long as you start with your longest X’s and work your way to the smaller ones, that way you can use the mistake boards on the smaller X’s! Keeps me from really wasting much material! Lol!
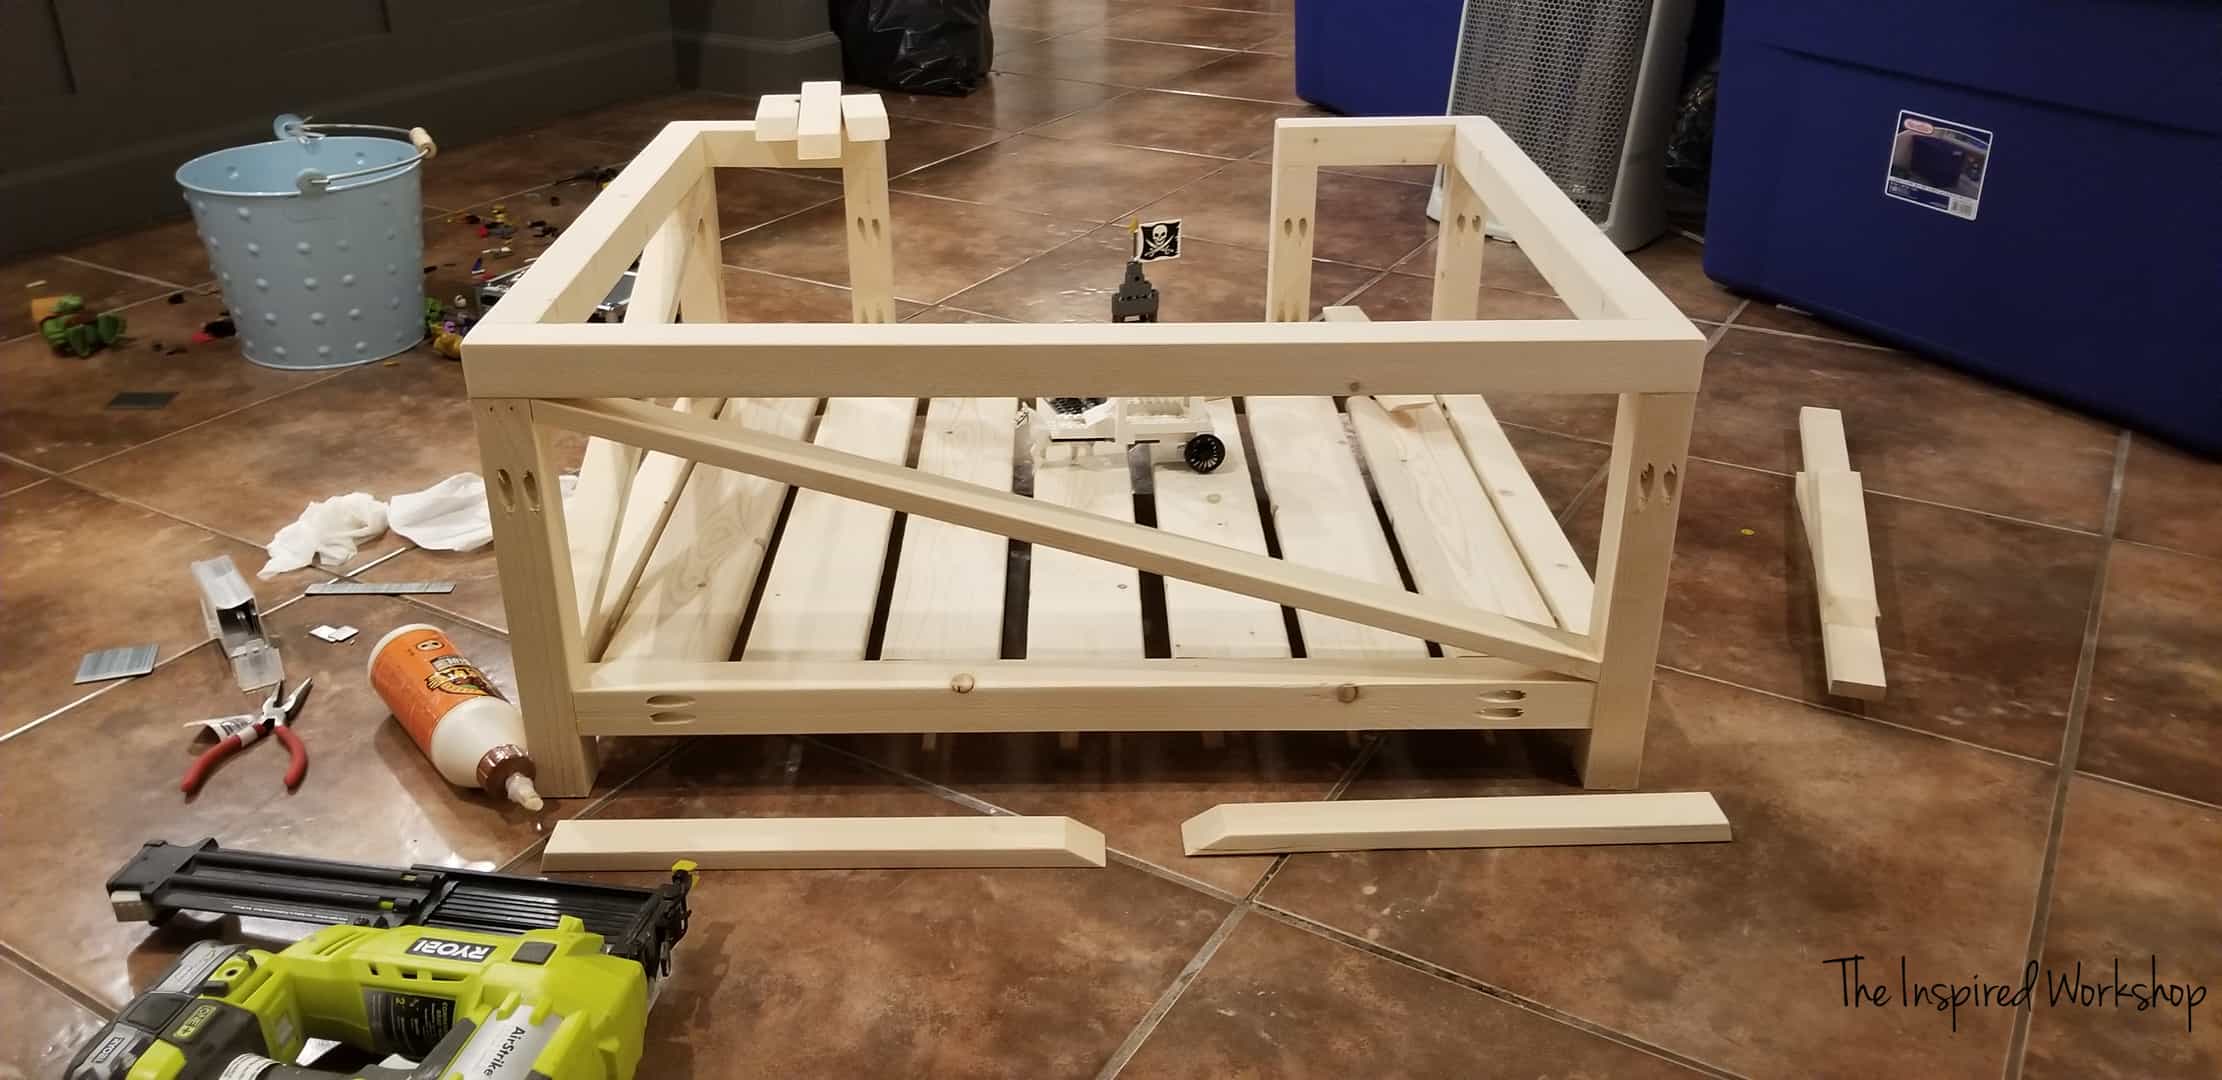
Building the DIY Dog Bed
The beginning base of the dog bed is so easy, and honestly, it would be cute left plain without the X’s as well! I also thought what if you made a modern version and did an offset angle pattern, you know like people are doing on their walls…that would be so cute! I may have to whip one up just for the fun of it!
Moving on, let’s get this baby built!
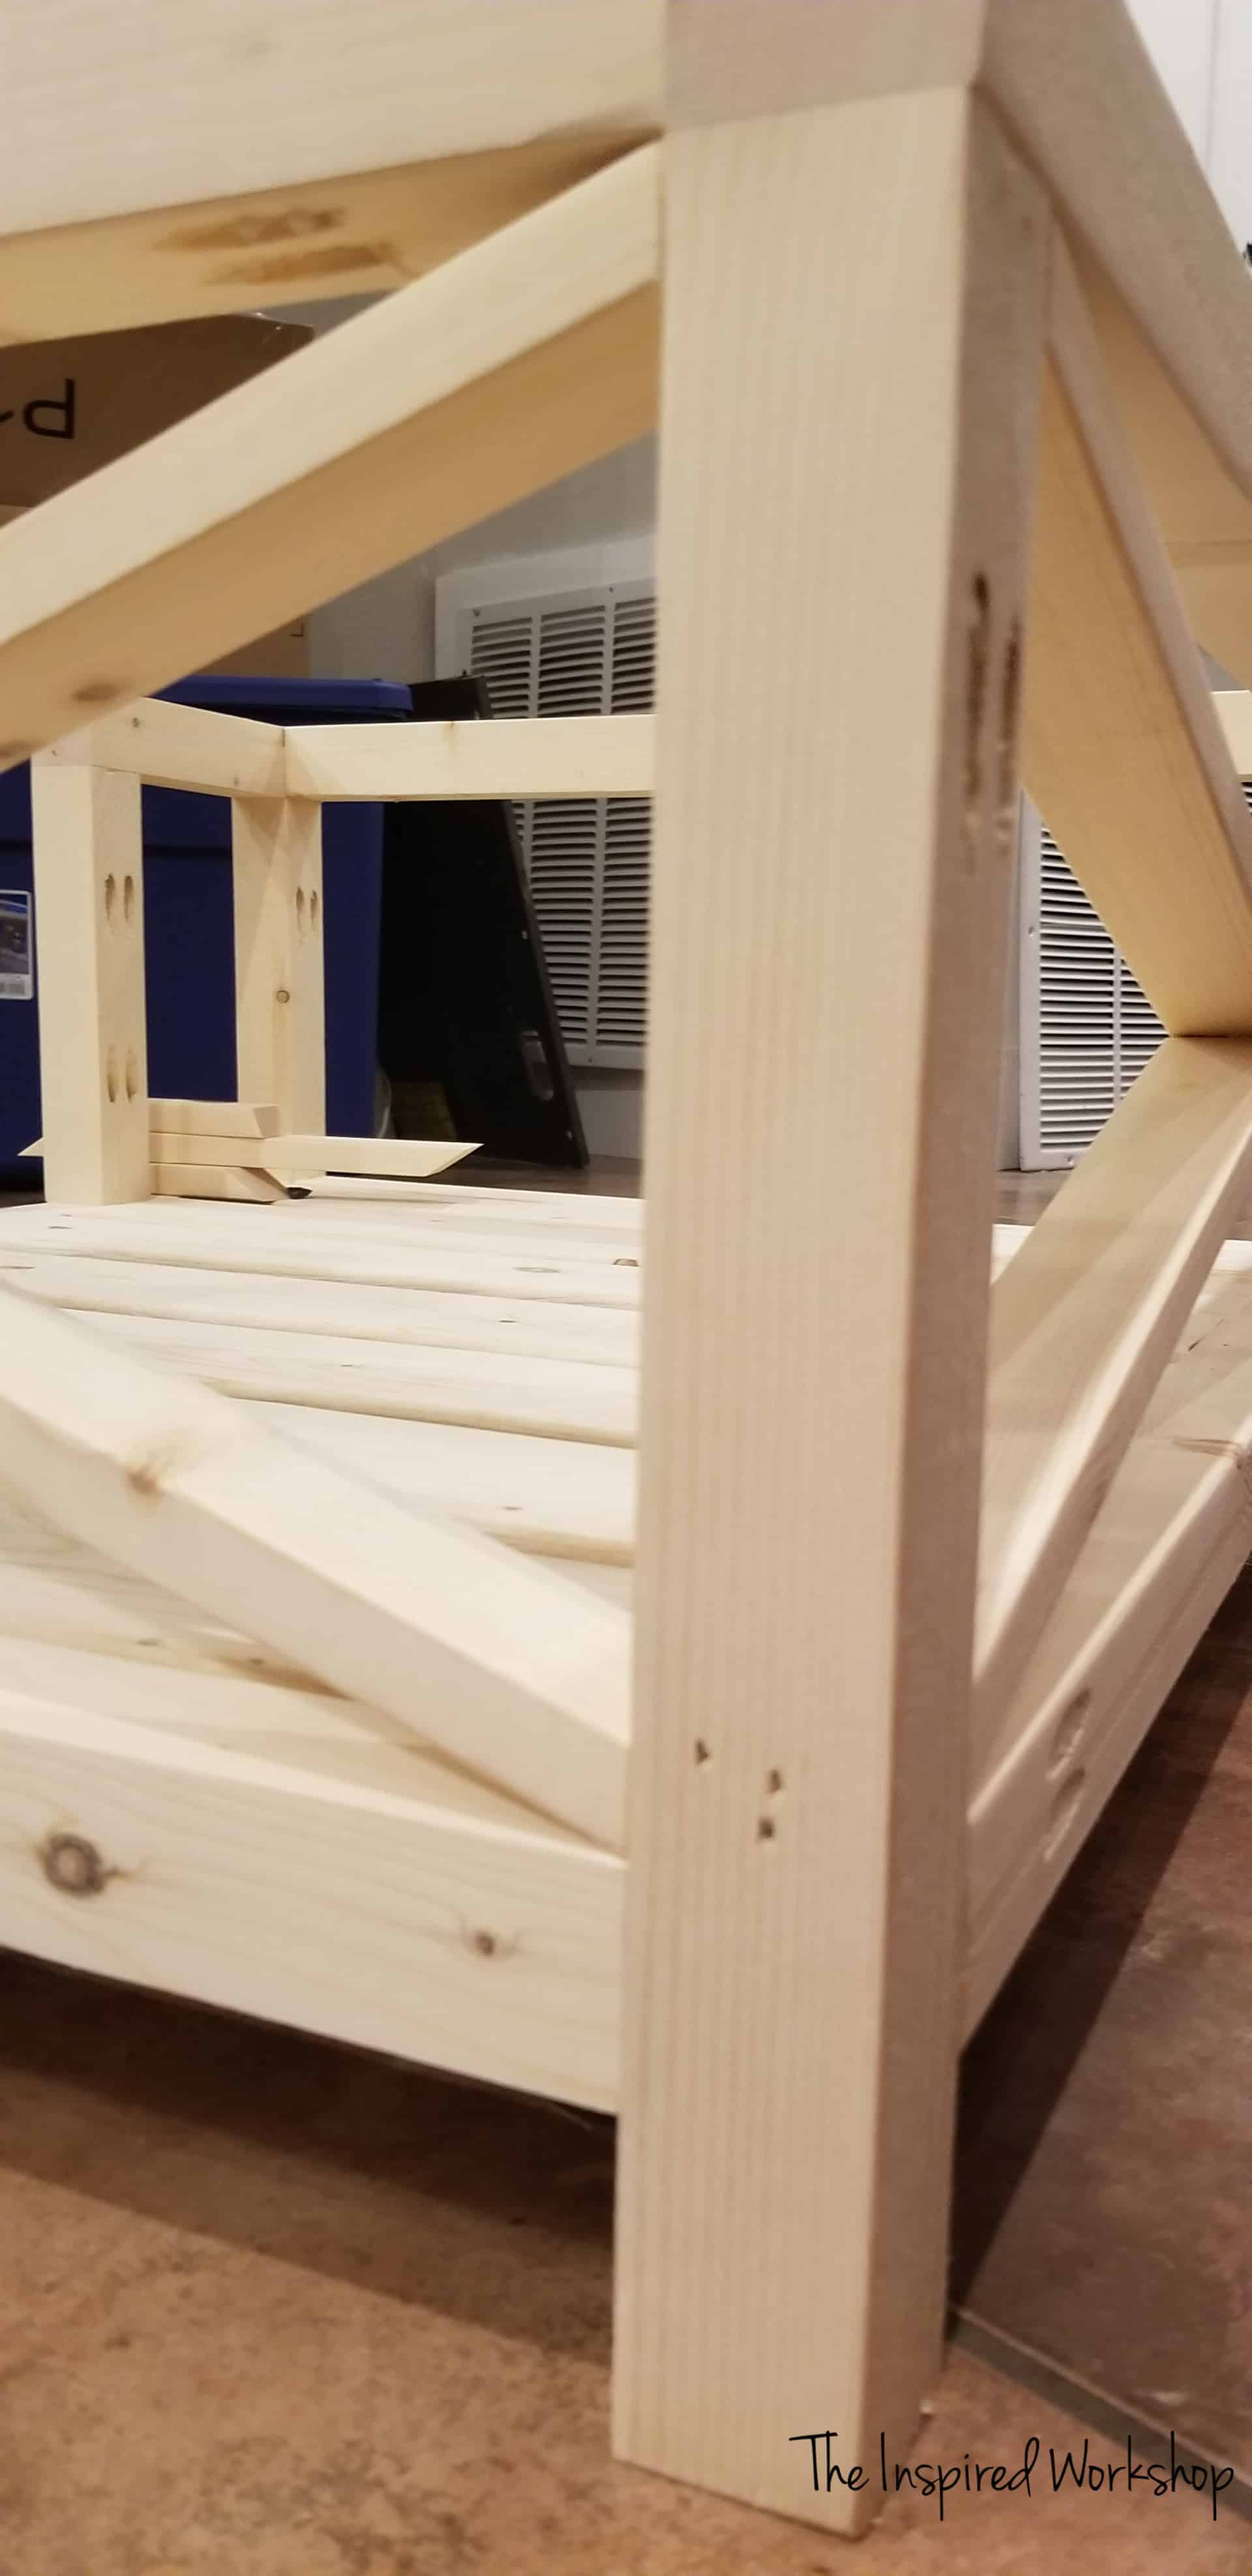
Starting with the back first, cut and pocket hole all the pieces! All the pocket holes will be drilled at 2 1/2″ depth. I haven’t given instructions on using the Kreg Jig in quite a while so I thought I would go ahead and give a little run down on how to use it, feel free to scroll right through if you already know how!
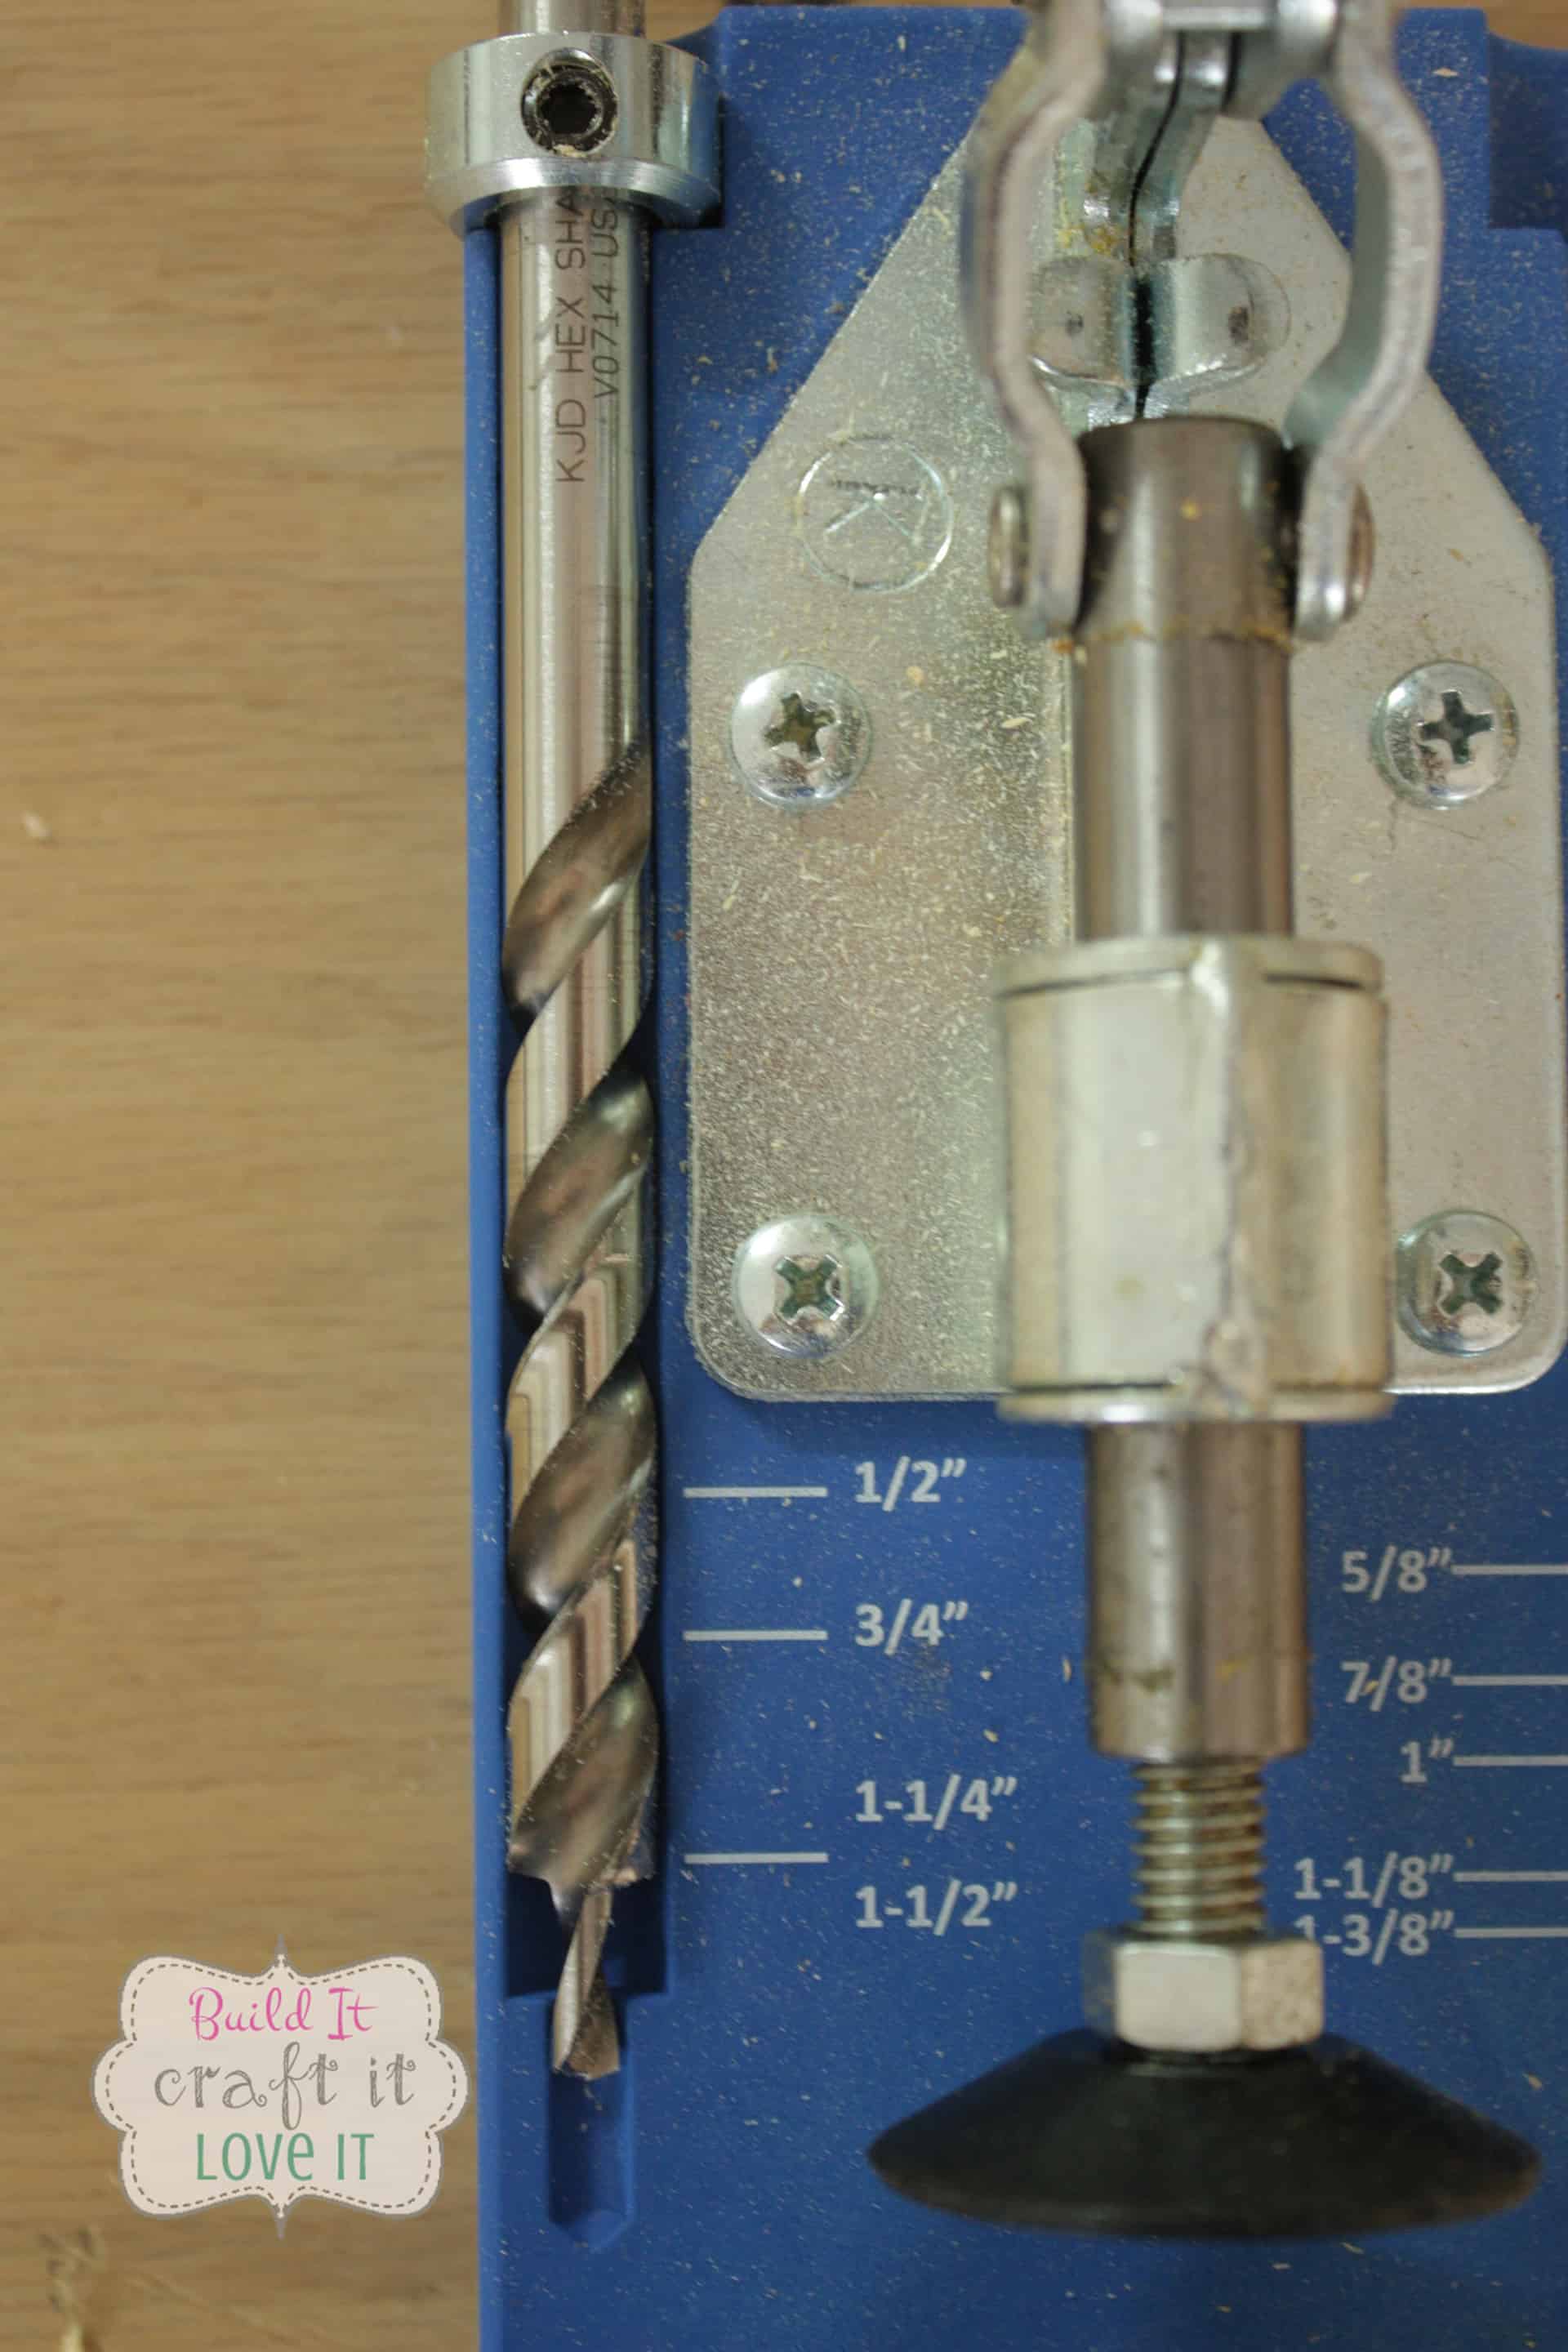
Set the depth of your Kreg Jig! I am demonstrating on a K4, but the way you set it is pretty much the same on all the models. Don’t mind the old photo from when this little ole blog was Build It Craft It Love It!
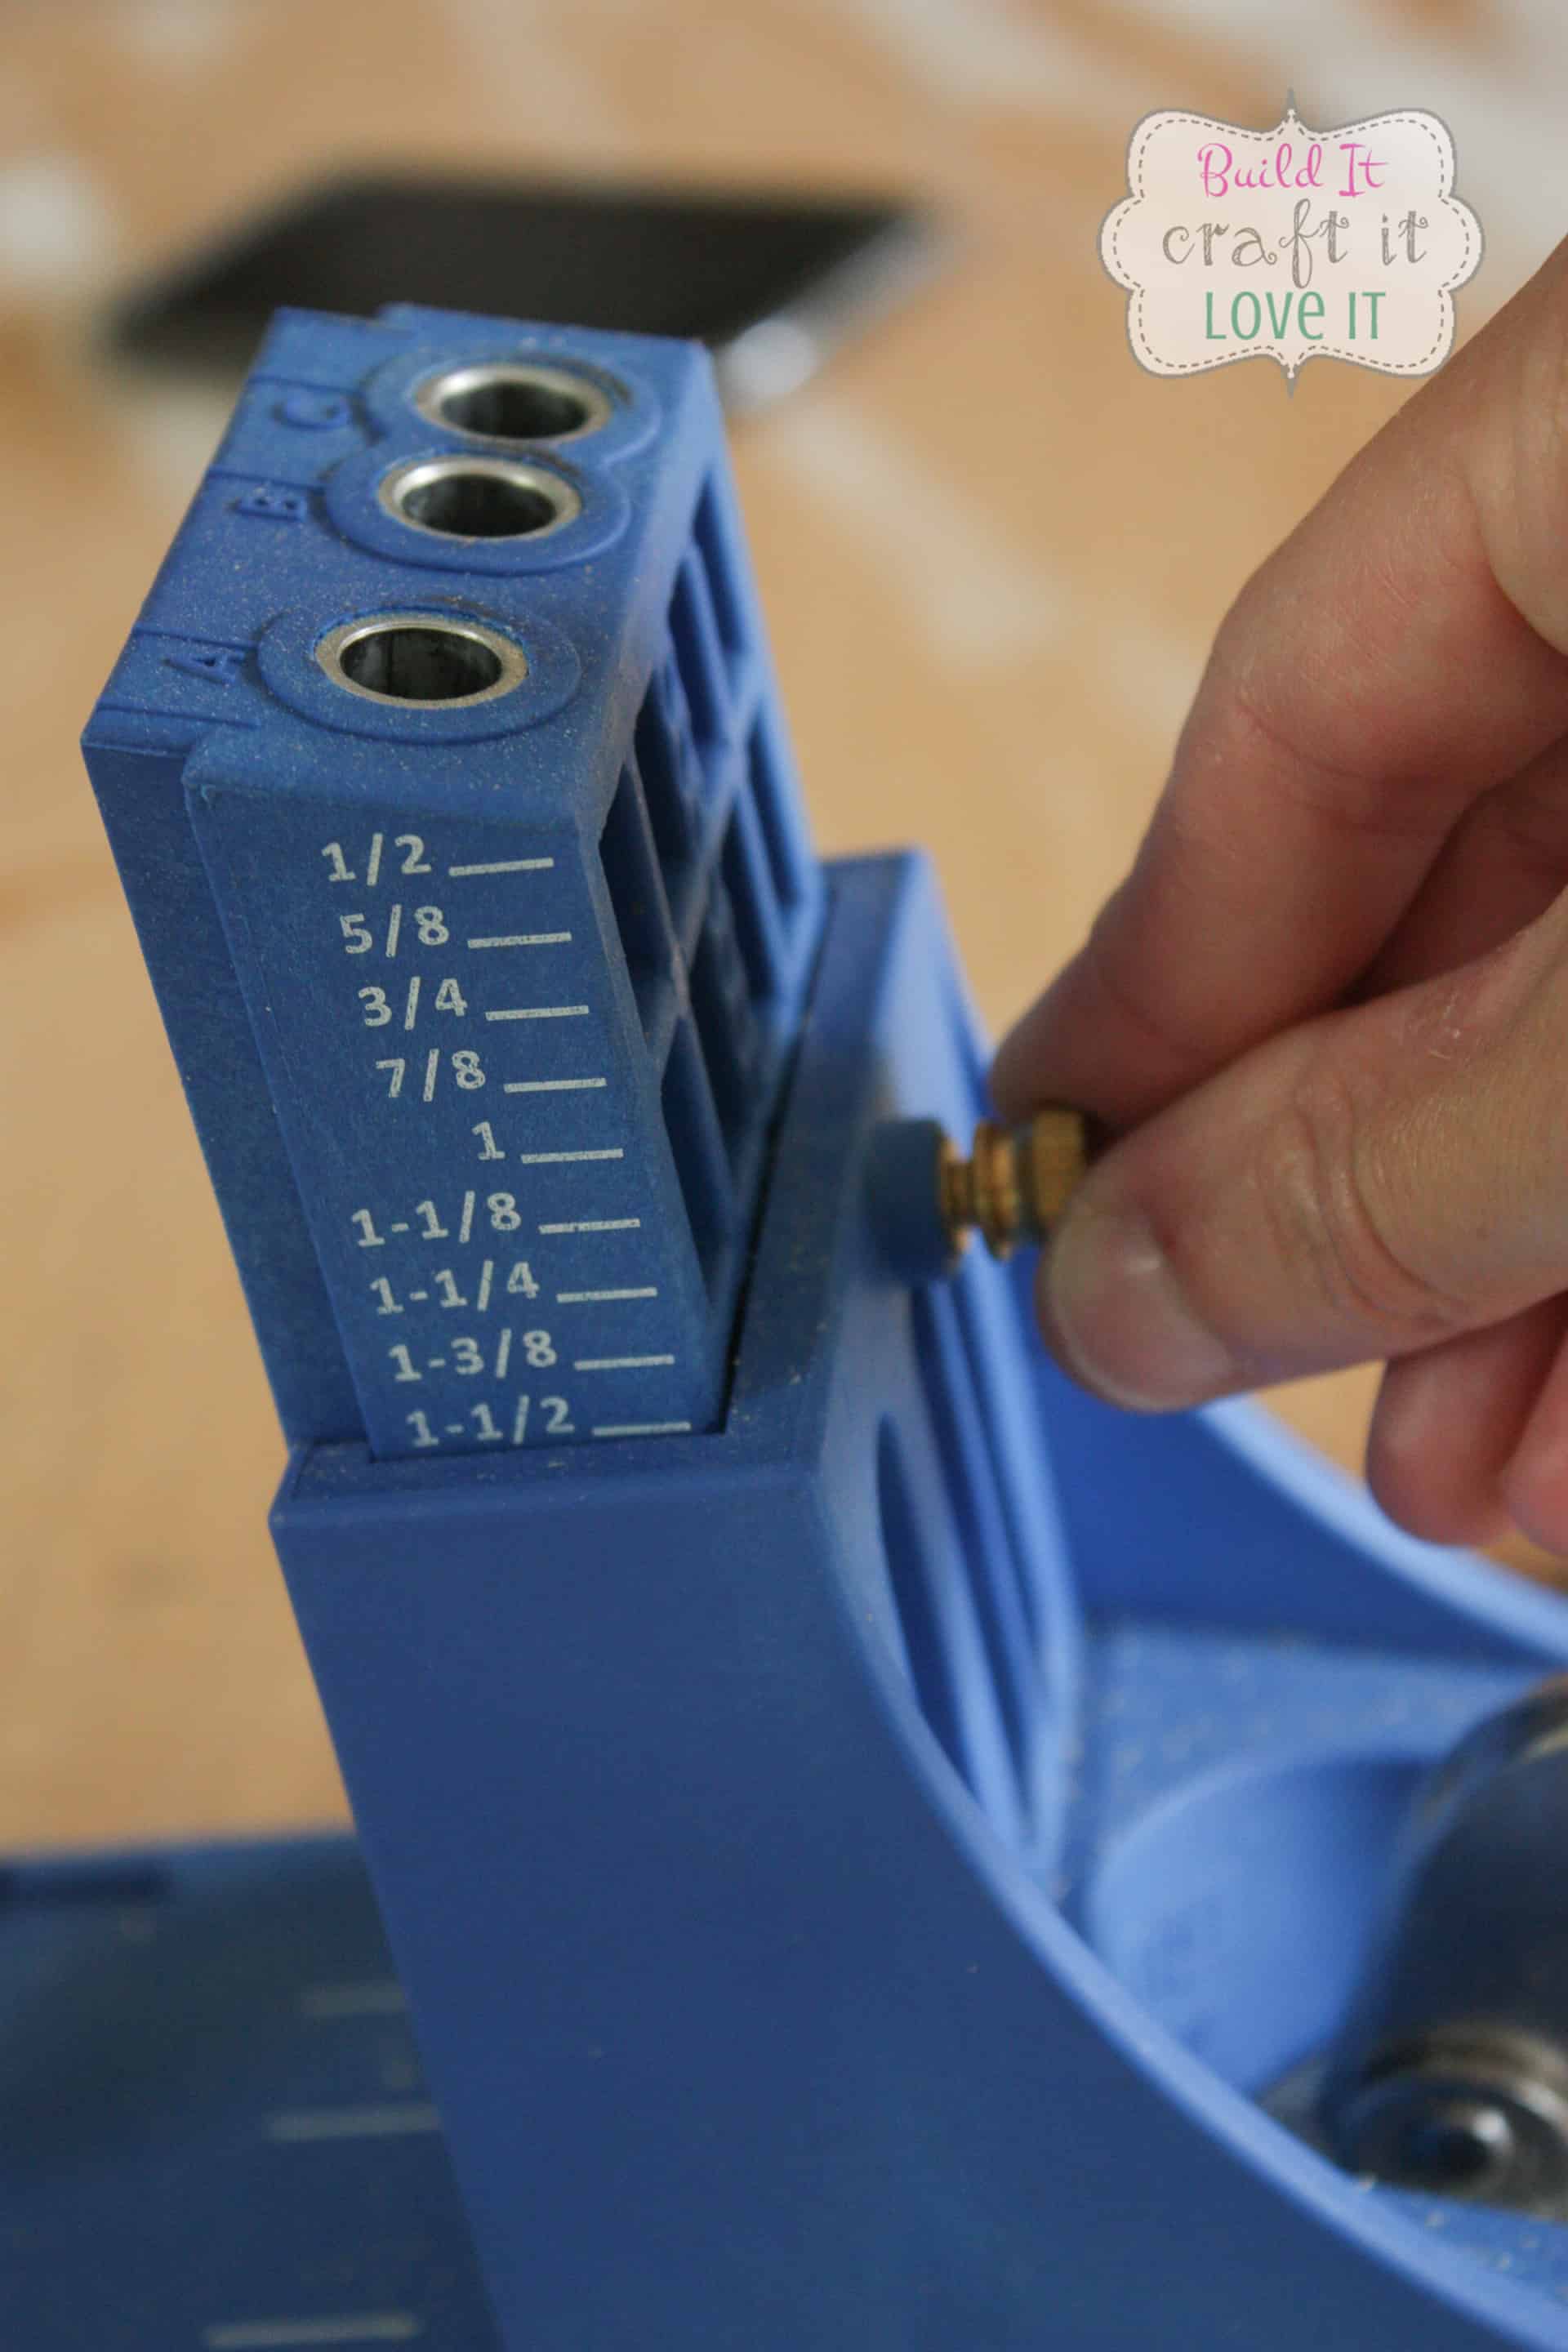
Next, set the depth of the collar on your drill bit.
Add your board into the jig and clamp it with the bar! Drill your holes! (This photo is not from this current project)
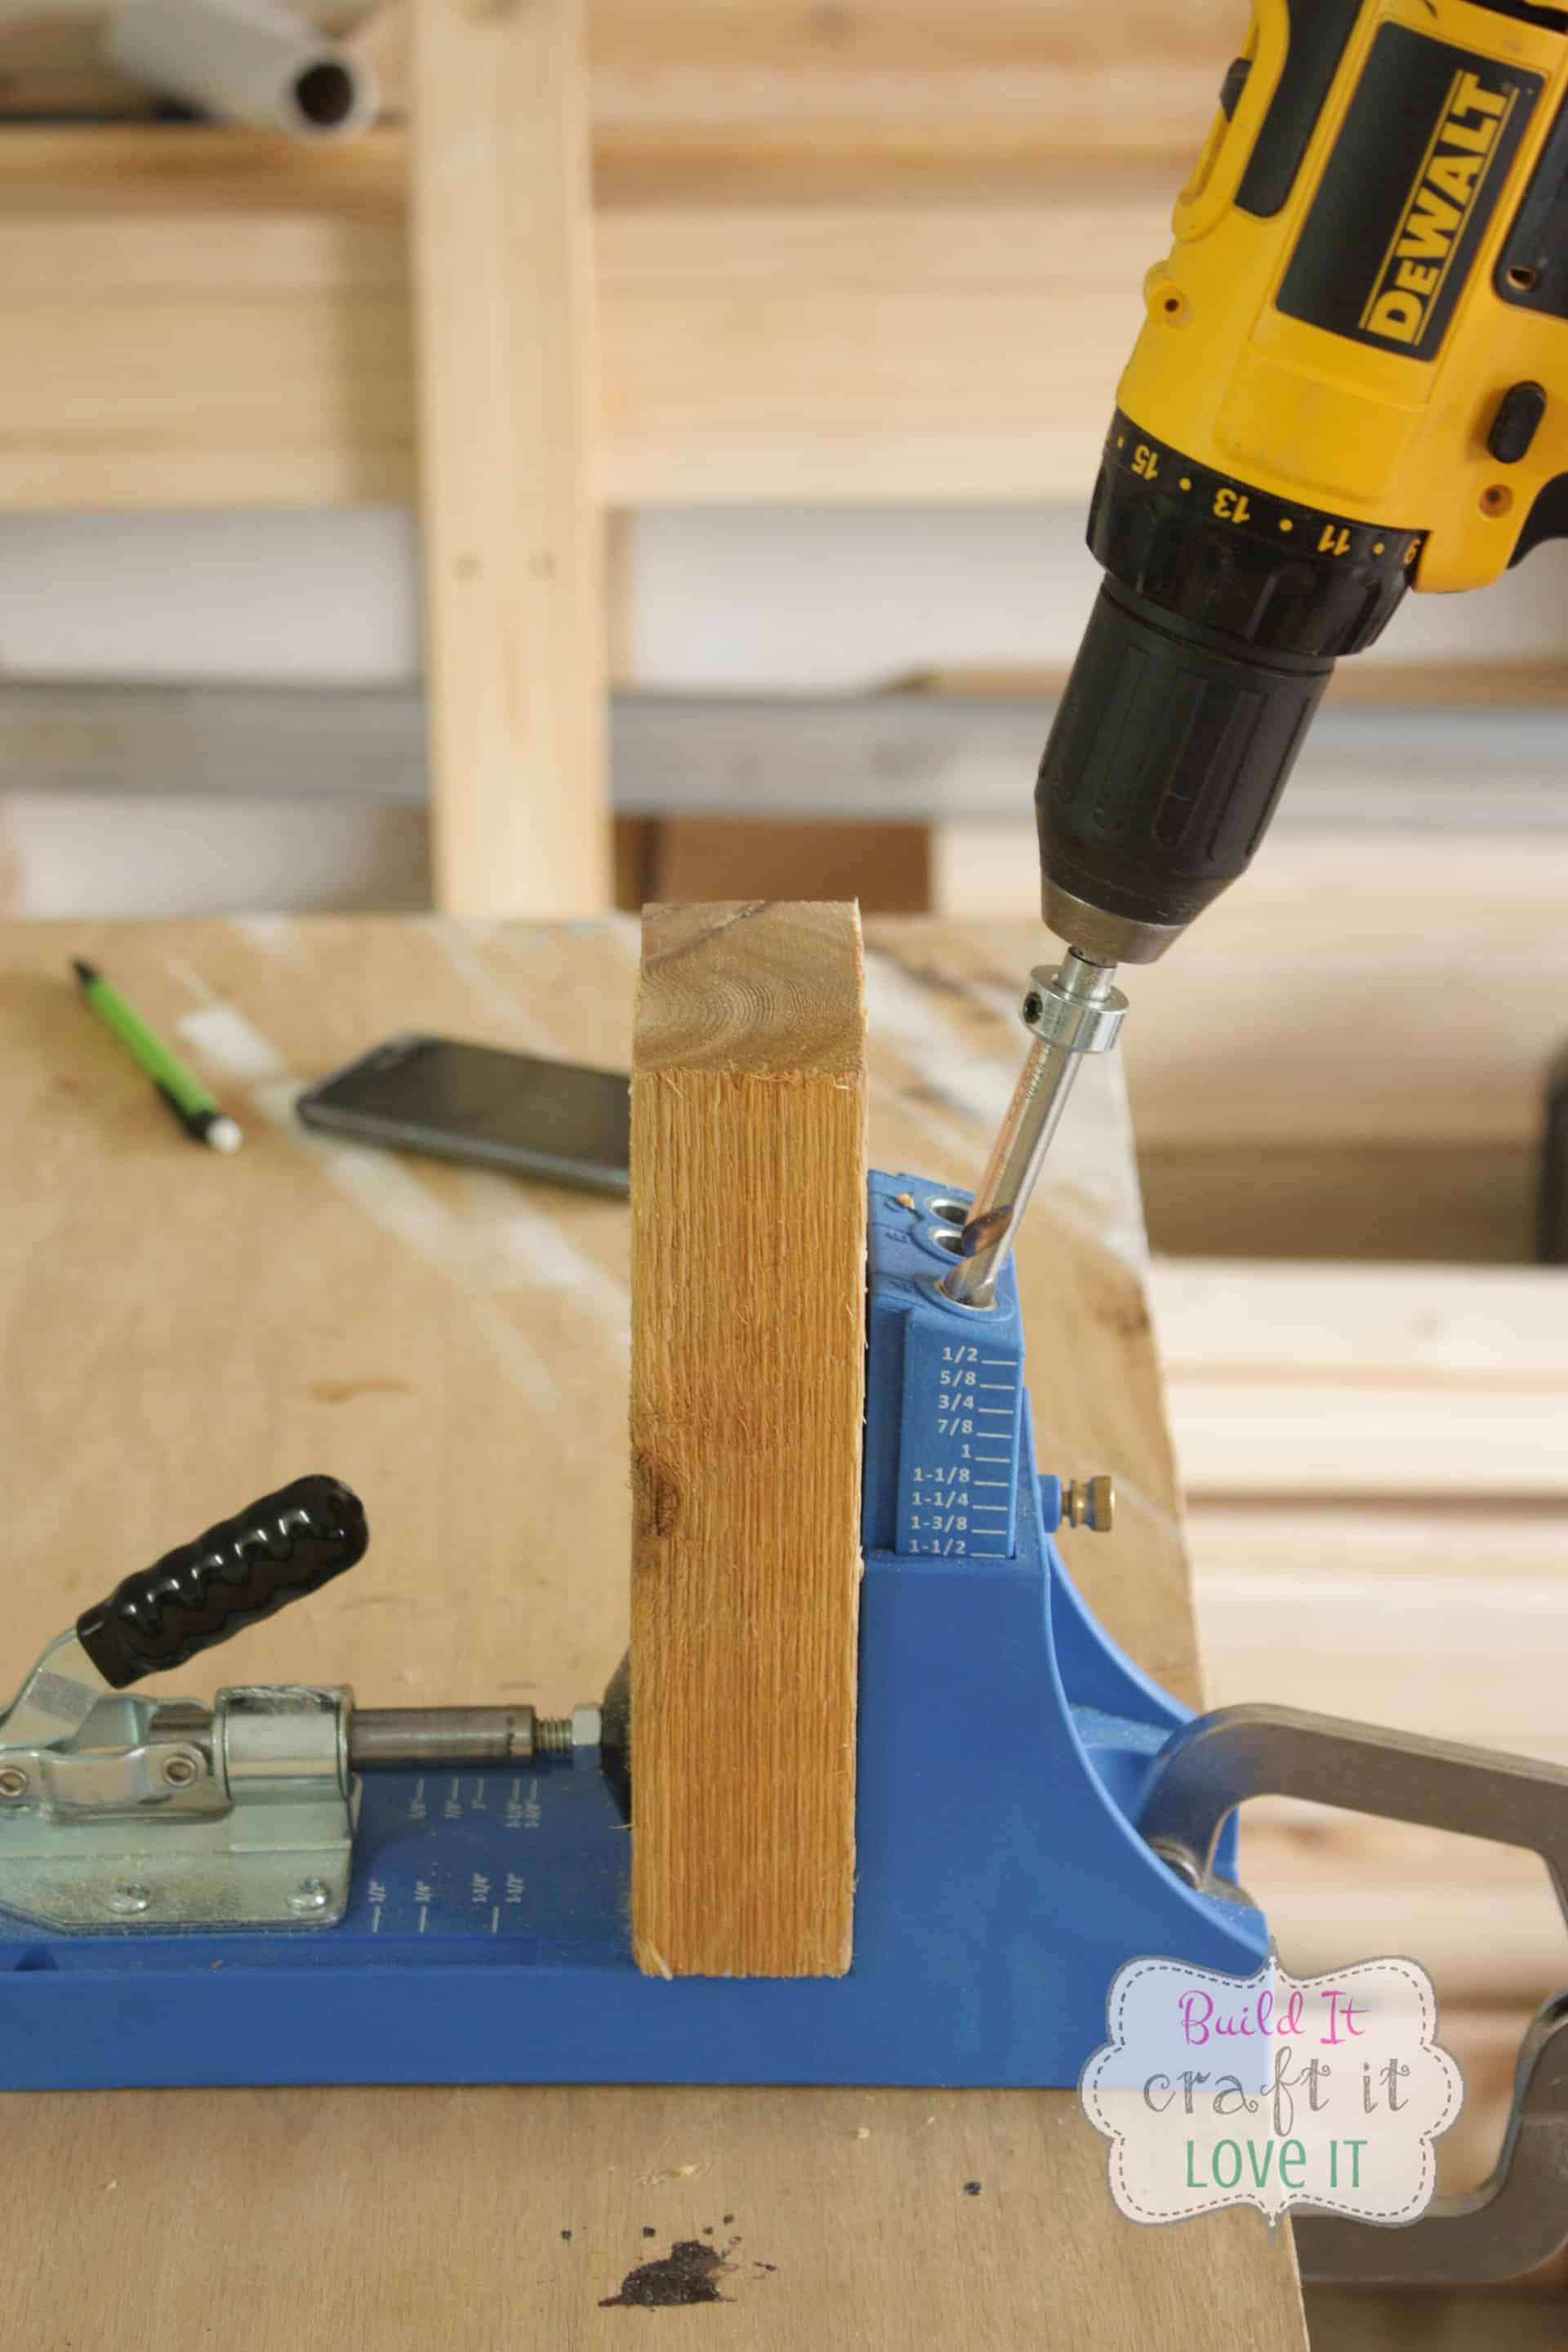
Viola! That easy! Now you can put your boards together with lots of wood glue and 2 1/2″ pocket hole screws! Make sure and use Blue Kote pocket hole screws if you are using your dog bed outdoors!
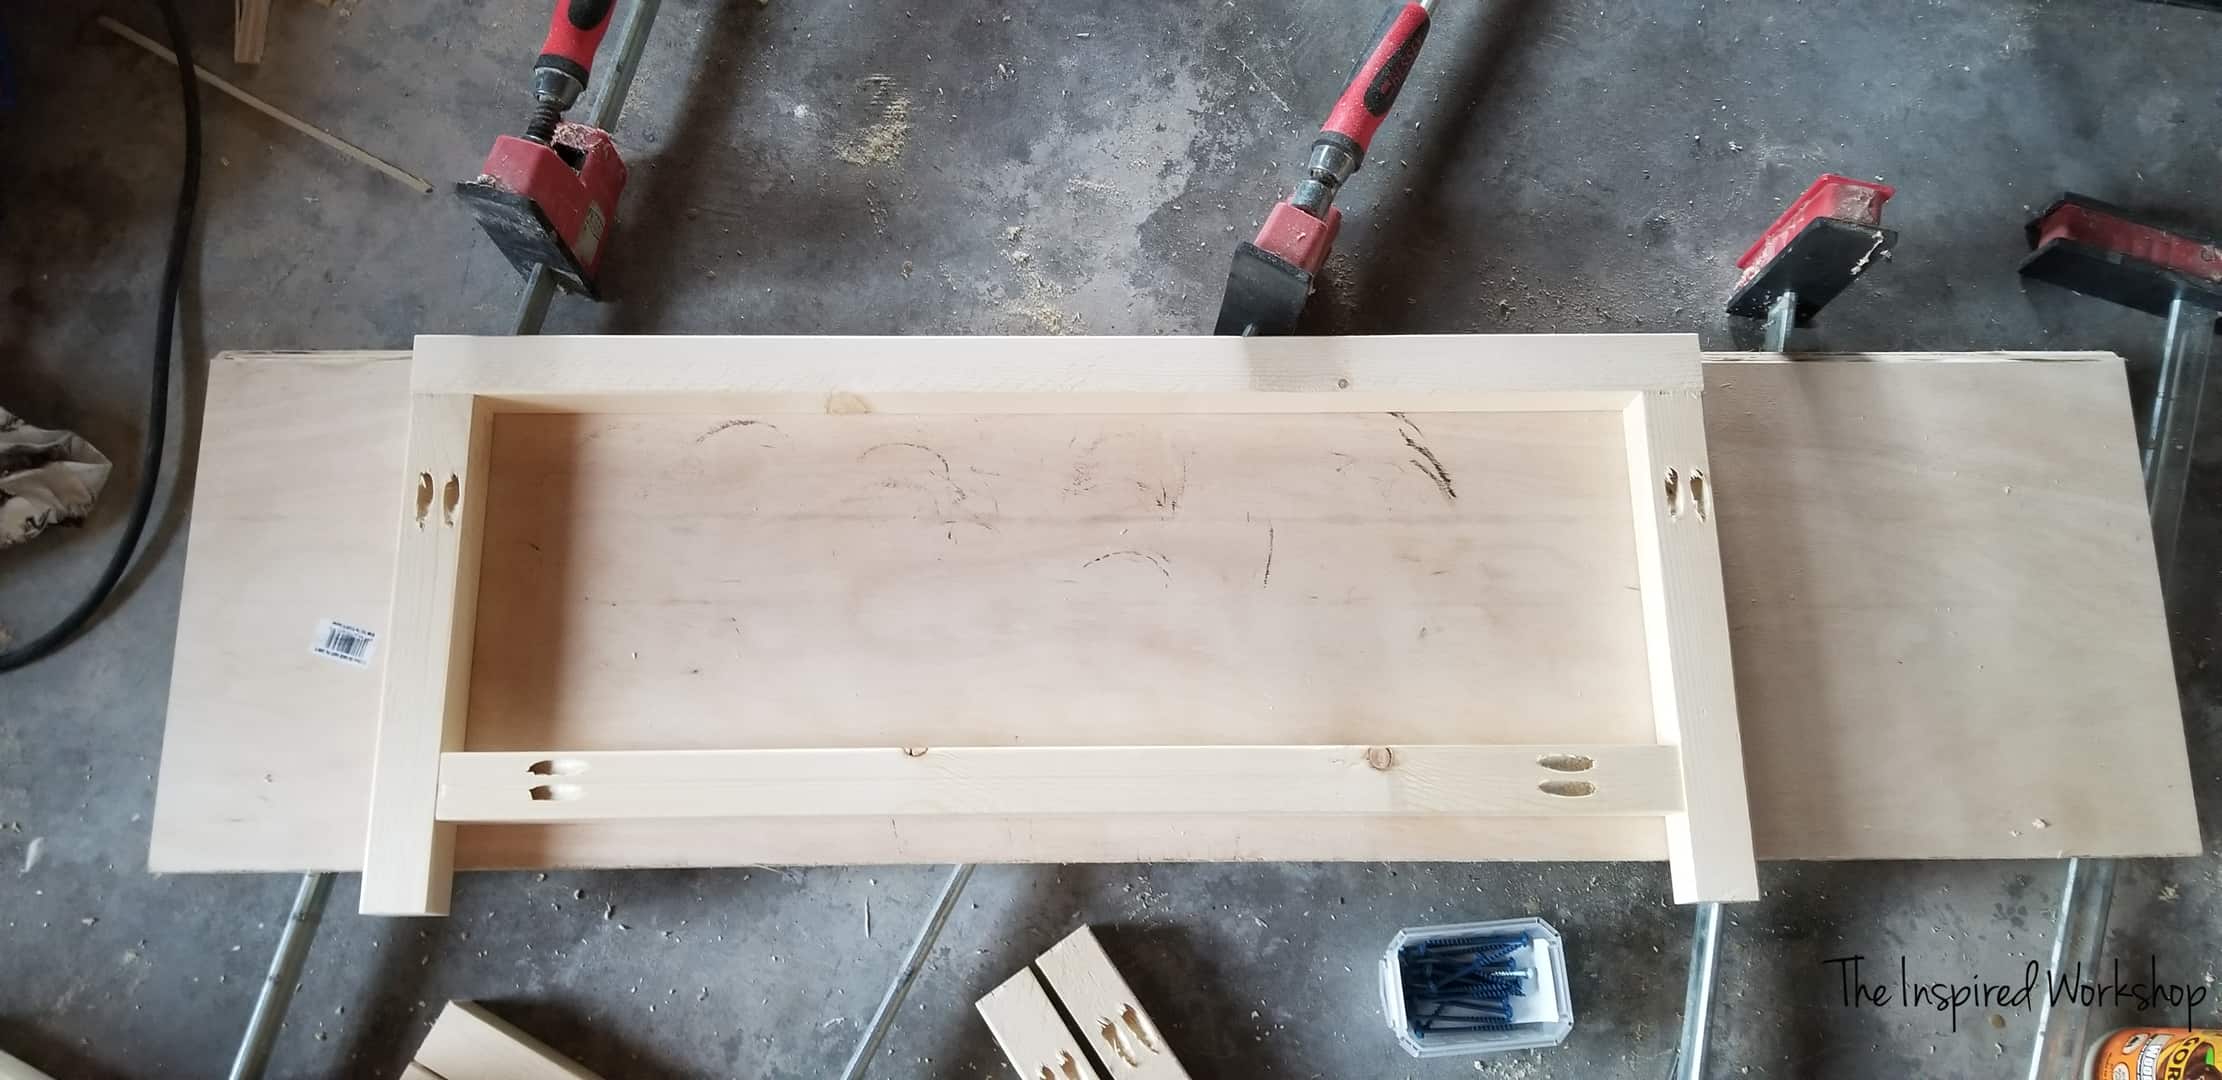
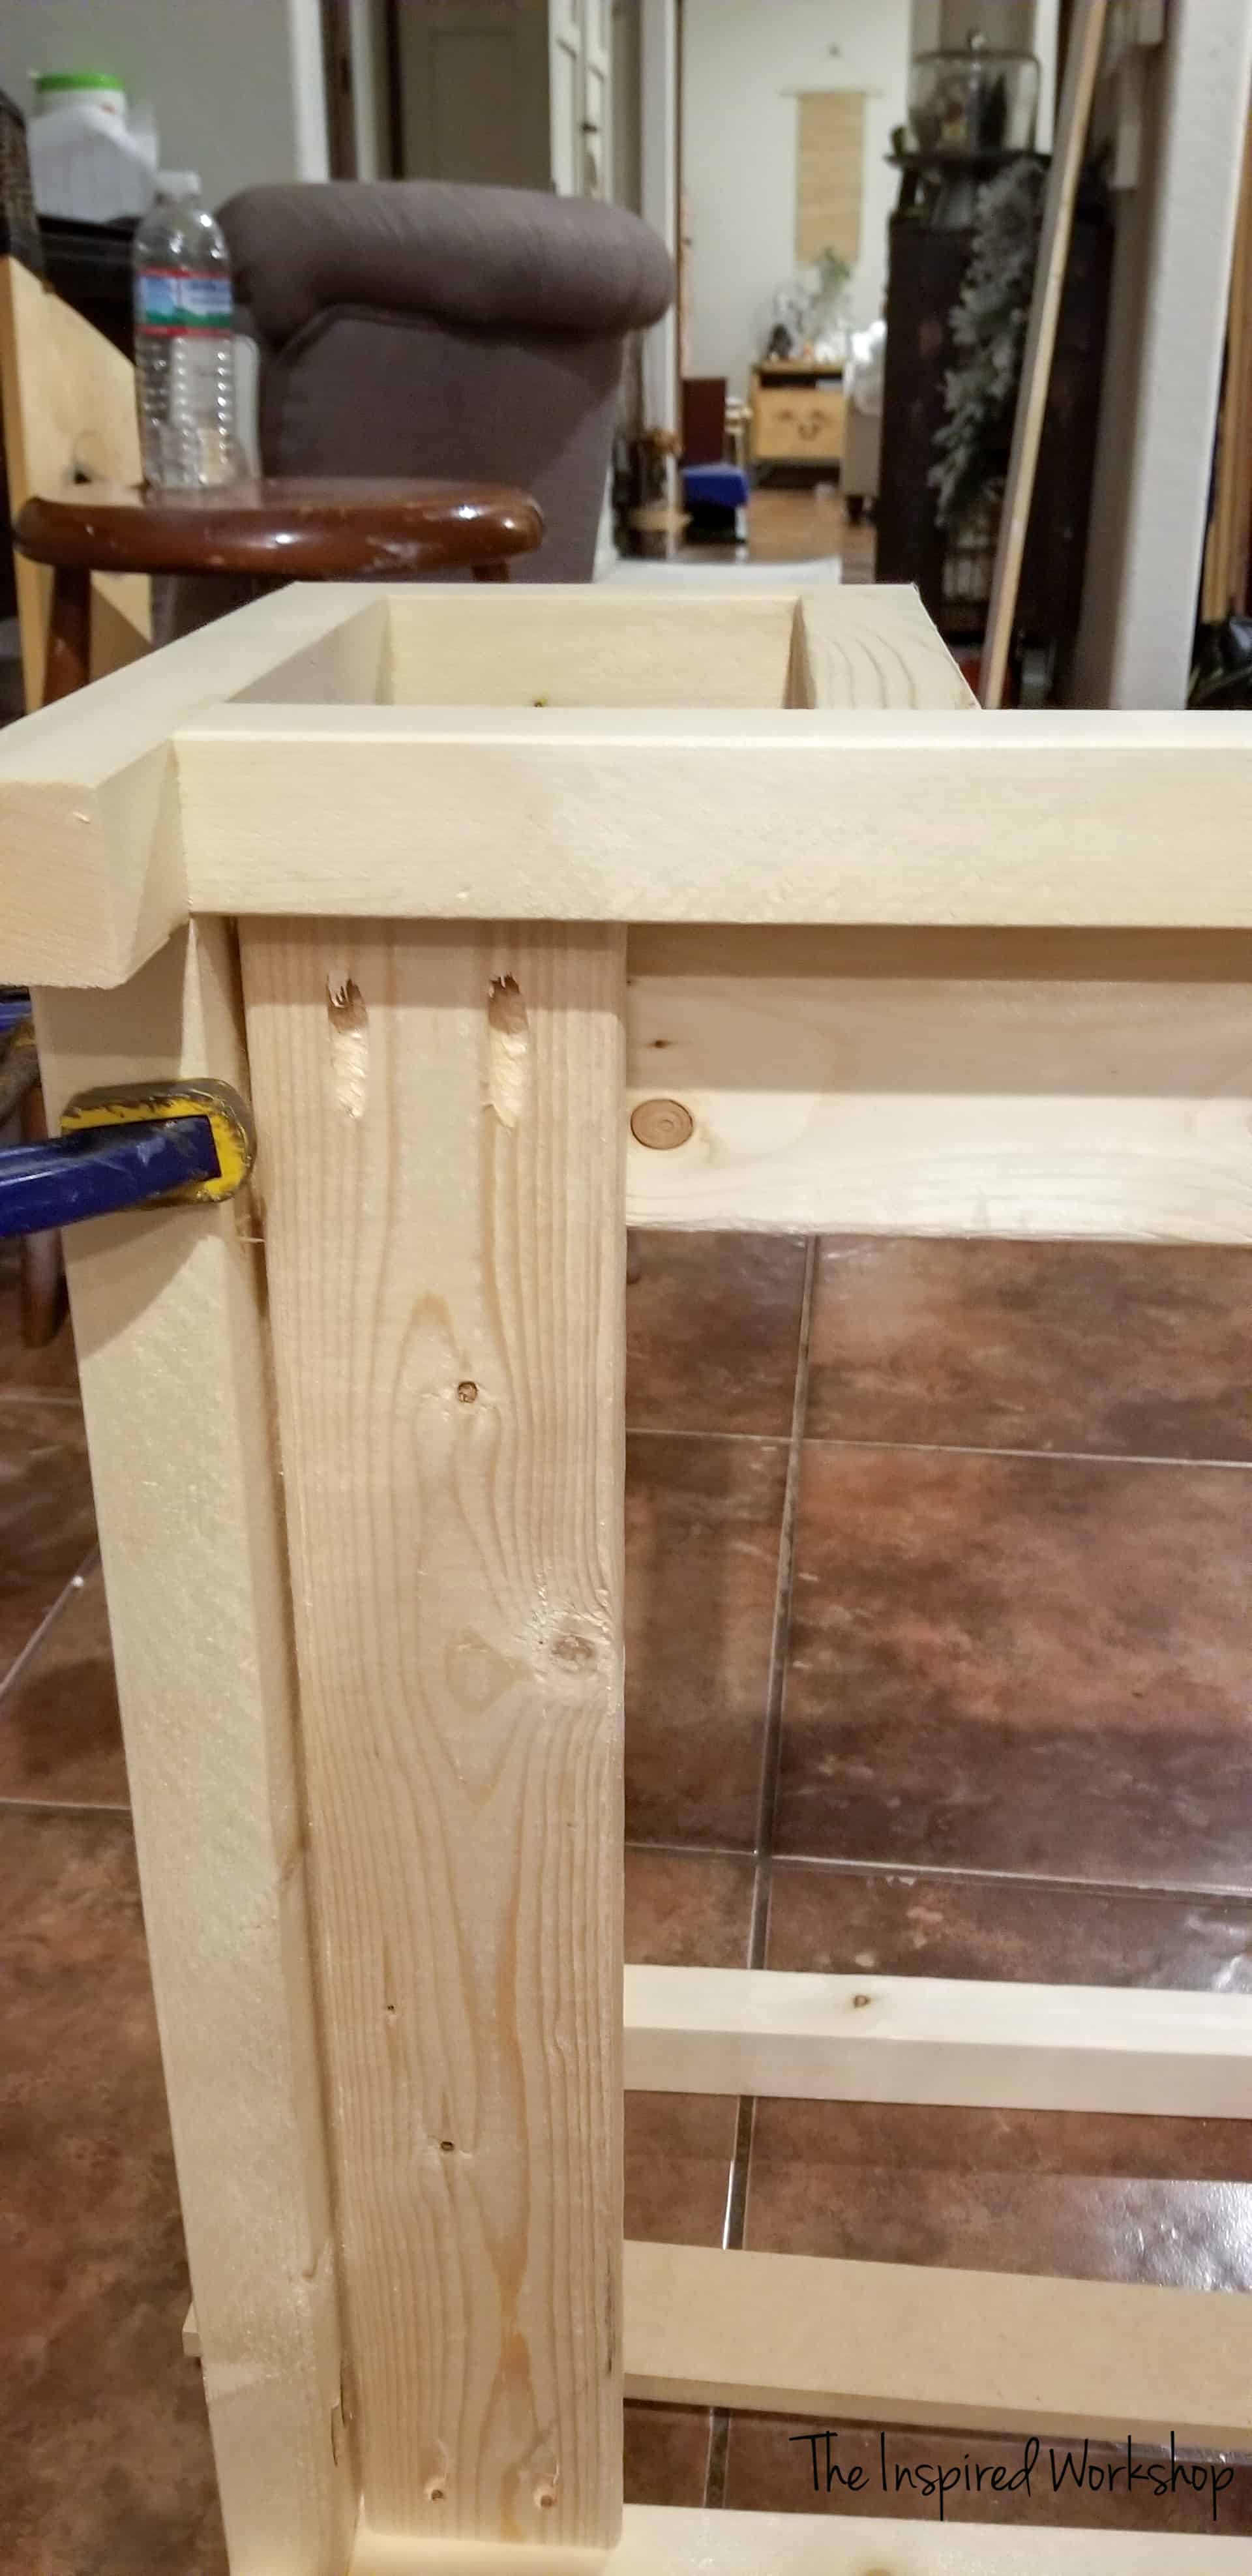
Here is the back of the dog bed. I didn’t even fill these pocket holes in because they will not be seen with it up against the wall! The bottom board is raised 2″ up from the ends of the 2×2 ‘legs’.
Next, piece together the front of the bed!
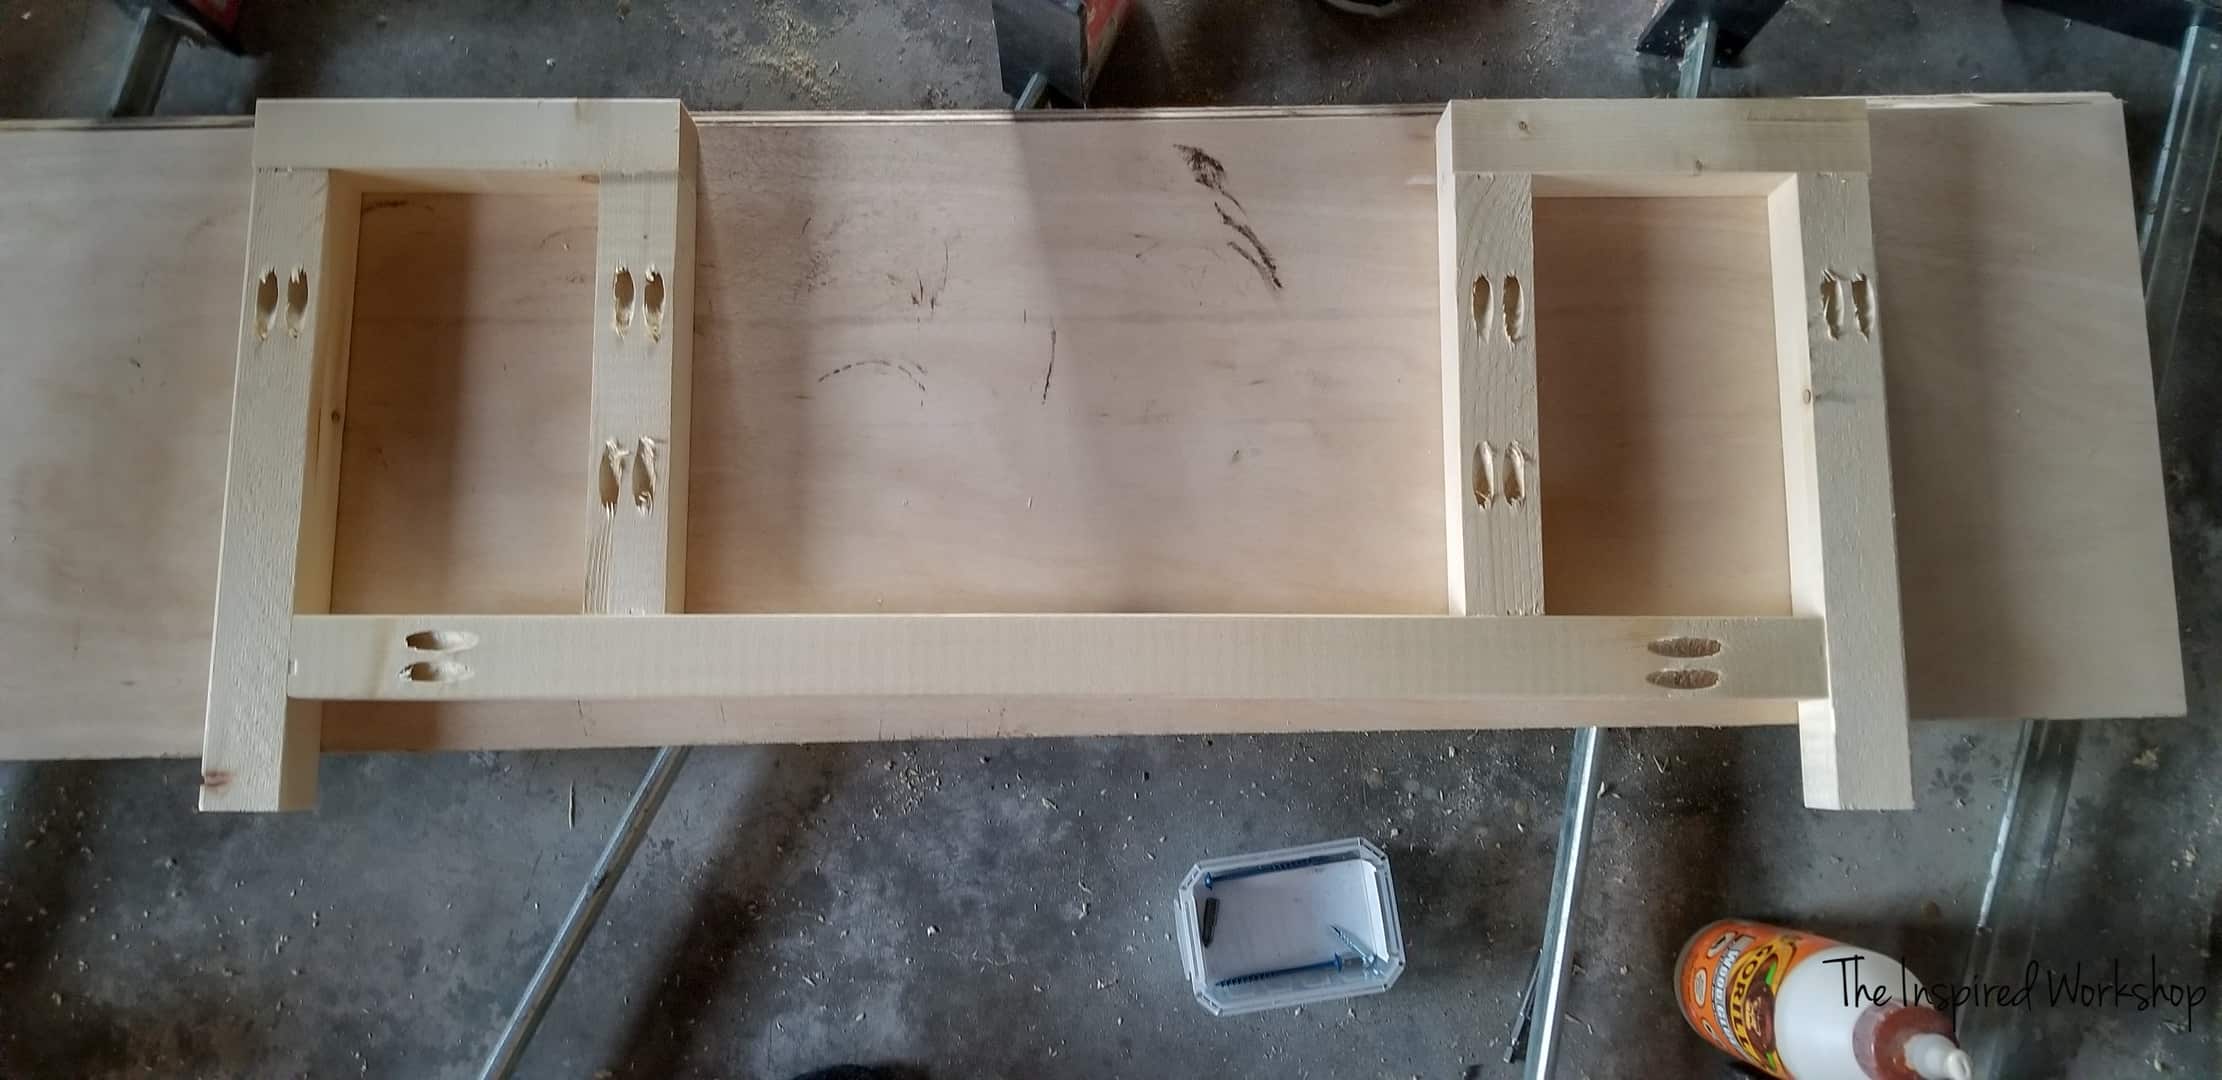
This is the back (above) and when you flip it over (below) it looks all nice!
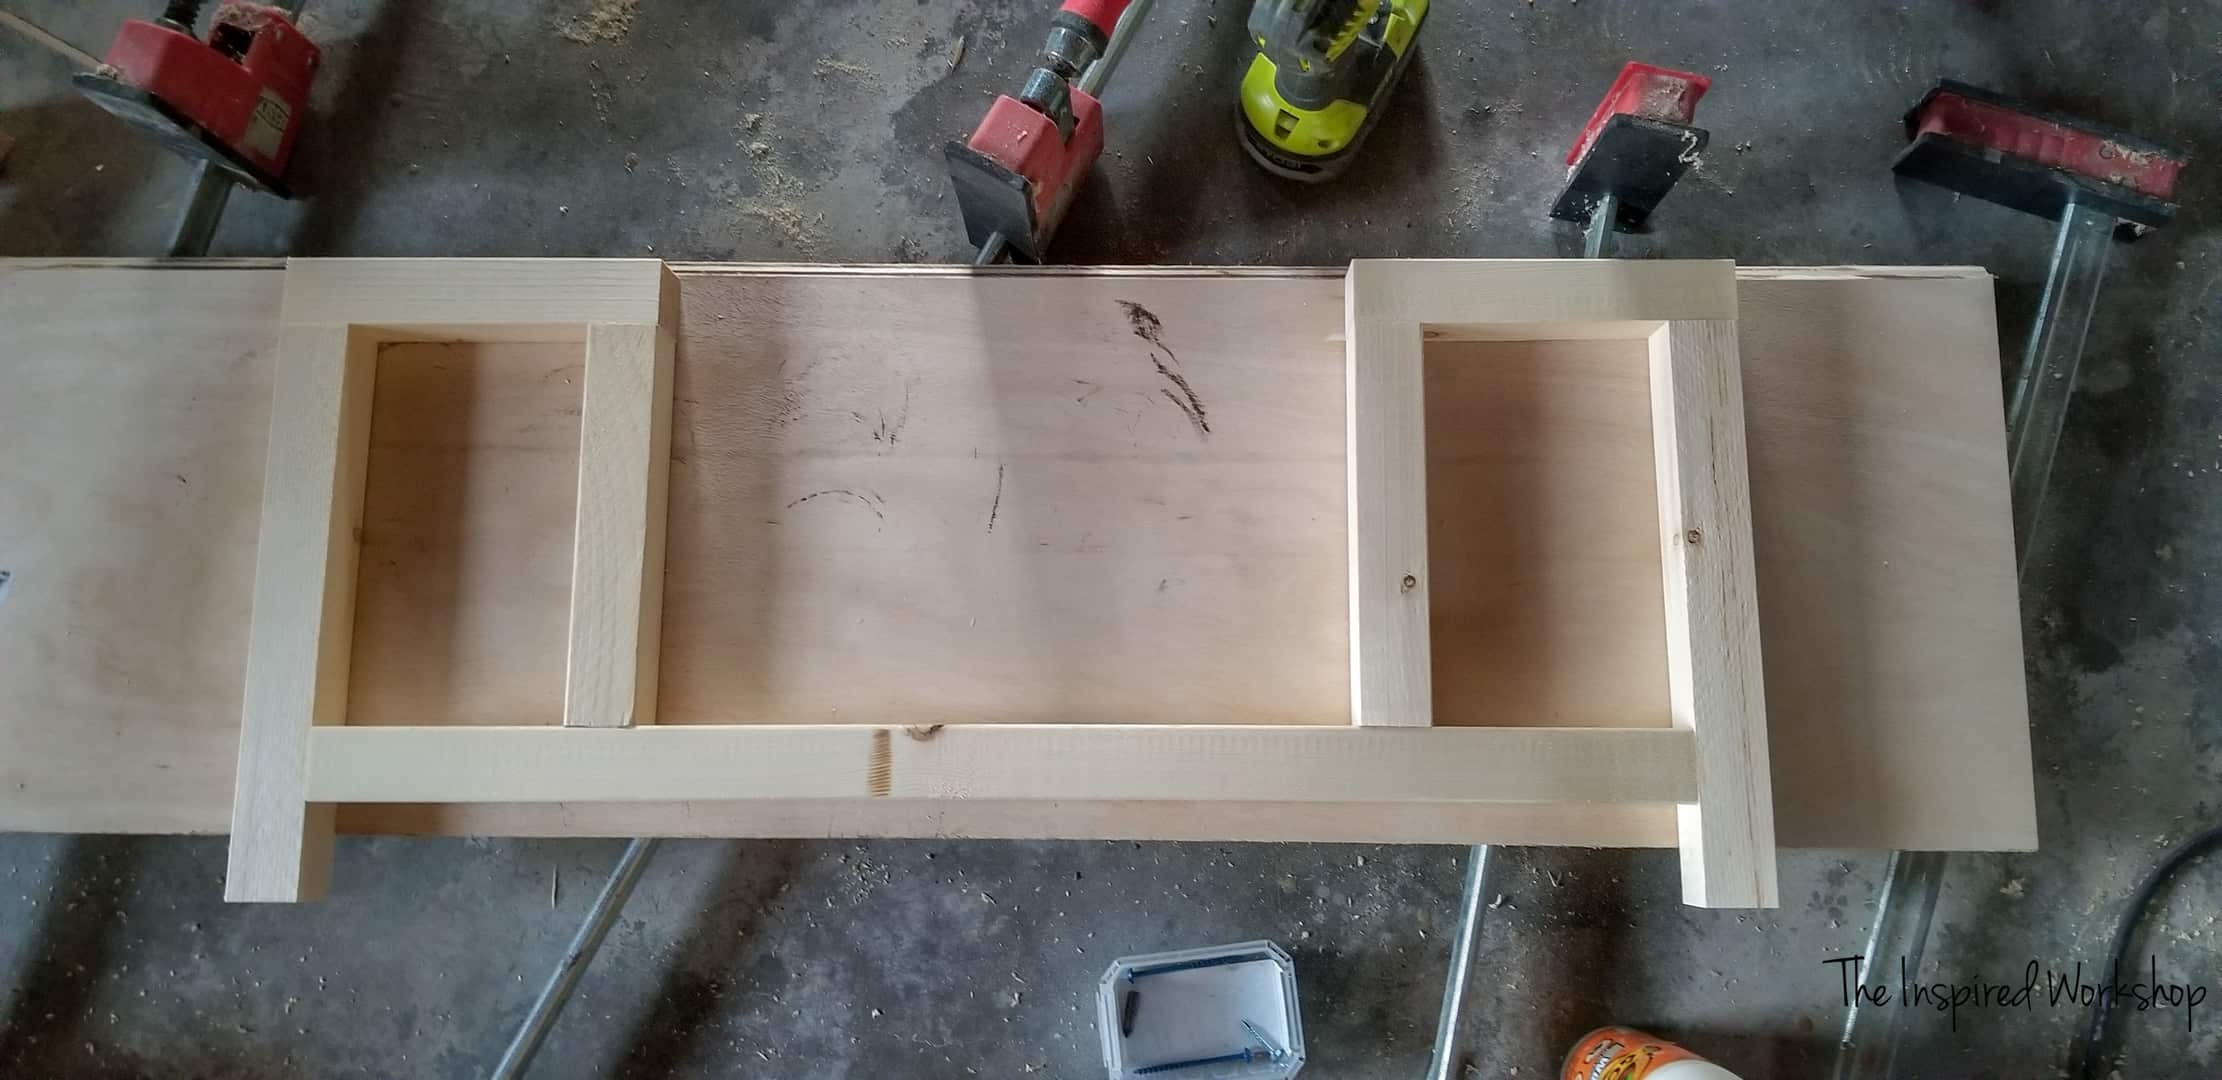
The bottom board is placed at 2″ up on the legs here as well!
Now you just need to connect the front to the back! Using the 2×2 @ 22″ you will pocket hole them as well.
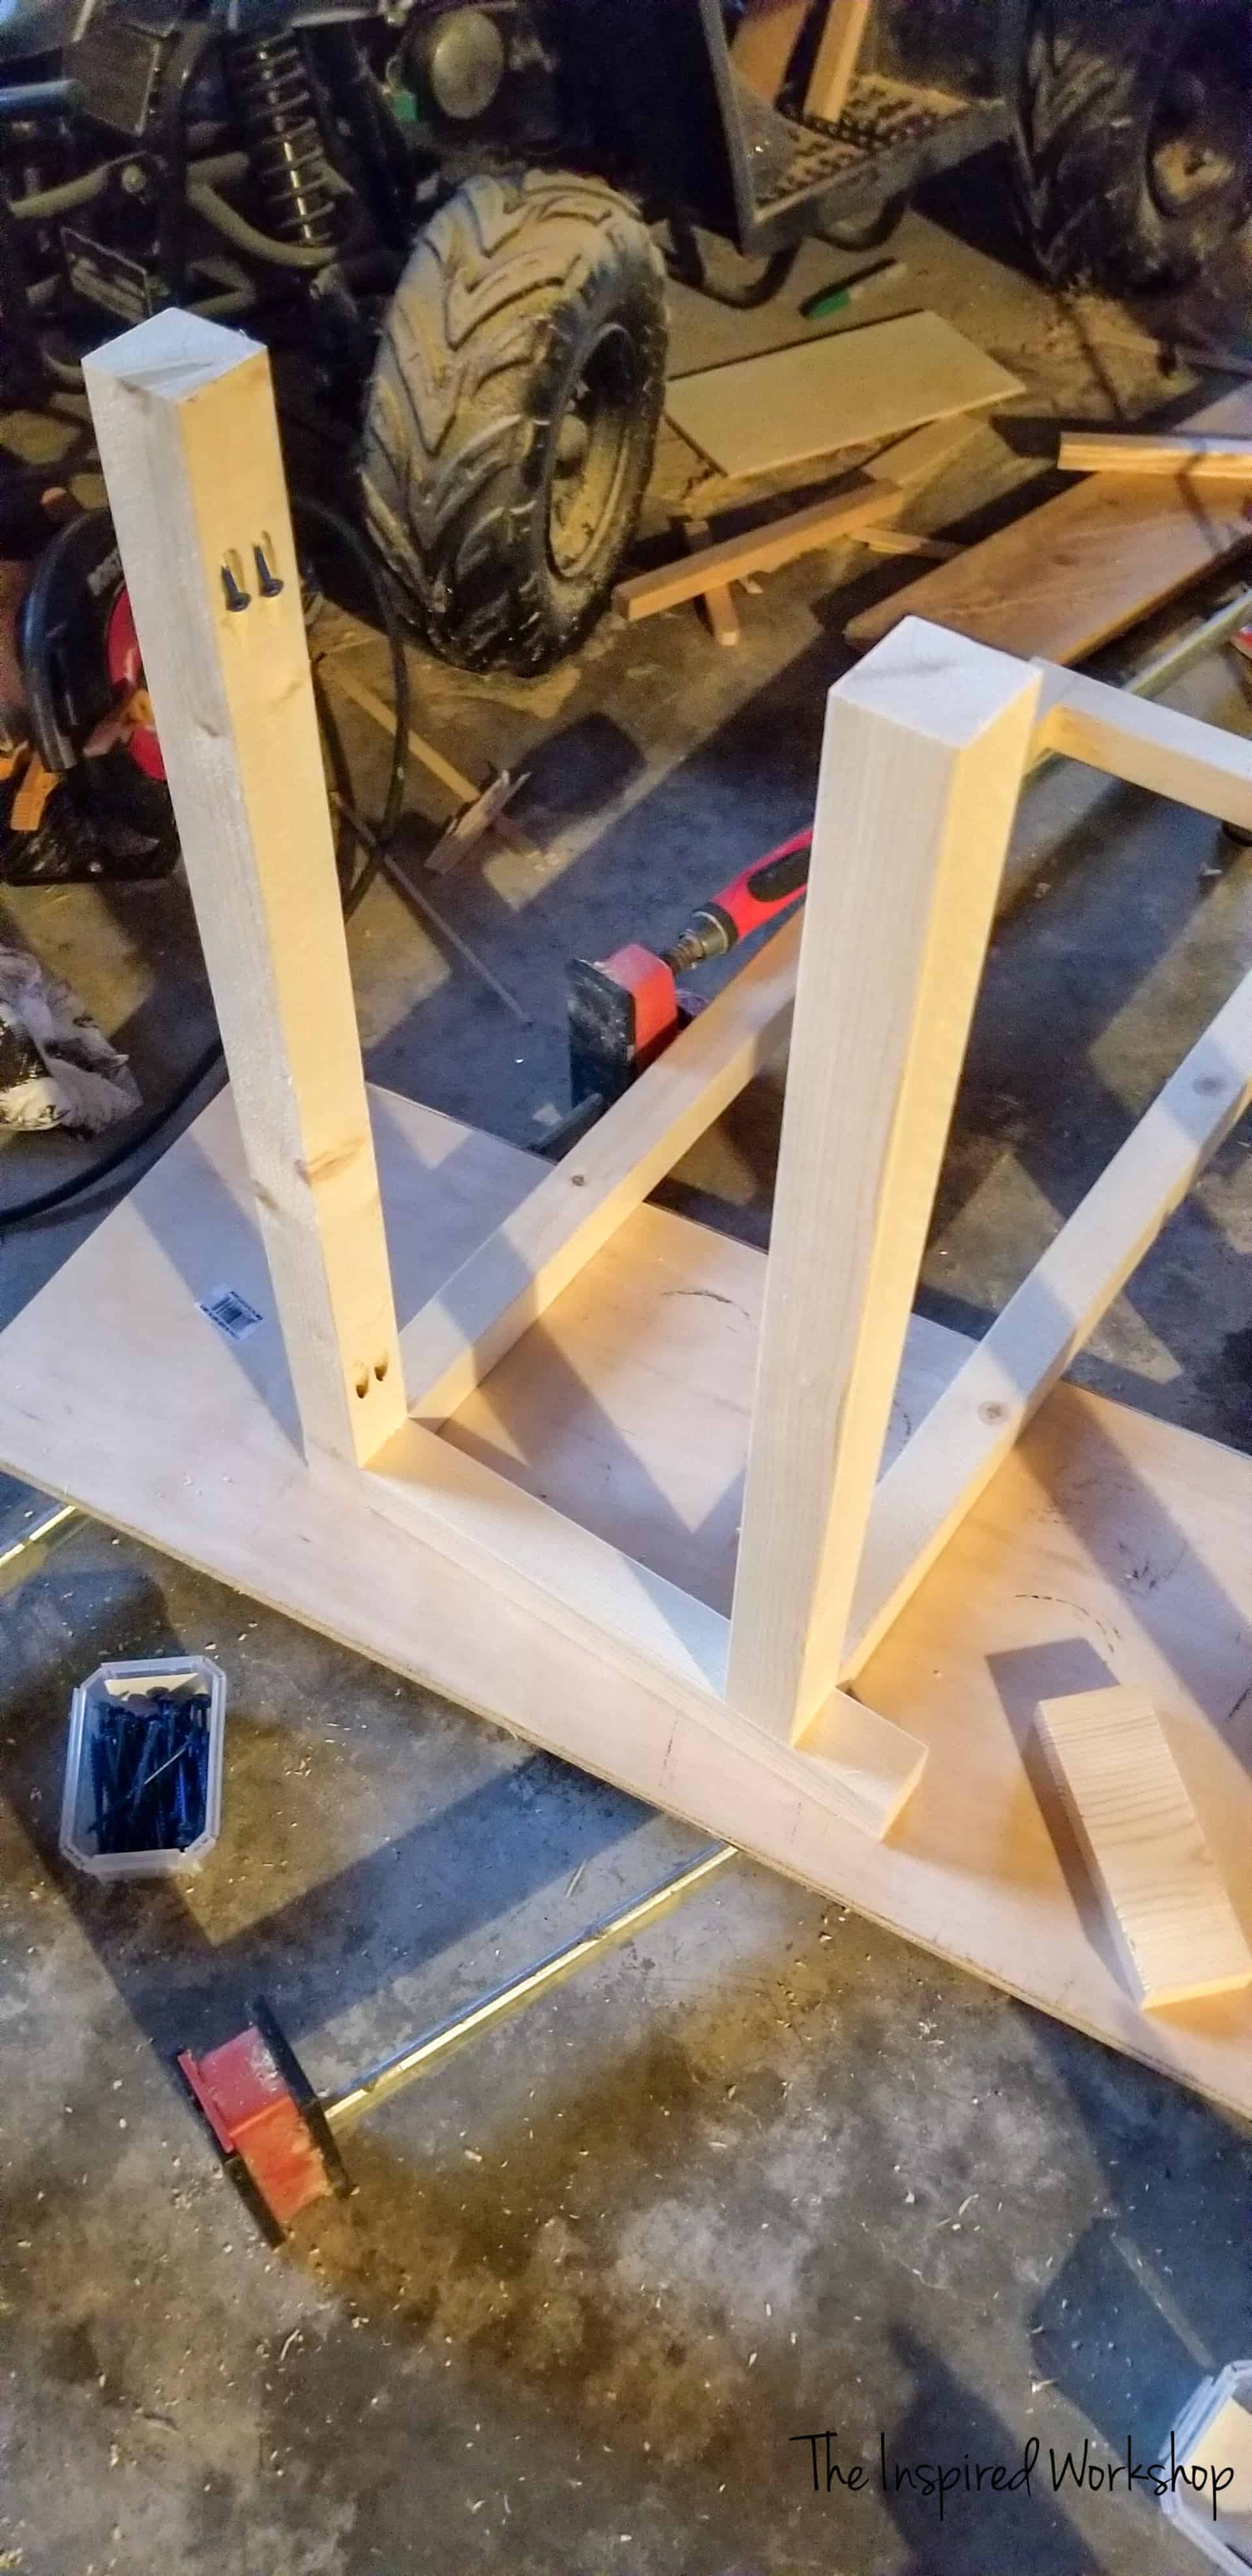
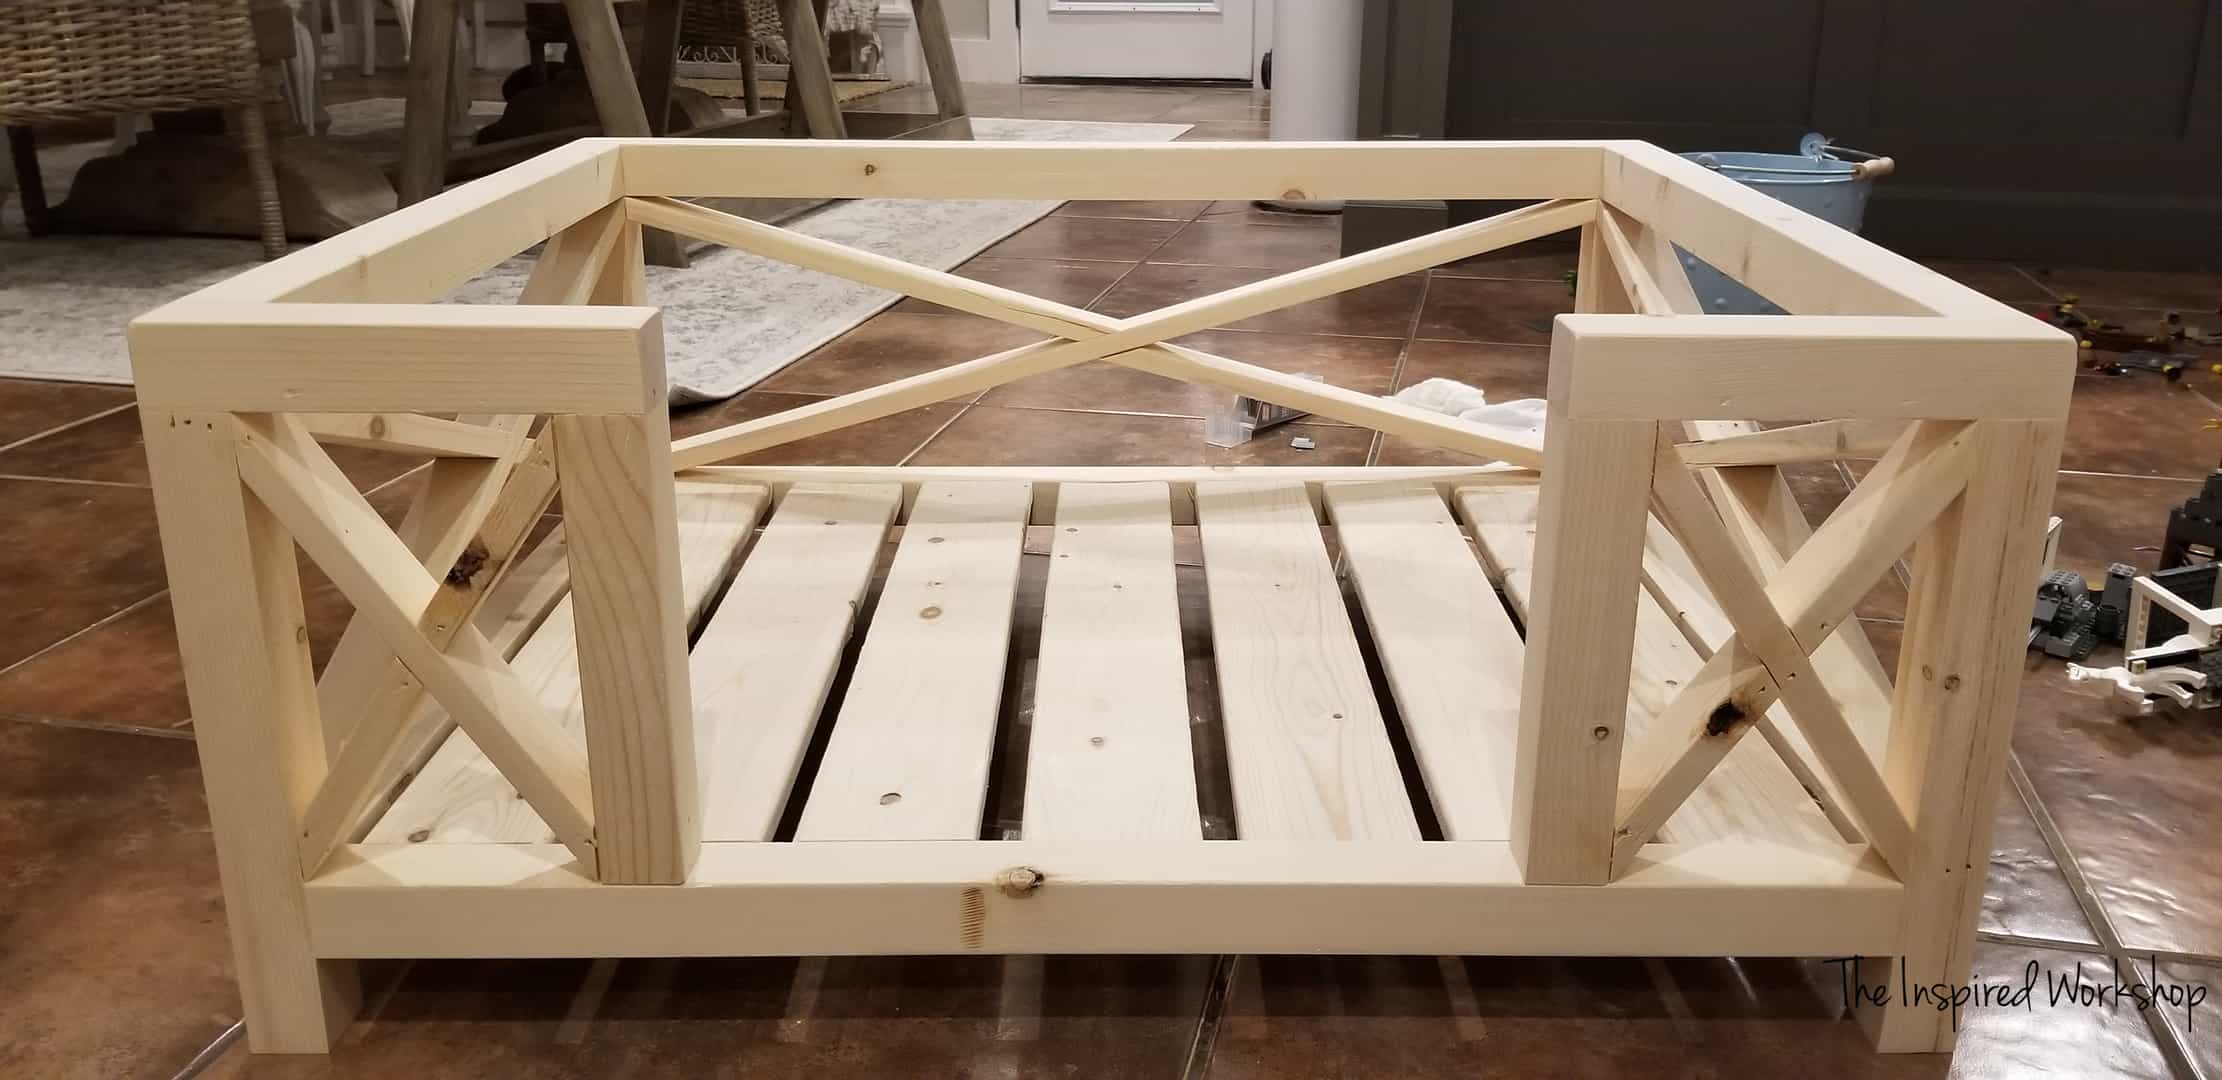
Once you have the frame all put together, add the supports to the bed! Now you will need to adjust your Kreg Jig to 5/8″ and your drill bit to 5/8″ and change your screws to 1″. Furring strips are not as thick as regular 1x4s so that is why I am having you set the Kreg at 5/8″ If you are using actual 1x4s, you will set it at 3/4″!
I used a board clamped across the top to keep my boards from raising up too high. It didn’t work the greatest, I mean, none of them went too high, but some of them were lower! Lol! Lucky me, this is for the best client who NEVER complains…my dog! 🙂
I spaced the boards out on the Sketchup where the first boards on each side are only 1/4″ spaced and the rest are 1/2″ spaced, but they all can be 1/2″ spaced!
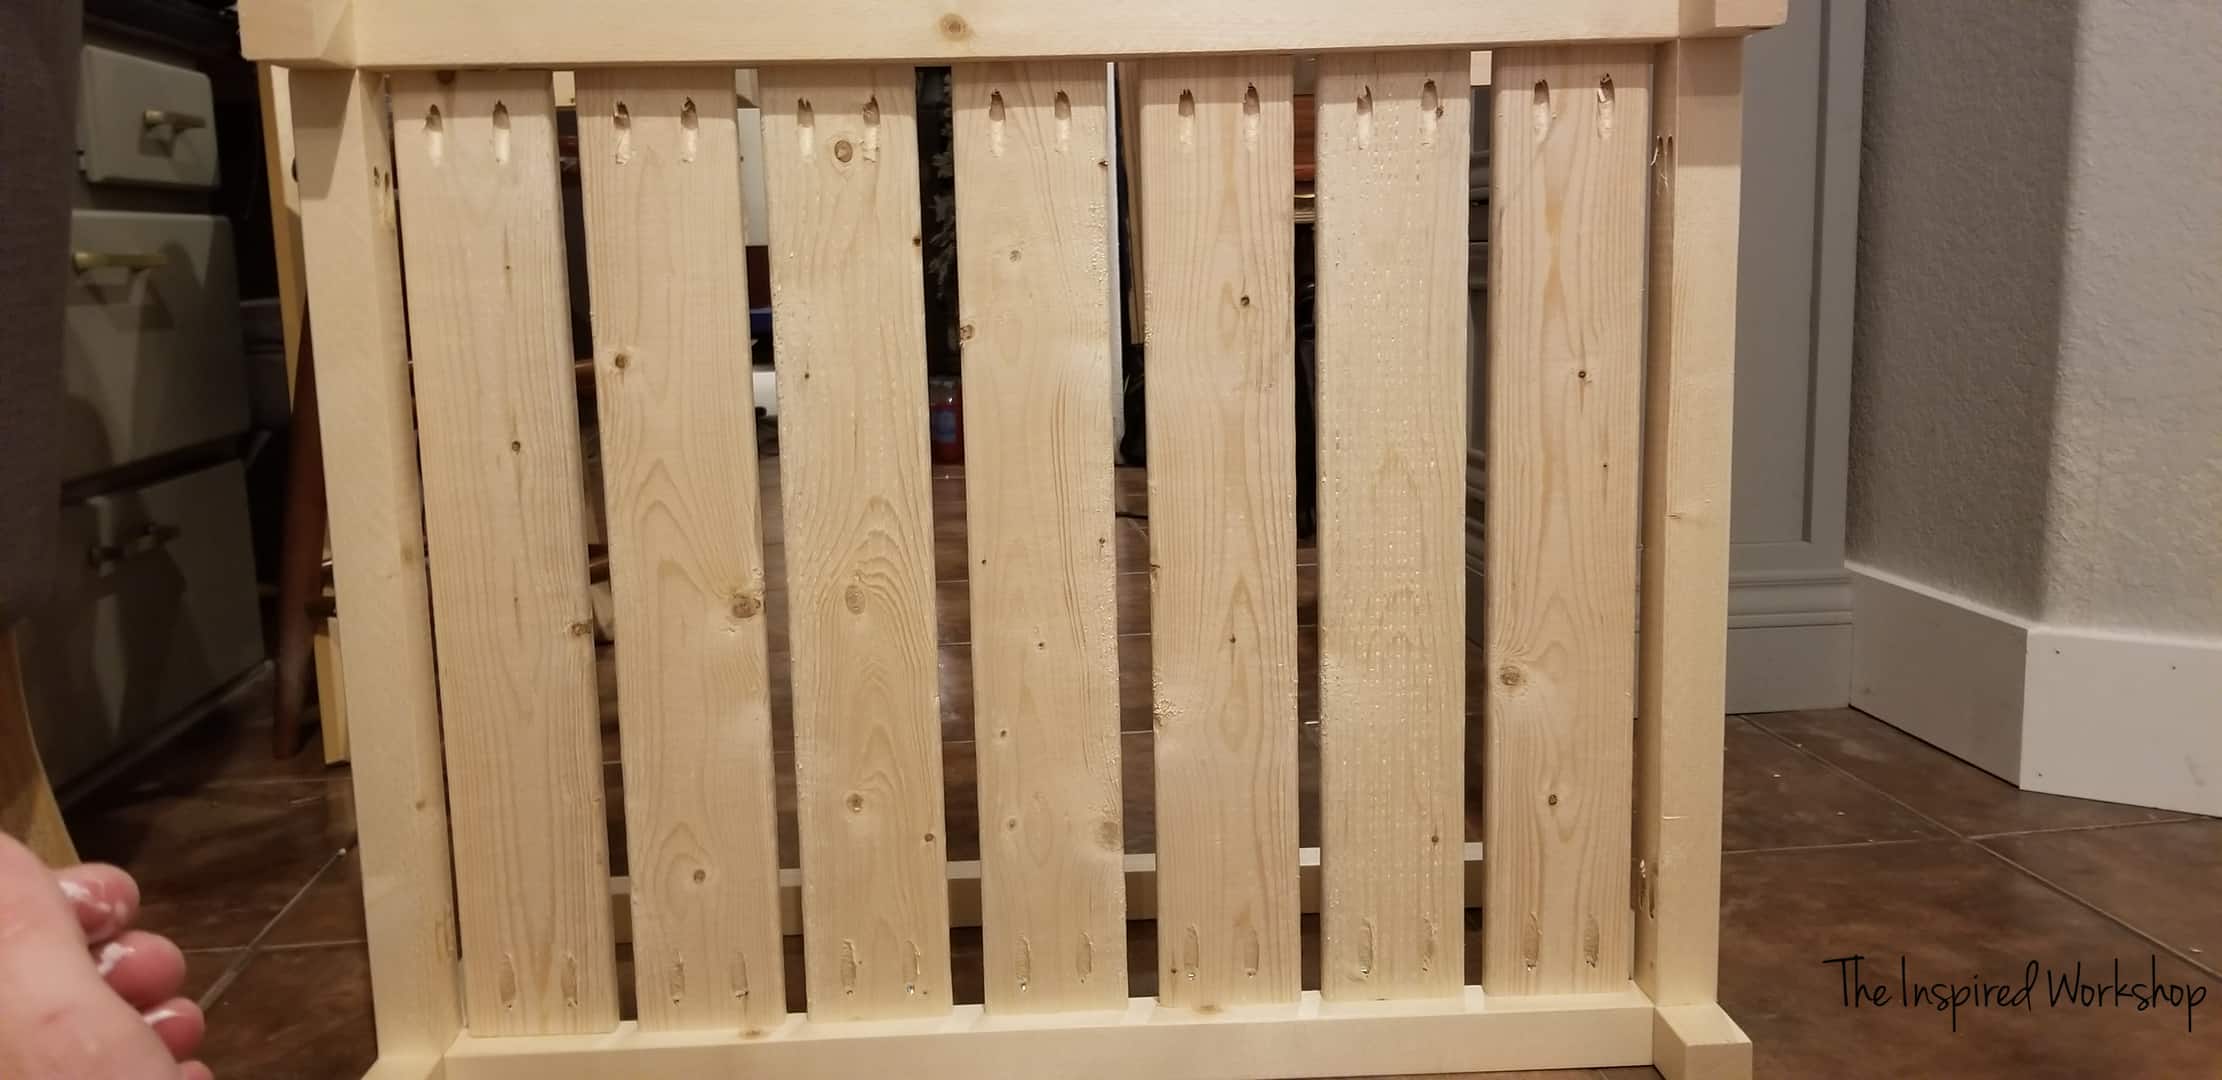
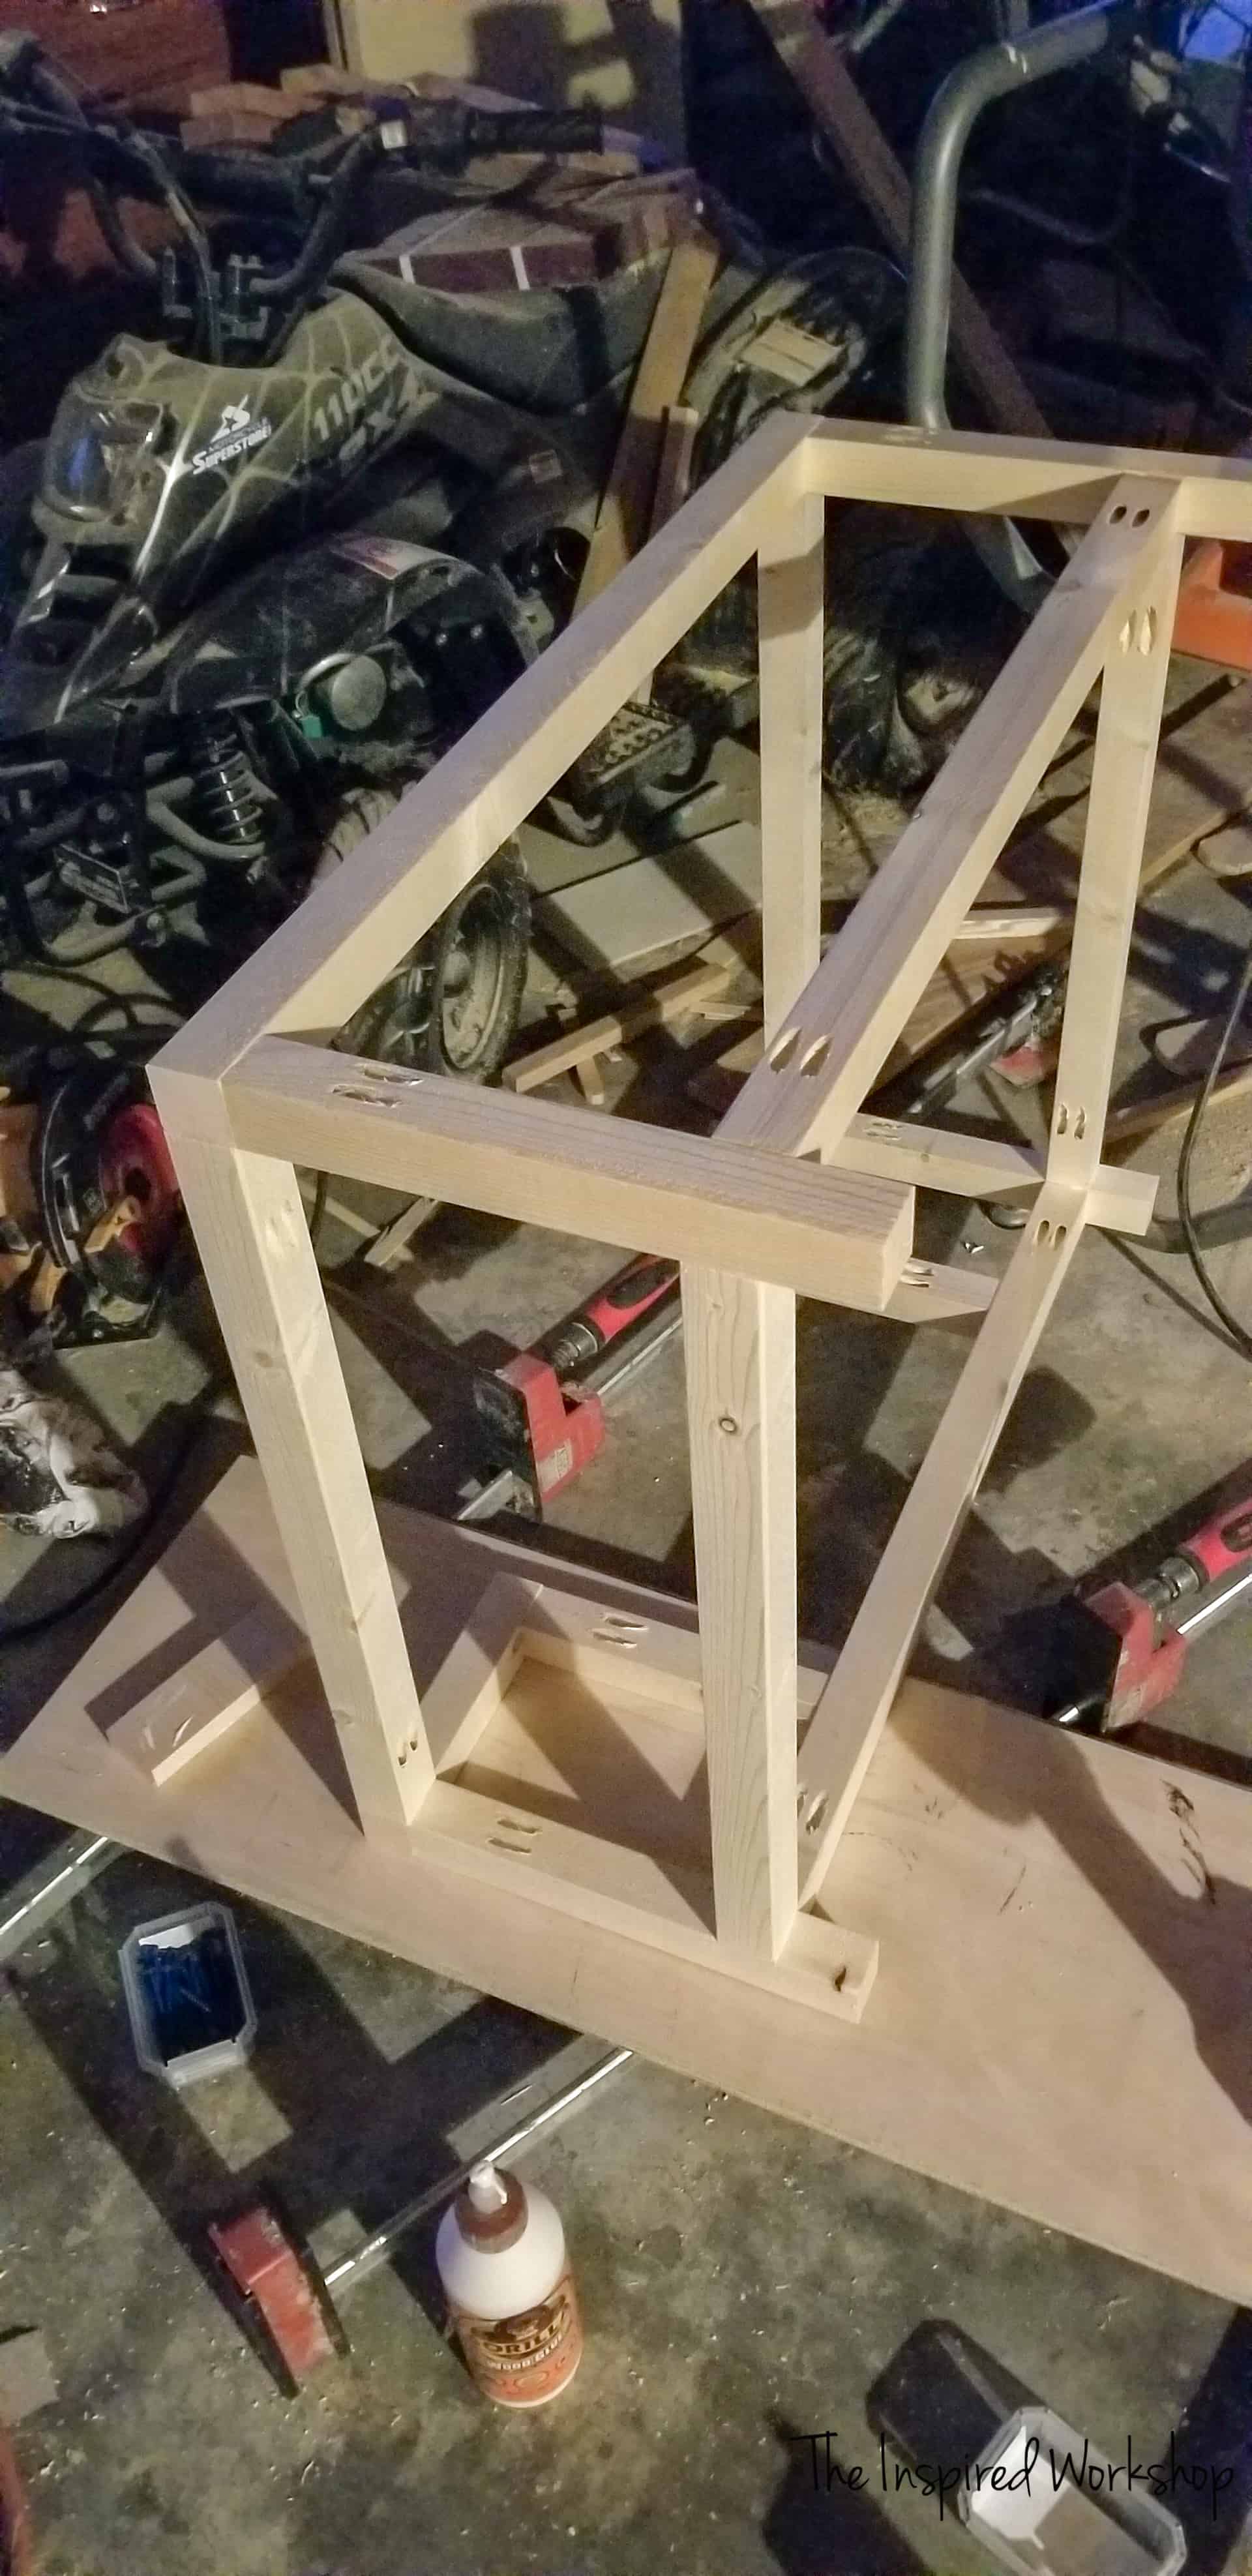
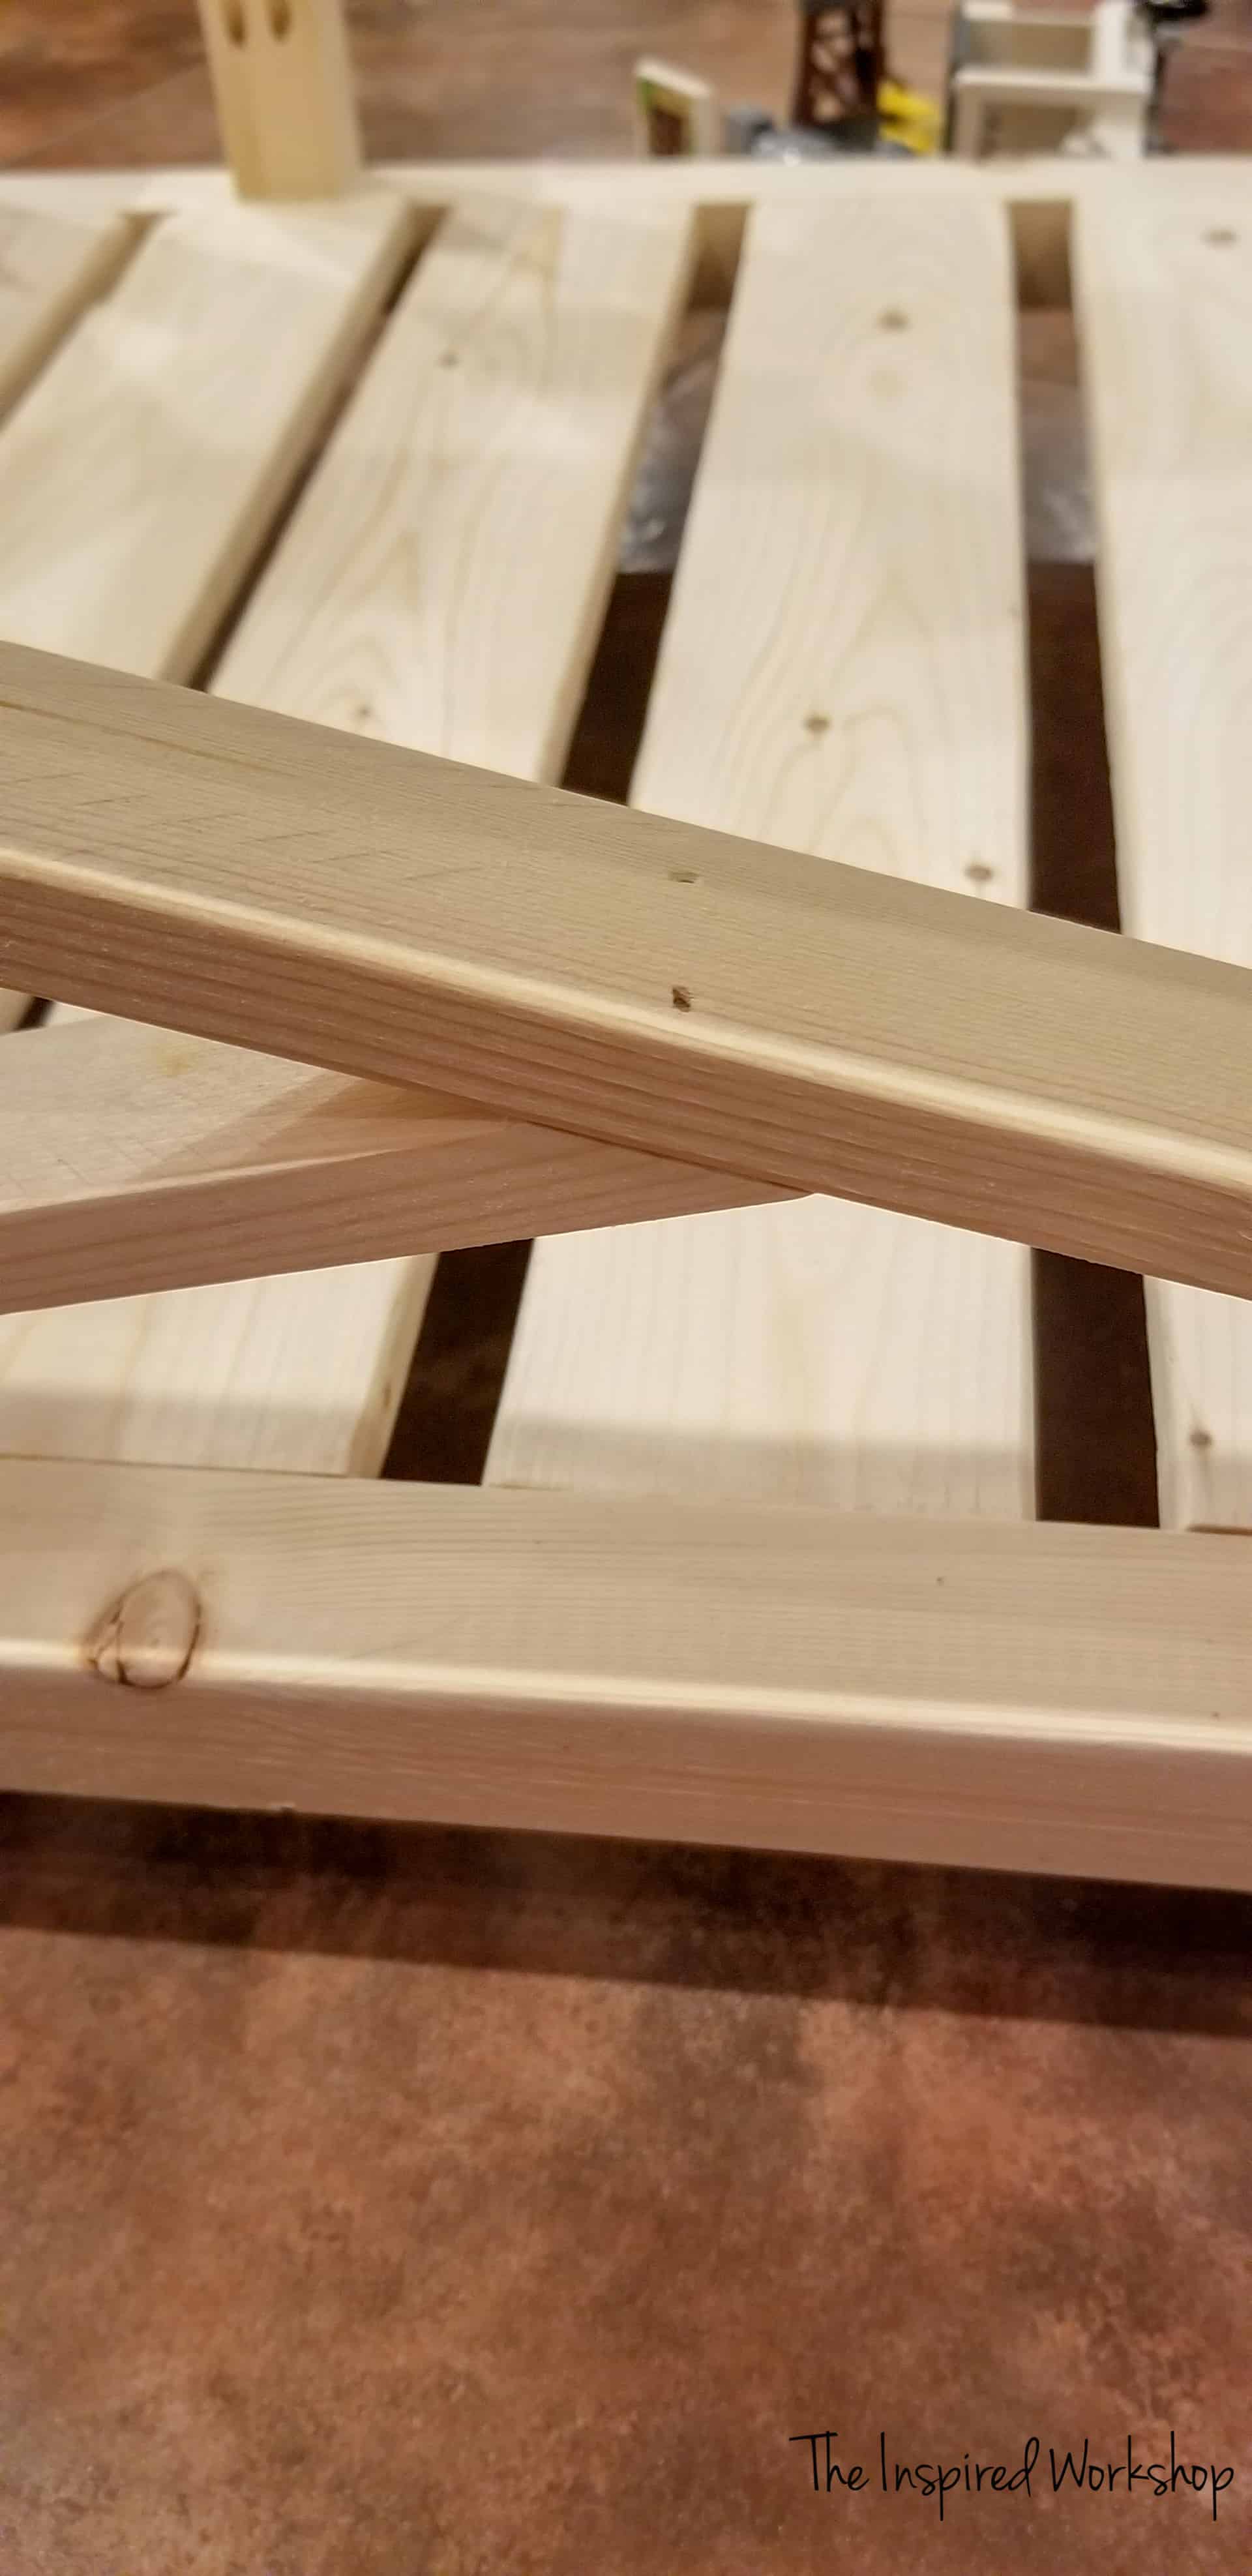
Dun dun dun…now come the angles and miters and X’s oh my! I started with the back of course…I placed the long piece first, and using glue and brad nails, I attached it. I used 2″ brad nails for the ends that went into a 2×2, but where the X met in the middle I used 3/4″. I needed maybe 7/8″ which I didn’t have on hand because some of the 3/4″ didn’t quite make it through.
After the solid piece was in, it was time for the split pieces! You can get all fancy and cut them with a half lap joint, but this is for my dog and I’ll be lucky if he hasn’t chewed it all to bits in a few days! So easy, non-fancy brad nails it was for me! Lol!
The above photo is a little blurry, but it is just showing how I brad nailed through the outside of the 2×2 to hold the corner ones in place.
Then you just slowly make your way around the dog bed the same way! Then it looks like this! (If you need more in-depth help on the angles and such, make sure and download the free plans!)

Wood fill if you want! Then stain that baby! I used my favorite stain right now, Old Barn Milk Paint Stain in Weathered! I LOVE this stuff! It’s non-toxic and the color is fabulous! It is more expensive than other stains but I say it’s worth it! Just know I am not an affiliate of any kind of hers at all and make NO money off of the above link!
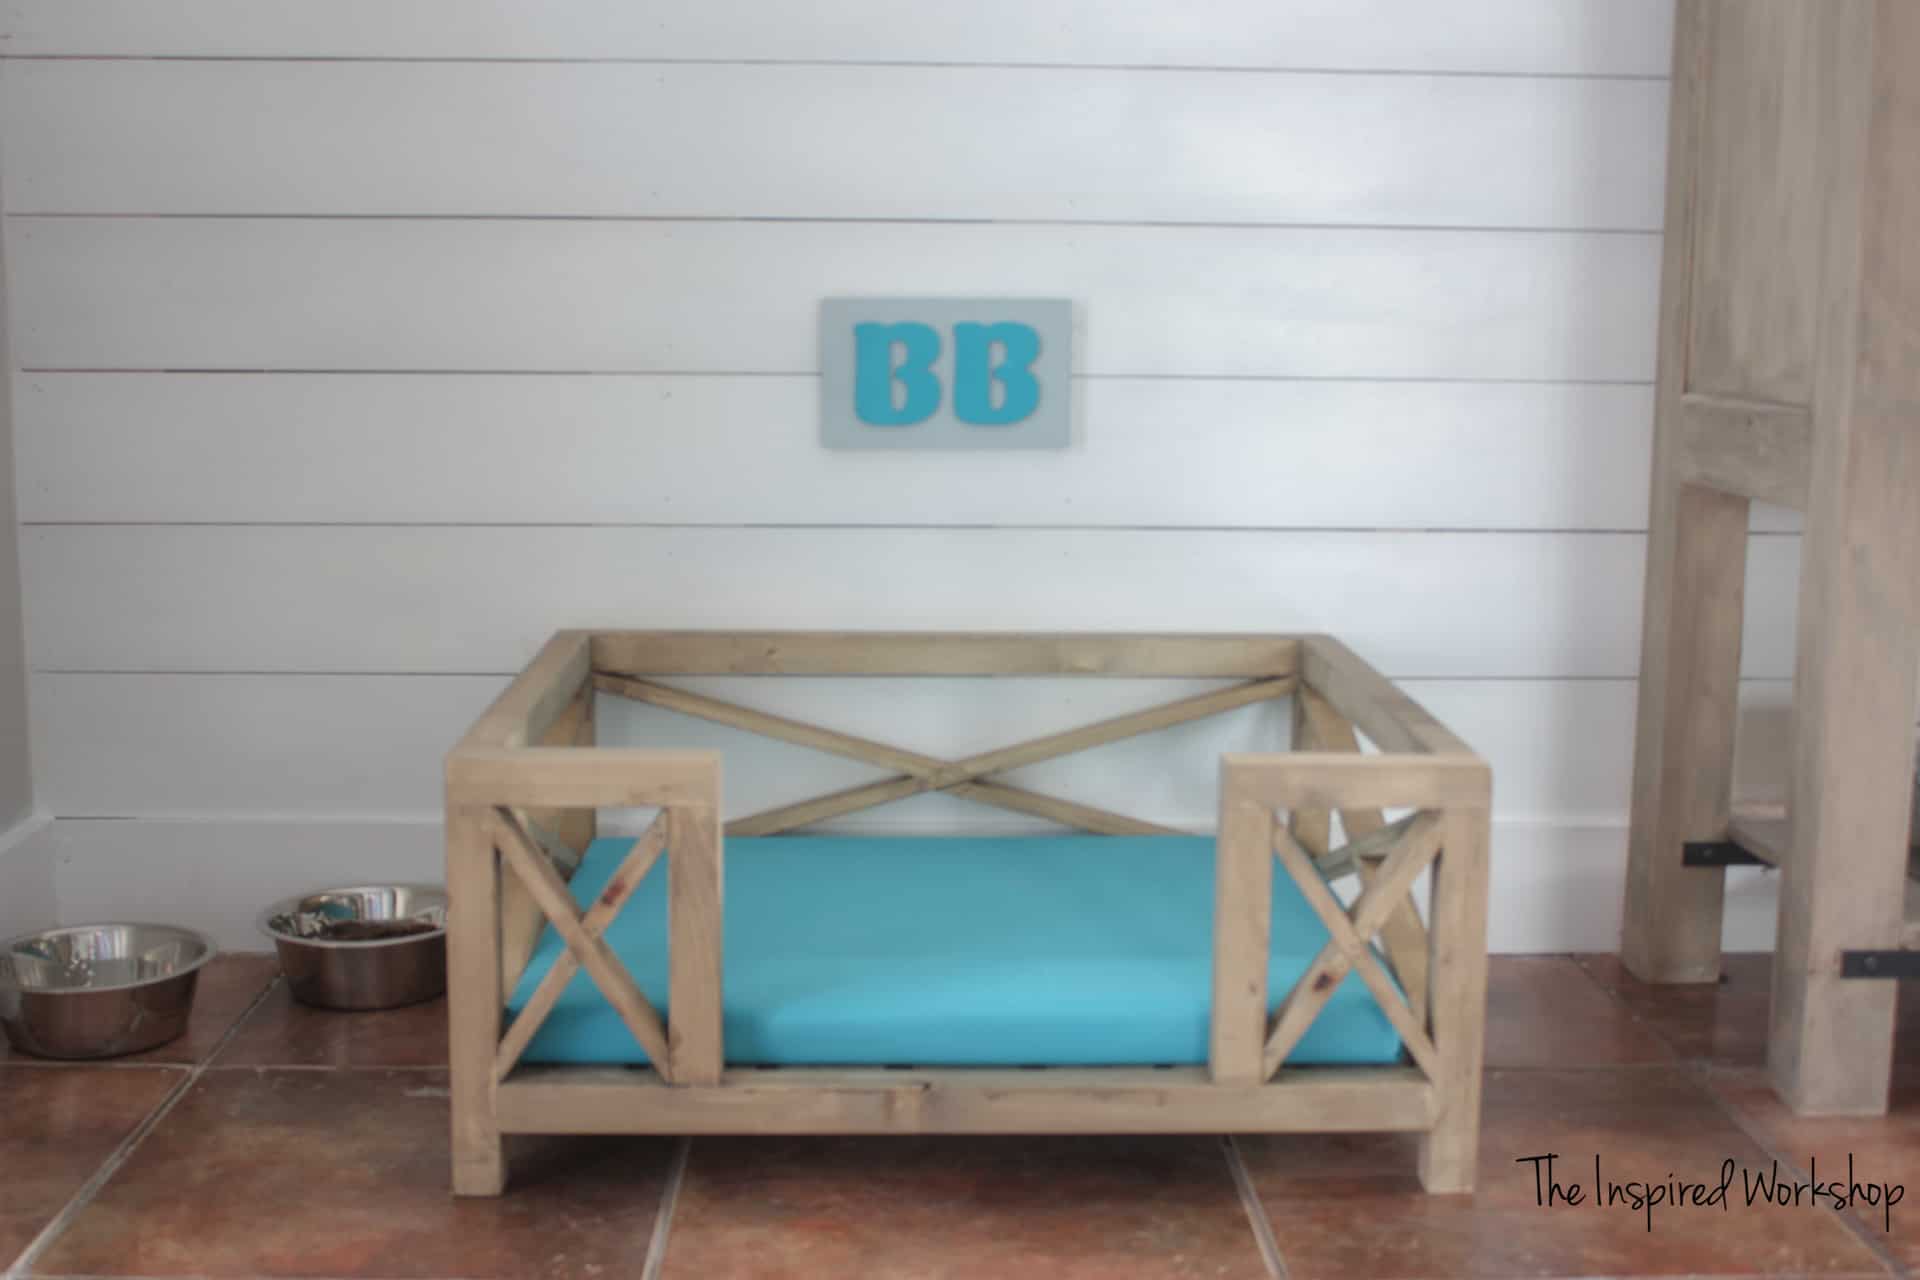
Now for that fancy cushion, I know you have been dying the see how I made that beauty! 😜 Okay, so it was super cheap and easy but I am so glad I only spent 20 bucks on it and not 60 like I almost did! Lol!
Making the cushion for the DIY dog bed
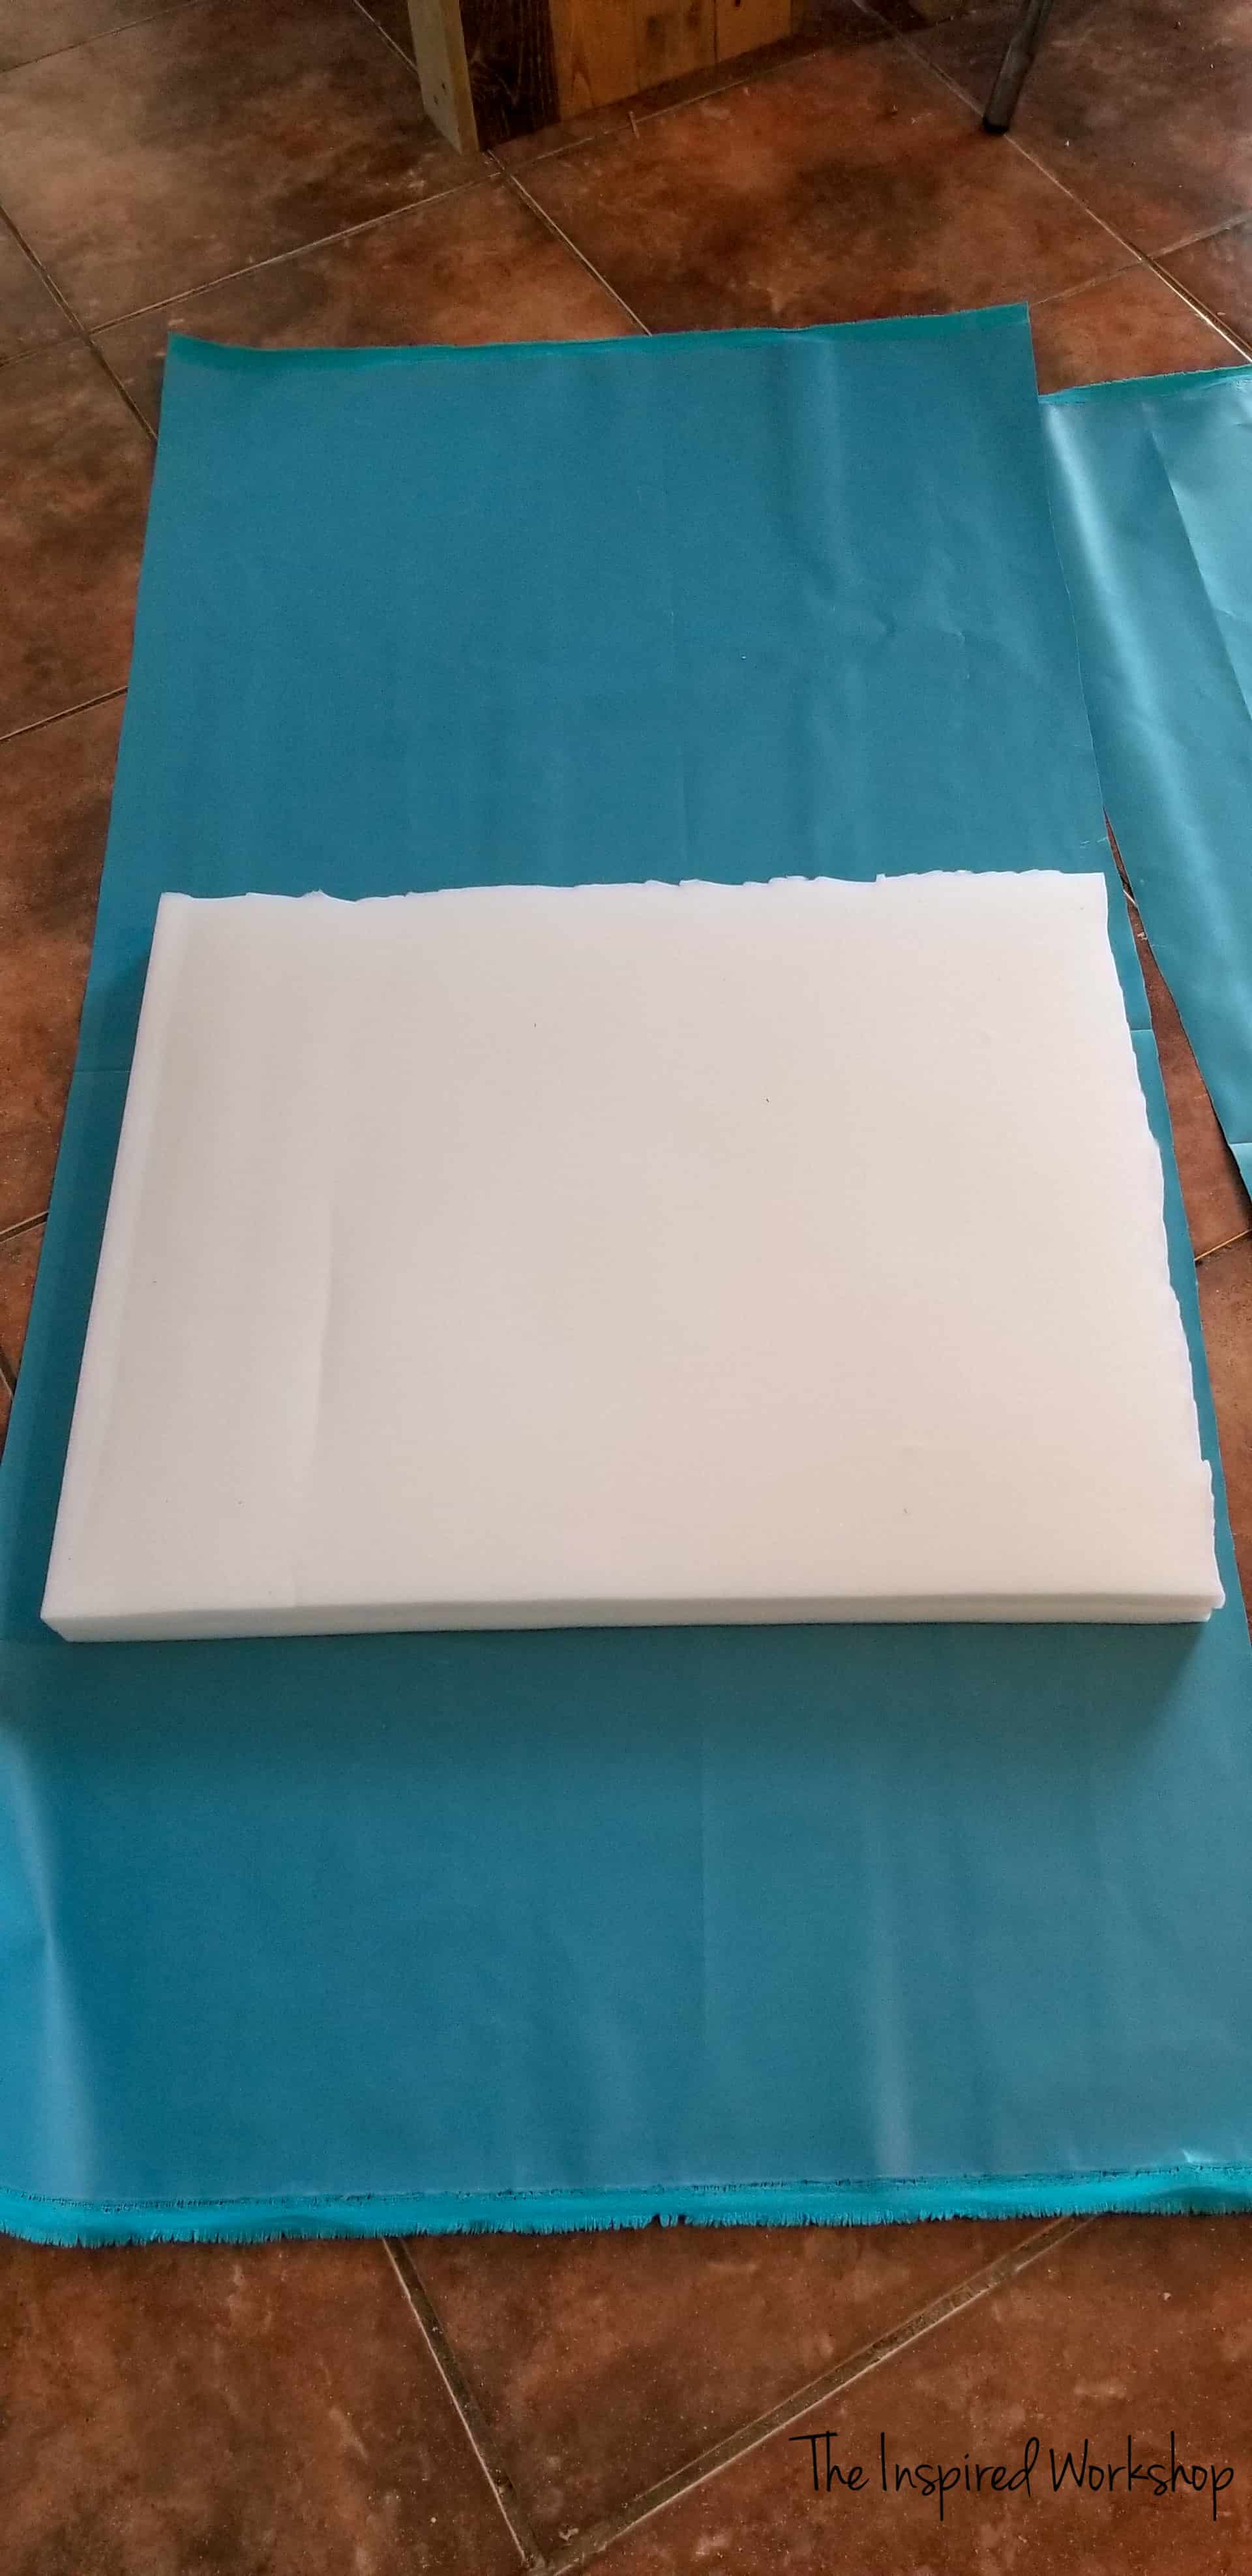
I bought this roll of upholstery foam at Walmart and cut it down to 28″ x 22″. I then found this amazing outdoor fabric at Walmart as well! I am telling you I want to cover EVERYTHING in this! Super duper cheap and WATERPROOF…but feels like fabric on the one side, totally plastic on the other! It seems super durable and if it doesn’t fade, I may cover my house in it…okay, that may be going a little far…but it’s really good stuff!😄
I literally just cut the fabric a little larger than my foam, rolled it up and hot glued it, I glued the ends as if it were a Christmas present! The fabric is so thick, that you can’t even tell there are jagged edges where I cut the foam! Reason number 232 why I love this fabric so much! Lol!
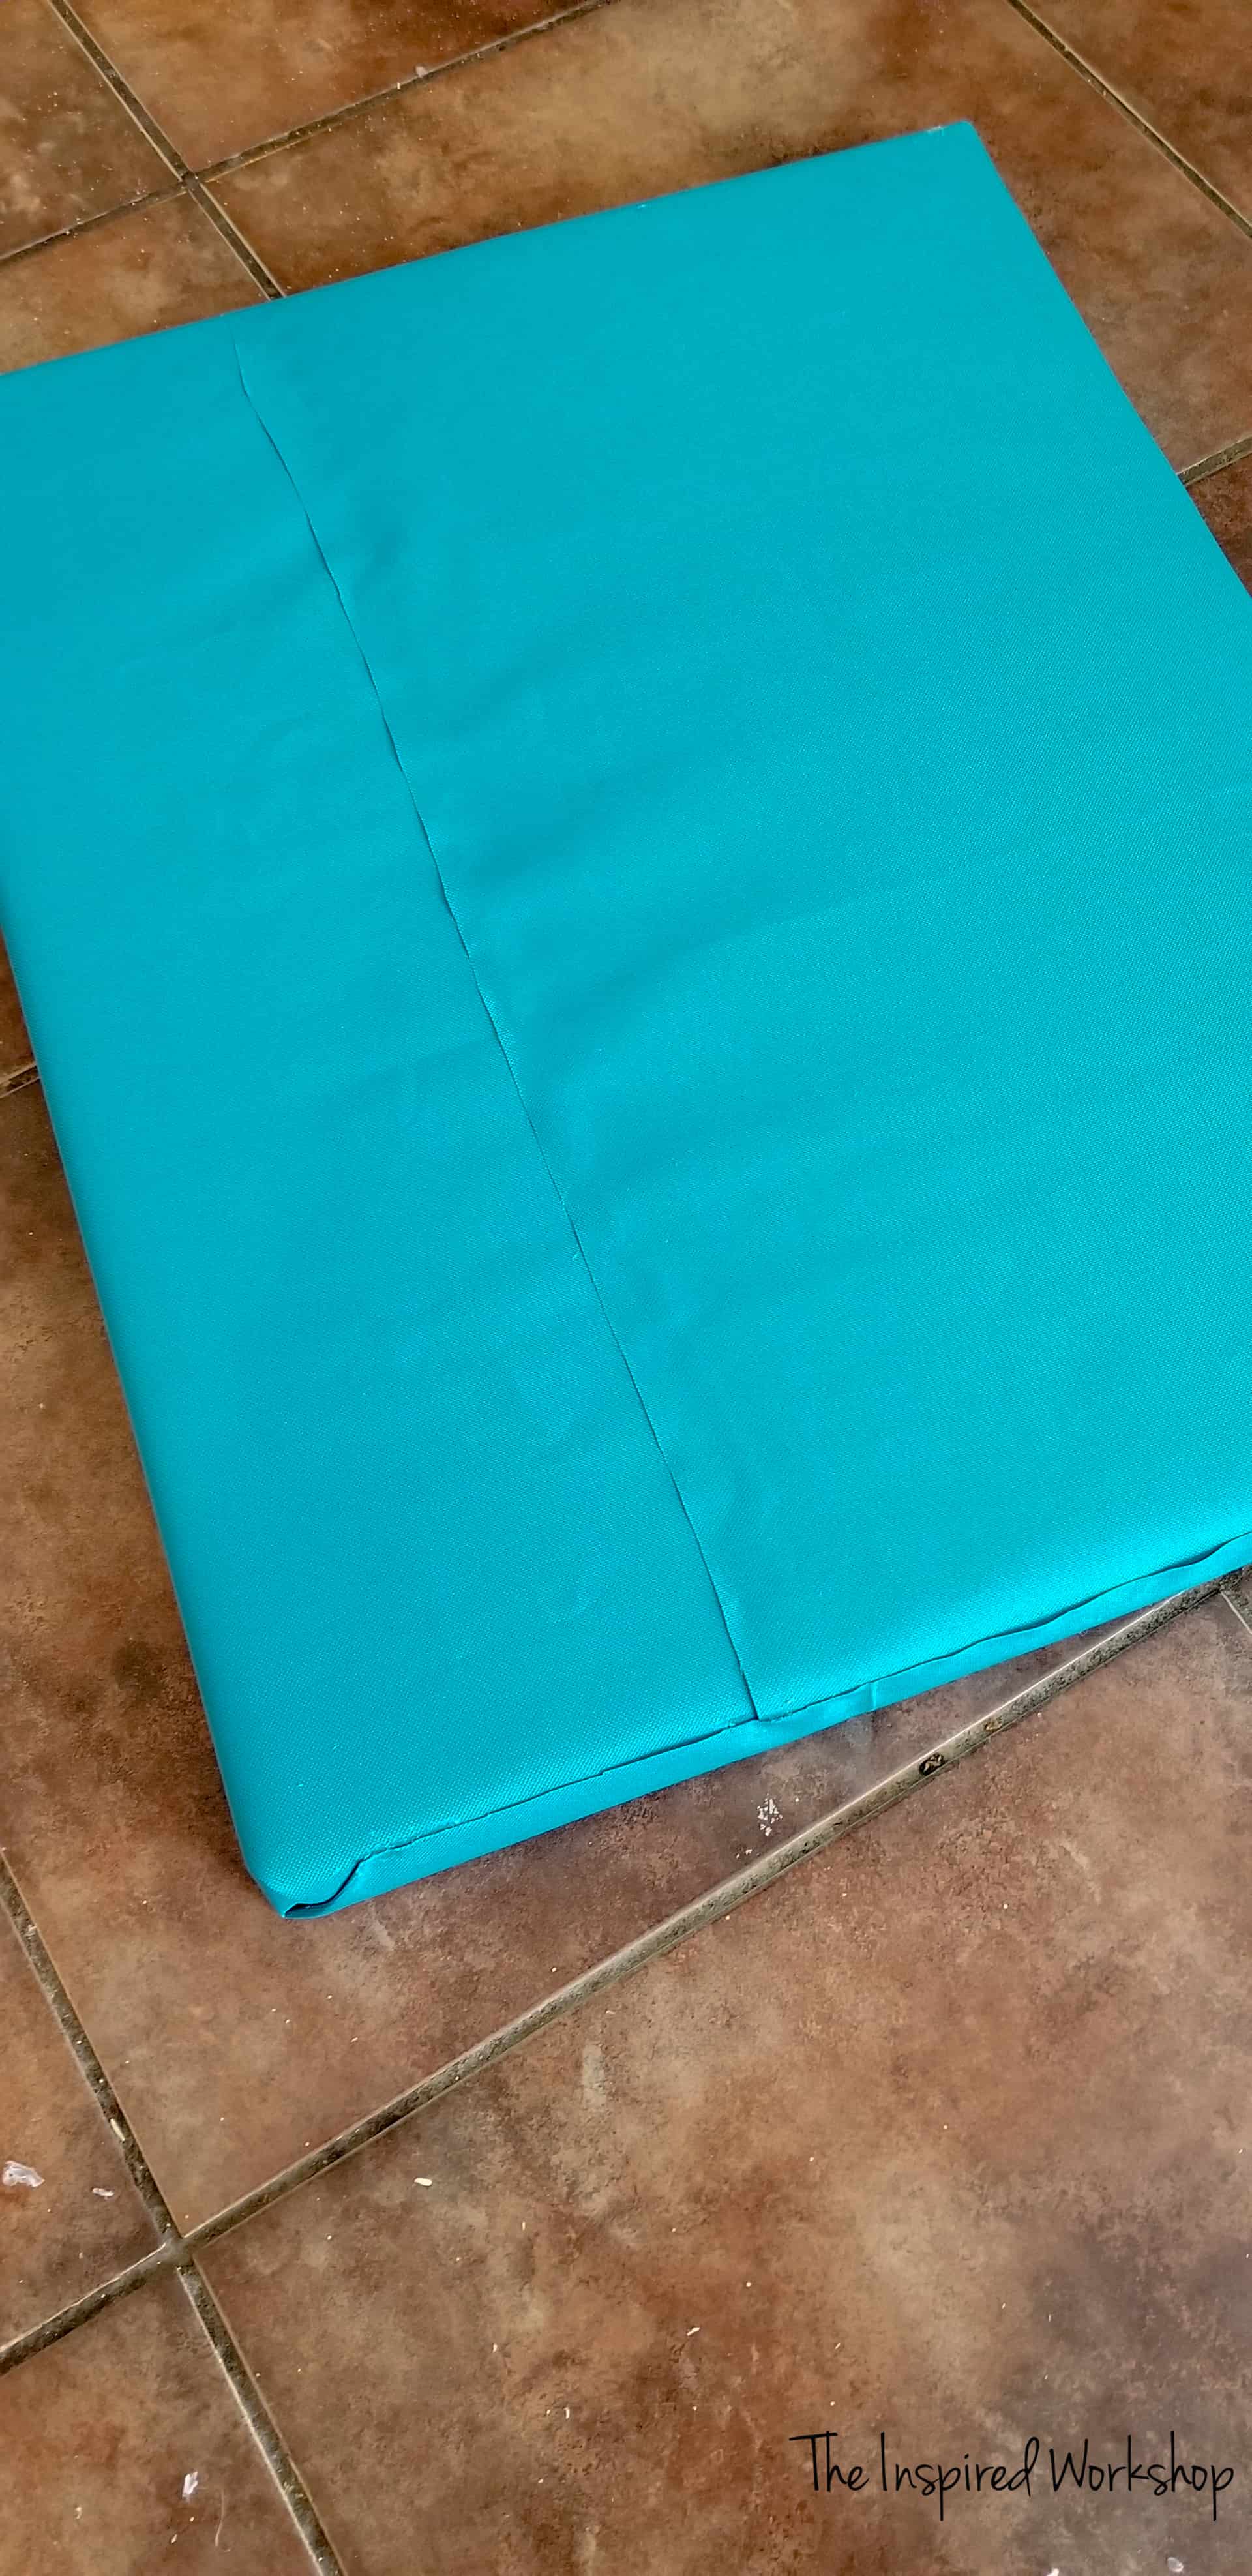
Haha! See how easy that was…and no one will ever know!😉 Don’t mind all the wood chips on my floor…and paint splatter from, well I don’t even remember! LOL!
And DONE!
I hope you enjoyed this tutorial and I would LOVE for you to email me a picture if you build one!

Want to save this DIY Dog Bed for later? Pin it!

i just love this its amazing