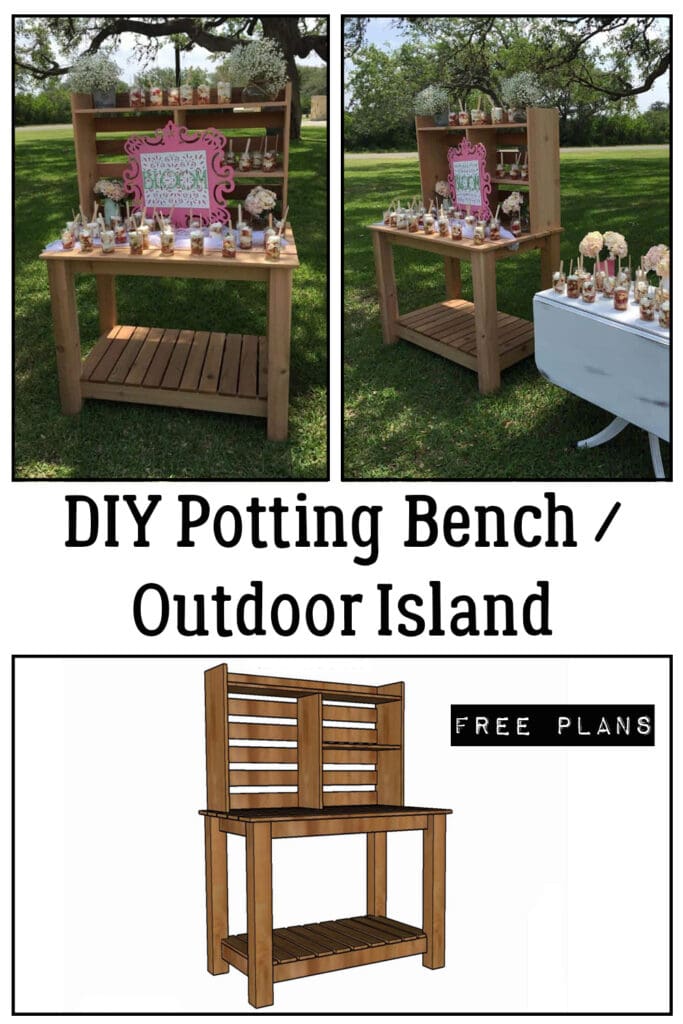
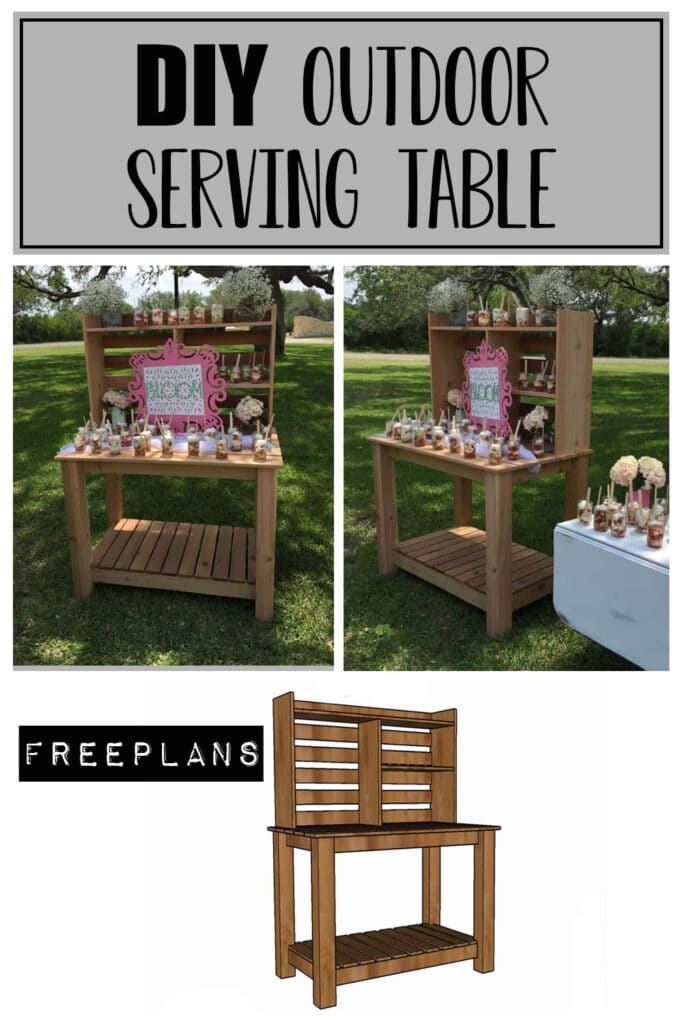
DIY Potting Bench or Outdoor Island
Outdoor table space and shelving are essential when trying to pot plants or serve a nice outdoor meal. This DIY potting bench that can also be used as an outdoor island is the perfect piece to have on the back porch or out near the garden! Build one to complete your outdoor space with these free plans!

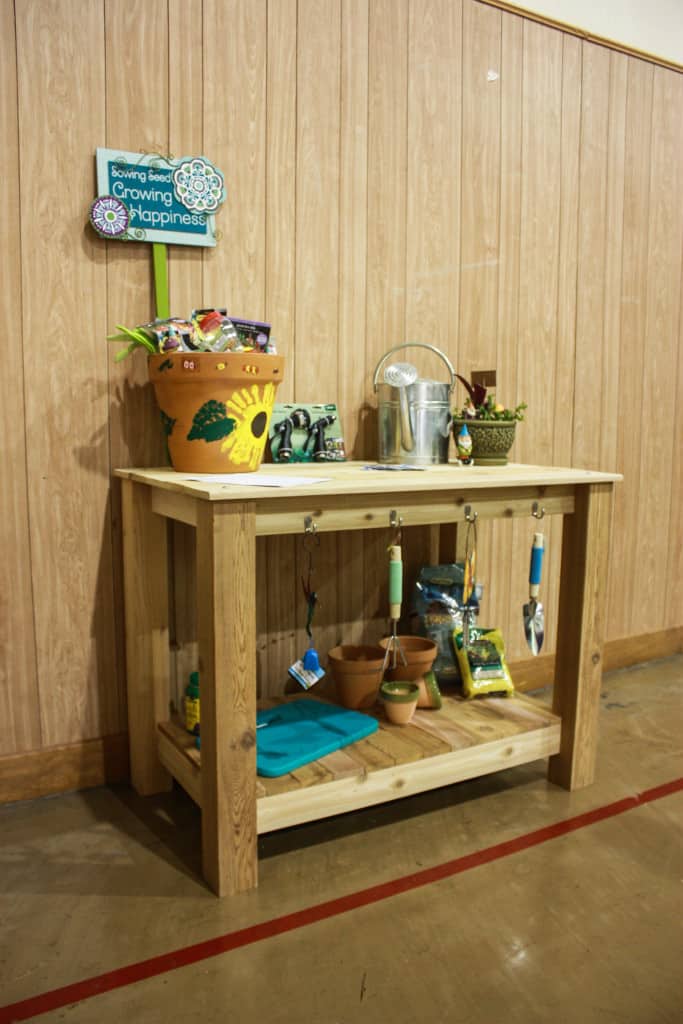
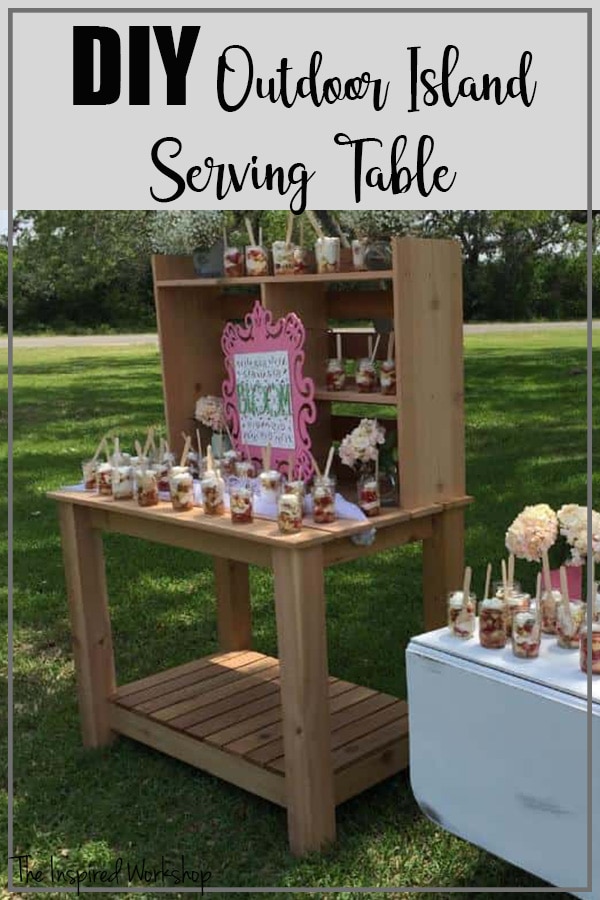
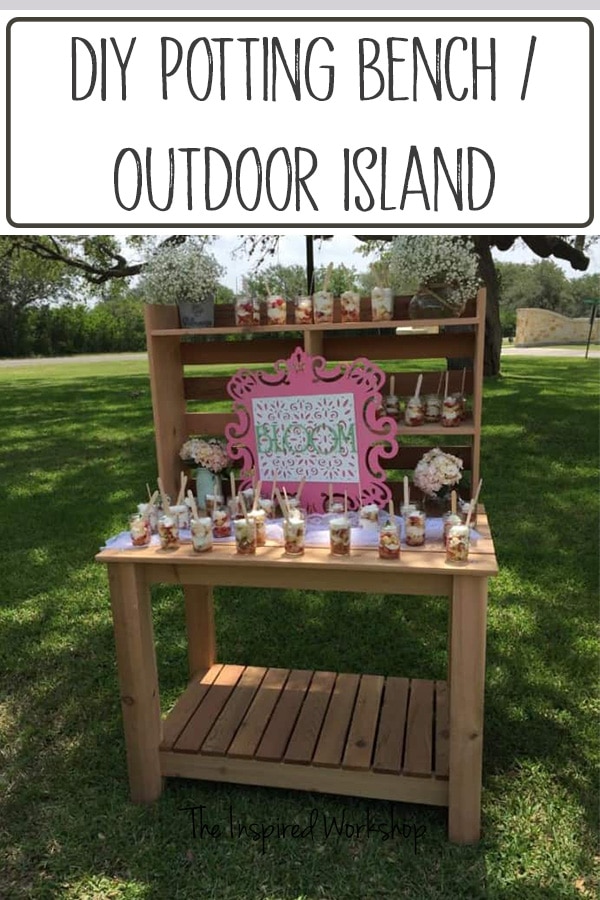
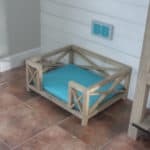
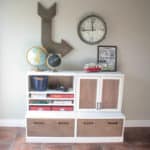
Photo courtesy of Shelley Green…thanks for the picture of the outdoor island looking so marvelous!😍
This last week I spent bustin’ my booty in the garage to get this beautiful outdoor island and hutch built! It is a potting bench or outdoor island depending on how you want to use it! A friend of mine asked me if I could build it for her in time for an event…I said yes, but as usual, I was pushing the deadline!! Lol!!!
Doesn’t it just look so adorable!! She did such an amazing job on this event, and on making my build look so lovely!! 😉 I also built this same table part as a potting bench for a school auction we had recently! This design can be used in multiple ways!
Pottery Barn wants a crazy $2200 if you buy the outdoor island (as they call it) and hutch together!! What in the world?! Yeah, that’s what I said!! They did have cute wheels on theirs which you could easily add to yours…but it does add to the cost!
This piece is incredibly versatile and can be used in so many ways! I want to build myself one to use in the garden as a potting bench or potting table but you can easily move it onto the back patio and use it as an outdoor island serving table! I NEED one! Lol!
If you are interested in other outdoor projects I have a few you may enjoy! This round concrete dining table, or x base concrete dining table with benches! What about a few outdoor planters to make you porch or patio perfect, want to get rid of some scrap wood by making these planters?
Gathering Supplies to Build the DIY Potting Bench
I built this potting bench from cedar wood and it only cost me $100 bucks for the potting bench/island and $60.00 for the hutch…if you wanted to use this somewhere inside you could make it out of pine for only $100 bucks for both the potting bench and hutch! You could even use pine outside if you painted it with outdoor paint to save a few bucks!! *Update: lumber costs recently went through the roof so unfortunately, these prices are not the current costs!😬
Anyway, let us get busy and start the building of this beautiful baby!! I will break down the material list and cut the list as to the island and hutch in case you are only interested in making one without the other!
Here is the link to the printable plans for the Potting Bench / Outdoor Island! *Note I messed up and the Sketch-up plans are missing the cut list! I missed that step…please forgive me, and refer to the post when cutting, it would take me hours to redo the plans to include it!!
Since the sketch-up plans are very basic at describing the way to go about assembling a piece, if you have questions, the post should answer most of them… and of course, always feel free to comment at the end of the post or email me questions from the contact page! I don’t bite…I promise!! Lol!!
Materials List for the Potting Bench:
**Note: Amazon links below are affiliate links! Affiliate links are links that pay me a small commission should you make a purchase after clicking one…at no extra cost to you! It helps me keep the content coming to you all and so every purchase made after clicking my links are greatly appreciated!
Outdoor Island (potting bench):
- 2 – 4x4x8
- 3 – 2x4x8
- 3 – 1x6x8
- 3 – 1x4x8
- drill
- Kreg Jig
- miter saw
- 2 1/2″ pocket hole screws
- 2″ pocket hole screws
- wood glue
- brad nailer or finishing nails and hammer
Shelves/Hutch:
- 2 – 1x12x8
- 3 – 1x4x8
- 1 1/4″ pocket hole screws
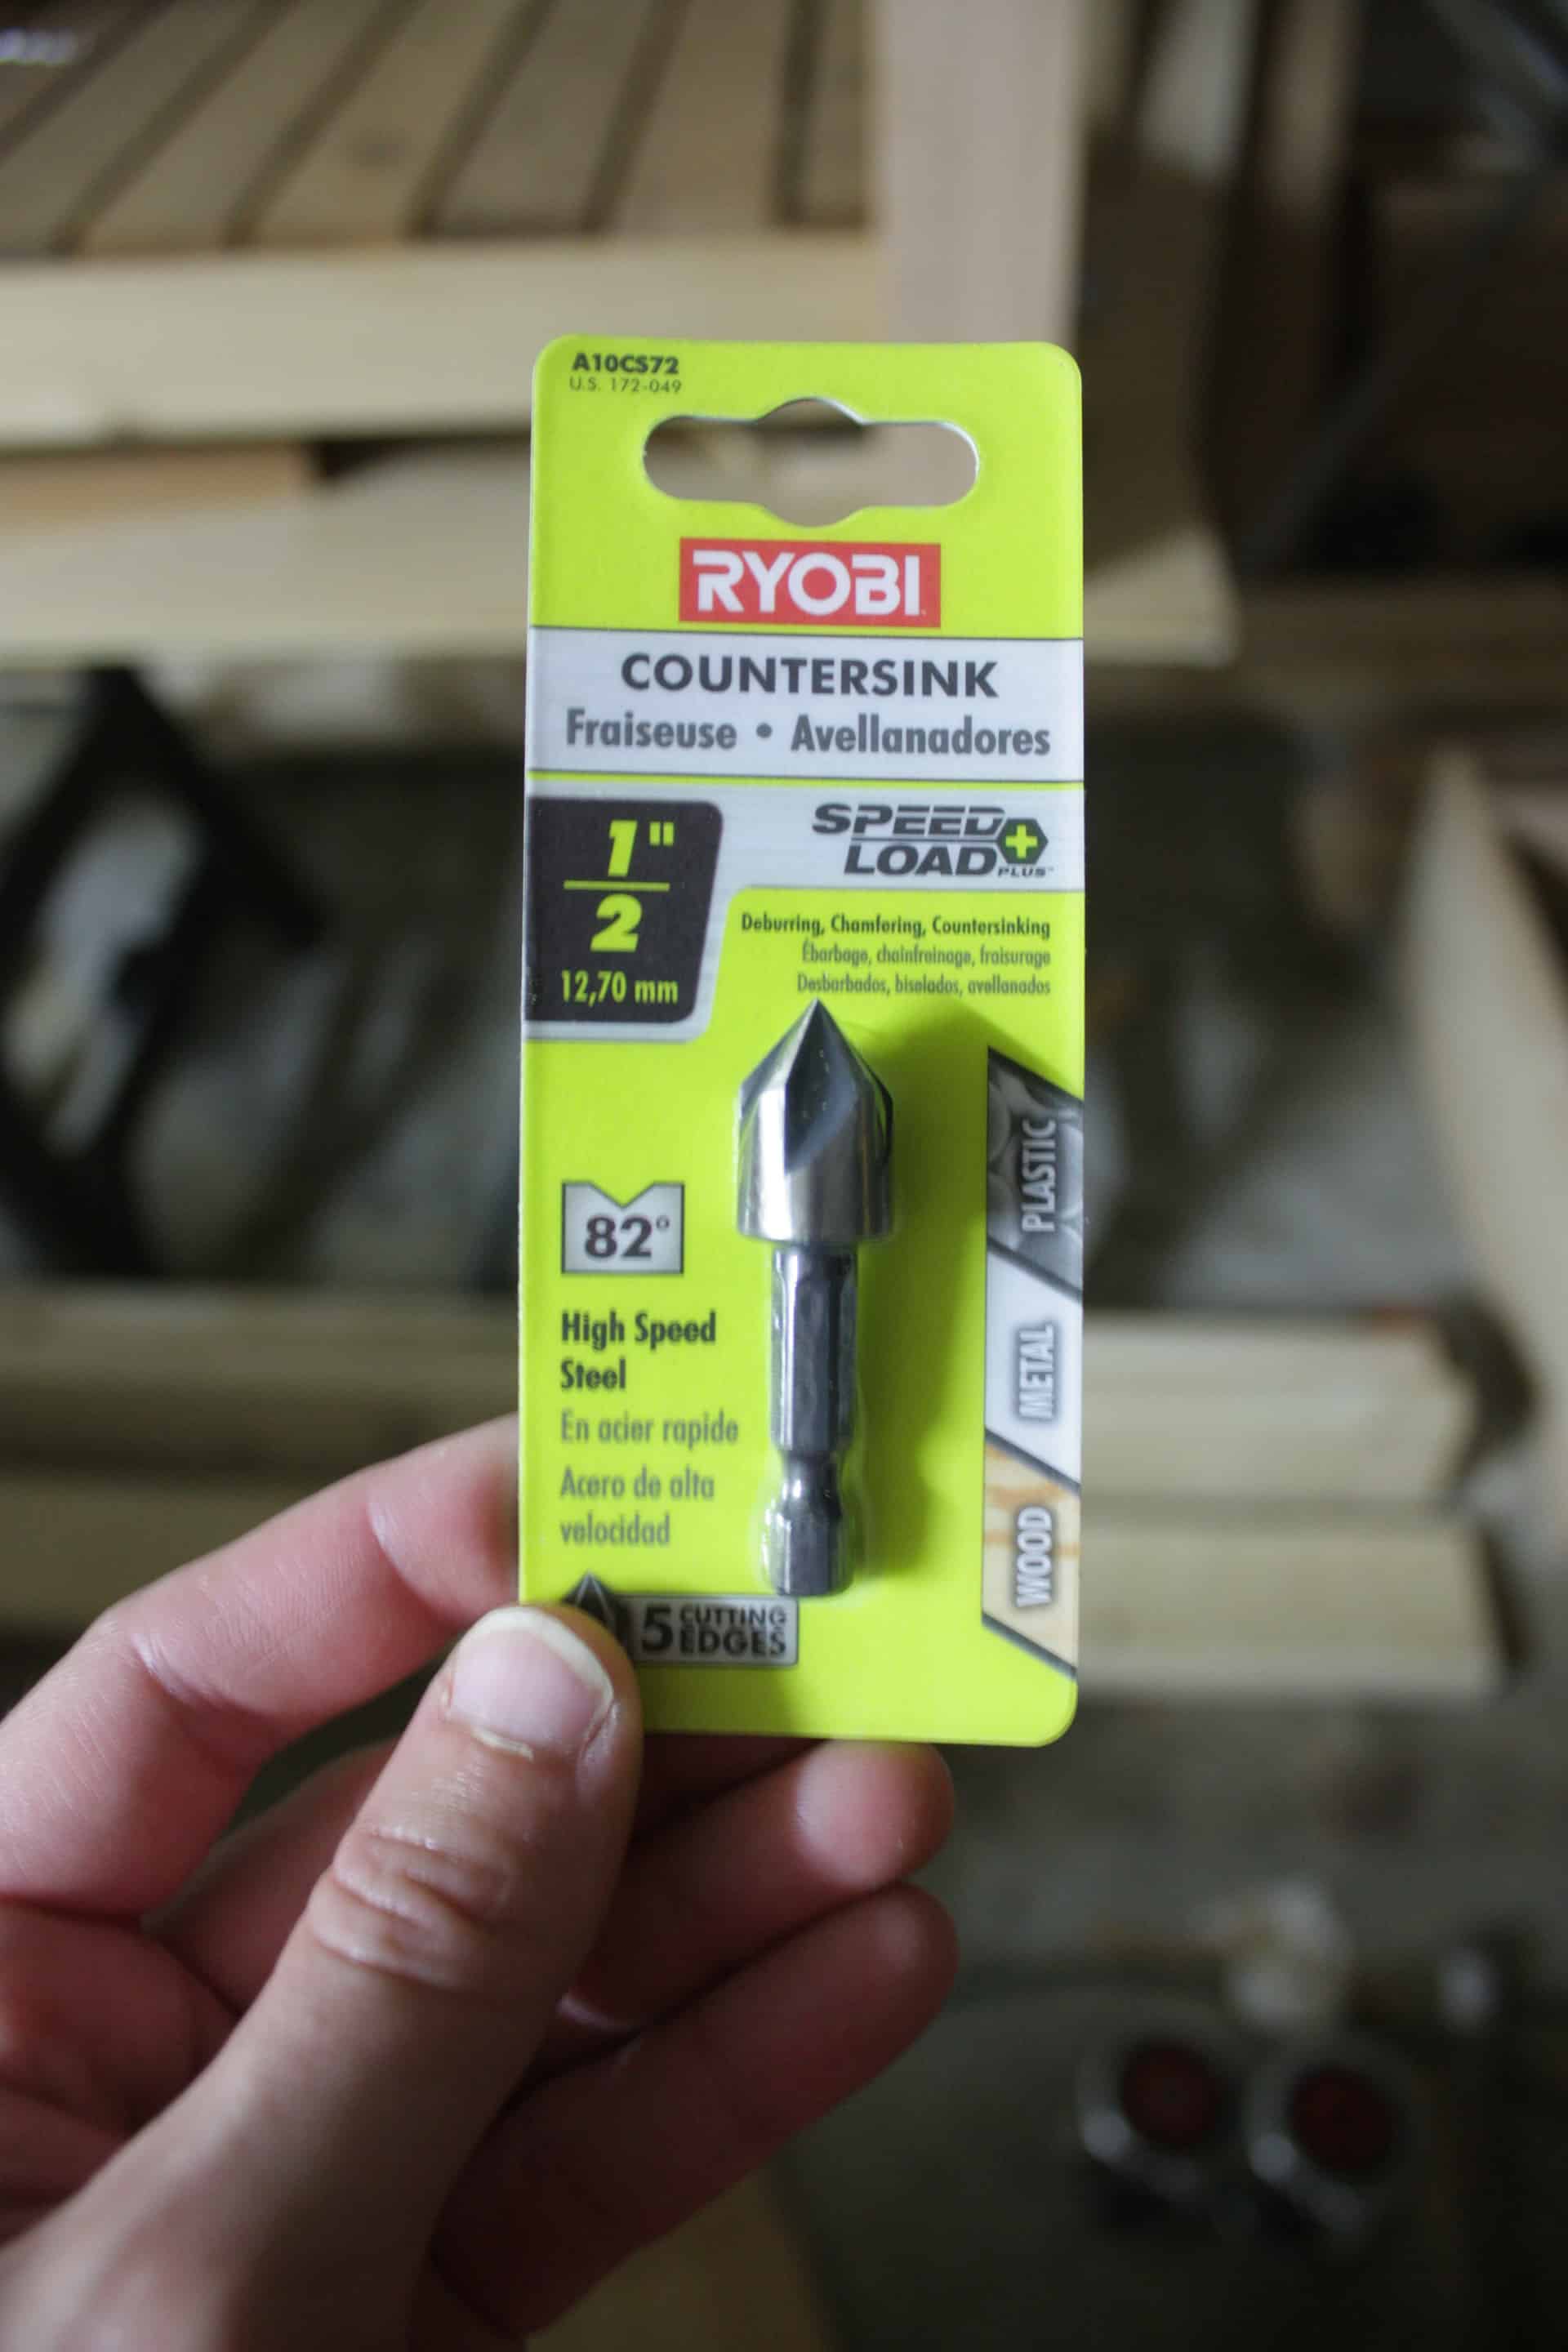
- 1/2″ countersink drill bit
Cut List for the Potting Bench:
Outdoor Island (potting bench):
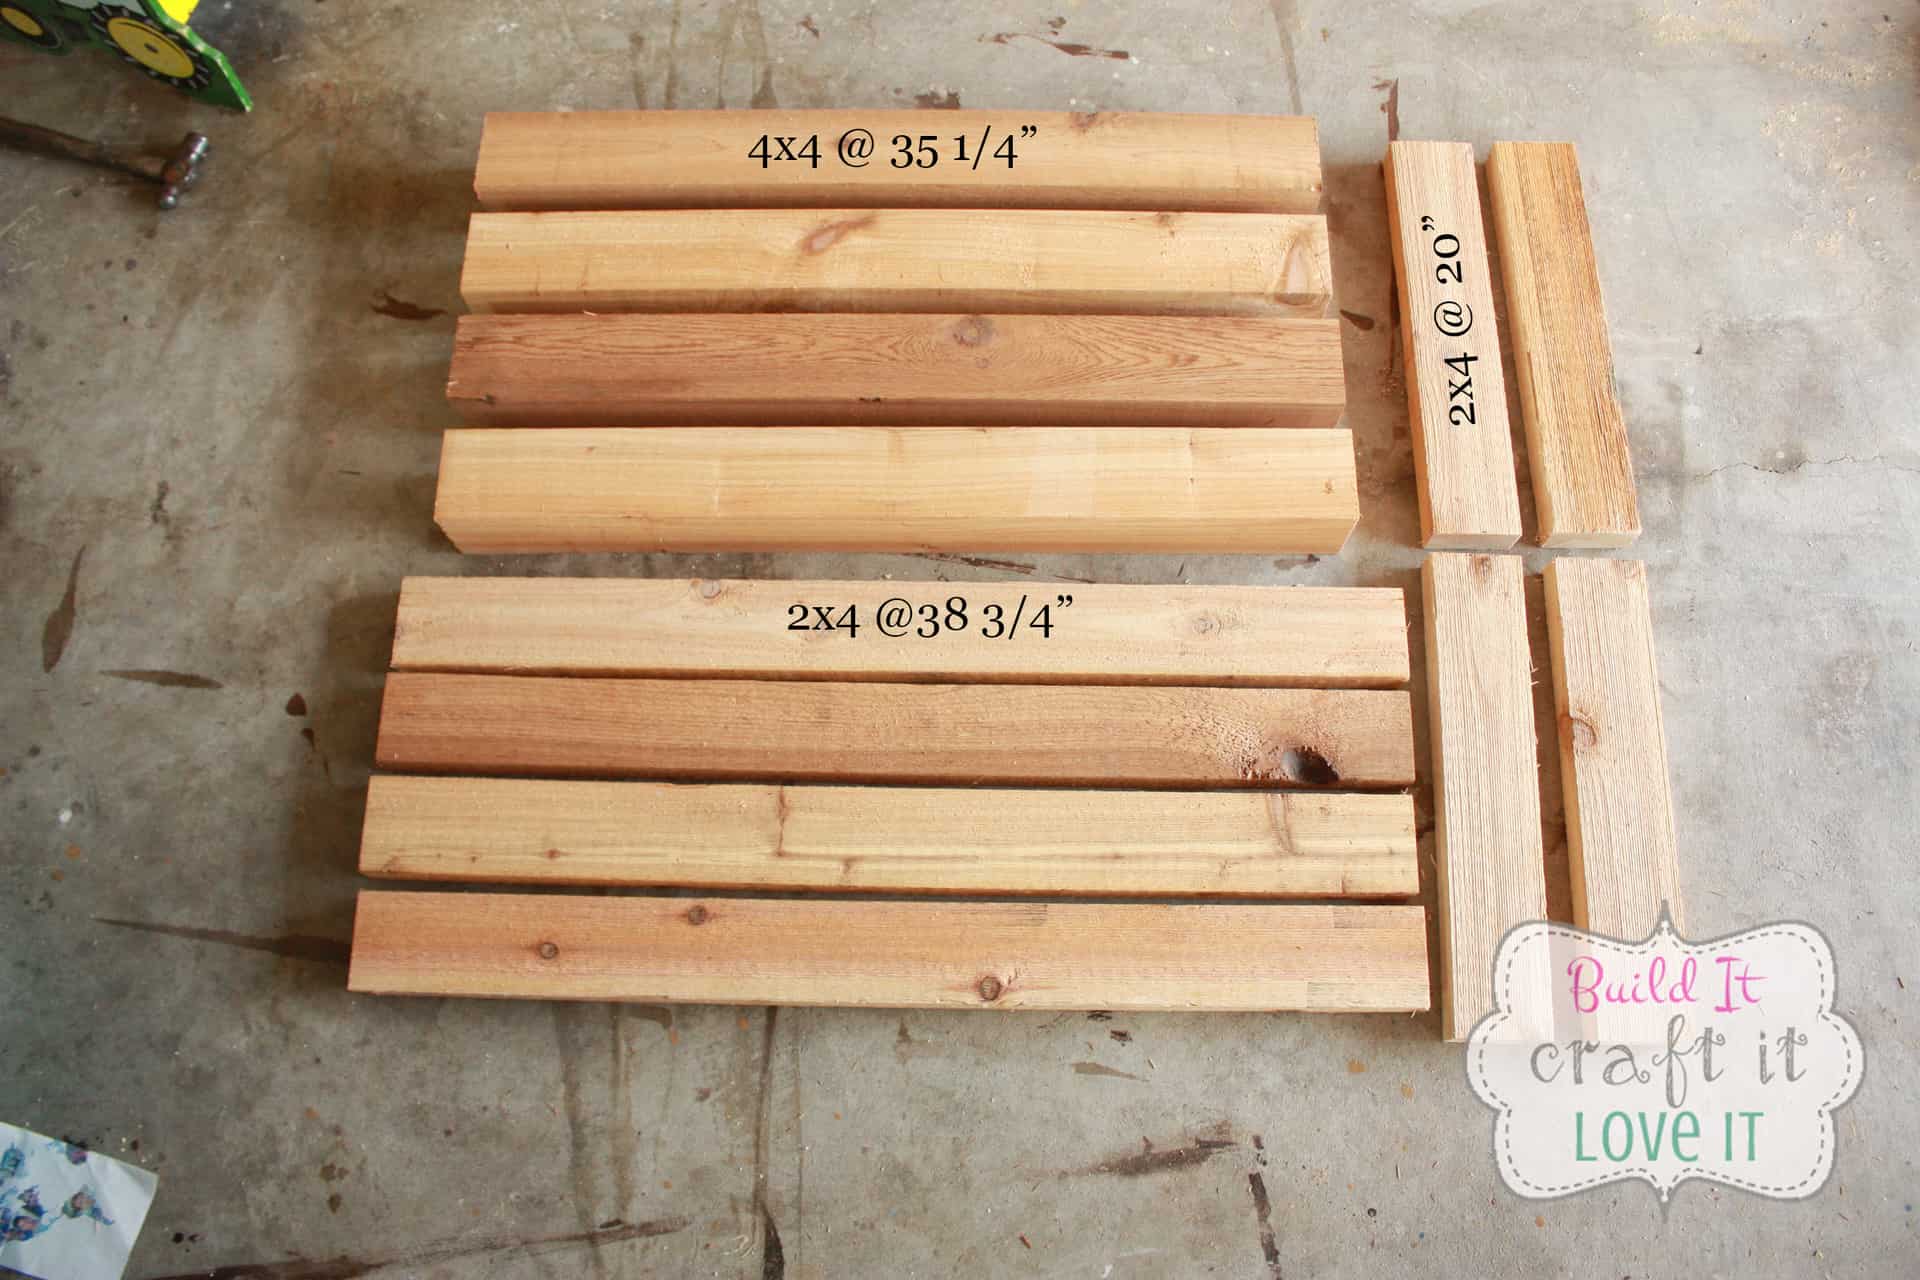
- 4 – 4×4 @ 35 1/4″
- 4 – 2×4 @ 38 3/4″
- 4 – 2×4 @ 20″
- 5 – 1×6 @ 47 3/4″ (After cleaning up the ends and cutting my 1x6s directly in half…this is round about where they were)
- 11 – 1×4 @ 23.5″ (my cedar 2x4s were 1 3/4″ wide, actual measurement, so make sure you check that before cutting)
Shelves/Hutch:
- 2 – 1×12 @ 30″
- 1 – 1×12 @ 43 1/2″
- 1 – 1×12 @ 25 3/4″ ripped down to 10 1/2″
- 1 – 1×12 @ 21 3/4″ ripped down to 10 1/2″
- 6 – 1×4 @ 43 1/2″
Building the Potting Bench / Outdoor Island
Let’s go…what are we waiting for? Alright, first things first we have to get the main wood cut, the 4x4s for the legs, and the 2x4s to join the legs together!
Once everything for the mainframe is cut, we can start assembling, I used a Kreg Jig to assemble them, since we are drilling into 4x4s I am not sure how I would have attached them without one!
For those of you who are not aware of what a Kreg Jig is…you are missing out on the easiest tool to build with! It makes for a pretty strong joint even though my husband tells me all the time, “Wait you plan on only using pocket hole screws to hold that together?” And then AFTER I get it built, he always ends up saying, “Wow, that’s way sturdier than I expected!” And that’s when I shoot him the look, you know the one that says, “Yeah, I knew it was going to be fine all along!!” Lol!!
Okay so back to the Kreg Jig…moral of that story…it works really well and is super easy… so if you don’t already have one, run out and buy one ASAP!! You can get them at Home Depot, Lowe’s, or Amazon (affiliate link)!
I have the cheapest model they make and as I have said before, as much as I want to upgrade just for the fun of it…I can’t justify it because my little Kreg Jig R3 can handle every job I throw at it…so every time I think about buying the K4 or K5, I just spend that money on more wood because I just can’t convince myself to buy the bigger, better one…although if I would have known back then that I would use my Kreg Jig every week at least…I would have originally purchased the K4 or K5!
I have issues…I know…you are not the first to think it…and definitely not the last!! Lmbo!! Can you tell that is 1:18 a.m and I have had ALOT of coffee the way I keep rambling!! Sorry!! Back on track!
Okay, so we are going to use the Kreg Jig on the 38 3/4″ boards along with the 20″ boards. Here is what mine looks like.
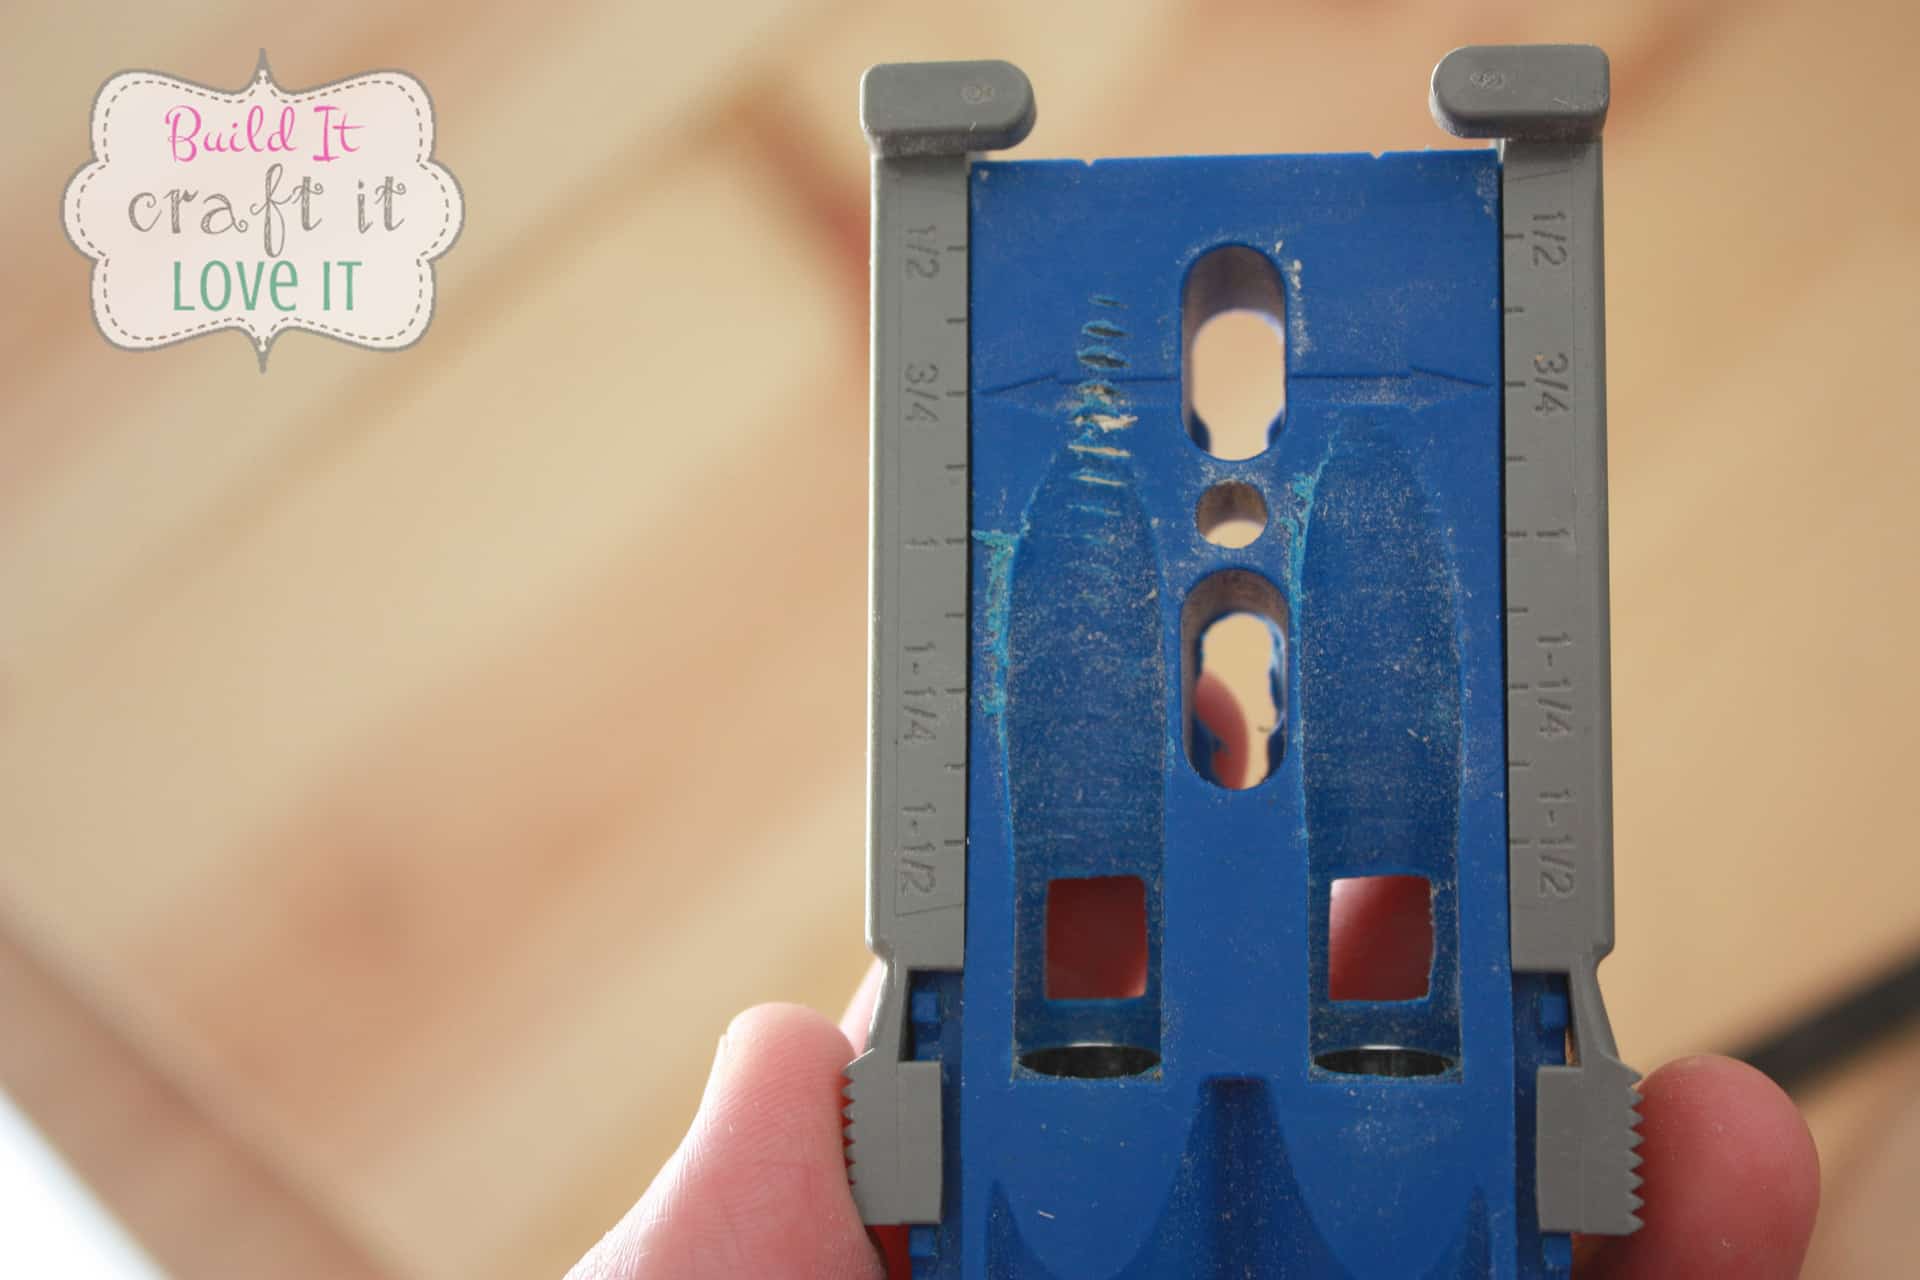
You just take this bad boy and set it to the correct depth of wood you are drilling into…2x4s normally have an actual measurement of 1 1/2″ but the cedar 2x4s were actually 1 3/4″ but after drilling pocket holes in a scrap piece to test…the 1 1/2″ setting was fine. You set it like this.
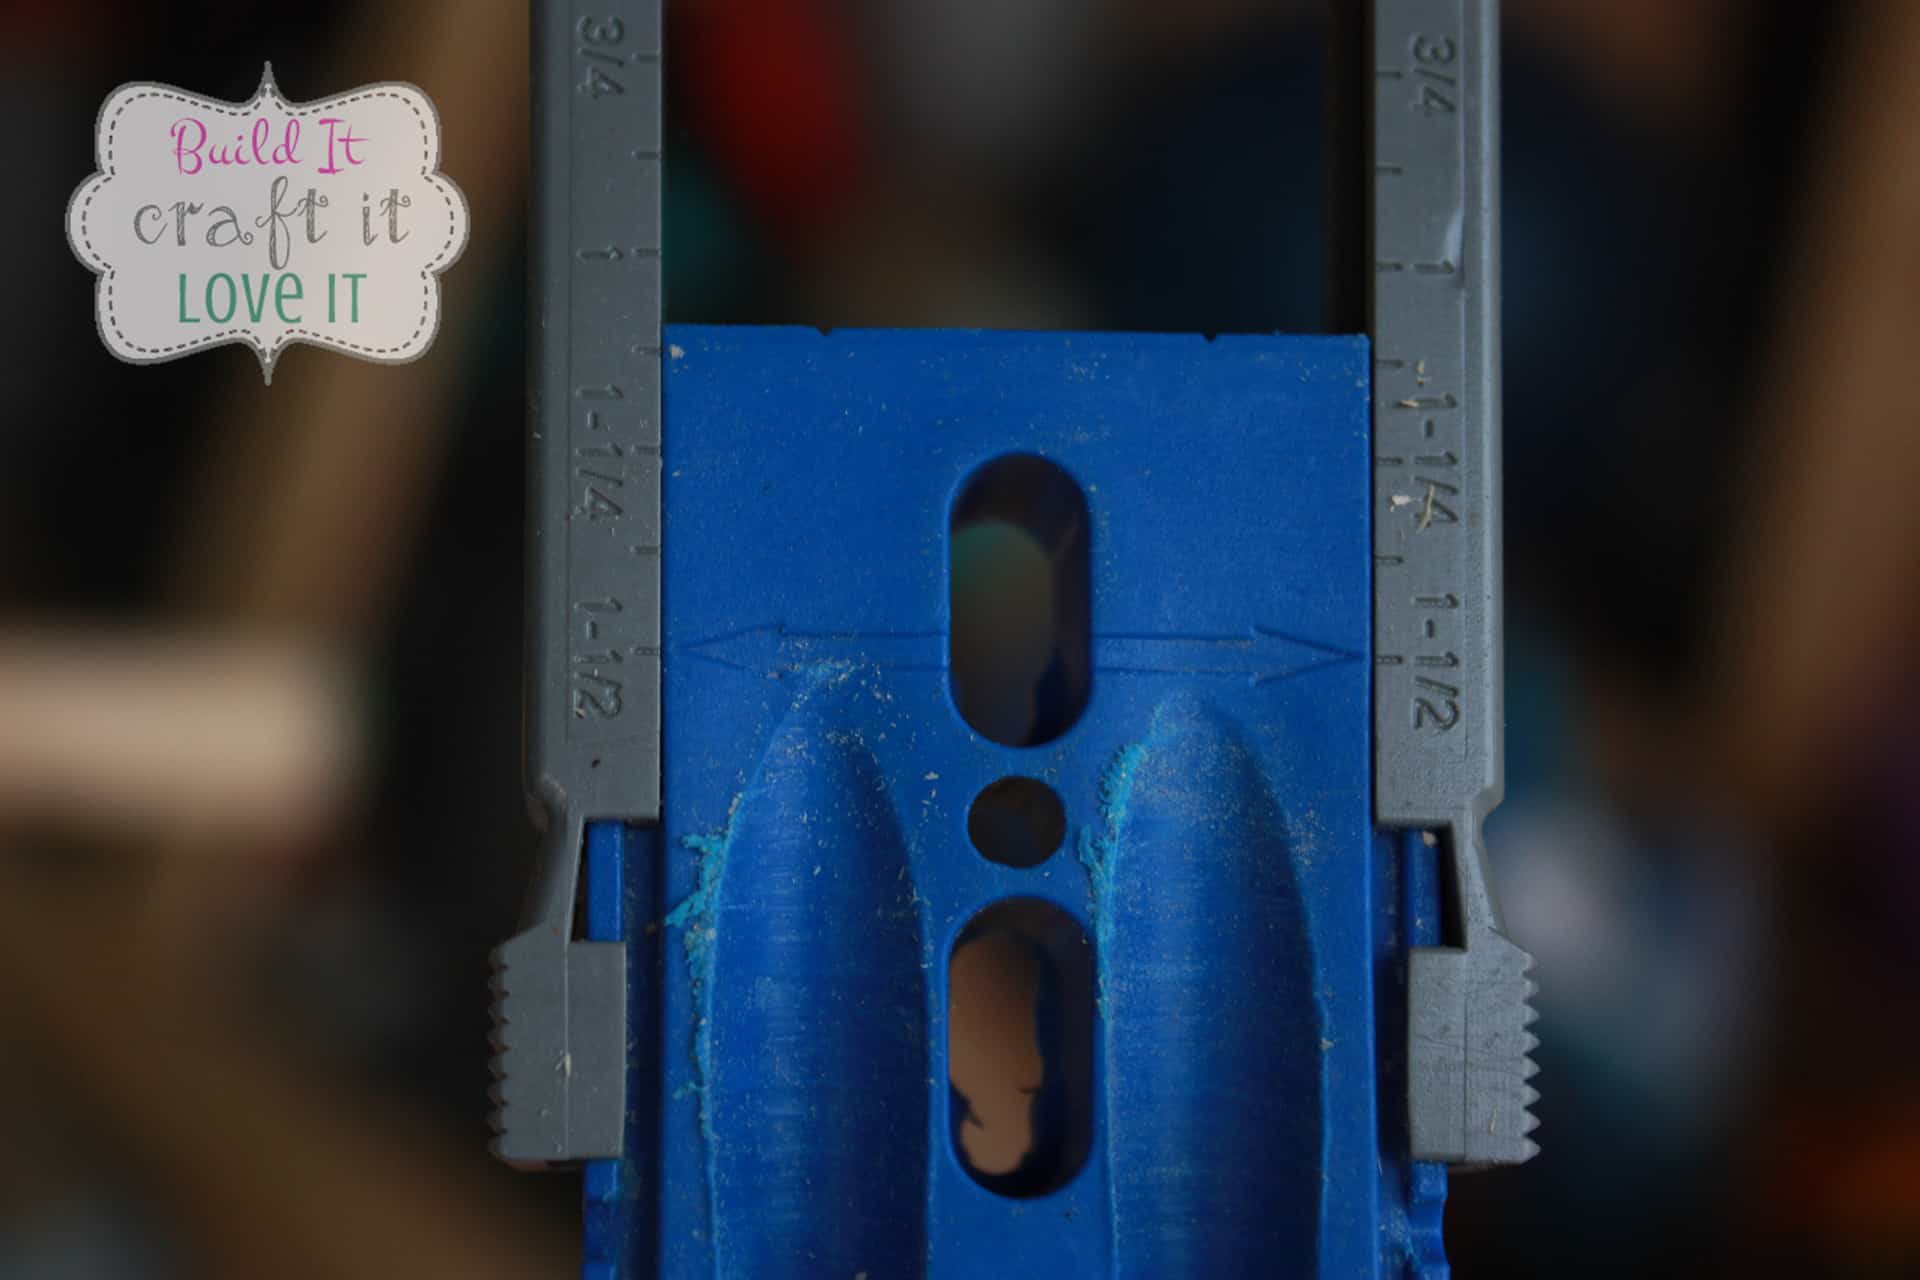
Alright, now you need to set your drill bit to the same depth, everything I am referring to here is included in your R3 set, inside the little gray box that it comes in, there is a guide and it looks like this.
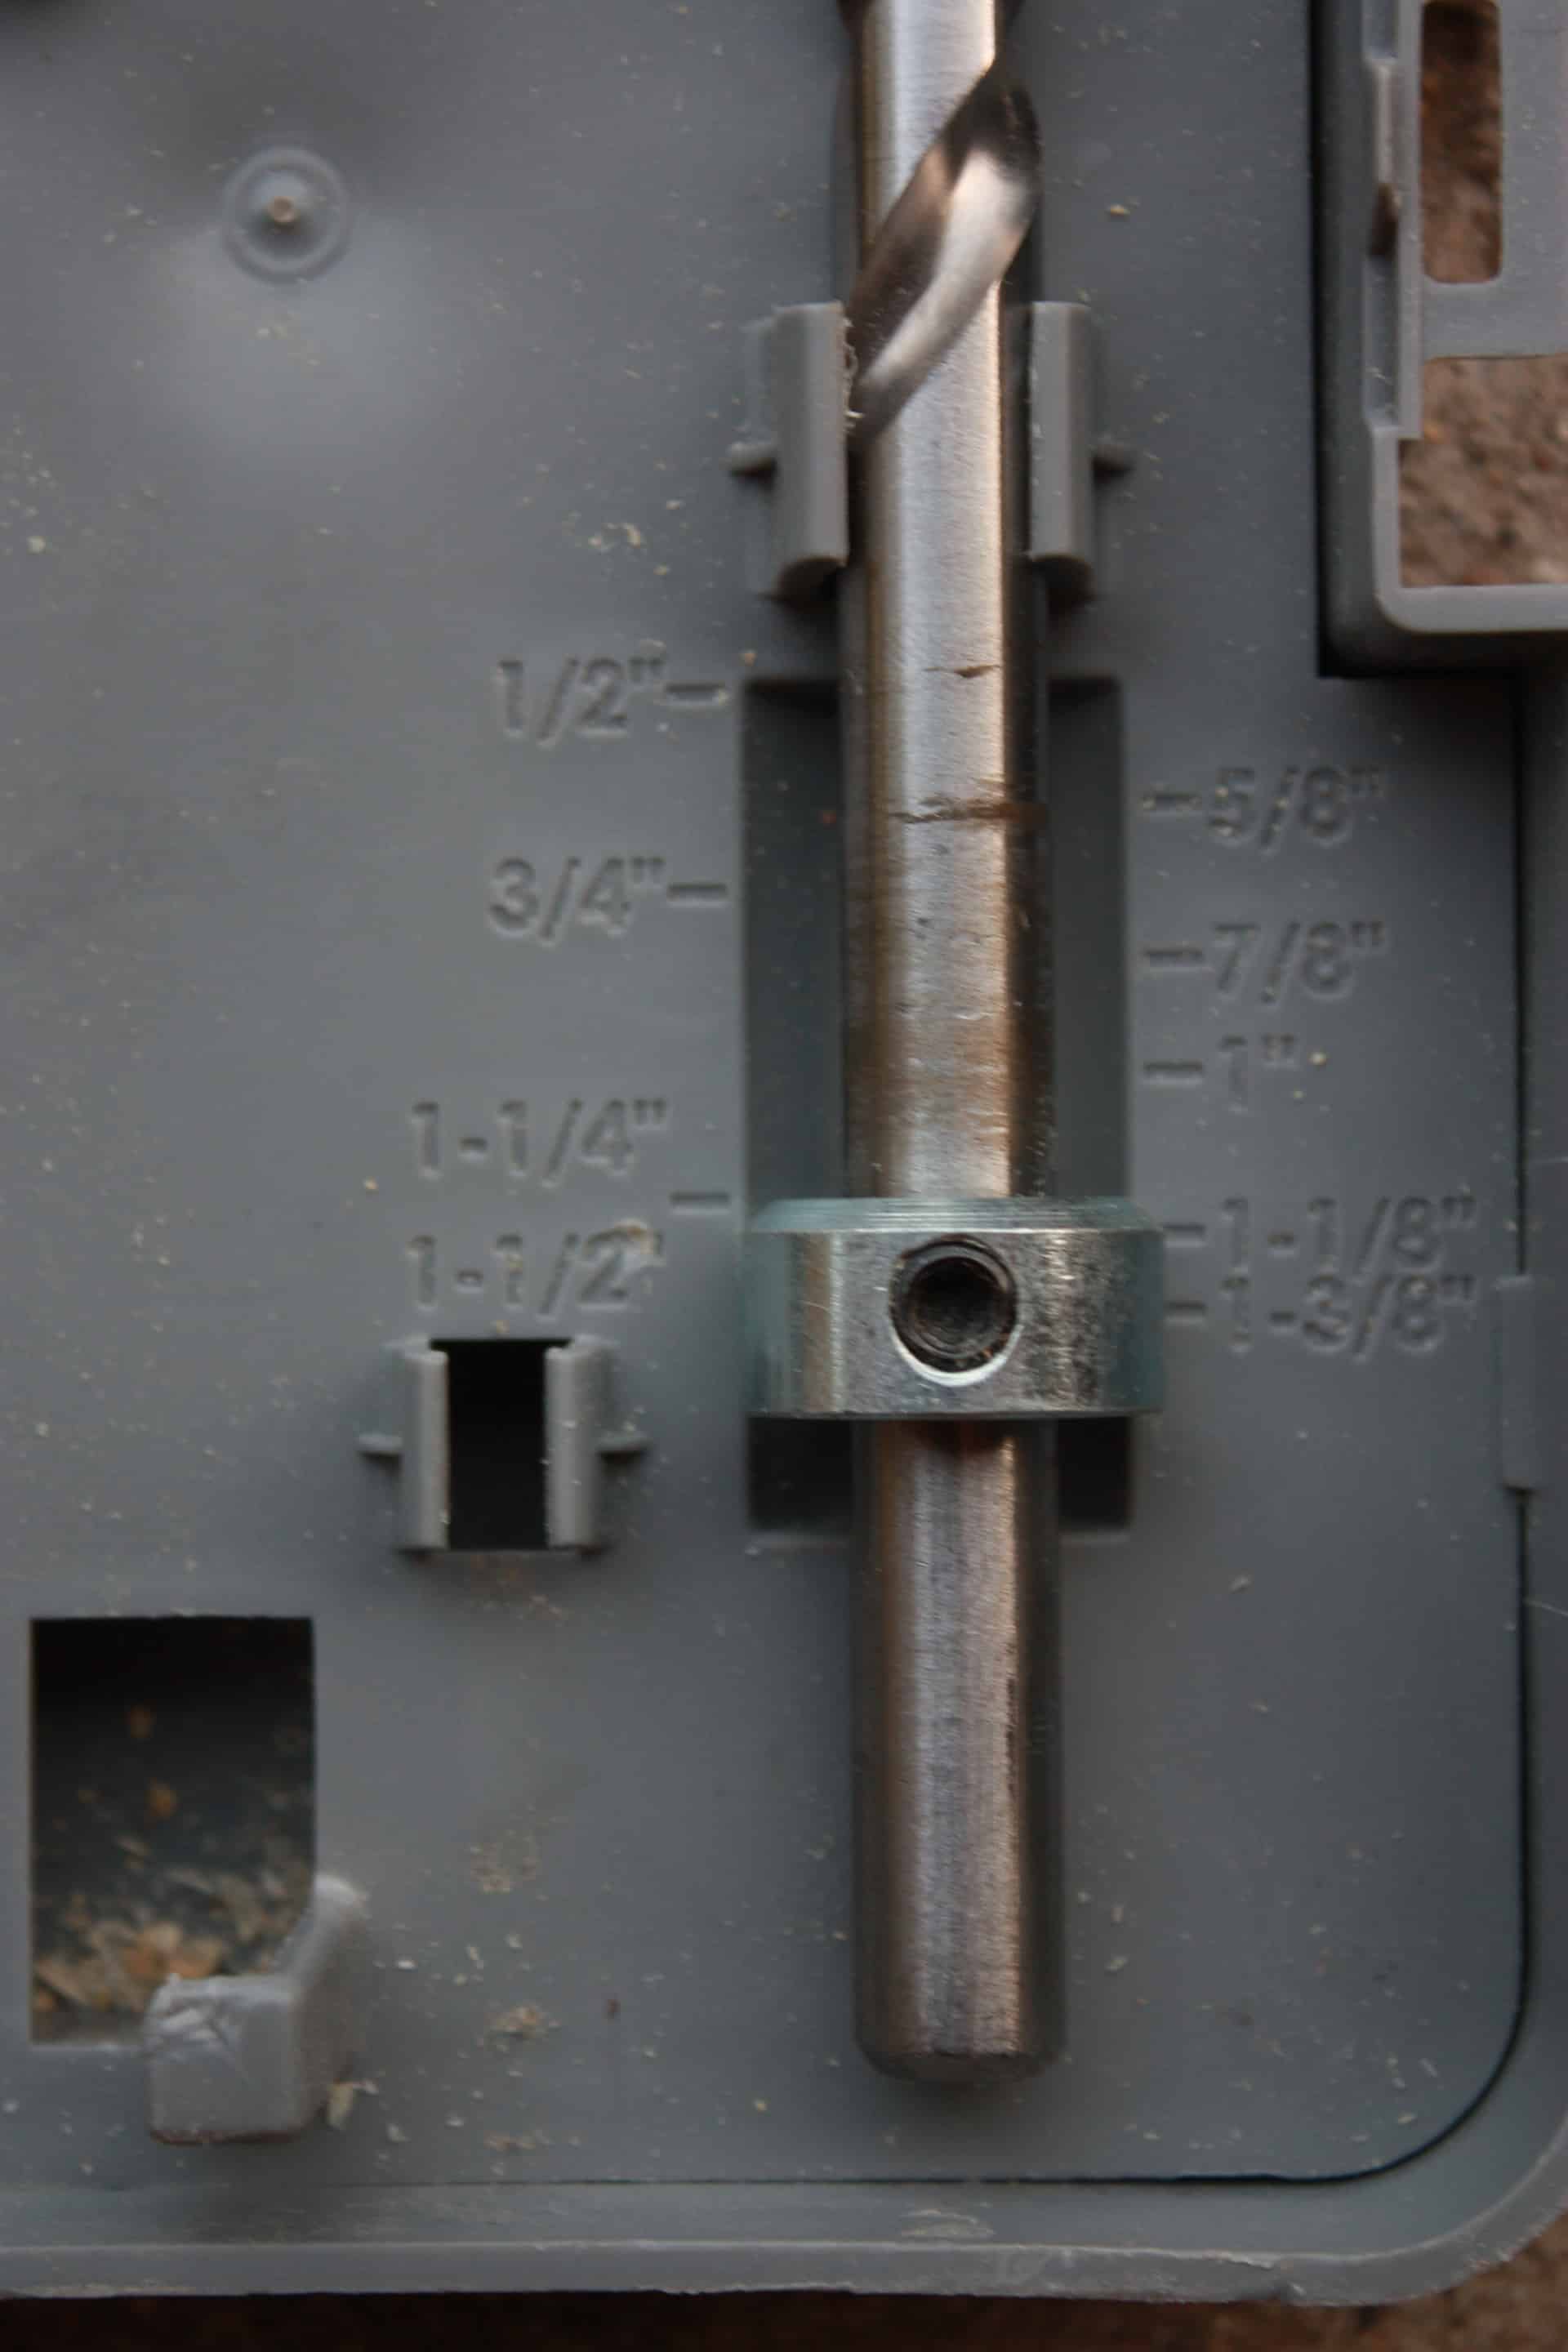
Also included is a little hex/allen wrench to loosen and tighten the ring around the bit so you can easily adjust the bit for different depths of wood! So once you have that set to 1 1/2″, you are ready to clamp the jig onto your board, Kreg makes awesome clamps for this but any clamp will work! Then get your drill bit in your drill and we are ready to go.

Building the table of the potting bench
The board shown here is simply to give you the idea of how to place your Kreg Jig…it is not an actual board from this project! So you drill two holes in the ends of all your 2x4s! They will then look like this.
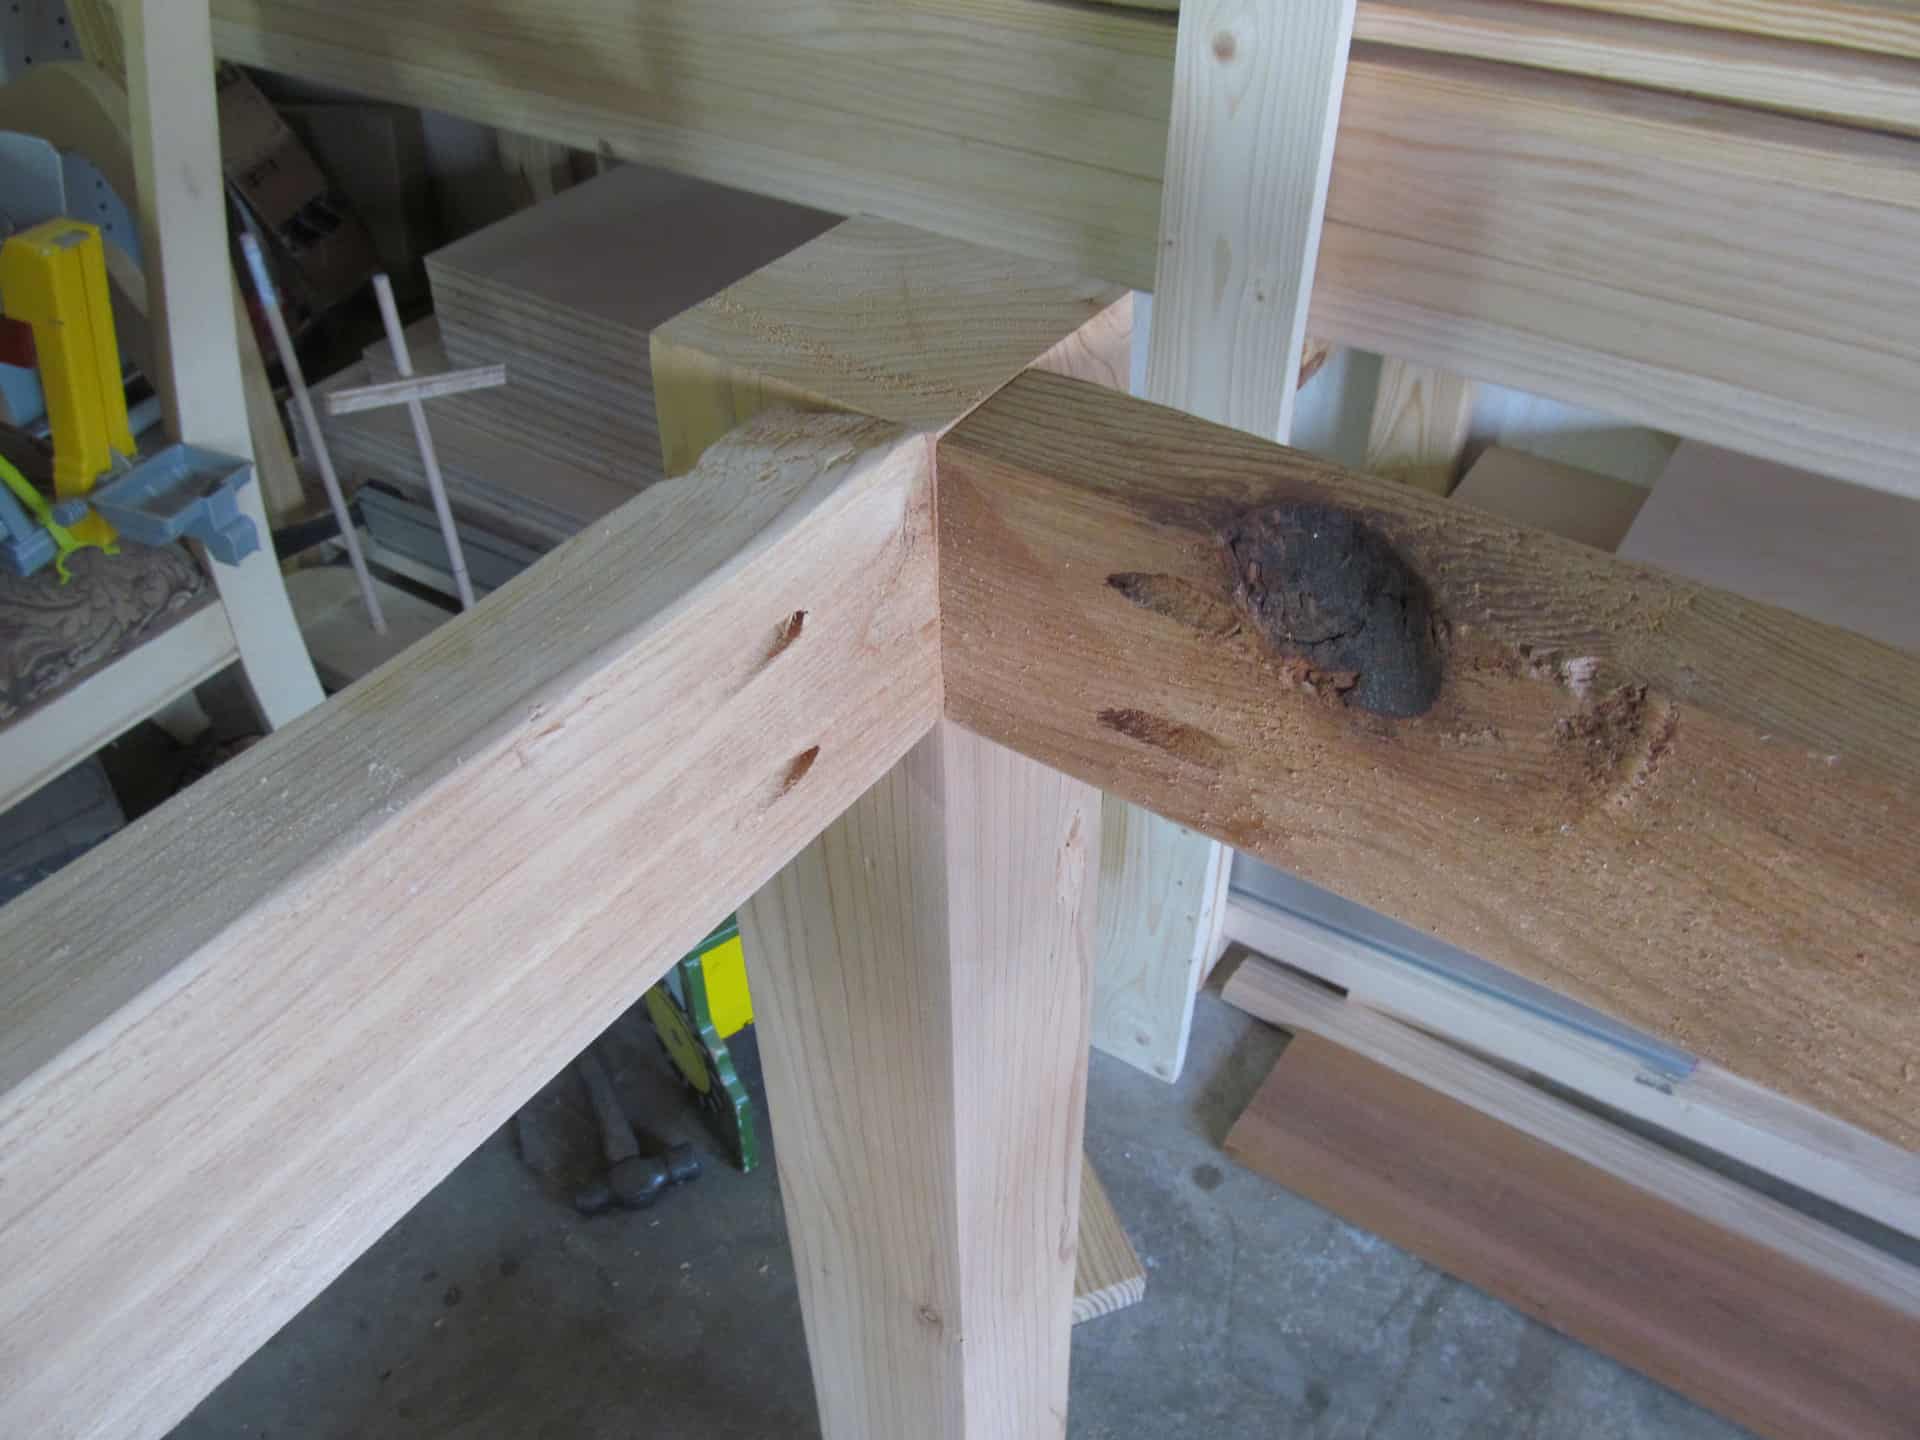
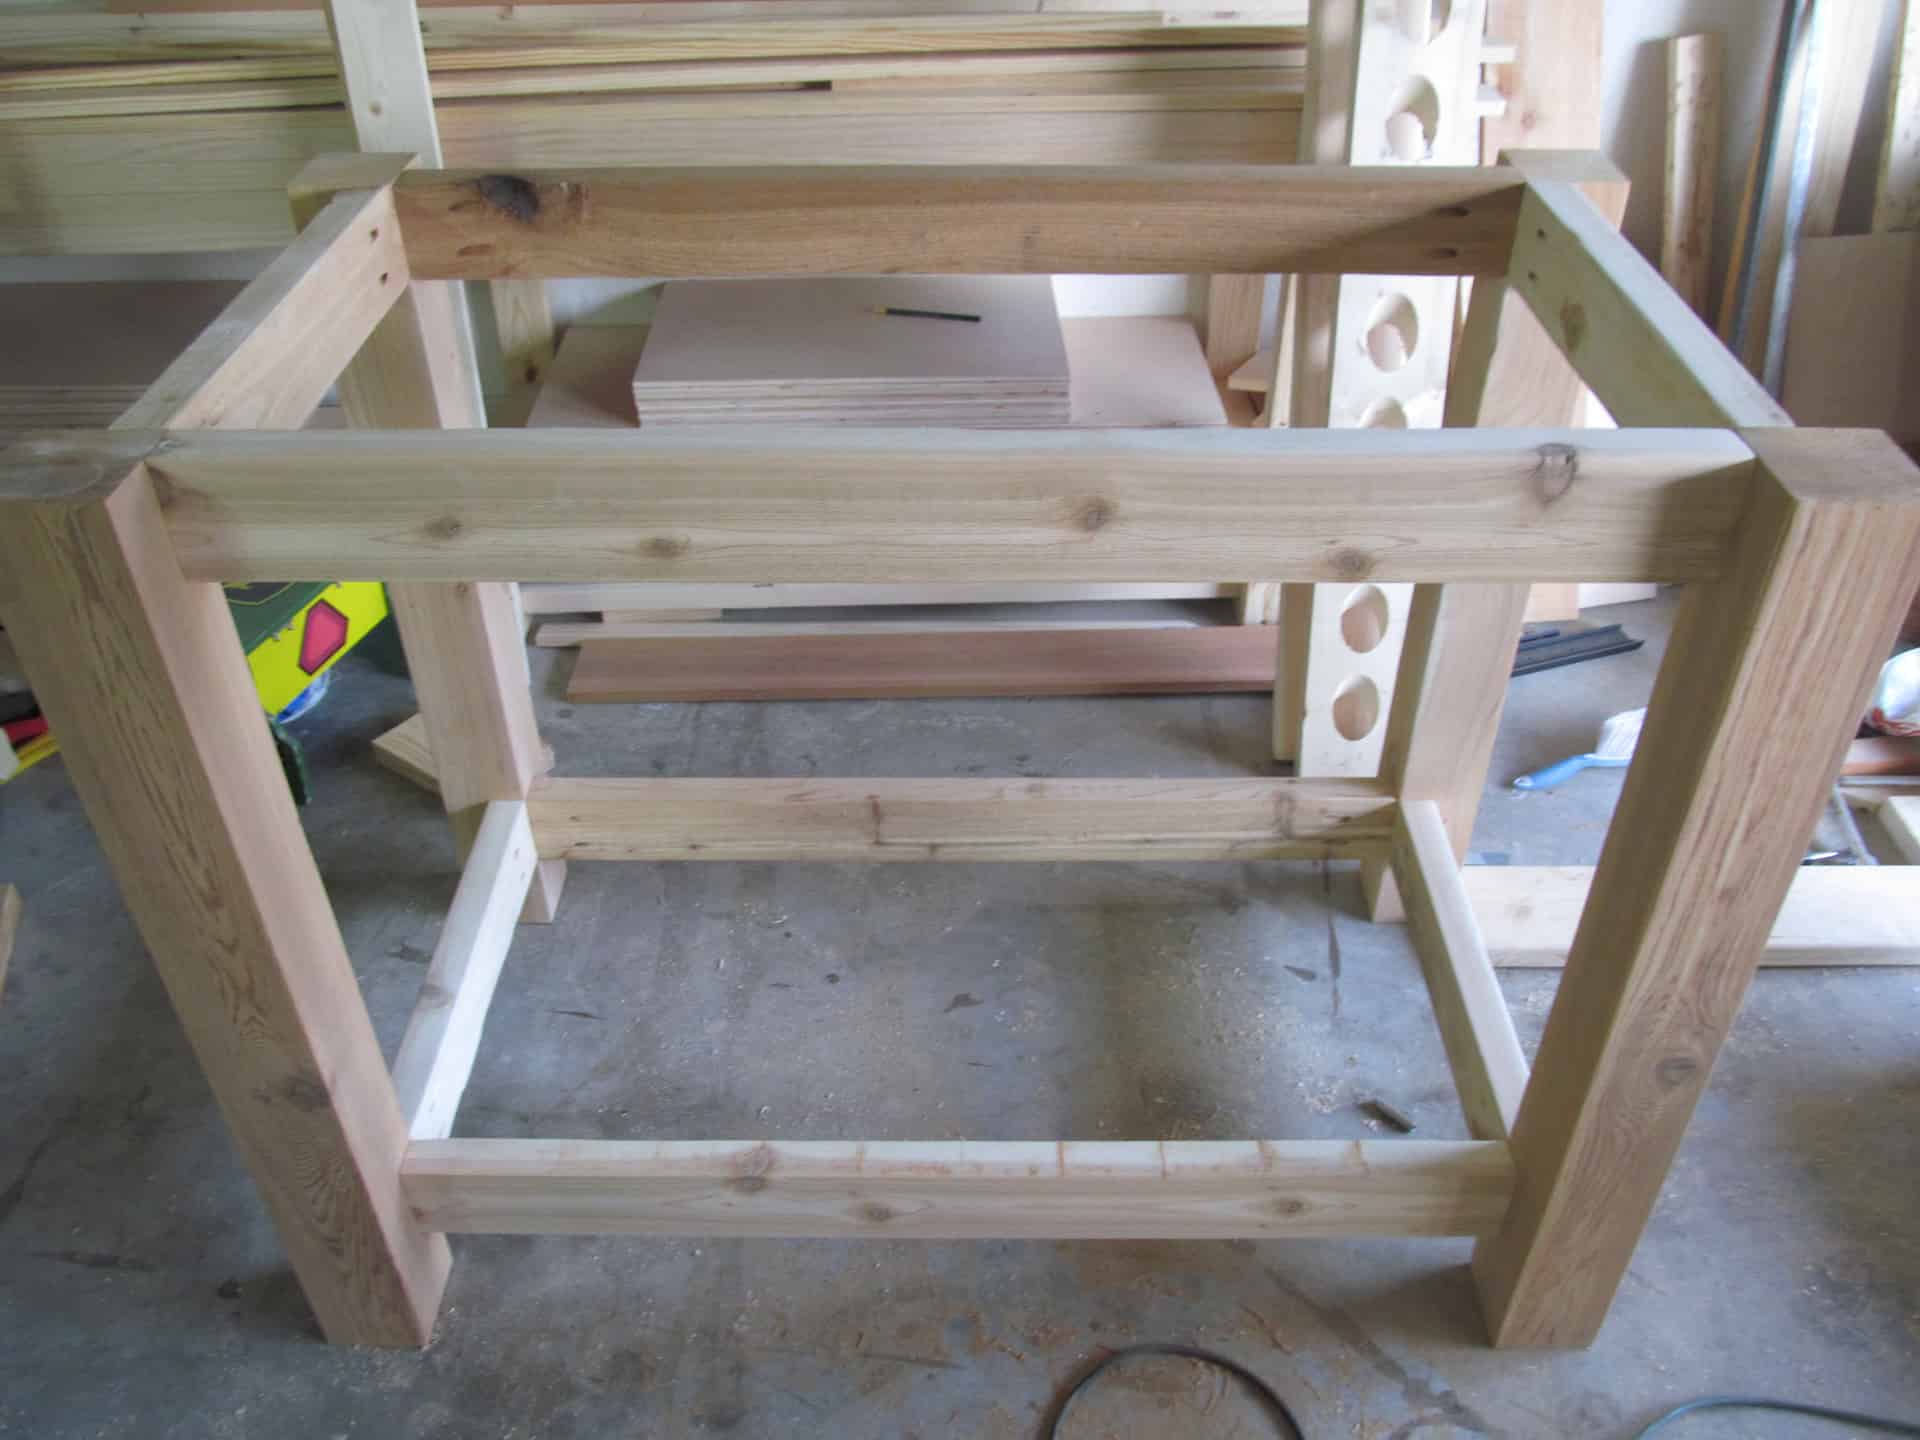
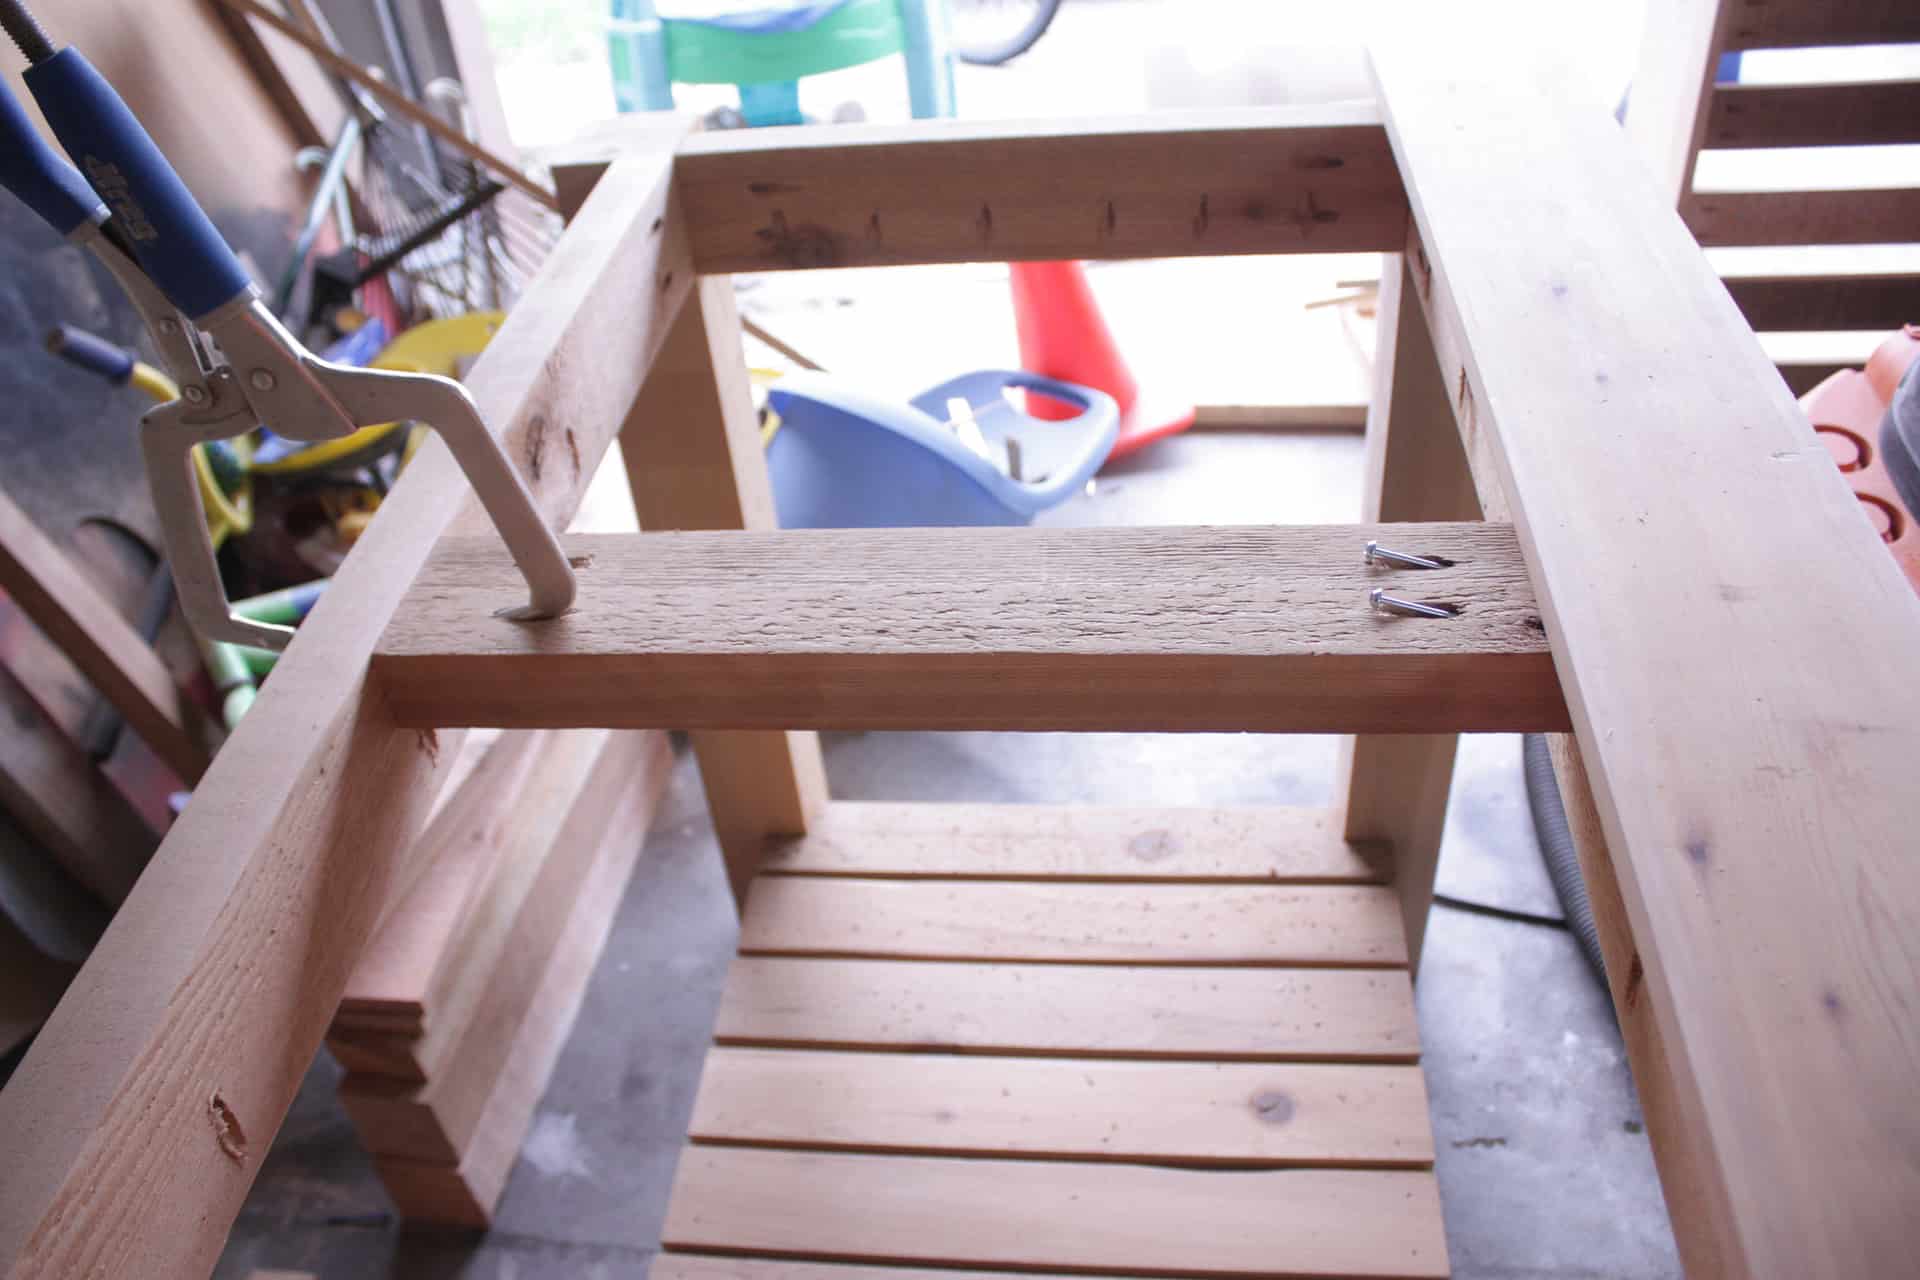
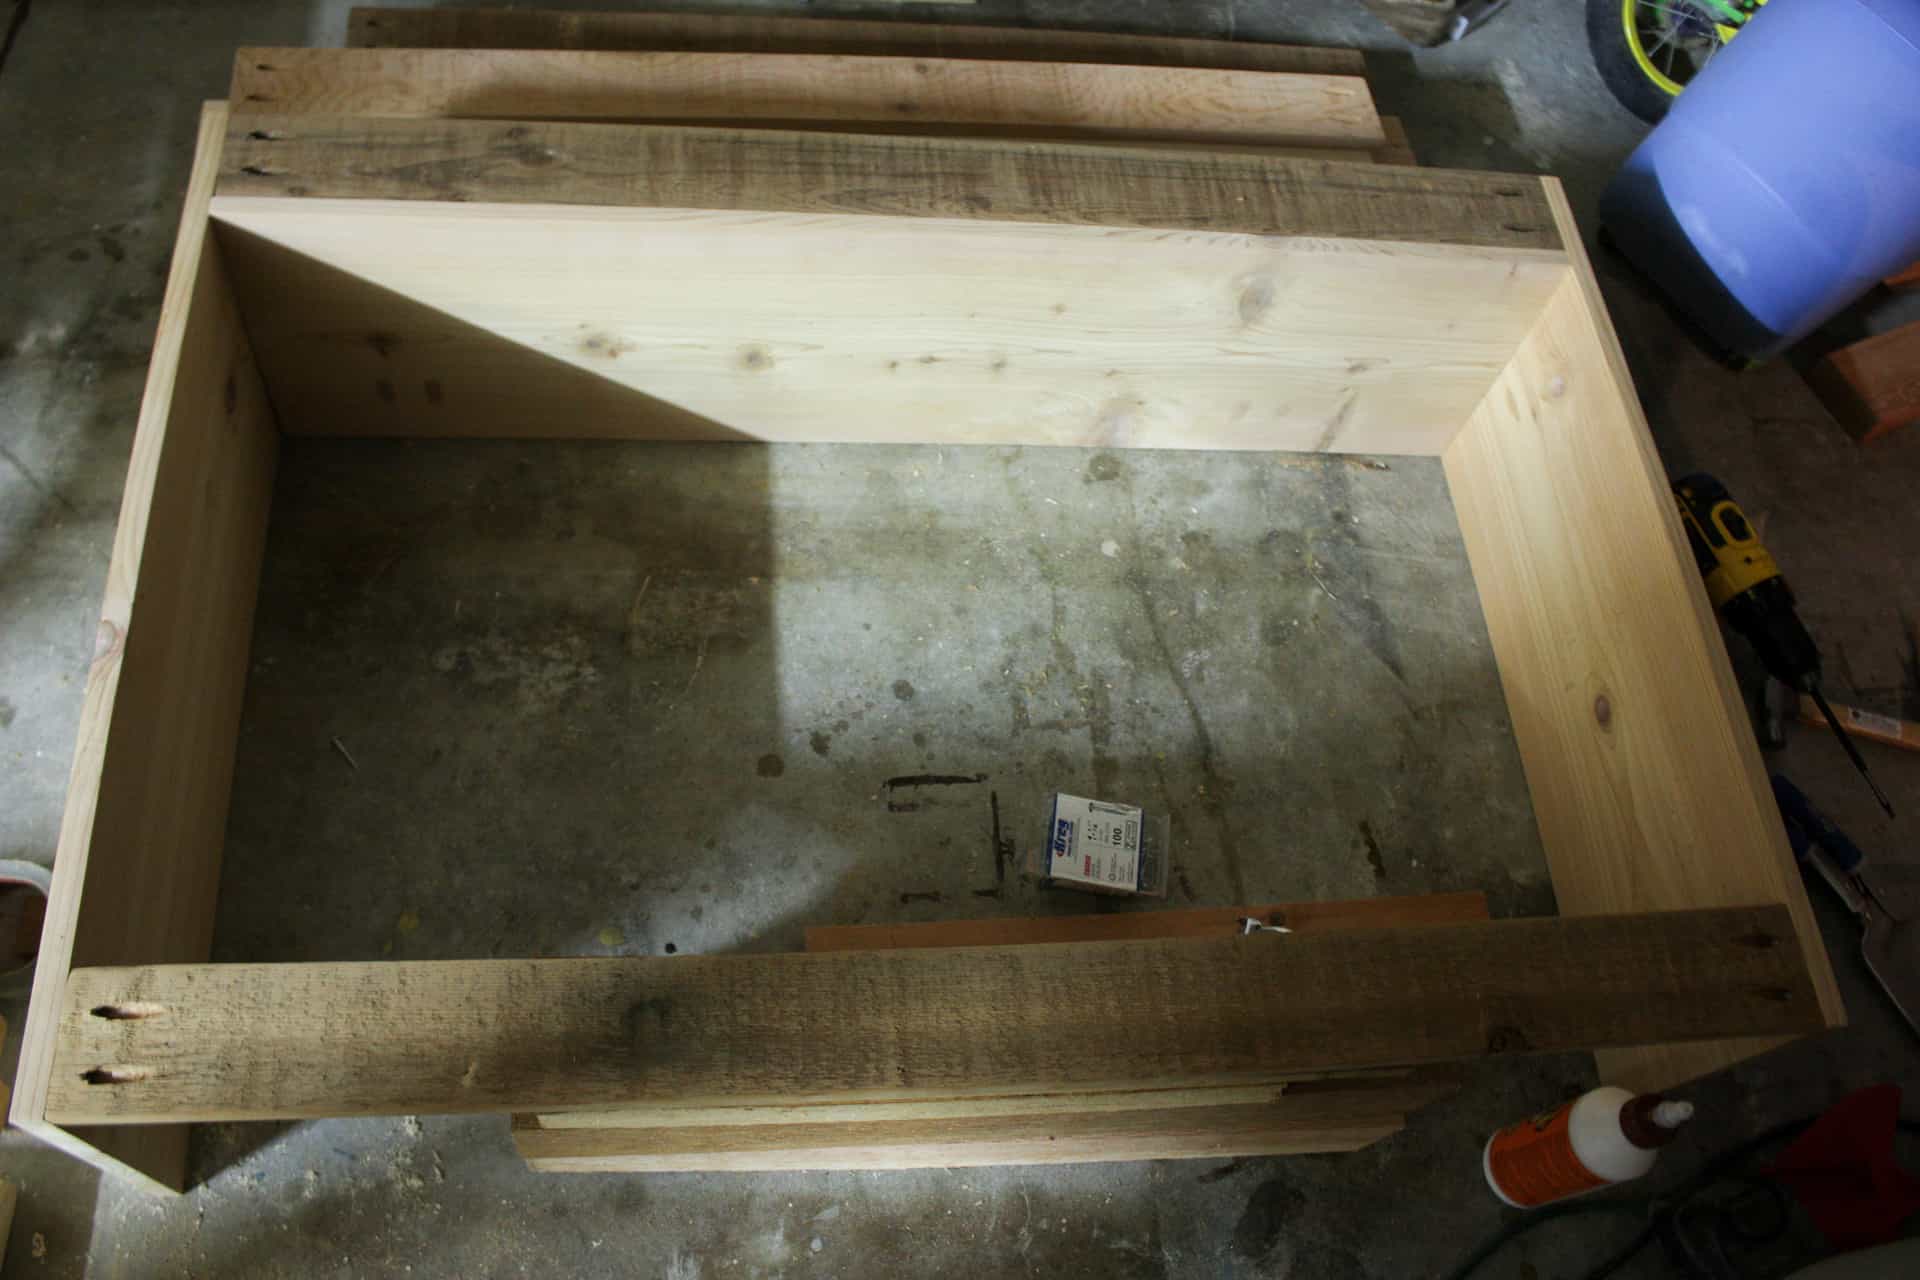
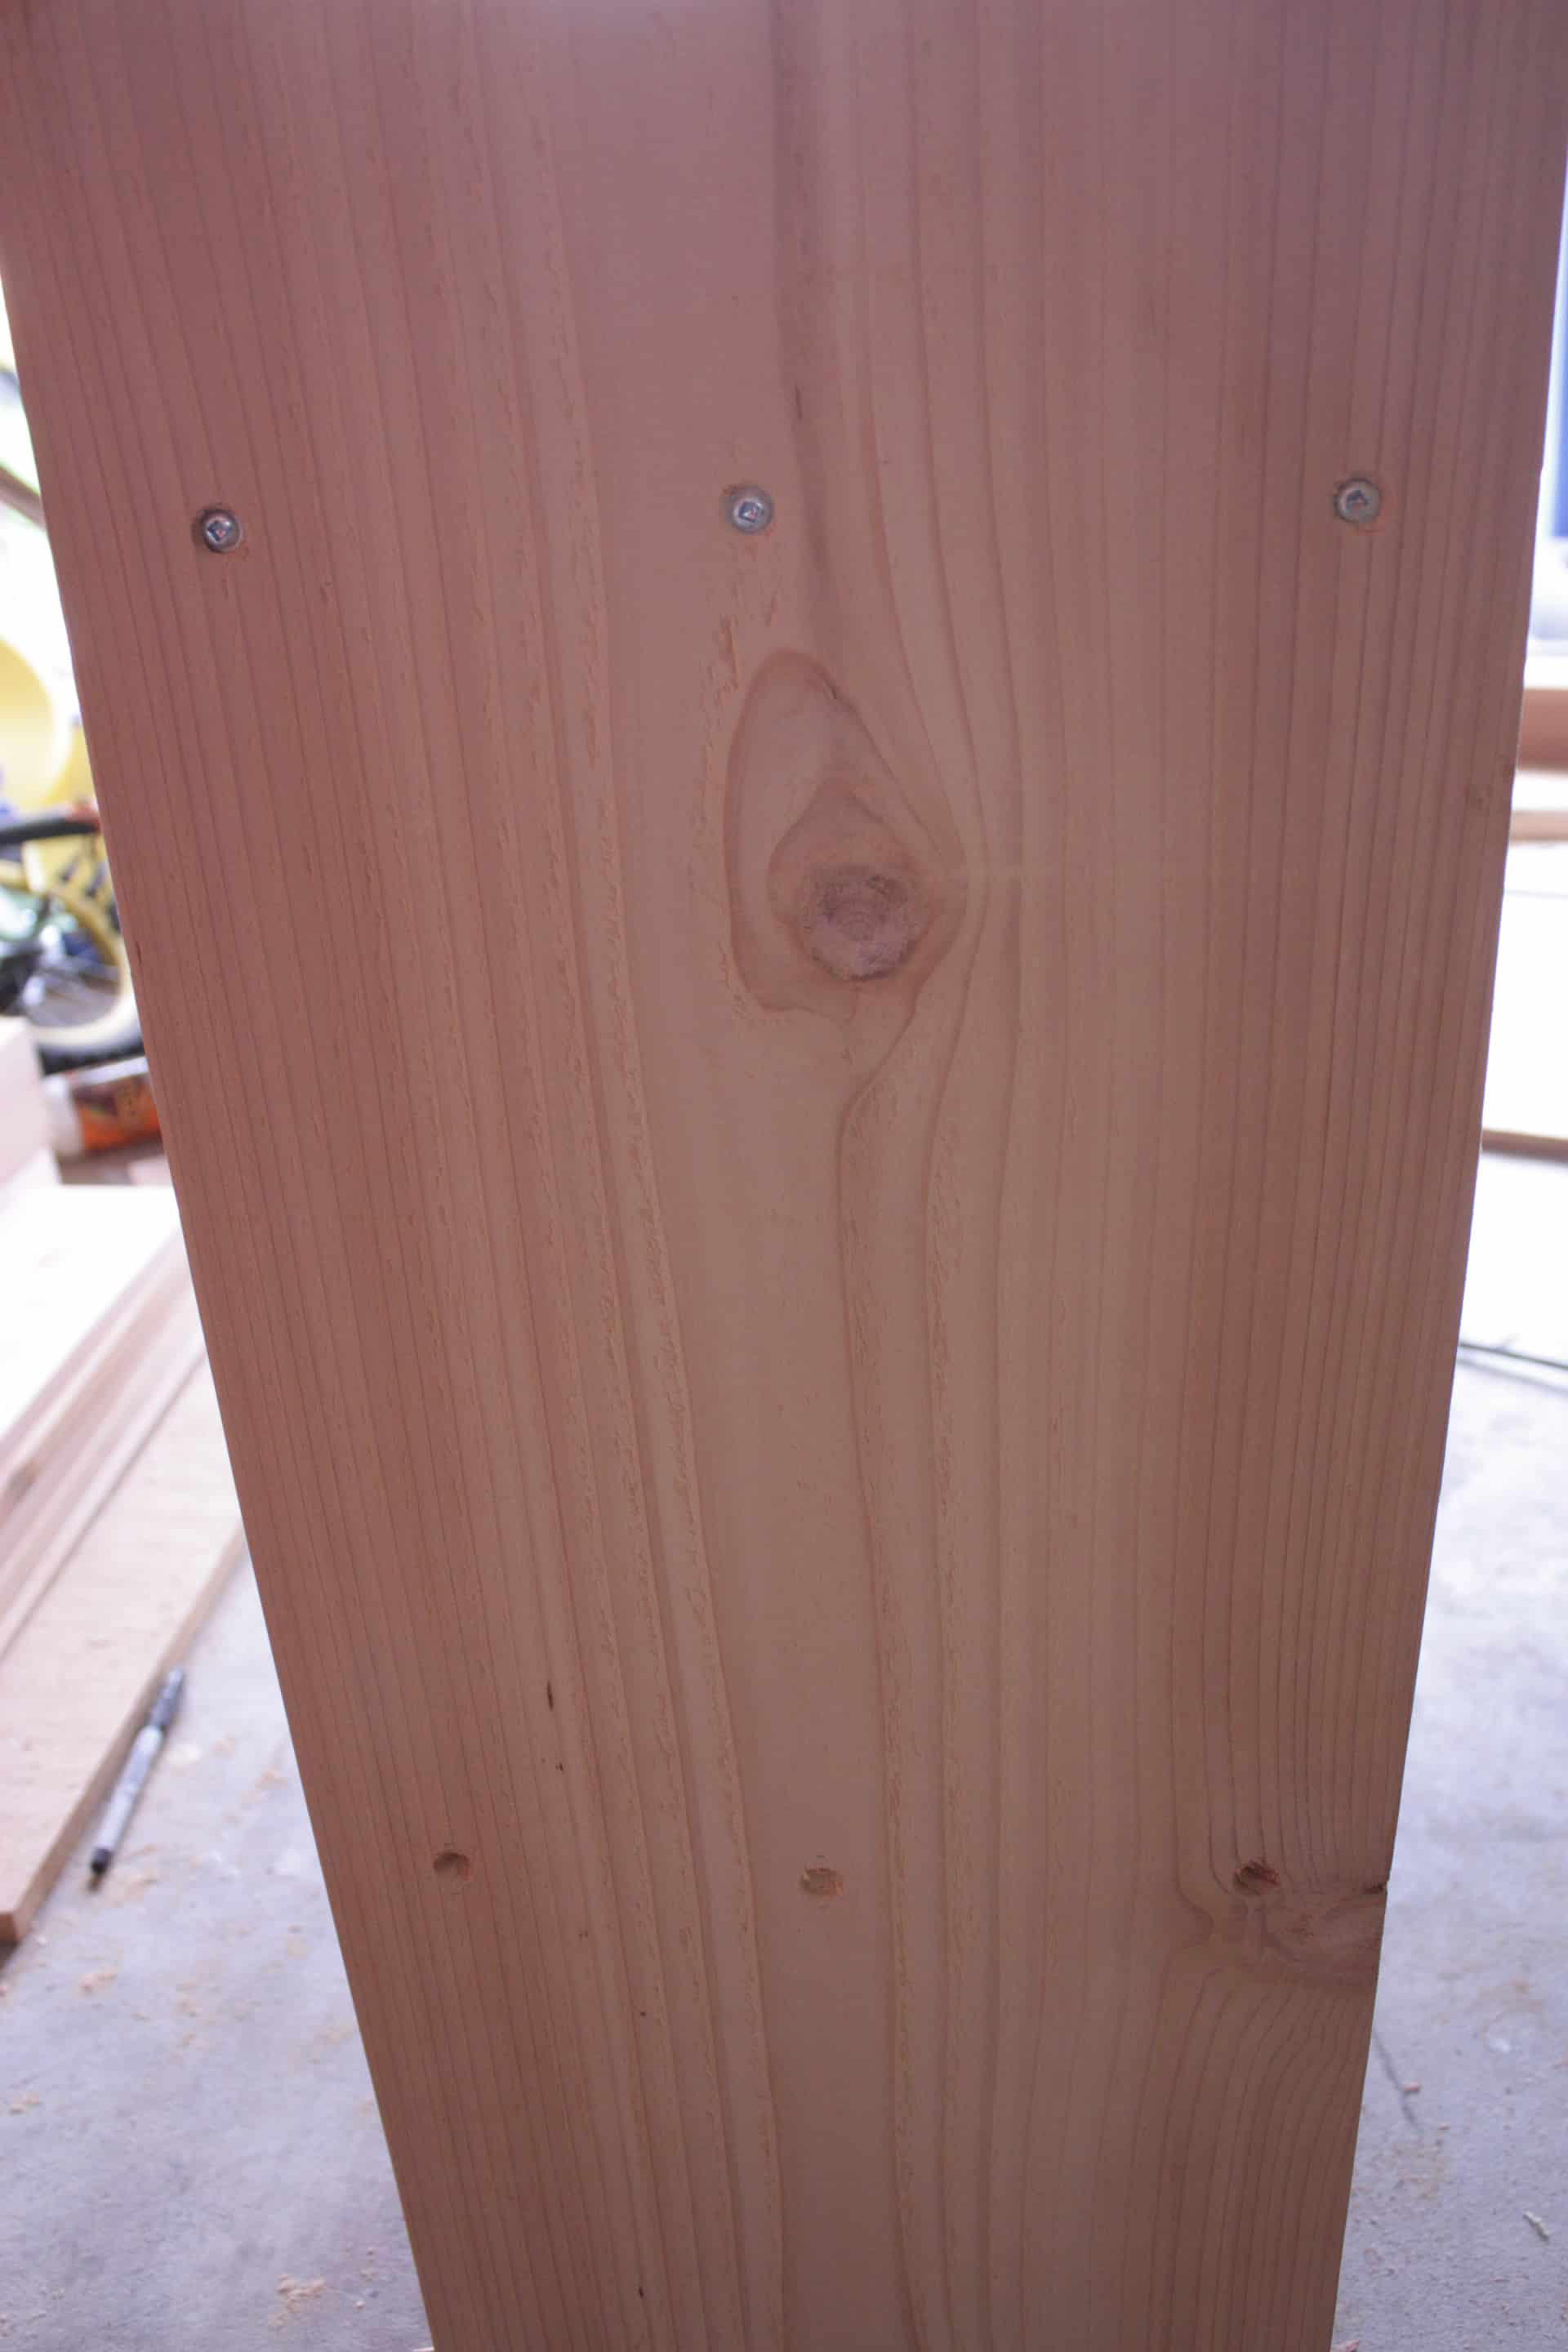
The building officially begins!! I first built the front and back frame, taking two 4x4s and attaching two of the 2×4 @ 38 3/4″ the top 2×4 is flush with the top of the 4×4, it is also flush with the back of the 4×4…not the front! The lower 2×4 is 3.5″ up from the bottom…you could make this higher if you wanted, it’s up to you! The lower 2×4 is flush to the back of the 4×4 as well…not the front! Does that make sense? The picture after the next step may help clarify!
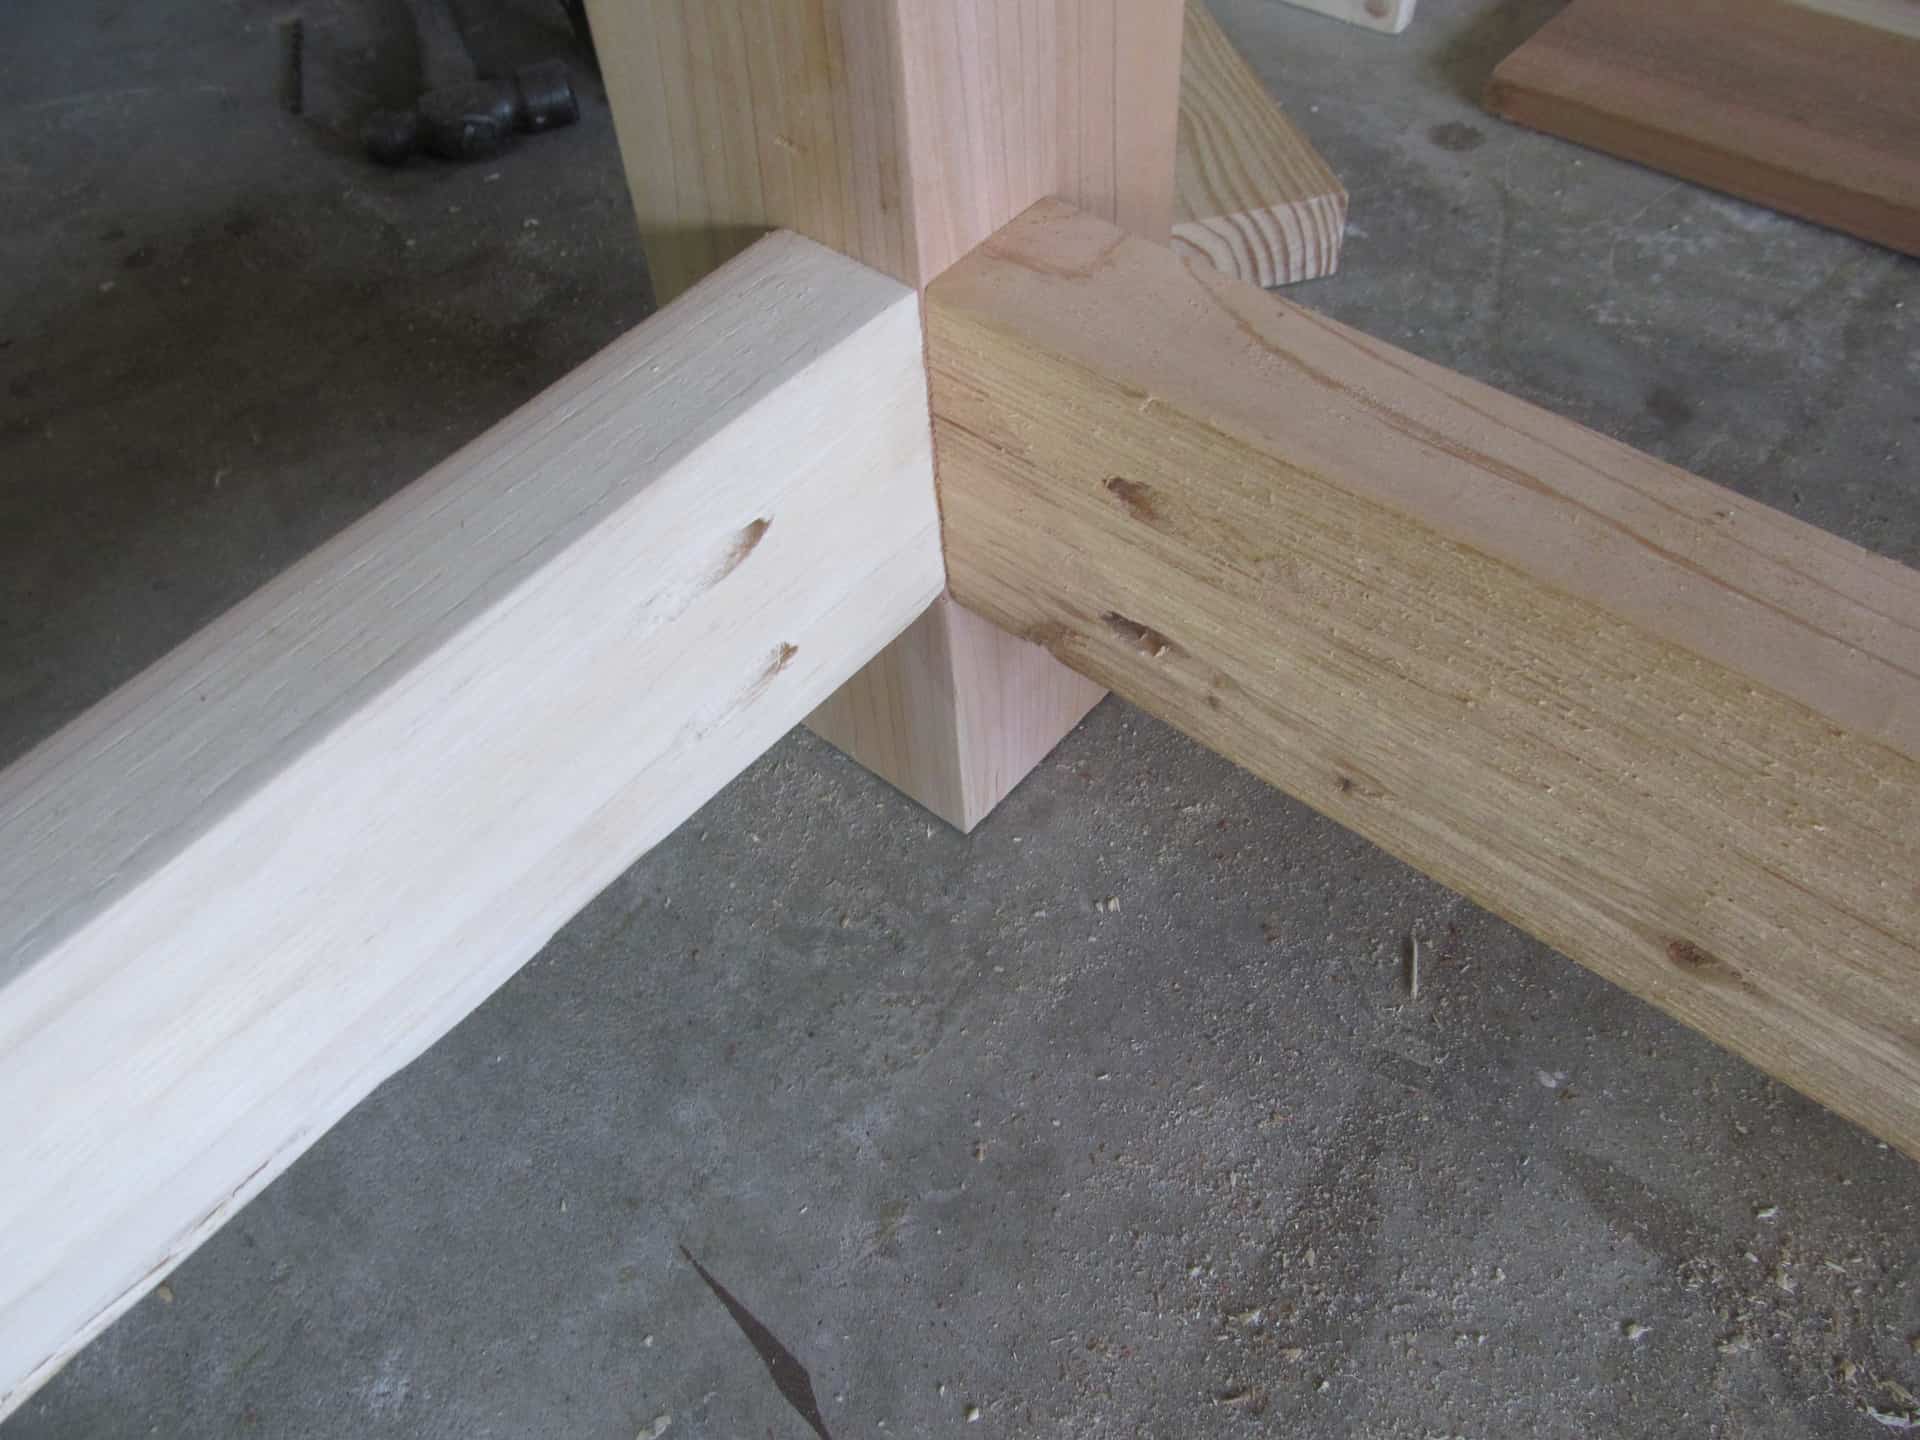
From there you will use the 20″ boards to attach your two frames together, you will end up with a top that looks like this.
Now, do not ask me why I took a picture of the ugliest boards I could find because I have no explanation! LoL! Luckily, we will cover them up in a minute! Haha!! So that’s the top and here is a look at the bottom!
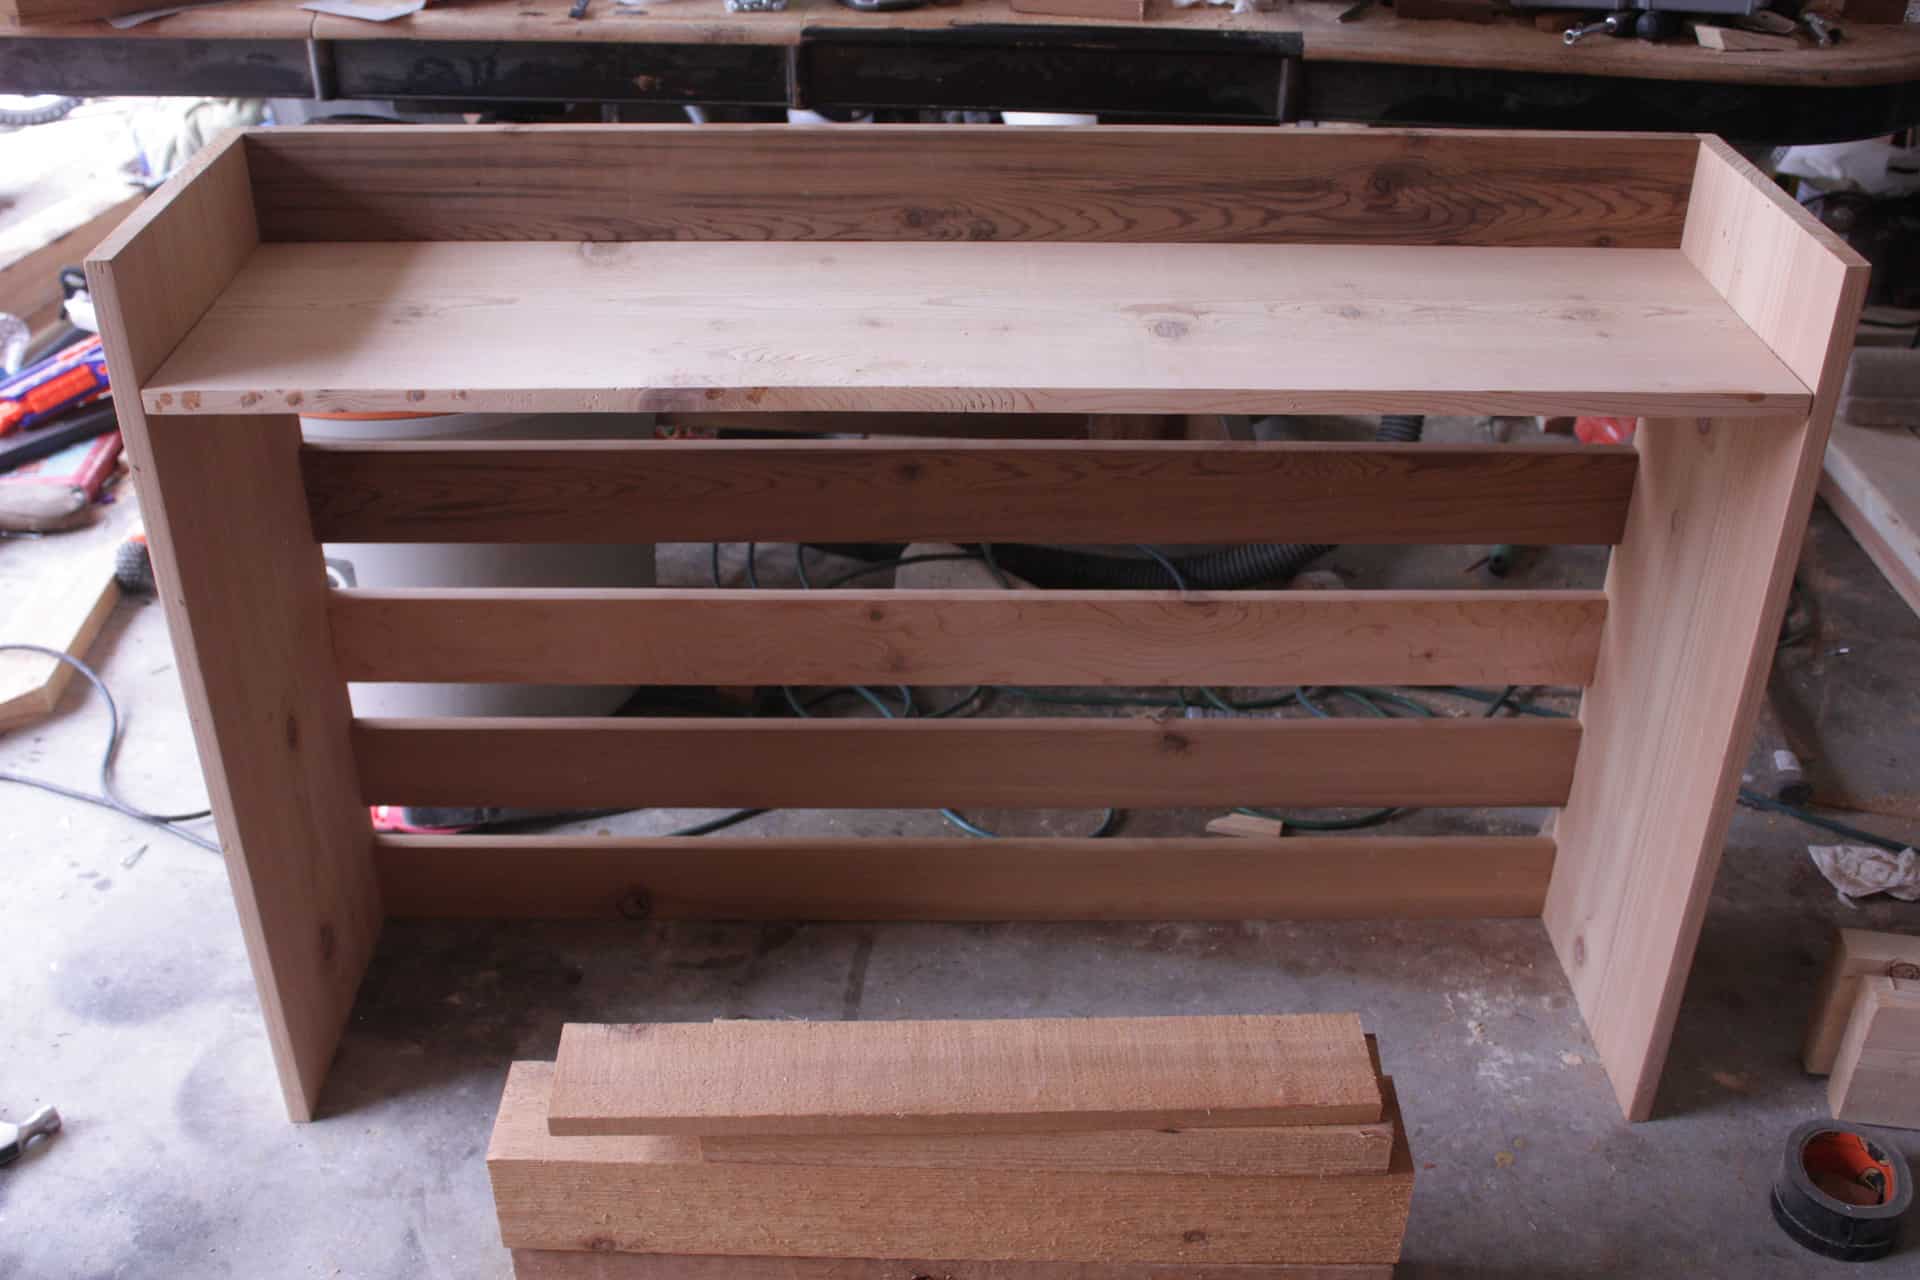
Much better!! Look at those pretty boards! See the other picture was just a fluke!! Hehe!! So now that we have them all attached, we have the frame done!! Look how purdy she looks!!
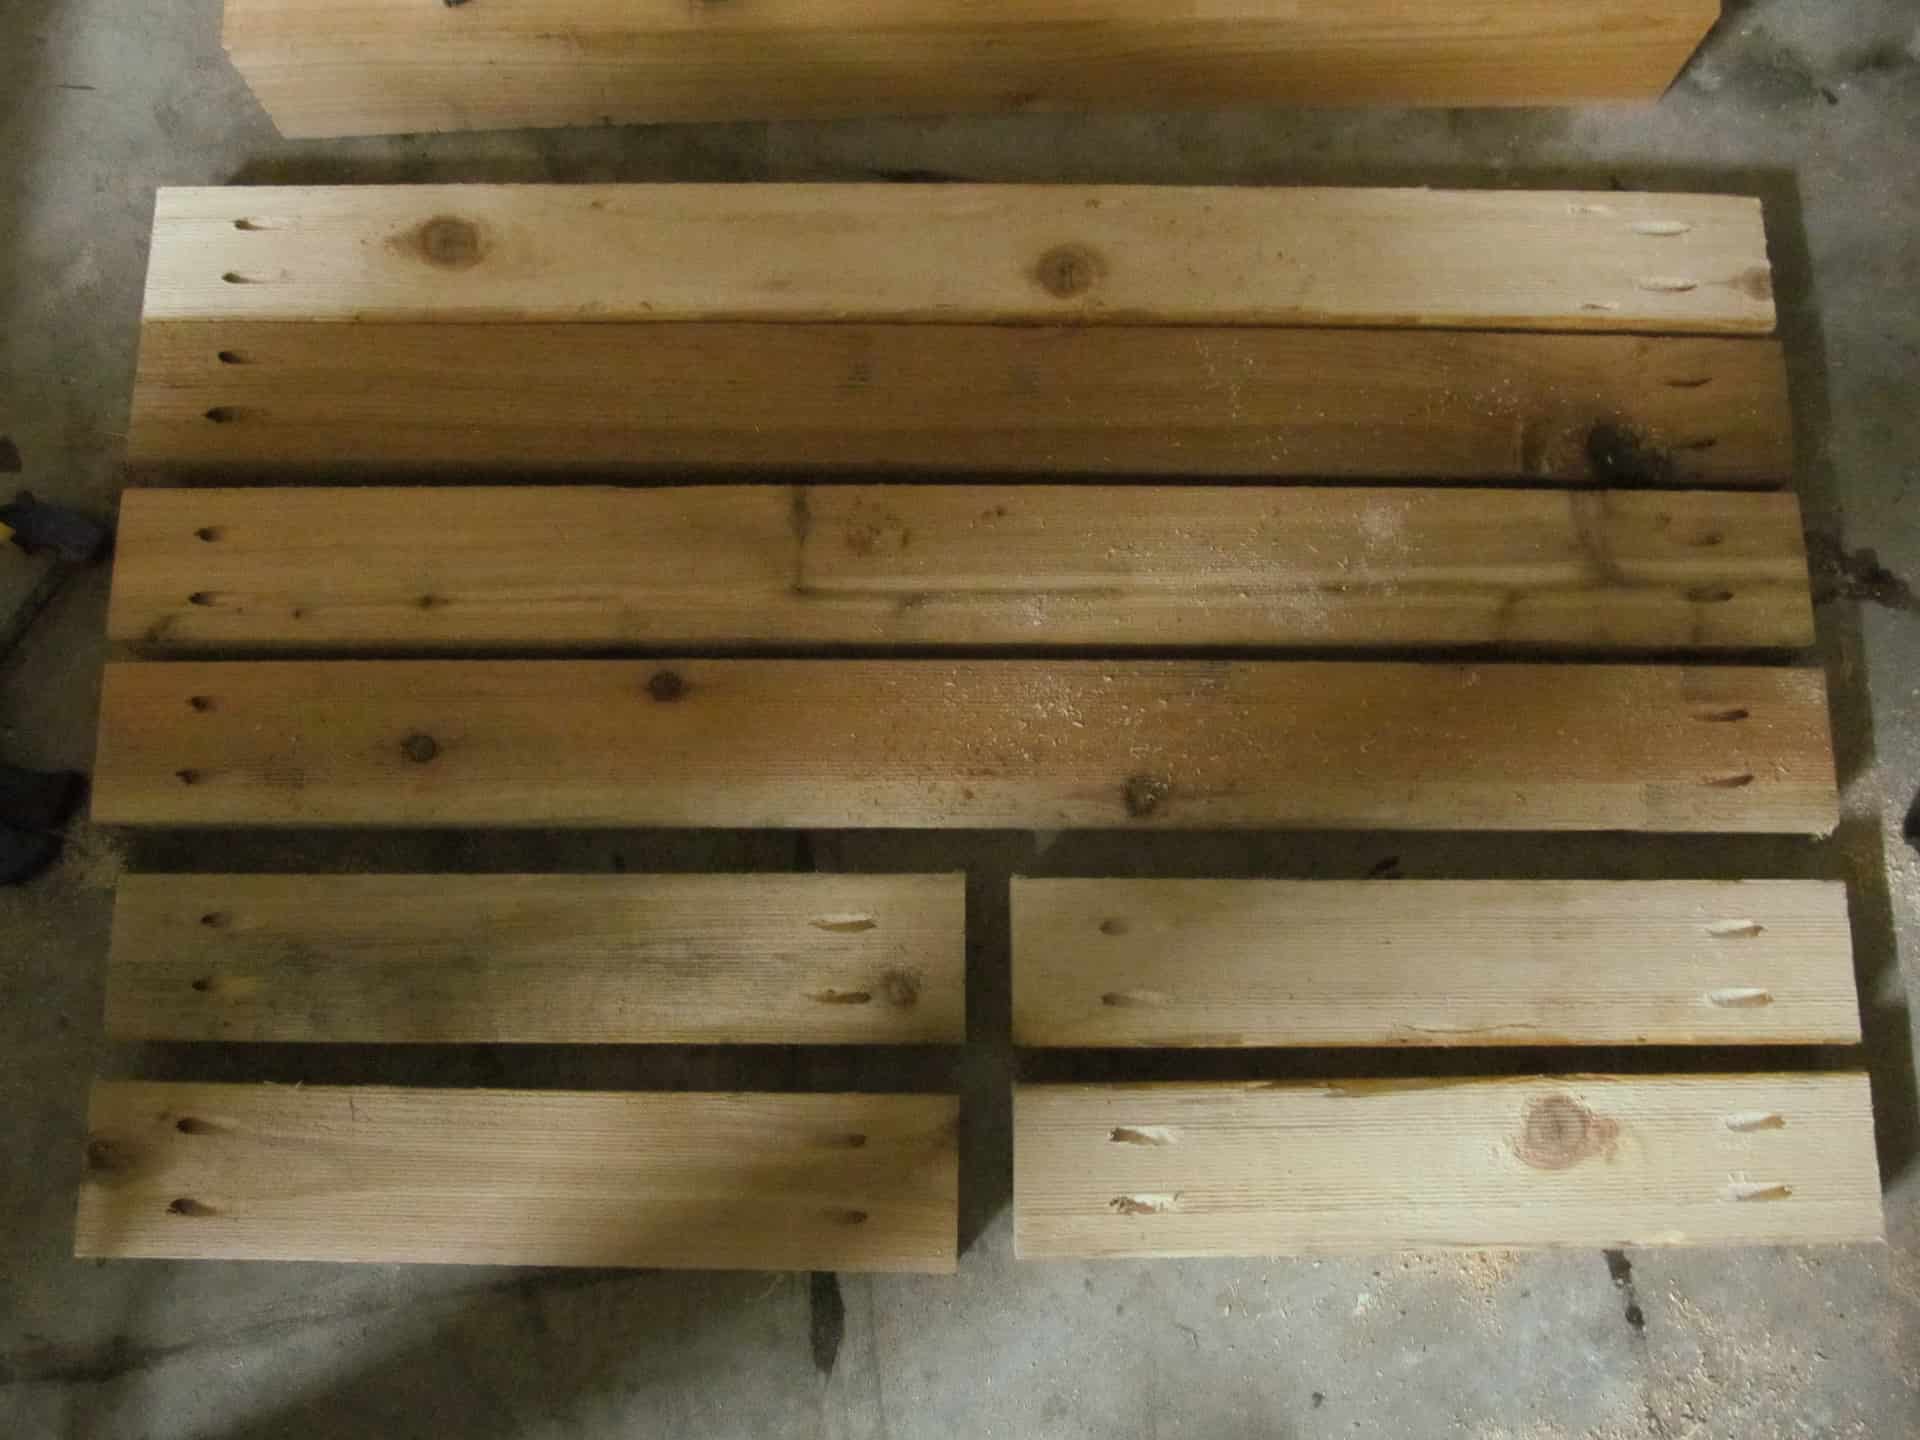
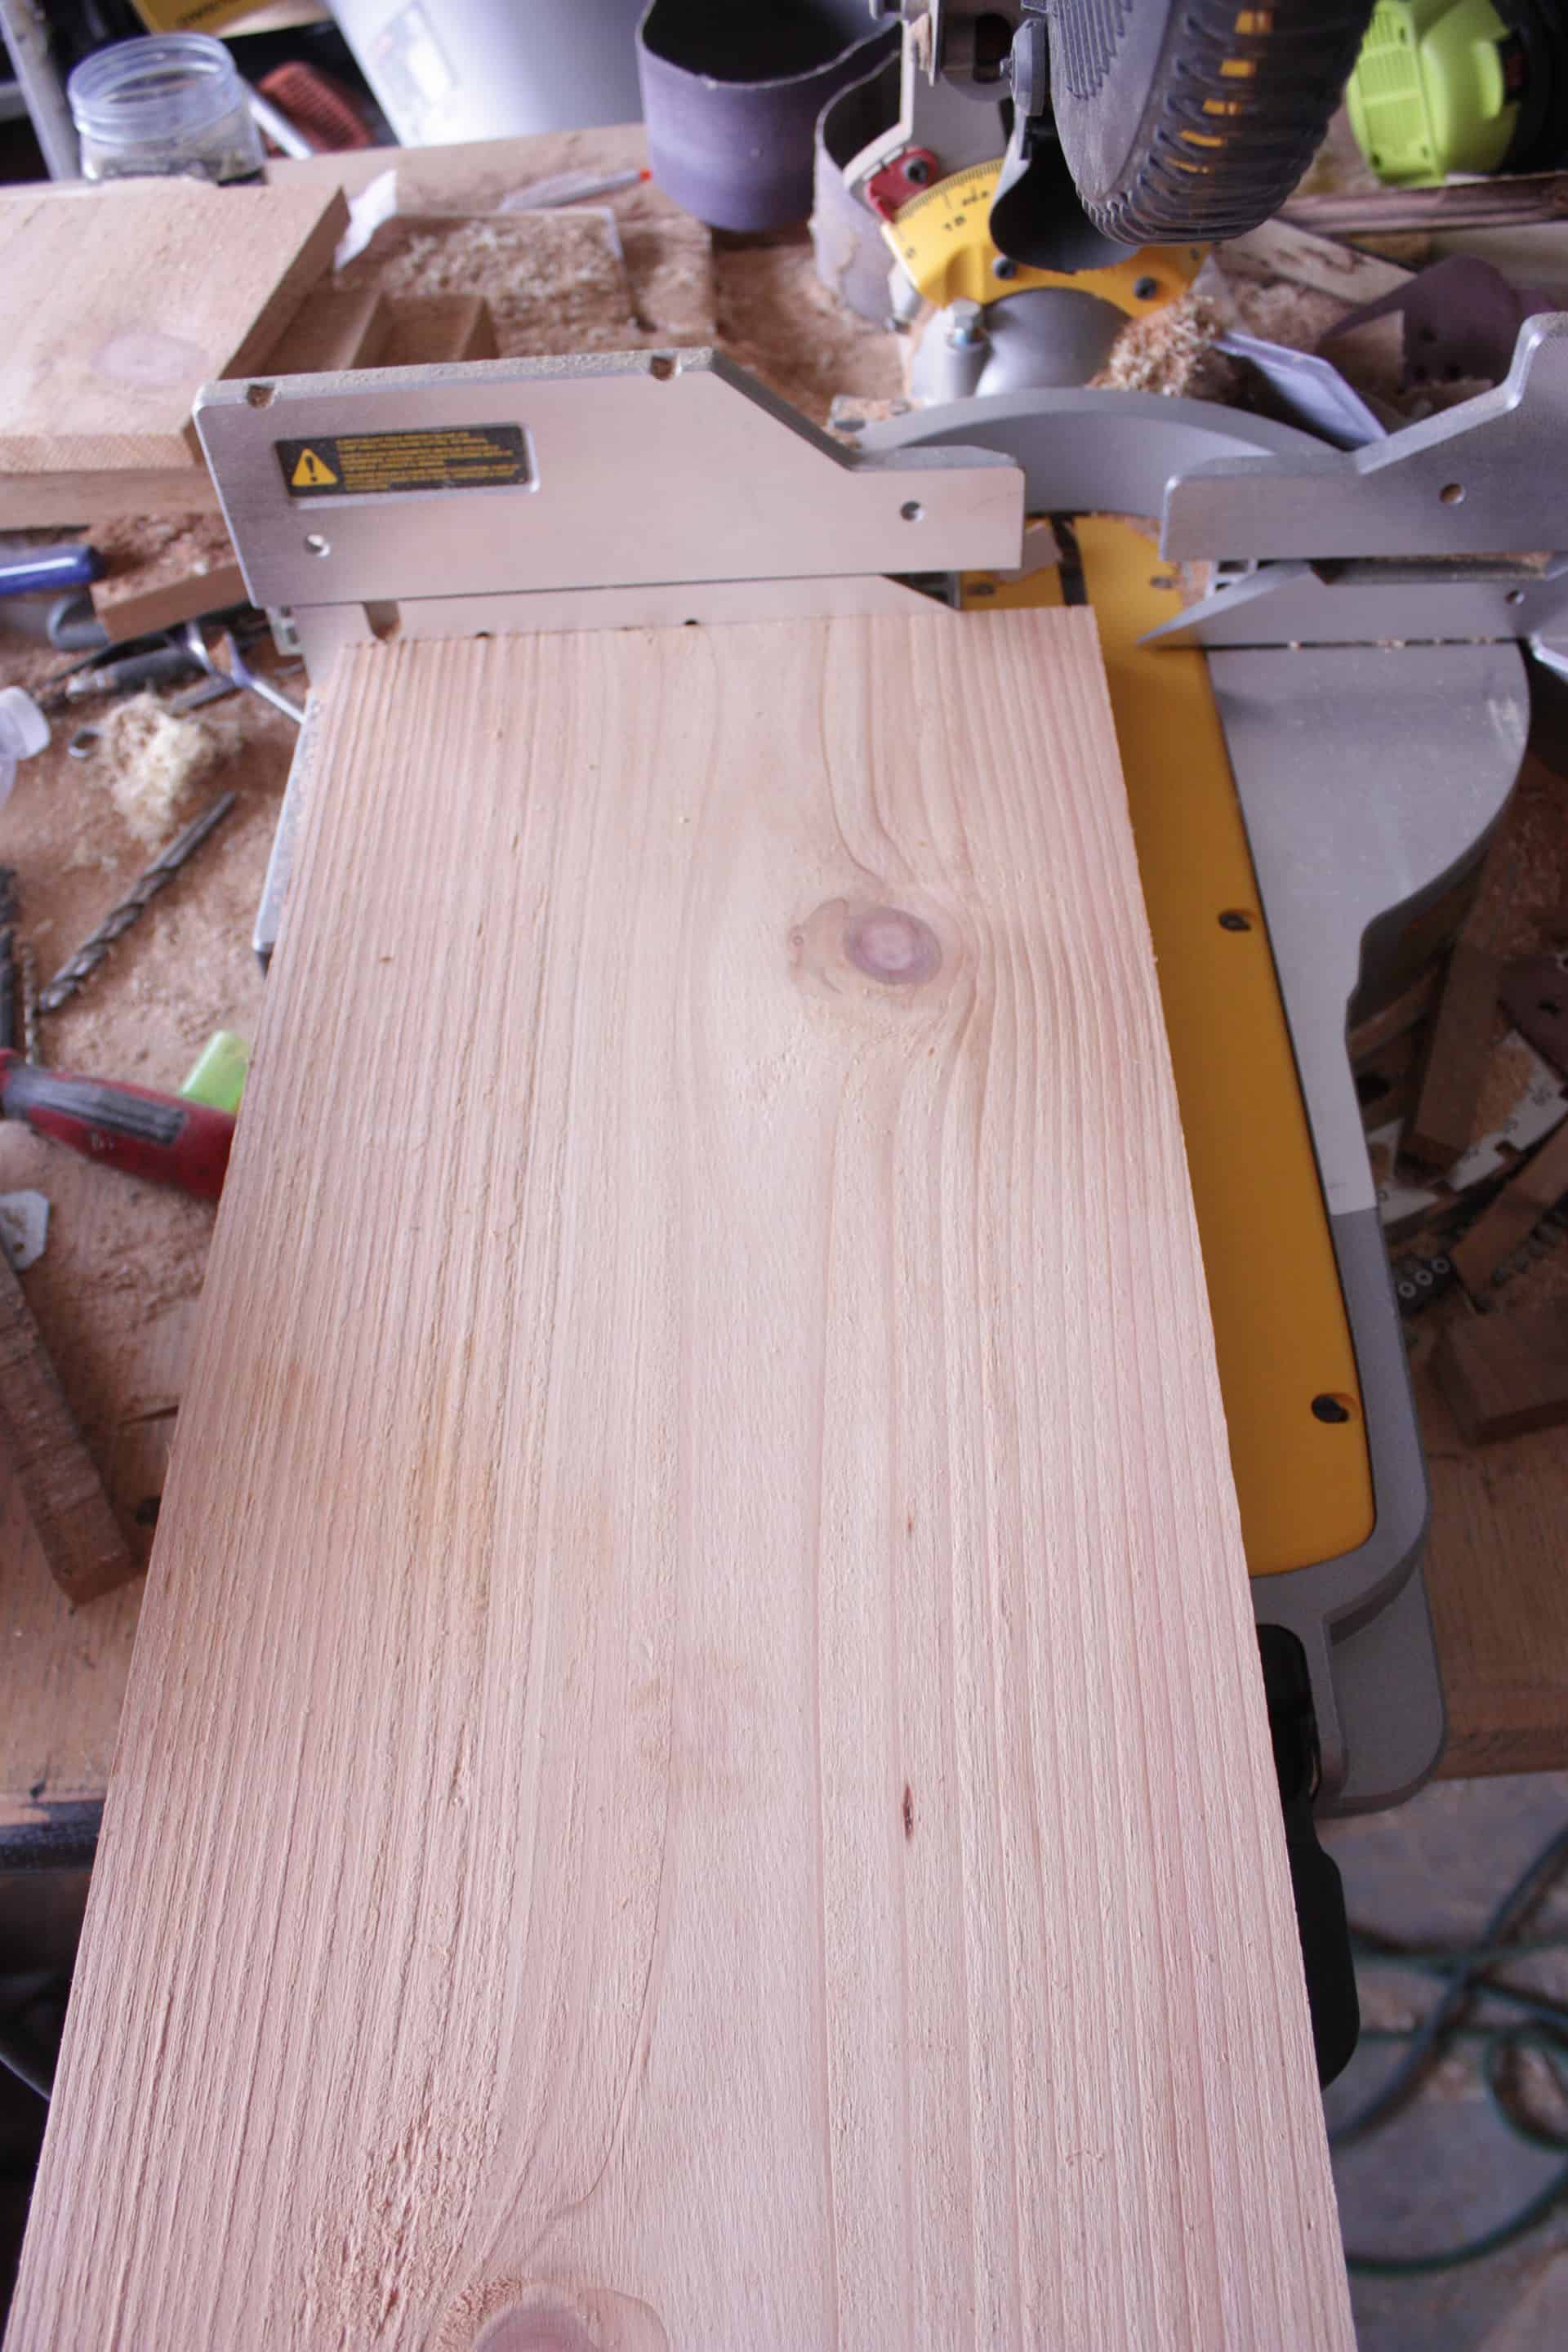
It is really crazy because at this point I almost just started cutting my 1x4s for the bottom without measuring, something told me as I was standing at the saw ready to cut…go measure to make sure! Thank goodness I did because I would have wasted the boards or a lot of my time… I wasn’t interested in wasting either one of those!! Lol!!
Luckily I measured because since the 2x4s were 1 3/4″ between the two of them it added an extra 1/2″ onto my bottom boards so they needed cut at 23 1/2″ instead of the 23″ I was ready to cut them at!! Another moral of the story…always double check!!
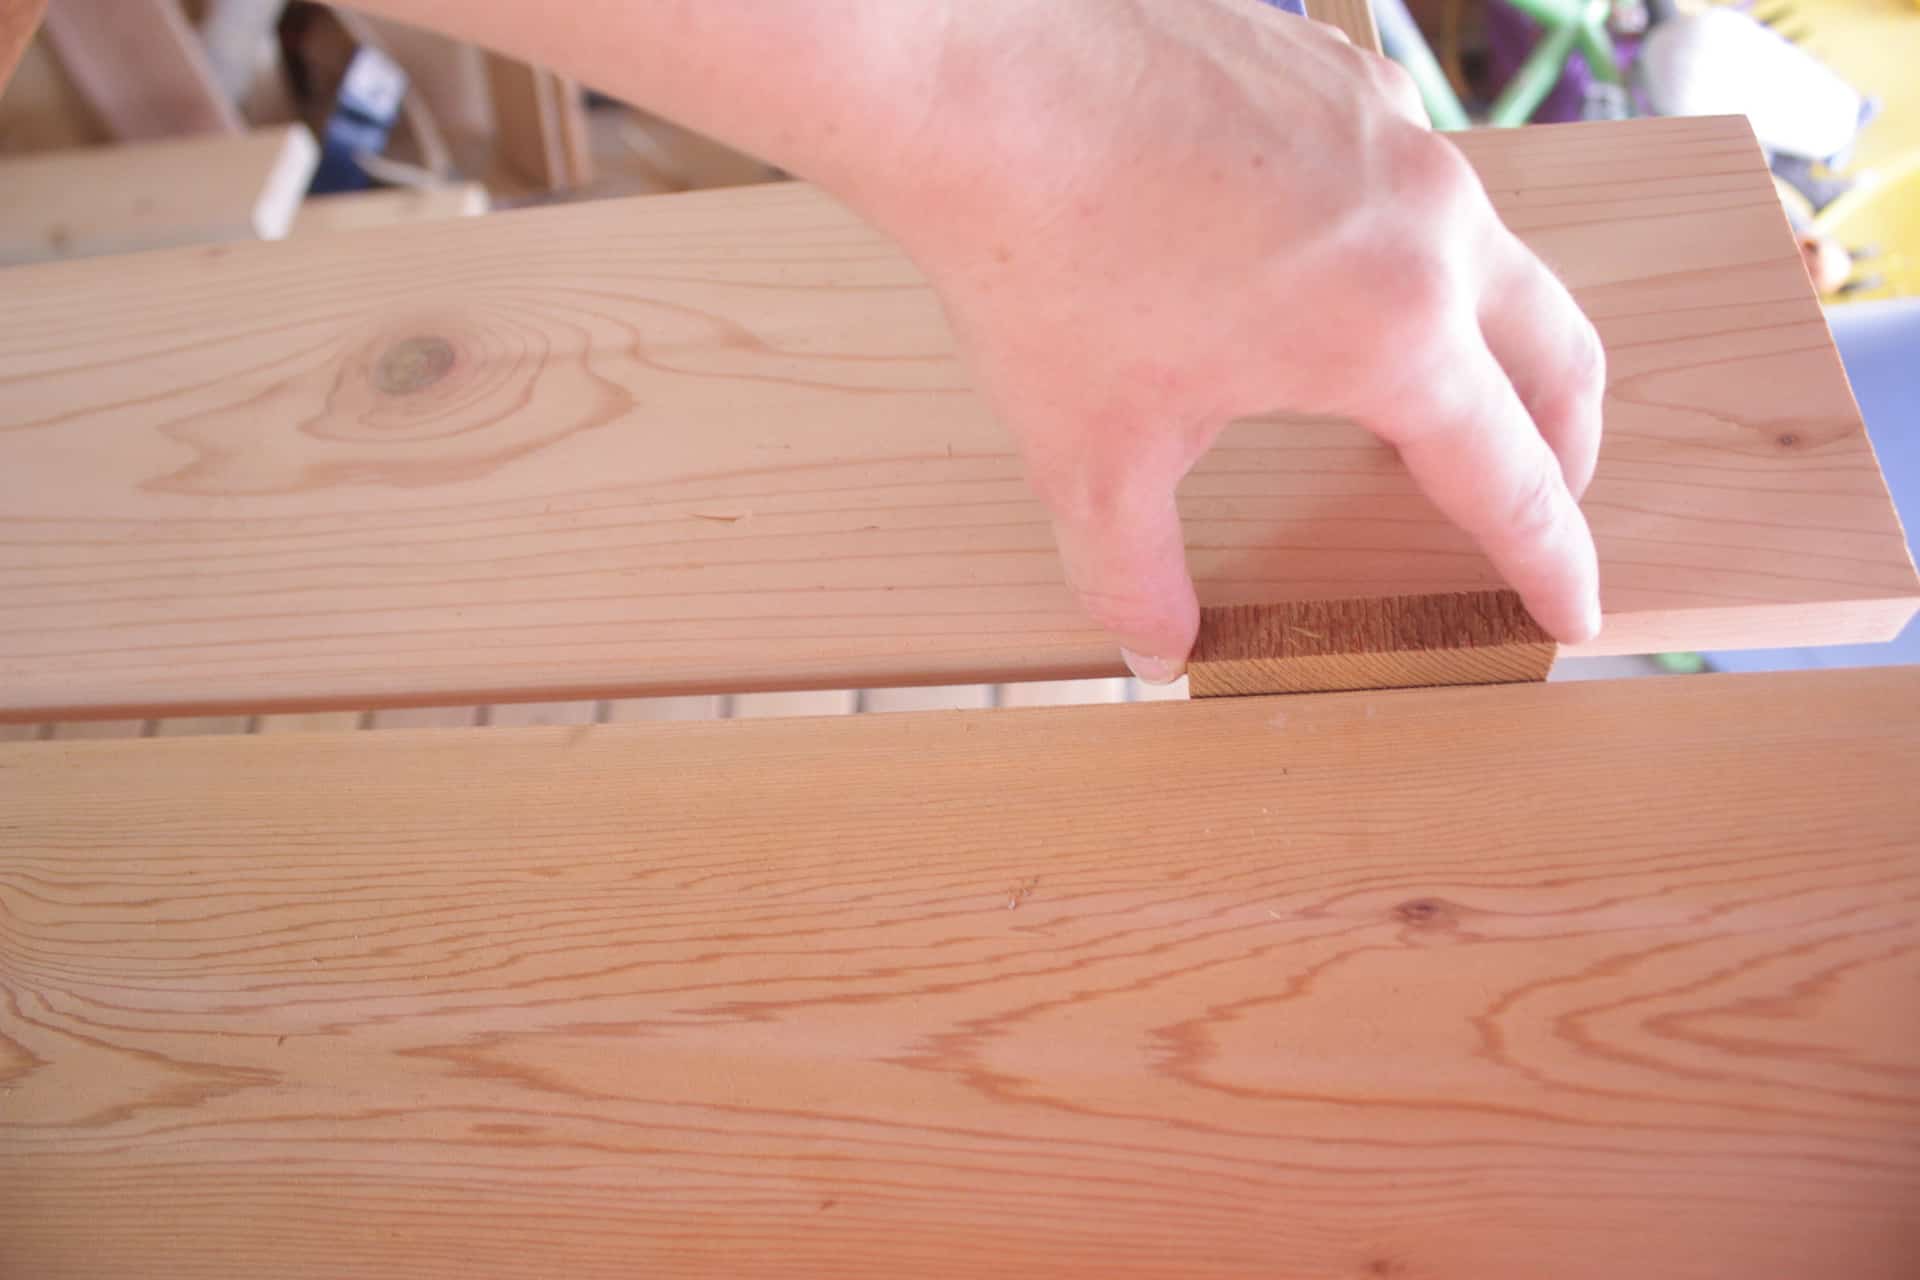
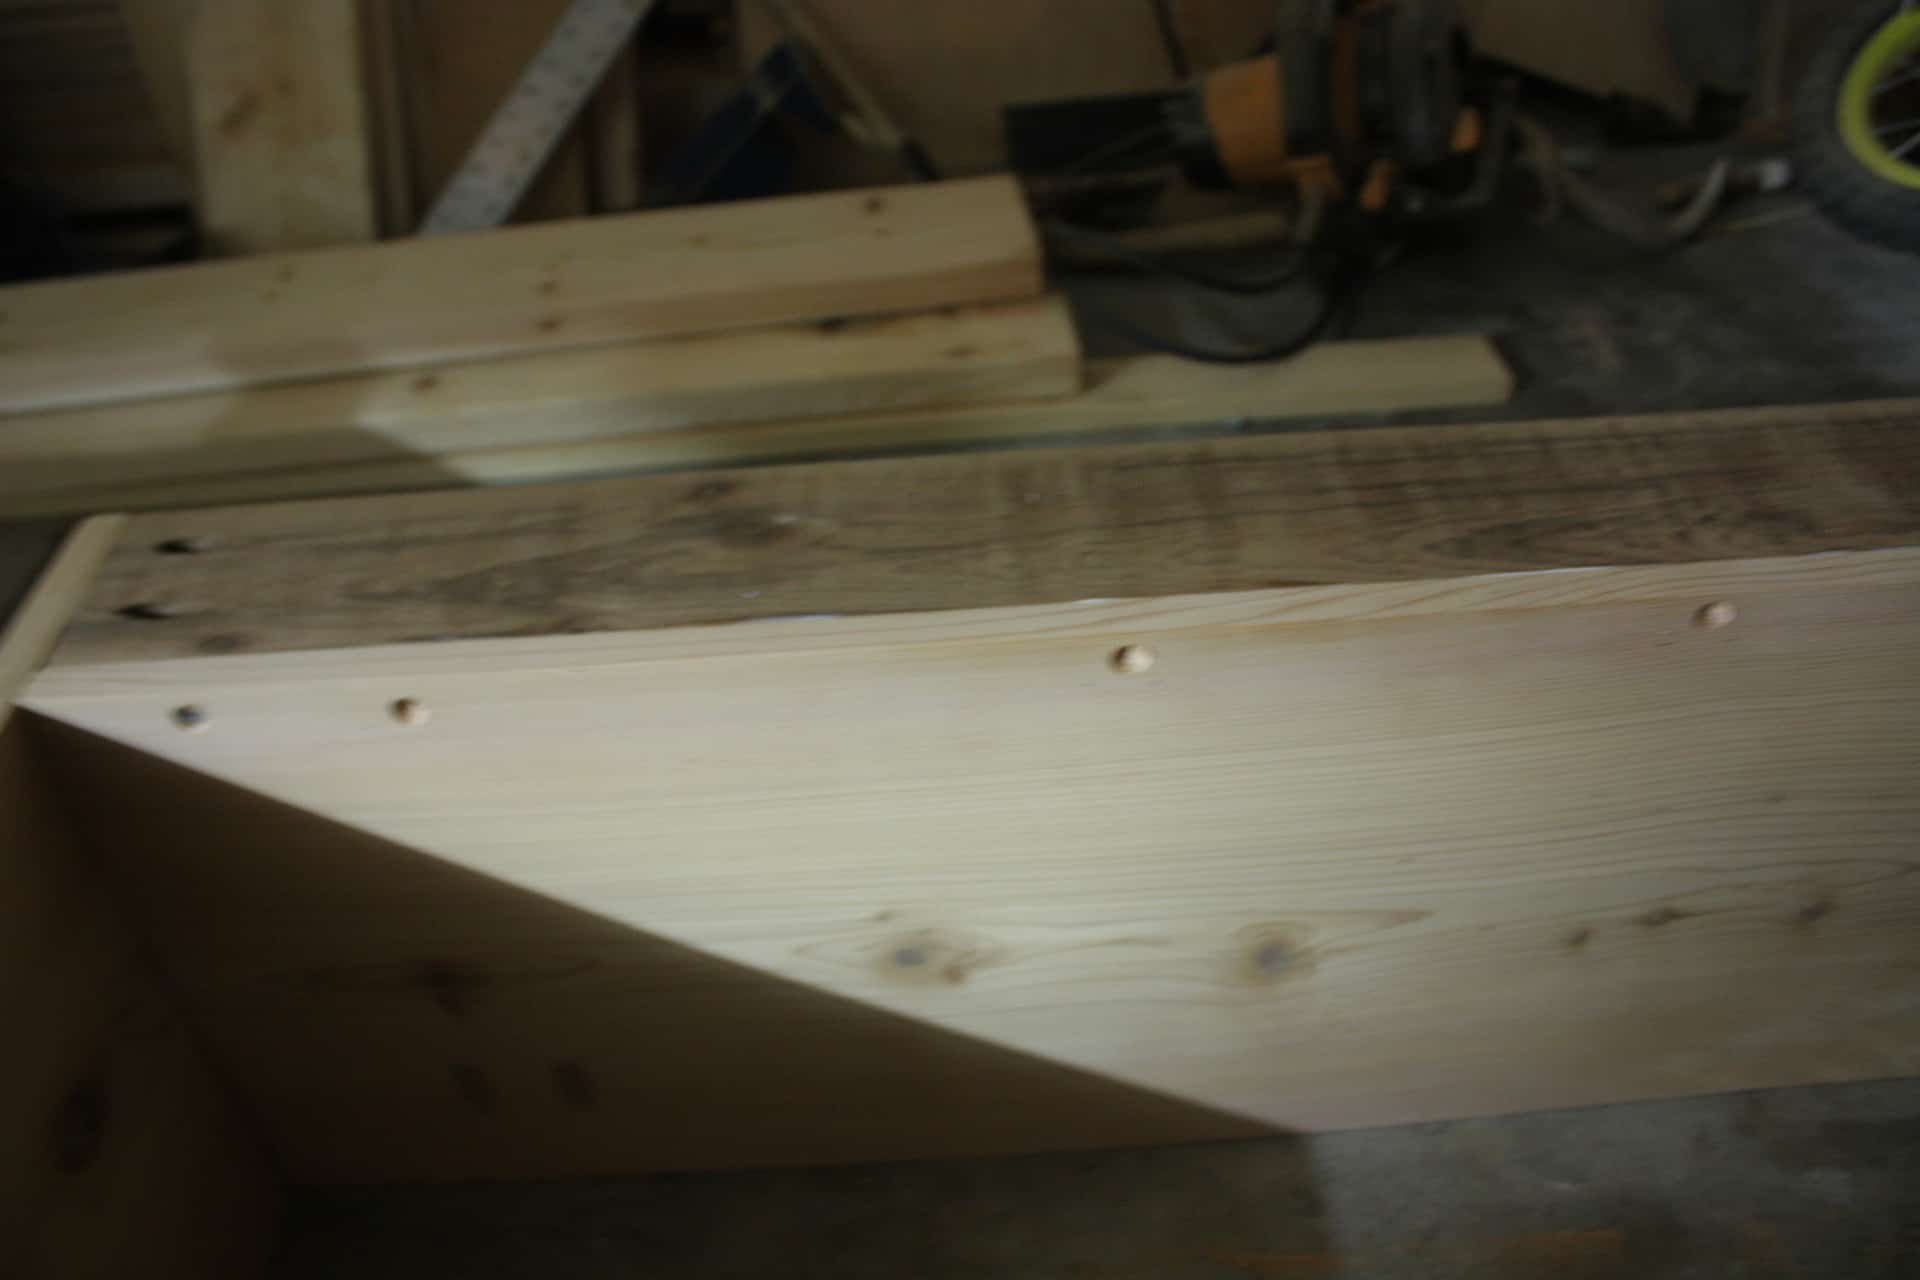
Once I had them cut, I had to notch out the two end boards so that they would fit around the 4x4s! I just laid them next to the 4x4s where they would go and marked where I needed to cut!
I used our really junky jigsaw to cut the notches out of mine, it is super easy…nothing to it!
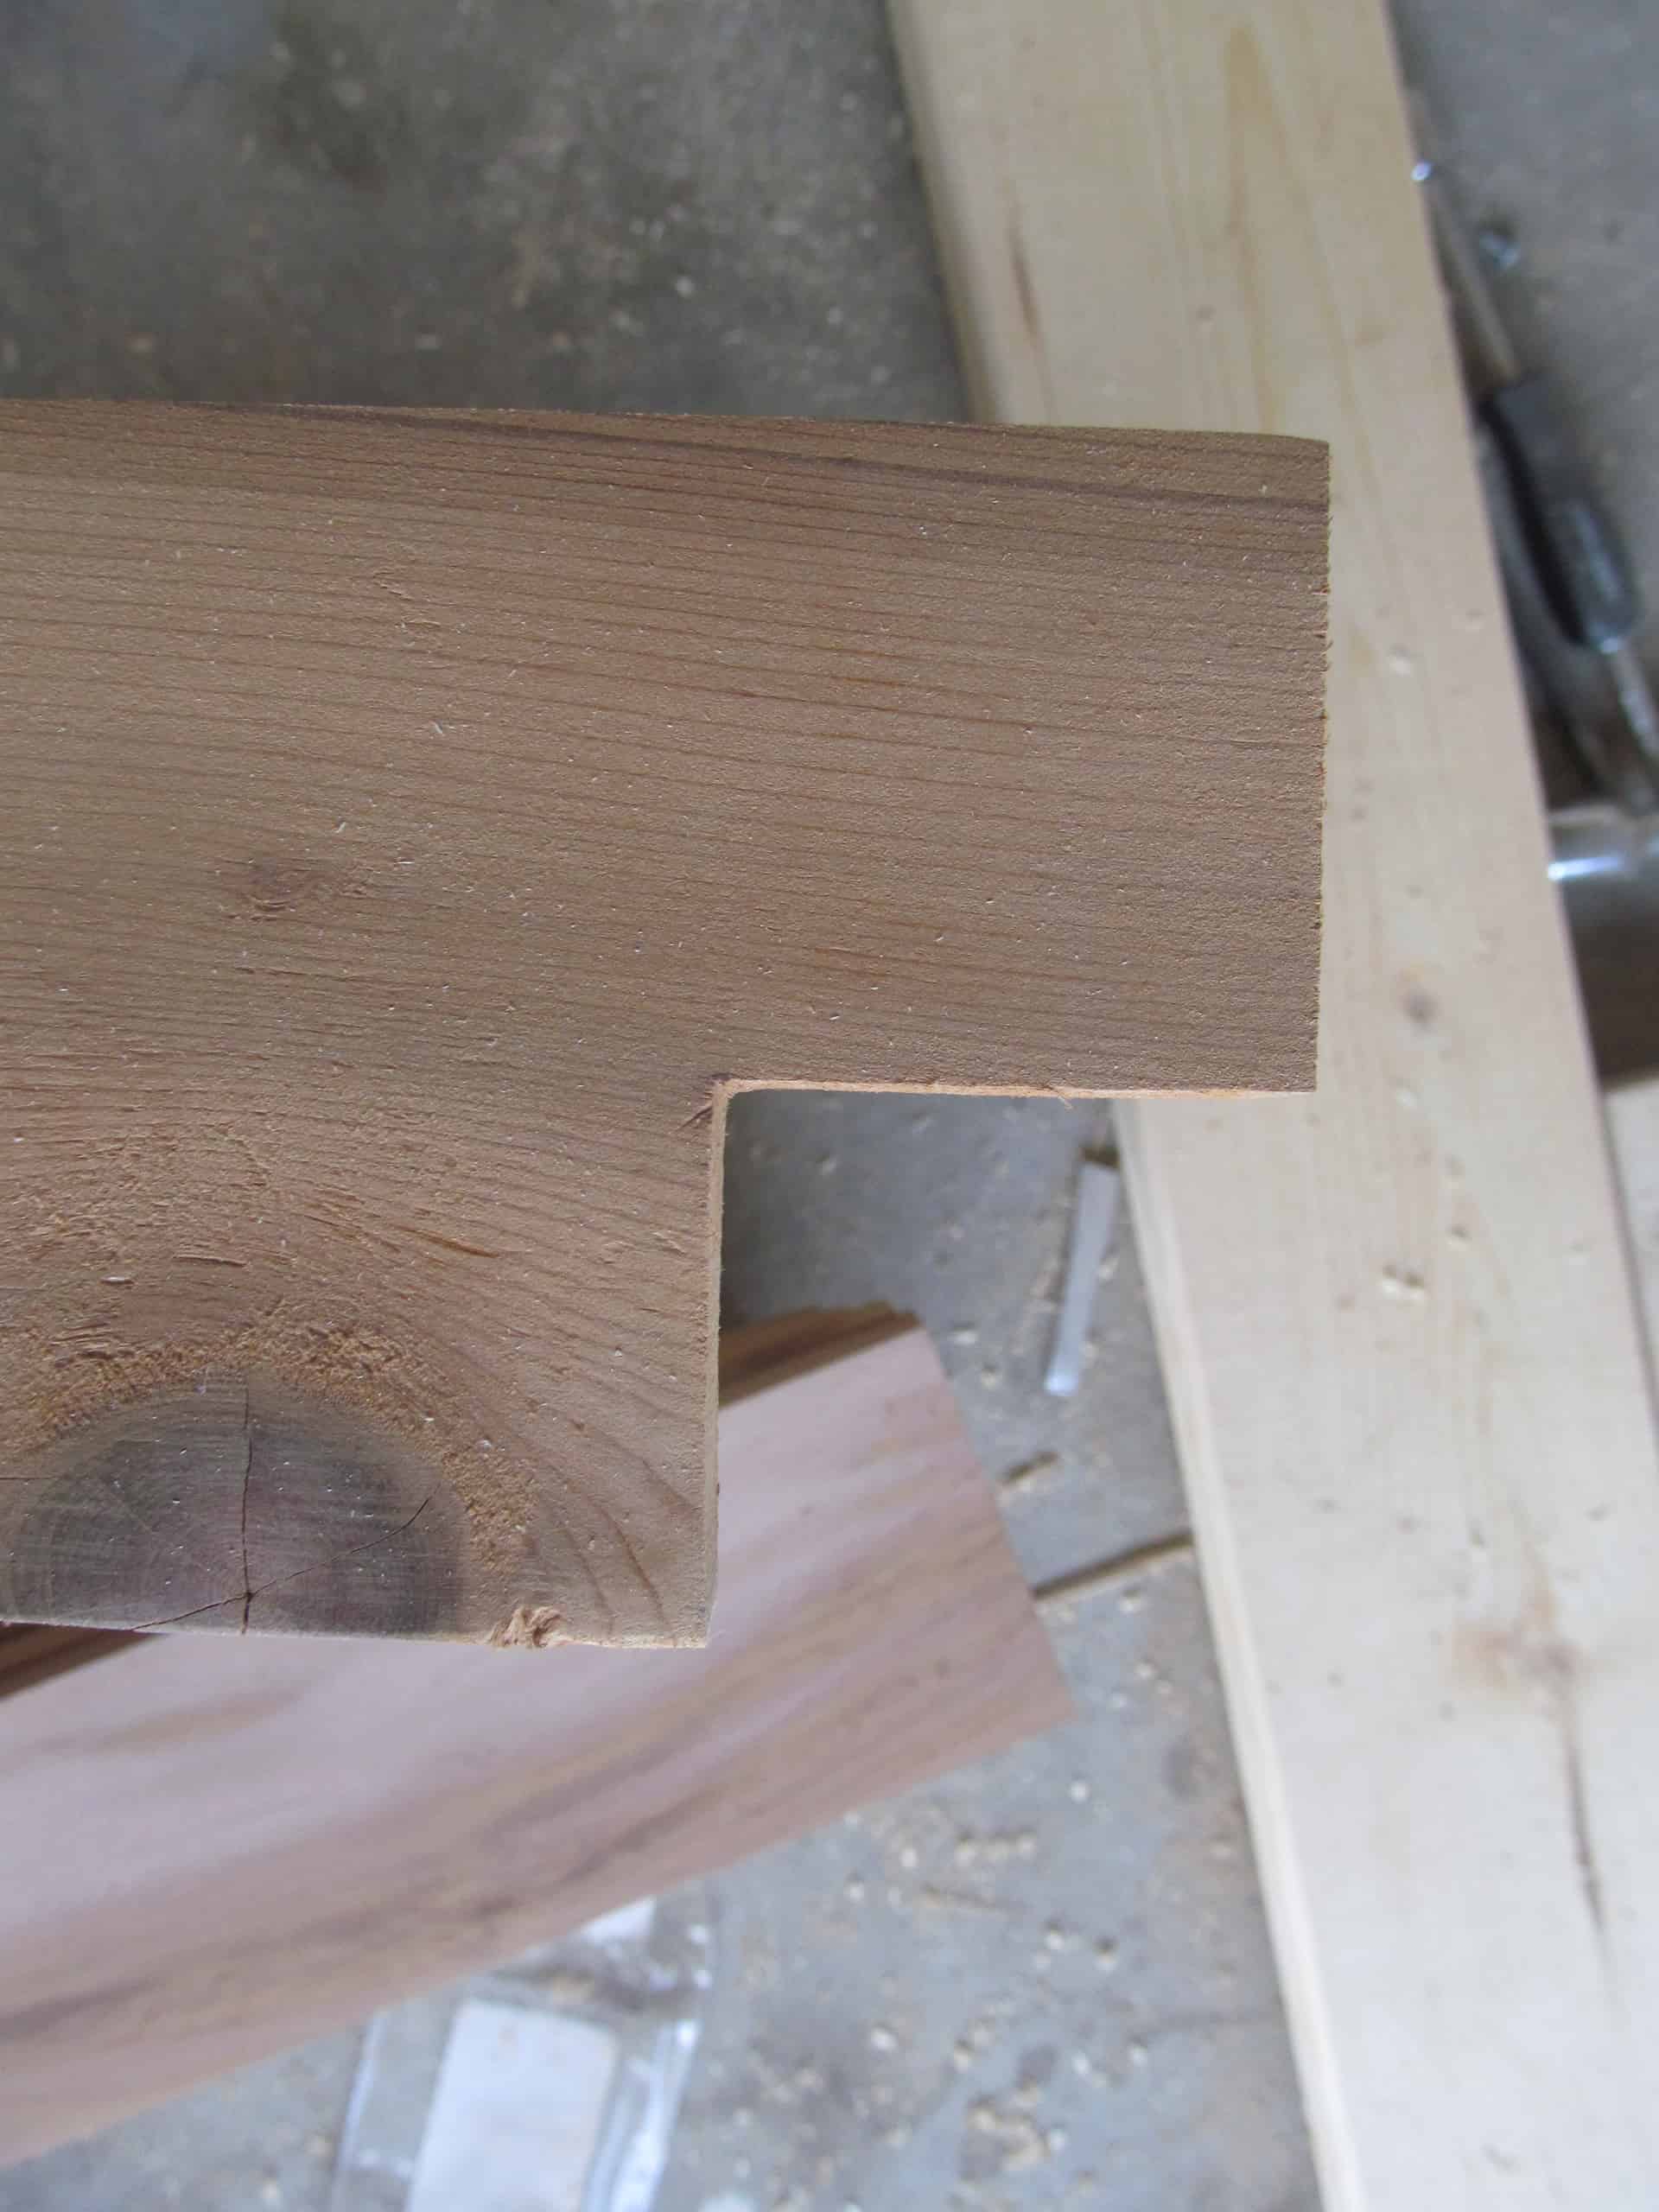
You will have to notch out both end boards and then you will glue and staple them in place…or that’s how I did it anyway…you could get all fancy if you wanted, and time allowed, and pocket hole each one flush with the bottom frame board! That’s the great thing about DIY, you get to make it exactly how you want!! Whoop!! They will look something like this if you glue and staple them as I did!
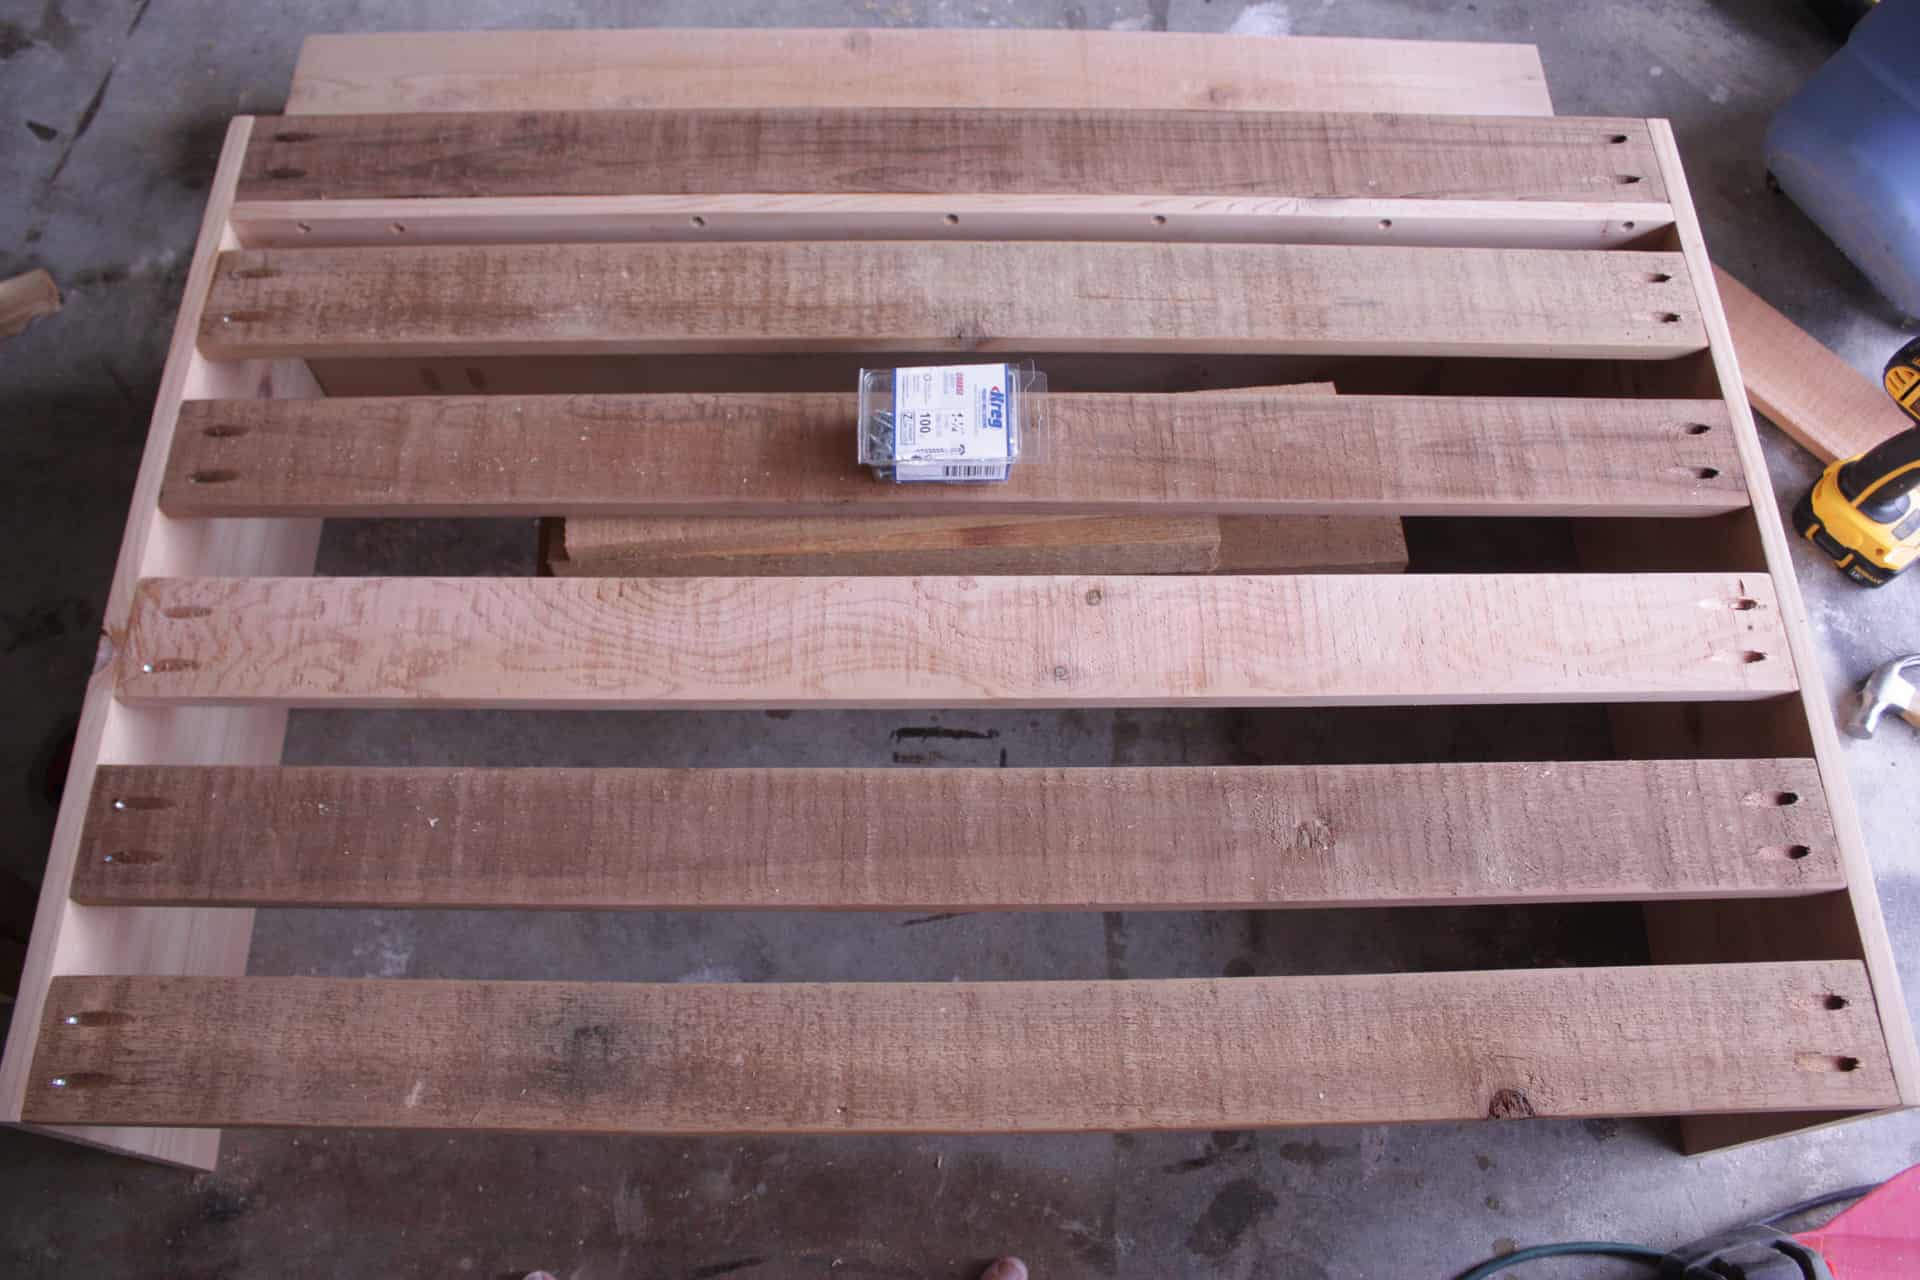
Once I had notched out my two end boards, I was ready to start rockin’ and rollin’ on the rest of the bottom boards! On the very first one I built for the school auction, I just placed them all up against each other without any gaps in between, because I didn’t have time to figure out the spacing to make it even…my brain was fried at 2:00 a.m. when I was out in the garage trying to finish it up because the next day at 12:00 p.m. I had to have it up to the school!!
Gee…you would think I would give myself plenty of time to work on things but let’s just say…to be nice…I’m not lazy…I’m just busy!!! LOL!! Okay…my husband would laugh hysterically at that, but that’s my story and I’m sticking to it!! 😏
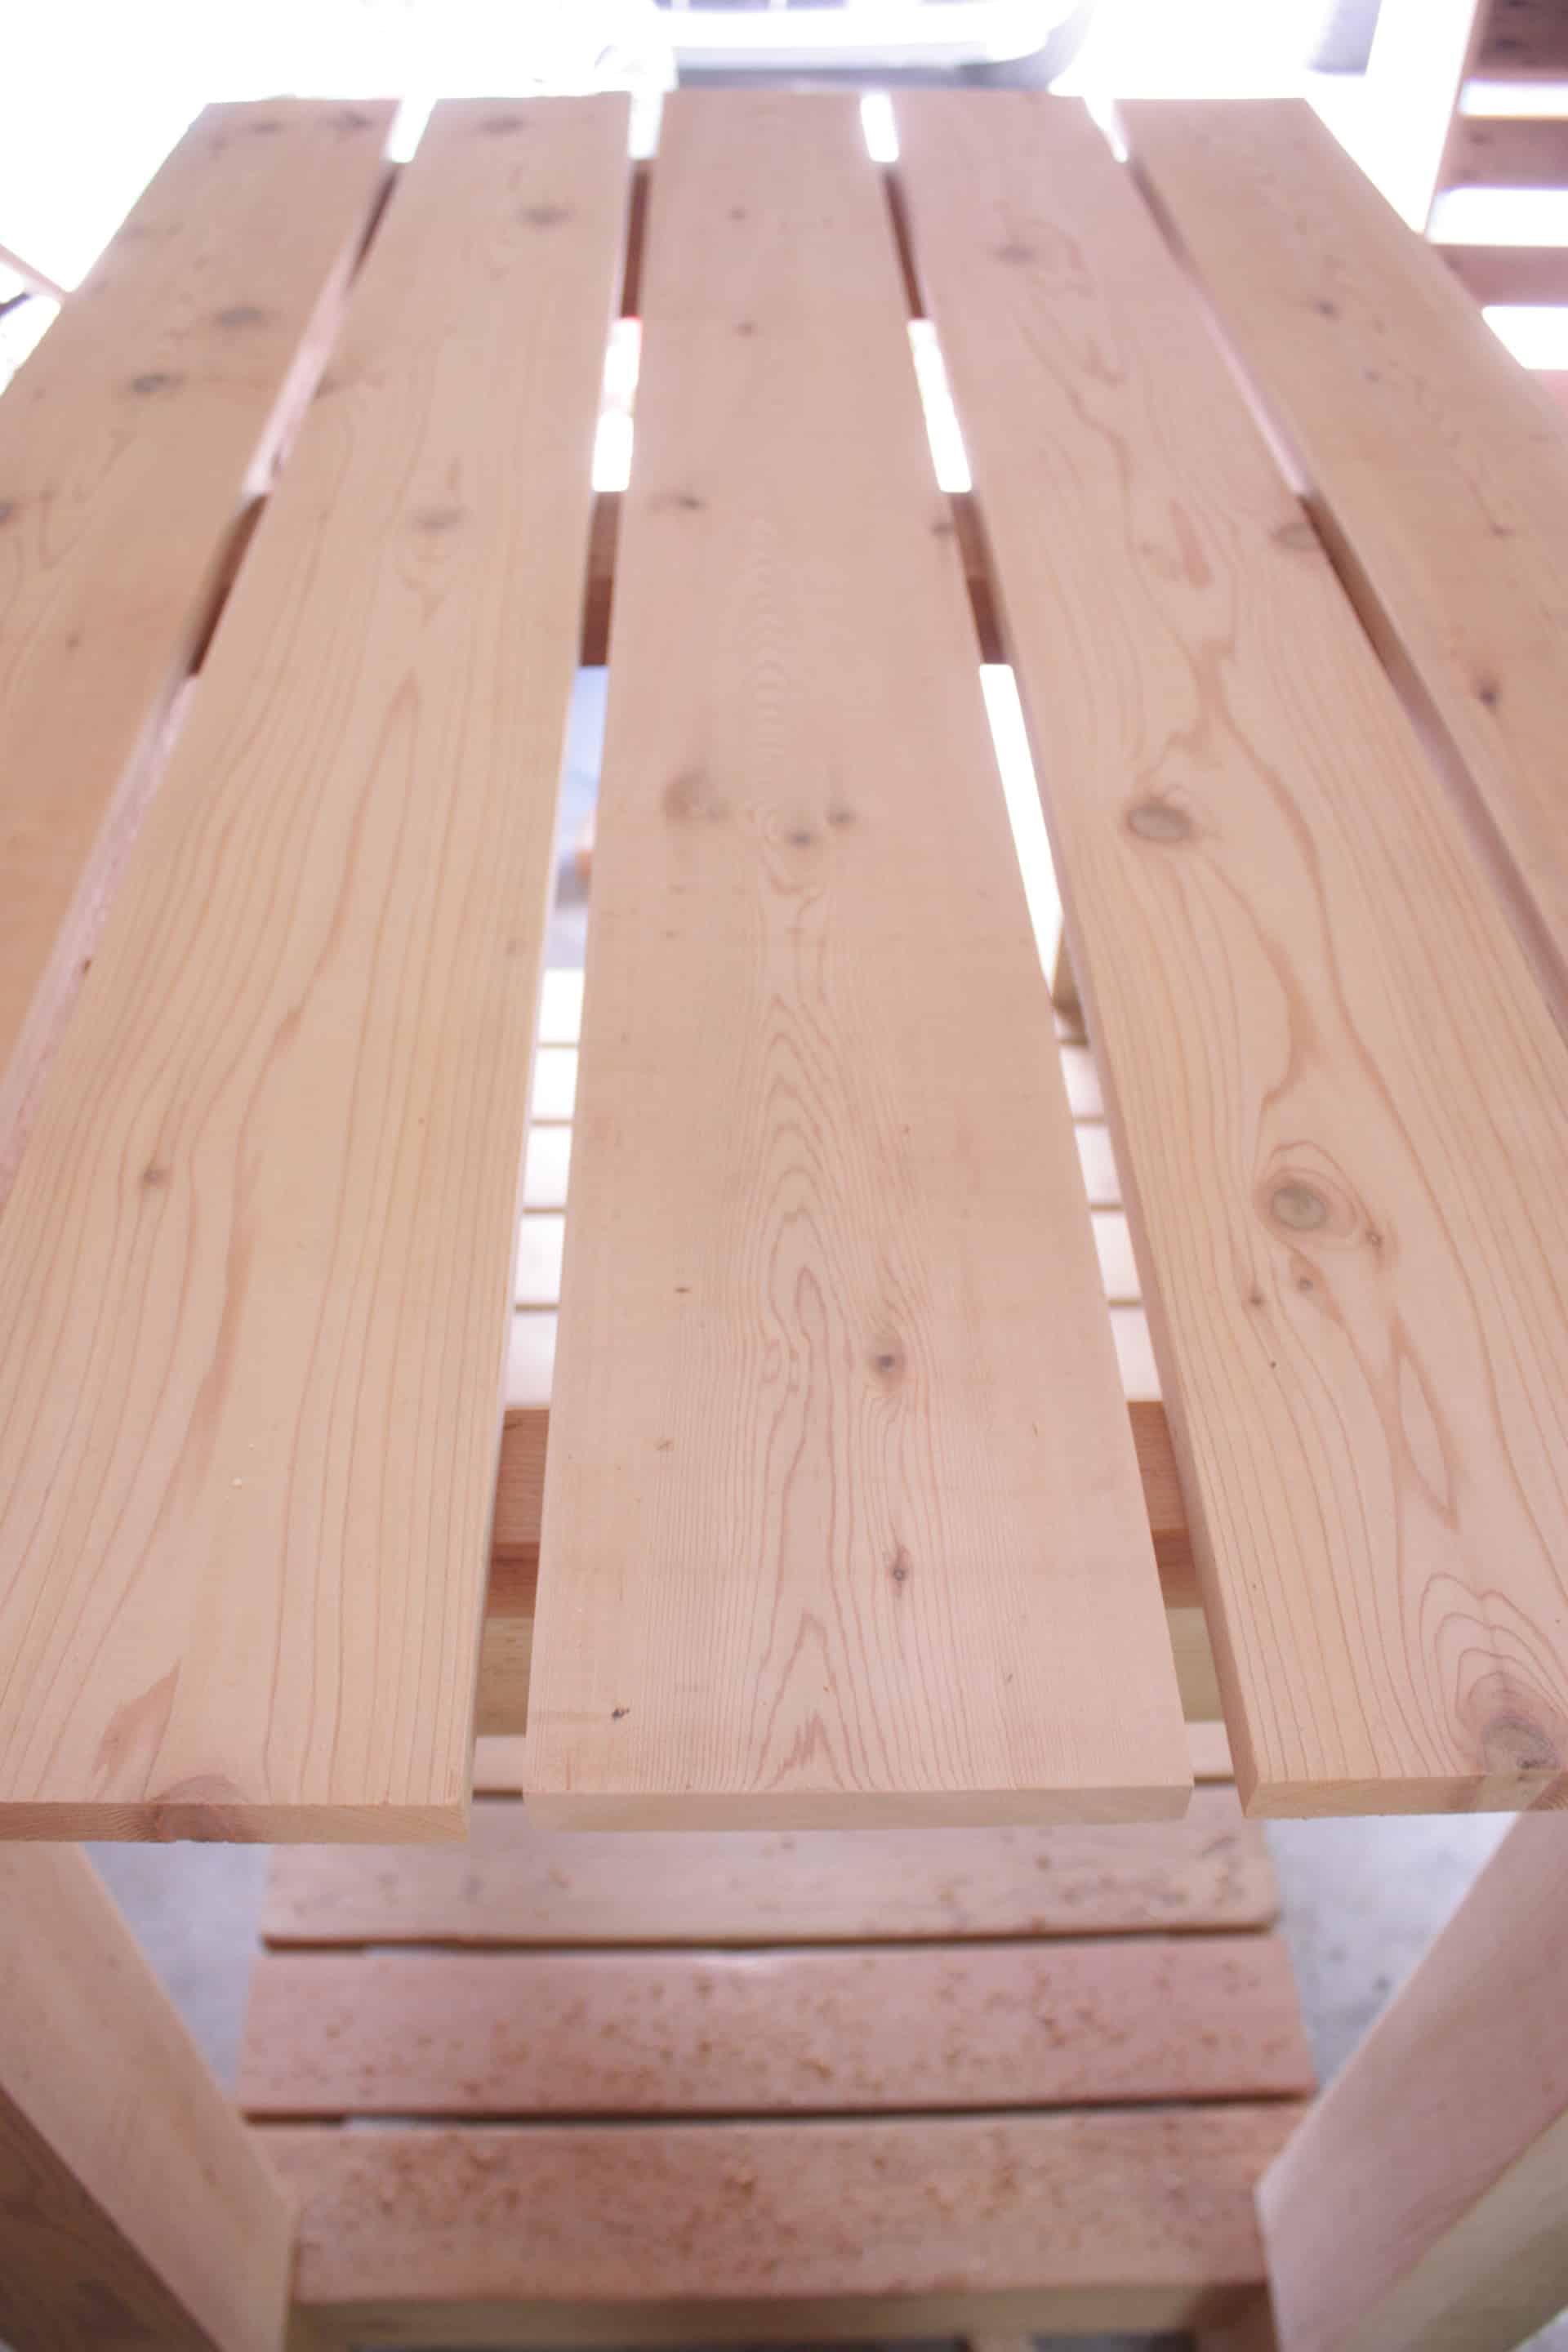
Anyway, for an outdoor piece, you really don’t want water to sit on top of the surfaces so adding gaps in between the boards helps the water find a way off the table! The space between my bottom boards was 3/8″…yours may be slightly different than mine…you will want to measure yours just to be sure and if it differs from mine here’s how you can figure out your gaps!
Measure in between the two boards you already attached, then multiply the number of boards you have by the size of the board…we have 11 boards total going on the bottom shelf, and we already placed two…so that leaves us with 9 boards…we are going to multiply that times 3.5 because each 1×4 is actually 3.5″ wide…we end up with 31.5 and you will subtract 31.5 from the measurement you took in between the two boards you already placed! Phew!!
That was a mouth full!! Are you following? I hope so…it sounds far worse than it is…let’s keep going! So my measurement was 35 1/4″ so I will then subtract the 31.5 from it and I am left with 3.75″ then I need to divide that by the actual spaces that I will have on the bottom which is 10 since I am using 9 boards…that equals .375…turn that to a fraction and viola…3/8″ space will be left in between each board!
But it is not so easy to sit there and use a tape measure and measure each one…so I always cut small scrap pieces of wood to the size I need and then use them as guides to space my wood!!
This makes sure each one is perfectly spaced without having to measure every time! Anything to make my life easier…I’ll take it!! Ha!! So now you just line those bad boys up with your spacers and glue and staple!!
Looking good!!!
After all that gluing and stapling…you have a beautiful lower shelf!
Now that that is finished we are a quarter of the way done roughly! Sheesh! Just go inside and take a shower and call it a day!! Lol!! Not really let’s keep going…we only have the top left and then the table is finito!! That is French for finished…okay not really!!! Where were we…ah, the top…
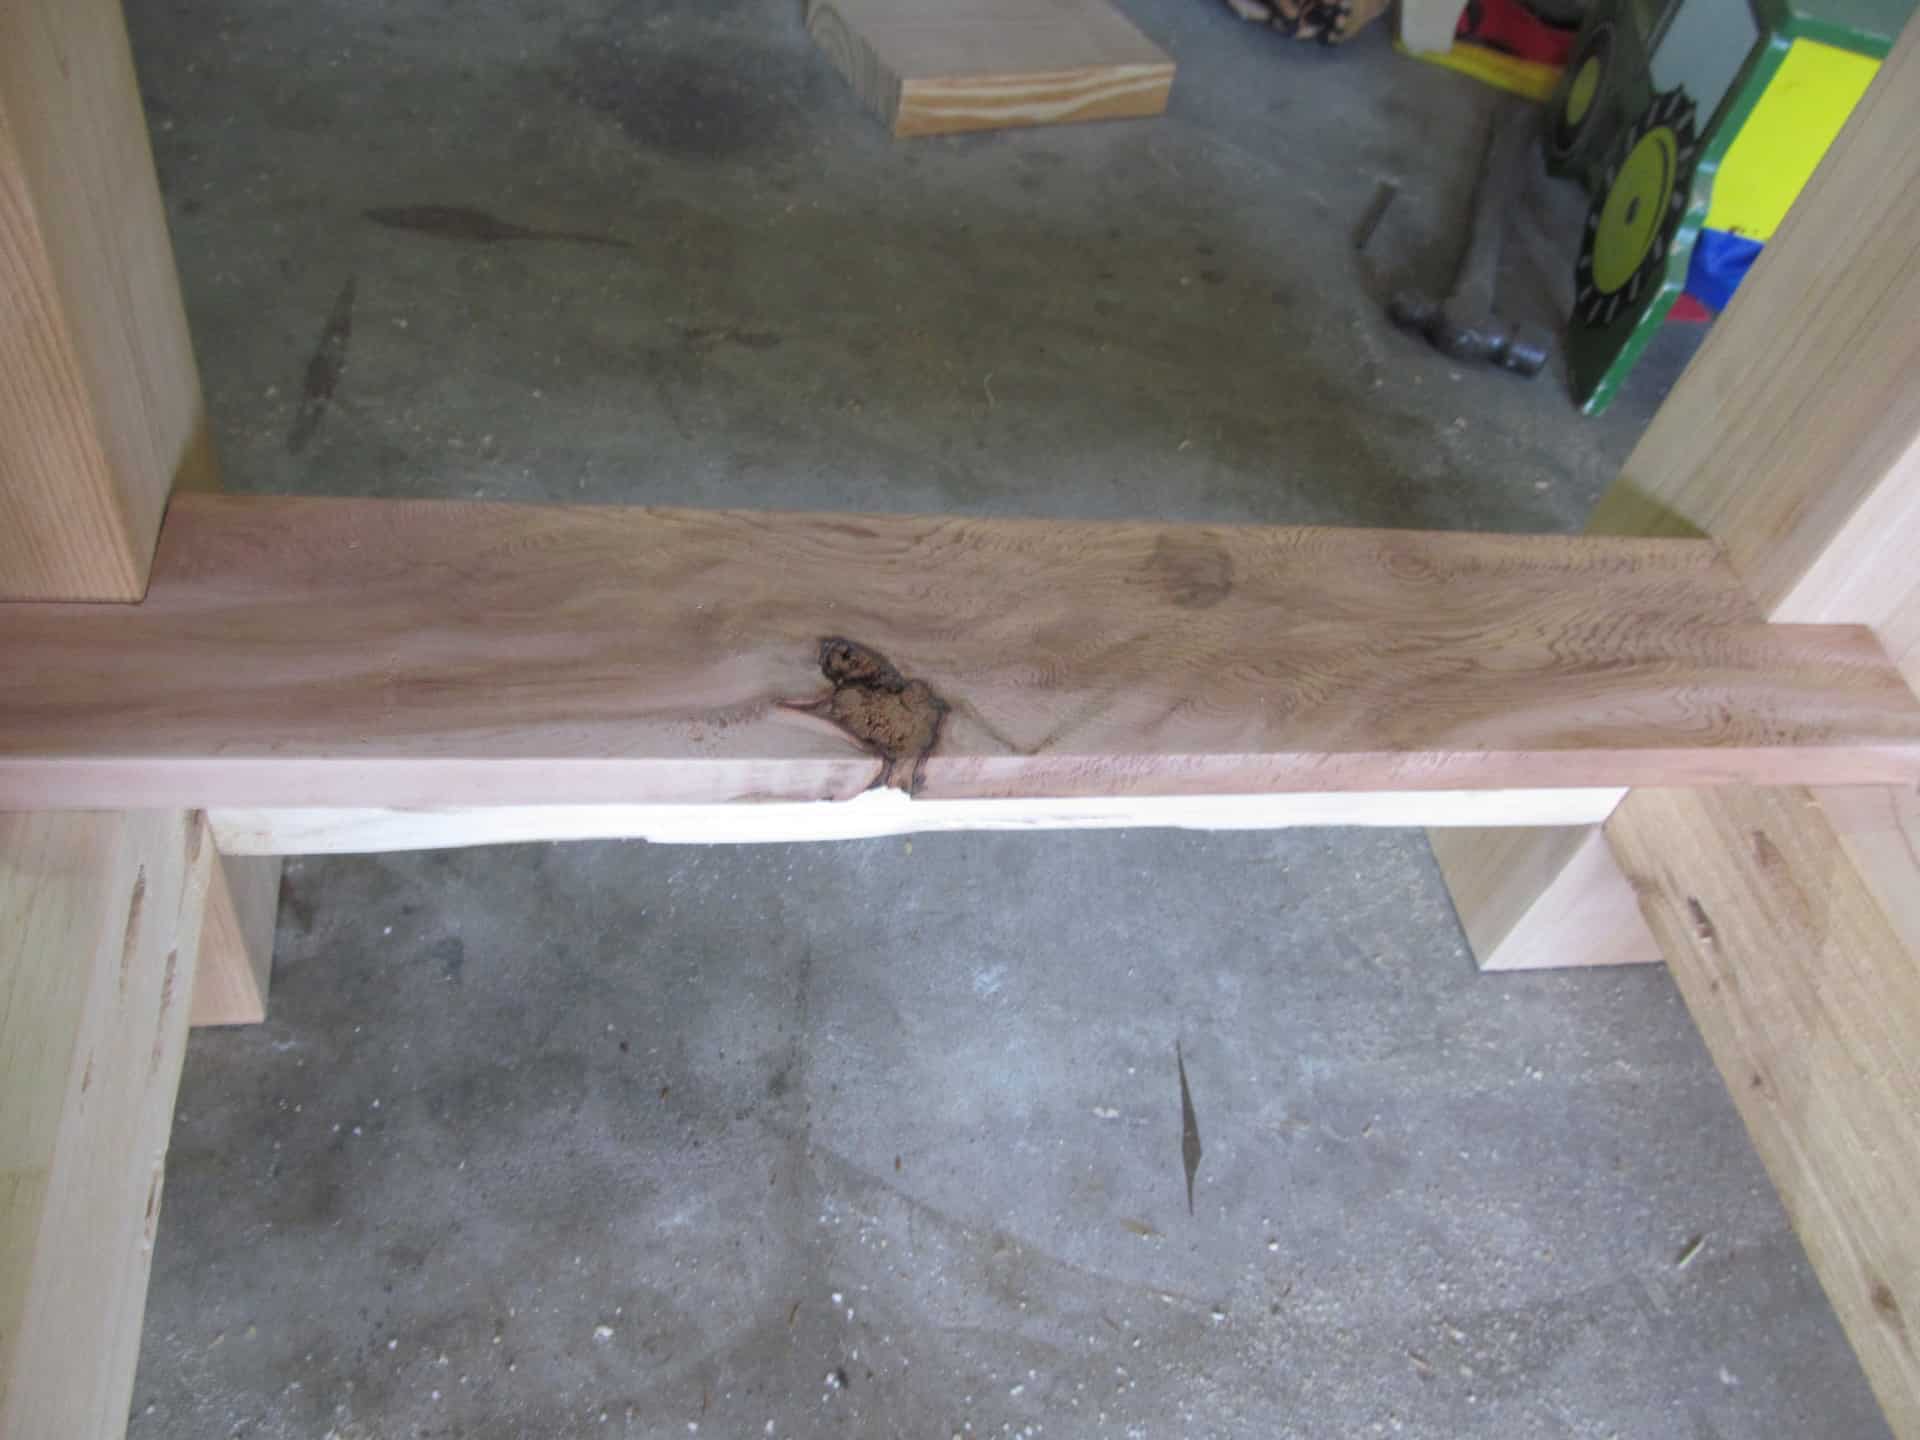
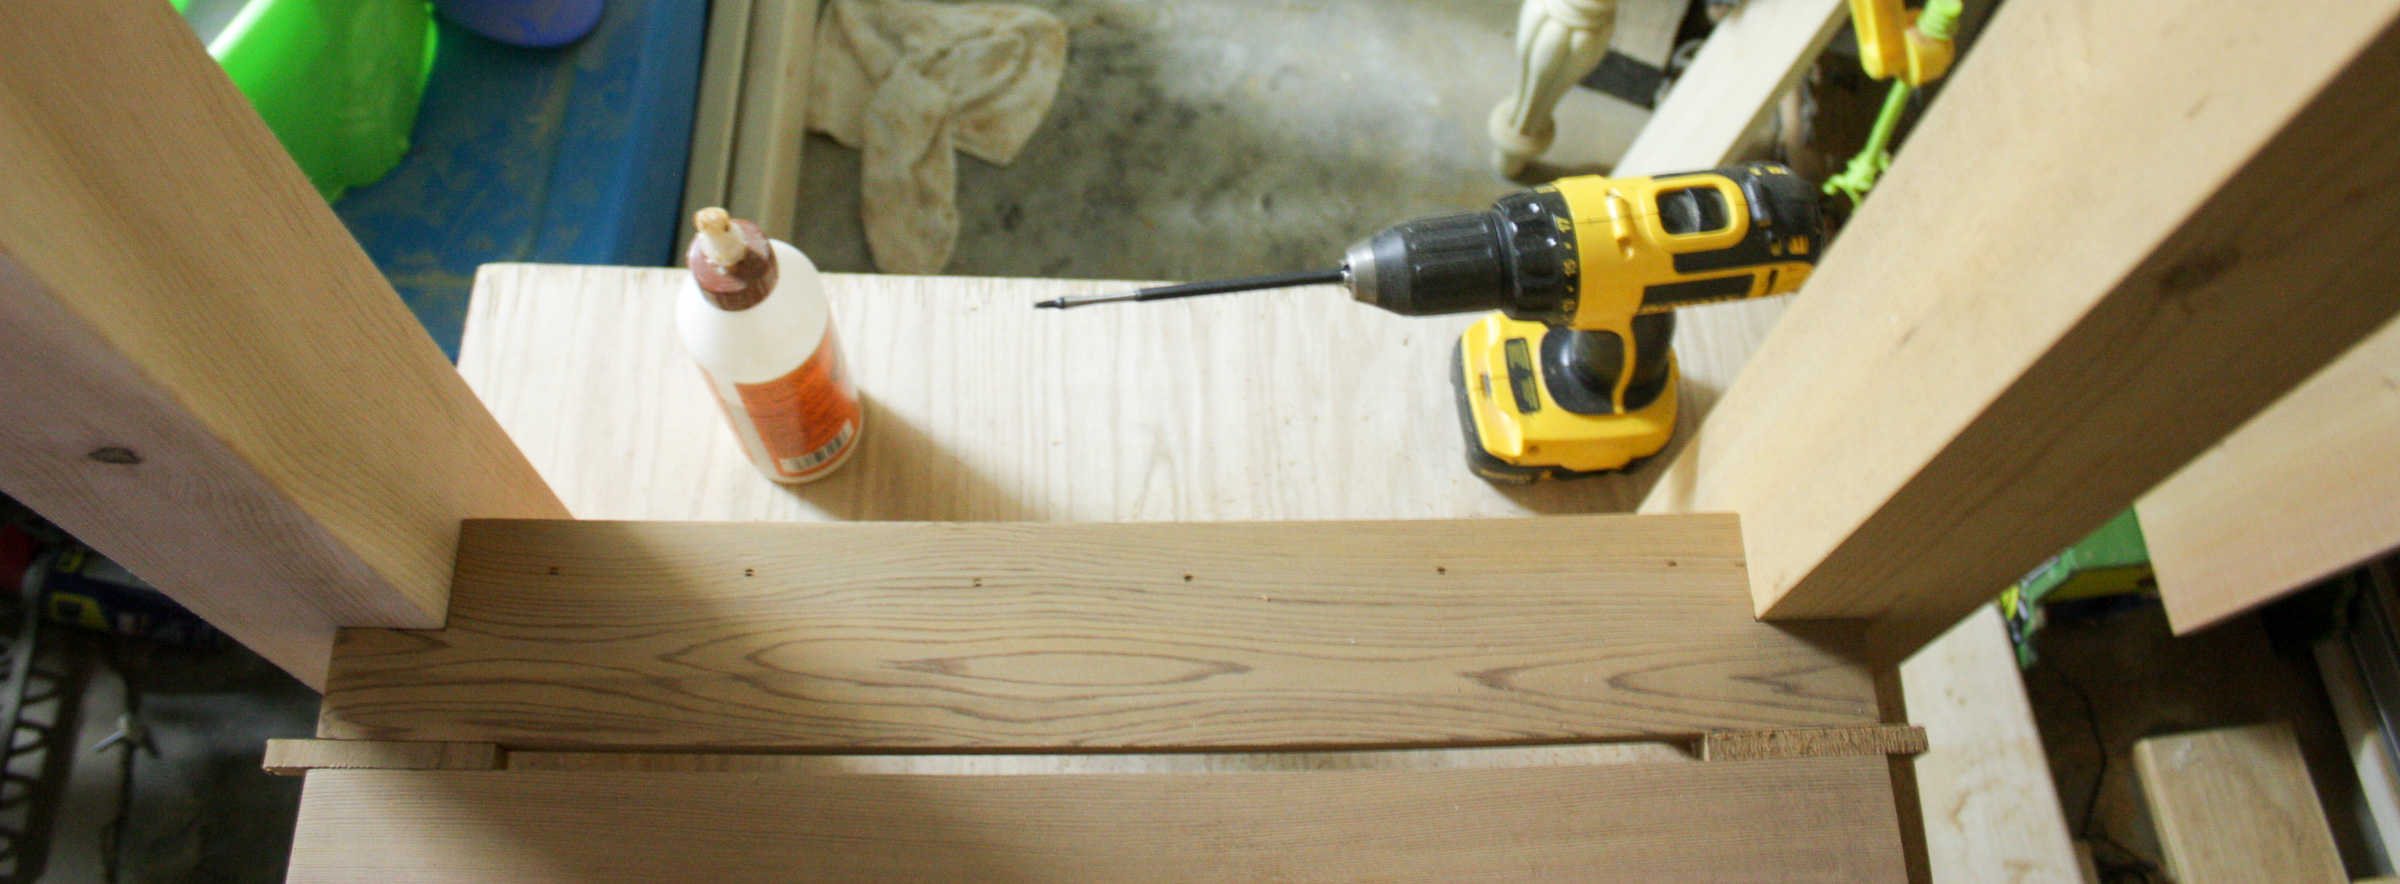
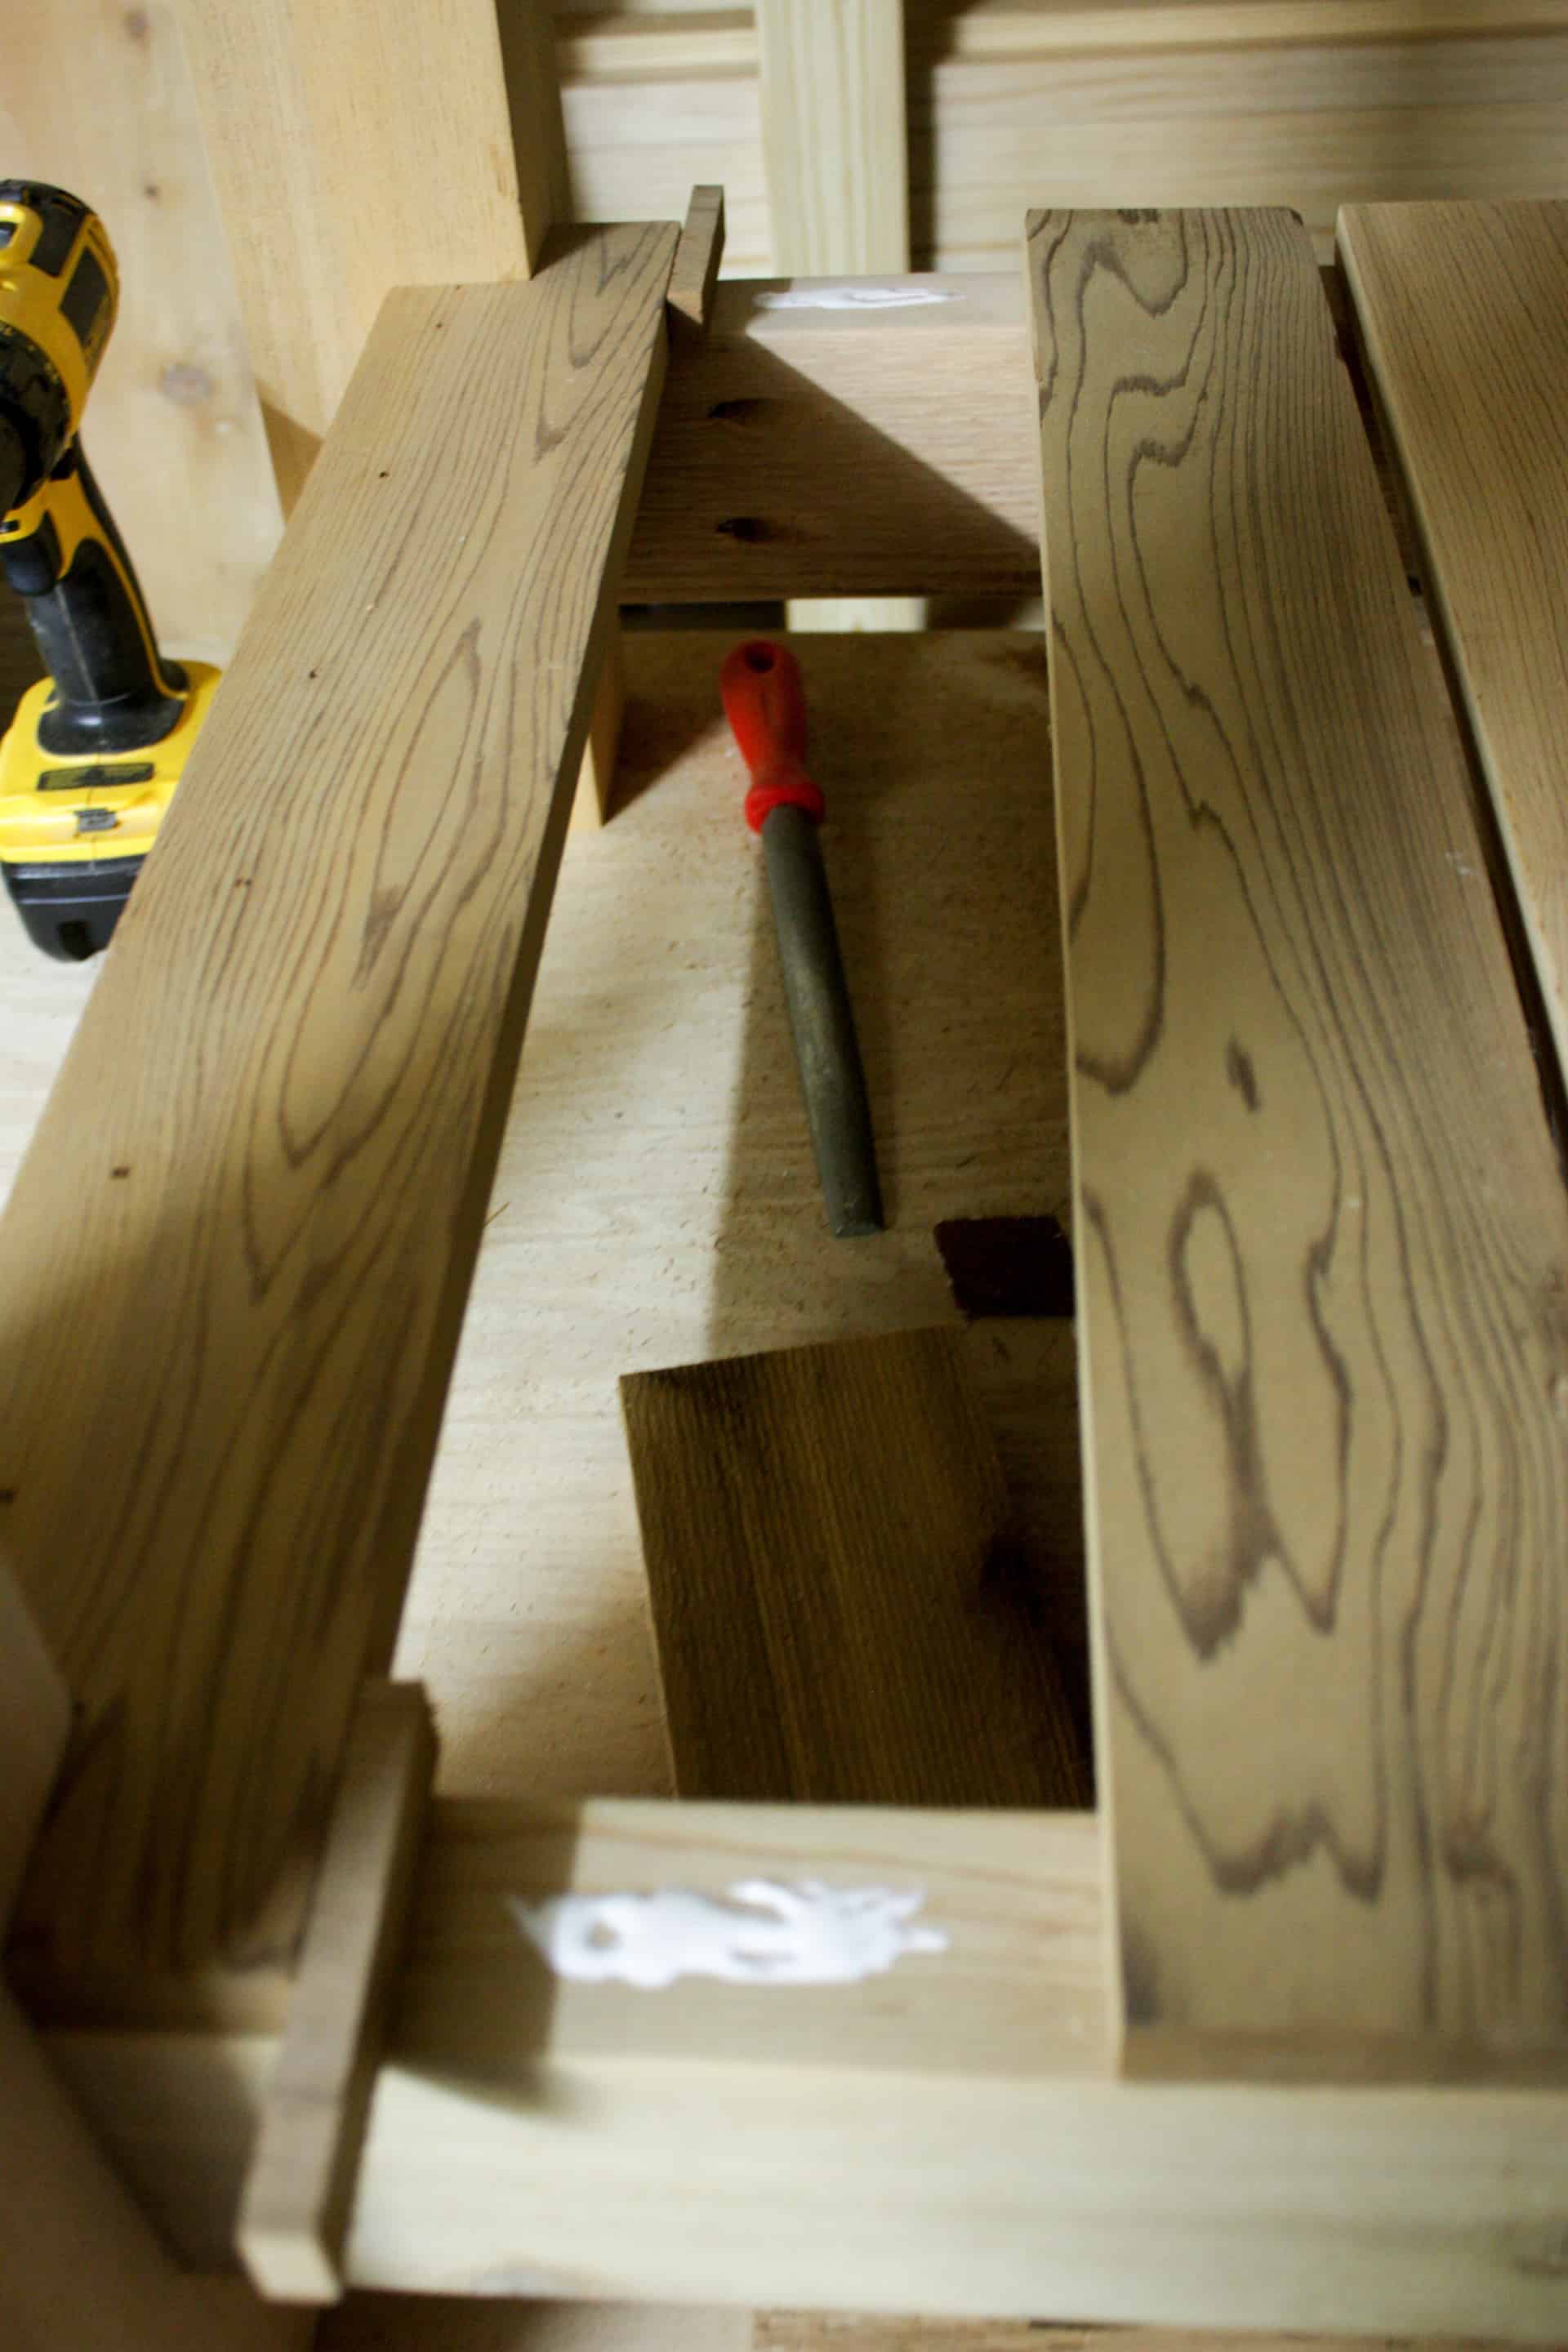
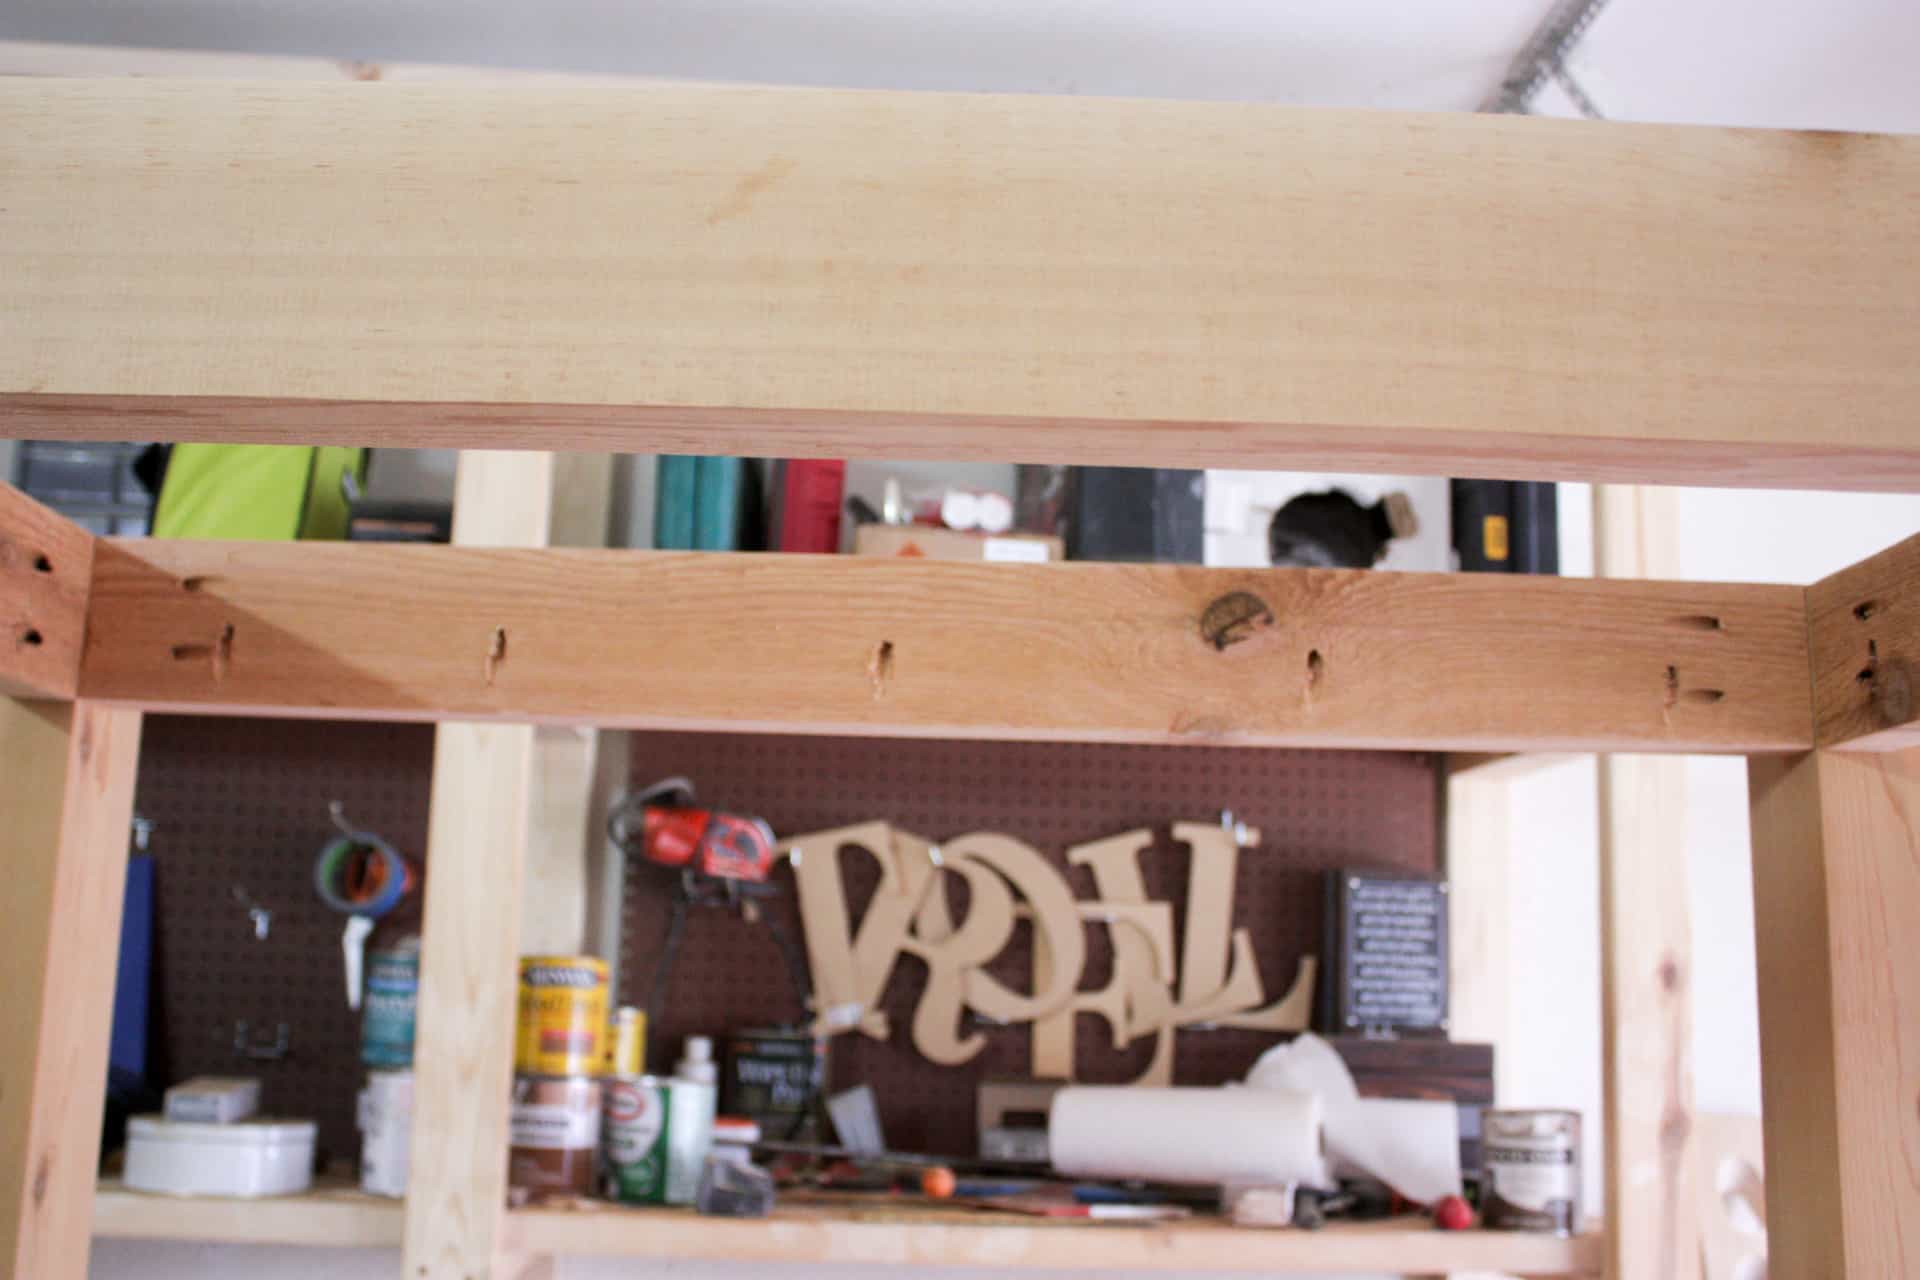
So your 1×6 boards are going to be at the top of the table…I did not plank them together because again being for outdoor use we did not want water just sitting on top of the table…we need it to fall through to the ground! So I just drilled pocket holes along the top 2x4s going up…

You can pocket hole your long 2x4s before attaching them but I would suggest waiting to pocket hole your shorter (20″) until you are ready to attach the tabletop, this way you can lay out your 1×6 boards and make sure you get two screws in each board!
Now before I show you the pocket holes and placement let me say something…I chose to place a scrap 2×4 @ 20″ across the middle of the table to attach the tabletop boards (1x6s) to…this is not listed in the cut list and the material list does not include this because it is not essential to the piece…you can easily make it without the board…if you would like the extra support, you will have leftover 1x4s that you could use if you wanted and it would work the same!
I just wanted to make sure if you saw that you didn’t wonder, “Hey what is that board, I don’t have that anywhere!!” It has happened to me before following other plans!! Lol!
Now, where were we on this pocket hole stuff? The long boards will look like this.
Try not to be distracted by the crazy clutter behind the board! Ha! Here is what the short side board will look like!
Alright, once the pocket holes are drilled we are ready to attach the 1×6 boards!
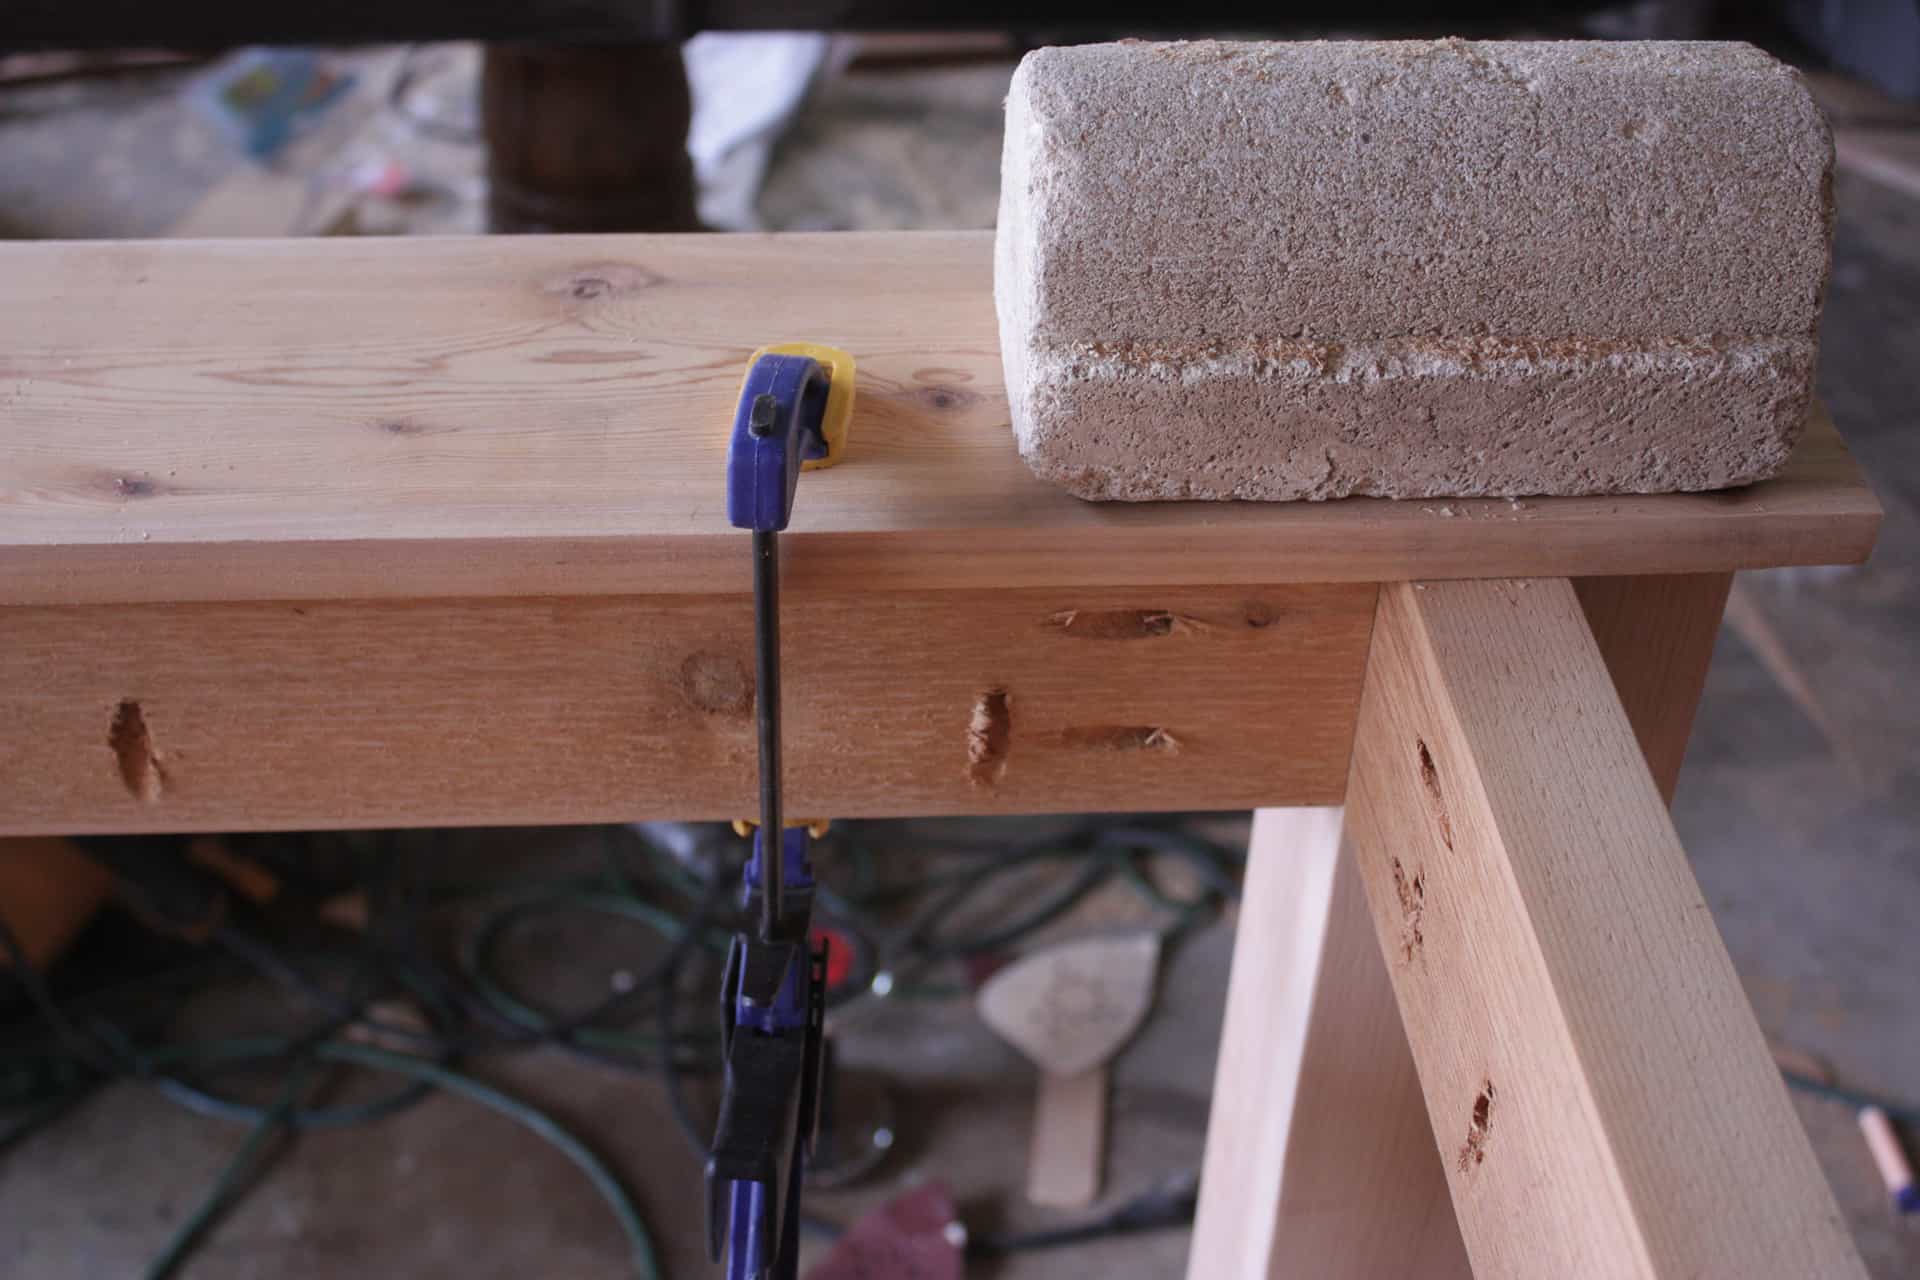
Yes, I use garden bricks to help me hold boards in place! 😂 My husband wasn’t home to offer extra hands, so I did what I could!! 😅
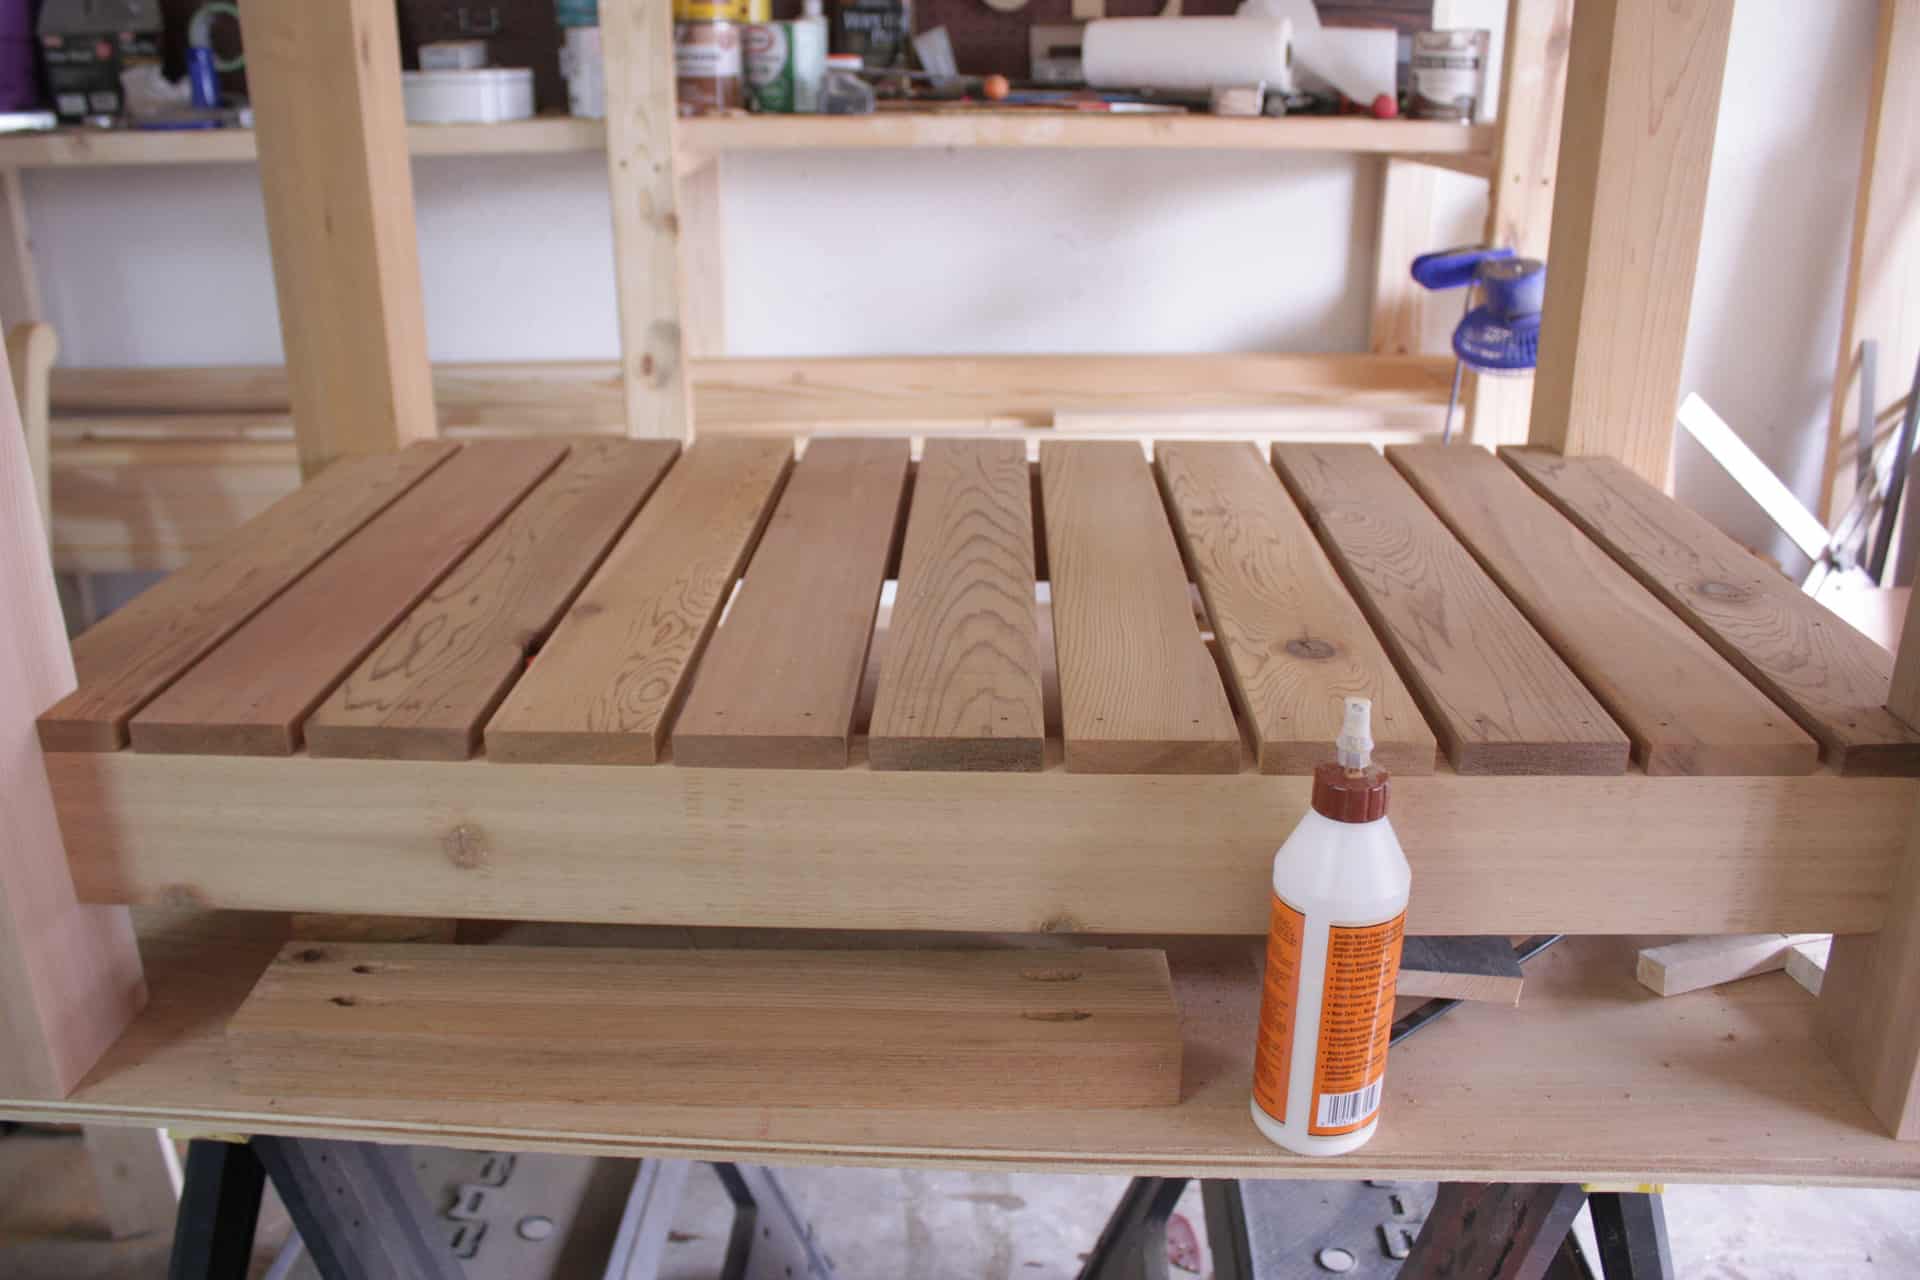
I lined the front board up by leaving a 1-inch overhang to the sides of the 4×4 legs and 1 inch in front of the 4×4 leg…it may not be exactly 1 inch…just make sure both sides are even! When I had it where I wanted it, I clamped it down and screwed it into place…yep, I sure did forget to glue it!! Lol!!
After all that lining up and moving around…I screwed it in without glue…and unfortunately, it stayed that way!! 😬 I made sure with the back one to put glue first…before laying the board down and lining it up! I just lined the backboard up the same way as the front and screwed it in place… 1-inch overhang to the sides and back!
Next, we have to calculate how much space to leave between the boards again!! Fun, fun!! Putting those old math skills to work that I NEVER thought I would use!! 🤣 Thanks Mr.Burgess for teaching me how to convert decimals to fractions even though at the time I thought it was pointless!!! Lmbo!!
Follow the same steps we used above…measure the space between the front and back board…multiply the number of boards that have to fit in that space by the measurements of the board…3 boards x 5 1/2″ (the actual measurement of a 1×6)=16 1/2″…subtract that from the measurement you took a second ago which should be somewhere around 18 inches…18-16 1/2″=1 1/2″…now we need to divide the 1 1/2″ by the four spaces that we are going to have (around the three boards) that comes out to .375 again!
So we know that when that is converted to a fraction it is 5/8″!! Woohoo!! Yeah, I still got it! 🤪 If yours comes out the same, you can use the same little spacers we made earlier!

I then would put my gut to good use and take a straight, scrap board and make sure the ends of the boards were all flush…I knew I have been growing this belly for something! Lol!!

Once it was all lined up I would screw it into place!
Another important thing to mention…when using the Kreg Jig on 2x wood, you must drill it at 1 1/2″ but to use the screws that are supposed to be used (2 1/2″) they will come through on your tabletop…the reason is, Kreg expects that if you are drilling into 2x wood you are attaching to 2x wood…but in this case, we are drilling into 2x wood but attaching to 1x wood, so you need to go down a half-inch in screw length and use the 2 inch Kreg screws! They work perfectly!
Before you know it…the tabletop is complete!! HAPPY DANCING is in order!! #danceparty Yep! It’s a must…you have just done a beautiful thing…completed half of the project at hand and when you see how big and beautiful she is…you just won’t be able to control yourself…your hips just take-off!!💃🏼 Oh…is that just what happens to me? No wonder my neighbors look at me so funny!! 🤔 Don’t lie to me…you know it happens to you too, right!!! 😅
Oh. My. Gosh. Squeal! I LOVE it!!
But jumping down from my pot of gold at the end of my rainbow that I finally found…we do still have to build the hutch!! Or not…if you don’t want to build the hutch, you can stop now…but she’s totally worth building!! I’m telling ya!!
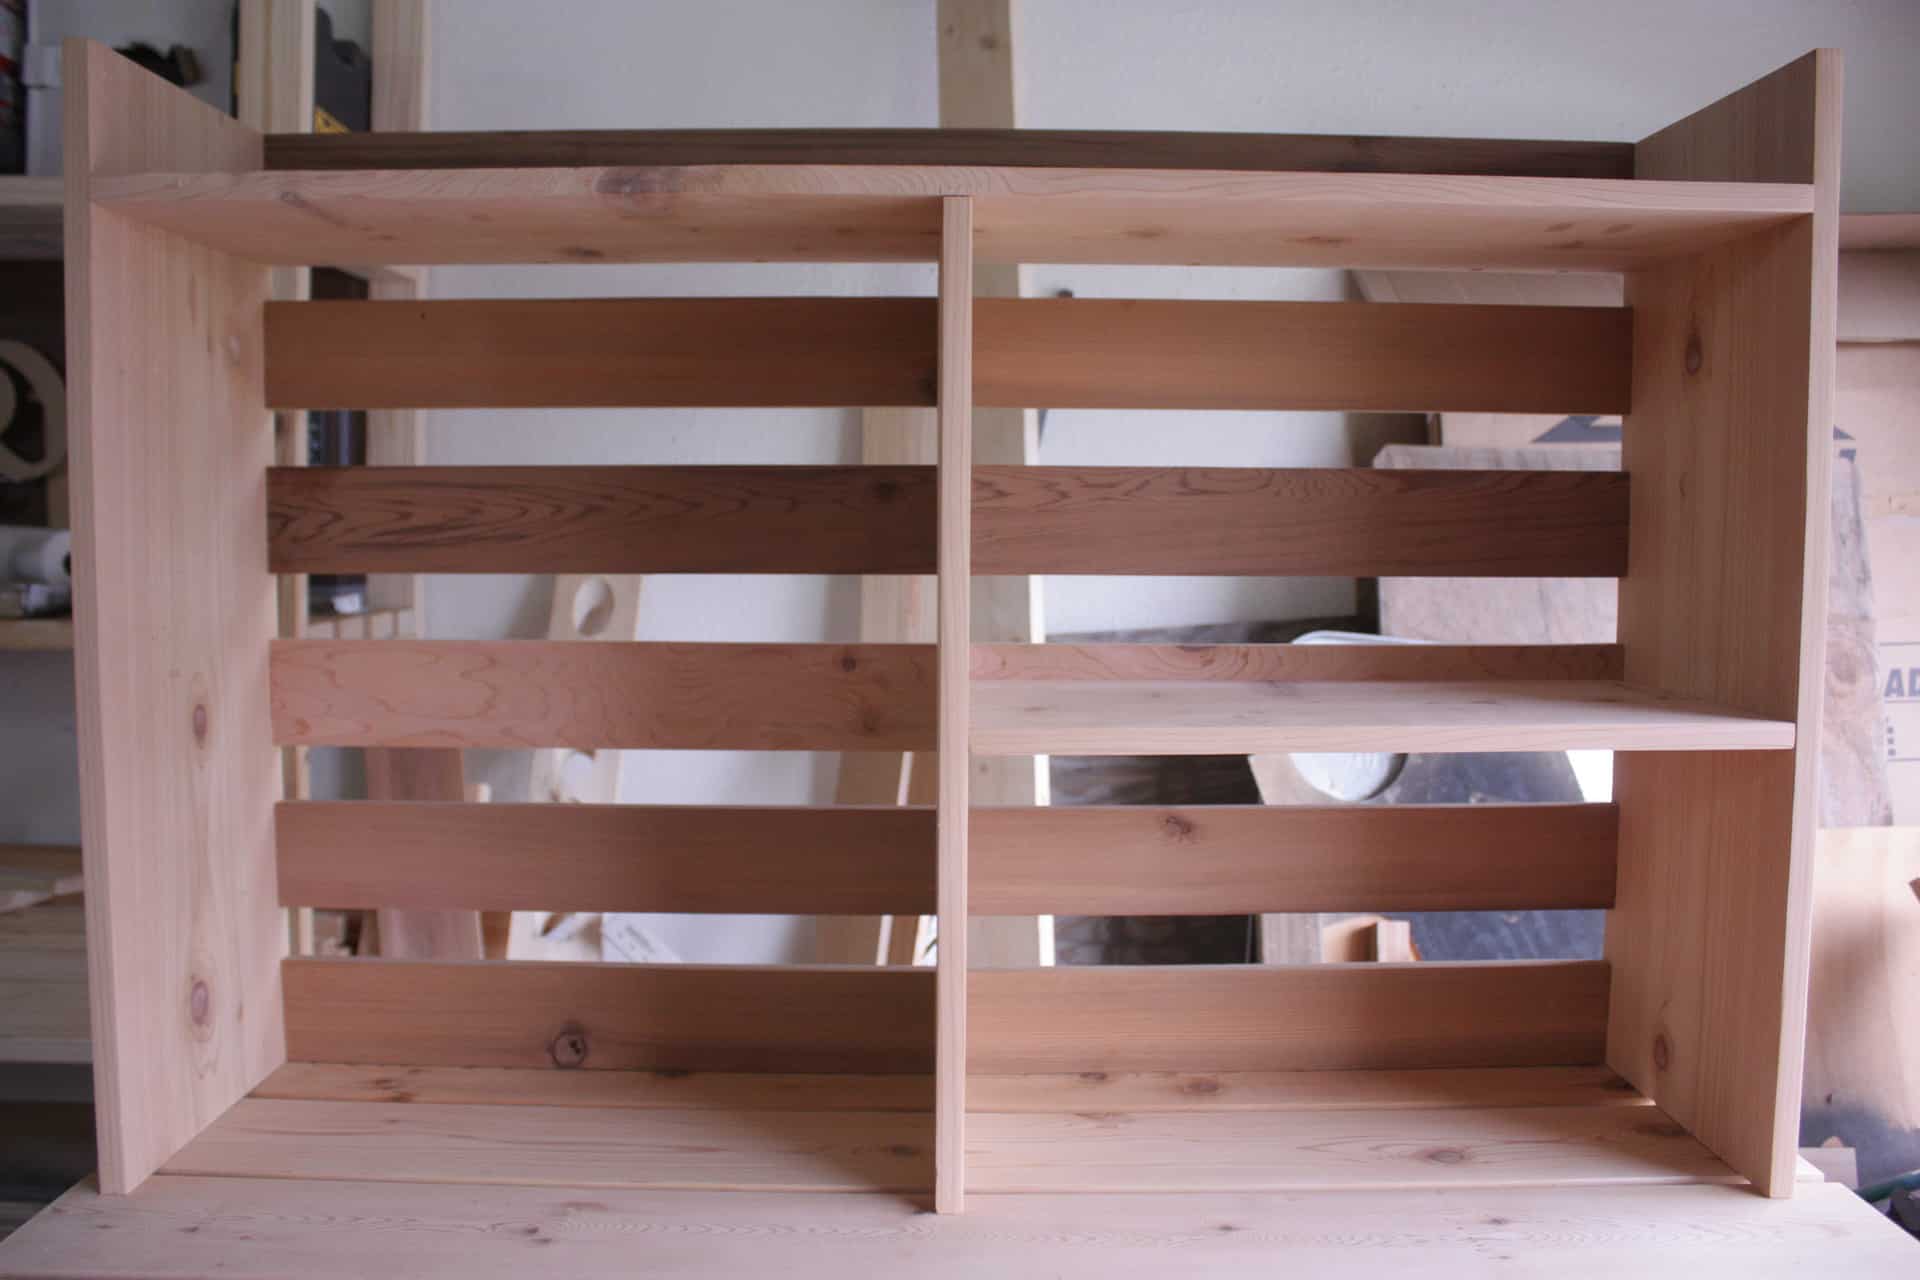
Building the top hutch for the potting bench
So I started by cutting my 1x12s for the sides…there are two of them and they are cut at 30″. I may have been dancing and singing while cutting those and forgot to take a picture…I’m sorry!!
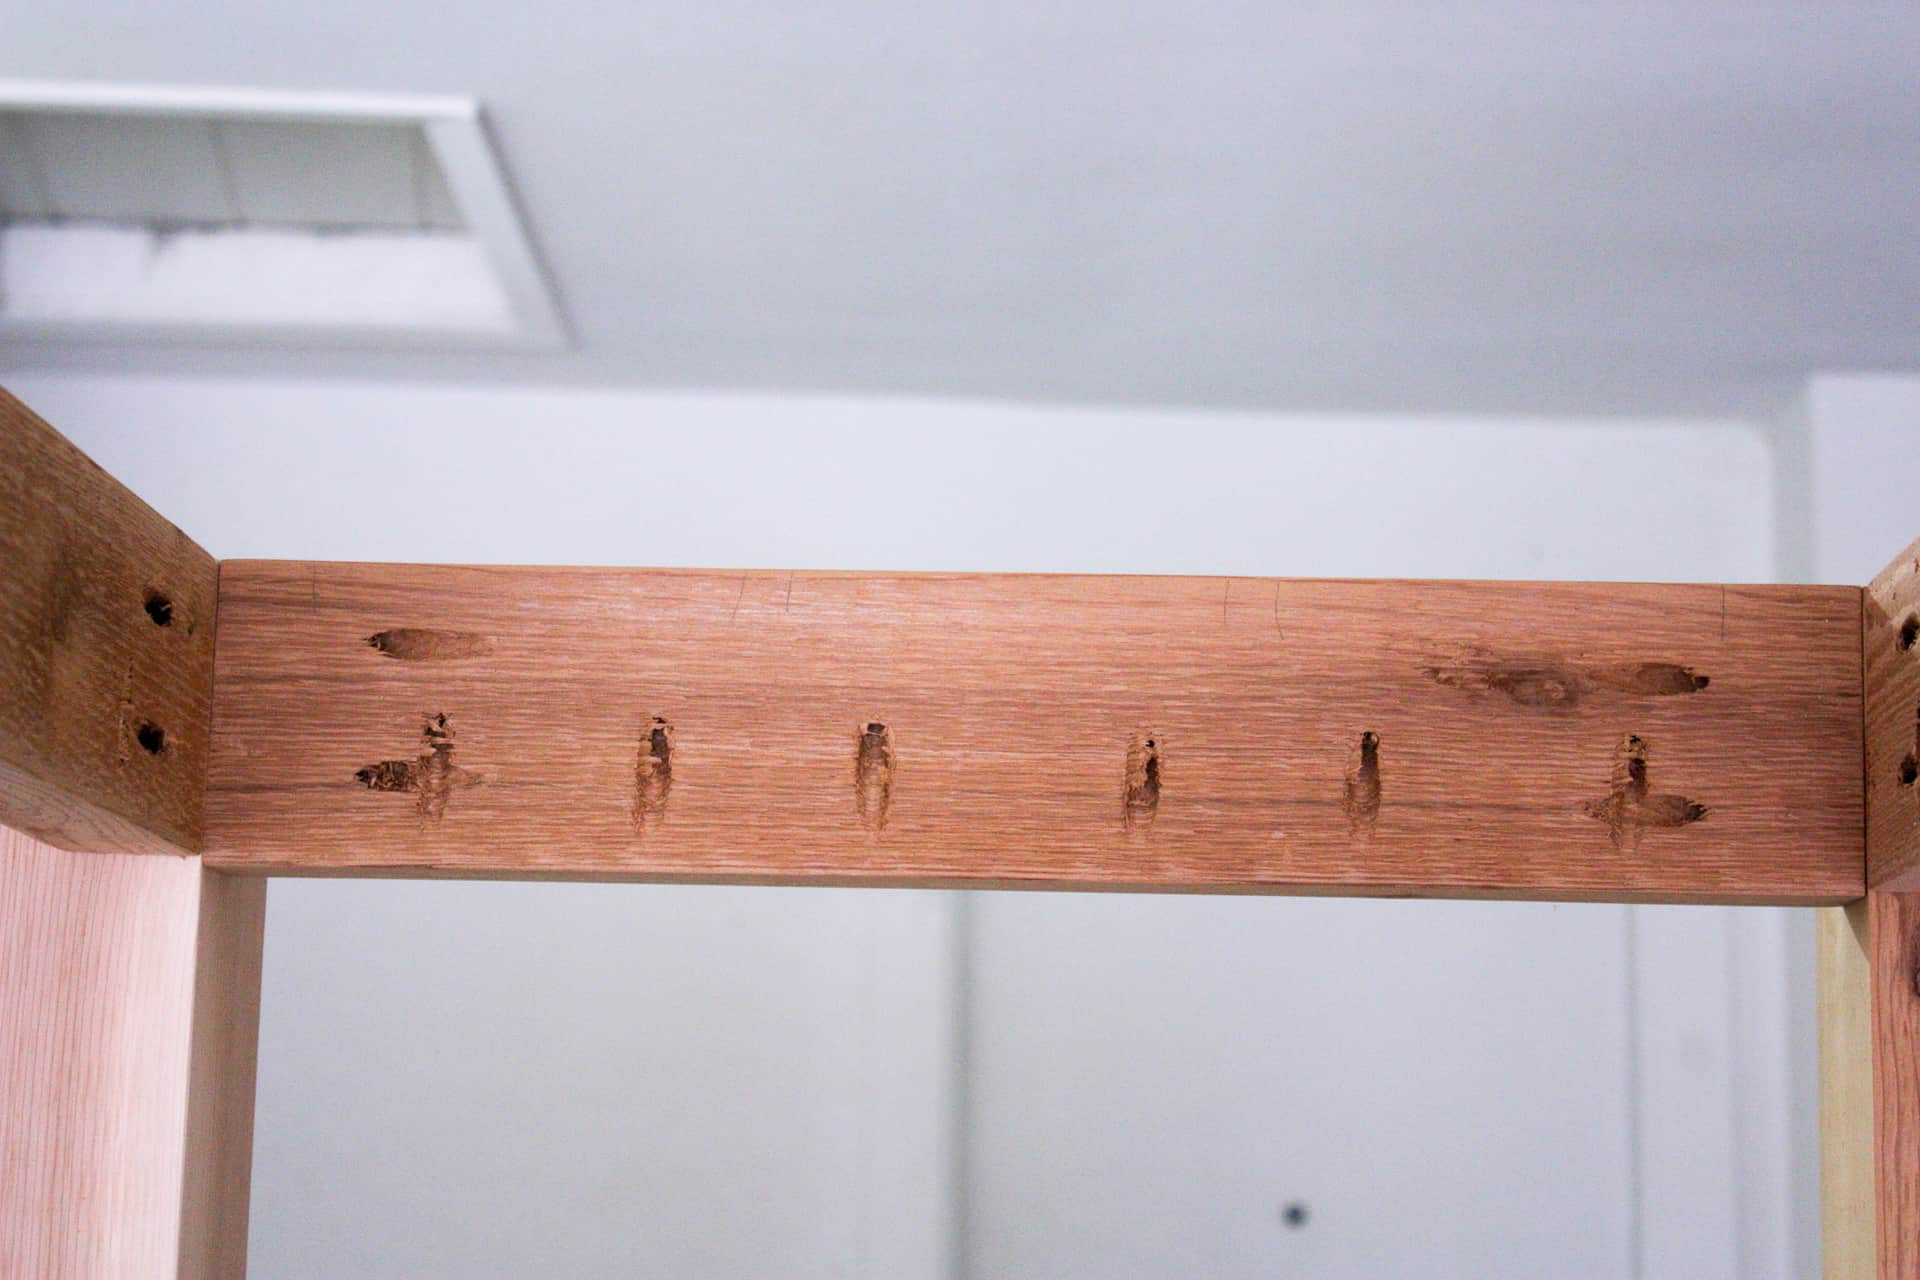
Next, I cut all the 1x4s for the back of the shelf and pocket-holed them…I was still dancing and singing and moving to the groove! I was singing that as I typed…I will stop now!! I had to change my Kreg Jig up to drill the holes in these boards. They are only 3/4″ thick (actual measurement) so we adjust our jig like so.
And our drill bit like so.

Now we are ready to drill our holes in our 1x4s @ 43 1/2″! They will then look like this!

Next, we just have to attach our 1x4s to our 1×12…I started with the top board…and since I was at home without my hubby and his extra hands, I LUCKILY had a Kreg right angle clamp…this bad boy is a MIRACLE worker… extra hands I never grew…but needed!! 🤗
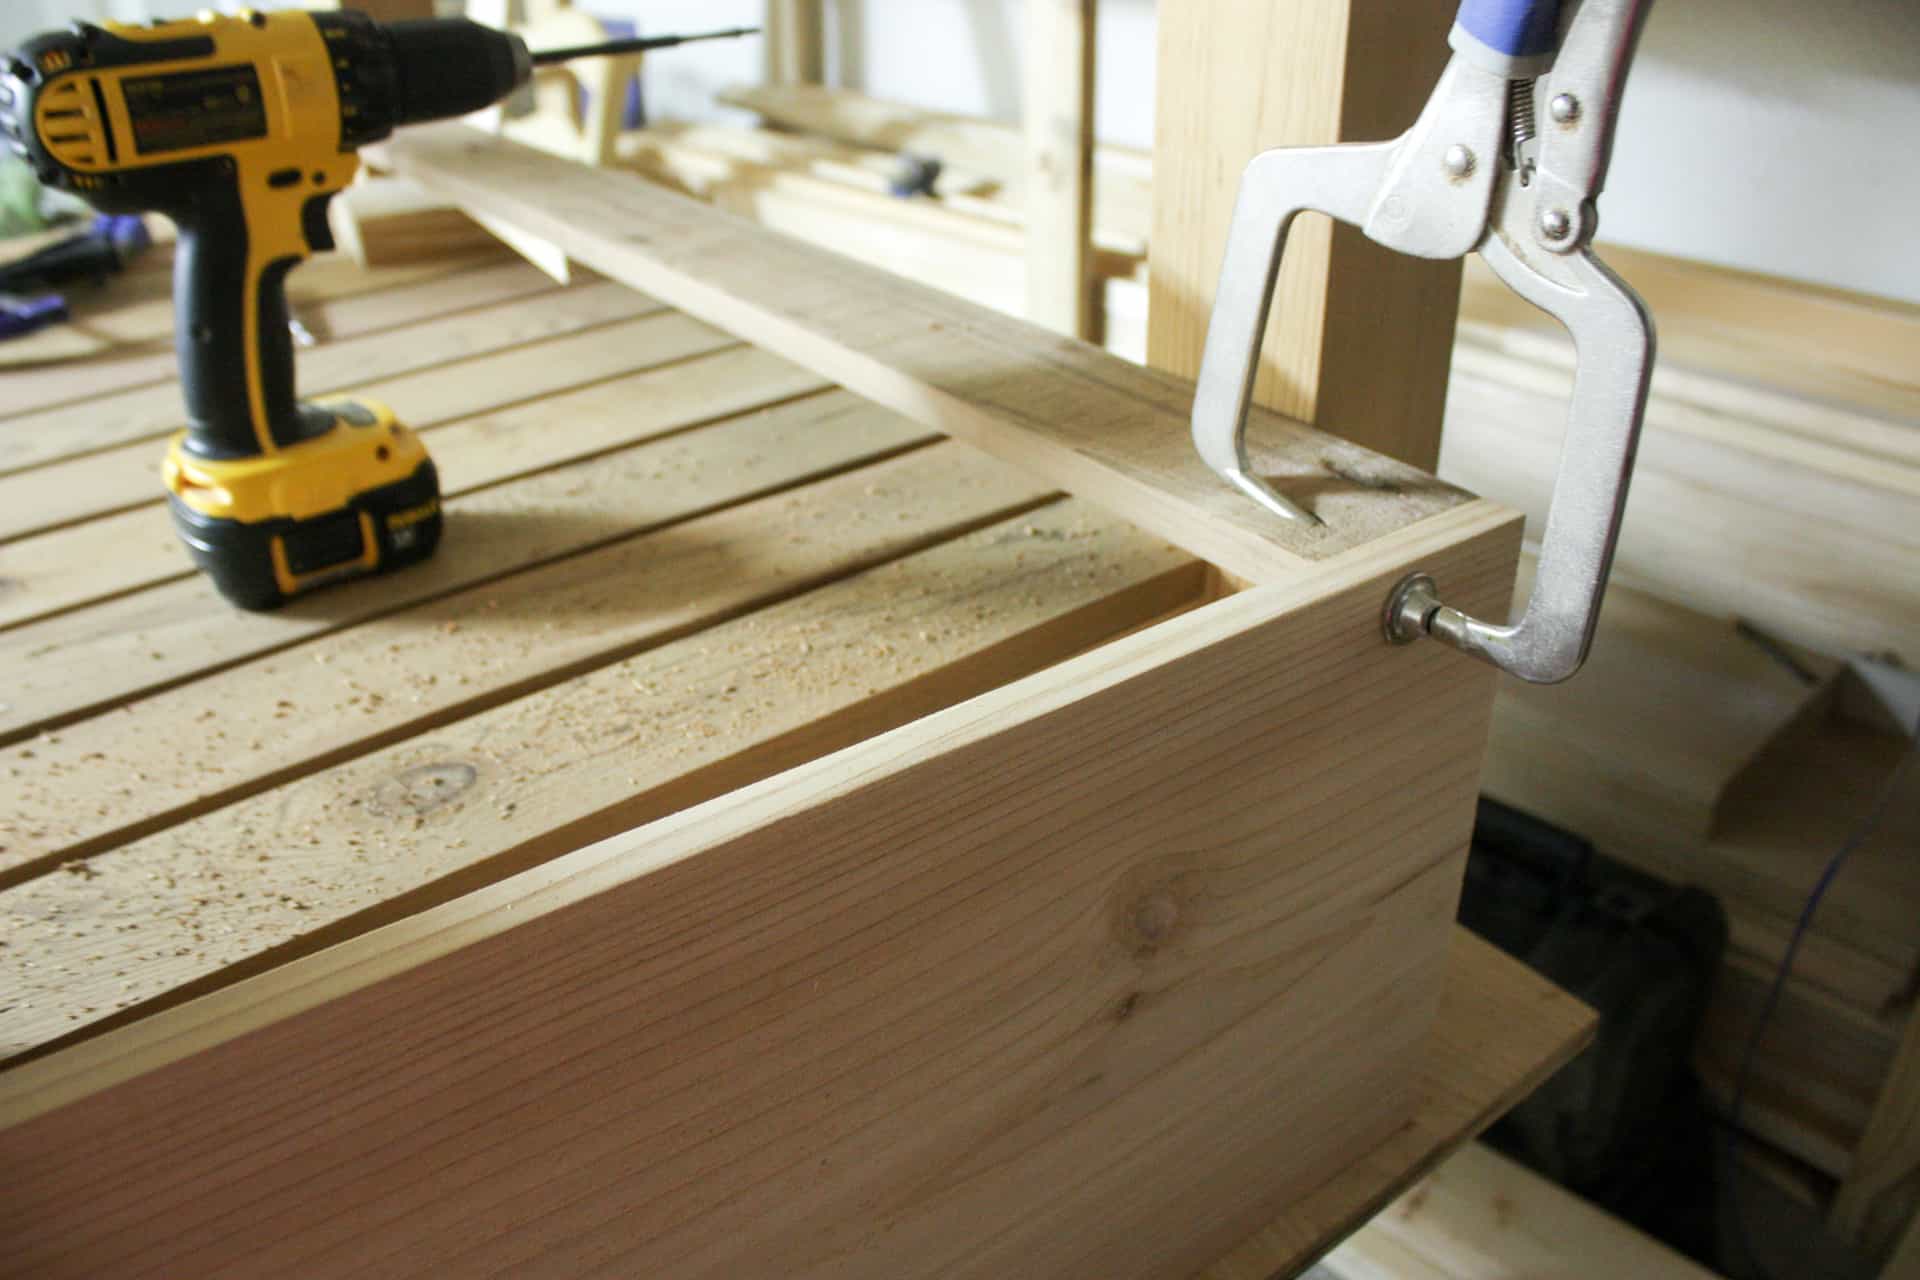
Make sure and glue the joint before you clamp it…and then once you clamp it…miracles happen I’m telling ya…no sliding or moving…sheer joy because you can screw the boards together and they stay perfectly flush on the edges! What? Ser-ious-ly!! Go ahead and get you one of those too while you are at the store grabbing your lumber…they sell the clamps at all the same places they sell the KregJigs at! You need it!!🤑
So after that, I attached the other side (1×12 @ 30″) and then the bottom board (1×4 @ 43 1/2″) It looked like this!
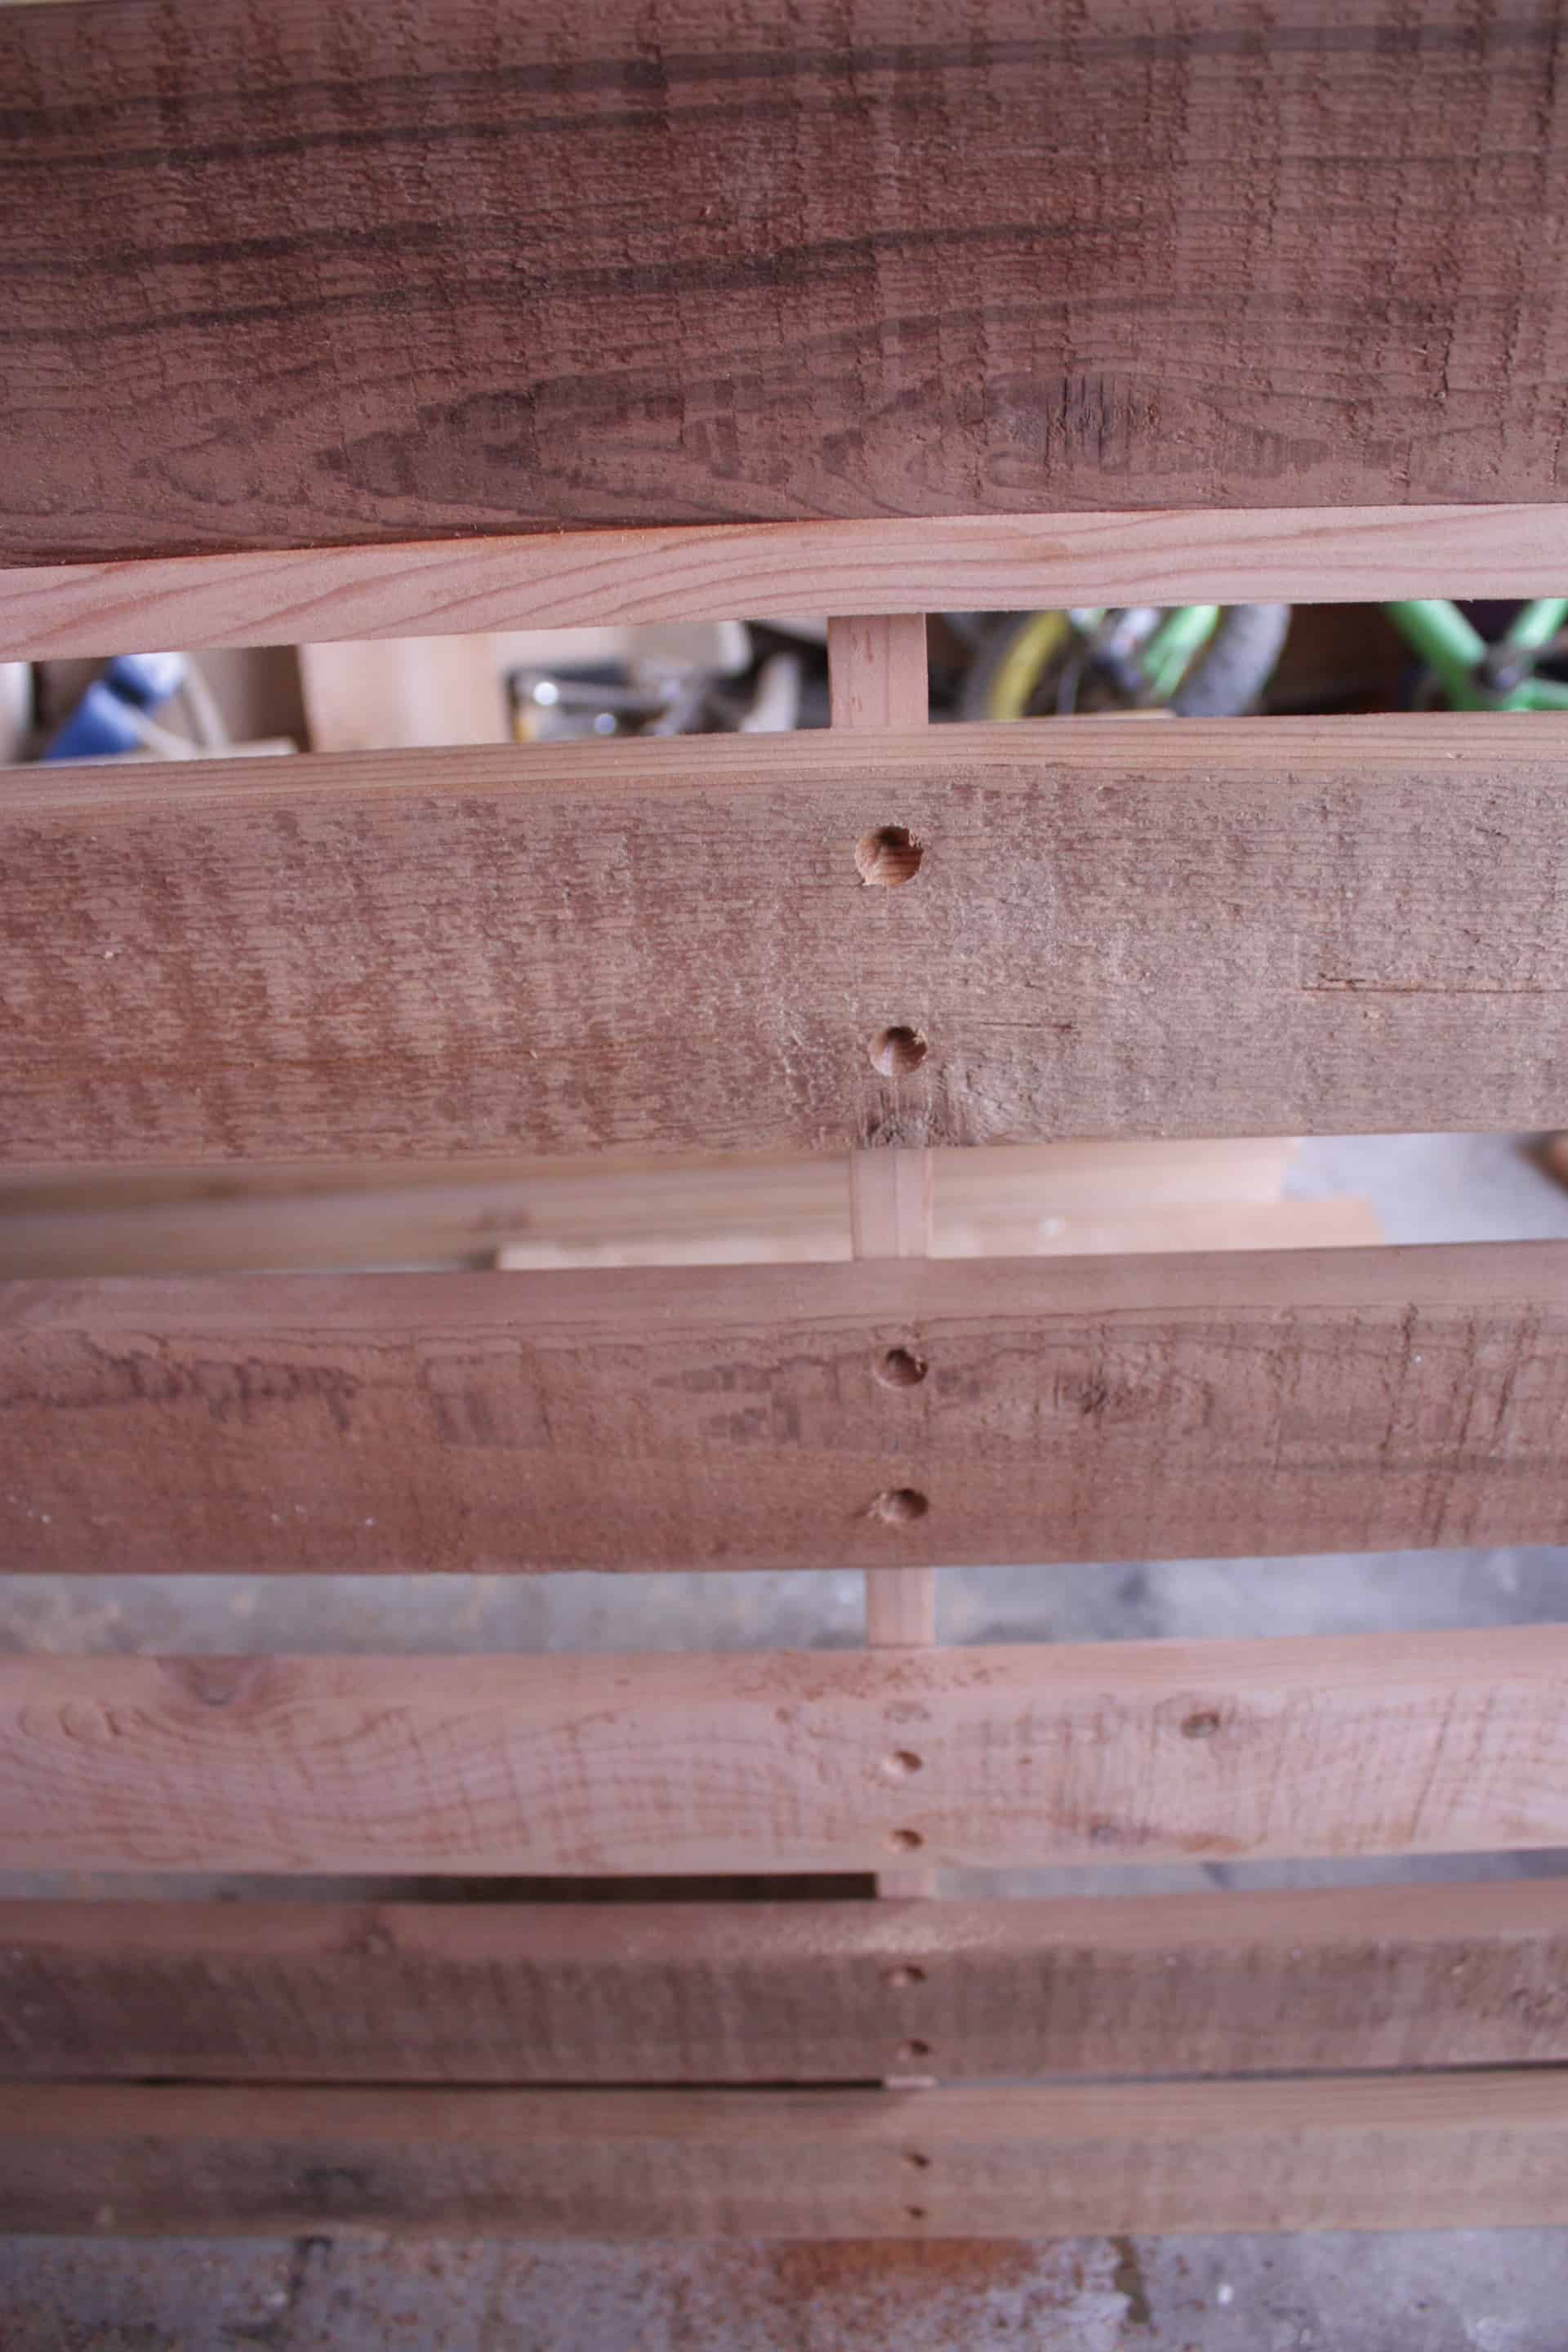
The shelf is the next step…but I had already placed it in the picture…it was just sitting there I hadn’t attached it yet! We need to screw this shelf in before we add any more back boards so I just took and drilled holes all along the bottom of that shelf with my new countersink drill bit that I find to be UHHH-MAZING!!! I almost want to just countersink ALL screws now…it is SO.MUCH.FUN.
Anyway, here’s a shot of the countersunk holes I drilled.
Sorry, a little blurry! But you can still see what you need to!
I just used my same 1 1/4″ pocket hole screws in the countersunk holes that I drilled, they looked really cute with their round little heads! I liked them and plus…it was late at night and there were no hardware stores open to buy different ones, and I didn’t have any other ones…it is always interesting how that can sway your opinion on whether or not you like something!! Lol! But I really did like how they looked!
After screwing the shelf into place, I could then measure…to find out how much space to leave between the boards…I will not make you read all that again so just refer to the previous two times I explained it!! I believe mine came out to either 1 7/8″ or 1 13/16″…I’m don’t recall…I was working on this back at 2:00 a.m. and so I cannot even remember if I marked the back or cut a scrap piece to be completely honest…I am drawing a complete…nothing! All I have is a picture that looks like this…
The next day, it was time to get back at it! I started by drilling countersunk holes in the sides of the hutch to finish attaching the top shelf…remember we drilled all the holes along the back of it…now it’s time to finish it up on the sides.

I screwed the same 1 1/4″ screws in and done! Same thing on the other side! Wam, bam!!
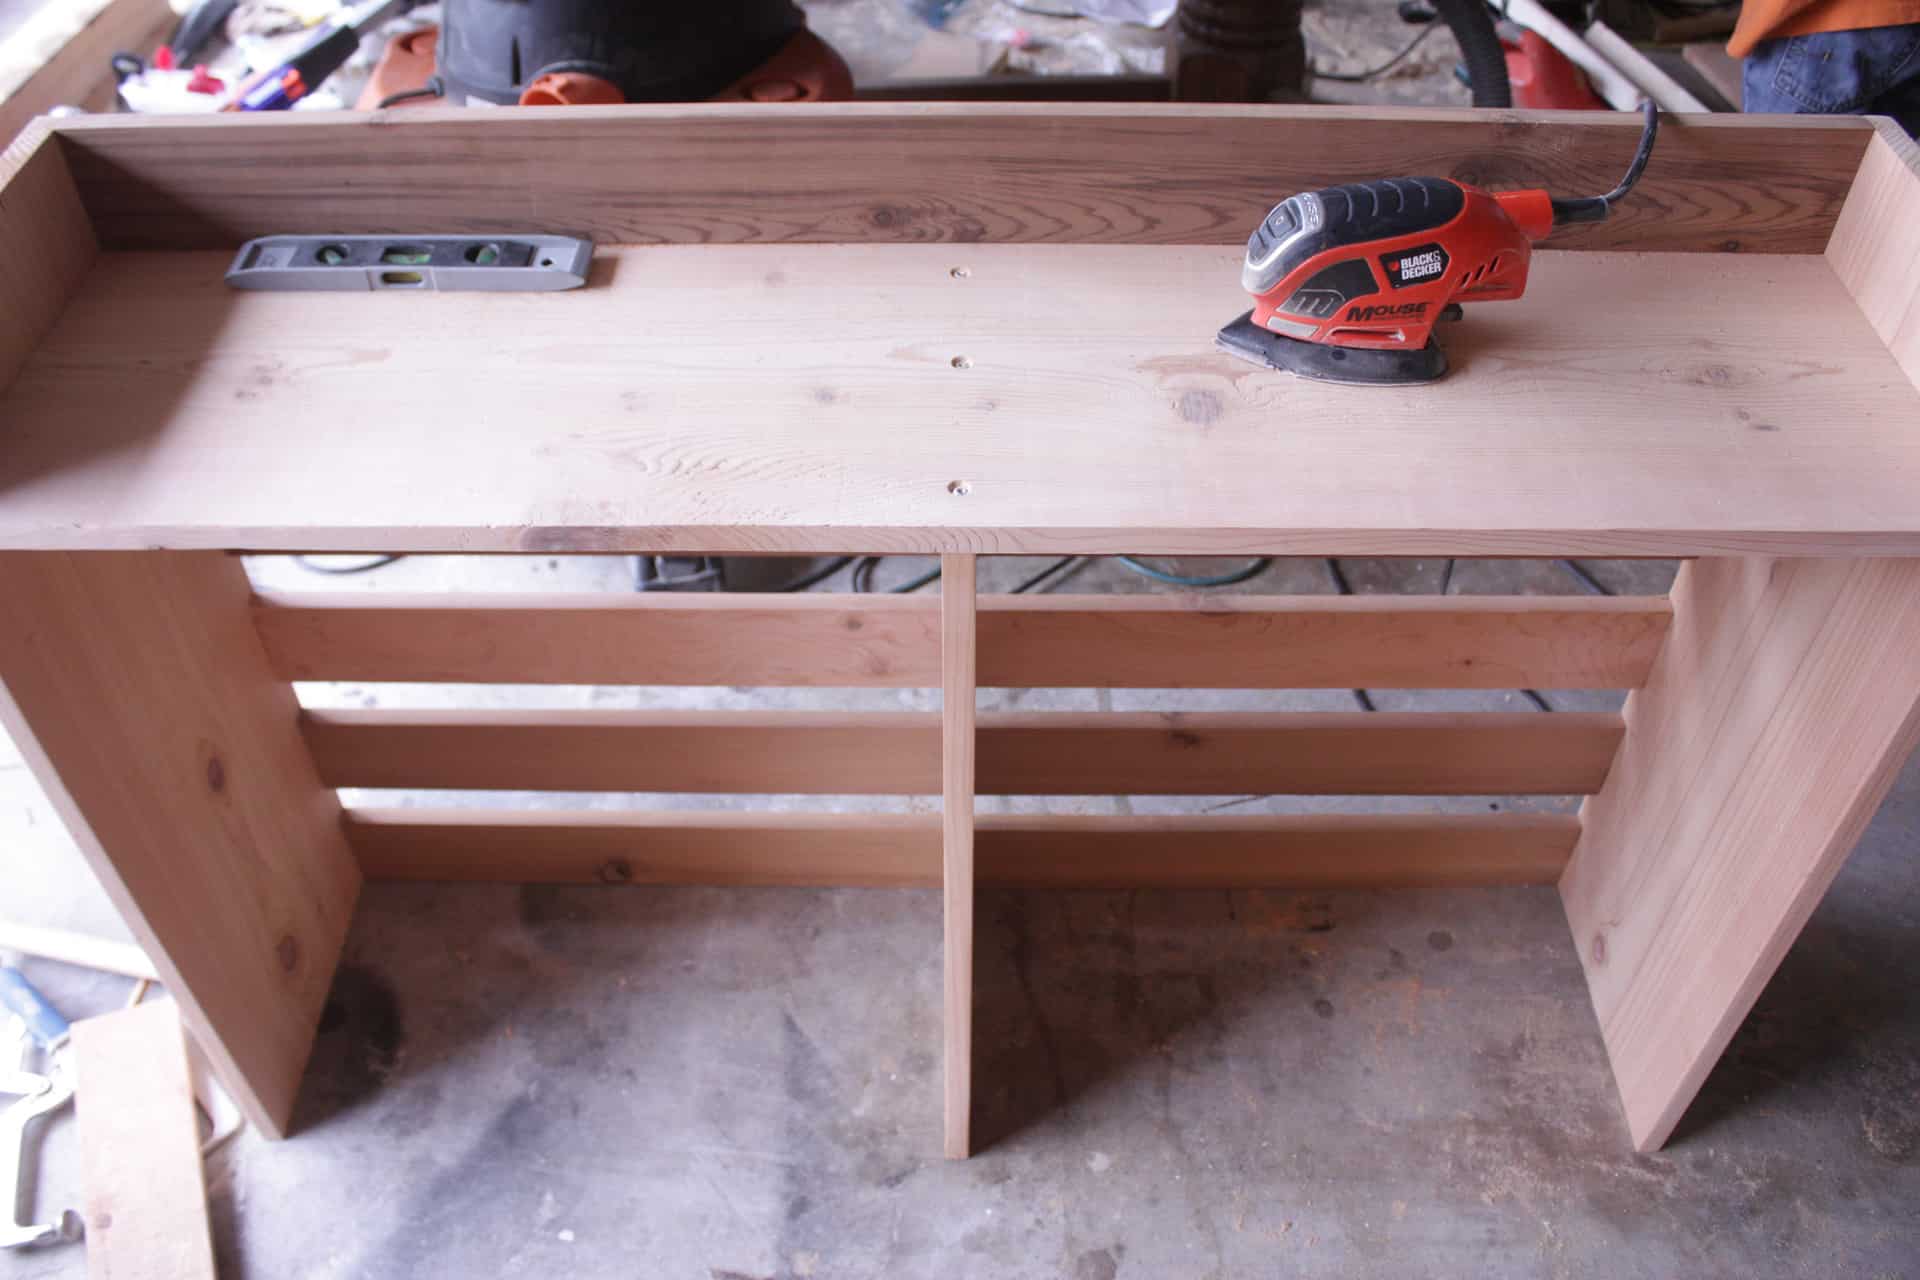
It is looking smoking hot at this point!! 😍
The next step is to cut the middle divider and get it attached…now you know we are using 1x12s but since the back is inset…this middle divider has to be ripped down by 3/4″ to compensate for the 1x4s behind it…or else your middle divider will stick out 3/4″ wider than your hutch…if that is okay with you then you do not have to rip it down.
You can easily use a circular saw or jigsaw…I used my miter saw…I just cut as long as I could one way, flipped it over, and cut it again the other way! I was so happy it worked out so easily! **Note: I believe it is against manufacturers suggested use to rip boards with your miter saw…if you choose to rip your boards with your miter saw you do so at your own risk!
Once you have it ripped down, you just drill some countersunk holes into the back along the 1x4s that are in line with the middle divider that you are attaching…like this…
Okay…not sure why all my pictures showing you my countersunk holes have to be so blurry…maybe I was just too excited to hold still enough for the pictures!! 🙄
Also, we need to drill countersunk holes along the top shelf where the boards meet.
See the beautiful holes along the top shelf…and ooh it’s starting to look like the hutch…we are ultimately so close to being done with this…so close!! The last thing before the hutch is complete is the second shelf that is only half the width of the hutch…your 1×12 @ 21 3/4″…we will need to rip this board down as well…or you could place it as we did with the top shelf and place it right underneath one of the 1x4s and you will need to drill 3/4″ pocket holes to attach it with 1 1/4″ screws!
I was all about ripping boards down with my miter saw after seeing how easy it was on the first board…but…please refer to the note above before trying it with your miter saw! I say to be on the safe side just use a table saw, circular saw, or jigsaw!
This board if you want it placed in the middle, is placed right around 13″…you can adjust the height of it to whatever you desire…I placed mine at 13″ and countersunk screws all along the back of the 1×4 that this board met up with, and then I also countersunk screws on the outside of the right 1×12 and on the middle divider.

Now…the hutch is COMPLETED!!!! WOOHOO!!! You have just built this amazing outdoor island and hutch and saved yourself over $2000.00!! Way to go!! High five!!
One last thing…once you have it where you want it…you need to attach the hutch to the island! We did so by drilling up through our 1x6s and into the side 1 x 12s we also drilled 3/4″ pocket holes along the bottom 1×4 at the back of the hutch and screwed 1 1/4″ screws down into the island!
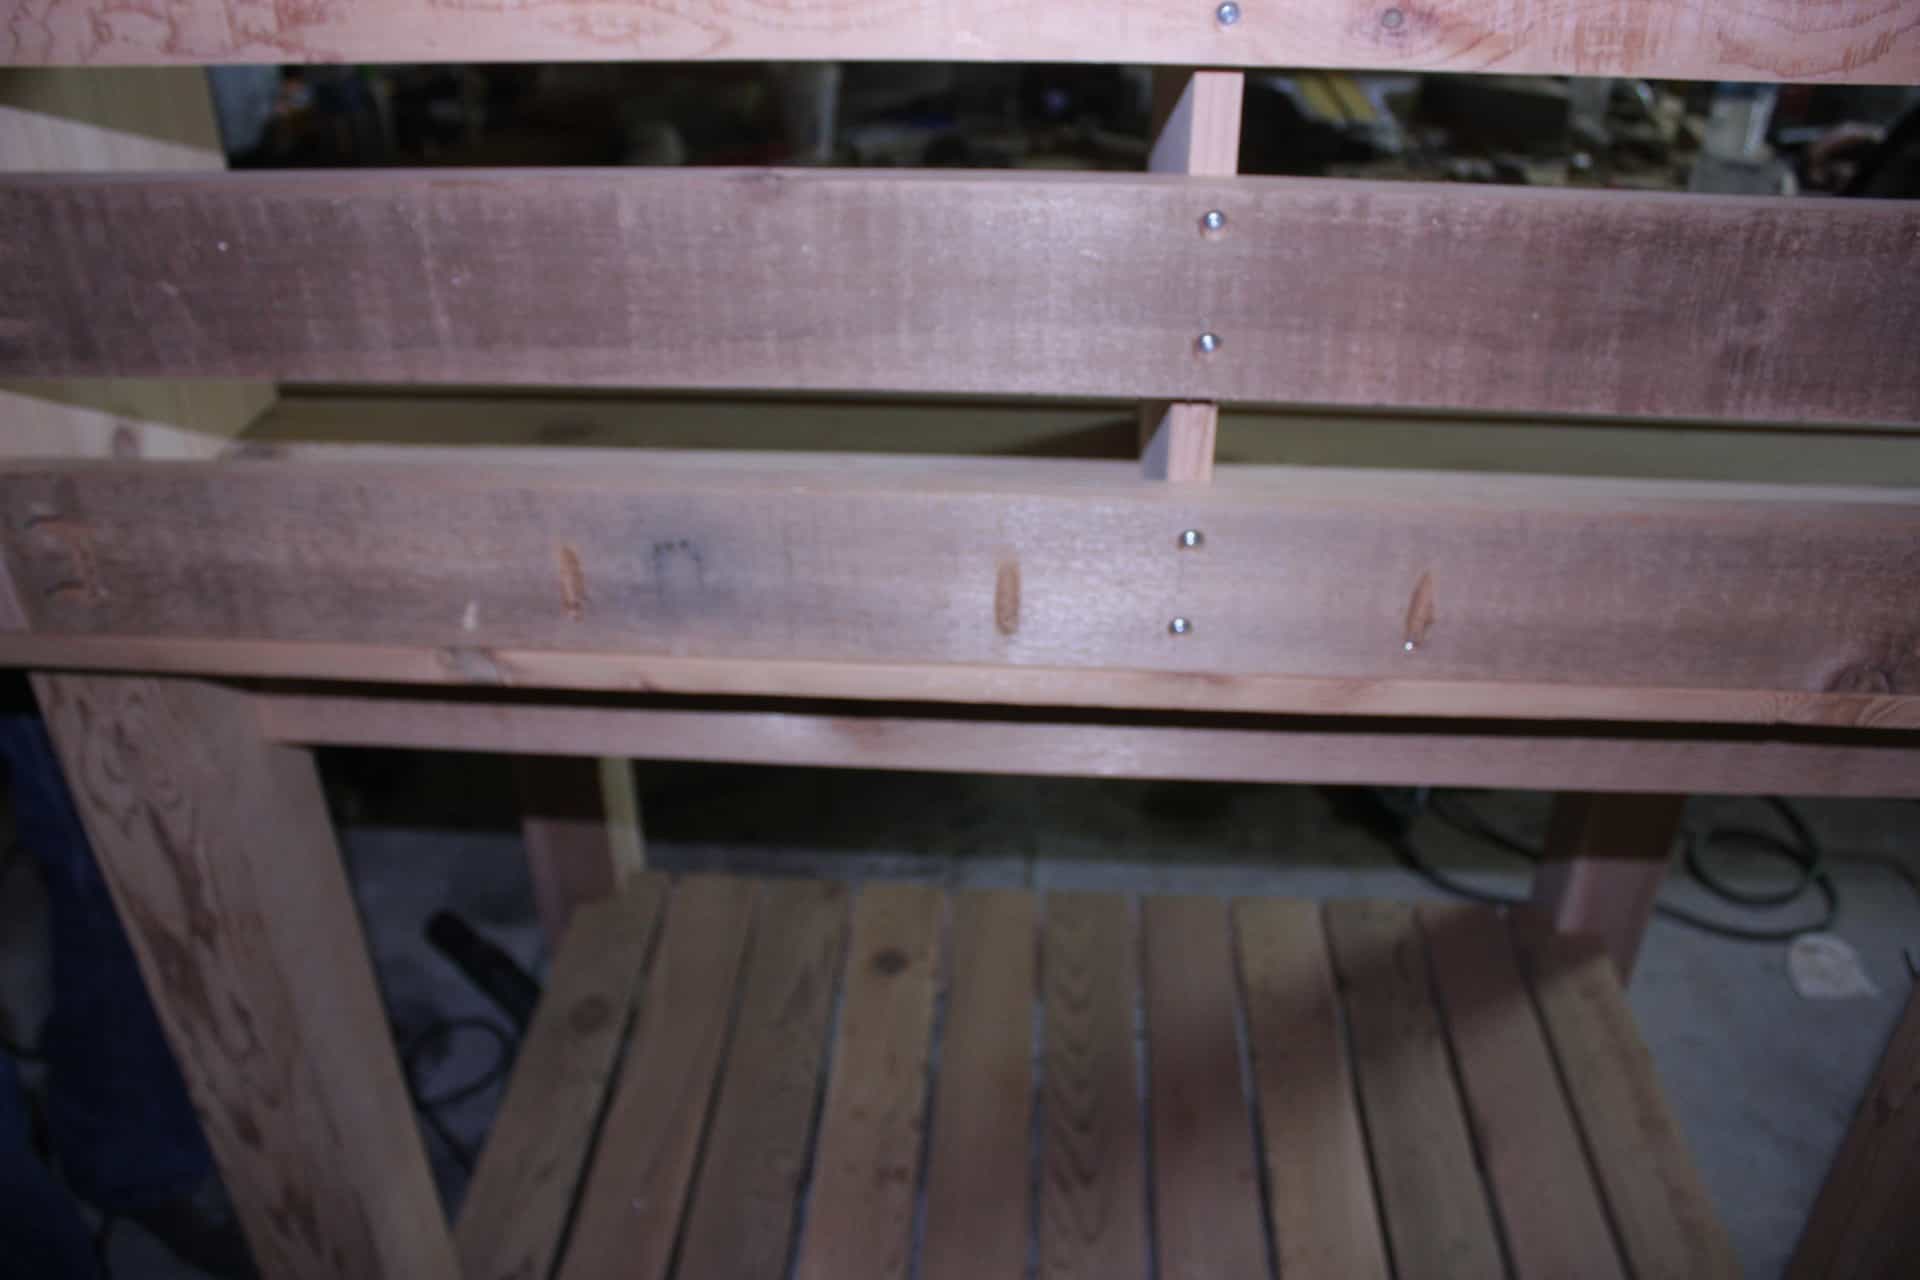
We also screwed in these really large screws on the corners to help hold the 1×6 in place on those large 4x4s and they looked really awesome too…but we were in such a hurry to get this to my friend in time that of course…I forgot to take pictures!!! Sorry!! If I get a chance I will take some pictures and update the post because I really thought they made it even better than it already was!! Lol!!
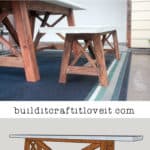
Here it is again!

And another slightly different angle because she is worth seeing once more…oh yes she is!!!
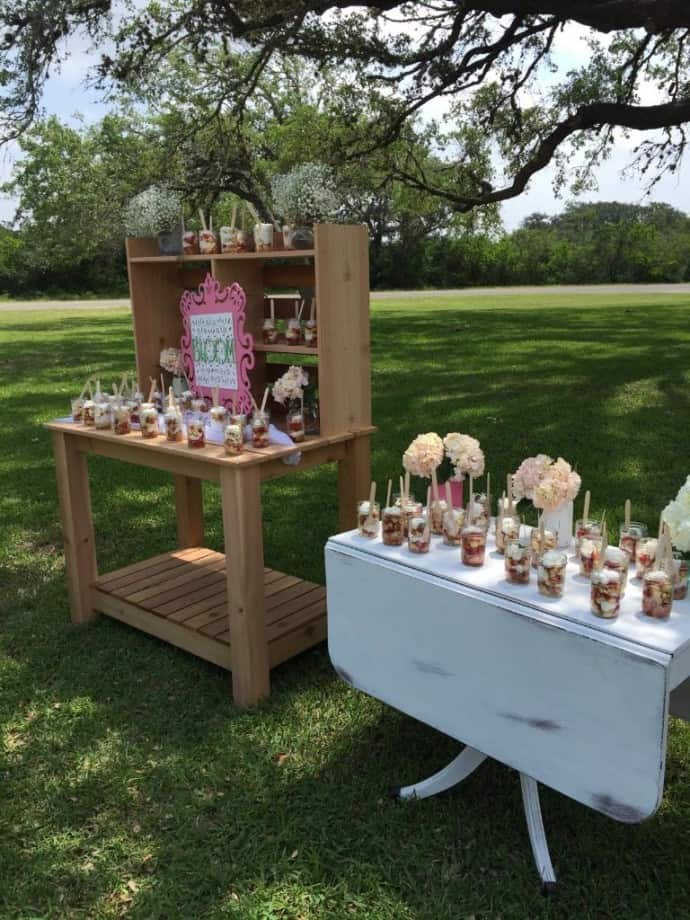
She made it look so great!! Now I may need one for myself!! Lol!!
If you are still awake and you made it through ALL of that!! I give you a round of applause…that was A LOT!!! If you are a person who doesn’t need all the pictures and all the writing I am sorry that I put you through that, but for those who need to see every step…I hope it helps!!
Feel free to ask questions below, or leave me a comment to let me know what’s on your mind!! Follow me on Instagram or sign up for new posts to be delivered to your inbox (scroll up on the sidebar) to keep up with all of my adventures in building!!
Whatever you BUILD or CRAFT, I just hope you LOVE every minute of it!!! Have a wonderful week!!
Happy Building,

Want to Save this Potting Bench / Outdoor Island for later? Pin It!

I absolutely love this, you my friend are TALENTED 🙂
I just saw this sweet comment lying here with no response!! Lol!! I am so sorry!! Thank you so much for your oh so sweet words!! And I think you have the talent my friend, it’s all you!!! 🙂 I mean who won Ryobi’s Guru last year…it wasn’t me!! Hahaha!!! Hugs Jeannie!!!