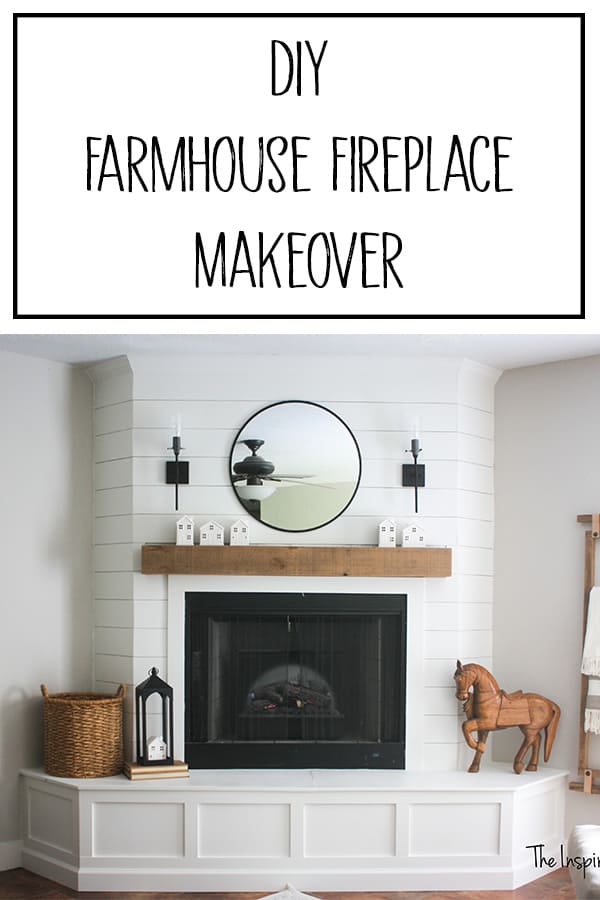
DIY Shiplap Fireplace Makeover
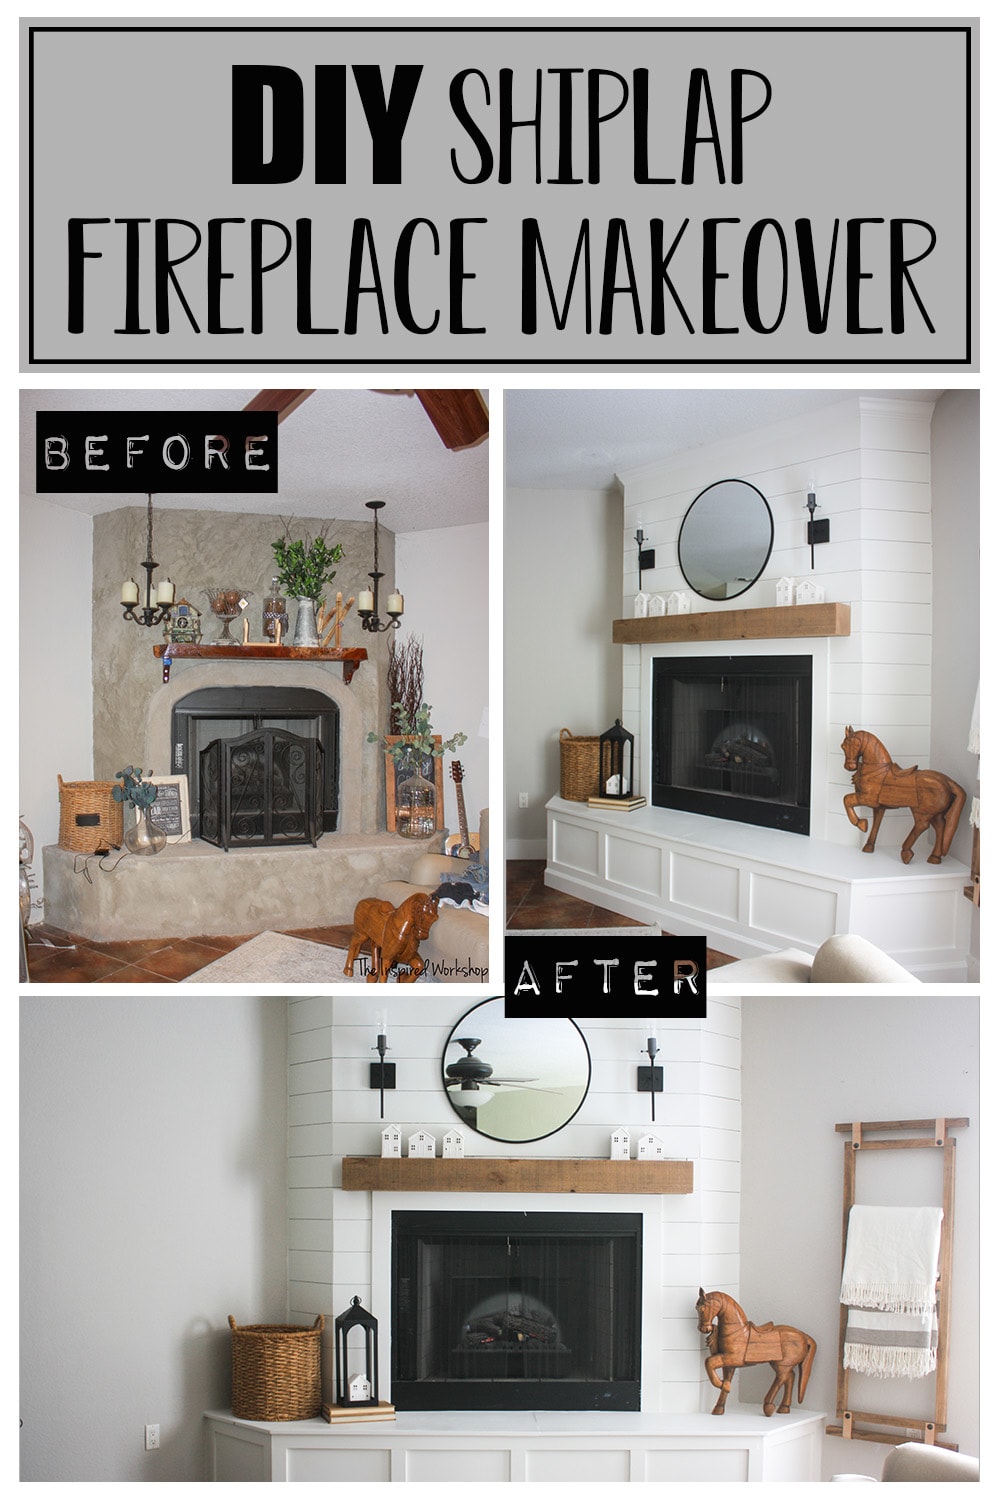
Fireplaces are the heart of the home on a cool fall or crisp winter day! Transforming a fireplace can transform the whole feel of the home. This DIY shiplap fireplace makeover is the perfect example of how a few sheets of plywood and some molding can transform your home!
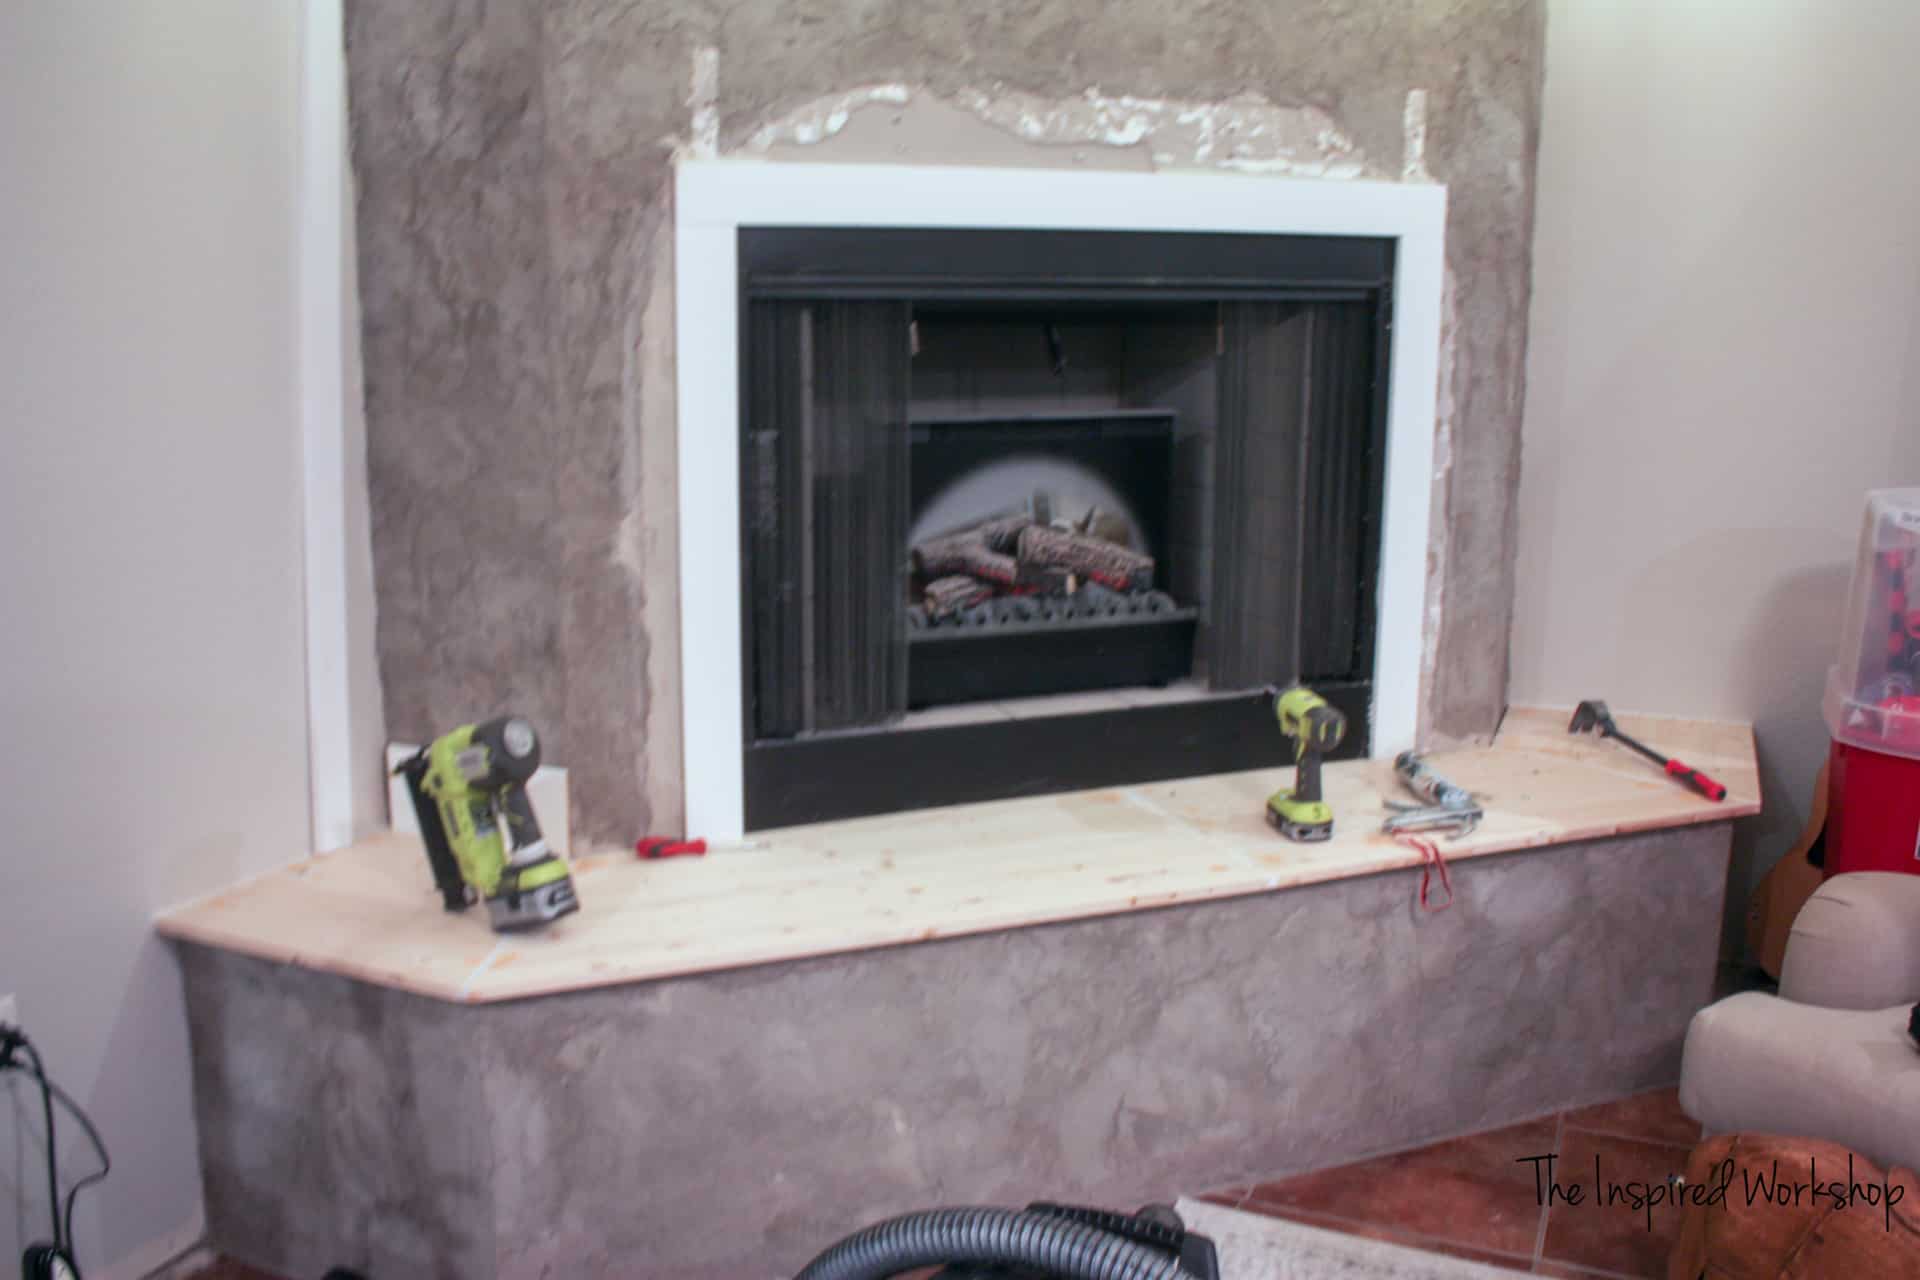
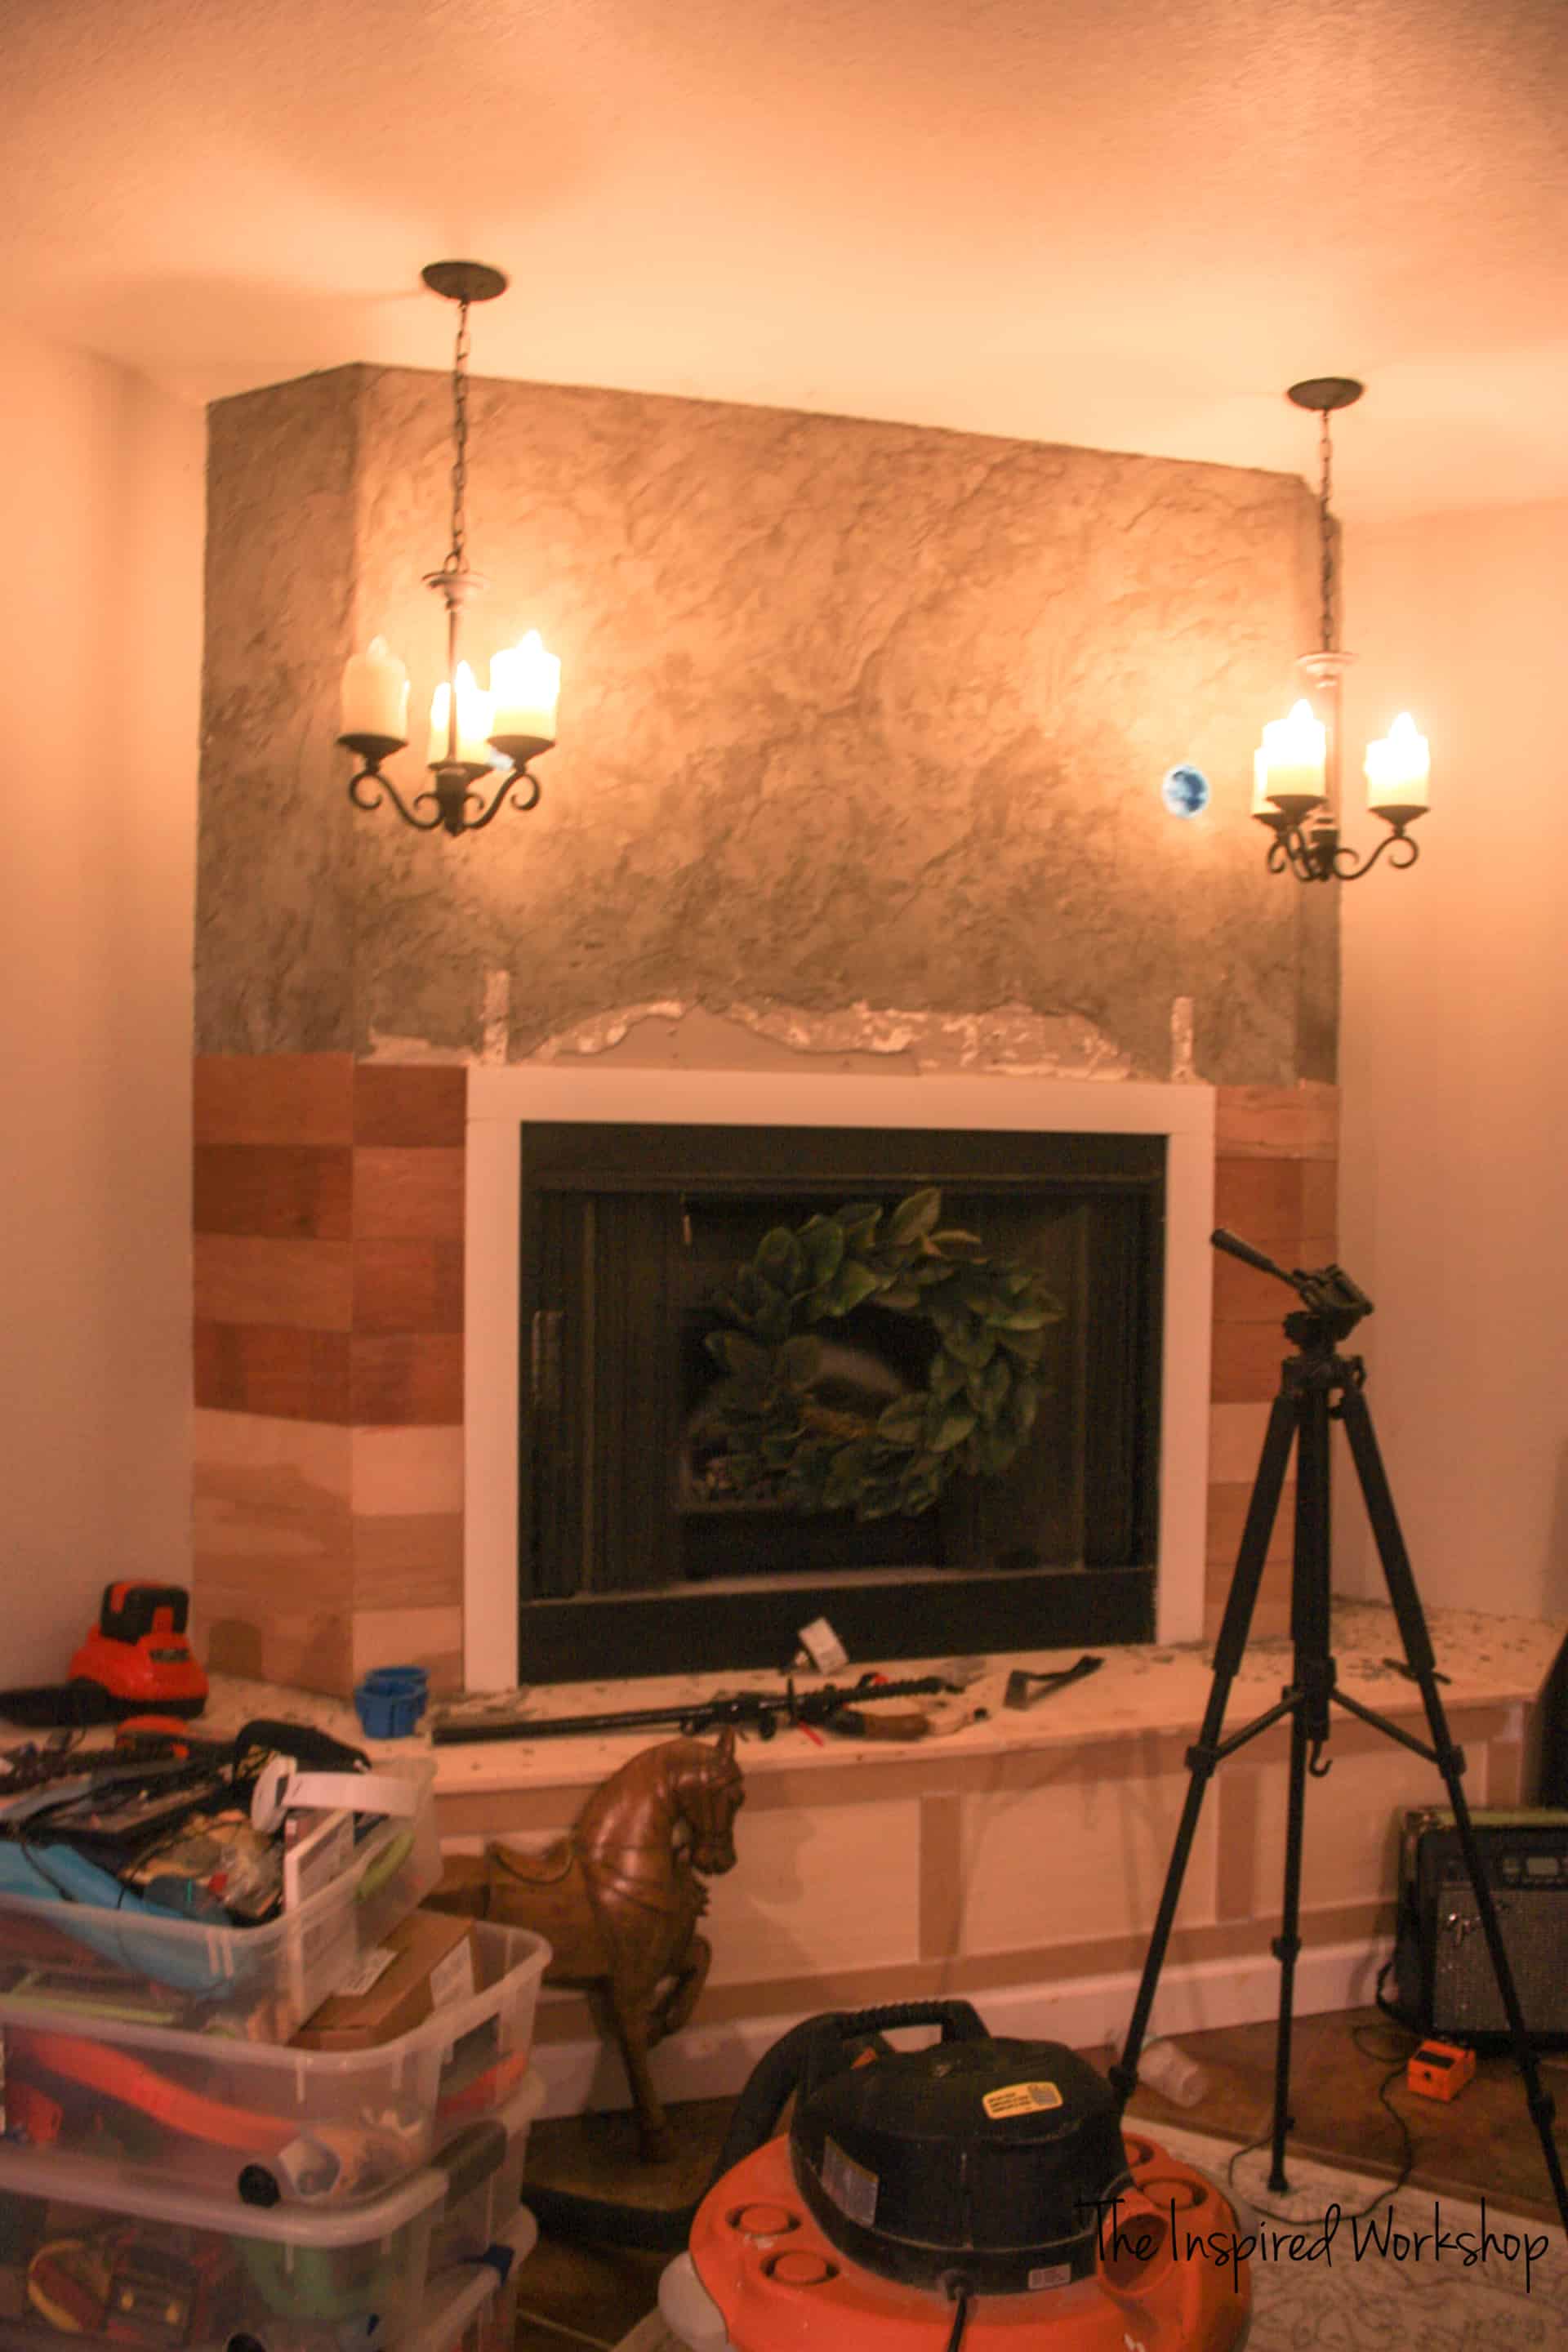
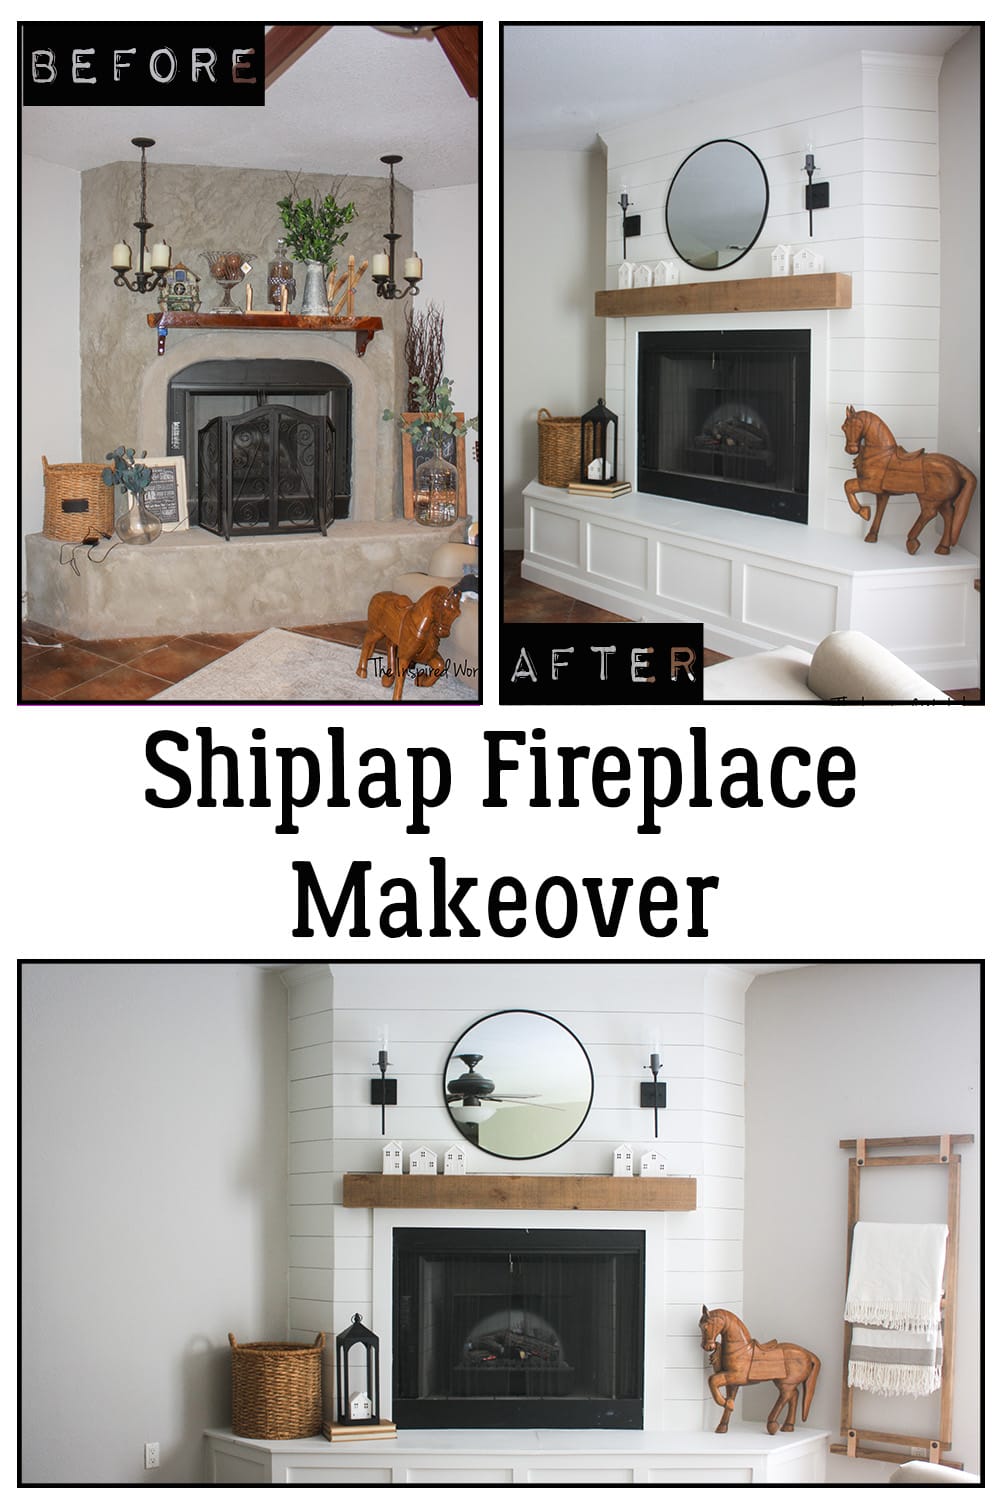
I bet you are curious to see what it looked like before…well, here you go!
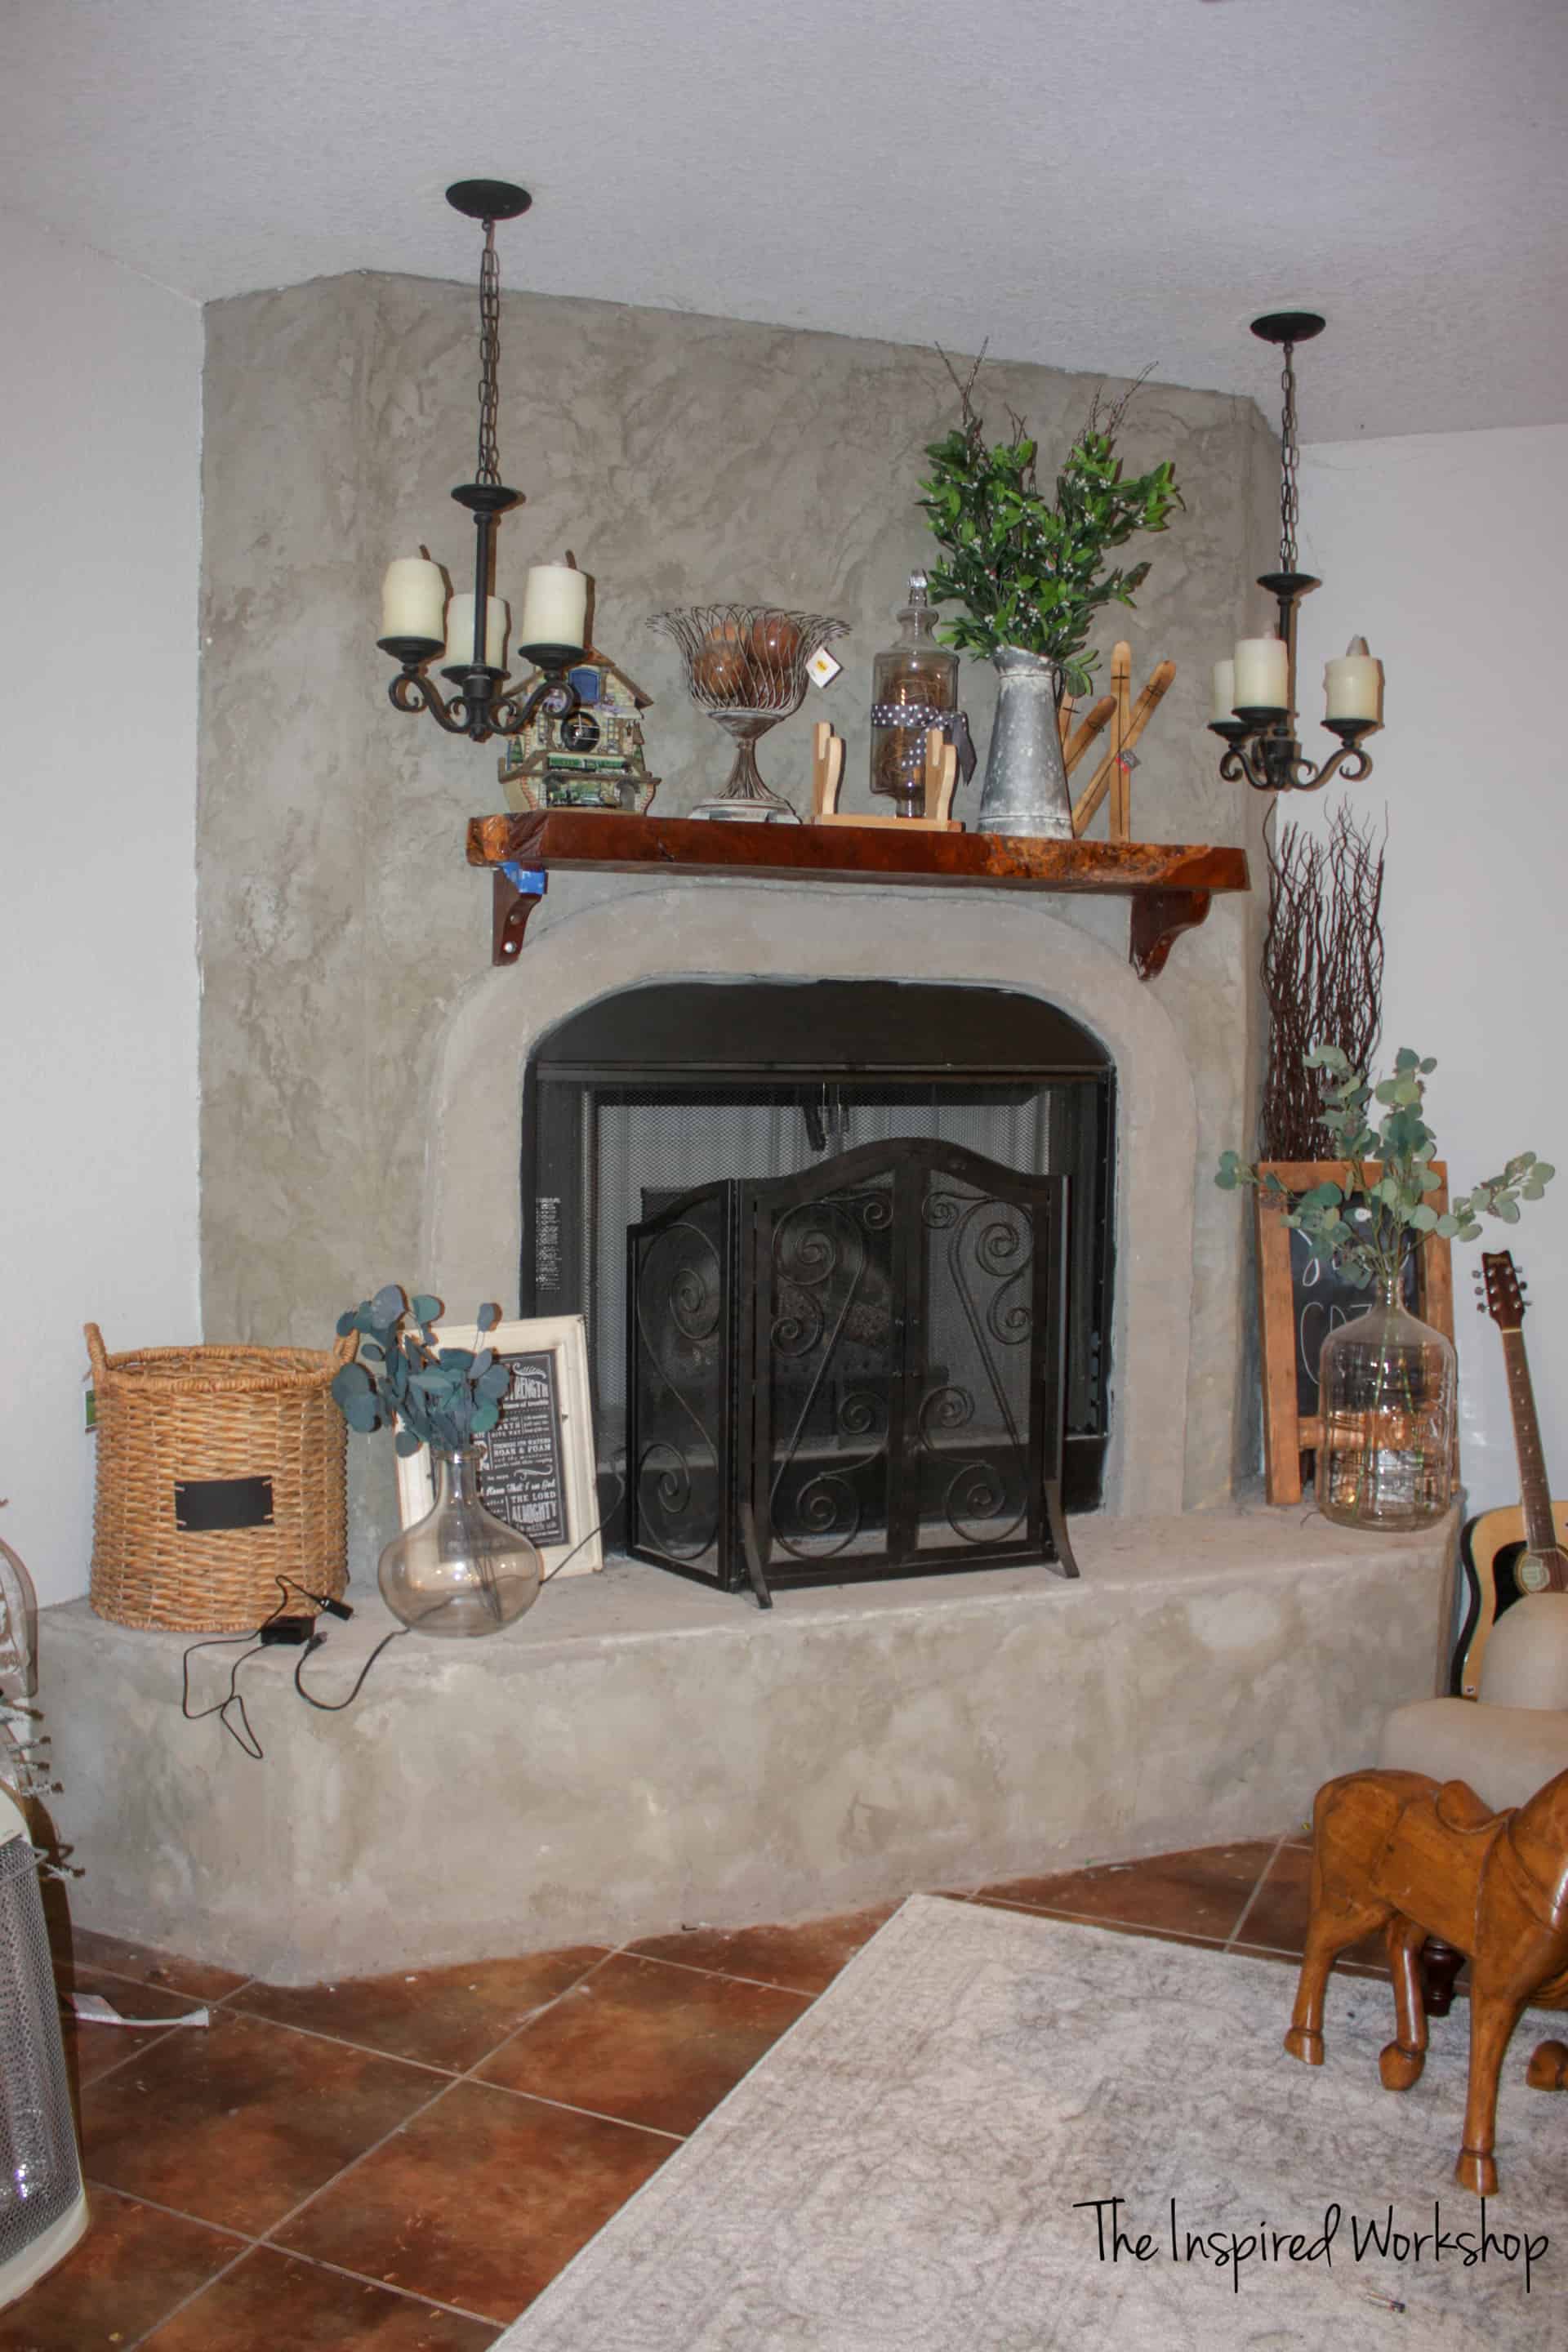
Sorry I didn’t stage the photo! Lol! When I FINALLY start a project, I can’t even think about wasting time to stage it, and yes, I could have cleaned it since I had to take everything off to get started…but then I would have forgotten to take a before photo!🤣 I can’t win them all, you just have to have an ugly before photo!😆
Now, I didn’t necessarily hate the concrete, it was just starting to flake off. Sometimes large chunks, and most often just powdery residue on the floor around it! It was frustrating to clean it up almost daily. Plus, I wanted to sit and enjoy my coffee by the fireplace…but I would get up and have cement dust all over my butt! 🙄 Now, I can enjoy it without any worries, and the best part is…I didn’t have to remove the concrete.
Remember the cement wall in my kitchen renovation that we took out? Well, after removing that and the MESS it created, there was NO WAY I was removing this from the fireplace. We decided to just cover it up to make it a quick and easy weekend project! I am hilarious, seriously…a weekend project…bahaha!! Who was I kidding that I can do anything over ONE weekend?! 🤣 Yeah, I am not sure when I even started this makeover, does that tell you how long ago it was?! I think it was before last Christmas but I am really hoping I am wrong! 🤔
Would you like to see how I made this shiplap fireplace makeover happen…in way more than a weekend! Lol!
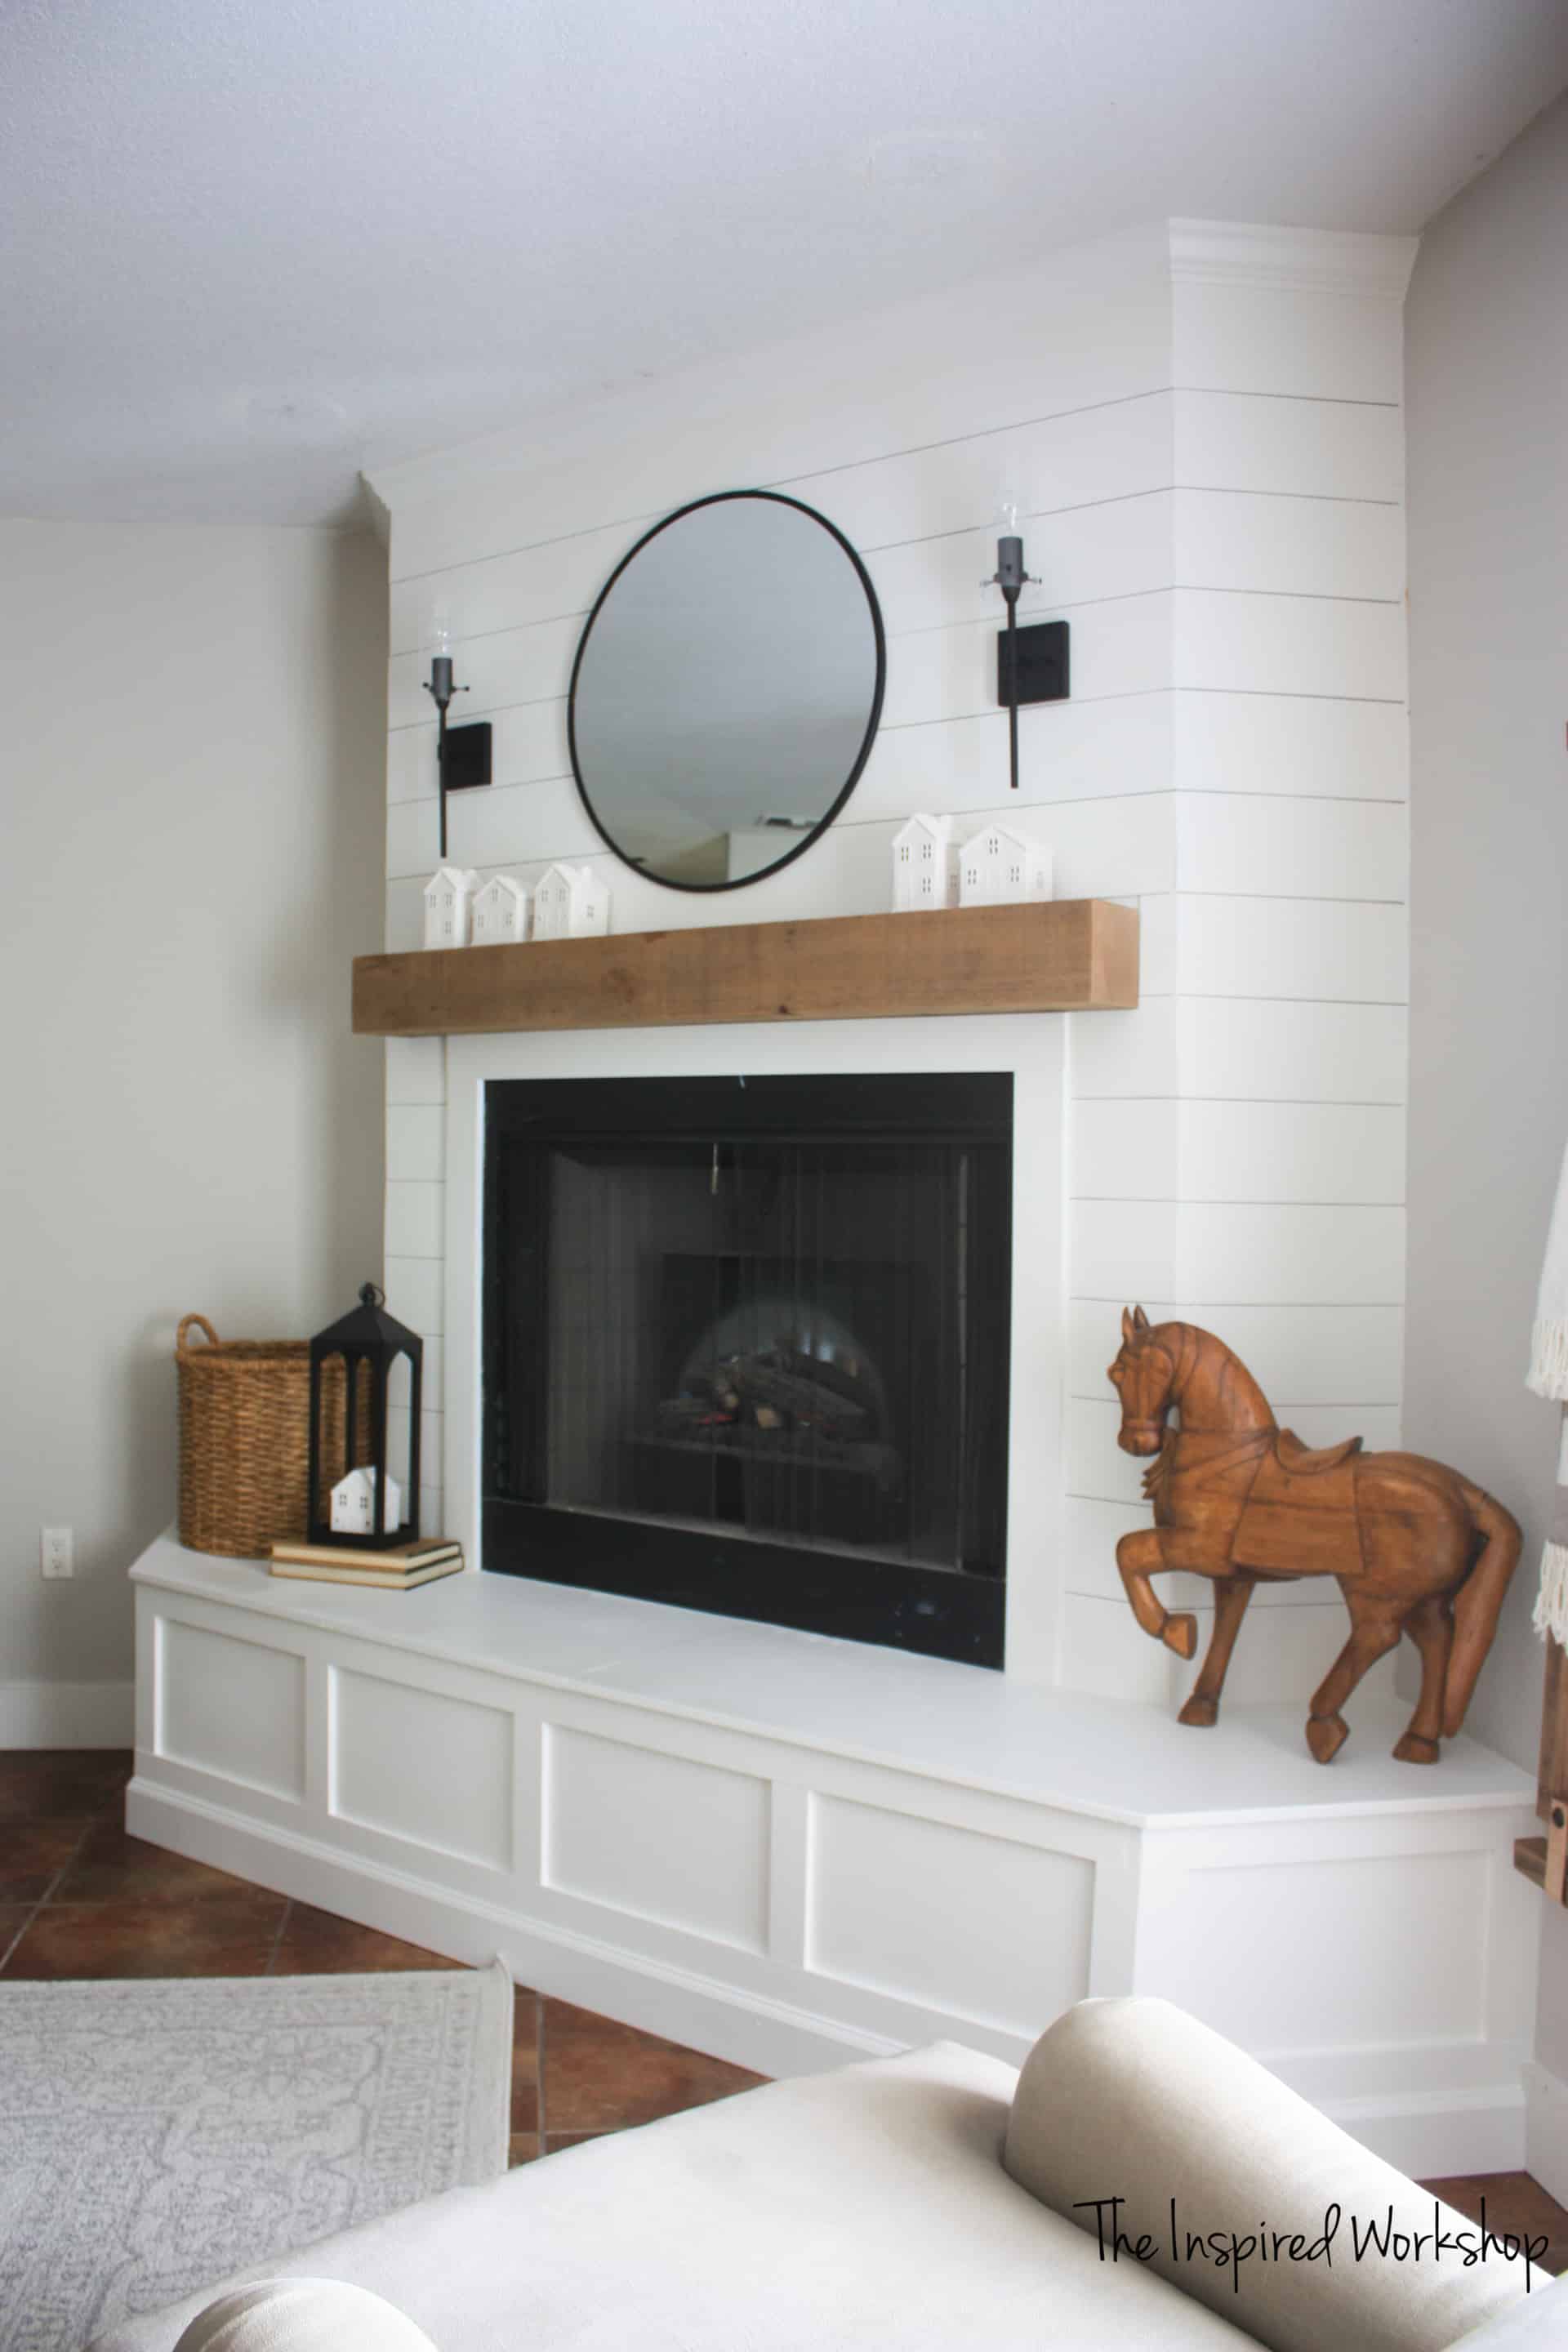
I am so eager to decorate this baby for winter! I can picture it already! Update: Look at how beautiful this shiplap fireplace is at Christmas time!😍
Gathering Supplies for the Shiplap Fireplace Makeover
Alright to start, I will show the materials I used but, if you wanted to makeover your fireplace, in the same way, you will need different amounts of materials based on the size of your fireplace, and more than likely far fewer supplies than I used! Lol!
Materials for the Shiplap Fireplace Makeover:
*NOTE: Links below may be affiliate links! If you click a link, I make a small percentage of your purchase at no extra cost to you! I appreciate every time you click a link whether you make a purchase or not! I just love that you are here reading my blog!
- 3/16″ underlayment (like plywood but cheaper) ripped into 6″ strips
- 1/2″ MDF
- 1×4 primed board
- 2×4 board
- stick of crown molding
- baseboard molding
- pine edge-glued panel
- 6×6 cedar post
- brad nailer
- hex bolts
- laser level
- Caulk gun – this is one of my FAVORITE tools ever! No more hand cramps while caulking! I put a link to amazon to show you the caulk gun but you can pick it up at your local Home Depot for 39.99 without a battery or charger if you already have Ryobi 18v tools!
- caulk -Dynaflex Alex Flex – this is also my FAVORITE caulk! The main difference between this caulk and others, this one DOES NOT SHINE through paint! Take it from a woman who has been caulking baseboards, window trim, door trim and everything else in our home…it is the BEST I have found!
There really isn’t a cut list offered for the shiplap fireplace makeover because your fireplace is not going to be the same as mine!
Shiplap Fireplace Makeover
So the whole process of the fireplace makeover is simple as can be! The sheer size of this fireplace and the angles that most fireplaces do not have make it take a lot longer than any other shiplap fireplace makeovers will!
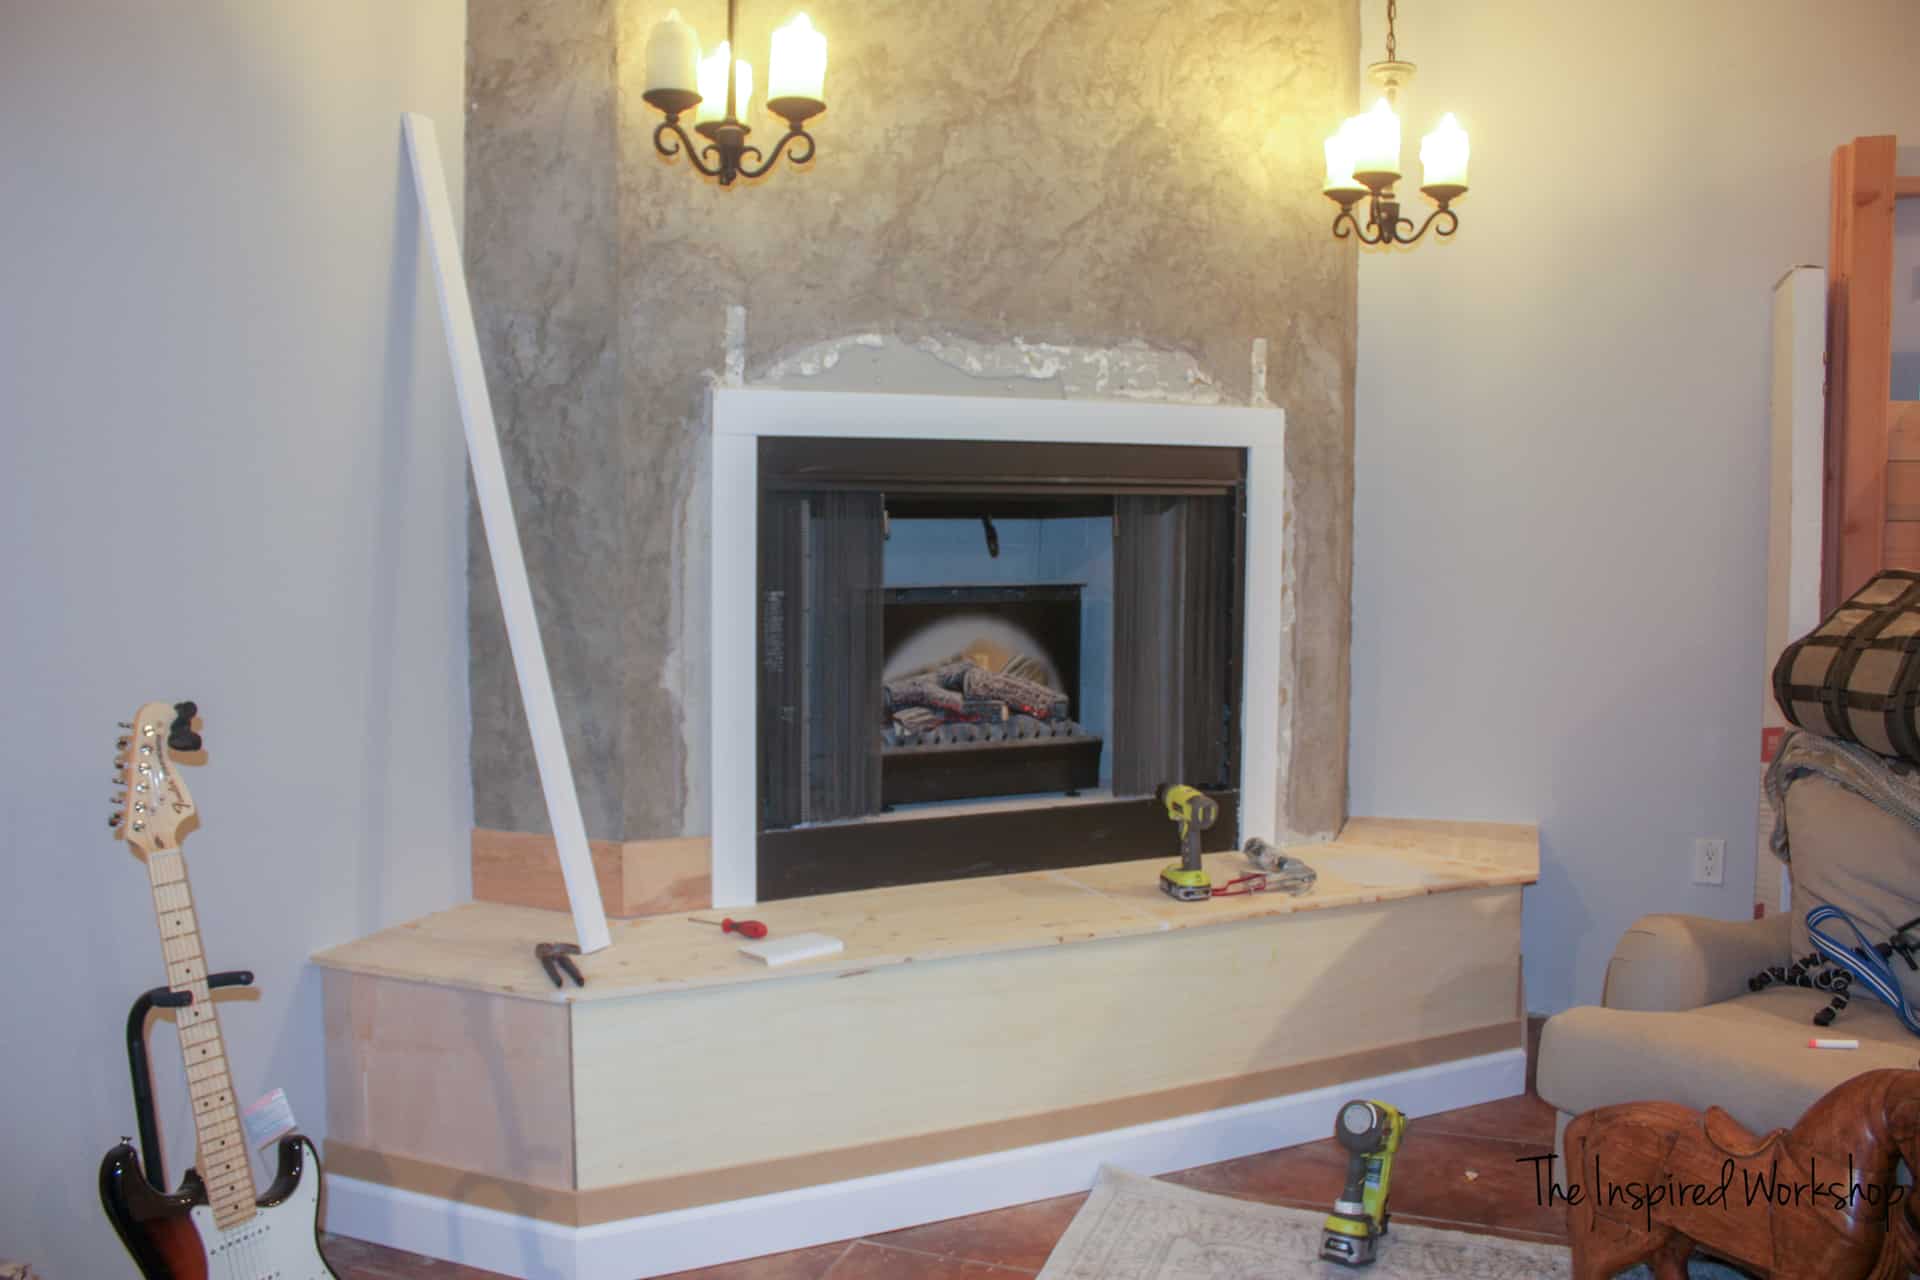
Creating a New Hearth for the Shiplap Fireplace Makeover
I started the makeover by covering the hearth. I ripped the 24″ pine panels down to 19″. The hearth measured a little under 18″ and the MDF was 1/2″ thick that I was adding to the bottom of the hearth. The underlayment was 3/16″ so this left around a 1/2″ hangover which I wanted! Pictures are a little blurry for the next few steps.😕
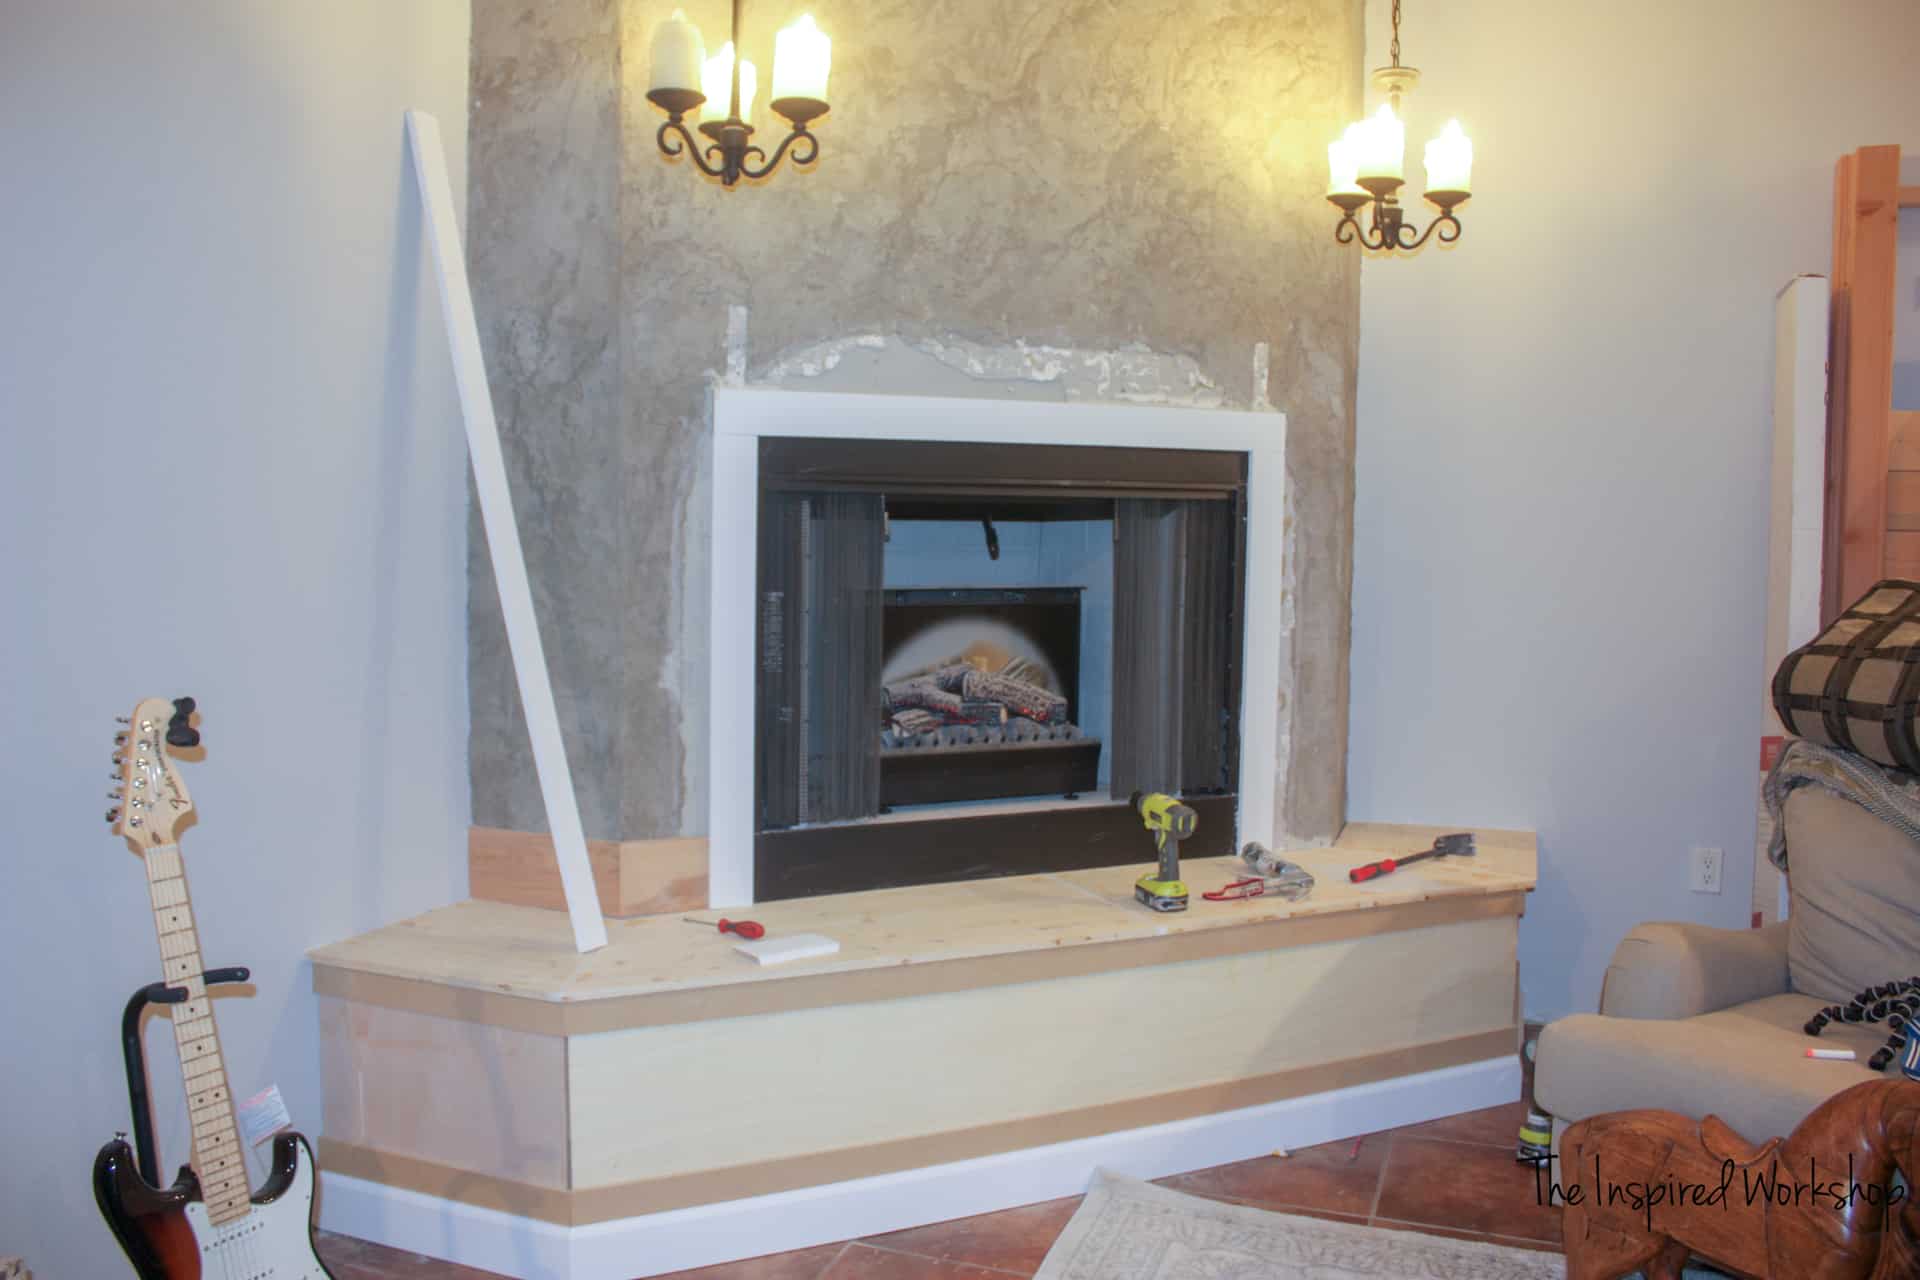
Once I had the hearth, or seat as I think of it, covered I could just start working from the bottom up. I covered the whole base with underlayment. I did not bevel it or anything for the angles since I was adding the MDF molding later.
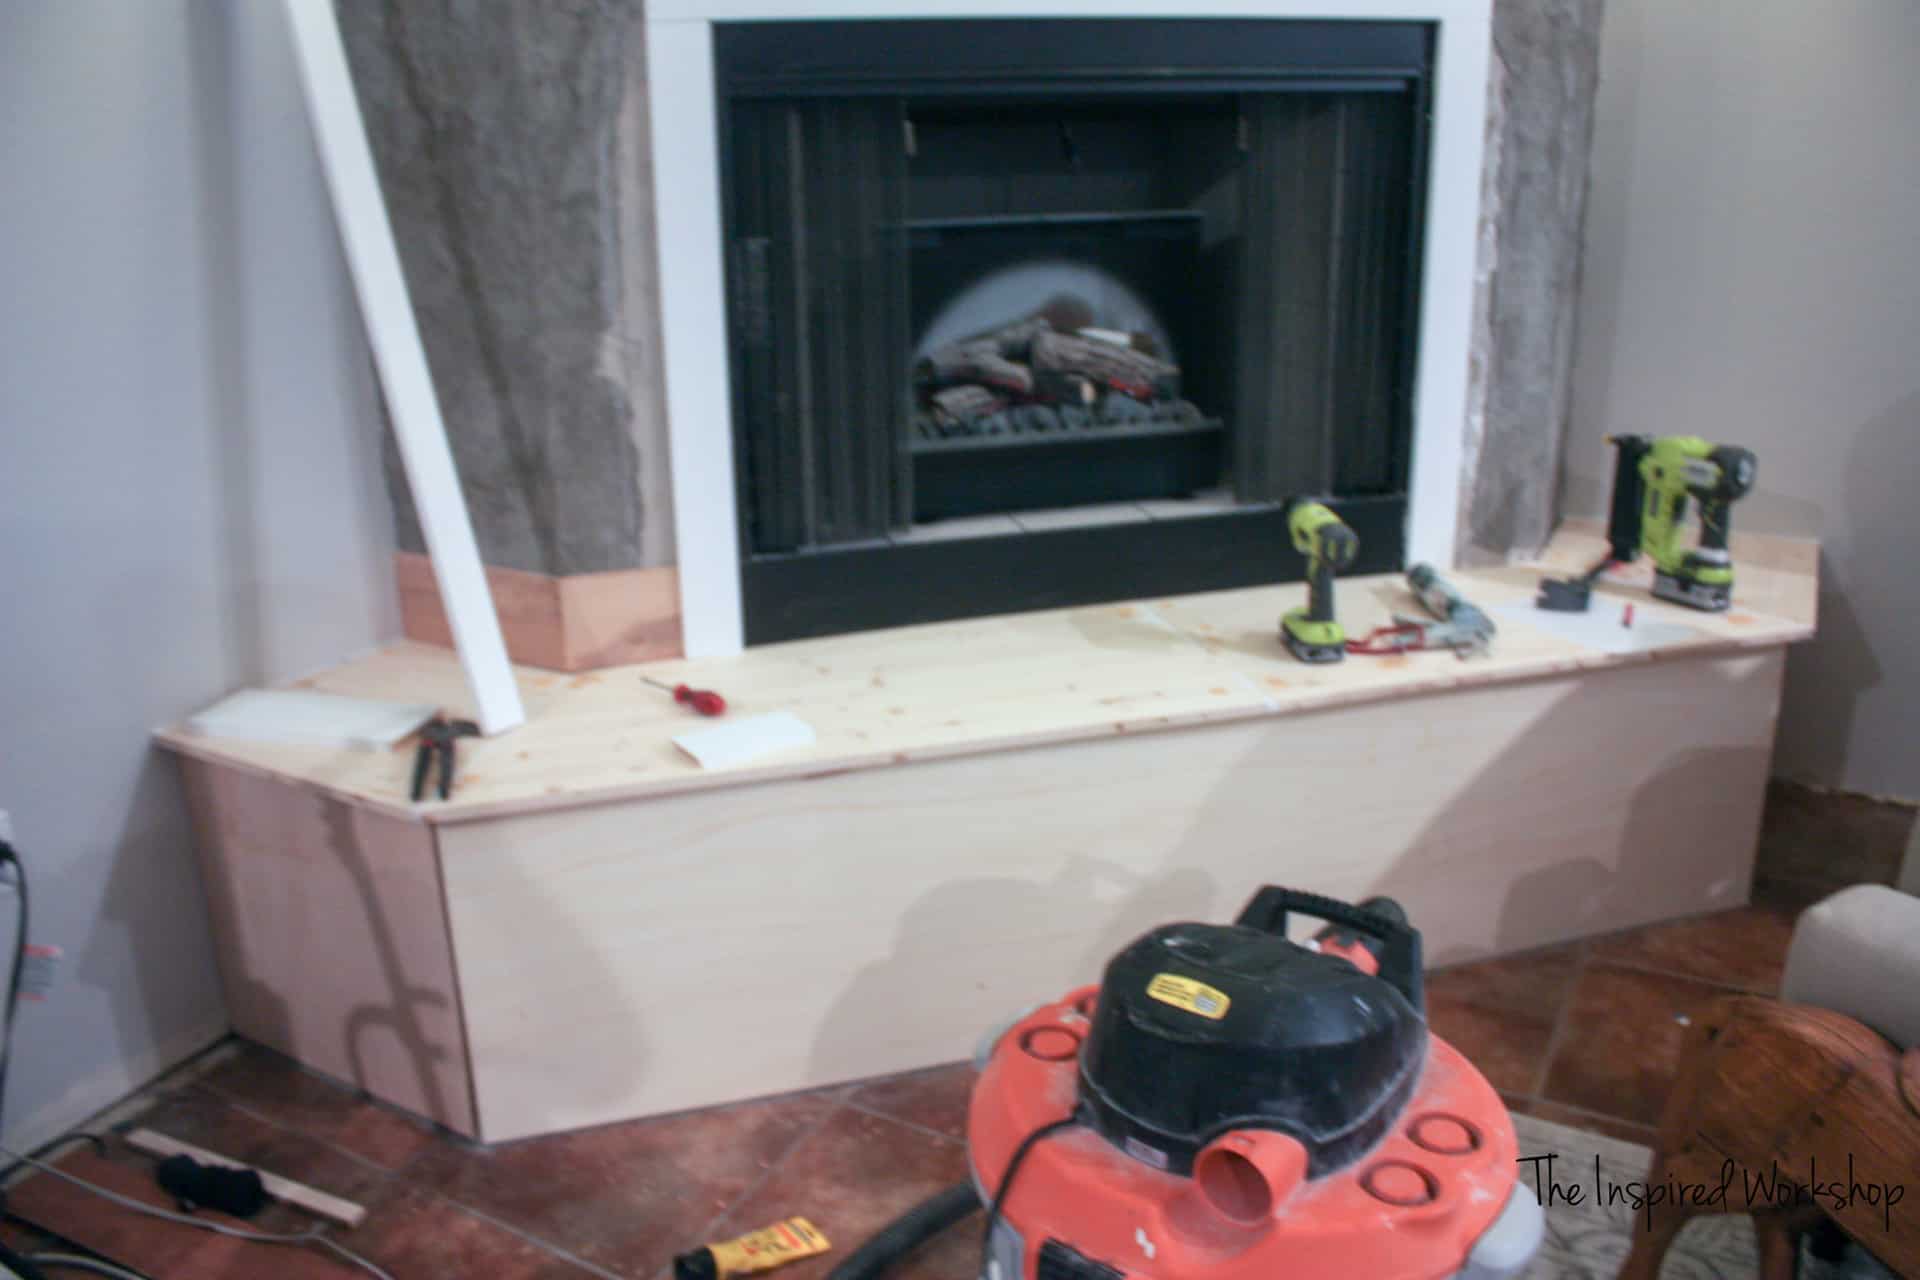
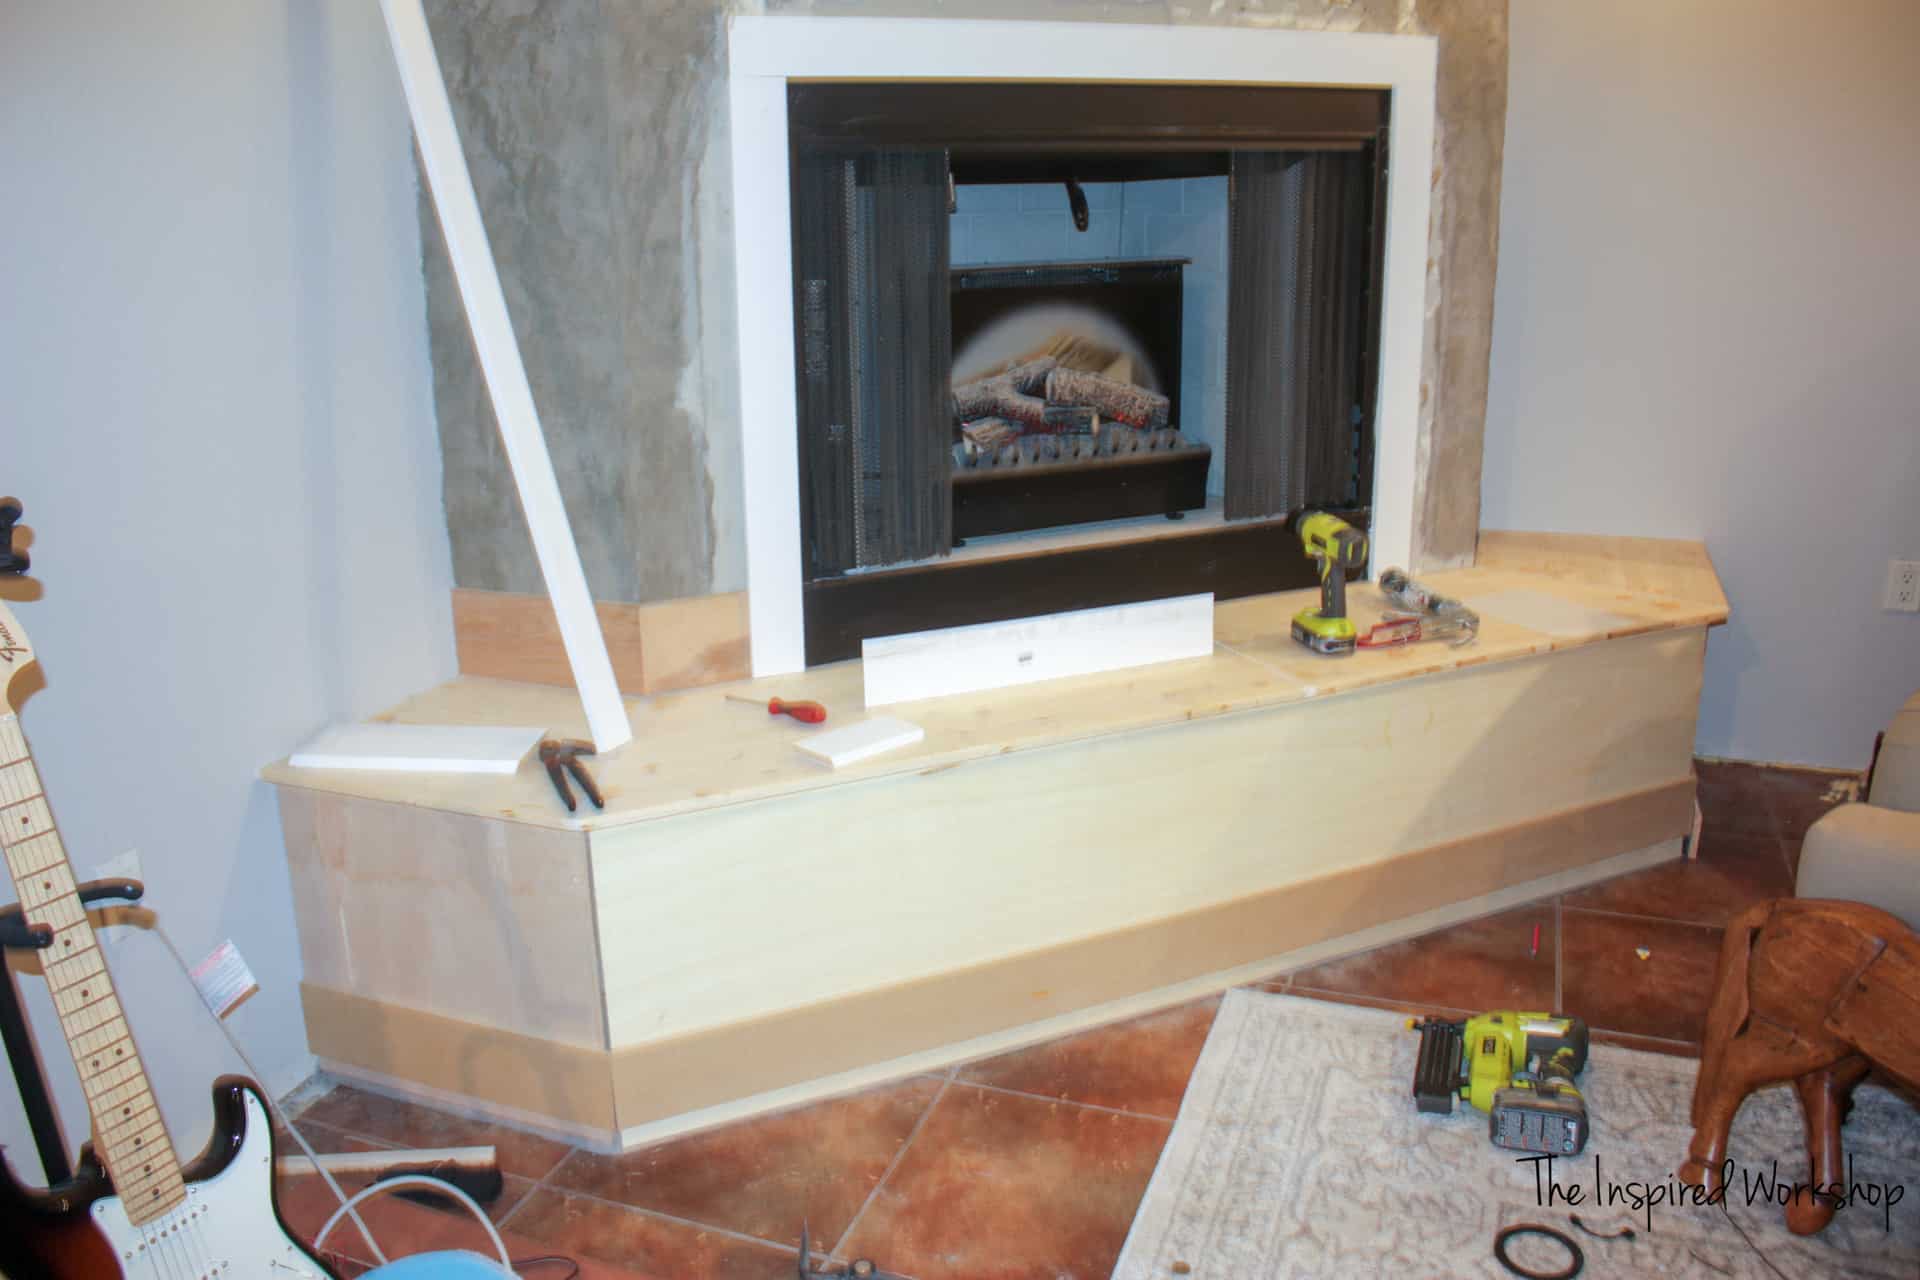
I then added the trim molding out of MDF, I did miter/bevel the ends for seamless fit! Our fireplace ended up having roughly 30 degree miters, so each board is mitered 15 degrees off square.
I bumped the base MDF up a few inches from the floor because I was adding baseboard over this.
I just kept adding the molding to make the fireplace base match my kitchen cabinets! I love the traditional squares made of molding!
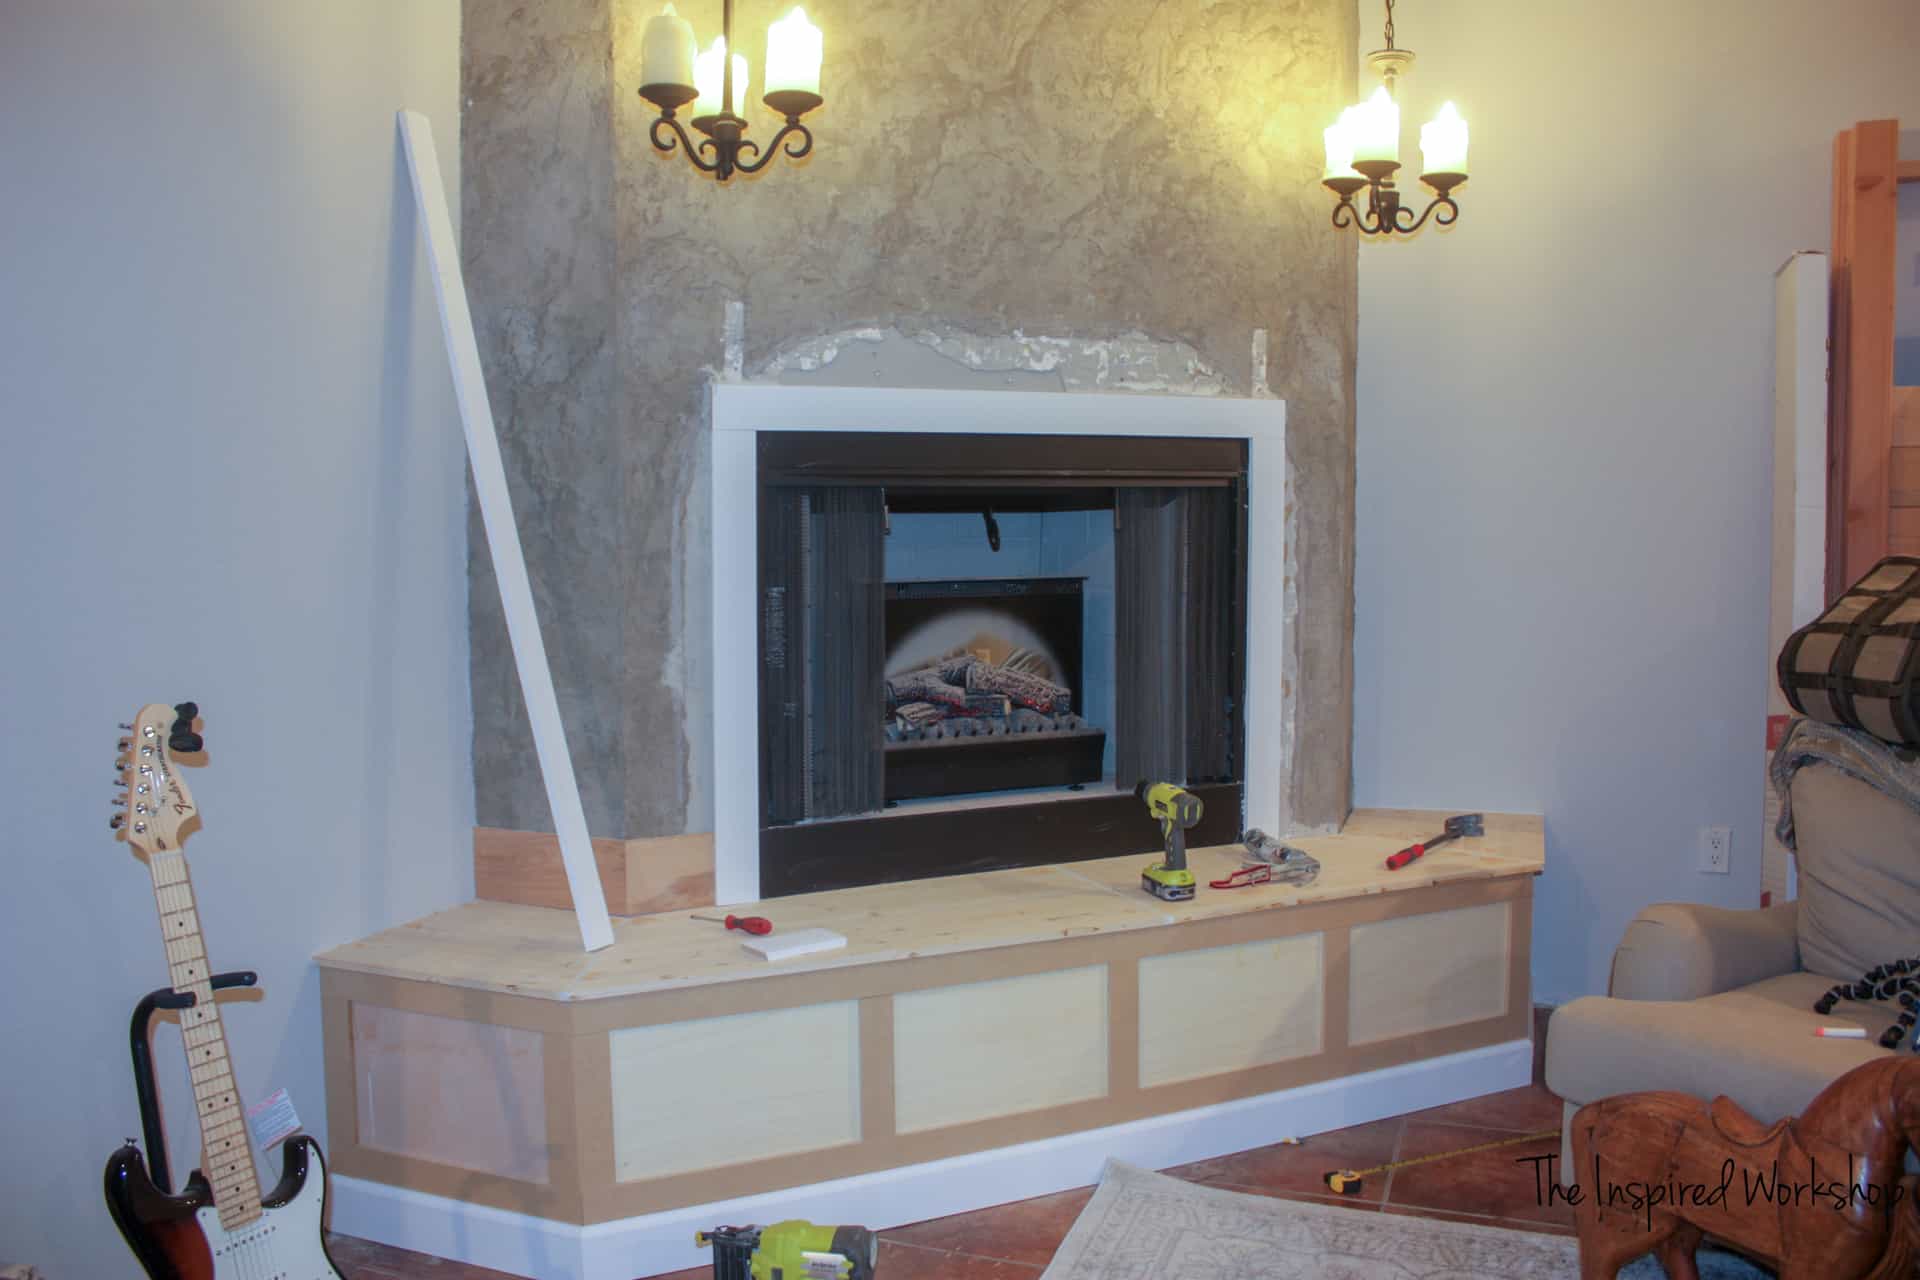
So this was the work I actually accomplished in that one weekend. Then I left it to sit at this place for a long time, you want to know why? My brad nails kept hitting the concrete and curling back up through my shiplap boards…and that pissed me off! Lol! Once I was determined to get back to it, months later, it was quick progress though.
Adding Shiplap to the Fireplace
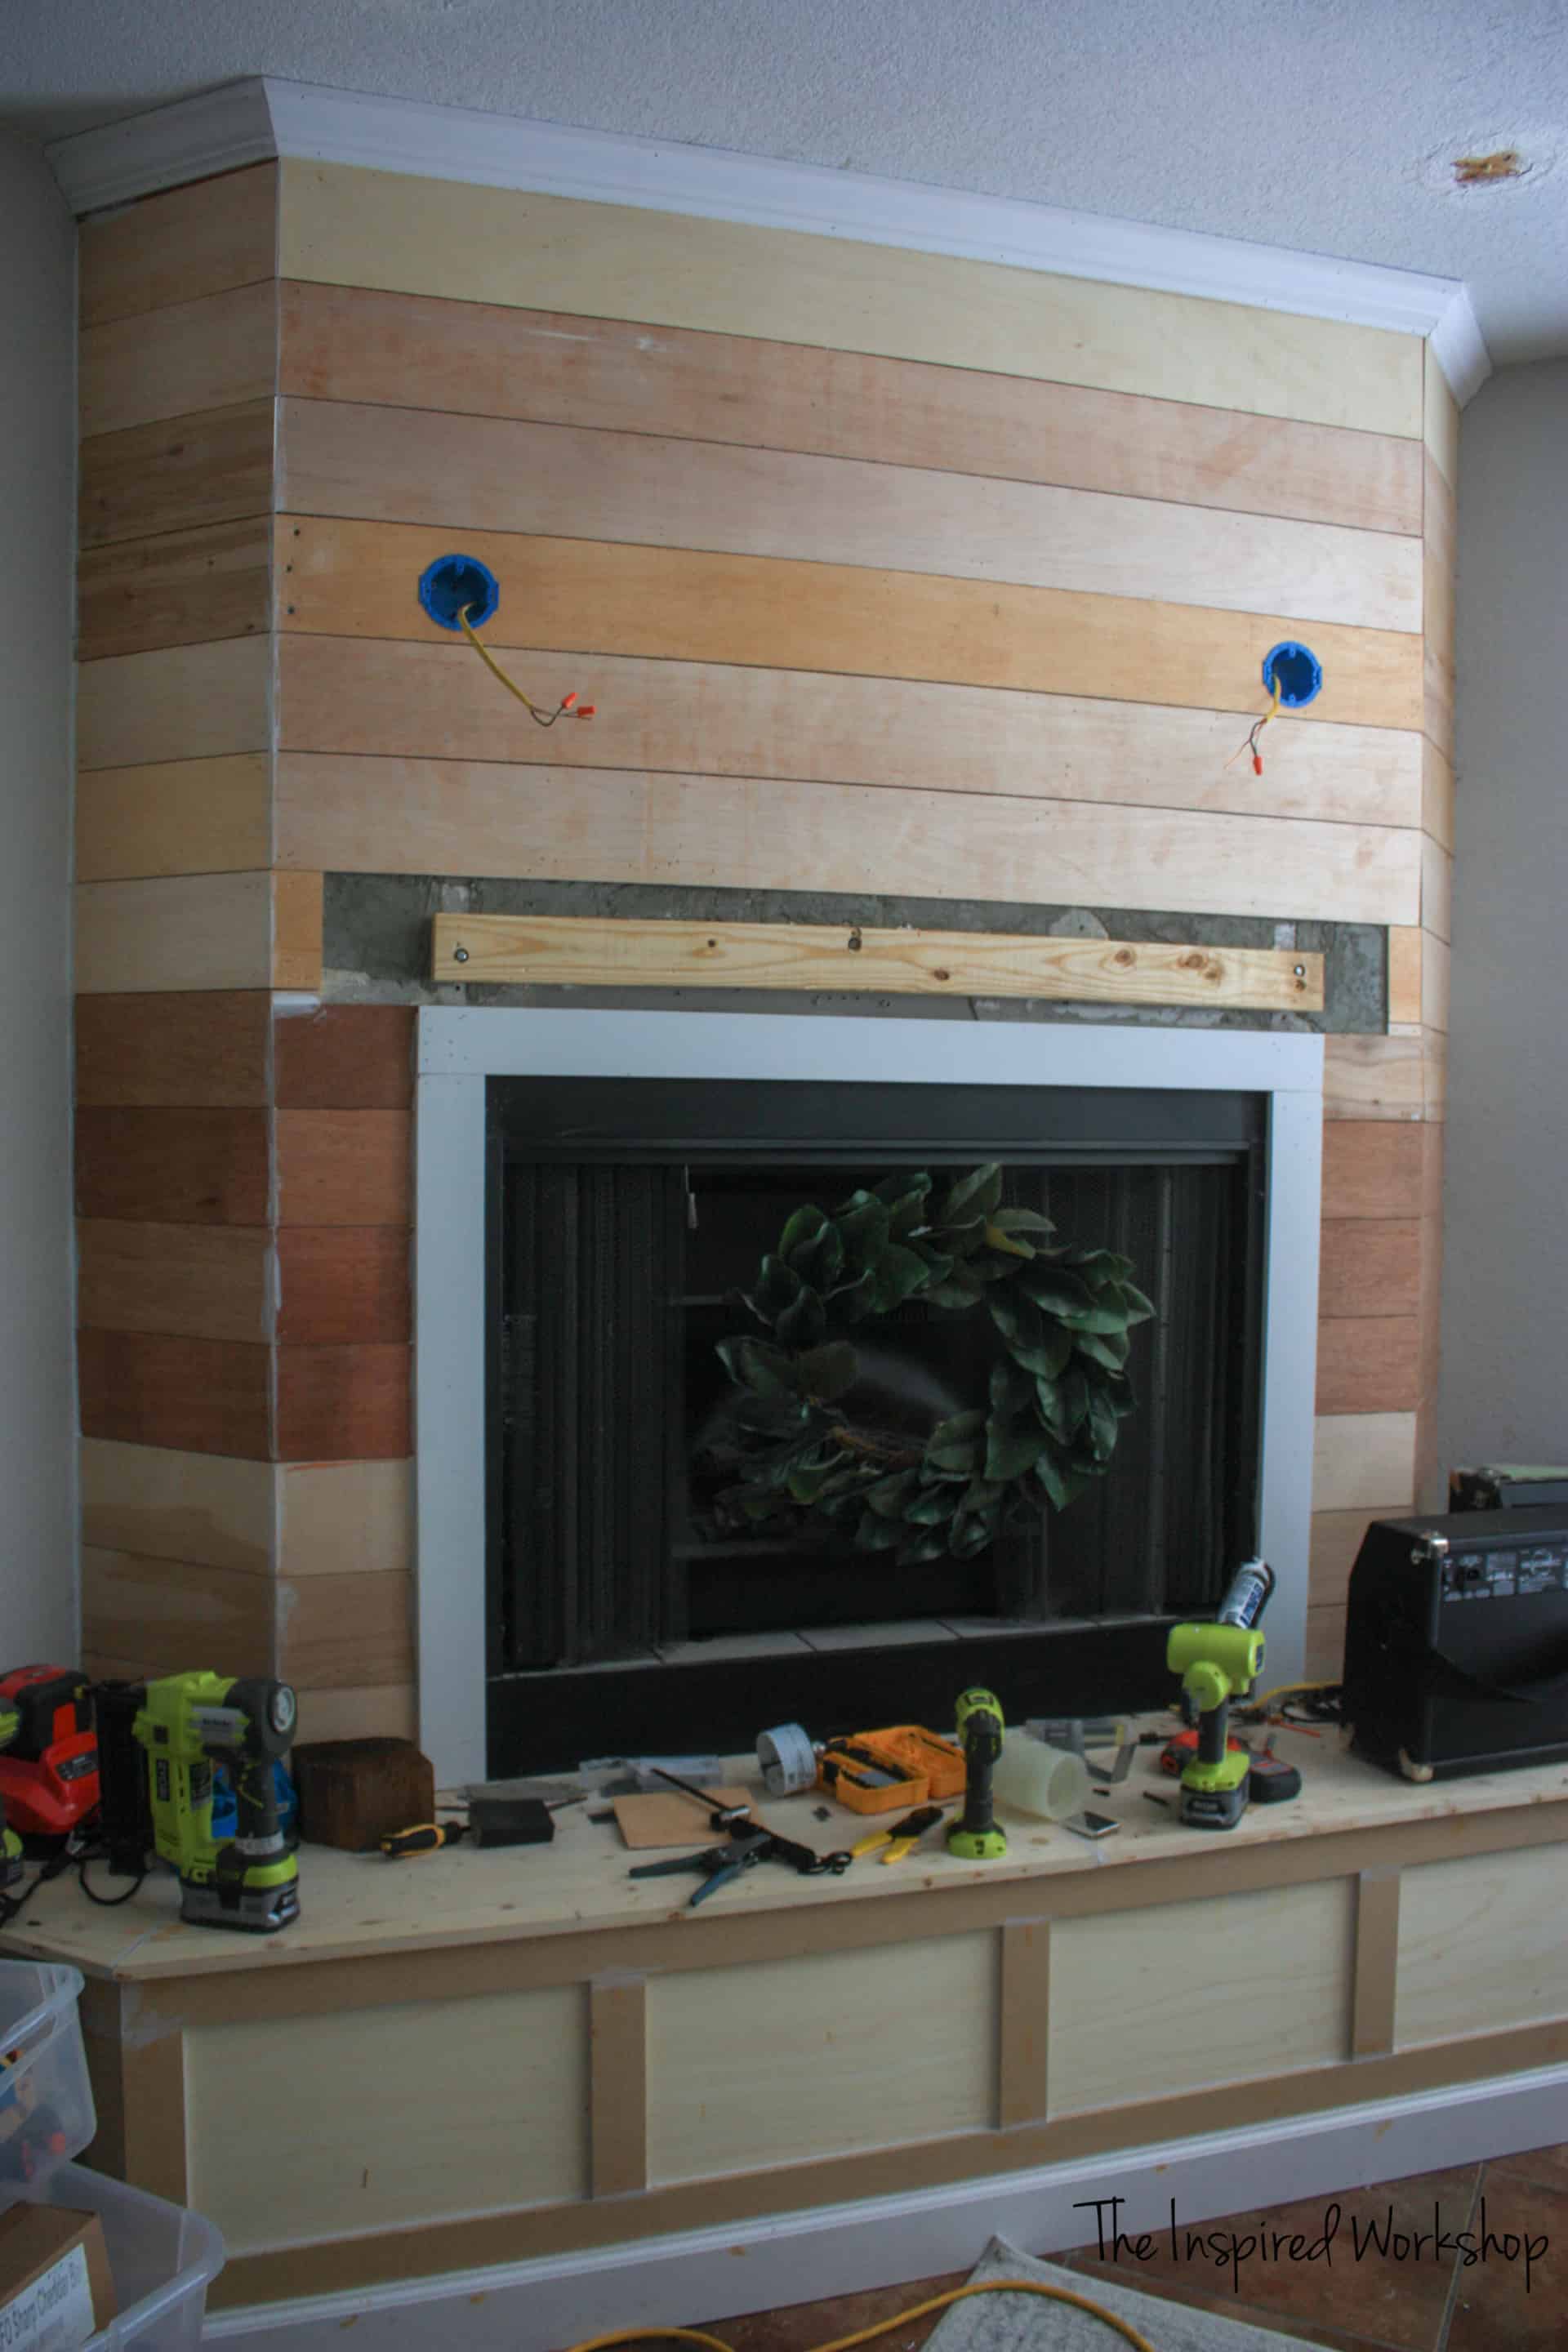
I just cut and brad nailed the shiplap boards over and over until I reached the top of the primed 1×4. Then it was time to figure out the mantel!
Making the Mantle for the Shiplap Fireplace Makever
We don’t have any real salvaged wood yards around here, and I really didn’t want to build a faux beam mantel, so I decided I would use a real solid piece of wood but I would buy it brand new and let it weather outside for a while. Cedar is the only non-treated wood I could find in a 6×6, and for a reasonable cost, so I went with it! 😍After weathering a few weeks it lost that orangy color that cedar tends to have (that I don’t like)! I love it now that it is a more warm wood color with gray tones!
To hang the cedar post, I had my hubby do this for me while I was out and about on motherly duty! 😉 He screwed a 2×4 on the fireplace, using hex screws that were pretty big into the studs of the fireplace. You can see it in the picture even though this picture is out of order with the others!
He then traced the 2×4 onto the back of the cedar post, drilled holes in the corners, and using a router routed out the back of the post so it could be ‘hung’ on the 2×4 and screwed into it!
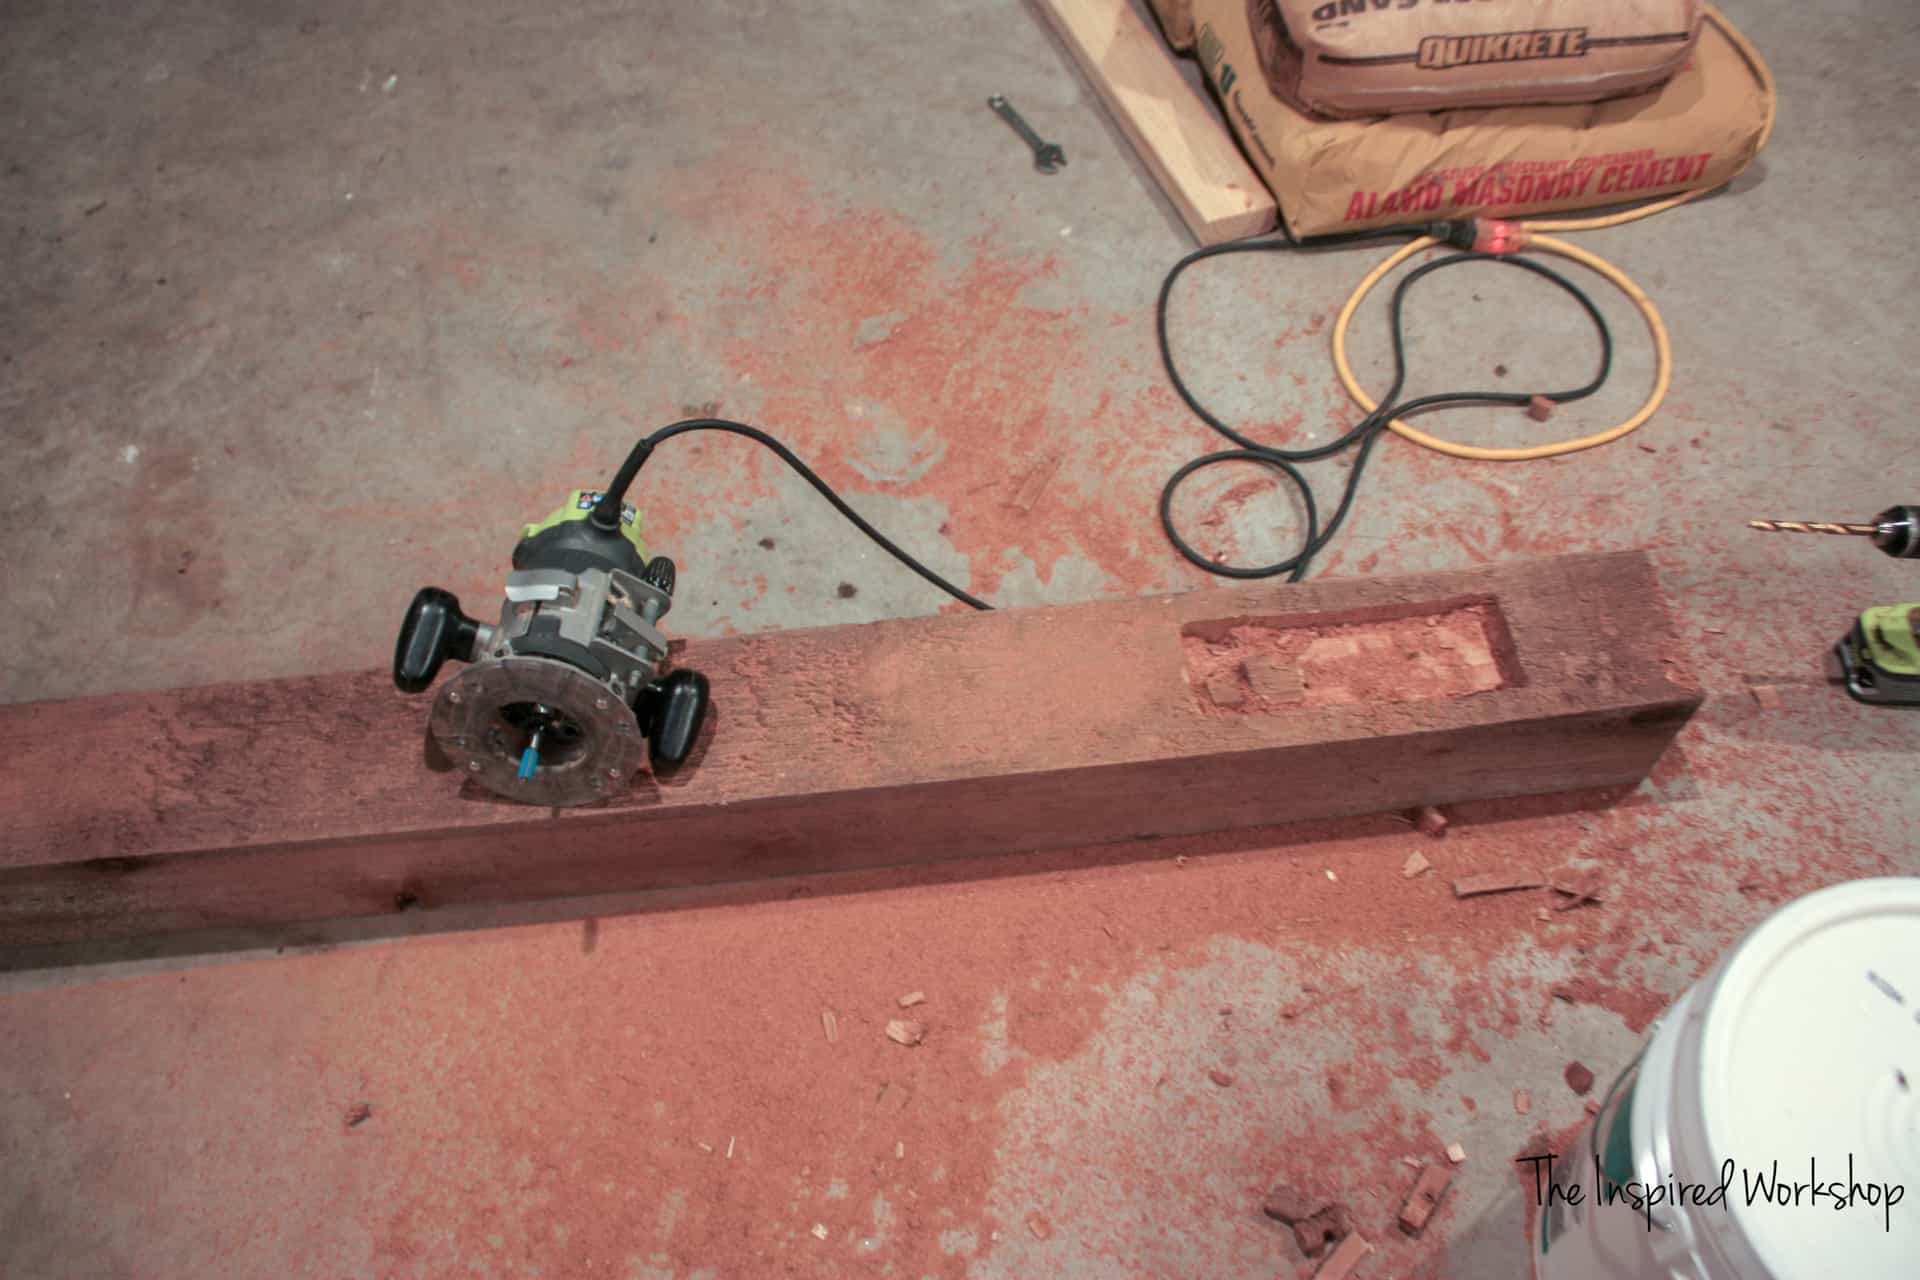
The router didn’t work as fast as he was hoping so he ended up switching over to the circular saw and only using the router on the ends.
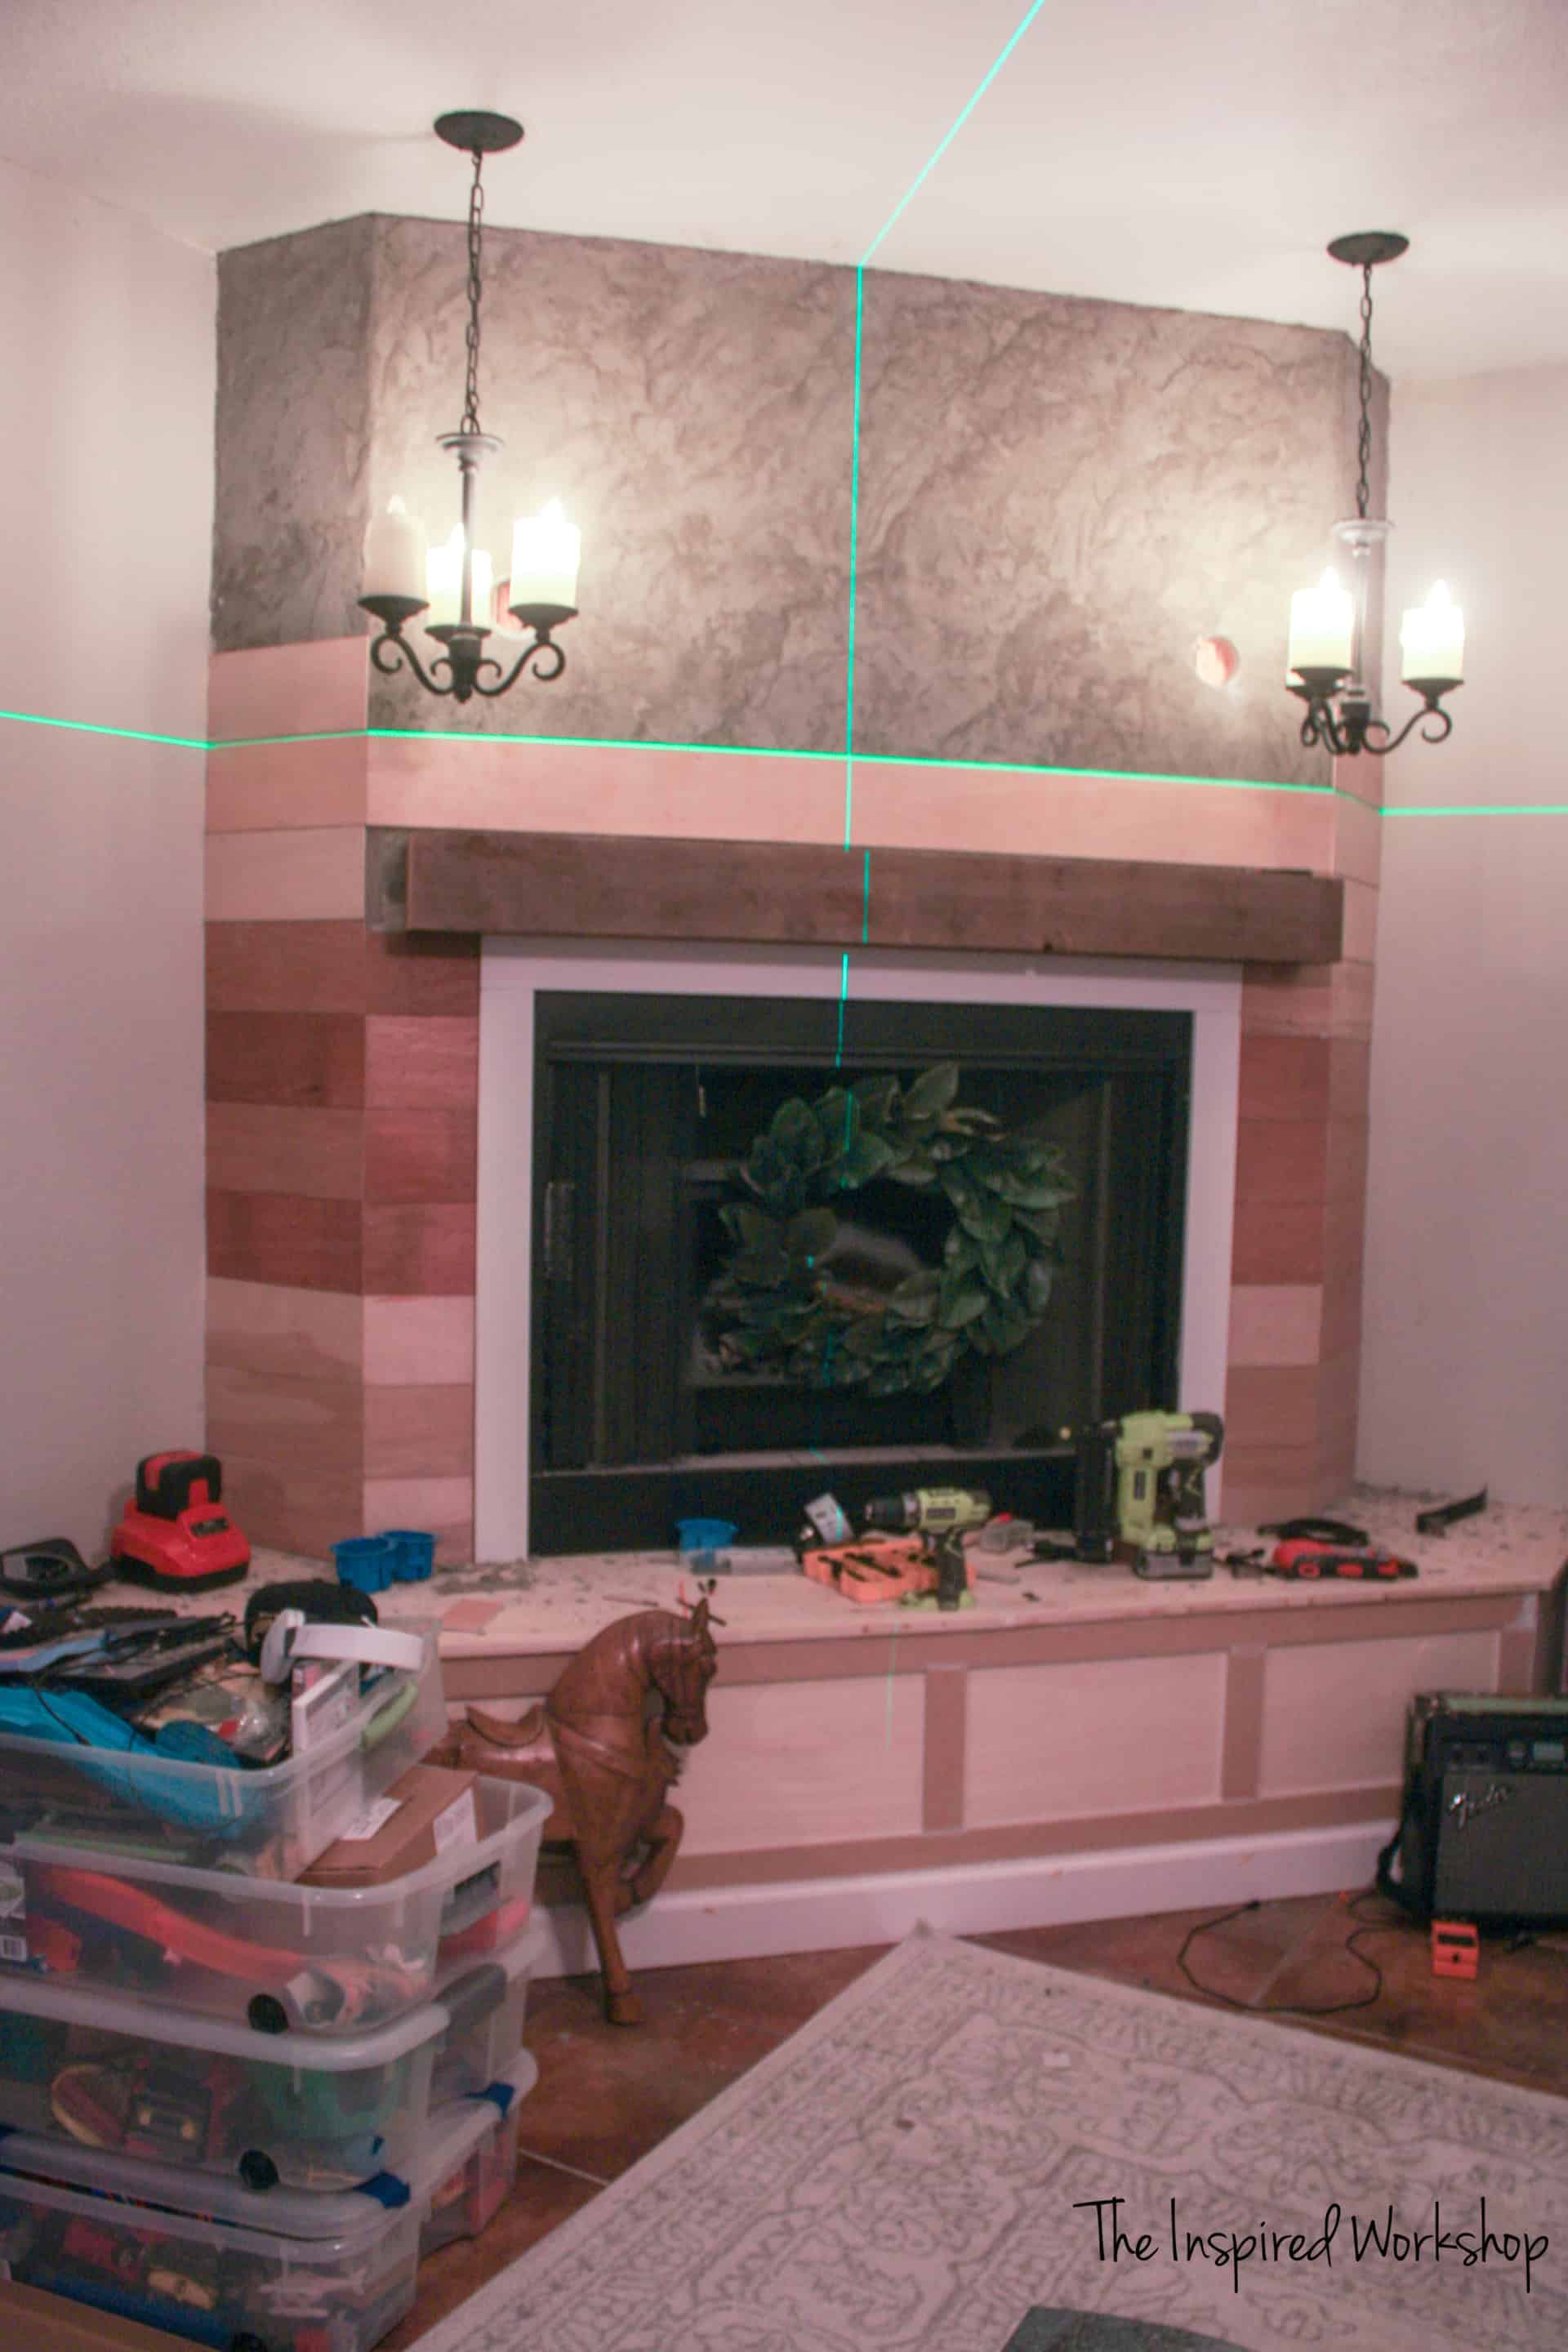
We used our laser level to make sure everything was level throughout the entire fireplace makeover. It is so easy to get off and then with all the lines, it is very obvious! This laser level (affiliate link) I cannot recommend enough, it has saved me on ALL my renovation projects! I honestly do not know how I would have accomplished some of them without it, especially tiling the kitchen wall!
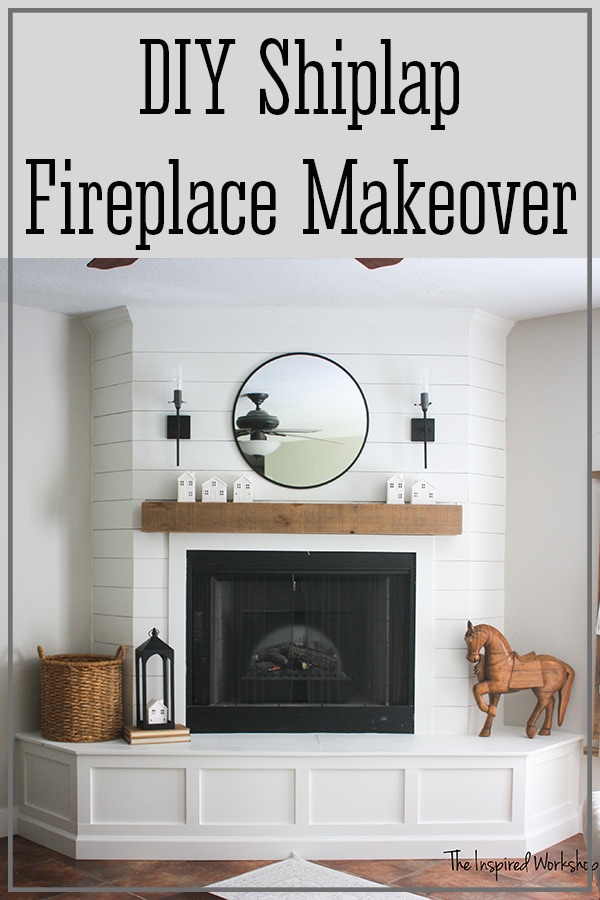
Anyway, back to the shiplap boards! After the 2×4 was set, I just kept adding the shiplap all the way up to the ceiling! I also had my hubby move the lightboxes to the fireplace instead of on the ceiling. You know, I am not sure I love that I placed the lights there…I wasn’t even thinking that it was going to totally mess up my decor options!😬
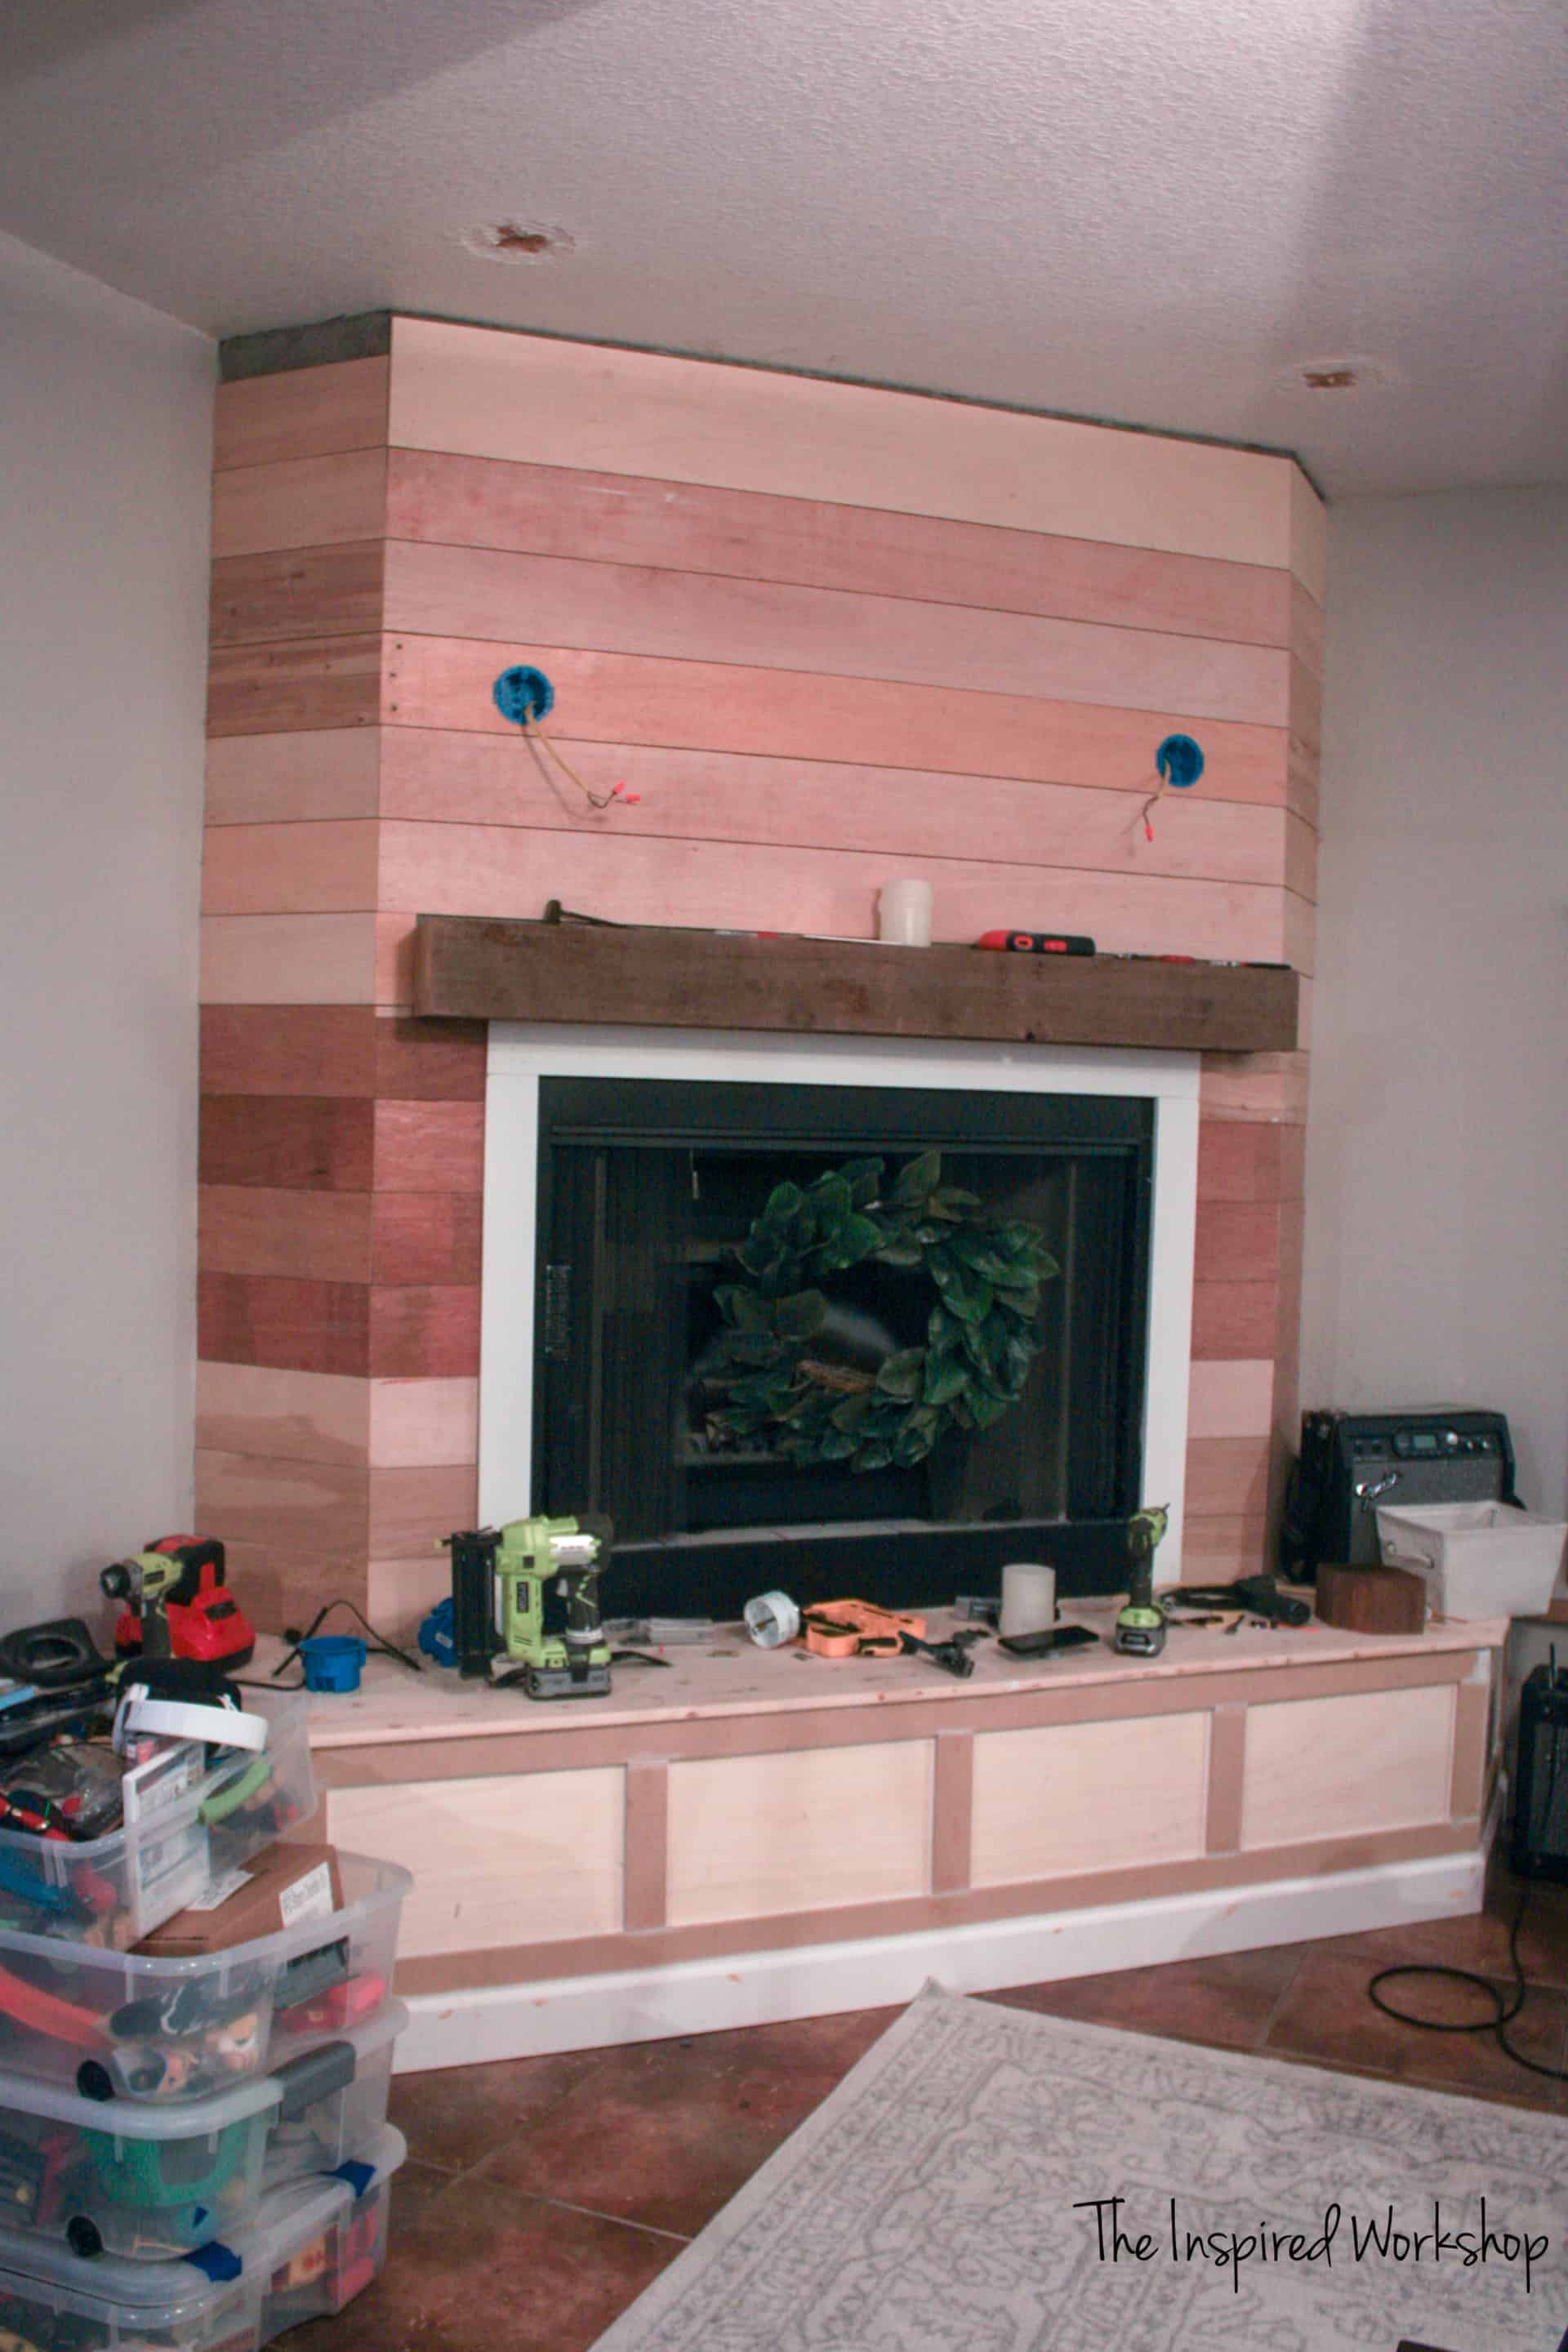
If you notice, my very top board is larger than 6″, I had to cut one at 8 1/2″ because the ceiling was not level! Once again, the same problem I have all over this house! Lol! I opted to trick the eye into thinking it was straight by placing the larger board. If I would have used a 6″ board, the line would have been under the crown molding on the left side of the fireplace and then you would have seen the line on the right side of the fireplace! Talk about distracting and bothersome! Oy! I would have gone crazy, but this little change-up saved me! 🤩
I added the crown molding, and boom, almost done! I will admit I was ready to party once I was at this stage in the project!
Now everything just needed to be caulked to cover ALL MY IMPERFECTIONS!!😅
Finishing the Shiplap Fireplace
And last but not least, paint! I opted to spray the fireplace vs hand roll it because a few minutes of taping everything off saves a TON of time not having to roll the paint on! Each coat literally only took 10 minutes to spray on! The most underrated tool in my tool arsenal I believe is my paint sprayer (affiliate link)! I LOVE my Home Right sprayer…no this post is not sponsored by Home Right, Ryobi, or anyone else, I just love sharing what makes DIY a little easier for me with you!
Here she is ready for her spray!
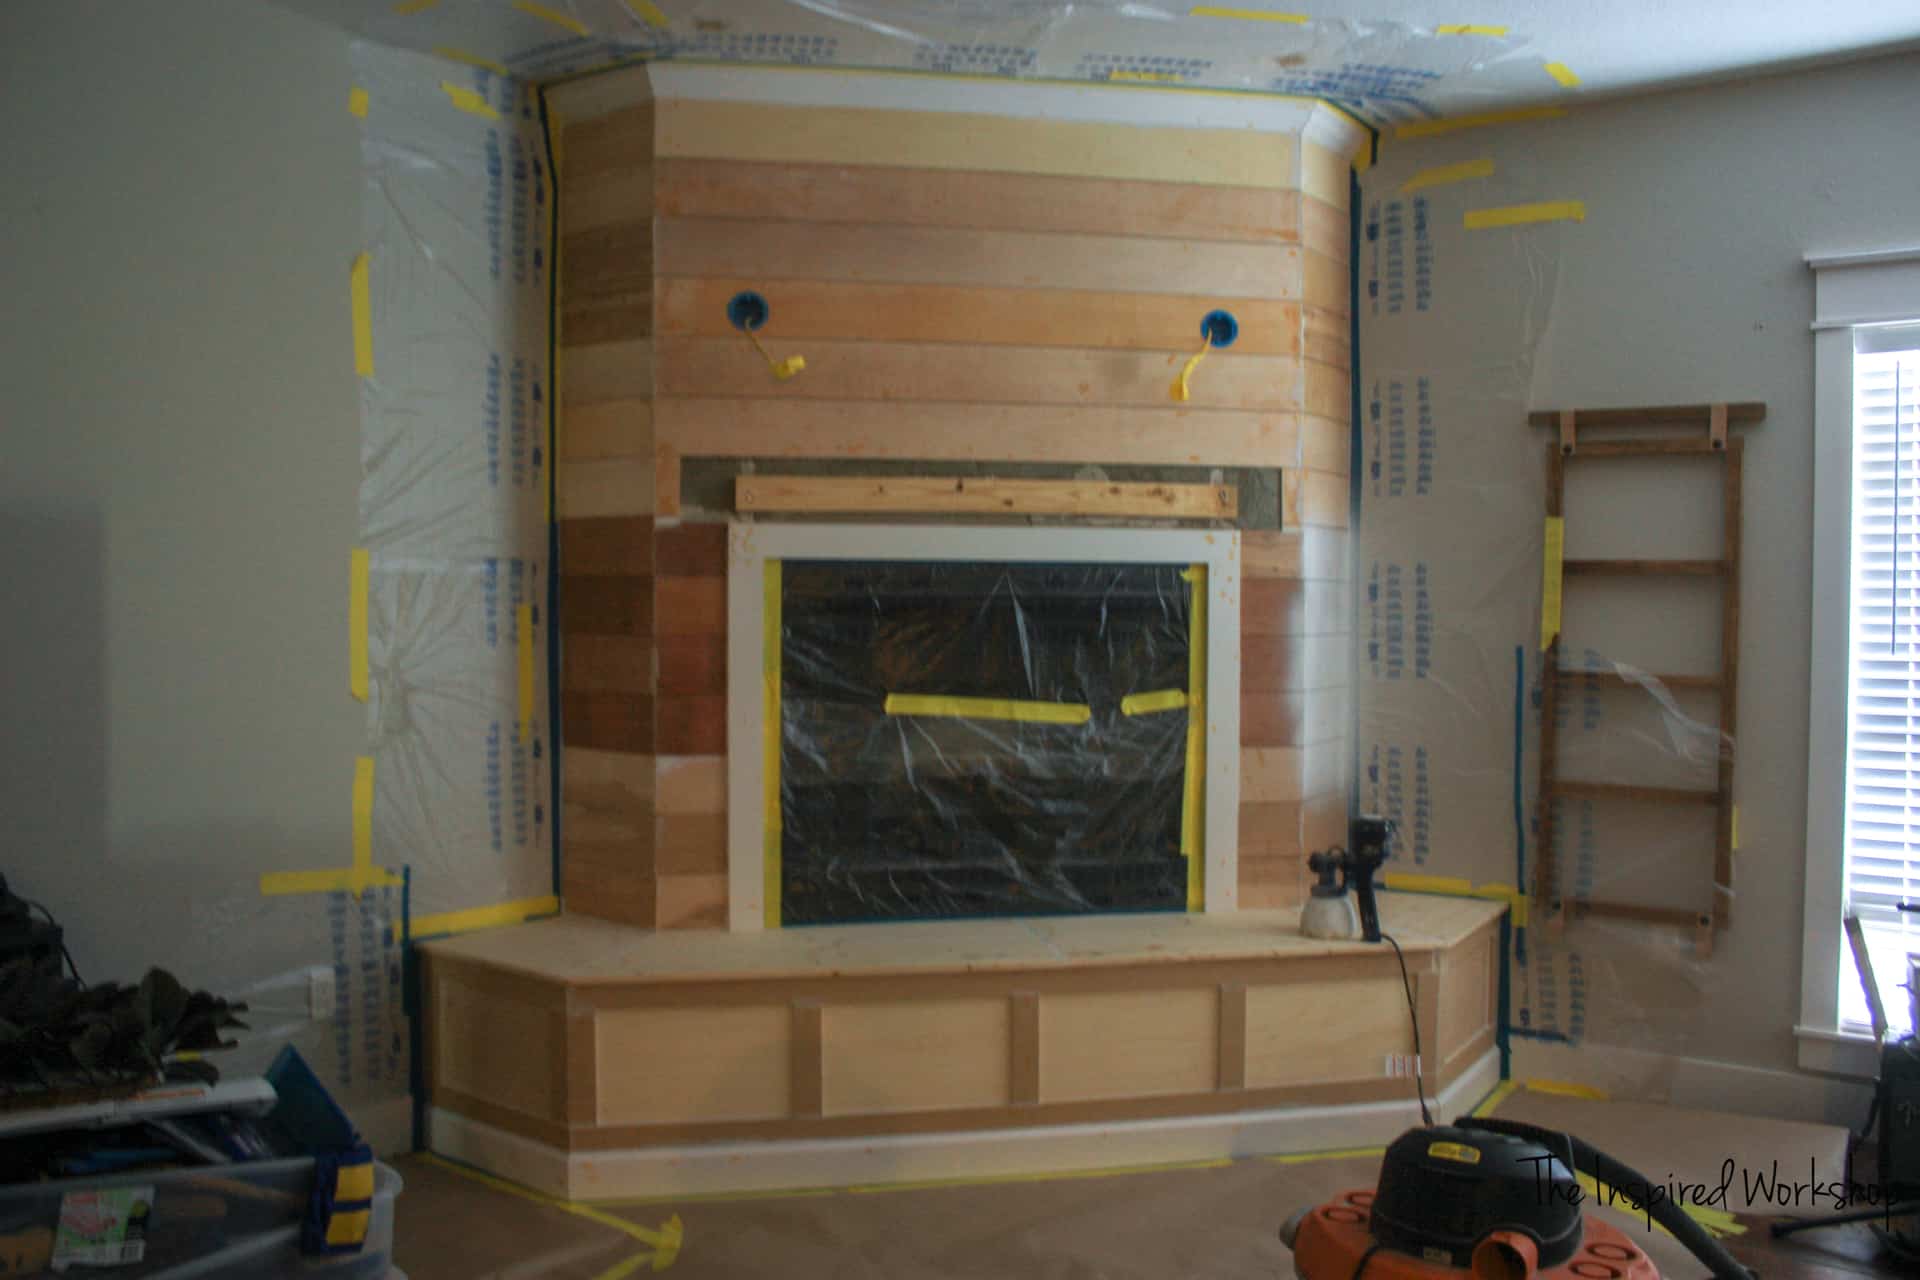
When using a paint sprayer, you definitely want to cover surfaces because the overspray/dust can go places you wouldn’t even imagine! Lol! I ruined my son’s PlayStation with overspray and it was across the room!🤦🏼♀️
Another amazing product that I discovered recently is this painters’ tape (affiliate link) that comes with 24″ of plastic already attached to it, they even have it with 48″ already attached! Let me just tell you…it’s a freaking game changer…the real MVP of this makeover!
Primer sprayed! I used the same primer on this as I did my kitchen cabinets, it’s called Zinsser Bullseye 1-2-3, and the best place to get it is your local Walmart, they have the best price!
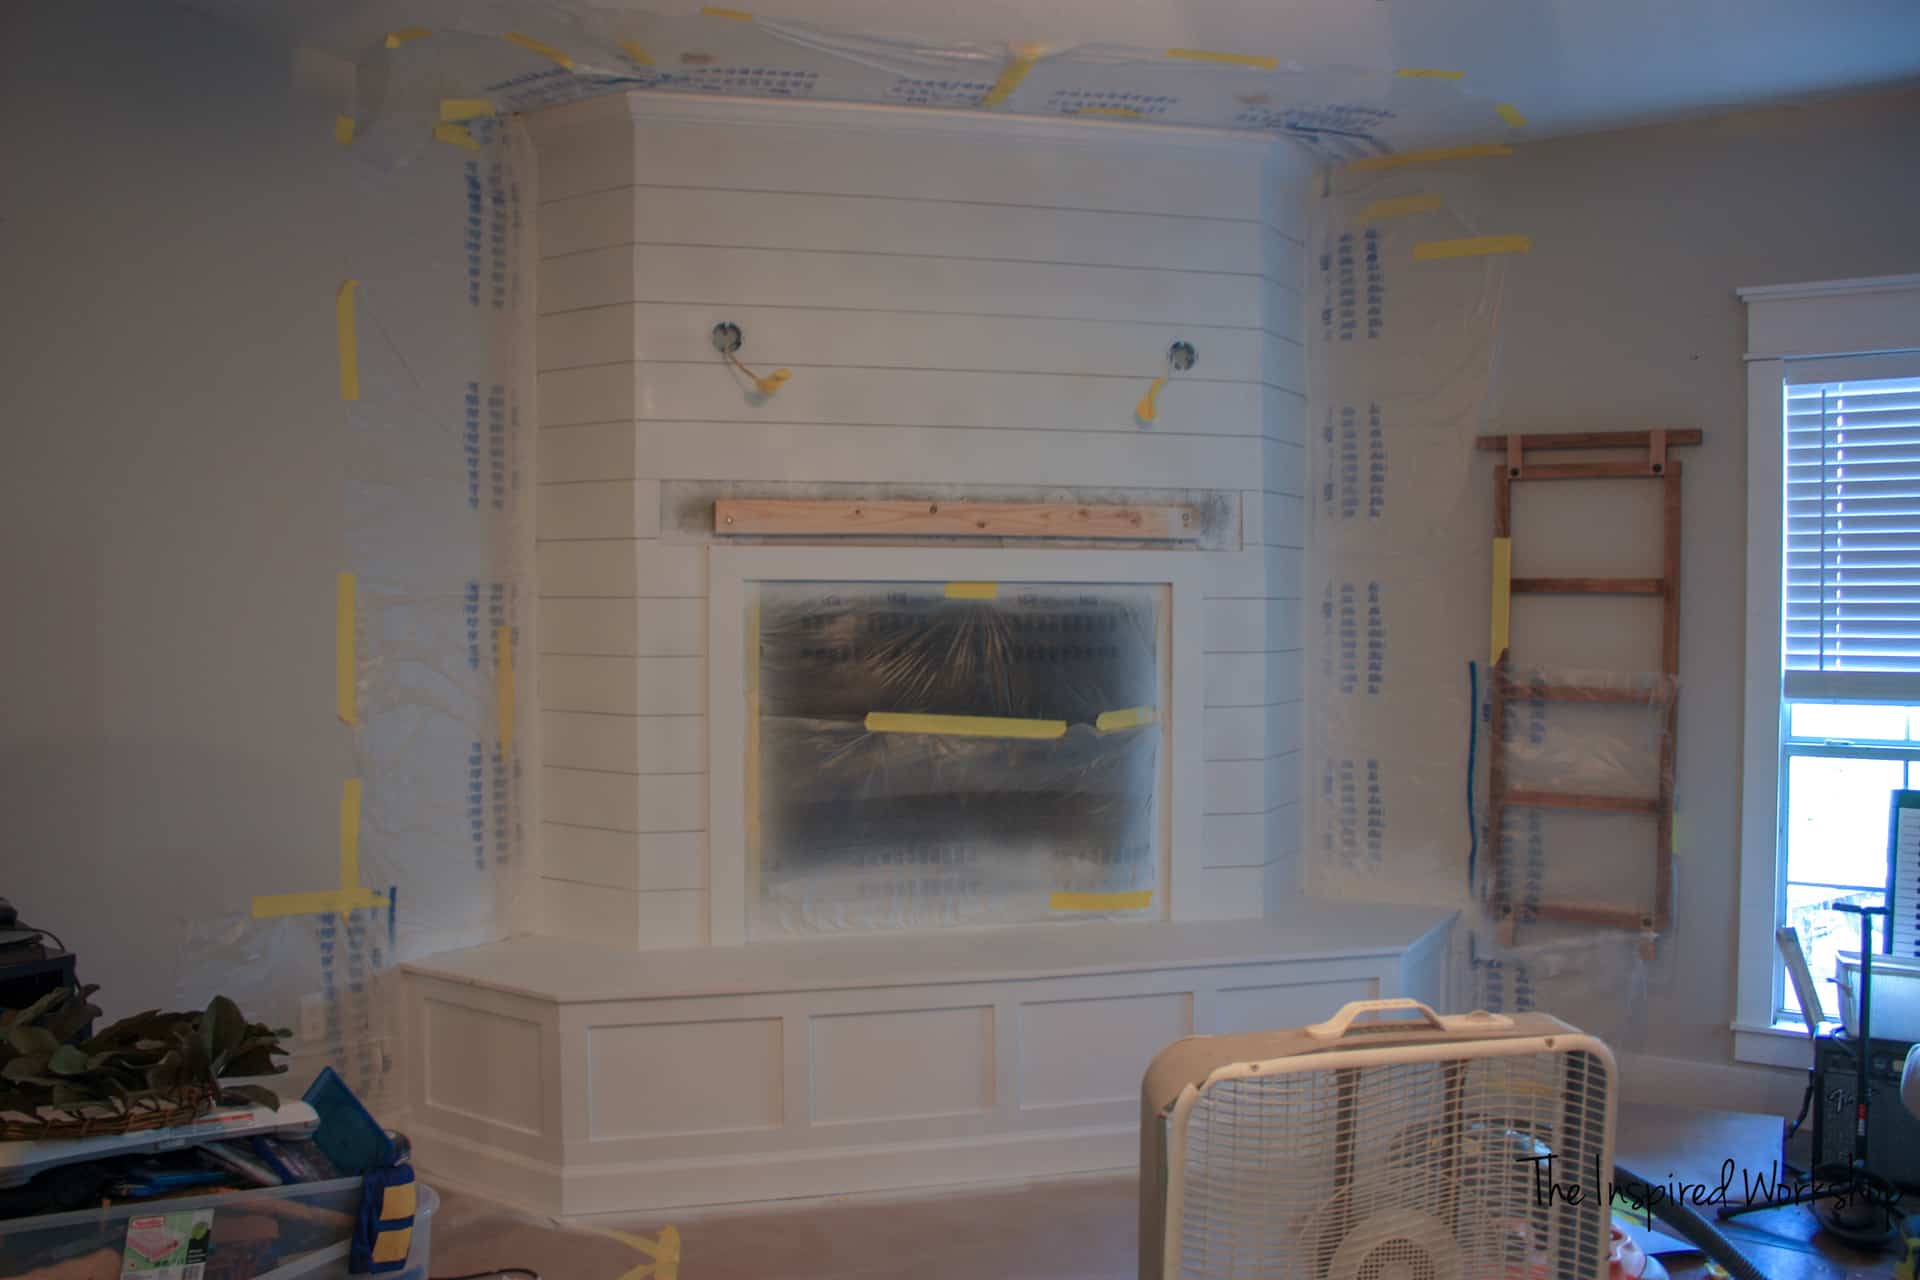
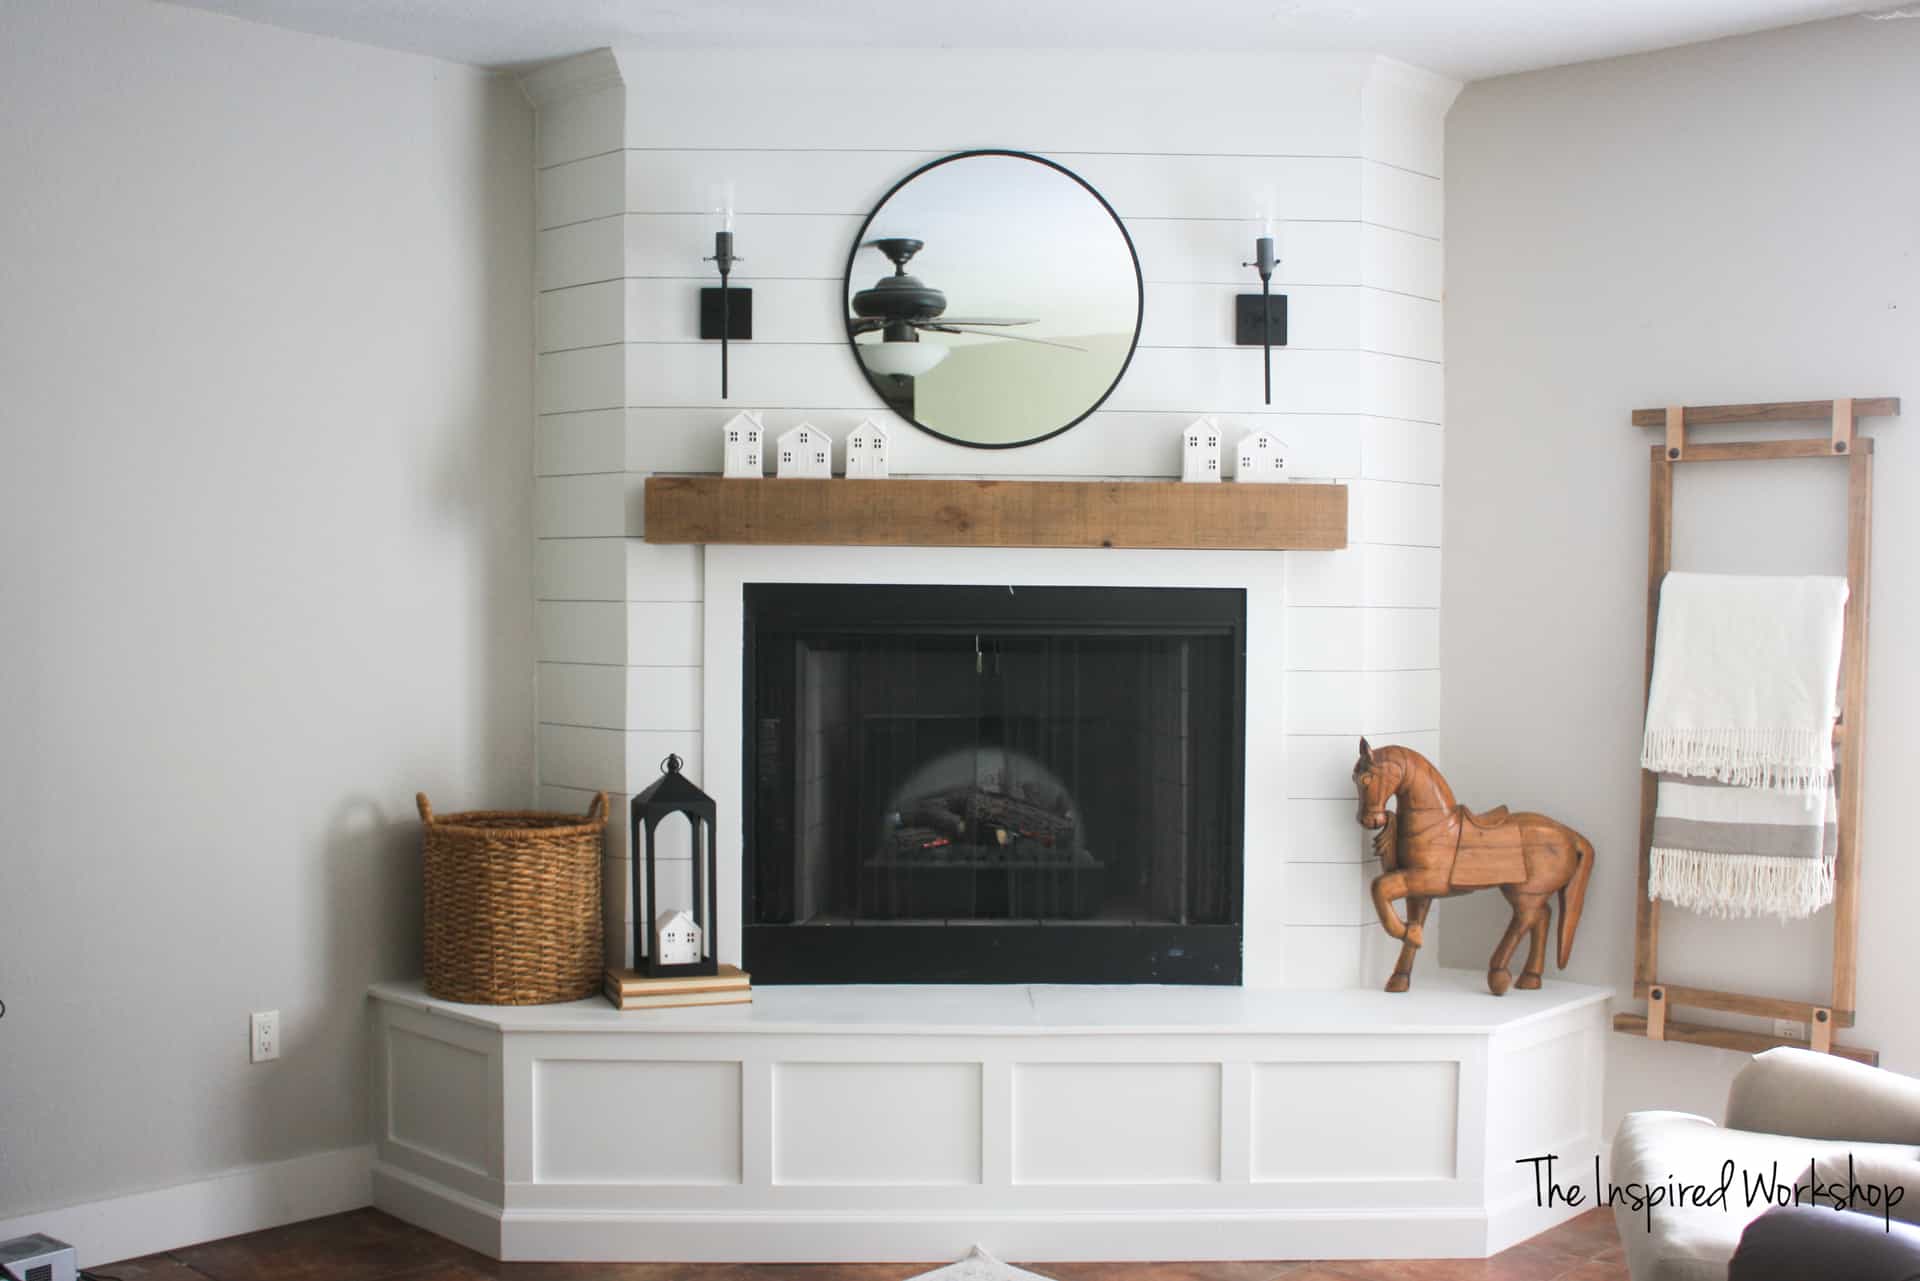
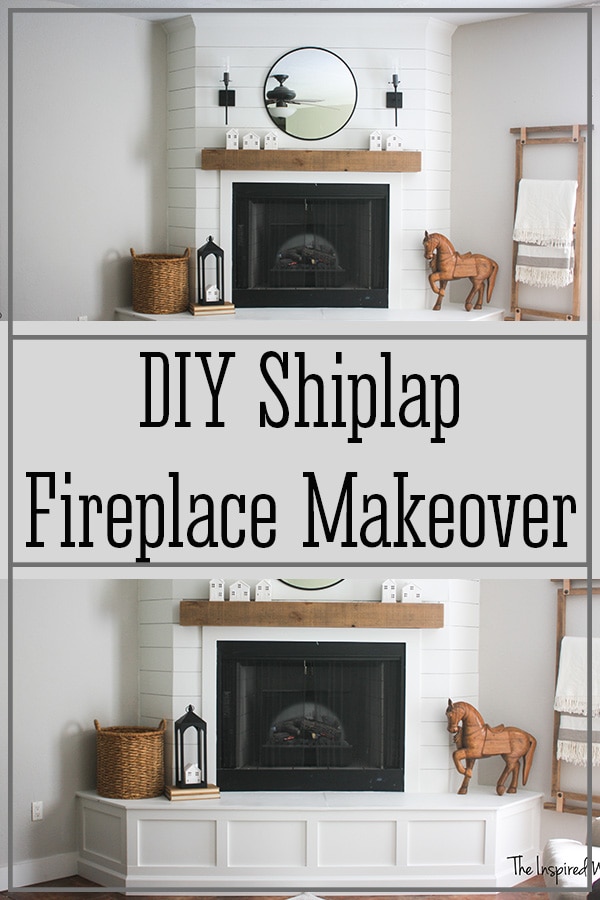
I painted the fireplace Pure White by Sherwin Williams, two coats and it was time to add all the finishing touches! Woohoo!
Decorating the Shiplap Fireplace
Here is the link to the step-by-step post for the modern blanket ladder I built to the right of the fireplace if you would like to build one for yourself!
And here are links to the items I used to decorate the fireplace! Some may be affiliate links, others are not!
- Lights – Amazon – I only paid 36.00 for them, when I added this link they are charging 99.00… don’t pay that much they will go down!
- Mirror – Target
- Basket – Target – discontinued!
- Lantern – Walmart
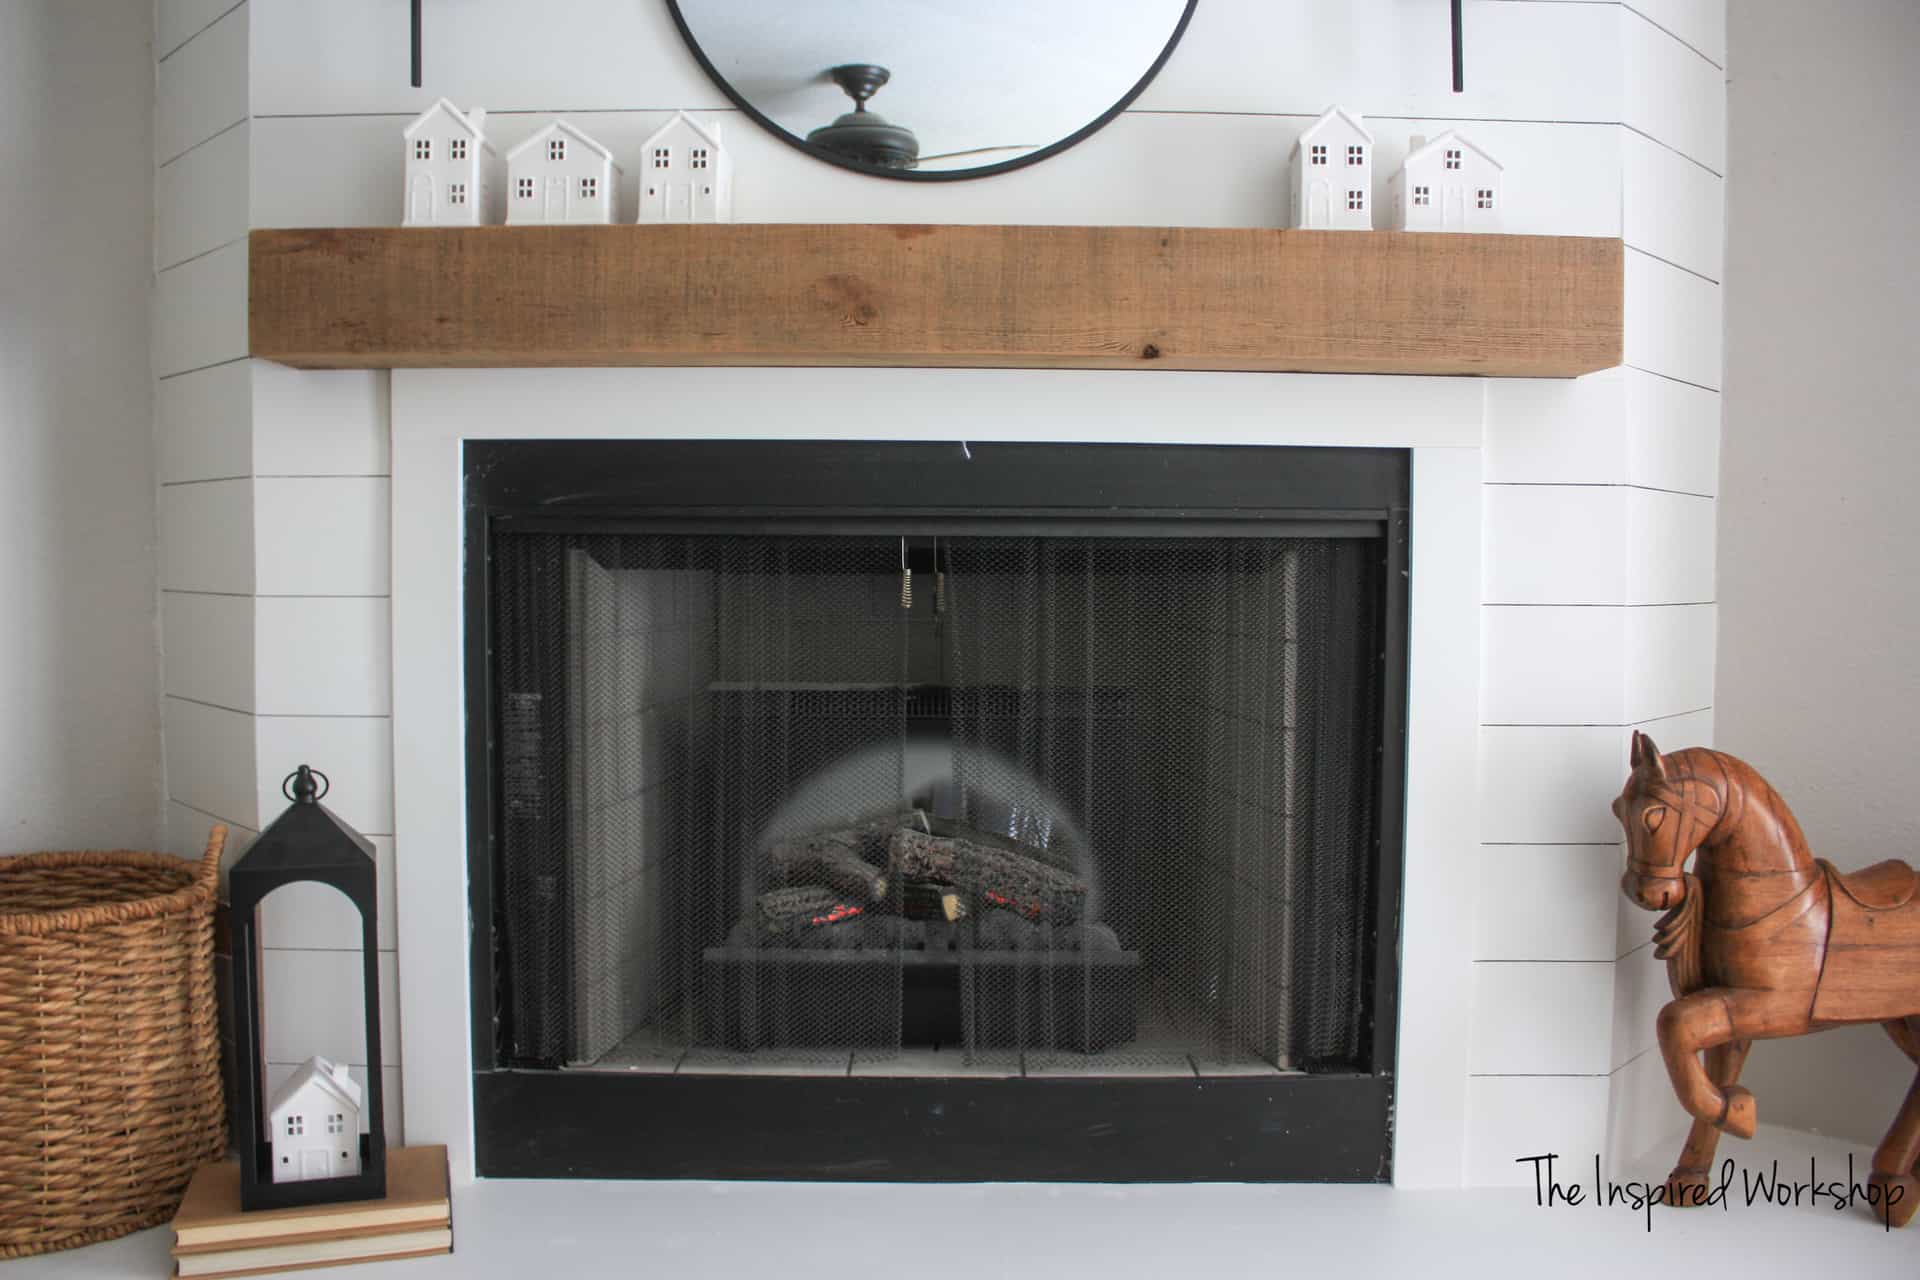
- Horse – antique store locally – I would have bought this one off of Wayfair though had I seen it first, I felt like I was completely ripped off on the price of the horse I bought! Lol!
- Small White Houses – Target Dollar Spot!
I hope you enjoyed following along with the process of transforming my fireplace in this post! Any questions, ask away in the comments! Thank you so much for stopping by!

Love this Shiplap Fireplace Makeover and want to save it for later? Pin it!
How did you attach the wood to the stone?
Hey Terri!
So it is not actual stone, it is a layer of concrete done almost like plaster over Hardie board! I was able to brad nail the boards without any issues besides a random brad nail that would come back through! Lol! It was far too uneven of a surface to even use liquid nail or some other from of adhesive, just the brad nails! And the fireplace is still the same right now and has not had any issues to date! Hope that helps!
Thanks so much for stopping by! Have a good one!
Cara
This looks like a real working wood burning fireplace. How does it meet code to install a combustible (wood or mdf) hearth cap directly in front of the working fireplace? The remodel with the panels is lovely. The original hearth looked very tall but doesn’t look extra tall anymore due to the panels.
Hey Janice!
Thank you so much for your sweet words about my fireplace makeover, I appreciate it! My fireplace is not real, I wish it was, but it is fake! Lol! So no, you would not want to use wood as a hearth material! When I very first started my planning for the fireplace makeover, I thought we could reopen the fireplace as it was converted before we moved in…so I thought anyway, but turned out it was completely fake and didn’t even have a chimney outside, how did I miss that?!🤷♀️ Well, there went my hopes of having a real wood burning fireplace! 😔 Anyway, during the planning phase, I was going to do a slim concrete hearth out of the same white concrete I used on my island countertops, so that would be an idea if you are wanting the same look…a little more work though!😬 Hope that helps! Let me know if you have any other questions!
Thanks for stopping by!
Cara
Since you asked, I do have a question! We are at the very beginning of designing the face of a new gas fireplace and seeing your design has me thinking of painted panels on the hearth front. Because our floor is 20″ to the bottom of the fireplace, it’s higher than most hearths. But yours also looked quite high originally, until the remodel ‘re-proportioned’ it visually. It would help to know: what is the depth and length of your hearth….? Thanks for help!
Hi there,
I was curious to know the name of the colour of the paint on your walls? We are using Pure White for our fireplace as well and love how it looks with your wall colour. Thanks!
Hey Vanessa!
Thank you so much for your kind words! Our wall color is Agreeable Gray by Sherwin Williams! Thanks for stopping by! Have a good one!