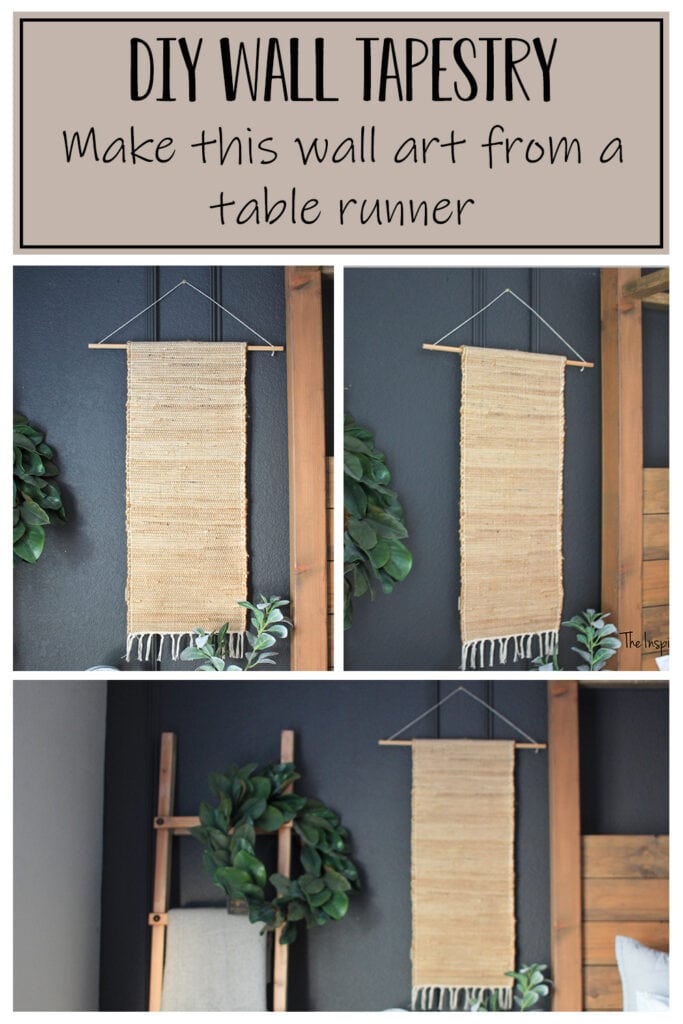
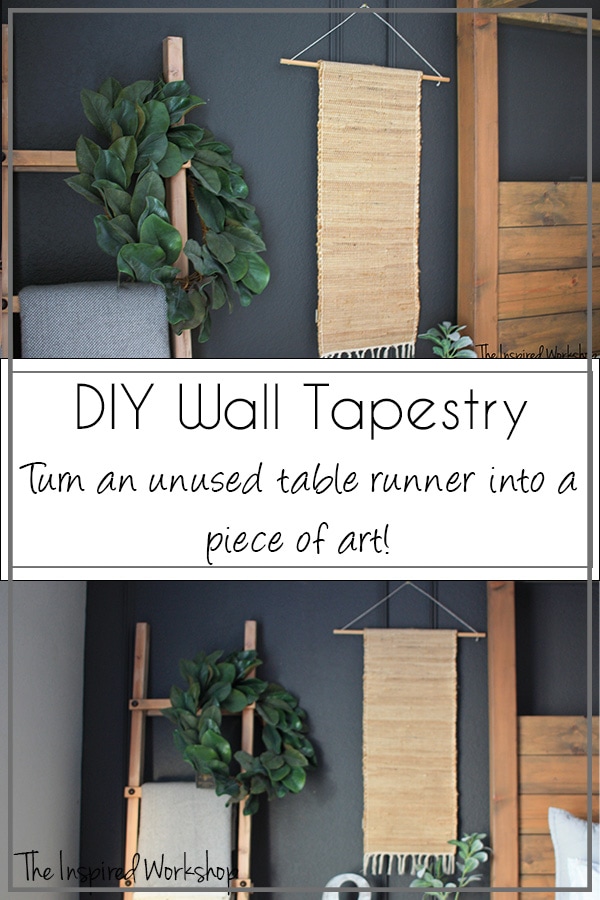
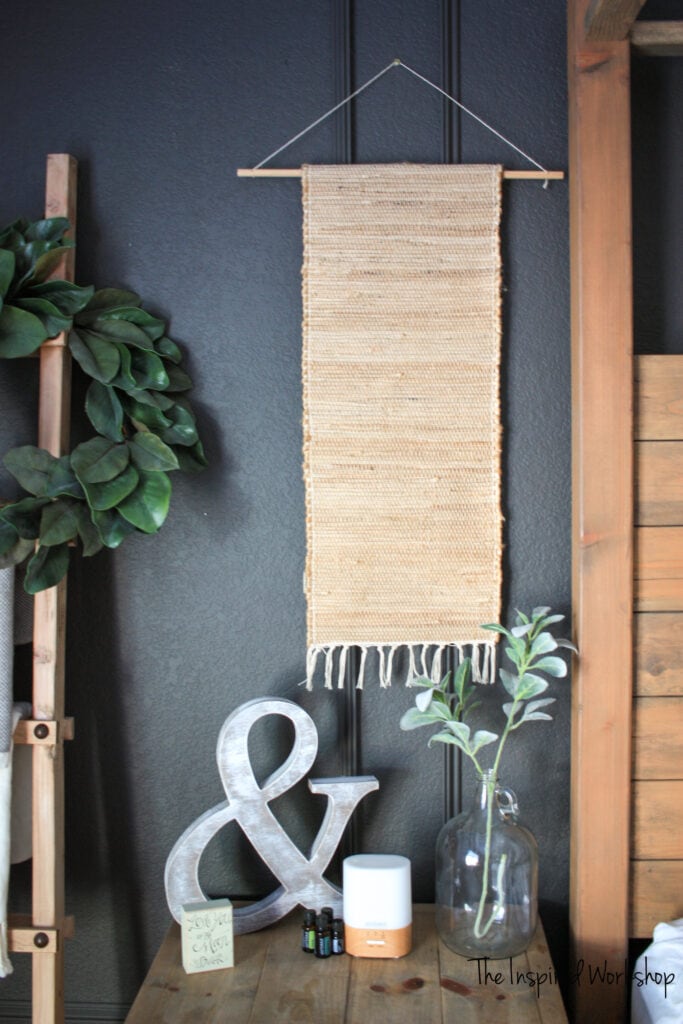
DIY Wall Tapestry from Table Runner
Wall decor doesn’t have to be expensive, and it doesn’t have to be extravagant, but it does need to make you happy and compliment the space! This DIY wall tapestry from a table runner is neither expensive nor extravagant but it will surely make you happy to look at knowing how cheap and easy it was to put together!
After having such rainy weather all last week and into the weekend, I’m telling you it poured and poured and poured some more! So, I really wasn’t feeling like going out into my shop to build…even though I have a list a mile long of things I need to build!! Lol!! I figured rainy days are great for crafts and I haven’t done much crafting lately!!
What?! I know, right?! Well, I whipped up this really cute wall tapestry from a table runner I had that just didn’t look as good as I had hoped for on my table…but I think it looks fantastic on the wall!! Lol!!
I forget how fun crafting is, it usually doesn’t take as long as building something and you get the same instant gratification from it! 😊 I’m sure with spring (and the rain it usually brings) right around the corner I will be sneaking in a few more crafts…I already have a couple in mind that I can’t wait to make and share!!
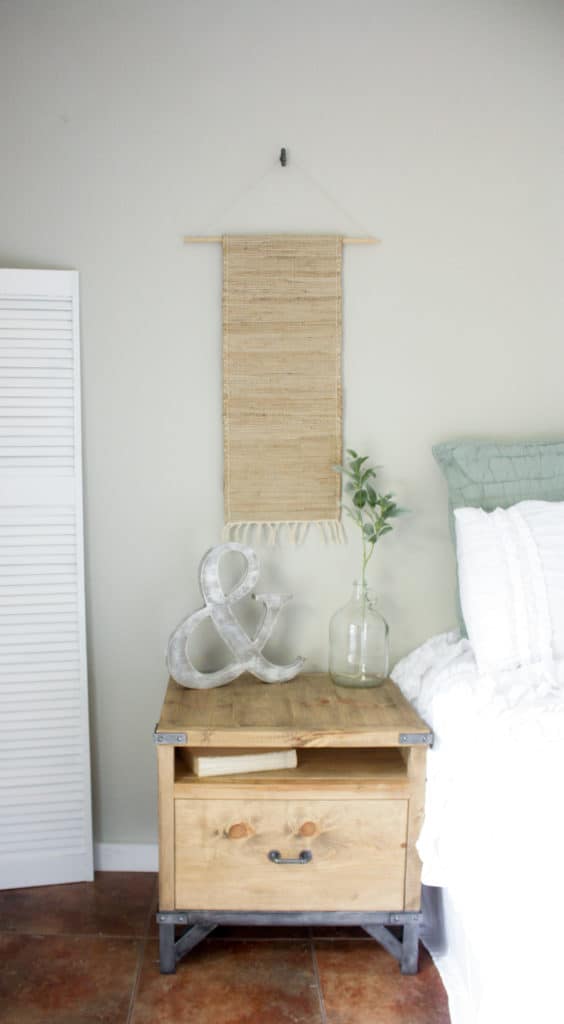
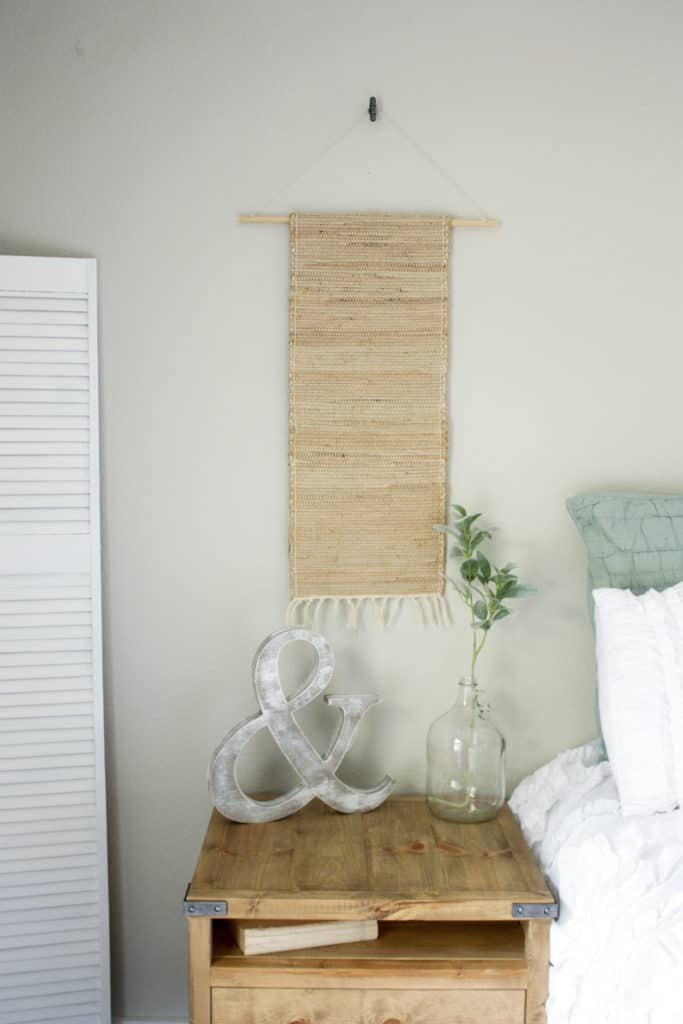
Look at my bedroom before I added the molding to the wall and painted it Urban Bronze! Wow, what a difference a little paint and molding can make!
BEFORE
AFTER
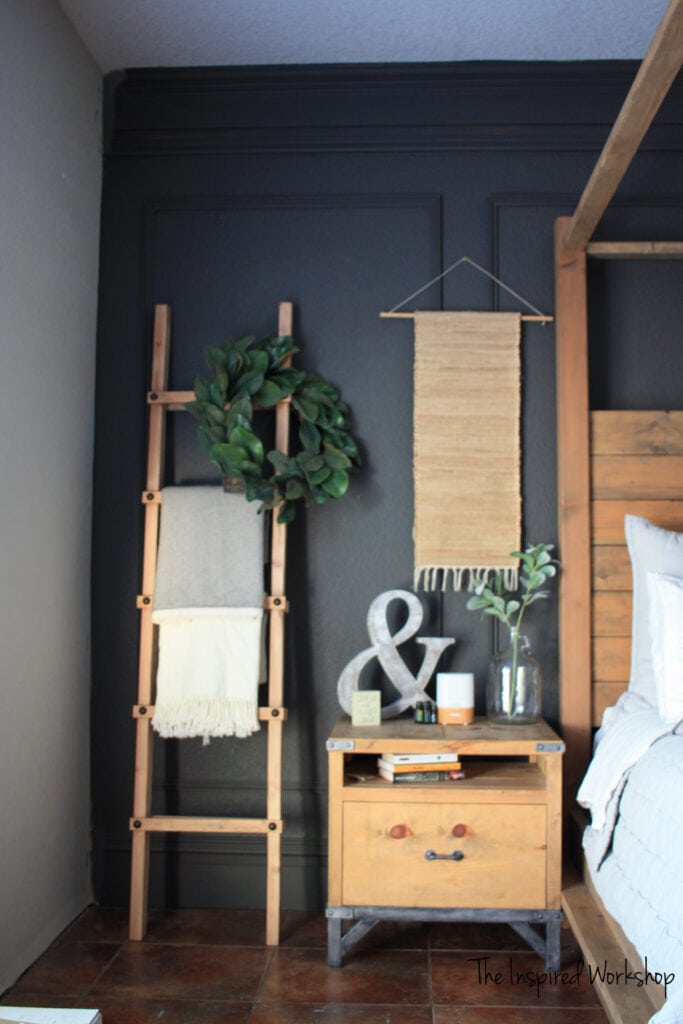
Also amazing what a difference a few hand-built pieces can make! I built everything in the photo pretty much, the tall blanket ladder, the nightstand, and the queen bed frame! And you are in luck because I shared all of them for you to make them as well!
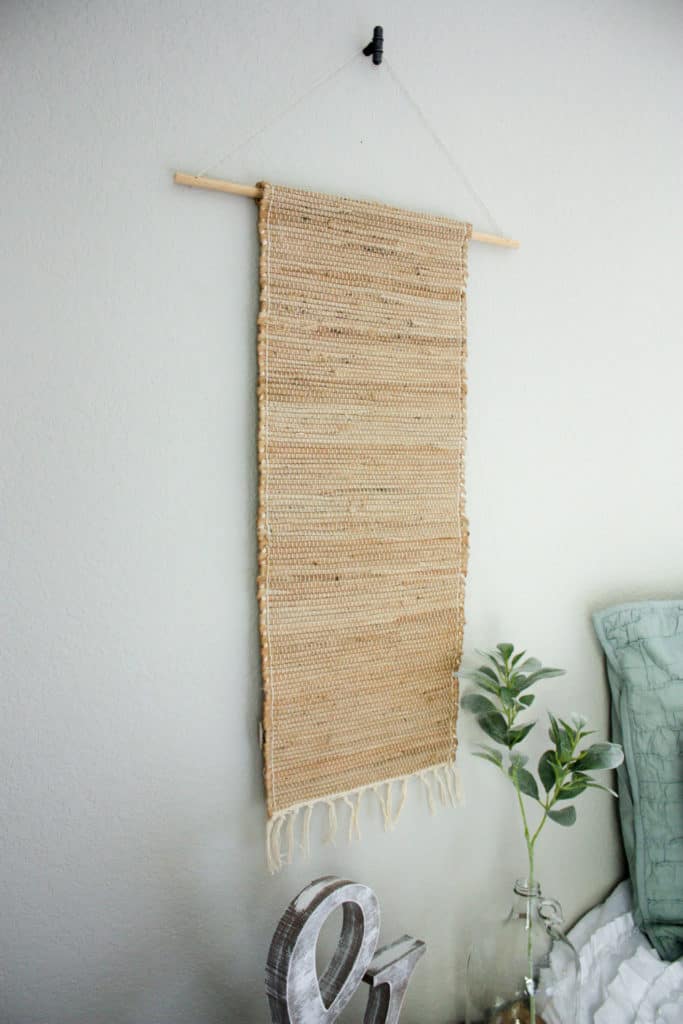
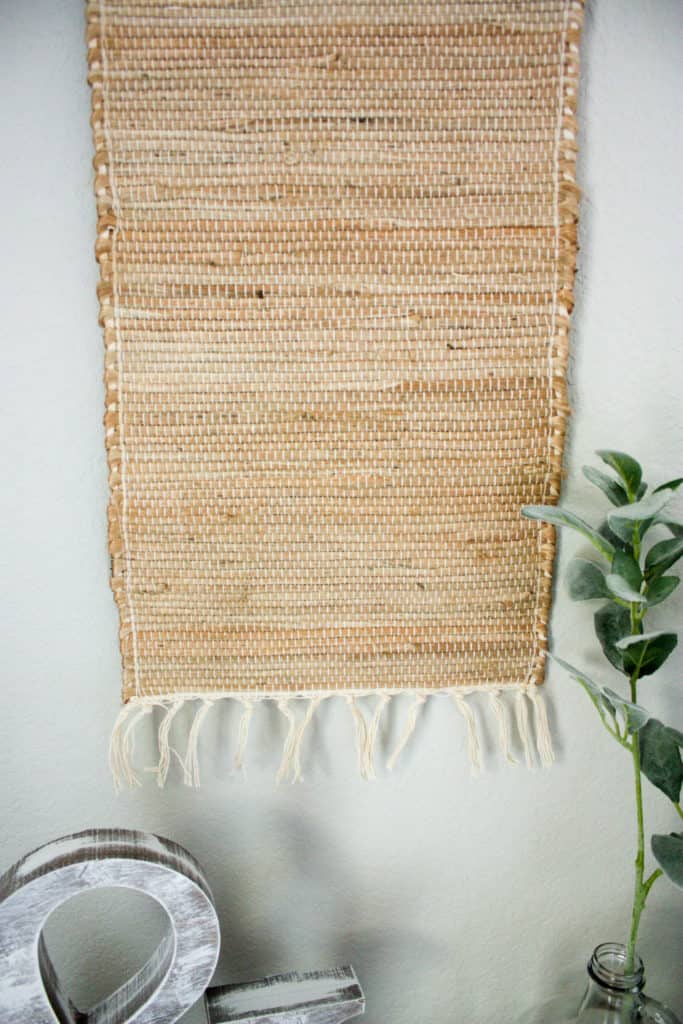
So this little DIY wall tapestry made from a table runner is super easy, takes very few supplies and I think creates the perfect subtle backdrop for above my nightstand!! The materials are enough to make two of the same wall hangings if you would like, and all in all, the total cost is 20.00 if you were to go buy this table runner brand new, if you use one you already have…its a dollar for the dowel rod and another dollar for the string! 🤩
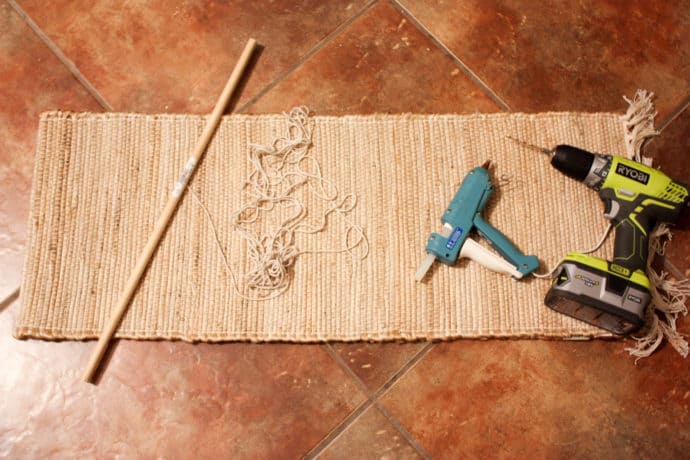
Gathering Supplies to Make a DIY Wall Tapestry
I bought this table runner at Pier 1, but as you know they have closed down now. You are in luck though because Hobby Lobby just brought this exact same table runner in for their Spring 2022 line! That means it’s 40% off right now and cheaper than the one I bought and used in this tutorial! Yesss! That is something to get excited about! Lol!
Materials to make wall tapestry:
***Amazon links are affiliate links! Affiliate links are links that pay me a small commission, if you make a purchase after clicking one, at no extra cost to you! It is such a win-win for both of us, you get what you need from Amazon, I get a small commission, and I get to keep giving you awesome tutorials for FREE!! Thanks in advance for any purchases made at my links!😉
All other links are just provided to help you find the materials I used, and I make no commission off of them!😊
- 1 – 1/2″ dowel rod @ 48″
- table runner of your choice – the one I used was from Pier 1 but as I stated above, Hobby Lobby now has it!
- hot glue gun
- scissors
- drill
- drill bit slightly larger (1/16″) than your string diameter
- string of your choice – mine is an off-white cotton string
- saw
Making the DIY Wall Tapestry from Table Runner
Have all your supplies ready and on hand to craft your wall tapestry!
Look at that super old glue gun!! Lol!! I couldn’t find my newer one and it still works by golly! 🤭
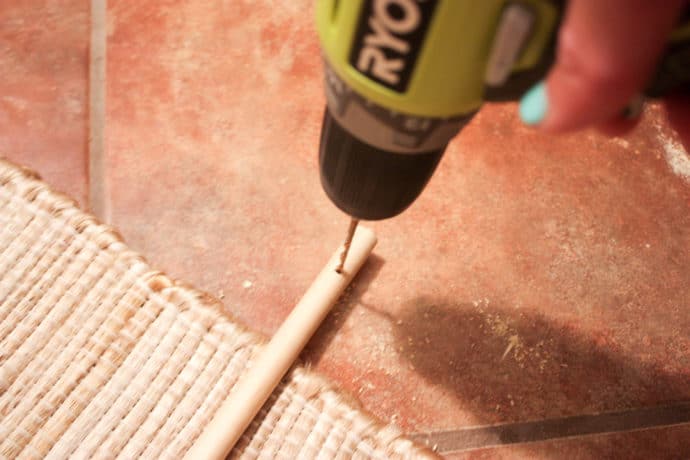
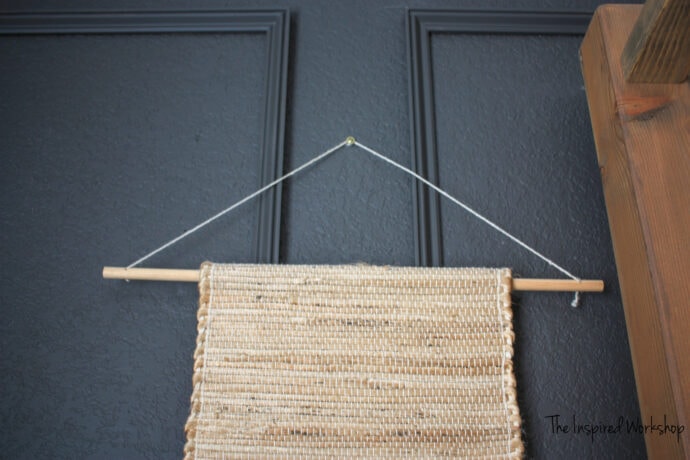
Alright, so to start off, cut the dowel rod down into two 20 inch pieces, you only need one piece if you only plan to make one!
Drill your holes about an inch or so in from each side of the dowel rod…I didn’t even measure mine, I just eyeballed it. Make sure that your dowel rod doesn’t roll at all when you drill your second hole…you want the holes lined up and drilled in the same direction!!
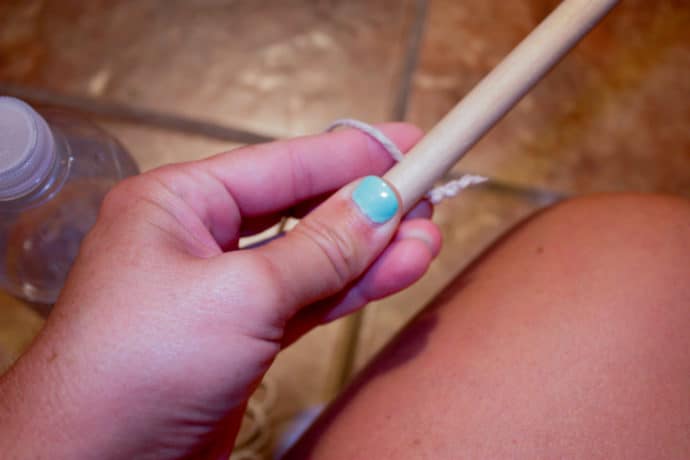
Cut your string to size. I cut mine at 28″ so that when tied, 24″ is left for hanging the wall tapestry.
Pull your string through the hole and tie it in a knot on whichever side you want to be the bottom of your dowel rod hanger! Make sure the knot won’t slip through the hole…I put a dab of hot glue around the knot to make sure!! Tie both sides.
Next cut the table runner in half! This table runner is only held together by the threads that are being cut, so if you use one like it, make sure and have your glue gun ready…don’t try to pick it up…it will fall apart! Take the glue gun and glue along the edge you cut to make sure it doesn’t fall apart and don’t move the table runner, set your dowel rod on it, and roll it up on the dowel rod!!
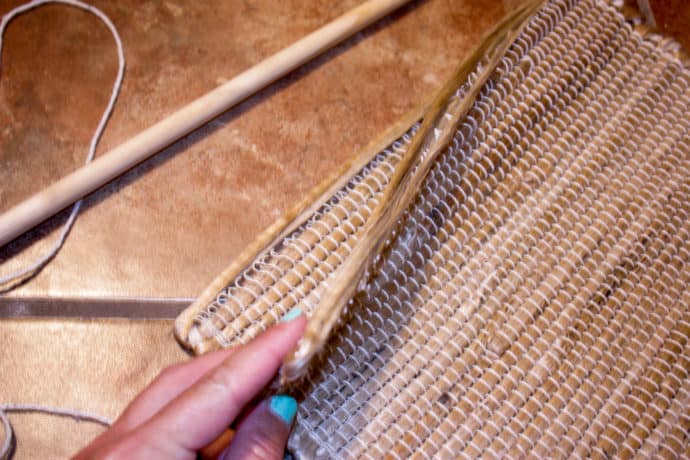
Make sure you center the dowel rod on the table runner! I just eyeballed this as well!
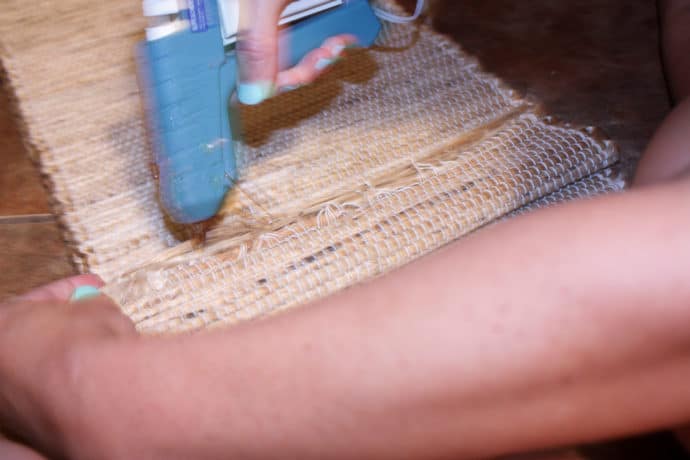
Sorry for the blurry pic…I am just rolling and gluing here! Put a good line of glue once you get it to the length you want…and VIOLA!! It is done!! You can repeat the process and make your other one!! How awesome was that?! In all of ten minutes you can have some really great wall art and for so cheap as well!!
I am ready to make five hundred crafts!! I was so excited by how this turned out…okay, not really my shop is already calling my name…I need to use power tools…luckily today was sunny and I already have been!! Woohoo!!
Hanging the DIY Wall Tapestry
Now to hang it…if you are interested…this was really fun too!! Brad from Fix This Build That showed on his IG stories how he made a piece of hanging wall decor with knobs, which gave me the idea to use the knobs I already had and hang this the same way he had!! (Check his blog out by clicking the link above if you enjoy woodworking…he always has great tips and amazing builds to share!)
Take your knob…any type of cabinet knob and screw the screw that comes with it, into it!
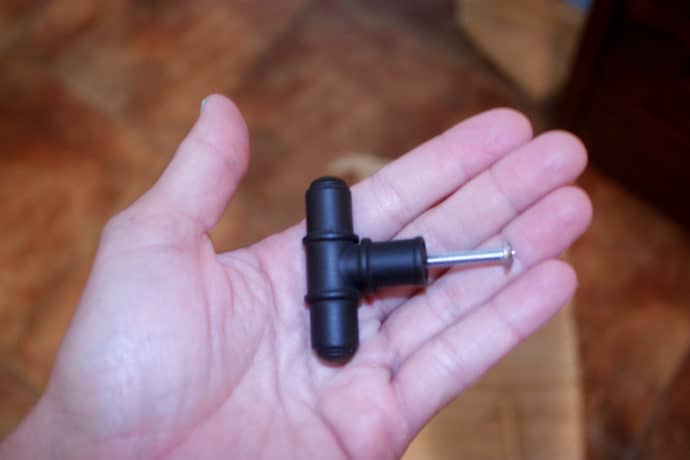
Now using a Dremel (affiliate link) or another small cutting tool for metal…cut the screw head off of the screw!

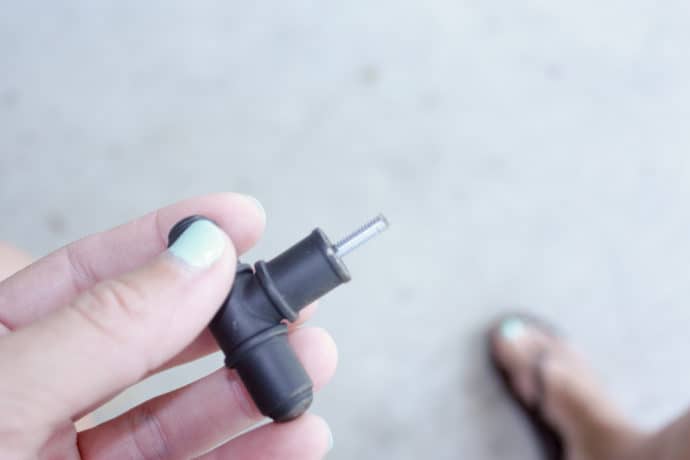
Now you have the perfect screw ready to be placed into a plastic wall anchor! Screw the wall anchor into the wall and then screw your knob into the anchor and hang your beautiful piece!!
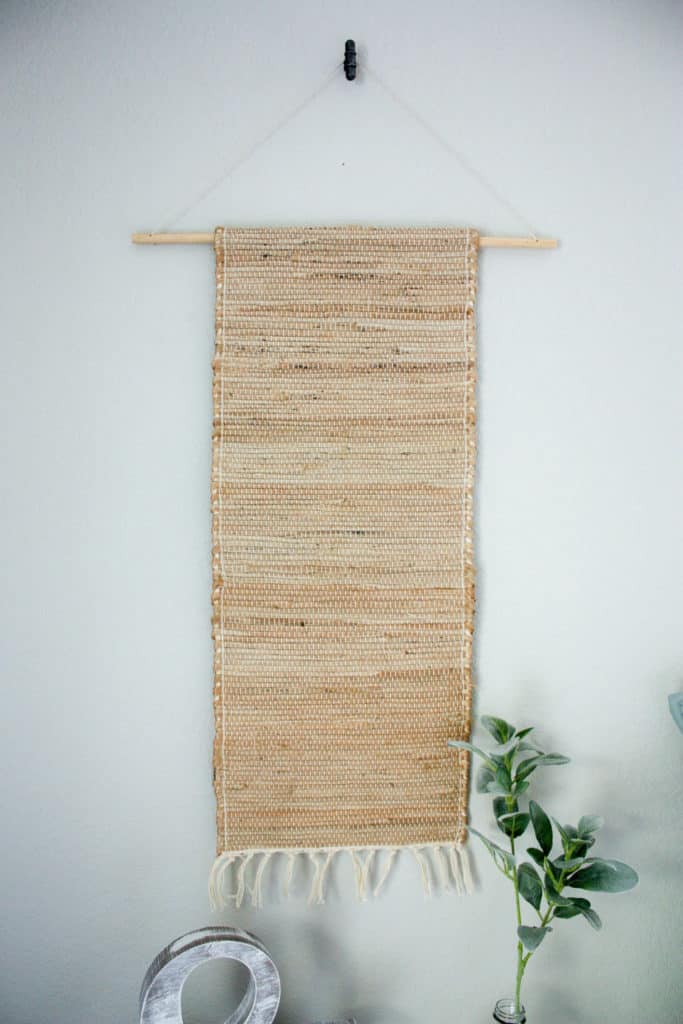
When I rehung the wall tapestry after painting the wall, I just used one of my favorite gold screws (affiliate link)! You can hang it any way you would like! That’s the beauty of it!

I don’t know about you, but I pretty much am in love with it!!
Thanks so much for stopping by!! Have a wonderful evening!!
Happy Crafting!!

Want to save this DIY Wall Tapestry for later? PIN IT!