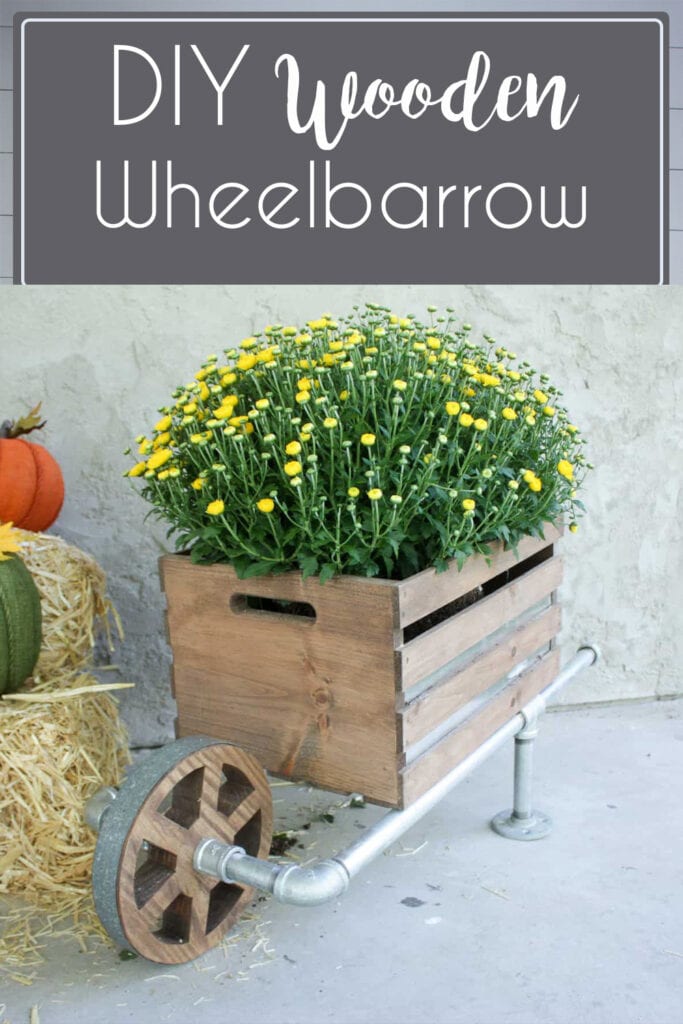
DIY Wooden Wheelbarrow

This post is sponsored by The Home Depot!!
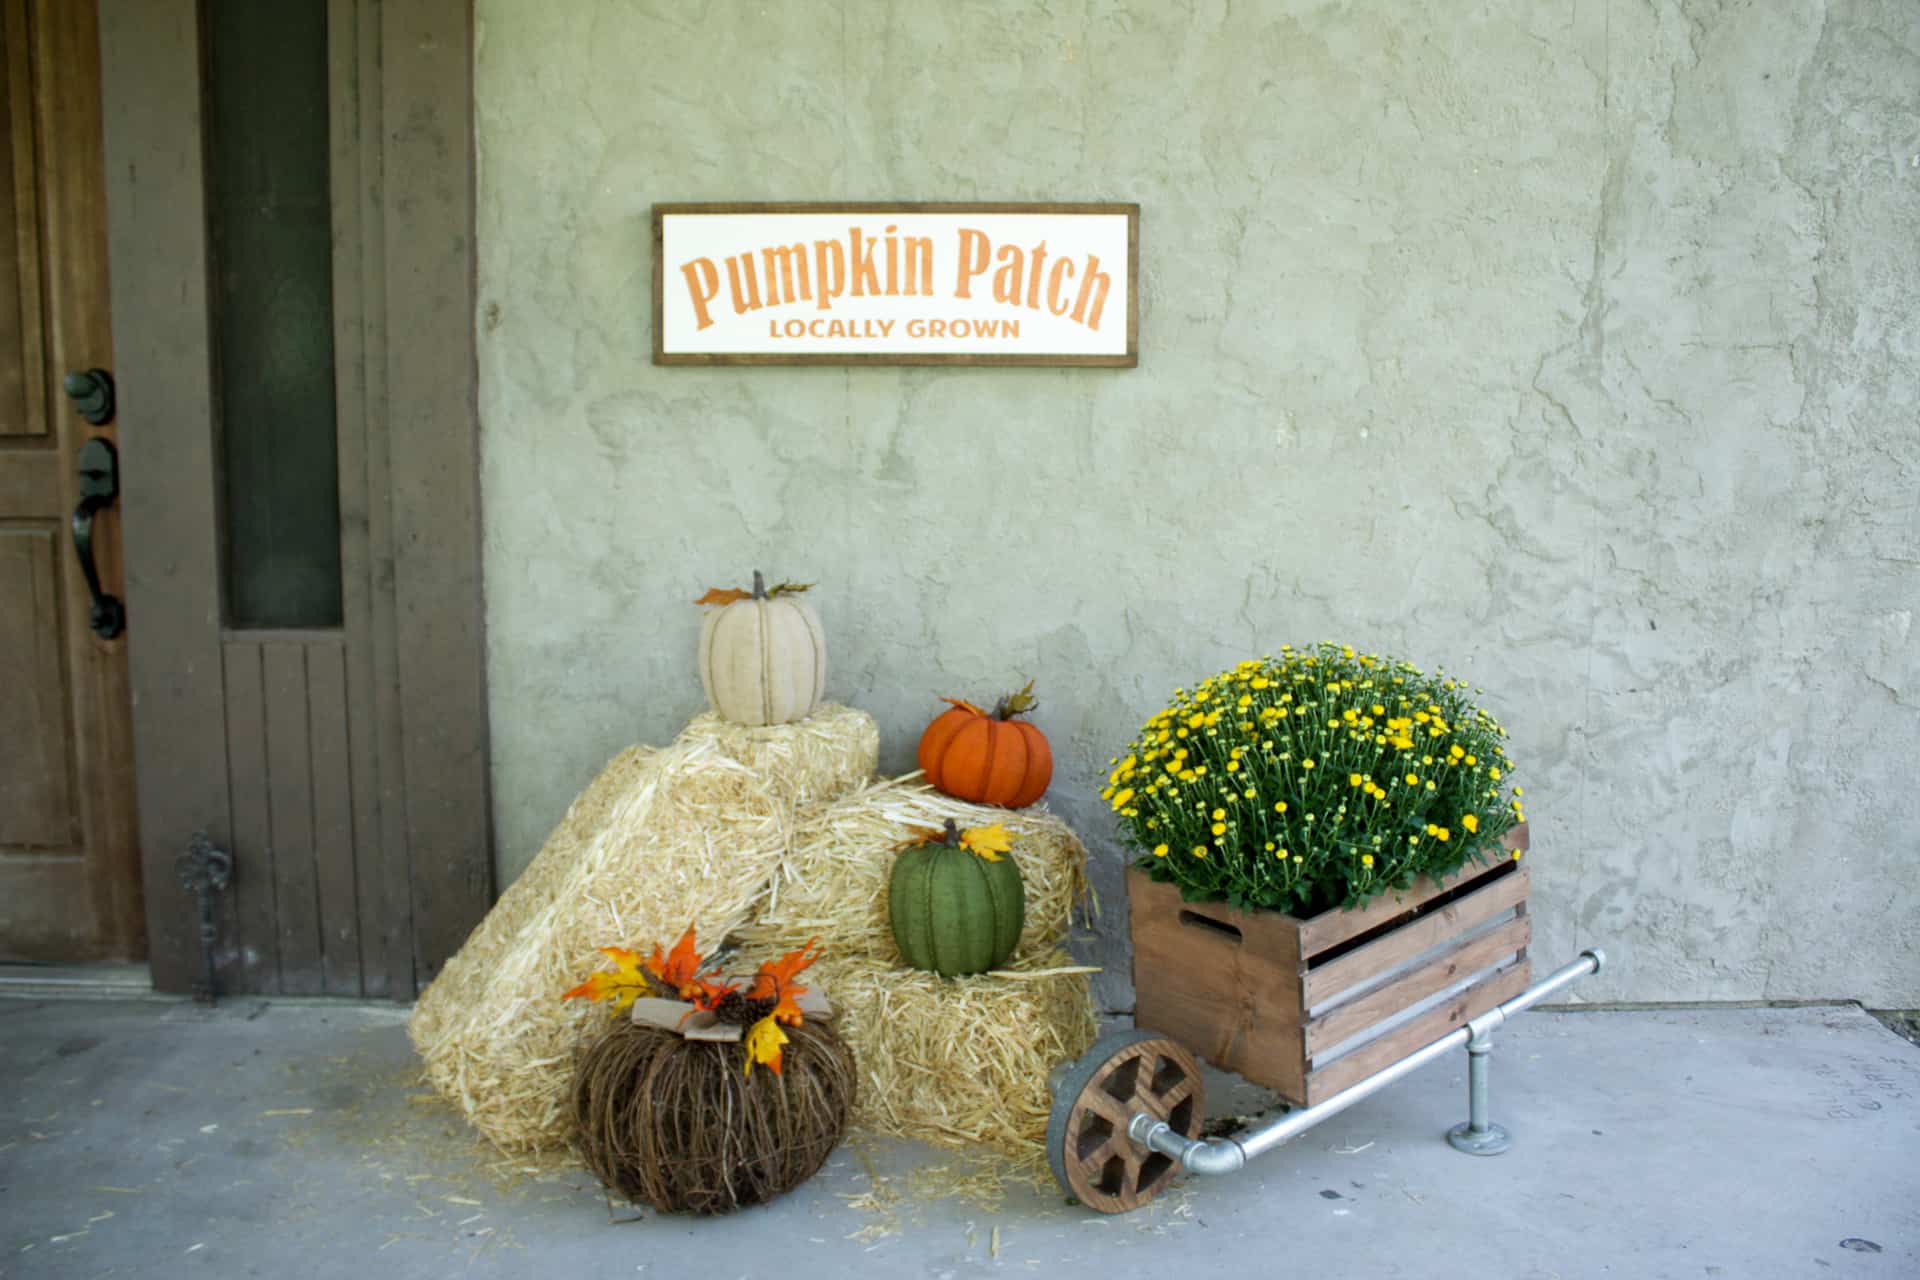
So temperatures here in Texas haven’t budged away from smoldering, but my porch makes me think that it has…as long as I sit inside in the air conditioning and drink iced pumpkin spice latte while looking at it through the window anyway!! Lol!! I cannot contain the excitement that I have to show you how I made my version of the Home Depot workshop, DIY wooden wheelbarrow!
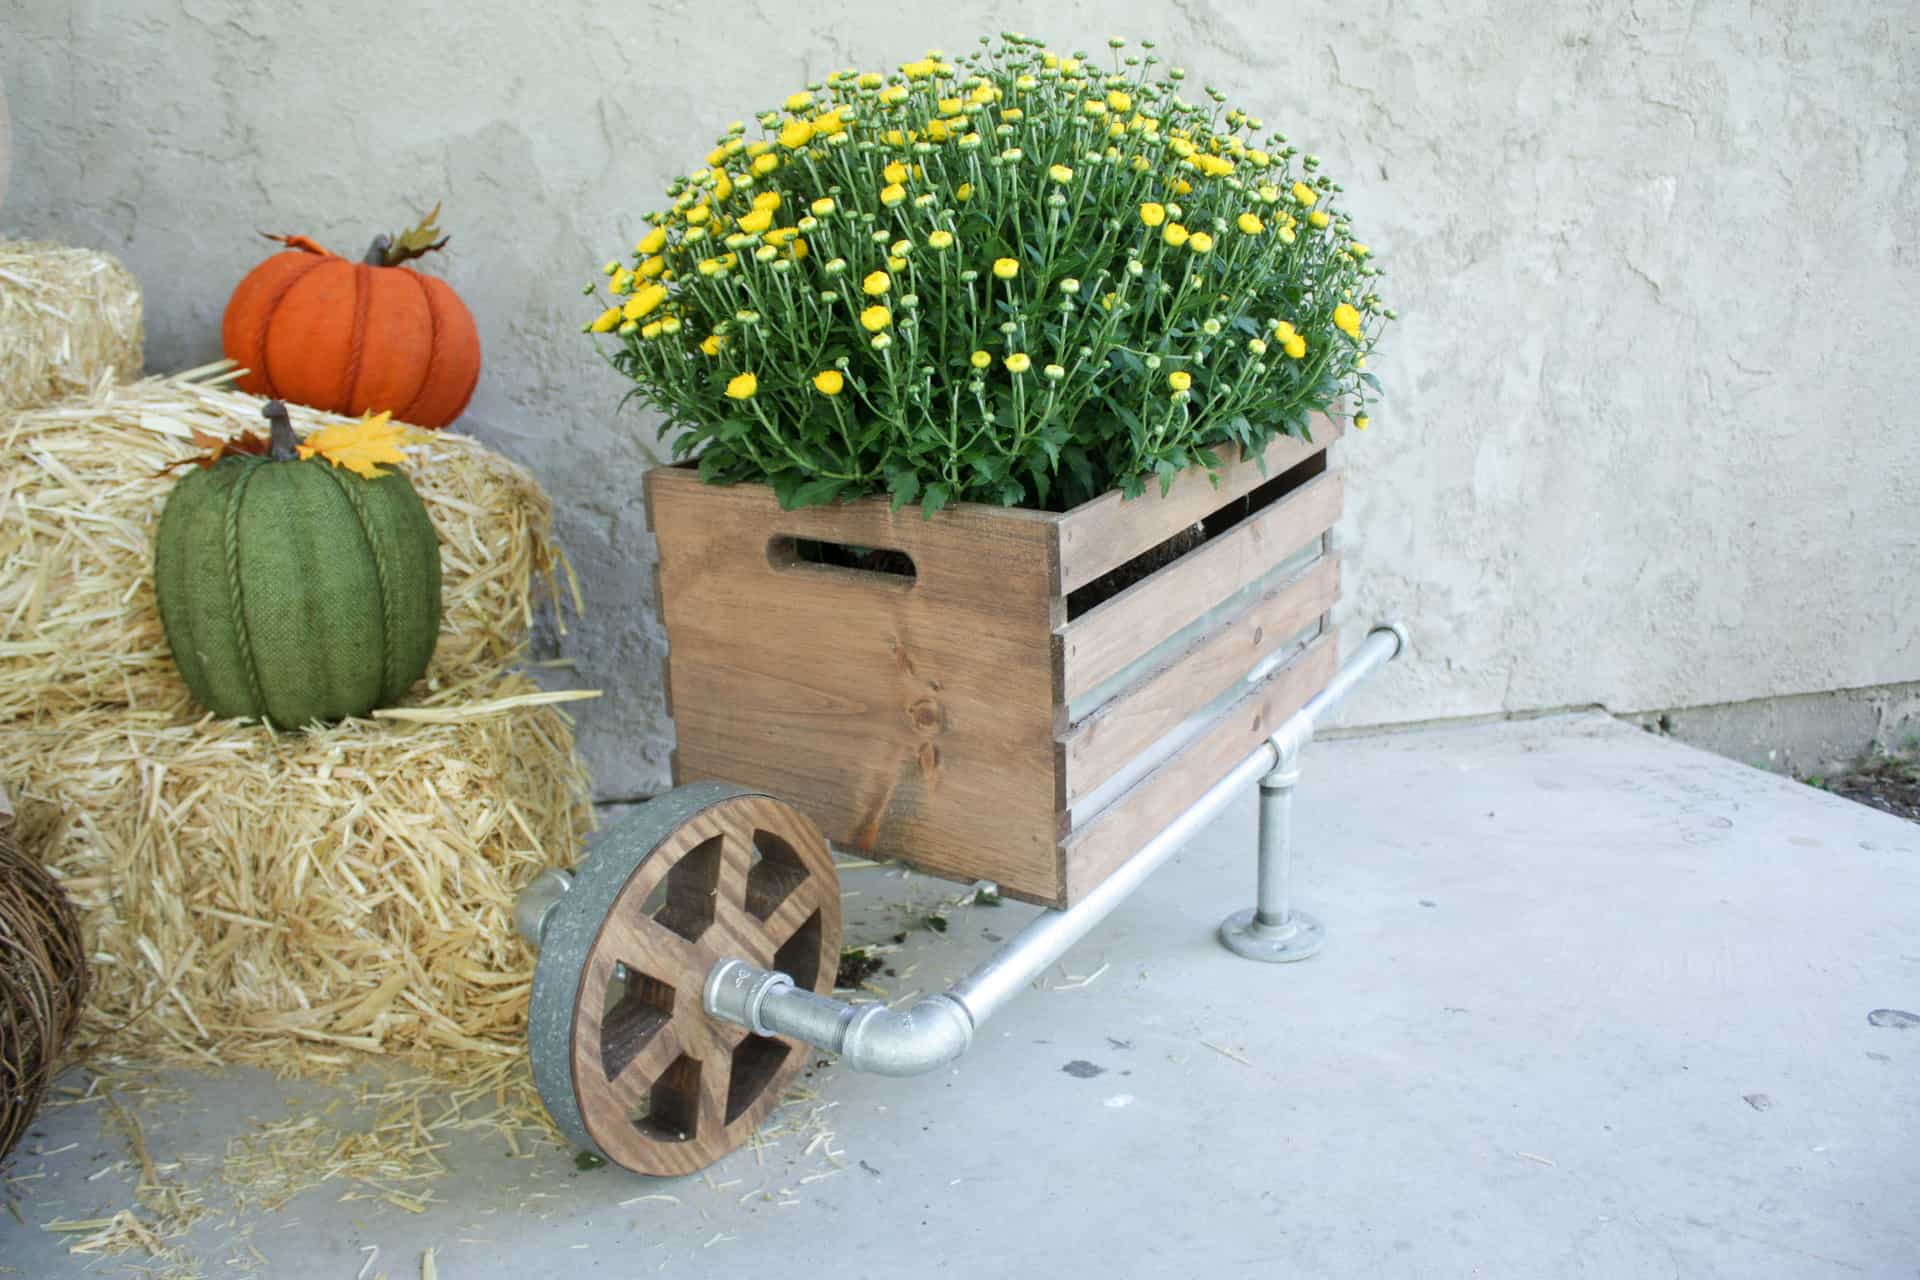
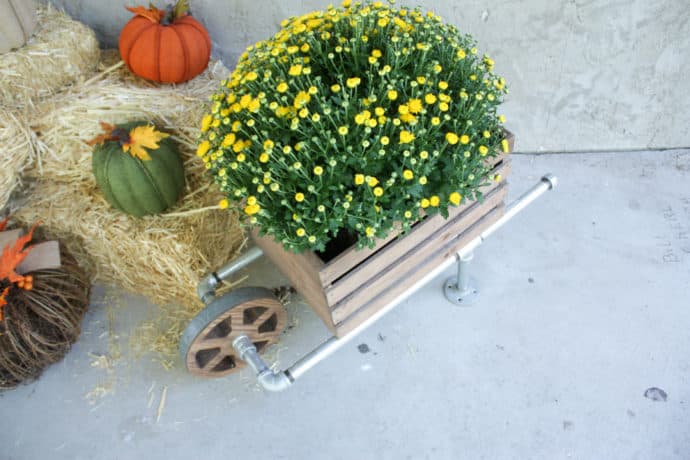
Last week I shared that I would be collaborating with Home Depot and a host of other amazing DIY bloggers to bring you all our versions of this DIY wheelbarrow made using a wooden crate that they will be making in-store at the Do-It-Herself Workshop! I changed a few things with mine, used the galvanized pipe instead of the wood, and added the galvanized sheet so I could use the wheelbarrow as a planter if I wanted! But I didn’t need to change much because I think it is incredibly adorable as it is built in the workshop!!
Have you signed up yet at your local Home Depot to help build one? If not, click below to sign up!!
UPDATE: The workshop is no longer available, but you can check your local Home Depot for upcoming workshops you can attend!


I have signed up to attend some of their DIY Workshops…they have so many options, there is literally something for everyone, of EVERY skill level!! They offer Do-It-Yourself workshops for anyone to attend, Do-It-Herself Workshops so ladies you can build in a class full of other ladies, and maybe meet some new friends who enjoy woodworking just like you, or who are just getting their feet wet trying out DIY!!
Or for the little loves in your life, they have Kids Workshops so that you can give them the confidence early on to do amazing things!! I always have proud momma moments when my kiddos spend time in the garage with me and come up with some of the most creative things!! Children getting hands-on and being creative exercises a part of the brain that their iPhone just isn’t going to exercise!! LOL!!
So, go ahead and sign up yourself and the kiddos up for a workshop and then come back and read below to see how I created my version of a rustic wheelbarrow…and get links to all the other blogger versions…you don’t want to miss them!! Go ahead, I’ll wait right here until you get back!!
Okay, you all signed up?! Great, let us get busy then!!
Gathering Supplies for DIY Wooden Wheelbarrow Planter
So first I took a trip to Home Depot, and I must say I left a few shiny pennies there that day because the fall section they have is on point!! They had the cutest burlap pumpkins…and hay bales ready to go… wicker pumpkins that light up, wreaths for the door, doormats, and some lanterns that I have been kicking myself for passing up!! They are a one-stop-shop for your porch for fall y’all!!
Anyway, so I grabbed a Crates and Pallet crate…bam…wheelbarrow basket already built!! Lol!! Then I went with ¾” galvanized pipe instead of the wooden baluster, I was tempted to use copper pipe because it just screamed autumn to me but I wanted to be able to use this cute little wheelbarrow at Christmas time as well, you know with some little presents in it, and I figured the copper and Christmas colors may clash.
So I played it safe and went with galvanized for my rustic wheelbarrow!! After I spent all the money on the pipe, I thought to myself it would have been smarter to use PVC pipe and spray paint it, you could get this same great look for a lot less money than I spent that way!!

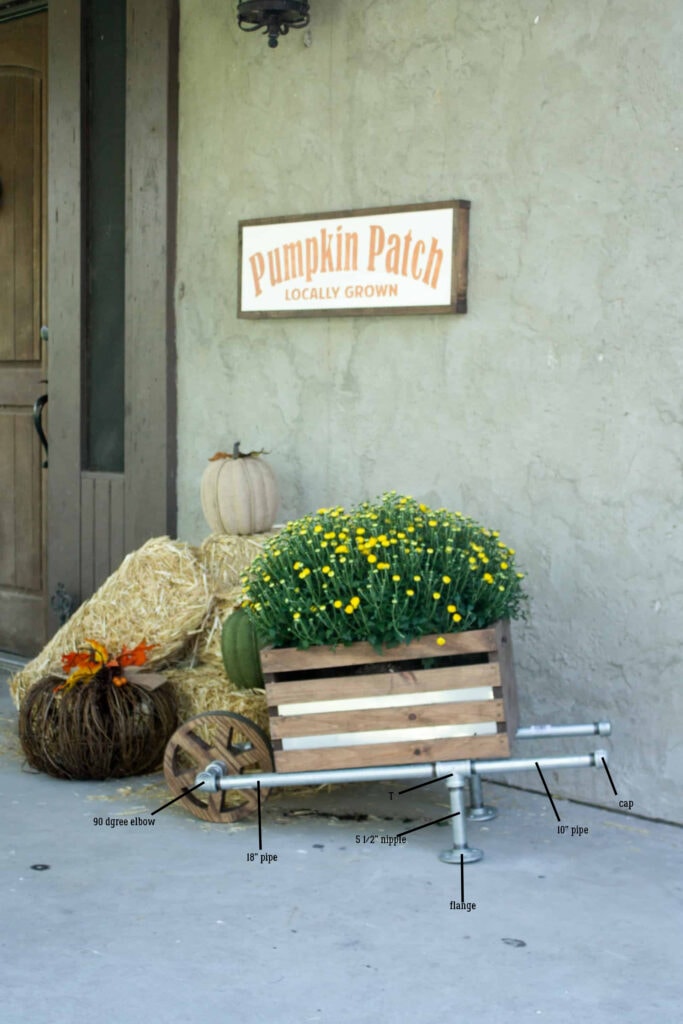
Materials needed for the DIY Rustic Wheelbarrow
All pipe pieces listed are 3/4″
- 2 – 18” pipes
- 2 – 10” pipes
- 2 – 90 degree elbows
- 2 – 5 ½” nipples
- 2 – flanges
- 2 – Ts
- 2 – 3” nipples
- 2 – couplings
- 2 – end caps
- 1 – 2” nipple
- scrap piece of 2×10 wood to cut wheel out of – about 9″ long or more
- 12″x24″ galvanized sheet
- 1 1/4″ x 30″ galvanized strap tie (around the wheel)
Building the DIY Wooden Wheelbarrow
It is pretty simple to put your DIY wooden wheelbarrow together with your frame once you have your pipes! But before we start throwing our pipes together, you have to have a wheel!! I chose to cut six little holes in mine, and make it out of a 2 x10 instead of a 2×8, it just made it a hair bigger and I liked that!! After deciding how many holes if any, and cutting them out, you have to drill a hole for your pipe to fit through the middle…3/4″ pipe is about 1″ on the outside so a 1″ drill bit should suffice!
After drilling the hole in our wheel my hubby helped me hammer some old strapping we had lying around to the outside of it…it is probably my favorite part of the wheelbarrow! You can pick some up strapping at Home Depot for really cheap!
Now that the wheel is ready to go, we just have to use the 2″ nipple through the hole in the wheel, then we use the two couplings on each side of the wheel to hold it in place! Next, attach the 3″ nipples…I chuckle every time I say nipple when I work with this pipe and it makes everyone else laugh too!! It’s just funny, I’m sorry, where were we?! Ah yes, just twisted our nipples on!! Ahahaha!! I didn’t mature passed the age of, well, a 12 year old boy!
The 90-degree elbows connect to the 3″ nipples and then the 18″ pipes are placed, then we need the two t’s and they allow us to add the braces/legs for the wheelbarrow!! The 5 1/2″ nipples are for the legs and the flanges make a nice solid surface for them to rest! The 10″ pipes complete the handles once you add the cap!! Wow!! That sure was easy!! Didn’t even have to break out a saw or do anything besides twist some pipe!! I love it!!

I turned my crate into a planter by adding a little more galvanized metal, I just can’t get enough of that stuff!! Lol! I bought two small sheets because that was all my Home Depot had in stock, but I would have rather had a larger sheet to cut down, either way, it worked so of course I had to plant a mum. I already killed the first one that I bought not even two weeks ago!! Lol!! My black thumb is bad, really bad, and kinda makes me wonder why I turned this into a planter when I can’t keep plants alive!!🤔😂 But it looks really great!!
Now to attach the crate we just used some self-drilling screws and screwed through the wood slats on the bottom of the crate and into the pipe! Boom! Done! How simple and easy was that?! But yet, how adorably cute is it?! So adorable!!!
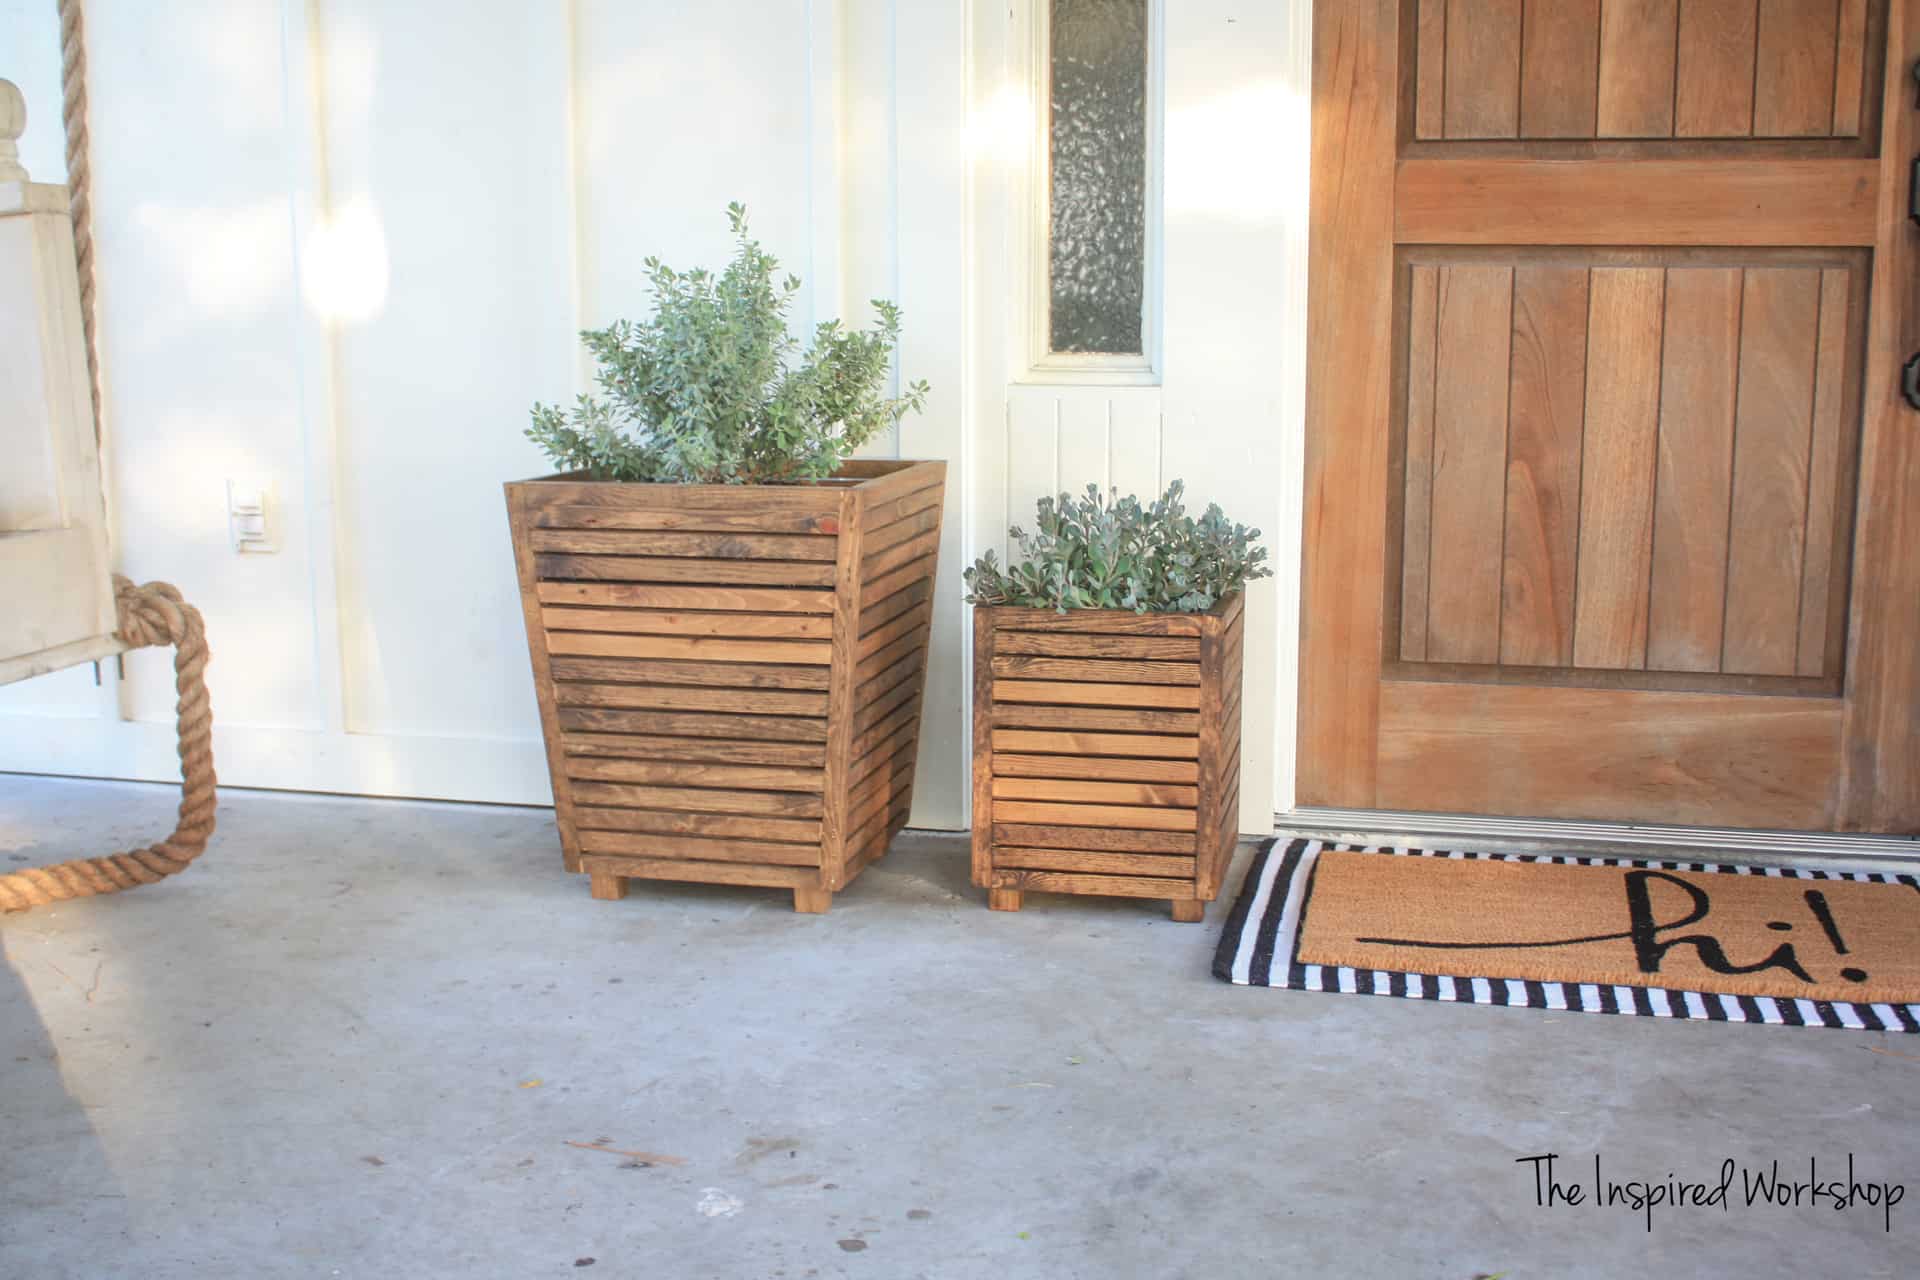
Interested in other planter ideas for your porch? Check out the planters I made out of scrap wood! DIY Scrap Wood Planter and that DIY Porch Bed Swing you can just barely see on the left of the photo!
Make sure and check out all the variations of this cute little project by clicking the links below!! Let me warn you, you are going to want to run out and grab the makings for one of these cuties after seeing some of the sheer adorableness other bloggers came up with!! A shout out to Mrs. Jenn from Build Basic who asked me to take part in this virtual party!! Thanks, girl!! The link to see her wheelbarrow is HERE!! And the others are down below!! Make sure and sign up for a FREE workshop if you haven’t already!!
- DIY Huntress
- Pneumatic Addict
- Fix This Build That
- Newly Woodwards
- Keeping It Cozy
- Chronicles of Home
- House of Wood
- Remodelando La Casa
- The Homes I Have Made
- Chatfield Court
- Homemade by Carmona
- My Love 2 Create
- Uncookie Cutter
- Sawdust 2 Stitches
- Cozy Little House
- Love of Home
- Duke Manor Farm
- Field Treasure Design
- Tinsel and Wheat
- That’s My Letter
- Addicted 2 DIY
- Averie Lane
Have a wonderful Monday!!

Want to save this DIY Wooden Wheelbarrow for later? Pin it!
Such a nice variation by adding the pipe pieces! I didn’t know that strapping existed otherwise I would’ve used that! The wheel looks awesome.
I love your industrial-themed cart/wheelbarrow!
Brenda
Perfect rustic industrial touch, so awesome!
Oh my word, those pipe fittings! What a great way to take this to the next level, so to speak. Just love it.