Make a Custom Sweatshirt with Patches
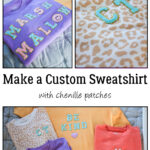
Chenille patches have been making a comeback recently and adorn everything from backpacks and caps to sweatshirts! Sometimes though, looking in all the stores and scouring the internet you still can’t find exactly what you are looking for, so you may just have to put on your DIY hat and make a custom sweatshirt with patches!
You know I love to DIY everything, and how sometimes when I can’t find what I’m looking for, at the price I want to pay I build the furniture instead of buying it…well, I couldn’t find a sweatshirt that I wanted either, so I made a custom sweatshirt with patches and I’m sharing just how easy it was with you all!
I had seen some really cute chenille patch sweatshirts online that had the word Mama or Love on them. I was looking for something a little more, I don’t know, just different than that! When I saw how cheap you can get the chenille patches, I had to make some custom sweatshirts with patches for myself!
How freaking cute are they? And oh my gosh, the options are ENDLESS!!! It makes me crazy, and I now know why people open Etsy shops selling stuff like this, I can’t possibly wear all the sweatshirts I want to make!🤭
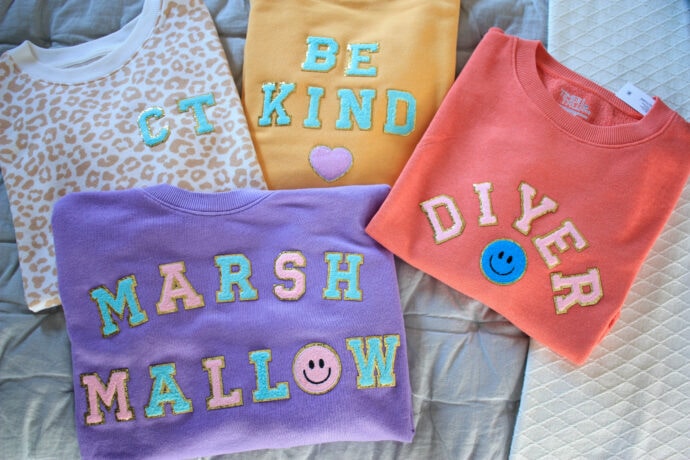
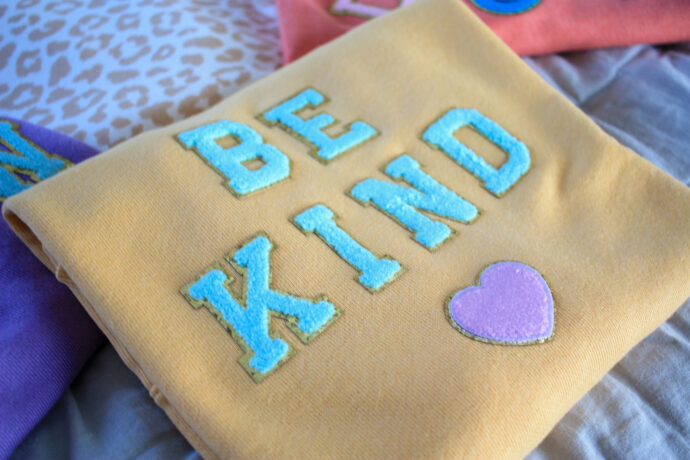
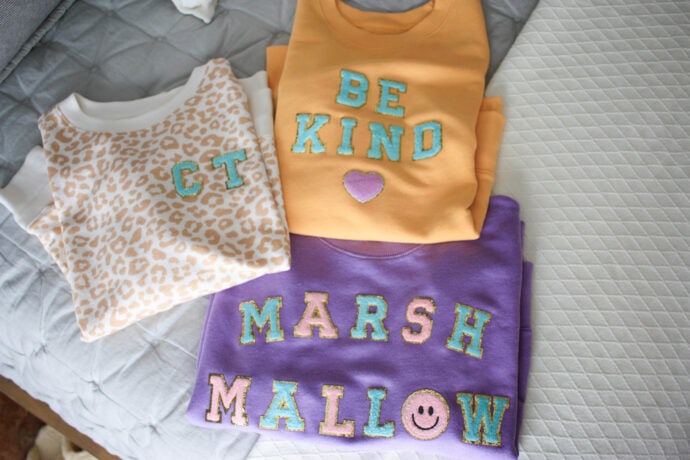
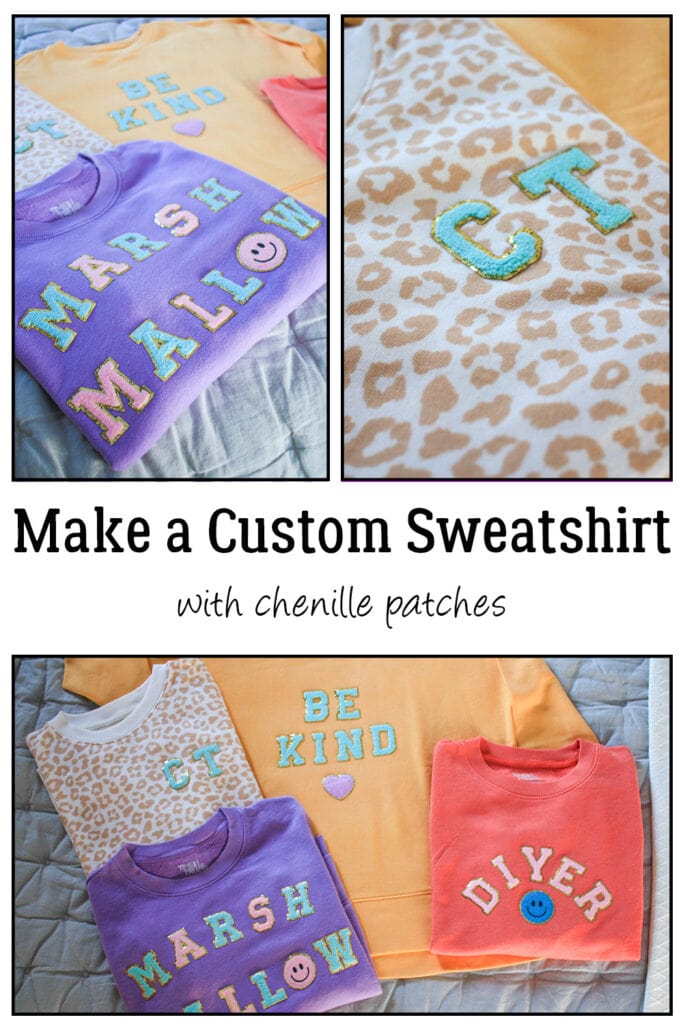
Check out the Be Kind sweatshirt, everyone needs a Be Kind sweatshirt, and how adorable is it in that yellow and blue?!😍
The next one may be my absolute FAVORITE, and the real reason I had to make a custom sweatshirt, it is a Marshmallow sweatshirt! No, I do not like the artist Marshmello…I mean, no offense to that marshmallow head DJ, I like his music and all, but I am talking about Veronica Mars Marshmallows! IYKYK M’kay!
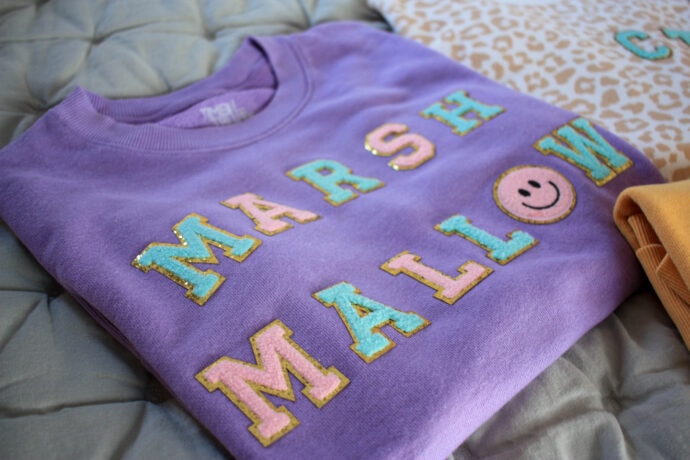
I wish I would have used all the same color letters on this one, but I love it still!
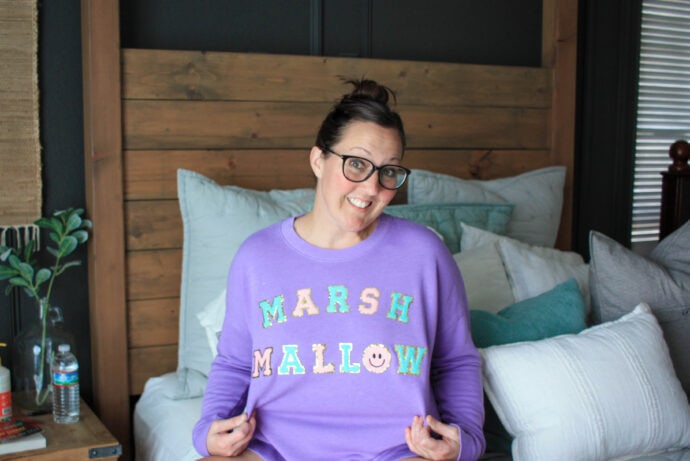
Veronica Mars is probably my absolute favorite show ever, so it was only fitting that I make a custom sweatshirt that reminds me of my love affair with LoVe! Don’t even make fun of me for my 12-year-old girl’s choice in shows! 🙈🤣 I am what I am!😅 A BIG A$$ DORK!😂🤣
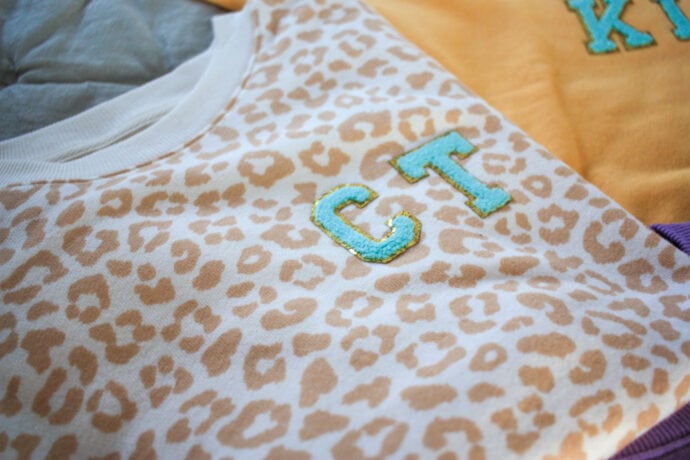
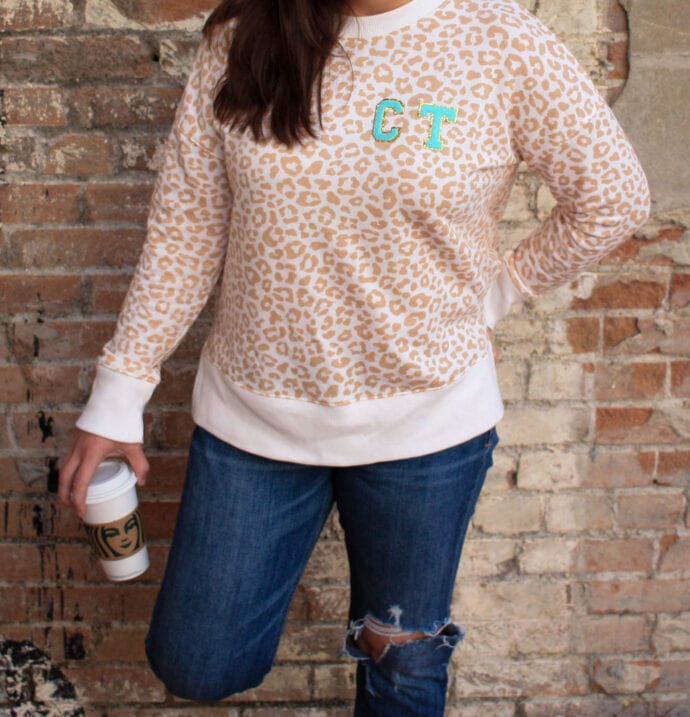
The most mature custom sweatshirt on the list is this initial one! I love the simplicity of the patches, letting the sweatshirt be a little bolder and patterned! I wore it the other day in Walmart and had two compliments on how cute it was! 🥰
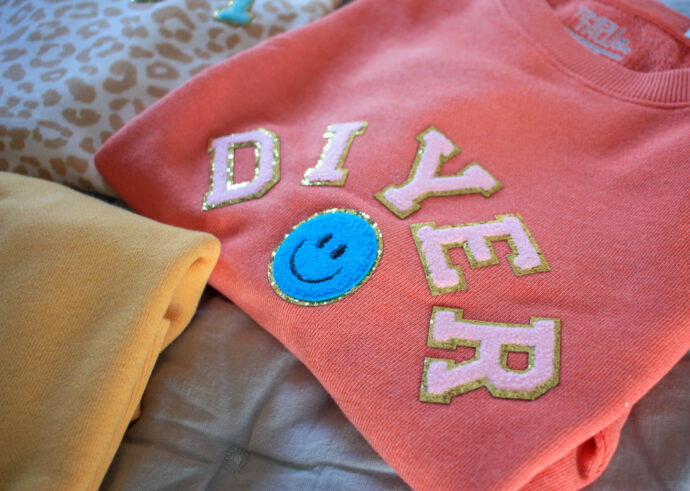
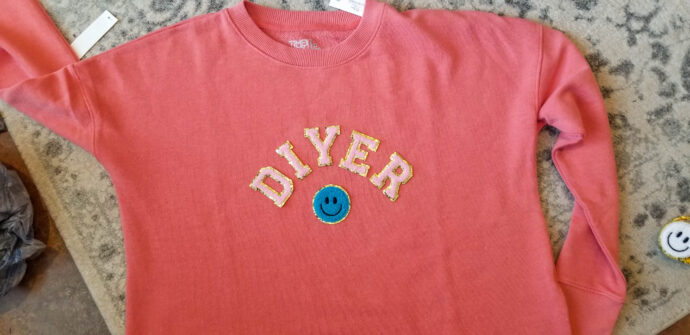
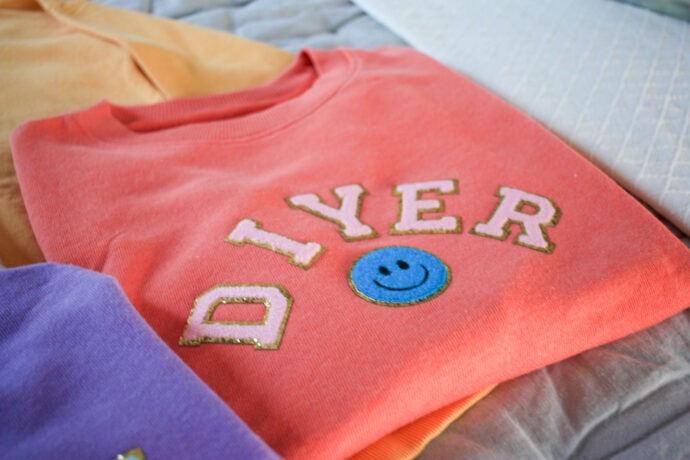
And of course, I HAD to make one that says DIYer…but man I wish I would have ordered the larger size and made DIY large and er small! Dang it, I hate it when that happens! 🤪
Y’all these sweatshirts are my favorite too, they are from Wal-Mart and I am not even kidding, they are a lighter weight so I can wear them longer, especially here in Texas I can pretty much wear them all fall, winter, and spring! But the fit is perfect, loose but not make you look larger than you really are loose! And the best part…they cost $9.50 and every Wal-Mart still has a ton of them!
Want to get to work making your own custom sweatshirt? Let’s do it!
If you enjoy no-sew, fun projects that are easy to create you may also like this DIY gnome pillow cover, or these adorable no-sew holiday gnomes!
Gathering Supplies to Make a Custom Sweatshirt
Materials Needed to make a custom sweatshirt:
**NOTE: Amazon links below are affiliate links! Affiliate links allow me to make a small commission, should you make a purchase after clicking one of my links, at no extra cost to you! It is really helpful to offset the expenses of running this little ole blog and bringing free content, I appreciate any time you shop at my links, but we are still friends no matter what! Lol!
- Sweatshirt of your choice – the Walmart ones may not be available if it’s been a while since I posted this!
- chenille patches of your choice – blue letters – pink letters – smiley faces and hearts
- iron – just your regular ole household iron
- ironing board – or firm surface to iron the patches on
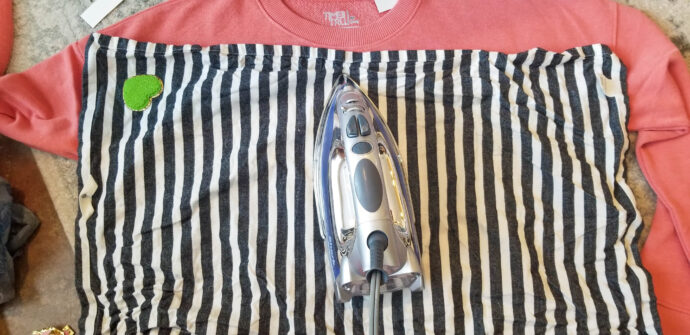
- cotton kitchen towel – make sure it’s 100% cotton so it doesn’t burn or melt, and use the thinner ones, not the terry ones like a bath towel, they are a little too thick!
- sewing measuring tape
Make a Custom Sweatshirt
After you have chosen your sweatshirt, your patches, and you have gathered your supplies, you can make a custom sweatshirt! It is so easy, I mean whoever you get the sweatshirt from did all the work! Lol! All we have to do is add to it to make it custom and cute!
Figuring out the layout of your patches on your custom sweatshirt
Figuring out the layout is the hardest part, making sure it’s all evenly spaced and straight across the sweatshirt is the longest and hardest part! I used the sewing measuring tape to help measure, I also used a regular ruler to help make sure it was all straight!
I first just laid the patches out on the sweatshirt to see what design I was wanting to create!
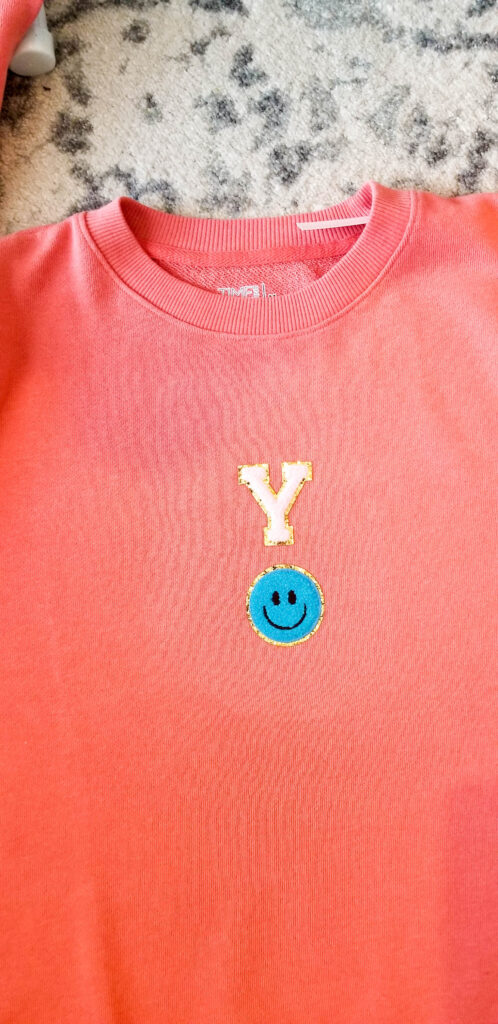
Once the letters are lined up roughly how you want them, make sure the middle ones are lined up exactly where you want them and remove the others. I only attached the Y and the smiley face at first, this just makes it easier to keep everything lined up and not sliding!
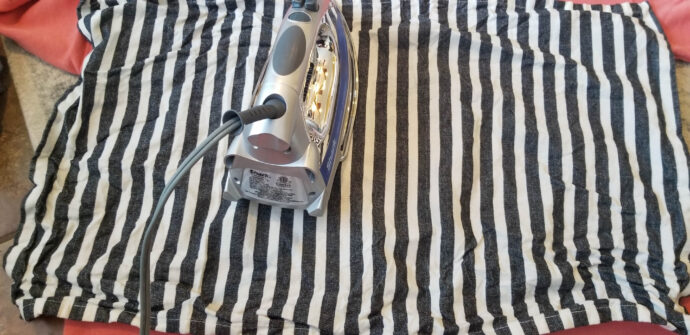
Make sure the iron is on the highest, cotton-linen setting…as long as your towel is 100% cotton.
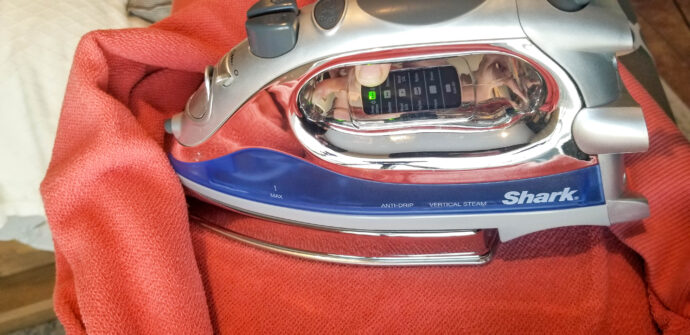
Then, as carefully as possible throw the cotton hand towel over them and set the iron down on top of the towel where you know the letters are. Do not iron back and forth, leave it in one spot for around 2 minutes or even a little more, then lift it up and move it to where you need it and set it down again!
Make sure to hold it on the letters for a couple of minutes.
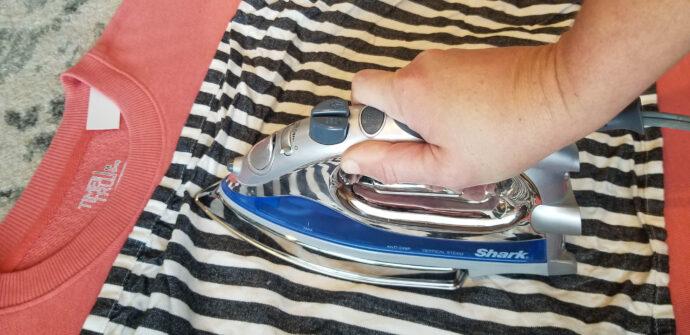
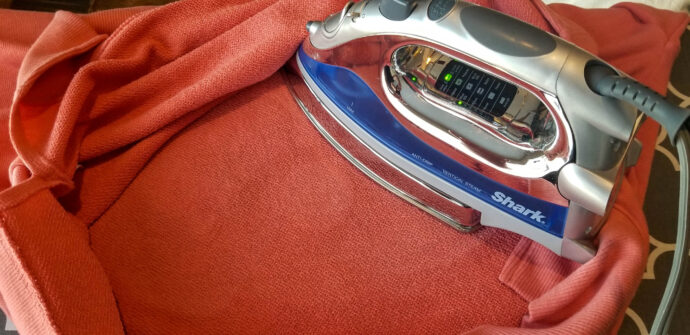
Flip the sweatshirt over and iron the letters the same way from the inside…no ironing back and forth, just set it and press. I pressed them from the inside for about 7 minutes to make sure they were well heated. I even would shoot one puff of steam just to make sure it was as hot as possible! You do not need to have anything over the sweatshirt again, make sure it’s 100% cotton or adjust your temp settings based on fabric!
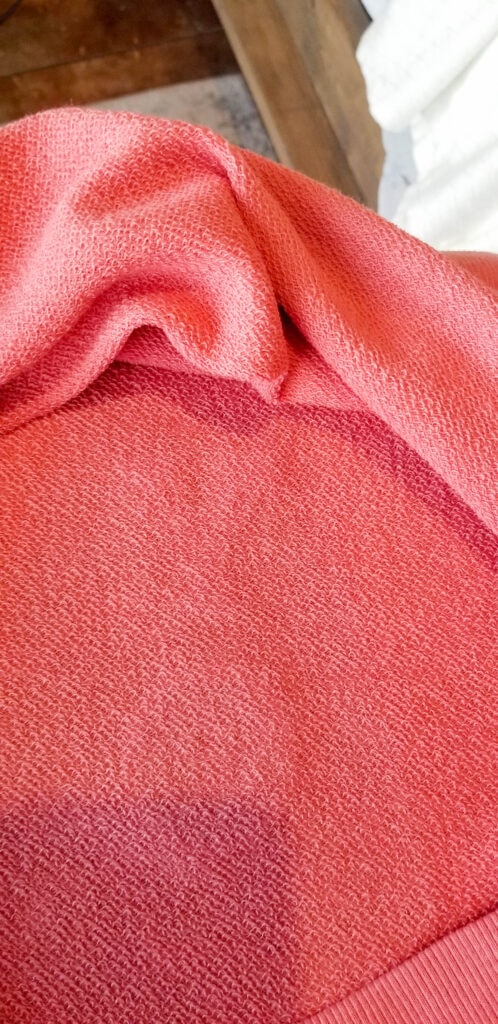
You can ever so lightly see the Y and the circle of the smiley face below!
Don’t get the sweatshirt real wet or anything with the steam, just one puff on each area!
Let it cool, flip it back to the front so you can add the rest of the letters!
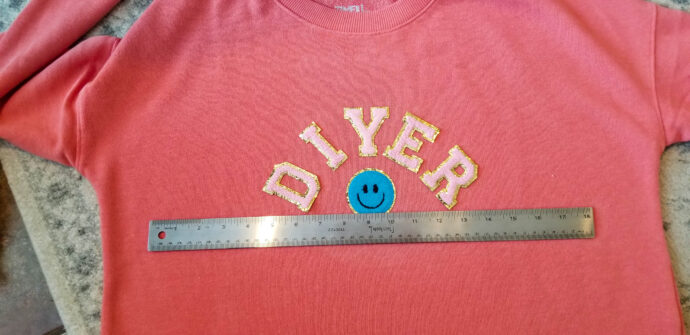
Note, I measured from the top of the neck of the sweatshirt on both sides of the neck down to the ruler with the sewing tape to make sure the ruler was straight!
It may not be PERFECT, but luckily when you put it on, it’s not completely obvious! Lol! Doing the words in smaller sections did seem to help keep everything lined up though!
Anyway, repeat the exact same steps as when adding the Y and smiley face to the rest of the letters, I did do the rest of them all at once just making sure to lift, not ironing back and forth when moving the iron!
Lay the kitchen towel over the patches and set the iron in place, first on the letters on the left and then the new letters on the right!
Flip it over and press them on the inside as well!
After you have applied all the letters or smiley faces, or whatever patches you chose, let them cool, and guess what…you’re done making your custom sweatshirt! Boom! Go show that baby off around town…or the house if you are like me and really just want them for lounging! Lol!
They are so cute! If you make a custom sweatshirt with patches, please tag me and let me see it! @theinspiredworkshop I can’t wait to see what you do with them, I want to make so many more! Lol!
Happy Sweatshirt Making!😉

Want to save this custom sweatshirt post for later? Pin It!


You are so creative and genius. I really like these patches. Thanks for sharing.
Thank you so much! Have a good one!
Cara
How do you suggest caring for these? Wash normal?
Hey April! I have washed and dried mine and they all have held up just fine! If you want to play it safe you can hang dry them, but they look good as the first day I wore them even with drying them!😁 Hope that helps! Thanks for stopping by, have a good one!
Cara