DIY Ring Toss Game

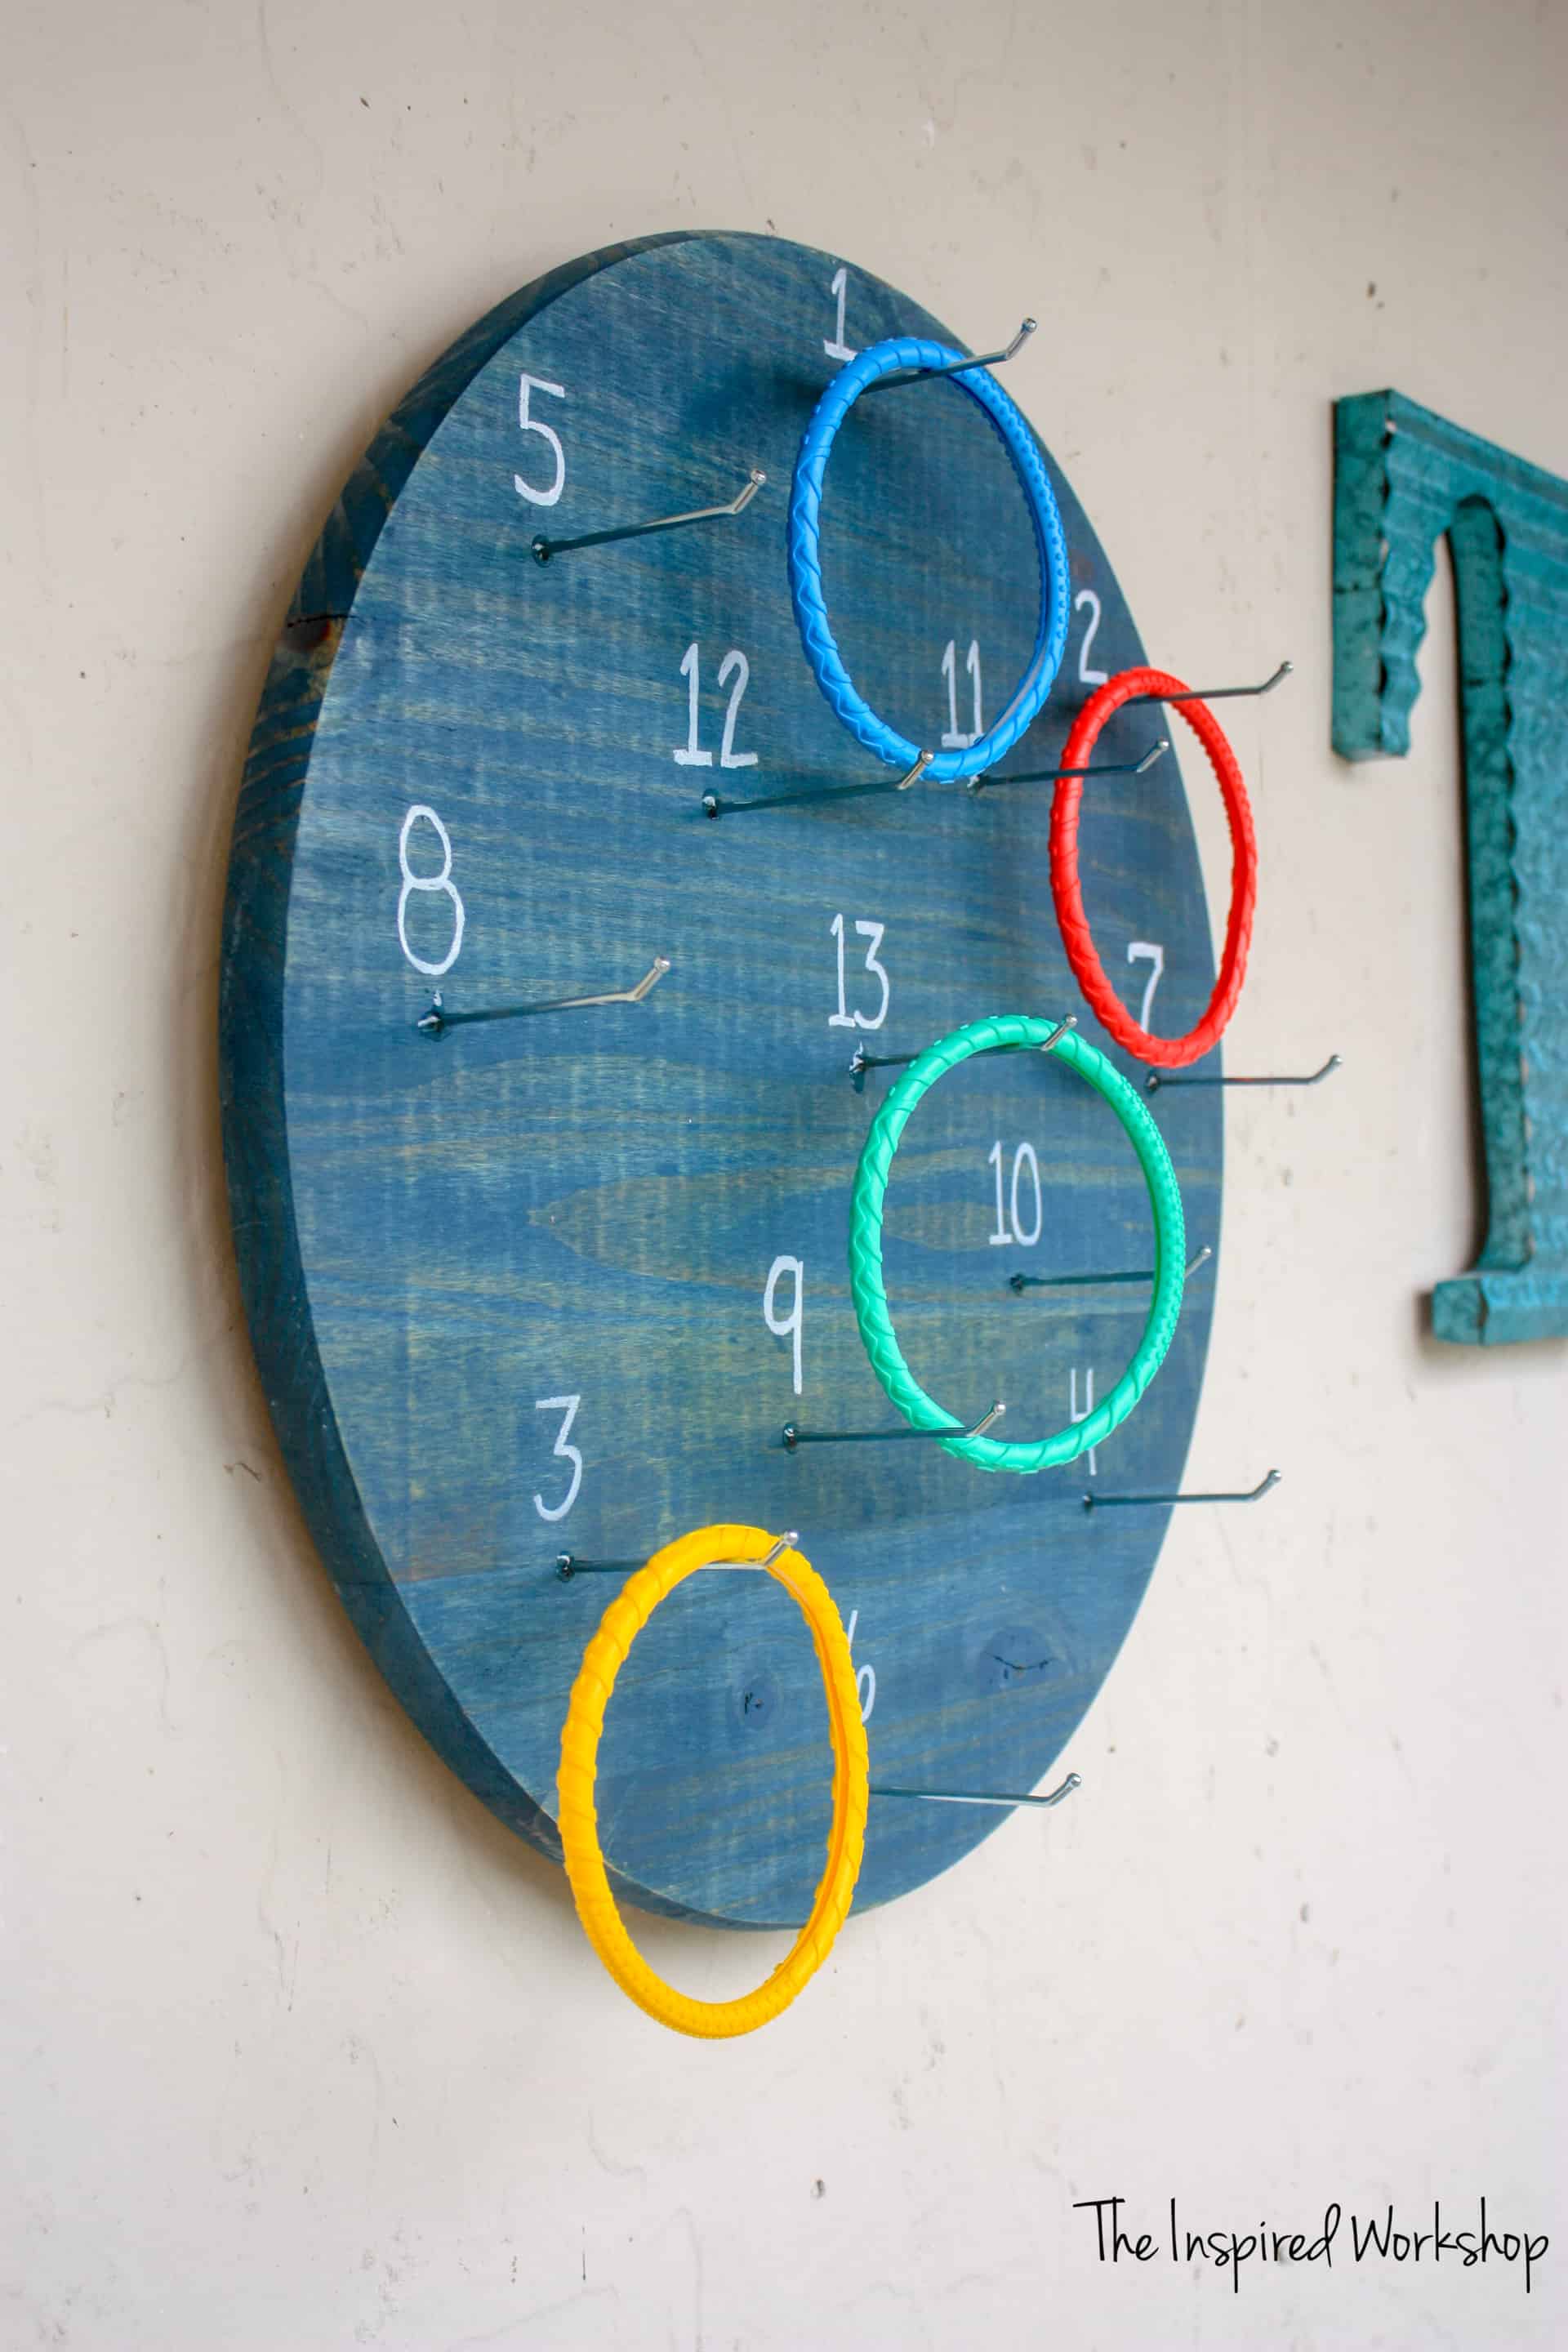
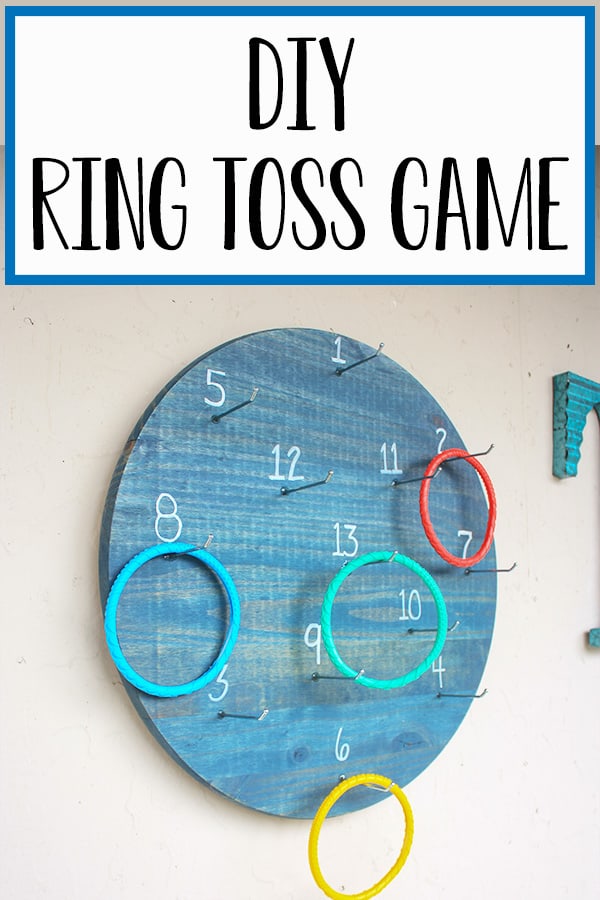
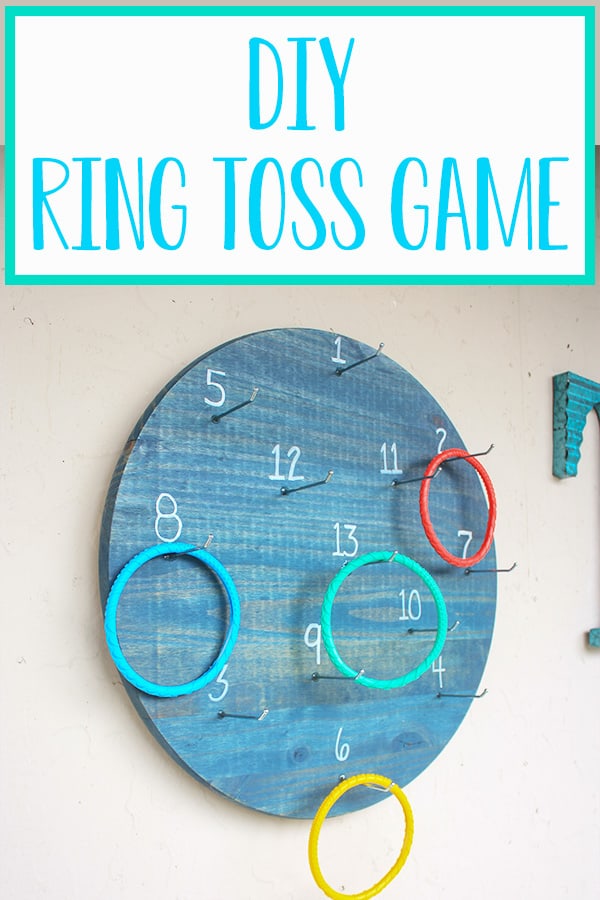
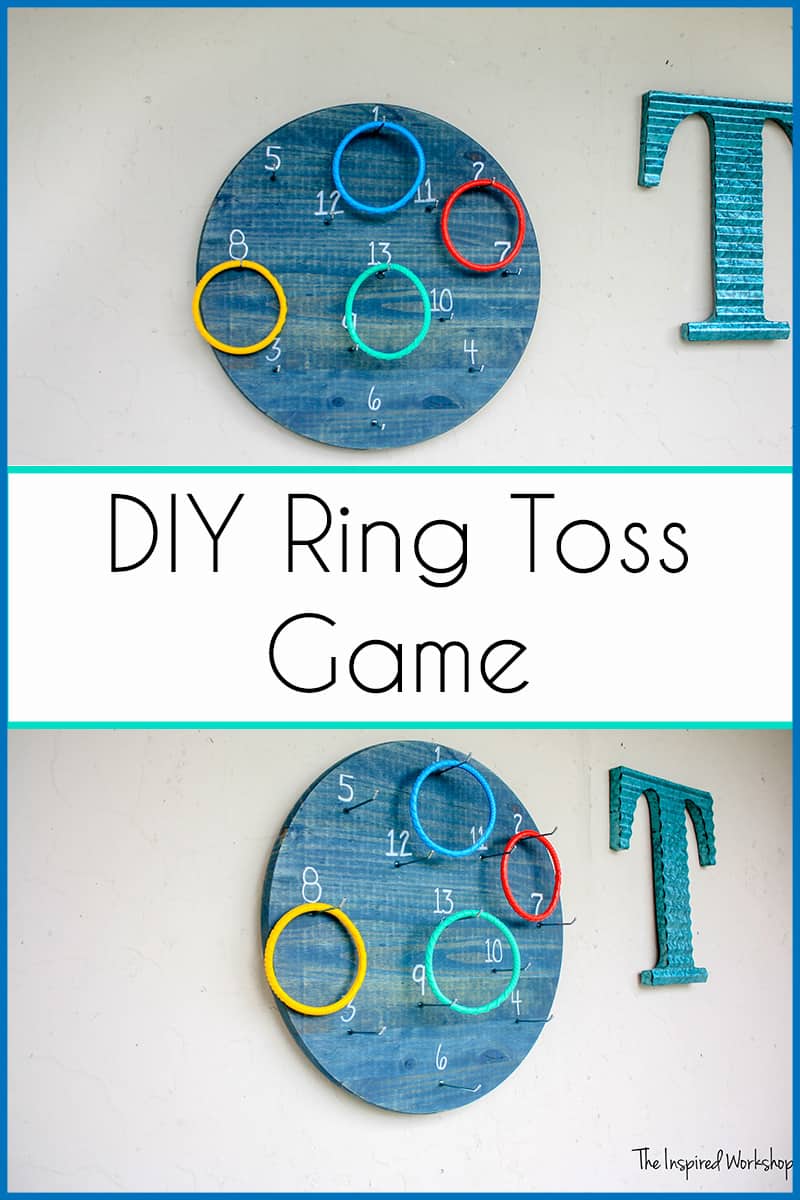
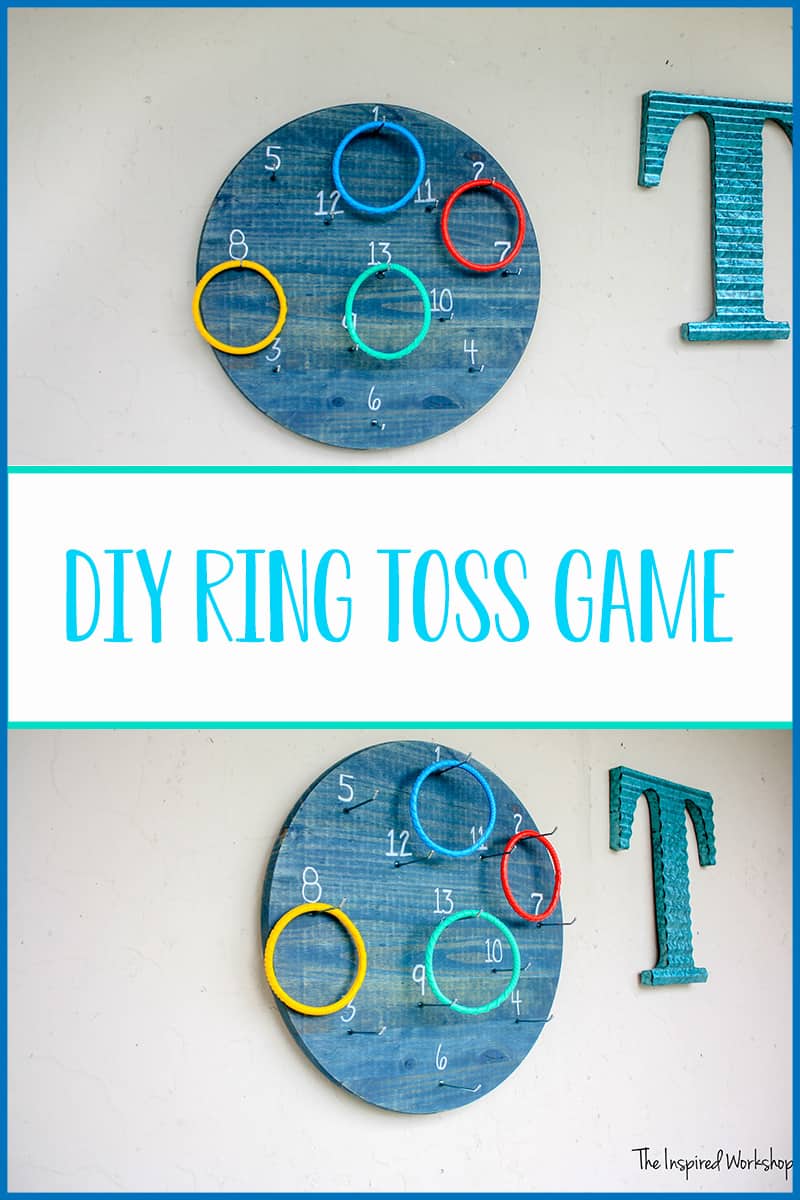
Hey, hey, hey!! I am happy to be partnering up with my blogging friends again to bring you DIY games this month for our DIY Challenge! I created this cute little DIY ring toss game that is a slight twist on the regular ring toss you know and love! You mount this one on the wall instead of throwing them on the ground! Check out my version!
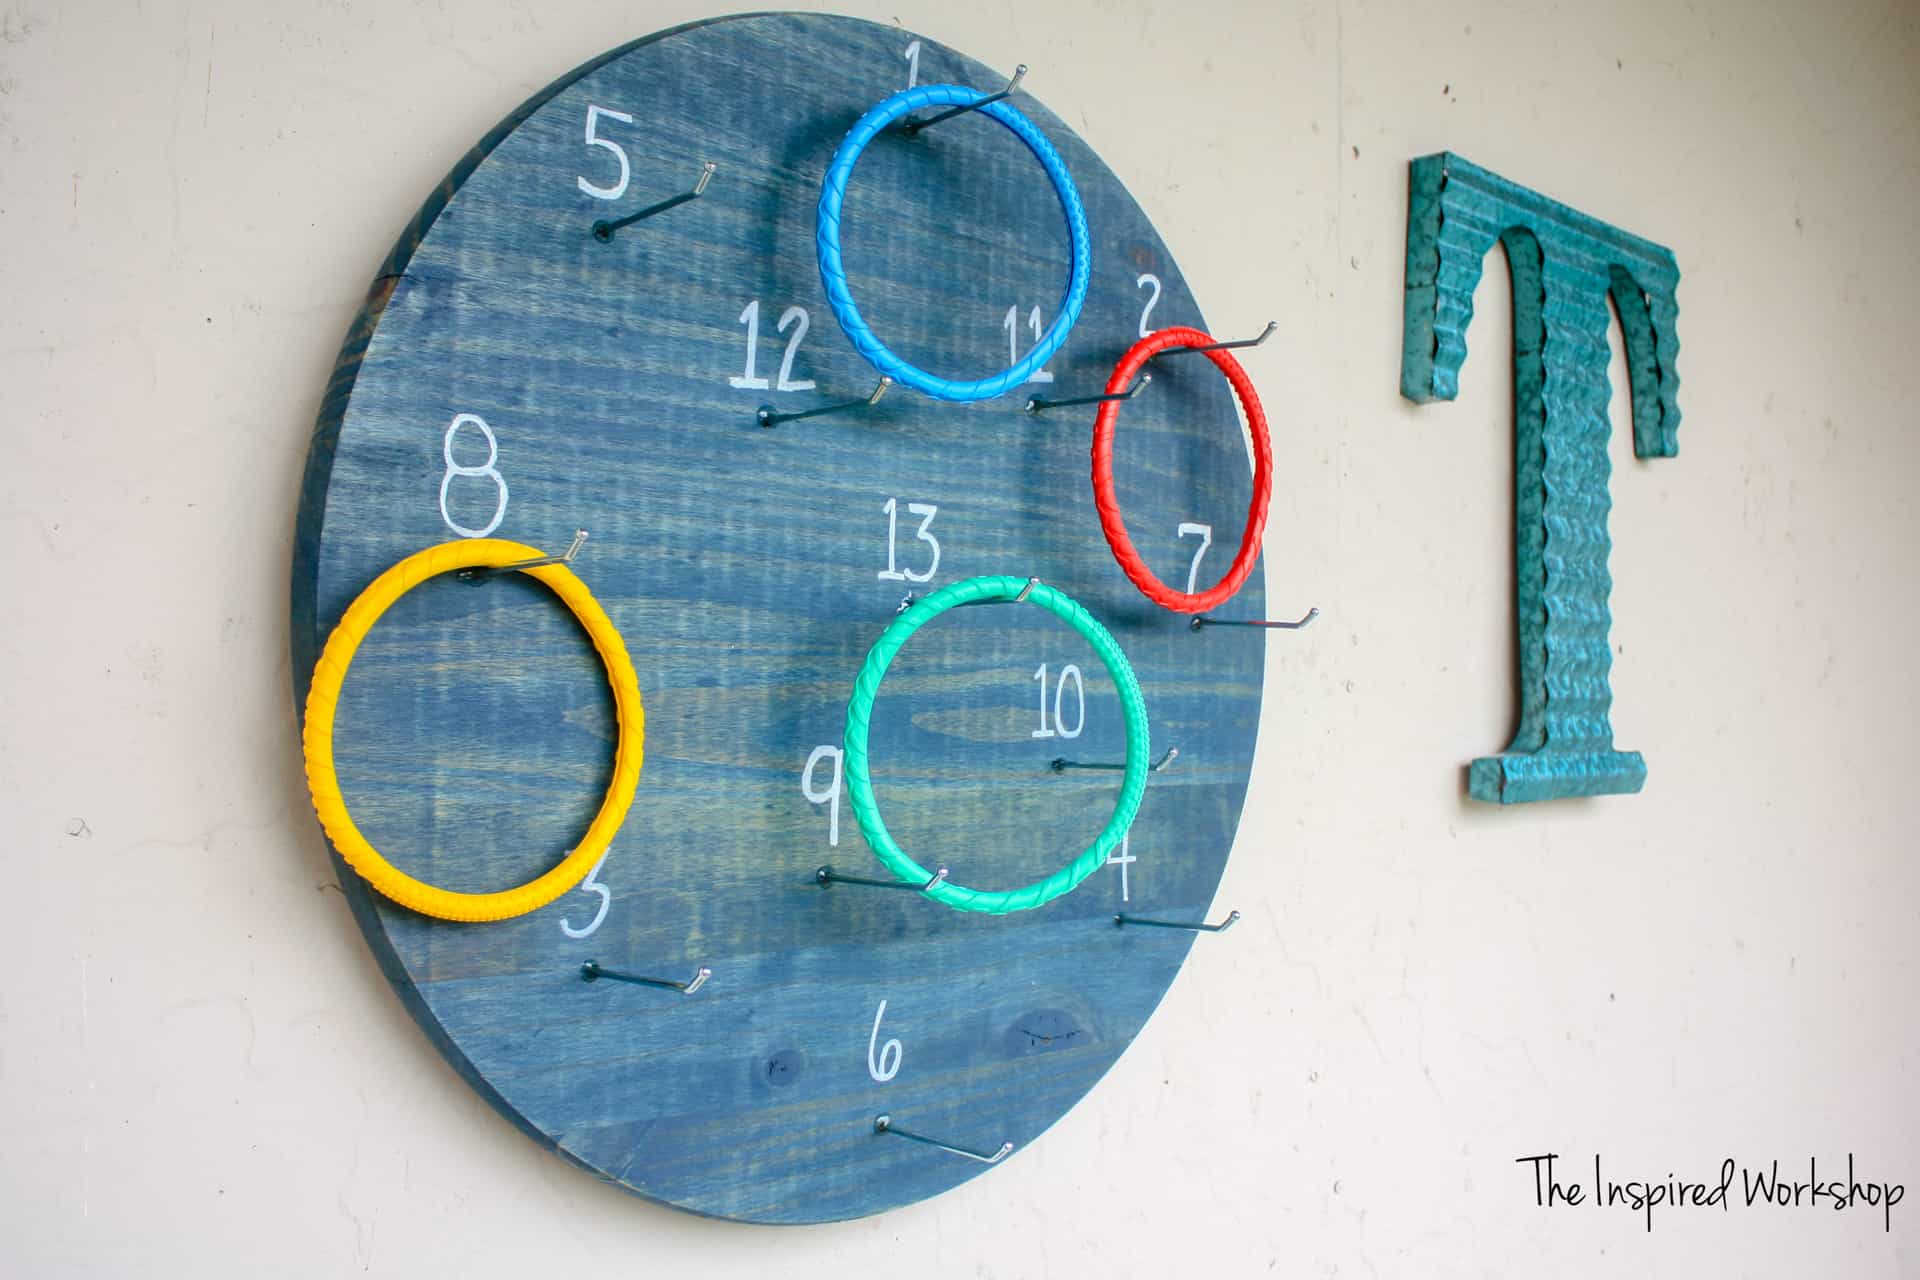
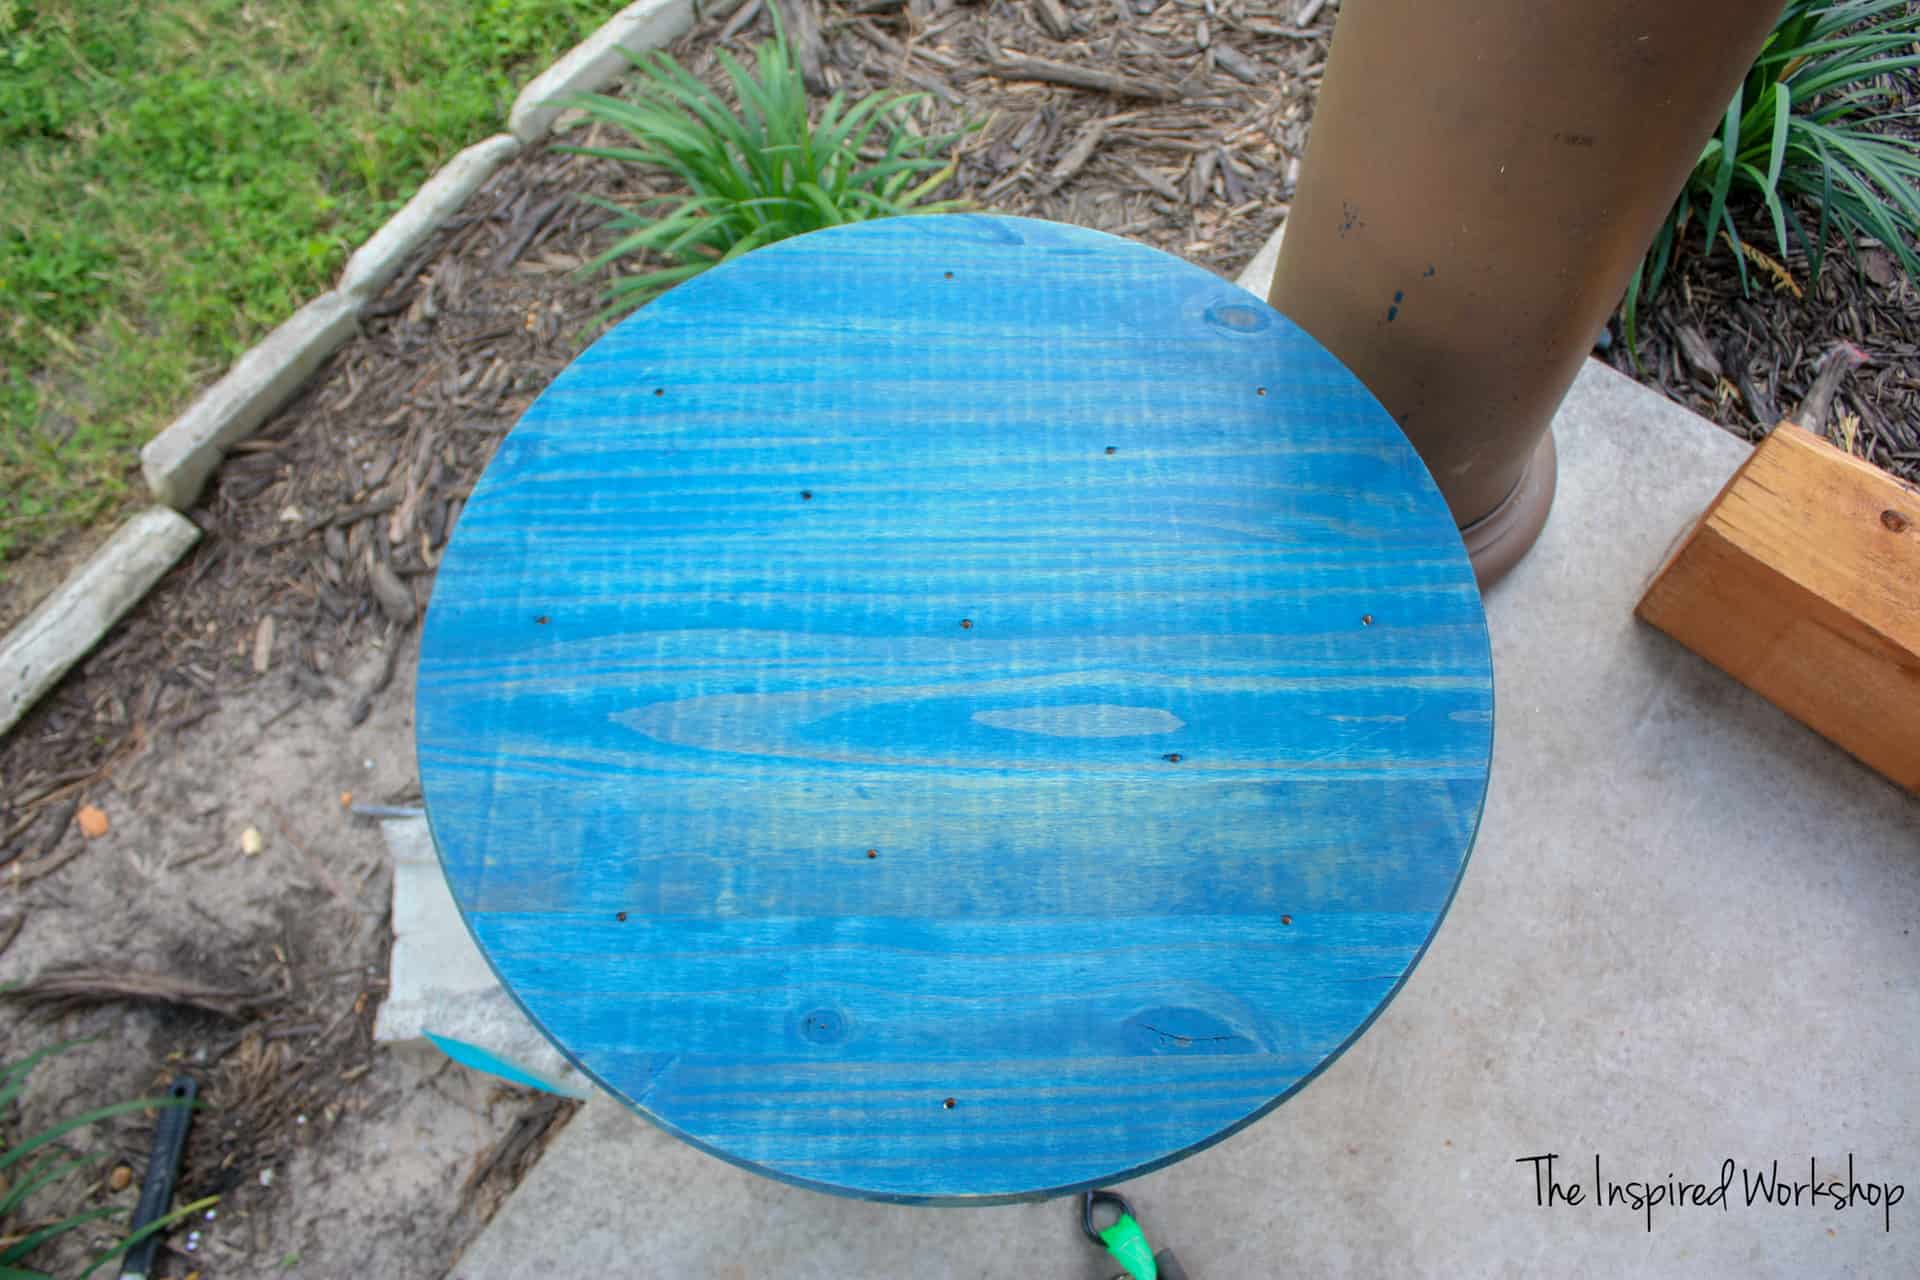
Cute right?! I love the navy stain…I have had it forever and never tried it, but after finding it recently I knew this was just the project for a fun color!
We have had a blast playing all different ways with it this weekend. I do plan on ordering some other rings! Lol! I had these on hand for the pool and so we used them, but I would not buy them for it..you can get much cheaper options on Amazon!
This was one of the EASIEST projects I have ever done! The circle was purchased for a table I was building, and then it split…so to the scrap pile it went! I realized it was perfect for this project even with its small flaw! So ordinarily I would not purchase this round because I could easily glue one up and cut a circle with my router, but since I already had it, I was using it! Lol!
You know, Mother’s Day is just around the corner and you can make one to hang in the backyard and entertain the kids while mom is enjoying her brunch or breakfast in bed! The great thing is, it is similar to darts which my kiddos love, but I don’t have to worry about them stabbing one another… “on accident” of course!😂🤣🙄
Update on Selling DIY Ring Toss Games at Market Days
Alright, I have had several people ask about making these for selling at craft fairs and local market days, and I happen to have a little information to share since we’ve tried it!😊
My kiddos spent a week working to make some of these to sell at a local Market Days, luckily we found ways to make the cost slightly cheaper than when I originally made the one for this post! We even made our own rings to make them more cost-effective! I just wanted to share the changes we made in case you are interested in making them as gifts or even to sell as we did!
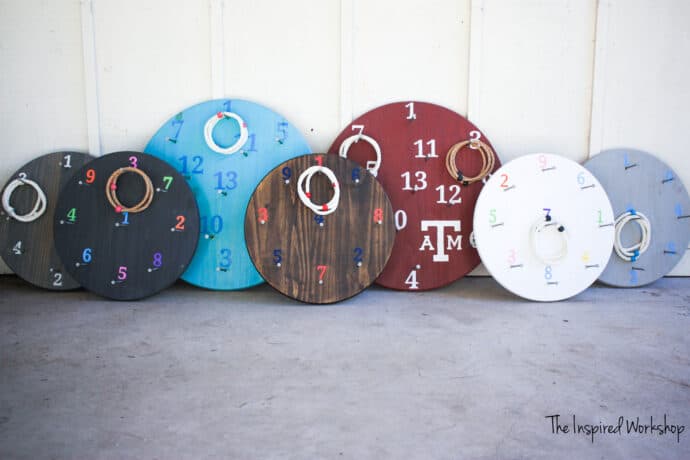
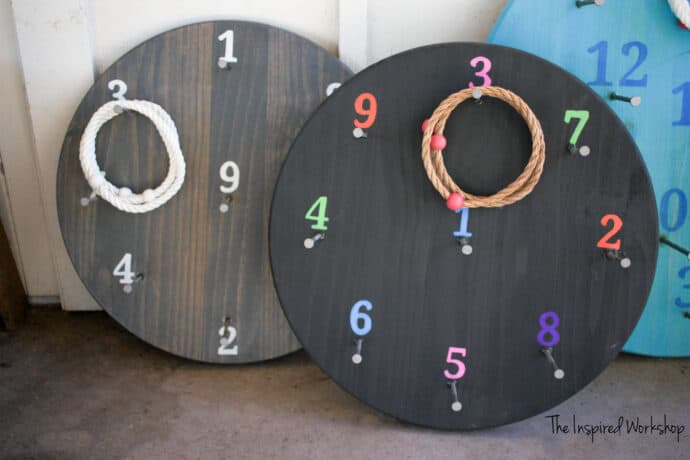
I wish I would have taken a photo at the beginning so you could have seen all of them together! We sold a Texas Flag painted, a UT Longhorns, a Weathered stained one with white numbers, a Dallas Cowboys themed one, navy blue with turquoise numbers, turquoise with yellow and white numbers, and I cannot remember the others! Oy!
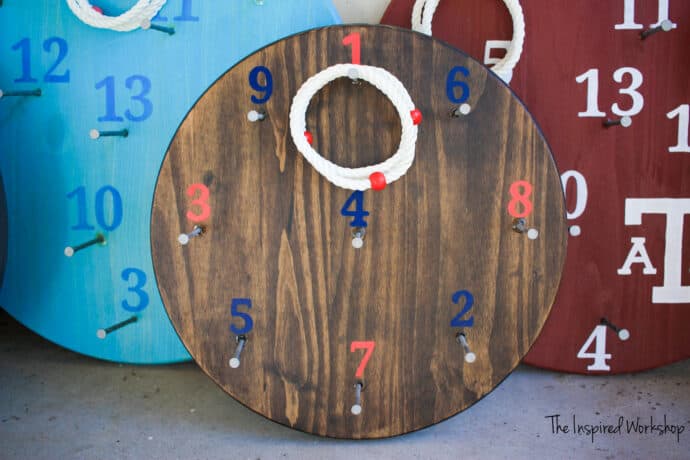
So the changes we made to bring the cost down were, we changed out the peg board hooks for roofing nails…this significantly brought the cost down on these as opposed to the one I made, and then we stenciled the numbers to make them look so much better than the hand-drawn ones!
Also, we made our own rings instead of using the pool rings because even on Amazon, the rings were no cheaper than 5 bucks for 4! That does not make you money at a market day for sure! Lol!
How we did at the Market Days
We made 19 ring toss games in total, the market days were a complete flop in the sense that we were told that they usually have about 1600 visitors over the weekend, but yet they MAYBE had 200! Lol! It was disappointing, to say the least for the boys, but they still made it out alright selling all but 3 large ring toss games (they gave one away to a friend for his Birthday) and selling 2 of the small ones! Made back their money and made a little to spend! Plus they still have these that I am going to list on FaceBook Market Place for them!
All-in-all I think it was a pretty good item to sell at Market Days, had this have been as big as she said it was going to be, we would have sold out no doubt!
The large ones definitely sold better than the small ones, understandably! The large ones sold quickly at $40 and the small for $30. We originally started them at 45 and 35 but they weren’t moving very fast, and we realized real quick there would not be as many people as we were told… and we didn’t want to take them all home with us! Lol!
We were able to get the cost to build the large ones down to 14 dollars each, and the cost to build the small ones was, I think, 10 dollars! That included 6 rings for each ring toss game! That wasn’t including buying any stain or paint though because we had it all on hand!
I have a quick tutorial to make some rings for your ring toss game – DIY RING TOSS RINGS
Are you ready to make yourself one, one for a gift, or 20 for market days?! No matter what, or who you want to make one for, I have ya covered!
Gathering Supplies for Ring Toss Game
*NOTE: Amazon links below are affiliate links! Making a purchase after clicking an affiliate link pays me a small percentage at no extra cost to you! I always appreciate it, but never expect it! 😉
Materials to make your DIY Ring Toss Game:
-1 – 24″ wood round – I purchased mine at Home Depot, go in store to buy it though because online they show it to cost 21 bucks but they are only 9.89 in store! You can make your own with a 1x6x10 and glue them up and cut a 24″ circle, but it is too easy to just grab one for 10 bucks!
-13 – straight pegboard hooks (This package on Amazon was the same price for 25 as I paid in store for 13! You will have enough you can make one for a friend as well!)
UPDATED: We changed out the pegboard hooks to these 6″ timber ties to save money! Again, buy them in store though because they have a 1lb or 5lb box in addition to the options listed online! Also, just a note, we cut them down to 4″ length. You could just buy 4″ 20d nails and not have to cut them down, they are almost the same size and everything!
– Epoxy
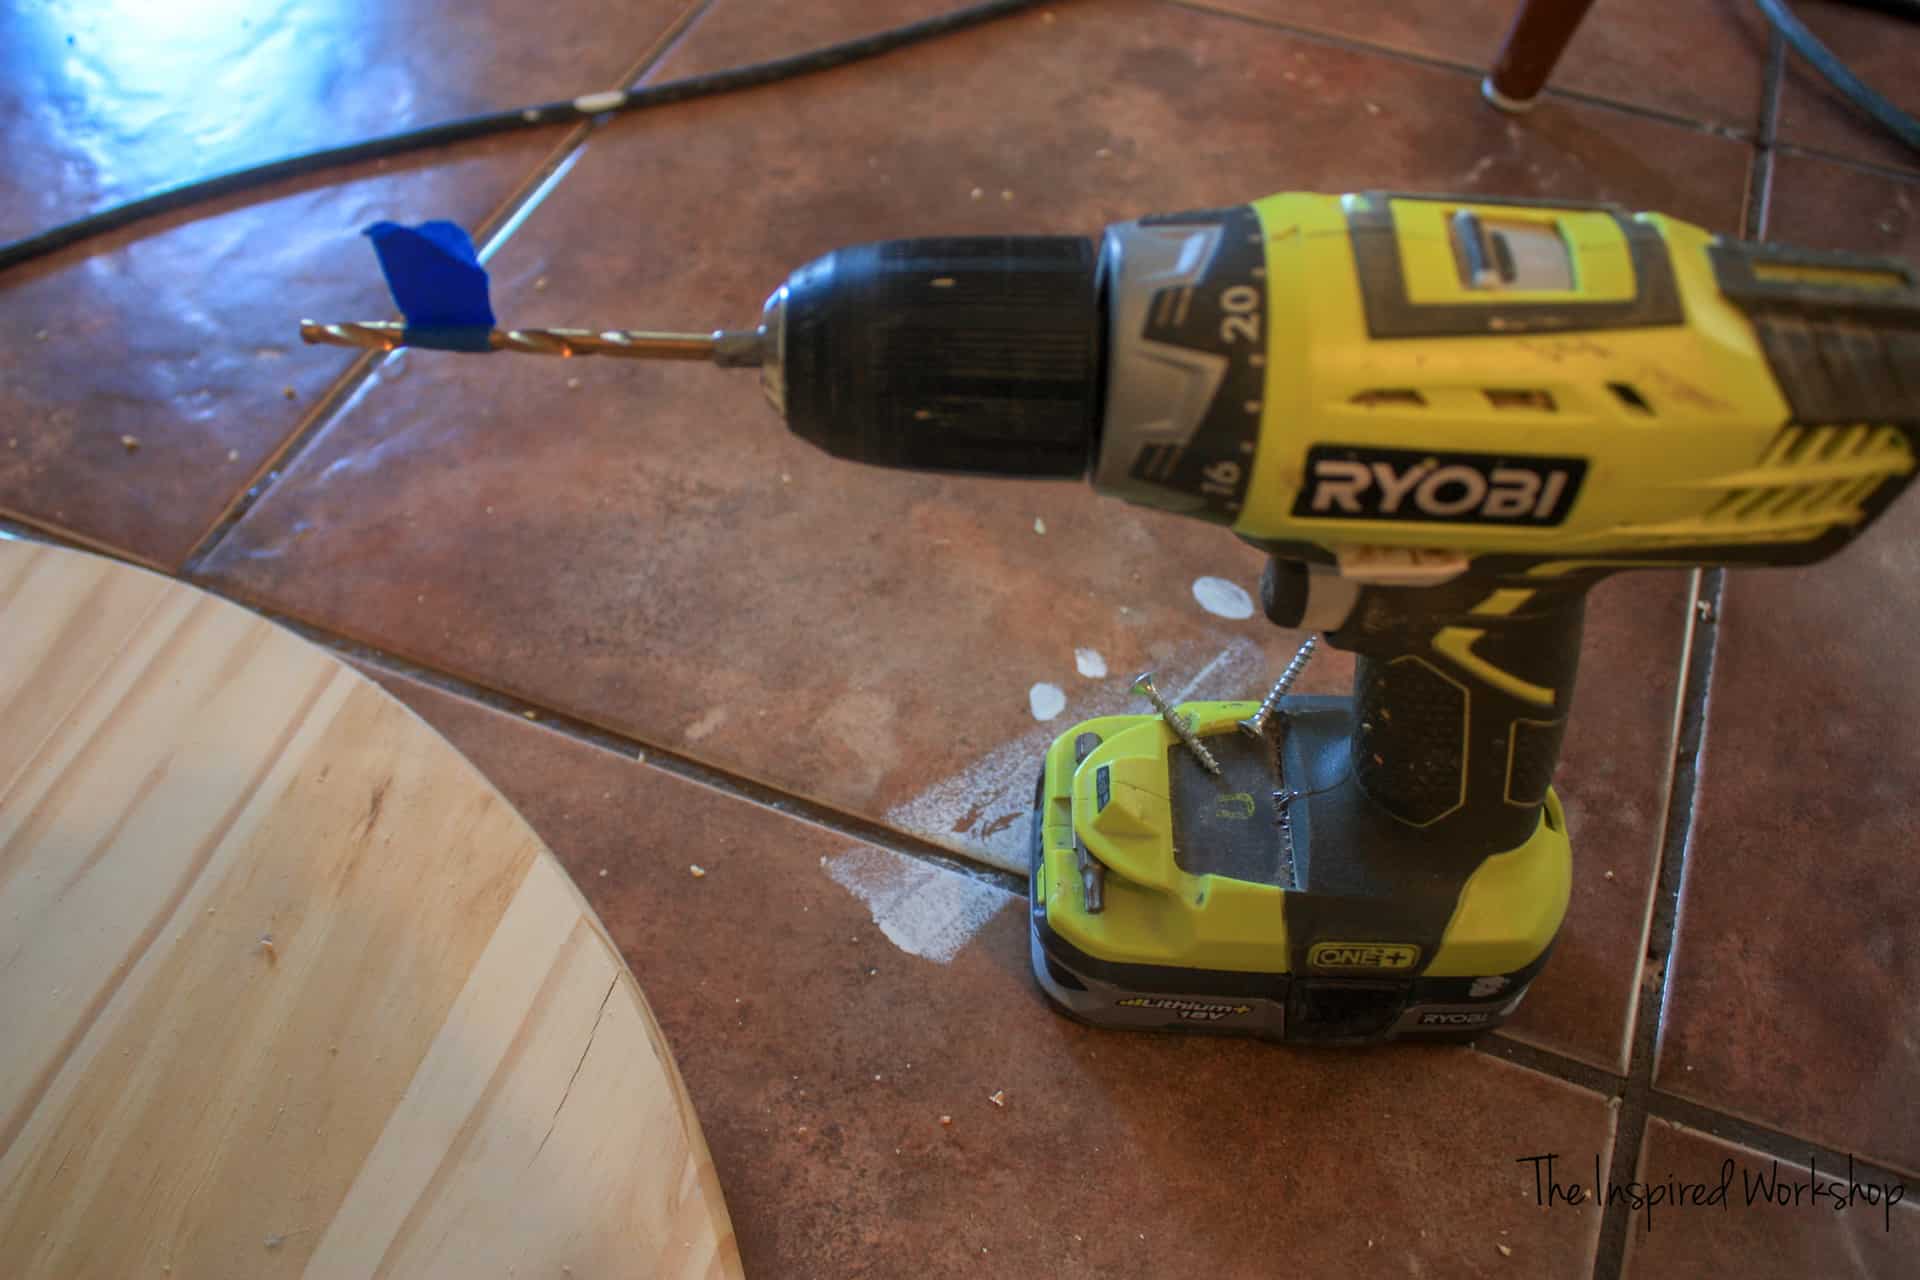
– Angle grinder or Dremel tool to remove peg hooks – we had to use an angle grinder to cut the nails as well!
-Drill and 1/4″ drill bit
-paint or stain of your choice!
–number stencils – if you want to make your numbers look pretty!
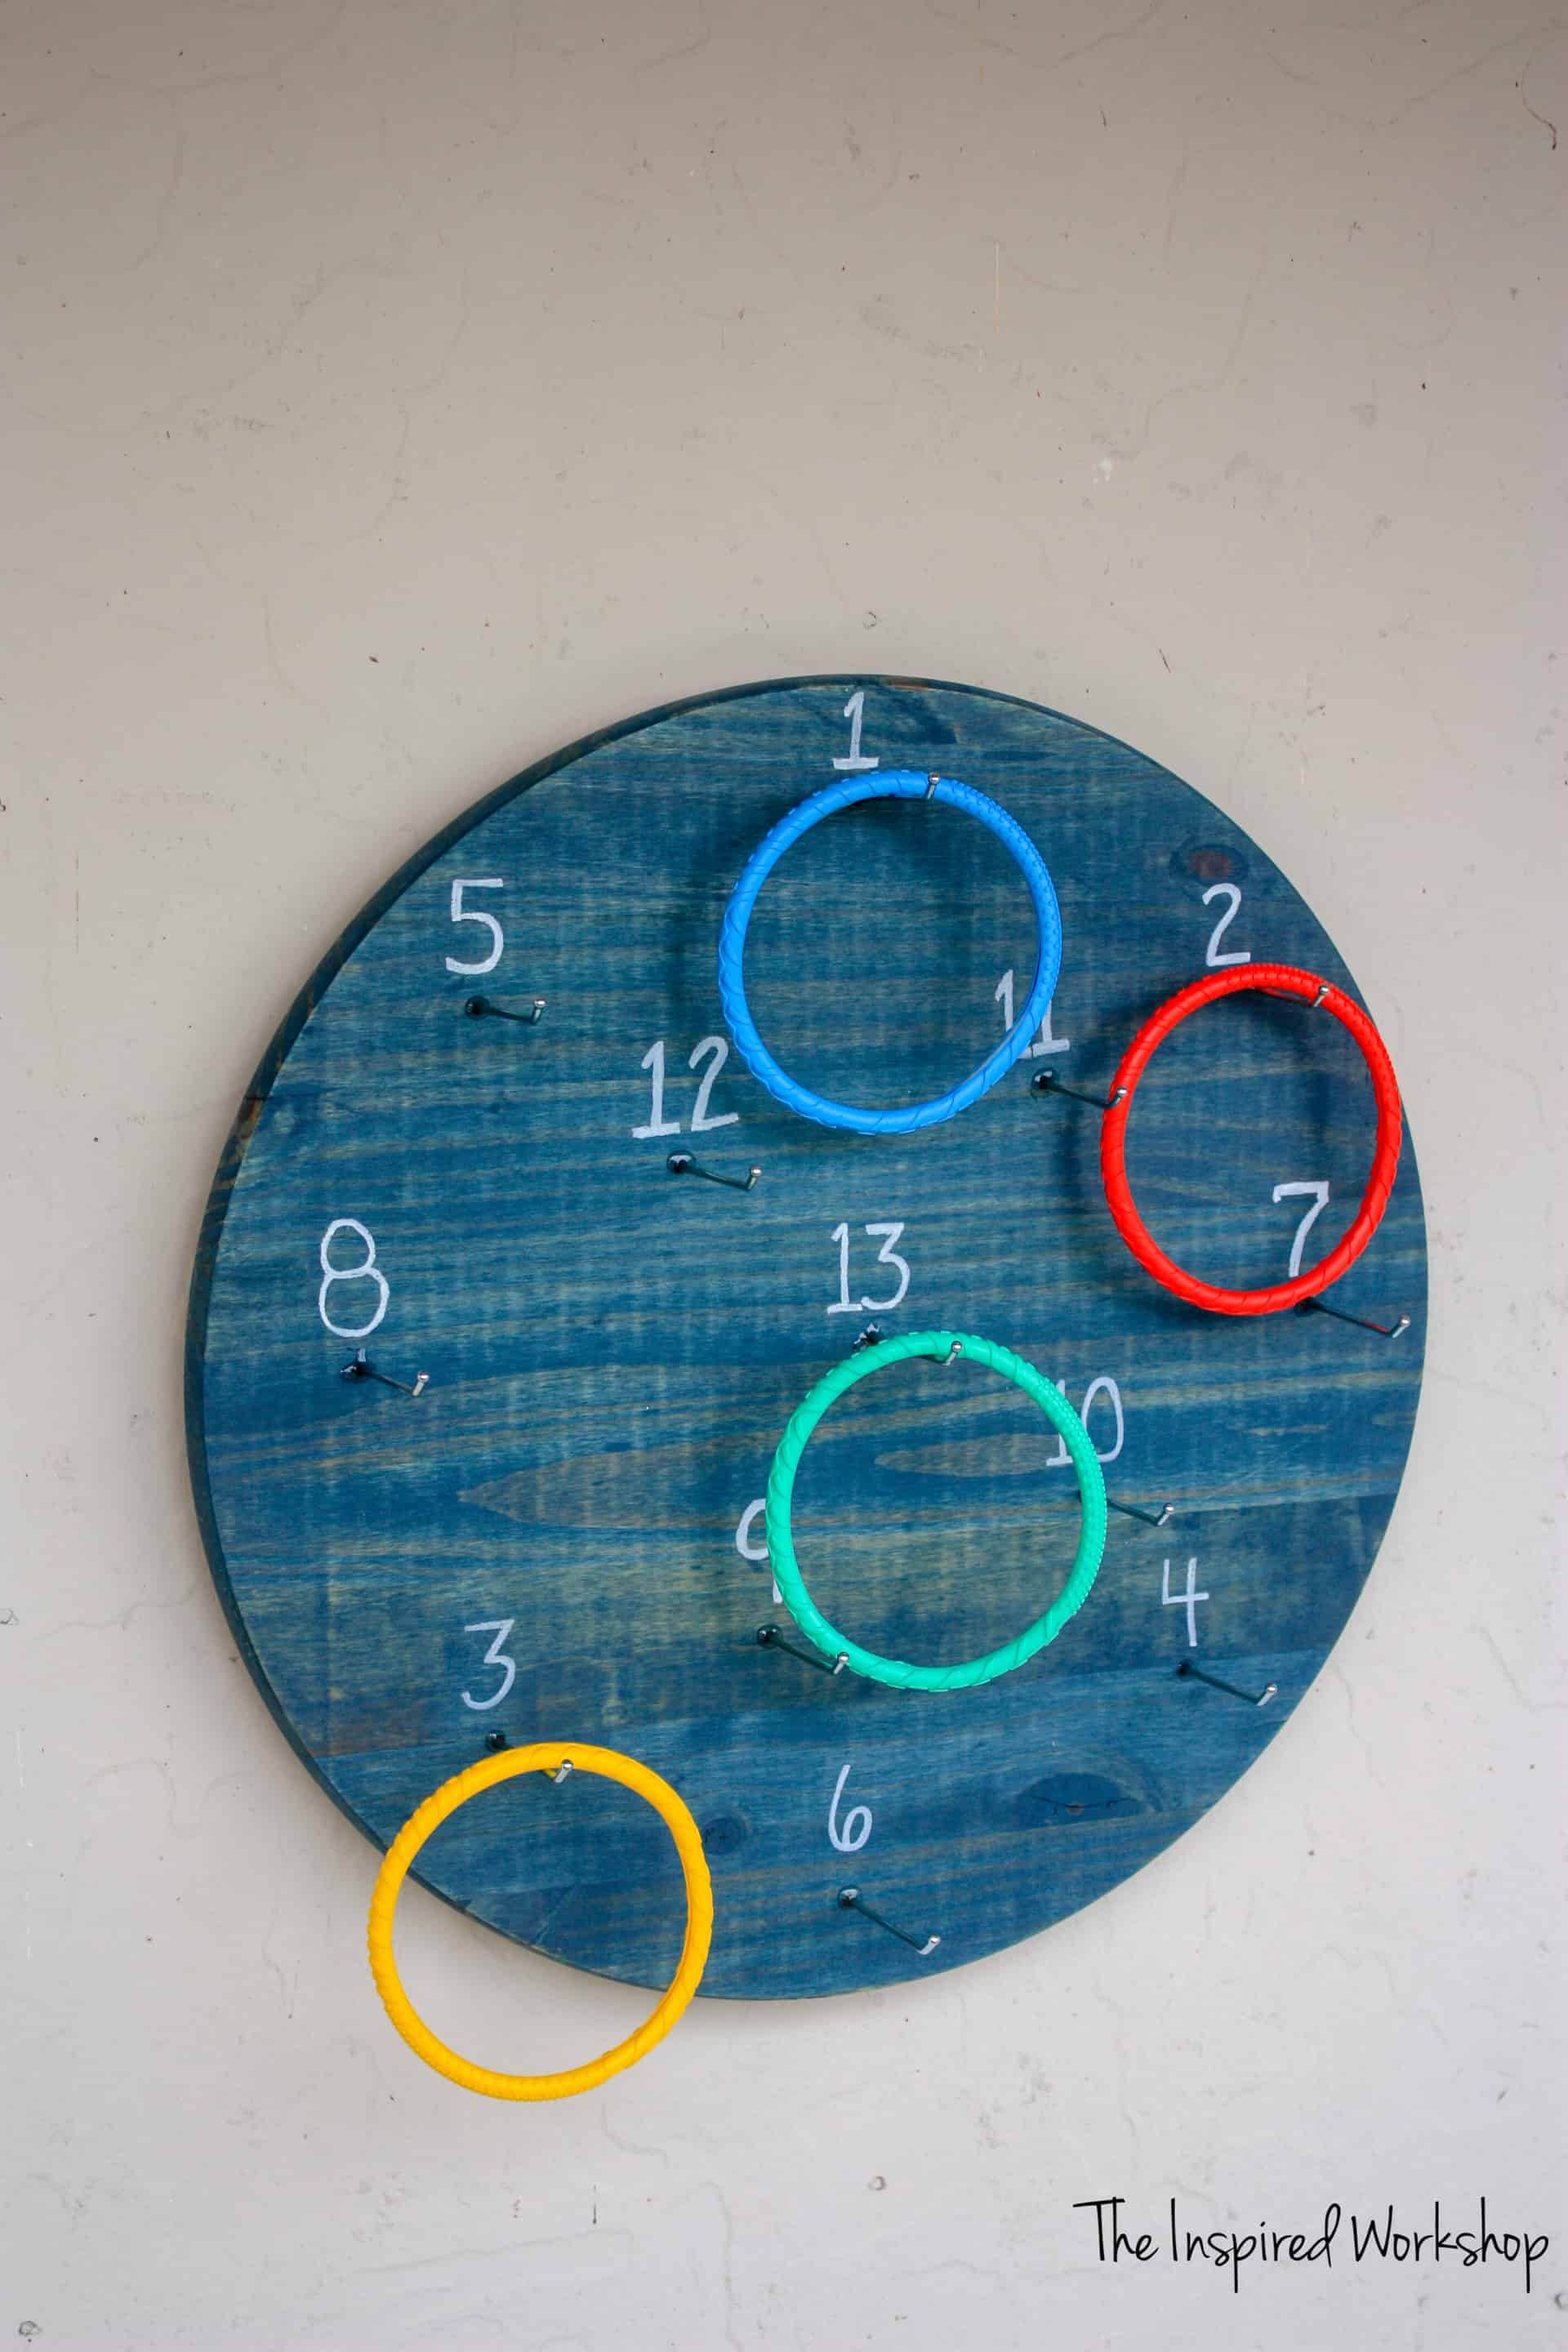
–Rings of some sort – you can even make some out of rope or plastic tubing you have laying around the house. I created this post after making inexpensive rings for the market days!
Cut List:
-4 – 1×6 @ 24″ **if you want to make your own circle
-1 – 1×6 @ 12″ – scrap piece of wood to make french cleat hanger, or you can just purchase a sawtooth hanger
Making the DIY Ring Toss Game
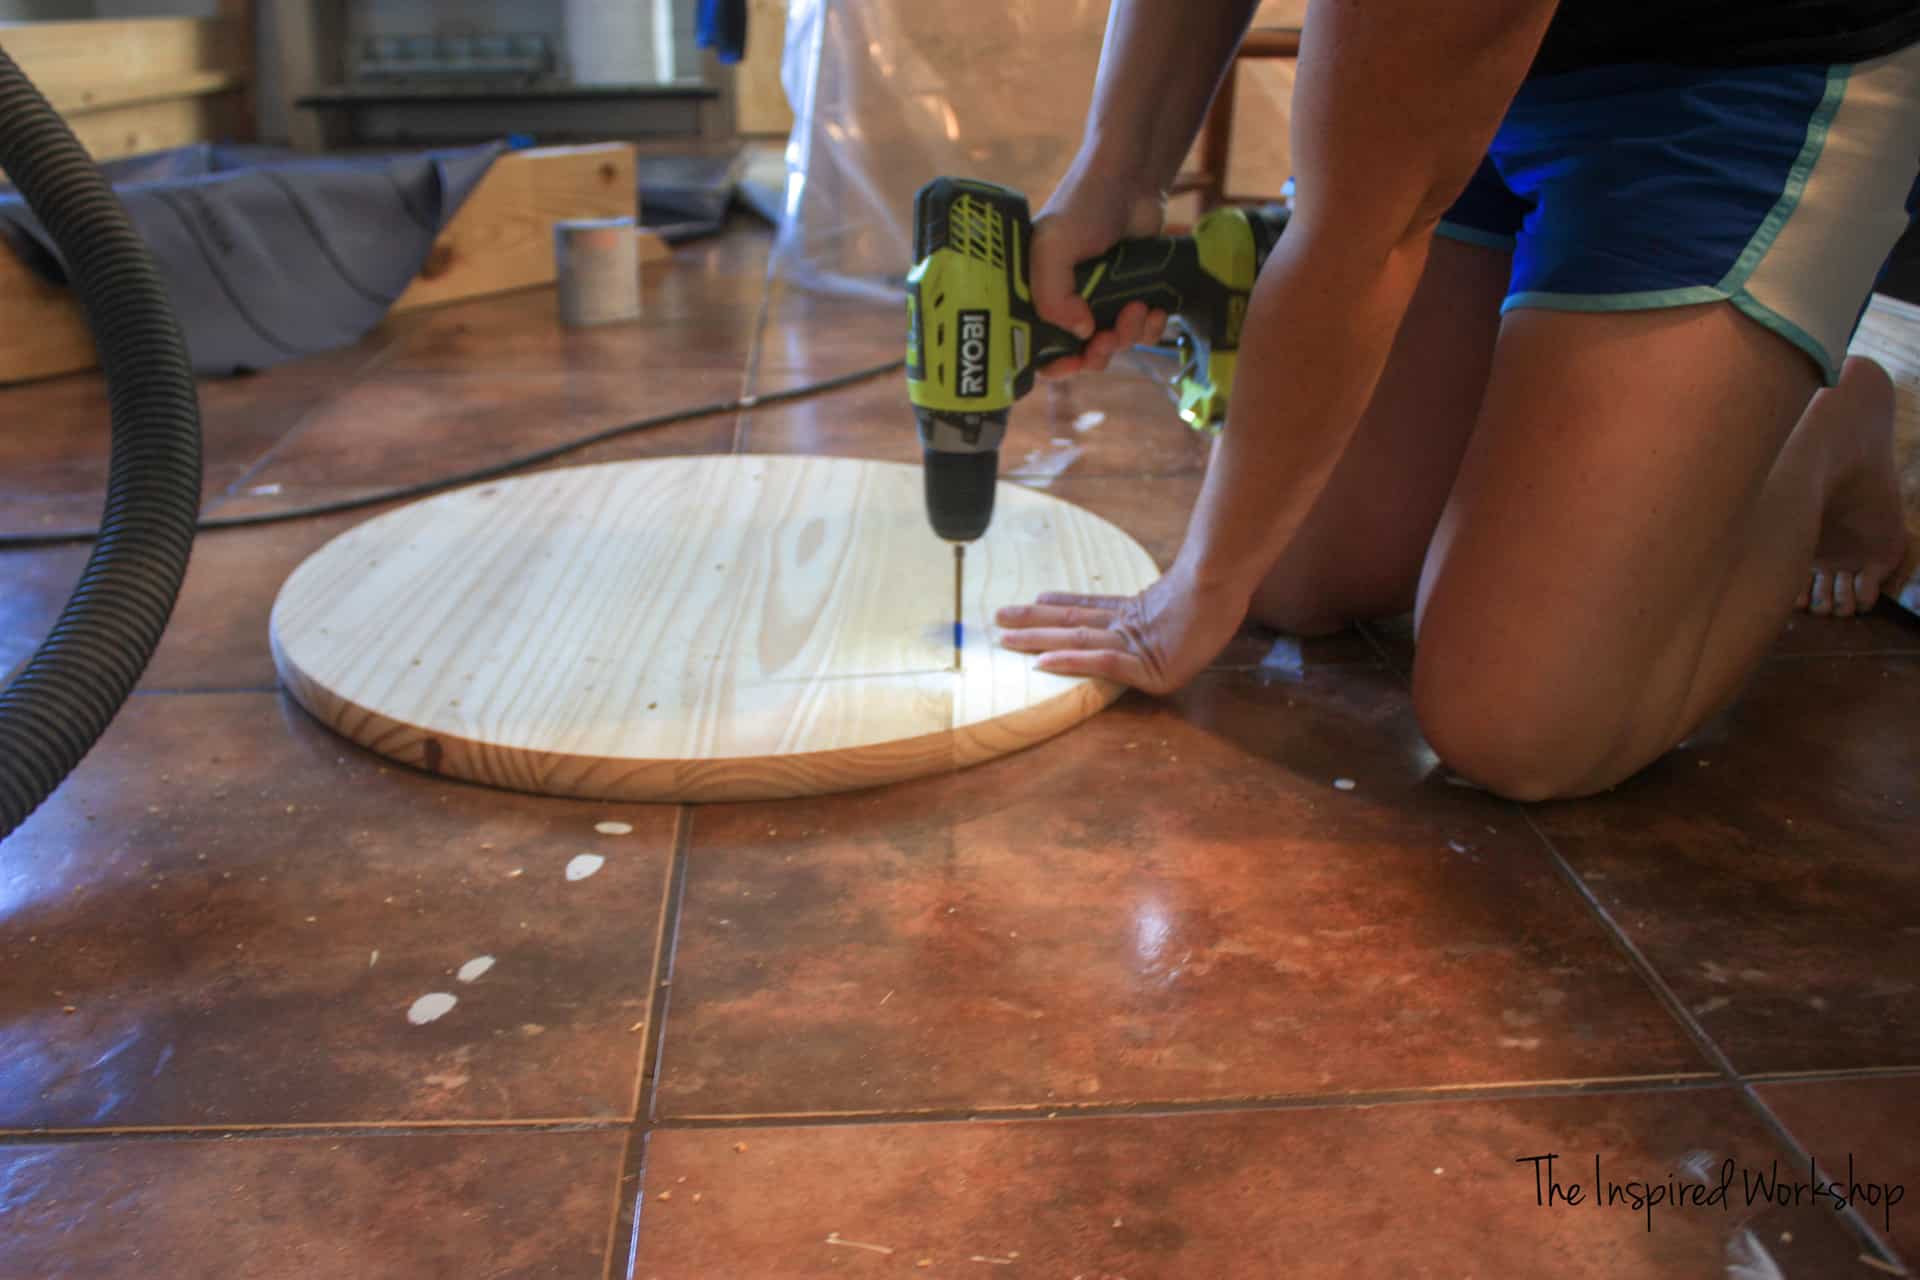
Since I used the wooden round, I just had to drill holes, stain the board, write the number, epoxy the peg hooks in…and boom start playing! It’s that EASY!! If you are making your own round, you will just need to glue up the boards and then use a jigsaw or router to cut a circle from the boards you glued up!
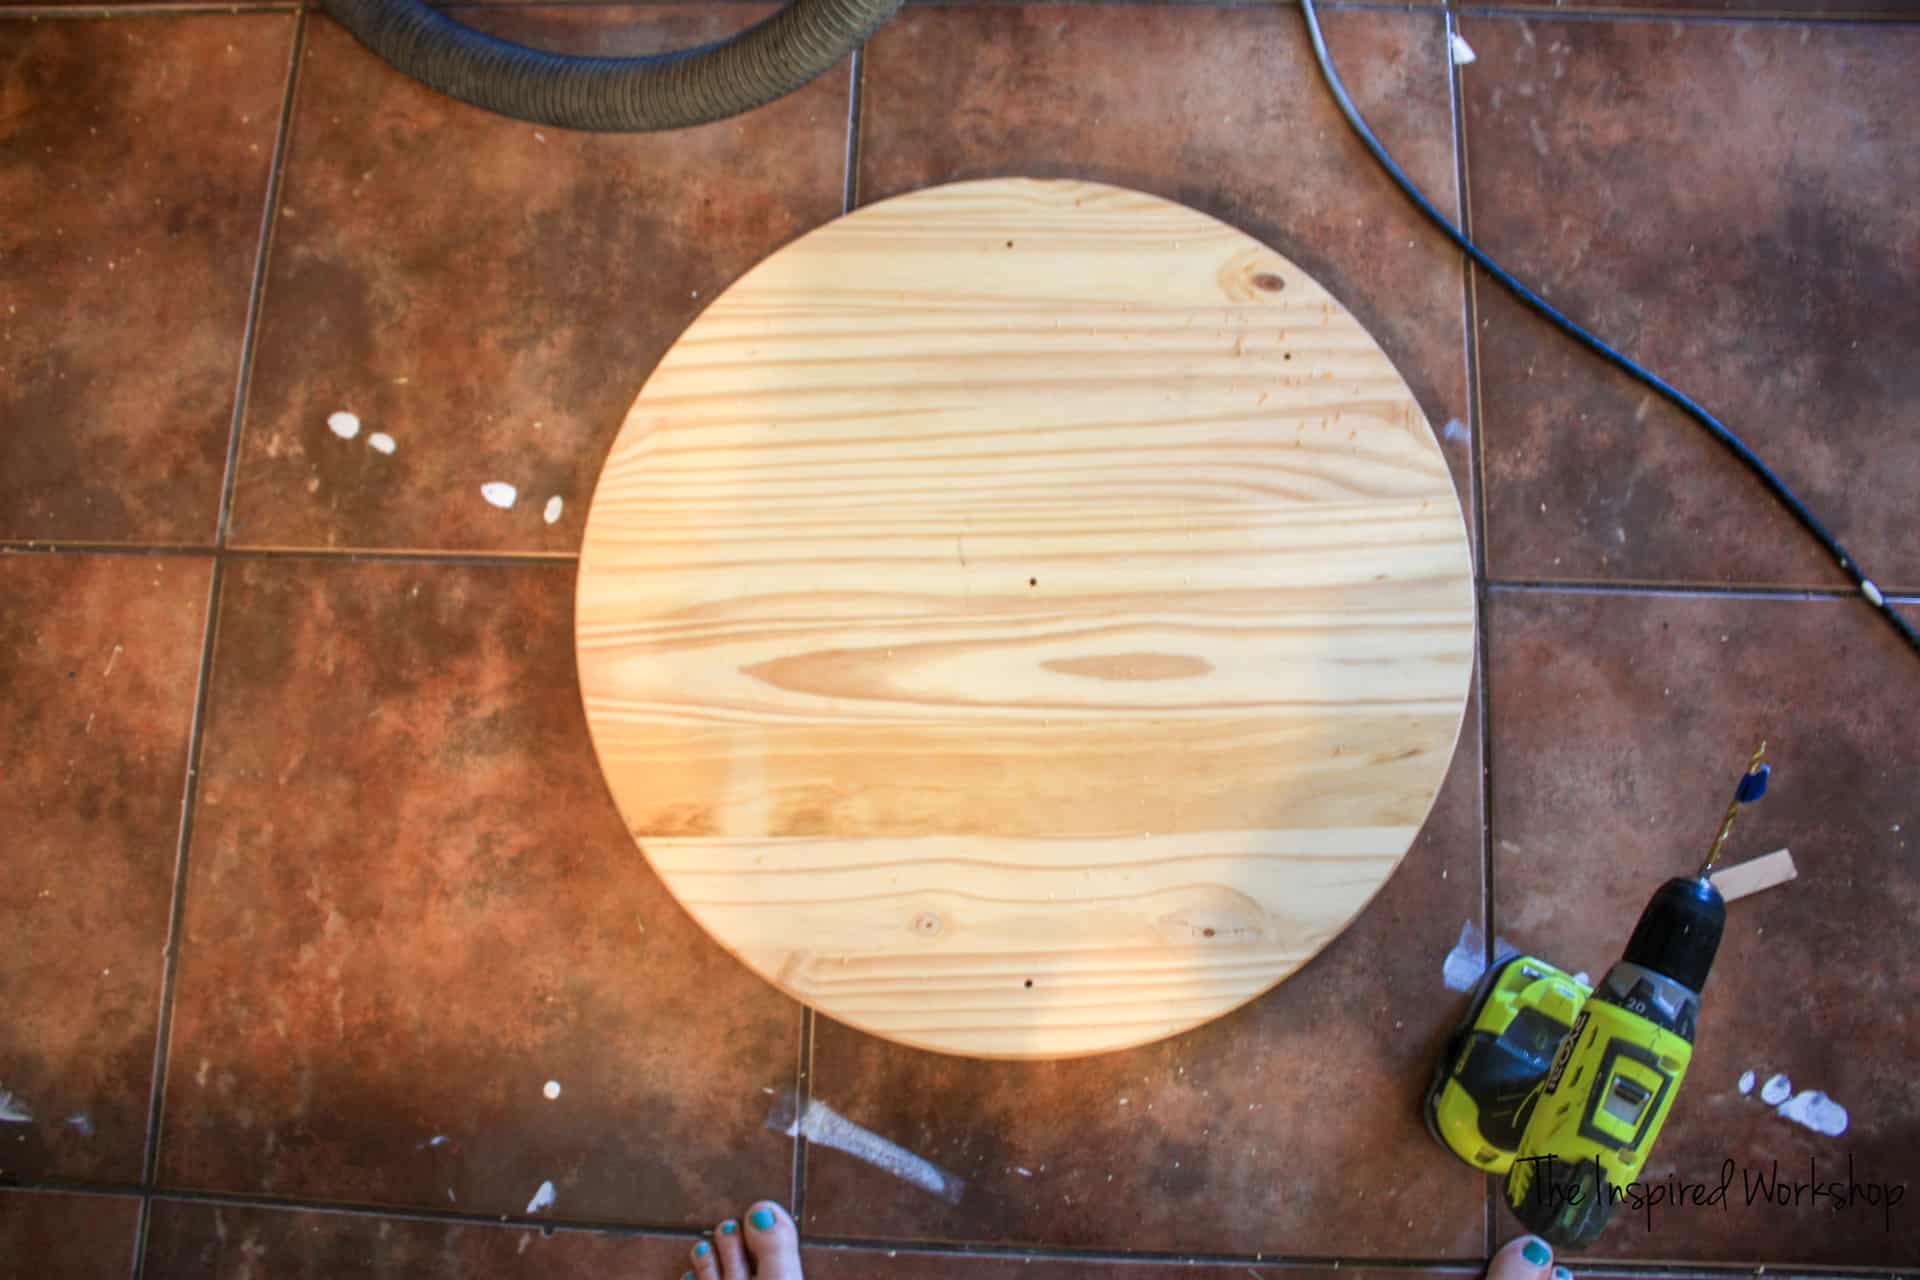
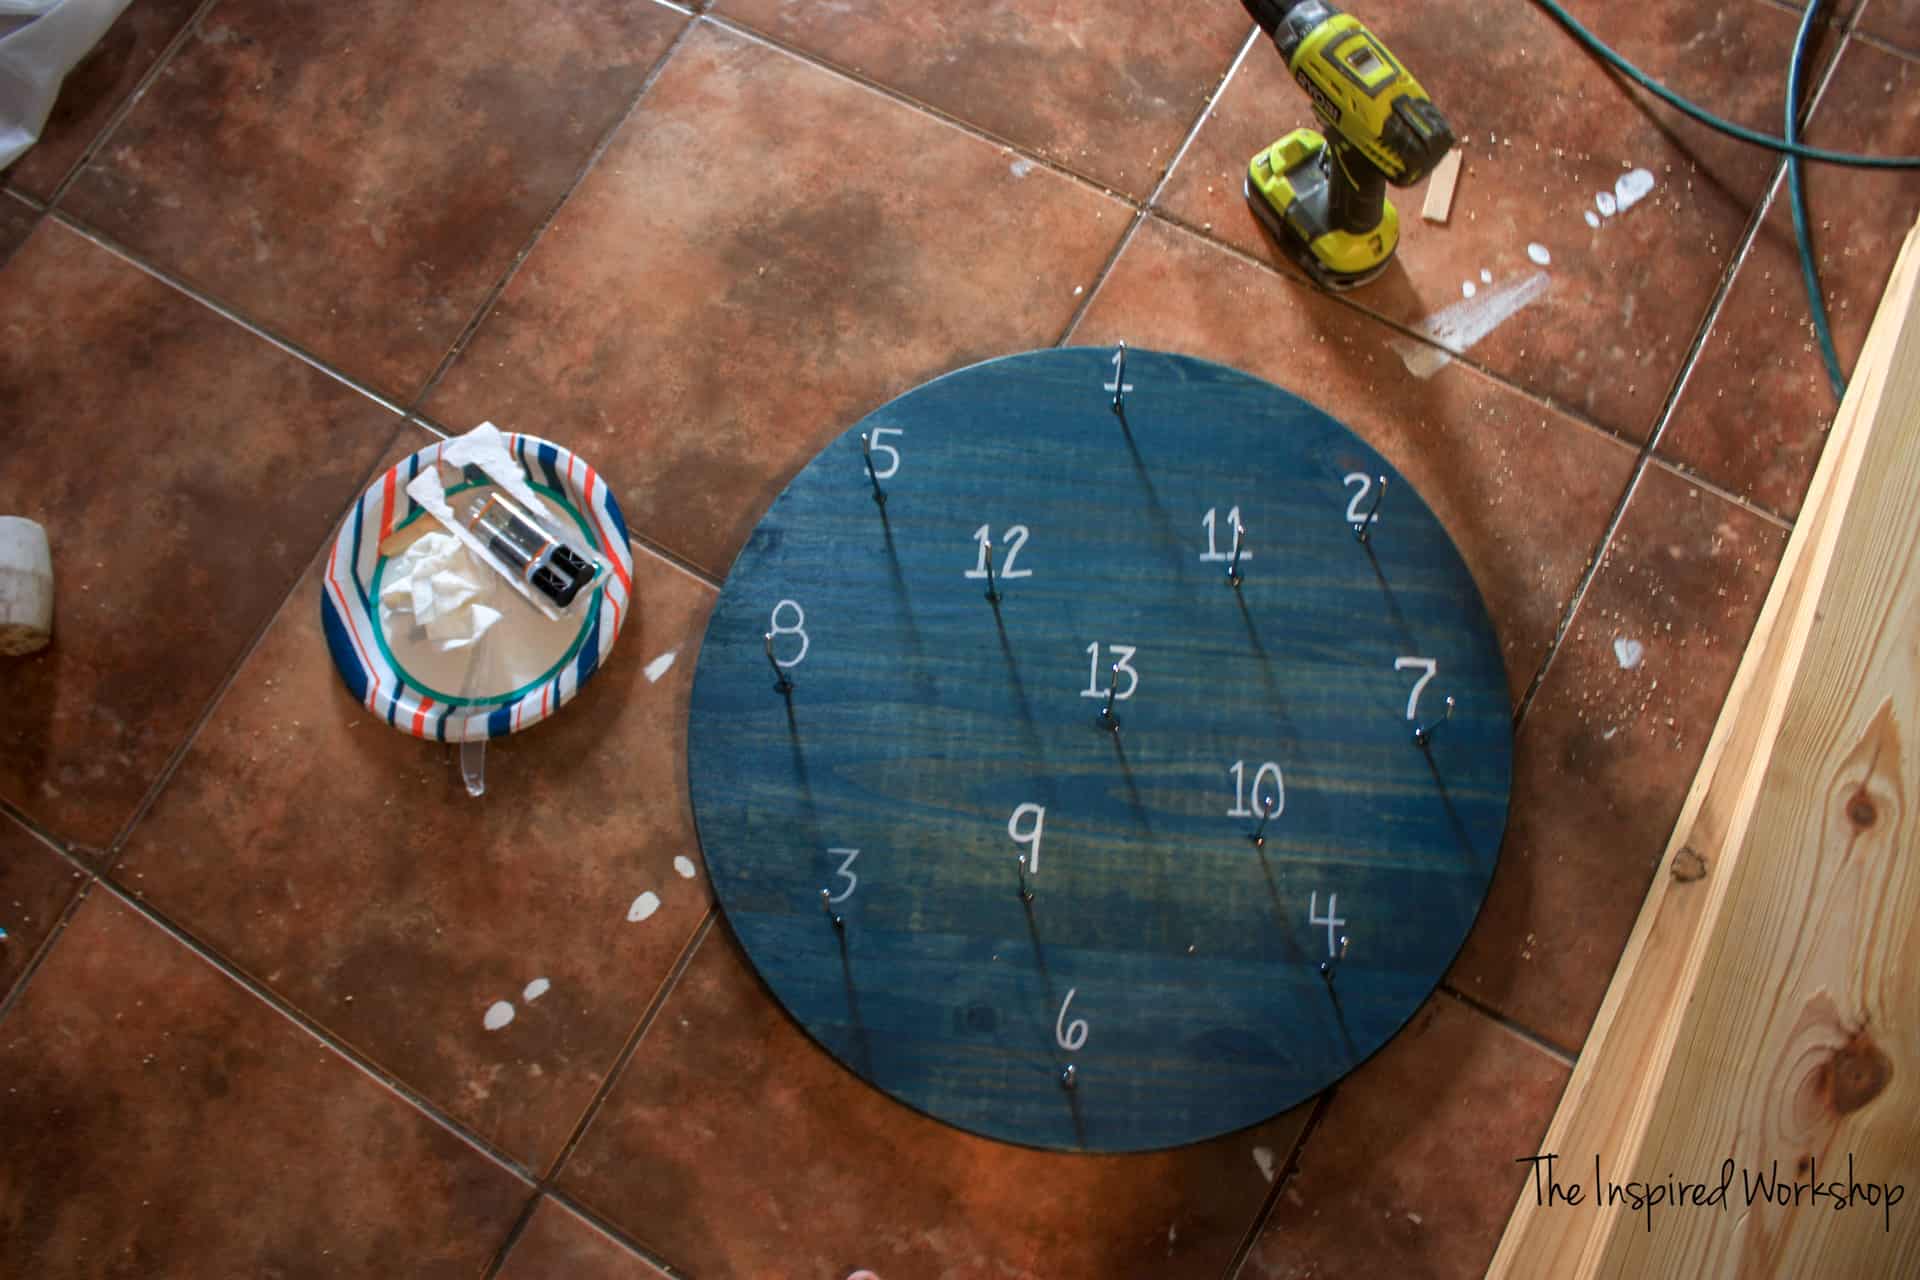
I drilled my holes pretty randomly and didn’t go all the way through the wood. I wanted the epoxy to have a little pocket to fill instead of running out of the back! I used a piece of painter’s tape as a guide to keep me from drilling too deep!
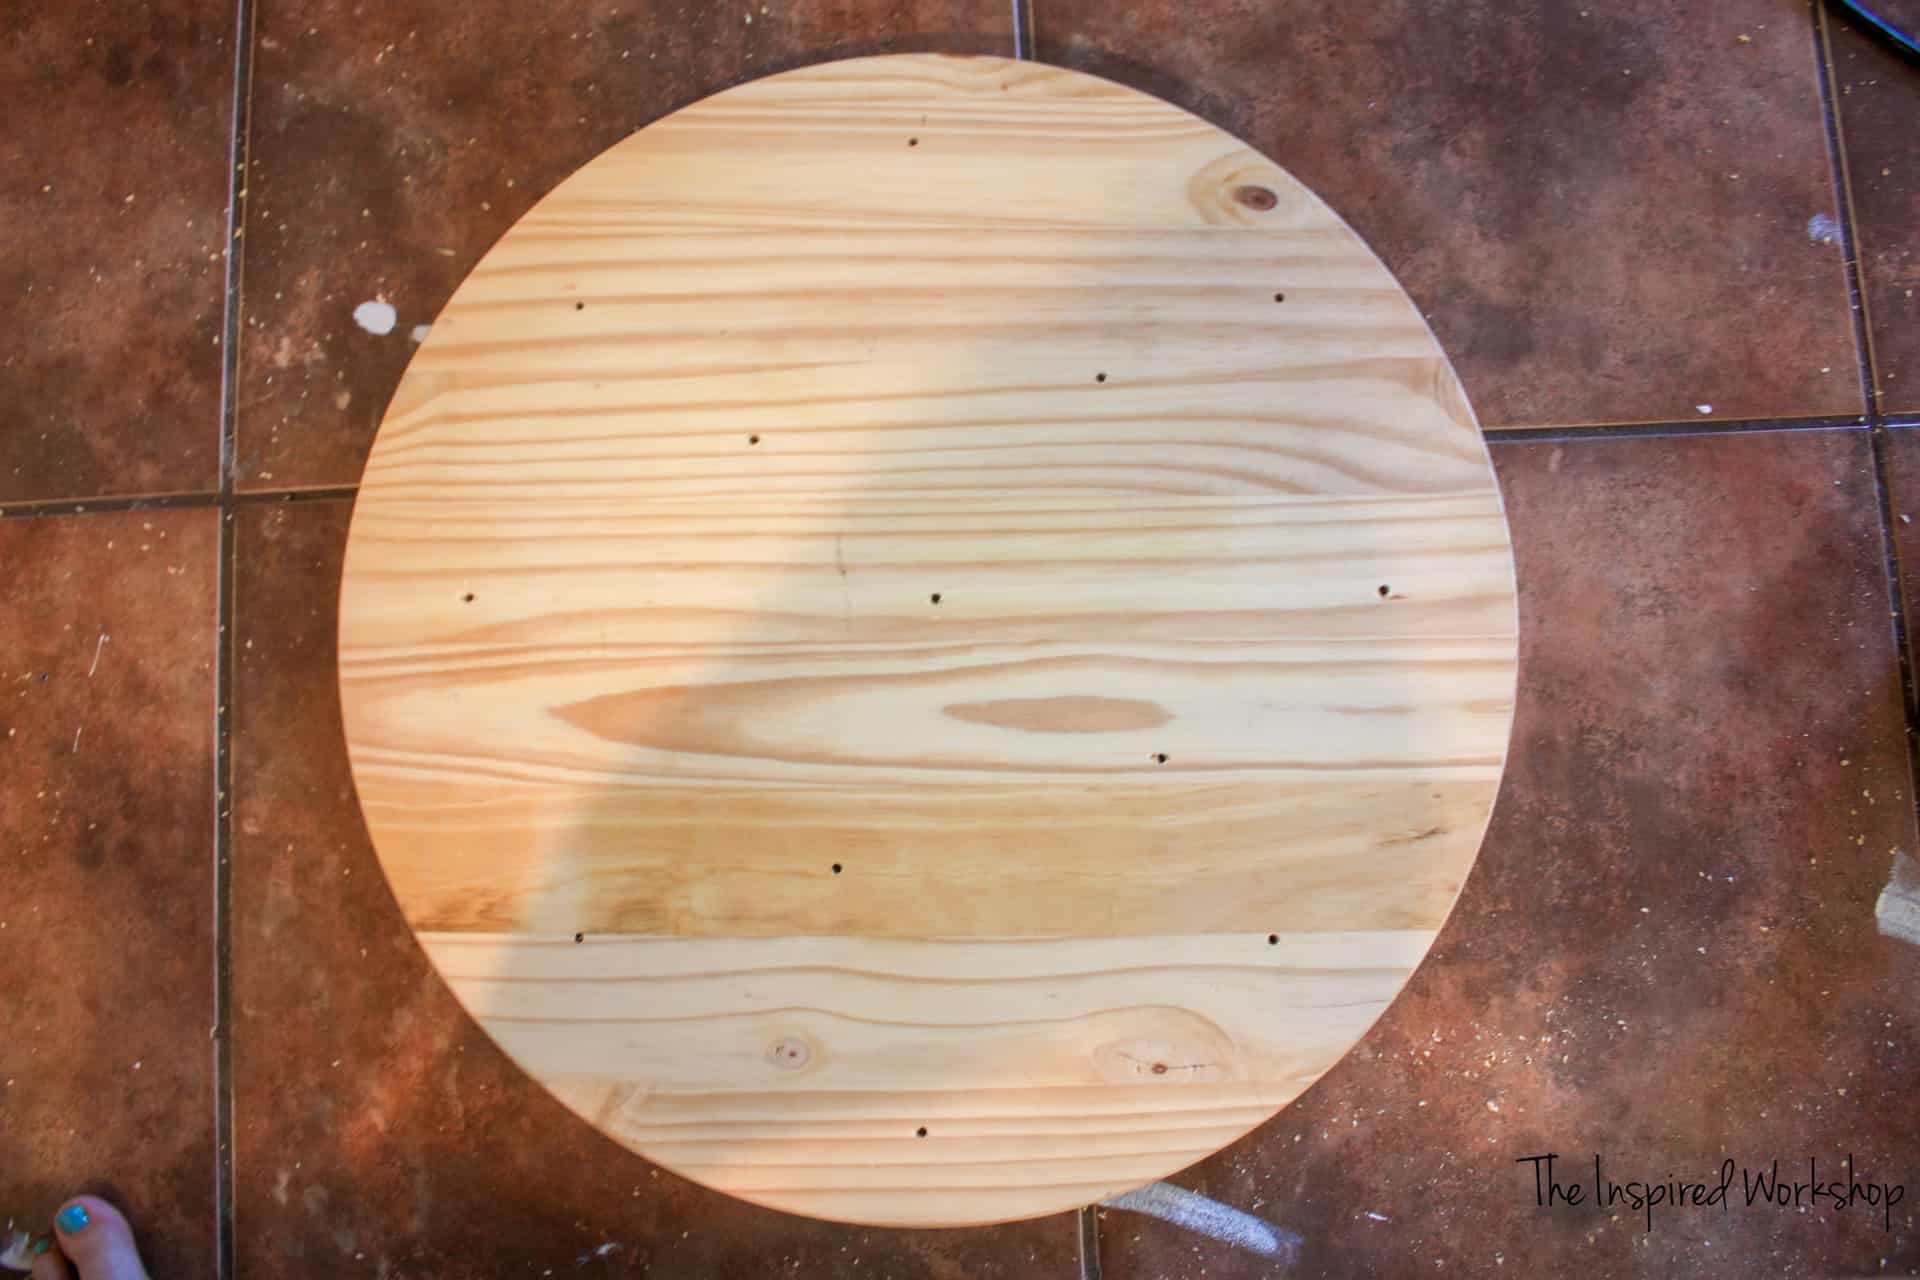
After drilling the holes, I stained the board before adding the hooks.
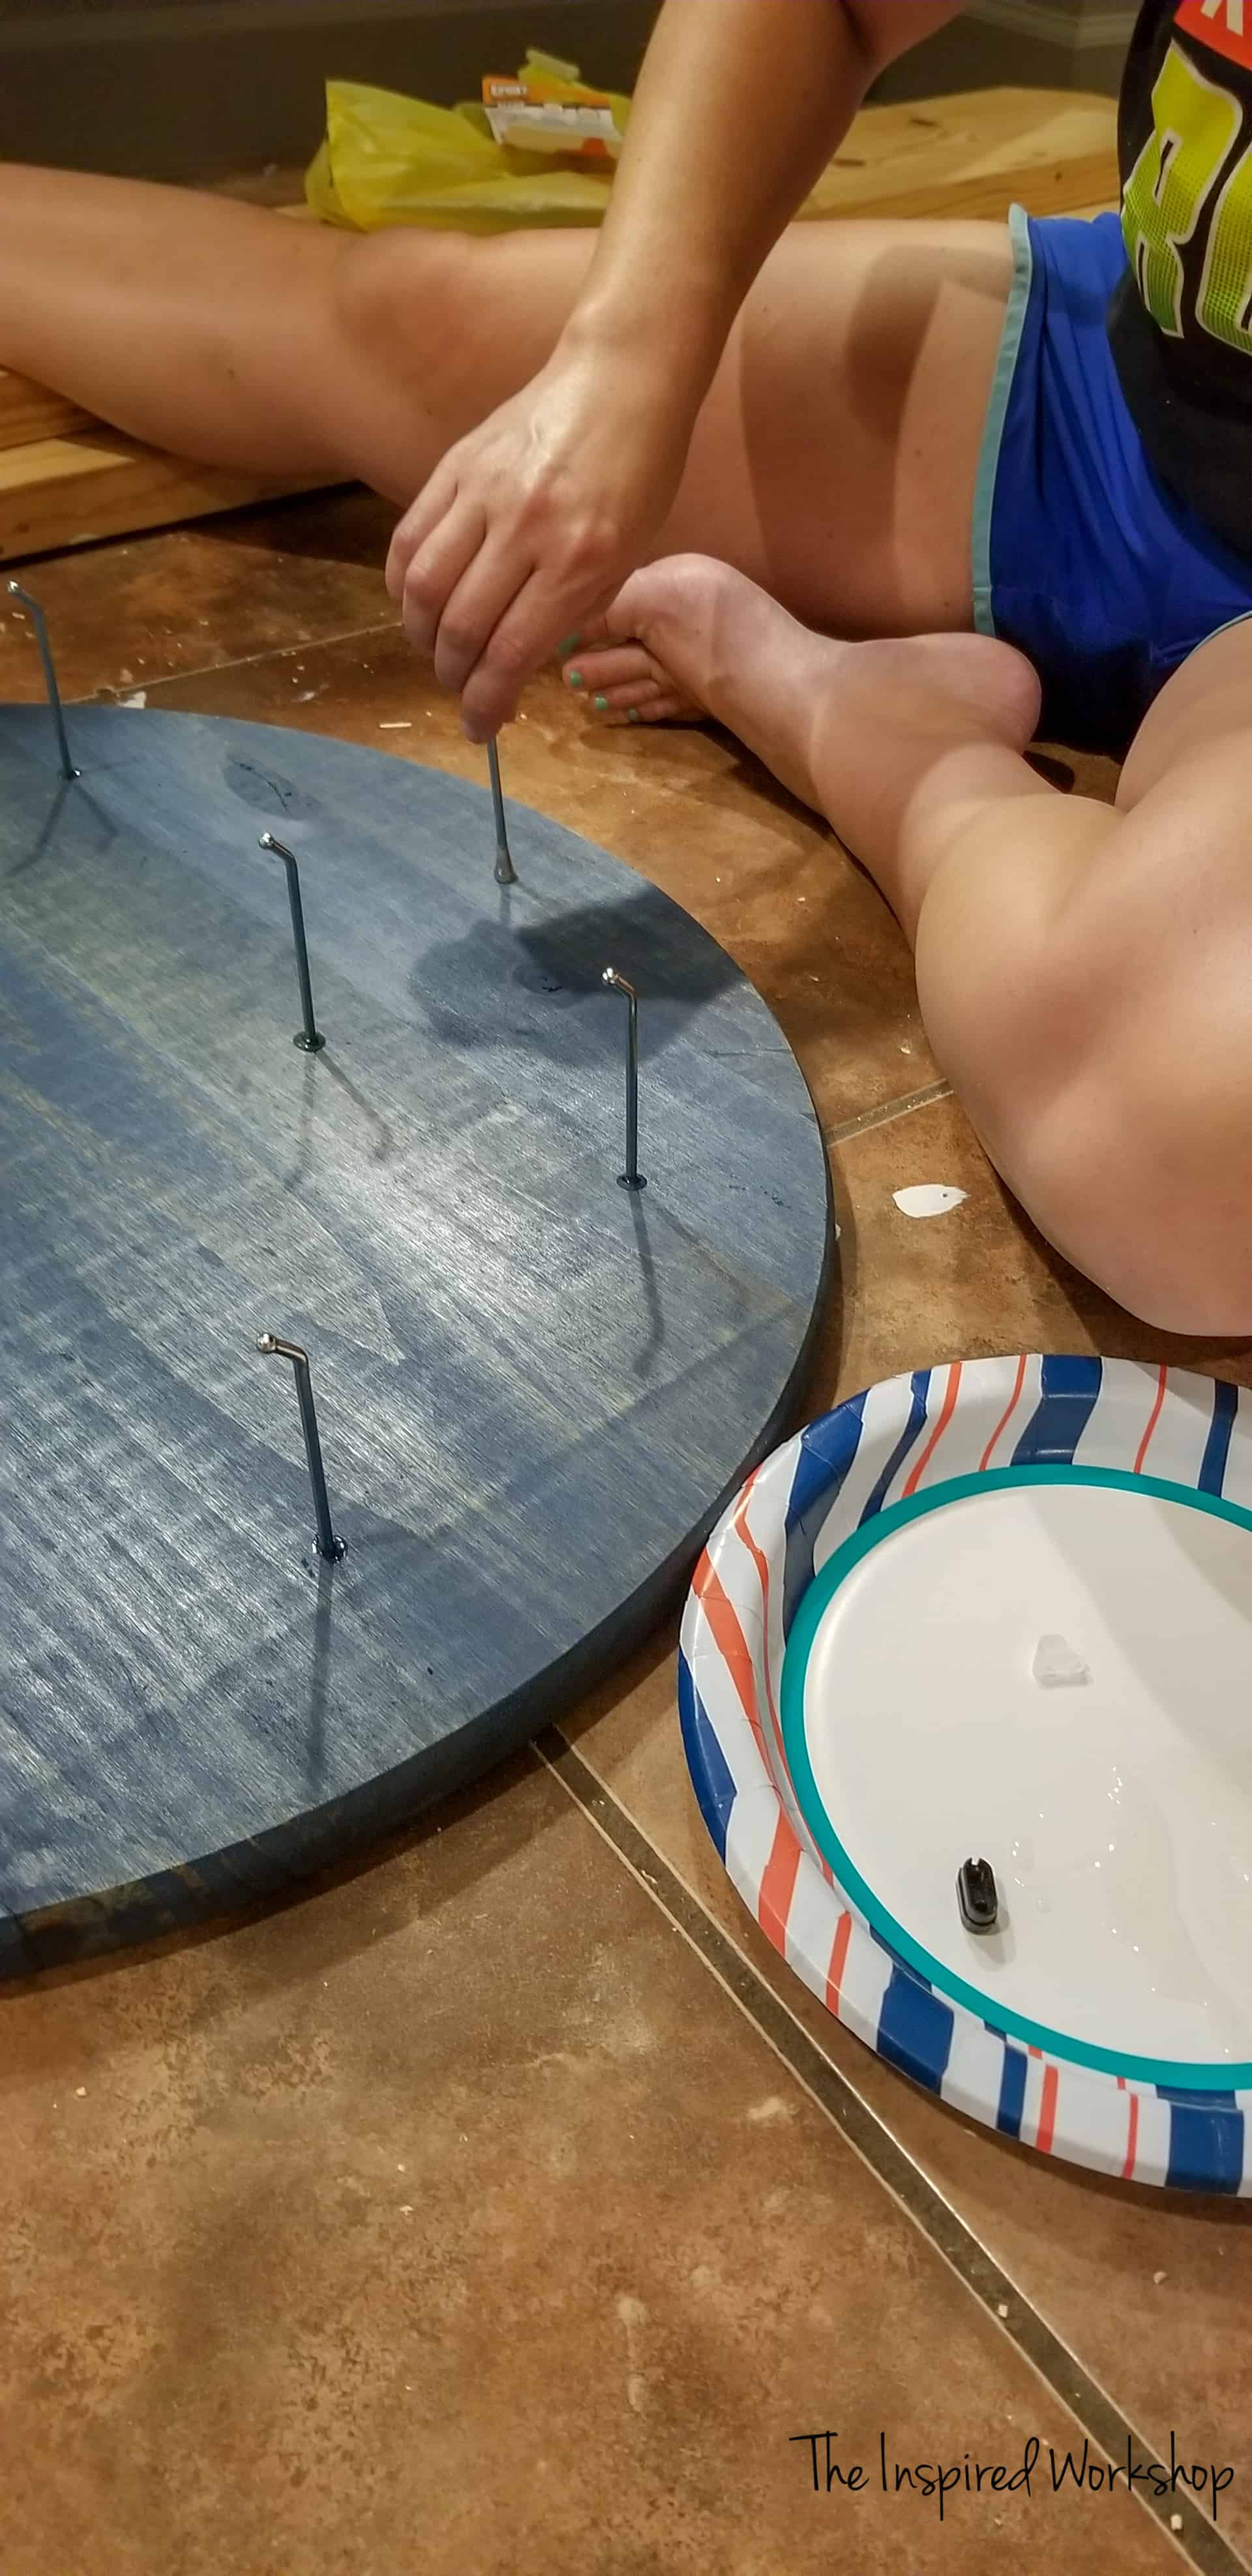
My hubby cut the hooks for me while I was staining the board, so guess what…I didn’t get pictures of that process! Lol! But here’s what they started out as!
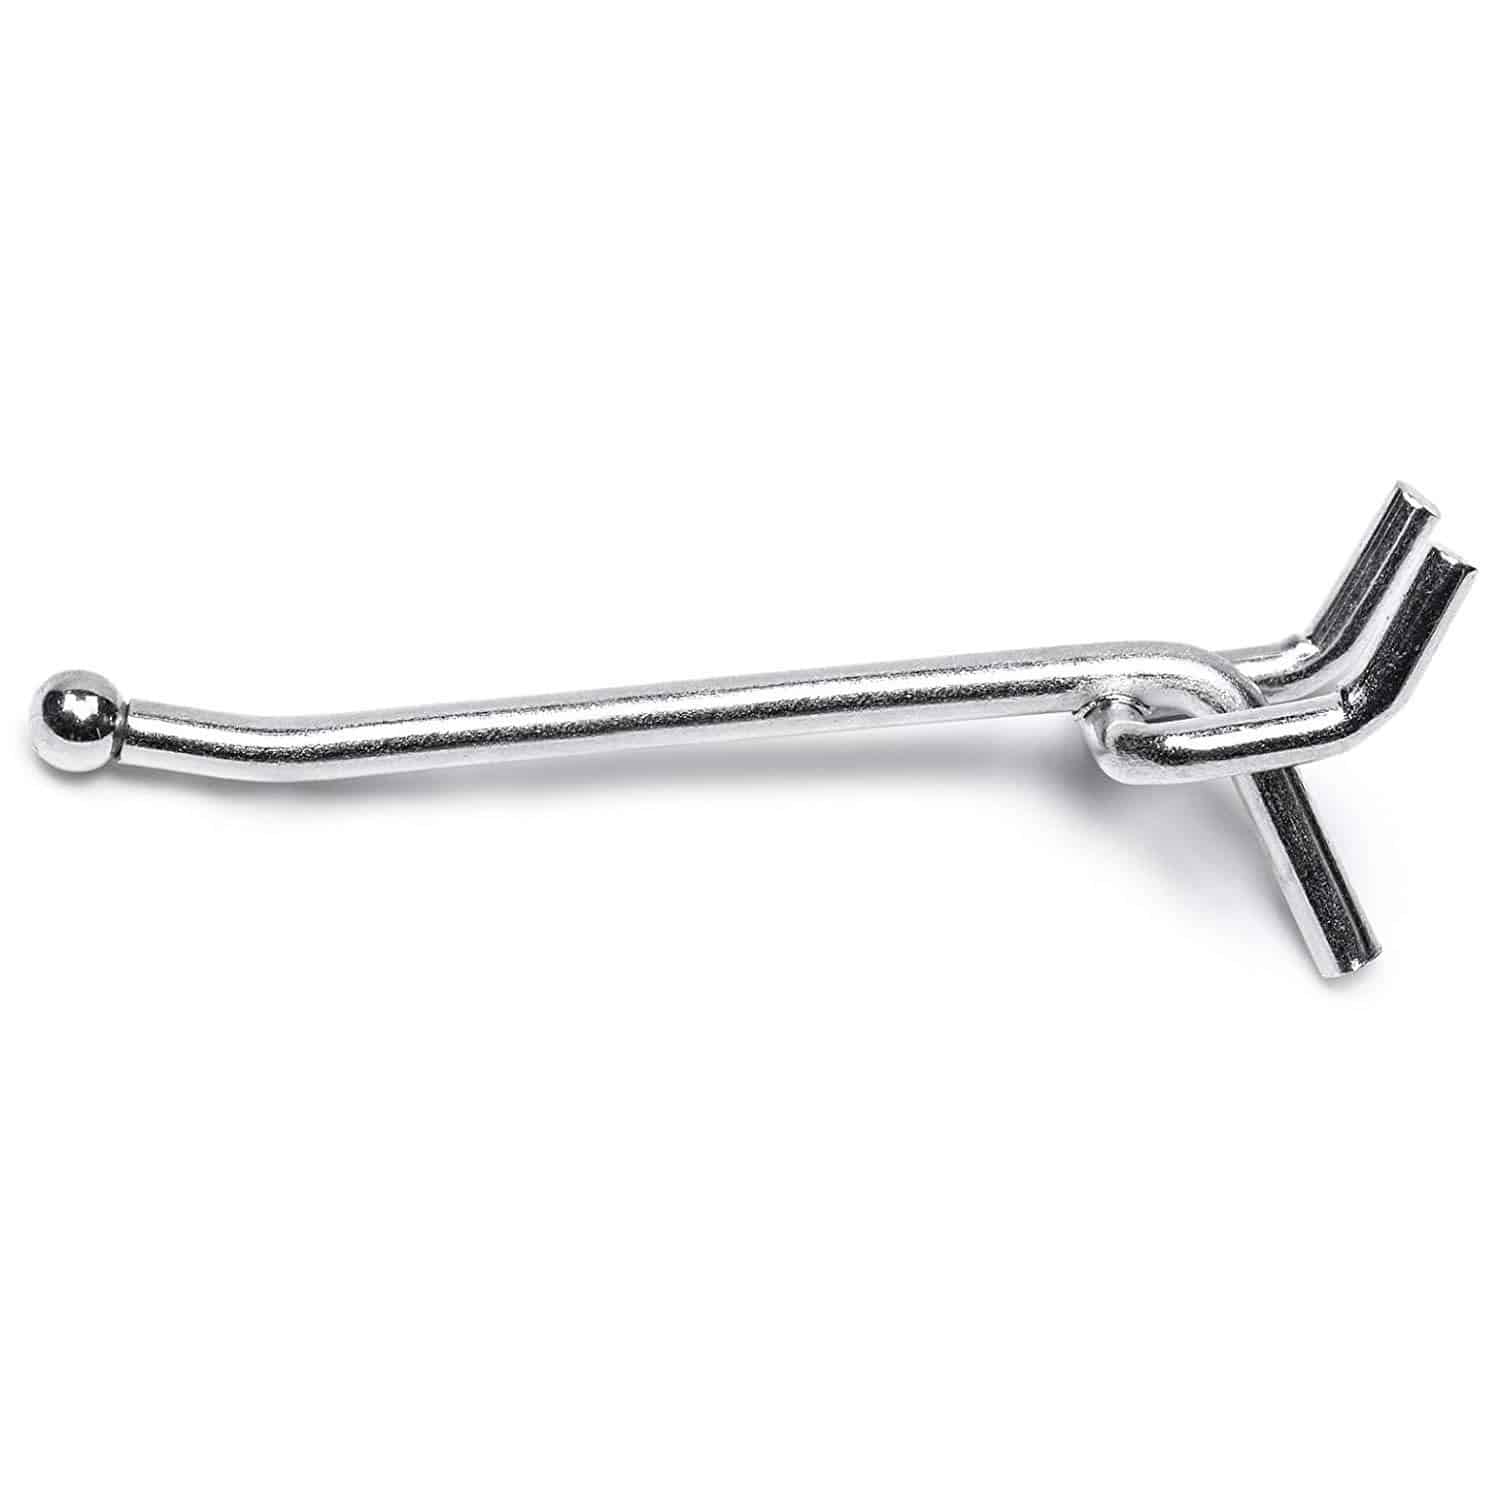
He just cut that back piece right off and made them straight hooks! Perfect! He also lightly ran the sander over the end that would be epoxied into the board to help the epoxy hold.
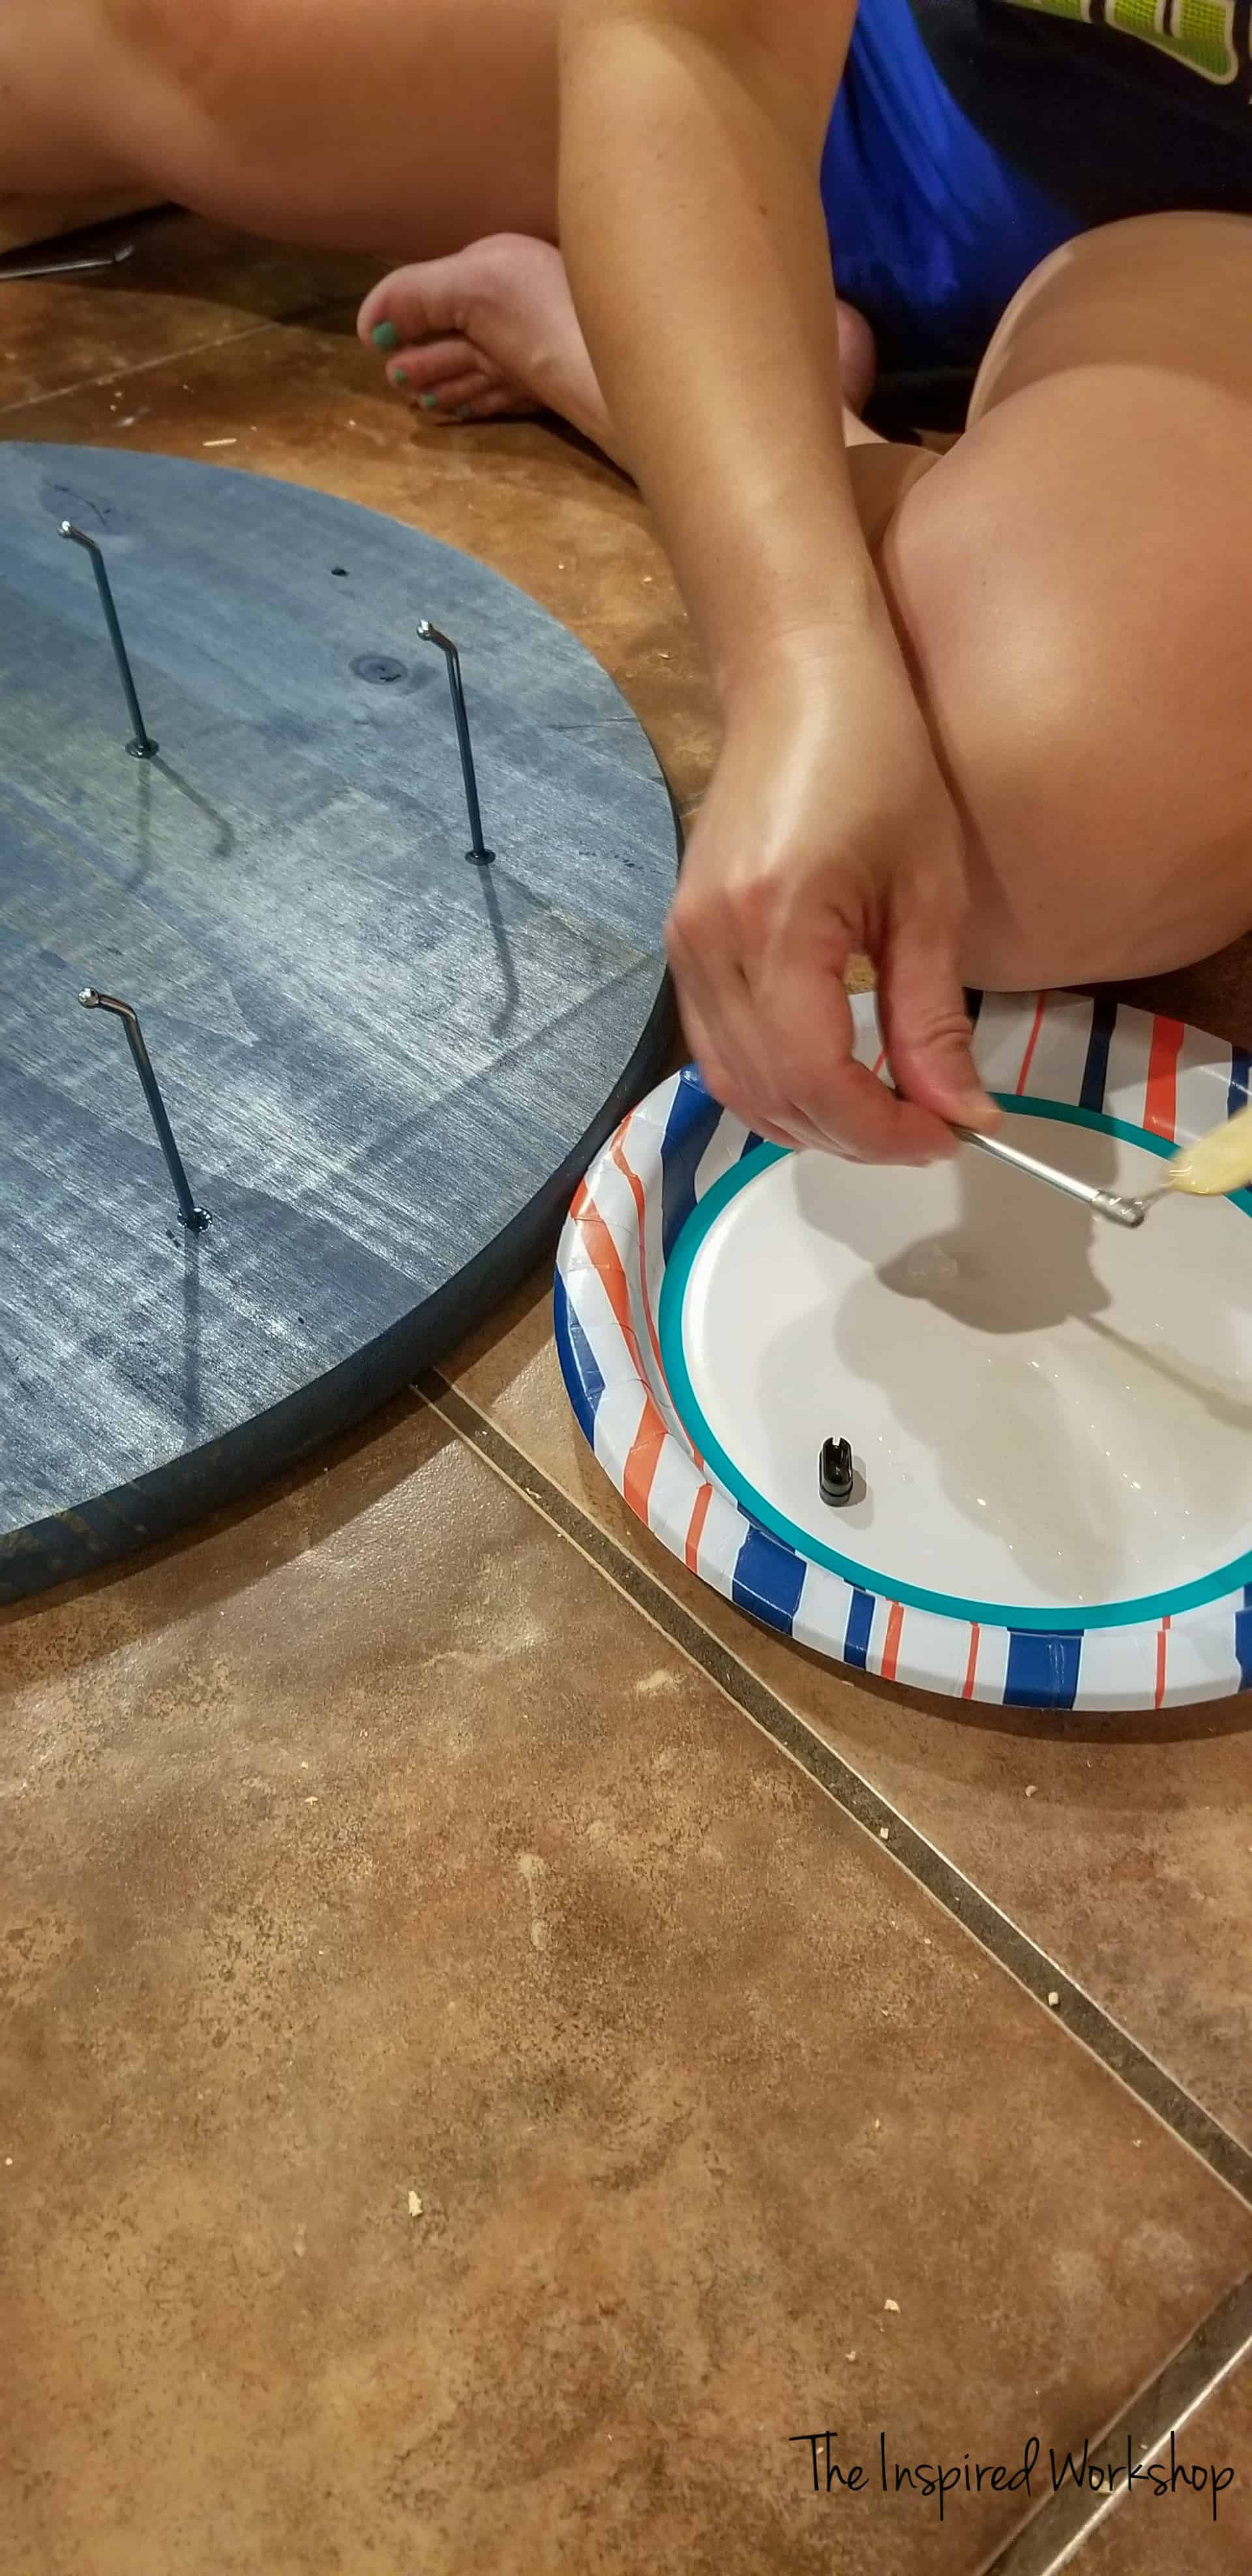
Using the epoxy, I just mixed it up and smeared it onto the end of the hook that was going into the board. I put it on pretty thick and let it drip into the hole first so it would have a firm attachment, I don’t want any loose hooks!😬 Epoxy came up around the pegs and I left the excess there to help hold them in!
I gave a number to each peg in randomness! I just used a chalk marker to write them, then sealed the piece with an outdoor polyurethane. I would suggest using a paint marker, not a chalk marker…but again I was all about using what I had on this project! Lol!
The options are ENDLESS when it comes to making these! We even used glow in the dark paint on one even! How cool is that to play in the dark!
I made a french cleat like I have many times in the past to hang it! This has quickly become my favorite way to hang items because it is practically free…I always use scrap wood, and it is strong! I also love that I don’t have to measure precisely when hanging, as long as my board is level on the wall, I’m good to go!
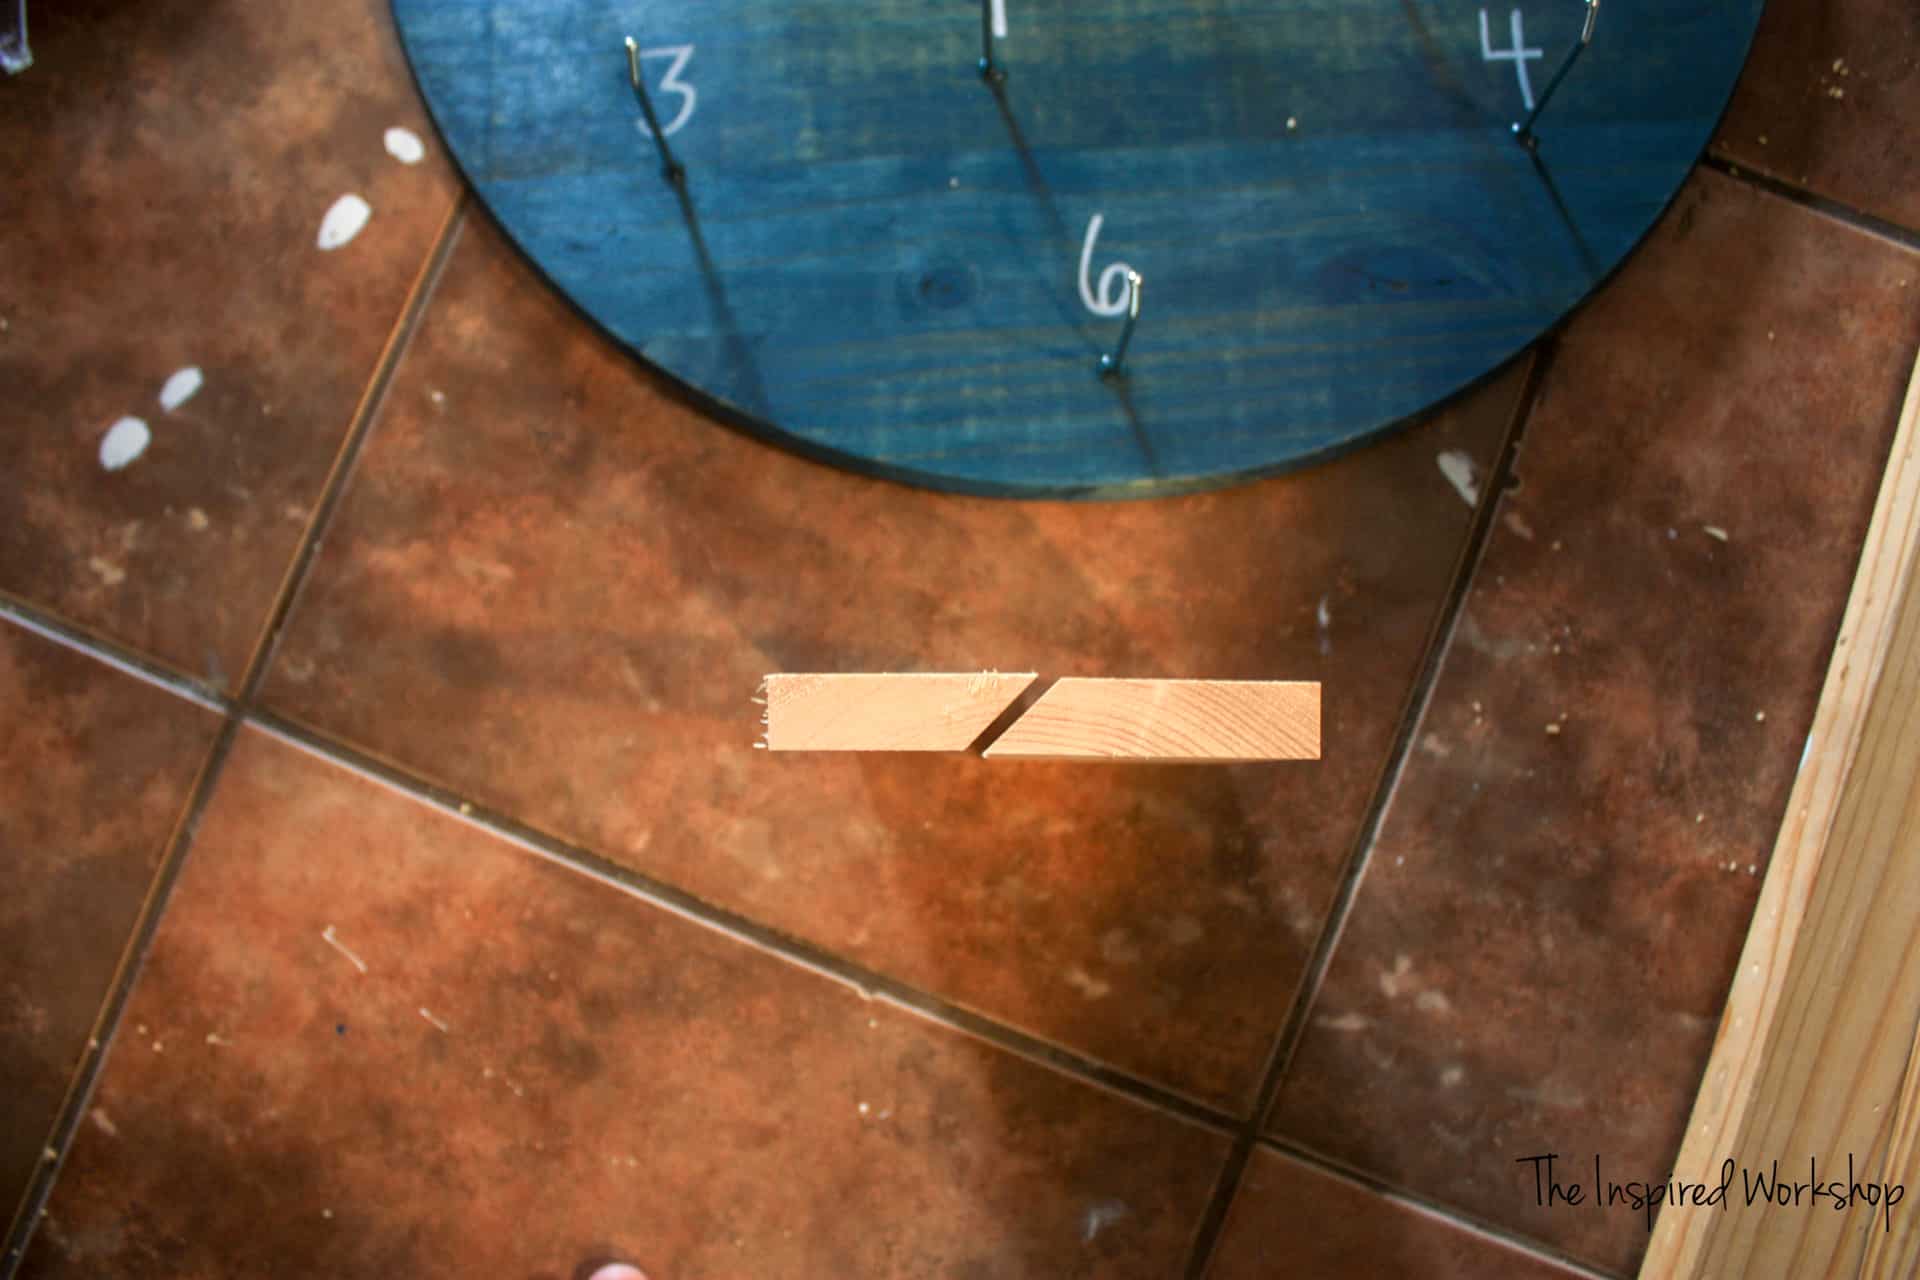
You basically just bevel a board at 45 degrees off square, the board above was a 1×6 scrap that I just cut into two pieces! A French cleat is made! Hang one of the pieces on the wall, and the other on your piece!

Boom, DONE! That was so EASY! Now challenge the kids or friend to a game of ring toss! We played first one to 21 without going over, and then we would just take turns seeing who could get the highest score! You can come up with so many ways to play your new DIY ring toss games and have fun for hours!
Enjoy!
Looking for another fun family game you can build yourself? How about some cornhole boards? Gotcha covered with some free plans! DIY CORNHOLE BOARDS
Now you will definitely want to go check out the other amazing DIY games of my fellow blogger friends!
Hope you enjoyed the tutorial and found many wonderful games to play with your family with this month’s challenge! Make sure and sign up for email notifications of new posts so you won’t miss any of our challenges!
Have a wonderful day!

Want to save this post for later? Pin it!
2 Comments