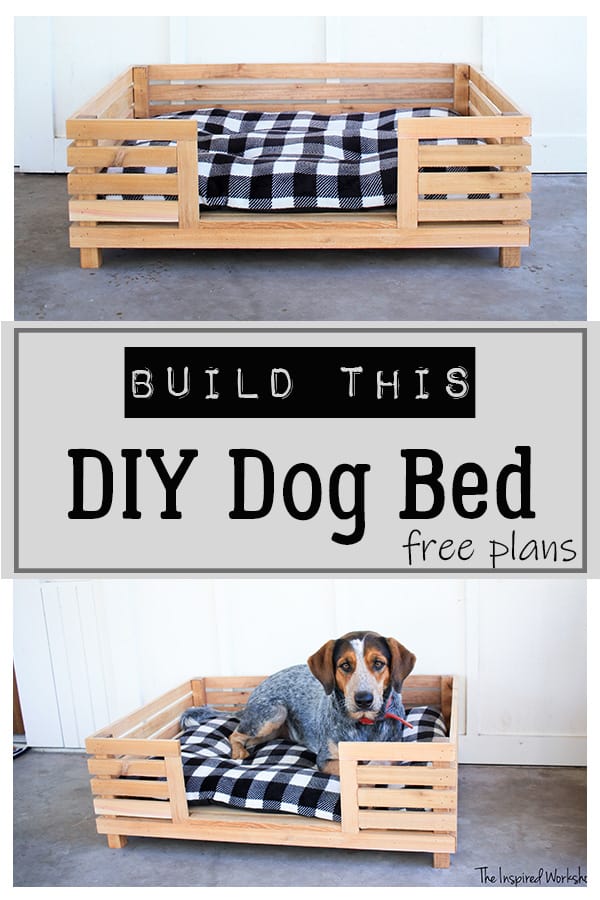
DIY Large Dog Bed
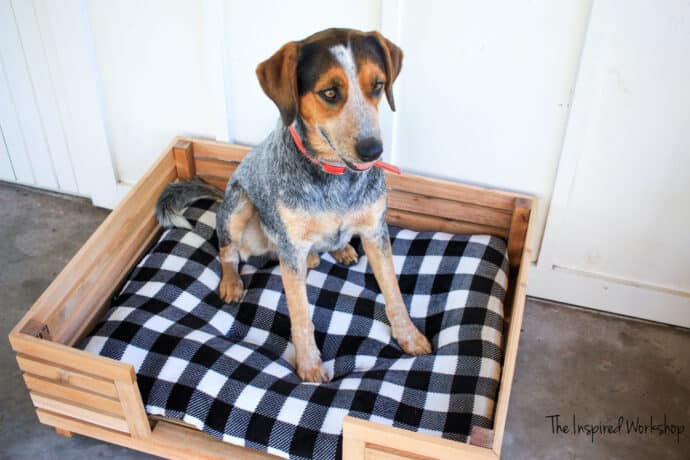
The furry family members in our home need their own special place to curl up at the end of the day! Build them this inexpensive yet stylish DIY dog bed that has a classic look to fit the design of any home and looks just like a piece of furniture!
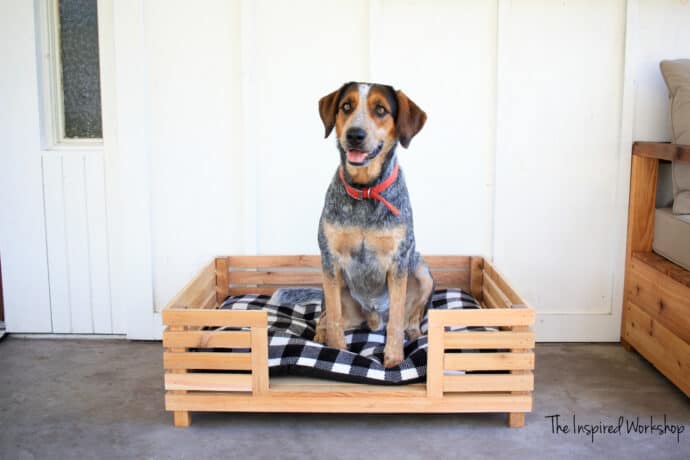
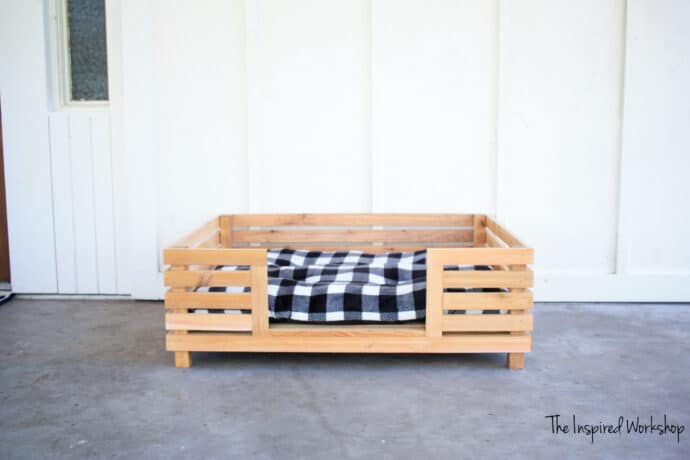
With winter weather knocking on the door, my dogs think it’s too cold to lay on the tile by the back door so they needed a comfortable spot to keep warm! I built this large DIY dog bed with slats of wood for a modern vibe! They love it and haven’t complained… yet,😁 well except that I made them model…as you can see they aren’t really cut out for modeling! Lol! They are however cut out for getting lots of treats! Oy!
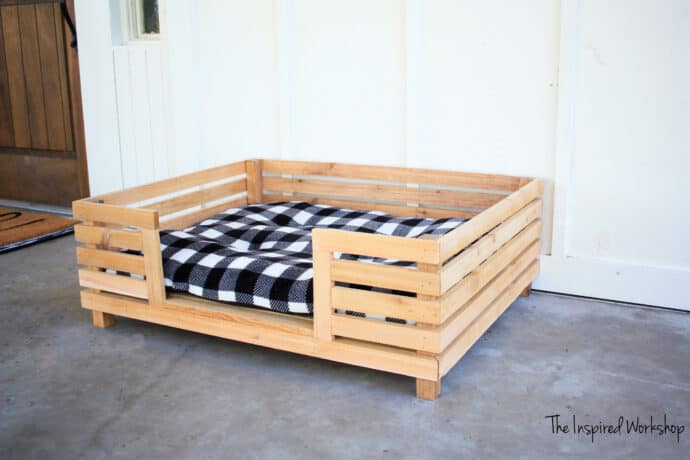
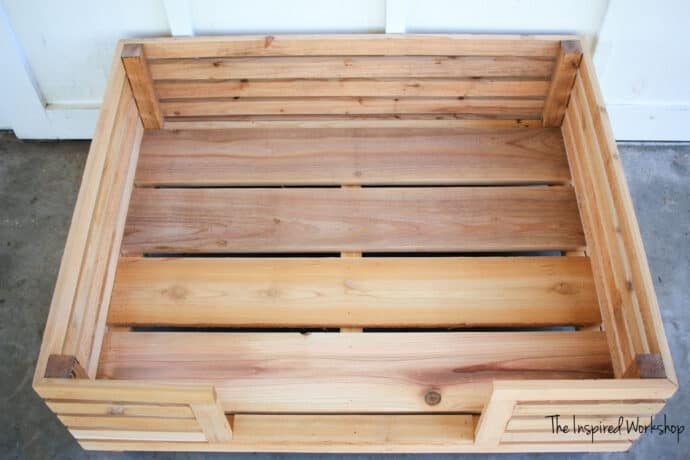
This dog bed is such a simple build but the mitered corners add that modern and sophisticated flair, perfect for your favorite pooch!
Y’all hurry and RUN, don’t walk to Walmart, this cushion is only $9.88!!! I am not sure if they are a holiday item or an all-the-time item, but it’s not worth risking it being sold out if it’s only for the holidays!
I have bought so many dog beds that they tear up and waste my 50-75 dollars that I swore to them they were never getting another one! That was until I came across this baby! I mean, if they waste my 10 bucks, we can still be friends! I cannot find it online so you will have to go in-store!
I think it’s adorable! The only thing I can’t figure out is if I need to build another one because that is the exact same so they can have matching beds or build a slightly different one so that they have coordinating beds?! Hmmm… desicions, desicions!
I used fence pickets to build the DIY dog bed so that I could keep the cost minimal! As I said, they like to tear stuff up so I was not about to spend tons on this dog bed! The total cost for the dog bed with current lumber prices was 26 bucks…plus the cushions brought me to a grand total of 36 dollars! I spend more than that on just the bed cushion normally, and I think this looks so much better, and bonus… it is way easier to clean around! 💃
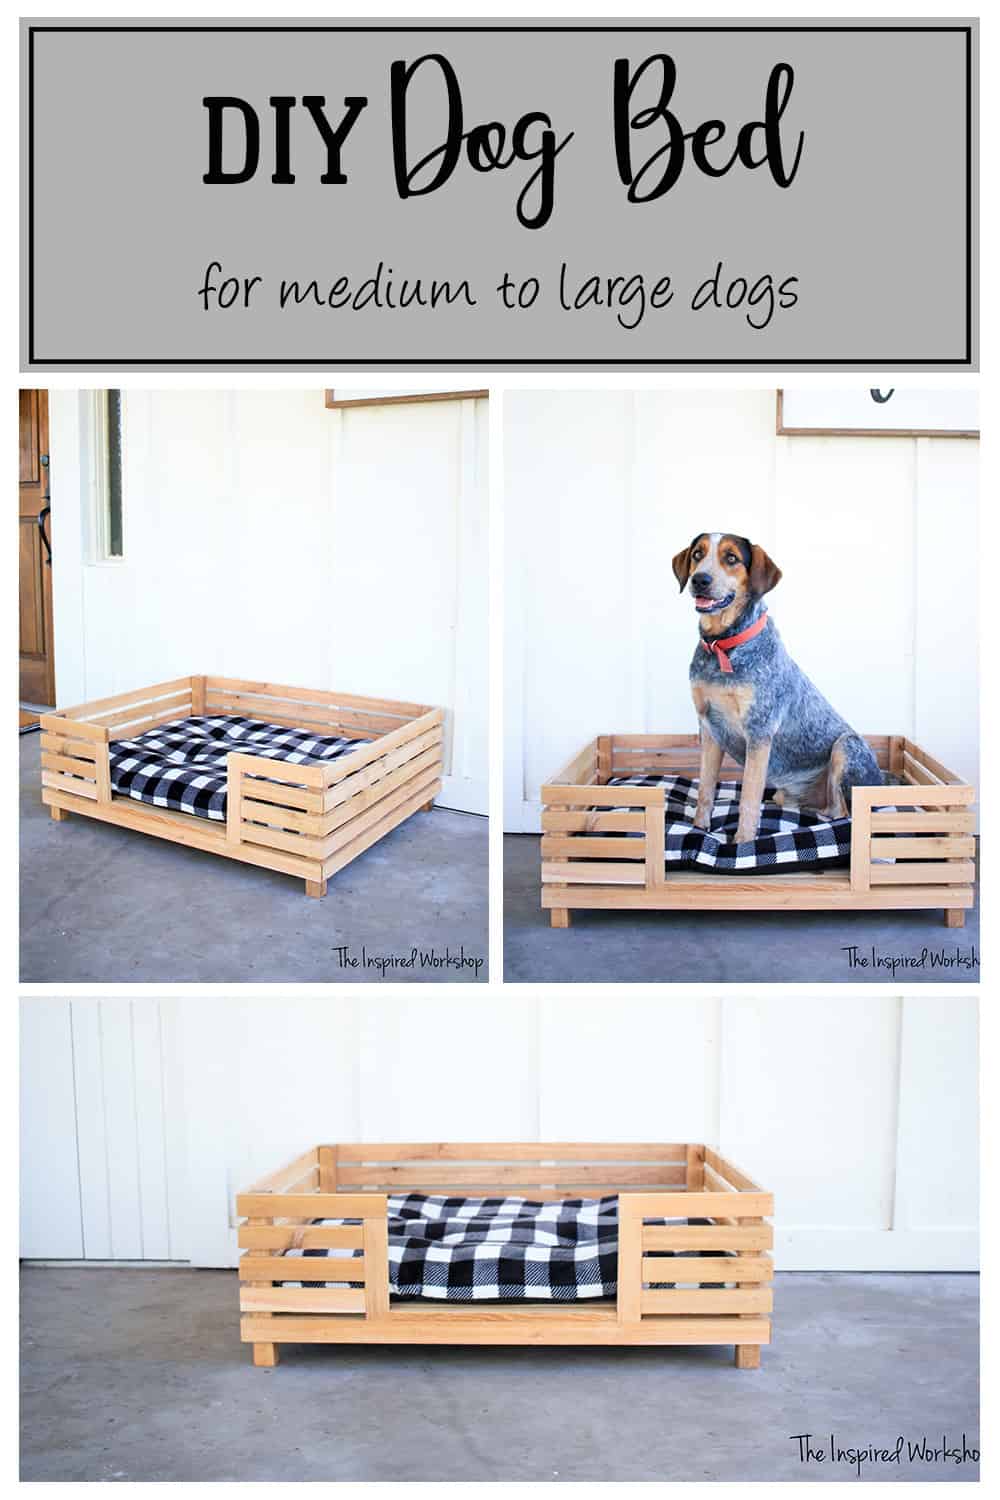
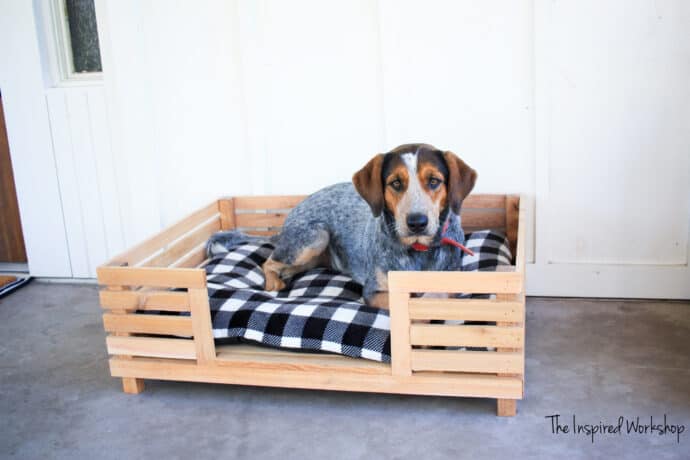
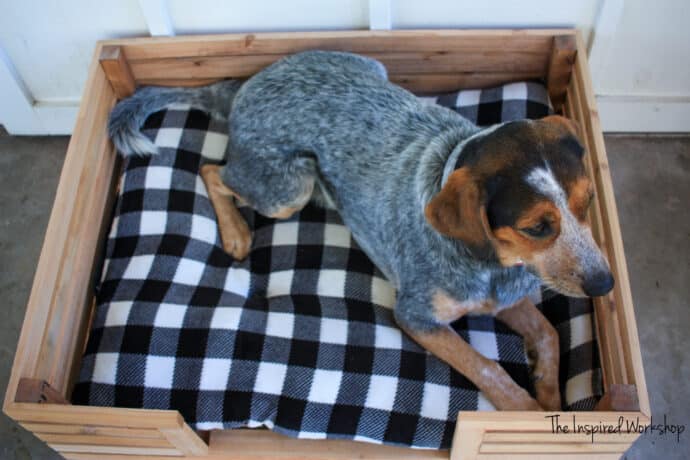
For size reference here is my boy Thor laying down in the bed, he is around 60-70 lbs ( you know how the weight fluctuates with that winter ‘fluff’ we all put on.. LOL)! They consider the cushion to be medium, but it is the same size as most large dog beds I have bought! He has plenty of room… he and Dexter were in it together for a while and both fit! Lol!
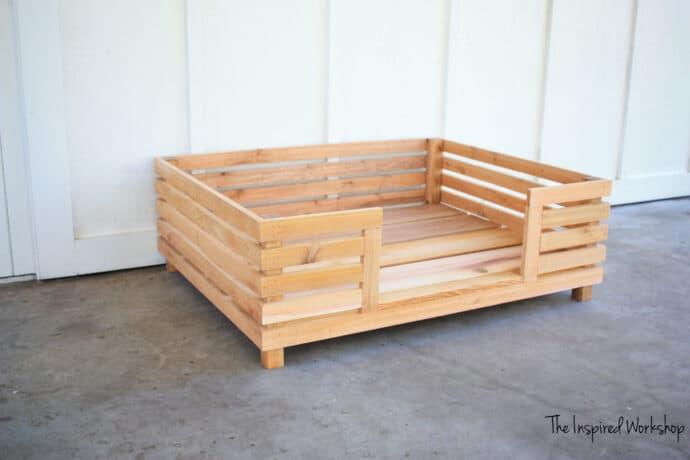
Here’s the dog bed without the cushion! I just love the simplicity of the design!
Alright, do you want to surprise your dog with a large modern DIY dog bed for the cold winter season? I’ll show you how!
Overall Dimensions – 35 1/8″ L x 28 1/8″ W x 12″ H
Download the FREE PLANS on how to build your own DIY Dog Bed here:
Need a dog bed that’s a little smaller, or want a little more farmhouse style? Check out the dog bed I made for my last pup! DIY Dog Bed – Pottery Barn Knockoff
Gathering the Supplies for the DIY Dog Bed
NOTE: AMAZON links below are AFFILIATE links! Affiliate links are links that allow me to make a small percentage off of your purchase should you choose to make one…at no extra cost to you!!! I appreciate it when you make a purchase through my links as it helps keep the content free, but I’ll still love ya either way! Lol! Other links (Home Depot) below are provided just to help you find products I use, I make no money off of them!
Materials Needed for DIY Dog Bed:
- 4 – 8ft fence pickets
- 2 – 2x2x8
- wood glue
- Kreg Jig – this is the one I still use, but look around and don’t be shy to try one of their new models!
- brad nailer
- 2 1/2″ pocket hole screws
- 1 1/4″ brad nails
- miter saw
- sander
Cut List for the DIY Dog Bed:
- 4 – 2×2 @ 12″ legs
- 2 – 2×2 @ 31″ front and back rails
- 3 – 2×2 @ 24″ side and middle rails
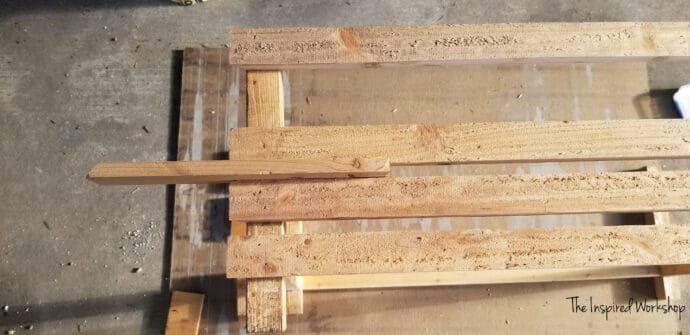
- ***NOTE*** All 1 1/2″ boards below are fence pickets ripped down to 1 1/2″ you can use 1x2s instead if you don’t have a table saw to rip them down but note any outside measurement will be slightly larger since 1x2s are slightly thicker than fence pickets about a 1/8″ should be added to any outside measurements! Feel free to email me if you need any help with anything cara(dot)theinspiredworkshop(at)gmail(dot)com!
- 6 – 1 1/2″ @ 34″ ends beveled at 45 degrees off square, not parallel, shortest side measurement – back boards and front bottom board
- 10 – 1 1/2″ fence pickets @ 27″ ends beveled at 45 degrees off square, not parallel shortest side measurement (short side of the bevel will be 27″) – side boards
- 2 – 1 1/2″ fence pickets @ 7″ front vertical boards
- 2 – 1 1/2″ fence picket @ 10″ one end beveled at 45 degrees off square, longest end of the board – top boards on the front
- 6 – 1 1/2″ fence picket @ 8 1/2″ one end beveled at 45 degrees off square, longest end of the board – middle boards on the front
- 4 – fence pickets cut @ 34″ (these are the supports and are not ripped down, they are kept at full width)
- 1 – 1 1/2″ fence picket @ 15″ bottom, front flat board
Building the DIY Dog Bed
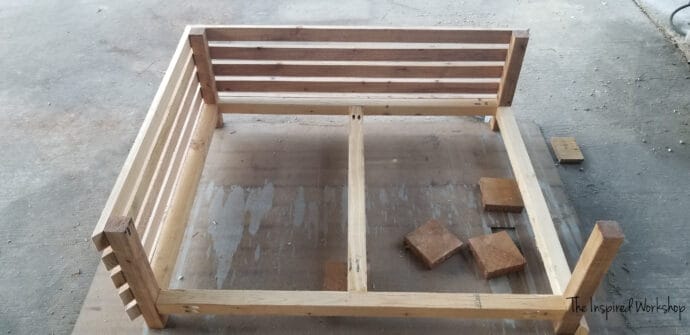
First things first, in building this DIY dog bed, we will need to build a basic frame for the slats to be attached to! The frame will be built using the 2x2s.
Step 1
Take two 2×2 @ 12″ legs and one 2×2 @ 31″ drill pocket holes at 1 1/2″ depth on the 31″ board. Use wood glue and 2 1/2″ screws to attach. The 31″ board will be 2″ up from the bottom of the 12″ boards.
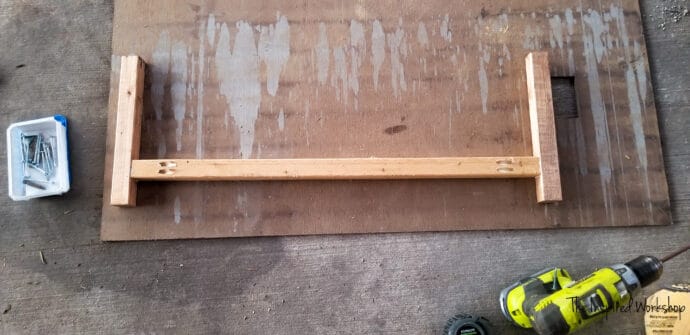
You will build 2 of the above pictured pieces to make the front and back of the dog bed.
Step 2
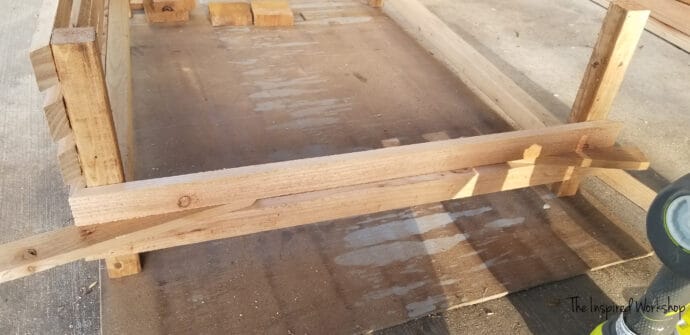
Then you will attach the front to the back with the 2x2s @ 24″. They will be attached the same way as the front and back, using pocket holes drilled at 1 1/2″ depth and using wood glue and 2 1/2″ screws to attach! I used small blocks of wood to set it on to make sure it was 2″ up from the bottom! This will create the sides of the frame!
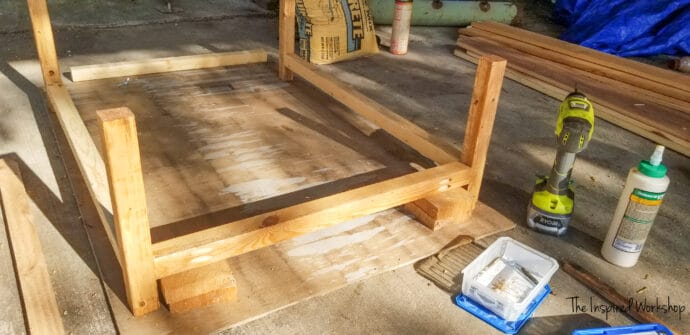
Step 3
Add the last 2×2 @ 24″ as a middle brace. Again, drill 1 1/2″ pocket holes, use wood glue, and 2 1/2″ screws to attach! (Don’t mind that I had already added the back and side slats when I realized I hadn’t taken a picture of the support board. You didn’t miss any steps! Lol!)
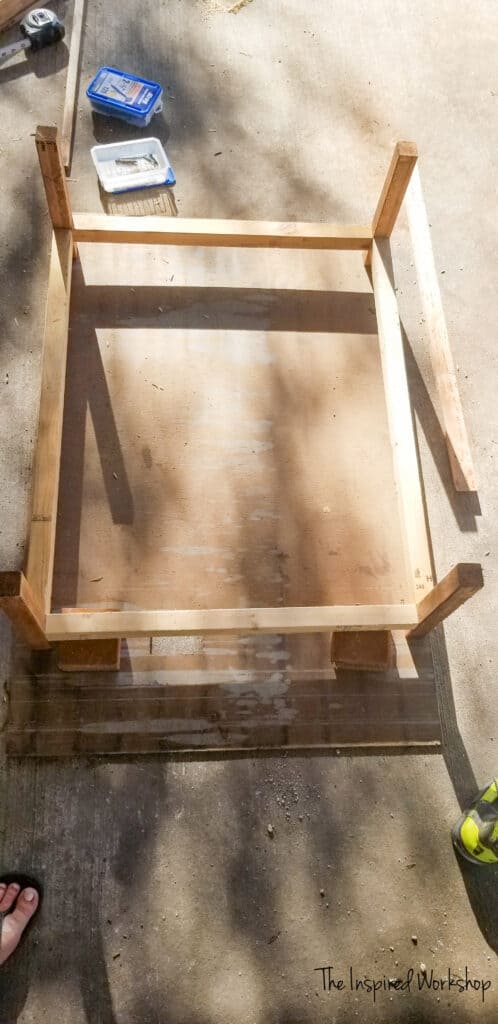
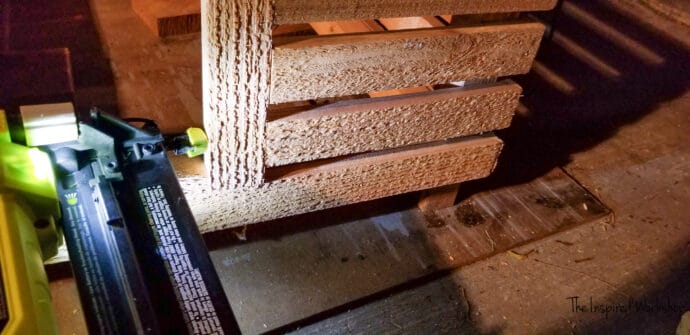
Step 4
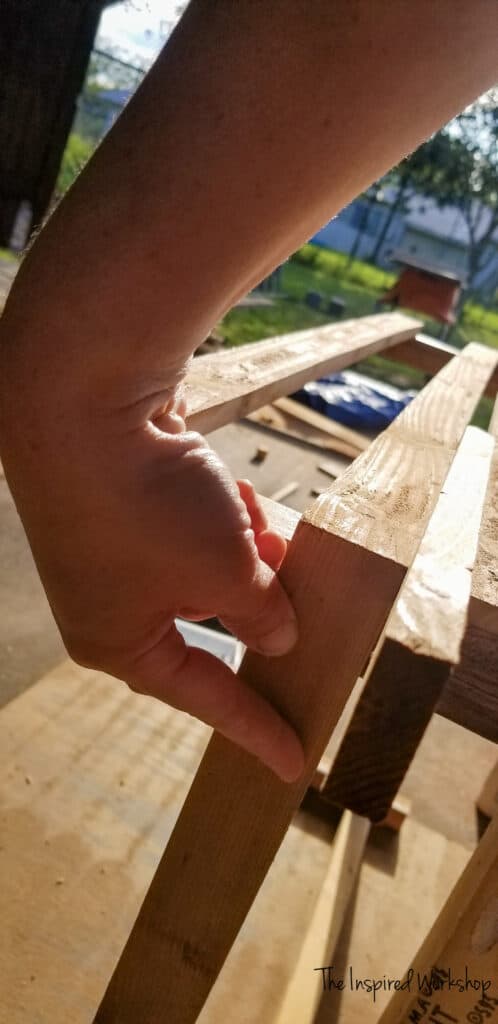
Next, start adding the back mitered slats. I used 1 1/4″ brad nails along with wood glue to attach them. To start the slats, line up the bottom slat with the bottom frame board. I then used a spare piece of fence picket to keep the spacing the same, plus it keeps it quick and easy to nail the slats!
Also to keep the mitered corners lined up, I beveled a scrap piece of fence picket to 45 degrees off square to hold up against the board I was nailing!
Step 5
Continue the slats around to the sides.
Step 6
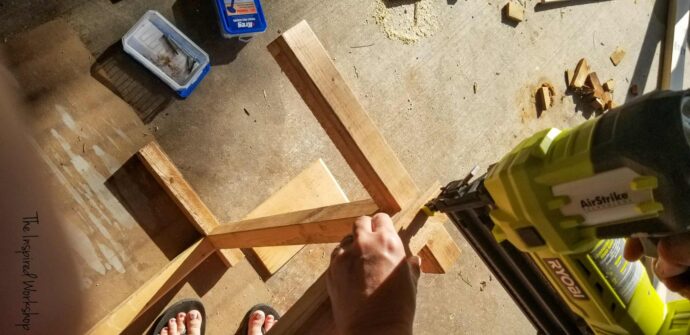
After the back and side slats are all in place, we are left with the front! First I attached the bottom 1 1/2″ fence picket slat. Then using the 1 1/2″ fence picket mitered on one end @ 10″ attach that one to the top. Then taking the 7″ fence picket board (that is not mitered on either end), you will need to drill 1/2″ pocket holes and use 1″ screws to attach it to the top and bottom slats.
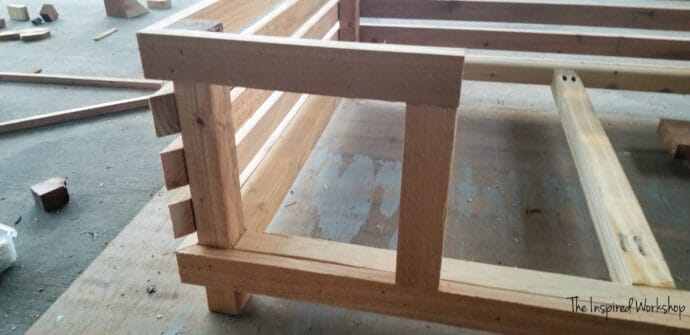
I flipped the bed onto the front to have enough room to get the screws into the pocket holes.

Add the last three slats (8 1/2″ mitered on one end) to the front to complete one front side. You can pocket hole these if you would prefer, but you will need a right angle drill and a smaller square bit in order to fit it to get the screws in. I just brad nailed them from the outside of the vertical board!
Do the exact same thing to the other side, and boom, the main build is done!
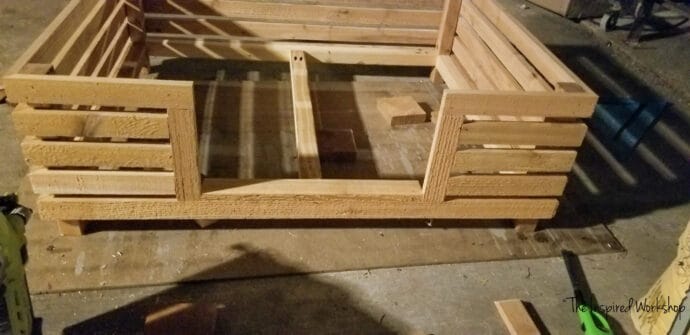
Step 7
Add the support fence pickets across the bottom. I just brad nailed them to the 2x2s with some wood glue!
Boom Baby!! It’s DONE!!! Woohoo! Happy Dance time!

Add the cushion!

Add the pooch of your choice!😜
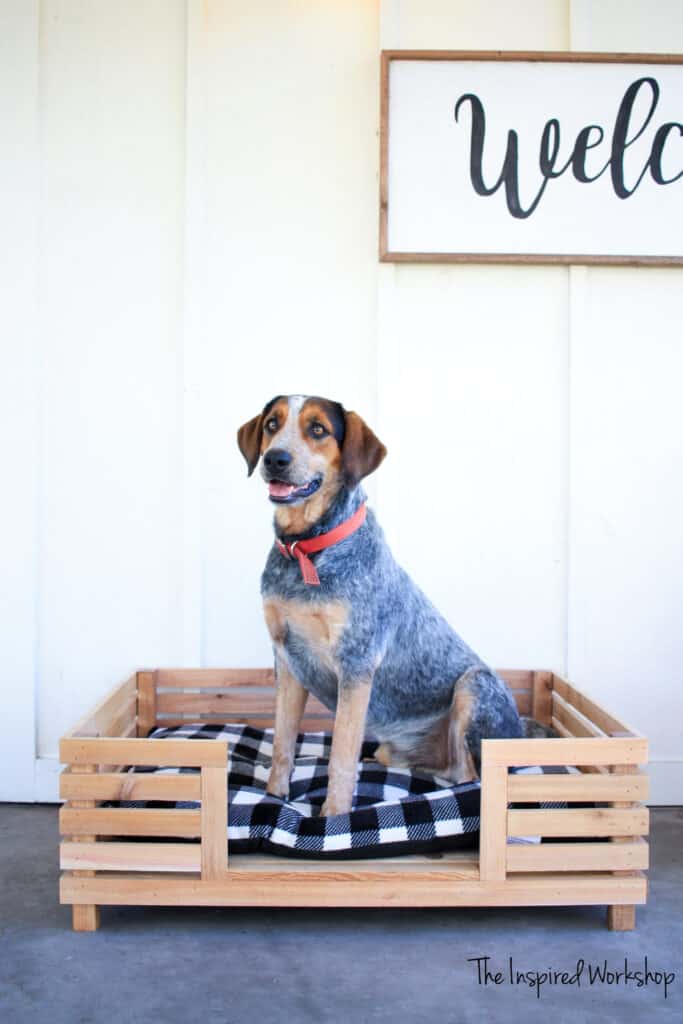
That’s my boy!!🤩
I just LOVE this DIY dog bed, how will I make a better one than this?! We shall see if I can!
If you are looking for any other dog projects, I have this DIY DOG HOUSE and this smaller DIY DOG BED! And I’ll have another dog bed coming soon for Thor’s brother Dexter!
Have any other dog projects you would like to see free plans for? Let me know below in the comments! Happy Building!

Want to save this DIY dog bed for later? PIN IT!