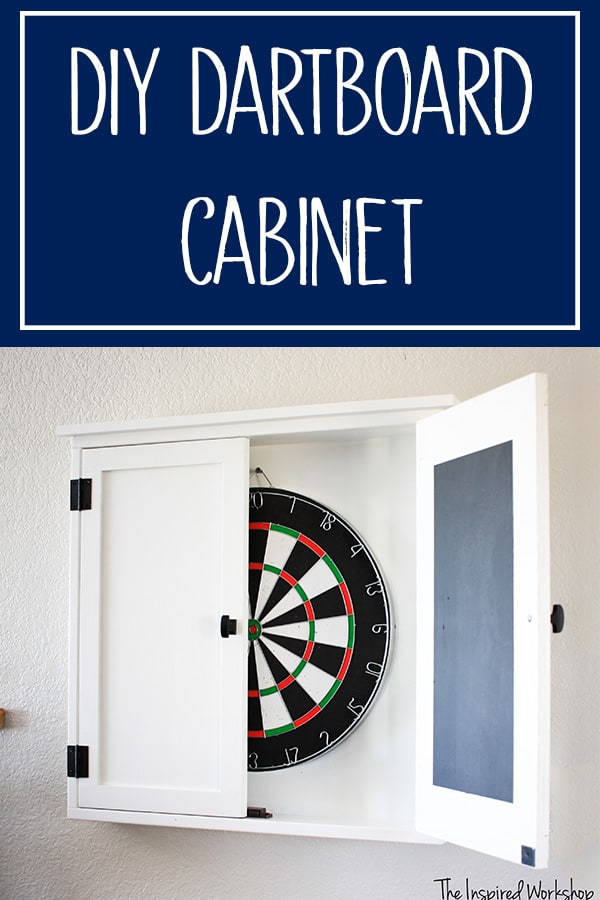
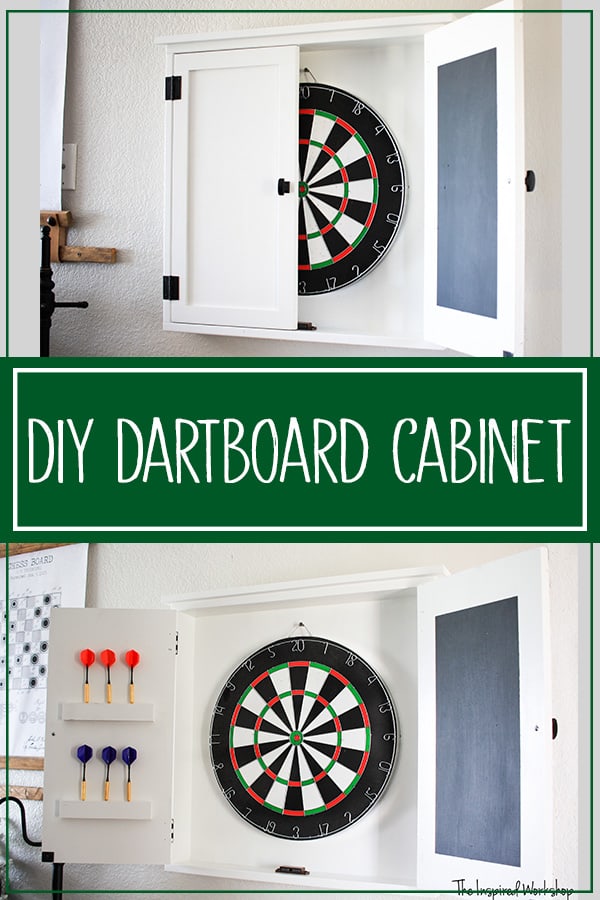
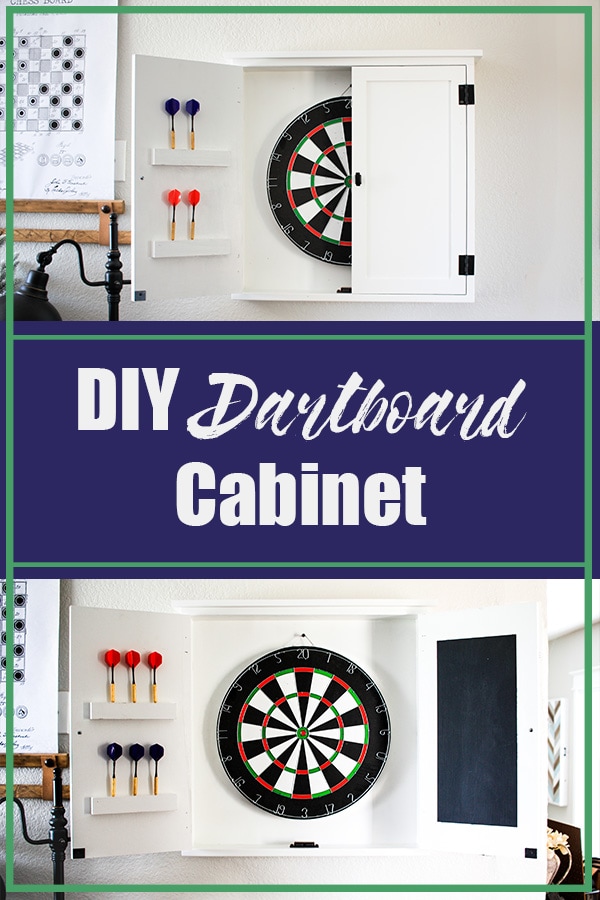
DIY Dartboard Cabinet
Dartboards are awesome, and everyone is usually up for a game of darts! What’s even better than having a dartboard to play darts when you want…how about having a dartboard cabinet to cover the dartboard when it isn’t in use so it isn’t an eye sore in a room! Free plans to build a DIY dartboard cabinet!
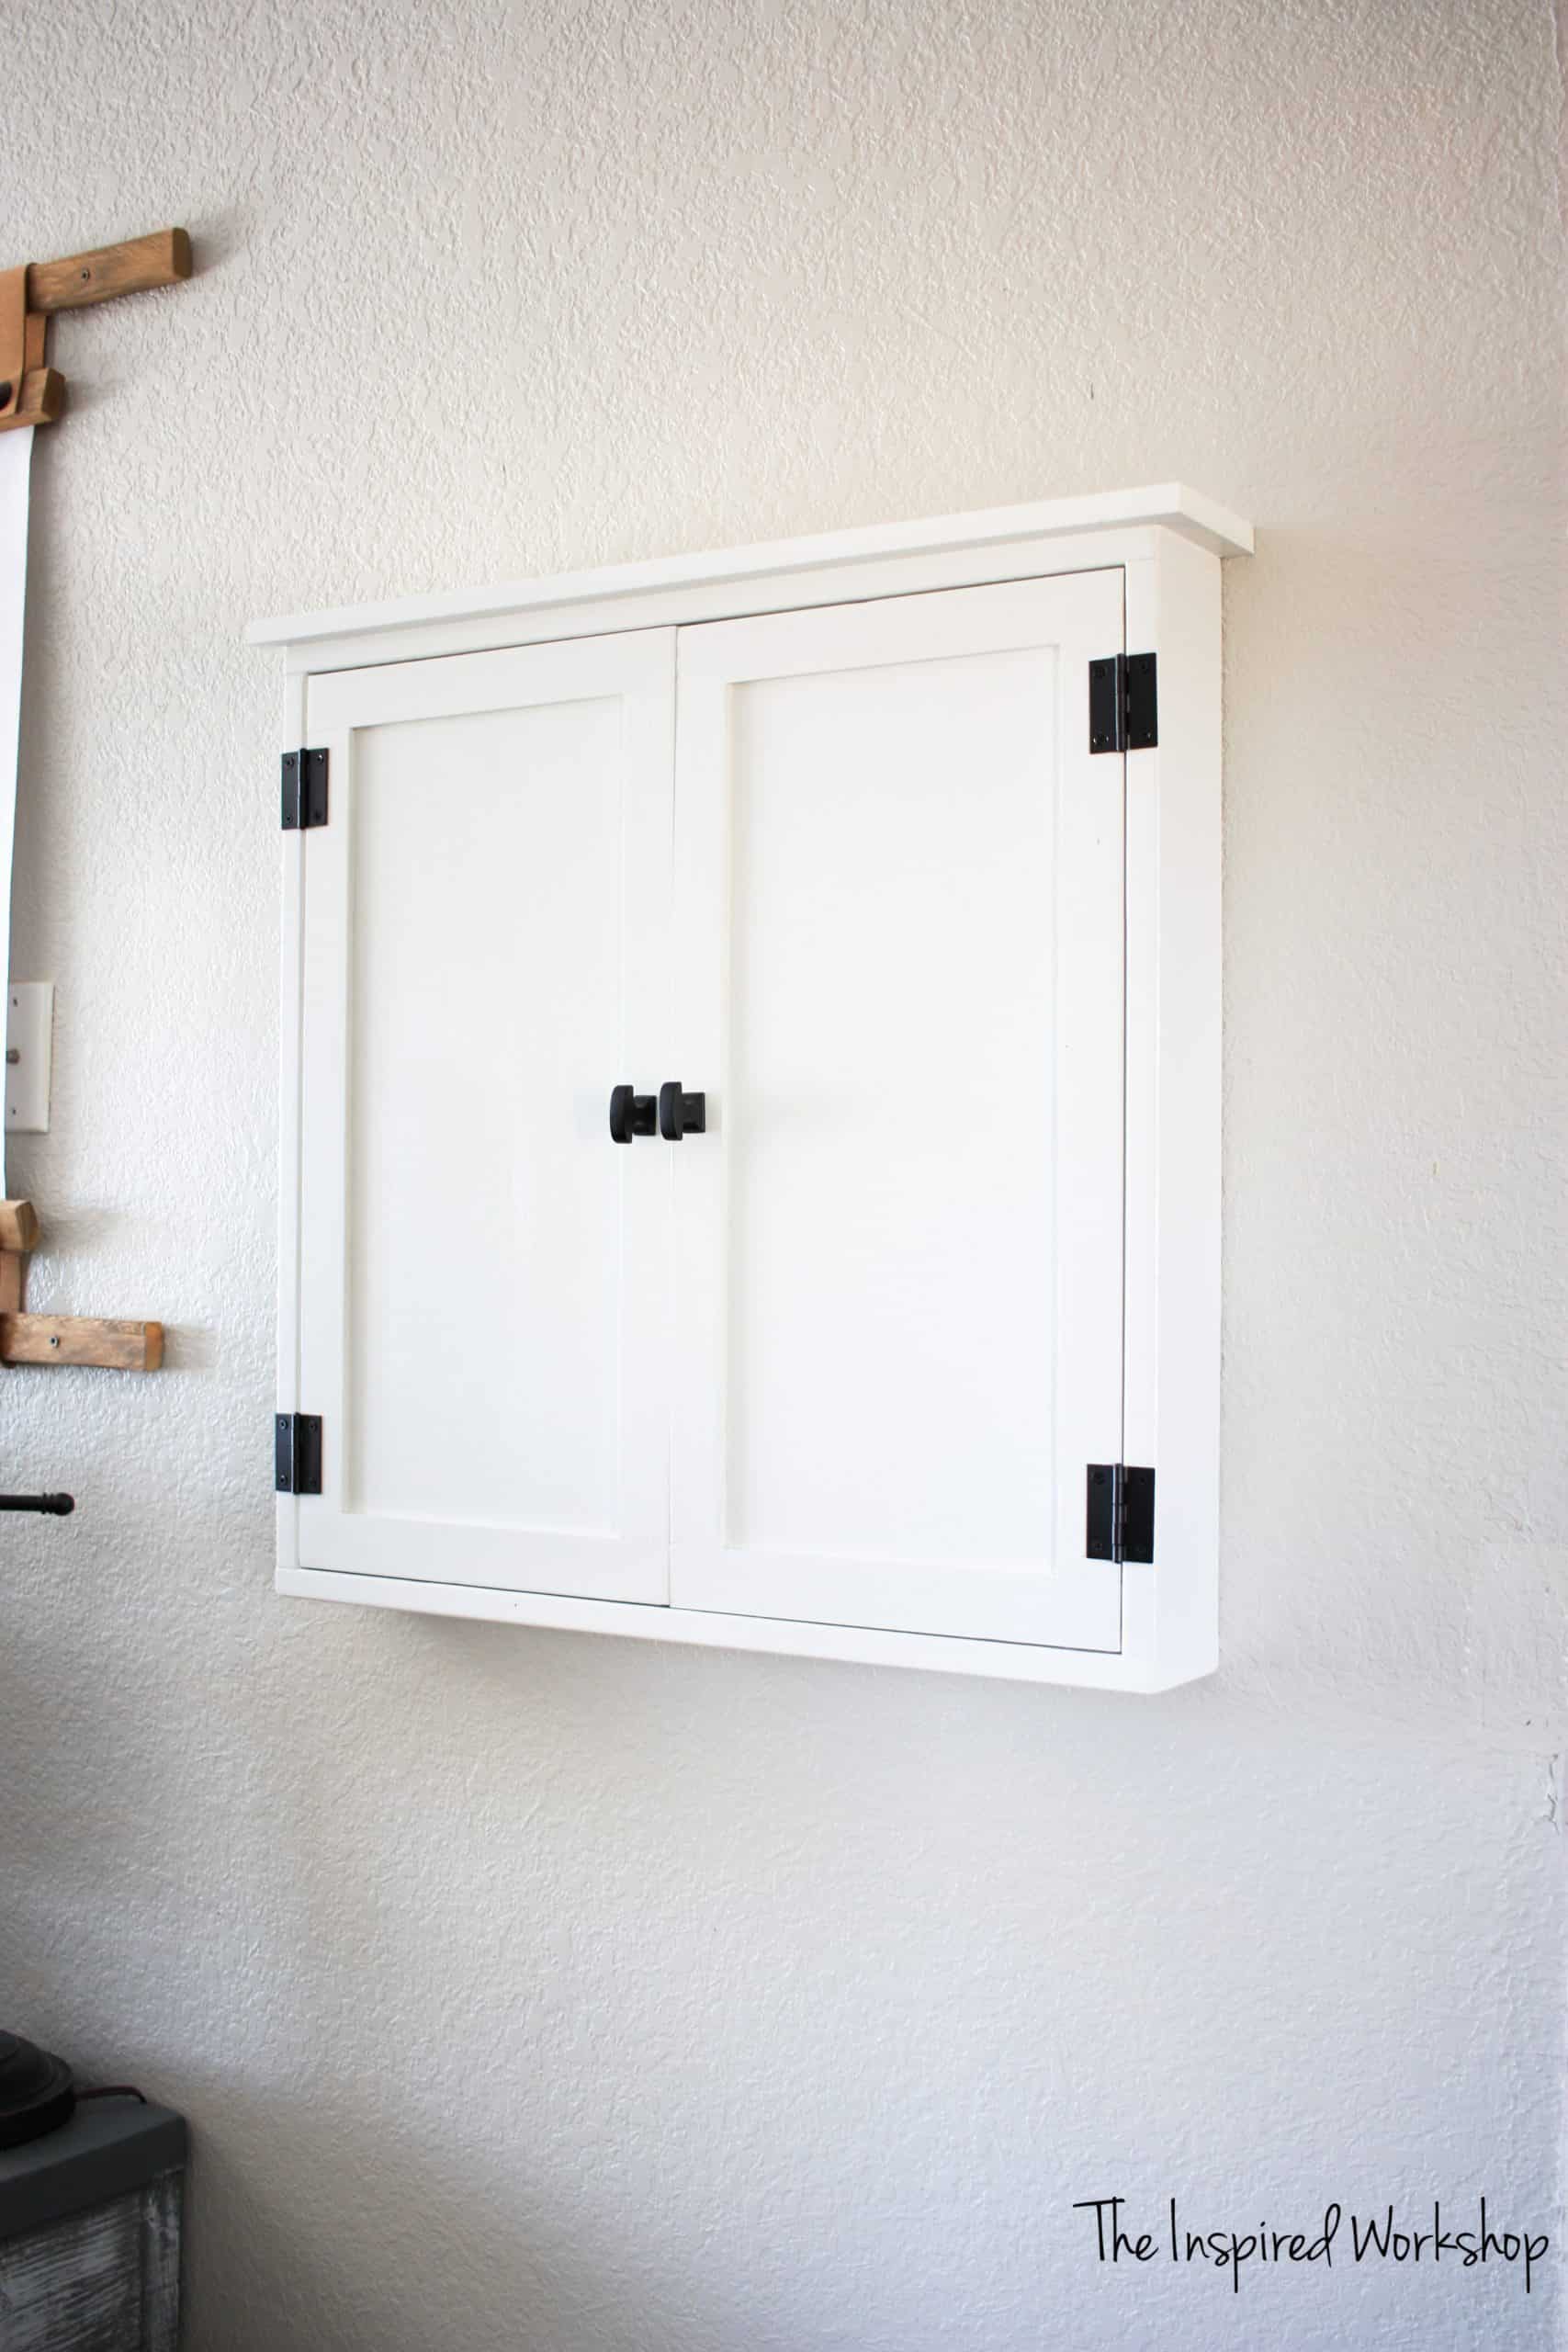
The best part is, I didn’t have to make the dartboard, just the cabinet, so you can throw it together in a couple of hours! What a GREAT gift idea, ready in a couple of hours! Sweeeeetttt!
Want to see the other projects I’ve posted that make great gift ideas? Check out all the DIY gifts!
Don’t have time to build this now? PIN IT for later!
Gathering Supplies to Make the DIY Dartboard Cabinet
**AMAZON links below are AFFILIATE LINKS (all other links are not but I include them anyway to help you find the same items I used). Affiliate links are links that pay me a small percentage if you make a purchase, at no extra cost to you! I always appreciate your support by purchasing through the links, this helps me keep my content coming at ya free of charge!
Materials to Build Dartboard Cabinet:
- 18″ dartboard
- 1 – 1x4x8
- 1 – 1x6x6 or a scrap piece of 1×6 ( you will only need 26 1/2″)
- 1 – 1x2x6 or 2 scrap pieces of 1×2 ( you will only need 2 – 8″ pieces)
- 1 – 1/2″ 2’x4′ sheet of plywood
- 12 ft of 1/4″ x 1 1/2″ lattice (from the molding section)
- 2 knobs
- 4 small hinges
- double magnetic latch
- chalkboard paint
- Kreg jig
- 1″ Kreg screws
- brad nailer
- drill
- 1/8″ drill bit
- wood glue
- saw
- white paint marker
Cut List for Dartboard Cabinet:
- 1 – 1/2″ piece of plywood @ 23″ x 23″ (back)
- 2 – 1/2″ pieces of plywood @ 11 5/16″ x 22 7/8″(doors)
- 2 – 1×4 @ 24 1/2″(frame)
- 2 – 1×4 @ 23″ (frame)
- 1 – 1×6 @ 26 1/2″ (top)
- 4 – 1/4″ lattice strips @ 19 7/8″ (door molding)
- 4 – 1/4″ lattice strips @ 11 5/16″ (door molding)
- 2 – 1×2 @ 8″ (dart holders)
Building the DIY Dartboard Cabinet
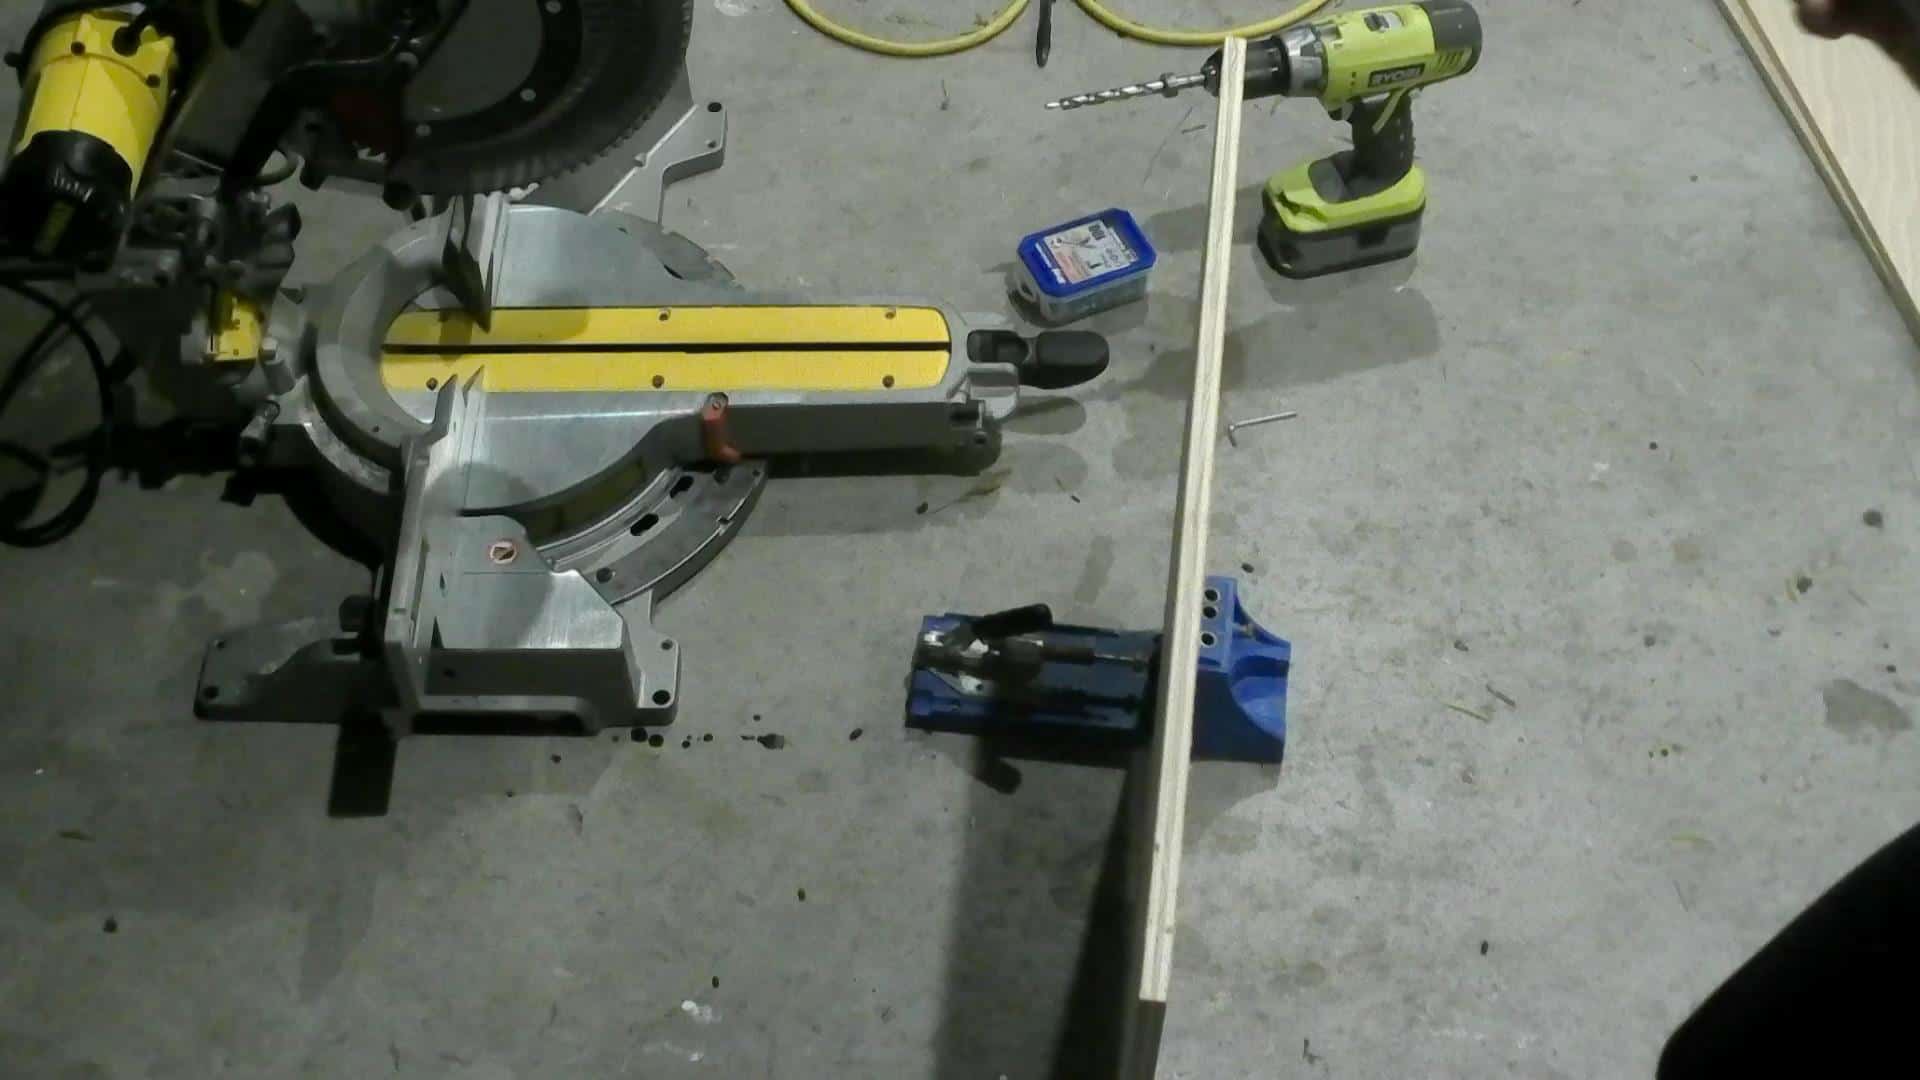
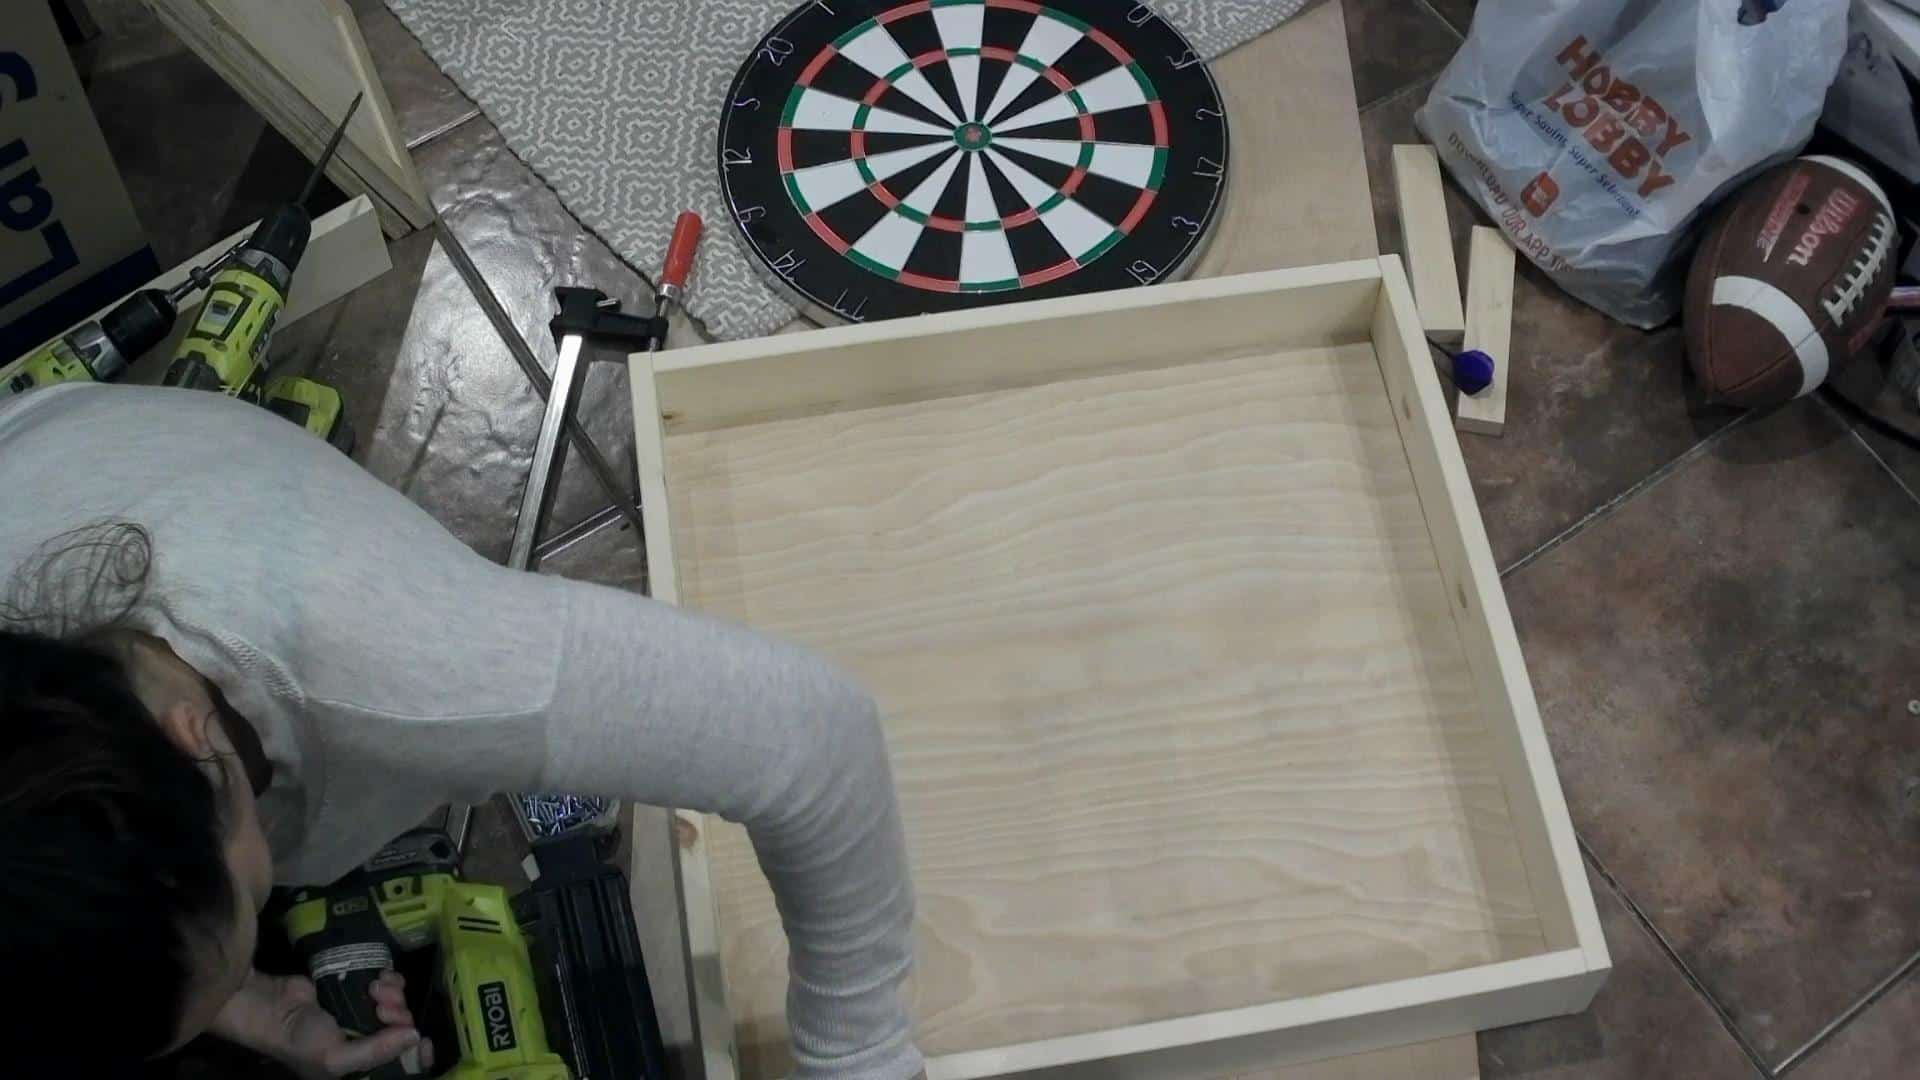
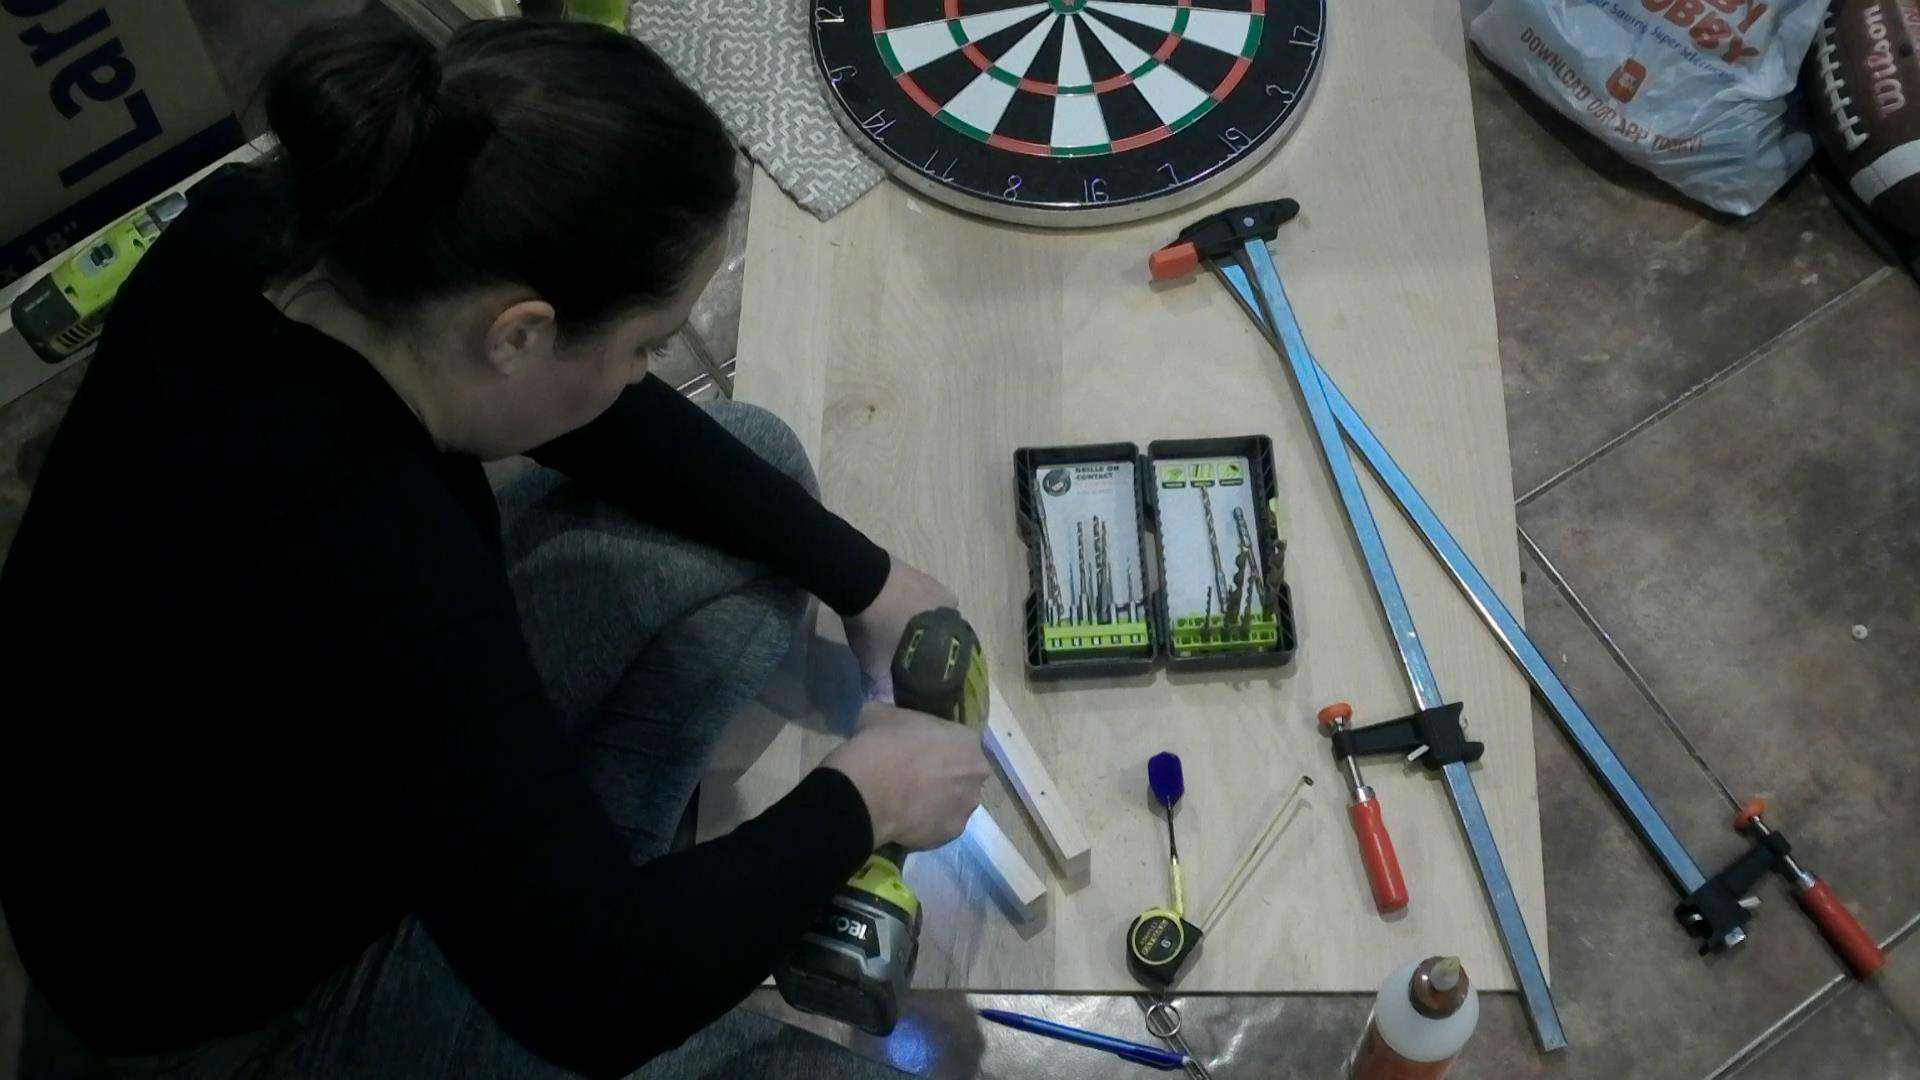
To start I ripped down my plywood to 23″x 23″ so that I could get by using one 1×4 instead of needing two! If you don’t have a table saw to rip the plywood you can use a clamp and a board as a guide, or the Kreg Rip-cut works really well! Or have Home Depot or Lowe’s do it for you when you purchase your plywood, just know that they won’t be the prettiest cuts!
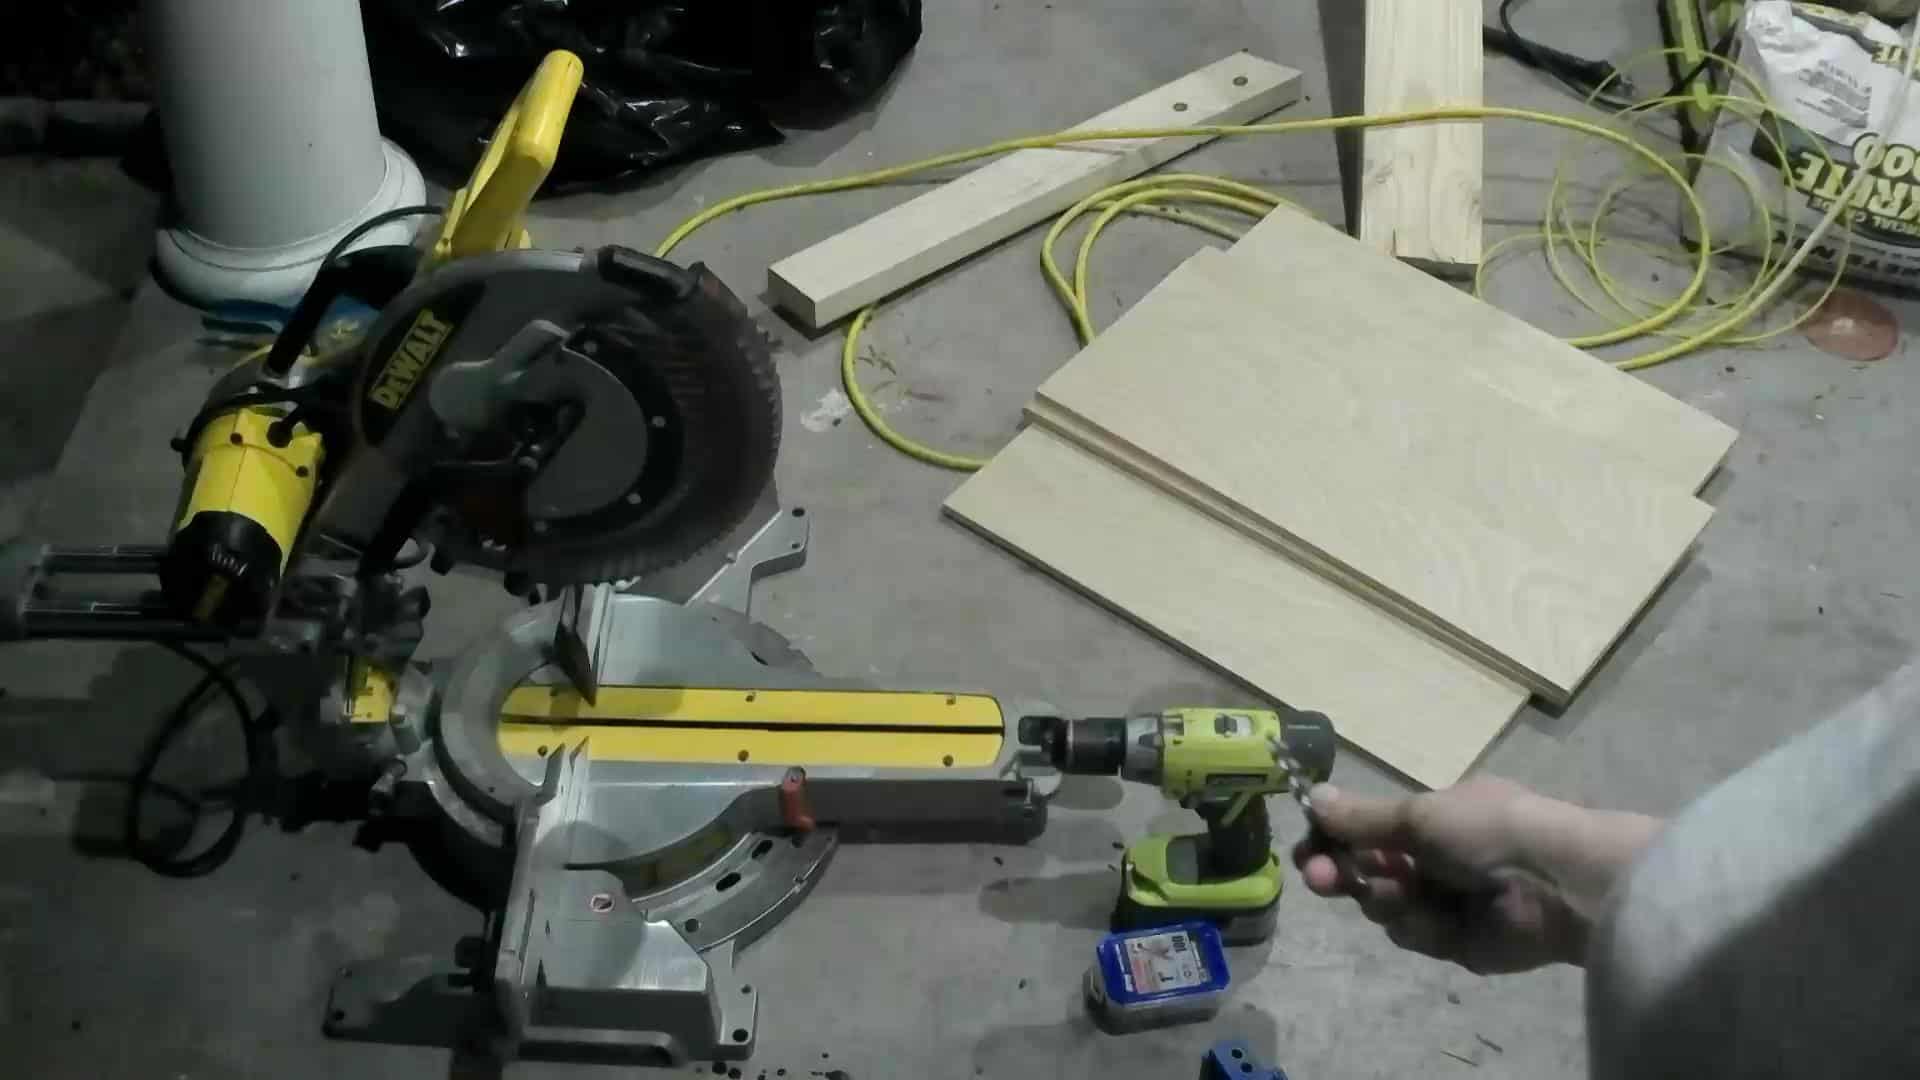
Next, cut the frame boards. To attach the frame boards, you will need to drill pocket holes in the back plywood. If you don’t have a Kreg jig, you could get by with using a brad nailer and wood glue, it is just really hard to shoot brad nails into 1/2″ plywood without any of them getting wonky and blowing out the side!
Using your Kreg jig, set your jig to 1/2″, then set your drill bit to 1/2″ and clamp your board into place. (sorry the pics are blurry, they are from the video)
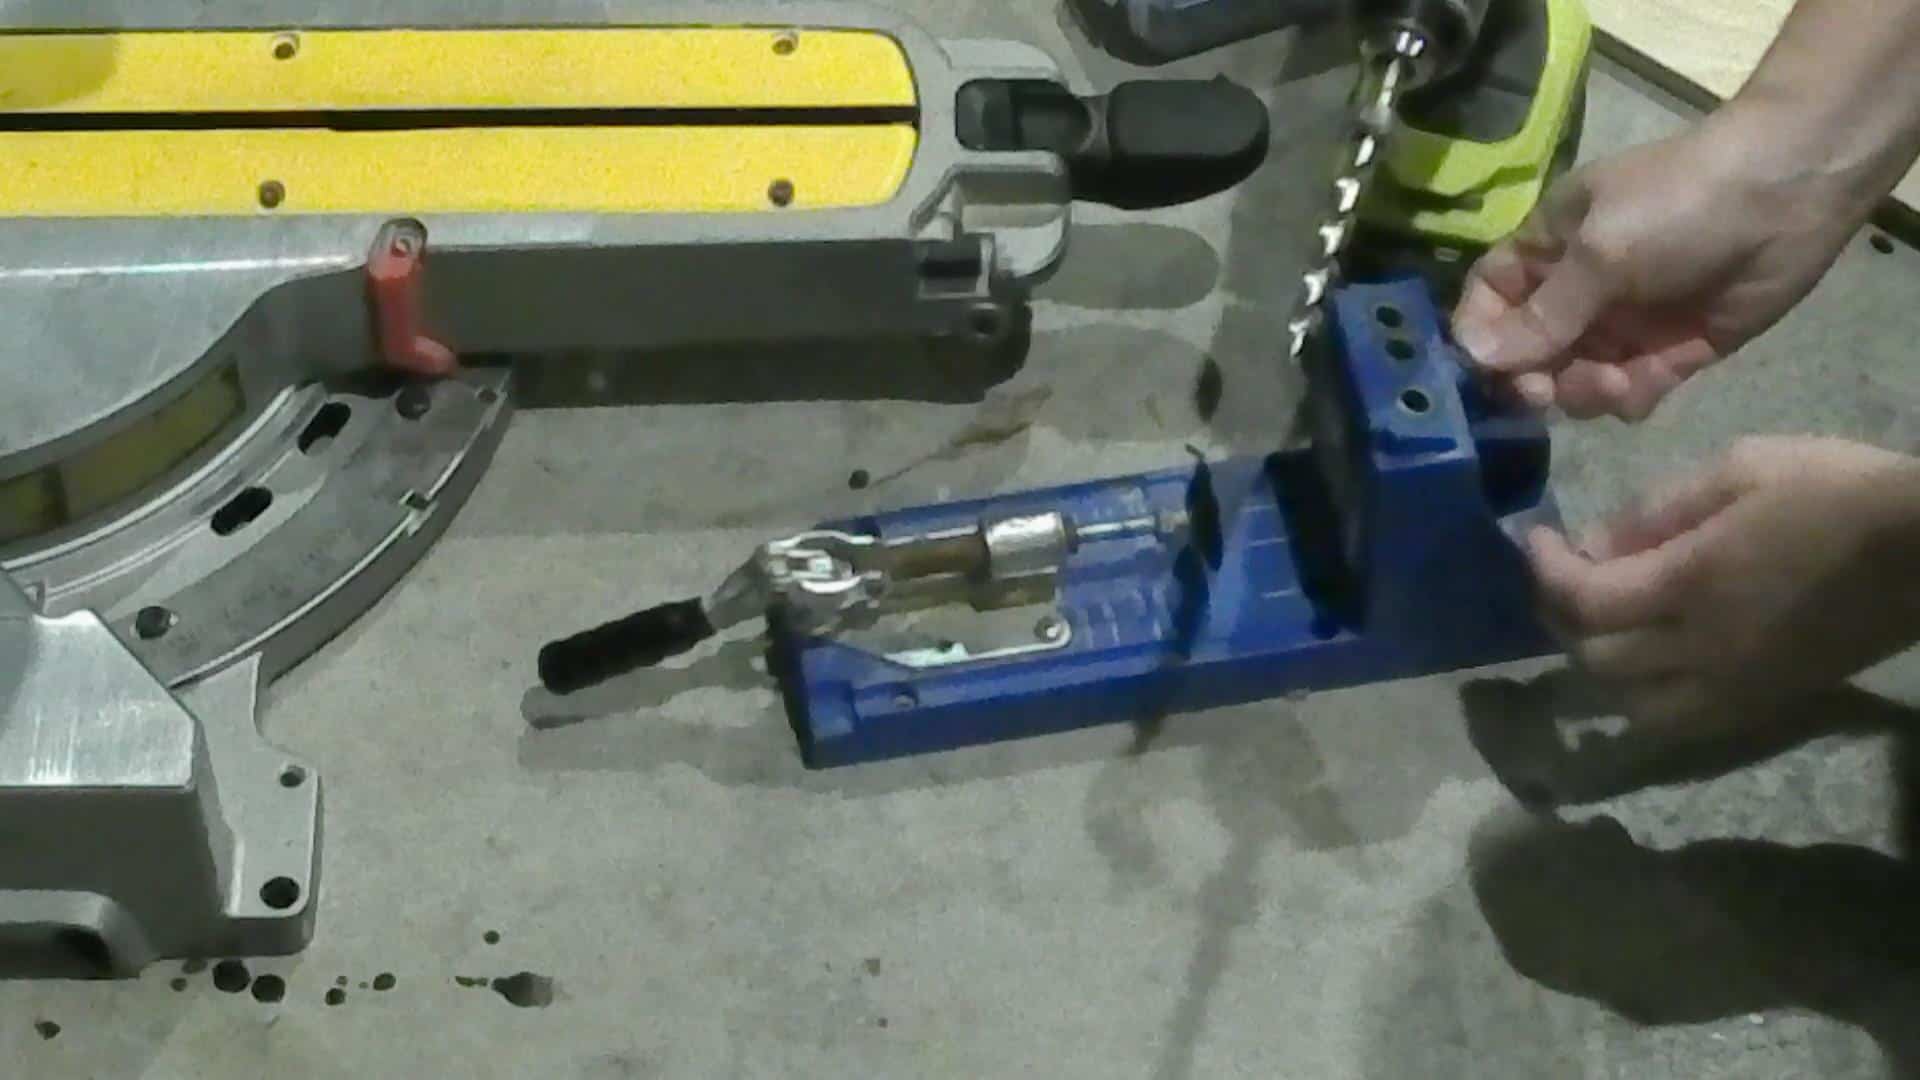
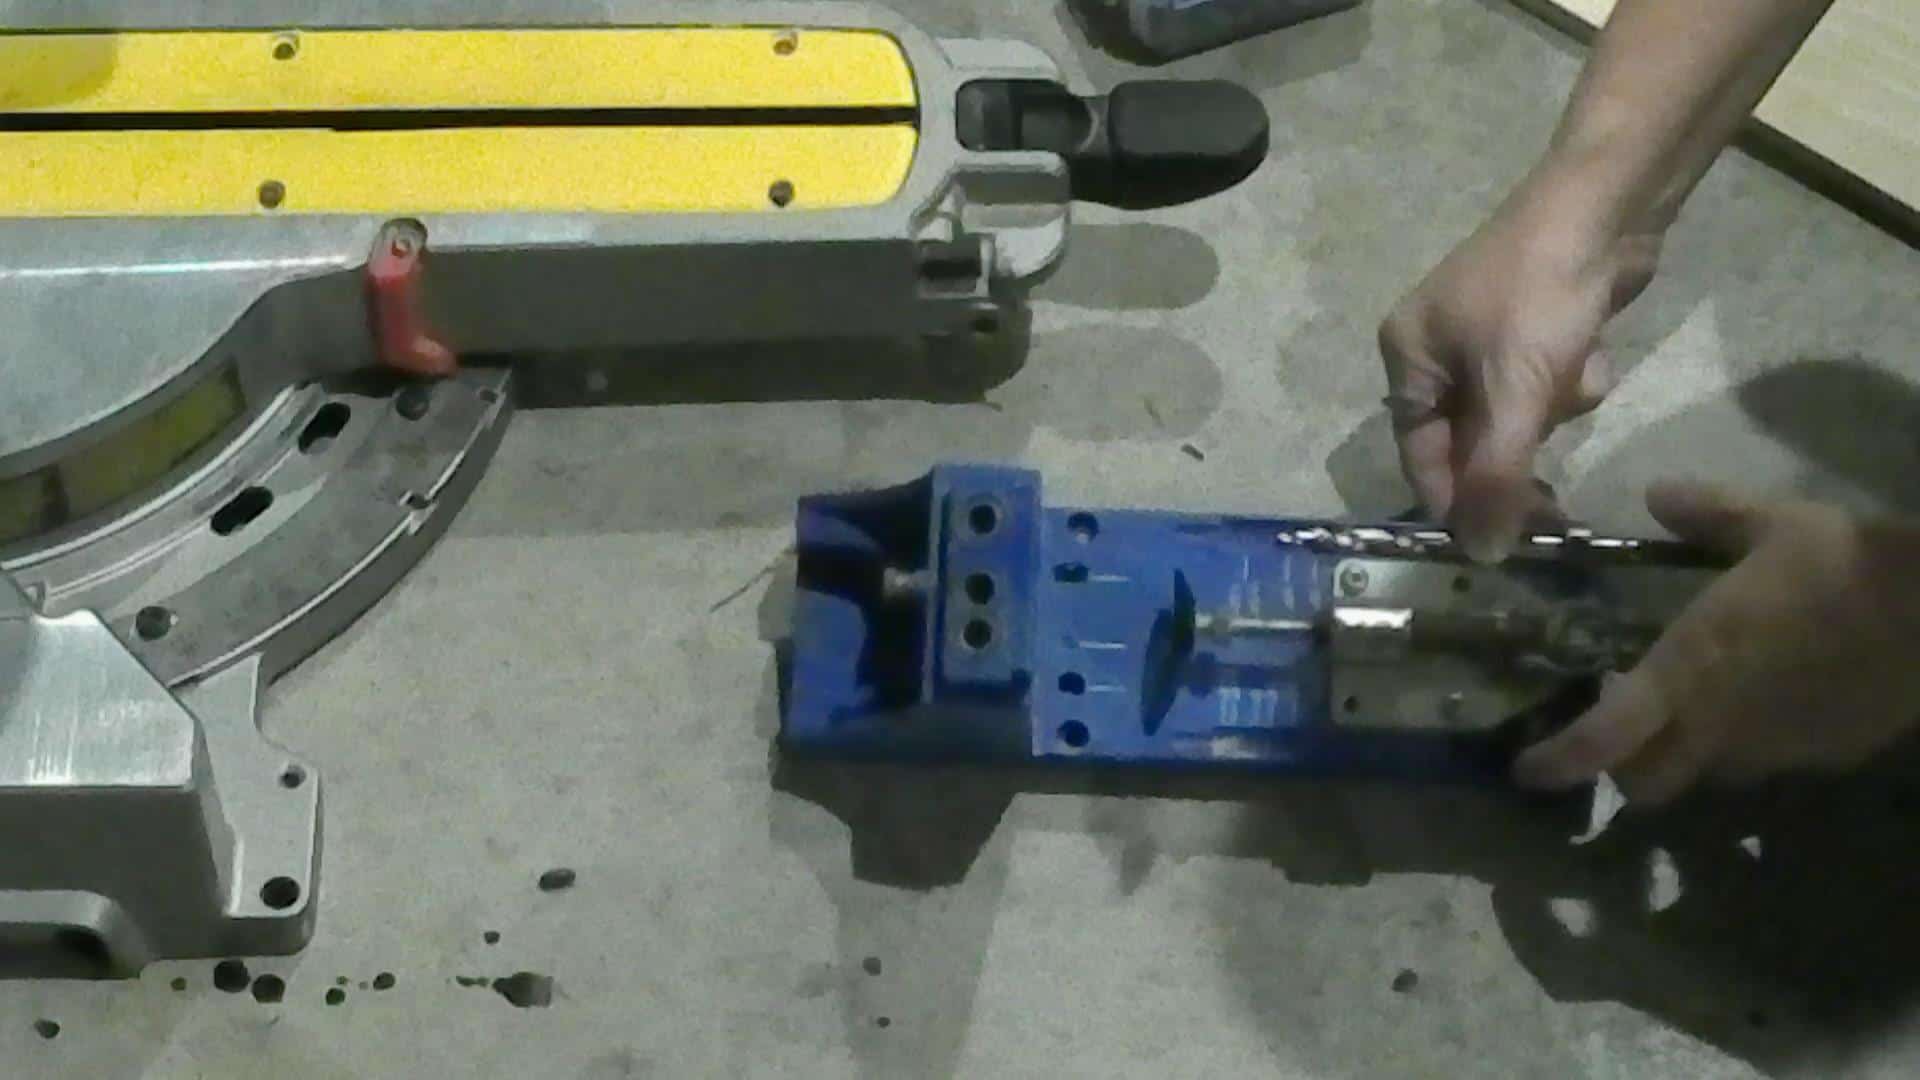
Drill holes all around your plywood.
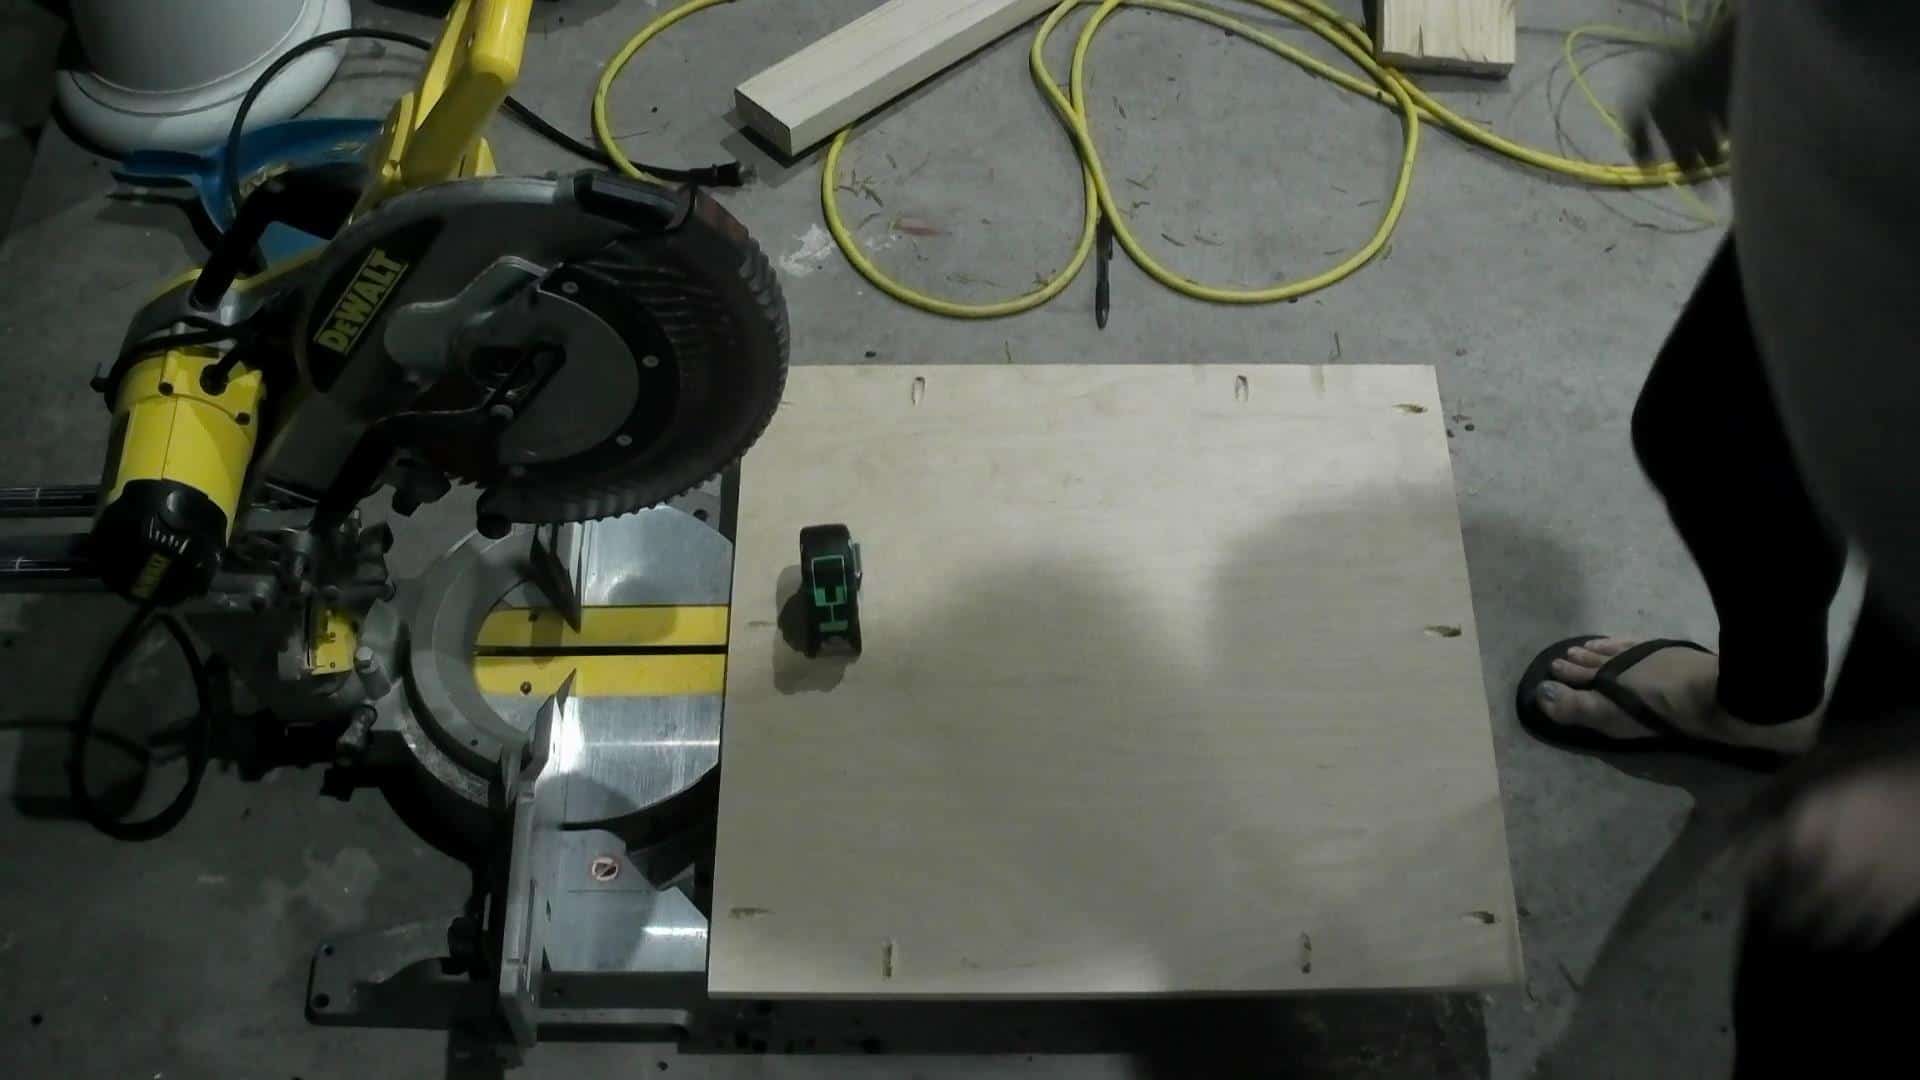
Using wood glue and 1″ pocket hole screws, attach the frame boards to the plywood.
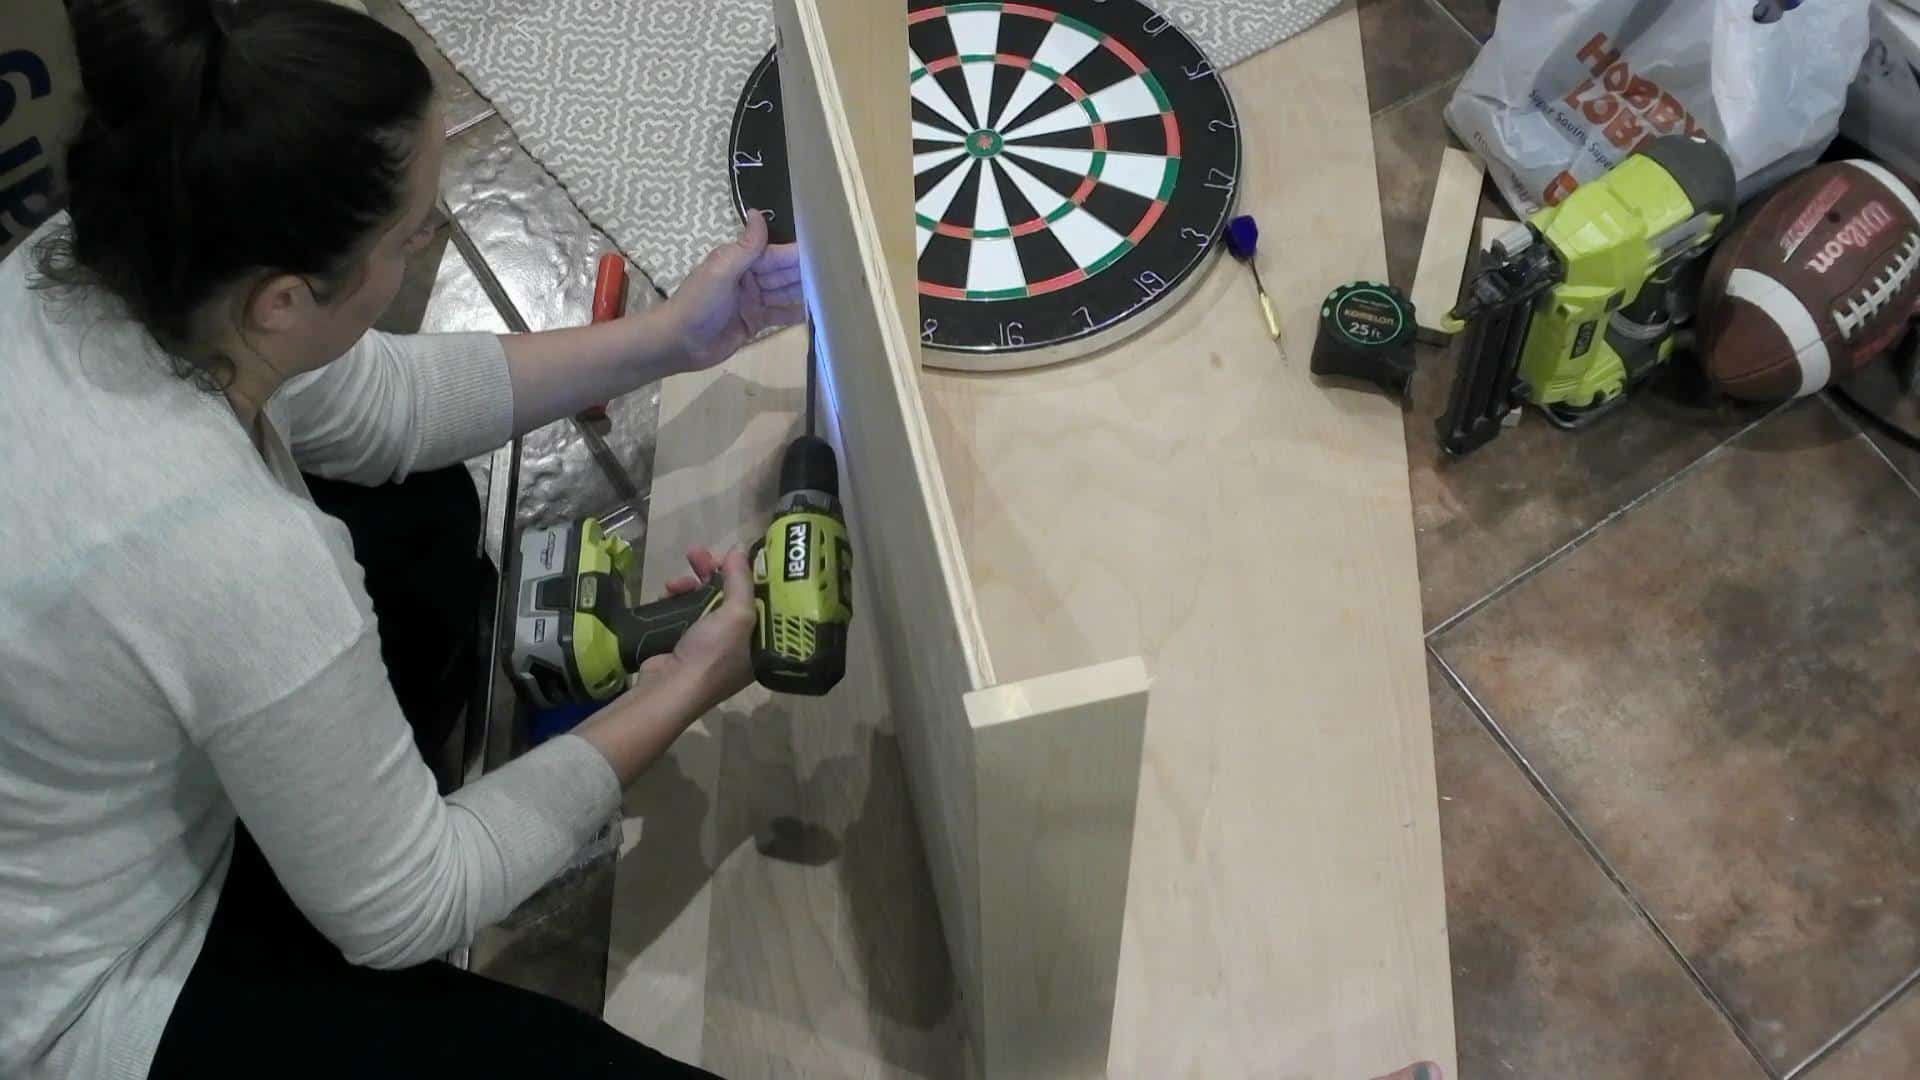
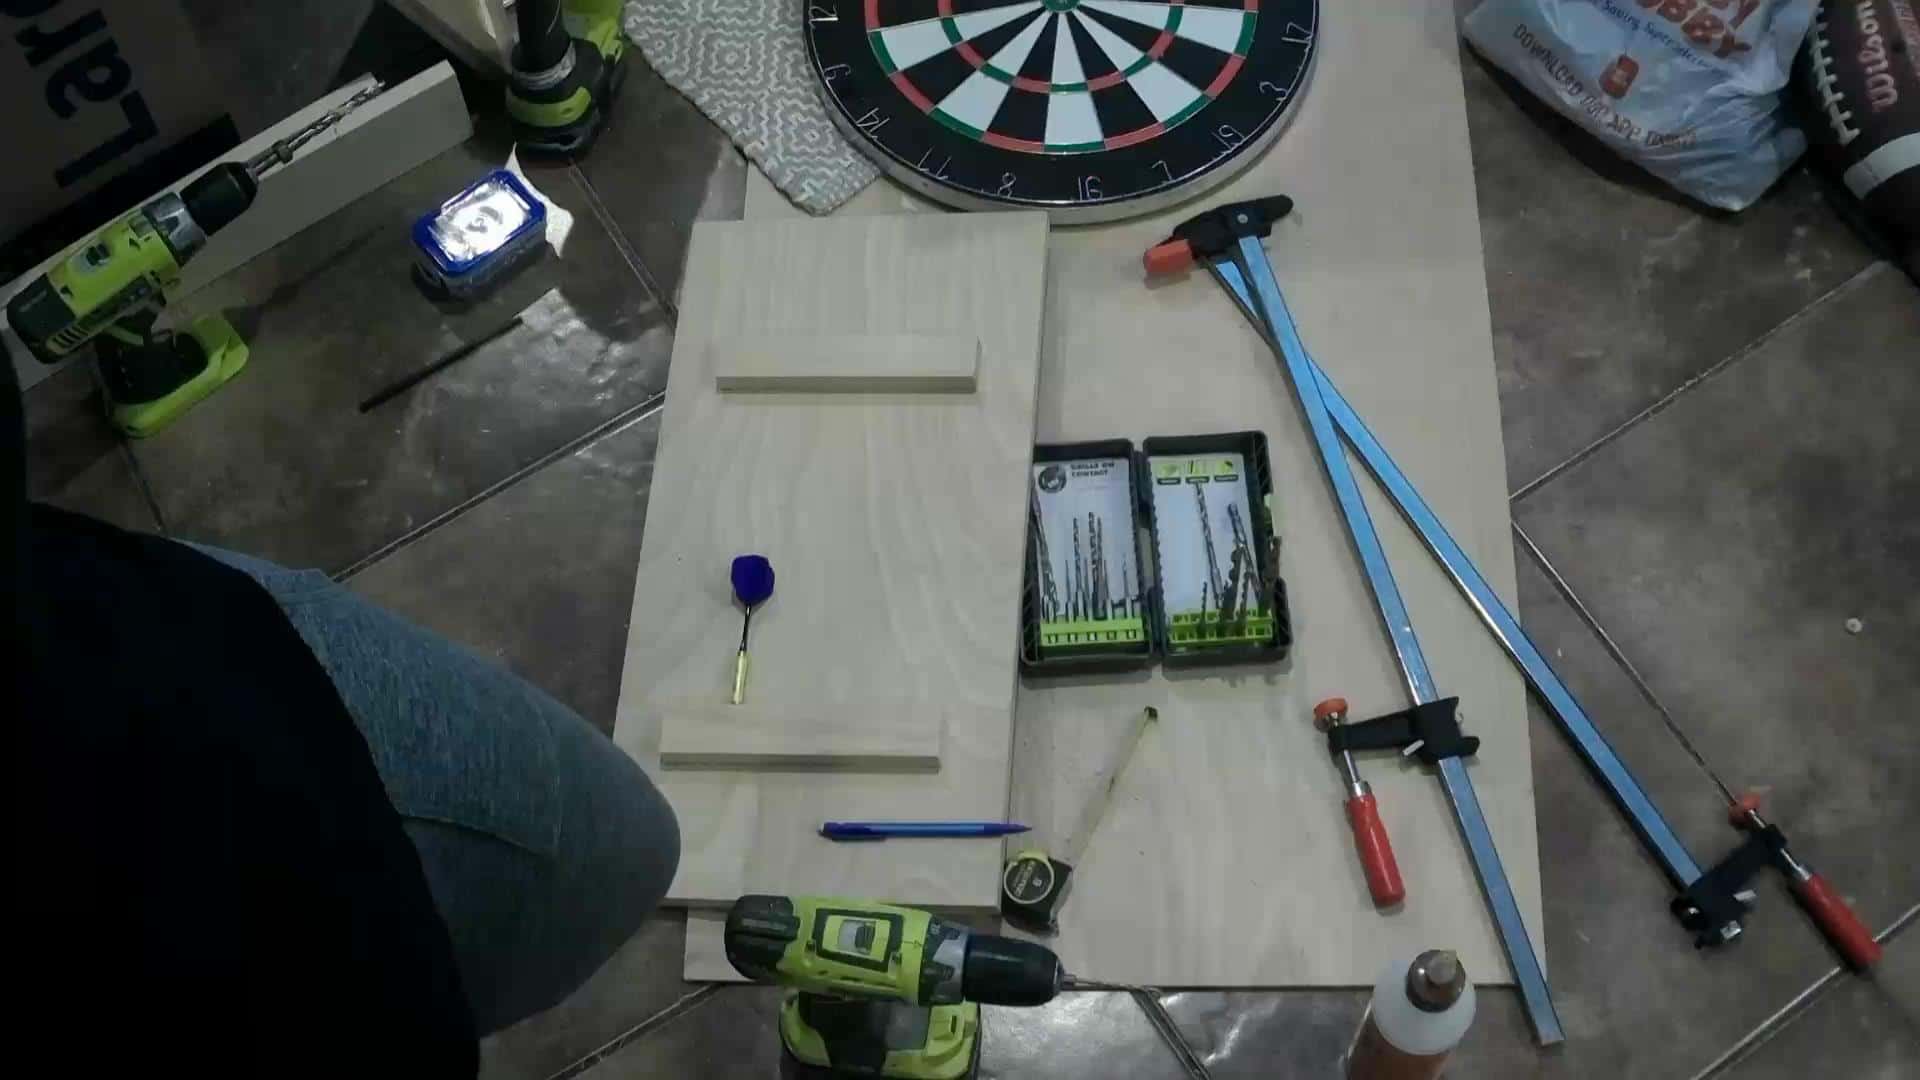
Flip it over and brad nail the side so they don’t lean inward.
I love how that was JUST cut off from the frame of the camera! 🙄 Hopefully, you can still figure out what I am doing!
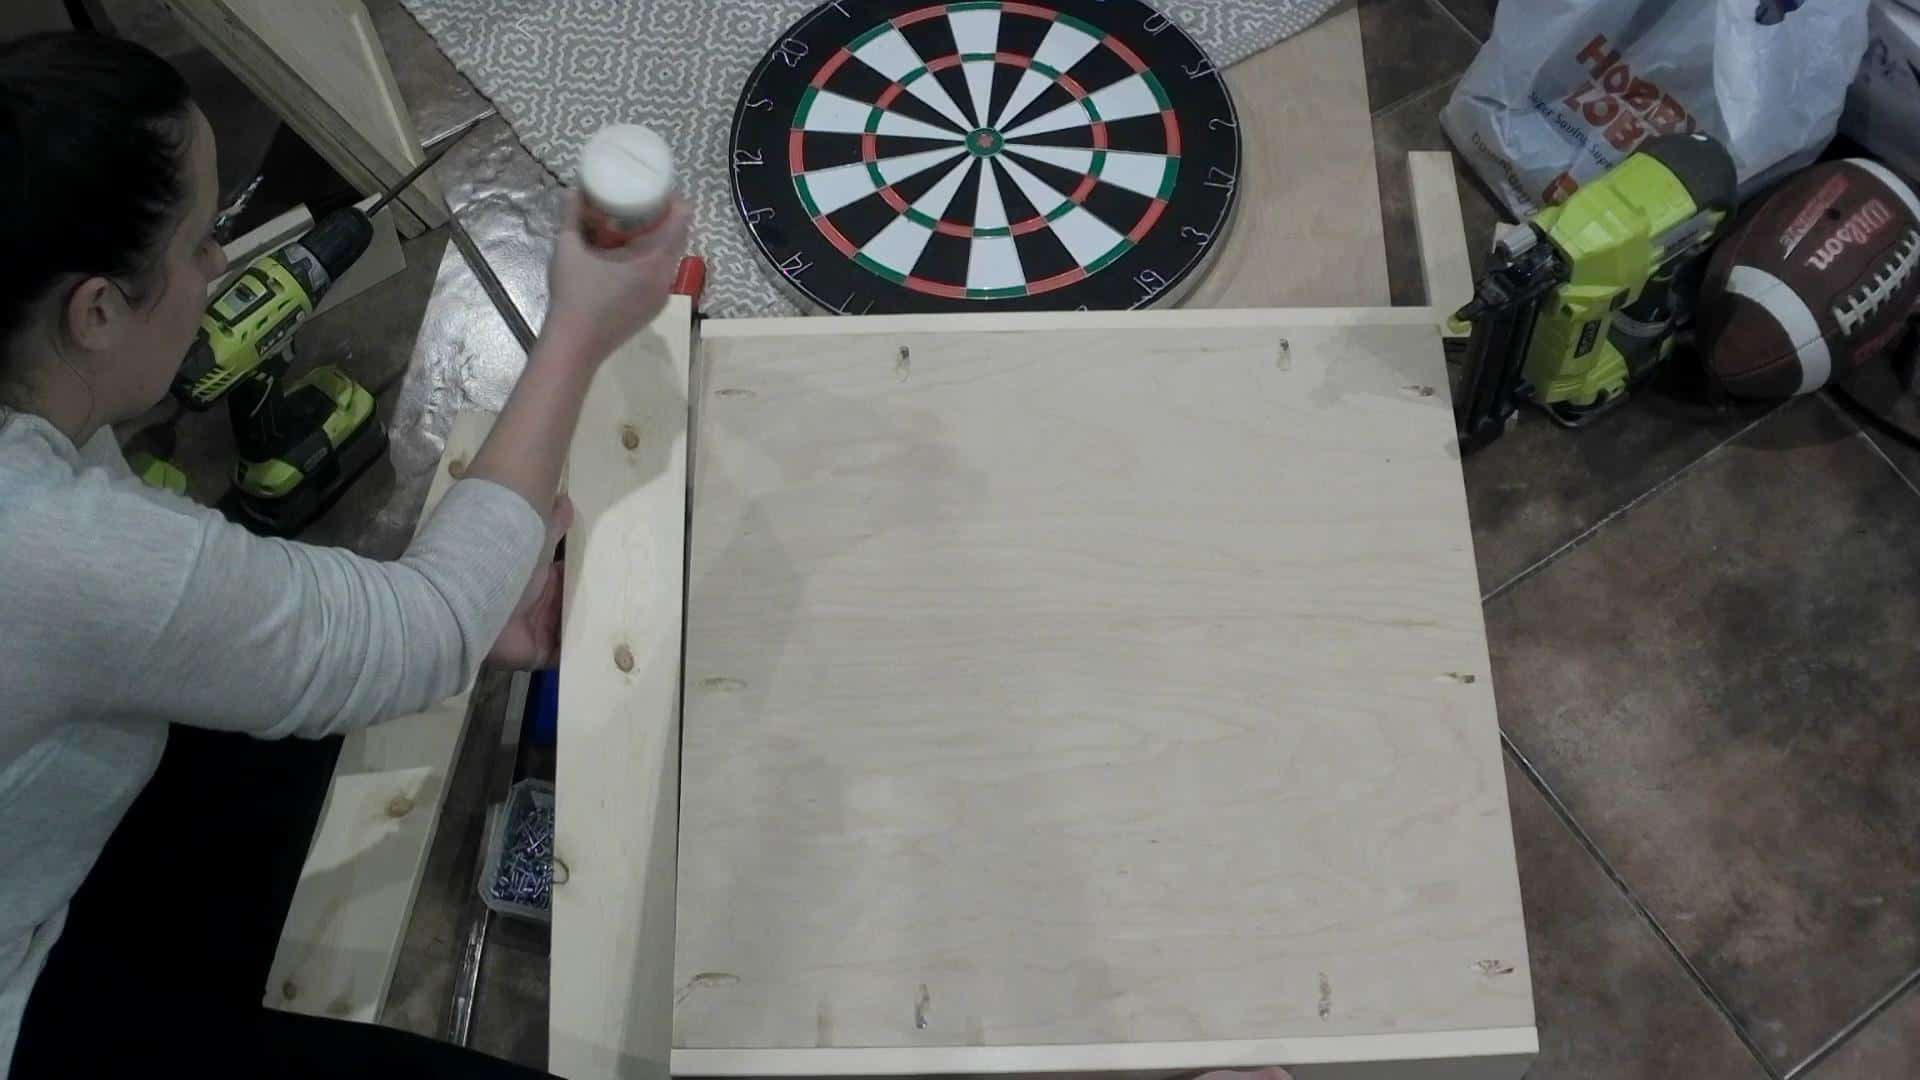
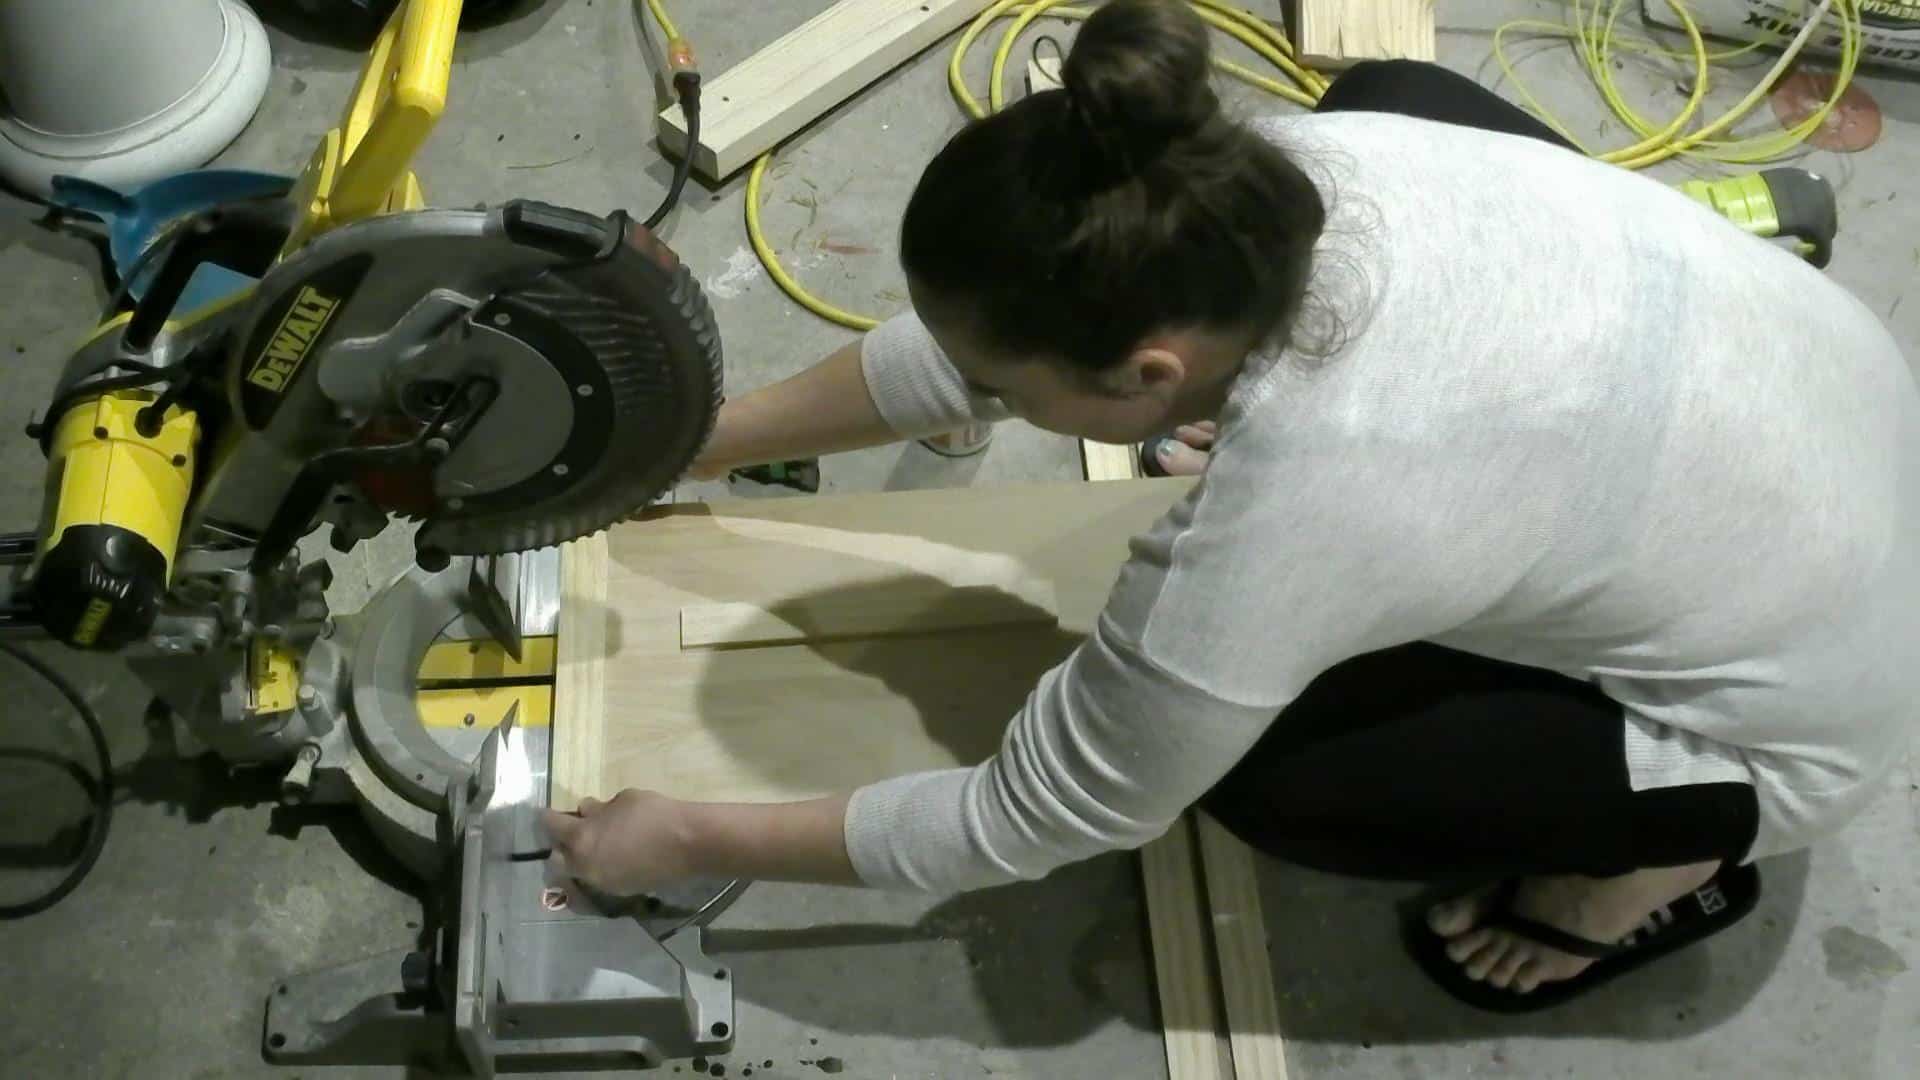
Add the 1×6 (ripped down to 4″) to the top of the frame. Center it, then use glue and brad nails to attach it!
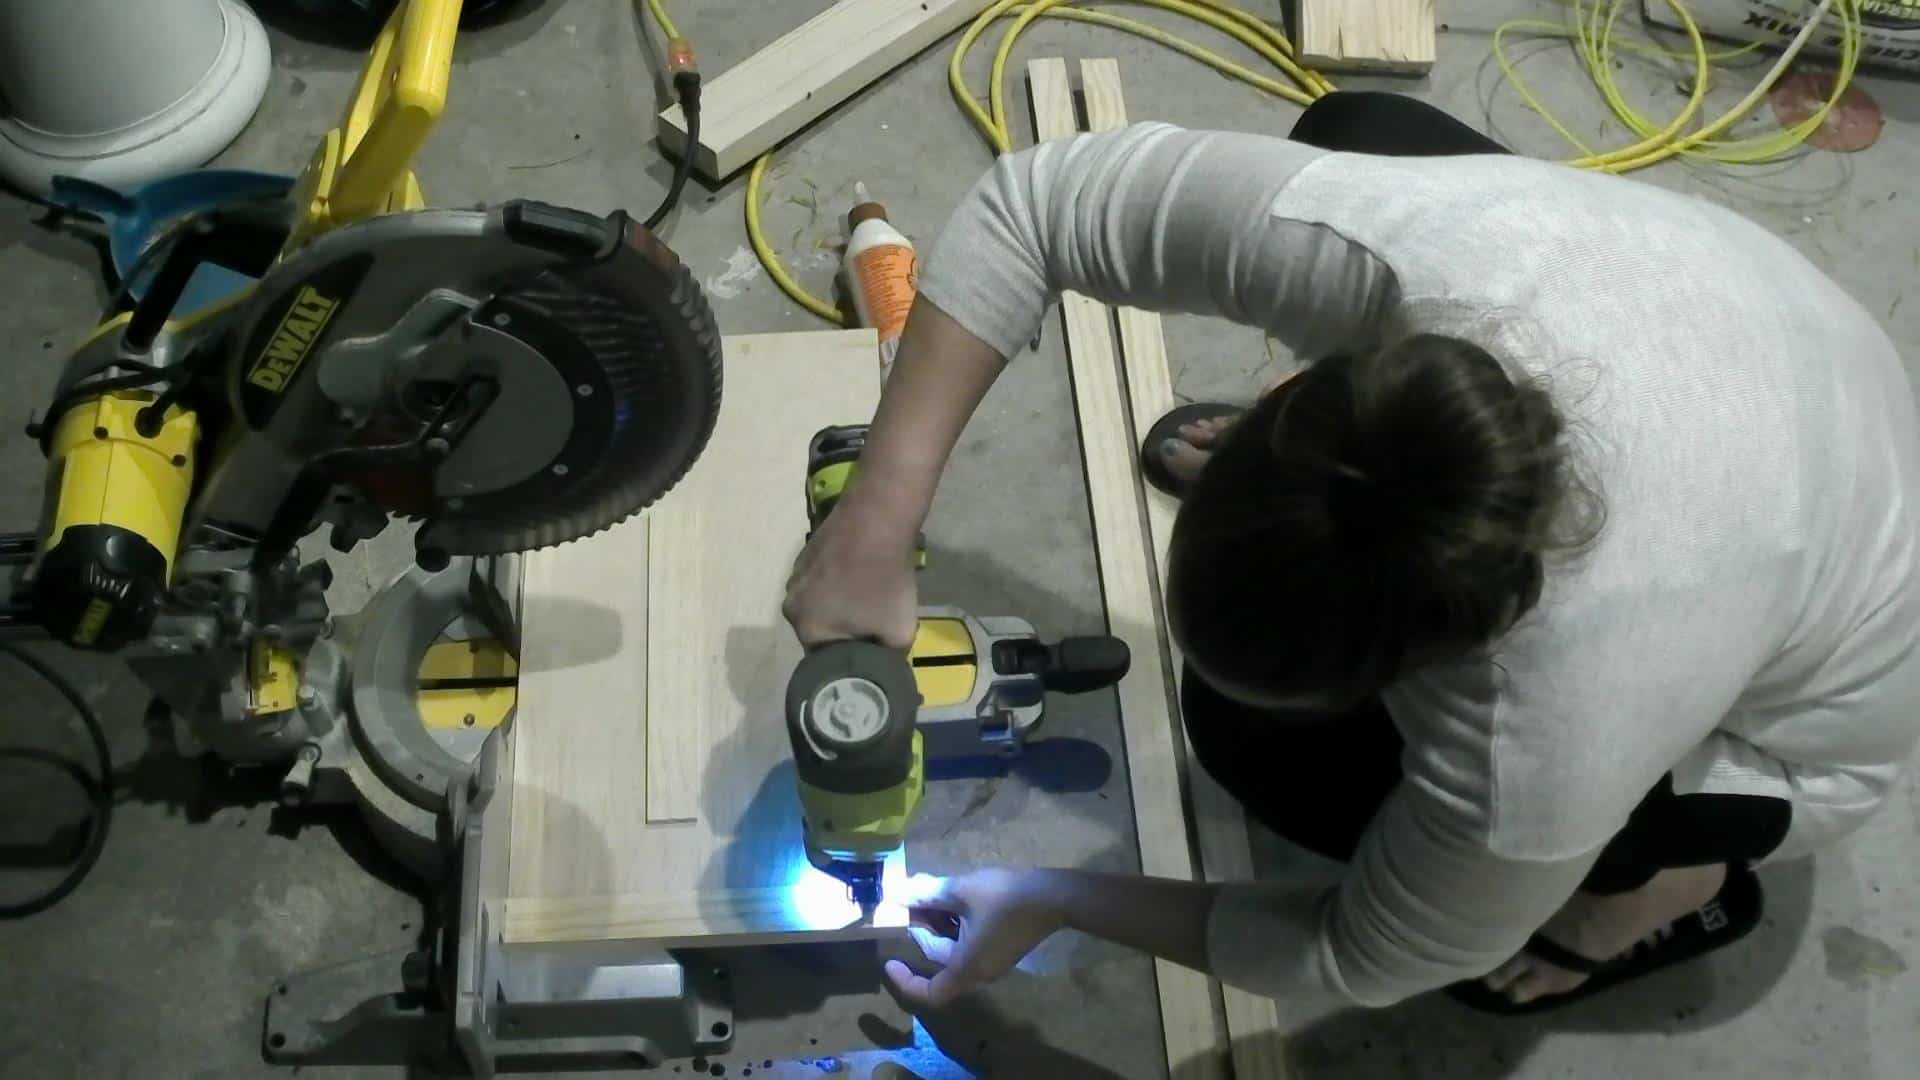
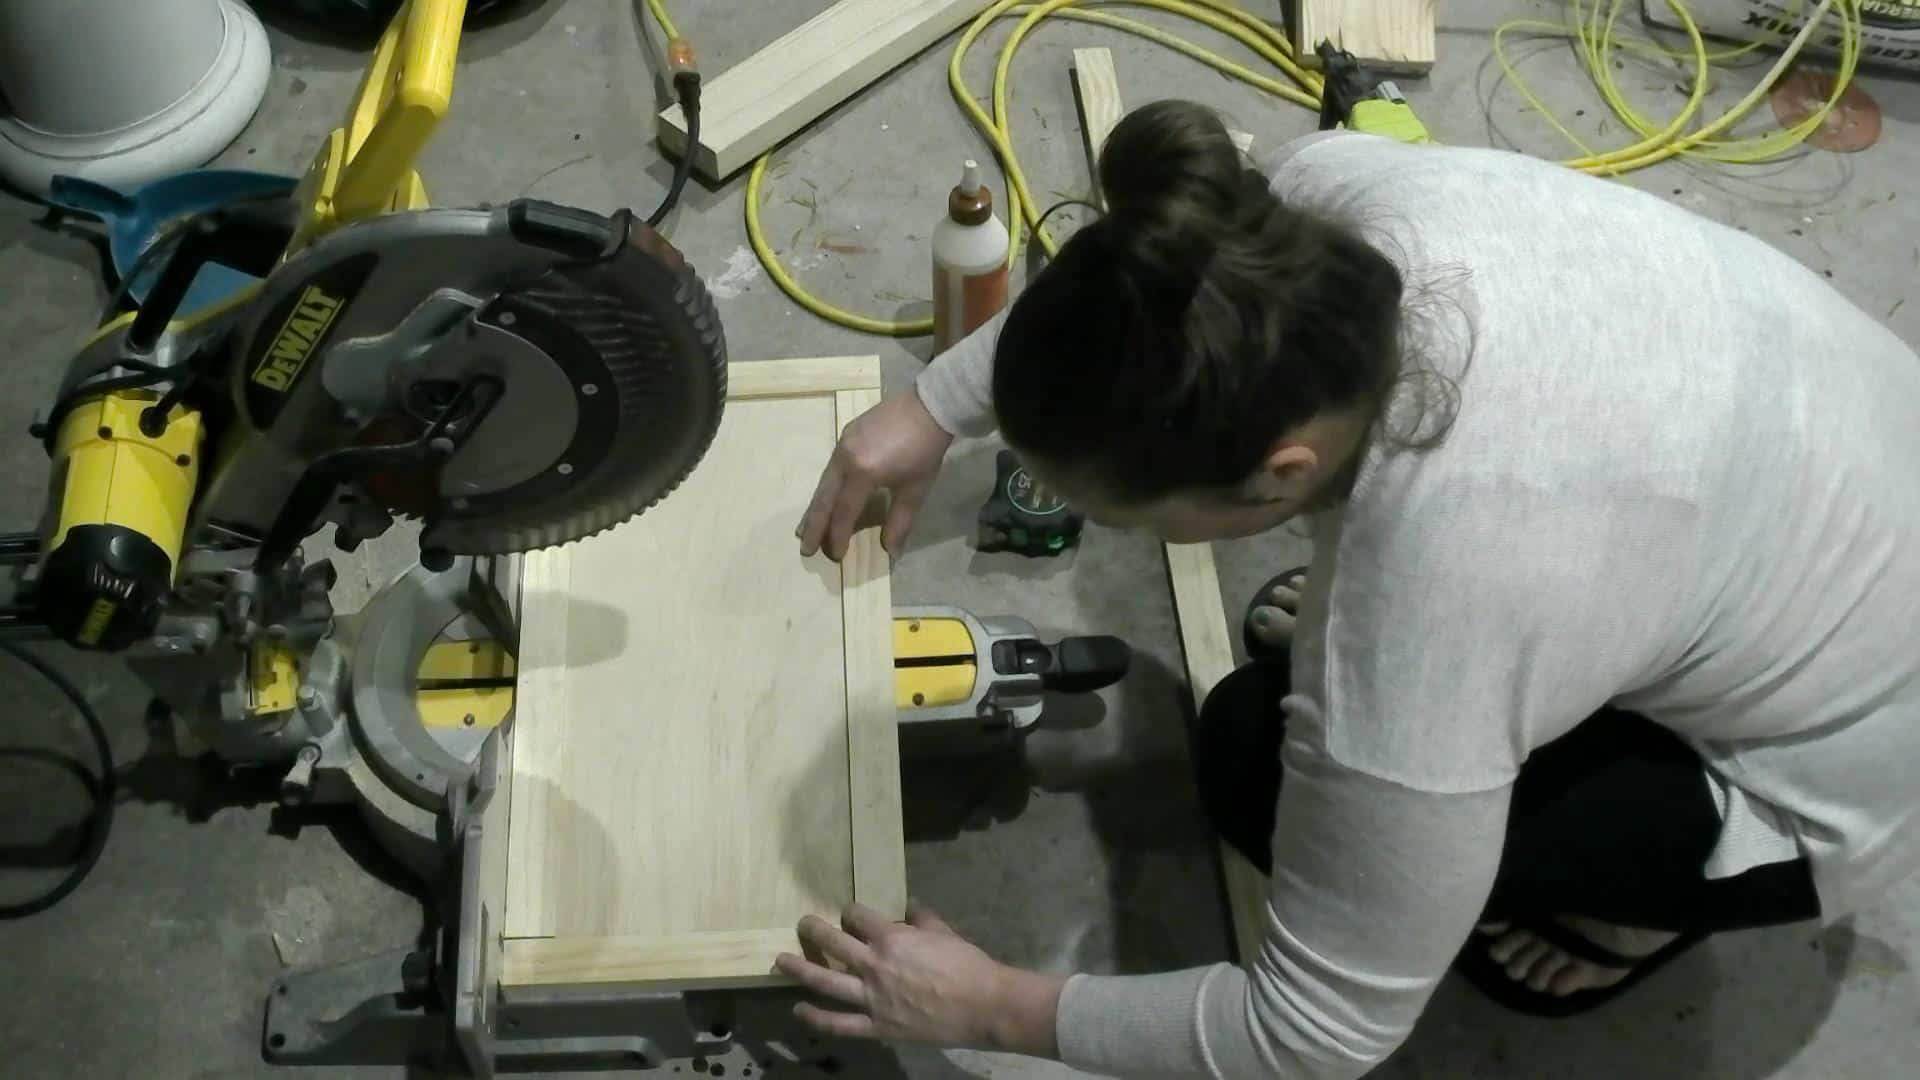
Next, cut your lattice strips for the doors. Attach them with wood glue and 5/8″ brad nails. Make sure the depth of your brad nails is just right so they don’t come out on the other side!

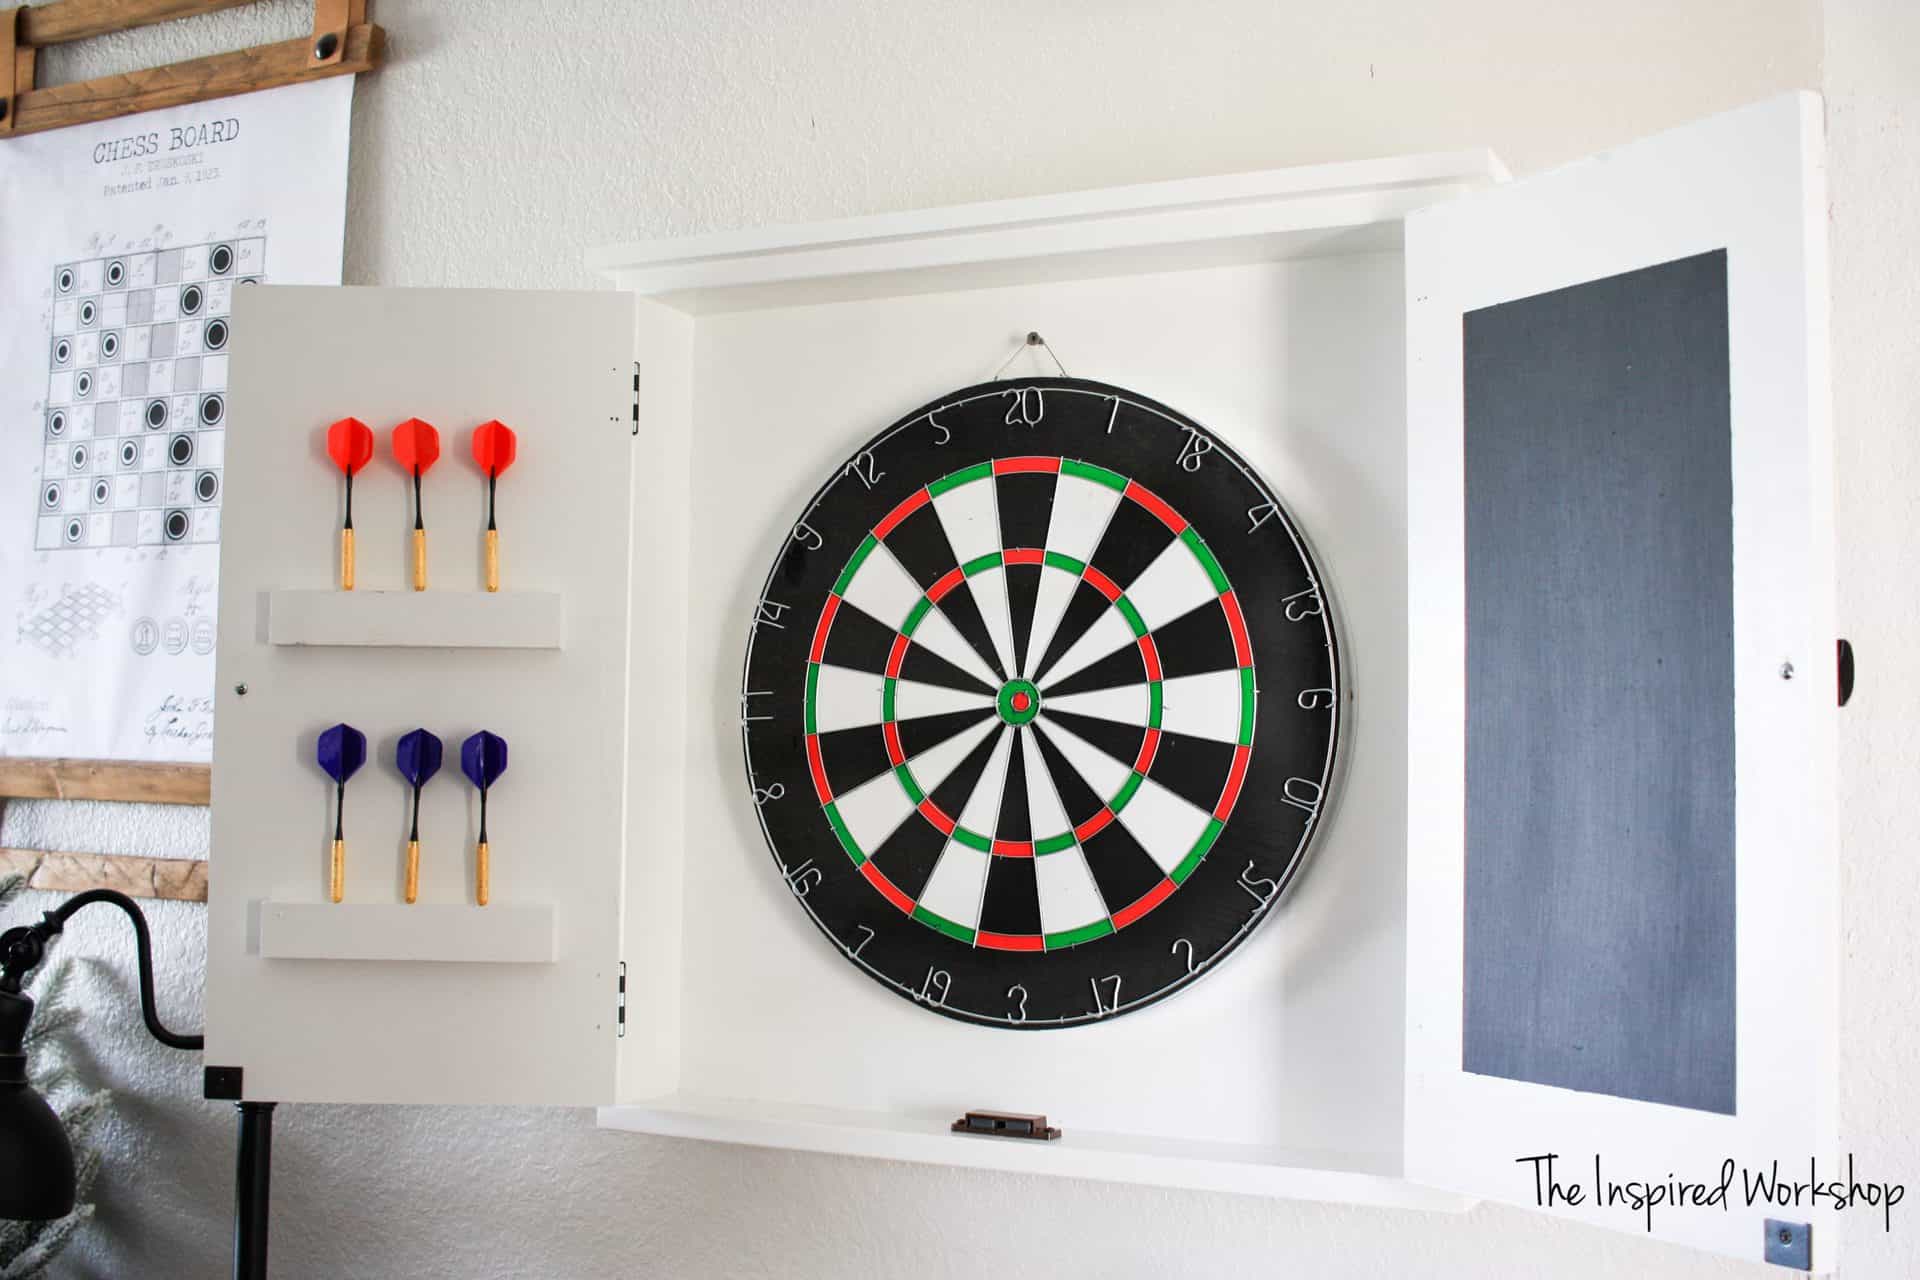
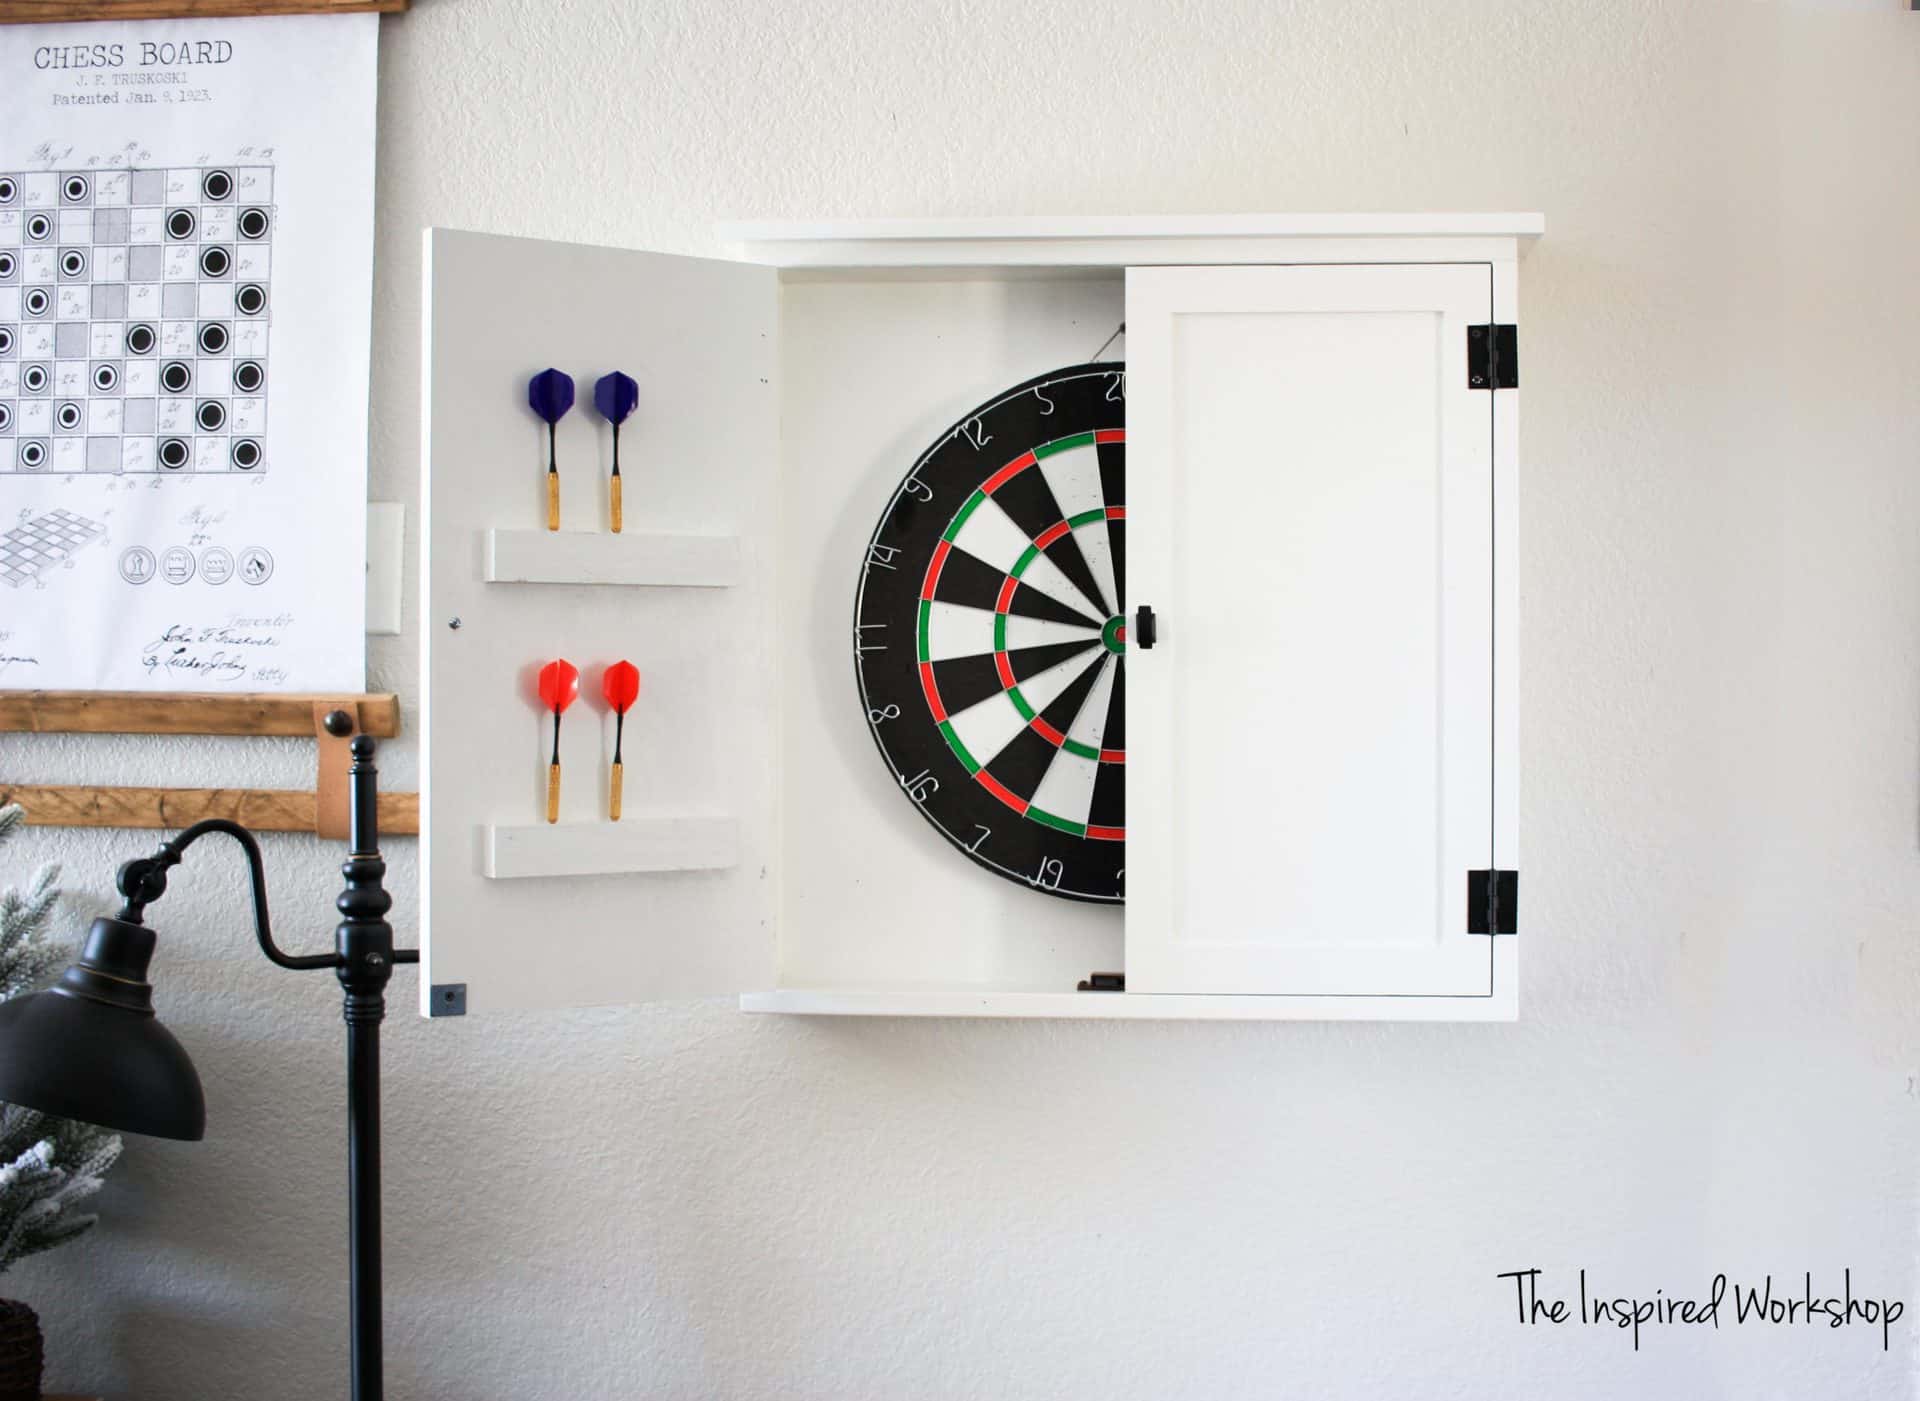
Once the doors are framed out on the front, you can dress them up on the back! To make your dart holders, you will need to drill holes in the center of your 1×2 at 2″, 4″, and 6″. They will be drilled into the 3/4″ side of the 1×2.
Then glue the 1x2s onto the backside of one of the doors. Make sure to center them on the door.
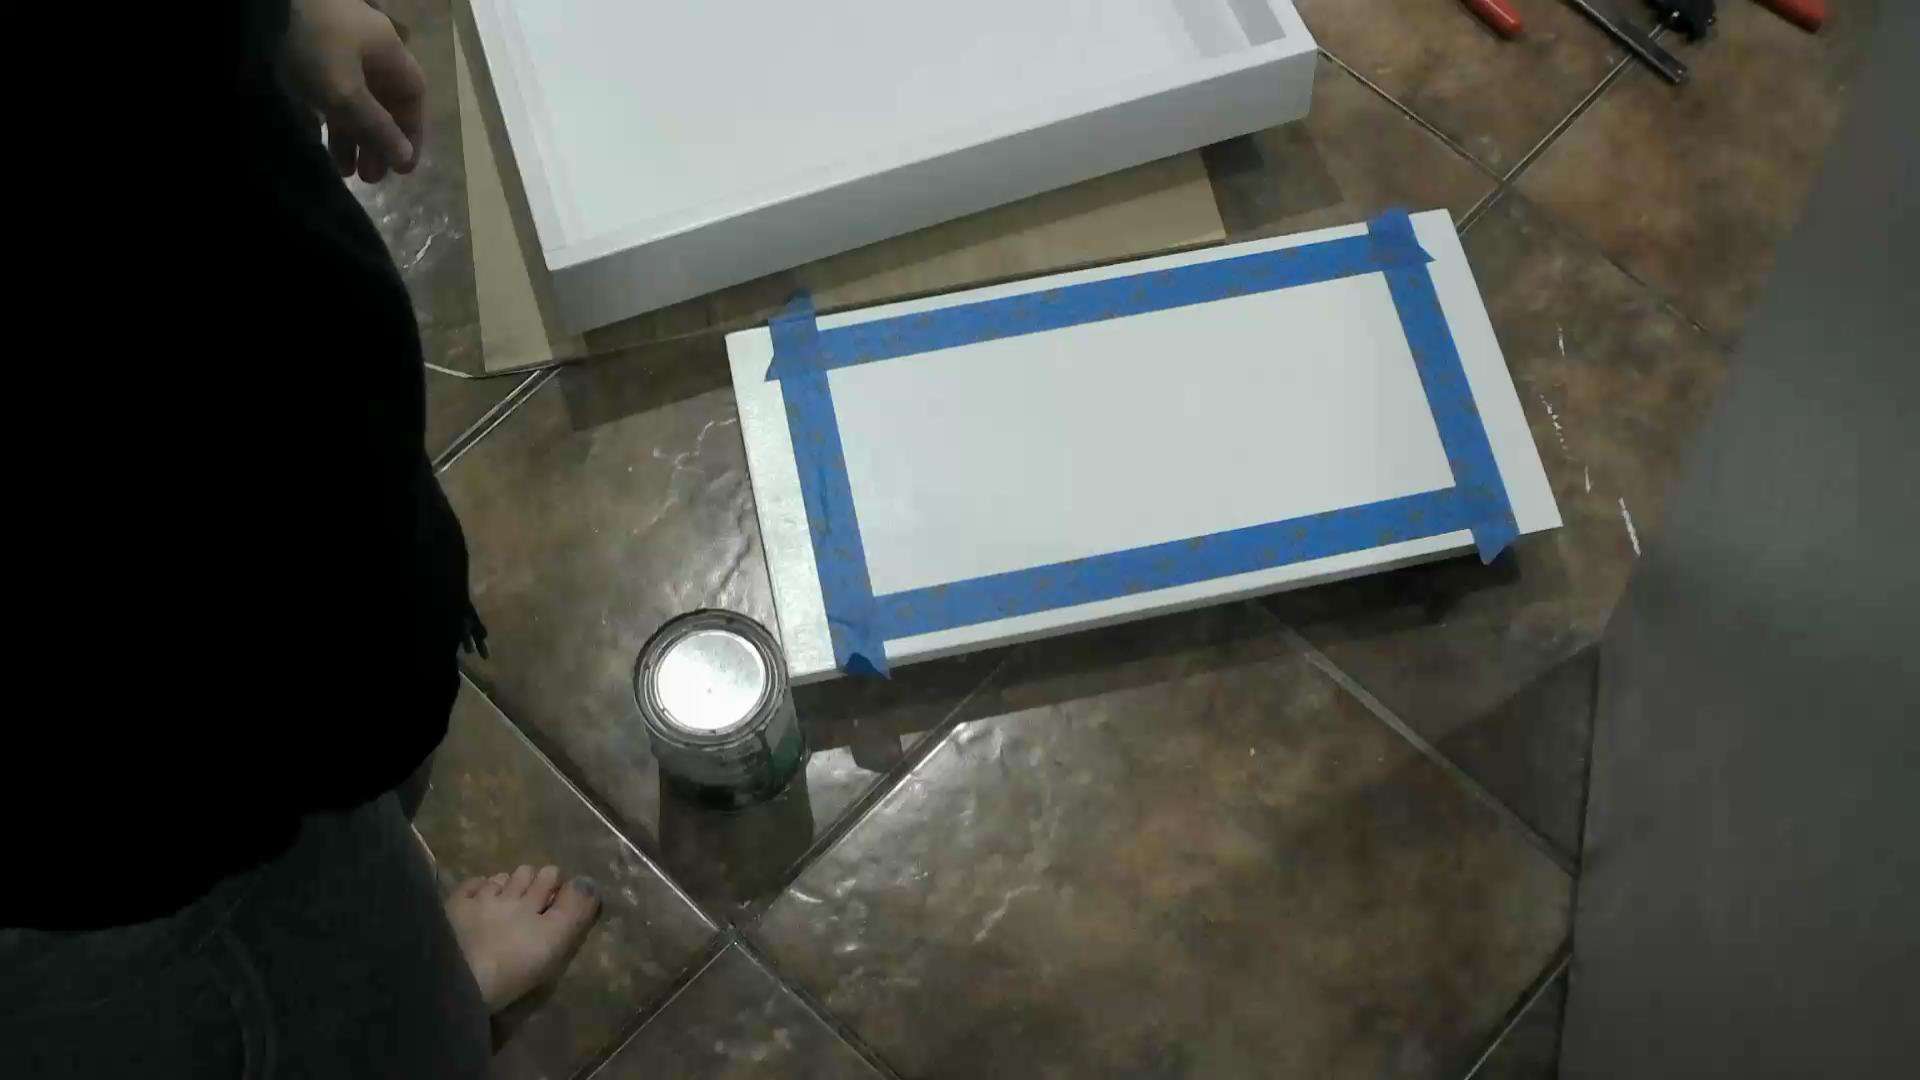
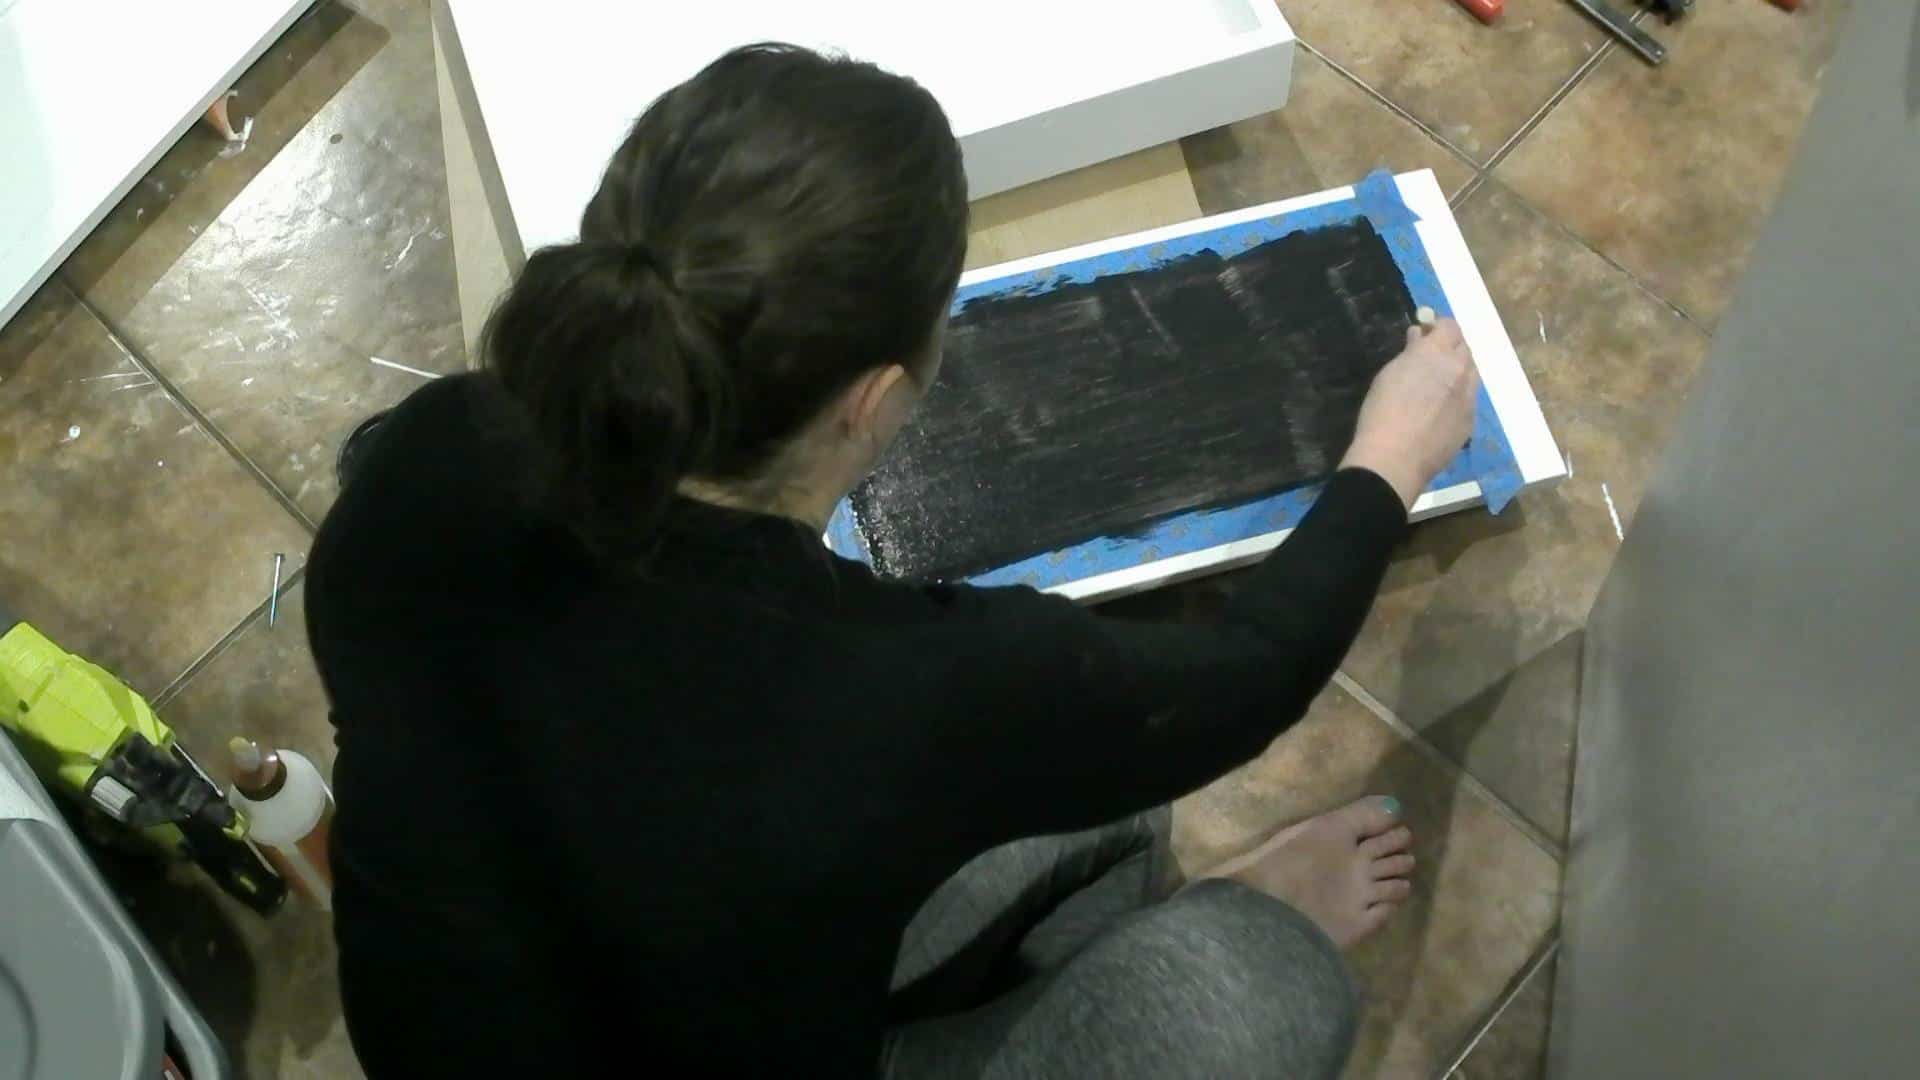
Paint or stain your pieces at this point!
Then, using painter’s tape, tape off a section of the door that you did not place your dart holders on, and paint it with chalkboard paint. This will be your scorekeeper.
Attach the doors to the frame with your small hinges. I used them flat since that is the simplest way you can use hinges! Lol! Also because it gives it a little character if you ask me! (no photo, sorry…my hubby did this for me while I was sleeping)
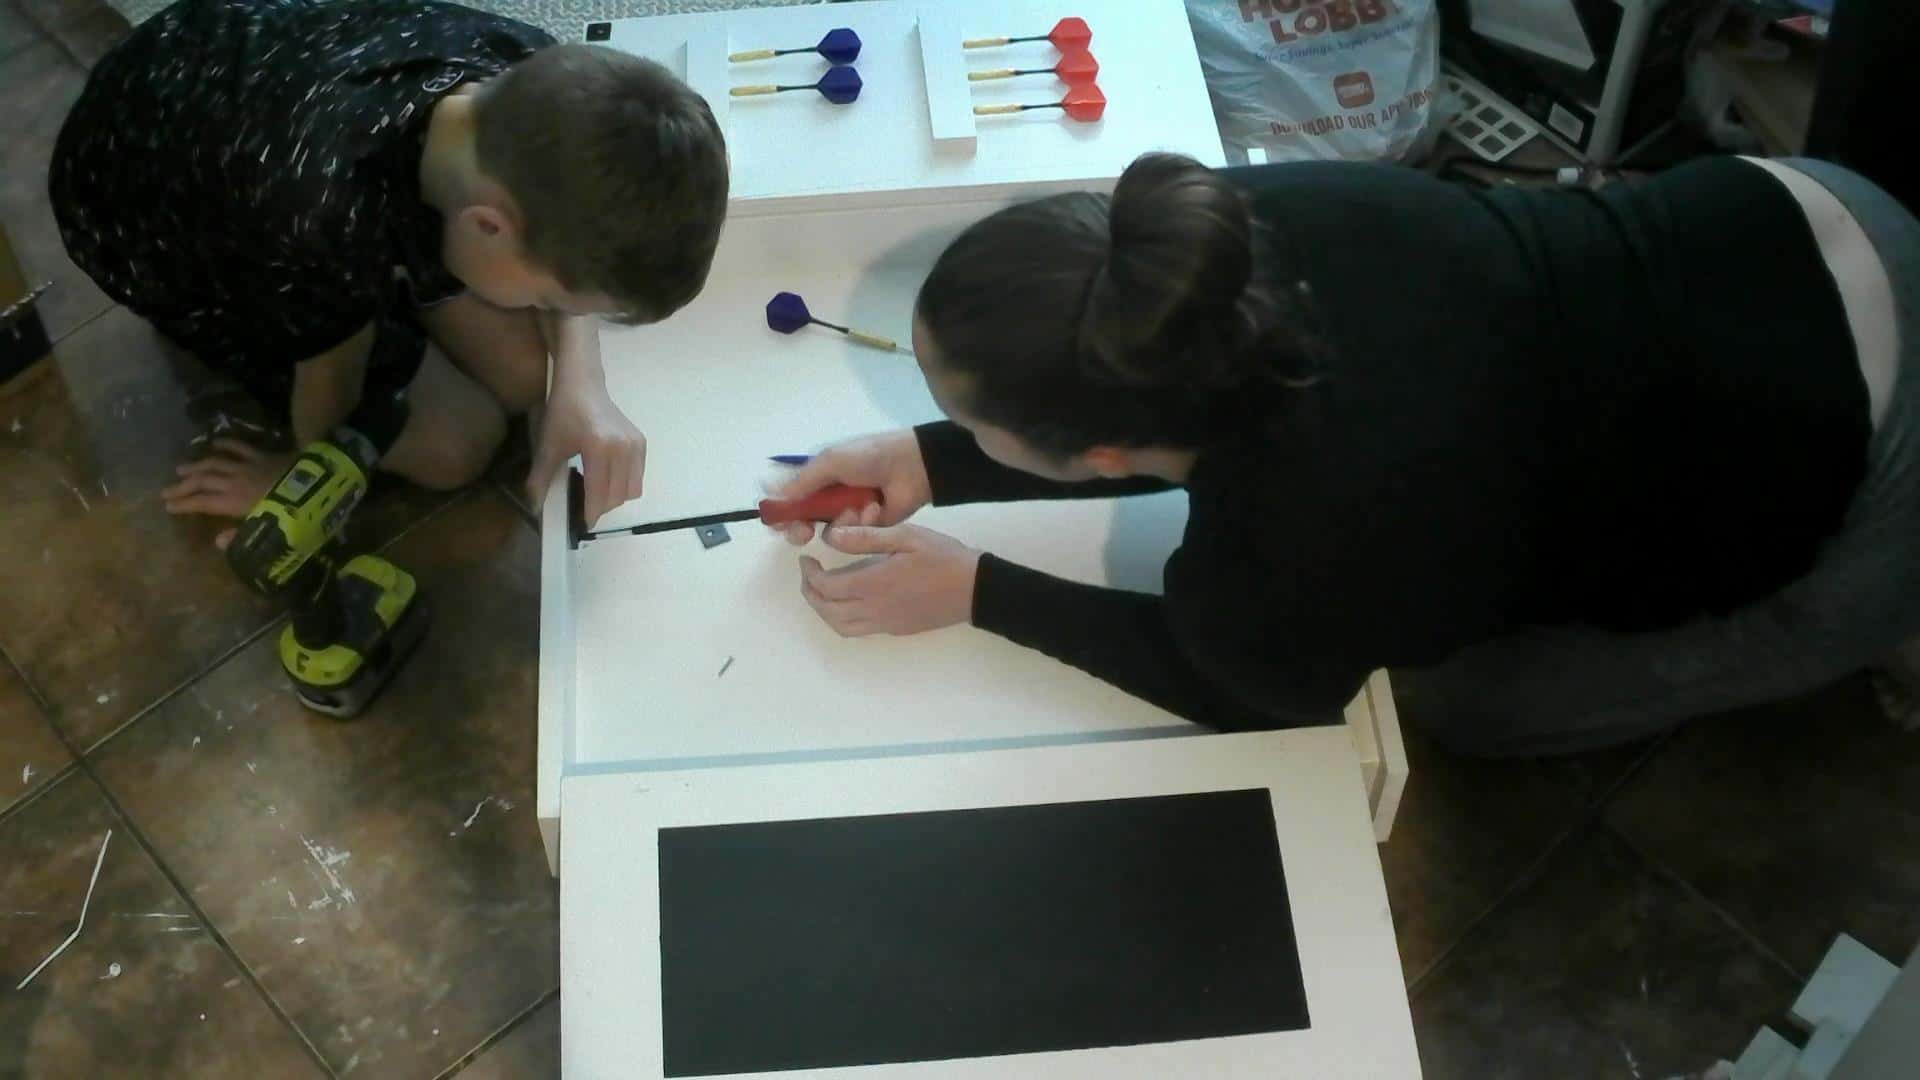
Attach the magnetic latch so that it will hold the doors steady while you drill your holes for your knobs! I just used a screwdriver for this part…and I had help from the best helper! Lol!
Measure and drill your holes to attach your knobs!
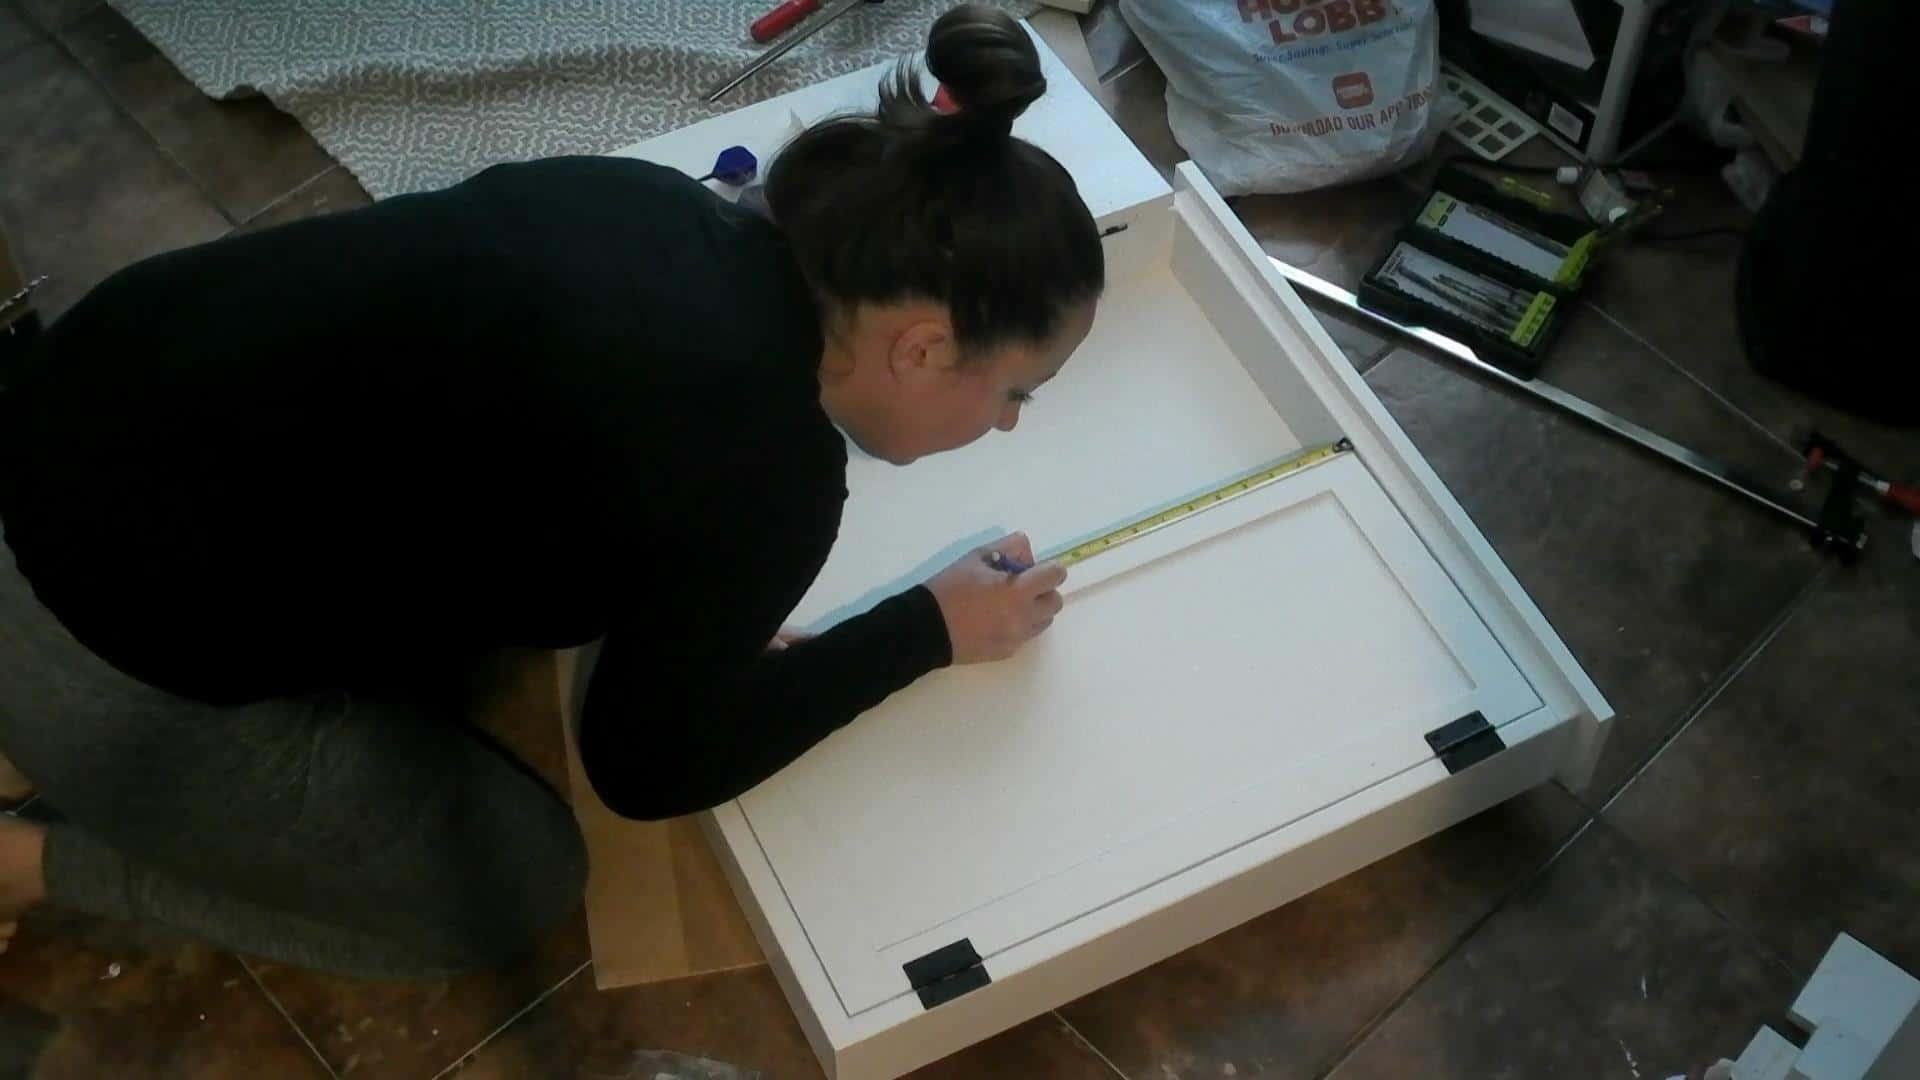
I like to use the yellow painter’s tape for marking and then drilling holes because I can see through it to see my mark! And yes, I COULD just mark on the tape but I NEVER remember to put the tape down first, and then I don’t want to go back and measure again! This is what works best for me!
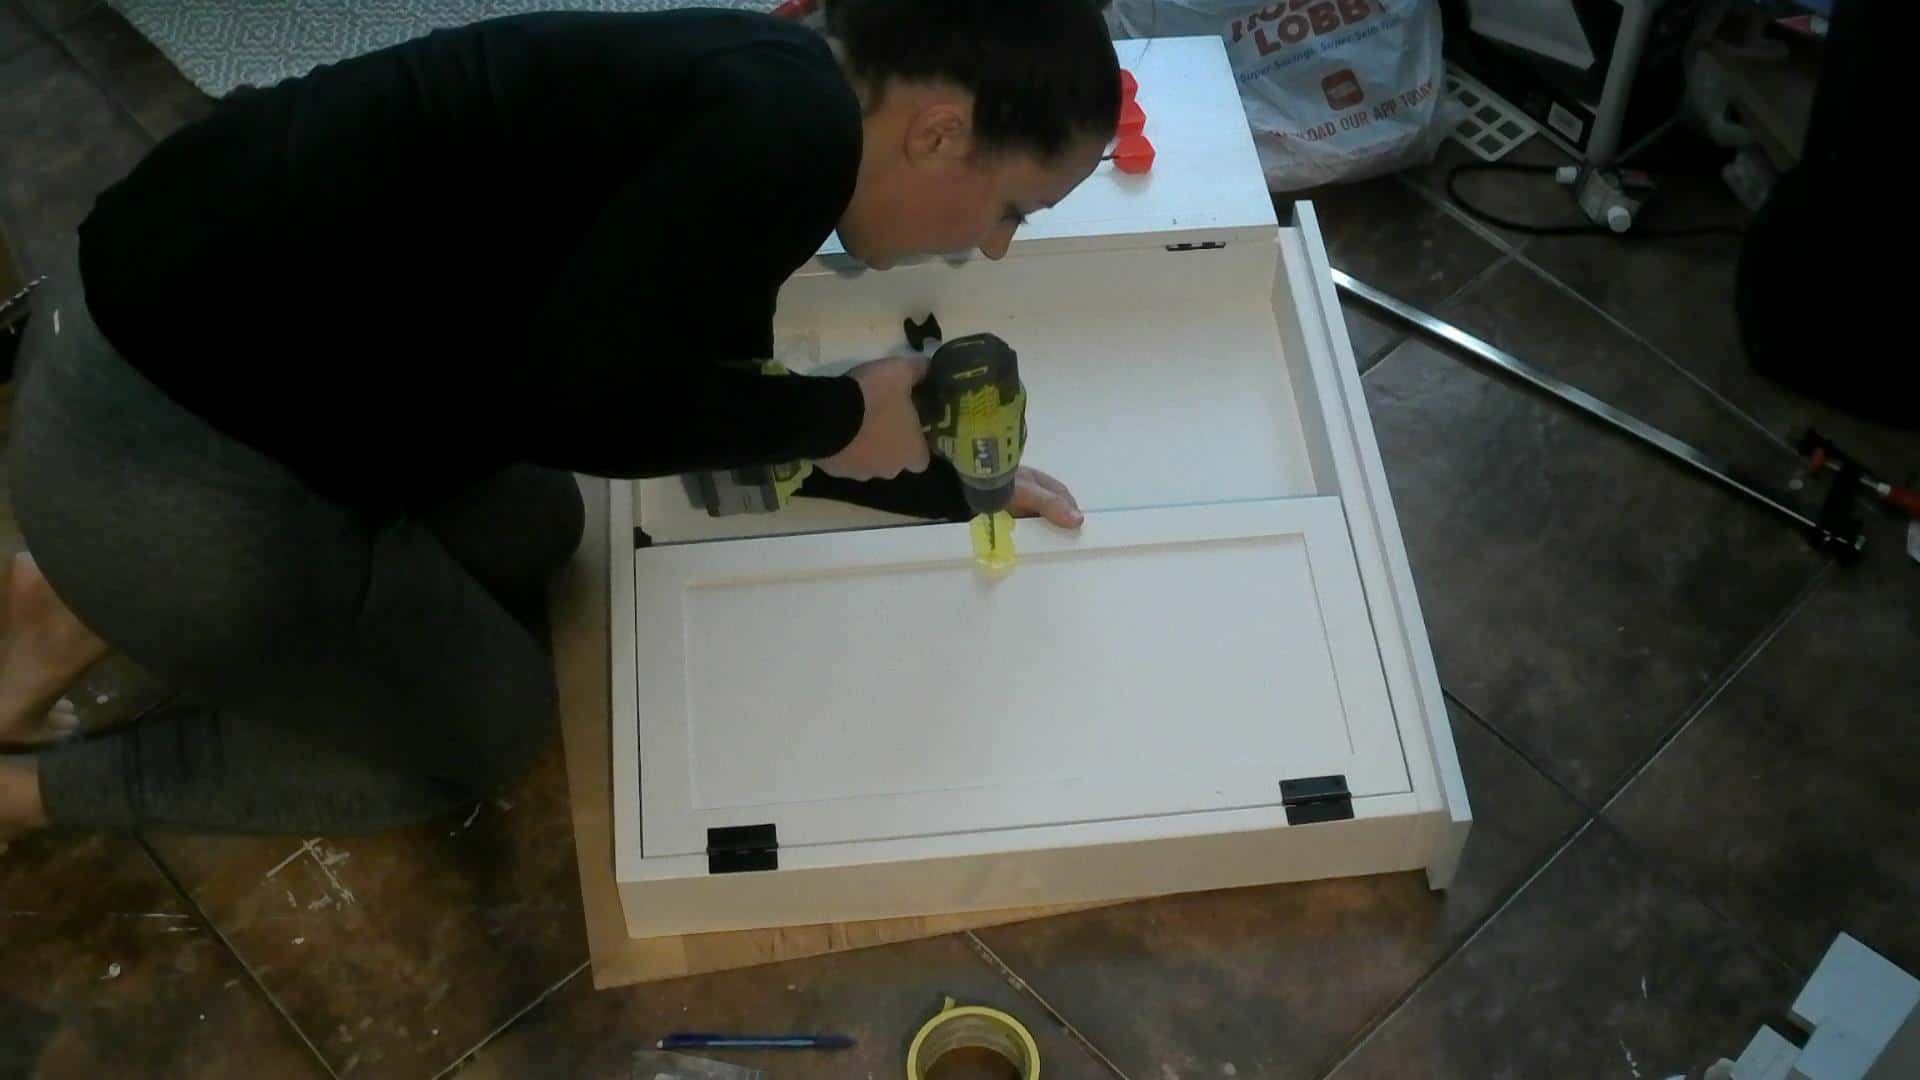

Screw the knobs into place!
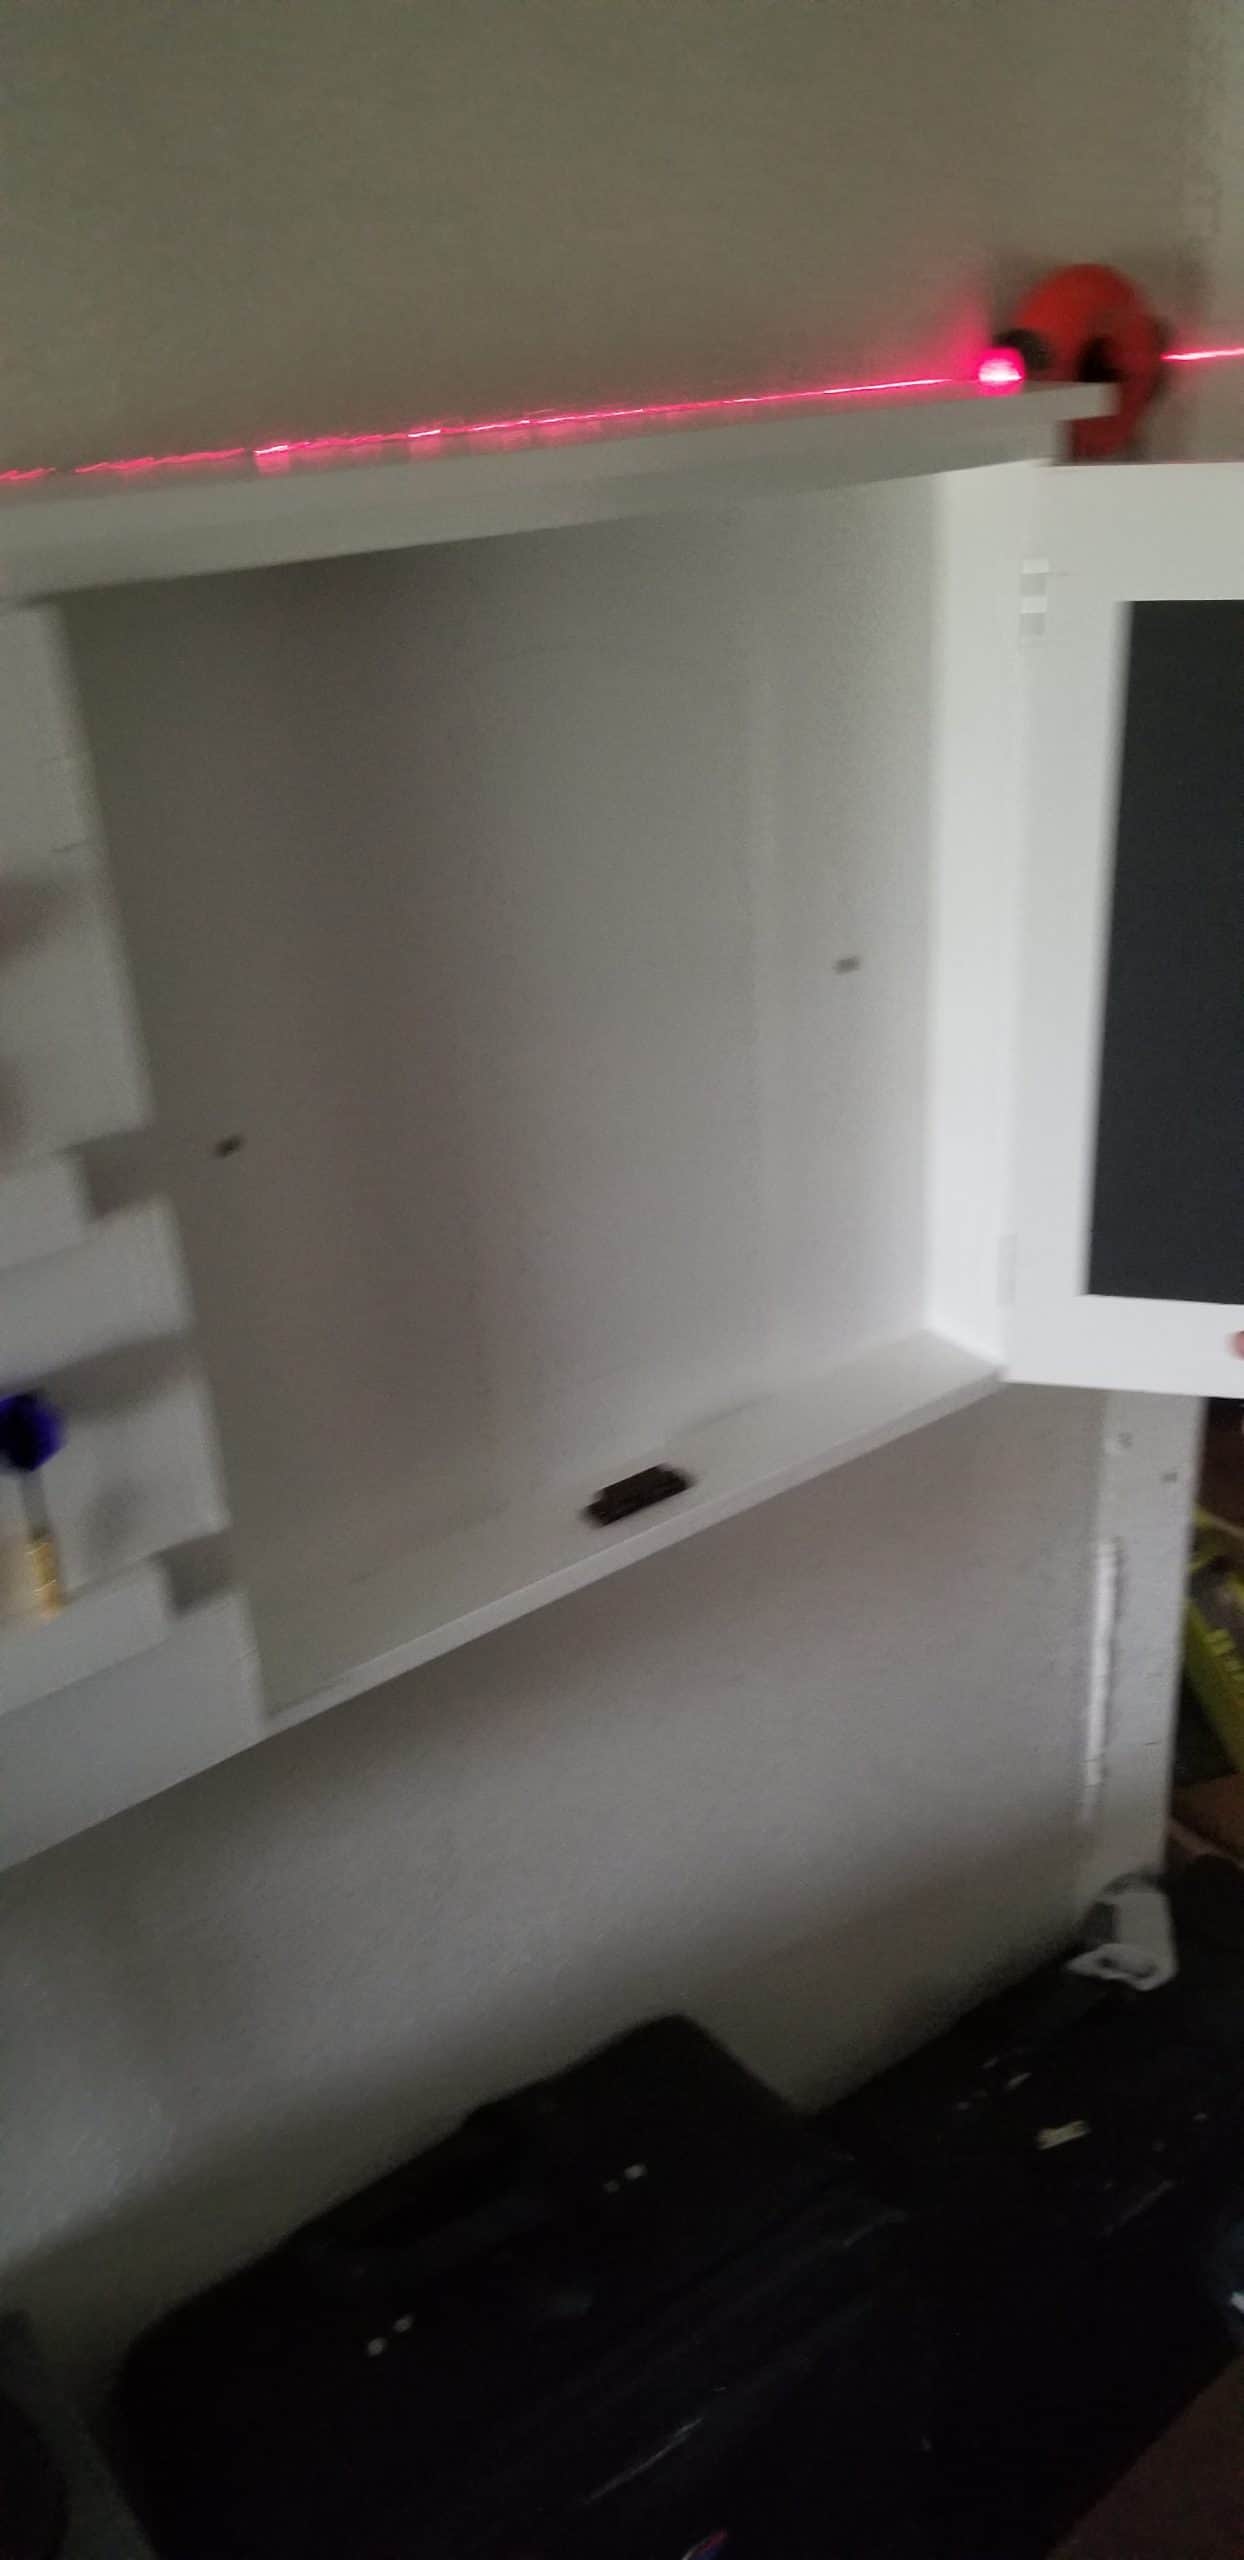
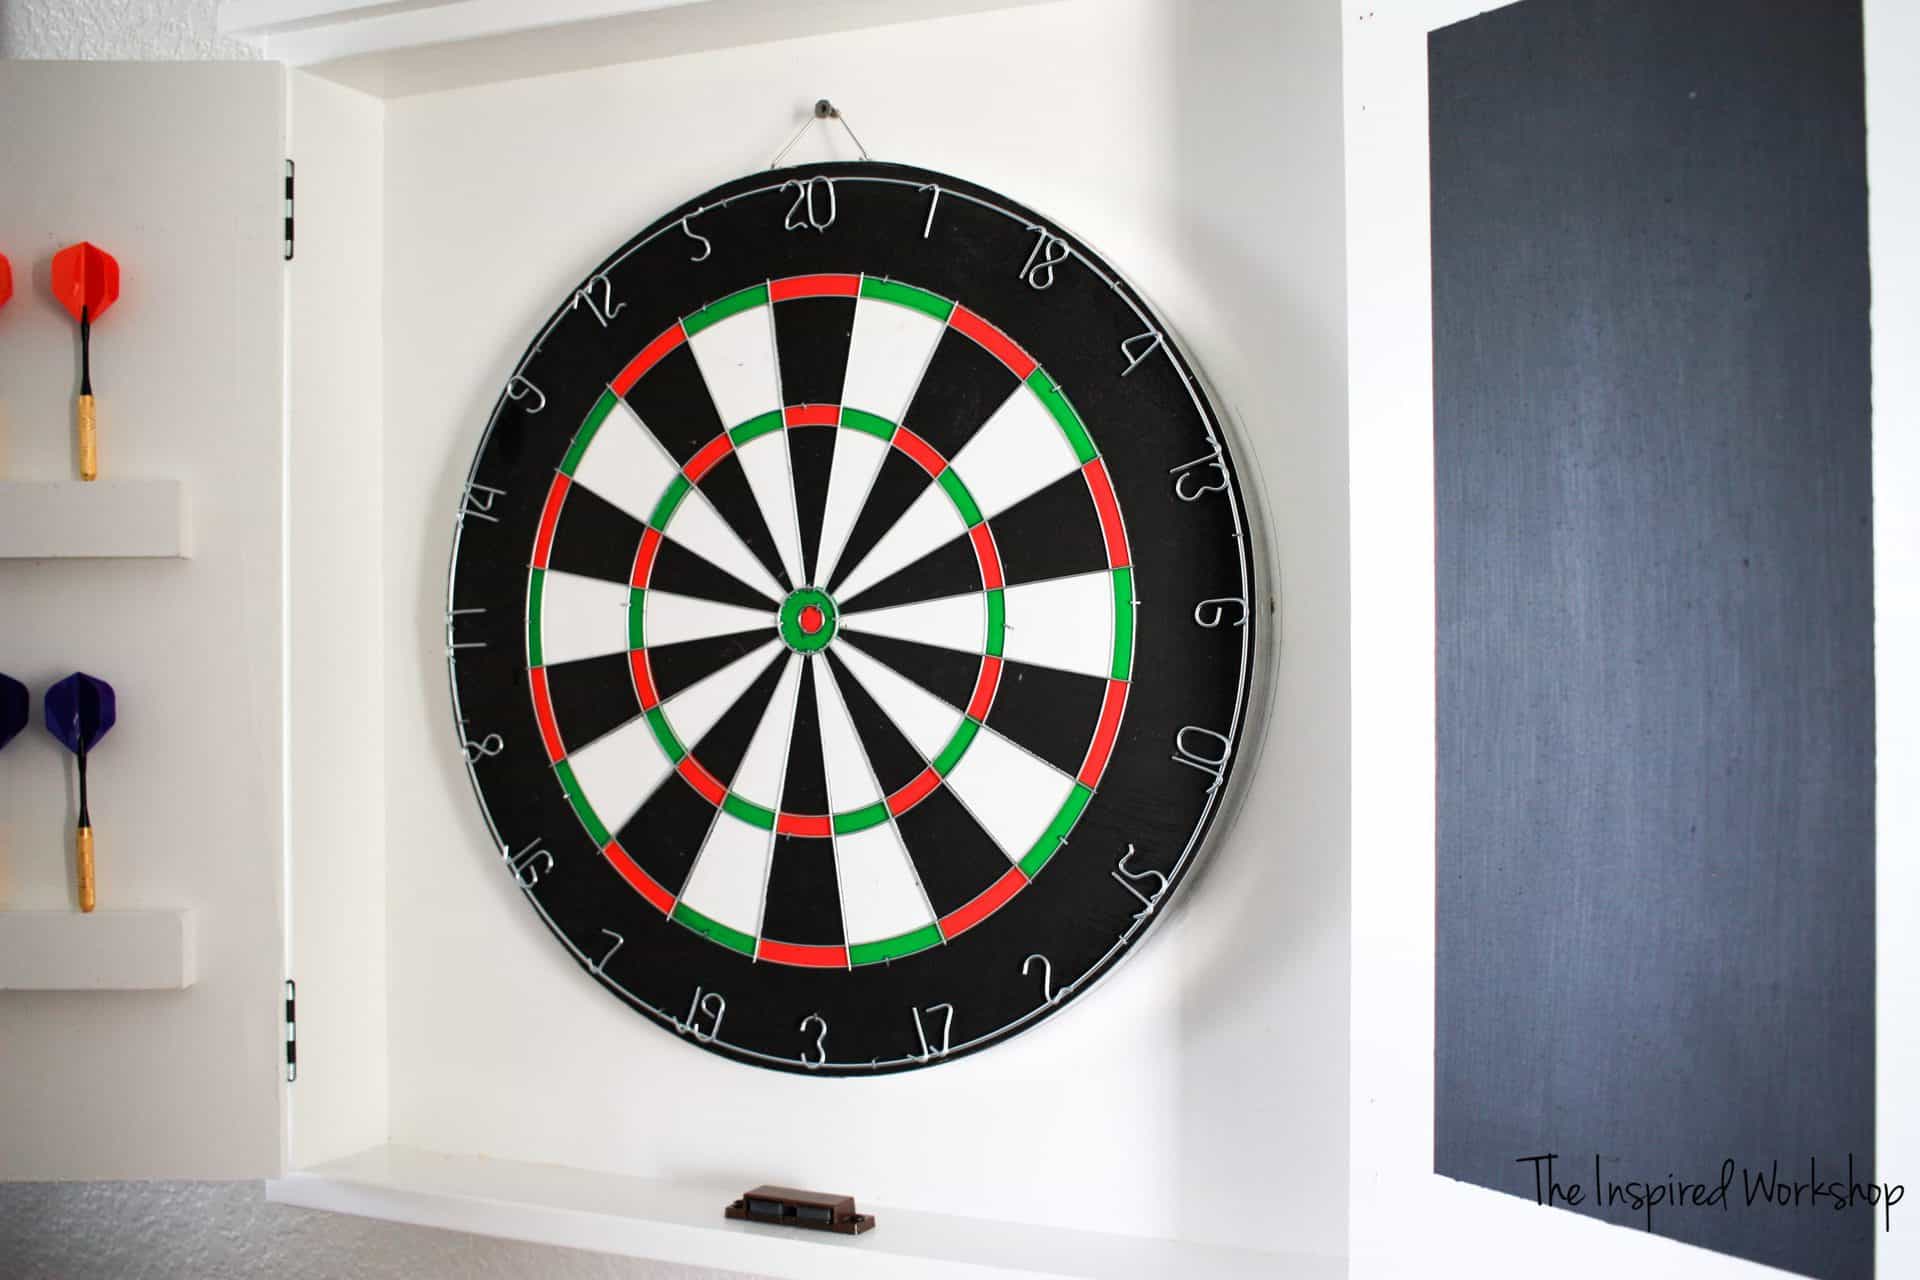
Hang that sucker on the wall! I just screwed it into the studs from the front side before hanging the dartboard inside. Don’t mind that this is an incredibly blurry picture my little one took for me! You can see the two black spots, those are the screws into the studs! You could use a hangman if you are giving it as a gift!
Then I put a screw to hang the dartboard inside the cabinet, that way we can change out the dartboard once it has too many holes!
And that is all there is to it! It is finito!
Love this project and think your friends or family would like it too? I would love for you to share it with them![social_warfare]
I better get busy, I have sooooo many more projects to bring you before Christmas! Happy Building!

One Comment