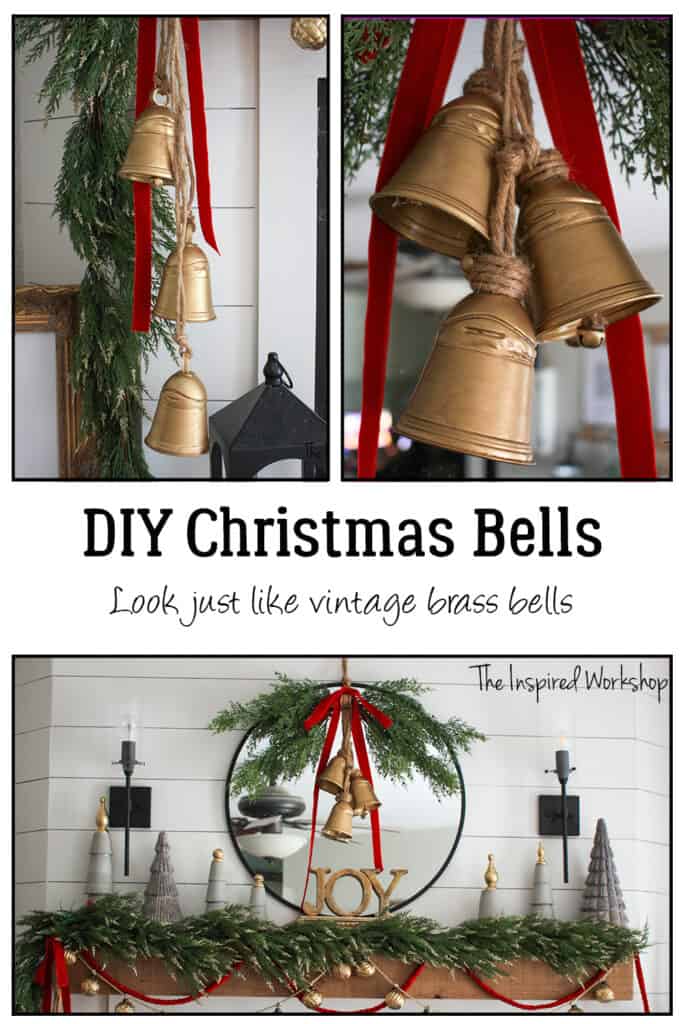
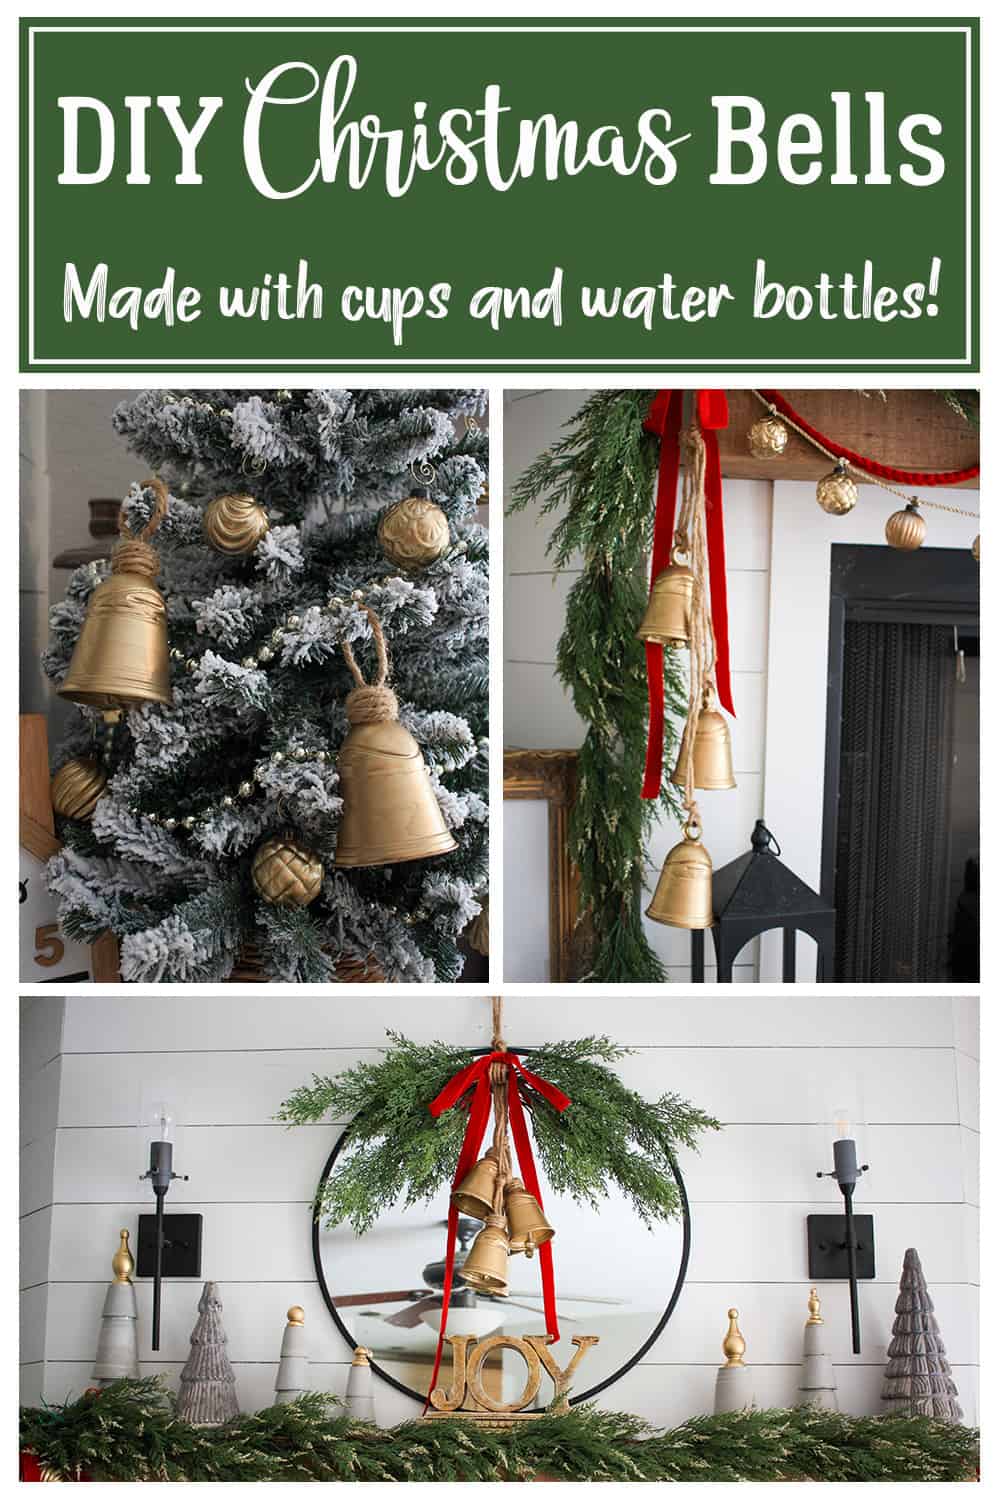
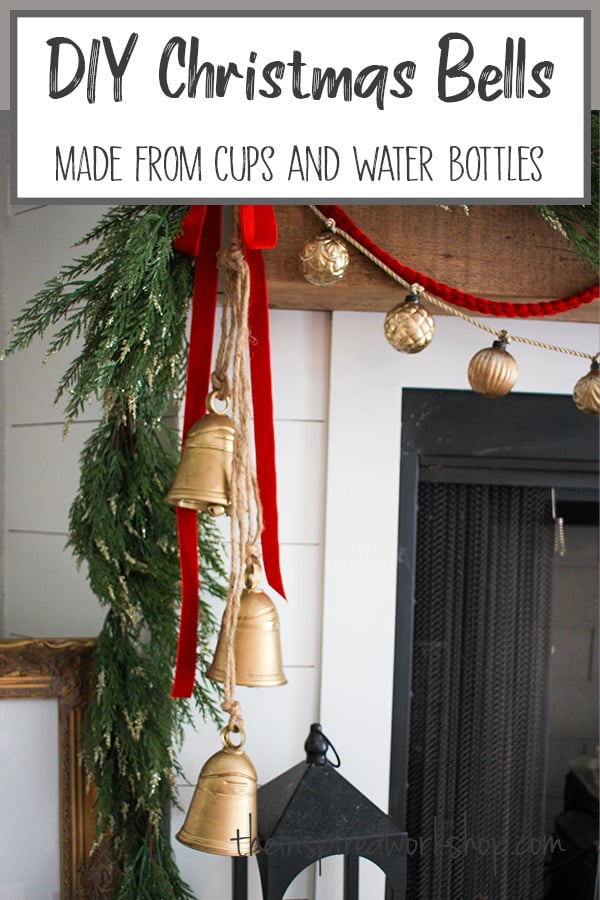
DIY Christmas Bells
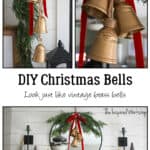
Vintage Christmas Bells are all the rage this holiday season and although they can be hard to find if you are looking for actual vintage bells, they can be expensive if you are purchasing newer ones made to look vintage! Alas, you can make your own DIY Christmas bells using plastic cups and water bottle tops!
Okay, so you know how HEB gave me the wrong plastic cups in my order and I made those awesome concrete Christmas trees out of them? Well, in the process of trying to find something to make the pointed top of a Christmas tree, I cut off the top of a water bottle…and although I didn’t think it looked much like a tree…it did look exactly like a Christmas bell!!!
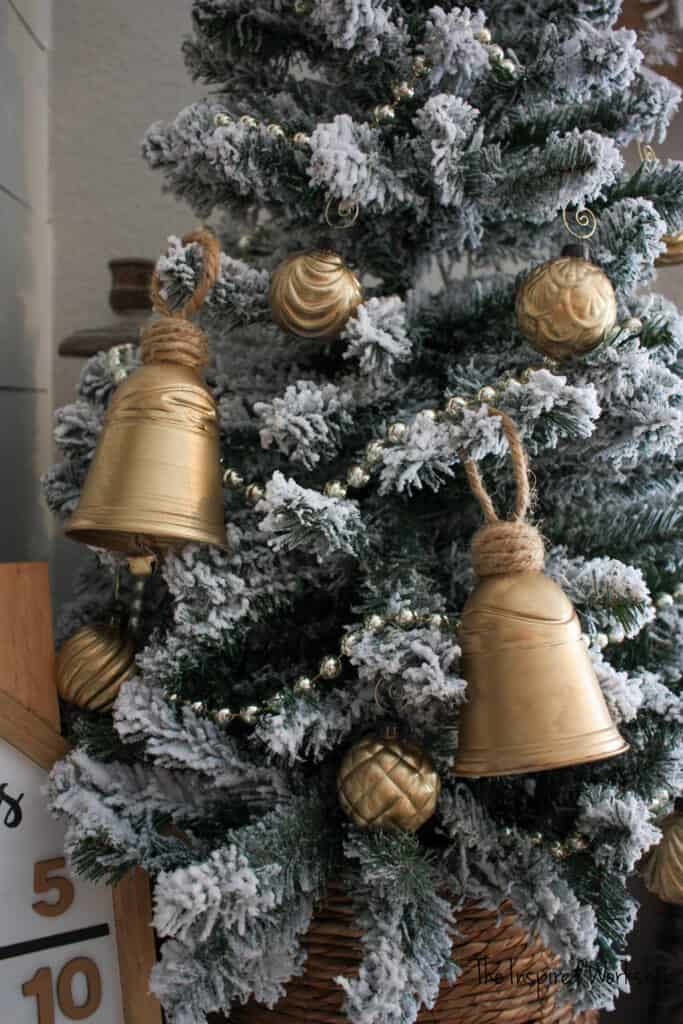
How stinking cute are they?! Y’all, that is a water bottle top and a freaking plastic cup!😂I don’t want to say that I’m crazy talented or anything, but if the boot fits!🤣😜 Bwahahaha! I’m so kidding, but they are awesome nonetheless, right?
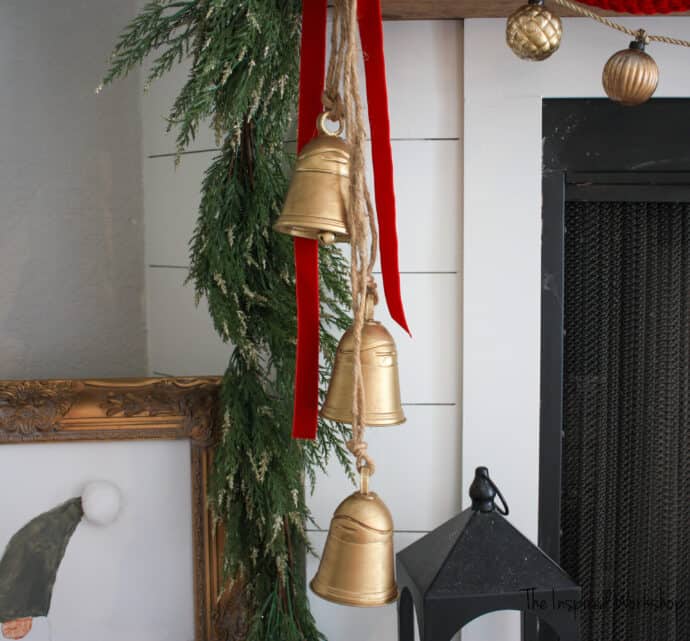
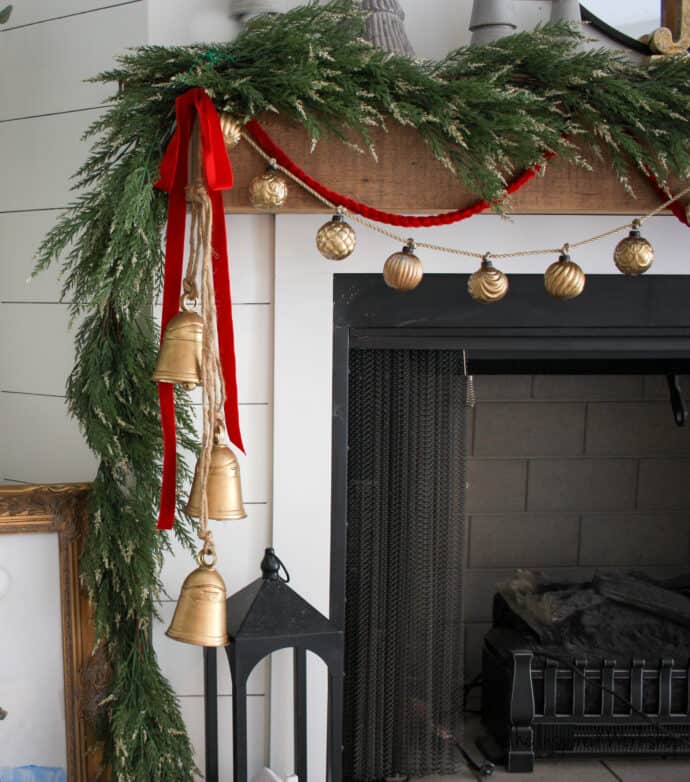
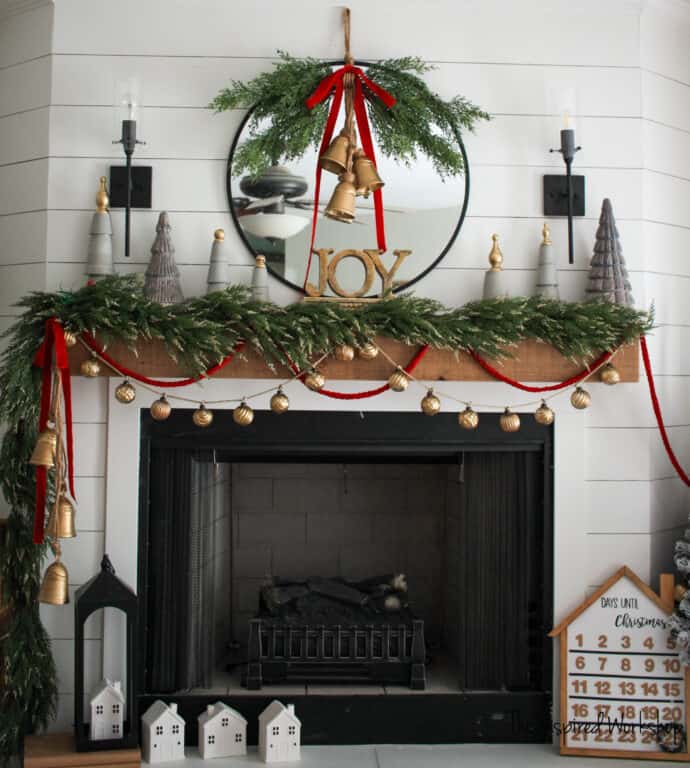
You have to have seen all the vintage brass bells that everyone hangs from their mantel and on their wreaths! Well as I have explained before, we have no good places to shop for vintage goods near me so I am pretty much SOL when I love something that is vintage! Now, I do know some stores have started selling replicas and I think even Amazon ended up with a cute set(affiliate link)!
But you know me, I have to try and replicate my own! LOL!
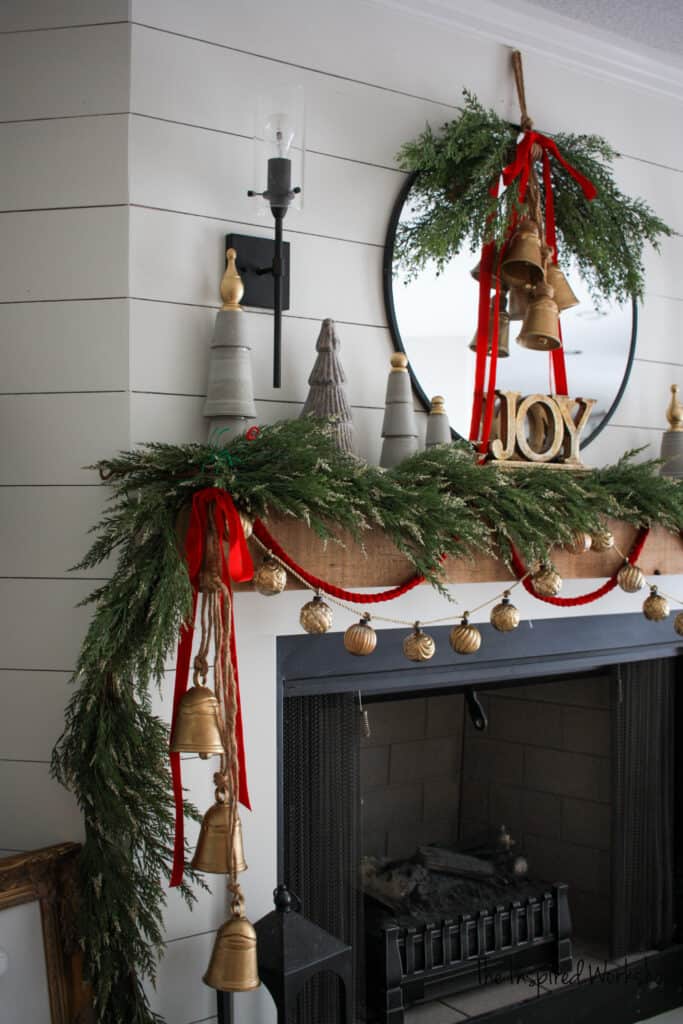
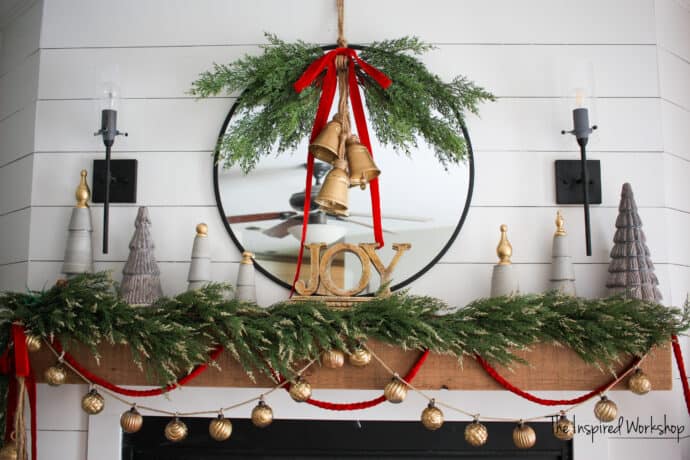
I used them on my mirror as well, and made two different tops for them!
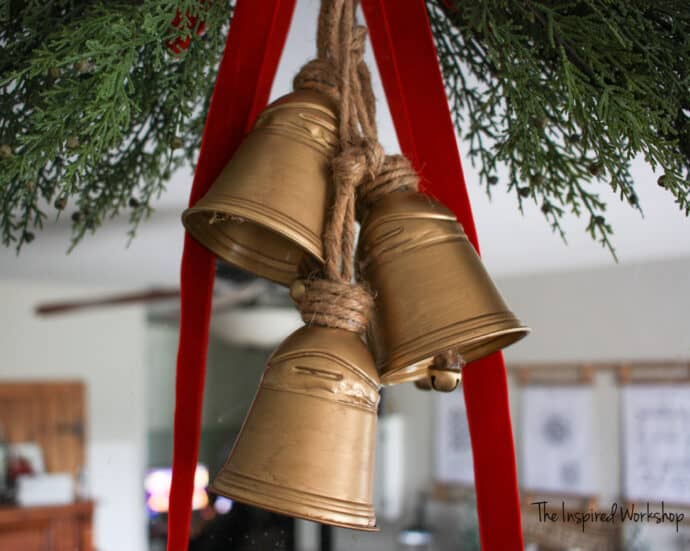
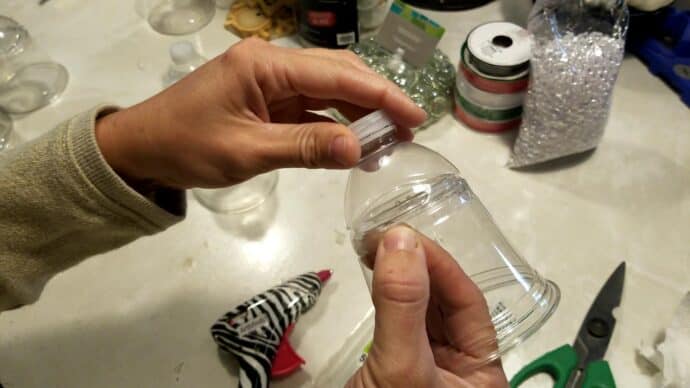
Look how vintage they even look where the water bottle top meets the cup! My inability to make straight cuts and all the imperfections in my work actually worked to my advantage on this project! 🤣
My hubby said, “Sweeeet Babe, our Christmas decorations cost like 3 dollars and 24 cents!”😂🤣😂
Me: “Well, I am just doing my part to watch the budget, and you are welcome!”
Him: “Umm, haven’t you changed out the whole fireplace decor like three times over the last week? I am pretty sure that cost more than $3.24!”
Me: “Did you already forget that I made bells out of plastic cups and USED water bottles? No respect for my talent at all!” 😂🤣😂
Funny as it may be, I really love them! Lol!
So, what do you say, do you want to make your husband so proud of how tight you are keeping your Christmas decorating budget and make some pretty much FREE Christmas bells?
Here we go!
Gathering the Supplies Needed for the DIY Christmas Bells
***NOTE: Amazon links below are AFFILIATE LINKS! Affiliate links are a method for me to make a tee tiny percentage back off of sharing products with you! If you make a purchase after clicking one of my Amazon links below or anywhere in this article, and make a purchase, I earn a small commission at no extra cost to you! I appreciate it anytime anyone makes a purchase from my links as it helps pay for the upkeep of this little ole blog and keep the projects coming at ya!
Materials to make the Christmas bells:
- 9 oz. plastic cups – the party style cups
- empty water bottles (Crystal Geyser is the brand my bottles were just in case you want the SAME ones I used!)
- hot glue gun and glue sticks
- metallic gold spray paint
- thin sisal rope – I honestly can’t remember where I even got mine, I have had it forever! This one looks like the same size though
- sharp scissors
- jingle bells
- brown acrylic paint
Making the DIY Christmas Bells
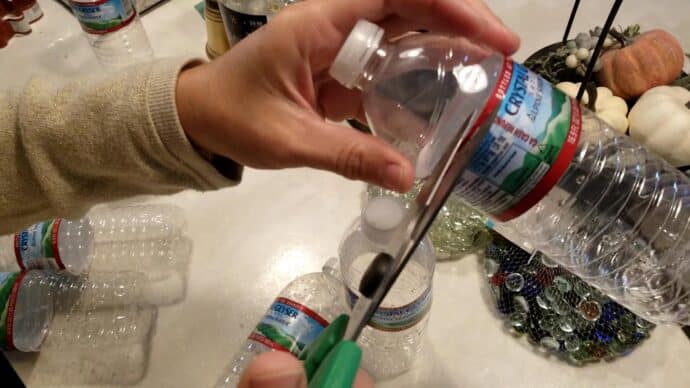
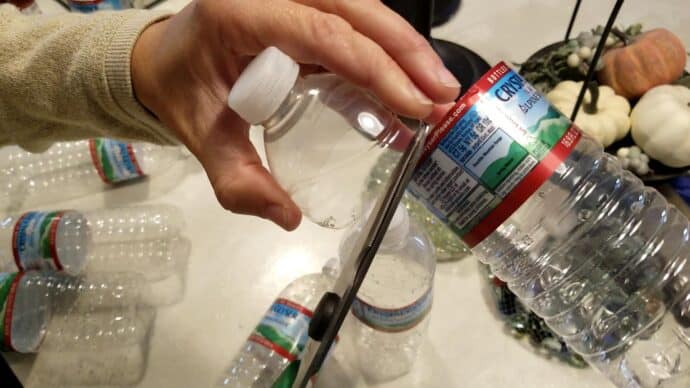
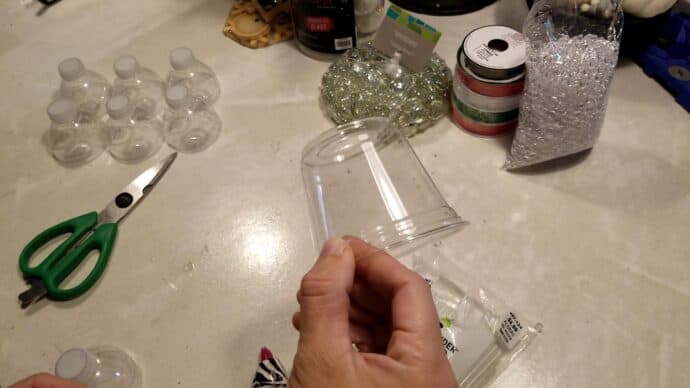
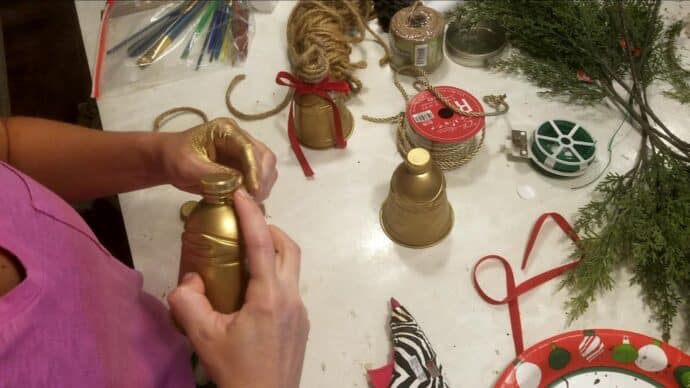
Okay, after gathering your supplies, start by cutting the tops off of your water bottles. On Crystal Geyser water bottles, there is a small ridge that you can cut along right at the top of the label.
Next, get your 9 oz cup and hot glue around the top rim. Affix the top of the water bottle to it! Make sure and use low temp on your hot glue gun or let it cool just an extra second or two before putting it on if you hot glue gun is a hi-temp! It will melt the water bottle…ask me how I know! Lol!
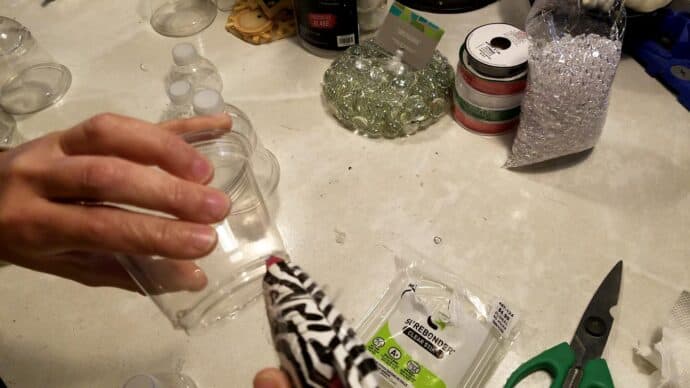
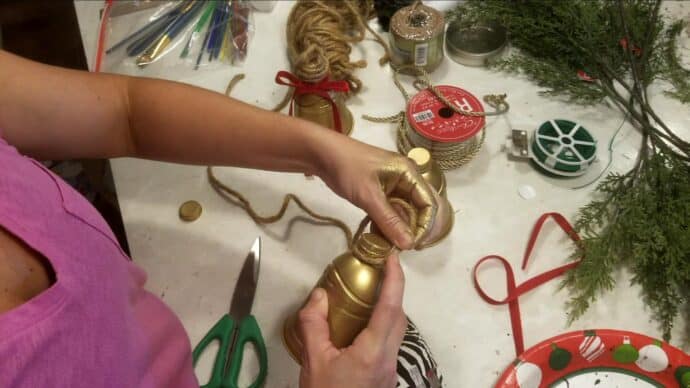
You can see the bell taking shape!
Now I ended up making two different tops for the bells, one leaves the bells as is and wraps twine around the part you drink out of…cannot for the life of me think of what it is called! Oy! Anyway, so that you know which way you want to make them, let’s look at both styles again!
Easiest way to make them:
To make this style, head on outside and spray paint your bells! If you want to make the slightly more complex version that looks like this:
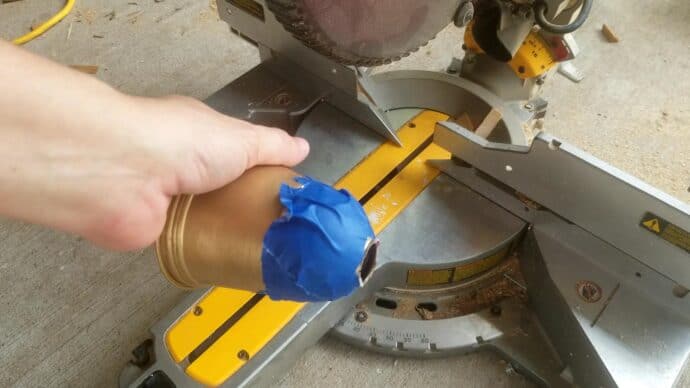
To make this style you will have to use a saw to cut the top of the water bottle off! It isn’t hard, just takes not being afraid of the saw…if you don’t hold it tight it will jump around and ultimately ruin your bell! (See photos below where I am drilling the holes in the lids to see the two I messed up!)
DISCLAIMER: I am not responsible for any accidents that may occur because of trying this method to make Christmas Bells, you must do so at your OWN risk!
To make them, as I said, you will need to cut the top off! I didn’t know that I was going to do this to some of them so all of mine were painted already but you can wait until you cut them to paint them!

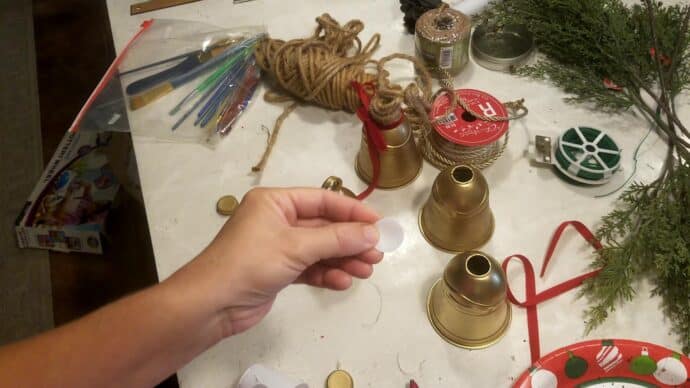
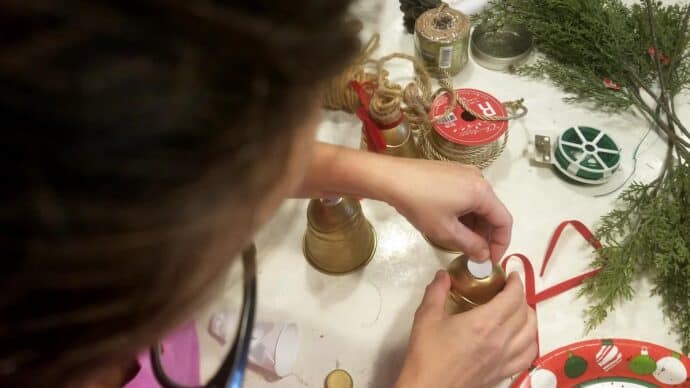
Now you are going to need to cover the hole you just made! Lol! I just took and cut a small circle out of a smaller white plastic cup but you can use the same cups you made the bells out of if you’d like!
You will need to drill holes through the lid. I used a 5/8″ forsner bit. You will want to screw the lid onto a water bottle to drill the hole, it makes it so much easier than trying to hold it and drill it.

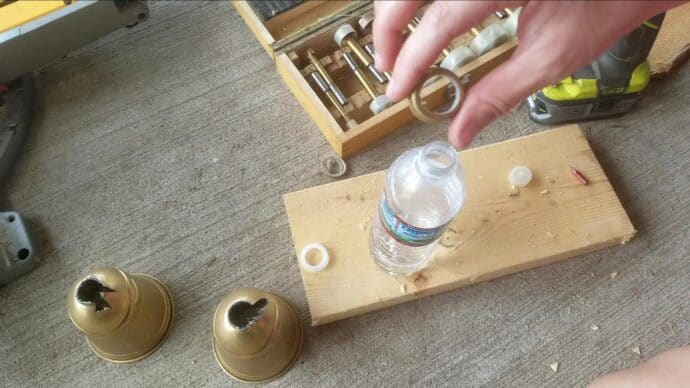
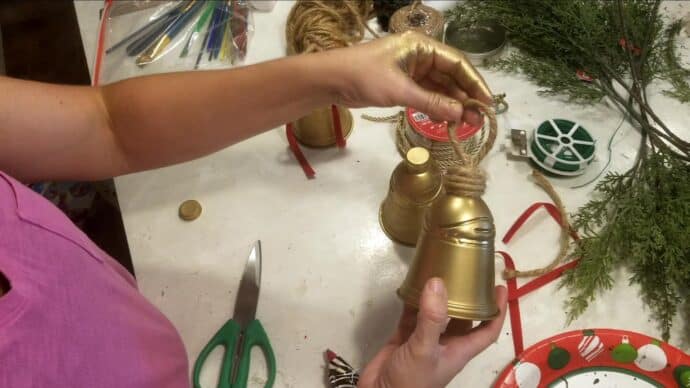
Glue that water bottle lid on its edge to create the ring to hang them from.
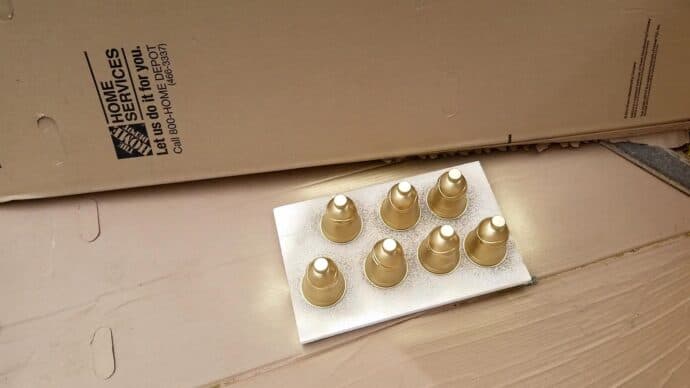
Now at this point, you would go spray paint them…I did it out of order!
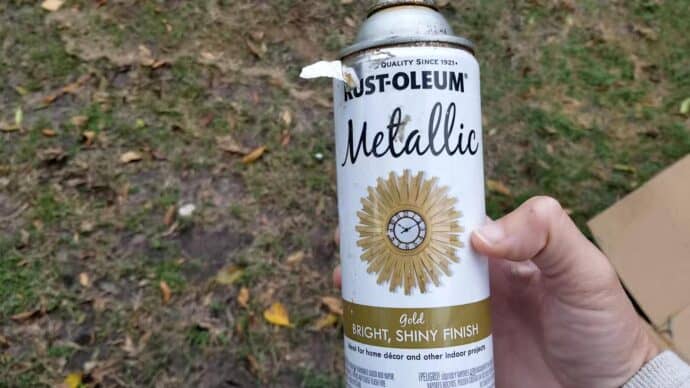
Anyway, I used the metallic gold spray paint from Home Depot.
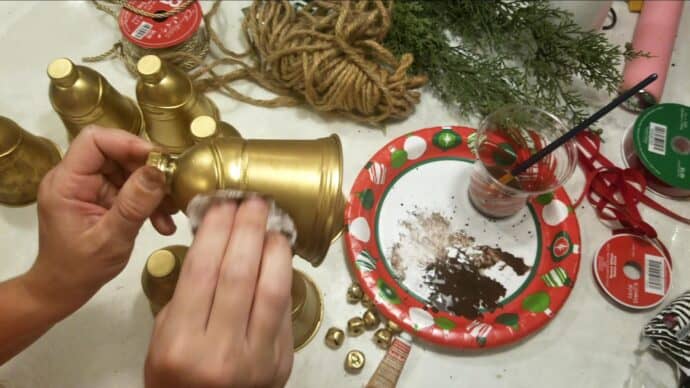
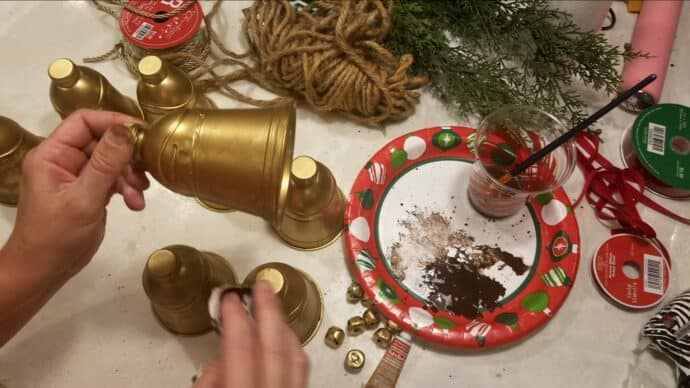
Now that they are painted a solid gold, we need to add a little vintage brass look to the bells!
I was able to easily get this look just by adding a little bit of brown acrylic paint. Dip your paint brush in a cup of water, then dip it in the paint to add water to the paint. Then using a napkin I would just dip it in the paint that was pretty watered down and roll my cup along the napkin. Make sure not to press to hard as to wipe everything off.
I tried several different ways to get the look I wanted and this was the most subtle but perfect patina I felt!
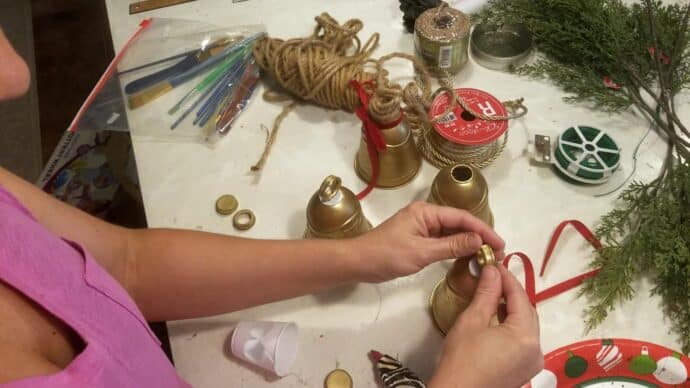
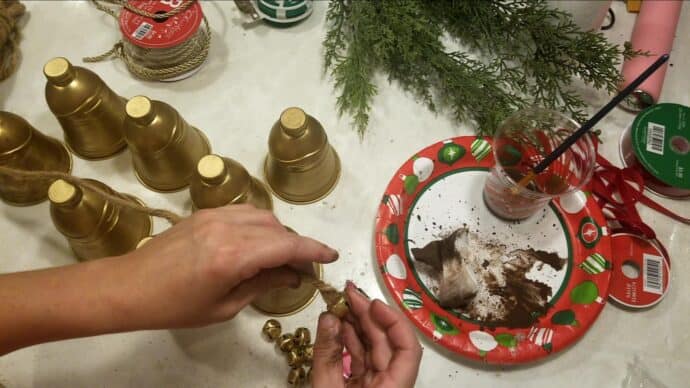
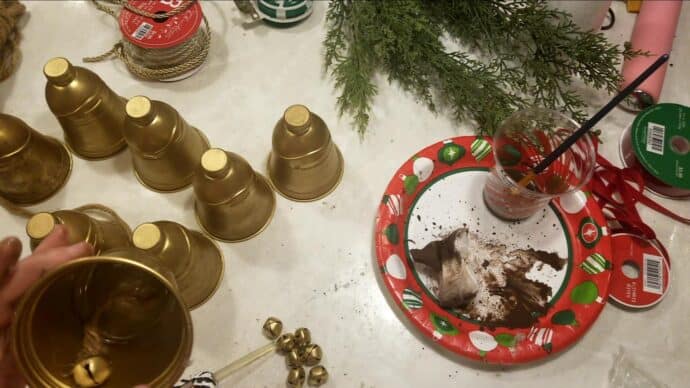
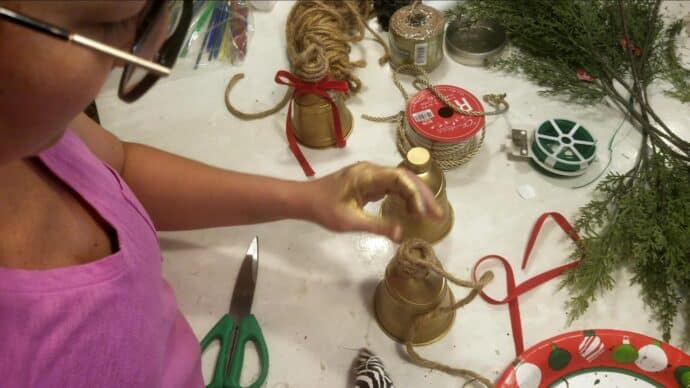
Next, add a little ringer inside! I used small jingle bells just as a silly idea so they make noise when you ring them!
All I did was hot glue one end of a small piece of rope to the bell, and glue the other end of the rope to the inside of the cup.
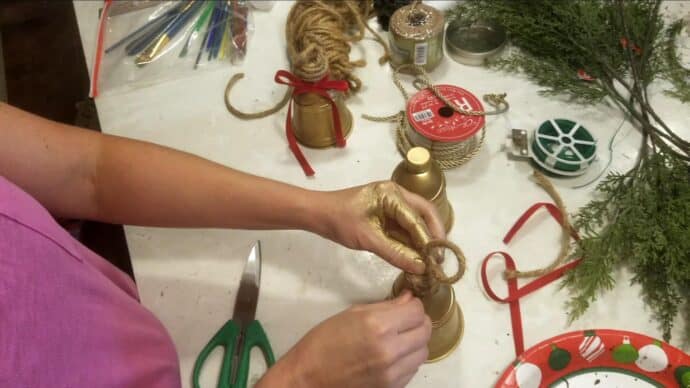
Now the easy style bell still needs its rope to make a hanger! All I did was start hot glue underneath the lip of the lid and kept running beads around and around until I made it to the top!
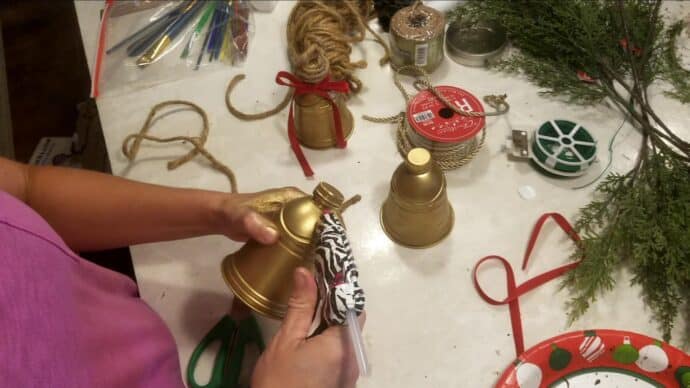

Once you make it to the top, you will cut the rope and stuff the end of the rope down into the swirl of rope, glue it first.
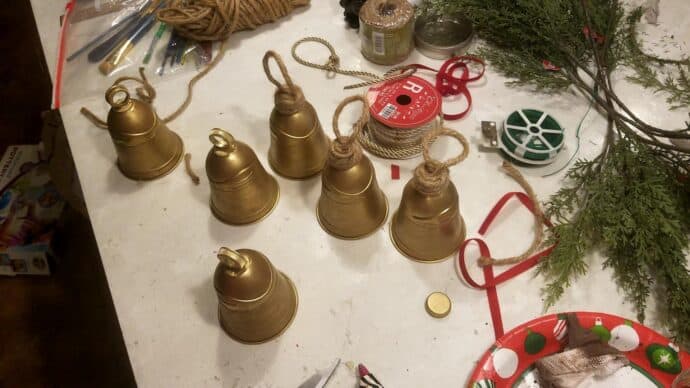
Boom they are done! Hang with rope or ribbon as you wish!
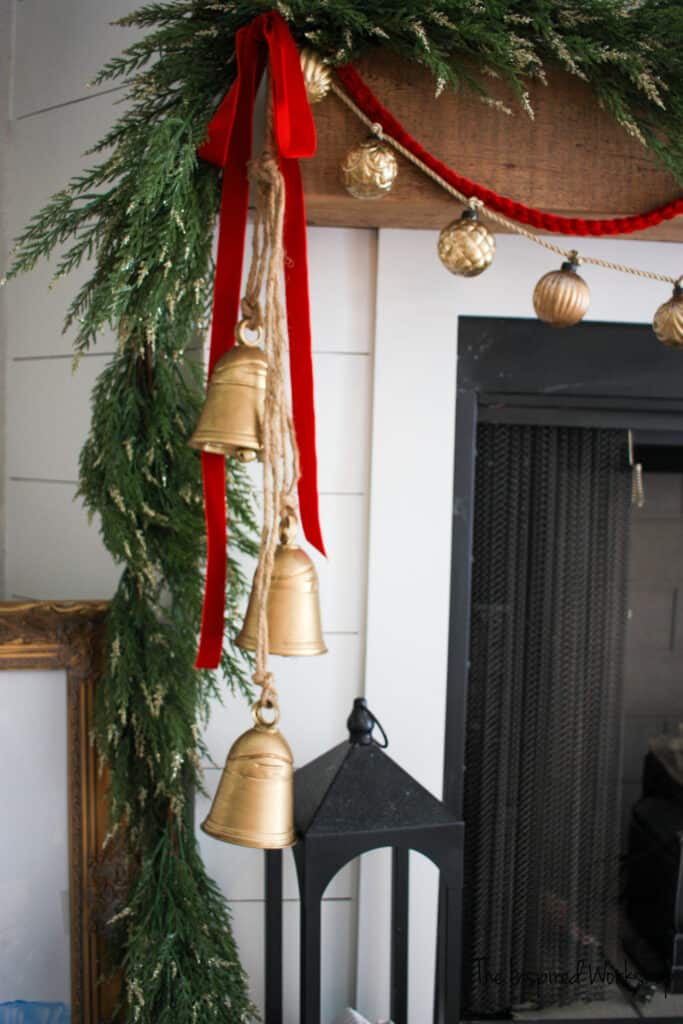
They both are beautful and have characteristics that I love!
What do you think, which is your favorite?
I can’t wait to see your versions of these DIY Christmas bells!
Heading off to do a little building instead of crafting, hope to see you soon!

Want to save these DIY Christmas Bells for later? PIN IT!
HI Cara..Thanks for the reply …Just finished in a flat hour, 6 bells…Thought I had gold paint handy, but not..Did have some silver leaf, that have had a hundred years and took only a “tad” to paint each bell..Found some multicolored round “somethings” too small for napkin rings, painted them and attached to tops. Distressed the silver a little and found some old sisal, had forever and Voila…so darn cute!!!…Looks like yours, only mine are silver. the inside jingler bells I made from a pkg of small ornaments from DG last year for a $1.00. Will put ribbon on tomorrow and make more, probably a dozen. The cups I have had stashed for 18 years from a party……Thank you so much for the inspiration and save from the dumpster..Ordered on the cheap a lot of greenery, so these little bells will probably cost …..hmmmm…$6.00 total at the most. MERRY CHRISTMAS TO ALL AND TO ALL, A GOOD NIGHT!!!
Left a reply the other day and for some reason, is not showing up on the replies? anyway, am in process of making the bells tonight….MERRY CHRISTMAS TO ALL!!!
Should have asked with other comment…Is that real greenery or did you order it etc? So pretty!!!
Absolutely adorable and I have many cups and goodness, water bottles. Have you figured out something for the bottoms of the water bottles? Will get started on this project and give to some friends. Thank you and have a MERRY CHRISTMAS AND A WONDERFUL NEW YEAR 2024!!
Hey Emma!
I am sorry, this is a wee bit late… but thank you so much for your kind words! They absolutely made my day!😘 I haven’t figured anything out yet, but man I sure would love to! And to answer you other question without it sending you three emails…lol, no that is not real greenery, I got it at Hobby Lobby! 😉 And, just to let you know, your reply didn’t show up because I have a spam filter set so comments don’t automatically post because of awful people putting awful things in the comments! Lol! Not mean to me, but you know, inappropriate things I don’t want on my site! 😵🤭😂 I hope your bells turned out perfectly, and you have the Merriest Christmas as well! Thanks again!!
Cara
These bells look amazing 👏
Am in the process of making my own bells but now going to add the water bottle at the top. You are so clever! Thanks for sharing & have a wonderful Christmas 🎄
Hey Jane!
Thank you so much, you made my day with your comment! I hope you have the merriest Christmas as well! And I hope your bells turned out perfectly!
Cara
thank you so much our class theme is Carol’s of the bells and our community project tree is bells so this is so simple for 4th graders to make and understand simple directions…. thank you again
4th grade home of Lancheros Guam GDOE
Hey Mims!
Thank you so much for your kind words! I am so excited that you will be able to use this tutorial with your students! I would LOVE to see the community project when it is complete! Thanks for stopping by all the way from Guam! Have a wonderful day!
Cara
Thanks for sharing. I’m going to try this. Did you make the garland with the gold balls?
Thank you so much, Margaret! I hope they turn out great! And yes, I sure did make the garland with the gold balls, if you’d like to check out that tutorial here is the link! DIY Gold Mercury Glass Ornaments Thank you so much for stopping by! Have a great one!