DIY Desk Makeover
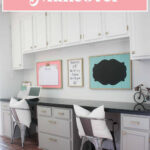
This desk area went from dark and drab to light and airy, with a little hint of fun! Small, inexpensive changes made this desk makeover worth every penny, and minute of time that it took to create! This space is now inspiring and uplifting to work in!

I couldn’t be happier with how this desk makeover turned out! It looks SO MUCH BETTER now!! Not that this area is exactly how I want it by any means, if it was my home, I would have gutted the area and made a closet on half with a sliding barn door! Since it’s a family home on family property though, I have to make do with out making huge changes! So working with what I had, I think it looks great!!😅
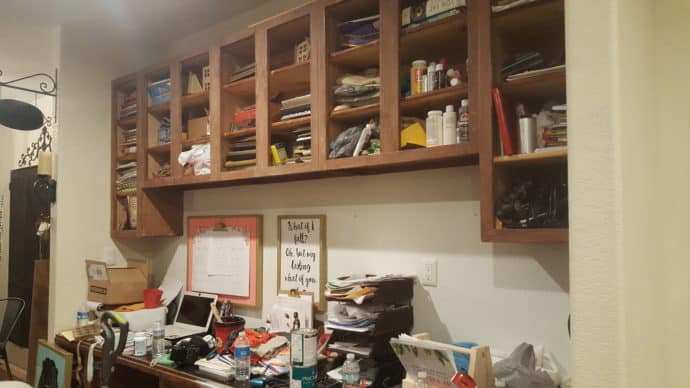
Now to see it before! You will not believe this but I lost my memory card that had three or four unfinished projects on it, the before shots to this project included, which is one of those things that gets you thinking, how does that even happen when no one normally touches my memory cards, but this one seemed to have slid through everyone’s hands and no one knows the where a bouts of it!! So they are not the best before photos, but they will show you enough!
That is the best “before” photo of the desk makeover I have now!! Notice the cabinet pulls, my aunt only drilled one hole and so they always swung different directions…I am thinking she put them up and planned on changing them but never got around to it!! Lol!! Seems that I would understand this because it is how I roll too!! 🥴
Here is an in progress shot of the desk makeover! That is scary! Lol! This area is really hard to photograph because it is almost like a hallway right through here! SO much stuff! Oy!
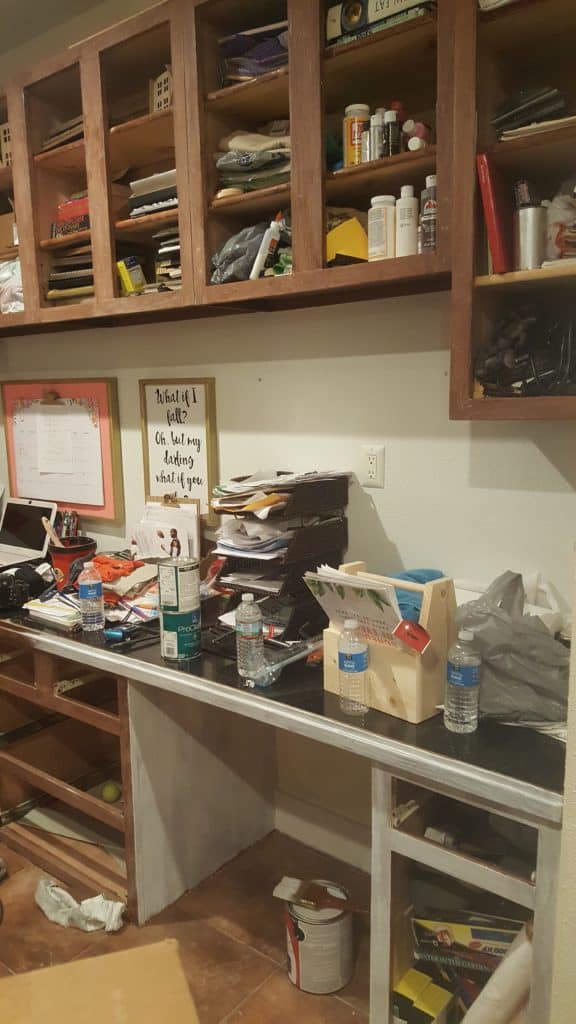
My anxiousness needs to see the after again! Lol! I can’t take that mess!😅
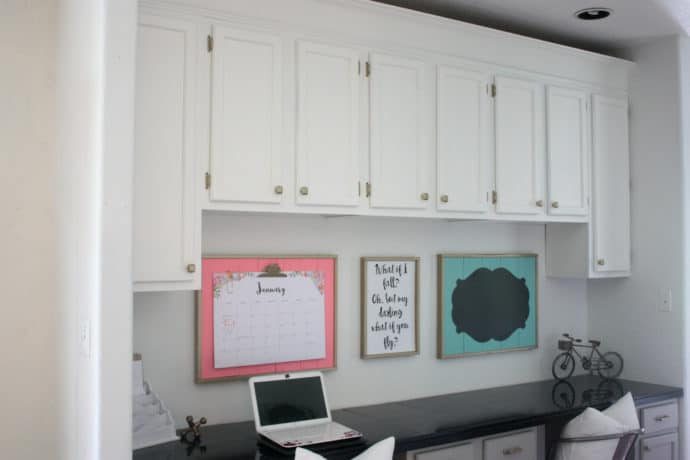
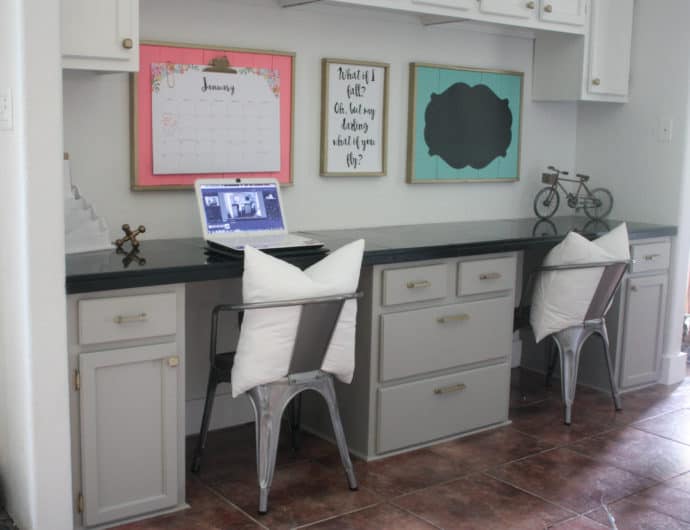
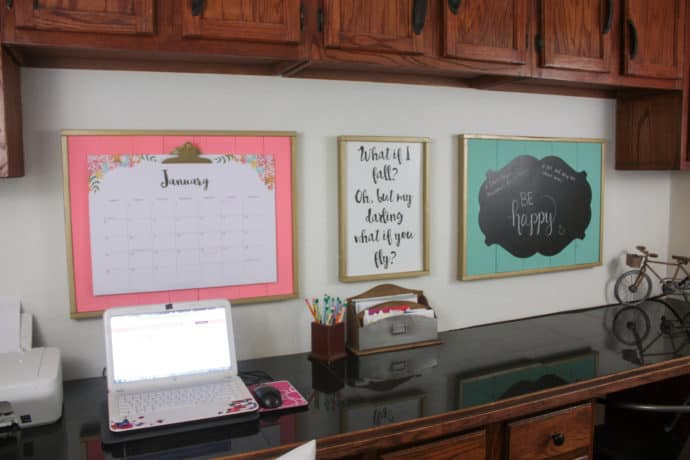
As you may have noticed, I built the cabinets up and added crown molding! Down below I will share the how to and show tips on making this renter friendly! I have to mention that all in all for this little makeover I only spent a total of $230.00, that was including the paint sprayer that I can now use on all my projects, wood, cabinet pulls, paint, primer and paint brushes!!
And the guy at Sherwin Williams made a really great point, the size of my built in desk area is about the size of a small kitchen based on the amount of cabinets! I mean my last kitchen didn’t even have but I think six cabinets in it!!
Gathering Supplies for the Desk Makeover
Alright, let’s gather the supplies to get this desk makeover done!
***NOTE: Links below are affiliate links! Affiliate links are links that pay me a small commission, at no extra cost to you should you make a purchase after clicking one! I always appreciate you shopping from my links as it helps me keep bringing you these amazing projects!***
Materials for the makeover:
- 1 – 1x8x10
- 1 – 1x4x8 (or any size smaller than 1×8 scrap pieces of wood)
- 1 – 10′ stick of crown
- 1 – 1-‘ stick of molding
- brad nailer
- 1 1/4″ brad nails
- screws
- drill
- caulk
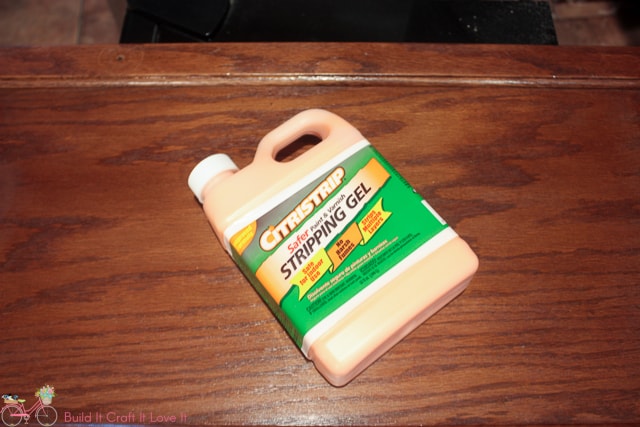
- CitriStrip
- Paint sprayer
- Paint – I used Sherwin Williams Alabaster on the upper cabinets and Sherwin Williams Dorian Gray on the lower cabinets – a little tip, I try to plan my projects ahead and only buy SW paint when they have their 40% off sale
Cut List:
You’ll have to measure your own space, mine was 119″ and so I just wanted to share how I did it, but your measurements will be different!
- 1 – 1×8 @ 119″
- 3 – 1×4 (or scrap wood) @ 11 1/4″
- 1 – stick of crown @ 119″
- 1 – piece of smaller molding 119″
Adding Crown Molding to the Desk Makeover
Alright so I’ll explain the difference between the renter friendly version of this desk makeover, and the permanent version as I go! The renter version is basically putting the thing together and sliding it in place!

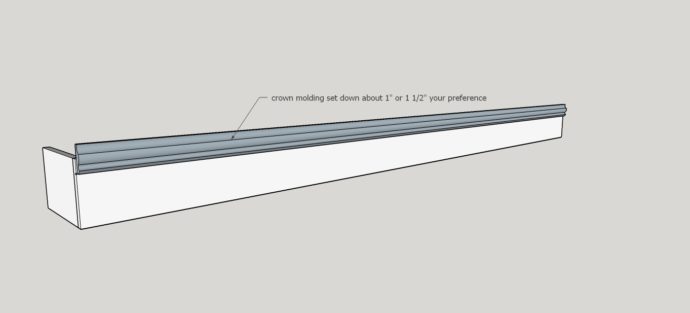
For the permanent option use pocket holes drilled at 3/4″ and screw the small boards into the tops of the cabinets very first!

Then brad nail the front onto the stationary small boards!
Now on both variations you can add crown molding, this will not need any fancy mitered corners because my cabinets are recessed into the walls, you will have to miter your corners if not!
And then add the base molding to cover where the board meets the top of the cabinets!
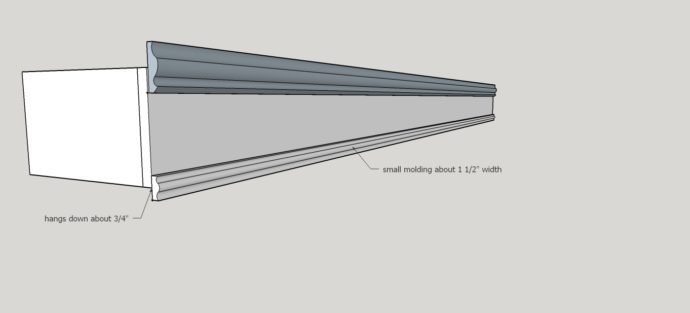
Caulk all the areas where molding meets the board and Viola!! If you did the renter version, slide it into place! If you did the permanent version…it’s already in place! Yes!!! Prime it and paint it just like the rest of the cabinets!
Stripping the Cabinets
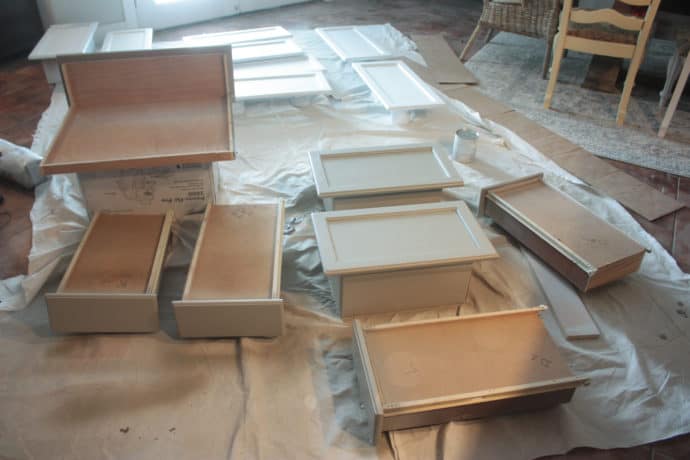
To give a little run down on how I painted the cabinets for the desk makeover, I will explain here even though I don’t have pics of the steps…and I will update the post to include the pics if I find the memory card!
I started by taking all the doors off the hinges and stripping the old stain! I used Citristrip on mine, you can find it at Amazon, Walmart, or Home Depot! It worked amazing even on the three coats of high gloss poly these cabinets had!! Took it off first go around, no problem!
You paint the stripper onto the cabinets with a paint brush with a really thick coat!
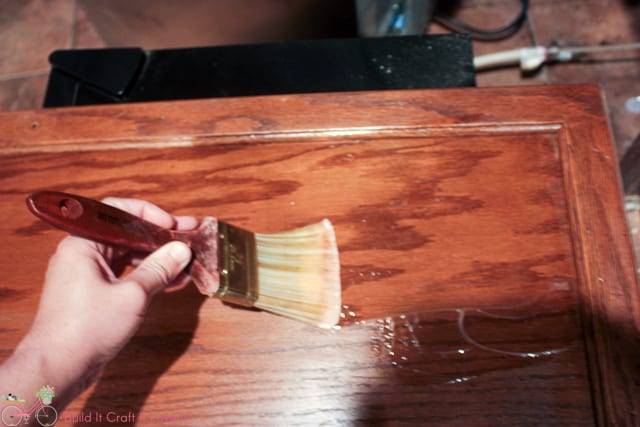
Leave it on for how ever long the bottle says, I think I left it maybe four or five hours or so! Then you scrape it all off, this part is sooooo satisfying! Lol!
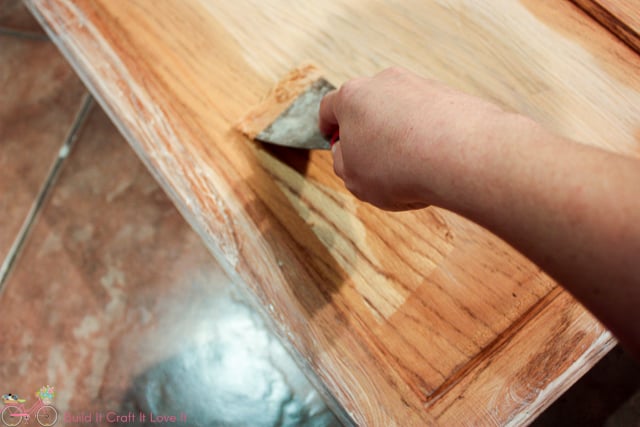
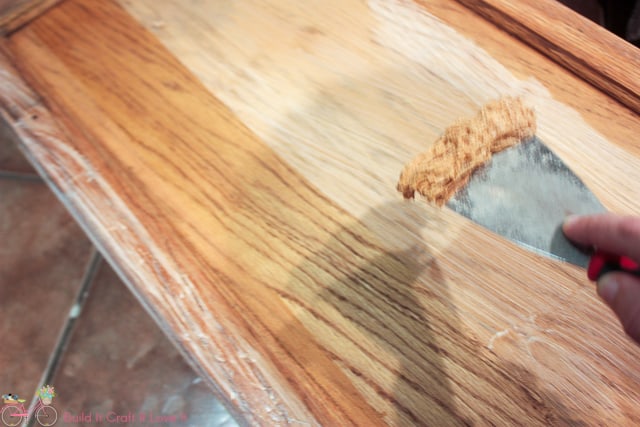
Once I had them stripped down, I cleaned them well with mineral spirits!
Priming and Painting the Cabinets
Next thing to tackling this desk makeover, I started spraying the primer on the cabinet doors and hand painting the primer on the face frames! For a more in depth tutorial see this how to paint kitchen cabinets post!
The sprayer I used was the Home Right Finish Max, I bought mine right before they came out with the new version that you don’t even have to dilute some paints (I still suggest thinning the paint)!! The one I bought is still cheaper though!! Lol! UPDATE: I have now used both versions and I can say, grab the new one if you have the extra couple bucks it cost, I was able to paint my chicken coop in only a few minutes because of the different sprayer tips it comes with!
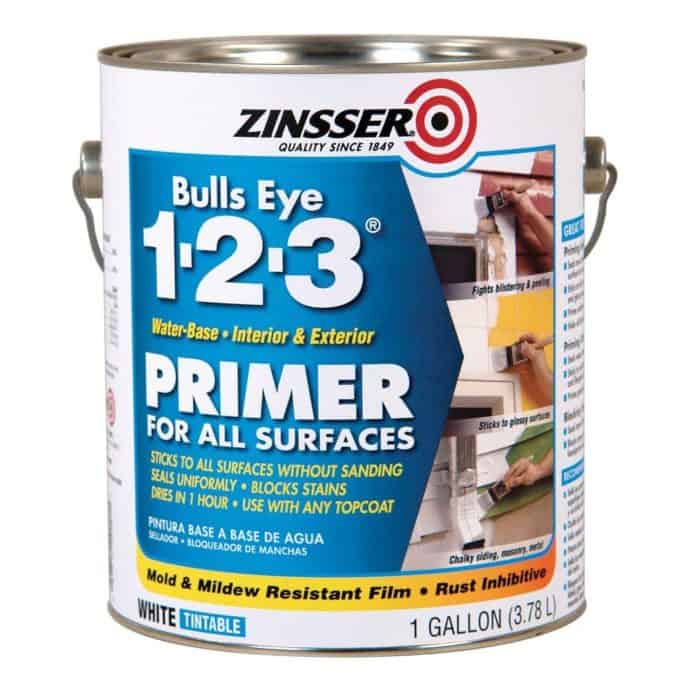
For primer I went with the Zinsser water based from Home Depot!
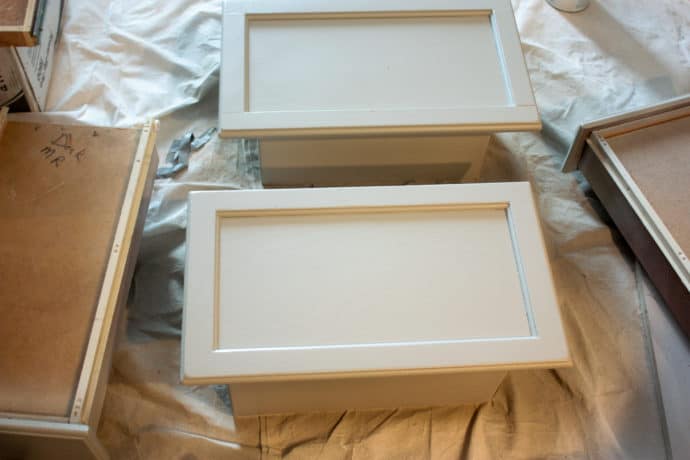
As for the paint I used Sherwin Williams Pro Classic Water Based paint…I want to say it is the most amazing paint I have ever used, and when they say it settles to not show brush strokes, they are not lying!! Lol!! I have tried a lot of paints that claim this, and they have all let me down!
I have added Floetrol to my paint to try and achieve this to no avail! This paint though, does it like no other and without any additives!! I did happen in on their 40% off sale which if you watch they have sales pretty often!! The bottom cabinets are Dorian Gray!

Top cabinets are Alabaster!

I am not sure if this had anything to do with how well it settled or not, but I hand painted the face frames and sprayed the doors, when you spray paint the paint, you have to dilute it with water to make it thin enough to spray, so I kept my paint brush wet while I painted the face frames and maybe it helped, maybe it was coincidence?
Great setup I had going on in my dining area!! I painted them inside because the paint had no real odor and I didn’t have a spray shelter, so I would have had all kinds of bugs in my paint!!
Once the cabinets were painted, I left them sitting for over 2 weeks, and then accidentally stacked them on the table in case our house flooded during Harvey, and some of them did stick a wee bit! I just lightly touched the spots with a tiny paint brush and no one will ever know!! So don’t stack them on each other just to be safe!! You do not need to leave them for two weeks!
Finishing Touches on the Desk Makeover
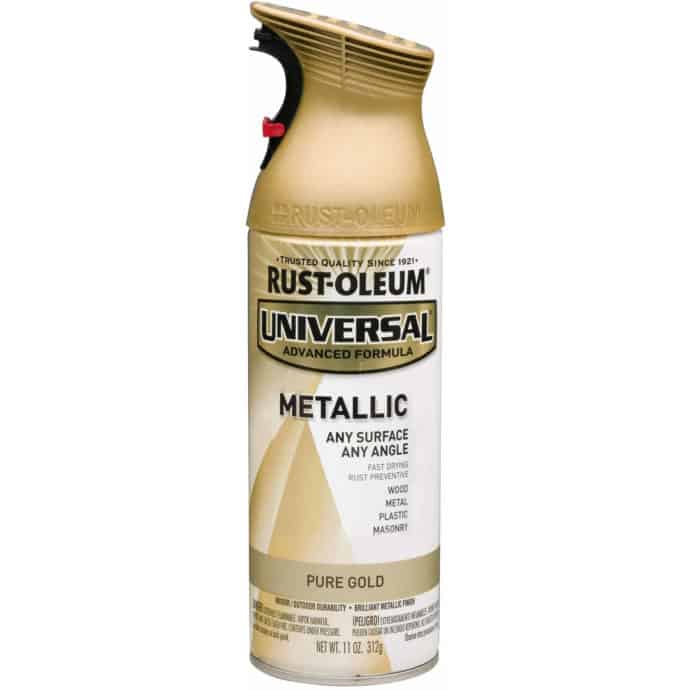
Cabinet Hardware – I used the Liberty Mandara Cabinet pulls and knobs from Home Depot on the cabinets of the desk makeover! I was able to get them in packs in the store which saved quite a bit of money! I then painted them Pure Gold by Rustoleum! I reused the hinges that were on the cabinets as well and just spray painted them the same color!
Counter Top Fix
One last thing that you normally wouldn’t have to do that I did, was painting the front strip of the counter top! They used black granite tiles to create the counter on the desk, not that it looks that bad, but it left them uncertain with how to finish the front of it and they ended up placing wood on the front and I wasn’t crazy about it!
I was going to rip it out and pour a concrete counter here, but it was going to be full on demoing the tiles and then finding the screws under the grout because the plywood was screwed into the cabinets underneath the tiles! So I risked messing the cabinets up in the process of trying to change the counters and didn’t want to take that risk for a home that we may only be in a few more months!
So I just painted the front solid gloss black to match the granite tiles and look more like a solid counter! It works better than it did but not my favorite part of the desk!! LOL!!

I think that pretty much sums up the makeover!! I enjoyed it and love the look now!! It was worth the effort for sure in the end, even though I questioned myself so many times in the process!! So if you are wanting to take the plunge and repaint cabinets, DO IT!! It will be worth it!!
Hope you all have a wonderful weekend, hopefully full of cabinet painting!!
Happy Building!

Want to save this Desk Makeover for later? Pin it!


It’s like a brand new room!
I know!! Thanks so much Sandra!!!