Scrap Wood Spiders
Hey there! I am so excited to announce that I have joined an inspirational build group on Instagram! Kate from @salvagedior is one of the sweetest ladies on Instagram! I have loved her since the beginning of my time on there, and she put together this group of four talented builders that I am already loving how supportive and kind they all are! Do you follow me on Instagram? If not, I would go hit follow because you are not going to want to miss any of these fun little builds we are doing! Make sure and follow my fellow builders on there as well, they are a talented bunch y’all!! @ofloinndecor @madeinthemeadows @foreveritts_home Here are my scrap wood spiders for week 1 which the theme was Halloween!
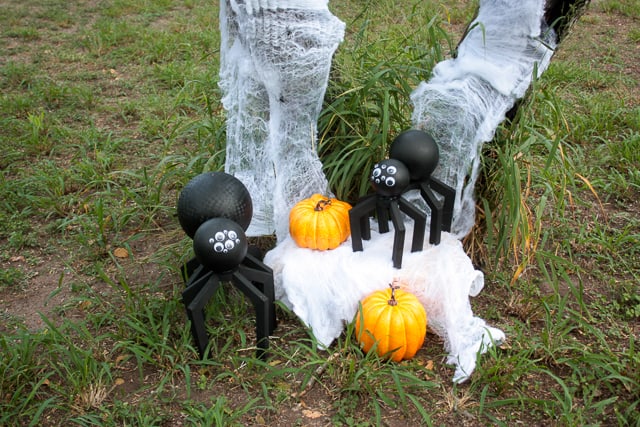
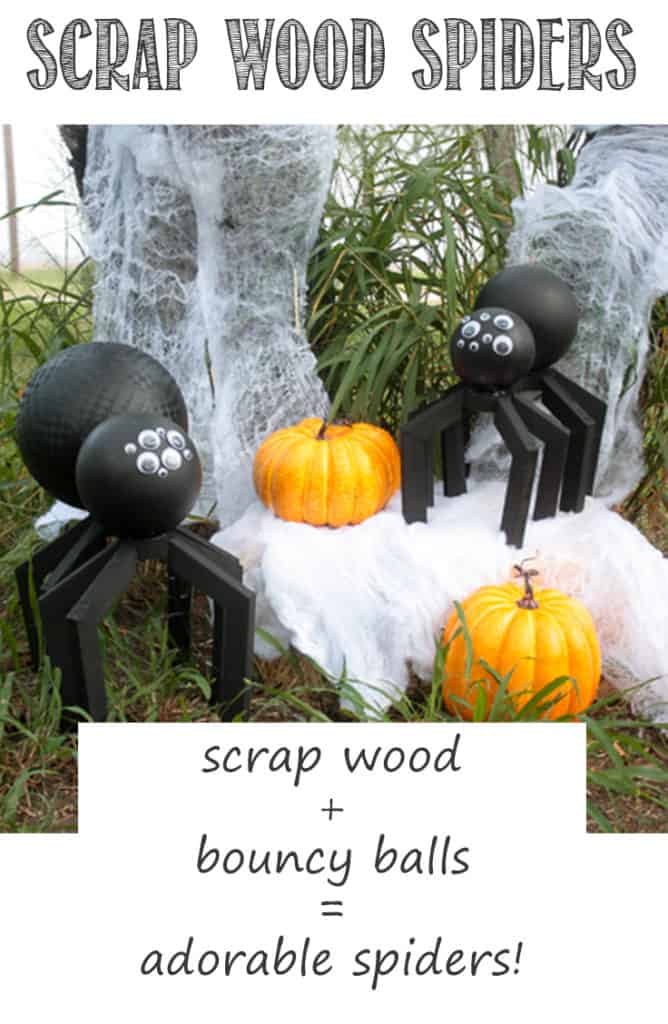
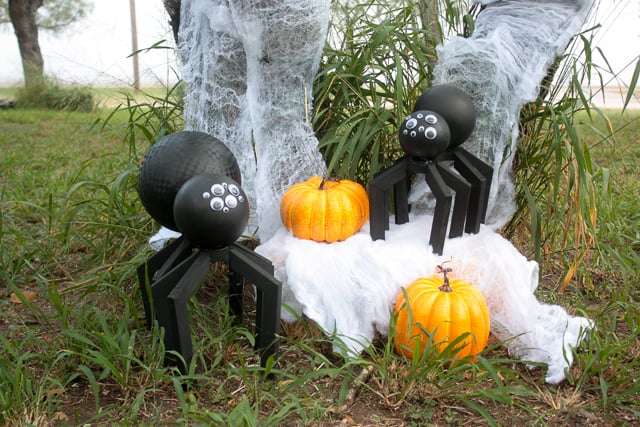
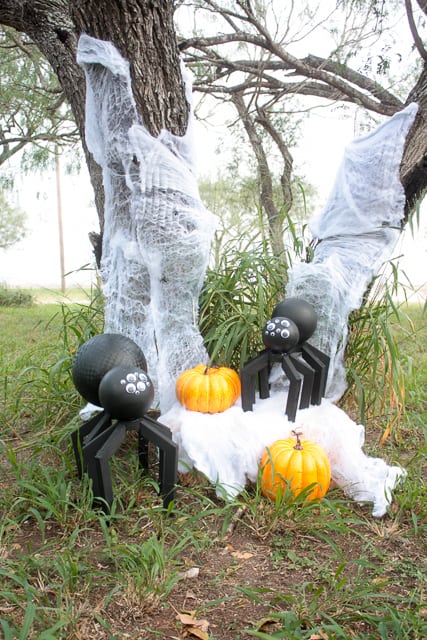
Using up some scrap 1x2s and old bouncy balls of my kids, we created scrap wood spiders!! How cute are they? I mean I am not going to be scarring any kids at my place obviously but I am totally okay with that! LoL!! I have to confess I am a big chicken when it comes to Halloween, I don’t like all the gory stuff!! ????
They are hilarious looking, my kids love them so that’s all that matters! ???? We will be sharing a small build each week until the end of December! I am so excited to share so many ideas I have in my head with you all, and the other builders are so inspiring!! I have to tell you they blew me out of the water on this week’s theme, they did a far better job than I did so you need to make sure and check them out! Links are above!
If you would like to throw together some scrap wood spiders, I will show you how!
Scrap Wood Spiders
Materials:
-a bunch of scrap 1×2 pieces, or 2 – 1x2x8 furring strips if you don’t have scraps!
-scrap board of any size that is at least 3 inches wide – I used a piece of plywood I had!
-old bouncy balls the kids don’t play with, or you can purchase new ones!
-black acrylic paint
-hot glue gun with hot glue sticks
-brad nailer
-wood glue
-googly eyes
Cut list:
-8 – 1×2 @ 7 1/2″ mitered on one end at 31 degrees off square (measuring longest end)
-8 – 1×2 @ 5 1/2″ mitered on one end at 31 degrees off square (measuring longest end)
-8 – 1×2 @ 4 1/2″ mitered at 31 degrees off square both ends, not parallel (measuring longest side)
-8 – 1×2 @ 3 1/2″ mitered at 31 degrees off square both ends, not parallel (measuring longest side)
Alright, this literally only took me an hour and a half from start to finish! It is a fun project to let the kids join in on because you really can’t mess it up!
Here’s the collection of balls I started with!
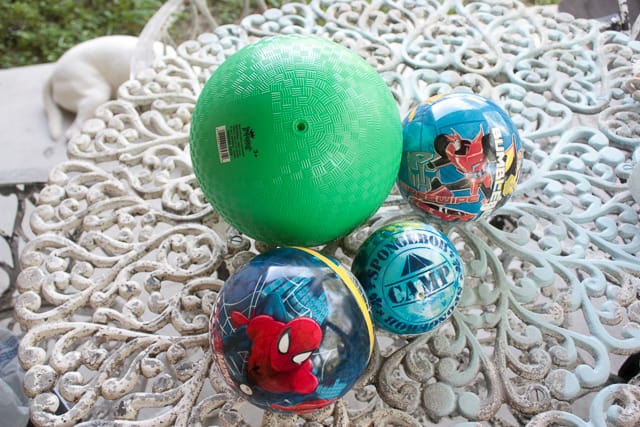
Starting off, I spray painted the balls, this did not work, I guess because they are polypropylene the paint would not adhere properly. I ended up going over the spray paint with acrylic paint and placed them in front of a small heater and they dried perfectly!
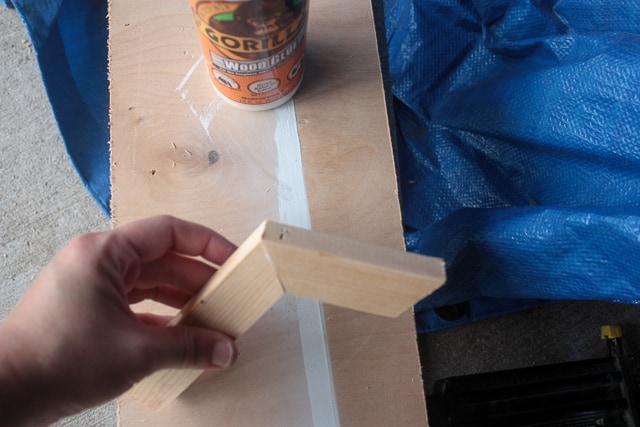
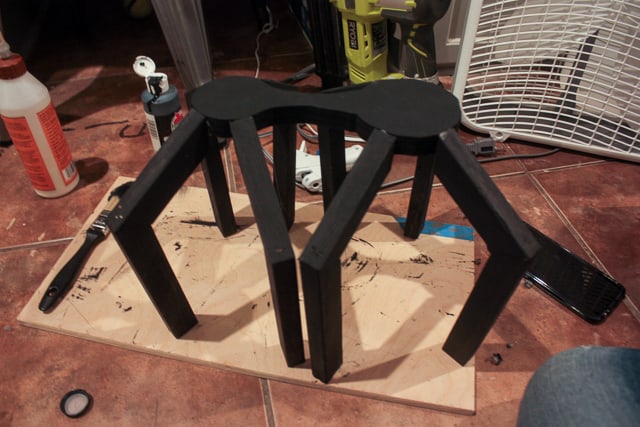
I cut all my spider leg pieces, each leg will consist of two pieces, one mitered on both ends and one mitered on one end! The longer ones are both for the larger spider and the shorter for the smaller.
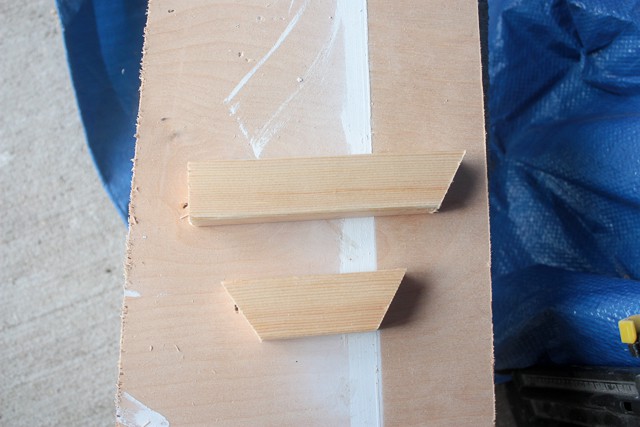
To assemble the legs, I just used wood glue and 1″ brad nails to staple them together!
After assembling all the legs I painted everything! Here are the balls after being repainted with the acrylic paint!
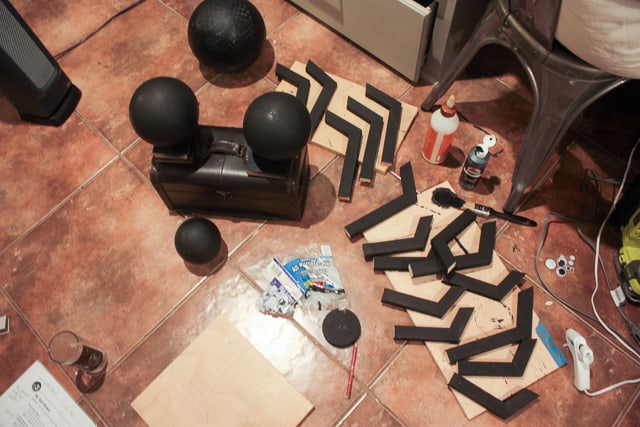
What a mess I can make!! Lol!
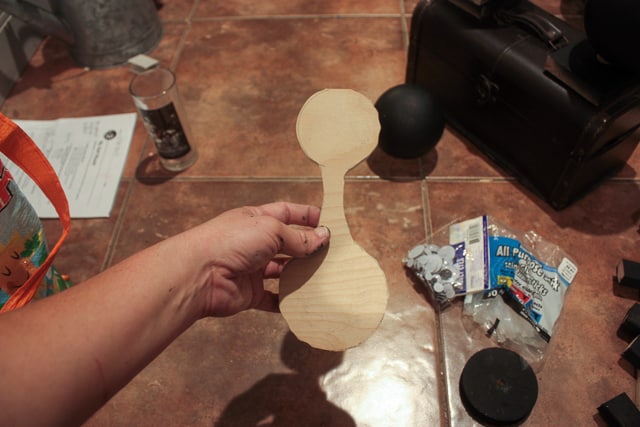
Next I had to create a body to hold the balls and legs together! I just looked around for a couple small circles to trace. Once I had my circles, I placed the balls on a scrap piece of plywood and saw the distance they needed between them…does that make sense? Then I just drew lines between them! Nothing perfect at all!
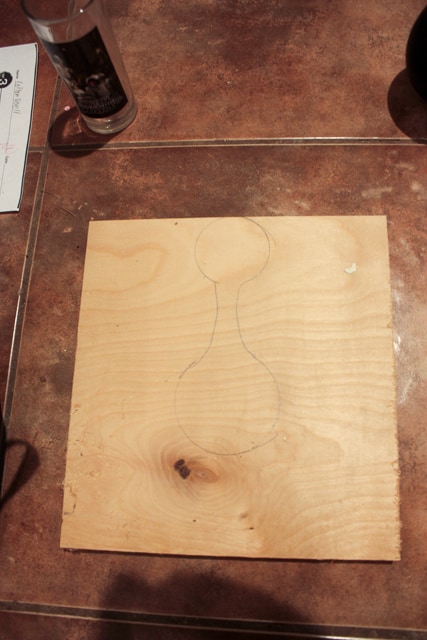
Cut it out with a jig saw or scroll saw. Mine looks awful, after getting a new blade and adjusting the tension my second one looked much better!
Using my brad nailer and wood glue I attached the legs to the body, I don’t know if you can really see it in the pics but I did not paint the mitered edge of the legs all the way, I only painted the bottom portion or else the wood glue won’t bond.
Next I hot glued the balls to the top and the eyes on the balls!! And that’s all folks…it was that easy!! Throw them outside with some fake spiderwebs and Halloween is done!! LoL!!
Hope you enjoyed our first round of #teamKatebuild, hope to see you next week!
Lots of Love,
Cara
Want to pin this for later?! I would love for you too!