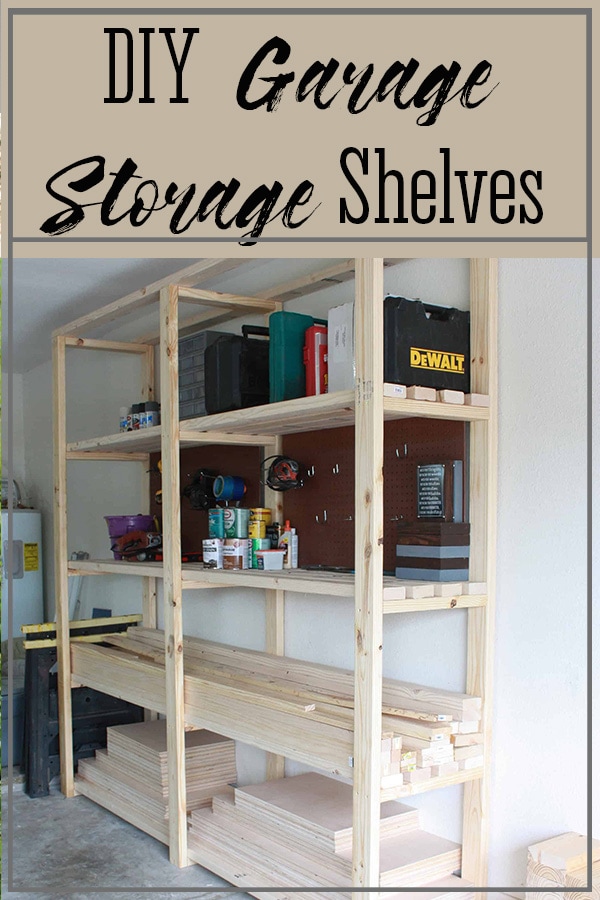
Easy DIY Garage Storage Shelves

Garage organization and storage are imperative if you enjoy DIY projects and building furniture and you don’t have a separate workshop, even if you just park your car and store a few things in the garage, it’s important! This set of DIY garage storage shelves is a giant leap toward being able to keep an organized garage and can easily be built with a few 2x4s!
This weekend was so wonderful…warm and sunny…not to brag since so many of you were in some very cold temperatures… but because of the beautiful weather here, I was able to get my garage cleaned, organized and a new shelf built! WOOHOO!!! Yep, and it was such an easy set of DIY garage storage shelves that I just had to share it with you!!
I am not a very organized person naturally, I have to work REALLY hard to be organized! LOL! I can work in complete chaos so I don’t normally like to spend time cleaning the garage when I can spend that time building! 😅 But this weekend I was on a mission…I had to clean it up to open the floor space because I am going to be starting a big build that I am SOOOOO excited about, yep with all that plywood!!
Anyway, a few weeks ago…heck maybe even months ago now…Ana from ana-white.com posted easy 2×4 garage shelving & so when I got the crazy hair to tackle the garage I knew I would use her plan because it is so easy to build! She wasn’t lying! Find the amazing video tutorial on how to do it at Ana’s site HERE!
I will give you a very quick walkthrough of what I did here as well since I adjusted her plan a little, Ana built her shelving huge – they are 20 ft. long I think she said! I would LOVE that…but let’s be real…how about 8 ft.! That’s all I had room for! Lol!!!
Let me show you the garage before I built the garage storage shelves! It’s bad, but I trust that we are friends and I can show you this without any judging! 😜

Wow, that was rough right? Embarrassing to say the least! Well, I am just glad it doesn’t look like that anymore!
Keep reading if you want to clean and organize your garage too!
Gathering Supplies to Build DIY Garage Storage Shelves
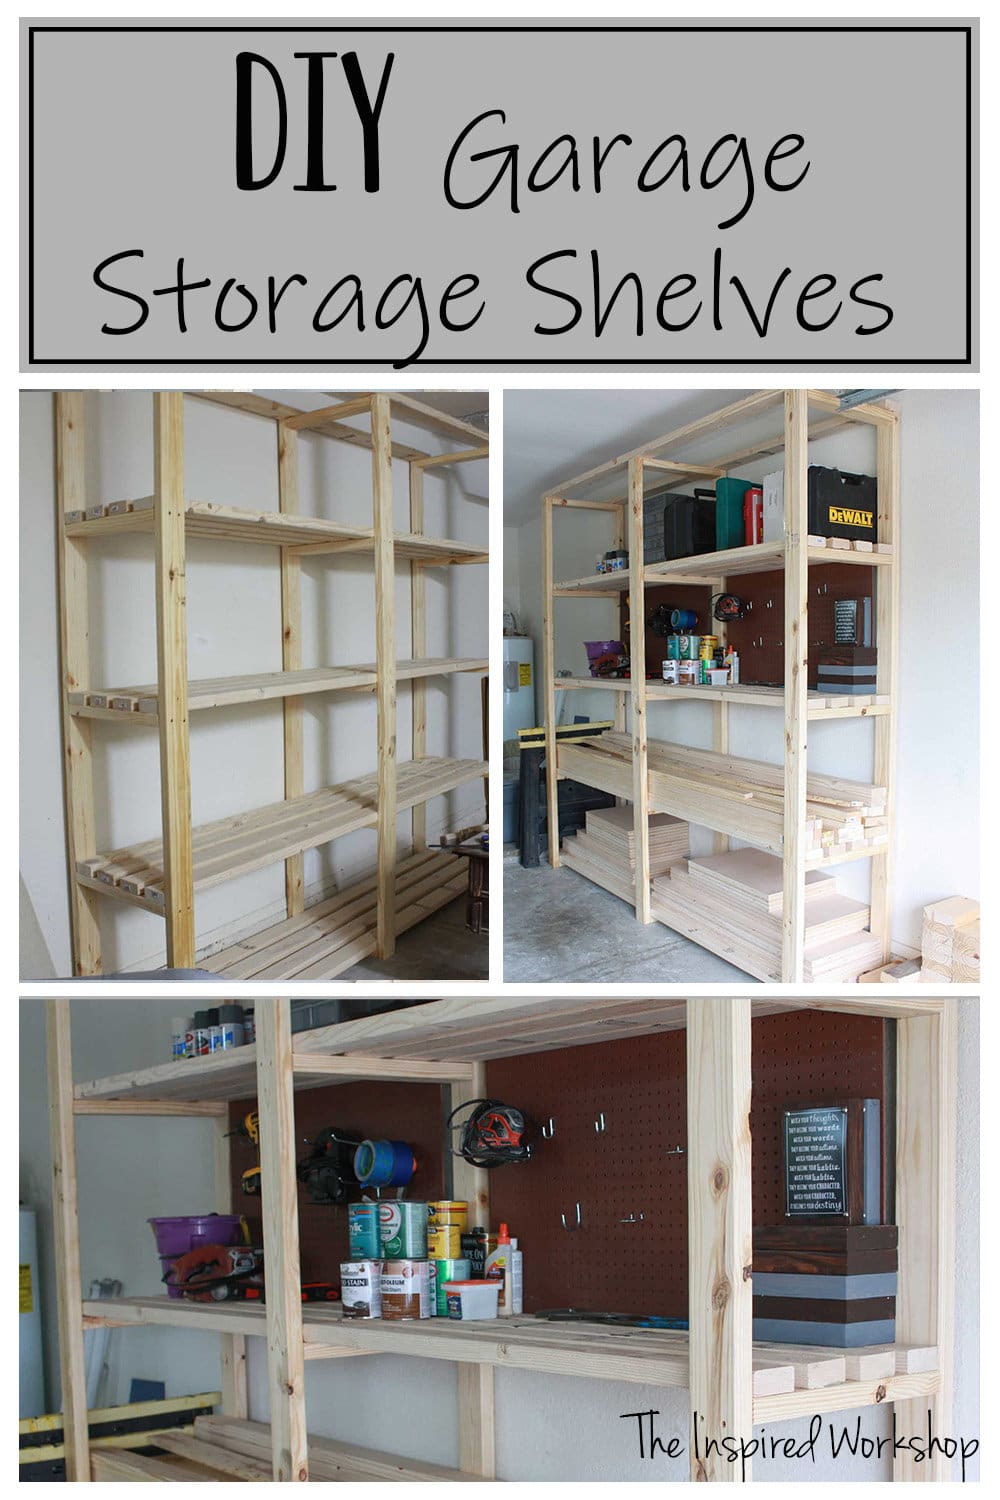
Alright, the dimensions of my shelf are 8 ft. long by 7 ft. 6in. tall and 21 in. wide. My original plan was just to build it 8×8 but my ceilings in my garage are 8 ft. tall, yeah, that wouldn’t work now would it? So I just bought some of the 2×4 studs @ 92 5/8″ So that I still wouldn’t have to cut the boards! Whoop!
That is the great thing about this project…you only have to cut a few support boards that go underneath the shelves, other than that you use everything off the shelf, which is why I used Ana’s plan…so simple…& Simple is my middle name…okay, not really, it’s Michelle but it should have been Simple! LOL!
Material List for garage storage shelves:
- 22 – 2x4x8
- 6 – 2x4x92 5/8″
- 2 1/2″ wood deck screws
- glue
- 4×4 sheet of peg board
- 1 1/4″ wood screws
Cut List for garage storage shelves:
- 15 – 2×4 @ 18″ (you can make these a little shorter if you prefer)
That’s it – that’s all the cutting you have to do!
Building the DIY Garage Storage Shelves
All you do after that is build your “legs” which are going to support the 2×4 shelves for your garage storage shelves.
You will use 2 of your 2×4@92 5/8″ and place the 18″ boards every so often – I did every 22.5″ …that leaves one shelf at 23″ but I was okay with that! You could do this part however you wanted though, you could make six narrow shelves or 3 very large shelves or 4 shelves like I did! This is why I DIY folks…you get to decide how you want to do things! Ha!
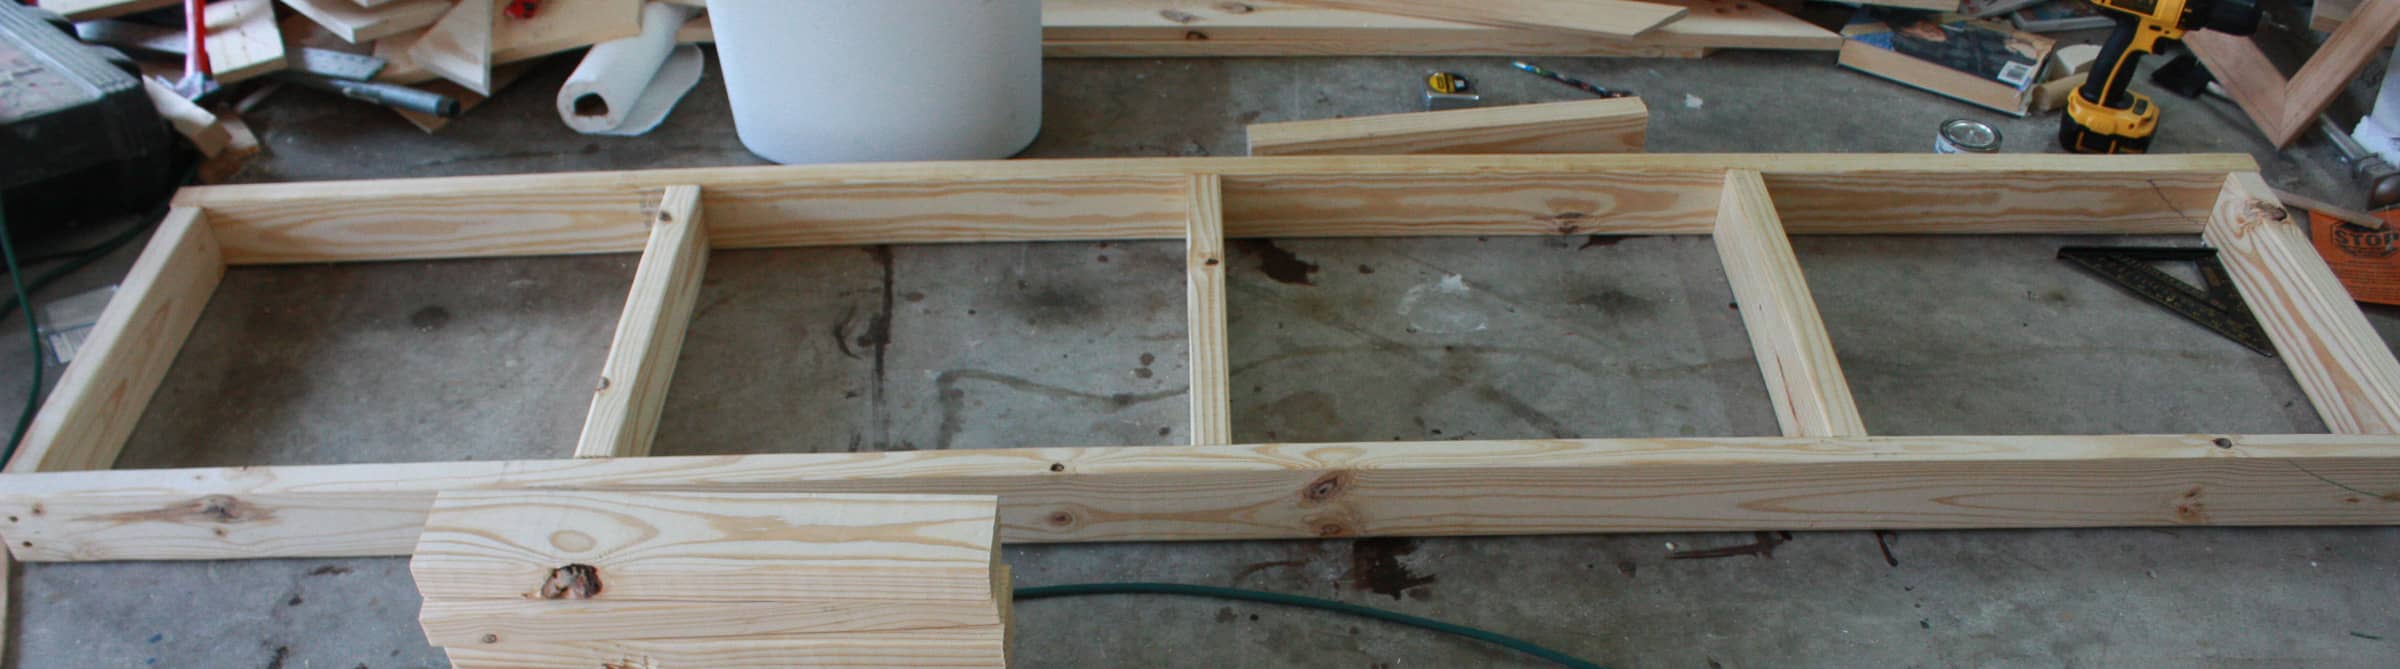
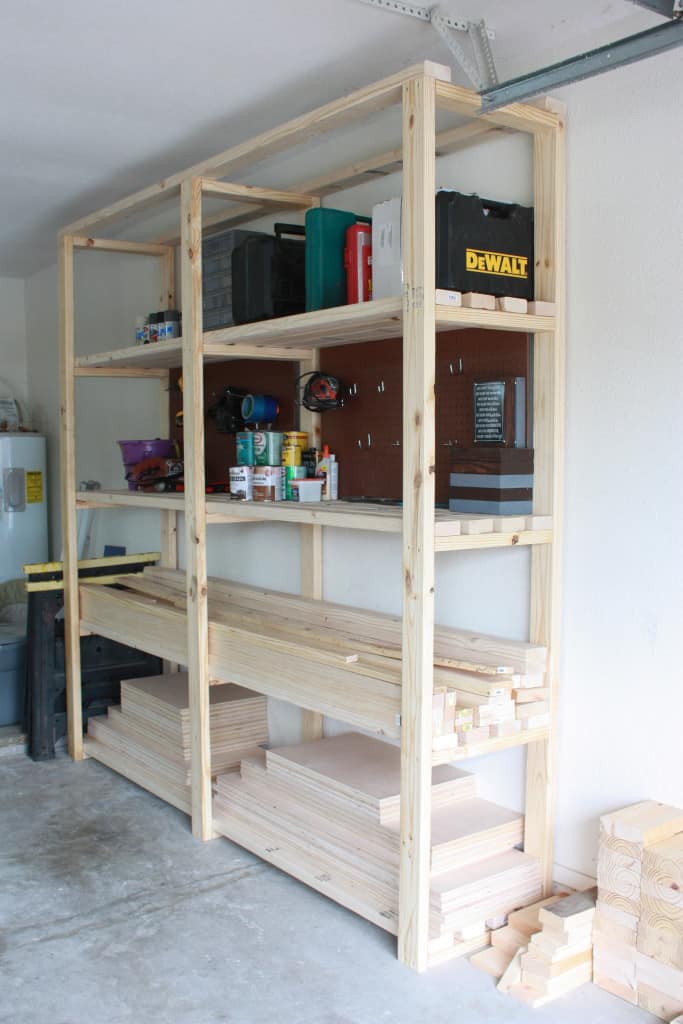
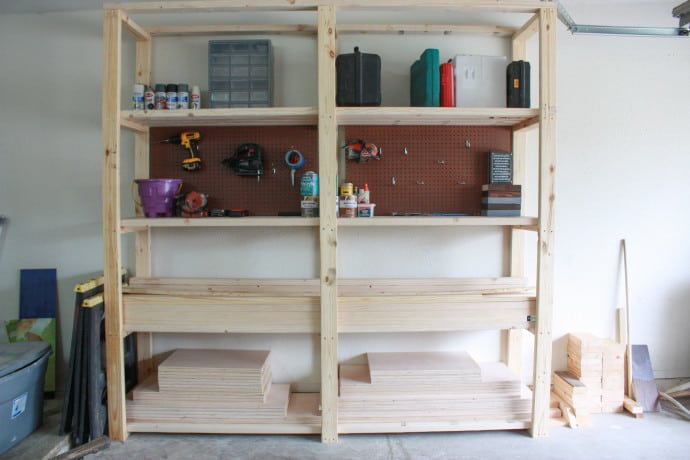
Just screw the 18″ boards from the outside with 2 1/2″ wood deck screws. Bam! Make three of these…stand them up where you want the shelf to be, leaving 41″ in between them, and attach your 2x4x8s by sliding them through the three supports you made and screwing them down! Four boards per shelf and using the same size screws you just screw the 2×4’s to each support. Thanks to my hubby, he actually helped me with this project and it only took us a matter of about 2 hours from start to finish! This is what it looks like all finished up!

Ana used four 2x4s across the top as well to make that a shelf but since mine was so close to the ceiling I opted to only use 2 for structural support and save the other 2 – 2x4s to build something else! Lol!
At this point, I decided to place a peg board on one shelf. I just bought a 4×4 sheet of pegboard and cut it directly in half…it said it was 4×4 but it was really 40″ x 48″ so it didn’t completely cover the space…anyway, we just used 1 1/4″ screws on the back of the shelf to hang it. I didn’t take pictures, once I loaded it up with wood, it was way too heavy for me to move when I realized I hadn’t taken pictures!
This peg board turned out to be the best part of this set of garage storage shelves…now I know why everyone hangs their tools on one! They are so much fun…they make all kinds of hooks and straight hangers, you can go crazy and put them anywhere & everywhere you want! Oh, how fun it is! Plus, the best part was I just created a lot of extra storage space for some NEW tools! Oh Yeah!
I should have painted the peg board and may do that soon!
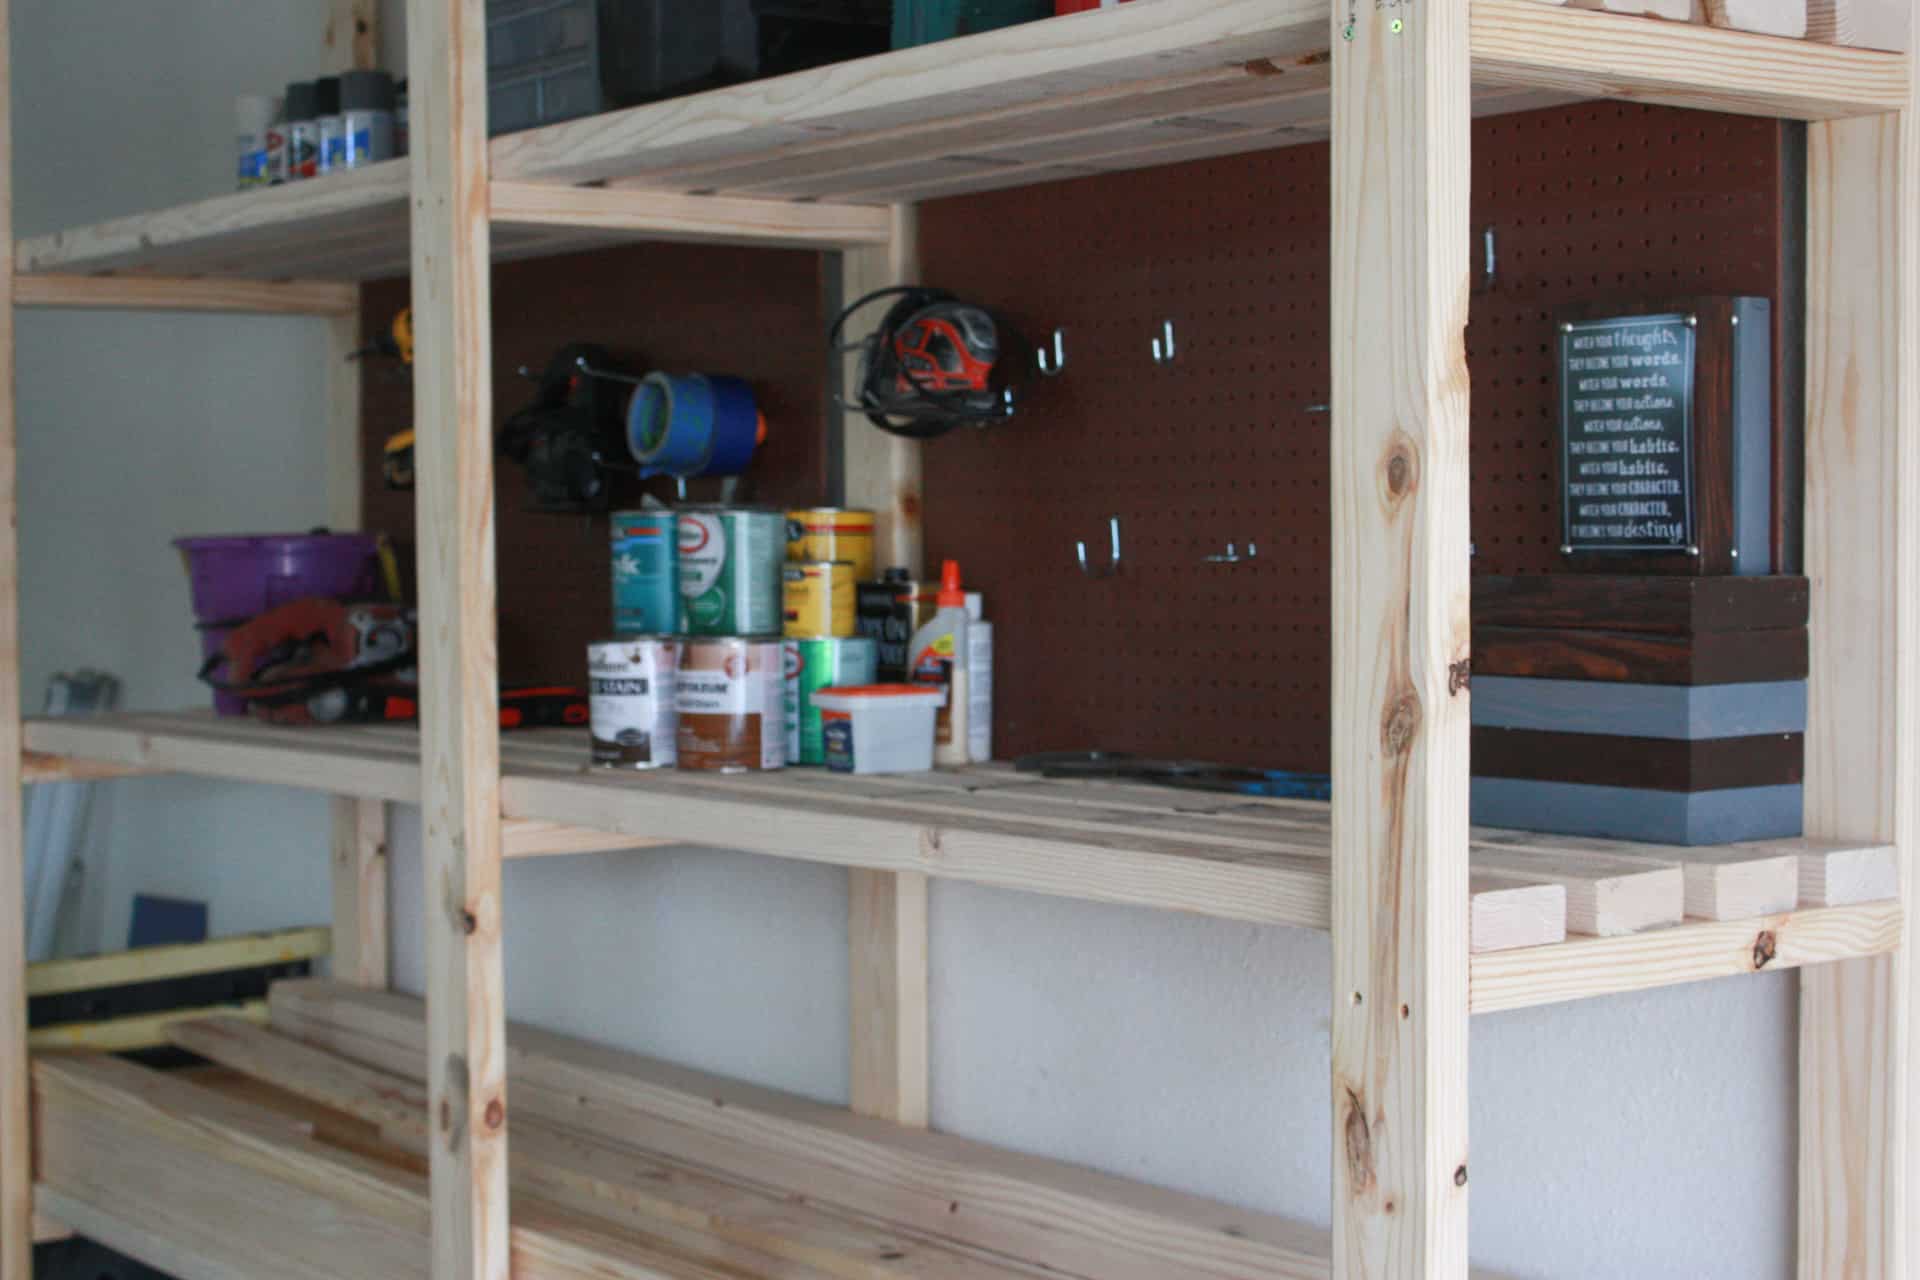
It is so perfect because I can easily see all the wood I have on hand and pull any out that I want to use!
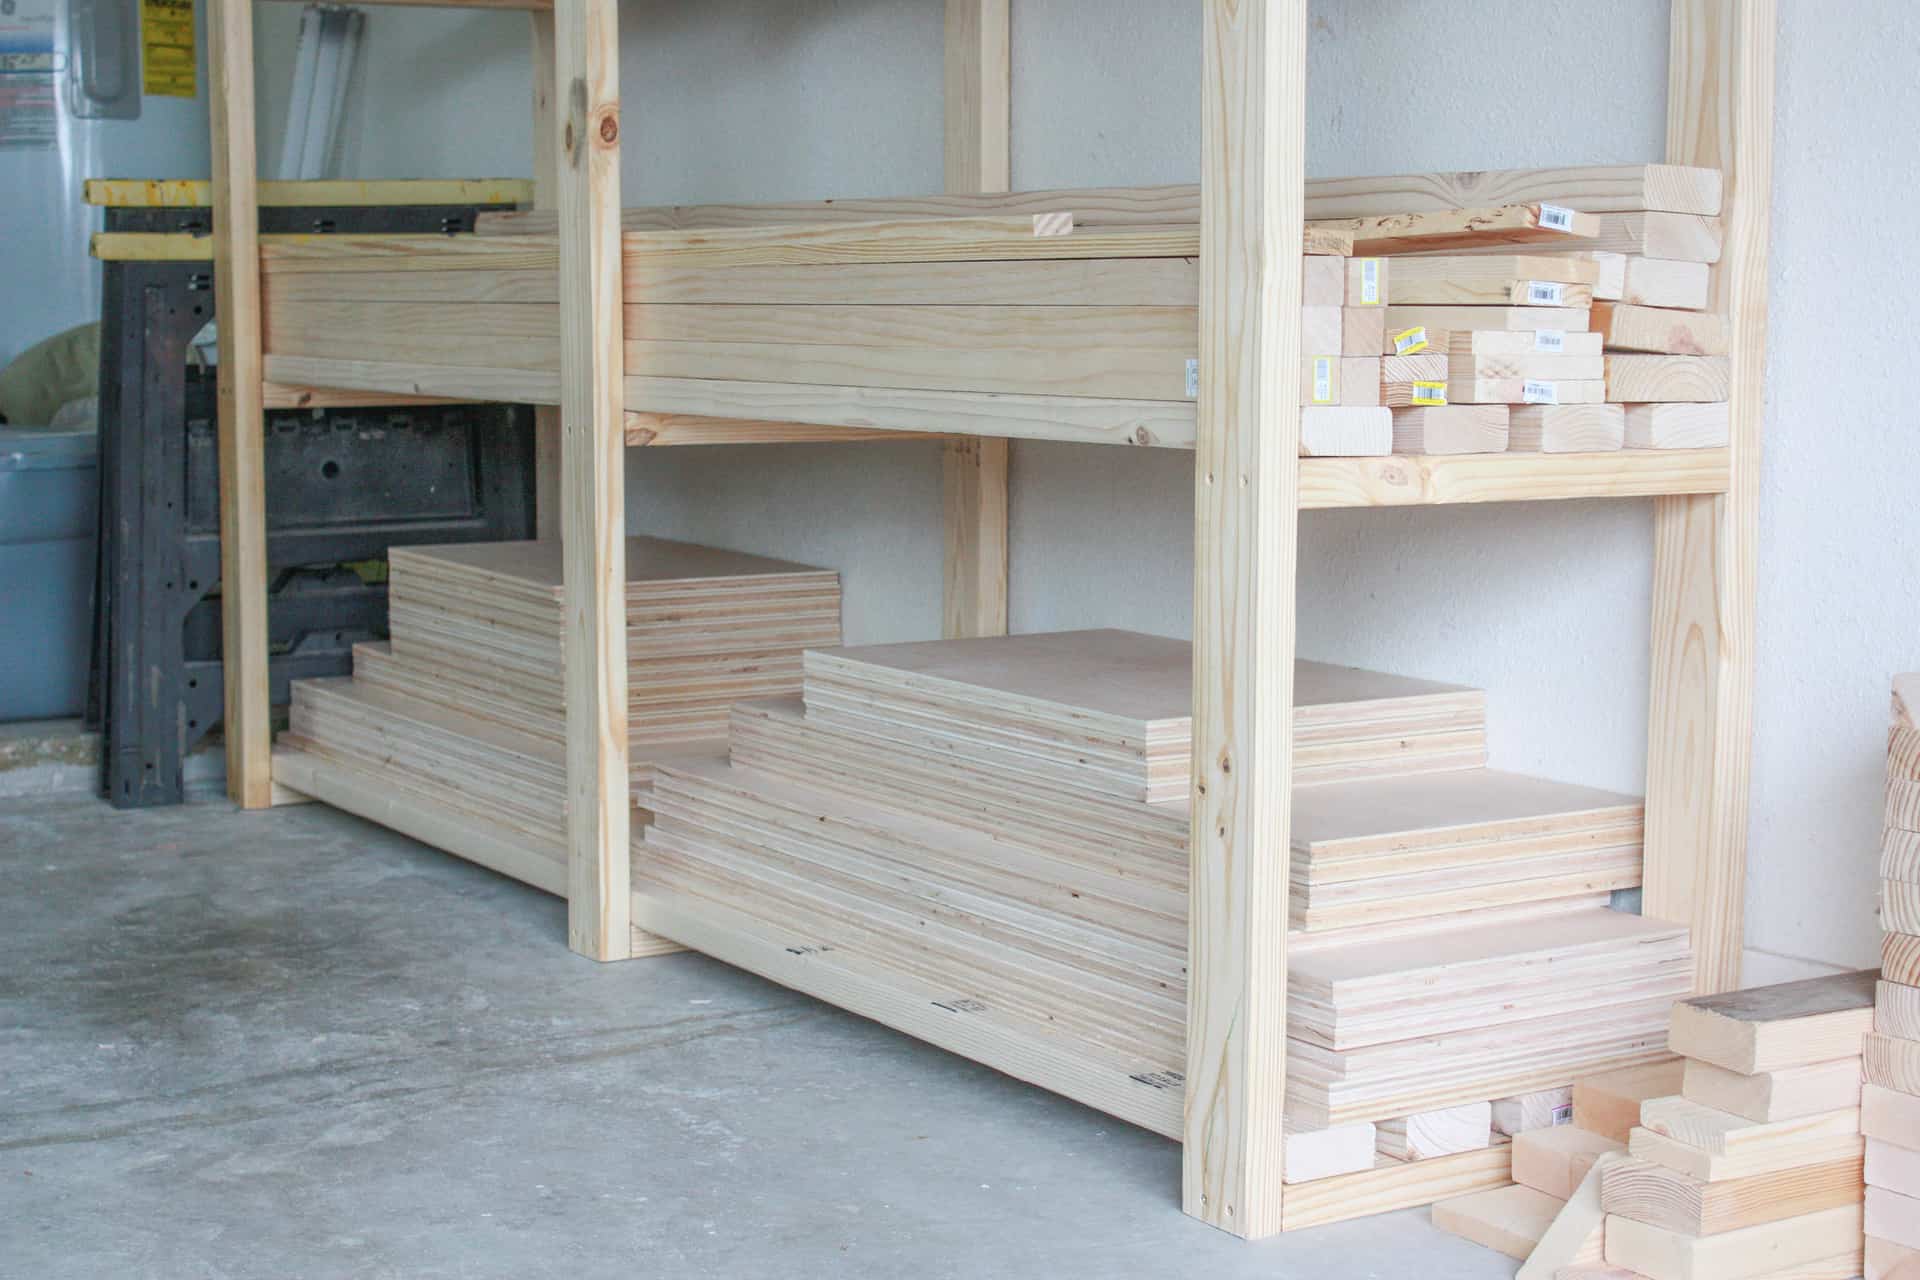
Look at that BEAUTIFUL PureBond plywood on the bottom shelf! I can’t wait to start the project that I cut that for! Update: I never built the entertainment center that I cut all that plywood for! Lol! But I did end up using some of it for this DIY media cabinet, and some on this herringbone door buffet.
You have no idea how great it feels to finally be able to walk through the garage without hopping around and tripping and falling all over to get to my saw! LOL! I still have half the garage to tackle! I have realized I am a bit of a hoarder when it comes to my boys’ old toys and things…like bikes they have outgrown or the little wagon they don’t fit in anymore and a lot more stuff that they won’t ever use again…it is all just taking up space, but it makes me cry to even THINK about getting rid of this stuff! I may have a problem! LOL!
I won’t think about that right now…only the happy thoughts about how clean HALF of my garage is!
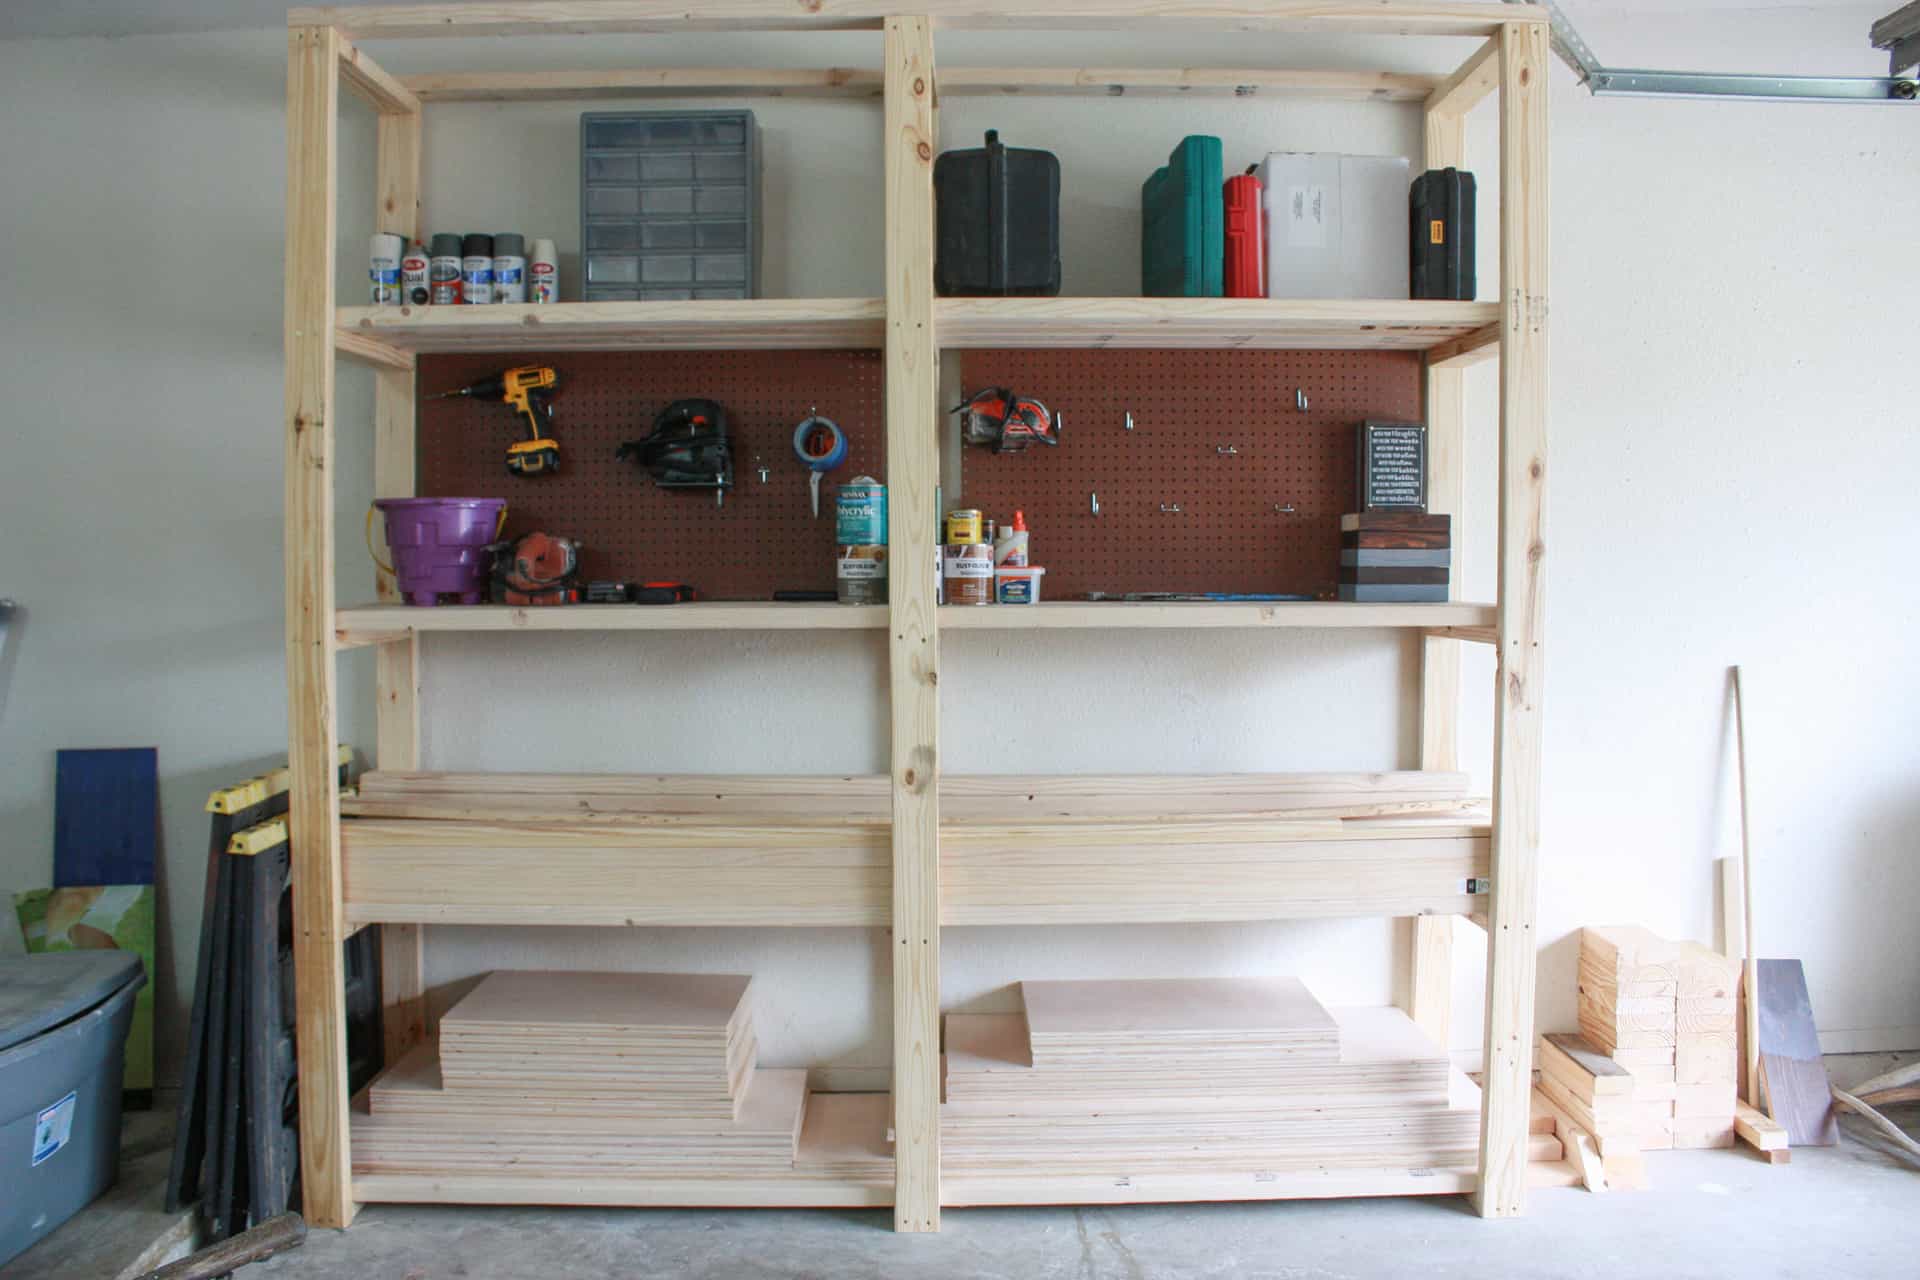
Look at all that space I have to fill! Well, it won’t be as spacious when I clean off my work table but it is amazing the amount of space this shelf has to offer! Ooh, la la!!
I better run so I can get started on my other projects in my almost clean garage! Have a great week! Make sure to sign up for email notifications of new posts so you never miss a beat!!
The form you have selected does not exist.
Whatever you BUILD or CRAFT, I hope you LOVE every minute of IT!
Lots of Love,

Want to save these DIY Garage Storage Shelves for later? PIN it!
i loved your simple design
Thank you so much!! I really can’t take credit for the design as Ana White (www.ana-white.com) came up with the original plans, I just altered them a little!! LoL!! I appreciate your kind words!! Thanks for stopping by!! Have a good one!!