DIY Upholstered Bench with Storage
This beautiful tufted upholstered bench is actually a DIY bench! It is hard to tell that this bench wasn’t purchased at a high-end designer store! Plans to build your own and tutorial on how to easily tuft the top of the bench are free for you to learn!

Now, I am not going to lie…there are a few areas that on my next upholstered project I hope to look better…but since it was the first project I ever tufted, I will give myself a learning pass! My next one just better be perfect! Haha!
The amazing part of this bench is that it has so much storage space, I was thinking oh maybe I could fit a few toys to get them off the floor, or I could place socks in it near the door so the boys aren’t running around looking for them every morning! But OH NO, it turned out to hold so much more! I am so surprised at what all can fit in this thing…my five year old son for instance! Haha! He insisted on getting inside…I did not put him in there! 😏
Gathering Supplies for the DIY Upholstered Bench
One just like this on Pottery Barn’s website sells for $699-1049… yeah that’s dollars! 😵 But with this tutorial, you can easily have this baby knocked out, and have all the extra storage within the weekend! Beauty and a purpose…move over hubby, I have a NEW LOVE! You will fall in love with this bench as well not just for the ease of the build, the lovely storage and seating… but the price!
This DIY bench comes in at right around $130 buckaroos! And if you have plywood pieces laying around as I did, it will only cost you right around $80 bucks! That is my kind of STEAL! You can also save money by using regular polyester batting…I chose to use organic cotton batting which of course costs double what polyester does!
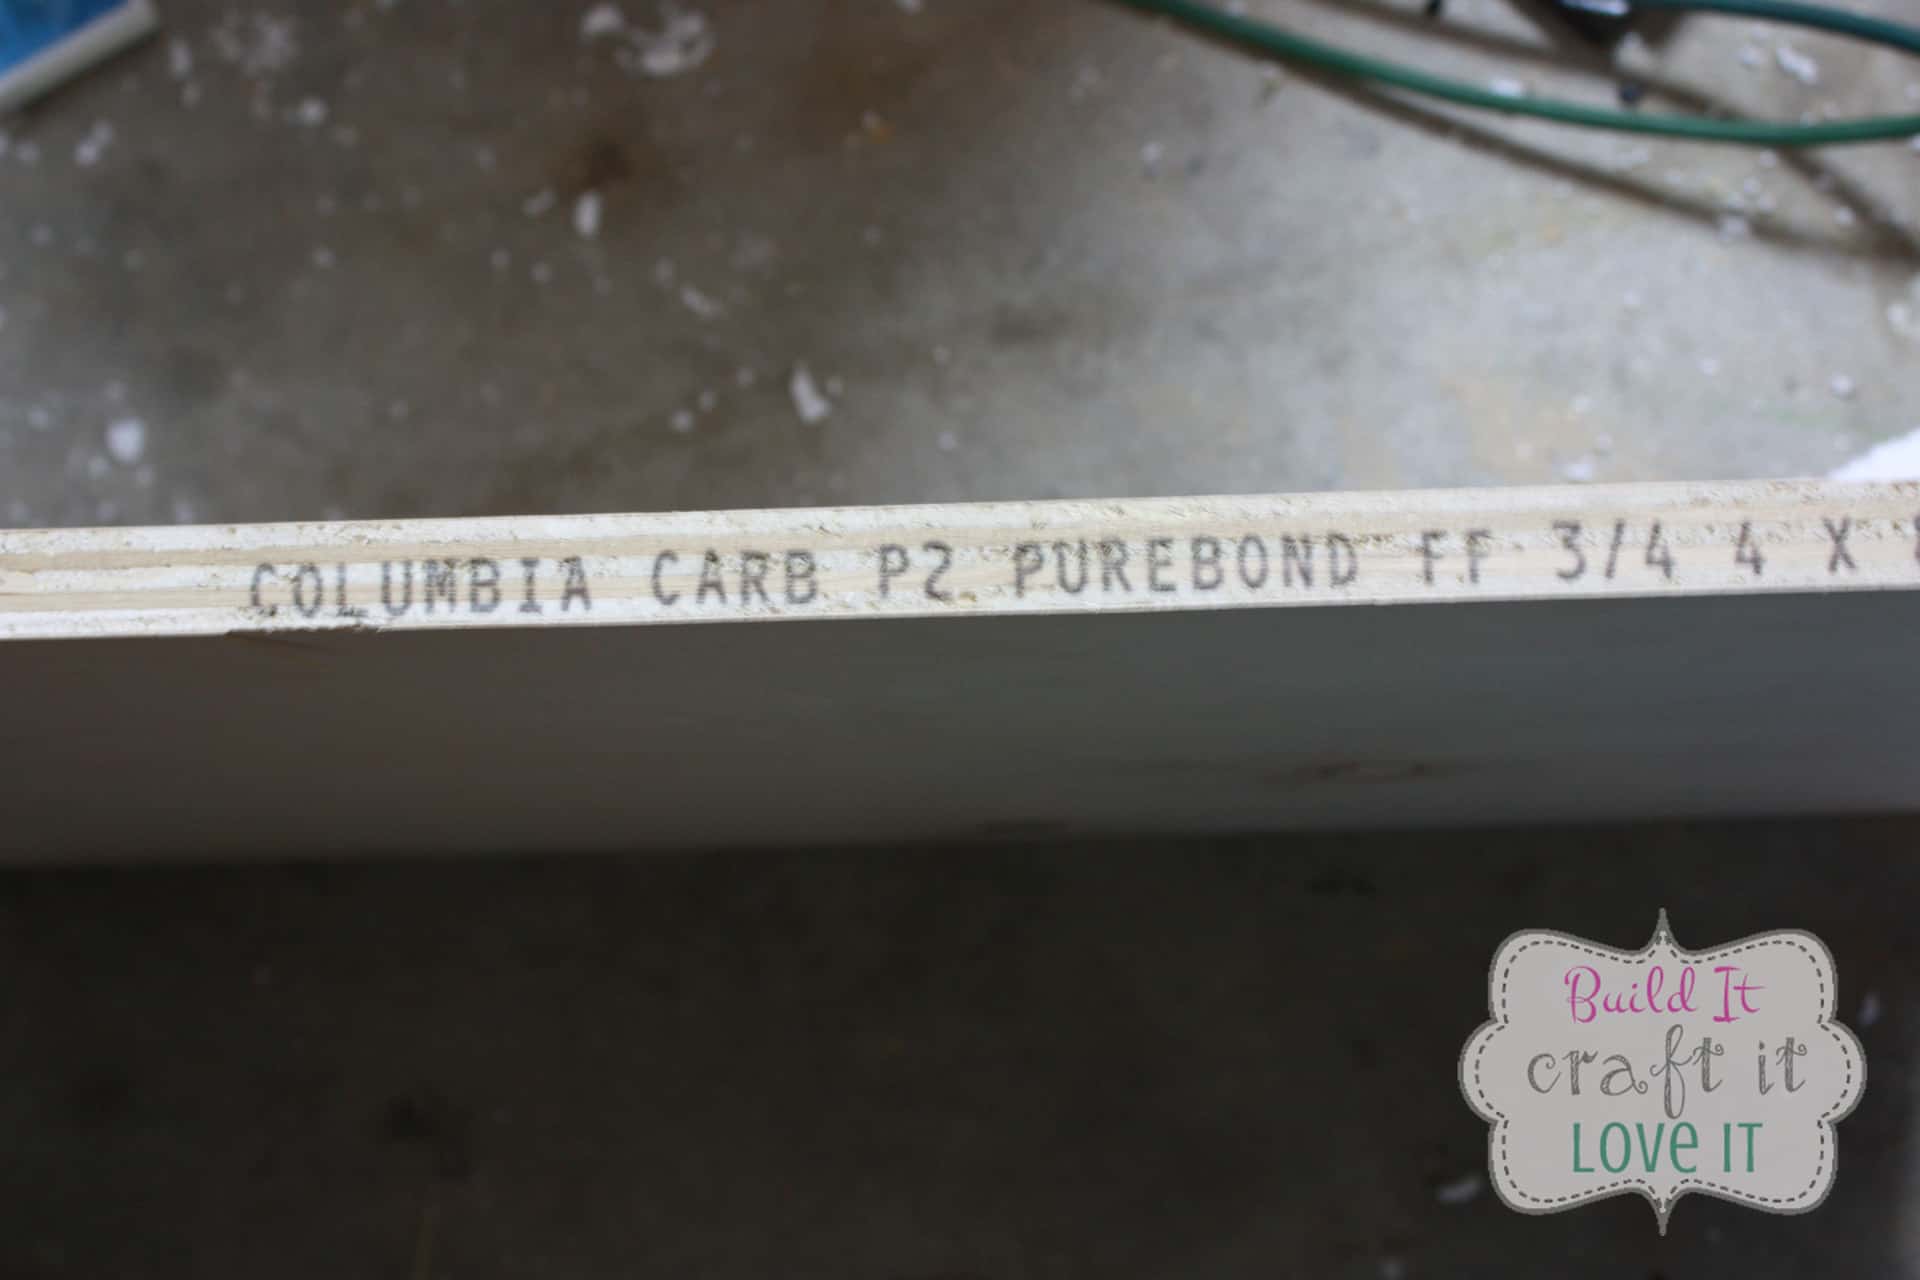
Also, I chose to use Purebond Plywood but if you wanted to save money you could use mdf or cheaper plywood but I think the plywood is worth the splurge for the air quality in your home! If you don’t have any plywood on hand and you buy the sheet, you can easily adjust the plans and make it longer if you have space for it! Since I was using scraps, I had to stick with a smaller box but honestly, it’s not small at all! Only mentioning this because the inspiration piece from Pottery Barn is longer at 58″!
Are you ready to get started building your own DIY upholstered bench? Let’s do it!
Material List for the DIY bench:
***Note Amazon links below are affiliate links! Affiliate links pay me a small commission (at no extra charge to you) when you make a purchase after clicking the link! This is a wonderful way to support my little ole blog and help me keep bringing new plans and content for free! I thank you in advance anytime you shop at my links, I appreciate it! Other links that are not Amazon are just provided to be helpful, no commission earned!😉
- 1 sheet of 3/4″ plywood
- Kreg jig
- wood glue
- fabric of your choice – I used a drop cloth you know the ones made for painting! The only problem I had was the drop cloth does stretch out somewhat, the box part is fine but the top slowly became a little loose, not sure though if it was the foam or the drop cloth!
- batting
- 4 wooden feet
- full-size matress topper
- Aleene’s Tacky Glue
- 2 stay hinges
- upholstery needle and thread if tufting – I used twine because I wanted to make sure the staples had something to hold
- button makers if tufting
- staple gun & staples…do yourself a favor, get an electric stapler if you can…I made it first go around with a hand stapler and then made it with an electric, the electric saved my hand from having a bruise an it was only 15 bucks more! Lol!
Cut List for the DIY bench:
- 2- 3/4″ x 40″ x 12″ long sides
- 2 – 3/4″ x 40″ x 16″ top and bottom
- 2- 3/4″ x 10″ x 16″ short sides
Building the Box for the DIY Upholstered Bench
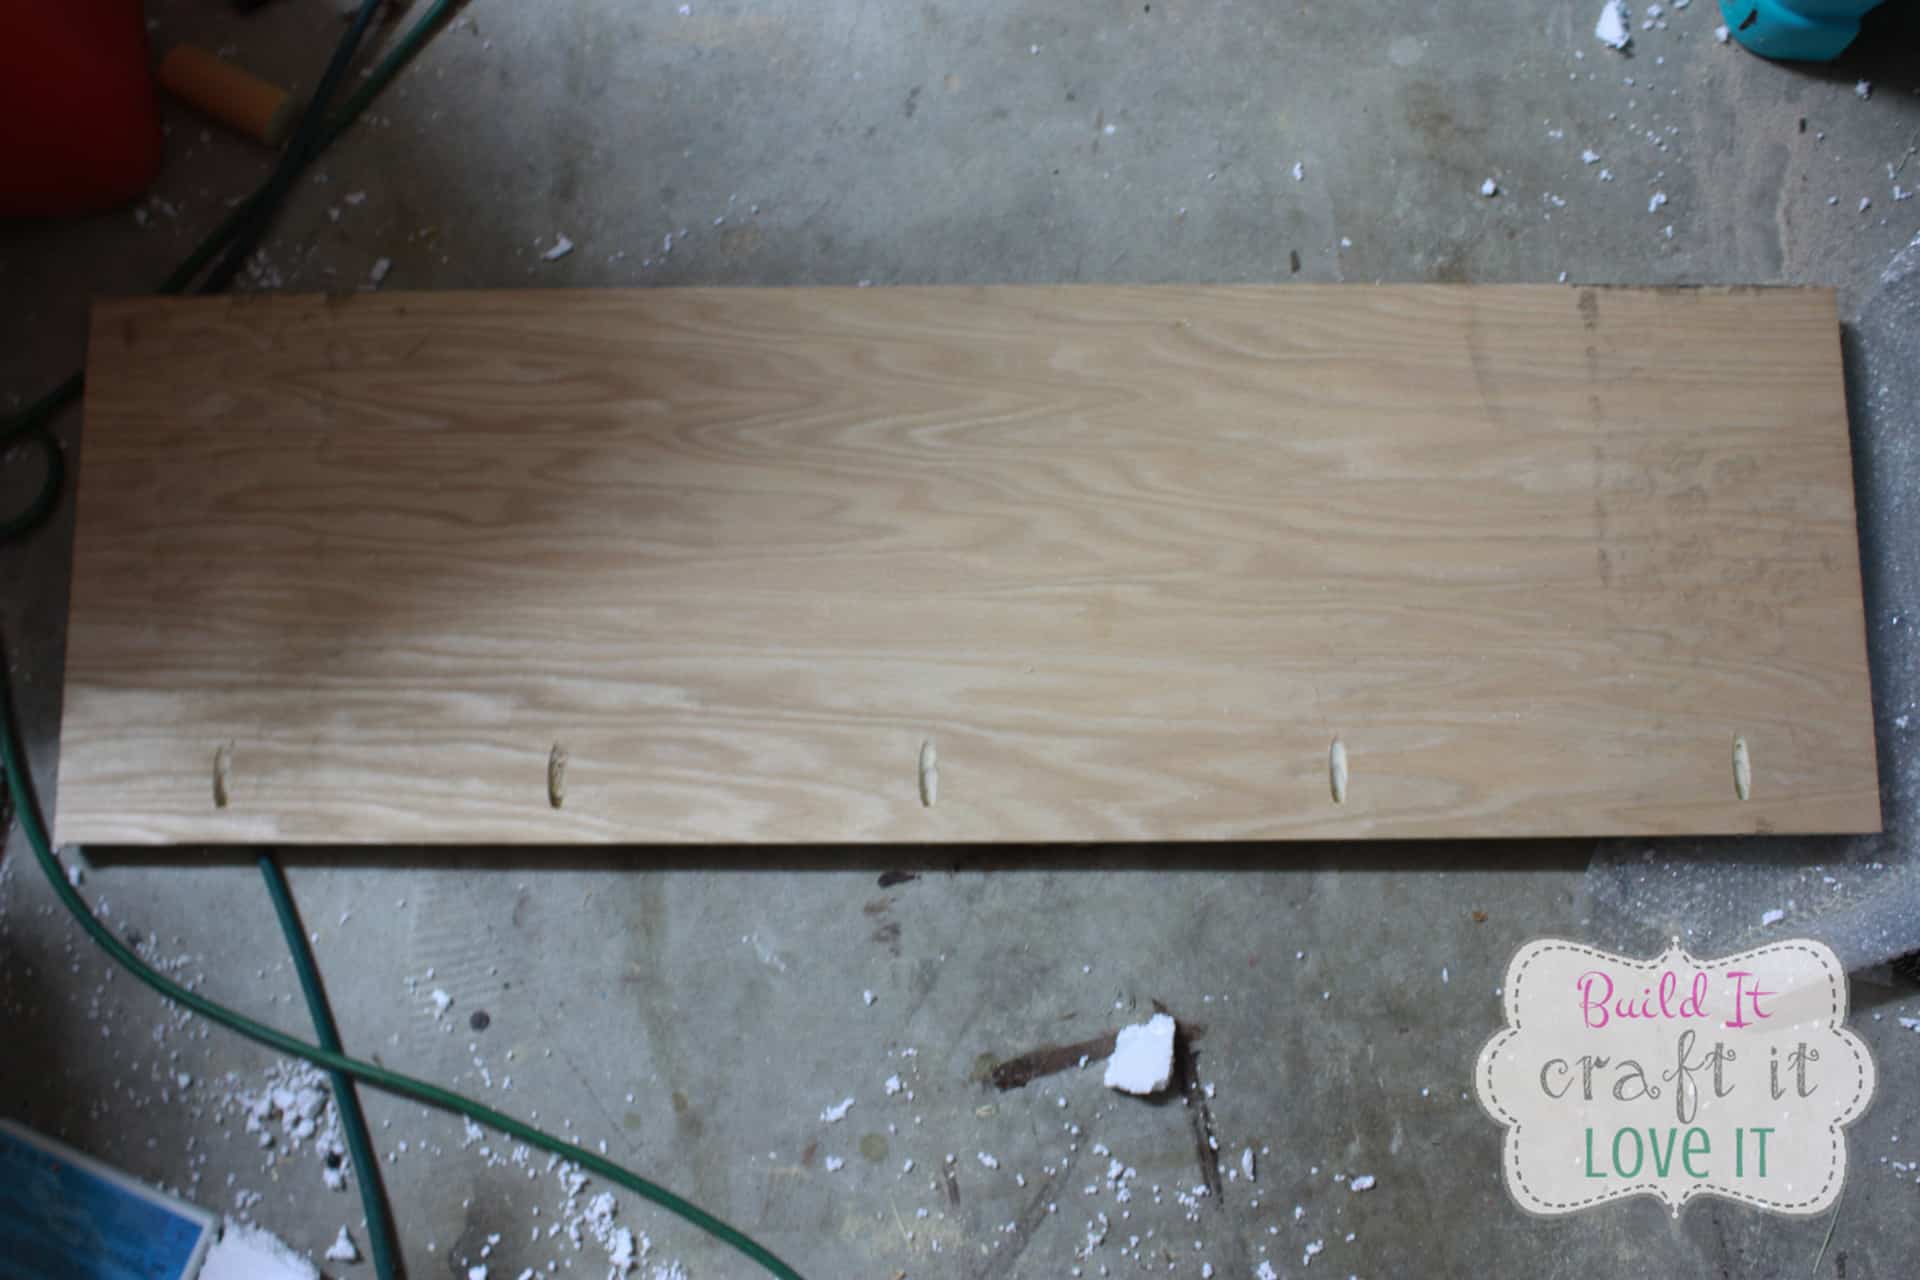
The beginning of this project was my favorite part because of how painless it was – just make your cuts out of the plywood that is listed above and you should have pieces that look like this – 2 short and 2 long.

And the top and bottom of the DIY bench!

As I mentioned earlier, I used PureBond Plywood on this DIY bench project! I am crazy about what pollutants come into our home…typical plywood uses urea formaldehyde to glue the little pieces of wood together inside of the layers of pretty wood, this off gases inside of your home and is toxic to our bodies when we breathe it in…but PureBond is to the rescue! **Not sponsored, just truly love their plywood!
Their plywood is made with soy-based adhesives that save our indoor air quality! Whoop! Whoop!! That is what I am talking about! It really isn’t any more expensive than regular sanded, cabinet-grade plywood, but for a project like this, if you aren’t concerned about pollutants, you can use a cheap grade of plywood or mdf to save money since it will be upholstered! If you’re interested in reading more about PureBond Plywood you can at their website!
Also, if you do not have a table saw or circular saw you can have Home Depot rip your plywood for you! I used my circular saw with a straight Bora clamp but I hear the Kreg RipCut is the bomb!! I’m sure the next time I have to cut plywood I will be purchasing one, I just have to try it…I will let you know how I like it!
**Update I did get a Kreg RipCut and even a Kreg Accucut and they work really well! Well worth the money! The rip cut is so nice as long as you have a good straight edge, the Accucut works great if you need to make a straight edge when you don’t have one…if that makes sense!
Now after your pieces are cut for the DIY bench, you will drill your pocket holes using your Kreg Jig; if you haven’t ever used a Kreg Jig let me give you a little run down on how effortless it is! You take your jig, I have the basic model which is the Kreg Jig R3 (used to be called the Jr), it looks like this:
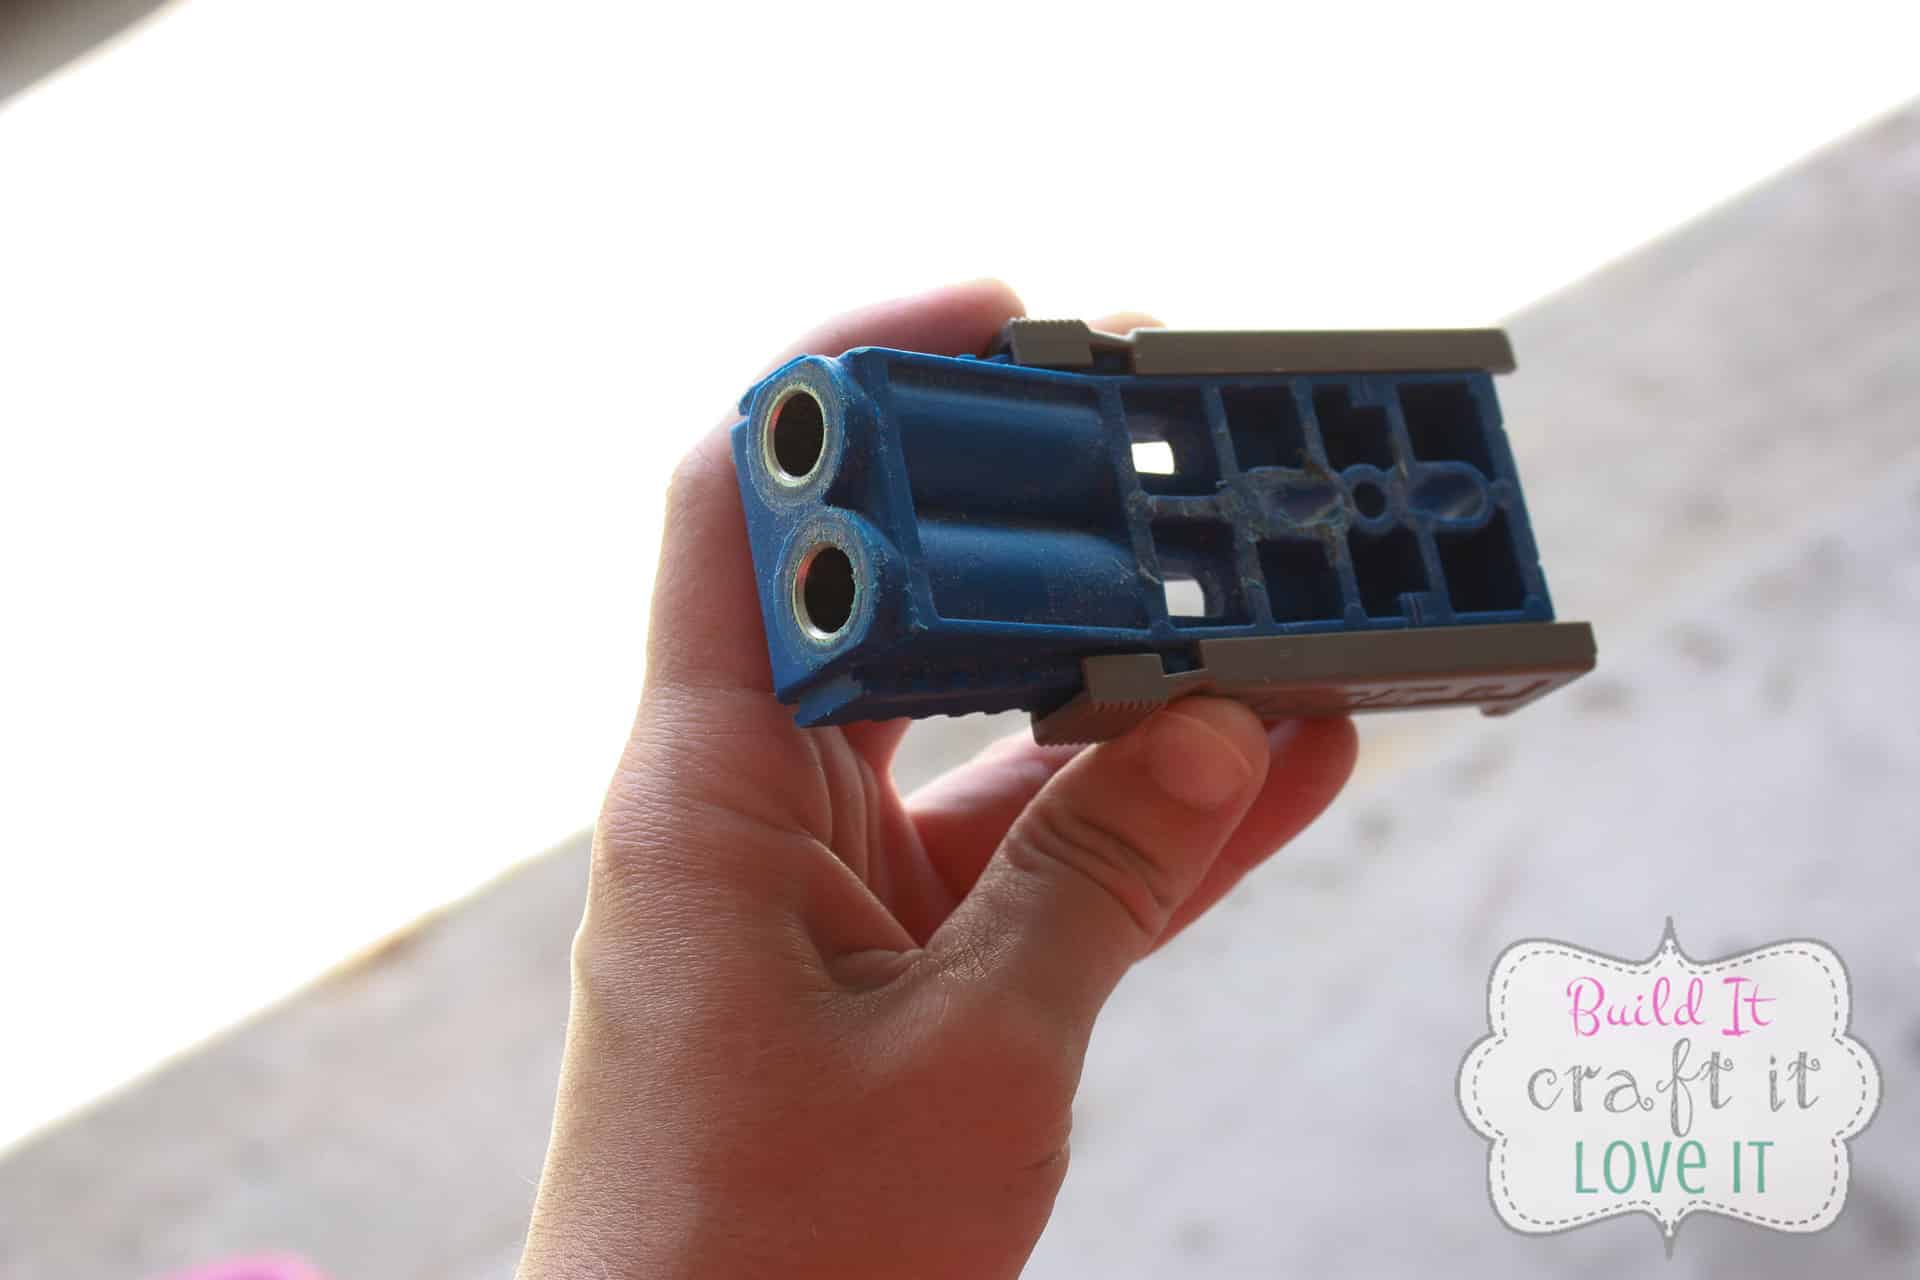
If you do not have a Kreg Jig and you do not intend on purchasing one, you are in luck because you can complete this DIY bench by simply screwing it together from the outside of the box with wood screws! They will be covered on the outside and no one will ever know! But if you are using your Kreg Jig, you will need to set it to the depth of wood you are drilling into… in this case our plywood is 3/4″ thick so we are going to set it at 3/4.
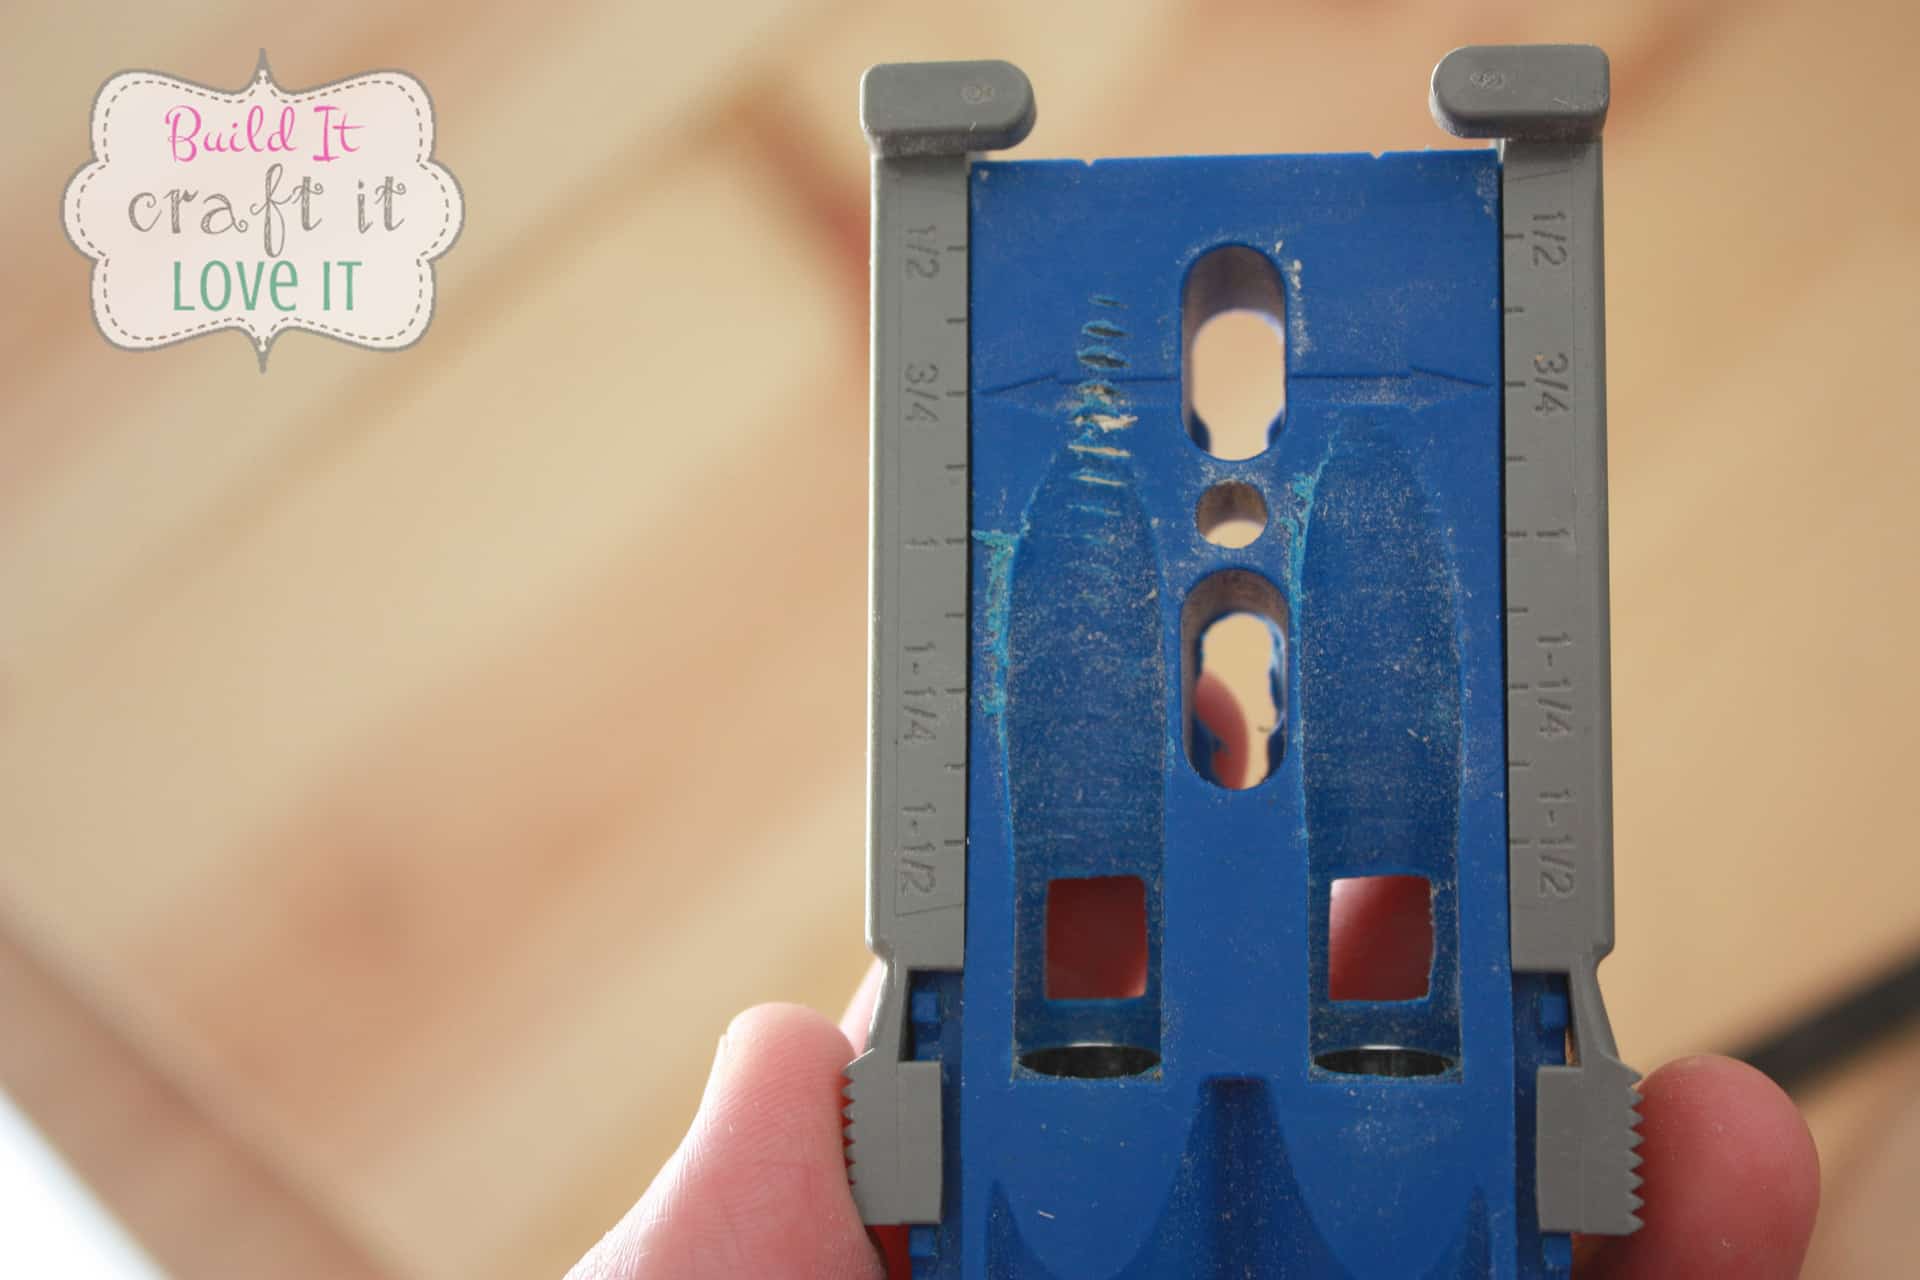
Your Kreg Jig will come with a drill bit that also needs to be set to the depth of wood you are drilling into.

The band around the drill bit moves up and down and you just tighten it with the provided allen key where you need it, which is 3/4 again since we are drilling into wood that is 3/4″ thick!
Then, you clamp it onto your piece of wood like so, and drill your holes!
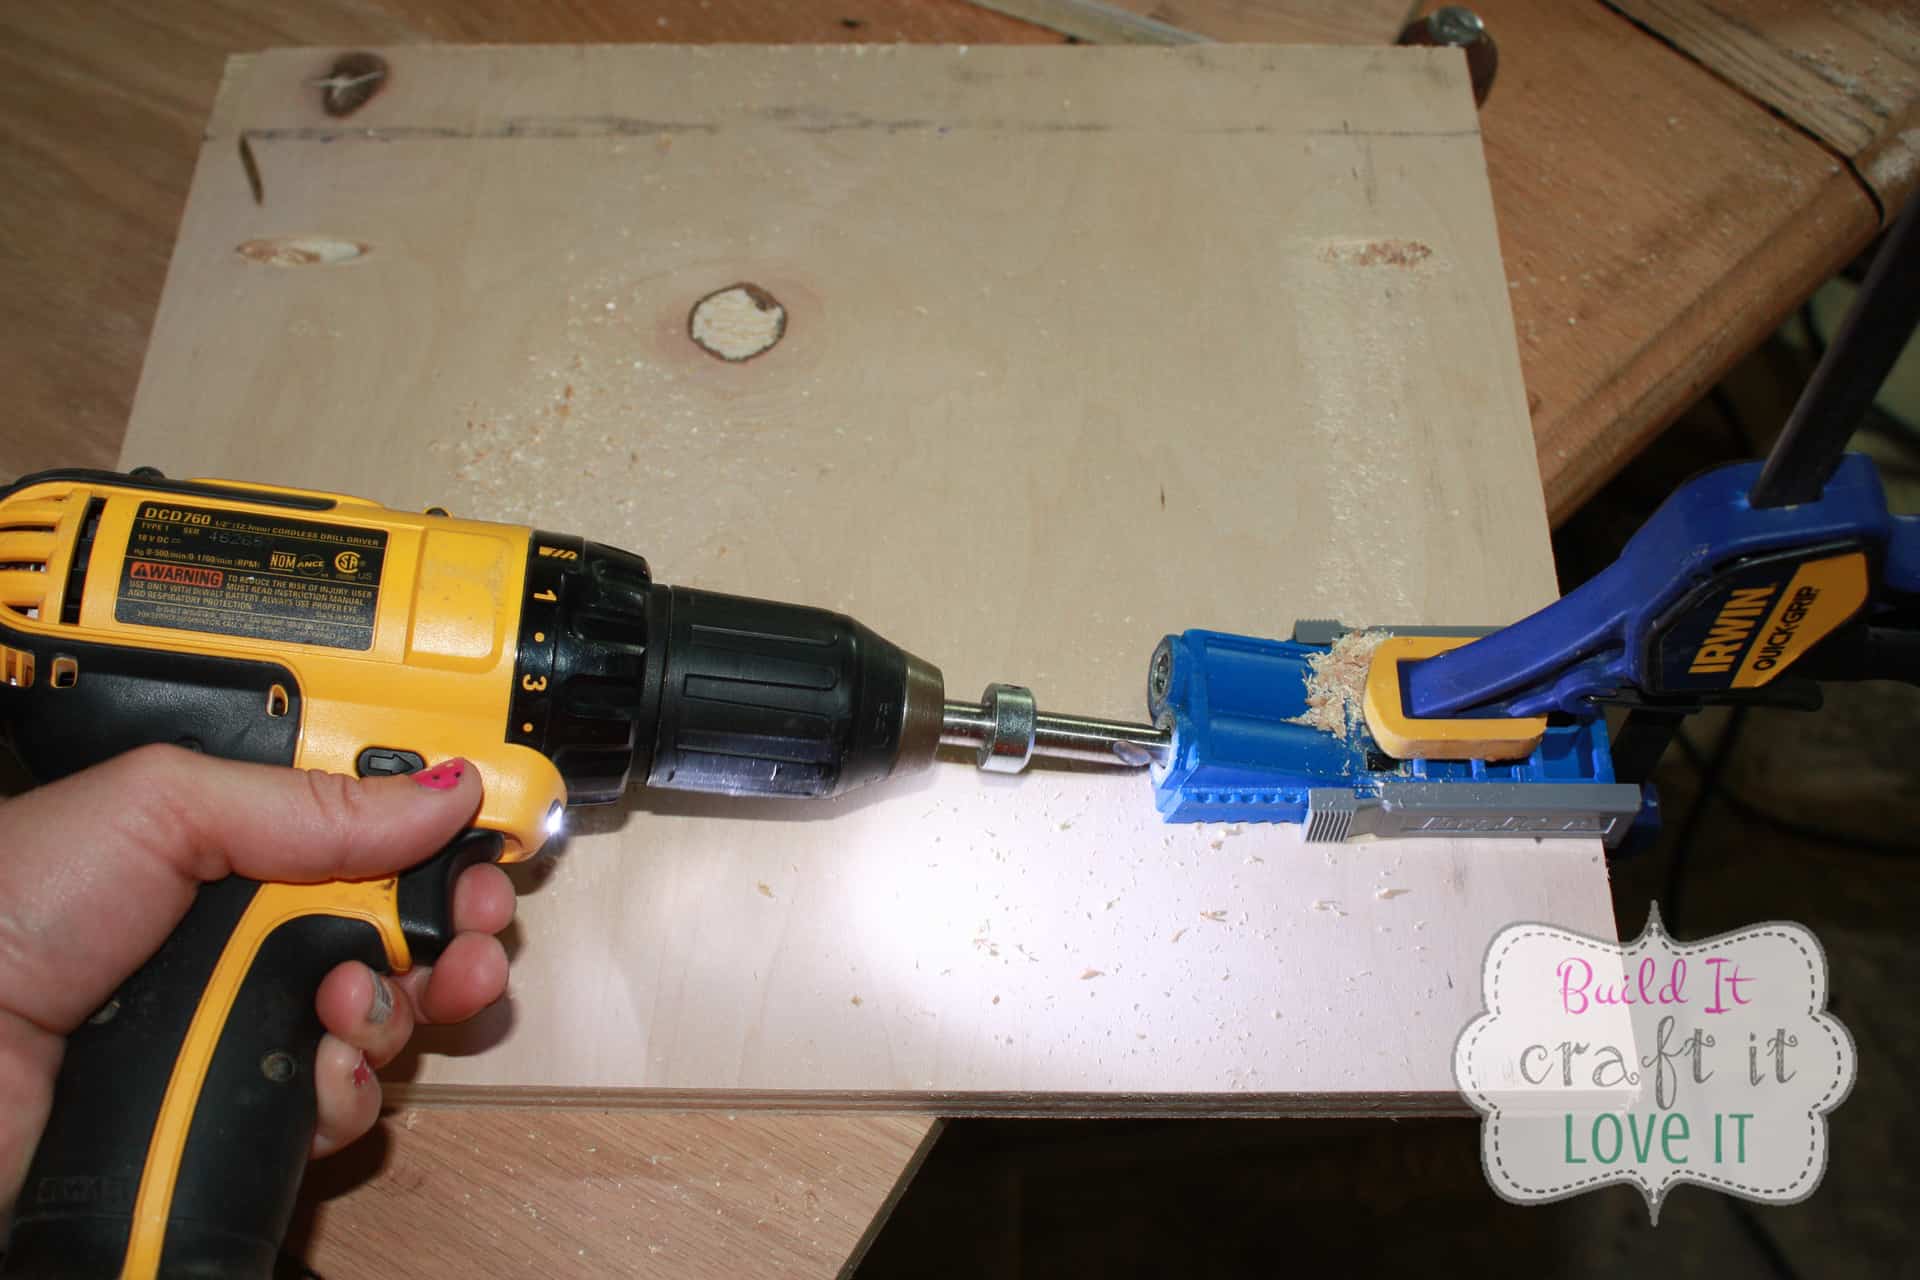
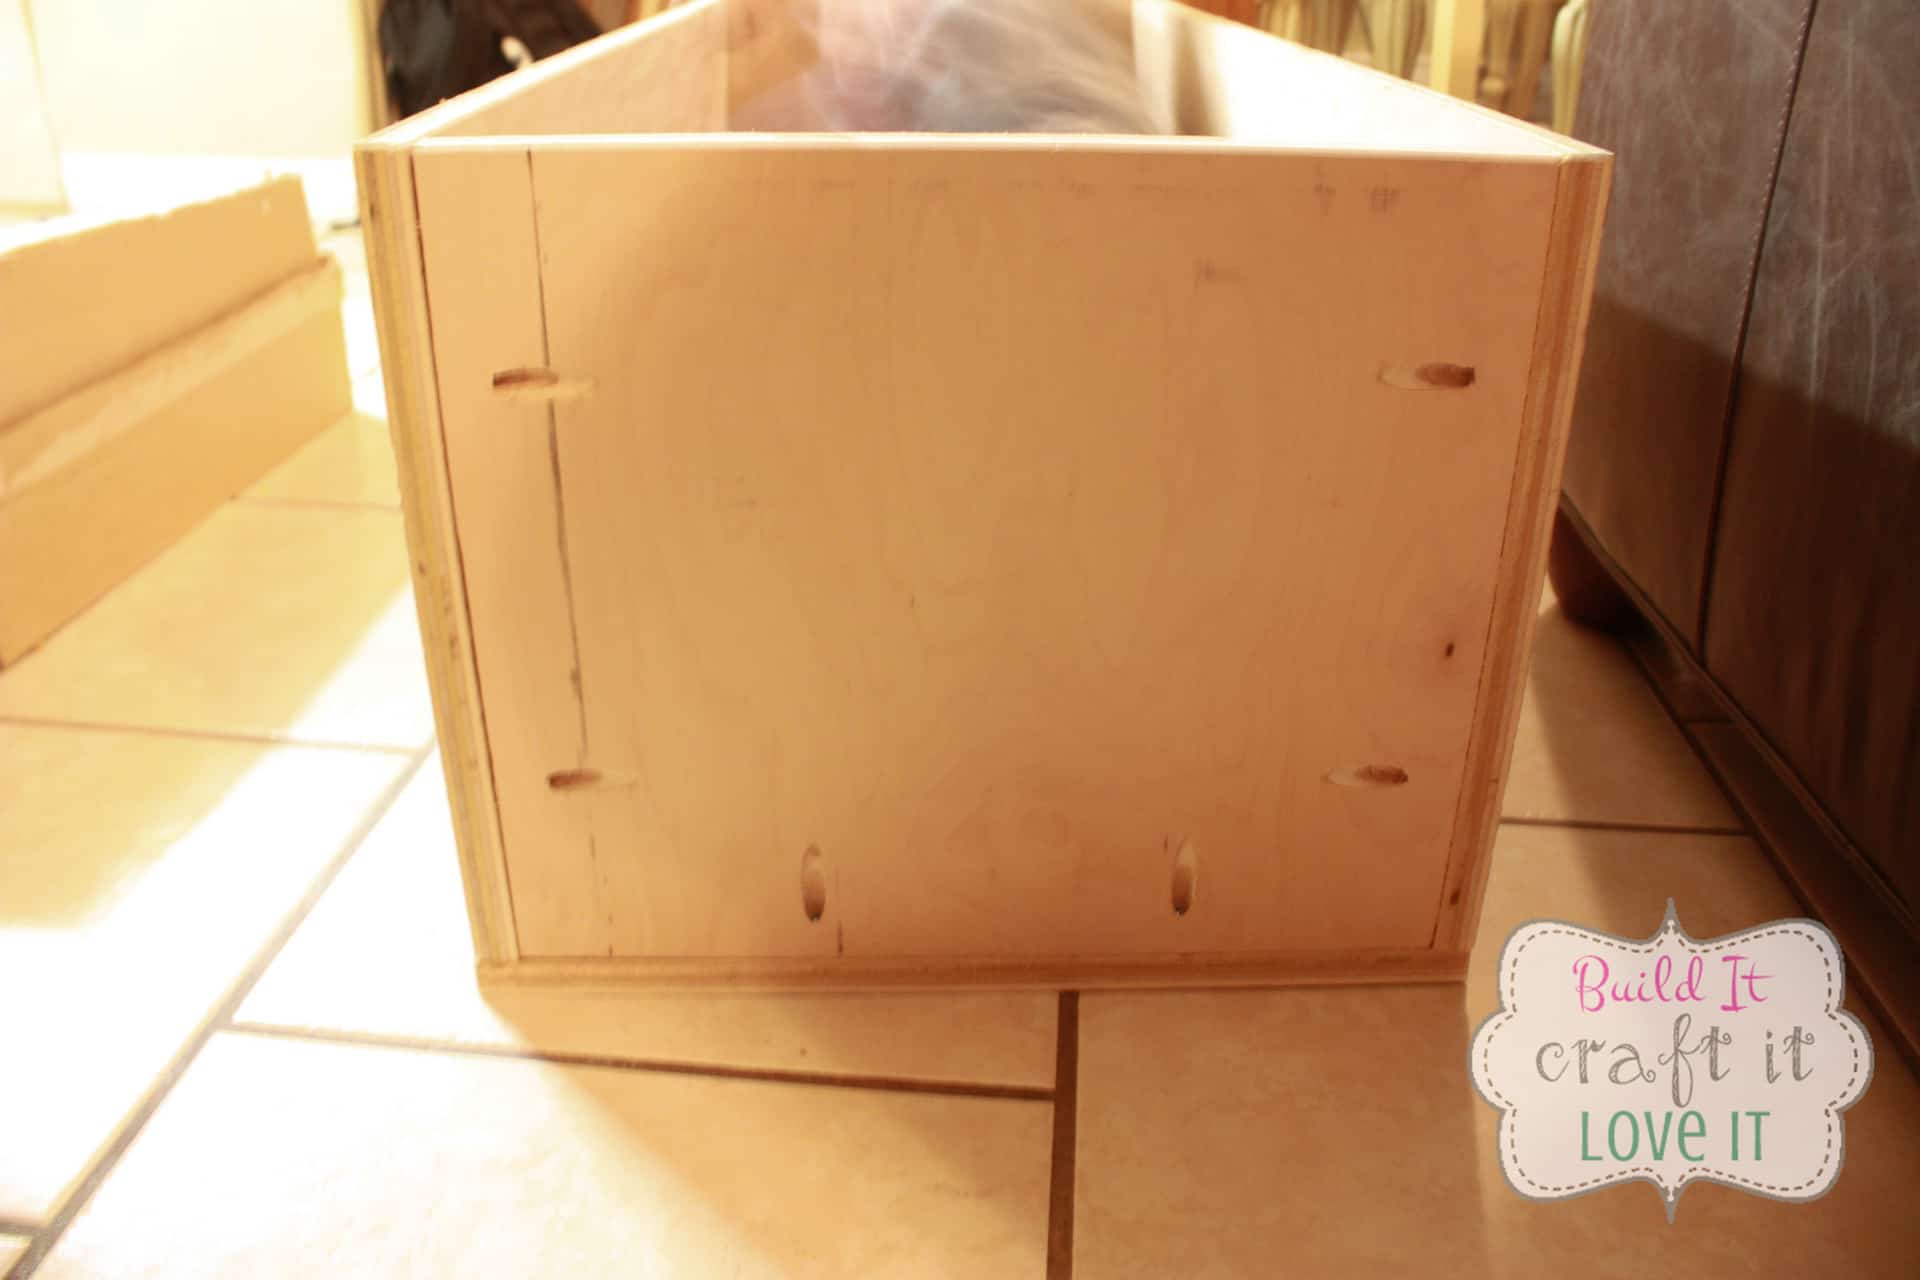
Tada! Easier than pie! Why do they say that anyway? Making pie really isn’t that easy…but building this DIY bench is! 😉 You now move the jig and repeat the steps until you have all the holes needed to hold your project together! The two long side pieces will only need pocket holes along the bottom.
The shorter sides will have holes along the sides and bottom like this.
Sorry, I forgot to take a picture of this while I was drilling the holes…at least I took one while we could see where they were! Ha!
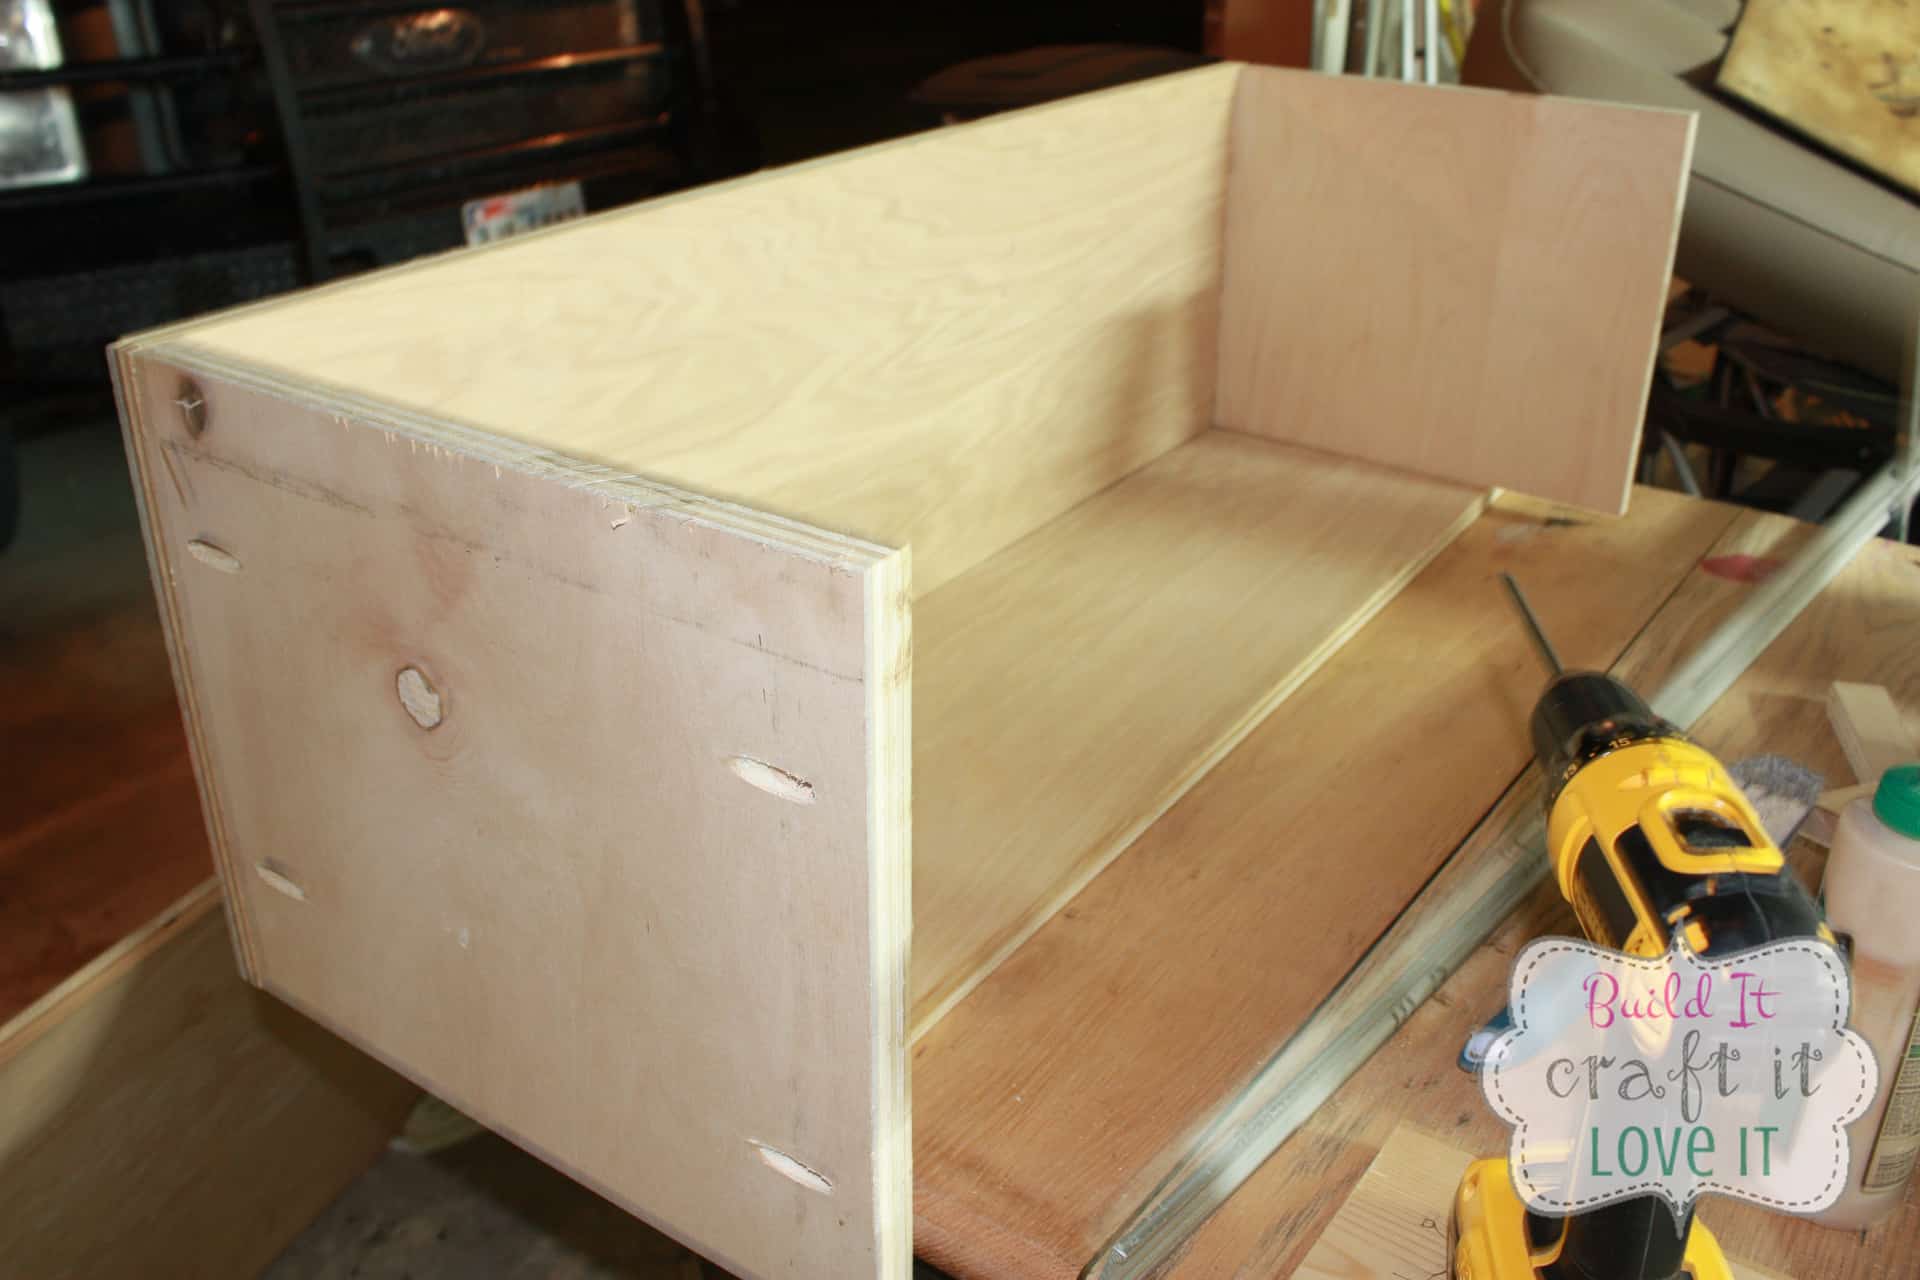
So you are just going to attach one of your long sides which is 40″ x 12″ to your short sides which are 10″ x 16″, make sure to use wood glue before you screw the screws into your pocket holes! You will use 1 1/4″ pocket hole screws to screw it together. If you are not using a Kreg Jig you will want to use at least 1 1/2″ wood screws or bigger!
One other thing, you can see here that my pocket holes are going to the outside of the box that will be the bench, normally this is not how you would do it, you would try to hide the pocket holes inside, but since we are upholstering this when we are done, we can place them on the outside to keep our inside looking good…well that is what I was thinking originally but after seeing my upholstery job…the inside is not looking so hot!!😂
Sorry, the picture is a little blurry! Sometimes I get carried away building and don’t check my pictures because I just want to build man!😎
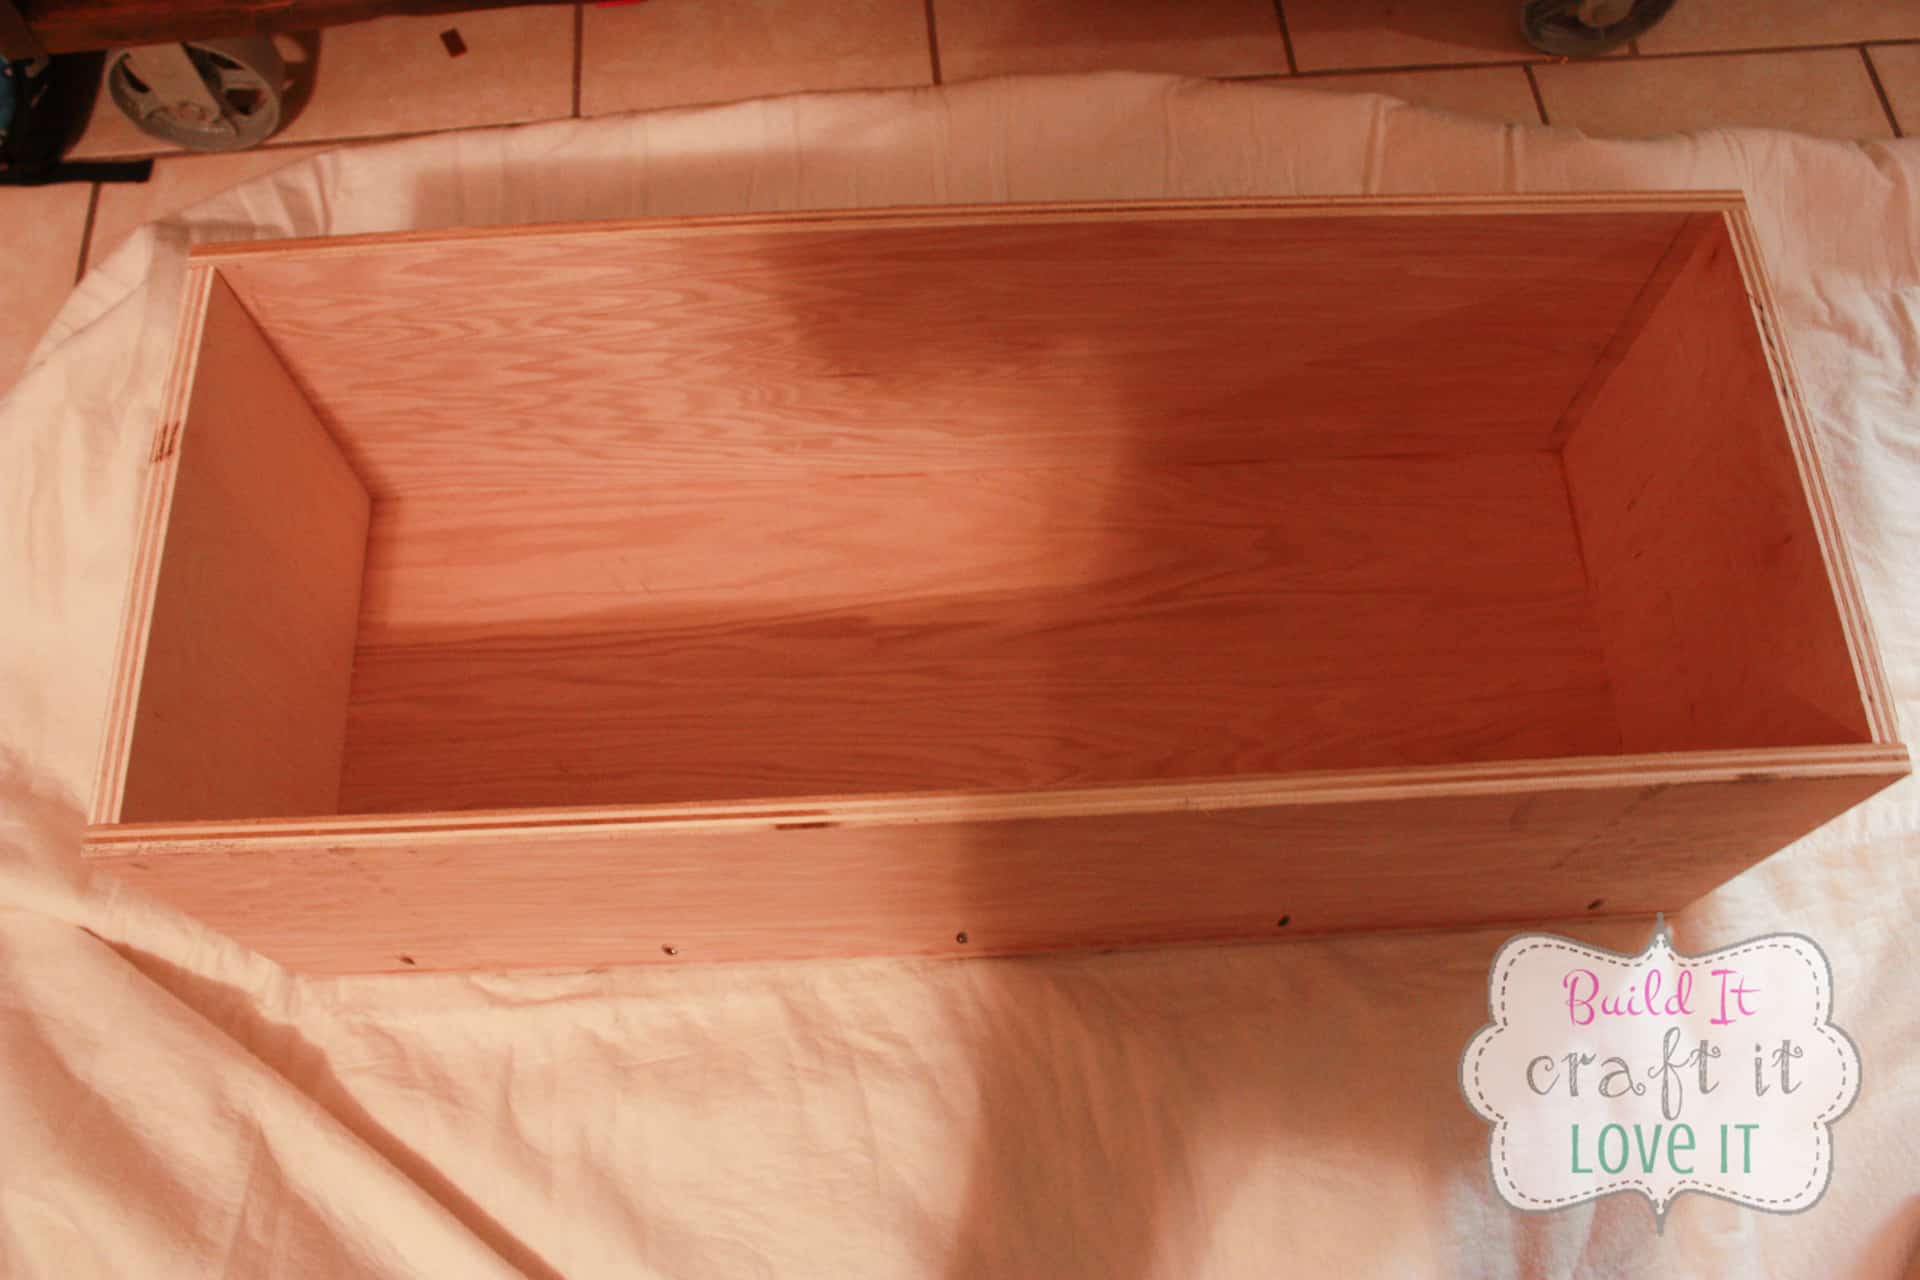
Next, you have to attach the other long side, and then attach the bottom to all the sides, don’t forget the glue…I’m not sure why but apparently I got really excited and forgot to take a picture of this, but I trust that you can figure it out! The top will be left unattached at this point, we will attach it to the DIY bench box with hinges at the very end!
Moving inside for me…the garage is WAY TOO MESSY to upholster out there! In all honesty, I even had to vacuum my living room just to bring it inside…so bad I know! I am not sure why our floors are always so dirty, it’s like I vacuum and a few hours later you would NEVER know it! What do we do in here? LOL!
Upholstering the Box for the DIY Bench
Alright, let’s let the upholstery begin!! Woohoo!!! Before we begin the upholstery on this DIY bench, I must add a disclaimer: I am NOT a professional upholsterer, any true upholsterer may have a heart attack after seeing the way I went about upholstering this thing! LOL! I am not responsible for anything that may happen to you if you read any further! 😅🤪
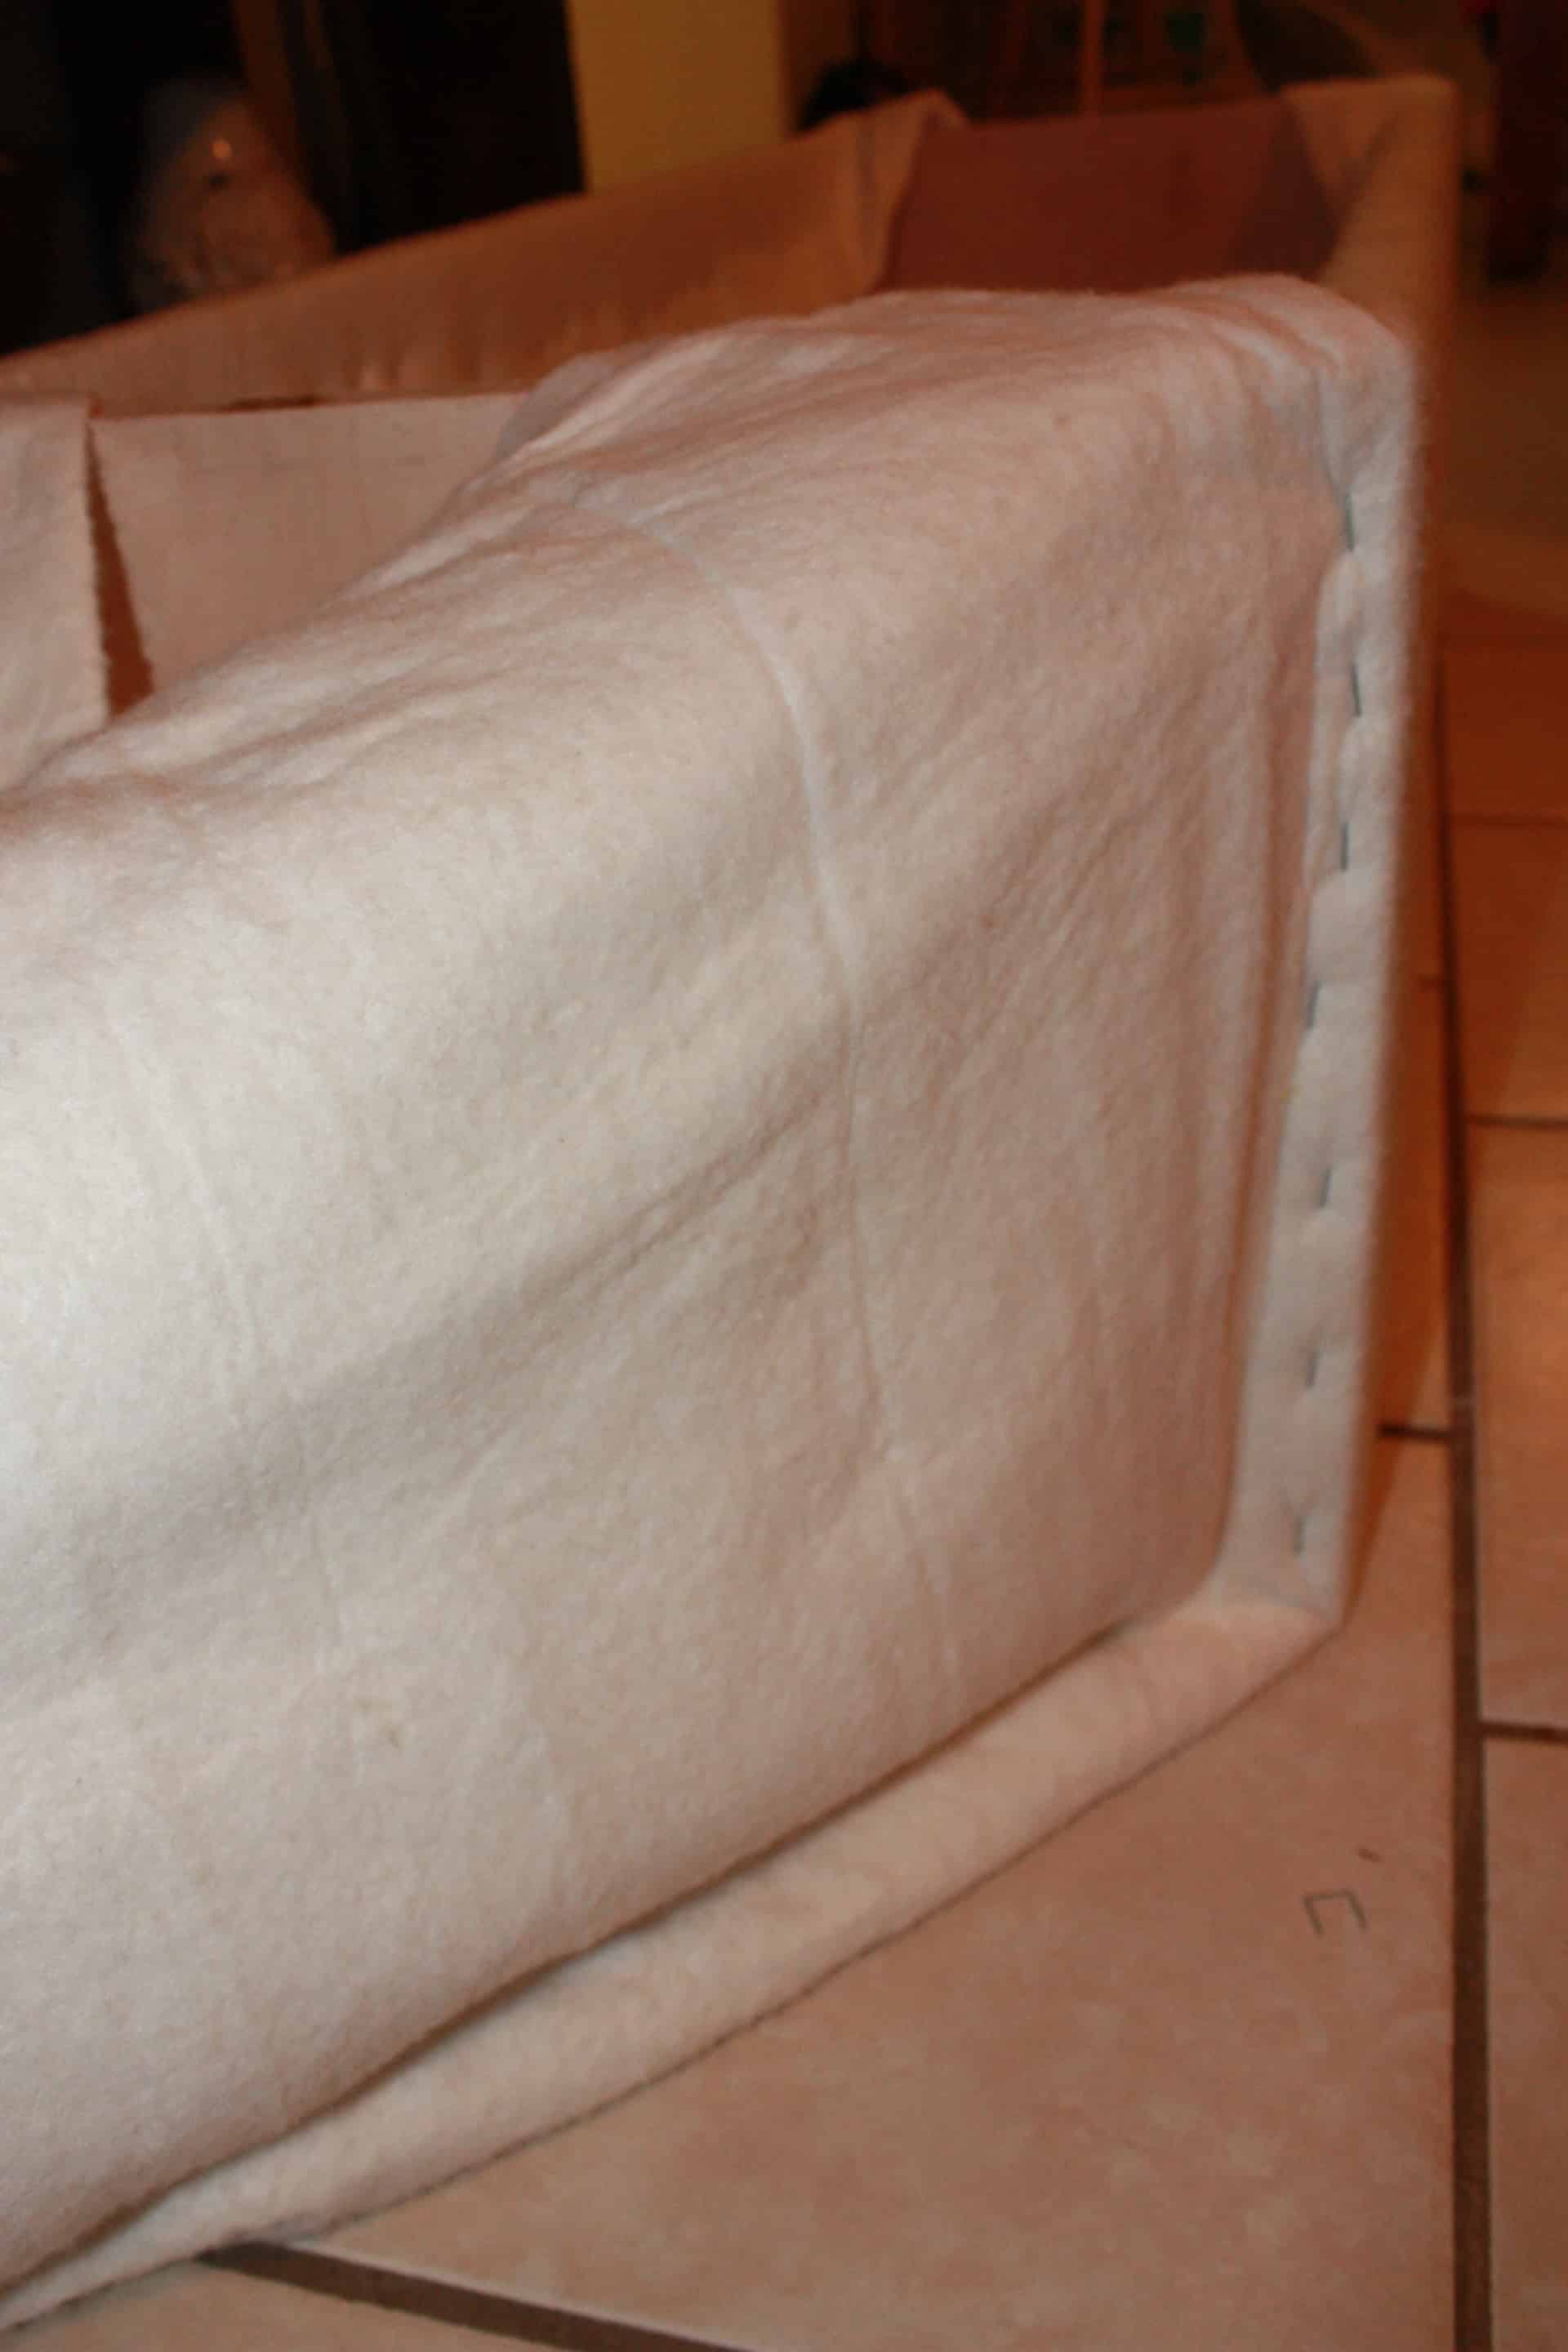
So you will start with your batting, I used natural cotton batting and doubled it over, but you can use regular polyester batting if you’d like, I wrapped the whole bottom part of the box like a gift box with a lid. I sat the whole box in the center of my batting.
Now, I just used a stapler from the upholstery aisle at Hobby Lobby that I bought when I did my window cornices, but I decided during this project that if I did any other upholstery projects I would buy an electric stapler…just sayin’! In order to go through wood, it does have to be a heavy-duty stapler and I used 1/2″ staples! My hand was killing me by the time I got done with the million staples I put in this DIY bench!
**Update I did purchase an electric stapler and it was worth every penny!!🤩👌

I just started by pulling the batting tight around the long sides and stapled, let me tell you I am not very good at this…I told myself in the beginning that I would be okay with however the interior of the box looked as long as the outside looked good, so you will notice in viewing all my pics that the inside is incredibly “rough” looking, to put it nicely!! LOL!
It was my first upholstery project besides making a window cornice, which didn’t matter how it looked on the backside because no one will ever see it…people will be able to see inside this box if they open it! This being my first project, I am okay with just not letting anyone open it besides my immediate family! Lmbo!
One thing I have to say, after watching a professional do upholstery on YouTube, next time I will order some upholstery supplies to give it a true store-bought look…but for now, I just wanted to see if I could even do it!

Look at that interior mess already with just the first row of staples…yikes…sad part is it gets FAR worse! Lol!
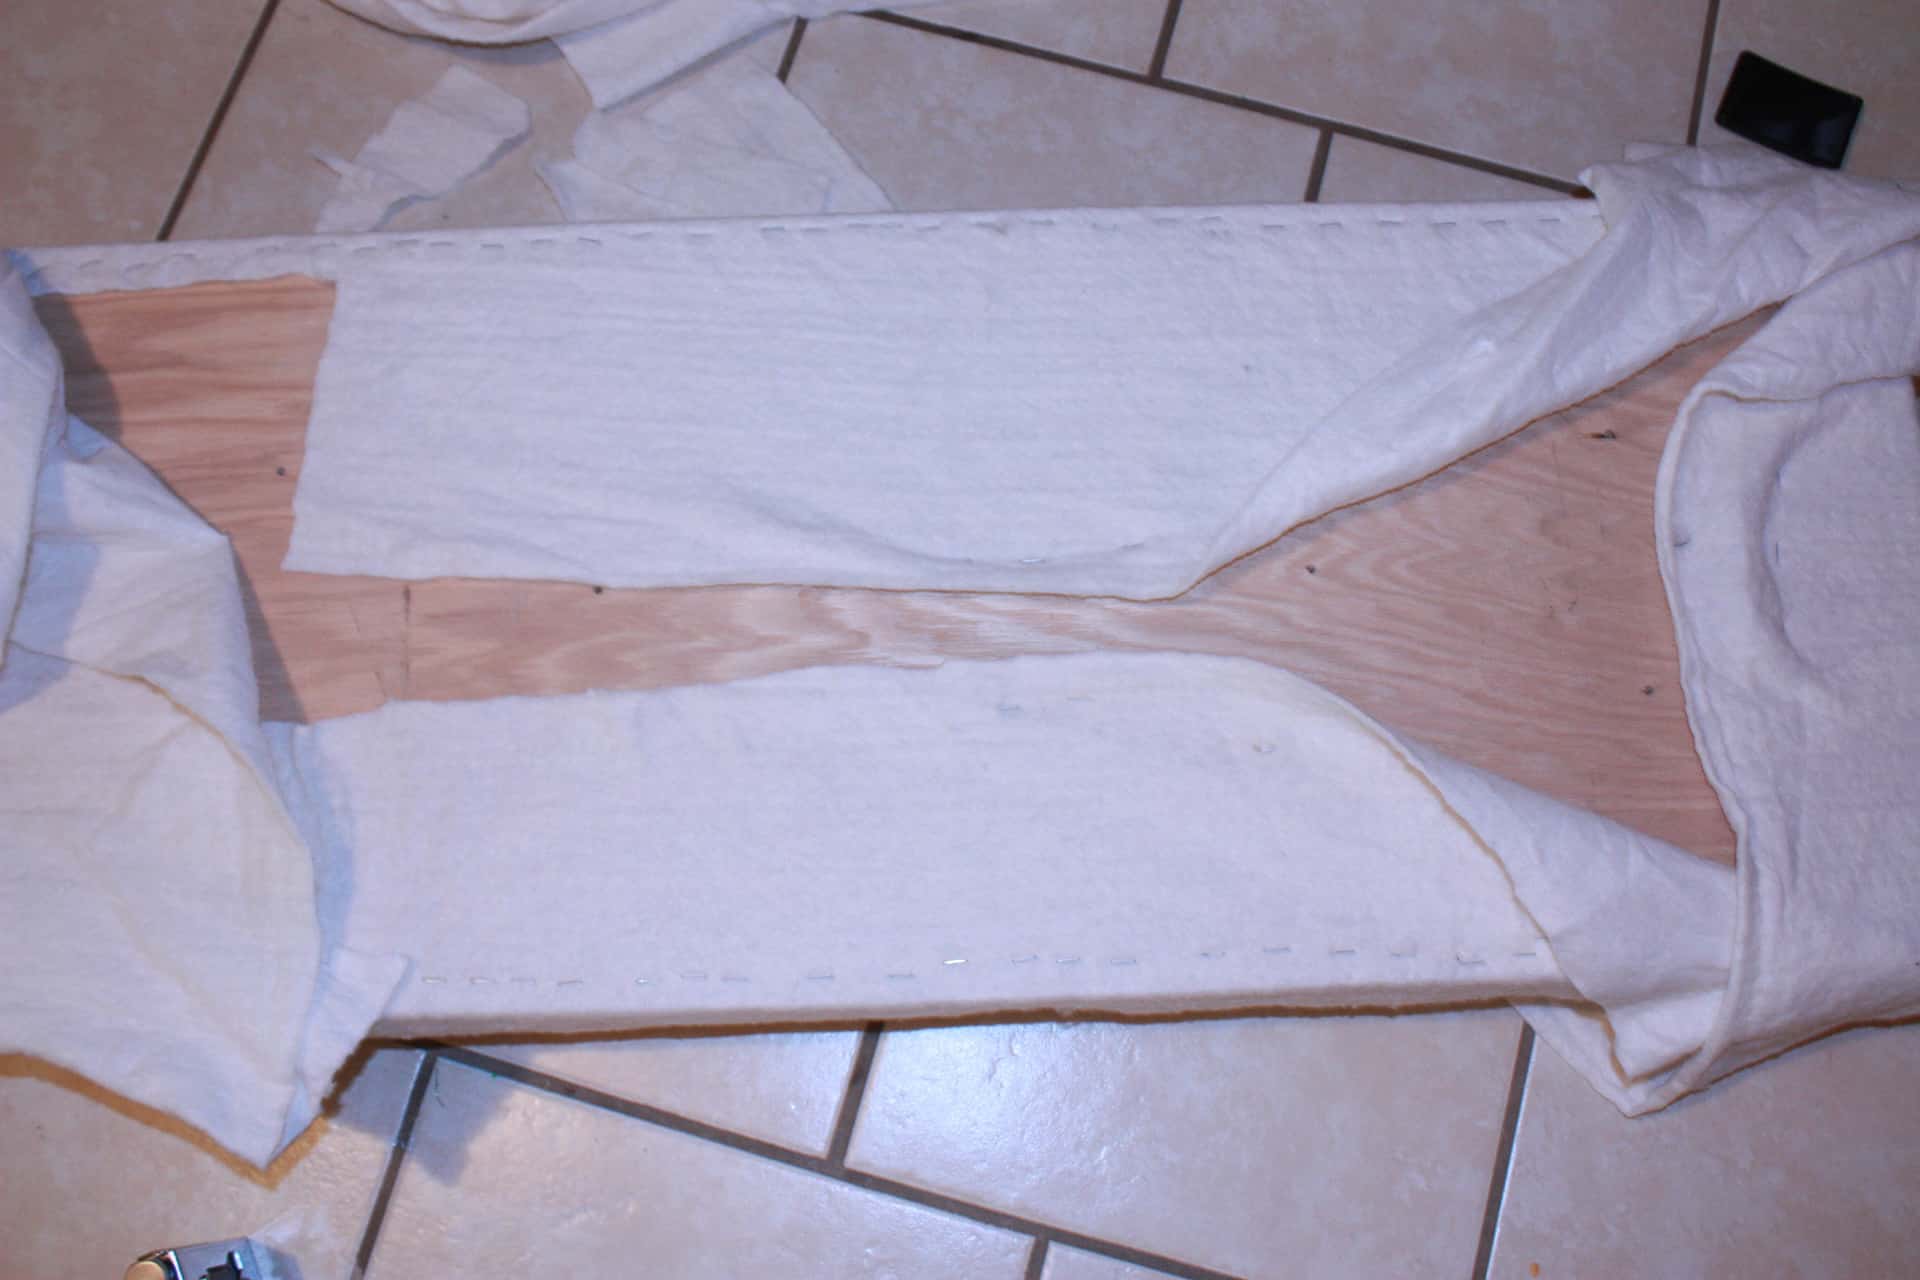
The long sides of the DIY bench were super easy but when it came to the short ends of the box, it wasn’t as simple!
I chose this method because it acquired the look I was going for…but again I am not a professional upholsterer, they probably have a better way of going about this! I pulled the batting around the side as tight as I could get it and put staples all along both edges (on the sides, leaving the top unstapled) and then cut the fabric right along the rows of staples…hopefully, you can tell what I mean by looking at the pics!
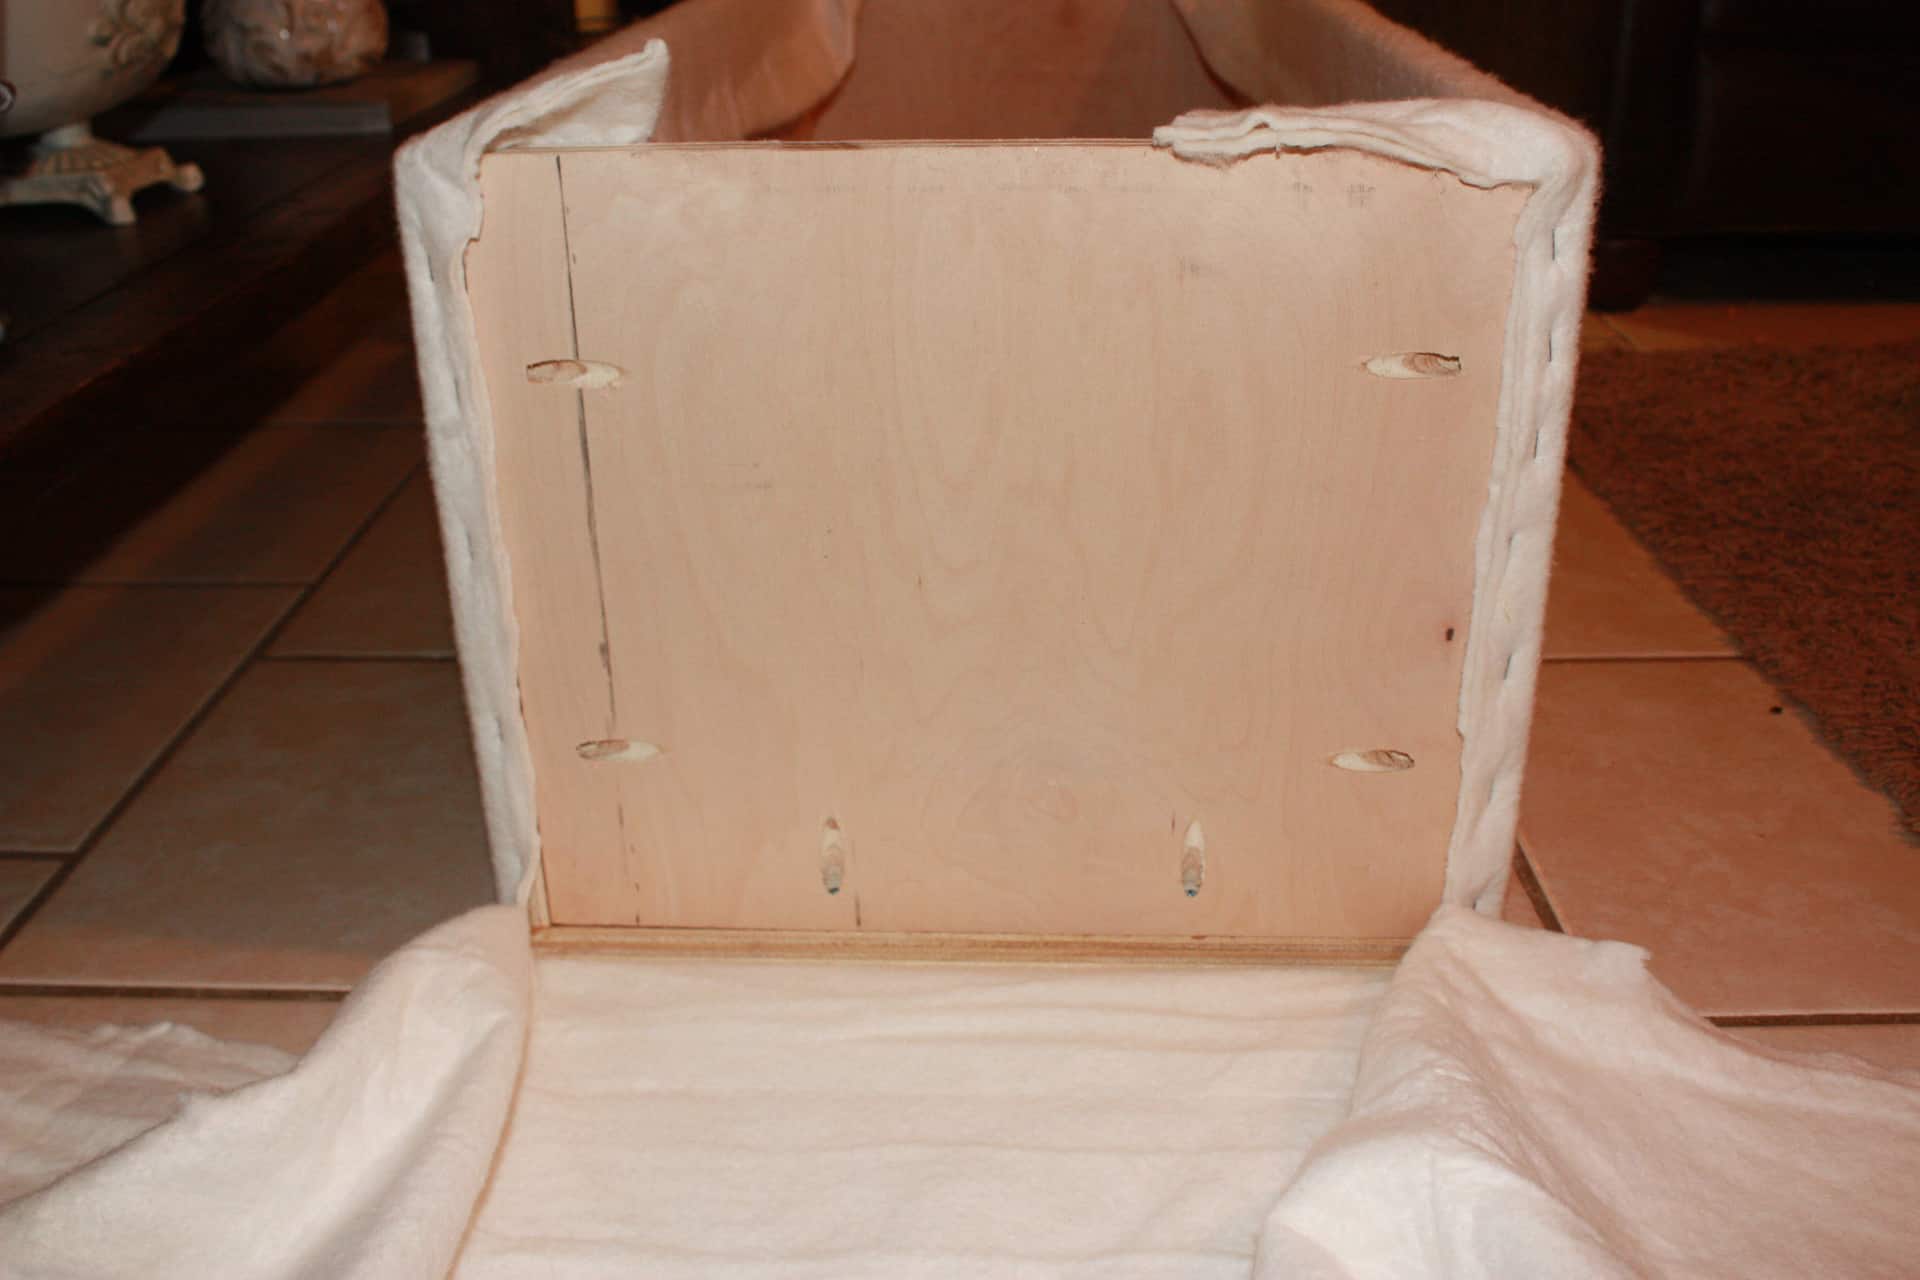
Now I cut the batting to where I had just the right size piece of batting to cover the end piece! Not sure if that made any sense… just look below!
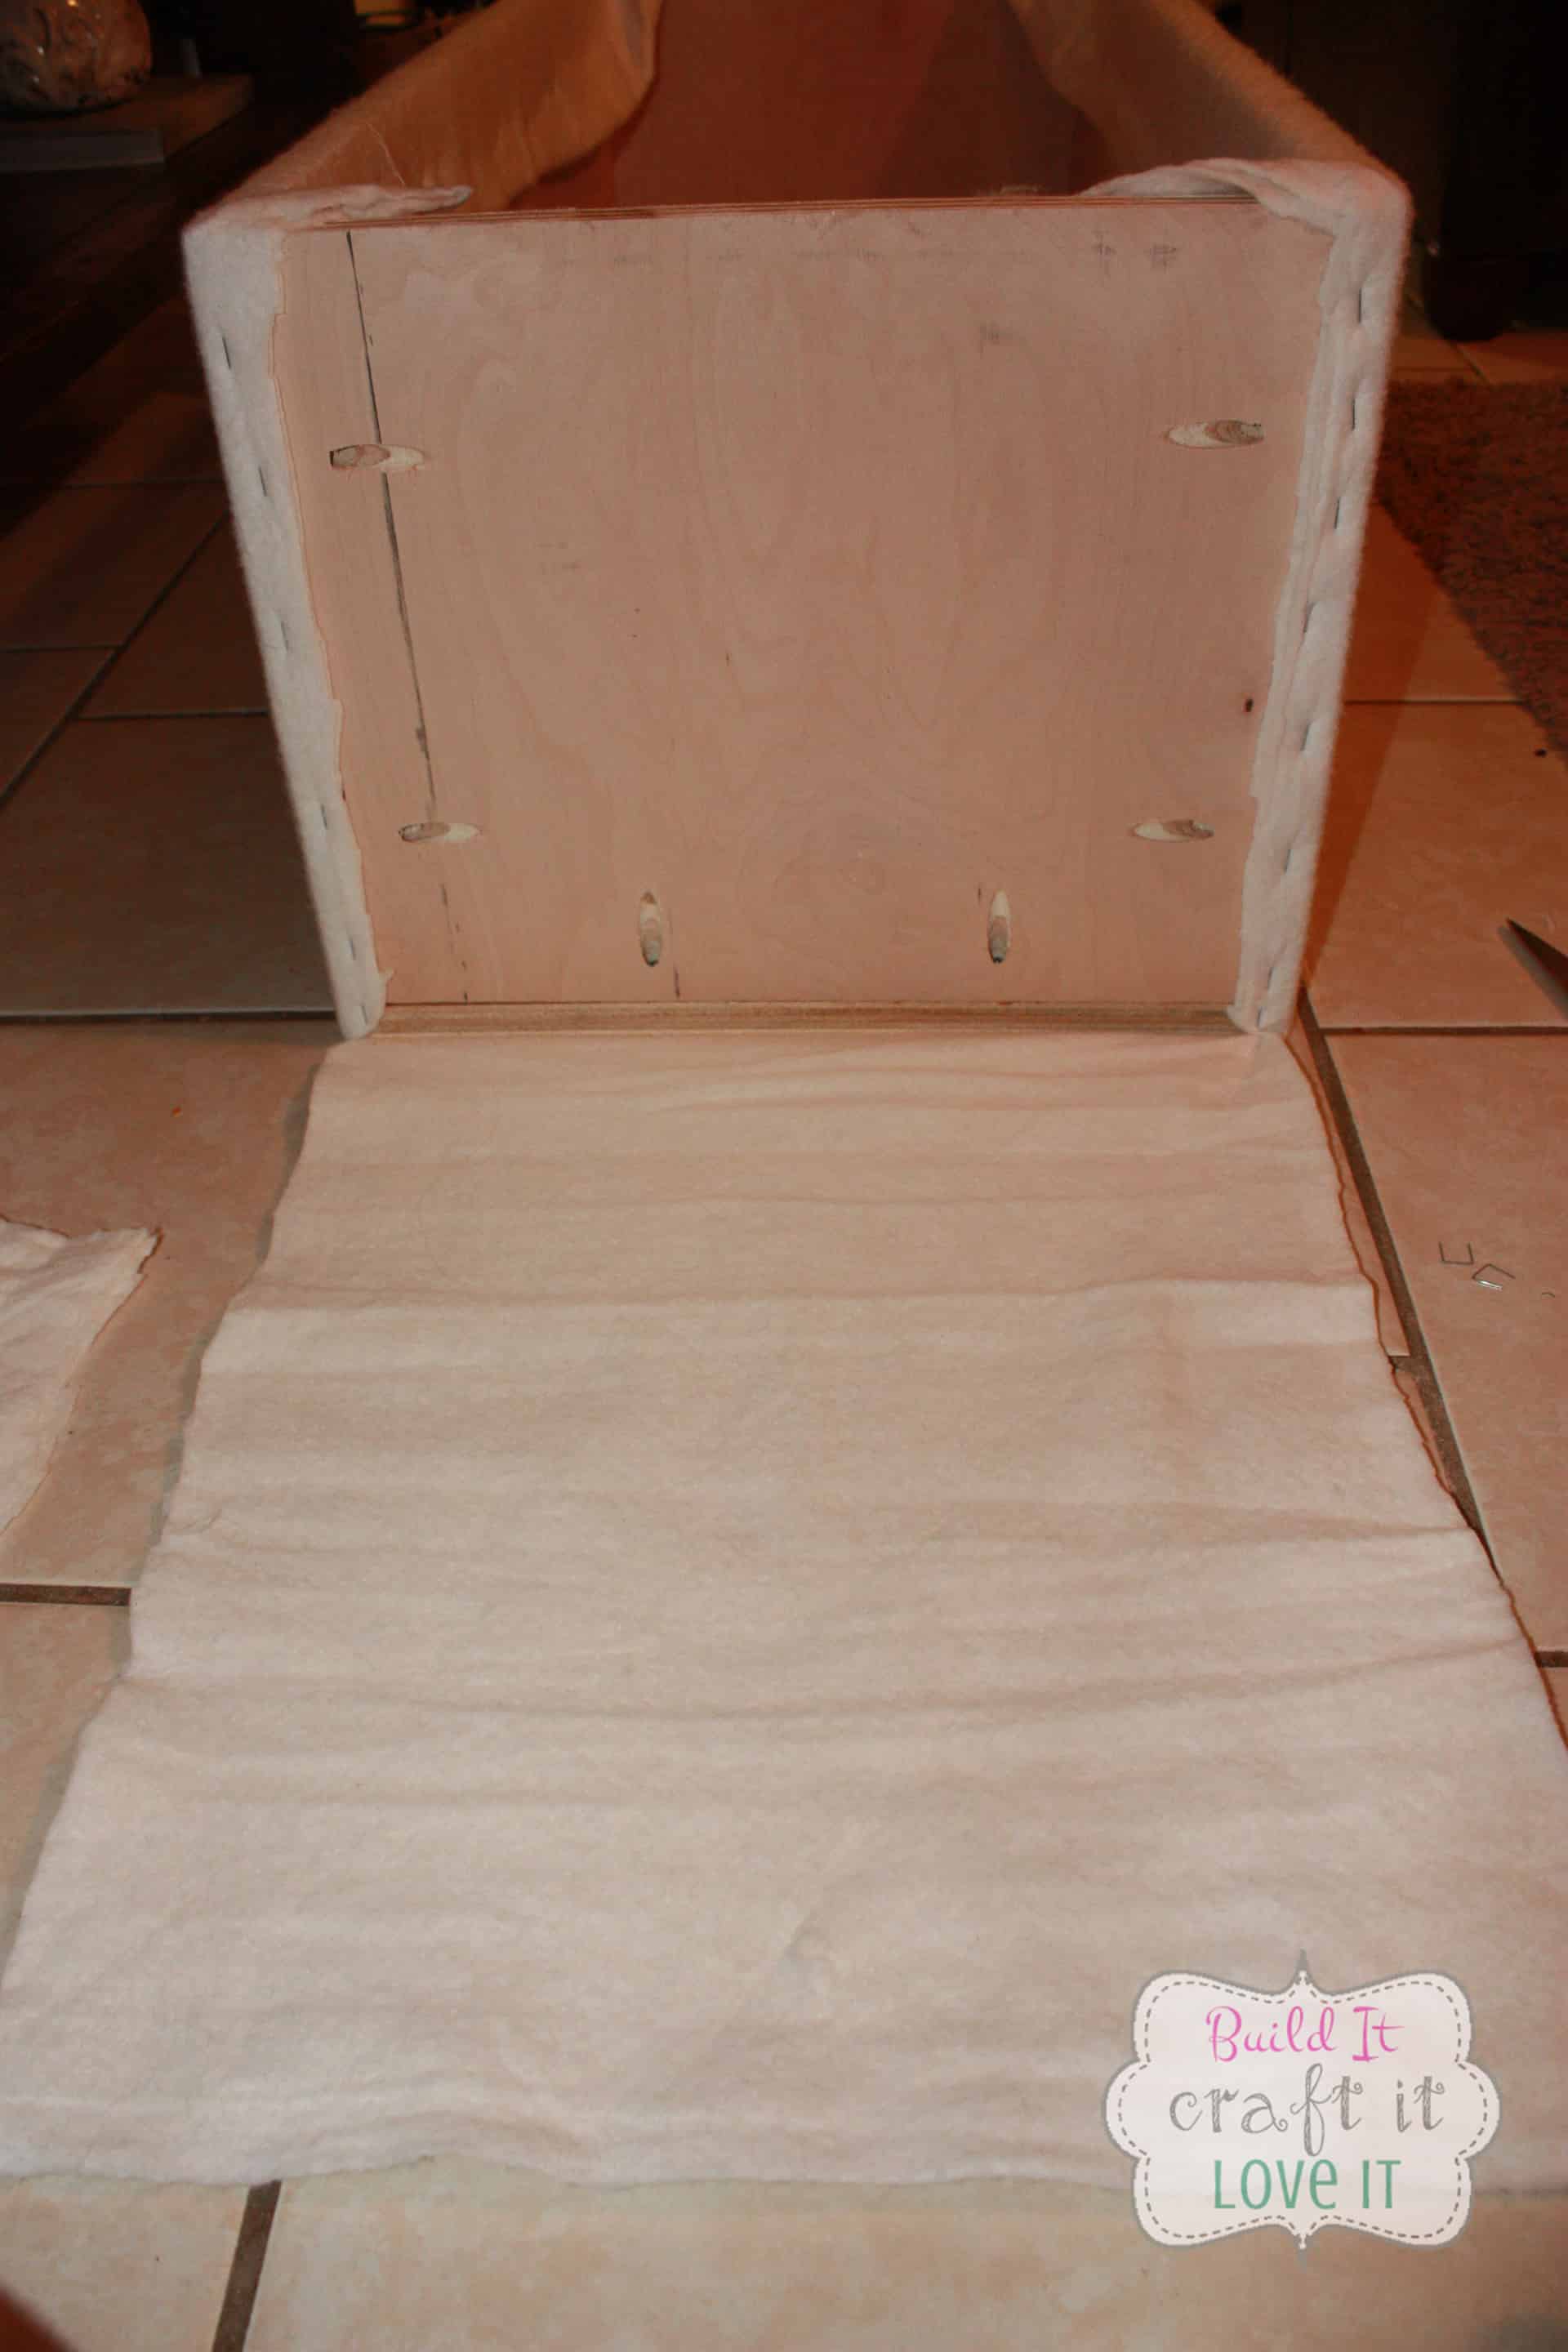
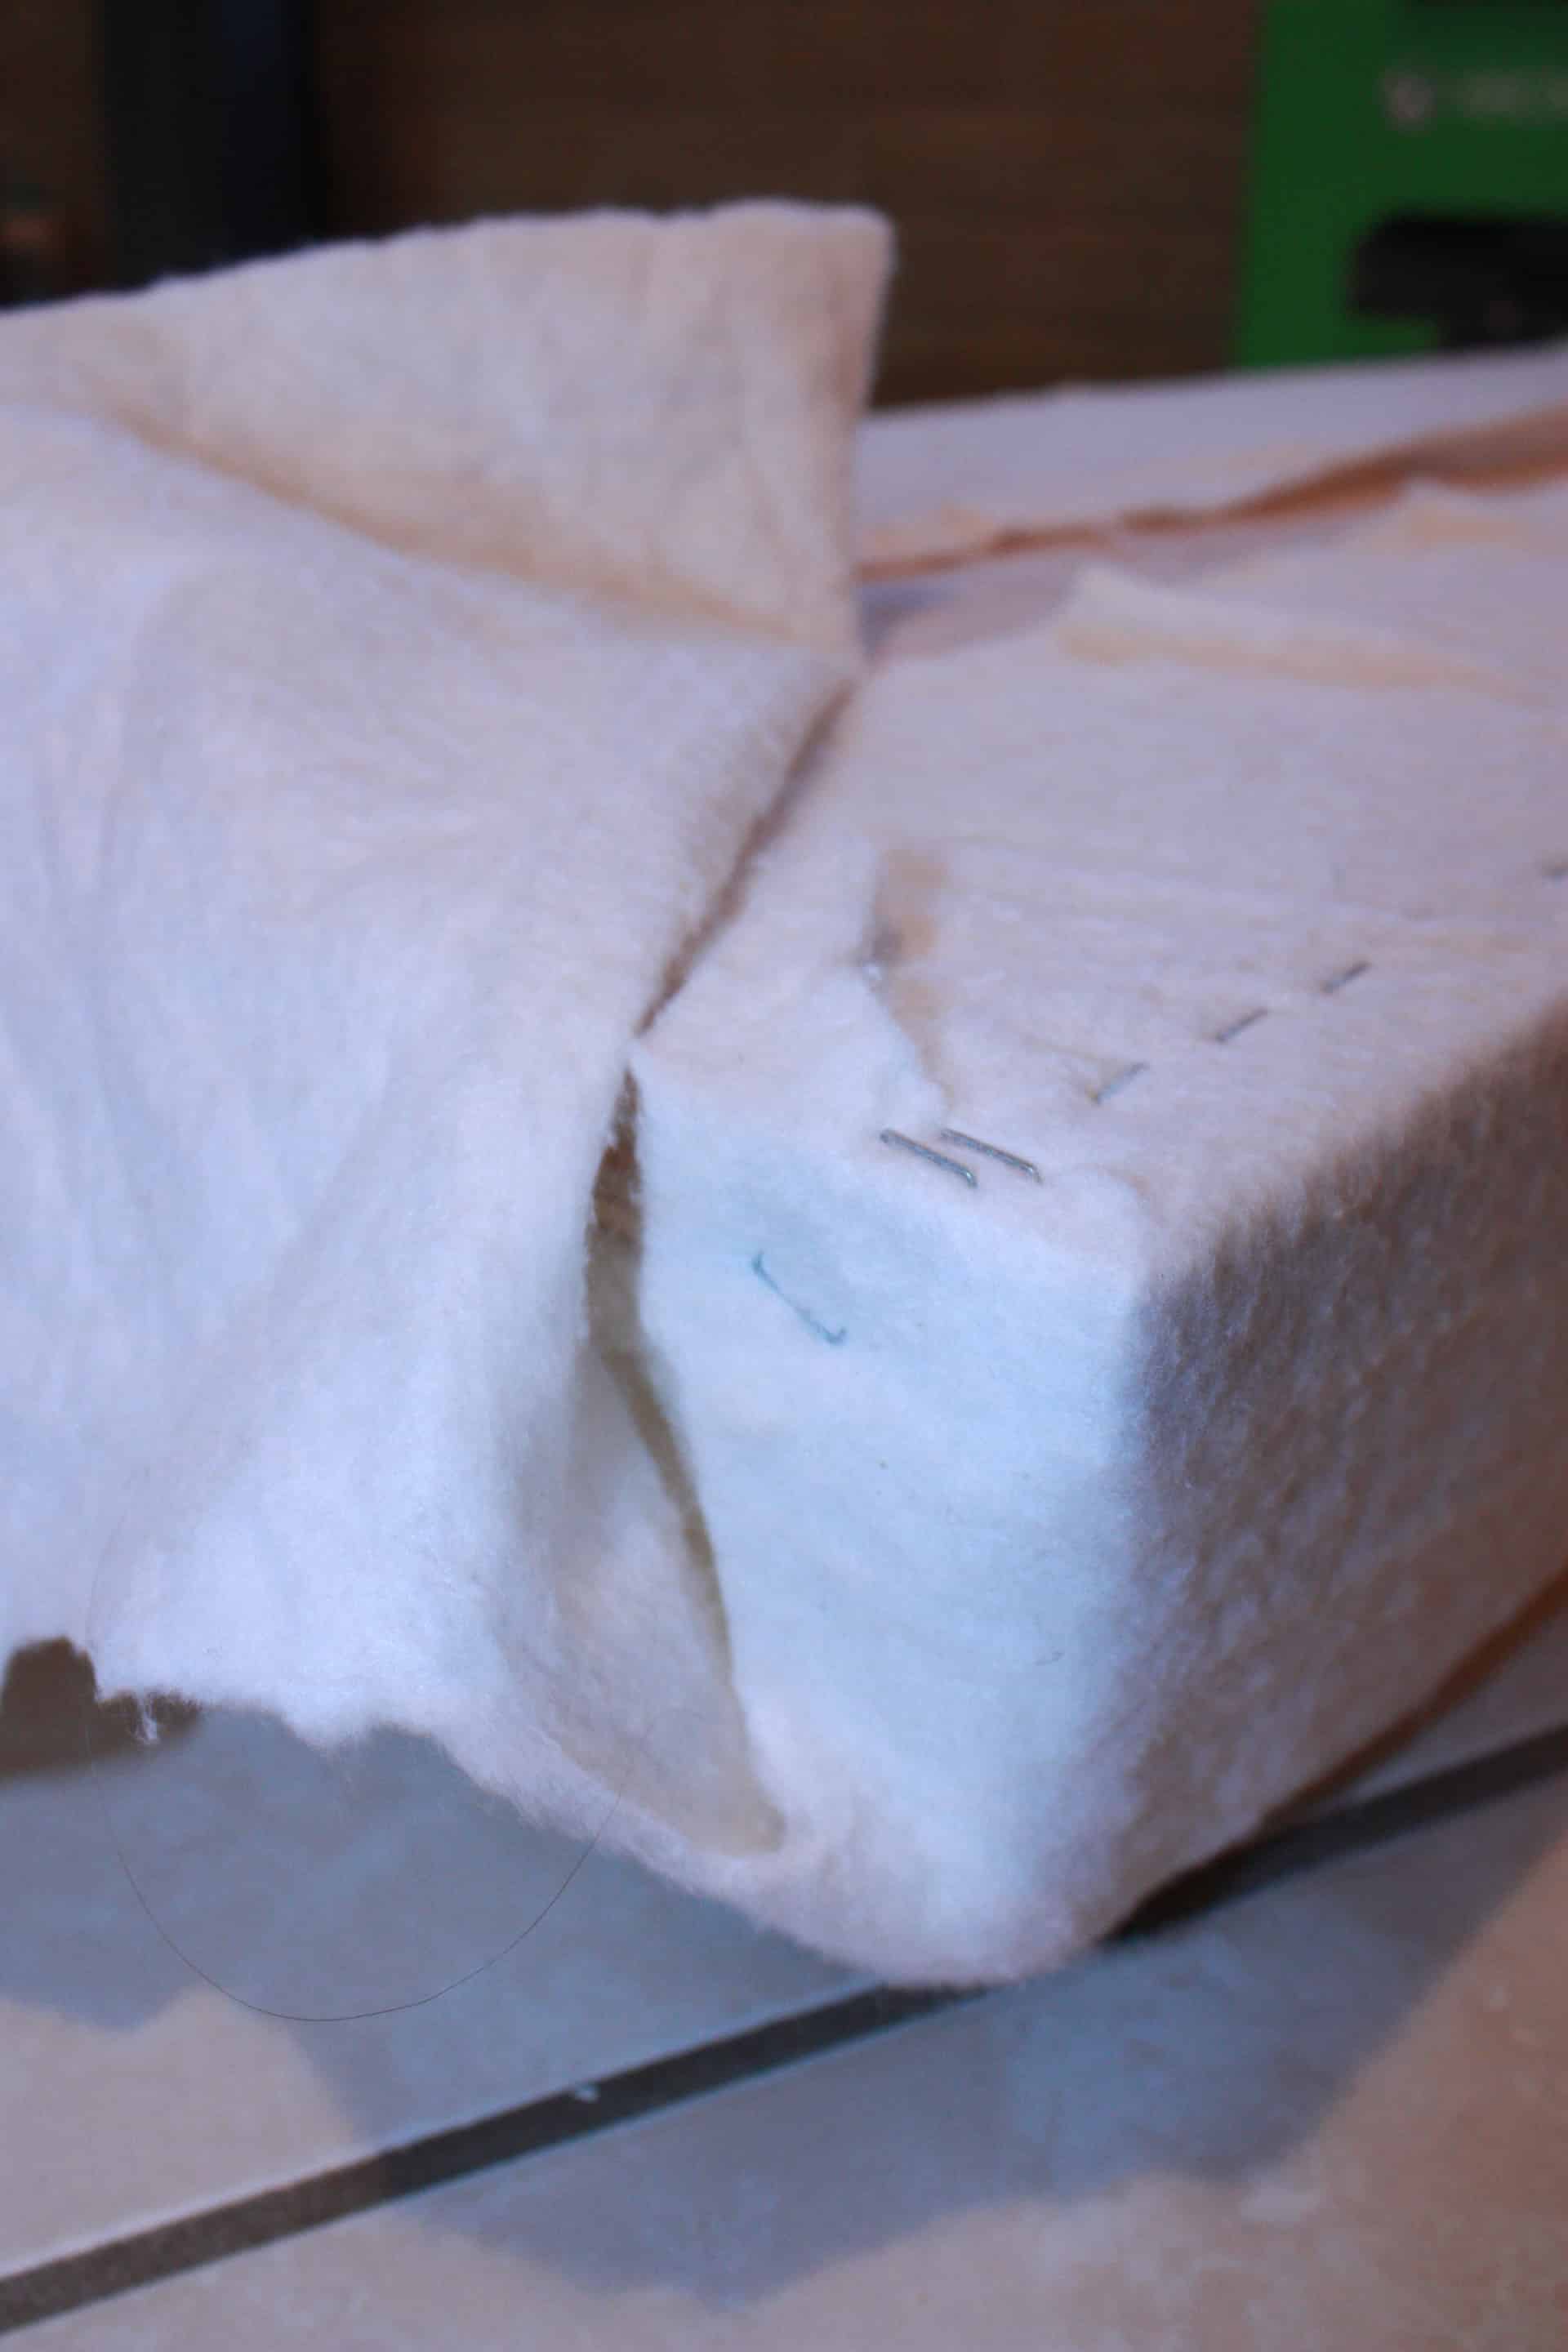
This way worked best for me to keep the batting from being so thick underneath the fabric! Next, I just pulled this piece up and tight and stapled it again along the sides (on the outside) and at the top, on the inside of the box.

Doesn’t look too bad huh?! The lighting inside isn’t all that great at night for pictures so please forgive my photos!
Well, that was a huge part of the project that we already completed! Whew! Oh, but there is still so much to come! LOL!
After the batting, I ironed my fabric…which I used a drop cloth for my fabric! Reason #1 for using a drop cloth is that there is no other fabric this thick that you can get so cheap and #2 is that drop cloth pretty much looks great with any color scheme, it is very neutral! And did I mention that drop cloth is so cheap? 🤭 I bought this 6×9 at Wal-Mart for $9.00! Perfection!

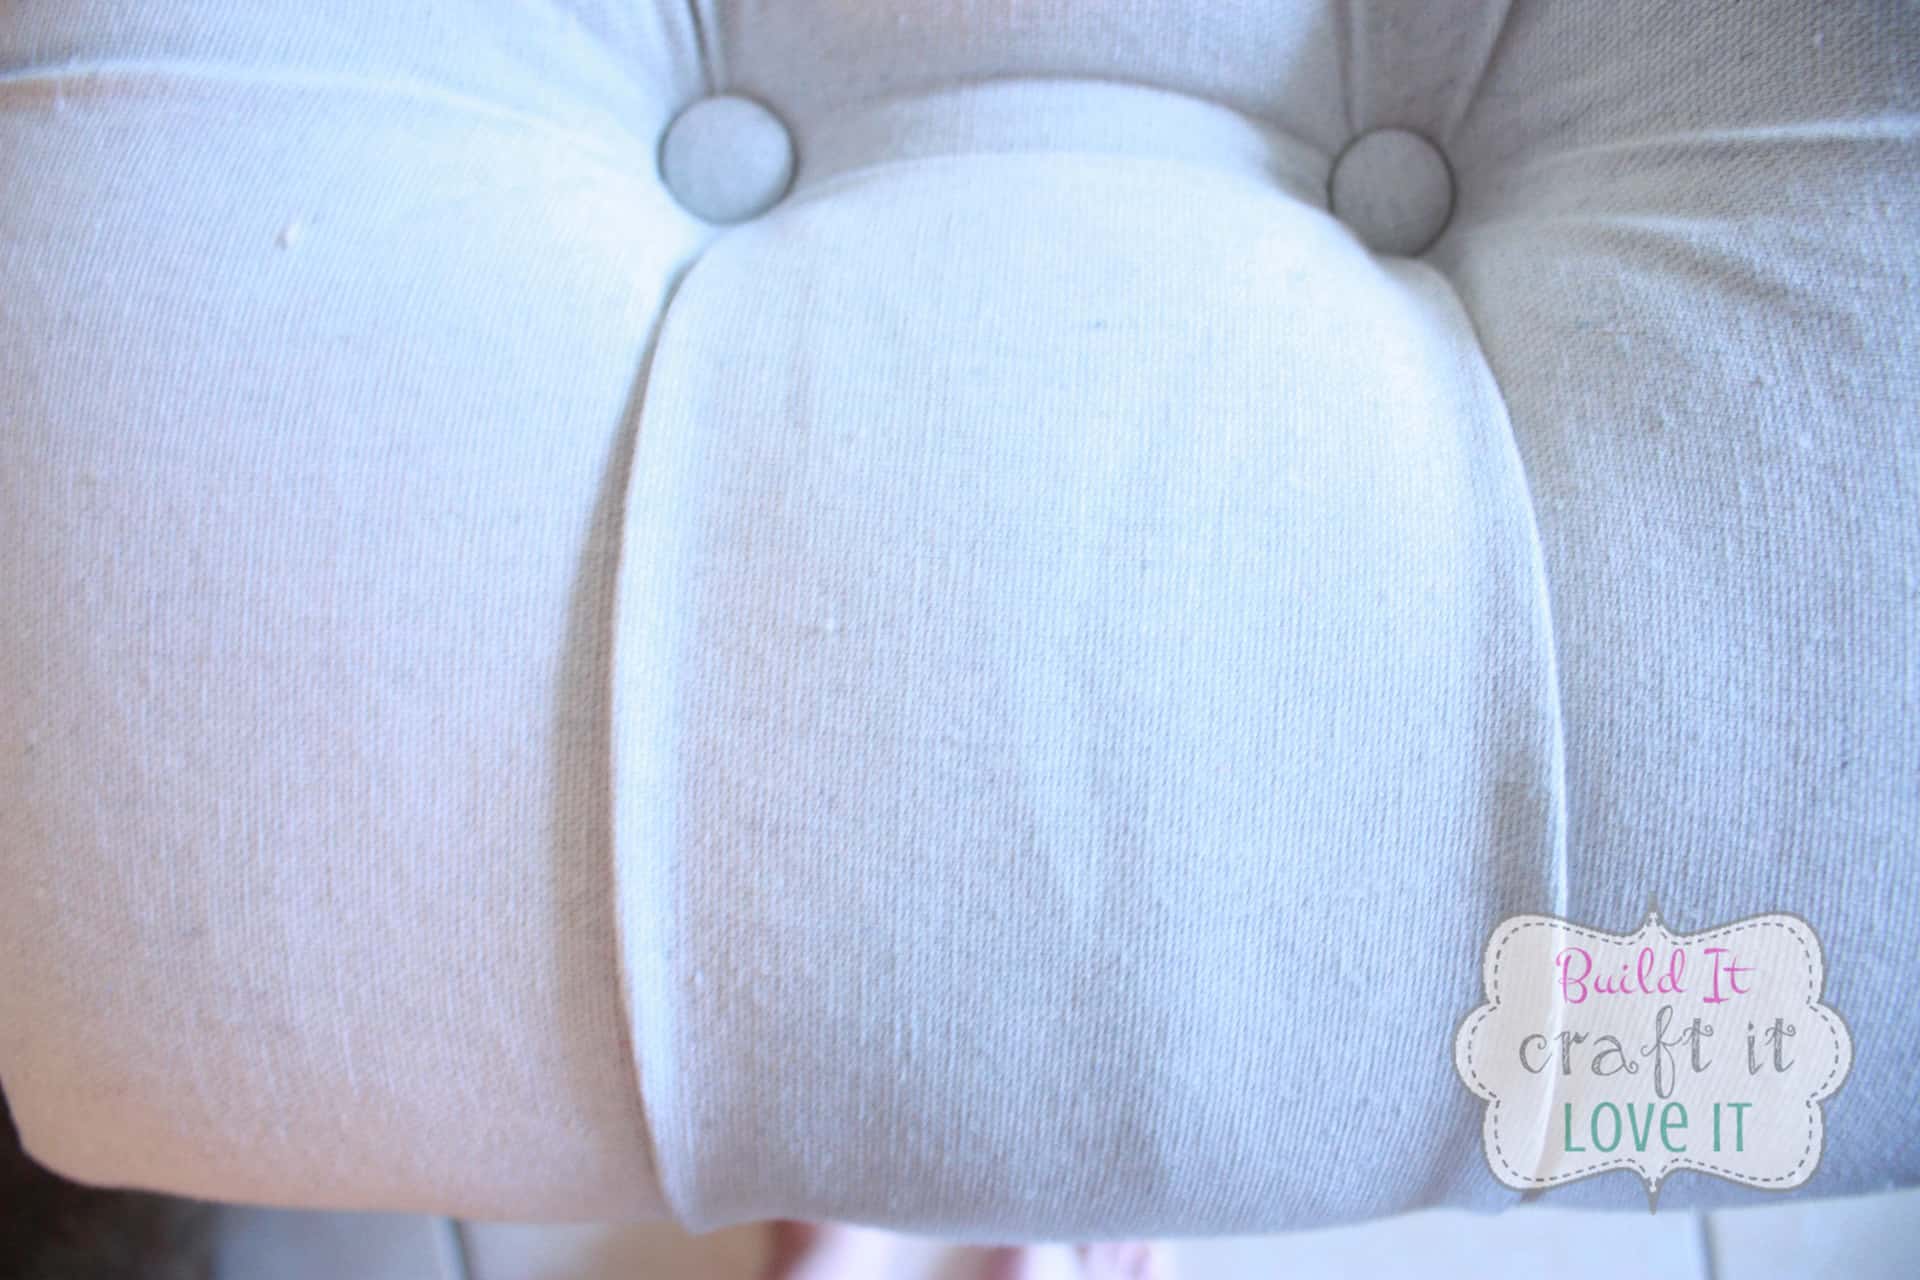
Next, of course, you have to iron your drop cloth to get all the folds out so you won’t see them on the side of your box! And then I just basically did the exact same thing that I did with the batting, only I did the ends a little different. Just a reminder…this is NOT professional…on the ends I cut the fabric so that it wasn’t all bunched up where it folded as you can see below!

It is the same idea as what I did with the batting only the edges of the fabric couldn’t be exposed so this was the easiest way I found to do it! Now you just fold your sides in on the piece of fabric laying on the floor.

Then I just pulled this up tight and stapled it at the top, on the inside! I also ironed the seams once it was stapled on the box, to flatten them as best I could, then glued the fabric on the outside, along the seams just to make sure it doesn’t try to separate after being sat on! I just used Aleene’s Tacky Glue.

After gluing each side I would flip it over and leave it standing on the end that I glued for a few hours to make sure it glued the seam flat.
**Update: Six years later the box still looks like it did when I first finished the box! This glue on the ends method actually held up really well!
And looky there, the bottom part of the box is almost ready to go, the only thing we need is the feet.
I bought the feet unfinished at Lowe’s and stained them my favorite, Varathane Dark Walnut! Just paint it on, wipe it off, wait an hour, and they are ready to go! Just one coat! Utterly Amazing! Before I found this stain, I always used Minwax and hated the staining process, now, I have to say, it is one of my FAV parts of a project!

Now normally, you would screw your feet in first, before upholstering the box because drilling into fabric is a no-no….but for me upholstering around four feet would have been a no-no! LOL!
I had to be a little creative here…don’t laugh, but my husband and I came up with this little homemade “drill bit” if you will, to cut the fabric out in a perfect little circle so that we could drill the holes for the feet without twisting our fabric up around the drill bit! So we took a Zebra pen, like this or maybe this one is a pencil…either way…you get it!

Well, we disassembled it and put the main pen part into the drill! Kinda’ silly right?! Sometimes, you gotta do, what you gotta do, to get that perfect look for a bargain price! LOL!!

So that my friends is your fancy “drill bit” that is going to cut you the perfect holes so you can drill the holes for your feet on your DIY bench!
Flip the box over and mark where you want your feet, the screw on the foot is in the center of the foot at exactly 2 in, I wanted them to sit a back away from the edge just a hair, so I marked them at 2 1/4 in. both ways and put a dot where we needed to drill…(just a note: if I built this piece again I would put the feet closer to the edge so they are more noticeable) then just used this fancy tool to do it! Hehe!
See, I told you! So cool right? Just make sure that you place the drill straight down and that you cut all the fabric and batting out and you can see wood or else what little bit may be left there will catch in the drill bit while you are drilling! I had my husband do the drilling because I was scared I would mess something up…haha!
Anyway, then we just used a 1/4″ drill bit and drilled the four holes for the feet to be screwed into, loaded the feet up with glue:
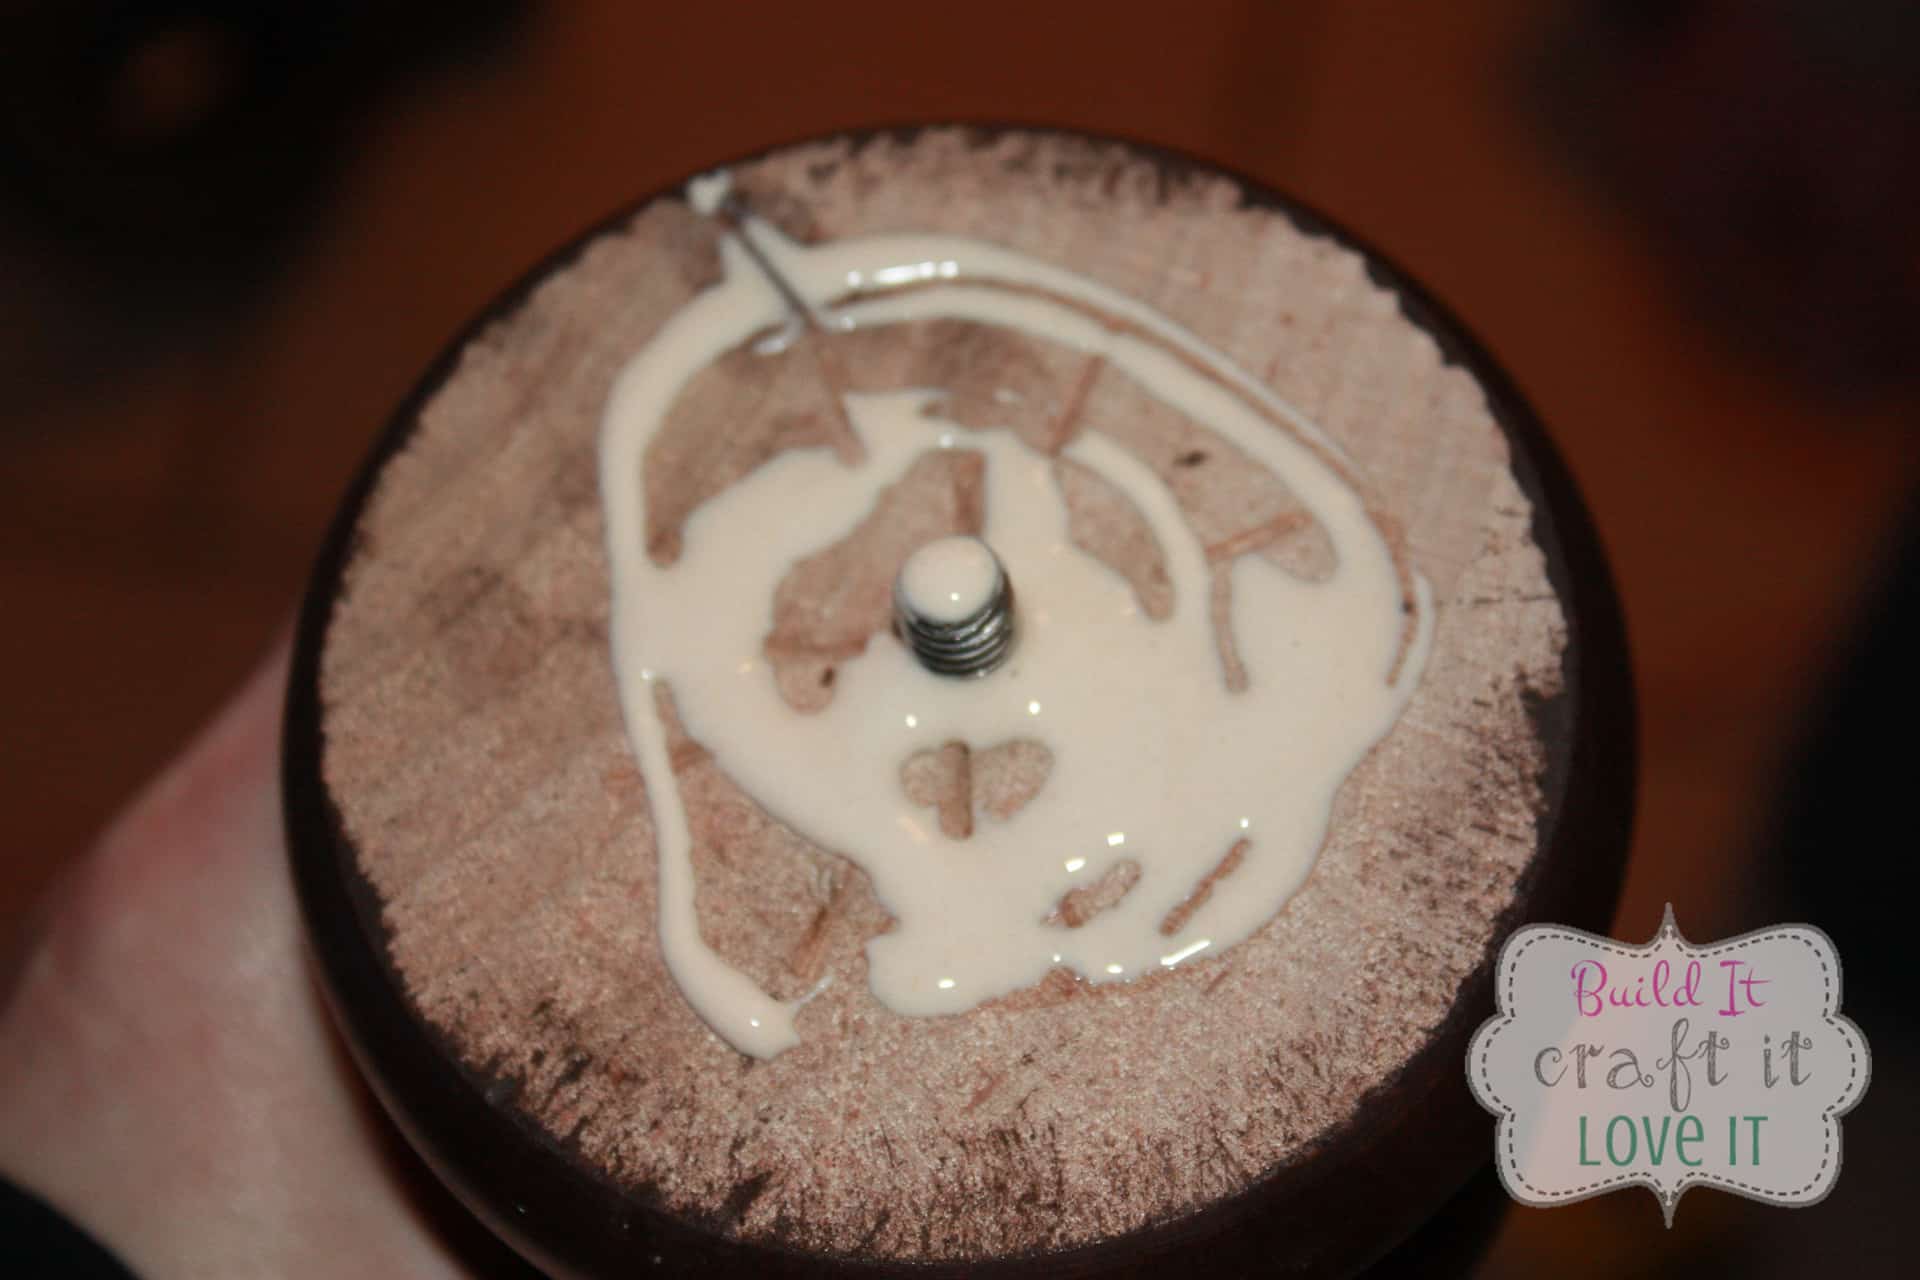
And screwed the feet into their new home…TADA!!
So close but yet so far to the end! You now get to move onto the top of the bench, the part that sat in my living room for weeks just daunting me…I was so afraid to mess it up…might as well not wait as I did…just jump in and get it DONE!!
Upholstering and Tufting the Top of the DIY Bench
So you take your last piece of plywood, and drill holes where you will want a button, I did my pattern like so:
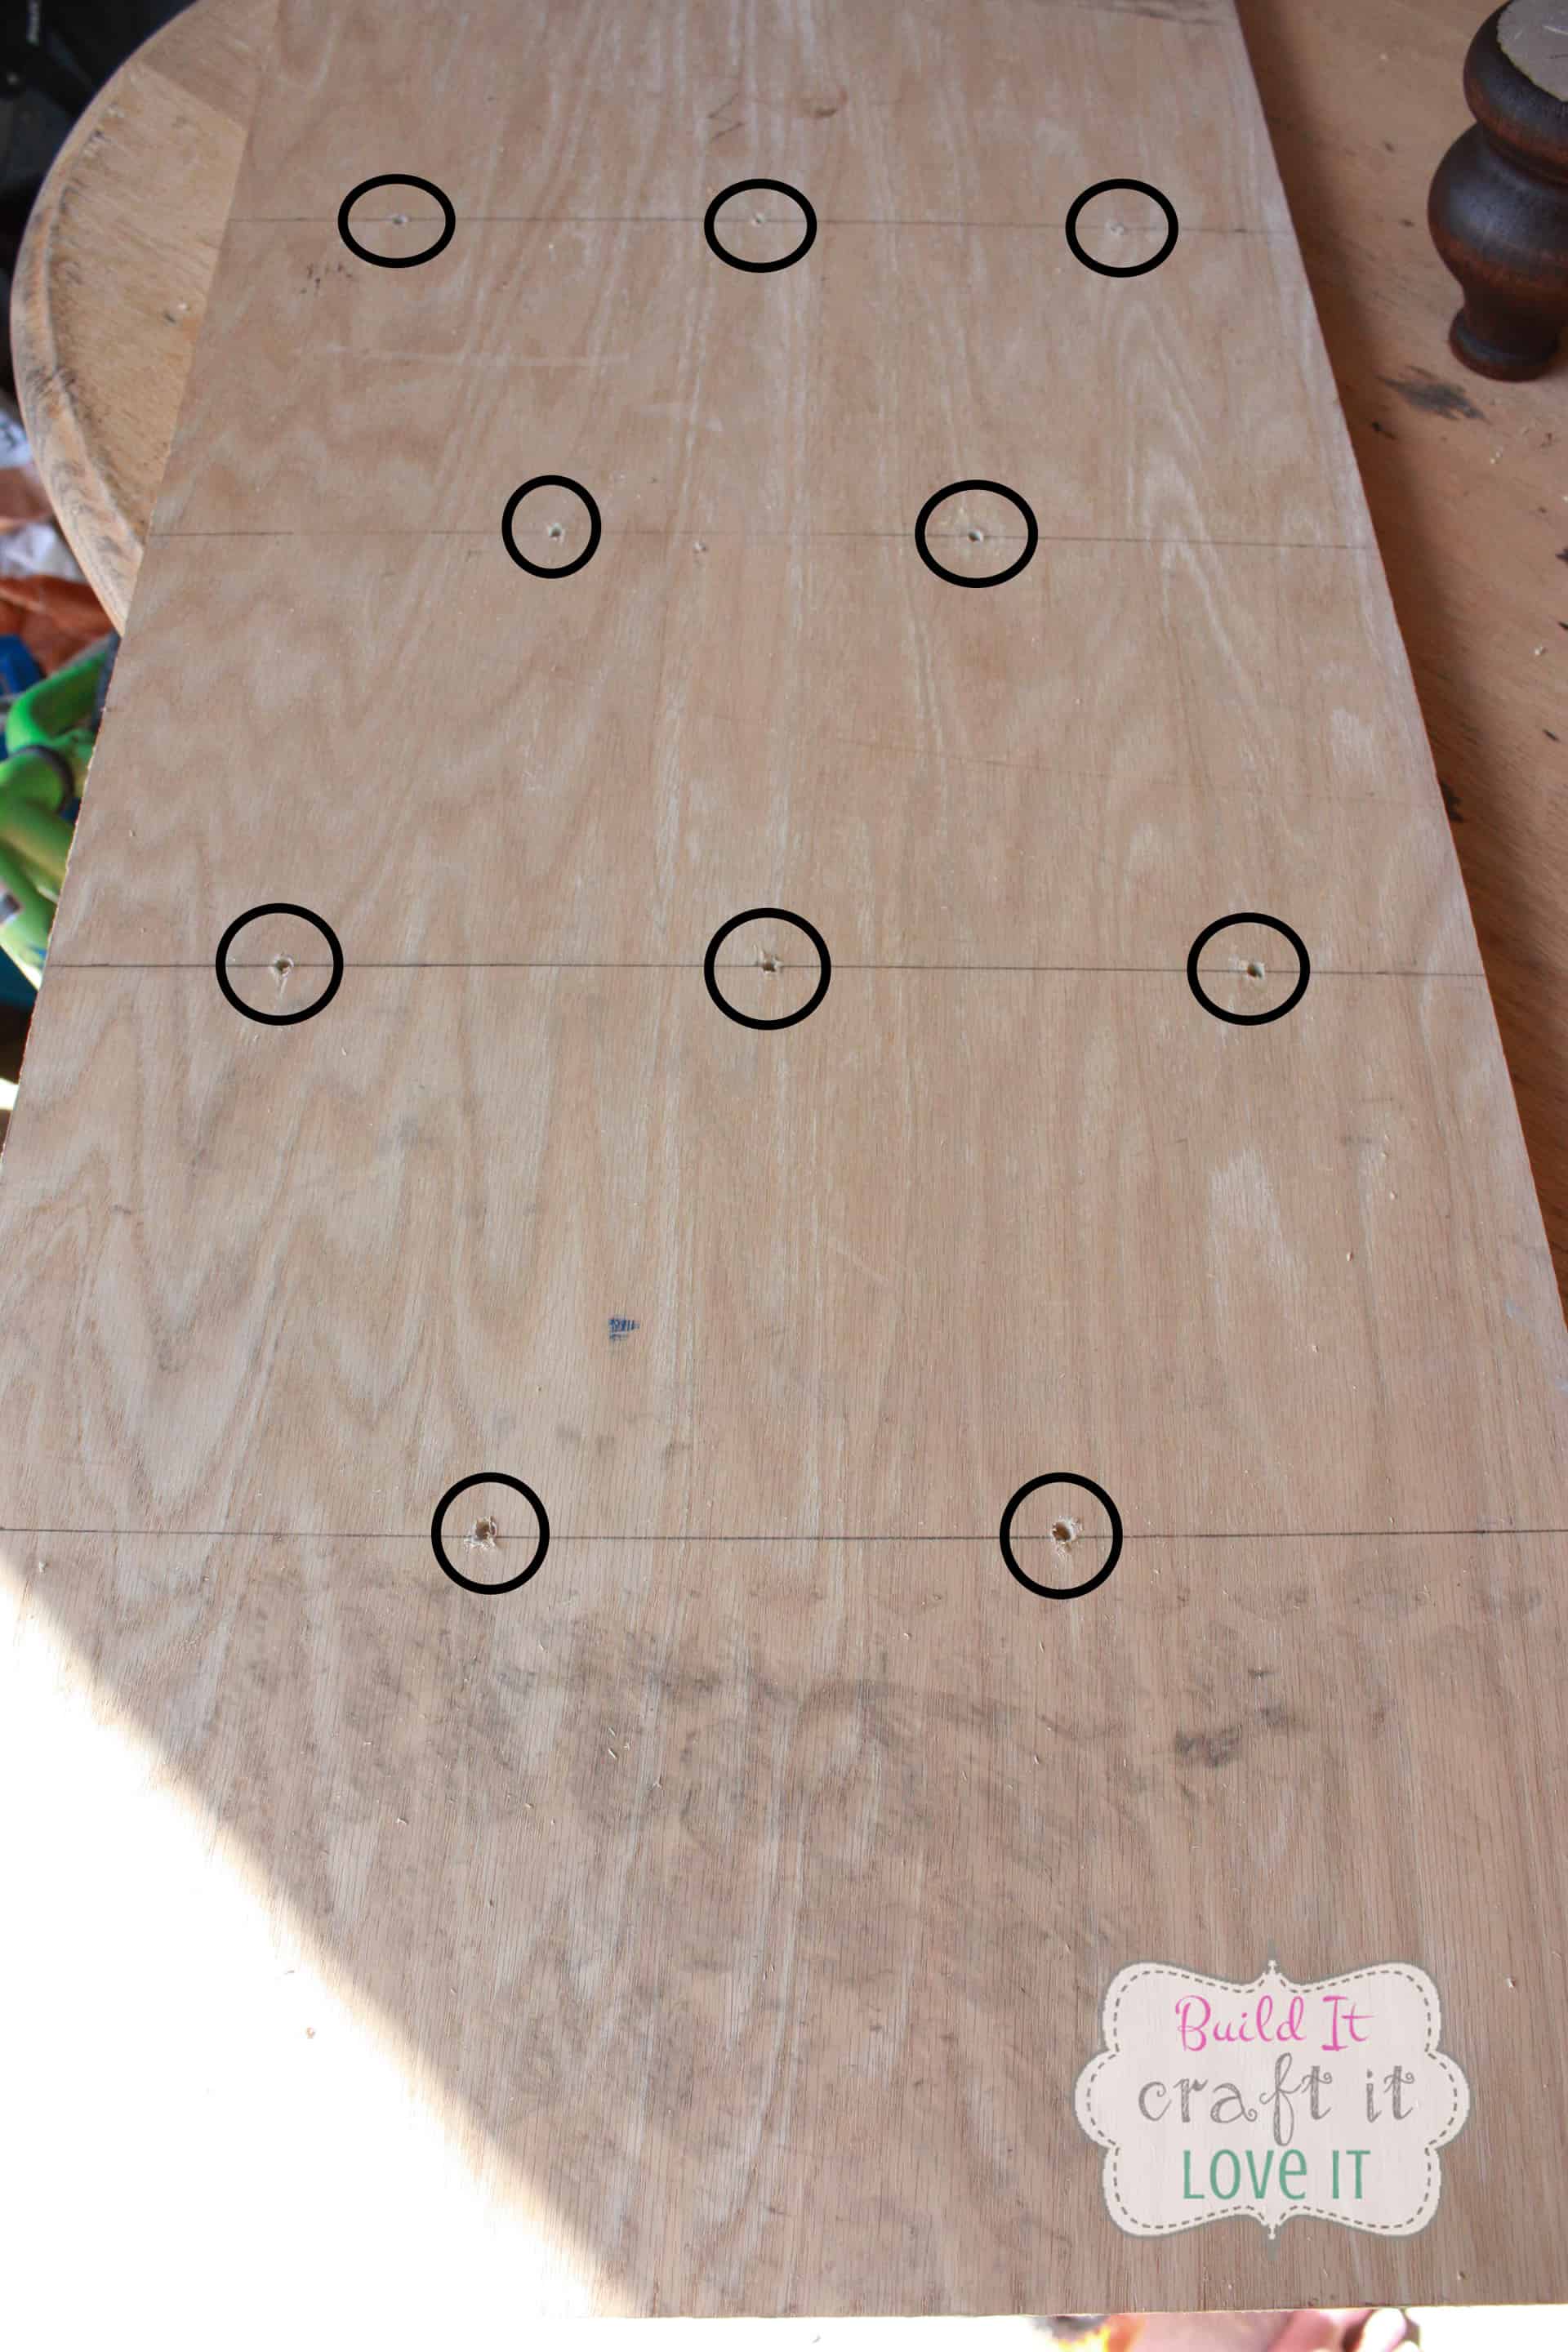
There is one more row of two holes that are not pictured here they are missing from the very top of the picture there! Don’t you like those tire marks on my wood? Thanks, Dad! I used to take all my wood over to my Dad’s house and he would cut it for me or help me cut it, but I left these scraps over there, and well, he used them for something but he couldn’t remember what?!! Obviously… to drive on! 😂🤦♀️
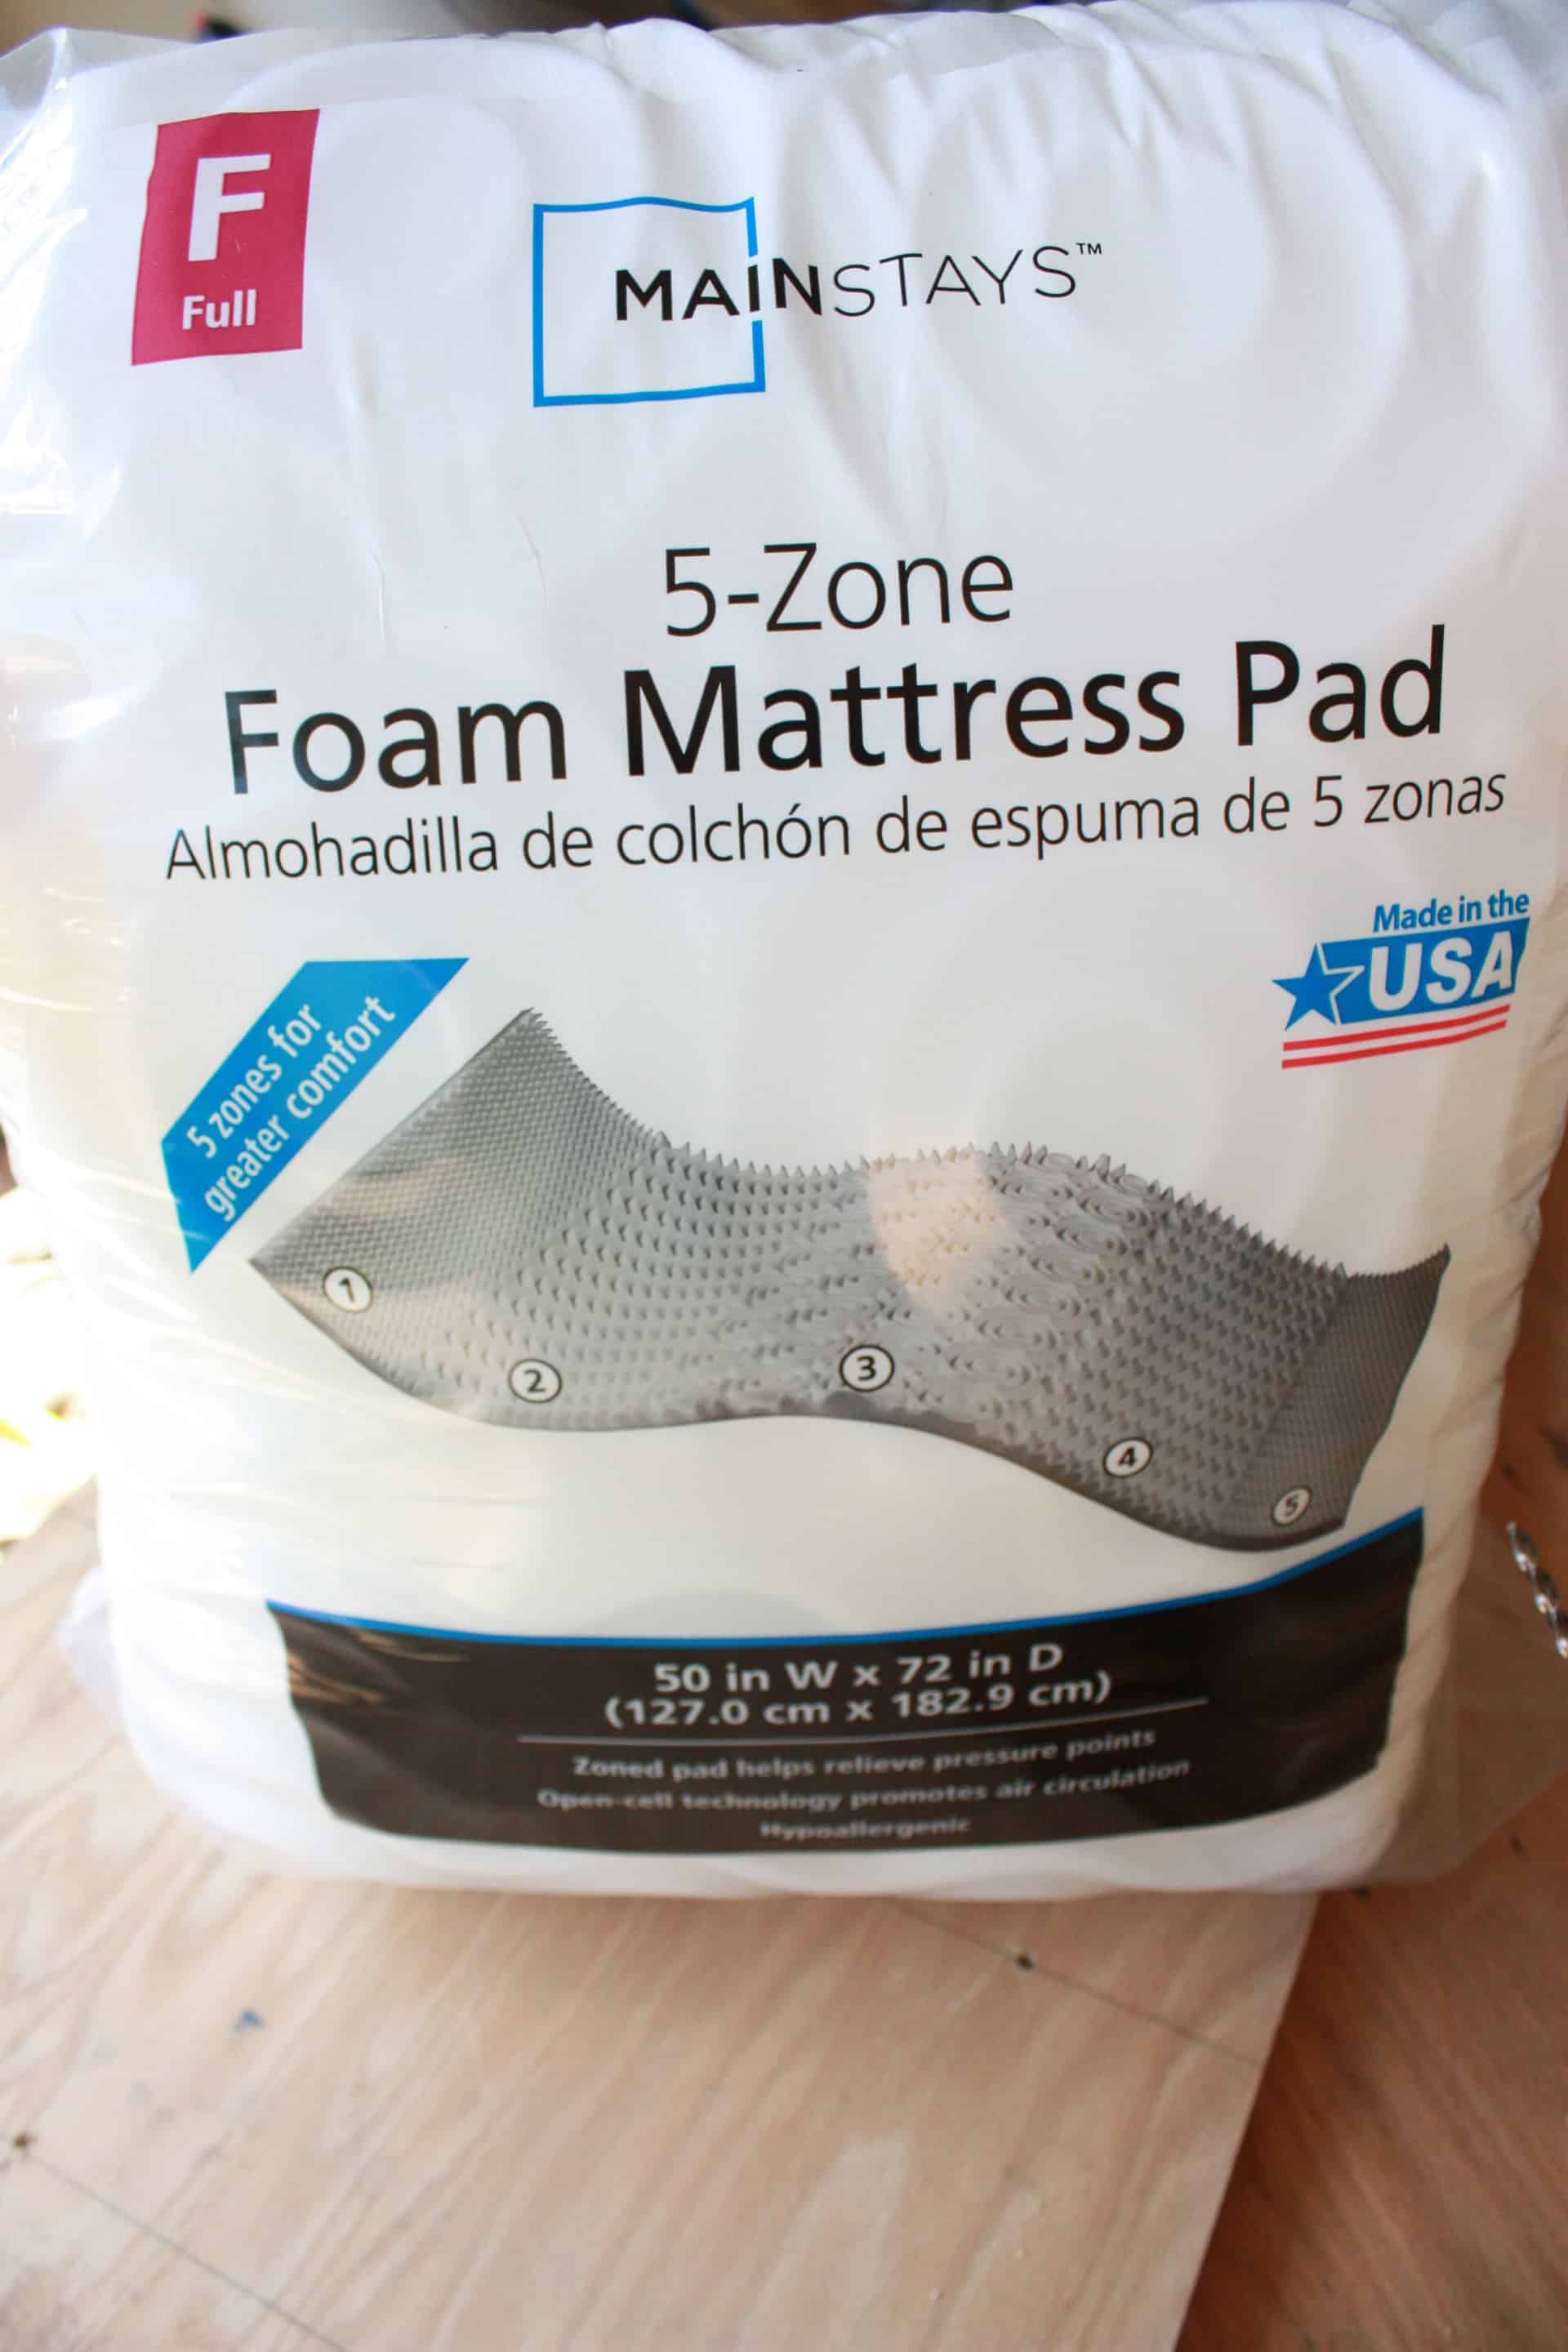
Next, I cut my foam, I opted not to use the foam they sell at craft stores because it was going to be rather expensive, and as I was browsing Wal-Mart one day, I saw a very inexpensive full-size mattress pad…you know like an egg crate only it doesn’t look like eggs anymore!
I bought this for only $11.00, that sure beats the $60.00-70.00 it was going to cost me for the 4-inch foam from JoAnn’s or Hobby Lobby, I even checked all over online and couldn’t find anything remotely inexpensive so I was beyond excited when I stumbled upon this foam at Wal-Mart!
So you will have to cut the foam down to size which is where, yes it would be much easier to just purchase the foam already cut to size, but the cost, remember…so I used scissors to cut it down to four pieces a little bigger than the piece of plywood was. Then I placed all four pieces of foam on top of each other and placed the piece of plywood on top of them. Last, I cut the excess foam with a carving knife along the edge of the board!
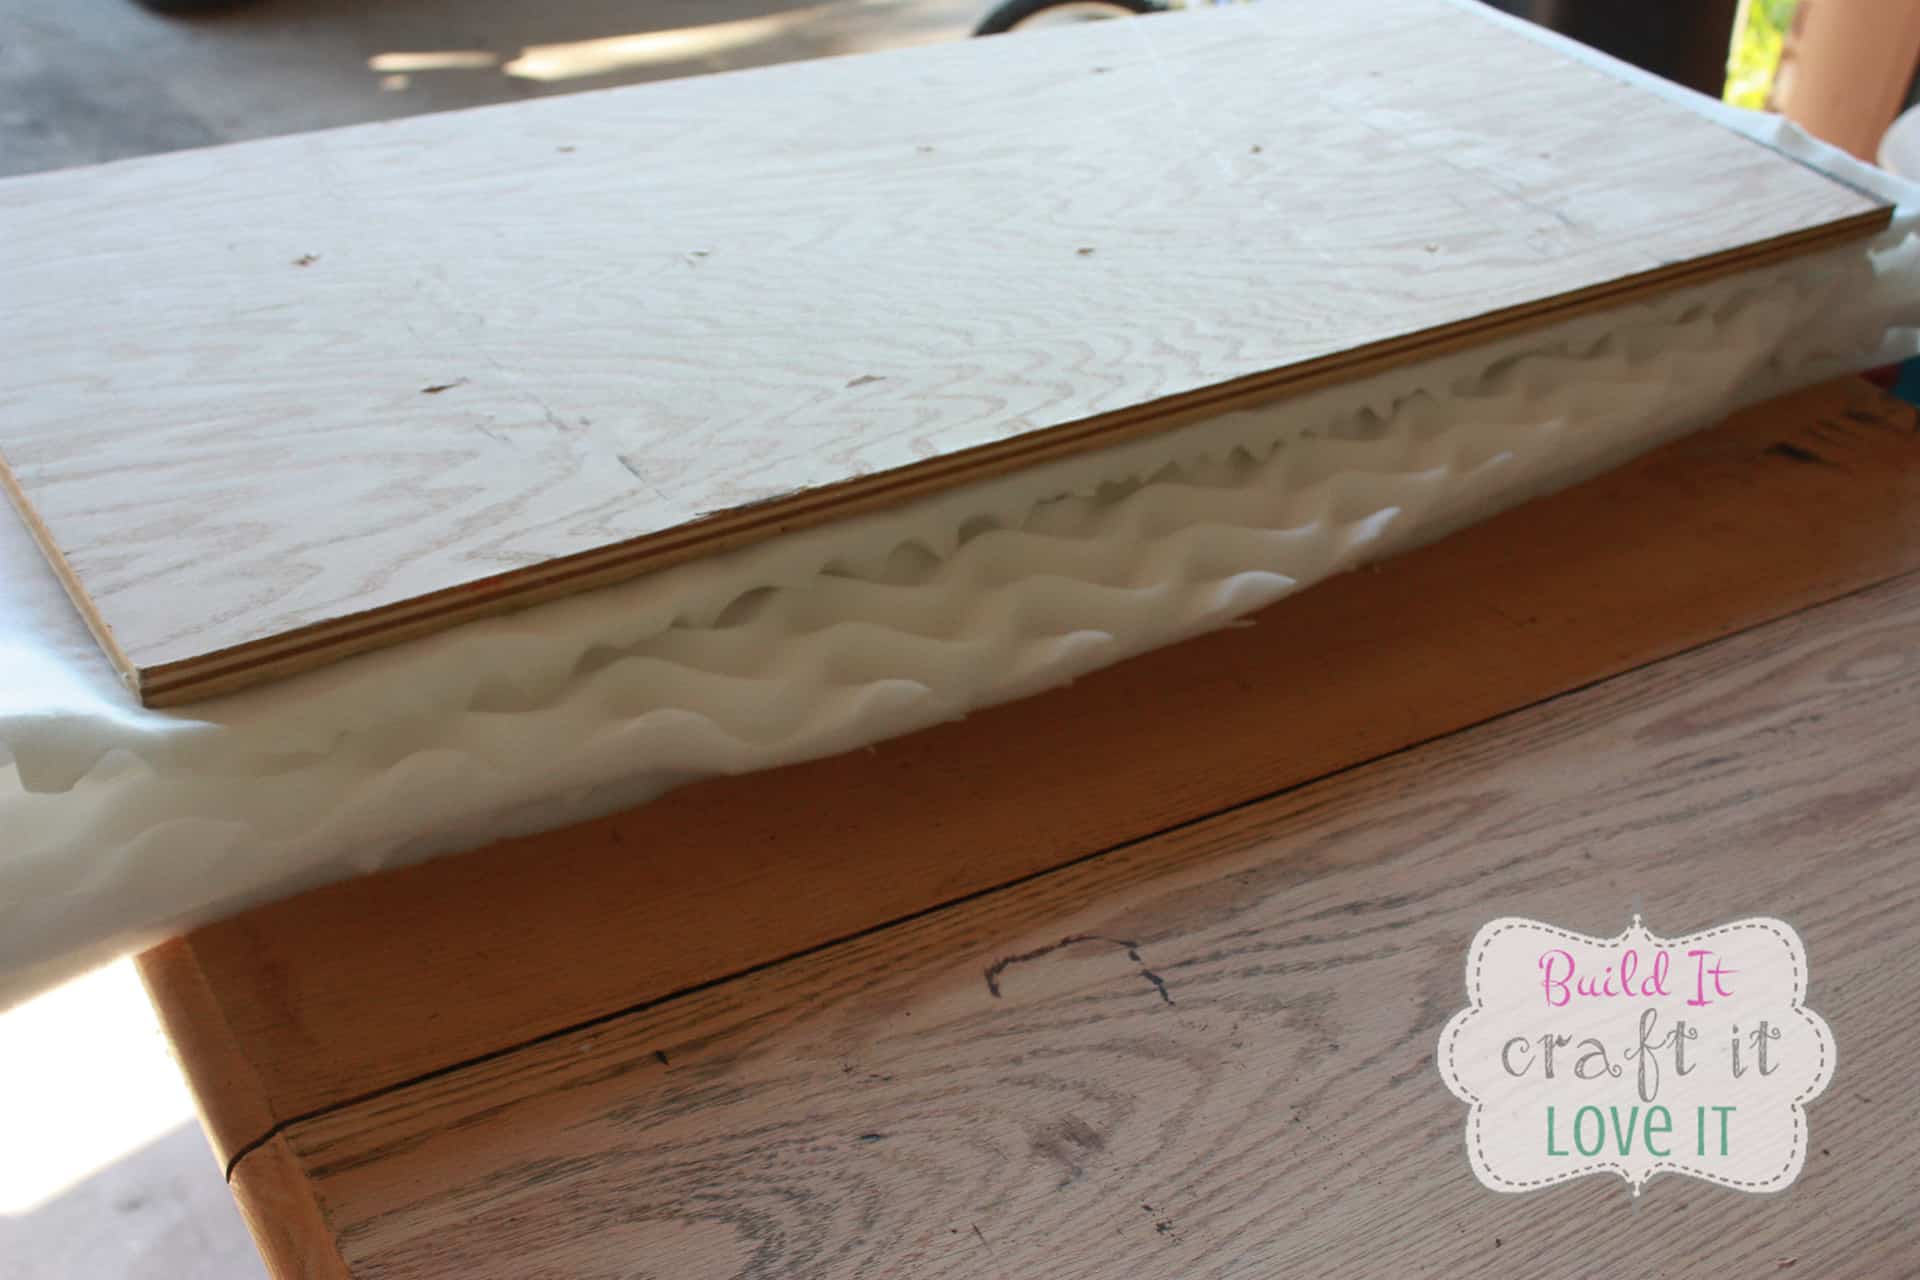
I just used a really cheap carving knife…Black and Decker and it didn’t work the greatest but it did get the job done! Hmmm! Well, since the bench top is tufted I am not worried that it is a little jagged in places, if I was not tufting it I would have been more particular at this point in making sure it was straight cuts but the tufting will hide a lot of my imperfection!
Yeah, I didn’t take a picture at this point but you will get to see what I mean in just a minute.
After cutting it as well as I could, I used spray adhesive to affix all the pieces of foam together and then to the board! Which was a completely wasted step because it didn’t work! Haha! So, I say, save yourself time, energy, and money, and skip this step!
Ooh! We are now at the upholstery part for the top!! Watch out, here we come!! The first thing I did was go ahead and make my buttons…well, I did this very first because I was scared, so I tried to put the actual tufting part off as long as I could! Is that just me? Does anyone else do that when you are scared you are going to mess something up?!
To make the buttons, I just used these cover buttons! You will need 3 packs if you grab them at your local Walmart or Hobby Lobby, but the Amazon pack I linked came with 18 for a much better price!
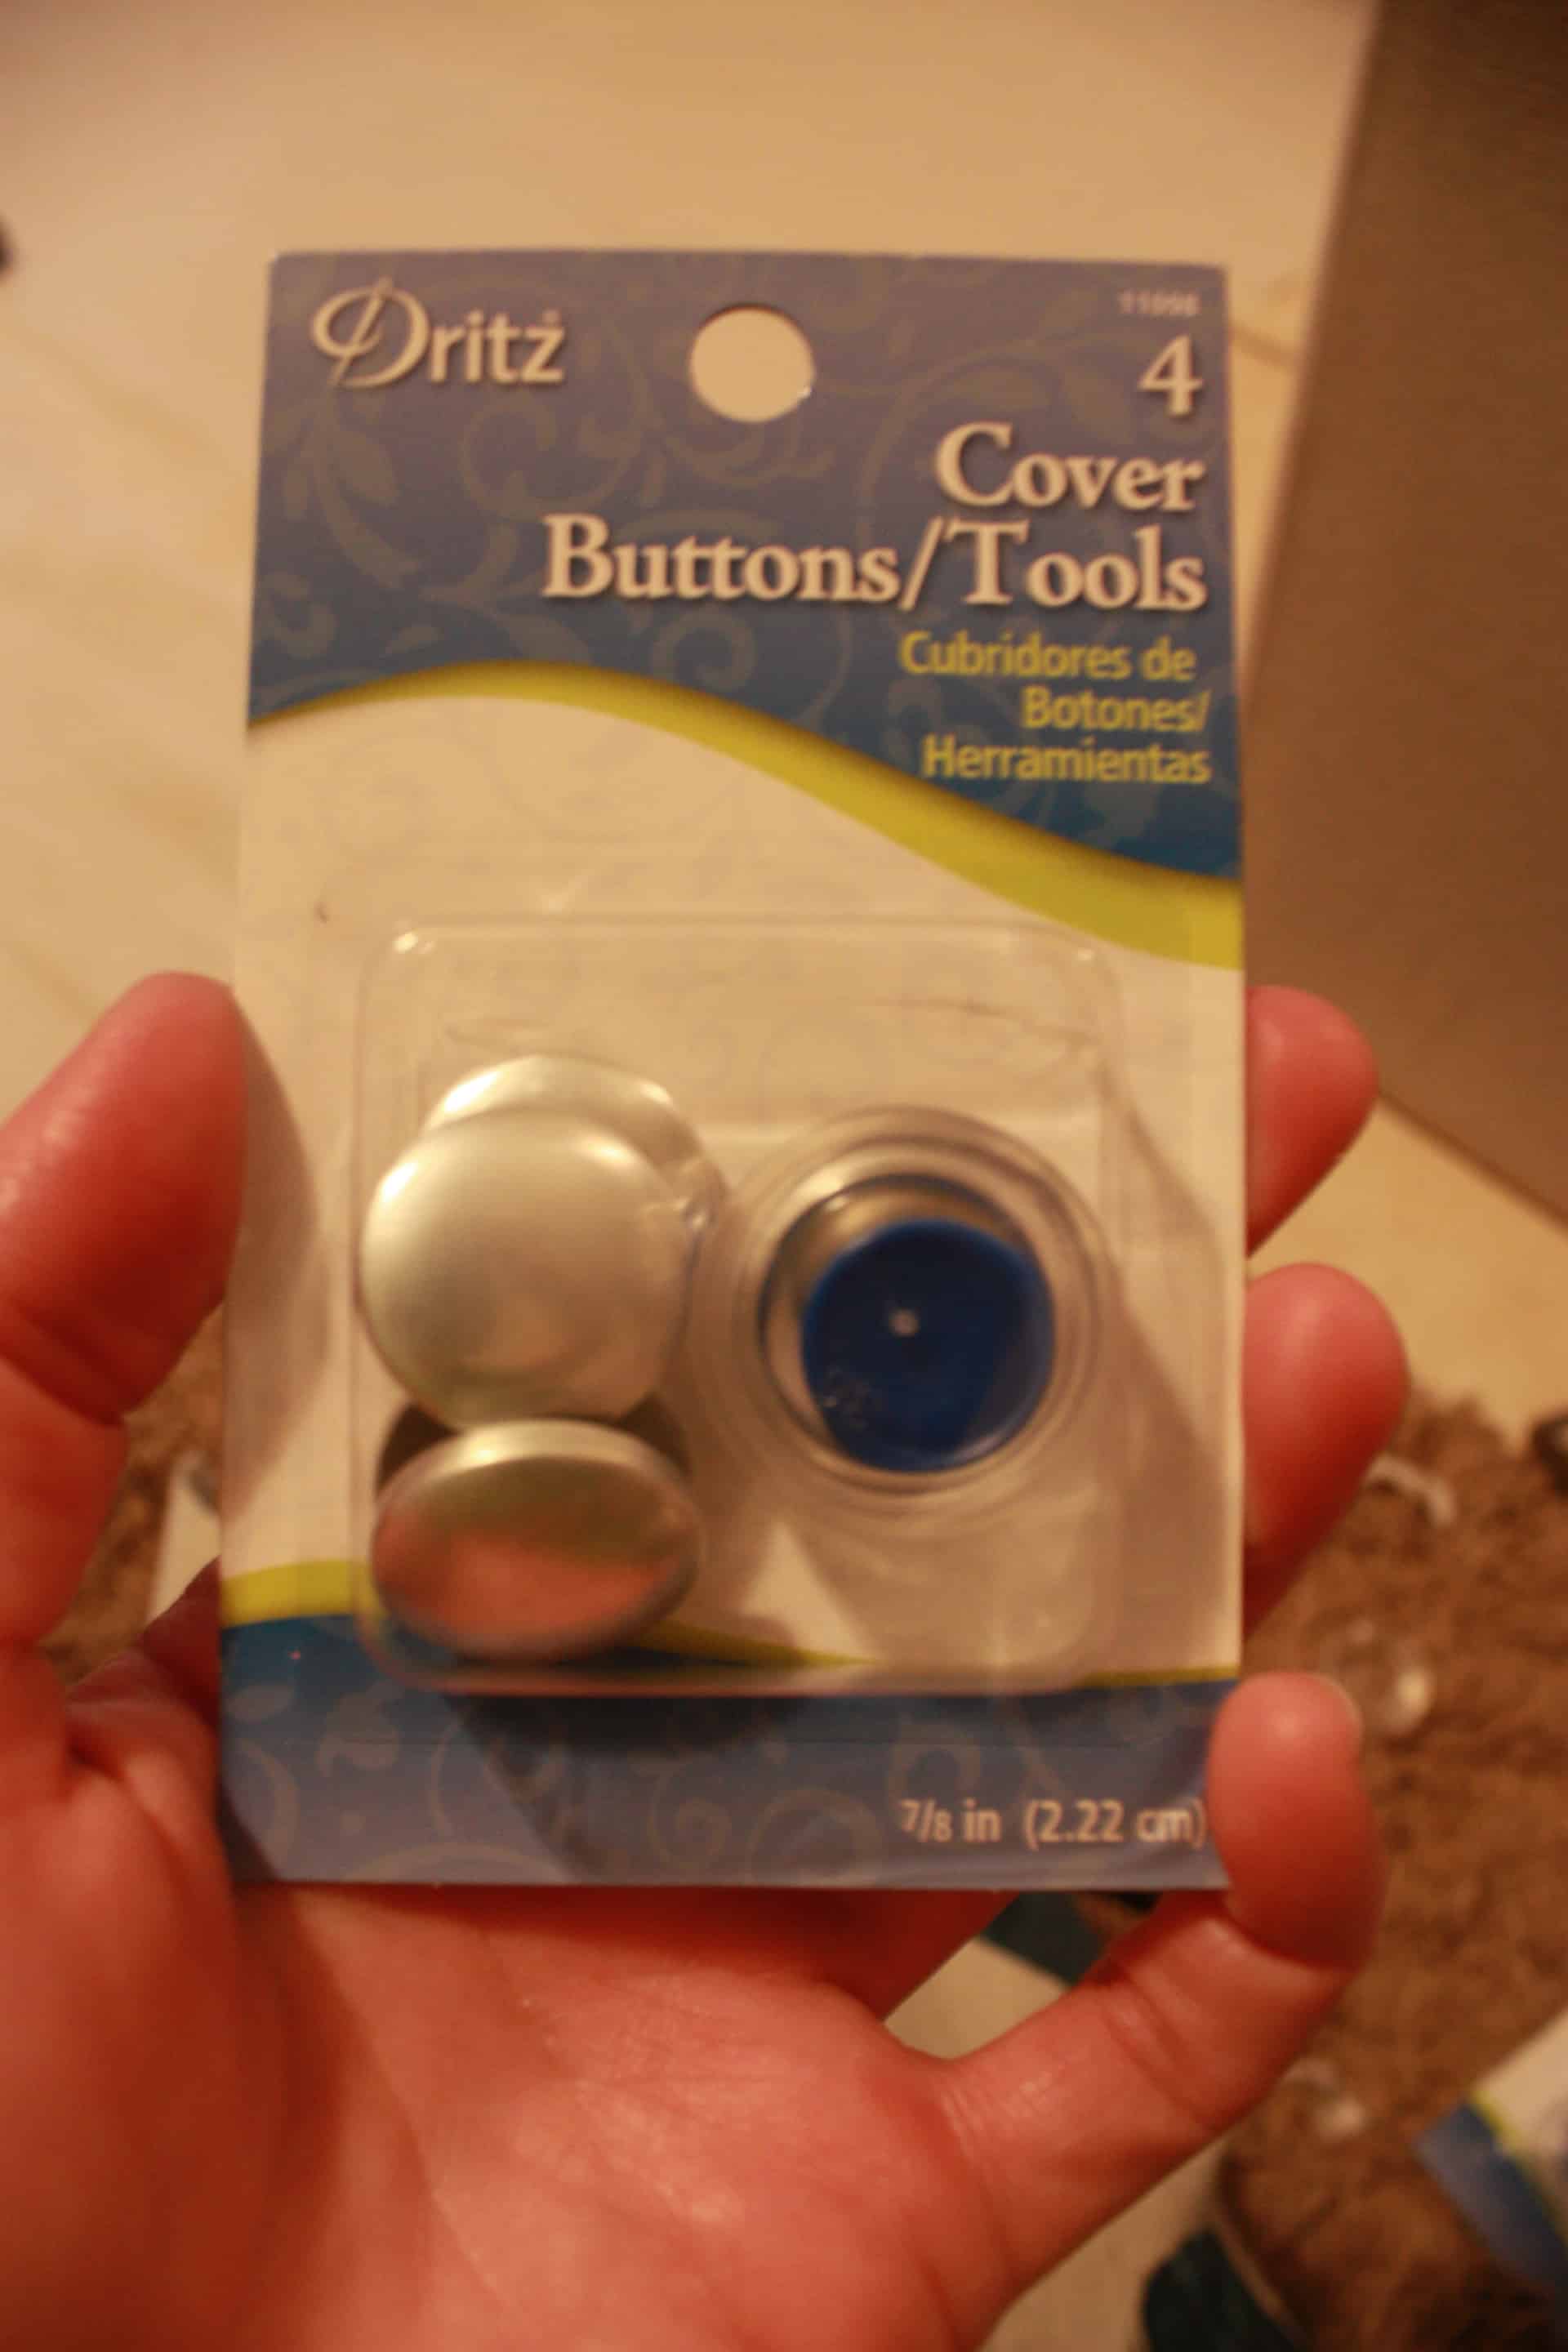
The button making is rather simple, and the package gives decent instructions, I didn’t take any pictures of this step, and trying to just type out what you do was not making much sense, so just try to follow the instructions on the package and feel free to ask any questions if you have one!
So, the buttons are made and there is nothing else to do besides starting the real upholstery process! Different people do this part very differently…I wanted my tufts to be deep and so I figured the best way would be to drill holes in the foam so the buttons could sink down in. I stuck an upholstery needle up through the bottom where the holes were and just marked around the needle with a sharpie so I would know where to drill without having to try and measure on my crooked foam!
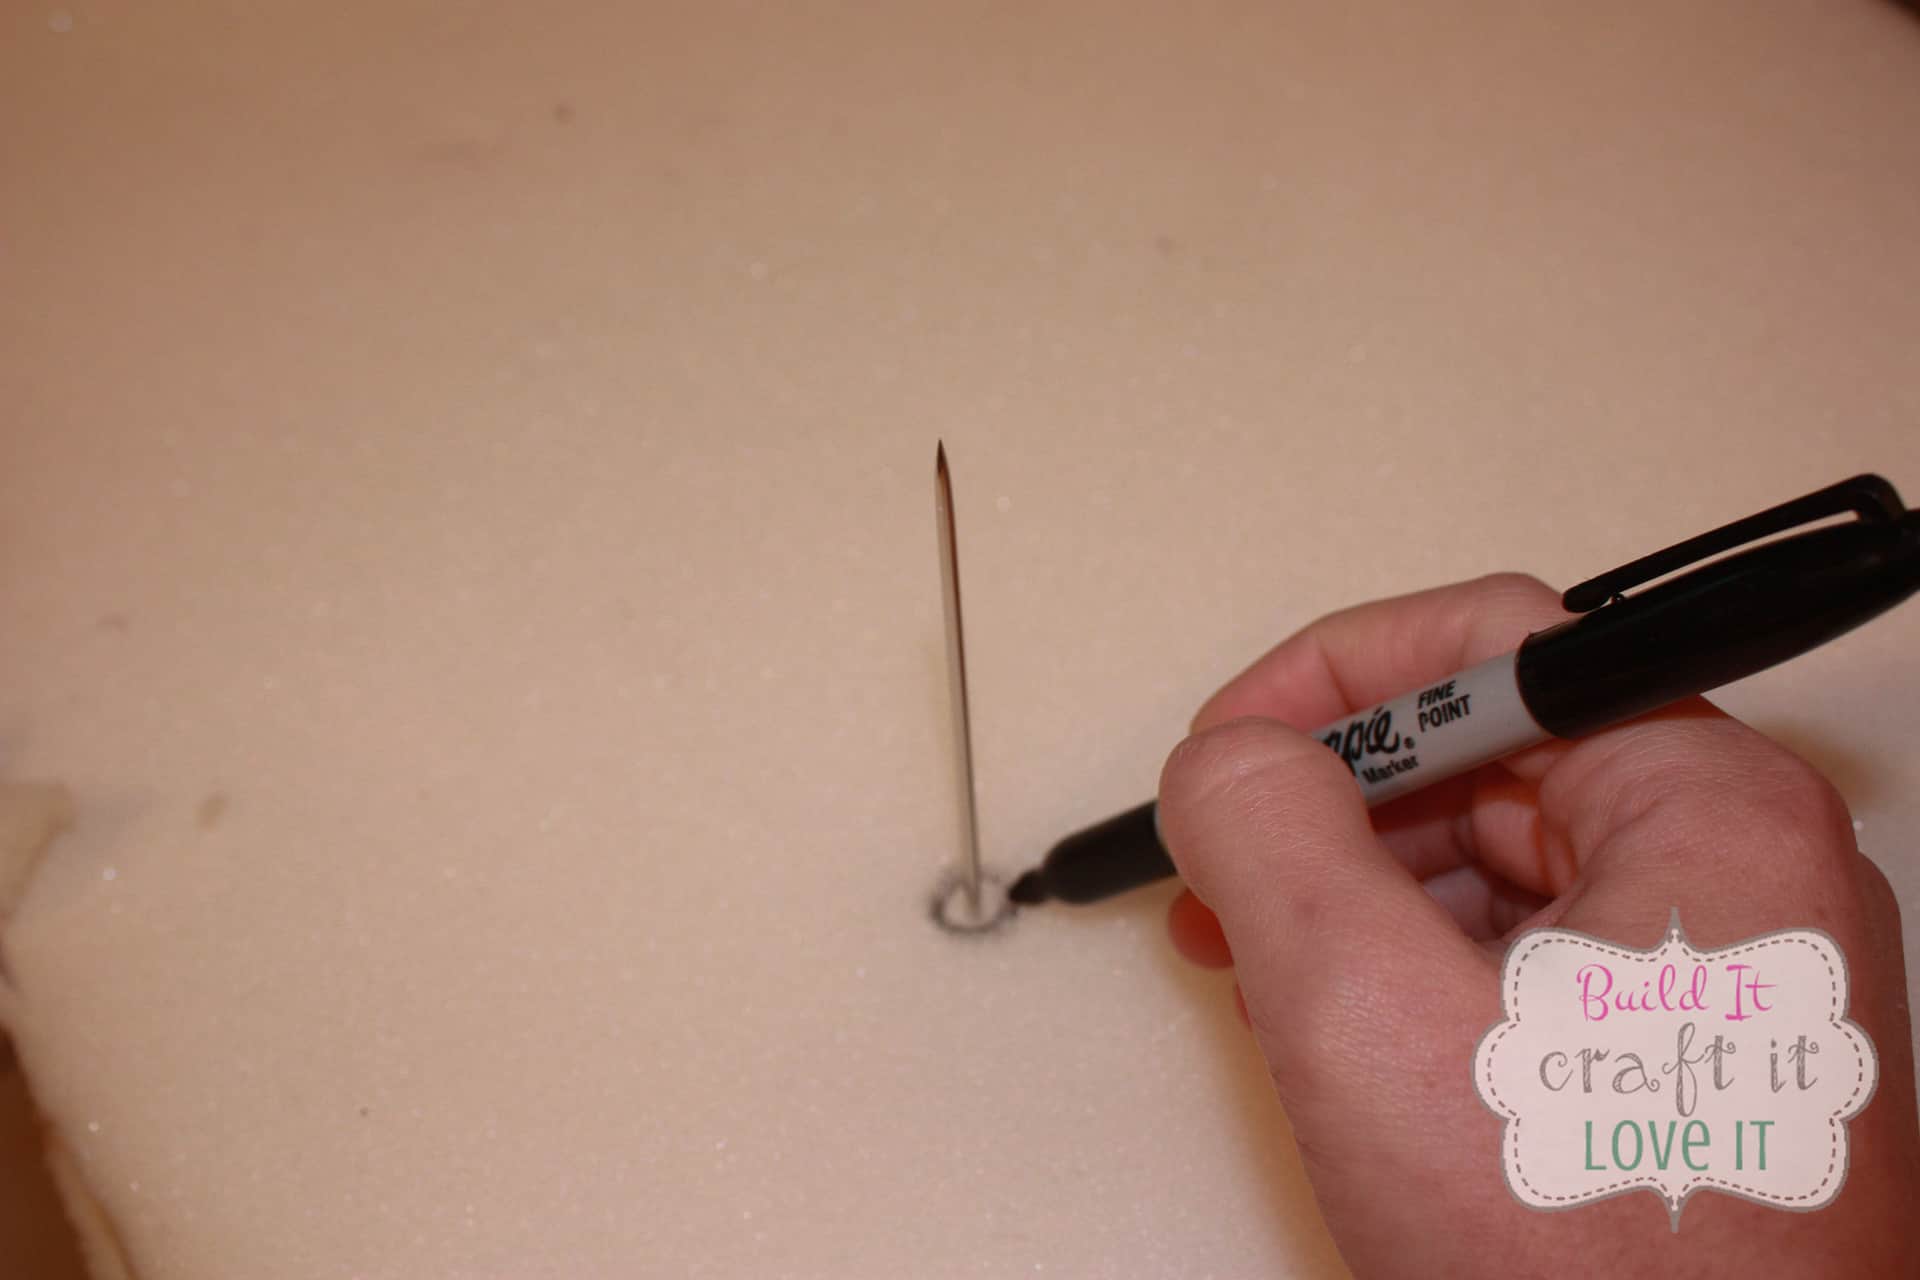
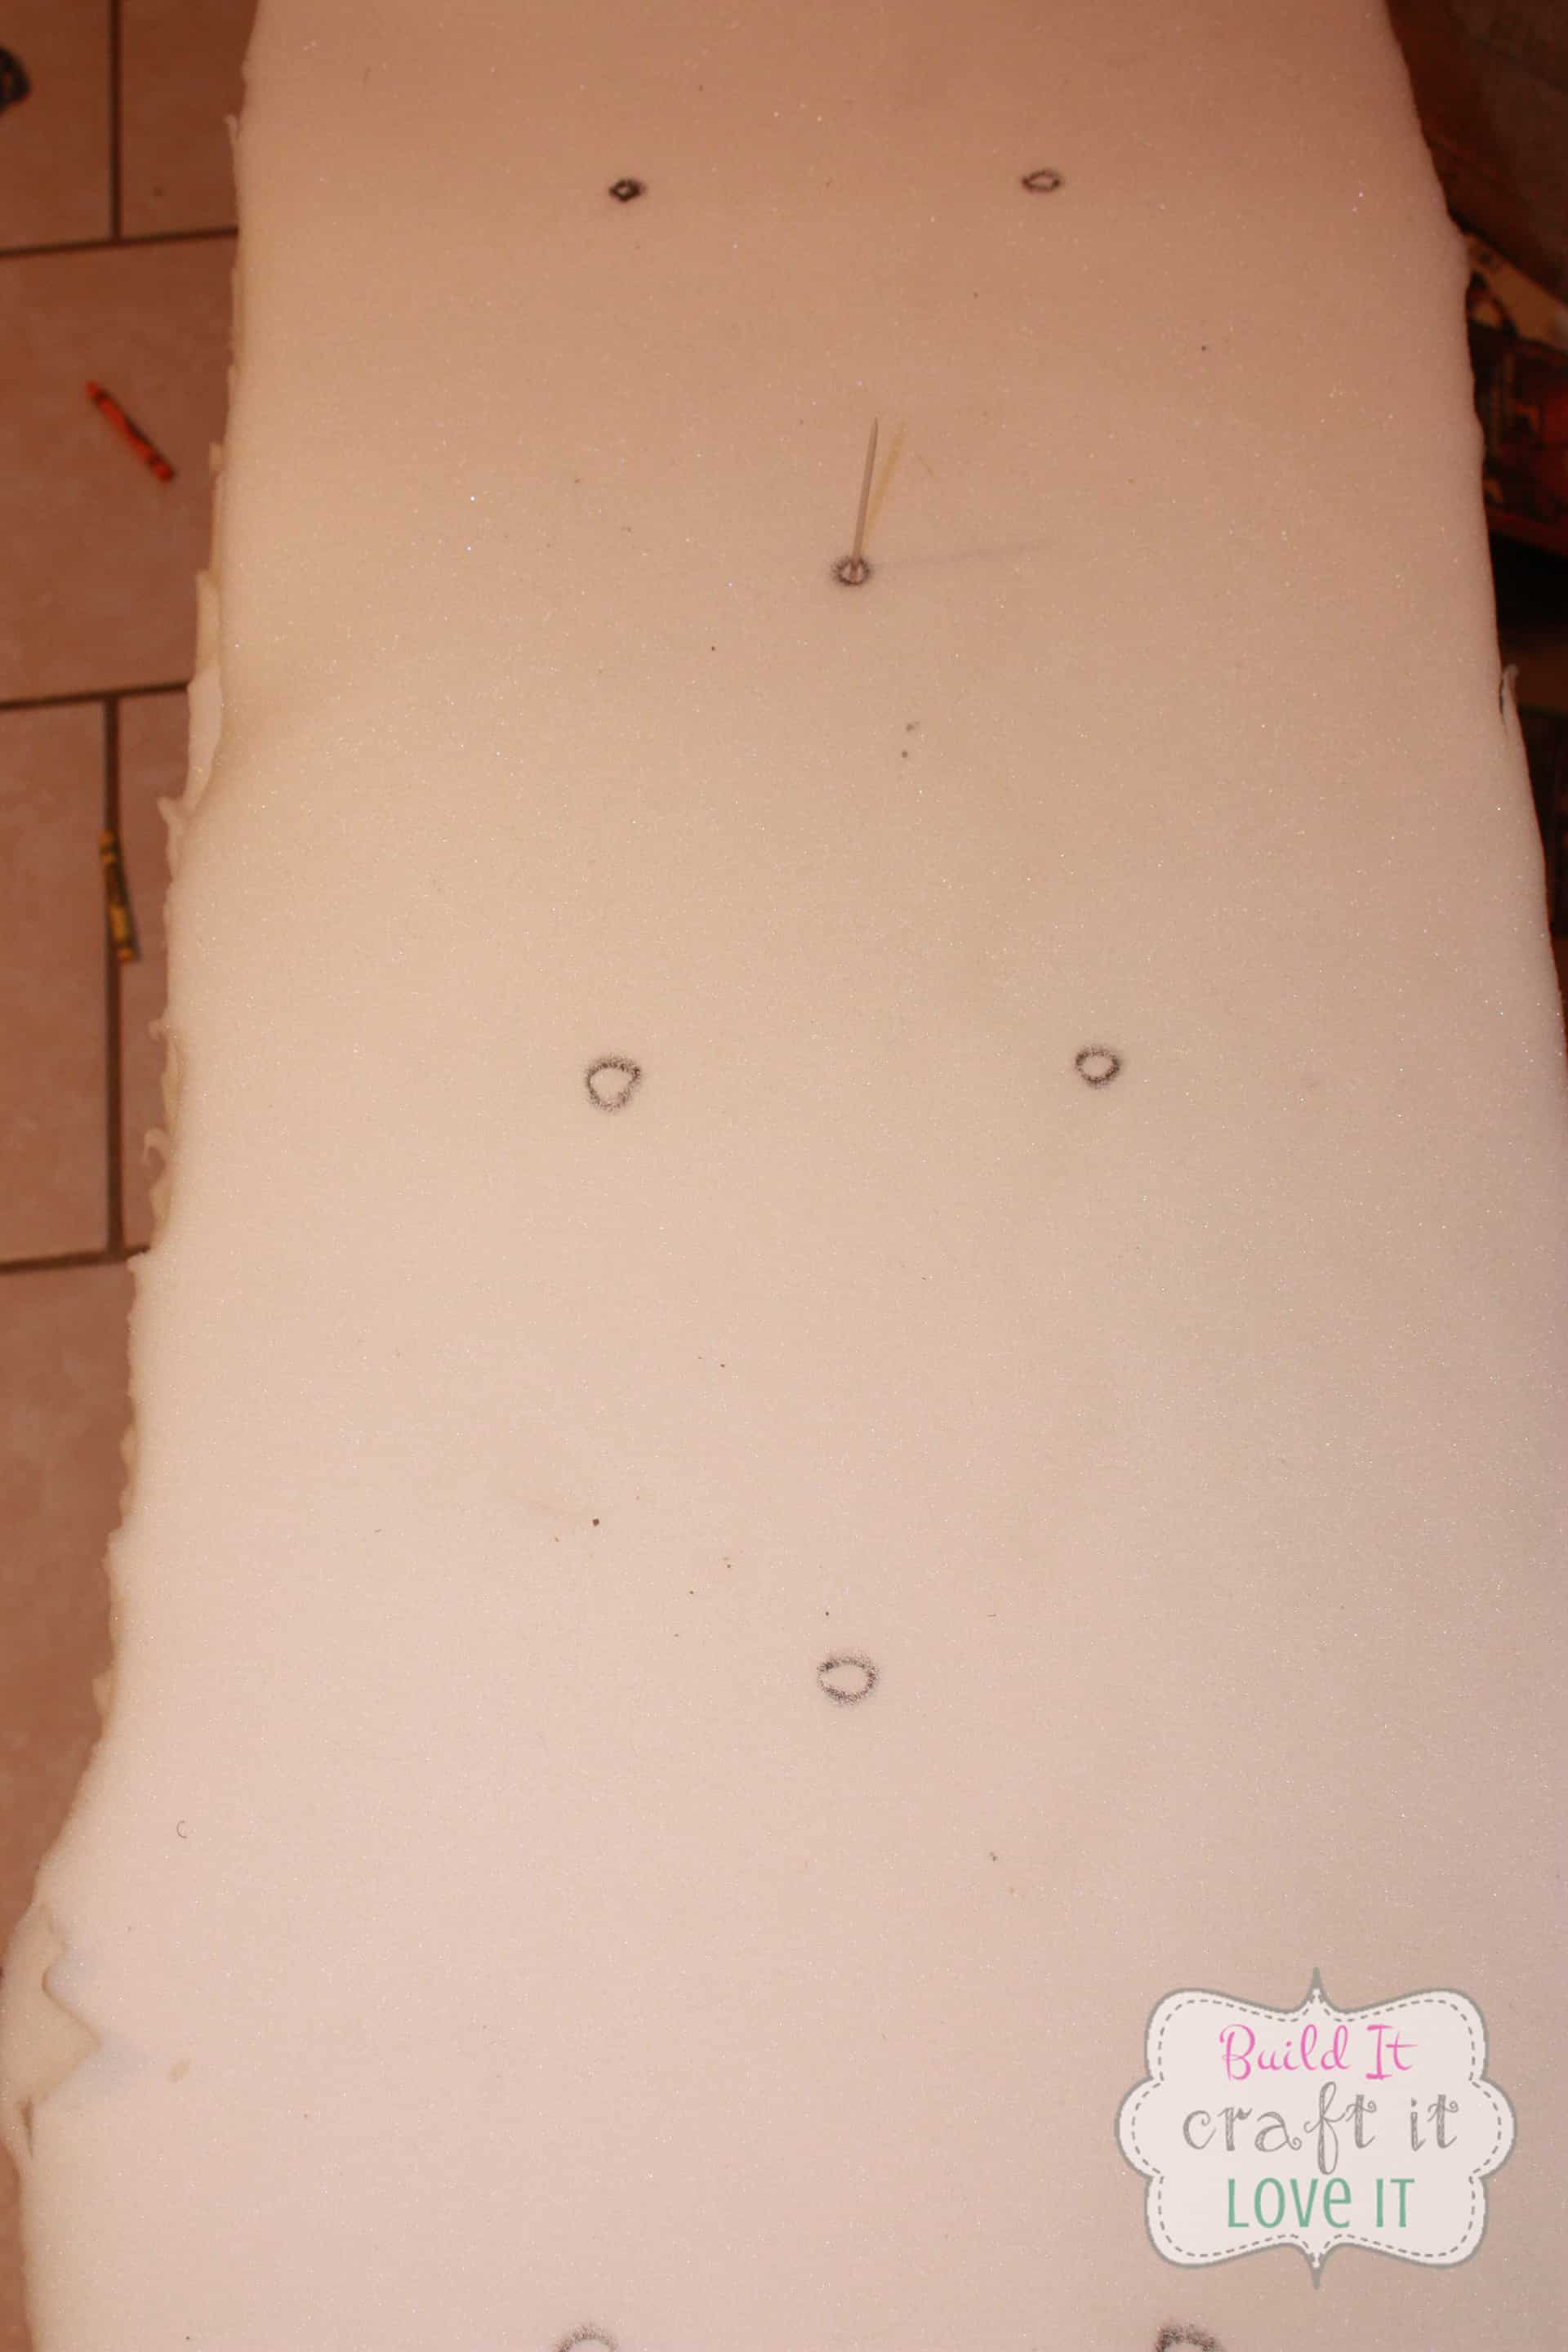
Did you see the jagged edges of the foam…Yikes!
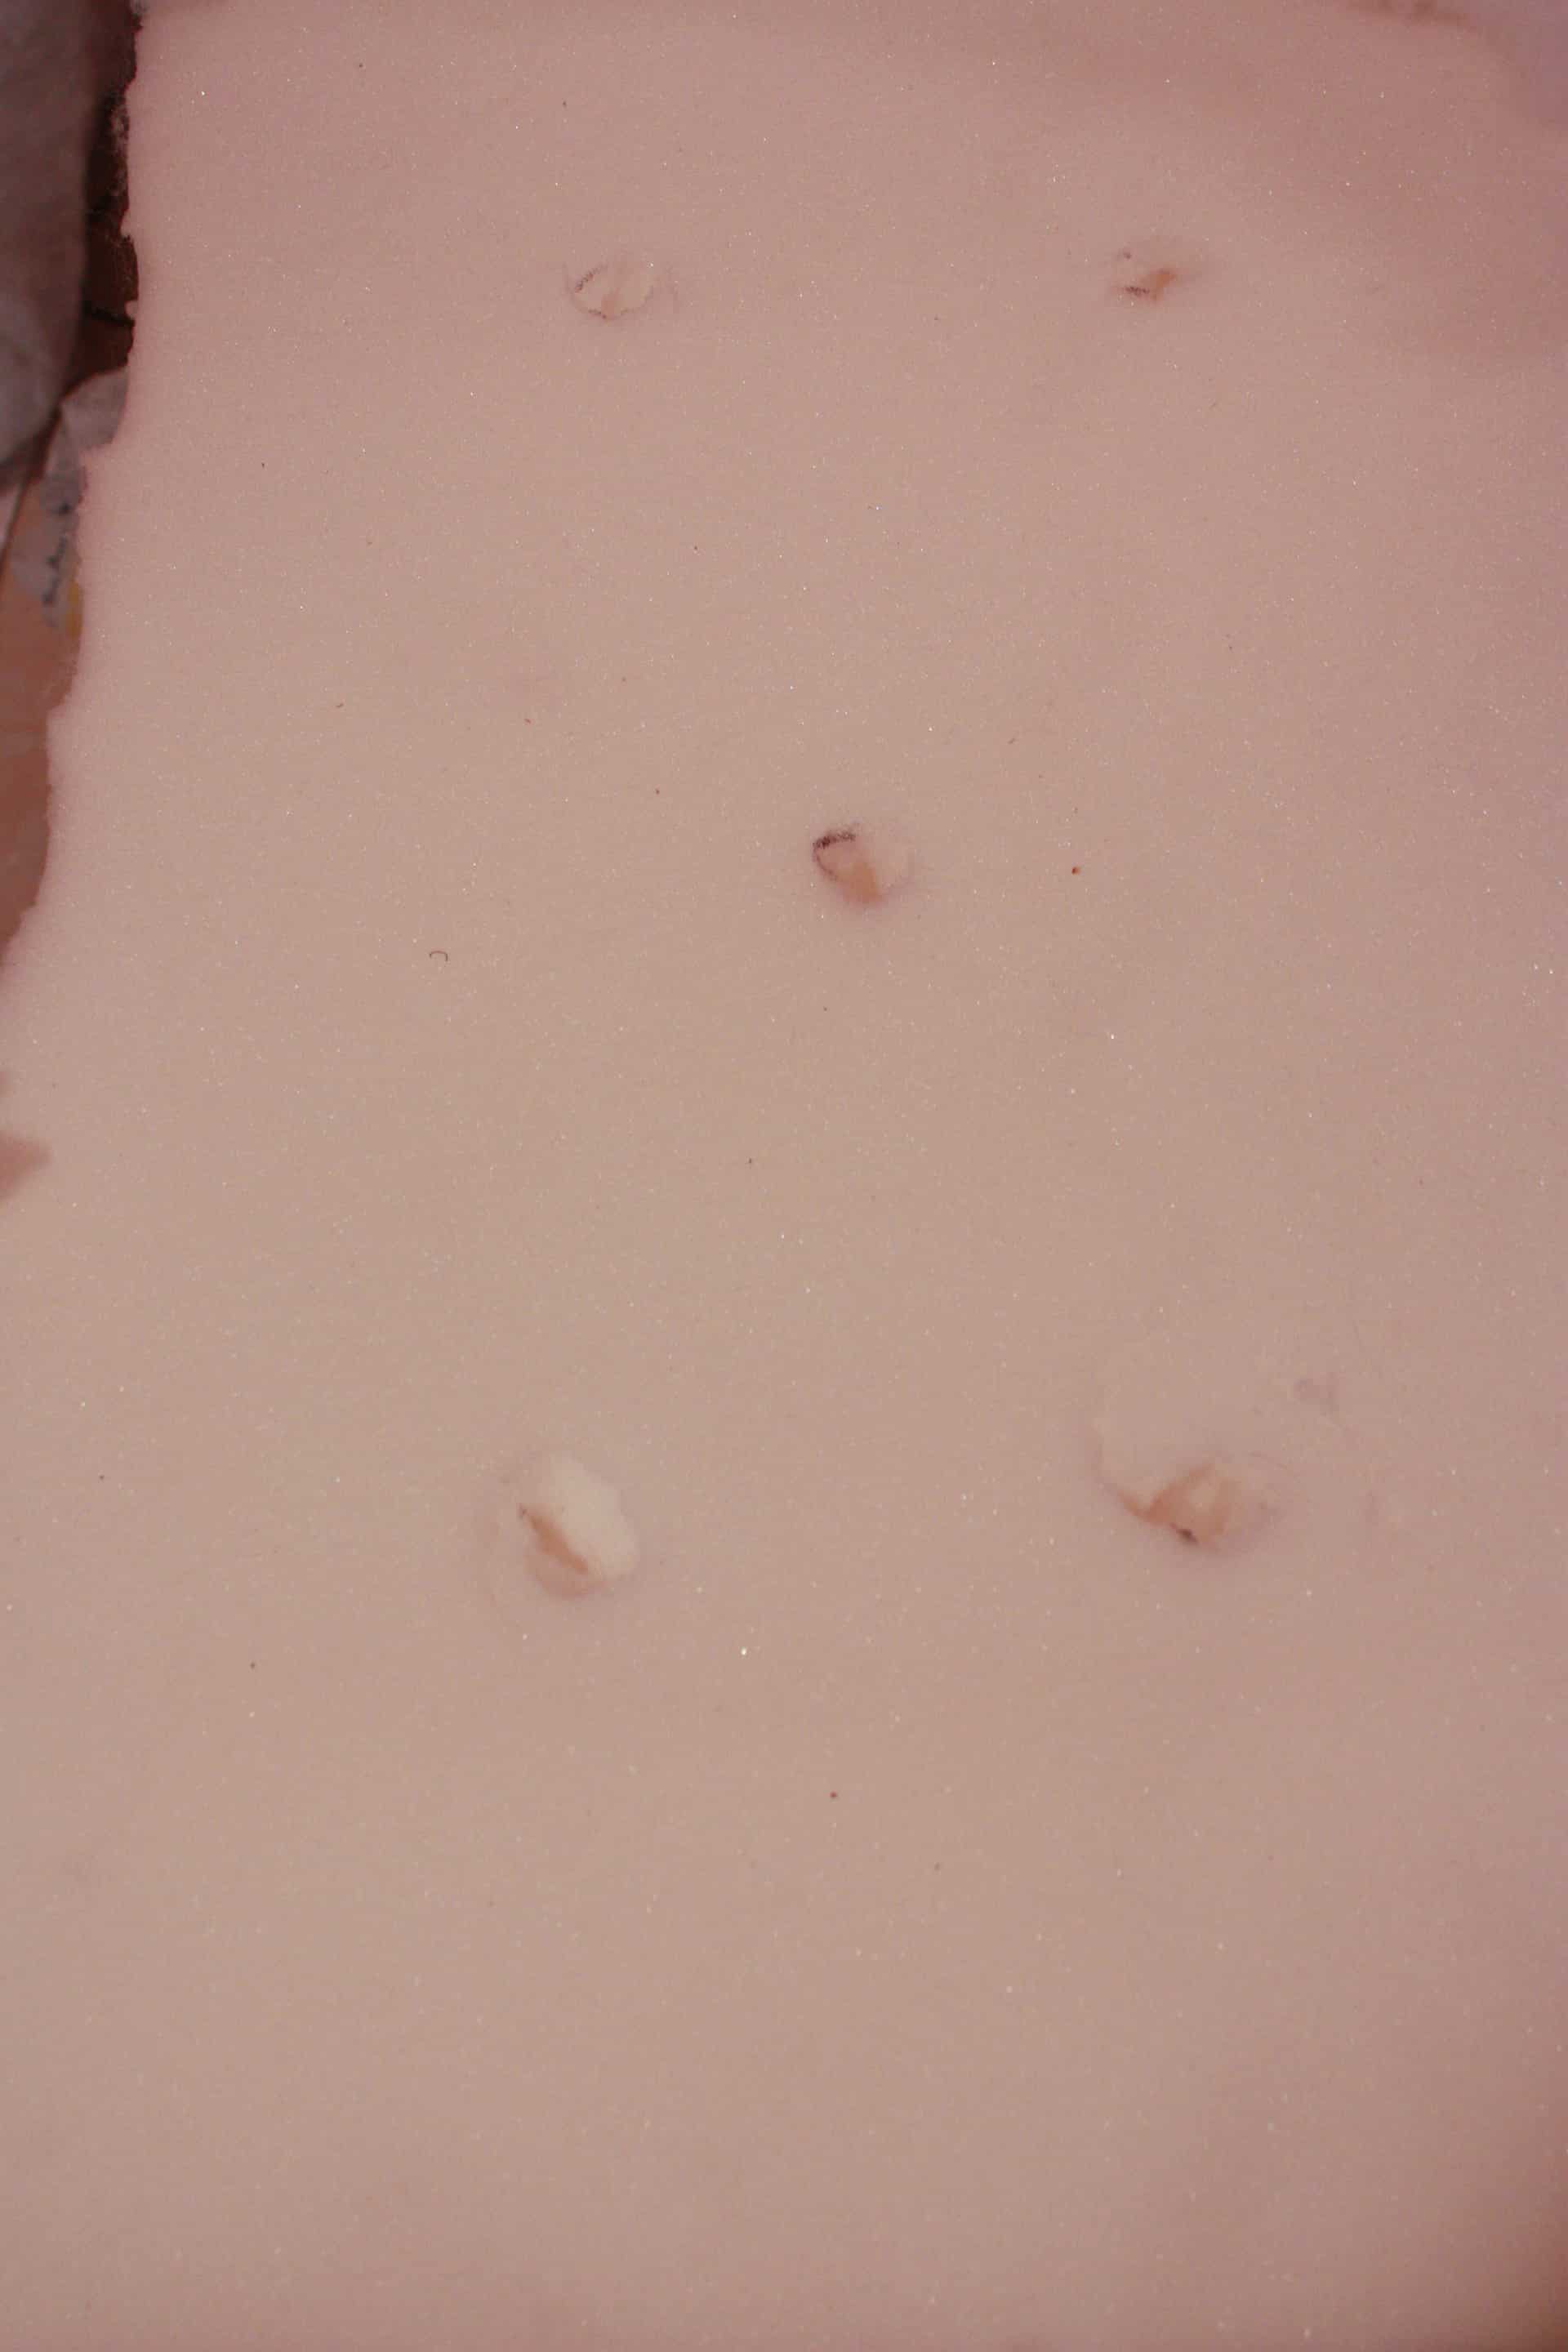
Moving right along…gaining some confidence but still daunting! LOL! Now we just have to DRILL ‘dem holes! I used a 7/8″ drill bit to make my holes. They were not even close to pretty holes!
Once the holes were drilled, I cut a piece of batting that would fit around all the foam and stapled this all the way around the board on the “back” of it!
The corners are always a bit tricky! I just pulled it tight inward and put a staple then pulled the other side flush…hope that kind of helps!
Then I had to once again mark on my batting where my button holes were going to be, so I did the same thing, drove an upholstery needle up from the underside and drew a circle around it with a sharpie!

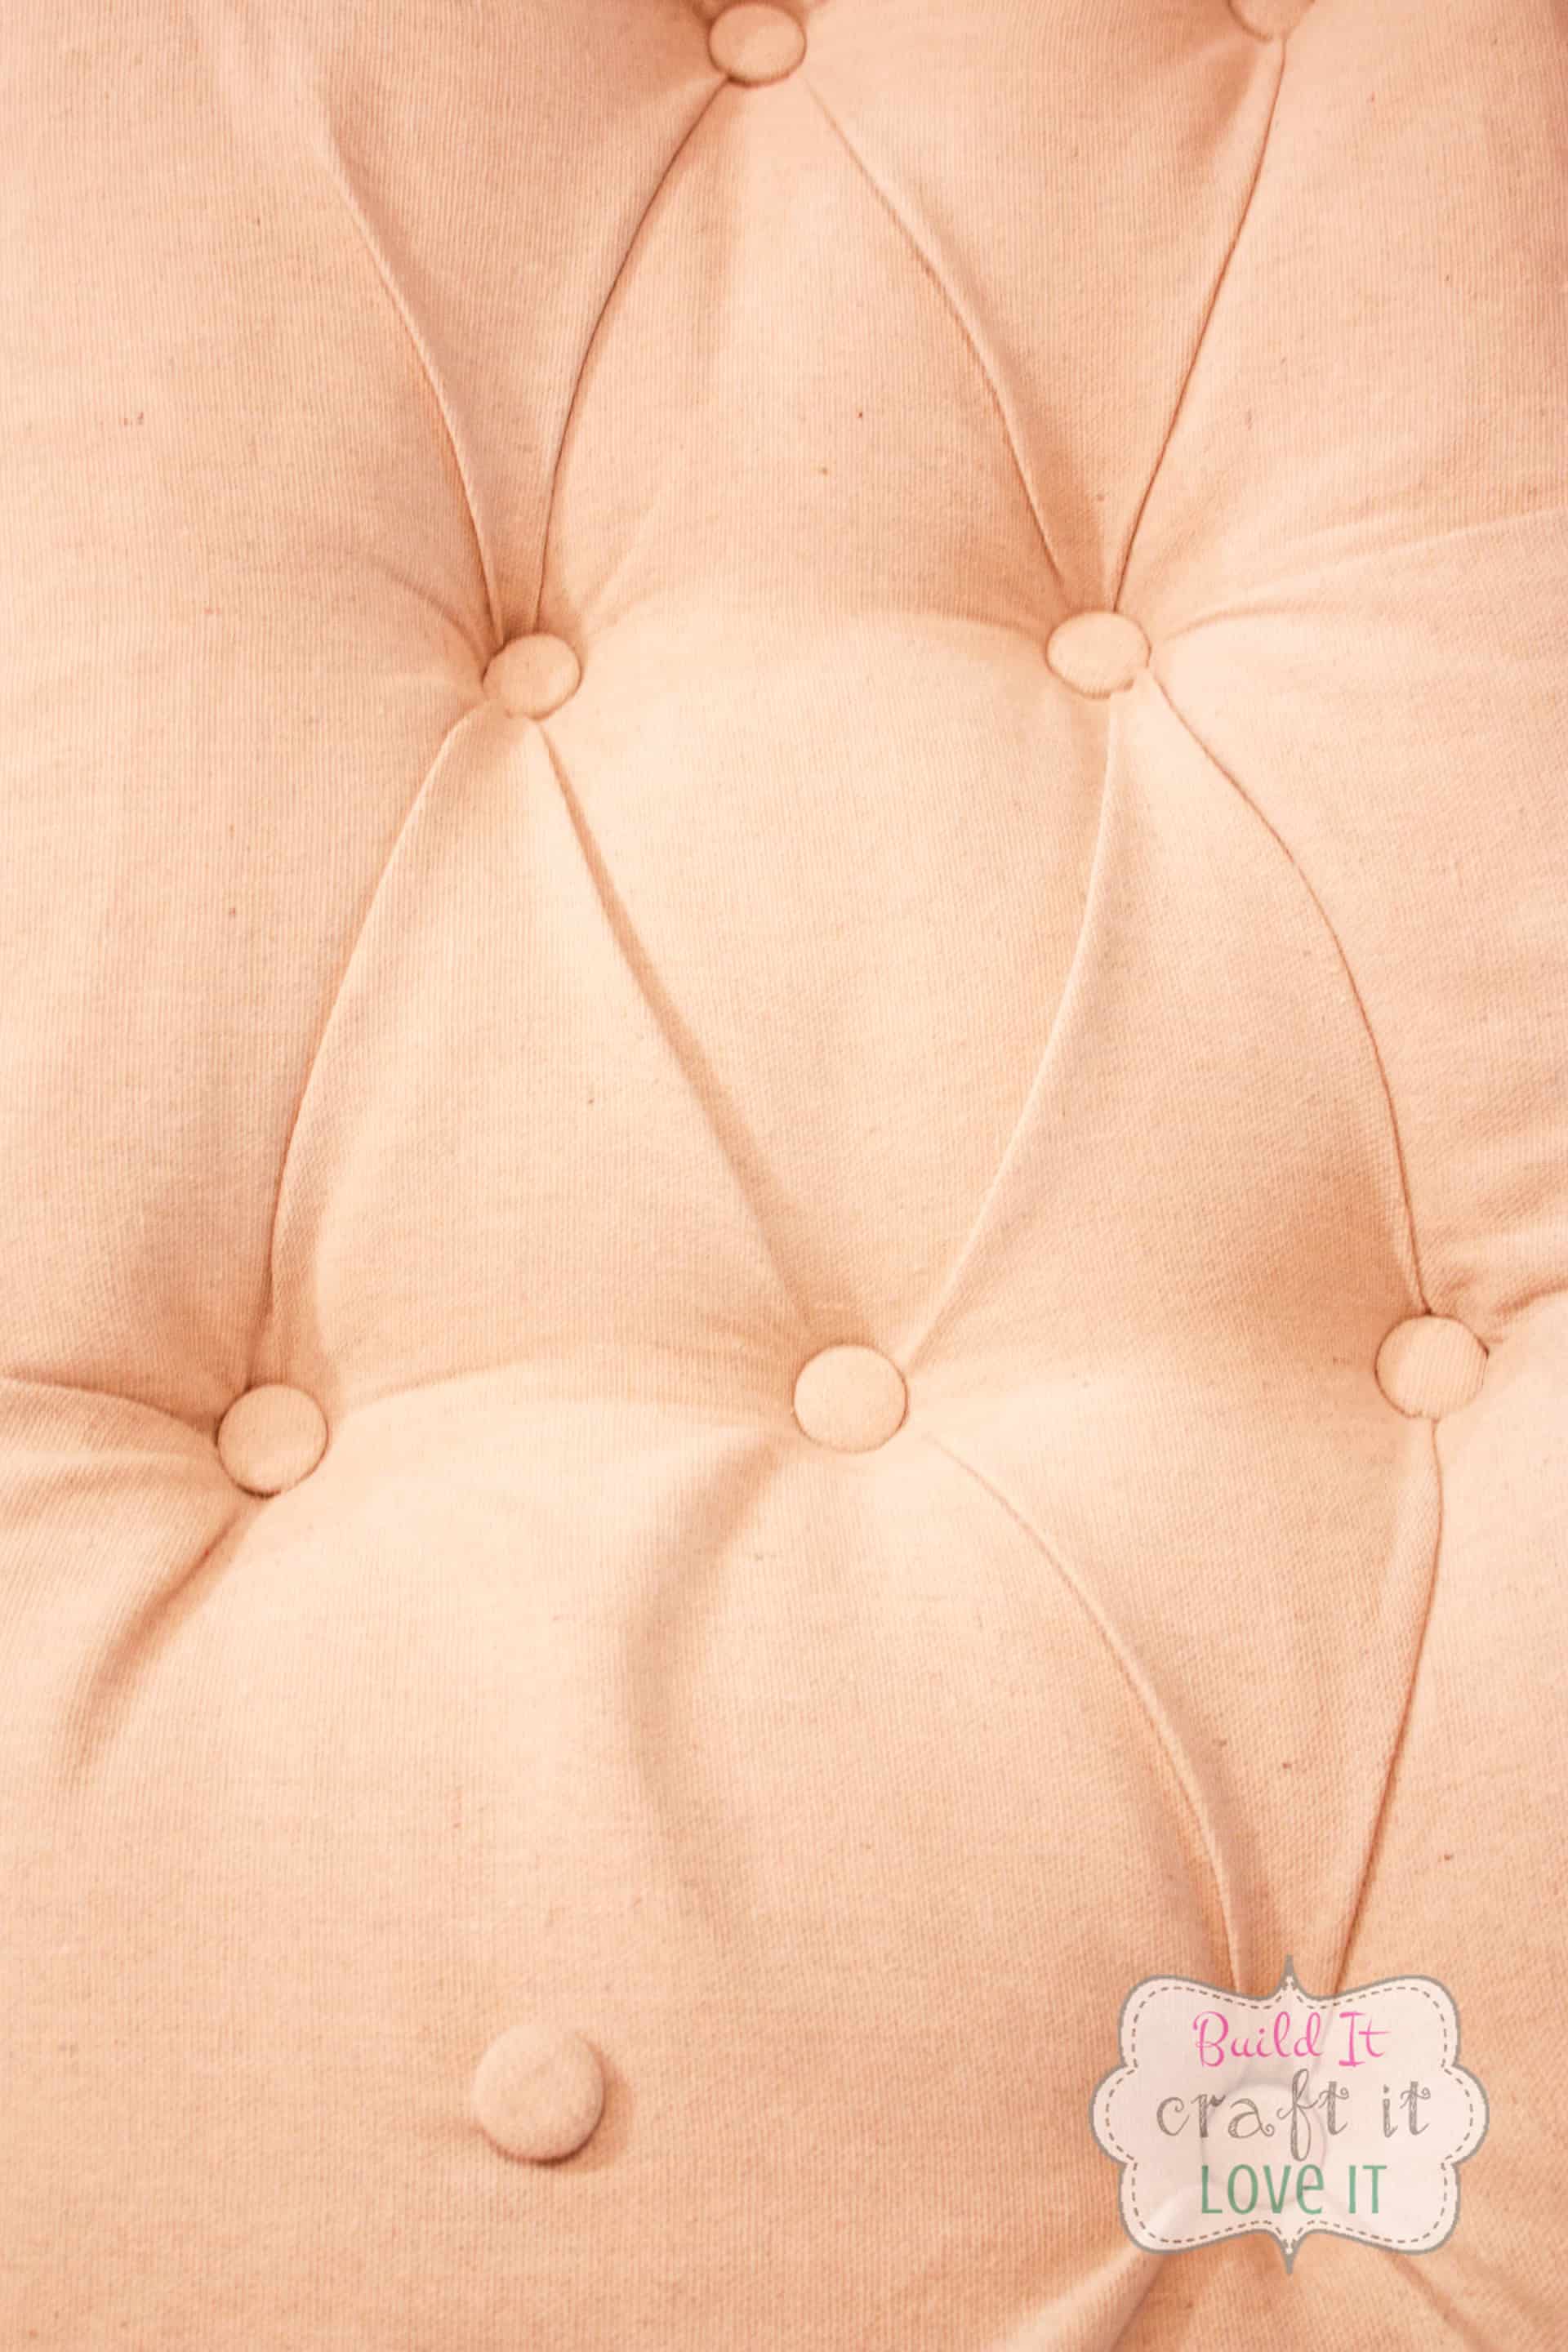
After getting this done, I cut X’s in the fabric, a hair smaller than 1 in. by 1 in. so that our buttons will be able to sink into the cushion and have a deep tuft! Just how I like it!
Now, the time has arrived for the final fabric…DUNDUNDUN! 😬
So after ironing your fabric, four times, if you are like me and thought you were going to get it done, ironed it and then had to do something else, the kids drove trucks on it, and then you iron it again thinking you were surely getting it done and off the living room floor… and then AGAIN it didn’t happen… and AGAIN you iron it and your boys built a fort out of it! HAHAHA!
Does that only happen to me? I’m starting to feel like maybe I’m not normal! LMBO!!
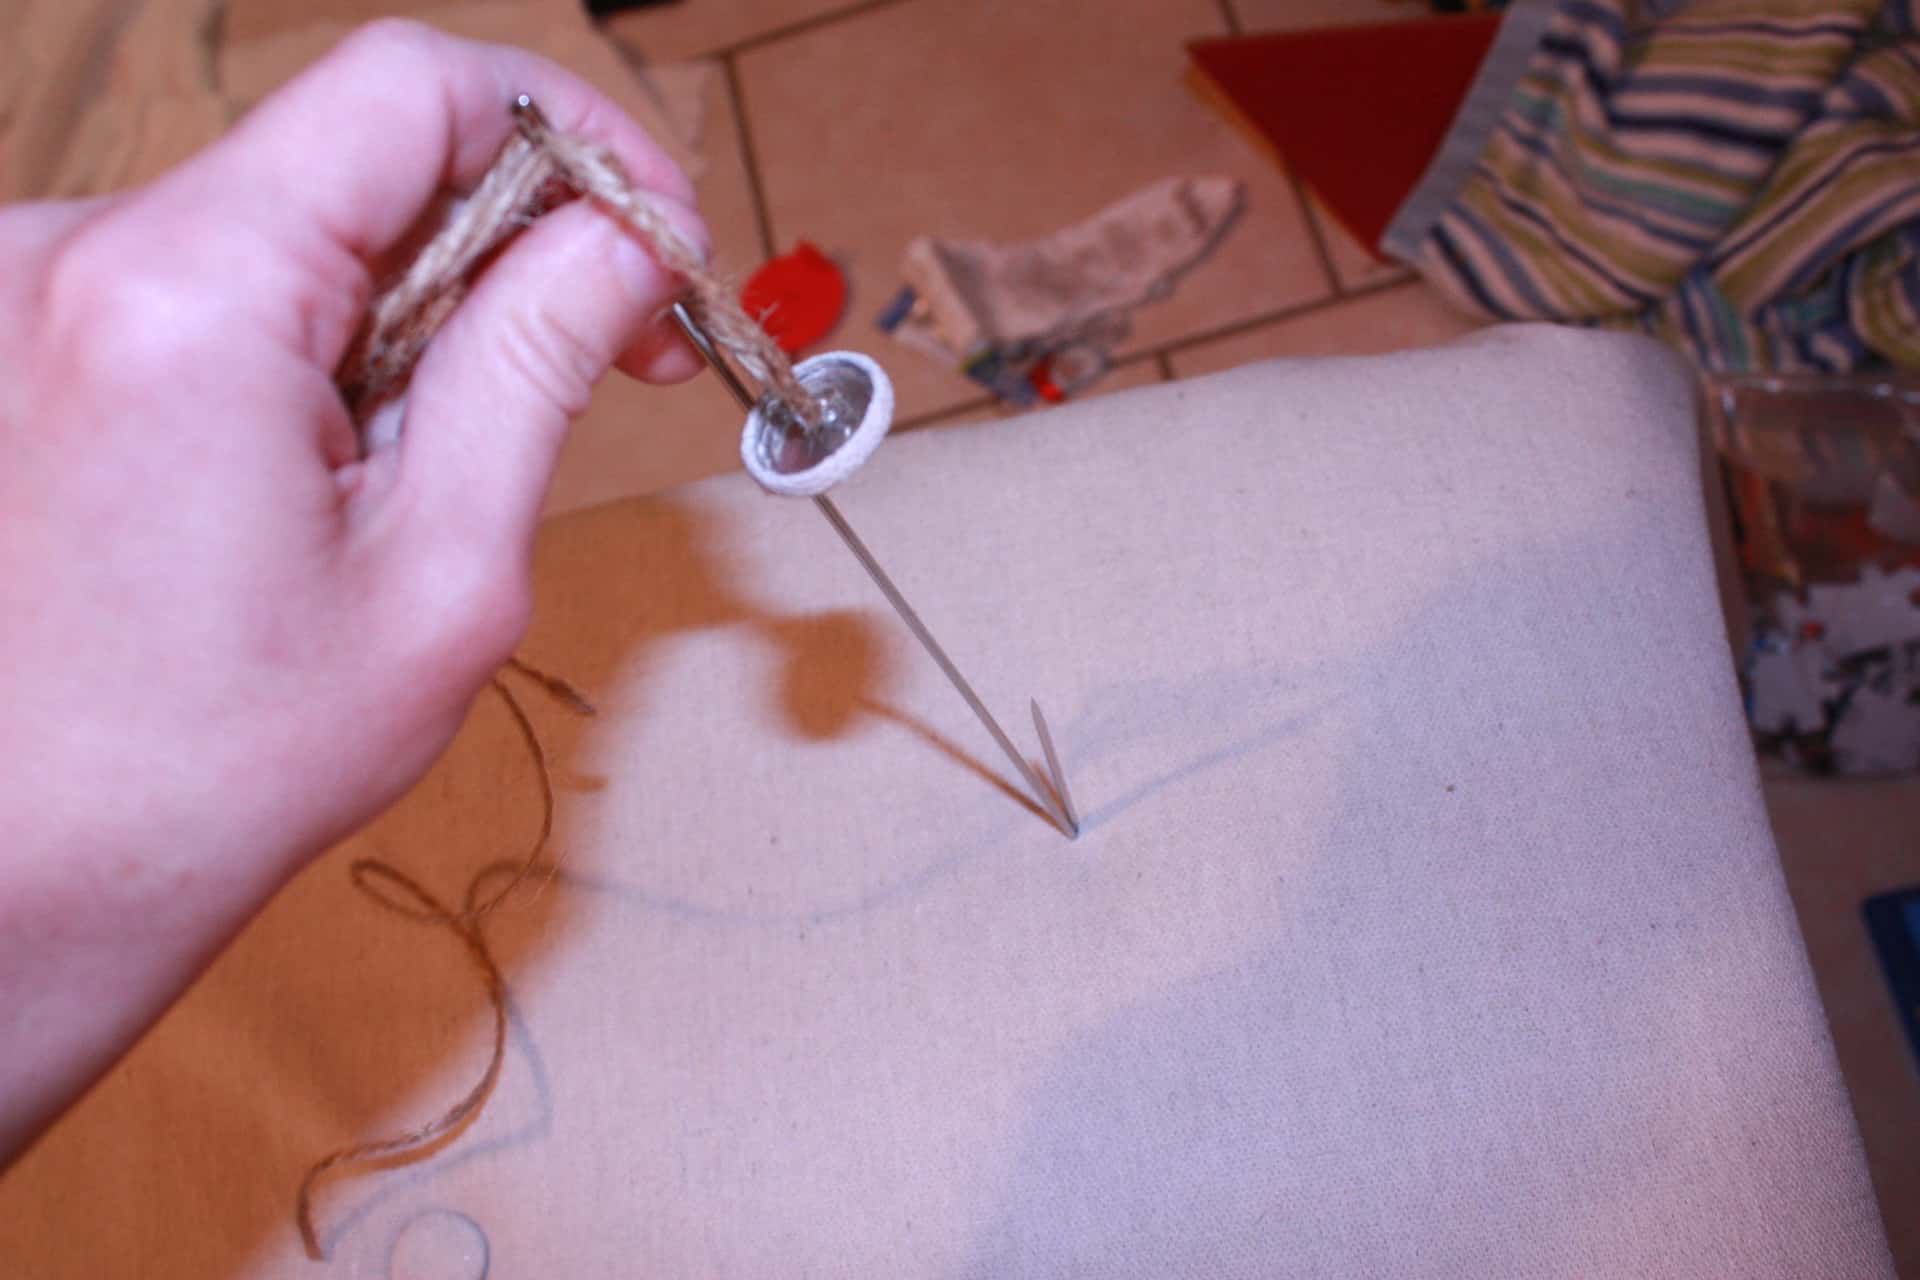
So you don’t need the fabric stapled yet because you have to tuft first, just pick a button and get started! I used twine to secure my buttons, I purchased upholstery thread…but I wasn’t sure the staples would hold it!
Just thread your needle with a button. I then used one needle to come up through my fabric to show me where the hole was.
Try not to get distracted by the mess around me in the photos! 😅 All those items were necessary in upholstering this bench…LOL! Okay, not really!
I just went from here and started pulling the buttons through but not stapling their thread until I got them all in.

That was my first two! Imagine I showed you this same photo with all the buttons in place!
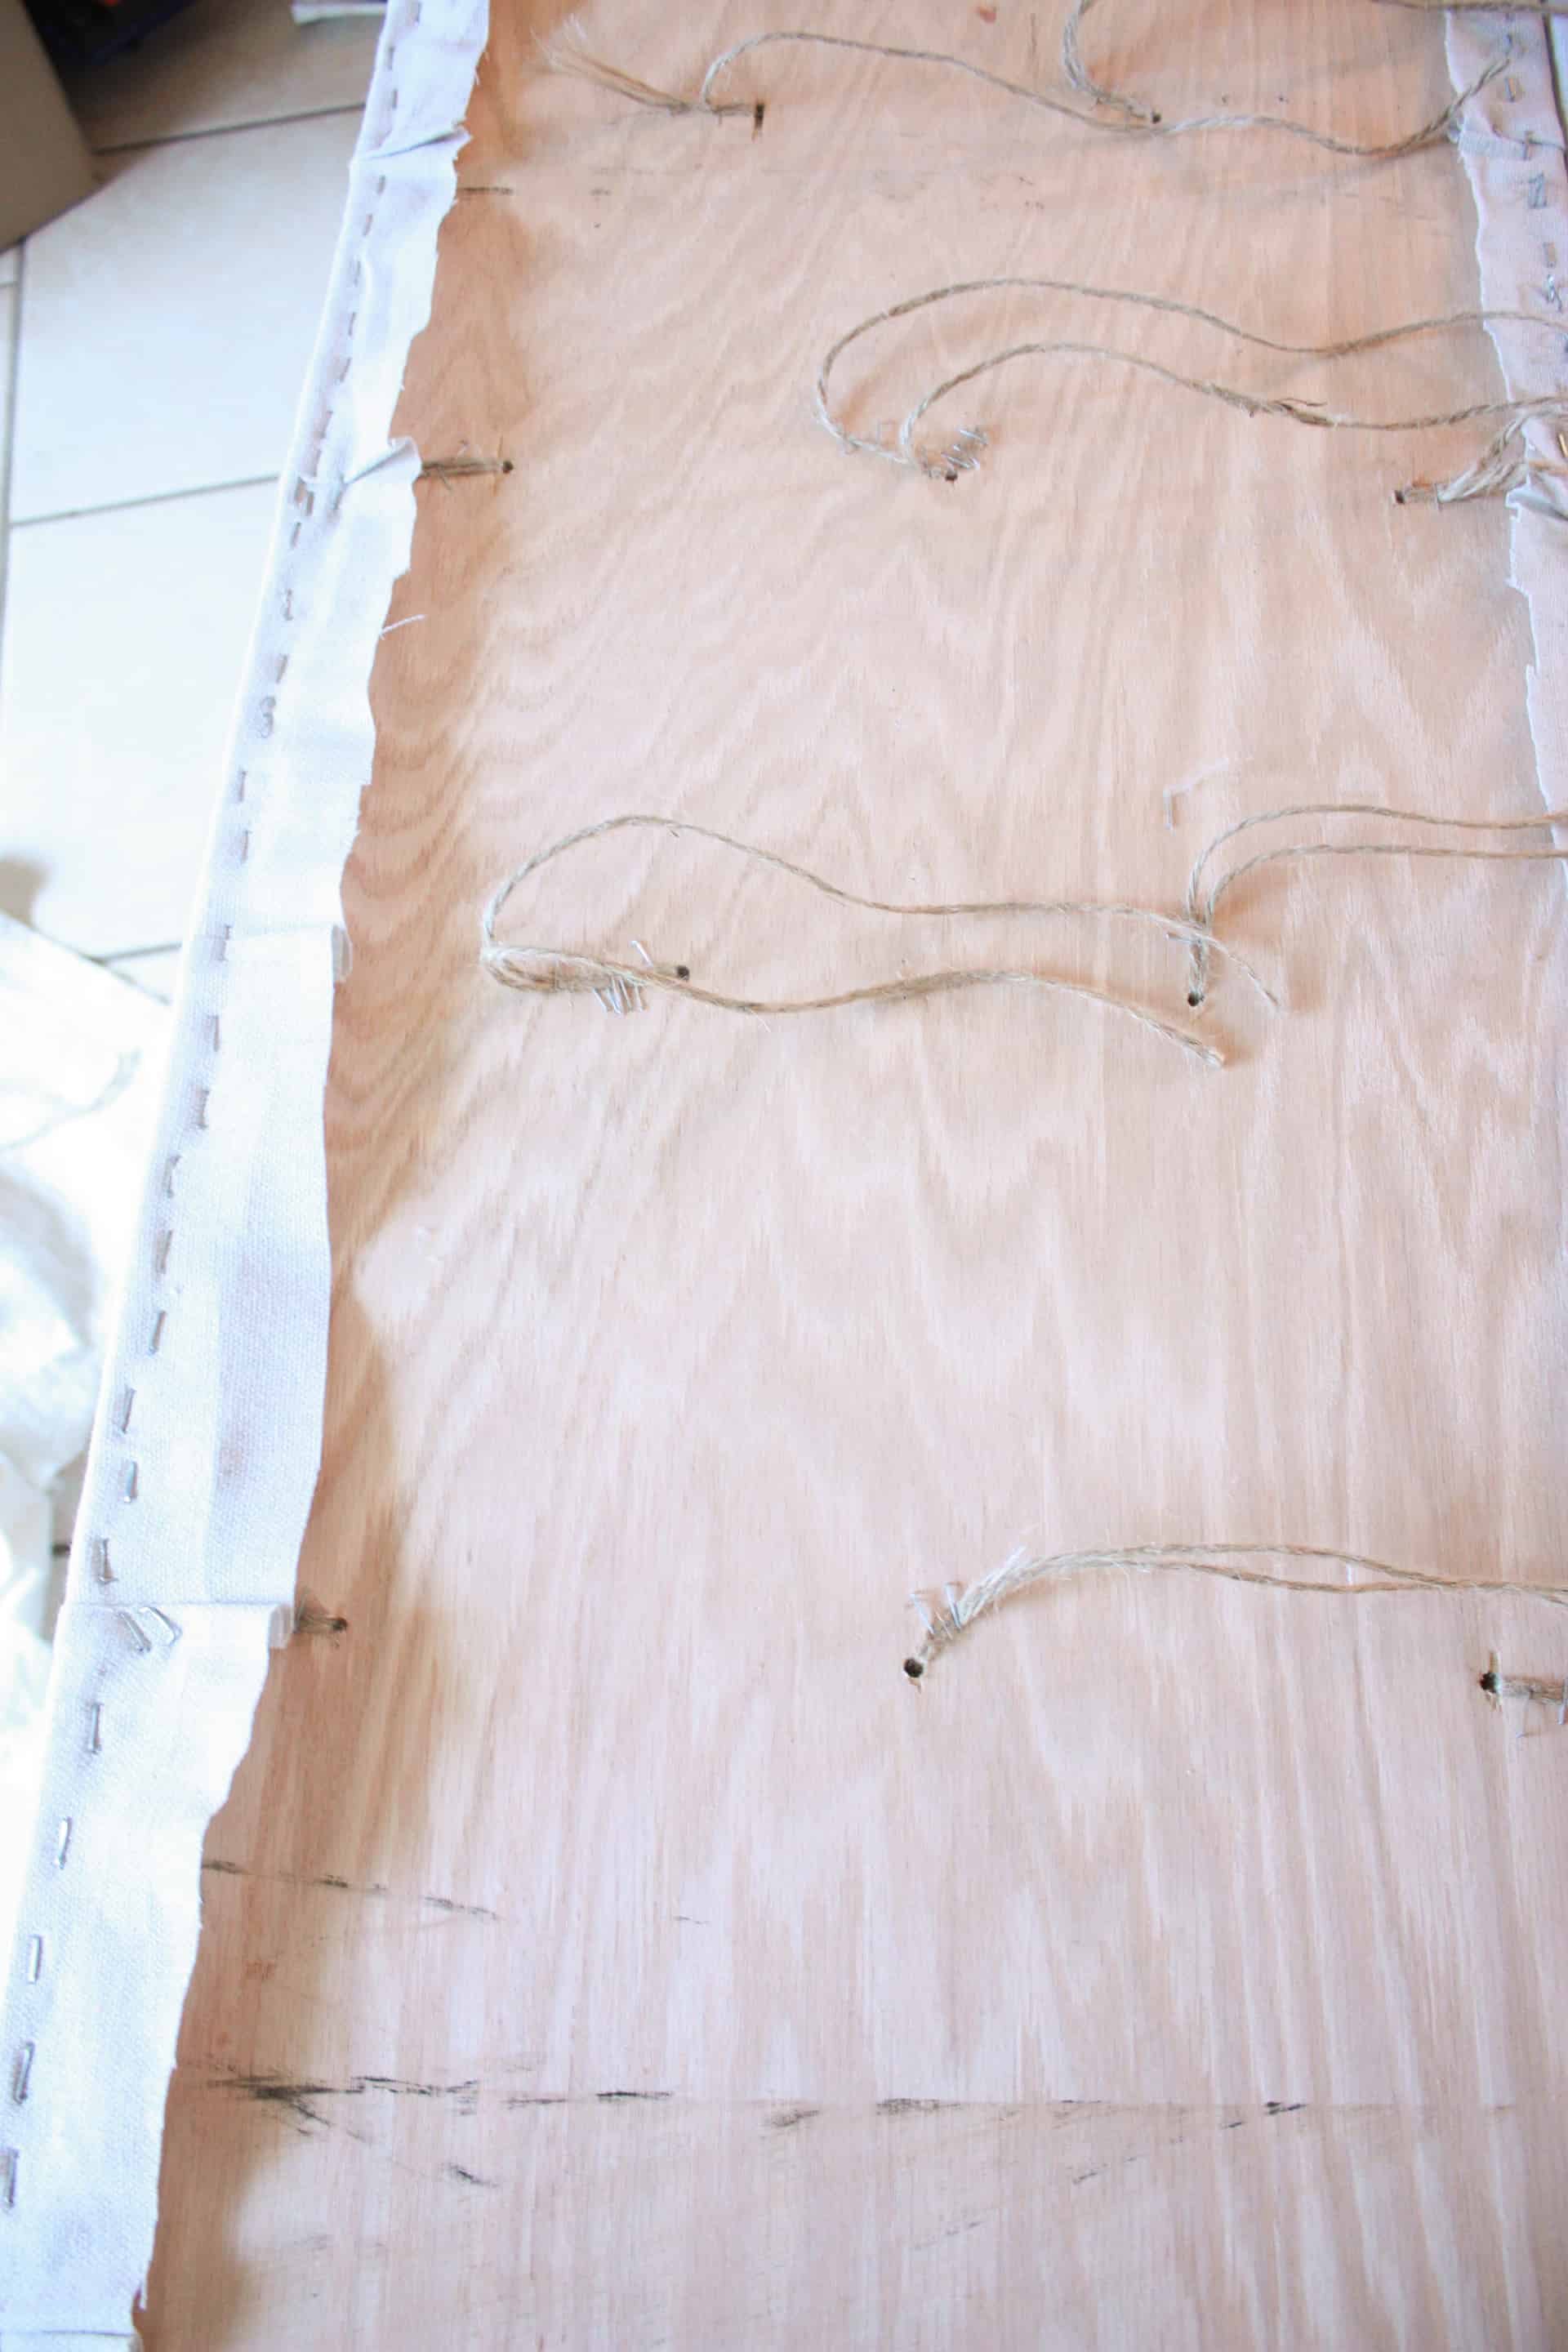
Once I had them all in I started the stapling process! This was harsh, my hands were on FIRE from pulling the twine so tight, and you will probably need a helper to push the button down from the top while you staple from the bottom!
I propped the whole top up, one end on my coffee table and one end on a box so that the area underneath was open. My son helped me to push on the button while I was underneath stapling! He actually did a pretty good job of judging how deep he needed to push…a couple of them are a little deeper than the others but he probably did better than I would have!!!
I started the stapling with the middle buttons first and worked my way out to the edges, making sure to pull the twine as tight as I could and putting 4 or 5 staples in each button’s twine and hammering them in to make sure it wouldn’t let go of my string!
I tried to make sure as I went to create folds where I wanted them…but the fabric seemed to have a mind of its own at times…so I was constantly going back and refolding! It was not the easiest thing in the world but looking back it doesn’t seem as hard as I thought it was while I was doing it! 🤪 At the time I was a potty mouth, in my mind for sure…since my son was helping me, I was trying to refrain from blurting them all out as I felt like doing! LOL!
It was so frustrating at times but it did come together and ended up looking better than I thought it was going to at the time I first started to staple the buttons! Just in case you feel like giving up at this point…I thought I would let you know that I did the same thing, but then I was really glad I went ahead and finished it!
I wish I could have taken more pictures at this point than I did but it was kind of hard to take pictures while doing it! Sorry for that! Here is a progress shot during the tufting…if you follow me on Instagram, you saw this picture a few days/week ago!
This was at the point that things were getting better but I had sore spots on my fingers still the next day from the twine!
After stapling all the buttons into place here is what the bottom looked like! Note: I went back and put extra staples on some of the twines after taking this picture!
Now came the scary part for me, the final stapling of the edges of the fabric…then the upholstery was done…which was really exciting but scary because whatever I did here was going to determine the whole look of the piece! No pressure! HA!
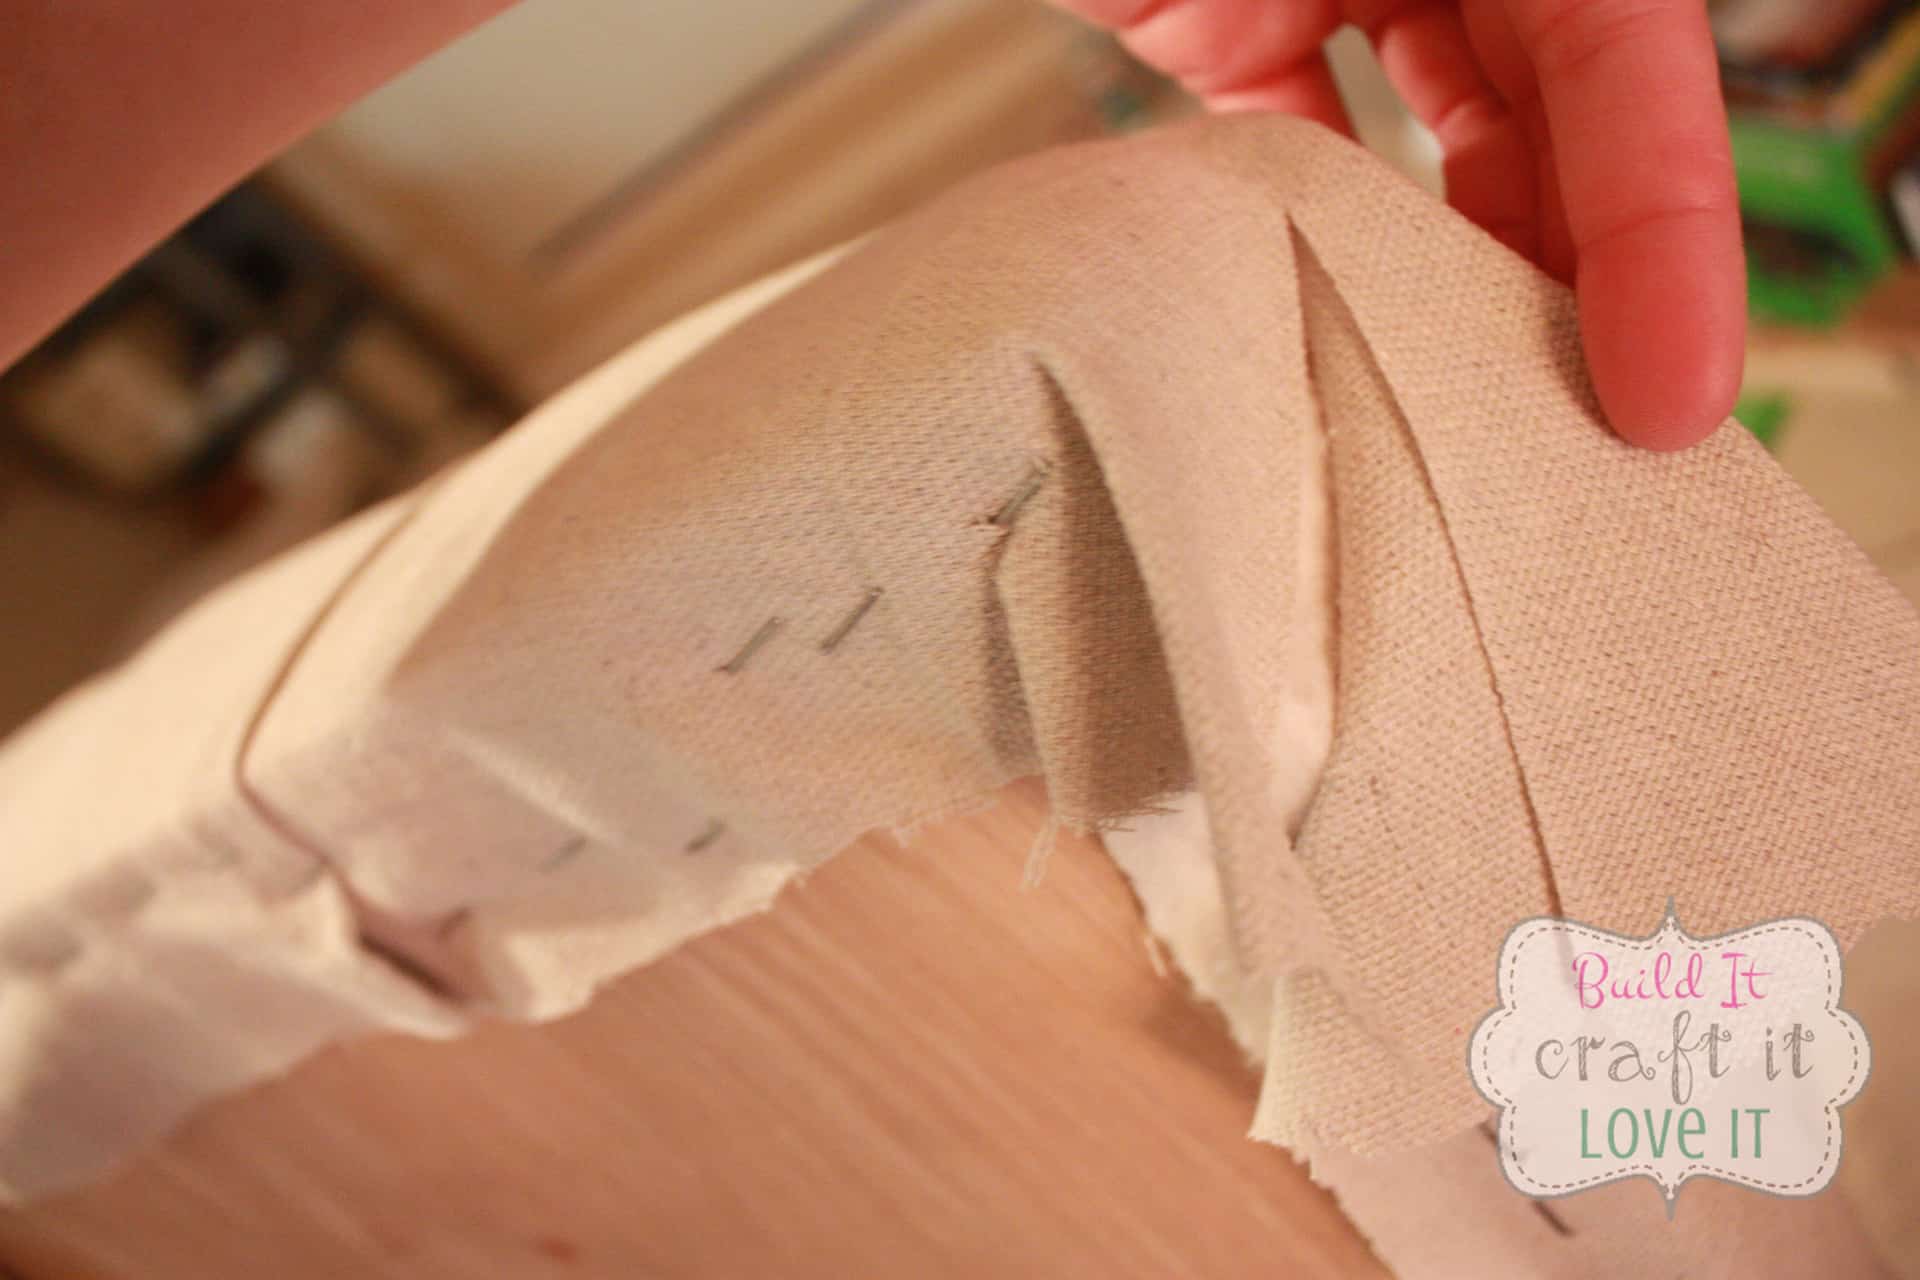
So I just started with my short ends…I am not sure why but it seemed right to me! Now at the last two buttons, the fabric ripples a lot and you have excess fabric since you tufted, you have to put creases in this fabric to make it lay flat, so I just worked the fabric until I got two nice creases coming off of the two end buttons, pulled the fabric down and started stapling the edge.
I then went over to the other side and did the exact same thing only this time I had to make sure that it was pulled really tight!

Now remember me telling you how I wasn’t worried about what it looked like on the inside…you see what I mean! LOL!
Then I started along the long sides, making sure you place folds everywhere there is a button.

Staple it down and start on the other side doing the same thing!
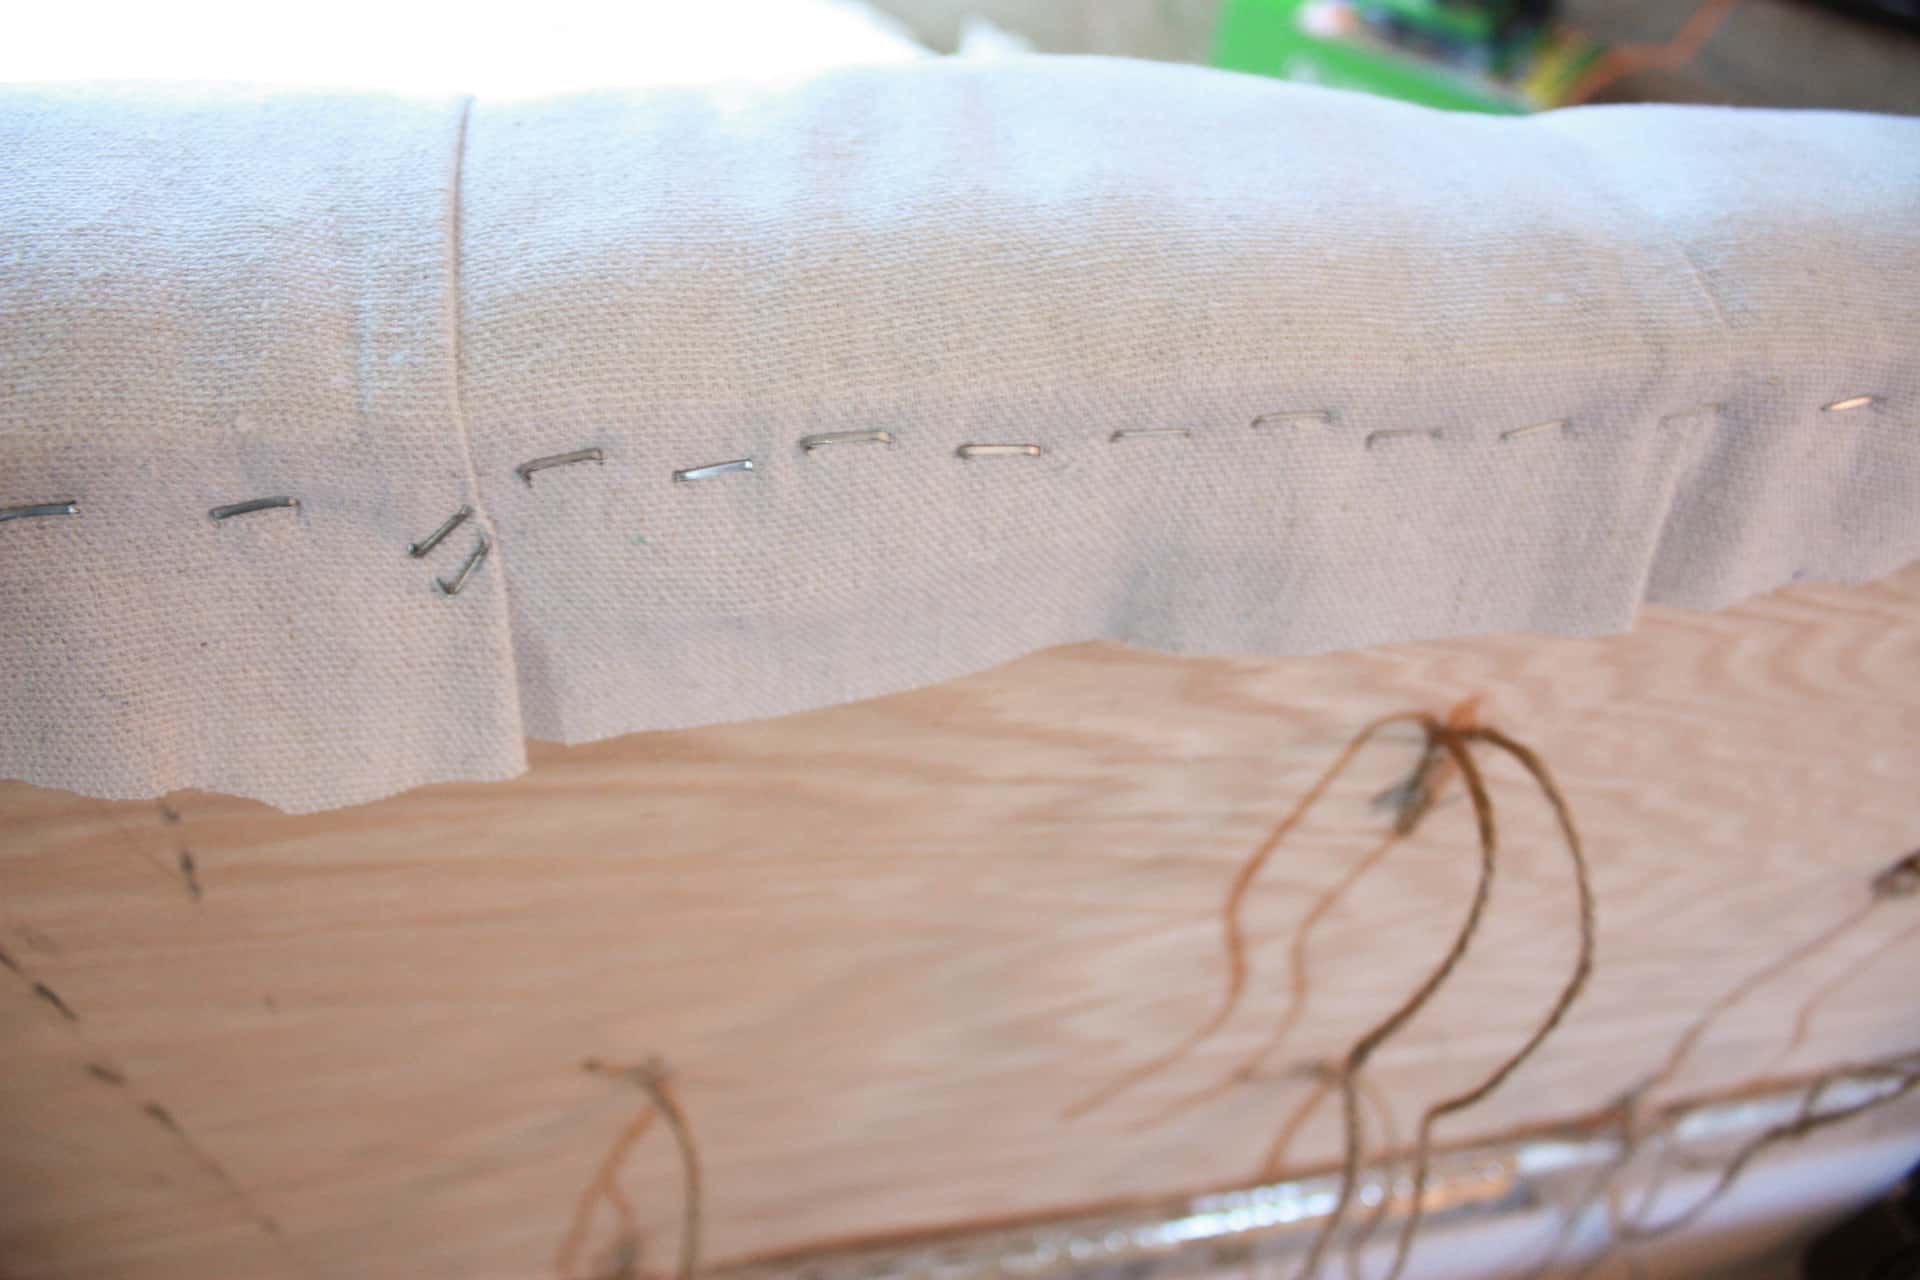
I had to run out and purchase more staples in the middle of stapling this side and let me tell you, apparently, lumberyard heavy-duty staples are much more “heavy-duty” than Hobby Lobby’s! They were tearing my staple gun up!! LOL!
My stapler would shoot apart after every few staples! I was determined at that point though to GET IT DONE, so I would just have to put it all back together every time and keep stapling! That helps to explain why they are really catawampus!
Corners were a bit tricky here because I didn’t want a huge bulge in the fabric…I just folded the corners in and rubbed real hard along the crease, opened it up, and cut along the fold…
Then I folded the top part over and stapled it! I went ahead and put some glue along this fold too!
OMG! You are F.I.N.A.L.L.Y. DONE with the upholstery!!! PARTY TIME!! EXCELLENT!! Name that movie?!
The last thing before this beauty is all the way done…hinges! I originally put the two butt hinges into place, along with the two stay hinges, but for some reason, it wouldn’t close all the way, I removed one of the stay hinges and it worked great! 🤷♀️ Unfortunately I have to look at the screw holes of the second hinge though!
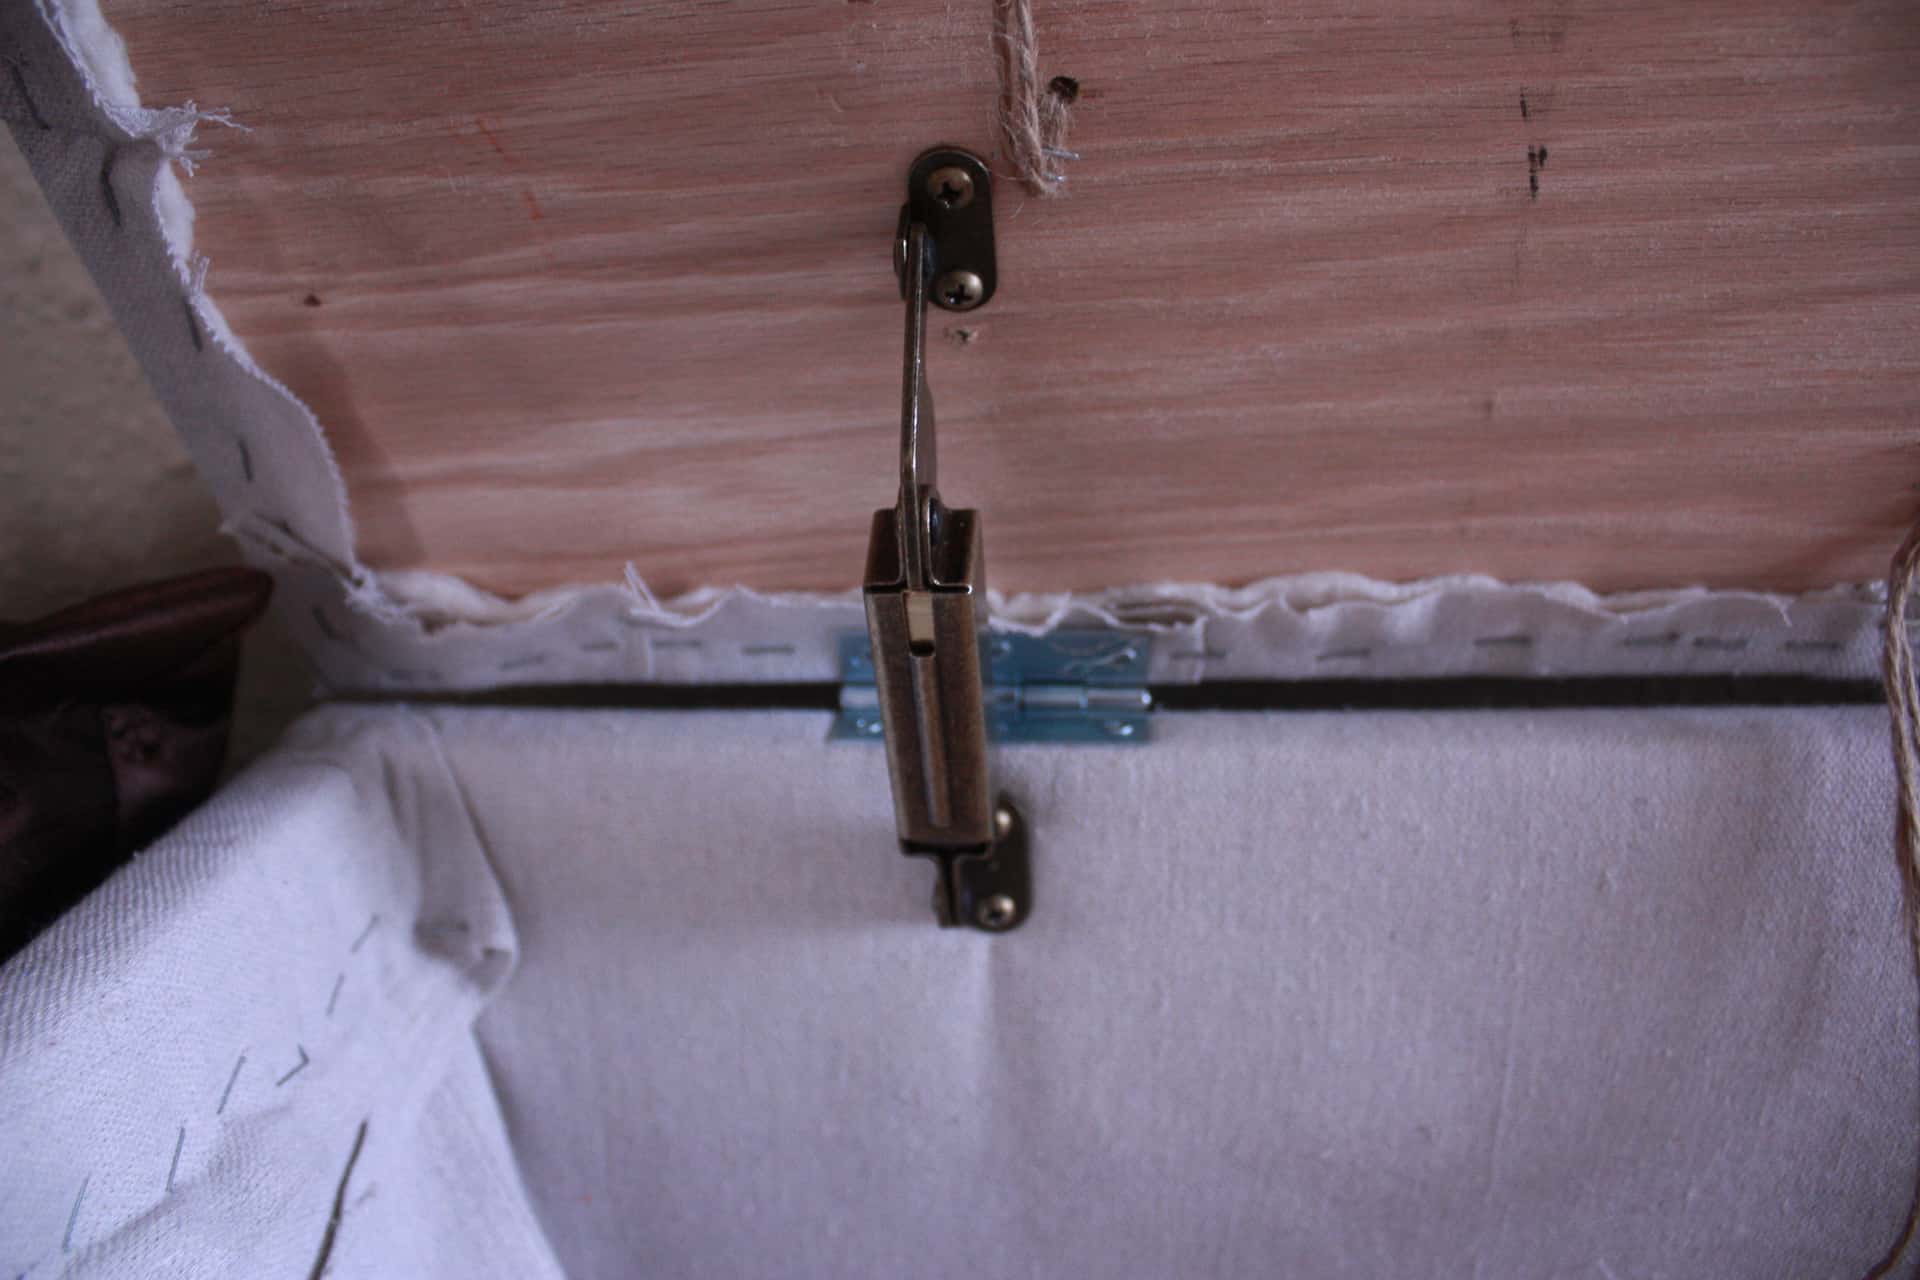
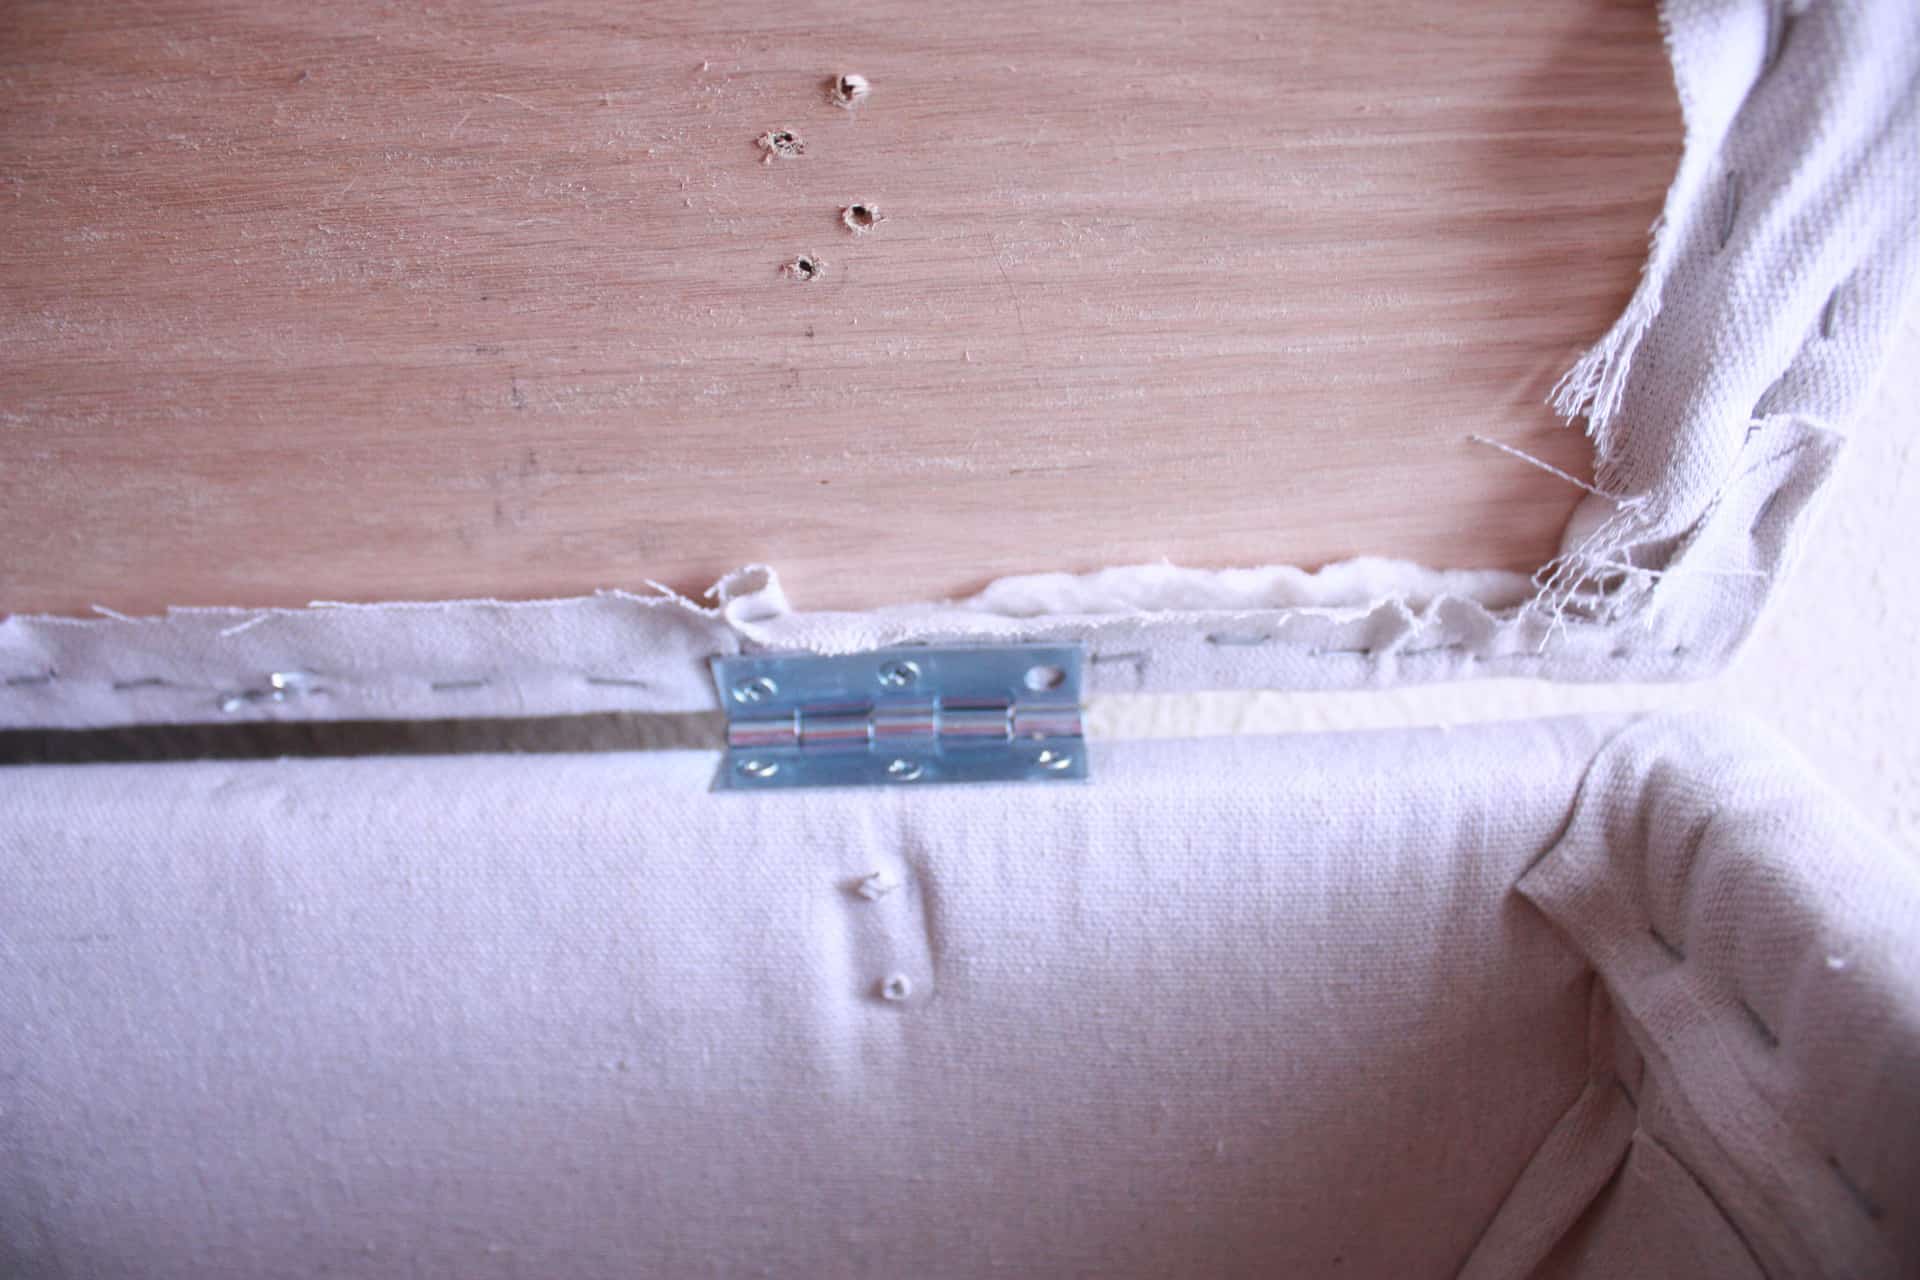
You can see where we had to remove the other lid support stay hinge! It just made the inside look so much worse…LOL! And here I thought nothing could make it look any worse than my upholstery job did!! 😂
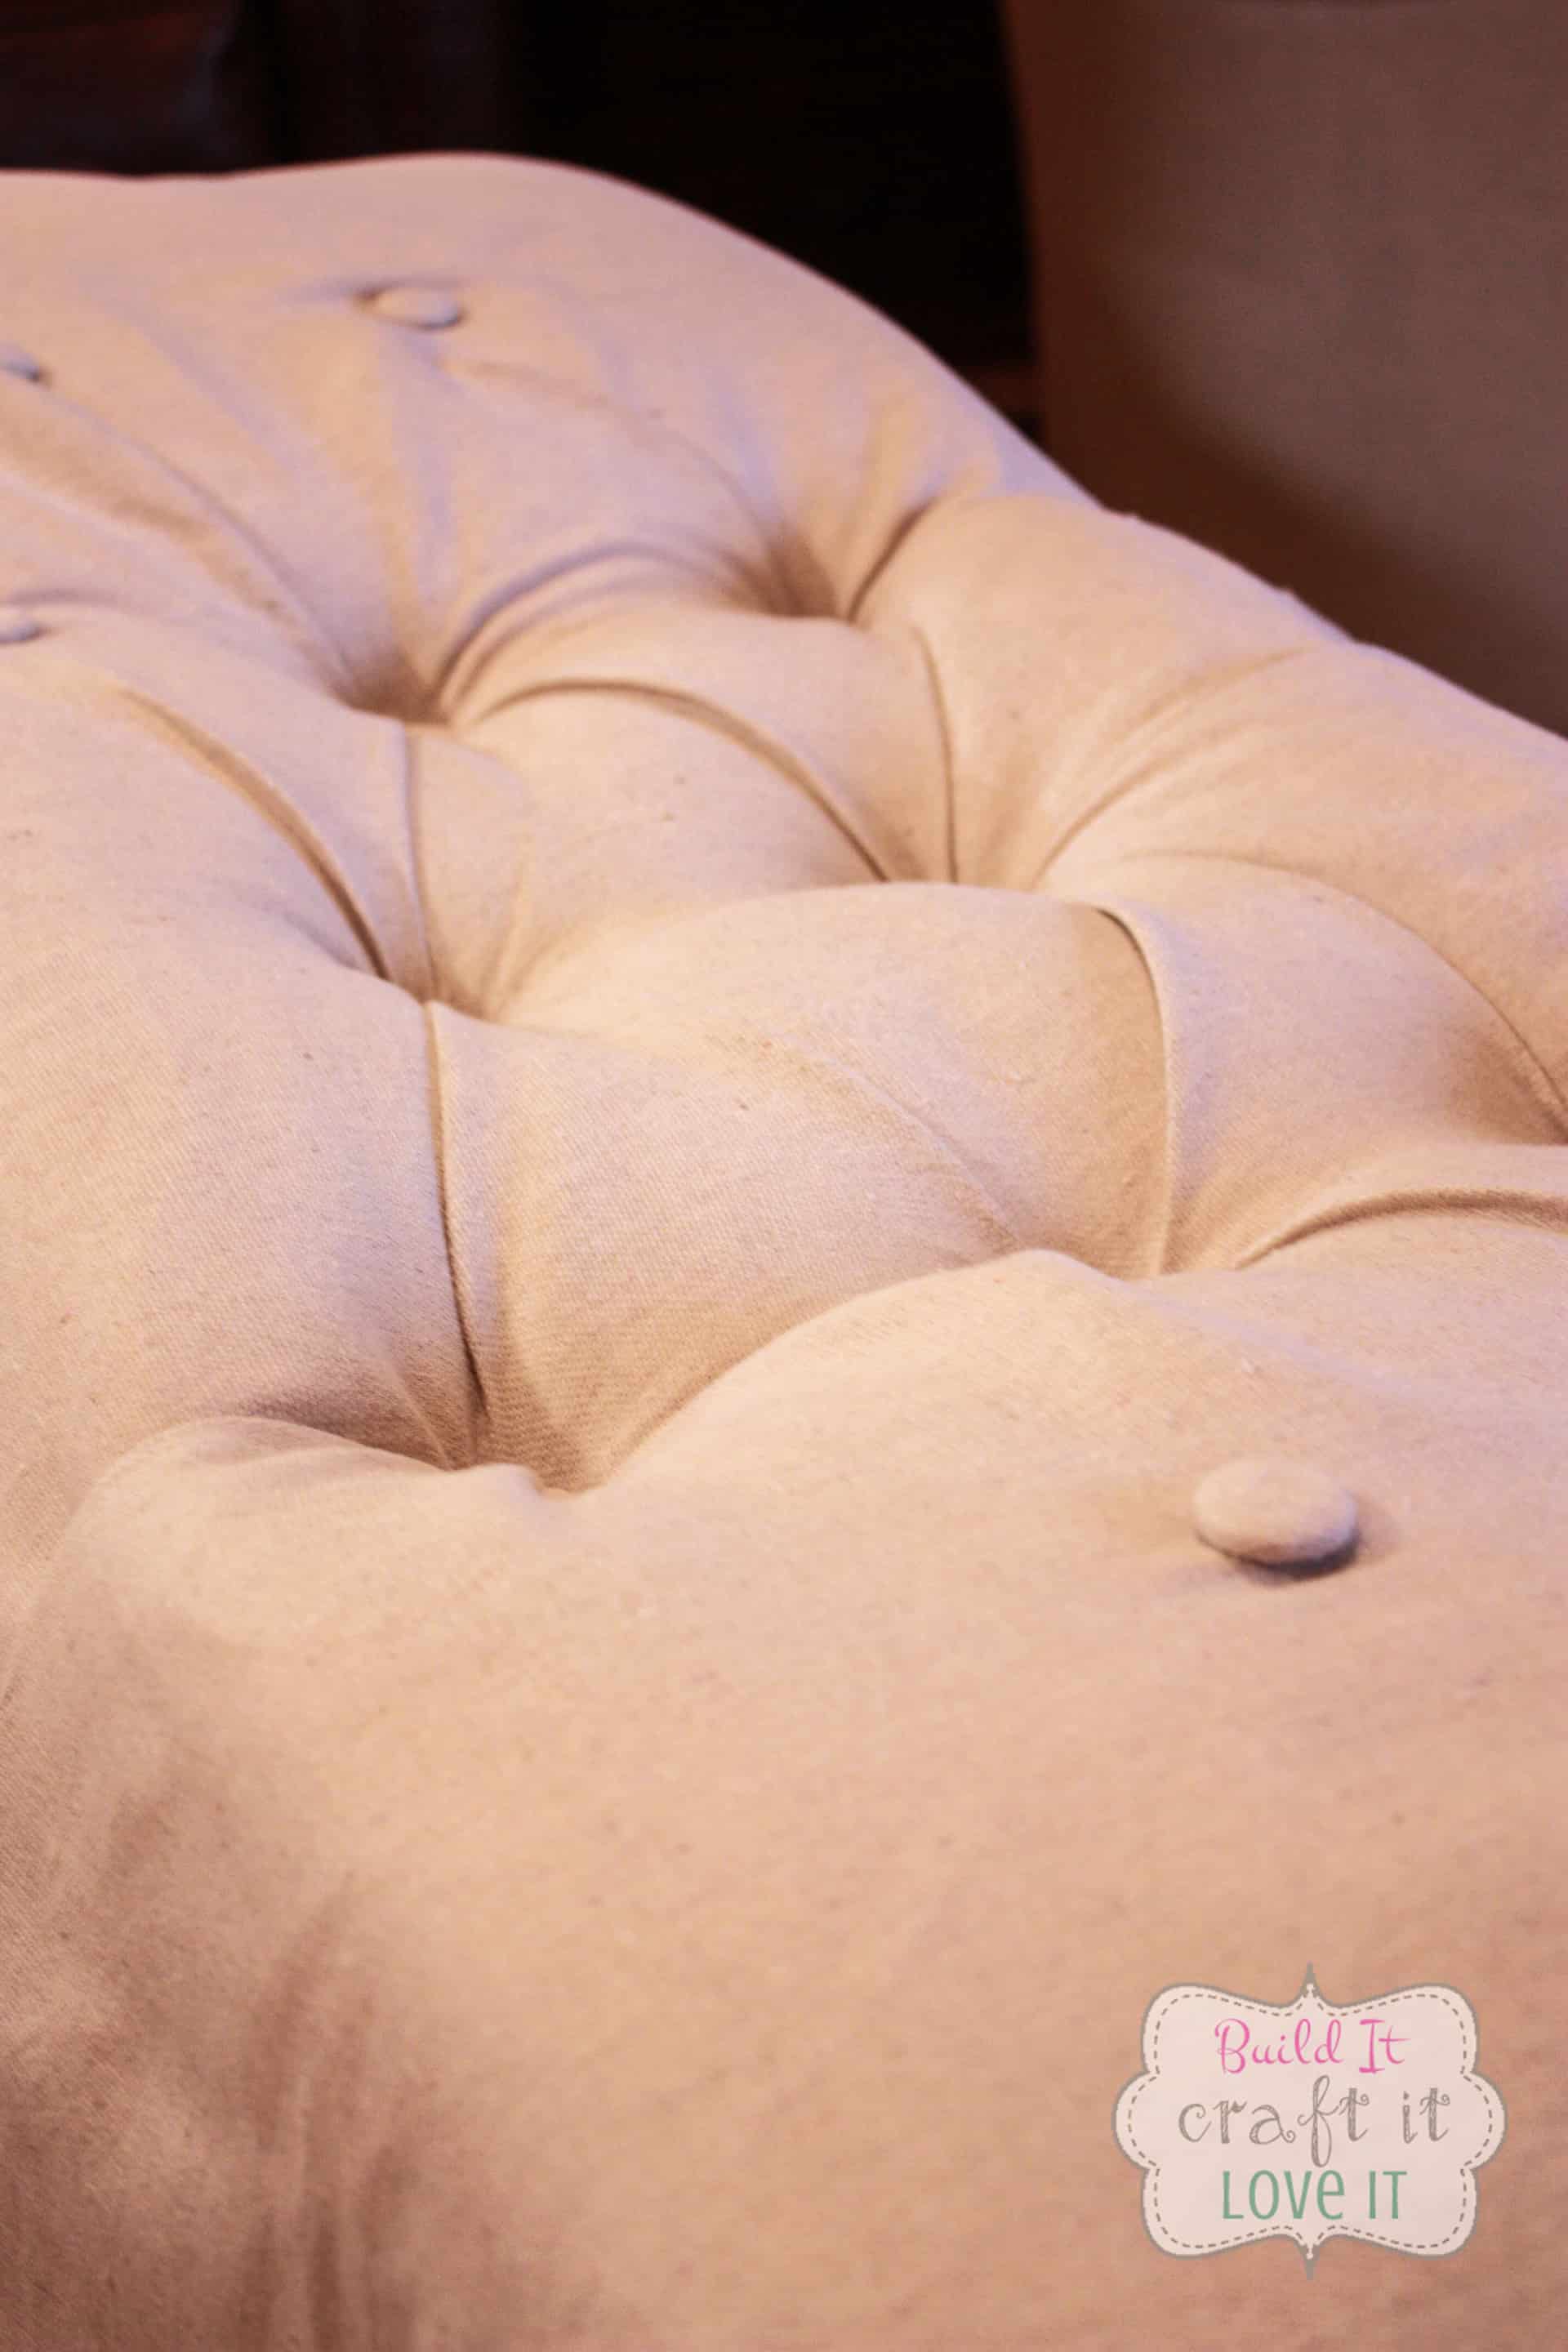
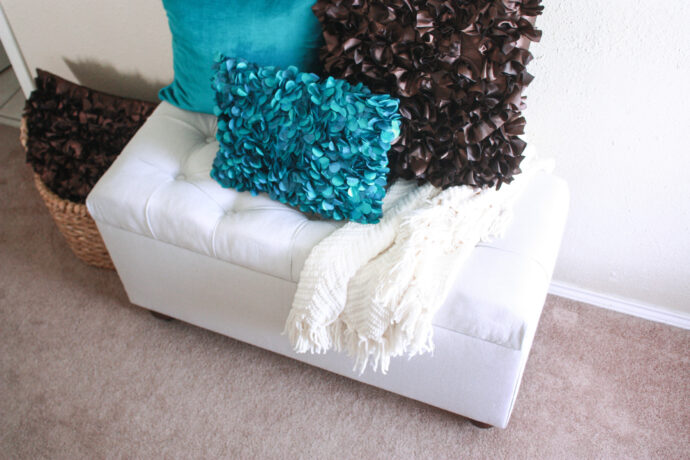
Well, she’s done, and a beauty if I do say so myself! Here are a few more pics of this beauty that I am kinda…totally…LOVIN’ now!!


Have a great week and you tackle some things on your to-do list…maybe complete something that you have been putting off for a while! Lol! That’s where I am headed, to complete an essential oil storage cabinet that has been sitting unfinished forever! 🤭
Lots of Love,

2 Comments