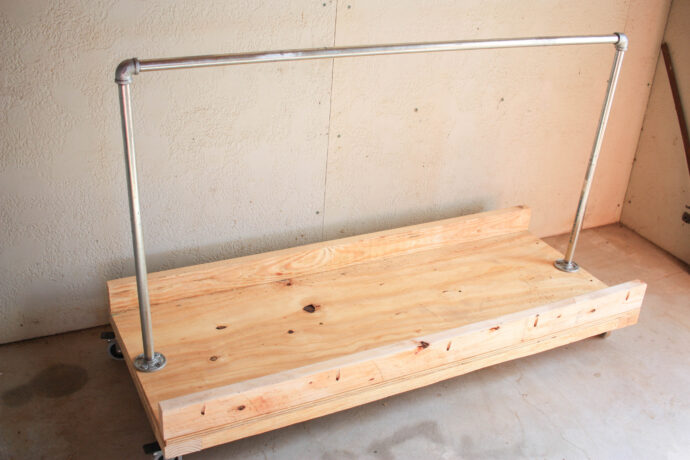
DIY Lumber Cart
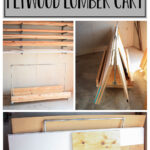
This lumber cart is the perfect way to organize and move large pieces of plywood in your garage or shop without causing them to warp! So easy to build, and only takes an hour or so to throw together! Get your workshop organized this year, and keep it that way when you have this simple DIY lumber cart to help manage and store large plywood pieces!
I am trying REALLY hard this year to get my shop organized and clean in a way that it will actually stay clean and organized! Lol! I am making sure that everything in the shop has a place to be stored in a way that works even if I have to store it long-term! I buy plywood a lot, and I usually get it ripped down in the store so I can easily carry it in my car, then I may only need half of it for a project which leaves another half to be stored!
I would lean them up against the wall like I’ve seen a lot of plywood carts or scrap wood carts people have built, but they always bow really badly in the middle, and then I end up using them for junk projects but not furniture! It becomes a waste and with plywood as expensive as it is, there is no way I am wasting half of a sheet of plywood if I can help it! Lol!
I realized when I would slide the plywood in and rest it longwise against something, it wouldn’t bow, so I thought you know if I could buy a lumber cart from Home Depot that would really solve my problem and I could just store my lumber on it! Well, that was a no-go at Home Depot, LOL, so I thought I could build something somewhat like it on a smaller scale and this is what came of it!
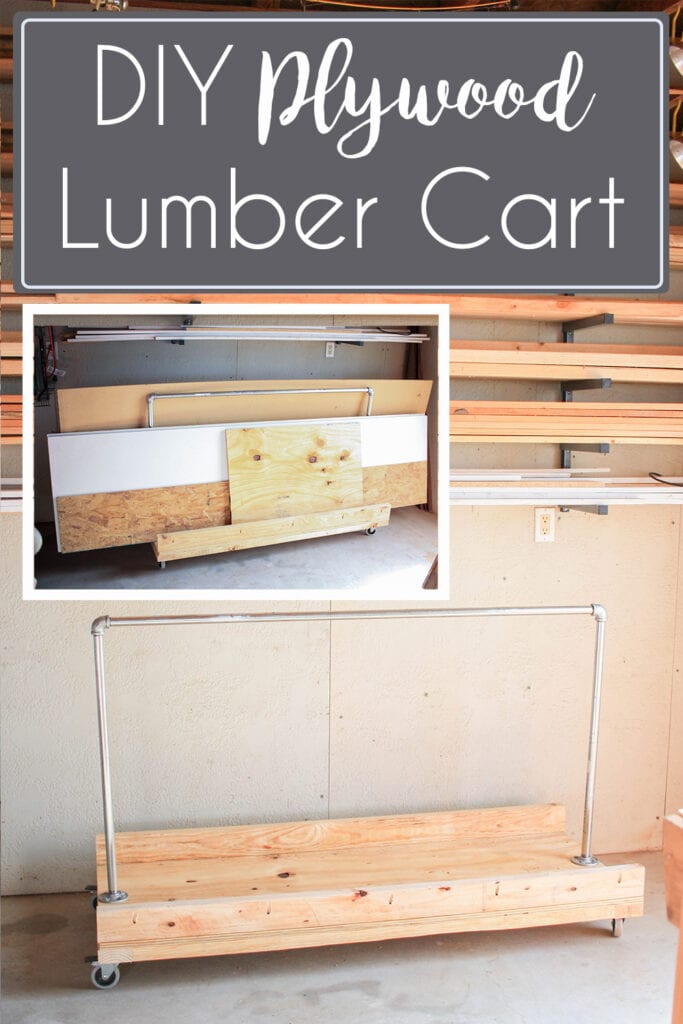
This may be the ugliest project I have ever built, but yet I am still in LOVE with it! Lol! This is one of those times I sacrificed beauty for function and ease of getting it done, and I am not mad about it at all!
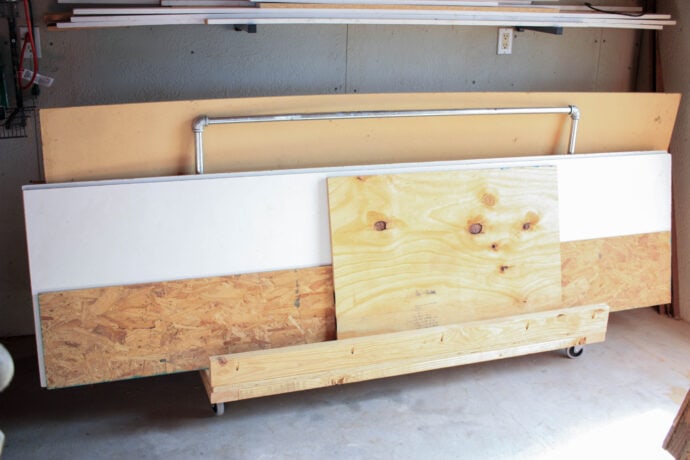
There are so many types of wood carts for lumber, plywood, or scrap wood, this wood lumber cart that I built really works the best for plywood, and sheet goods, but even more so for plywood that has been ripped along the length of the plywood or sheet! If you want a plywood cart to hold smaller pieces, this will work you will just need to add another bar lower or a T in the middle!
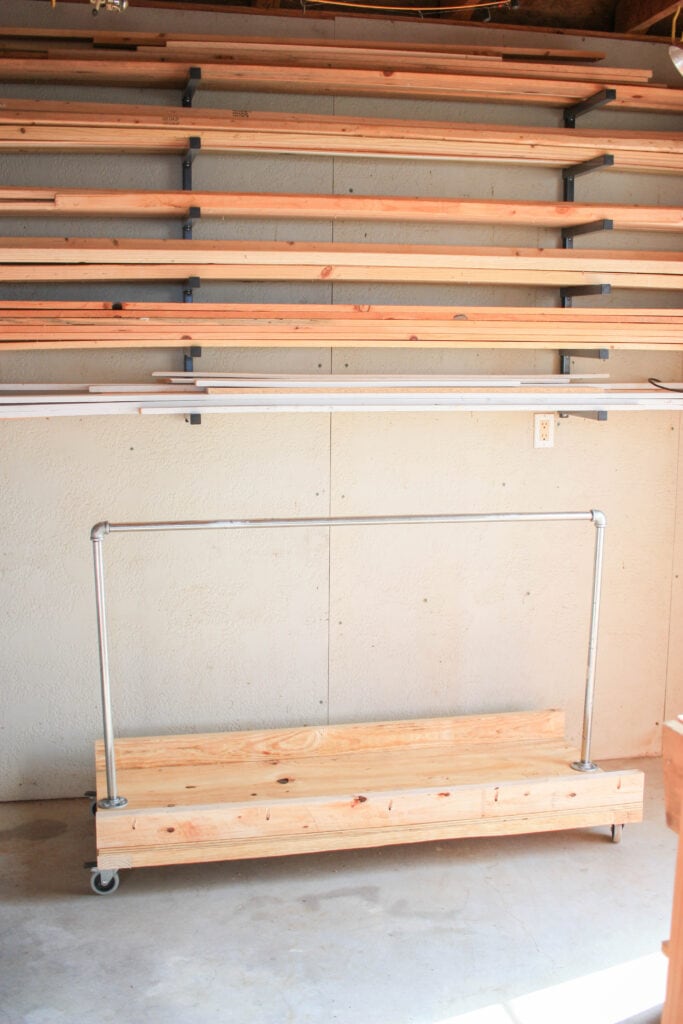
I love having my plywood racked like this, it has already saved me so many headaches and I can easily access it! I move the lumber cart out of the way when I need to or swivel it around if I need to access wood by the wall! It is awesome!
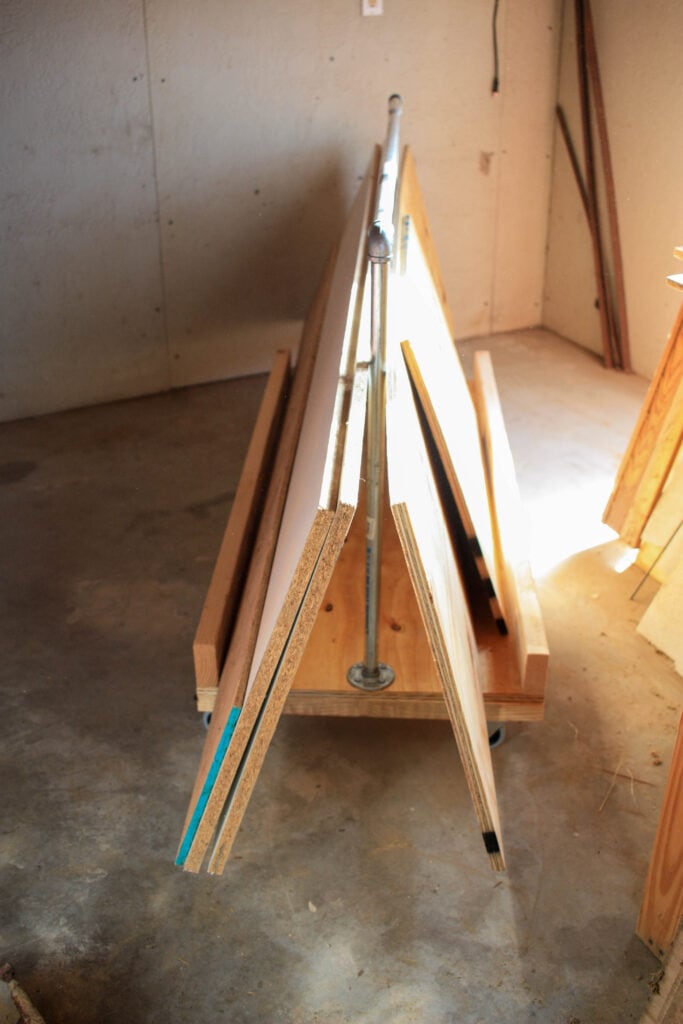
The warped piece of MDF was up against the wall, that is why I want it laying down on this cart instead.
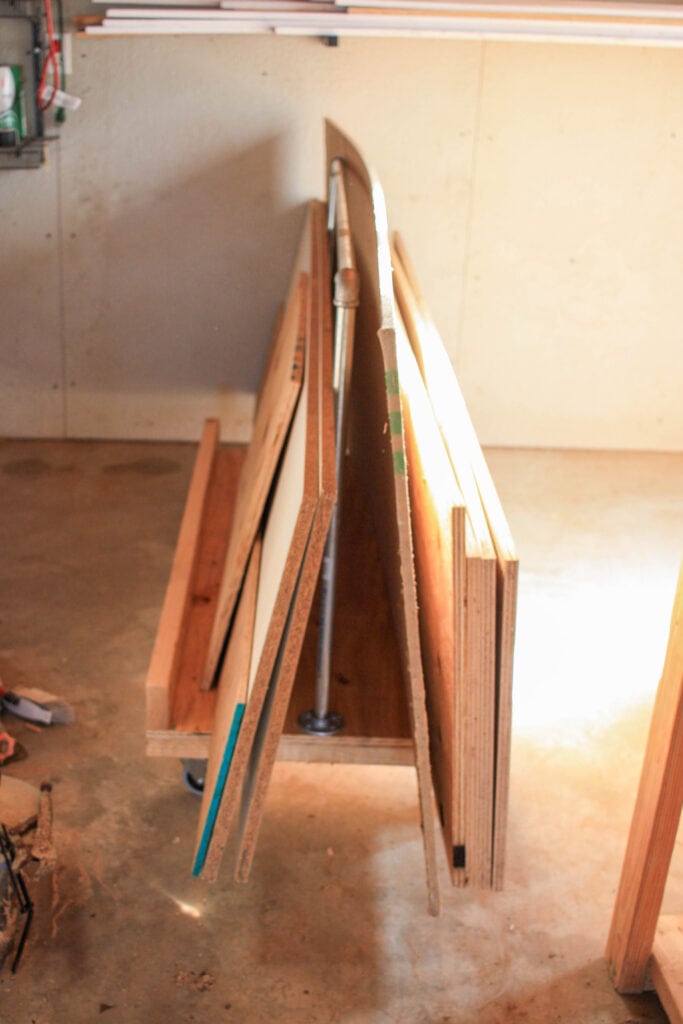
Tons of plywood and still room for more!
Gathering Supplies for the Lumber Cart
The total cost to build this lumber cart isn’t all that cheap, luckily I had a lot of the parts on hand which helped keep my cost down, I mean looking at it, it doesn’t look like it should cost much! Lol! Purchasing all the parts, you will spend 140 dollars, I feel like that is insane, two years ago you could have built it for at most 75 bucks! Everything has increased so freaking much that it is hard to want to build anything!
I have to remind myself, it is still cheaper than losing my mind because everything is disorganized or my plywood is warping and bowing because I am leaning against a wall! So it is worth the money and purchasing a lumber cart will still be more expensive than building this one! Okay, I’ve talked myself into it, have I talked you into it?
Let’s build this baby!
Materials for the DIY Lumber Cart
**NOTE: Amazon links below are affiliate links! Affiliate links allow me to make a small percentage, at no extra cost to you, should you make a purchase after clicking a link! I always appreciate you shopping my links as it helps keep this little ole website bringing you free plans!
- 1 4×8 sheet of 3/4″ plywood (you will have half of the sheet leftover – 2×8)
- 2 – 2x4x8
- 1 – 2x4x10
- 1 – 3/4″ x 10′ galvanized pipe – if your Home Depot or Lowe’s does not cut and thread pipe anymore, go to an Alamo Lumber, they still do!
- 2 – 3/4″ galvanized flanges – you can use the black pipe instead, it is cheaper on Amazon but more expensive at Home Depot 🤷♀️
- 2 – 3/4″ galvanized 90-degree elbows
- 1 – set of 4 casters
- 16 – 1 1/2″ lag bolts (for attaching casters)
- Kreg Jig
- 3 1/8″ screws
- 2 1/2″ screws
- 8 – 1/4″x3″ bolts (for attaching galvanized pipe)
- 8 – 1/4″ spacers and nuts
Cut List for DIY Lumber Cart
- 2 – 2×4 @ 60″
- 2 – 2×4 @ 53″
- 2 – 2×4 @ 24″
- 2 – 2×4 @ 17″
- 1 – 3/4″ plywood cut @ 24″ x 60″
- 1 – 3/4″ galvanized pipe @ 56″ (make sure and measure this for your cart, depending on where your flanges are placed, it can be shorter or longer than this measurement)
- 2 – 3/4″ galvanized pipe @ 30″
Building the DIY Lumber Cart
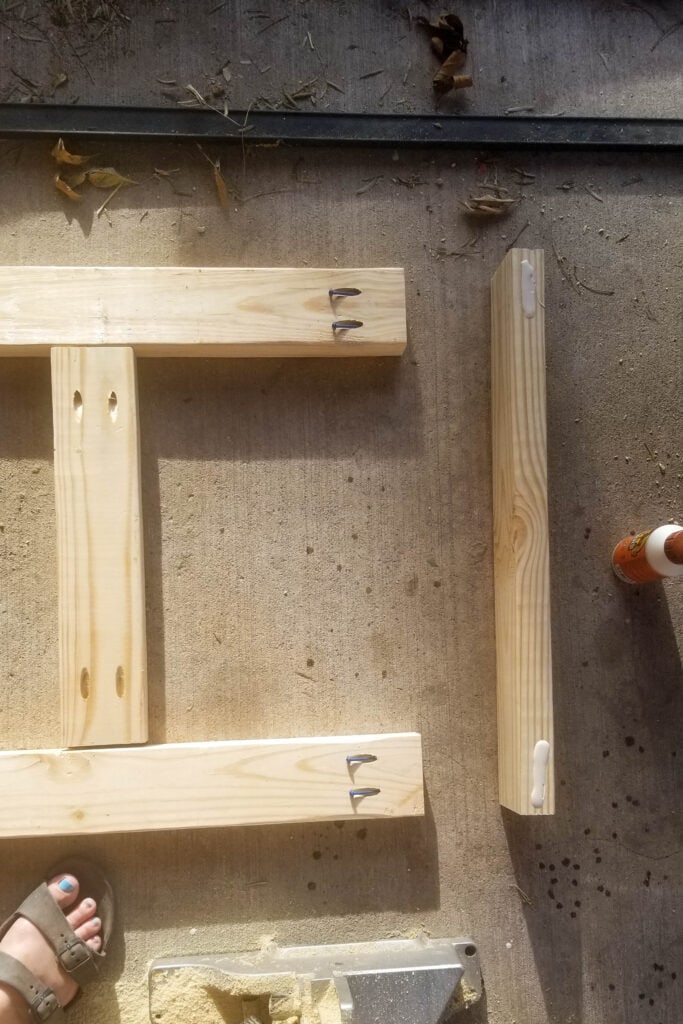
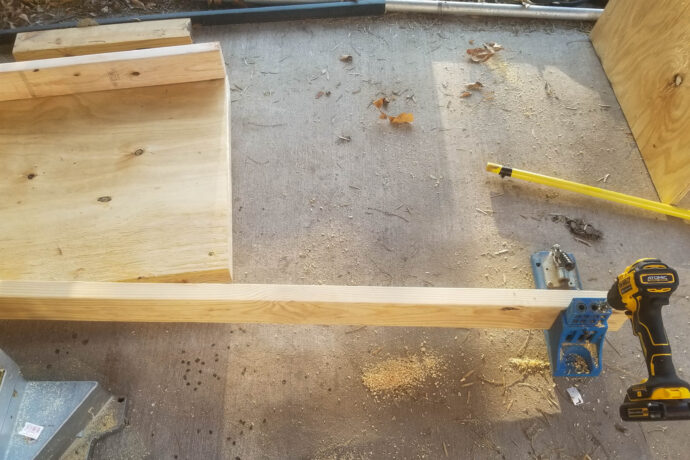
To start building the lumber cart, you will need to build the frame that the plywood will attach to! Using the 2x4s @ 53″, the 2x4s @ 24″, and the 2x4s @ 17″ you will build the frame.
You will use pocket holes drilled at 1 1/2″ depth, 2 1/2″ screws, and wood glue to attach the frame boards together!
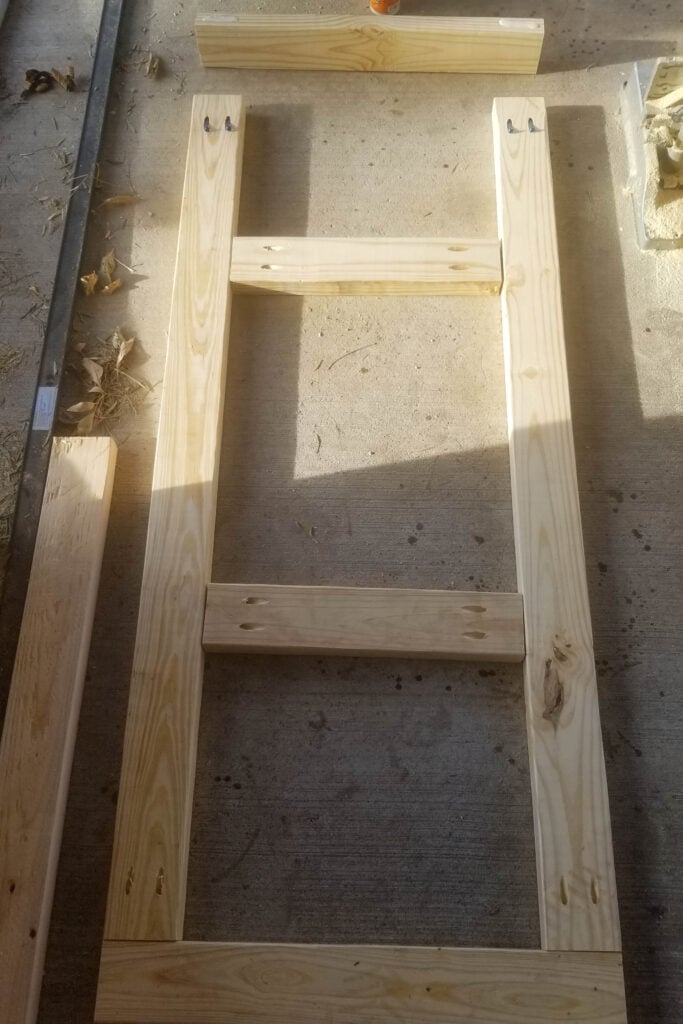
Make sure and use ample glue before attaching!
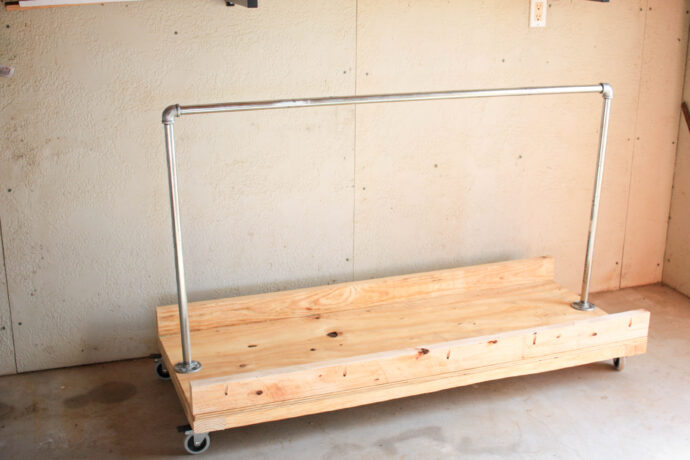
Once the frame is built it will look like so!
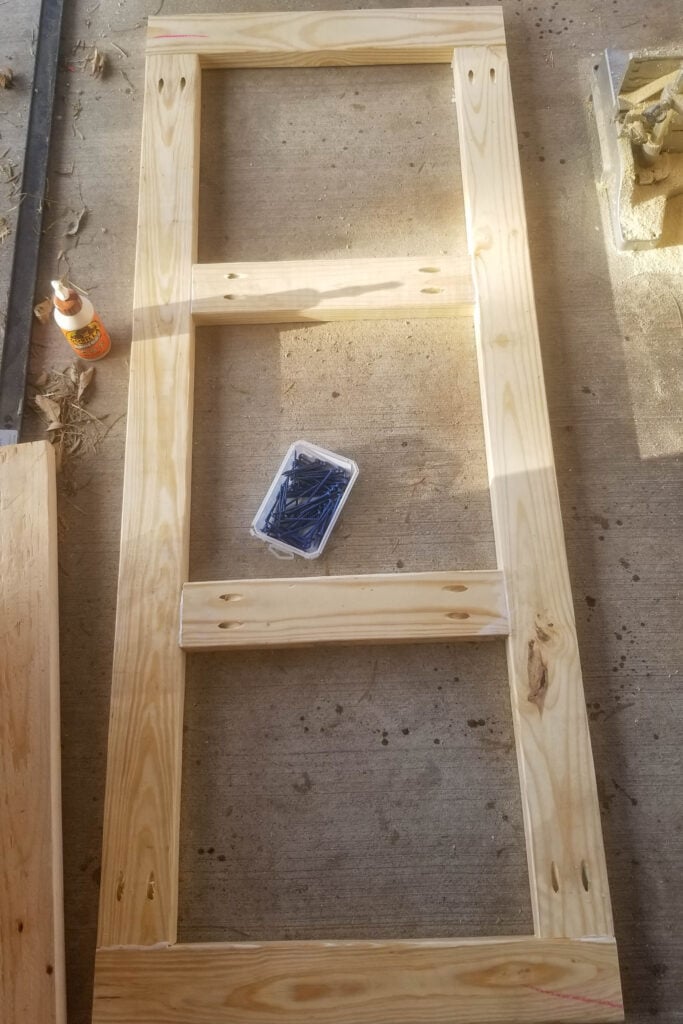
I did not even measure where to place the middle support boards, I just eyeballed the spacing to be evenly spaced!
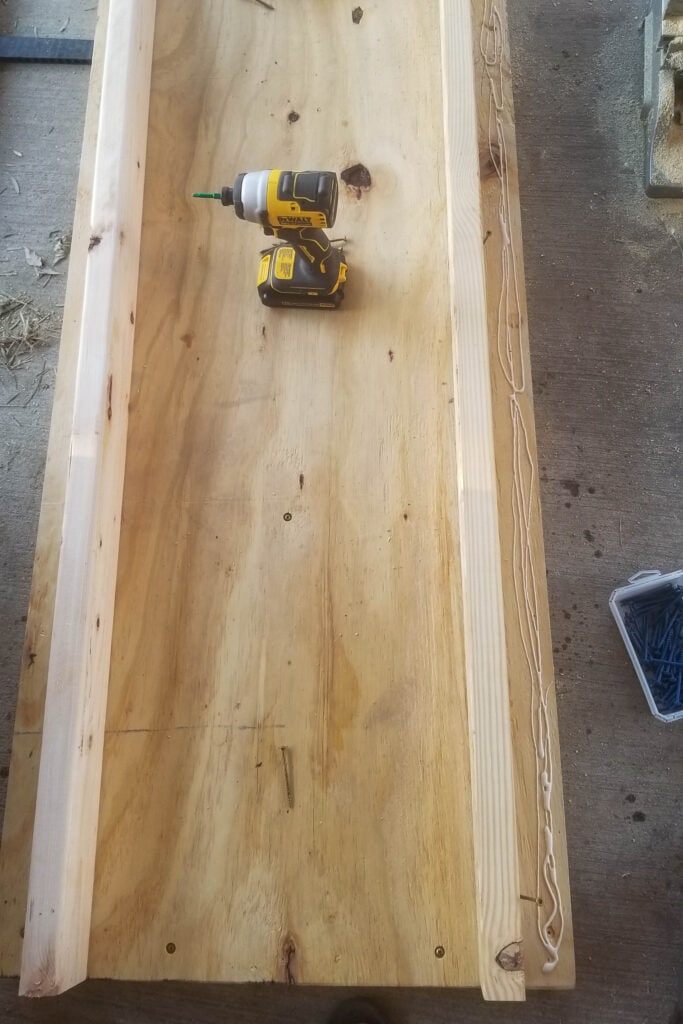
Next, cut your plywood down to size for the DIY lumber cart! I had the store rip it down to 24″, so I only had to cross-cut it down to 60″!
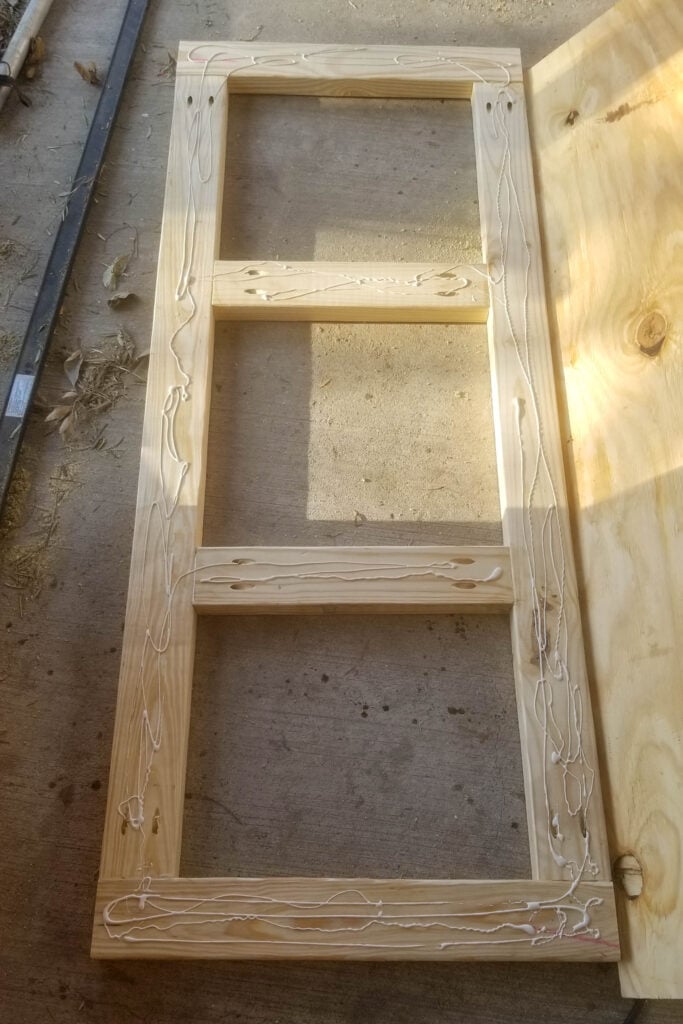
Once it was cut down to size, I dry-fit it to make sure it fits correctly, and then lifted it back off, and placed a bunch of wood glue on the frame before attaching it!
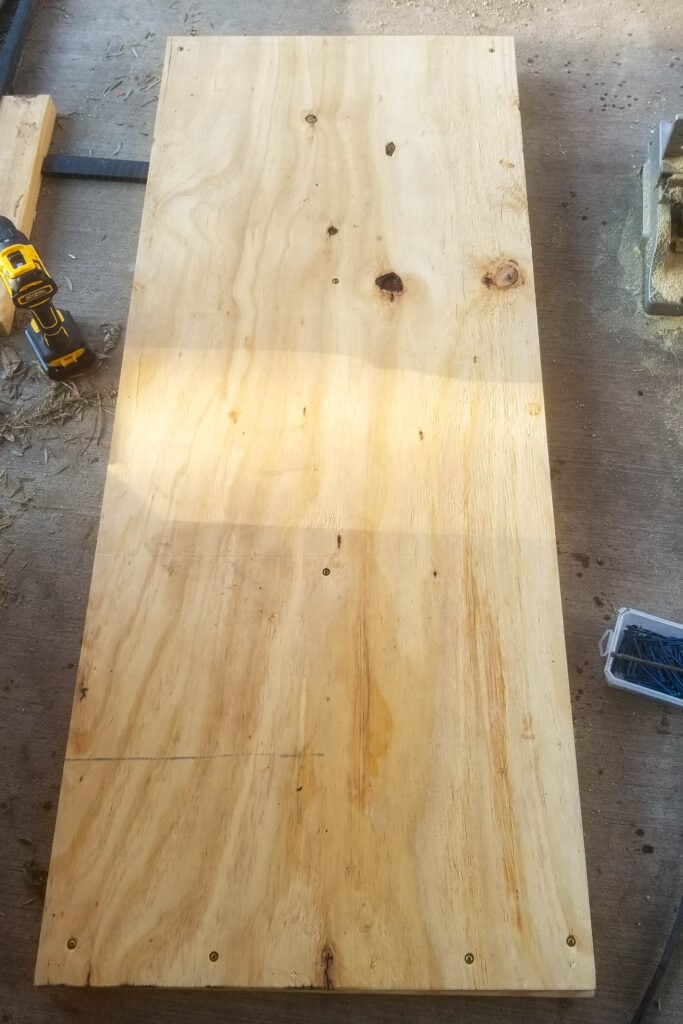
I used 2 1/2″ screws to hold the plywood in place until the glue had set, I didn’t have any 2″ screws on hand or I would have used them, but the 2 1/2″ stuck through the bottom a wee bit! You will never know once the casters are on, but just wanted to let you know!
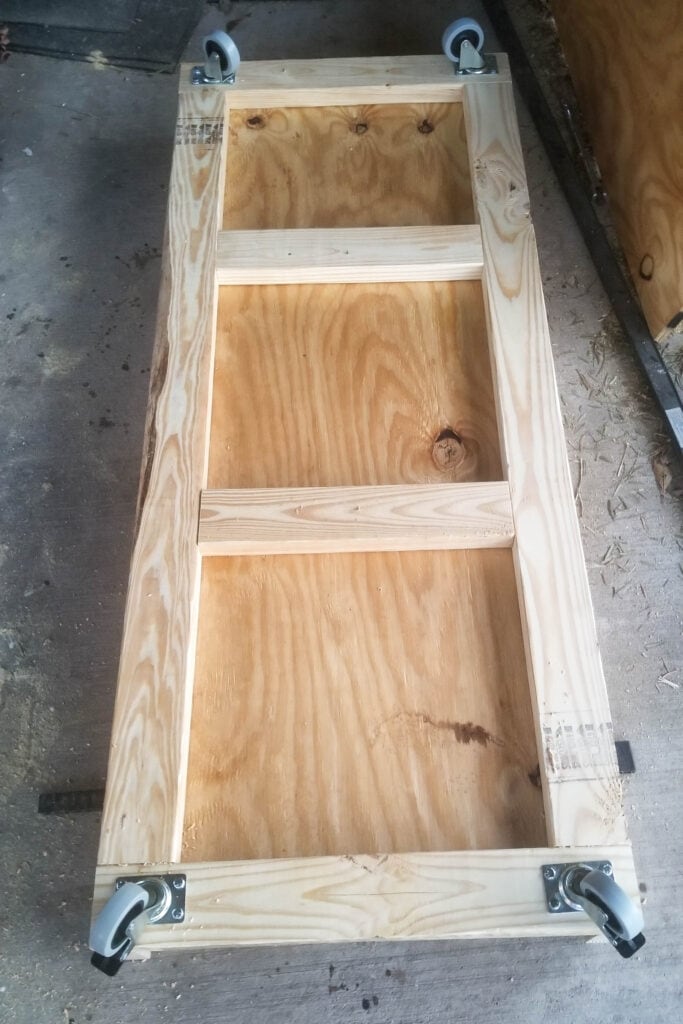
I backed the screws out on the four corners when I had the 2x4s cut to go along the edge! I drilled pocket holes along the edge of the 2x4s @ 60″. The pocket holes are drilled at 1 1/2″ depth and use 3 1/8″ screws and wood glue to attach!


Once you have the side rails attached to your wood cart, flip it over and add the casters!
After the casters are attached, flip it back over and attach the galvanized pipe! Screw all the pieces of pipe together before attaching them to the DIY lumber cart!
We used 3″ bolts to attach the galvanized pipe to the wood cart!
Your lumber cart is complete!
Now slide all your plywood onto the wood cart and twirl it around to see how amazing it really is! I have even more on the plywood cart now and I can move it all so easily!
Such a fun afternoon project to solve one of the largest nightmares in my shop! Cheers to getting organized in 2023!🥂 If you build a DIY lumber cart, I would LOVE to see it! And if you are looking for other shop organization projects check out this DIY garage shelf!
Have you built any cool shop projects that have helped you to stay organized in your shop? Let me know in the comments below! Thanks for stopping by! Have a good one!

Want to save this DIY lumber cart for later? Pin it!

I came across your blog when searching for a way to add steel bars to a dolly furniture cart to make moving my daughter’s mattress easier. If I get the pipe cut, how would I attach the elbows without threads? My dolly is 30″ x 18″. I’m thinking I’ll have bars similar to yours on each of the longer sides and maybe only 3-4′ high. Just trying to figure out how to make them sturdy. Thank you!
Hey Celeste!
Sorry, I saw this so late! When you purchase your pipe at Home Depot, Lowe’s, or even Alamo Lumber, they will cut it and re-thread it for you! They did it free of charge for me on another project! Hope that helps! Thanks for stopping by, have a good one!
Cara