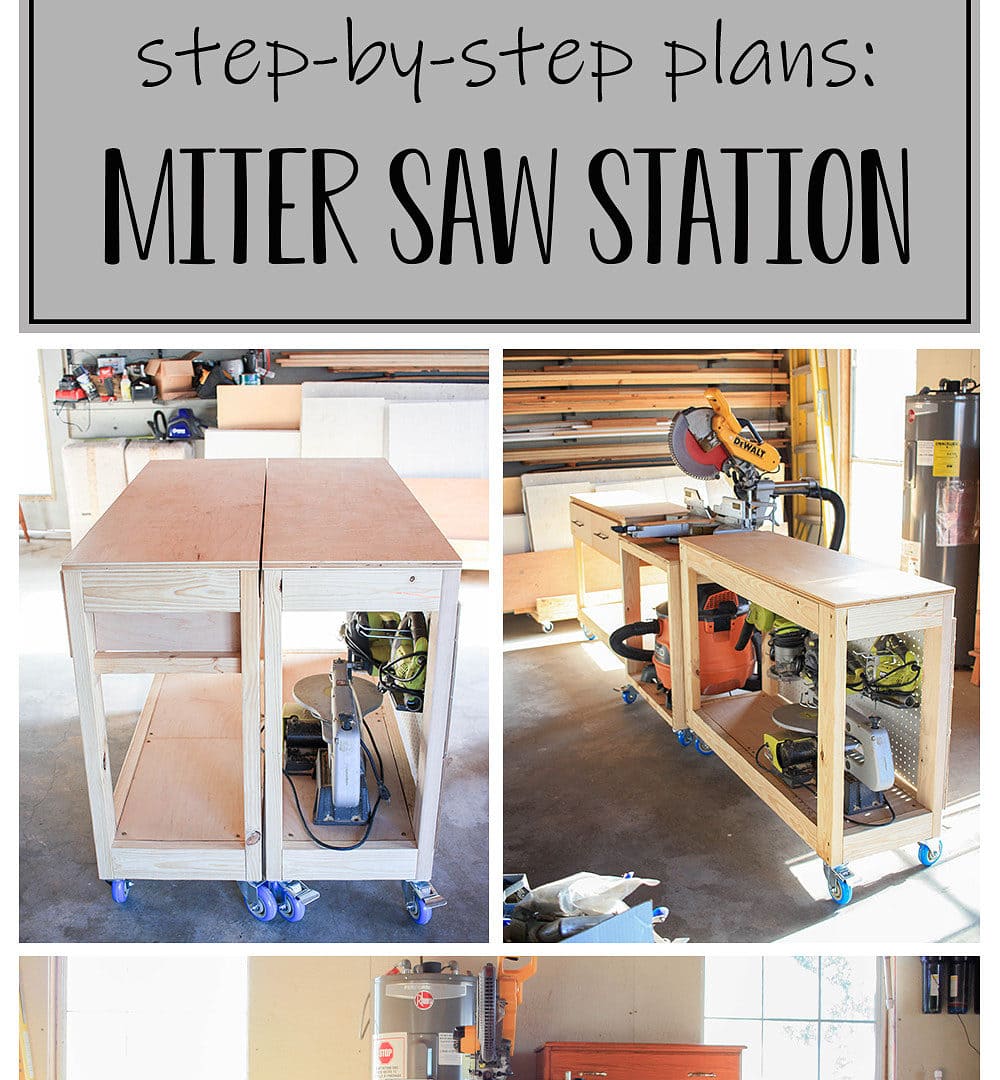
DIY Miter Saw Station
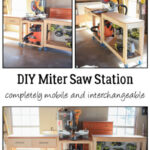
The miter saw is an absolute powerhouse in the workshop, it is one of, if not the most used tool in the shop! This DIY miter saw station is the perfect way to utilize the miter saw to it’s fullest potential! The best thing about this miter saw station is that it is able to be interchanged with this drill press stand and this router table as well! The casters make it mobile and with the interchangeable stands, you need this in your shop!
I kept the miter saw station slim because I don’t want it to take up a lot of space and you don’t cut anything wider than 14 inches on the miter saw so there really isn’t a need for a wider table to support the wood! When I realized this, I knew that it needed to work with the drill press and any other tools that you don’t use sheet goods on so that you can use them all to take advantage of the tables to make building easier!
Now, of course, I know that you need large assembly tables as well and so I have you covered with plans for these 4×4 table saw outfeed tables (coming soon)! But for this post we are going to build this narrow miter saw station to give you a little added storage and organization around the shop! And it’s all mobile so you can make a slightly larger assembly table with this slim miter saw station as well!

I am determined to get my shop organized and have a place for everything so that it can hopefully stay organized and this miter saw station is only one of the MANY projects I am sharing to build yourself an amazing workshop as well!
If you need a way to store your sheet goods, I have the plans for this easy to build lumber cart also! I mean, if I am going to organize my shop and get my life on track this new year, it is only fair that I share everything with all of you! Lol!
Alright, back to building this miter saw station!

Gathering Supplies for the DIY Miter Saw Station
This miter saw station costs around $240 if you have to buy everything at today’s cost, which is TOTALLY worth all the headache it has saved of cutting boards on the ground as I have been for the last couple years! Lol! I had a dining table I was using for a few years and I got rid of it when I ordered the casters that I used on this build, but funny thing, I ordered them two years ago according to Amazon! 🙈
The casters are the largest expense of this project and you can always build it stationary if you’d like to save money, but it is soooo much better when you can move it all around!😉
Materials for Miter Saw Station
- 1 – 3/4″ – 4×8 sheet of plywood
- 1 – 3/4″ – 2×4 sheet of plywood
- 1 – 1/4″ – 2×4 sheet of peg board
- 1 – 1/4″ – 2×4 sheet of plywood
- 12 – 2x4x8
- 4 – 2x2x8
- 12 – 4″ casters (you can do smaller but the leg measurements will have to be adjusted!)
- Kreg Jig
- 2 1/2″ screws
- 1 1/2″ screws
- 1 1/4″ screws
- Drill
- miter saw
- 14″ drawer slides
- socket adapter for drill
- 7/16″ socket
- wood glue
- 2 – drawer pulls
Cut List for the Miter Saw Station
Left Side Table
- 3 – 2×4 @ 41″ front and back rails
- 3 – 2×2 @ 41″ front and back rails
- 4 – 2×4 @ 30 1/4″ legs
- 4 – 2×4 @ 12 1/2″ side rails
- 2 – 2×2 @ 12 1/2″ side rails
- 1 – 3/4″ piece of plywood cut @ 15 1/2″ x 48″ top plywood
- 1 – 3/4″ piece of plywood cut @ 12 1/2″ x 45″ bottom plywood
- 2 – 3/4″ piece of plywood cut @ 8″x 12 1/2″ drawer slide support
- 1 – 3/4″ piece of plywood cut @ 6 1/2″ x 15 1/2″ middle divider for drawers
Drawer Boxes and Fronts for left side table:
- 4 – 3/4″ plywood @ 5 3/4″x 17 5/8″ front and back of drawer boxes
- 4 – 3/4″ plywood @ 5 3/4″x 13 3/4″ sides of boxes
- 2 – 3/4″ plywood @ 7 3/4″ x 21 1/4″ drawer fronts
Right Side Table
- 4 – 2×4 @ 41″ front and back rails
- 4 – 2×4 @ 30 1/4″ legs
- 4 – 2×4 @ 12 1/2″ side rails
- 1 – 3/4″ piece of plywood cut @ 15 1/2″ x 48″ top plywood
- 1 – 3/4″ piece of plywood cut @ 12 1/2″ x 45″ bottom plywood
- 1 – 1/4″ – 2×4 peg board
Miter Saw Stand
- 4 – 2×4 @ 26″ front and back rails
- 4 – 2×4 @ 26 3/4″ legs
- 4 – 2×4 @ 16″ side rails
- 1 – 3/4″ piece of plywood cut @ 23″ x 29″ top plywood
- 1 – 3/4″ piece of plywood cut @ 16″ x 26″ bottom plywood
Building the Miter Saw Station
This is a really simple build but it is three separate pieces that come together to make the miter saw station which can get confusing as I am trying to explain the building instructions so I have broken it down into the left table, right table, and miter saw stand! If you have any questions throughout the building process feel free to send me an email or ask in the comments section below!

Here’s the diagram of the plywood cut list so that everything is cut from the 4×8 sheet except for the top of the miter saw stand! The miter saw stand top is the 3/4″x23″x29″ and will be cut from the 2×4 sheet!

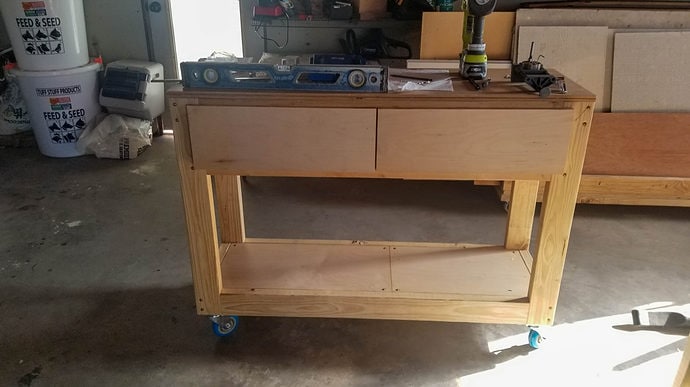
Left Side Miter Saw Station Table
The left side miter saw station table is complete with two upper drawers to hold anything you want, the drawers are small enough to not lose items stored in them, but large enough to house some larger items! I store my Kreg Jig and other Kreg tools in one and my circle jig and all its parts in the other! This keeps them all together and ready to be used at any time I want without having to look all over the garage!

The bottom shelf will easily store other tools that I don’t want just sitting on the floor taking up space and not being able to maneuver around! This is perfect for my scroll saw and such!
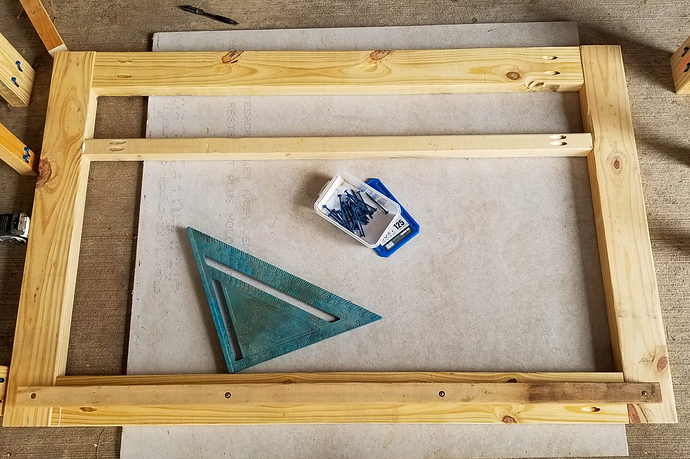
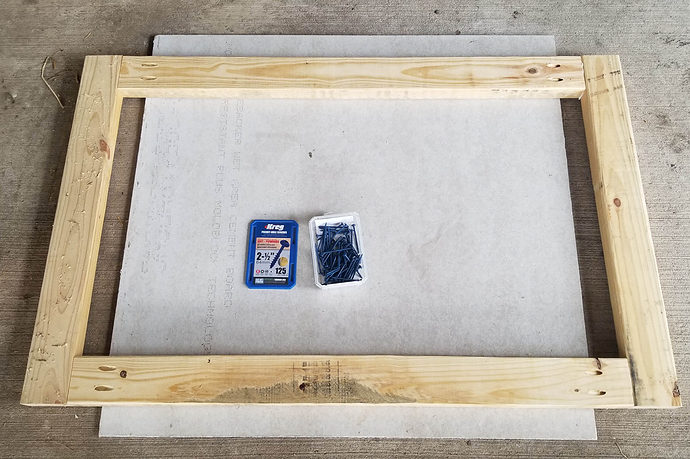
Alright, to build the left side table, you will build a front and back frame first!
Using two 2x4s @ 30 1/4″ (legs) you will pocket hole two 2x2s @ 41″ and one 2×4 @ 41″ together. Pocket holes will be drilled in the ends of the 41″ boards at 1 1/2″ depth. You will use 2 1/2″ pocket hole screws and wood glue to attach the front frame together!

Add a 2×2 @ 45″ to the bottom of the frame (the lower 2×4). This 2×2 will be set down 3/4″ to account for the plywood, and set in 1 1/2″ on each side.

The back frame will be slightly different, as the top will be a 2×4 @ 41″ instead of a 2×2!
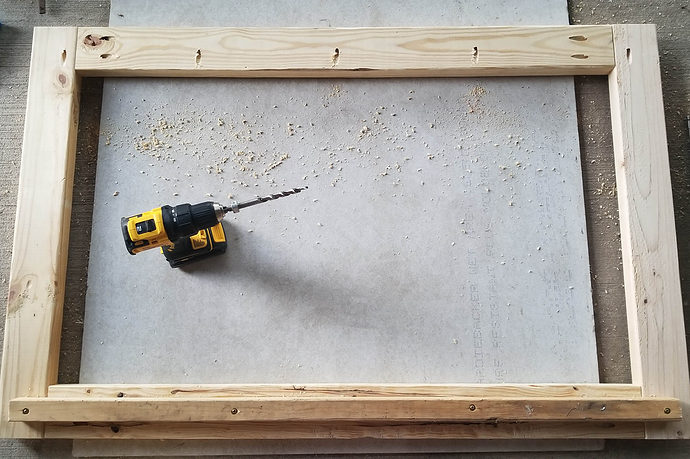
NOTE: I didn’t even think at this point about the fact that I needed pocket holes to attach my top, you will need to drill pocket holes along the top boards. If you are already at this point and have the frames built, you just need to take your Kreg jig apart to drill them! Let me show you how!
First, unscrew the depth knob on the Kreg Jig, and slide the Kreg Jig out!
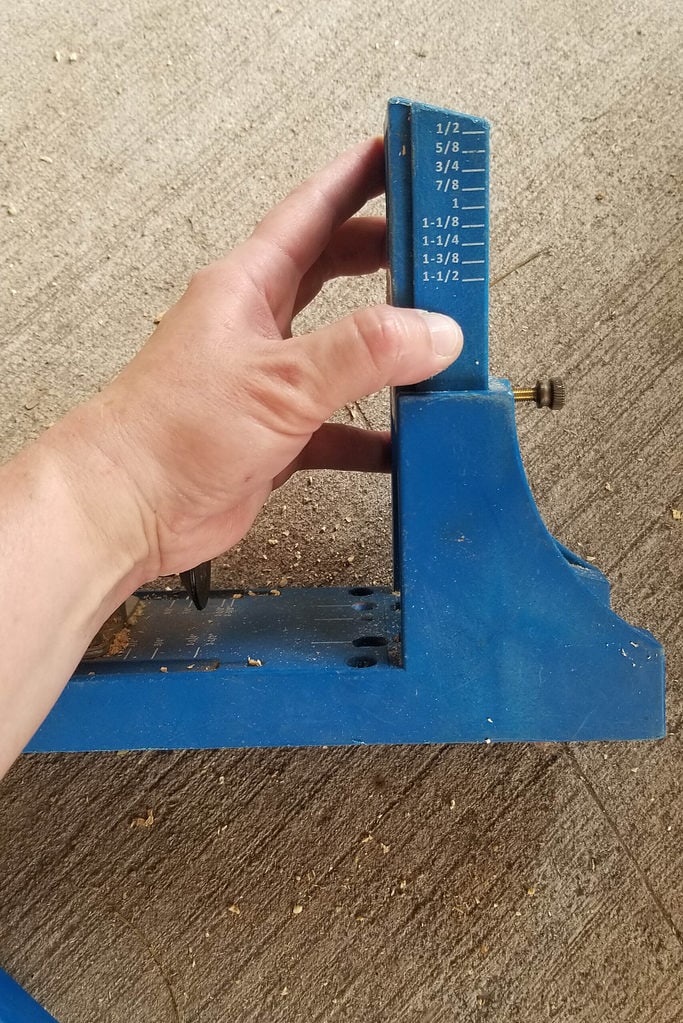
Alright, if you have the K4, it comes with this additional piece for using on large sheets, you slide the Kreg jig into this piece and use the same screw to tighten to the depth you want.

Now you can clamp this onto your piece and drill your holes!
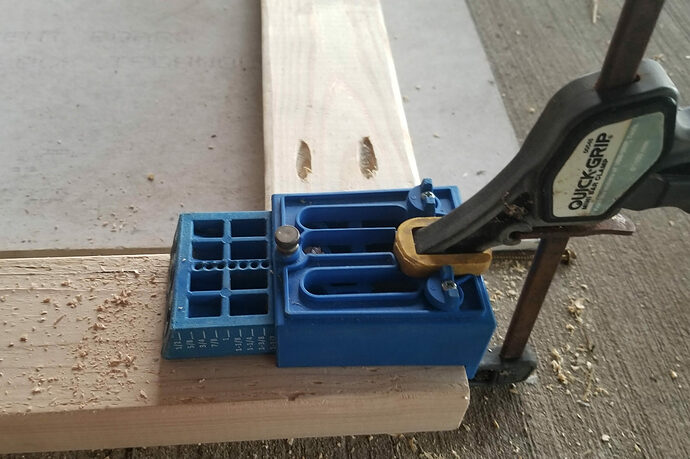
Pictures next two pictures below are NOT the frame we are building for the left side table it is only to show you how the Kreg Jig works without the base! This is actually the right side table but you get the idea!
Back to building this left side table!
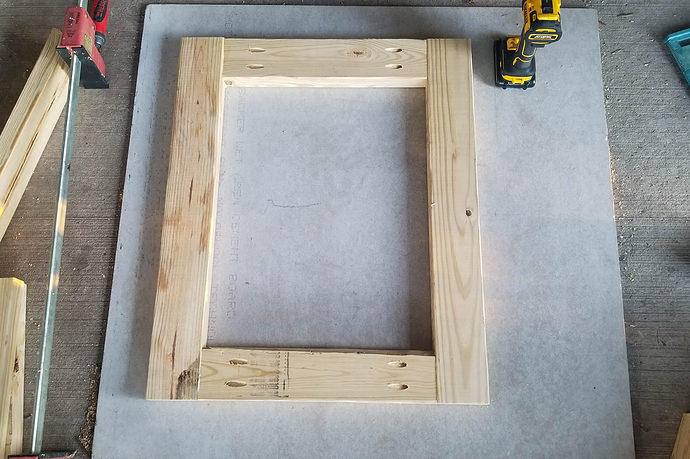
Once you have the front and back frames built, you will combine them to form the table frame using four 2x4s @ 12 1/2″ and two 2x2s @ 12 1/2″. They will be pocket holed on the ends at a depth of 1 1/2″ and use 2 1/2″ screws and wood glue to attach!
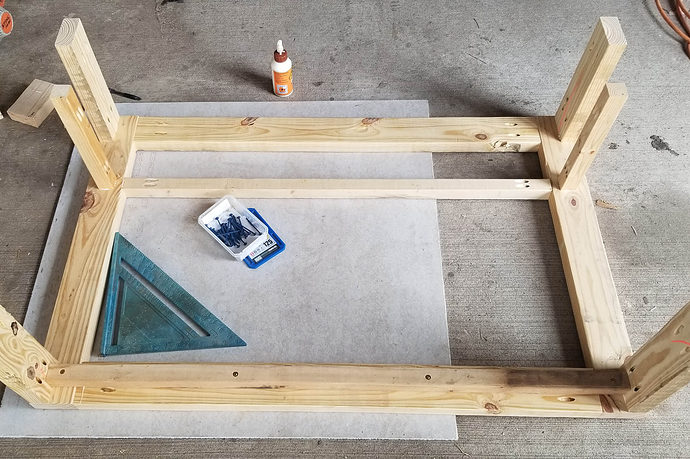
Note: the 2×2 is set in from the edge, this is so we can add a piece of plywood to the frame later on to attach the drawer slides to! I used a scrap 1×2 (since it is 3/4″ wide just like my plywood) to make sure I set the 2×2 back just right!
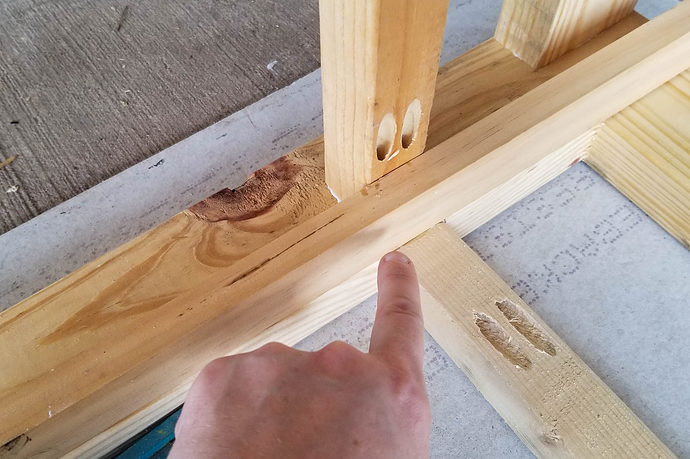
Once you have them attached to the back frame, you can set the front frame on top and attach it! Now, this was a mistake I made because I wasn’t thinking, the table is only 12 1/2″ wide so the kreg bit is too long to get into the pocket holes, you can use a right angle drill attachment to get in there, or you can do as I did and just use screws from the front to attach! I used 2 1/2″ screws through the front boards as you can see the screw heads! Make sure and still use wood glue!
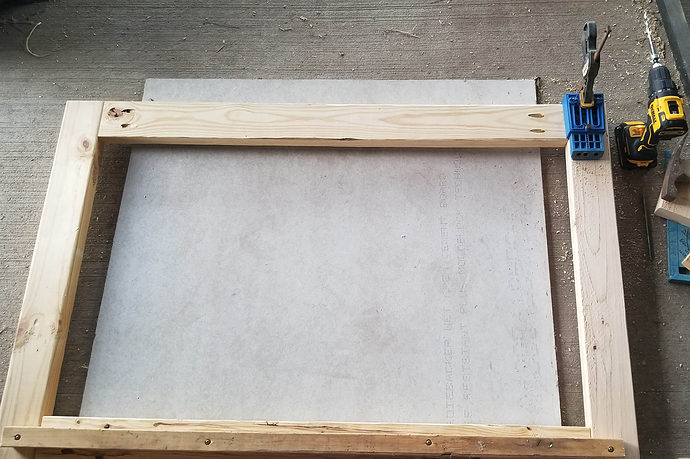
Once the frame is completed, you will add the bottom plywood (3/4″ x 12 1/2″ x 45″). I used two pieces on mine simply because I have a bunch of cut plywood that I really want to get rid of and this is the perfect way! Lol! I just used 1 1/2″ screws straight through the top of the plywood and into the 2×2 below!

Adding the Casters to the Left Side Table
Flip the cart over, to add the casters!
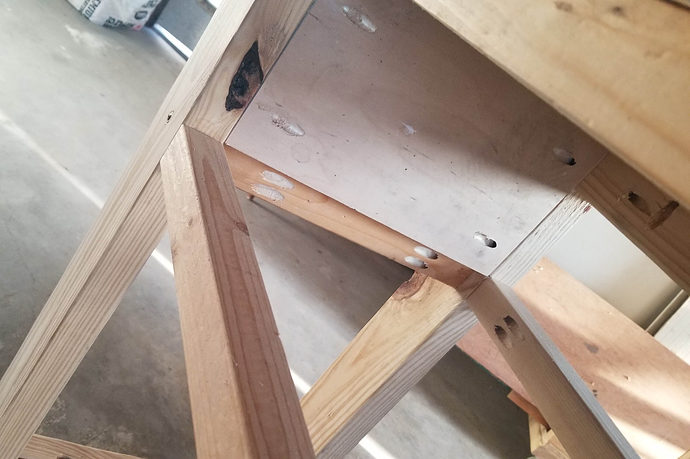
The casters will need an additional 2×2 scrap piece to support the fourth hole in the caster plate. They only need to be round about 3″ long, they need to be ripped down slightly to fit the space because it needs to be flush with the bottom of the frame!
You will want to pre-drill holes for the casters as well.

See the 2×2 and the pre-drilled holes!
Next you will need a socket adapter and socket for your drill!
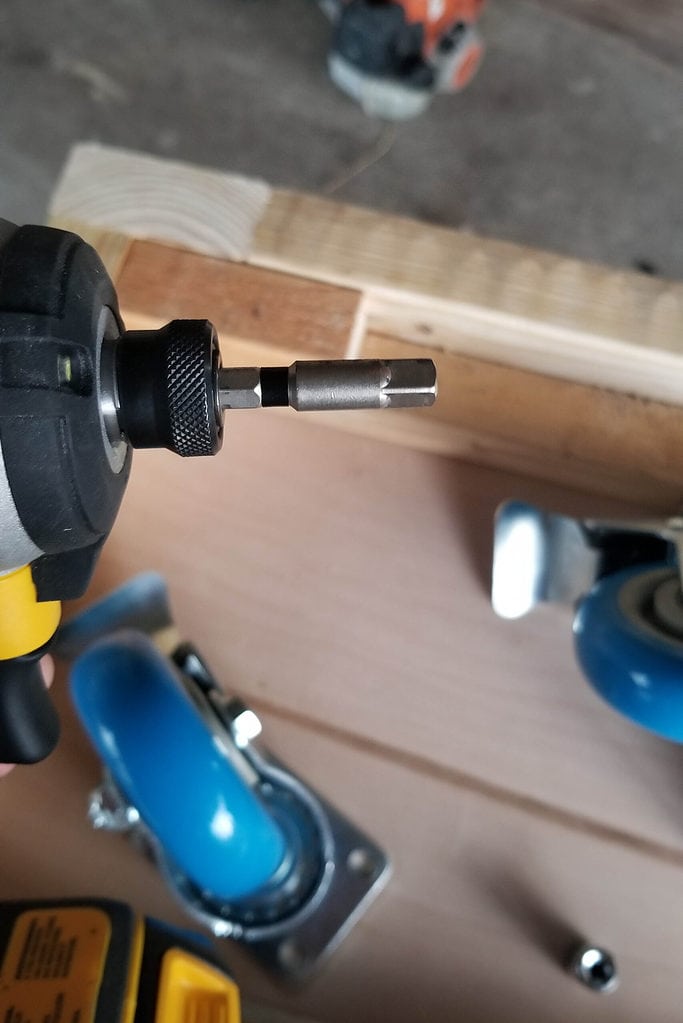

Use the washers and lag bolts that came with the casters to attach them!

Flip the left side table back over and add the top piece of plywood! Attach it with 1 1/2″ or 1 3/4″ pocket hole screws. I did NOT use glue on this top piece of plywood so I can easily change it out should I need to if it becomes damaged or something is spilled on it that affects it being level! I know how crazy I get in the shop and can’t take any chances! Lol!
Now the basic table is built and ready to go, we just need some drawers to complete the table!
Adding drawers to the Left Side Table
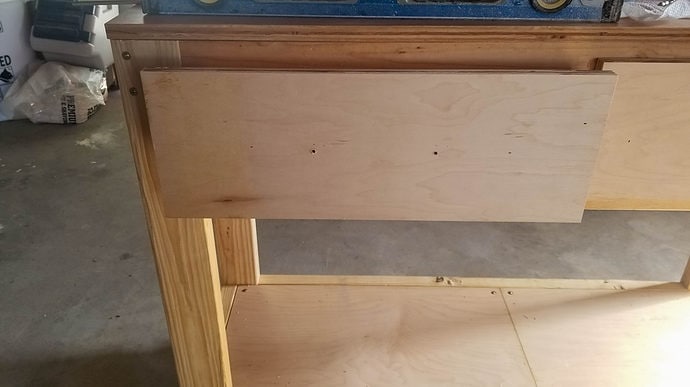
You will have to add some plywood to the sides and a middle brace if you want two drawers as I have built! You could make one large drawer if you wanted and then you don’t need a middle brace! I cut two pieces of 3/4″ plywood down to 6 1/2″ x 12 1/2″ and pocket holed them in place! The middle brace is just glued into place as there was not enough room to pocket hole it!
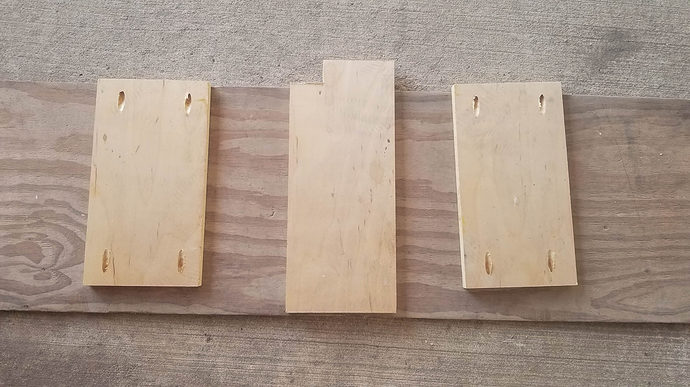
Right side!

Left side!
I didn’t get a picture of the middle divider before I added the drawer slides!
Building the Drawer Boxes for the Miter Saw Station
I ripped 1/2″ plywood down to 5 3/4″ wide, you can use 3/4″ since you will still have some left of the sheet you buy for building this! I was just using up plywood I had laying around!
When building drawer boxes, I like to add my drawer slides first and then measure to make sure it is a good fit! My middle divider was slightly off center, so my drawer boxes were slightly different sizes, it happens! Lol!


Once you have the correct measurements you can build your drawer boxes! I built mine too long and realized it after I was trying to install them! I could have just notched them to fit under the 2×4 but instead I cut them down a little! They will be 14″ x 19 1/8″. The exact measurement of each board are in the printable plans!
Once you have the drawer boxes built, you can install them! I needed all the space I could get in the drawers, so I opted to have overlay drawer fronts, you can have inset if you would rather! I think the inset drawers look best but since this was a shop project and function was worth more than beauty, I opted for the most space!

Attach the drawer fronts once the boxes are installed! Use wood glue and brad nails to hold the fronts in place so you can easily shoot screws in from the inside of the drawer!
Drill the holes for the drawer pulls!
And that is all there is to the left side table!

Right Side Miter Saw Station Table
The right side miter saw table for the miter saw station is a lot like building the left side table, only simpler for the frame!

Start building the frame with two 2x4s @ 30 1/4″ and two 2x4s @ 41″ to build the front frame! You will build two of the same frames to make the front and back frames! Pocket holes will be drilled on the ends of the 2x4s @ 41″ at a depth of 1 1/2″. You will use 2 1/2″ pocket hole screws and wood glue to attach.
Add the same 2×2 @ 45 across the bottom for the bottom shelf! Make sure and set it down 3/4″ to account for the plywood!

Again, I had to drill the pocket holes after the fact because I forgot when they were loose boards! Lol! See left side table above to see how to drill pocket holes at this point!
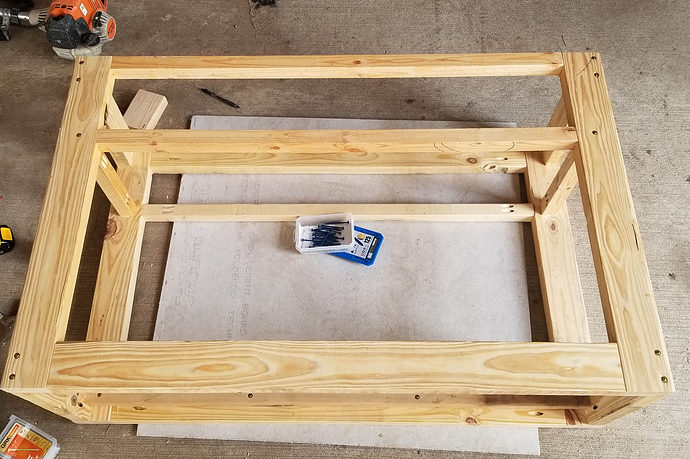
You will build another just the same as this one! And once you have them both built, you will put them together using 12 1/2″ 2x4s with pocket holes drilled on both ends if you have a right angle drill attachment, if not, just drill pocket holes in one end of the boards!
Use wood glue and 2 1/2″ screws to attach!

When you attach the front, if you don’t have a right angle drill attachment, just screw straight through the fronts of the boards! Use wood glue before setting the front frame in place! If you do have a right angle drill bit, you can just pocket hole the front on!
Apparently I didn’t take a picture of that step! Oy! There has to be one step in every project that I miss! Lol!
The lower shelf can be added now, and it goes the same as the left side table, just set the plywood in place and screw through the top of it! You can glue it in place if you would like, but I want to be able to change this out if it gets nasty at some point! And yes, I did use up some leftover plywood and so it is two pieces instead of one! Lol!

Now flip it over and add the casters! I am not going to go over this again, it is exactly the same as the left side!
Flip the right side table over and attach the top plywood with the pocket holes we drilled earlier and 1 1/2″ screws!

I hung a 2×4 piece of peg board on the back of this to hang tools corded tools that I don’t use all that often, but being as slim as this table is, they are so easy to get to! Works perfectly!

Miter Saw Stand
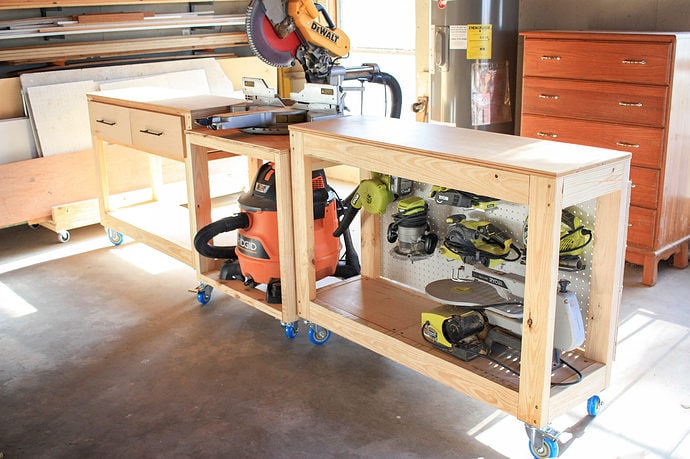
The miter saw stand is shorter and wider than the other two side tables built previously! This is the center section that is most important since it holds the MITER SAW!

***NOTE***The miter saw stand sits down 3 1/2″ lower than the other tables since my miter saw base is 3 1/2″ tall, you will want to make sure and measure yours to adjust the leg height if need be!
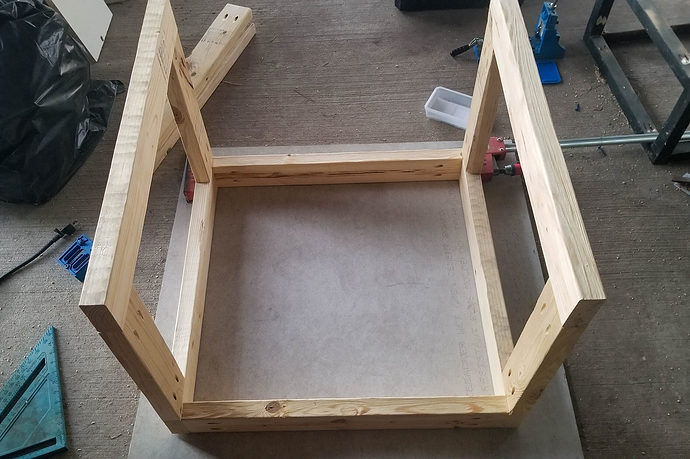
In order to fit my vacuum underneath my miter saw as my dust collection, I turned all the 2x4s to give me the widest opening! So at first, we will build our side frames as opposed to the front and back frames as we did on the side tables!
Build each side frame using two 2x4s @ 16″ and two 2x4s @ 26 3/4″ (if you use smaller casters as I did, you will need to adjust the length of the legs!) with pocket holes drill in the ends of the 16″ boards. Pocket holes are drilled at a depth of 1 1/2″ and use wood glue and 2 1/2″ screws to assemble each side, you will make two of the frames shown below!
Once you have two of the frames built, you will use the 2x4s @ 26″ to attach the frames together (this will then be the front and back). Notice how the 2x4s are turned in the picture below!
You will add the boards along what would be the top in this photo as well, they will be placed the same way, it got dark on me as I was assembling and I couldn’t get any pictures but I had to get it done!
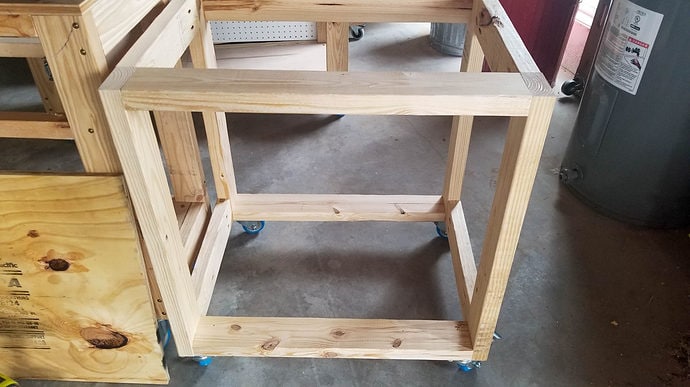
Once I had the box of 2x4s built, I turned it over and added the casters in the same way I added the casters to the side tables, only difference is you have a flat 2×4 to attach them to so you don’t need to add any 2×2 pieces, just connect them to the 2x4s and boom, almost done with the miter saw stand for the miter saw station!

Add the plywood to the bottom and the top of the miter saw station! You do not need to add pocket holes on this, the 2x4s are turned flat where you are just screwing through the 1 1/2″ side of the 2×4! Just screw straight through and into the plywood, you will need 2″ screws for this! I did not add plywood to the bottom of mine, but I did include the piece in the cut list in case you want to. I felt like it was a waste for me simply because my shop vac will be the only thing that ever goes under here, and it can fit without a piece of plywood!
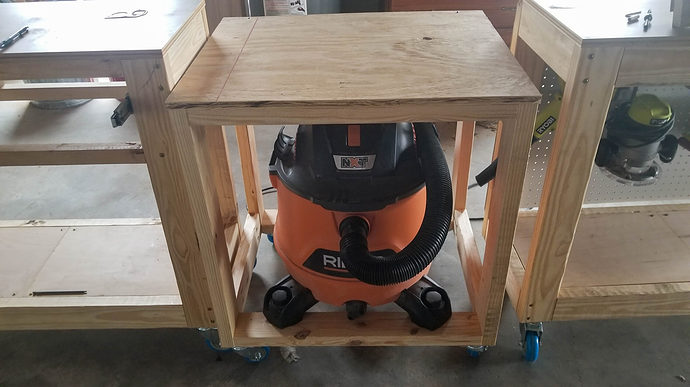
The bottom plywood will be pocket holed (if you add it) or you can add it across the top of the 2x4s if you would like, I needed it flush with the 2x4s for the height for my vacuum! Once that plywood is attached, the miter saw cart is ready to go, throw your miter saw up there and get cutting!
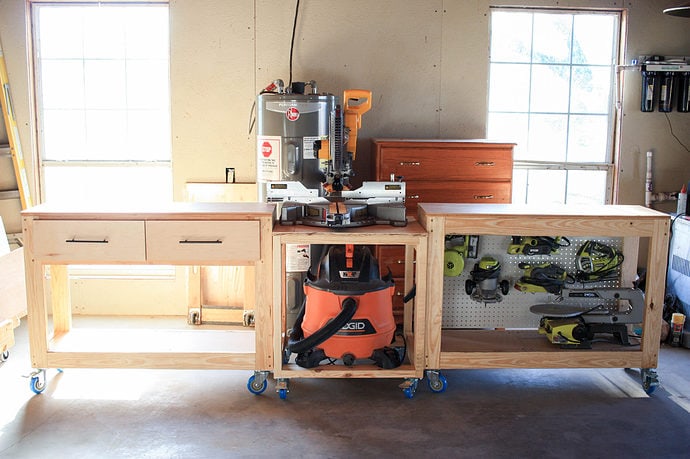
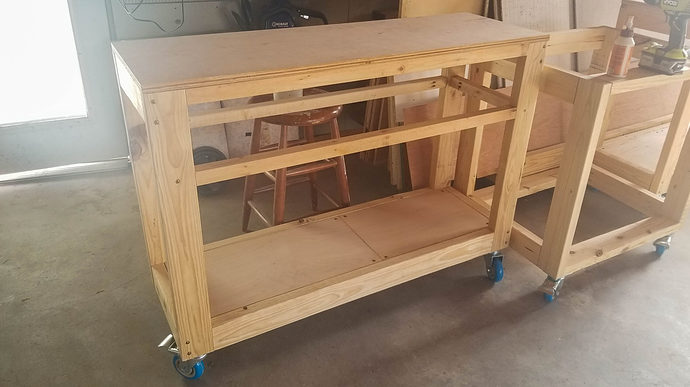
How amazing is that? I freaking love the mobility of this miter saw station and I can’t help but love being able to swap out the miter saw cart for the drill press cart or the router station, it truly is a GAME CHANGER in the shop!

Have you started organizing your shop this year? Tell me about it in the comments below!
If you love this DIY miter saw station but you need something a wee bit different, check out this AMAZING miter saw station by Ana White! It does not disappoint! Or you can check out this awesome miter saw station from Shanty-2-Chic!
Hope you’re building amazing things in 2023! Thanks so much for stopping by! Have a good one!
Happy Building!

Want to save this DIY Miter Saw Station for later? Pin it!