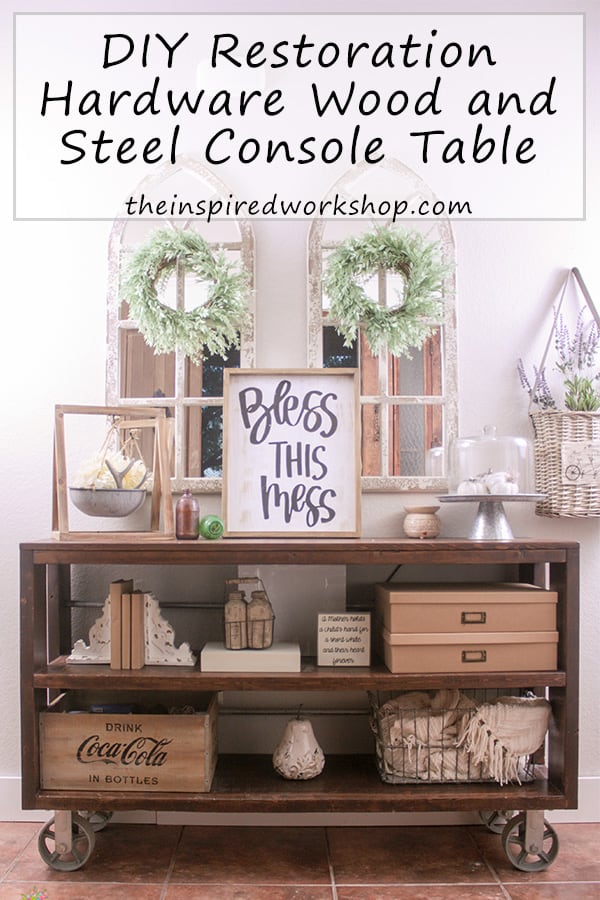
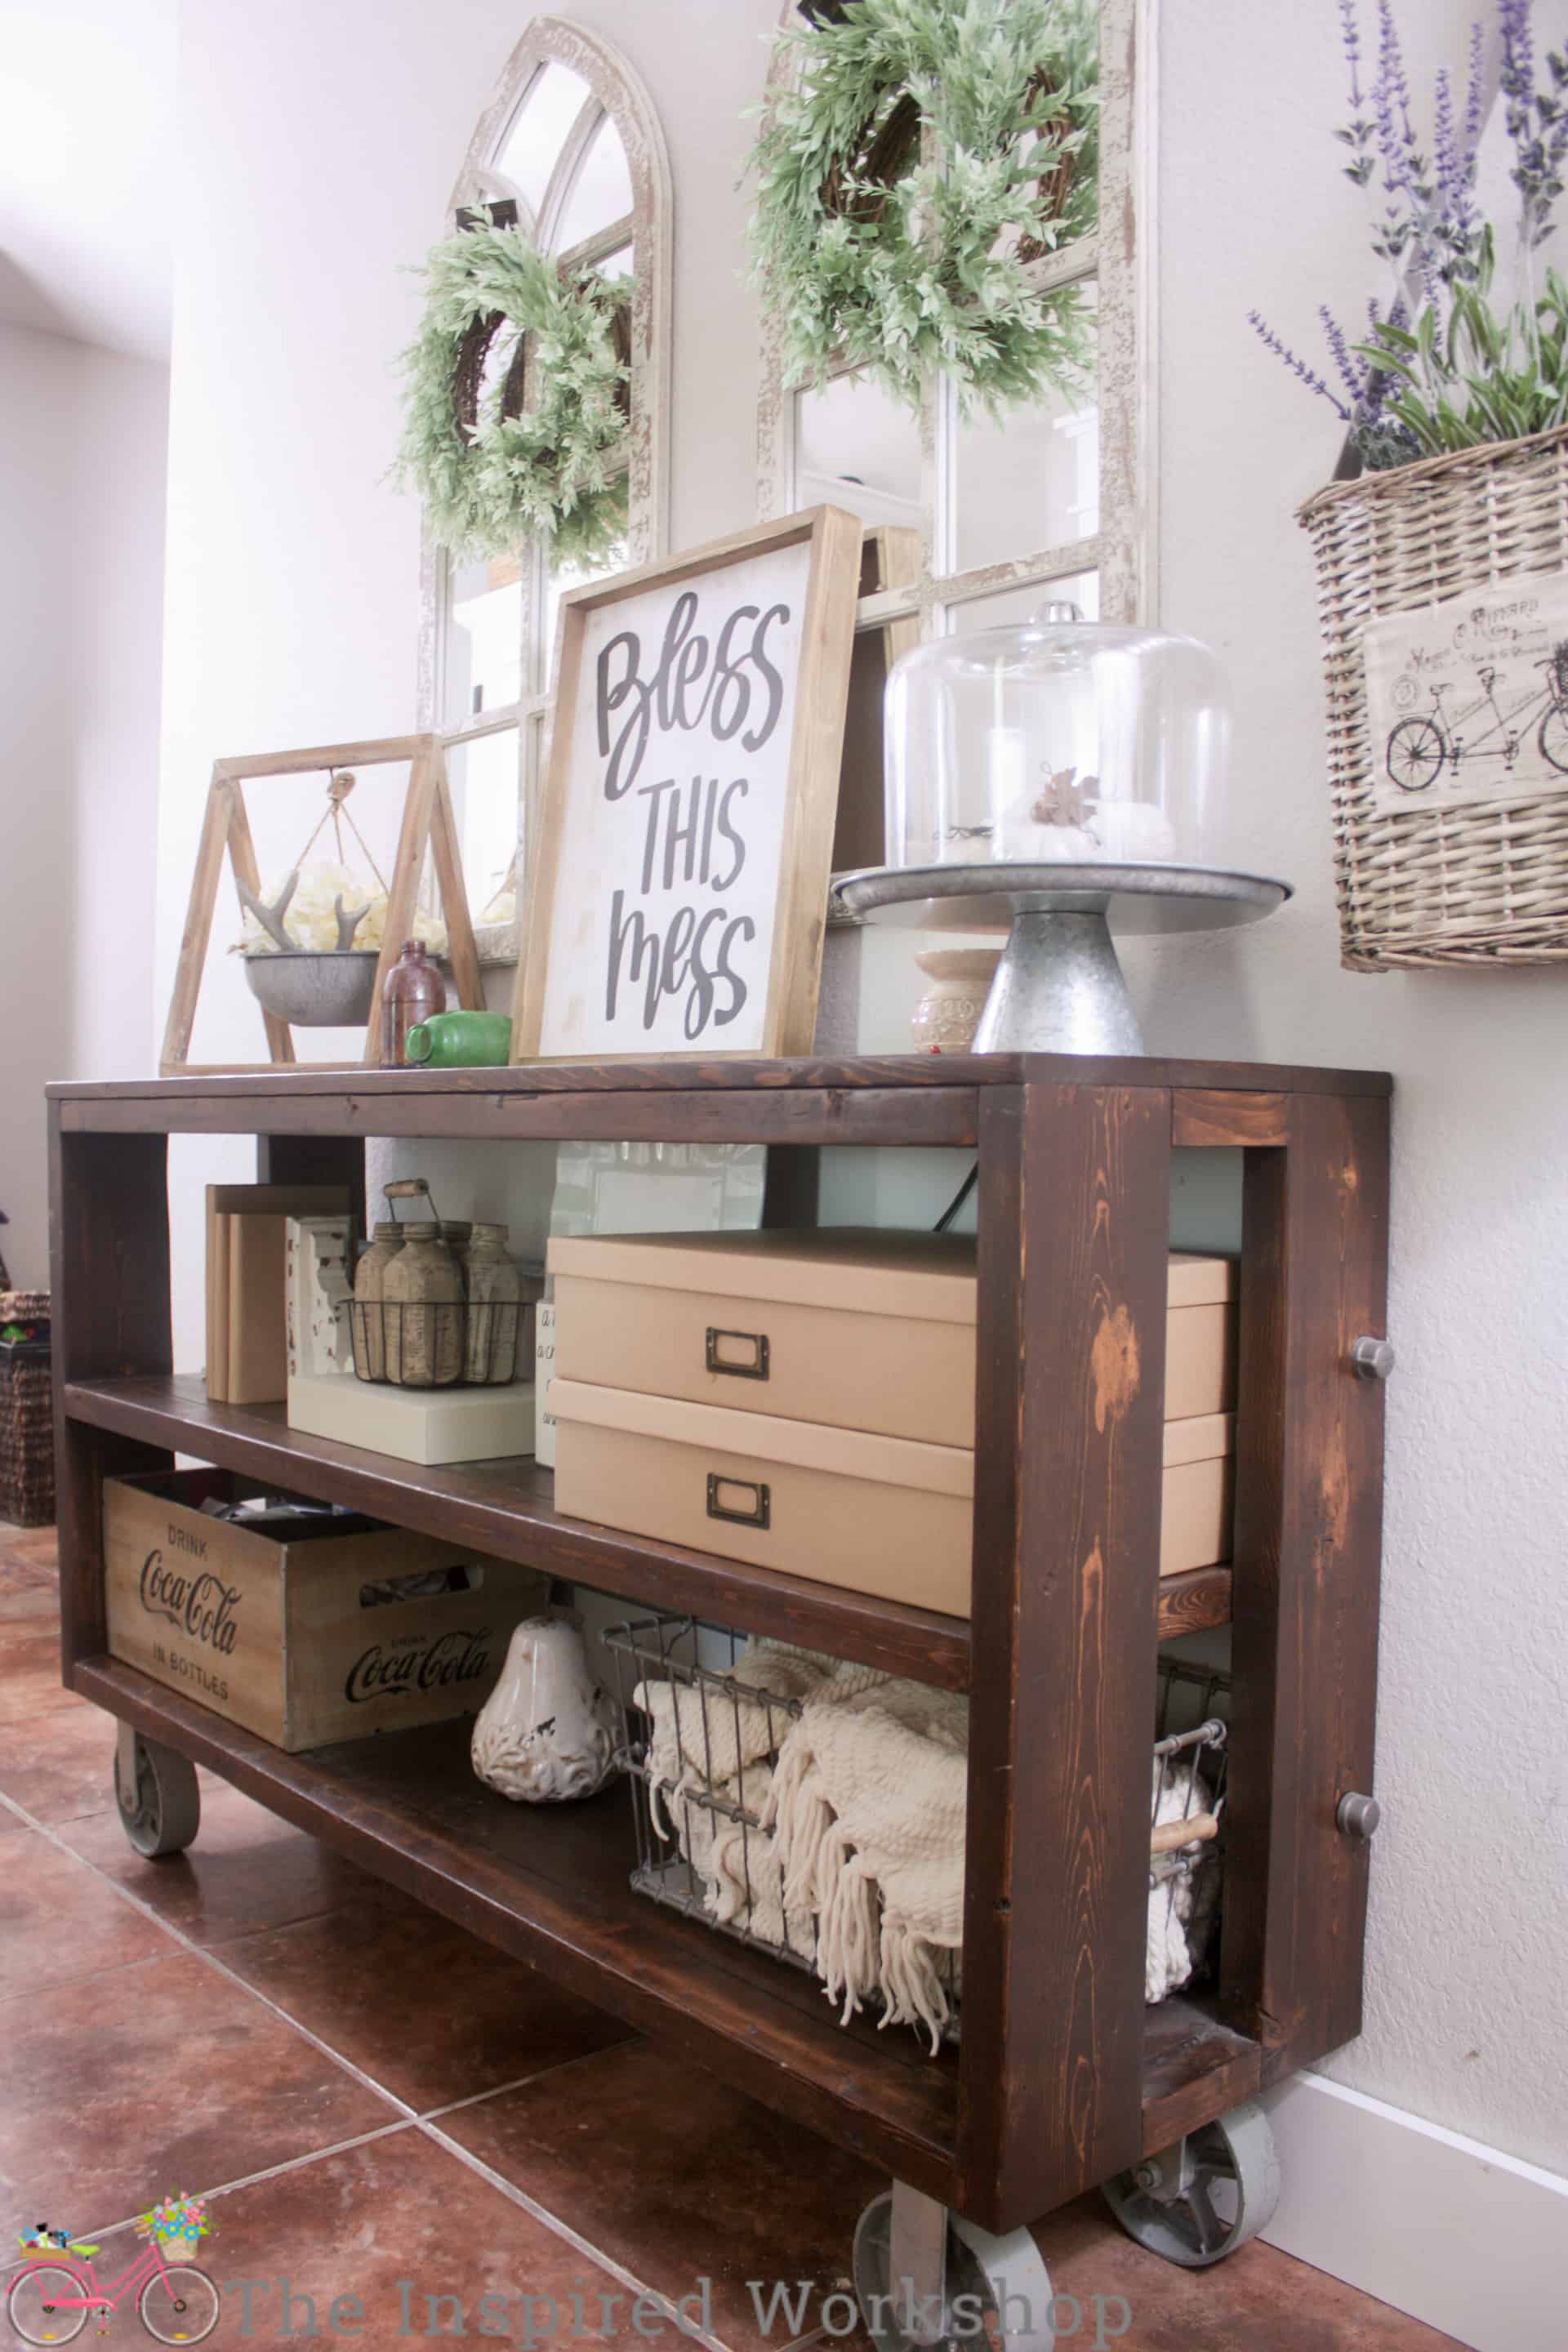
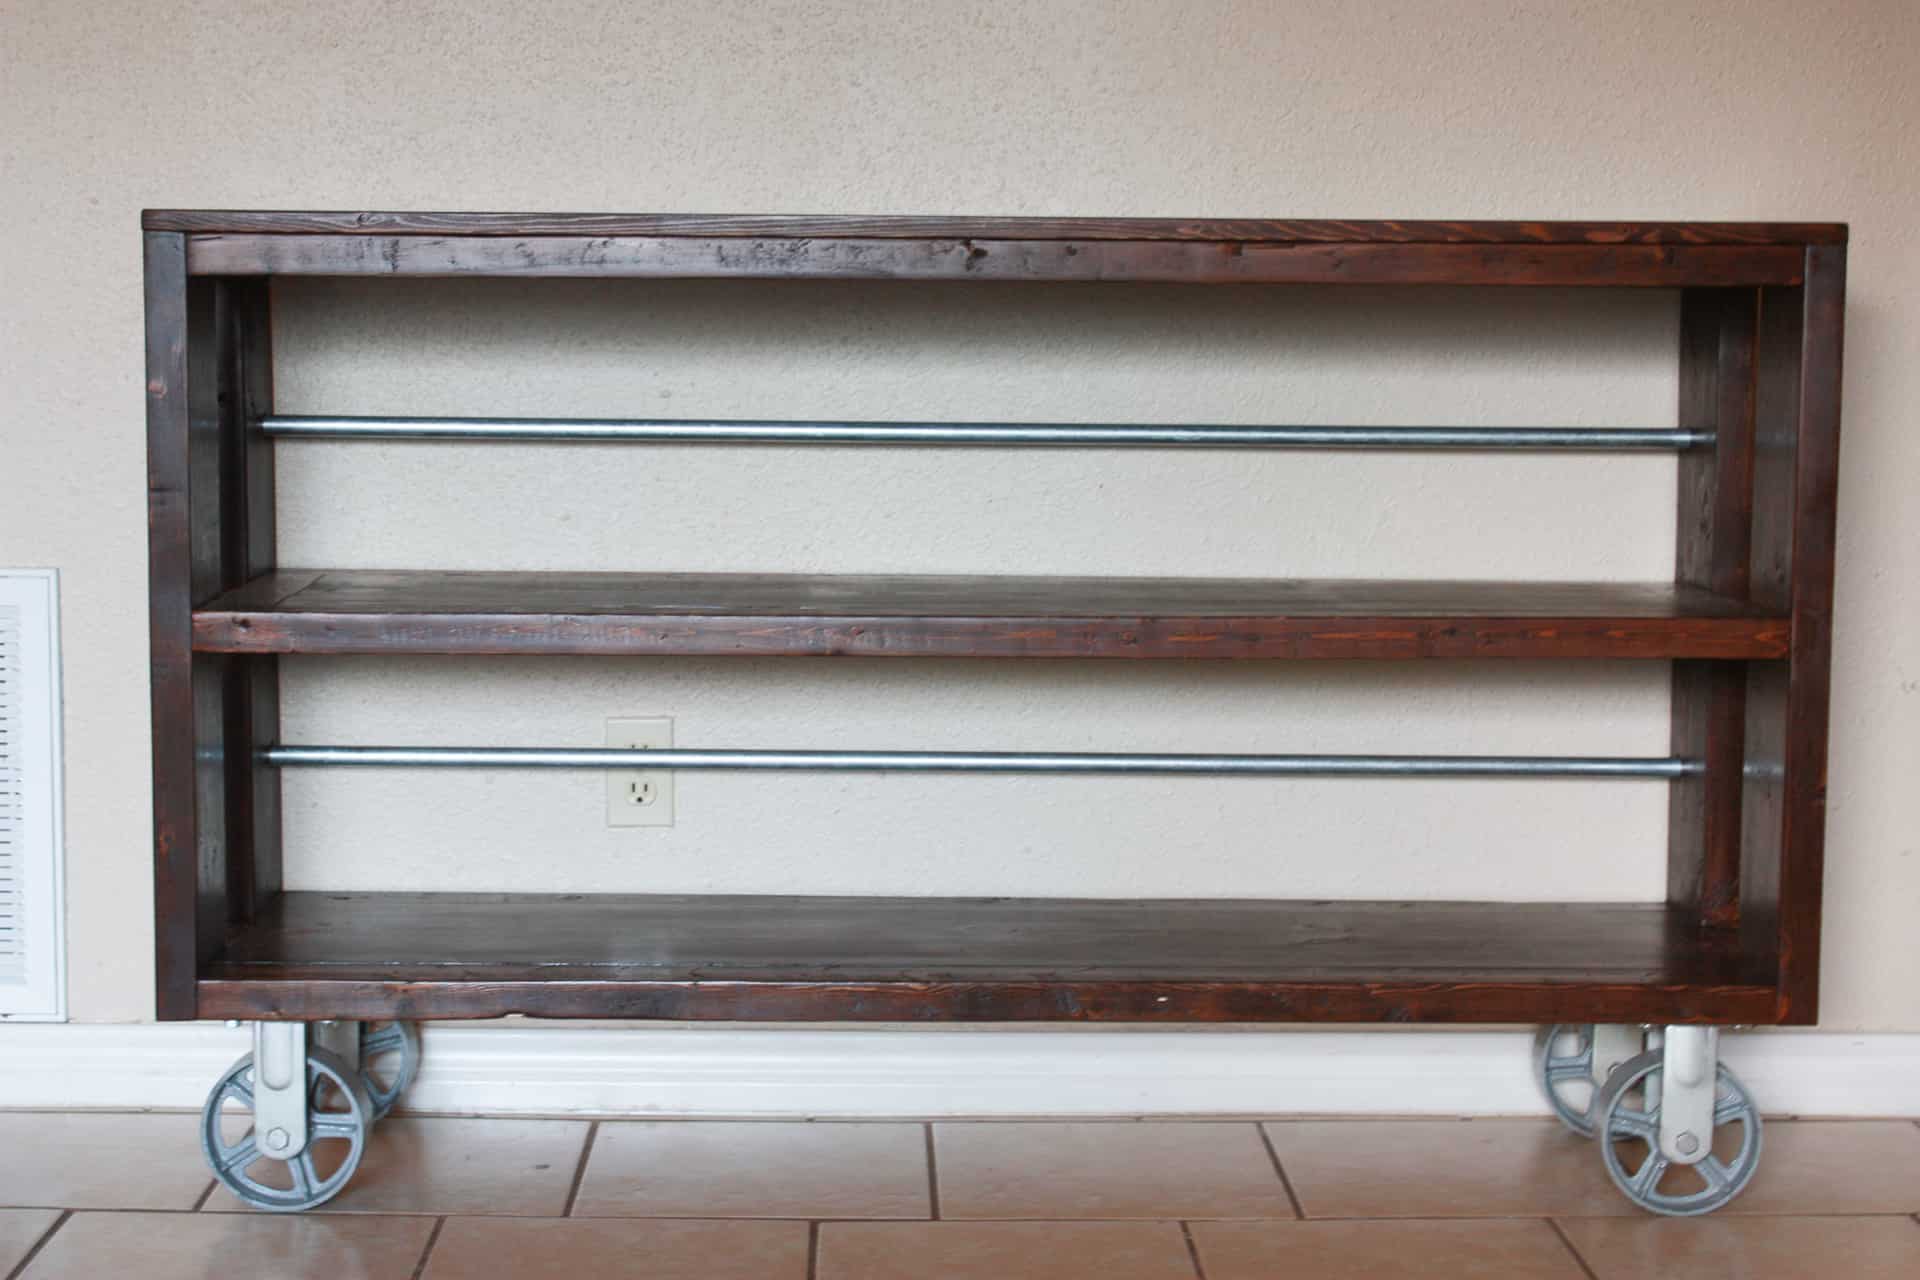
DIY Wood & Steel Console Table
This DIY console table is the perfect balance of wood and steel to make an industrial but classy-looking console table for your entryway, living room to use as a media cabinet, or anywhere you can use a long table! Lots of shelf space for storage and those large steel wheels add to the charm!
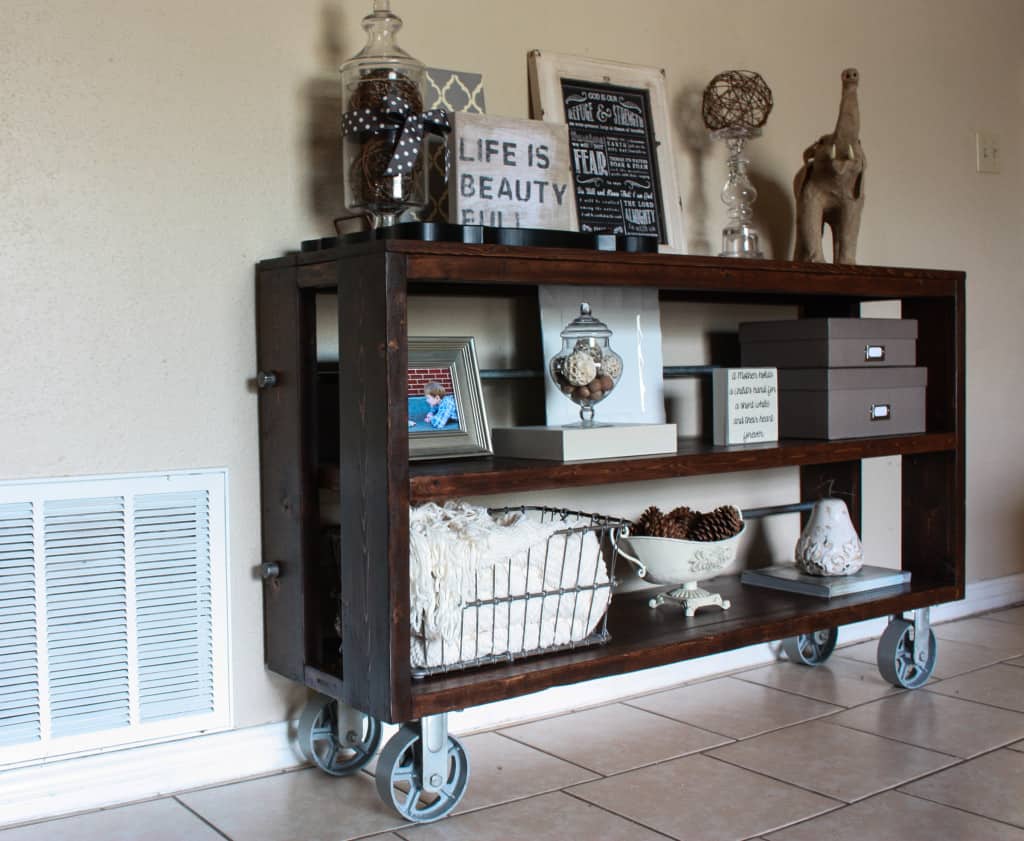
I am super excited to bring you my very FIRST POST EVER!!! Hopefully not my last! LOL! This DIY wood and steel console table is so special to me because not only is the tutorial my very first post, but also it is my first build that I designed the plans for myself!
I have built many things with the help of Shanty-2-Chic or Ana White but this was the first time I saw a table I liked, I drew it out, came up with a shopping list and a cut list… all by myself! I still can’t believe I actually DID it without even wasting any wood! Ha! Surprise Surprise!!! This table is a Restoration Hardware knockoff and is simple to build with my step-by-step plans!
Restoration Hardware offered several sizes in this table anywhere from 4ft to I believe 7ft long and with a hefty price tag of $1500 – 1995 plus shipping and taxes! Wowzer! No thank you! My knockoff look-a-like wood and steel console table was so much cheaper coming in at a grand total of $148.00! Whoop! Whoop! That is for wood, casters (almost half the cost at $68.00) and pipe, I didn’t include finishing supplies because I already had sandpaper, stain, and poly so add a few more bucks for those if you do not already have them!
It is such a simple beauty! I love the industrial metal wheels and pipe and the simple lines that I knew even I could recreate, and if I managed to do it, TRUST me, you can too!

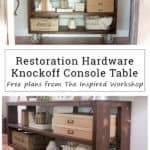
Here are the downloadable plans for you to build your own DIY wood and steel console table!
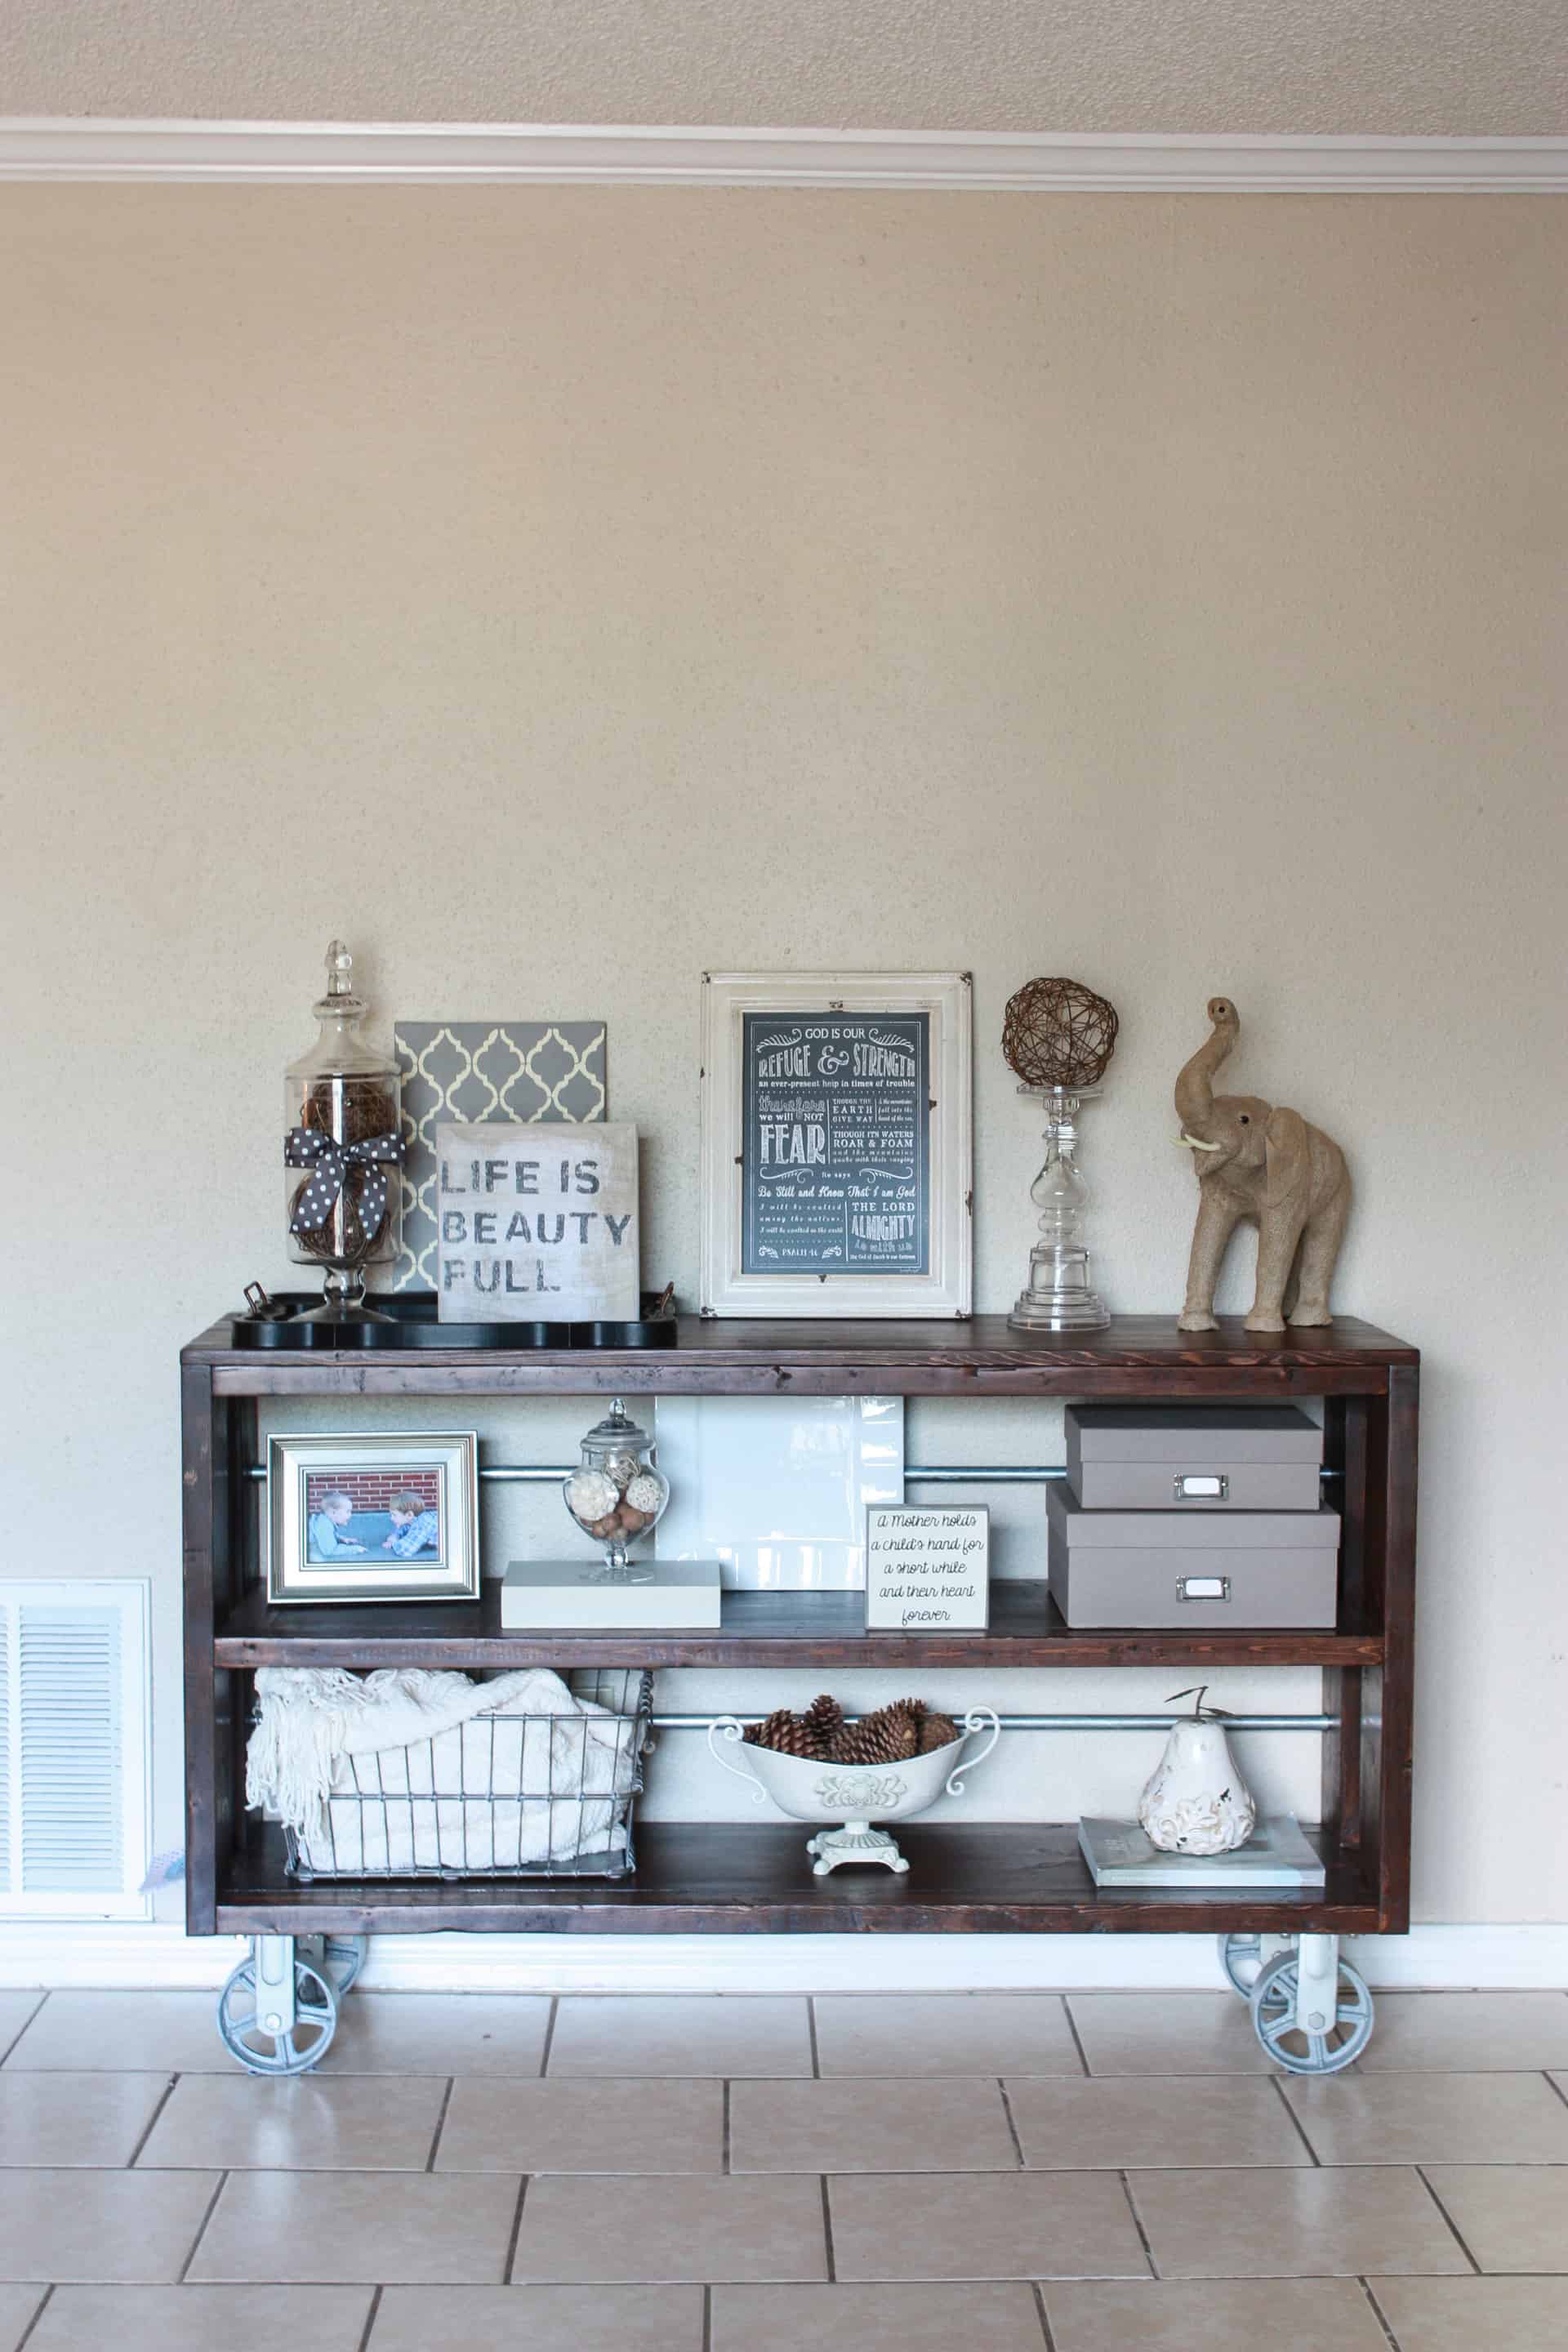
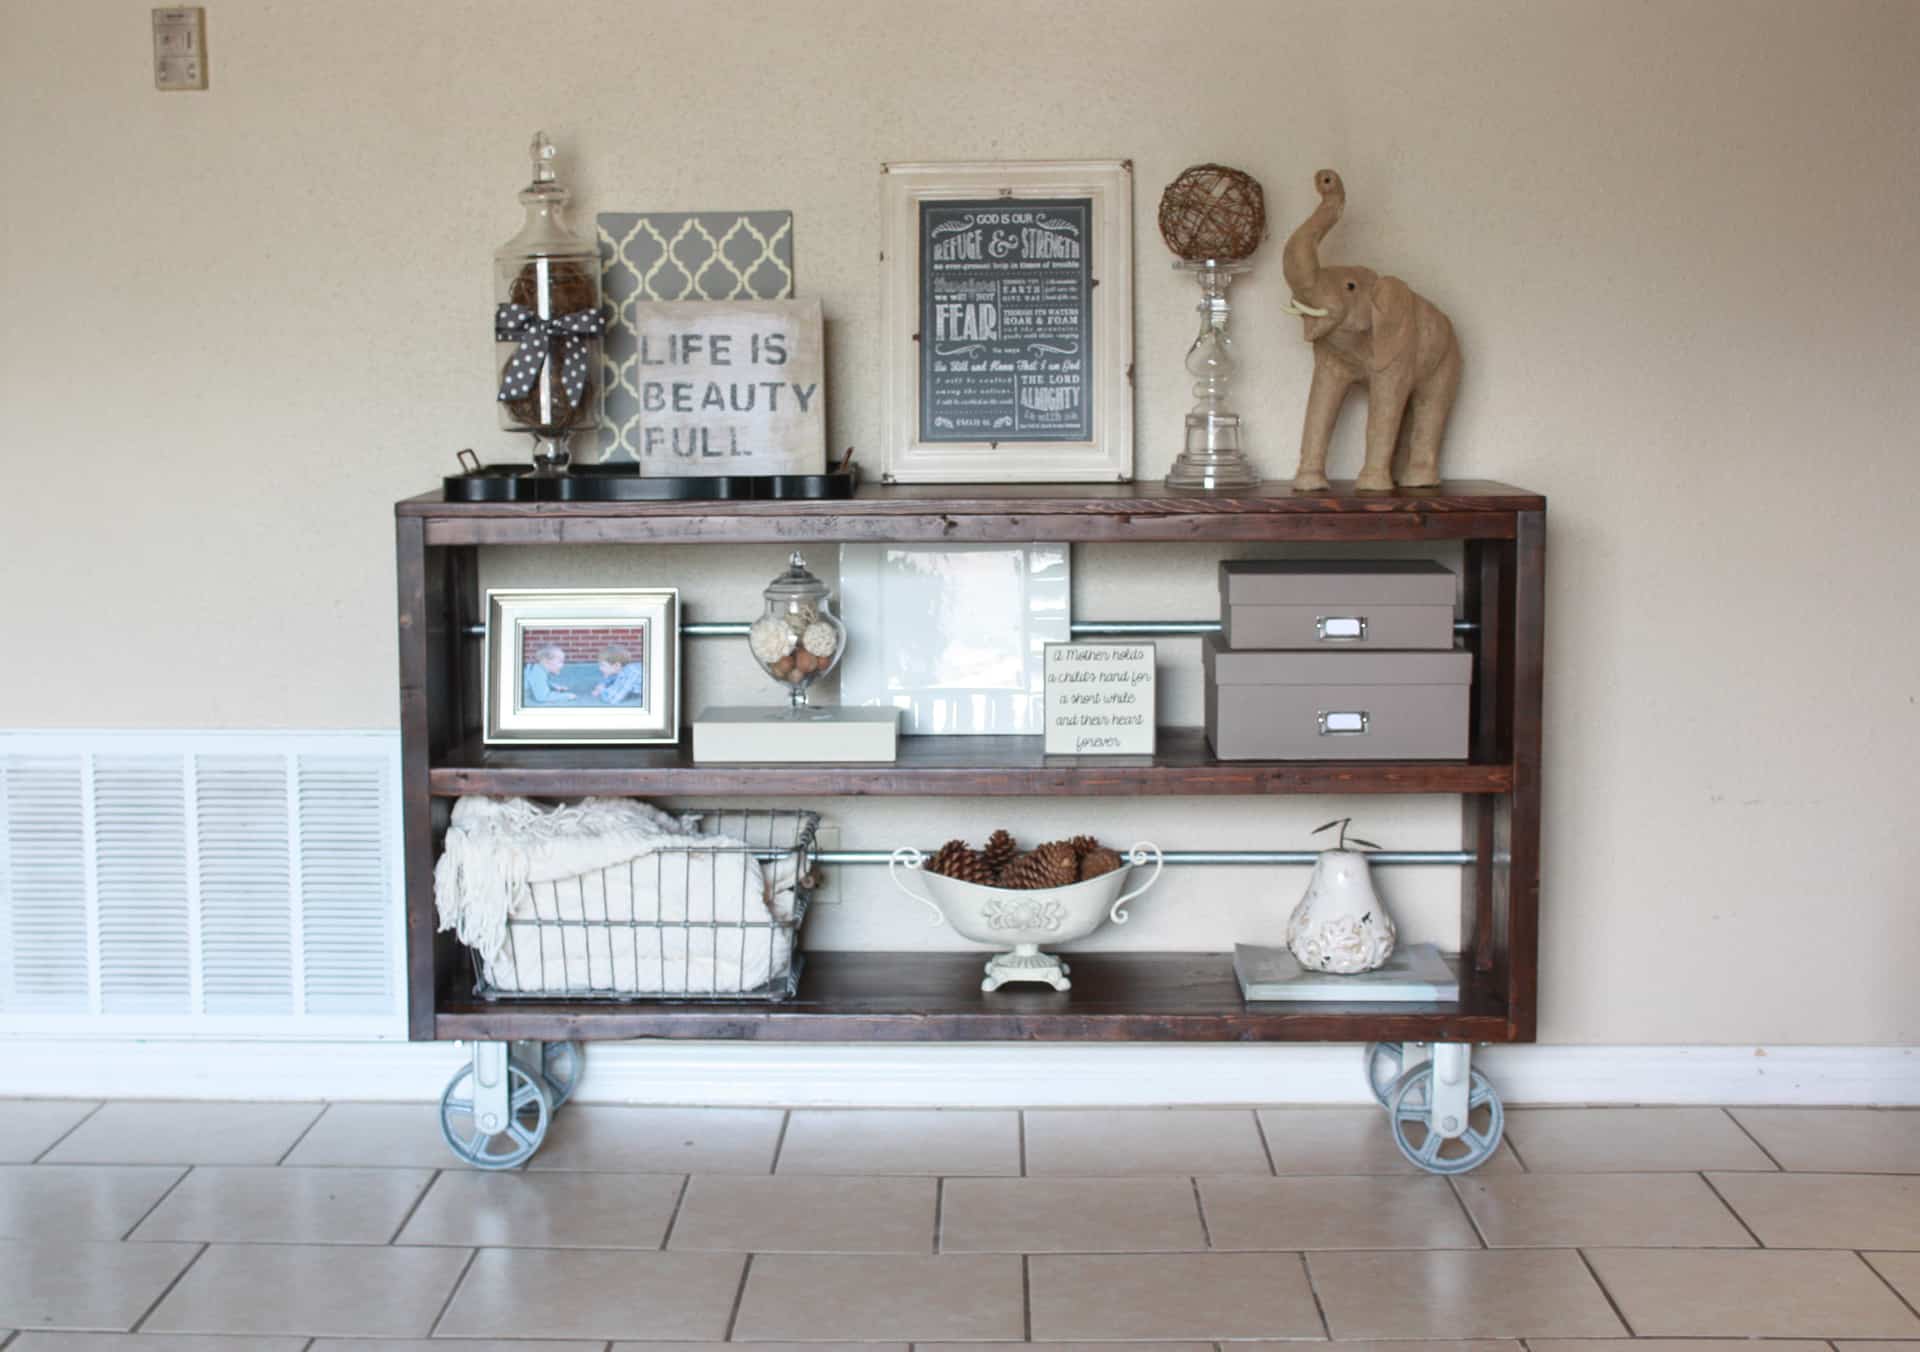
Restoration Hardware Wood and Steel Console
One more look at this console table before we get into the building of it and check out the updated photos from four years later!
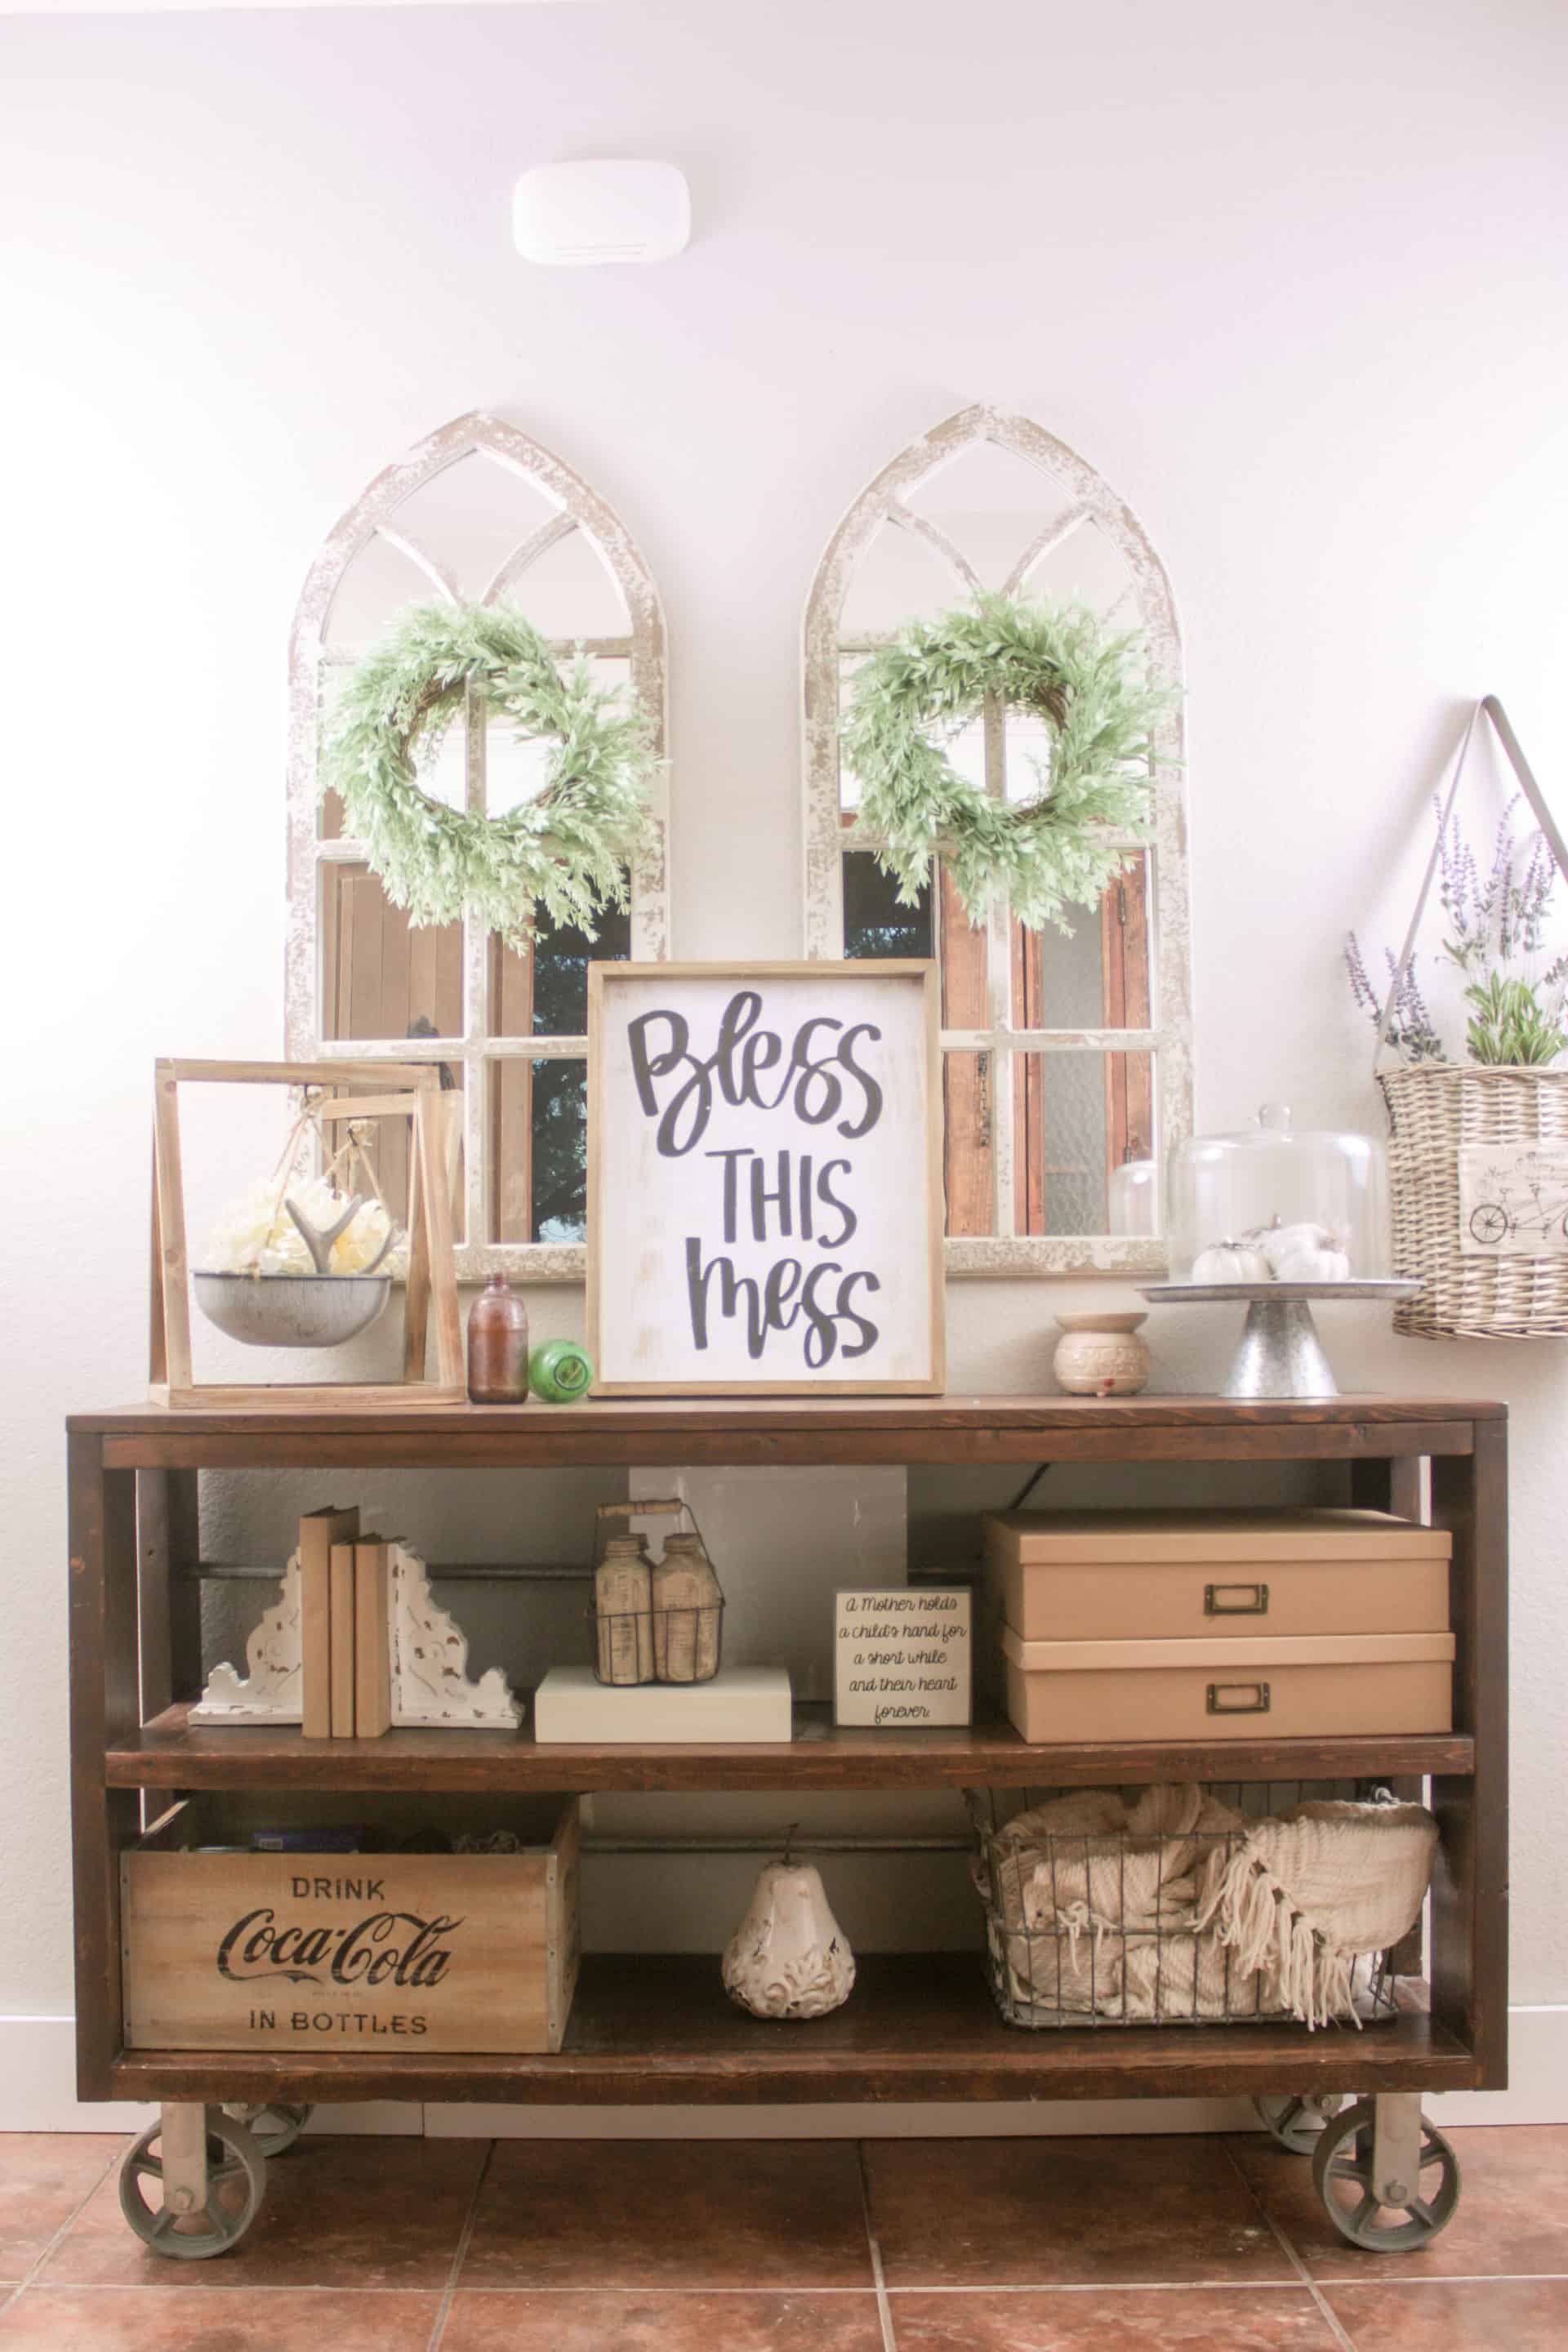
She’s four years old now but still looking as beautiful as ever, but I am building something new for my entryway! It all started with this one little console table, but you should see all the amazing plans I have shared now, check out the media cabinet, the narrow console table, or the herringbone door buffet if you’d like plans for some other amazing furniture pieces!

Isn’t she so purdy! I catch myself just staring at her sometimes…it’s not weird… Let’s get started so you can find yourself staring at your own console table and then you won’t think I’m so weird!😜 Well, you still may…
The overall dimensions of the table are 60″W x 16 1/4″D x 36″H.
Below is the step-by-step tutorial to build the console table, or scroll back up if you want the printable pdf plans!
Gathering Supplies for the DIY Console Table
Materials List for the wood and steel console table:
**Note: Amazon links below are affiliate links. Affiliate links are links that pay me a small commission (at no extra cost to you) should you make a purchase after clicking a link! I always appreciate you shopping at my links, it helps keep this little ole website bringing you new plans!
- 1- 2×2 furring strip – you can buy the shortest length available because you will only need 21 inches of this
- 6- 2x3x8
- 1- 2x6x10
- 3- 1x6x6
- 2- 1x12x6
- 2- 1/2″ x 60″ galvanized pipe
- 4- 1/2″ galvanized pipe caps
- 4- 6″ steel wheels – you can go with a smaller wheel if you’d like, they make the same wheel in 4 and 5 in. as well and will save you a little money!
- saw
- drill
- kreg jig
- socket wrench
- 7/8″ drill bit (for making the holes for the pipe)
- 2″ regular screws (to secure the planked tabletop to the frame)
- 2 1/2″ and 1 1/4″ pocket hole screws
- 16 – 1 1/2″ hex head screws- mine had a head of 9/16″(for attaching the wheels to the table)
- finishing supplies of your choice (sandpaper, stain, and polyurethane)
Cut List for the wood and steel console table:
*Just a note: I do not cut all my wood at first, I start with a certain piece (in this case the legs) and then cut as I go measuring for each additional piece.
- 4 – 2×2 @ 5 1/4″
- 6 – 2×3 @ 56 1/2″
- 2 – 2×3 @ 11 1/4″
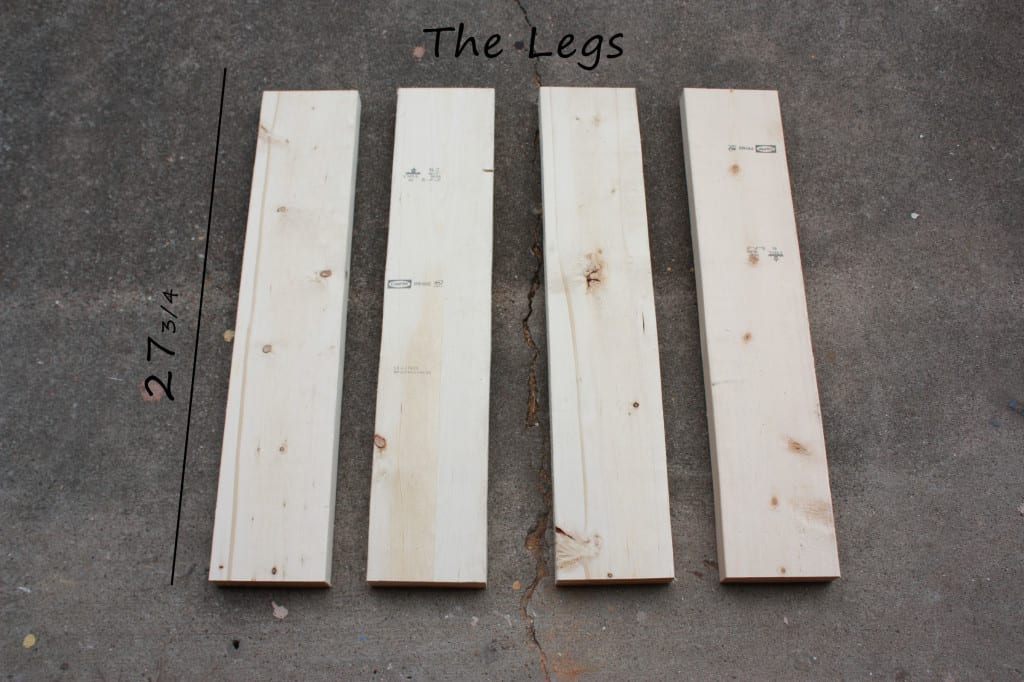
- 4 – 2×6 @ 27 3/4″
- 3 – 1×6 @ 59 1/2″
- 2 – 1×6 @ 11 1/4″
- 1- 1×12 @ 56 1/2″
- 1- 1×12 @ 51 1/2″
Building the DIY Console Table
Ok! To get started you will cut all the “legs” of the table:
Once you have them cut you can proceed to cut the middle 2x2s.
NOTE: Make sure to measure your 1×12 before you cut your 2x2s, my cut list is based on a 1×12 with an actual measurement of 11 1/4, if your 1×12 measures 11 1/2 you will need to adjust your 2×2’s to 5 1/2 inches instead of the 5 1/4 and your 2×3 x 11 1/4 will need to be changed to be cut at 11 1/2 as well!
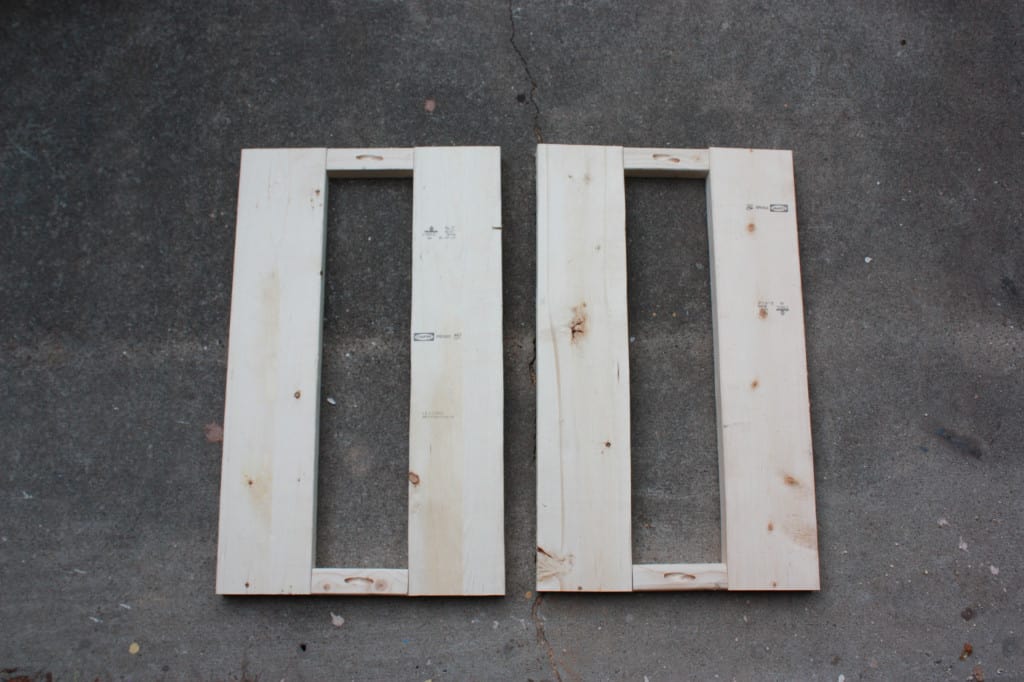
Your 2×2 pieces will need two pocket holes drilled to attach them to the 2x6s or “legs”- you will need to drill two 1 1/2 in holes with your Kreg Jig on each 2×2 and then use 2 1/2 in screws to attach!
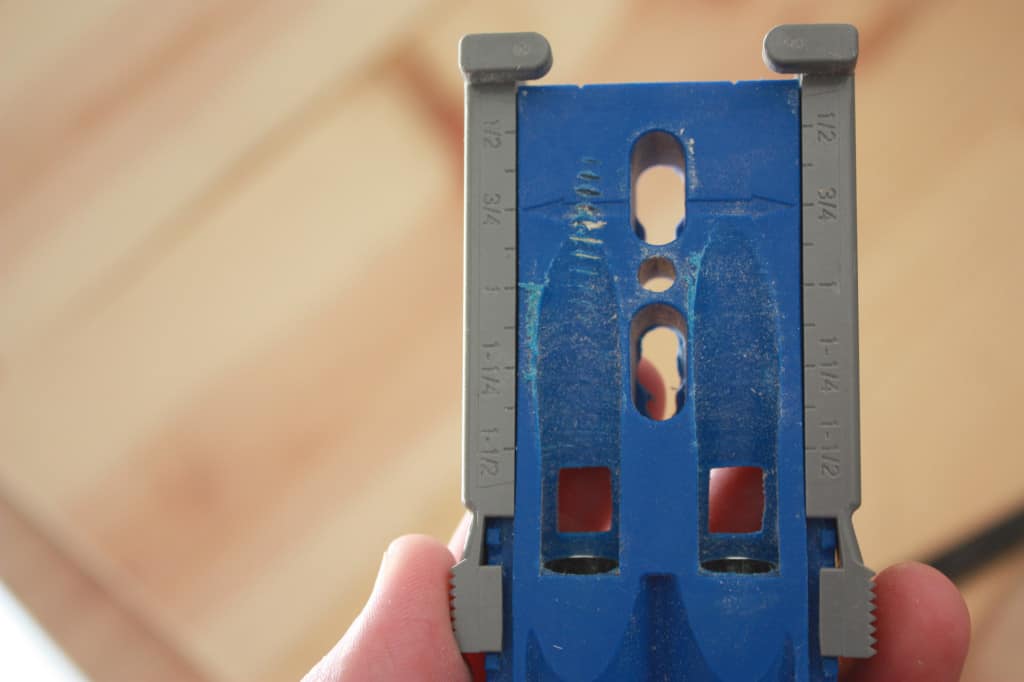
For anyone not aware of a Kreg Jig, it is simply a drill guide to drill pocket holes which then conceal the screws that attach your boards! I do not have a fancy-schmancy Kreg Jig, just a simple little Kreg Jig Jr…
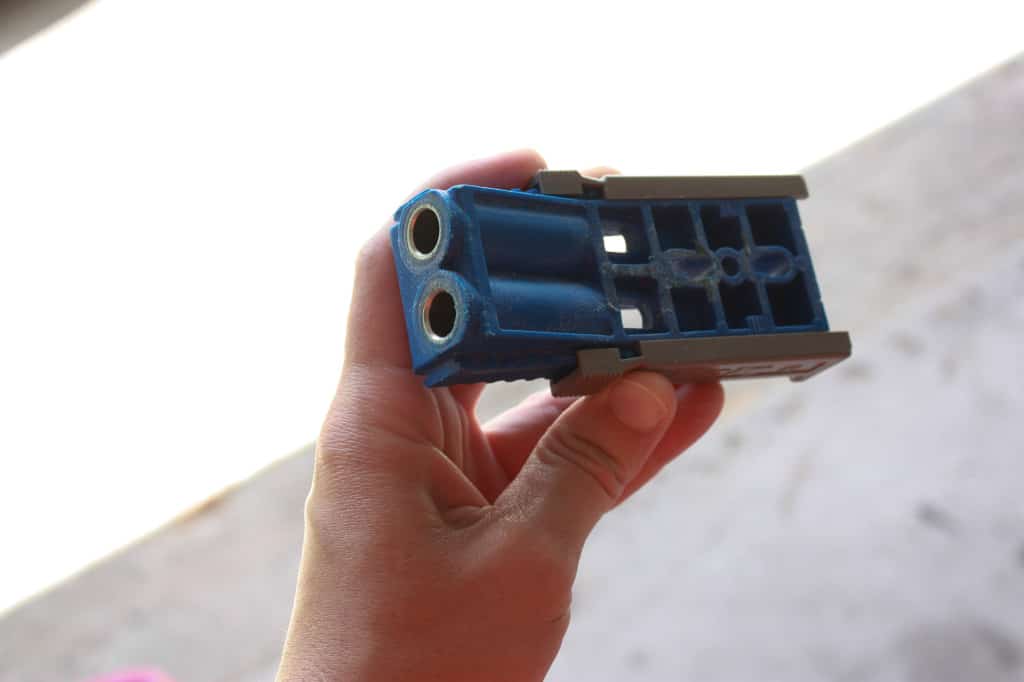
and for $39.99 you can’t beat what it can do! (you can tell mine is abused…which is beautiful because that means it’s being used and I am building 🙂 It can do anything the more expensive models can do but with a little needed elbow grease to clamp it onto your board! If price isn’t an issue, then, by all means, go for a better model, when I bought this it was for my first project and I wasn’t sure I would actually be able to build something so I didn’t want to go all out, I went cheap! Any way you do it, you won’t be disappointed, I promise! Go grab one from Home Depot, Lowe’s, Woodcraft, or AMAZON!
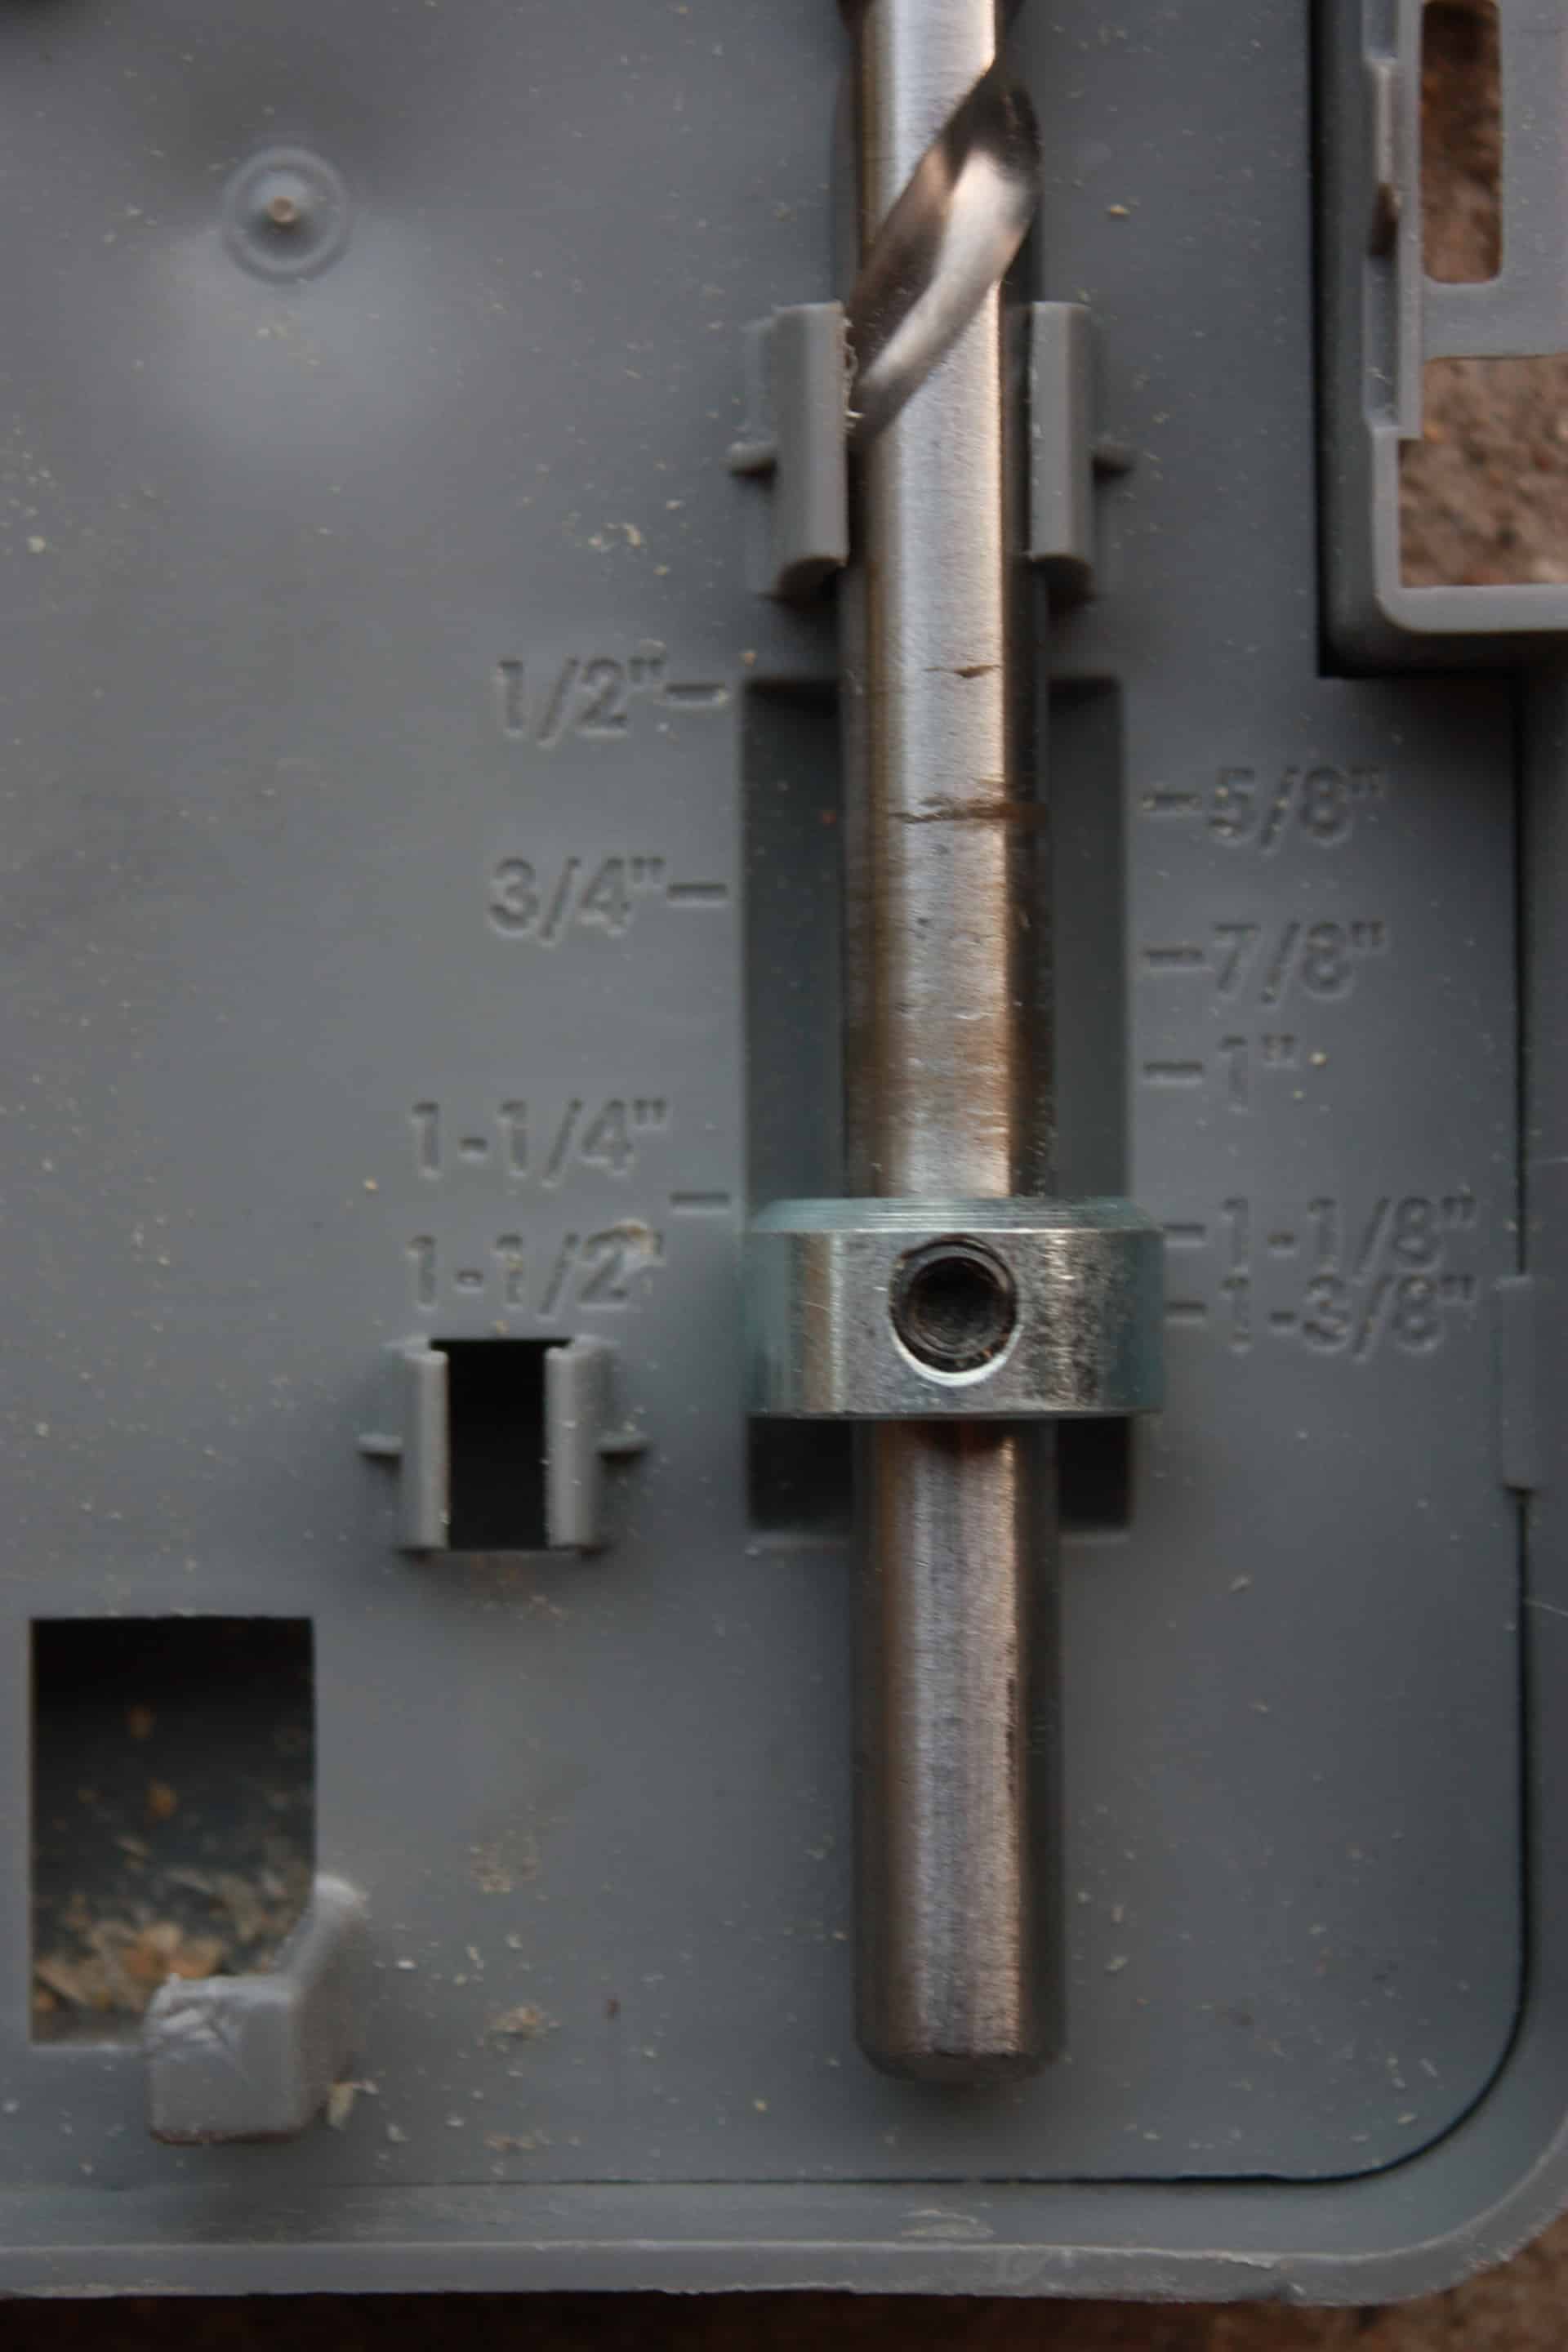
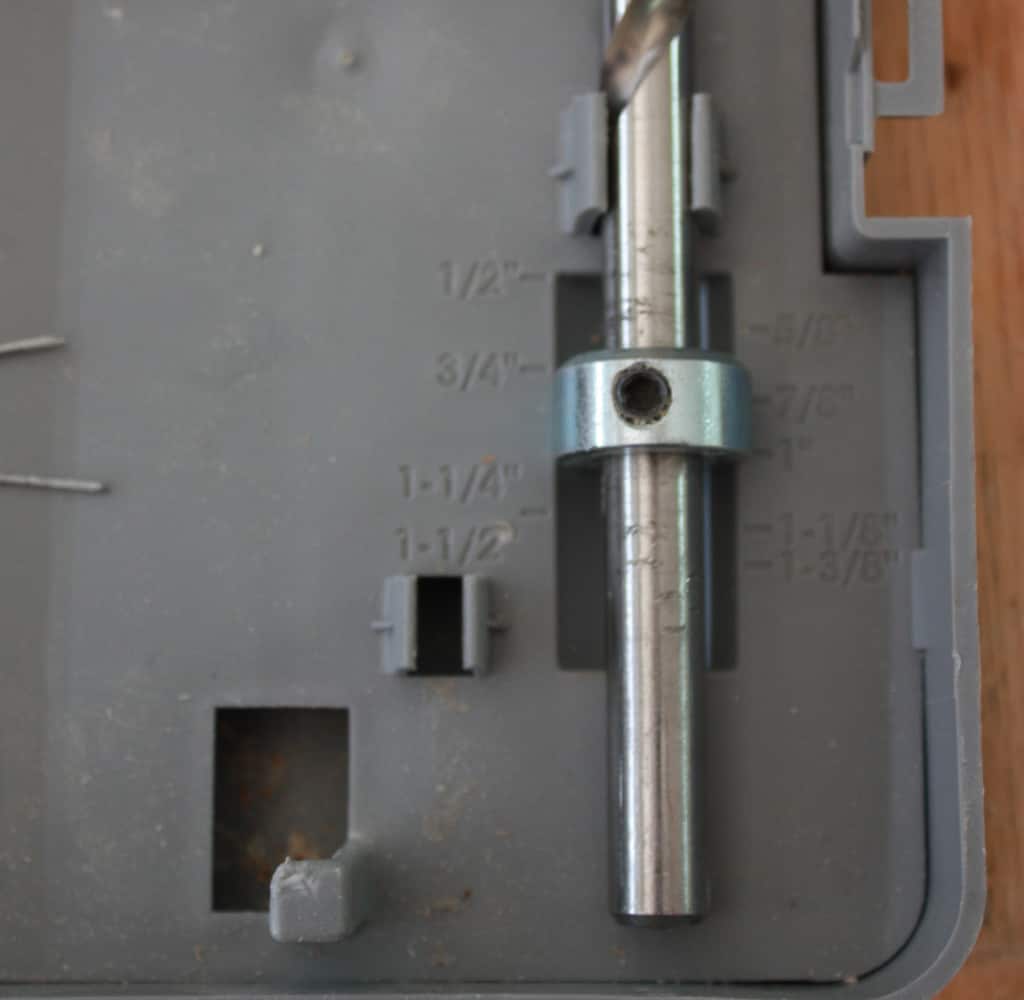
So to get to the fun part: to drill your holes, get your Kreg, and set it for the width of the wood you are working with, this 2×2 is 1 1/2 inches (actual width) so we set our gray slides to 1 1/2.
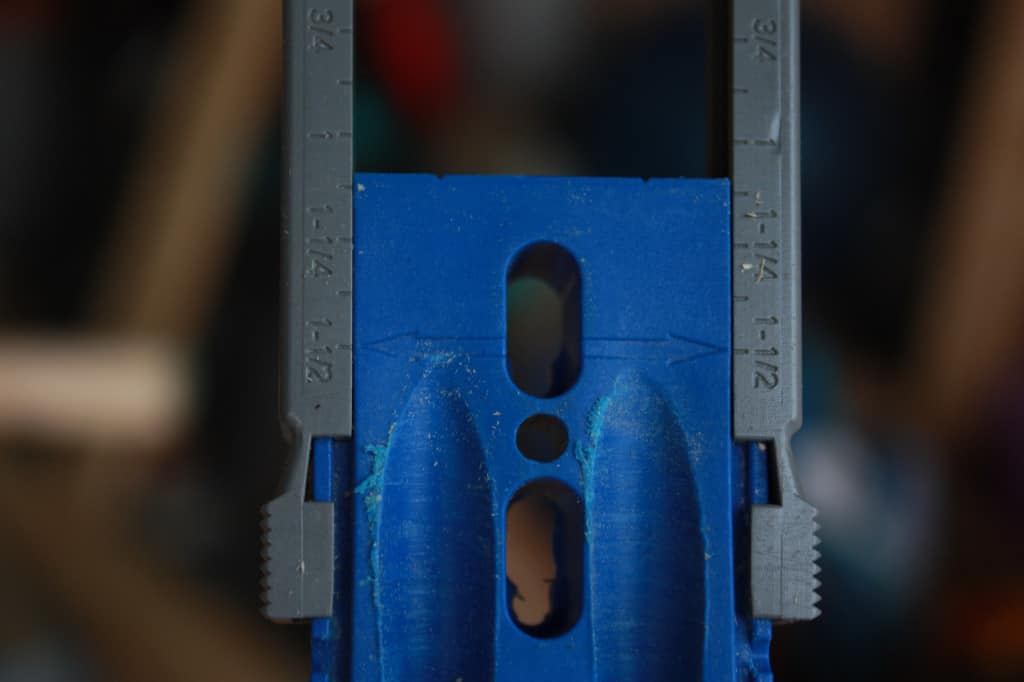
Next, you’ll set your drill bit to 1 1/2
Then all you have to do is clamp your Kreg jig to your board and drill it, baby…
(the picture above is just an example)
then you will have beautiful holes like mine…okay well yours may look better because mine are a little off from each other… no big deal…this doesn’t affect the job it’s supposed to do! I’m sure of it 😉
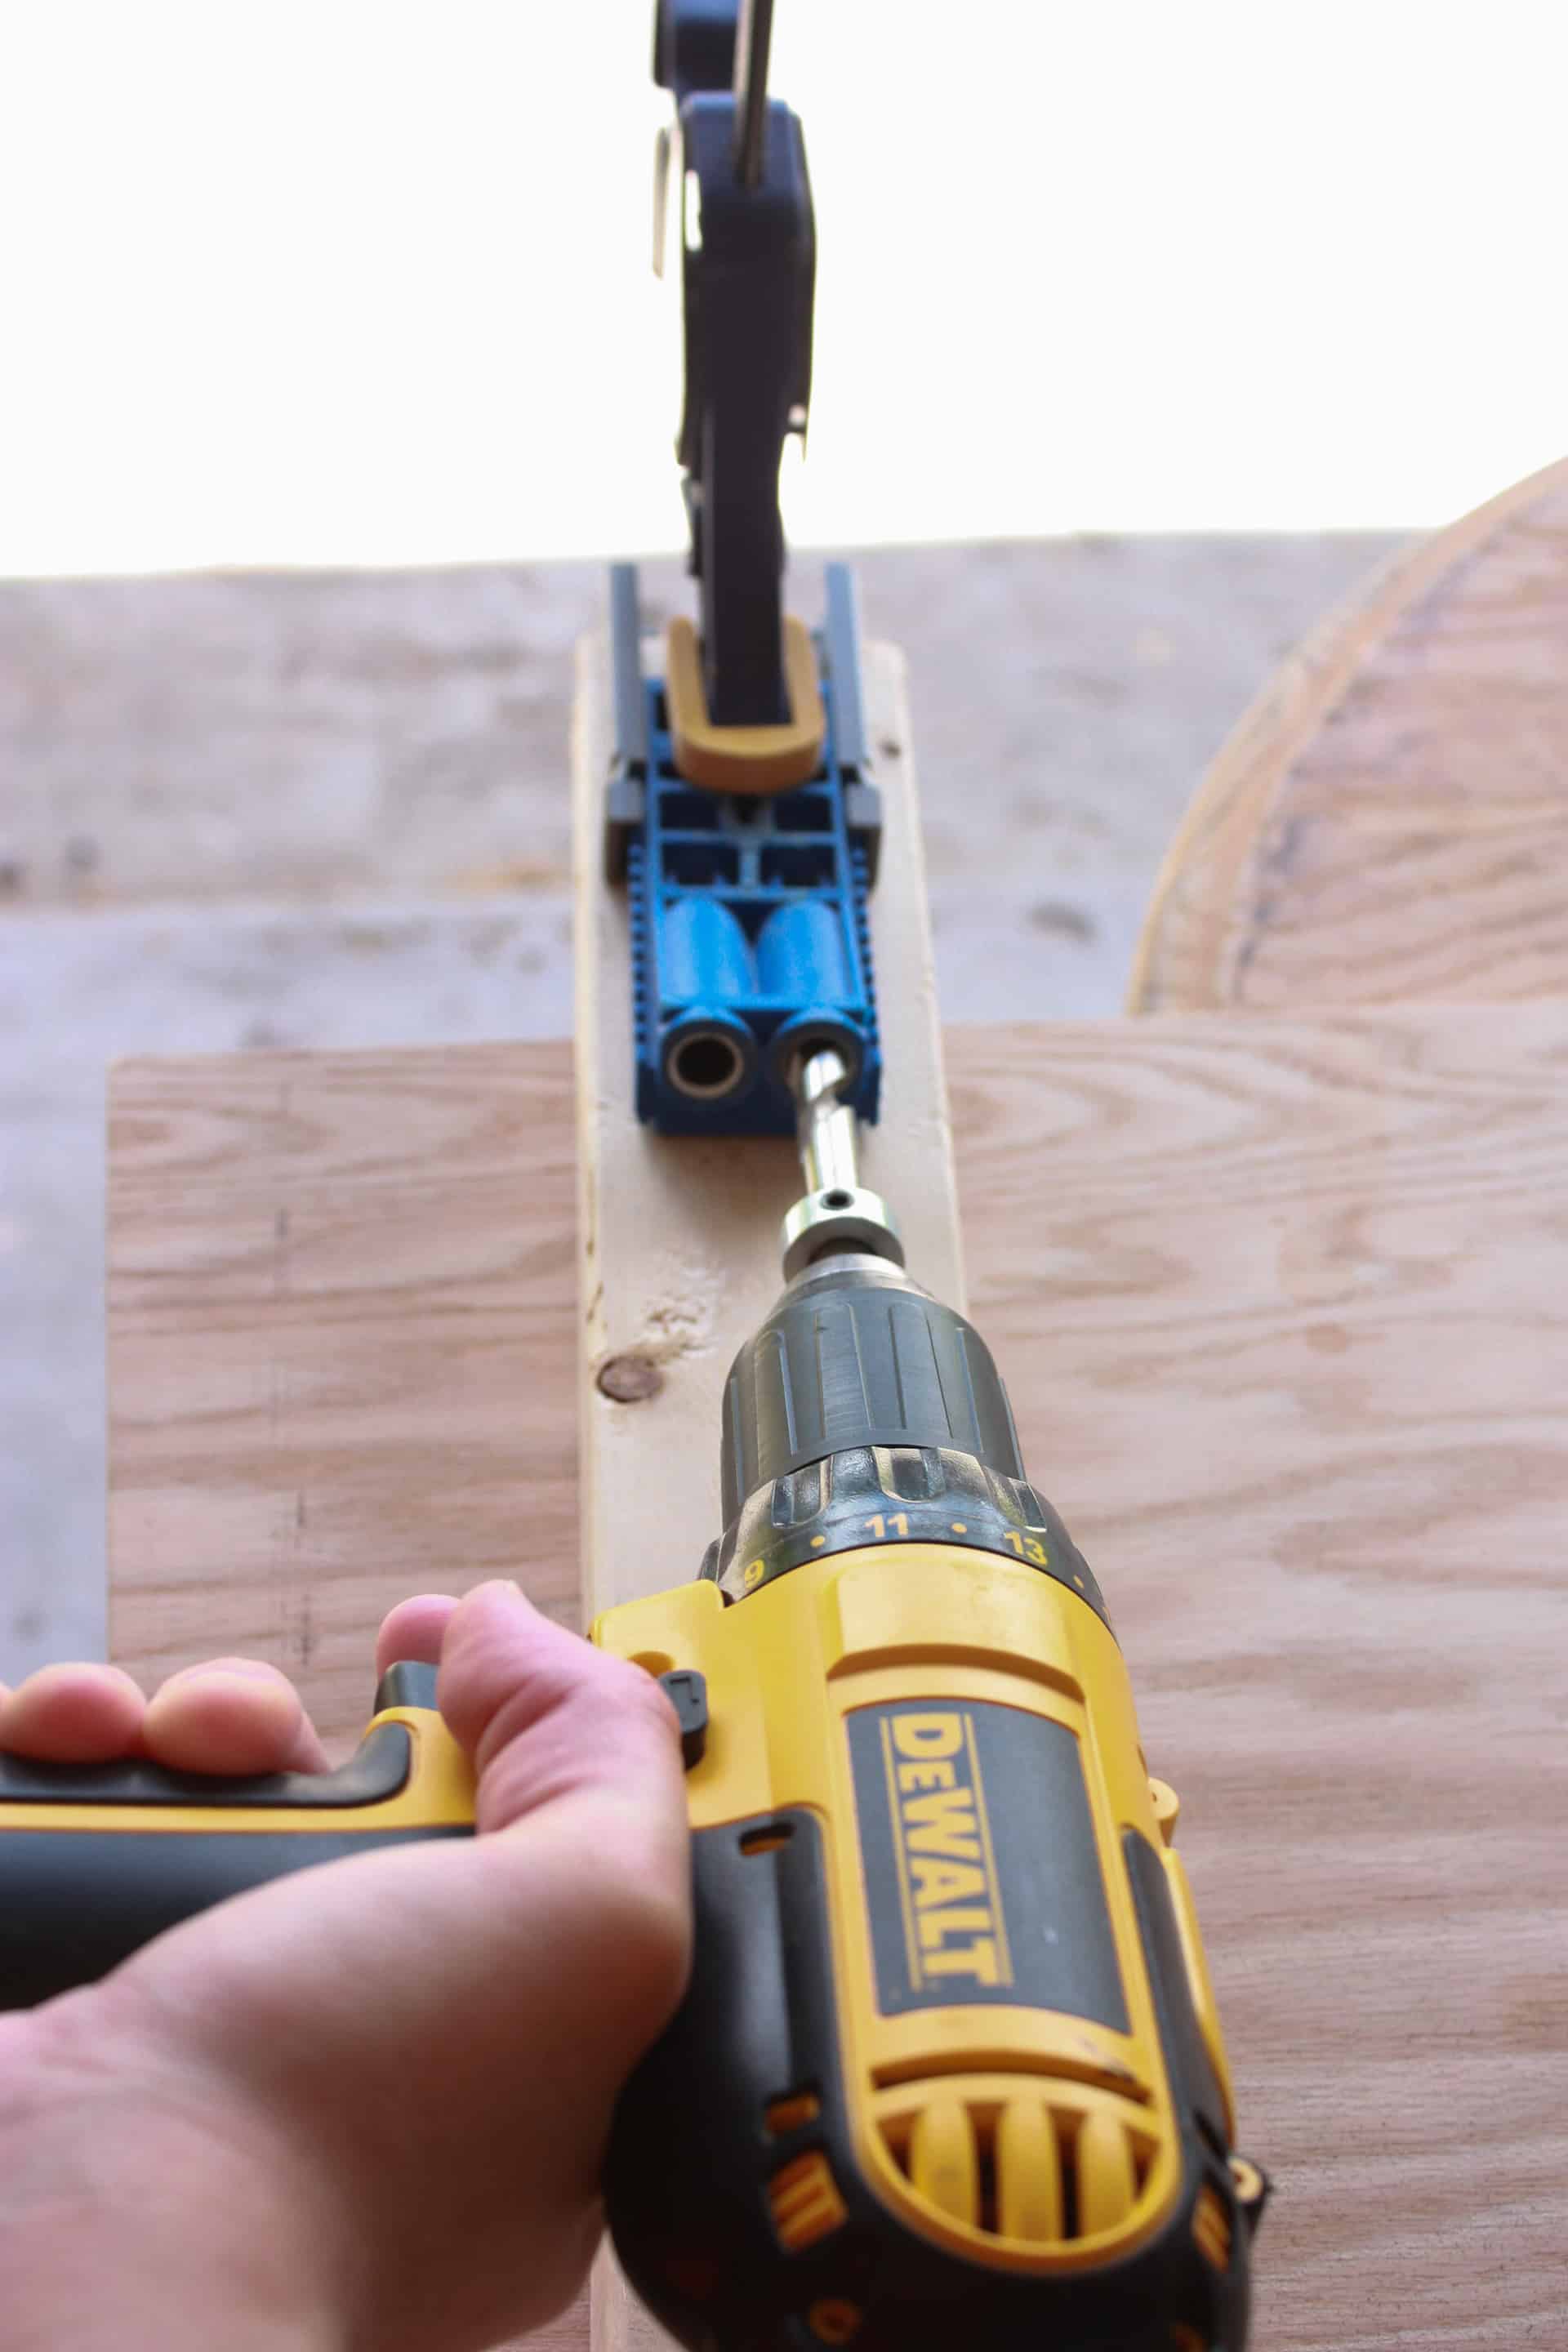
Now that we have our first holes drilled, add some glue and screw in your 2 1/2 inch pocket screws (you can use regular screws but Kreg makes awesome square head screws that are almost impossible to strip…thank you Lord… and your Kreg Jig set will come with a long square head screwdriver bit) … Viola… that was so easy! Now we can sit back relax, grab a drink, pat ourselves on the back, and celebrate this amazing victory… Okay, sometimes I like to celebrate Every Step Of The Way!
Moving on…
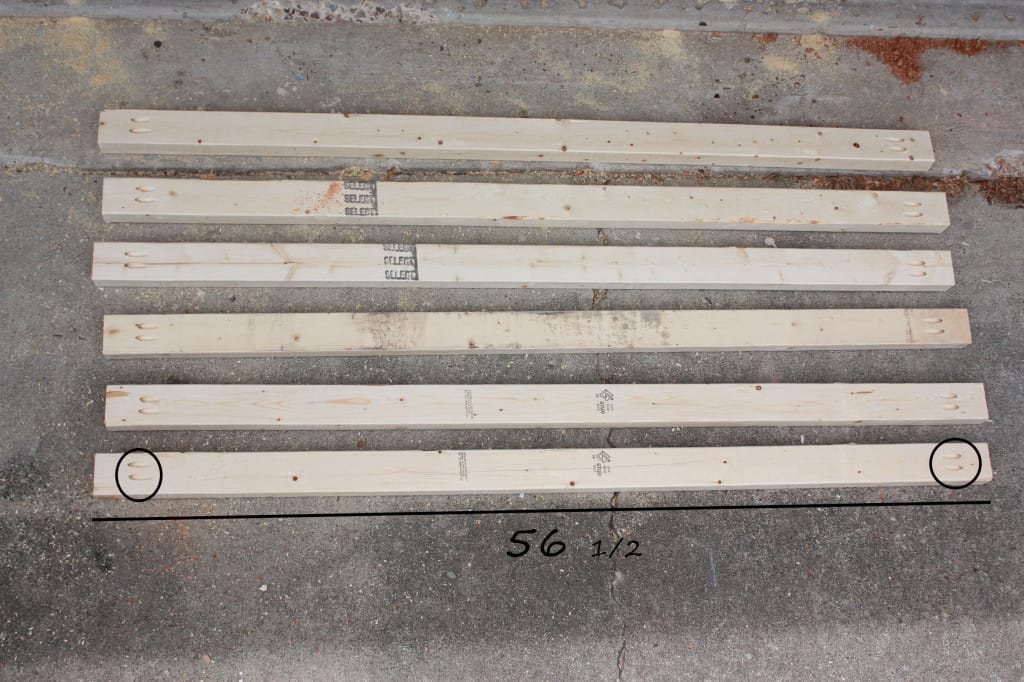
Now we shall cut our 2×3 x 56 1/2.
* An important note on this step: make sure your 2×3’s are cut no longer than 56 1/2″, they can be slightly shorter but if you go any longer than 56 1/2 your pipe caps will not be able to screw onto the ends of the pipe- but if you cut them a hair shorter, you can always have your pipe cut down a smidgen and rethreaded (I would know because I totally had to do this)!
Alamo Hardware rocks because they did this for me several times without complaint! I told you I kind of have a problem measuring!! But it all worked out, although this will not be the case if you cut them too long, you will then have to buy a whole new, and longer pipe- so don’t do that! Well, unless you want to, who am I to try and stop you?!
So your 2x3s will end up looking like the ones below with two pocket holes drilled on each end, again still using 1 1/2 in holes ( because the actual width of the wood is 1 1/2), and later we will attach them to our legs using 2 1/2 in. screws.
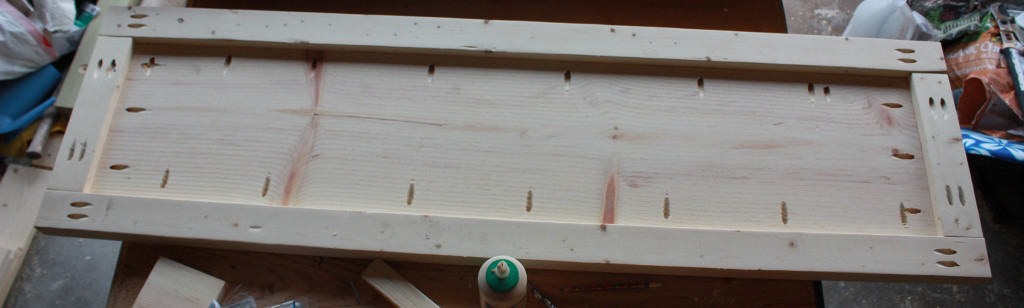
The 2x3s will become the front and back edge of all of your shelves, so once your 1×12’s are cut, we can drill pocket holes around all four sides to attach the 2x3s, you must adjust your Kreg Jig at this point because your 1×12’s actual width is 3/4″ so we adjust the gray slides to 3/4,
and then we have to adjust the drill bit to 3/4.
So now all we have to do is clamp and drill! The 1x12s are going inside the 2x3s to make the complete shelves! I did the bottom and middle shelves slightly different from each other. Here’s where I put the pocket holes.
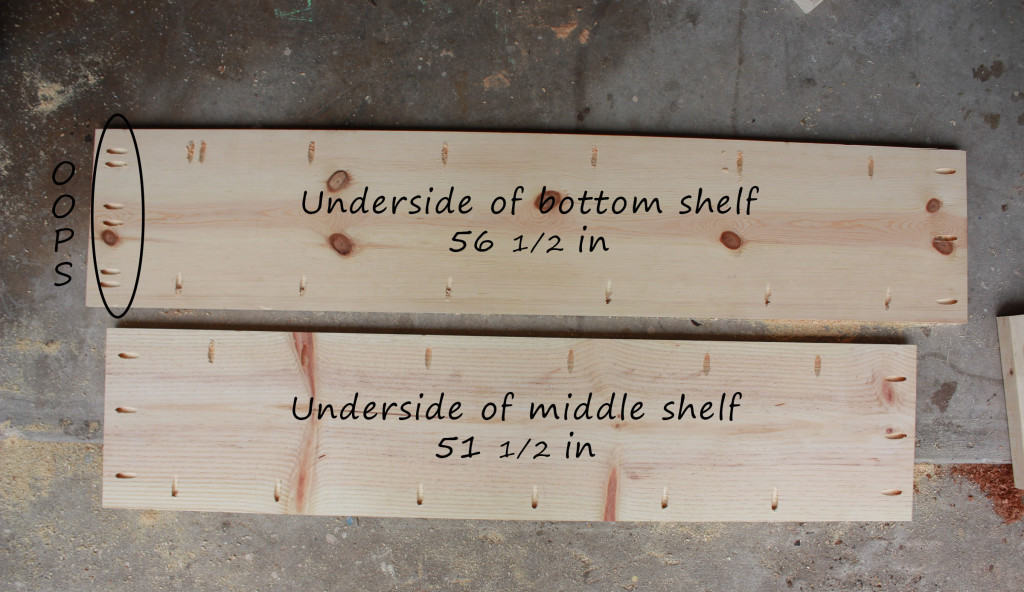
As you can see, on the left side of my 56 1/2″ board I accidentally drilled the wrong holes so I have a total of 6 holes along that one side but you only need 3!
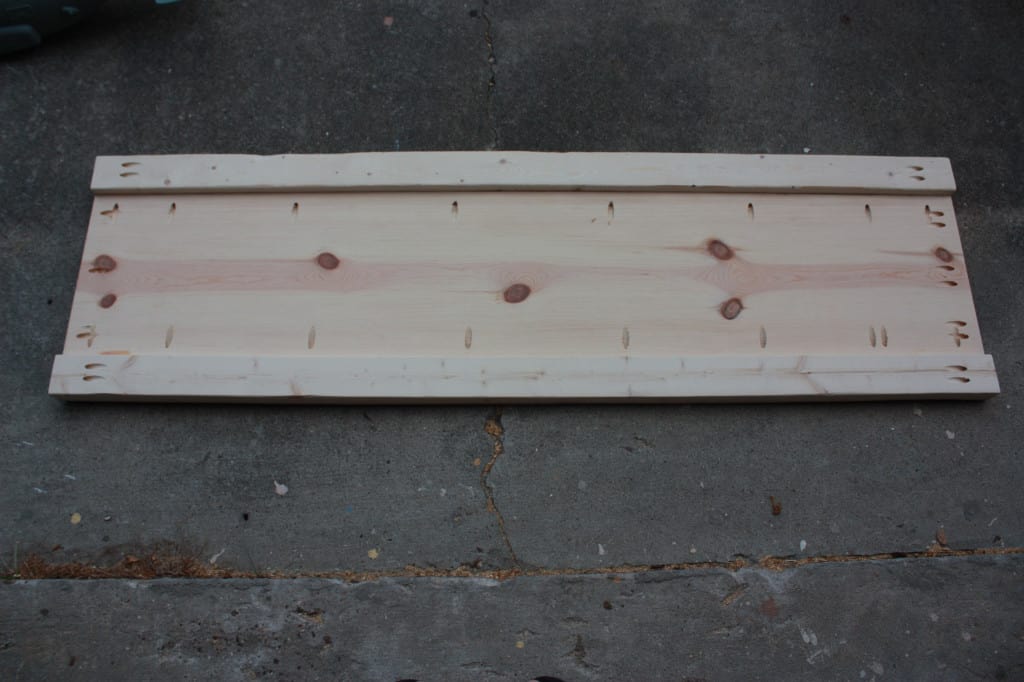
It’s time to join the 1×12’s to the 2×3’s to make the shelves, but do you remember in the cut list, the 2×3’s cut @ 11 1/4″ (or 11 1/2″ depending on the actual size of your 1×12) we will attach these two boards to the ends of the 51 1/2″ board…sounds a little like, “what?” just see the pictures down below! Here are the 2×3’s @ 11 1/4″, they need 1 1/2 ” pocket holes two on each end.

We will attach these to the 51 1/2 in. 1×12

After gluing and screwin’ all the boards together it should look something like this
…please excuse the MESS, I tried to crop all the junk out of the pic but it didn’t work, I can’t help it that the garage is storage, a trash can late at night when I don’t want to go outside to the big trash cans, and home to EVERYTHING I am tired of looking at inside! Yes, you have to be insane to be able to work in these conditions! Enough said!
Anywho, that’s what your middle shelf will look like after attaching all the boards together!
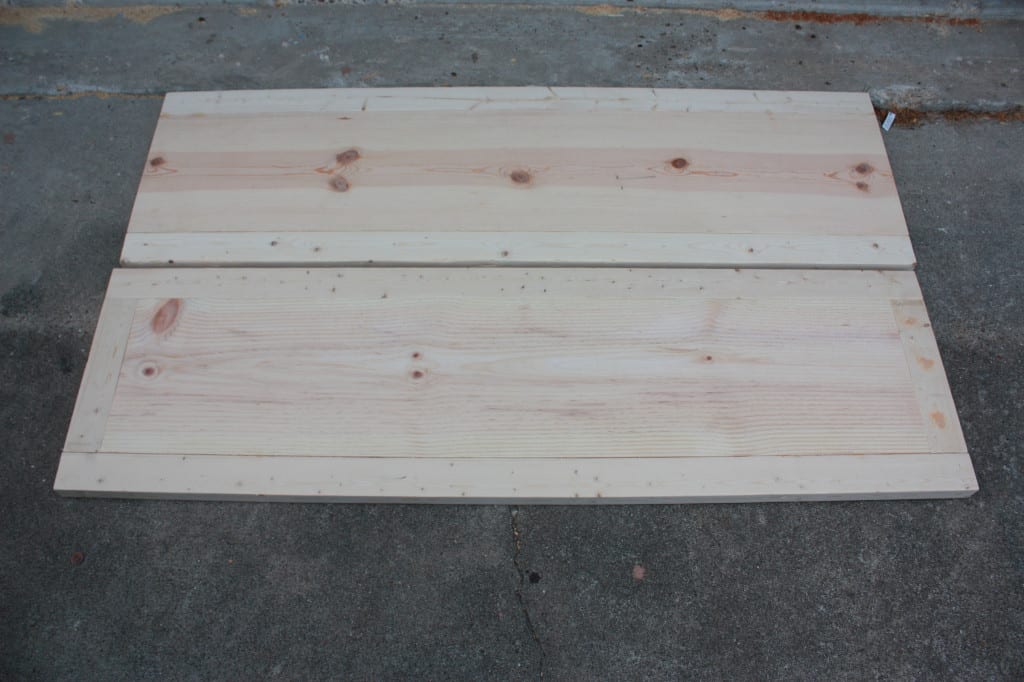
The bottom shelf will be a little simpler because we won’t have the end 2x3s **even though you could adjust the plans and put them on the ends of both your shelves if you would like, totally up to you! You would just cut both 1×12’s to the 51 1/2 in. and you would need to cut two more 2×3’s at 11 1/4 (or 11 1/2)**
But here’s the way I did it, my bottom shelf does not have the end 2x3s.
So now the shelves are ready to go…and you should celebrate… I did a little squealin’ and happy dancin’ at this moment! Look at those beauties!
After this point, the pace really picked up and I didn’t get to take as many pictures as I would have liked but I tried to capture what I could, and I will try to explain anything that I missed taking a picture of!
So from here, we get to see the table really coming together! We have to attach the shelves to the “legs” we built earlier. It was dark at this point which is why I started rushing… mosquitos are really bad after sundown here and for some reason, they LOVE my blood…I am so SWEEEET I guess!! LOL!
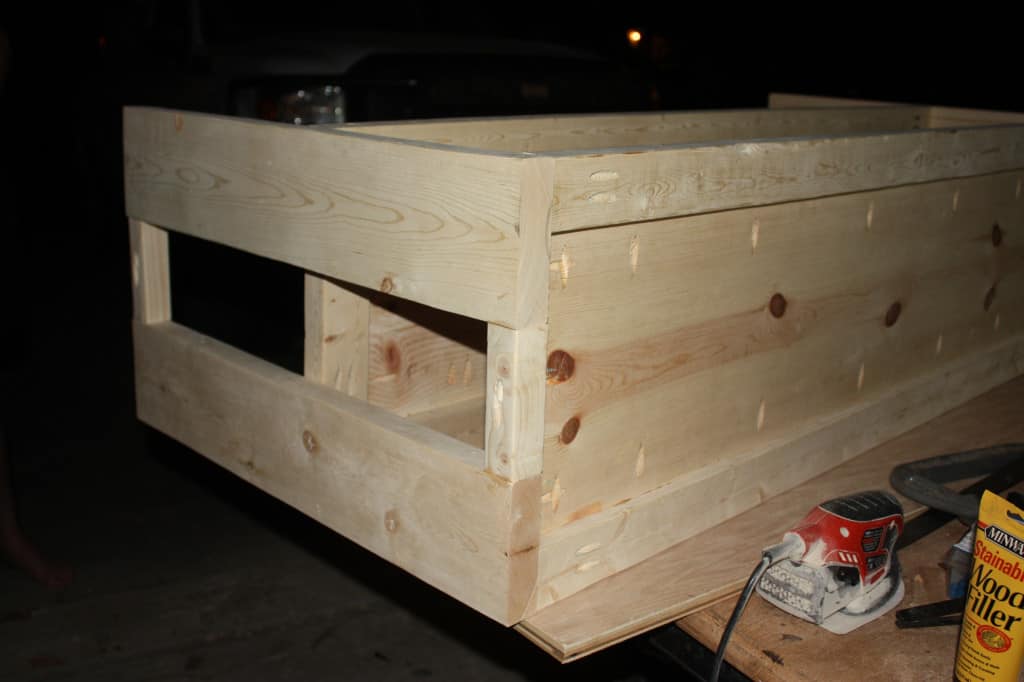
You can see the middle shelf doesn’t have the 2×2 to fill in the space which is how we want it!
Alright, looking good, almost done…just a little more, can’t give up yet!
So the next step is to add 2x3s to the top, they will be flush with the 2×6 legs
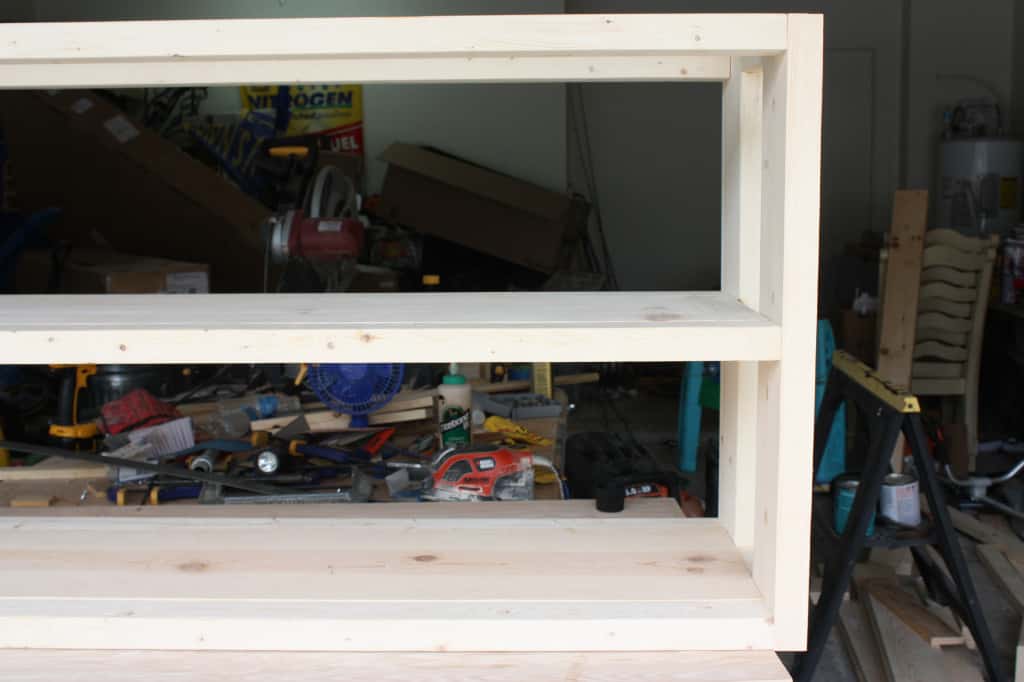
Okay, STOP judging…LOL…this is the ONLY pic I had to show what I meant by them being flush…I am so embarrassed by the disaster in the background but look, I’m willing to sacrifice my dignity to help you make this table! 😜 In case you are lost in the mess of this photo, look at the very top right corner, that’s where the flushness is taking place! Yes flushness is a word in my dictionary and yes I do NEED those boxes in the photo for something, I don’t know what, but something! 😂🙈
So if you can stop laughing at my poor soul having to work in this garage…we will get the rest of this table built!
Next, you have to assemble the top and for some reason, I did not take a picture of this very important step…UGH! How did I miss this one…I guess I just got really excited because I was almost done and totally forgot! My apologies!
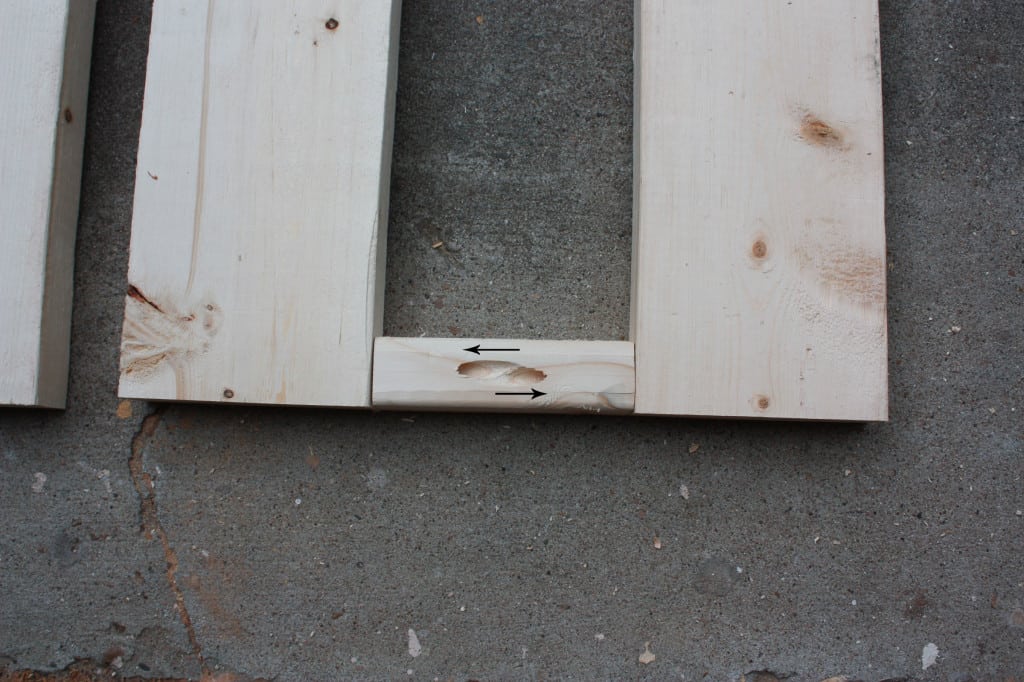
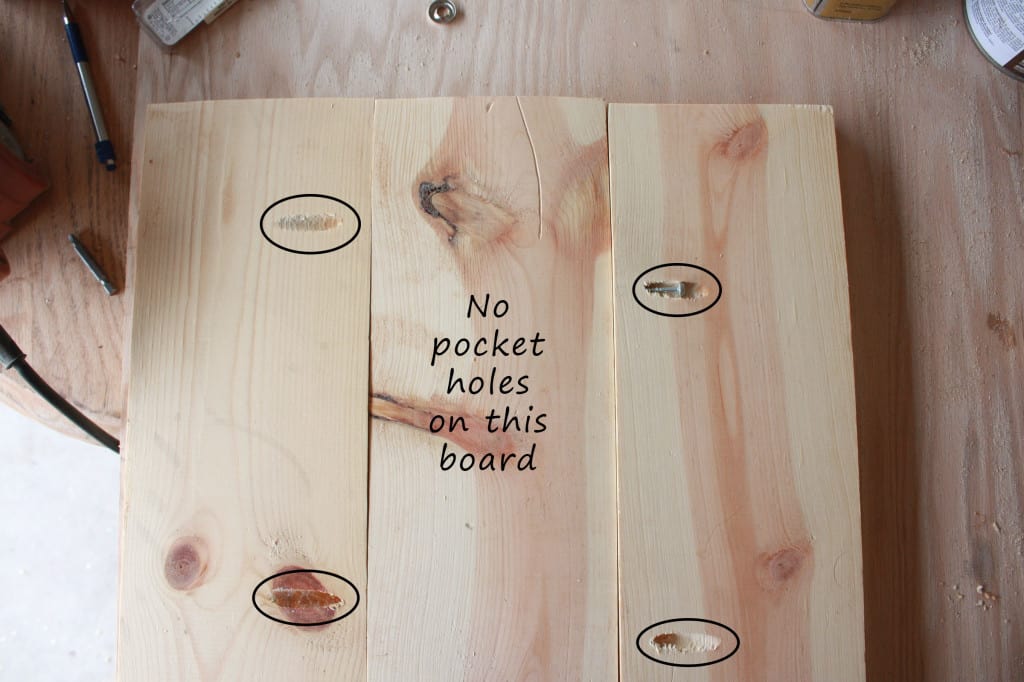
The boards will be pocket-holed together along the length of the board a lot like we did the 1x12s earlier only the 1×6’s will not need any holes on the ends of the boards and will only need pocket holes along 1 side of the board! So you just drill holes all down the length of your first board and your second board doesn’t need any holes drilled in it, and then you will drill holes all along the length of your 3rd board on the side facing your 2nd board…did that make any sense? Here is an example picture, this is just a sample, I took to help you see what I am trying to say!
Once you have your 1×6’s screwed together you can attach them to the table! You will just flip the planked boards over to rest beautifully on the top frame you made out of 2x3s, you will need to drill pilot holes for your screws, going up through your 2×3 then you will screw the screws in! Woah! What? Who? Since I forgot to get a picture of this step, this was the best I could do!
The last thing to do before you sand and stain is drill the holes for your pipe, I was so excited for this part but the excitement quickly faded trip after trip to the hardware store to purchase many drill bits before FINALLY getting it right, and lucky for you I did that dirty work so you can easily get the perfect one! A 7/8″ drill bit is perfect for the 1/2″ pipe, even though I didn’t figure that out until after I drilled mine with the 15/16″, here’s the one I bought
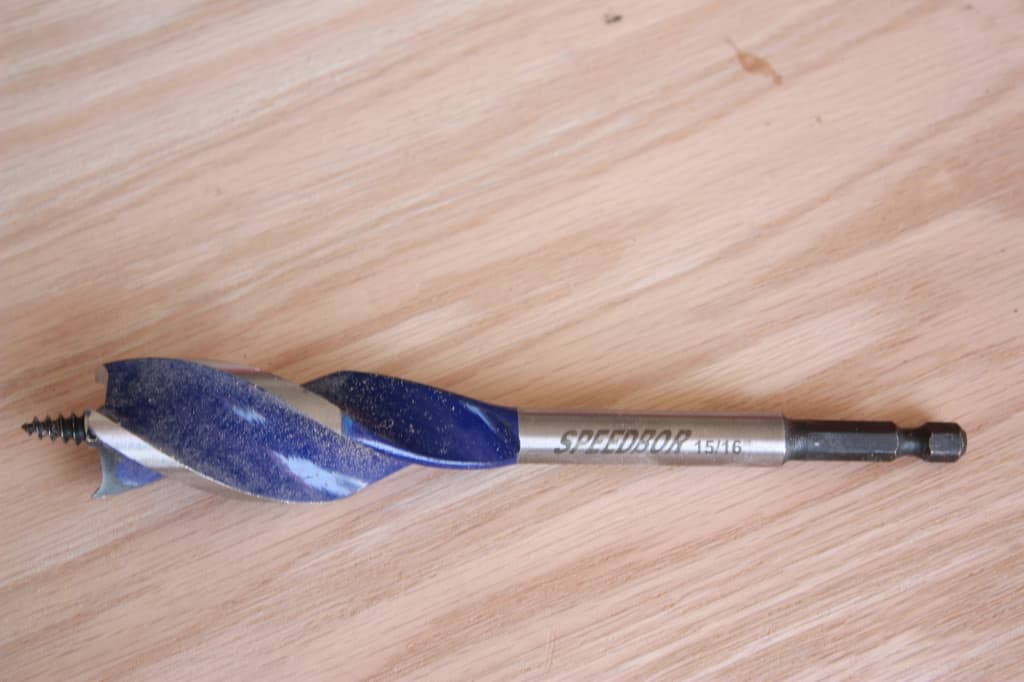
Yes, I bought pretty much every size from 1/2″ to 15/16″ except a 7/8″ but I am certain that the 7/8″ would be absolutely right on because the 3/4″ was a hair too small, and the 15/16″ was a hair too big! Whoopsies! I had already drilled it! It’s not too large to be a problem just not as snug as I would have liked!
I clamped a board on the inside of the 2×6 while drilling from the outside to avoid the wood splintering which usually will happen as the drill bit exits the wood on the other side when you use this large drill bit on softwood like pine. I had my hubby do the drilling because I cannot drill a straight hole for the life of me, this doesn’t usually matter on something small, but a hole of this size, and we would have big problems if it wasn’t straight!
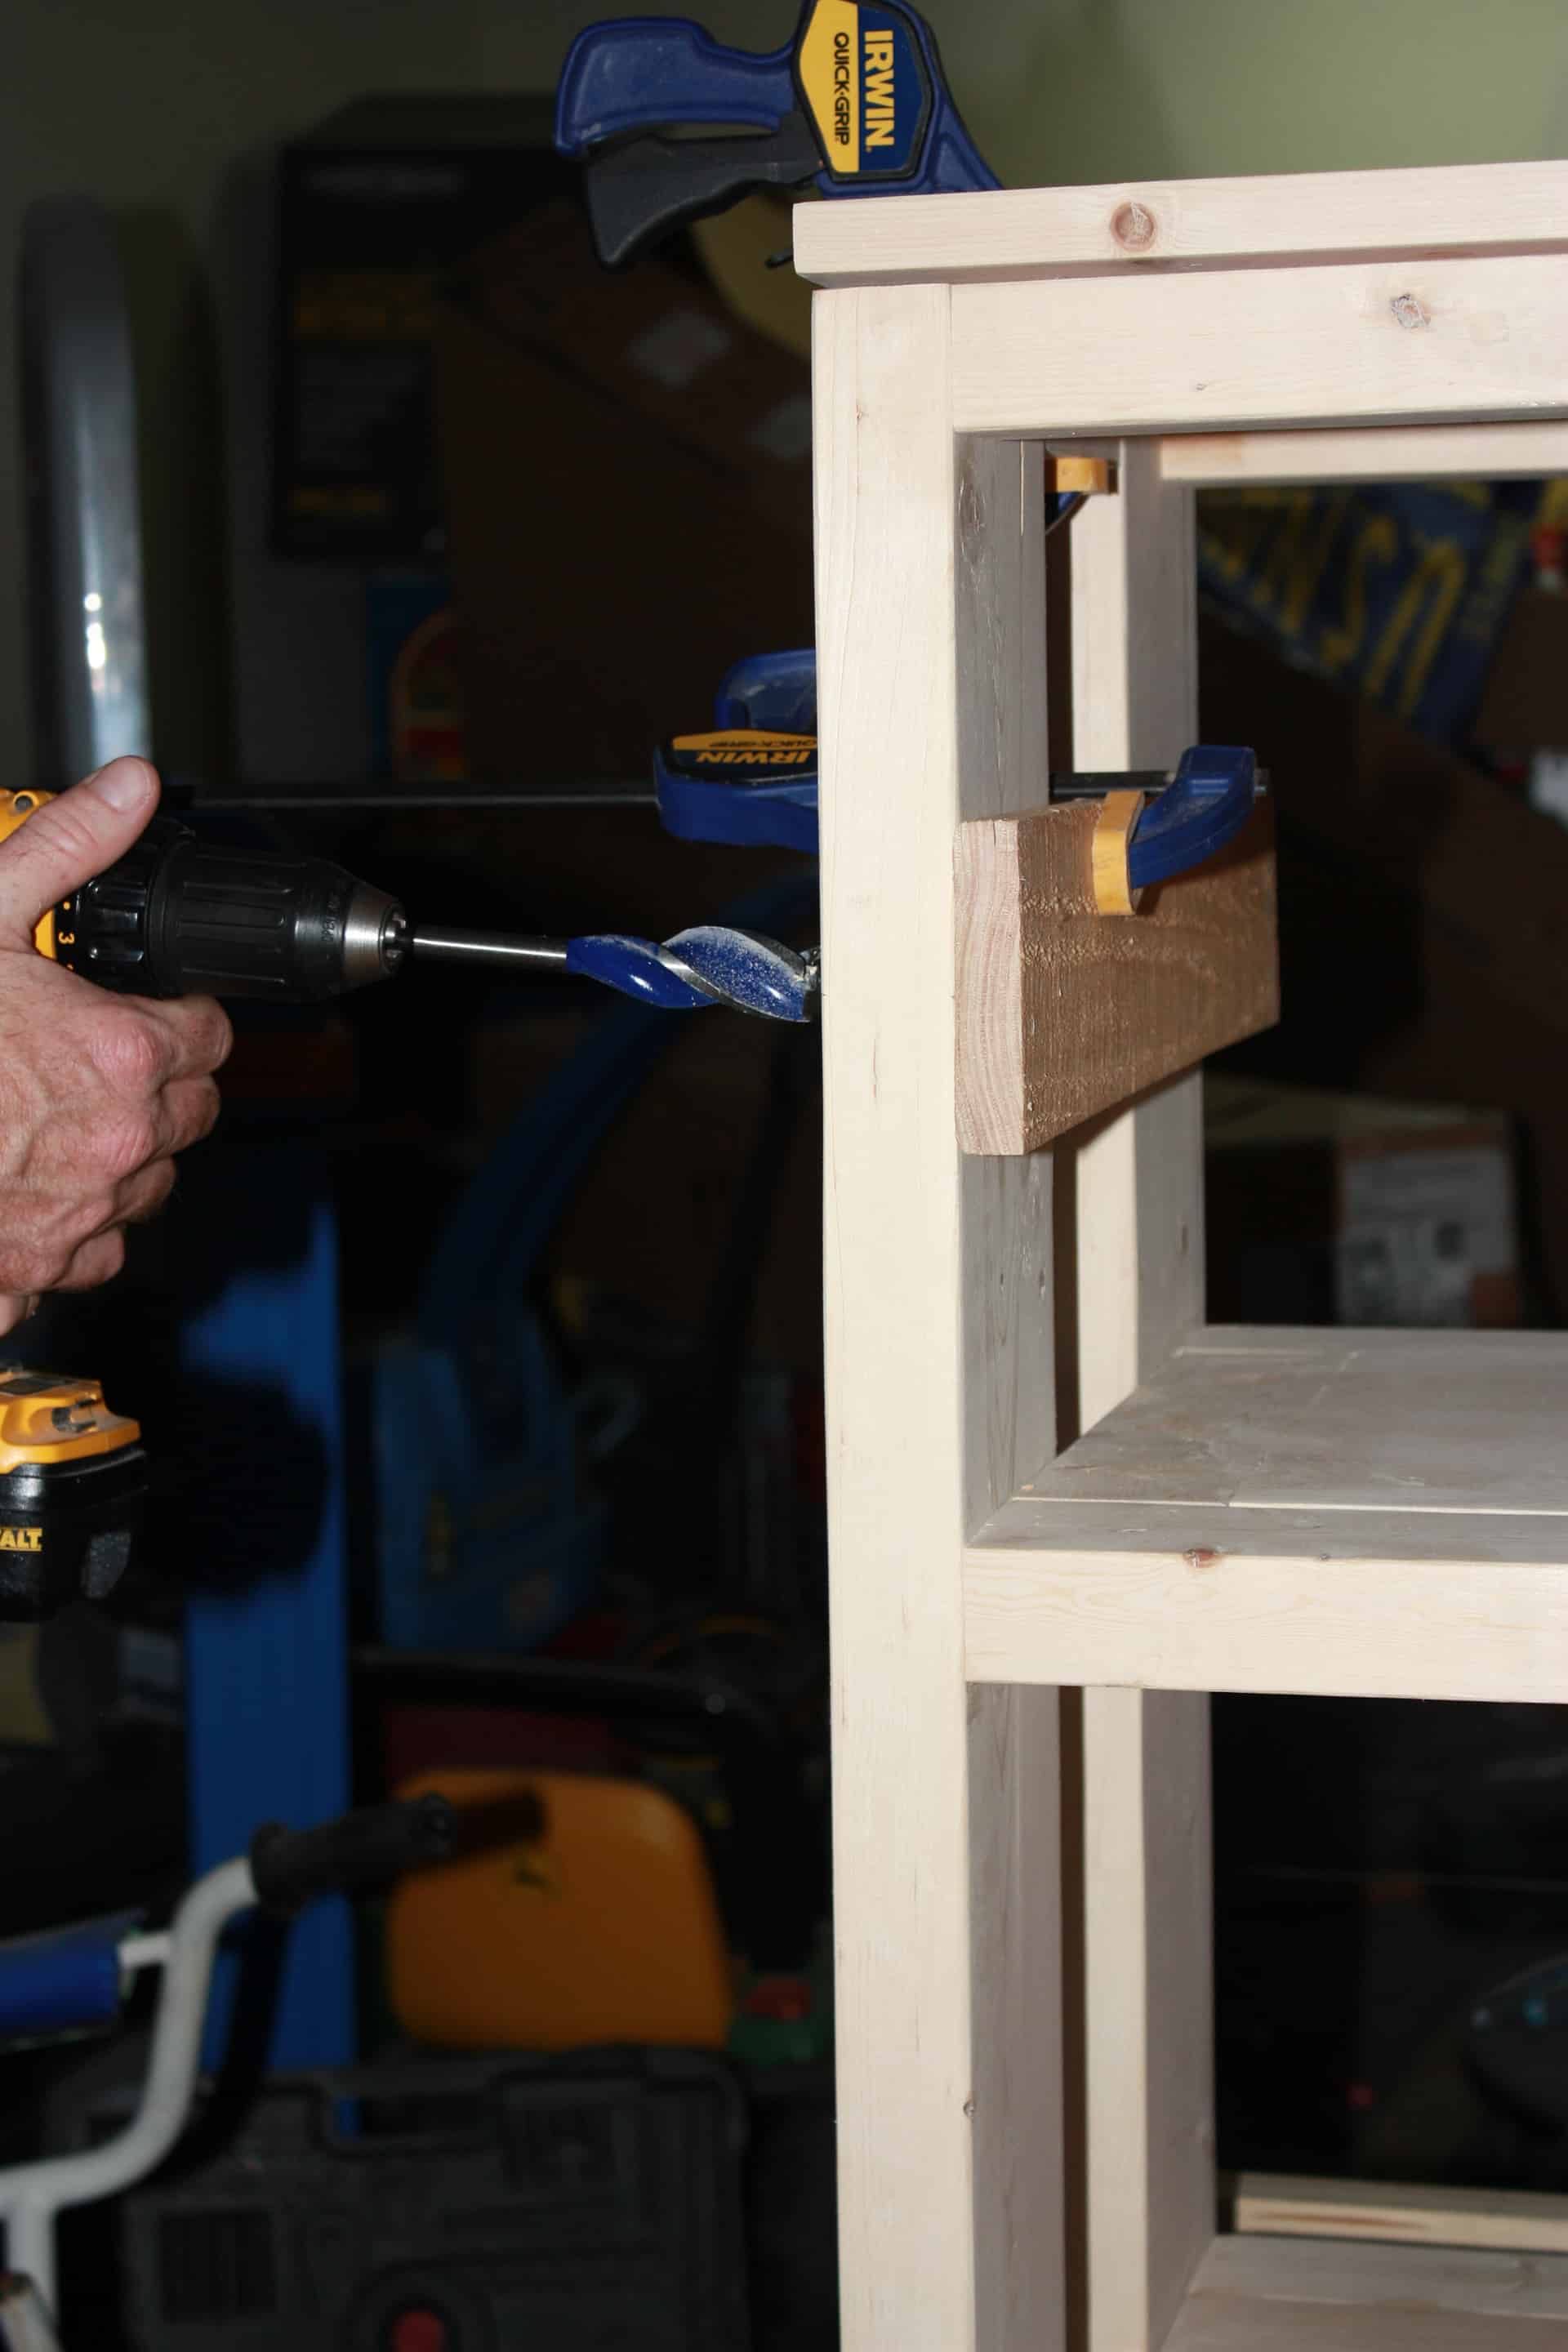
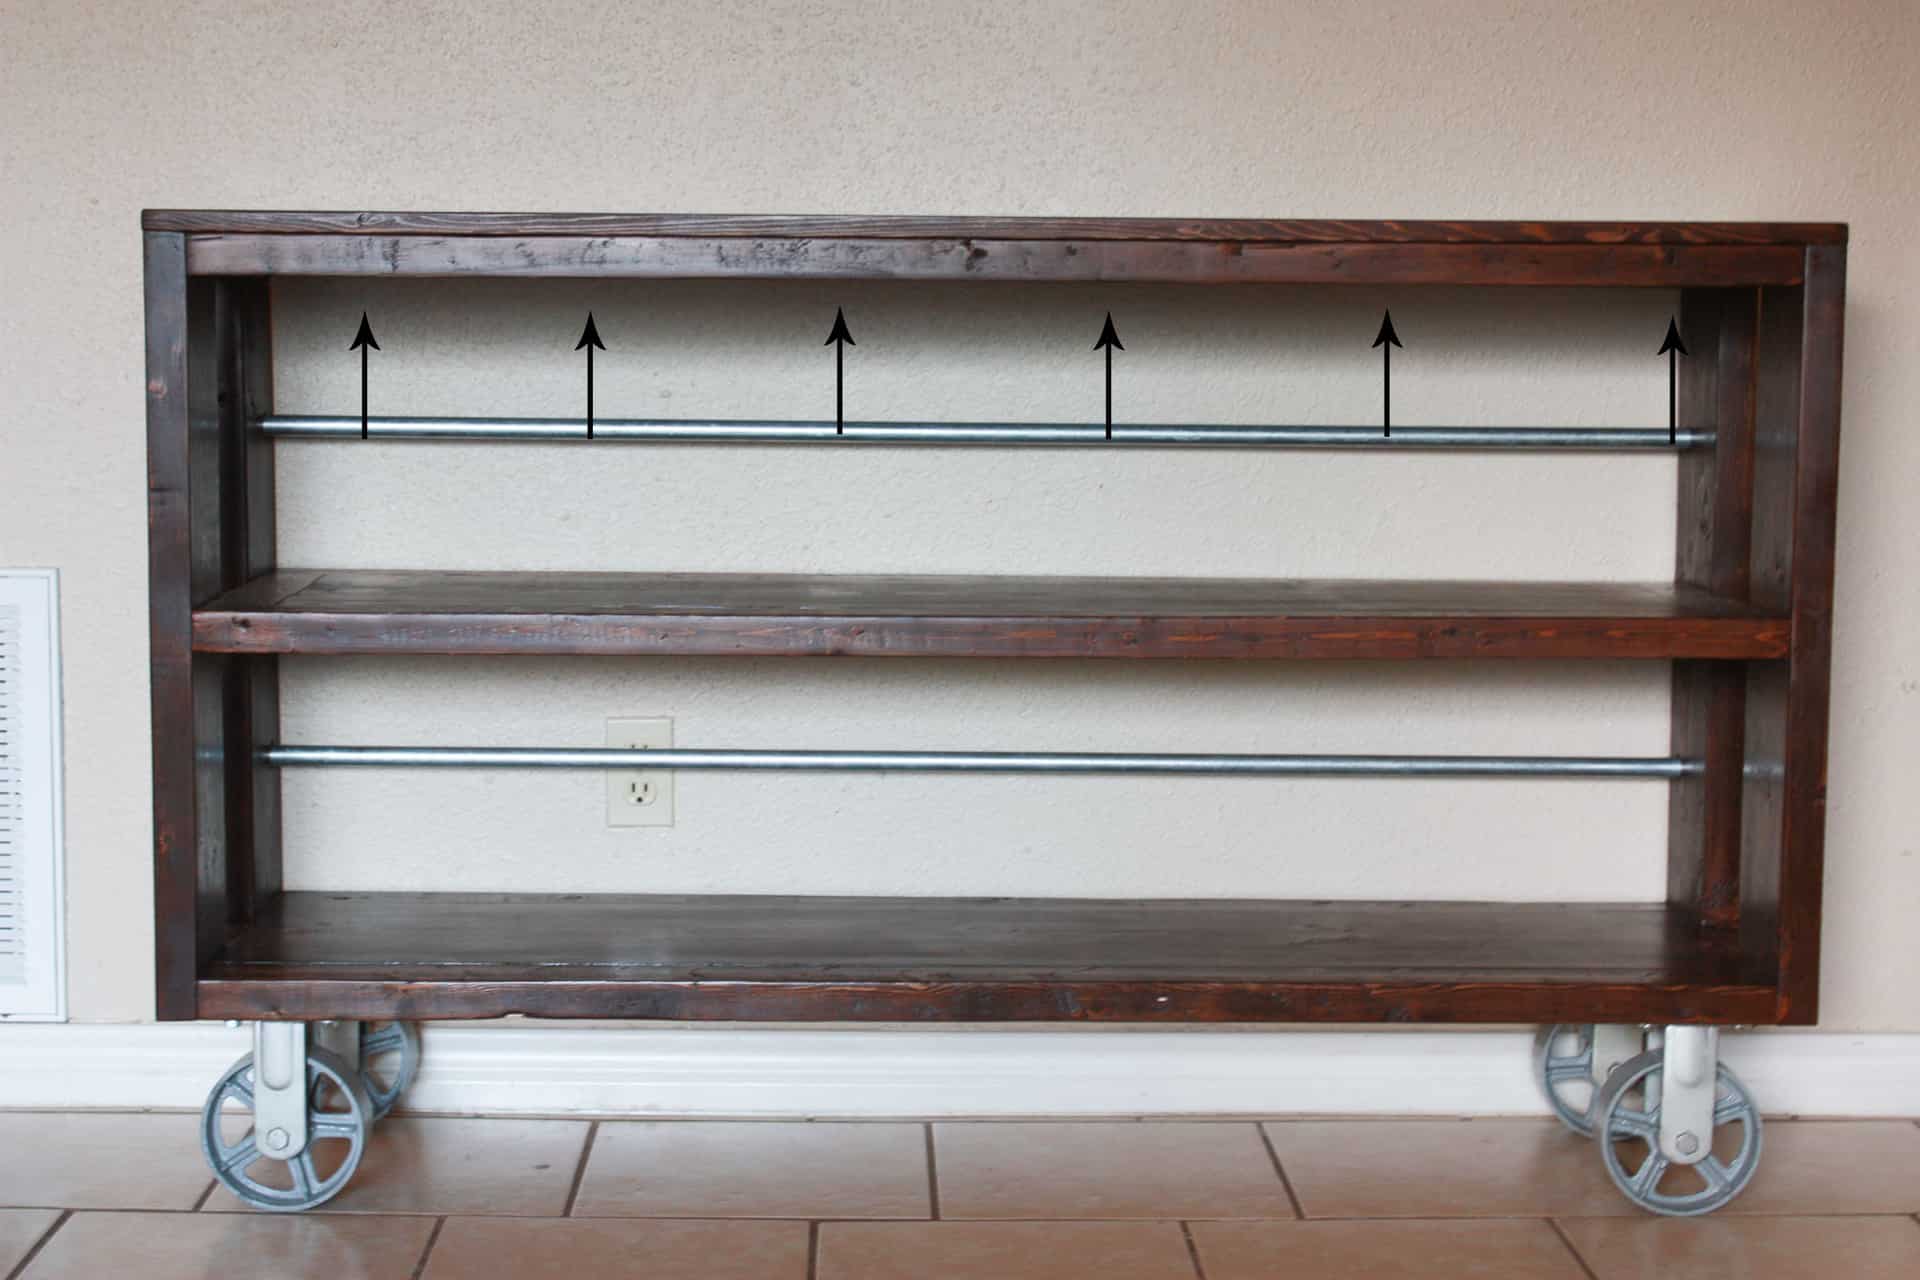
After I told him to straighten out his drill…Haha… we got all four holes drilled! Yea! You will want to drill your holes only about an inch off of the back 2×6’s (whichever you choose to be your back, there really isn’t a front or back until you drill the holes) but if you buy wood like me…not very well… you may want to hide certain flaws in the “back”! The holes will be drilled directly in the center between the top of the table and the middle shelf and then directly in the center of the middle shelf and the bottom shelf! If that made sense! See pic below!
Hopefully, that helps you to see where the bars are!
Now you can fill in any holes that need to be filled with wood filler and sand this bad boy down! Yep, I can taste it, it’s so close to being done, yet so FAR since the most D R E A D E D part is here…SANDING!!
I started with 80 grit, which I normally don’t do, but I had slim pickings for wood at Lowe’s and Home Depot so some of the wood was rather UGLY! Then I moved up to 120 grit and F.I.N.A.L.L.Y. I was at the point of 220grit… whew! Sanding is the WORST PART of a project! Glad I made it through that!
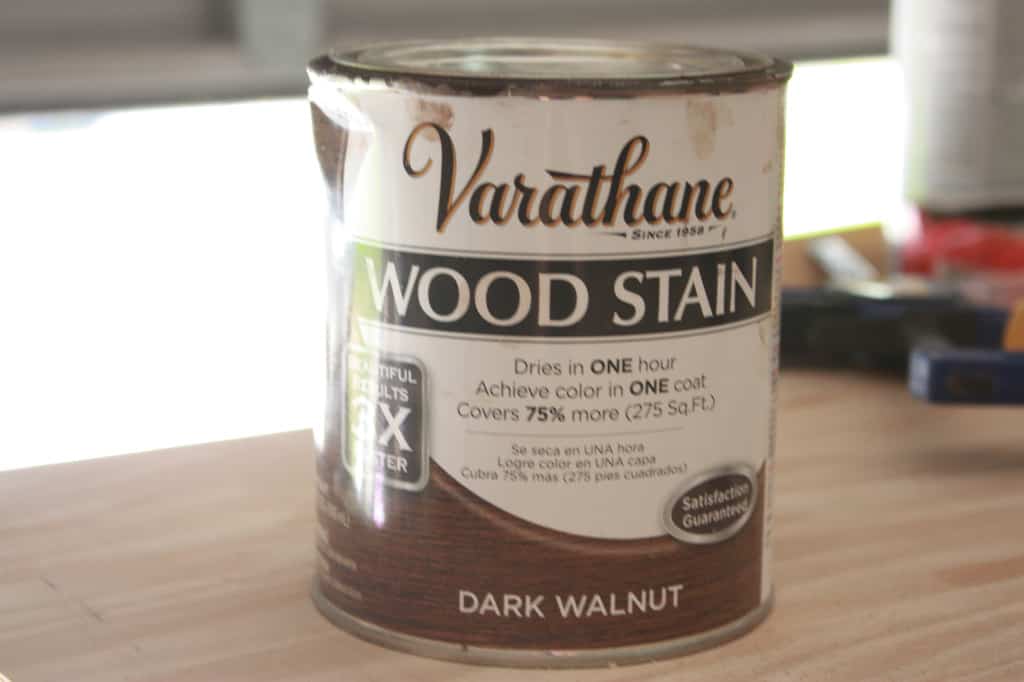
Now the staining is one of my FAV parts because it takes your raw, ugly wood and makes it look AMAZING, and after just ONE coat of this FABULOUS stain! Can you believe it, someone must have stolen my wish book at Rustoleum! One coat! HA! BTW I like very dark stains because they hide any imperfections…not that I ever need to cover anything…shhhh, don’t tell anyone my secret!
Alrighty then, you can move on to the last, and again, not-so-fun part of the finishing process…the polyurethane…UGH…I am not a fan of this part, but I have to say after finding this Minwax Wipe-On Poly it has made this step So. Much. Easier. This has officially removed poly from my sh* list!
I used to HATE HATE HATE polying anything because, if you got too much on your brush it was obvious exactly where you had put it, if you shook the can and got air bubbles, well your piece of furniture then had air bubbles…it was impossible for someone as impatient and crazy as me to ever get it right! But this stuff, oh my, you just put it on a rag and wipe…pinch…yes, I am awake…it is for real! I still can’t believe it sometimes!
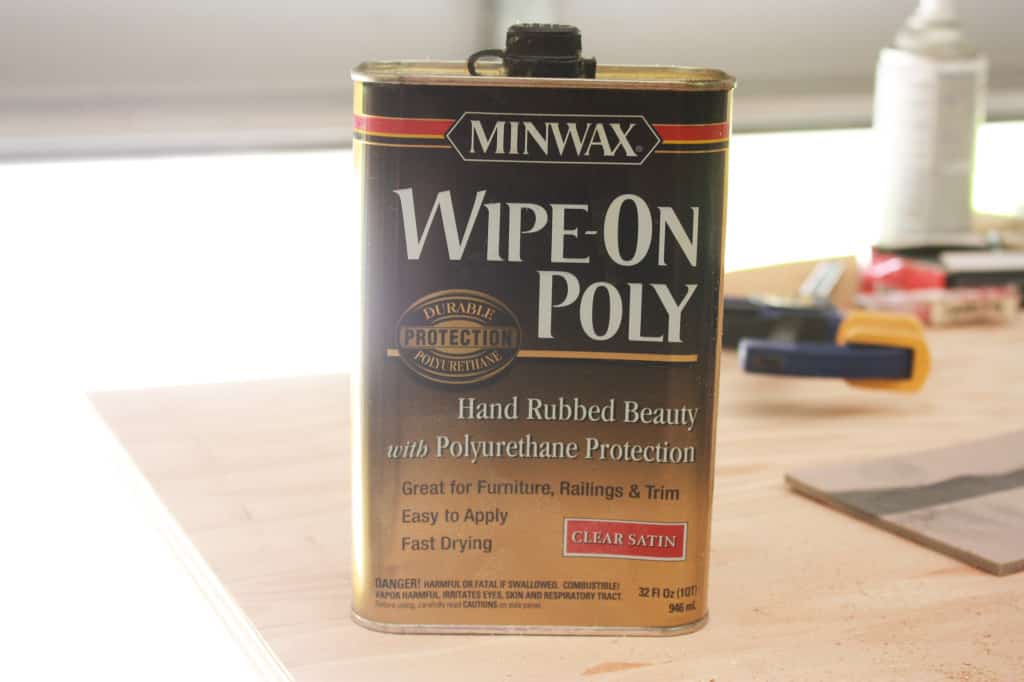
So after three coats, let it dry then add your pipe…just slide it through your perfectly drilled holes…because you probably let your husband do it like me or you are superwoman with a drill 😉 and then place the caps on each end to keep it in place.

Did you notice that I did not fill in my pocket holes underneath the top shelf? Who is ever going to look under there?!
Adding the Casters to the DIY Console Table
Last but not least, after everything else has been done, you can flip this baby over and give it some wheels! You will need the hex head screws that are 1 1/2″ long…Luckily, this part is pretty simple: the 2- 1×6 @ 11 1/4 boards are to be placed on the underside of the table, and the plates of the wheels are 3 1/2″ x 2 3/8″ since this is wider than our 2×3, you add the 1×6 to make a level surface for the wheel to be attached to. Apply some glue and the hex screws will keep the 1×6’s in place once they have been screwed in. You will want to clamp it while you pre-drill your holes and then screw them in!

Oh, after all that hard work and sweat, maybe tears…LOL…bring that baby inside and decorate her up!!! She’s all yours, feel free to stare!!!!
I hope you enjoyed building your table and feel free to ask questions in the comments or use the contact page at the top! To keep up with all of my projects make sure to subscribe to my posts via email! Follow me on Facebook and Instagram for sneak peeks of future projects! No matter what you BUILD or CRAFT, I hope you LOVE every minute of IT!

Want to save the plans for this DIY Console Table for later? PIN IT!