• Skip to secondary menu
  • Skip to main content
  • Skip to primary sidebar
  • Skip to footer
  • About
  • Blog
  • Contact Me

The Inspired Workshop

Inspiring you to Do-It-Yourself

  • Home
  • Furniture Plans
  • Remodeling
  • How To
  • Holiday
  • Crafts
  • Tools
  • Videos
You are here: Home / DIY Shutters for Chicken Coop

DIY Shutters for Chicken Coop

DIY Shutters for Chicken Coop

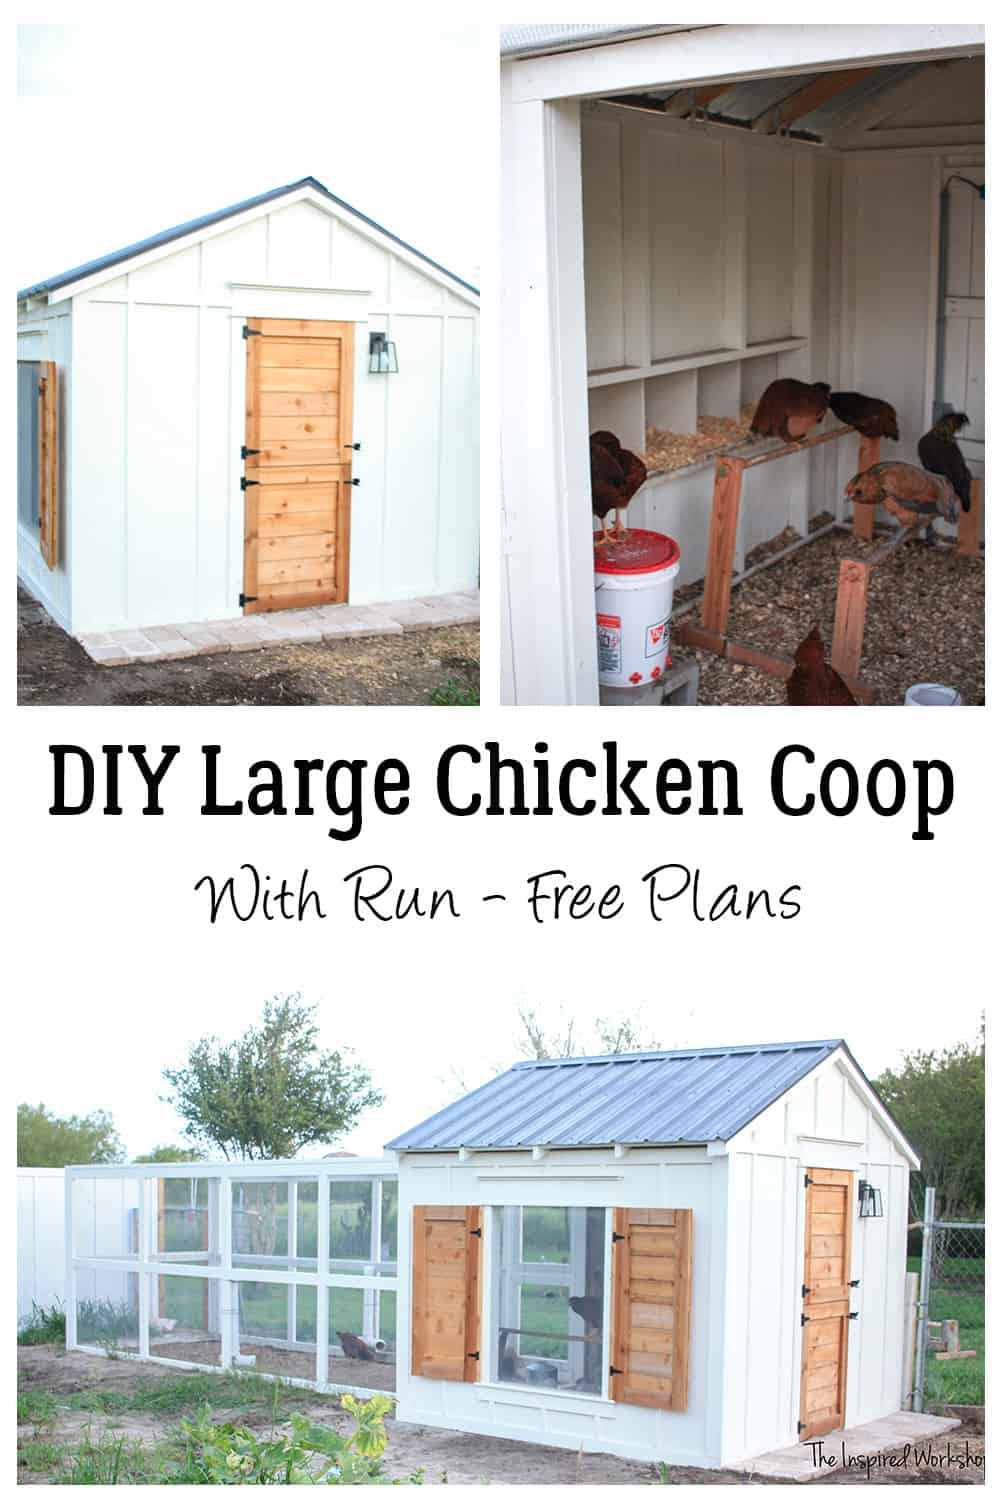
Alright, so you’ve built the chicken coop, the run, the front door, and the nesting box… the last thing left to do is build the DIY shutters for the chicken coop! They may seem like a step to skip, and for a short while of course you can, but they are so valuable when it comes to heavy rain! They keep the chicken coop completely dry!

We planned each wall of the chicken coop according to our weather and depending on where you live, you may need to change the walls around to best suit your needs!

Plans for Chicken Coop

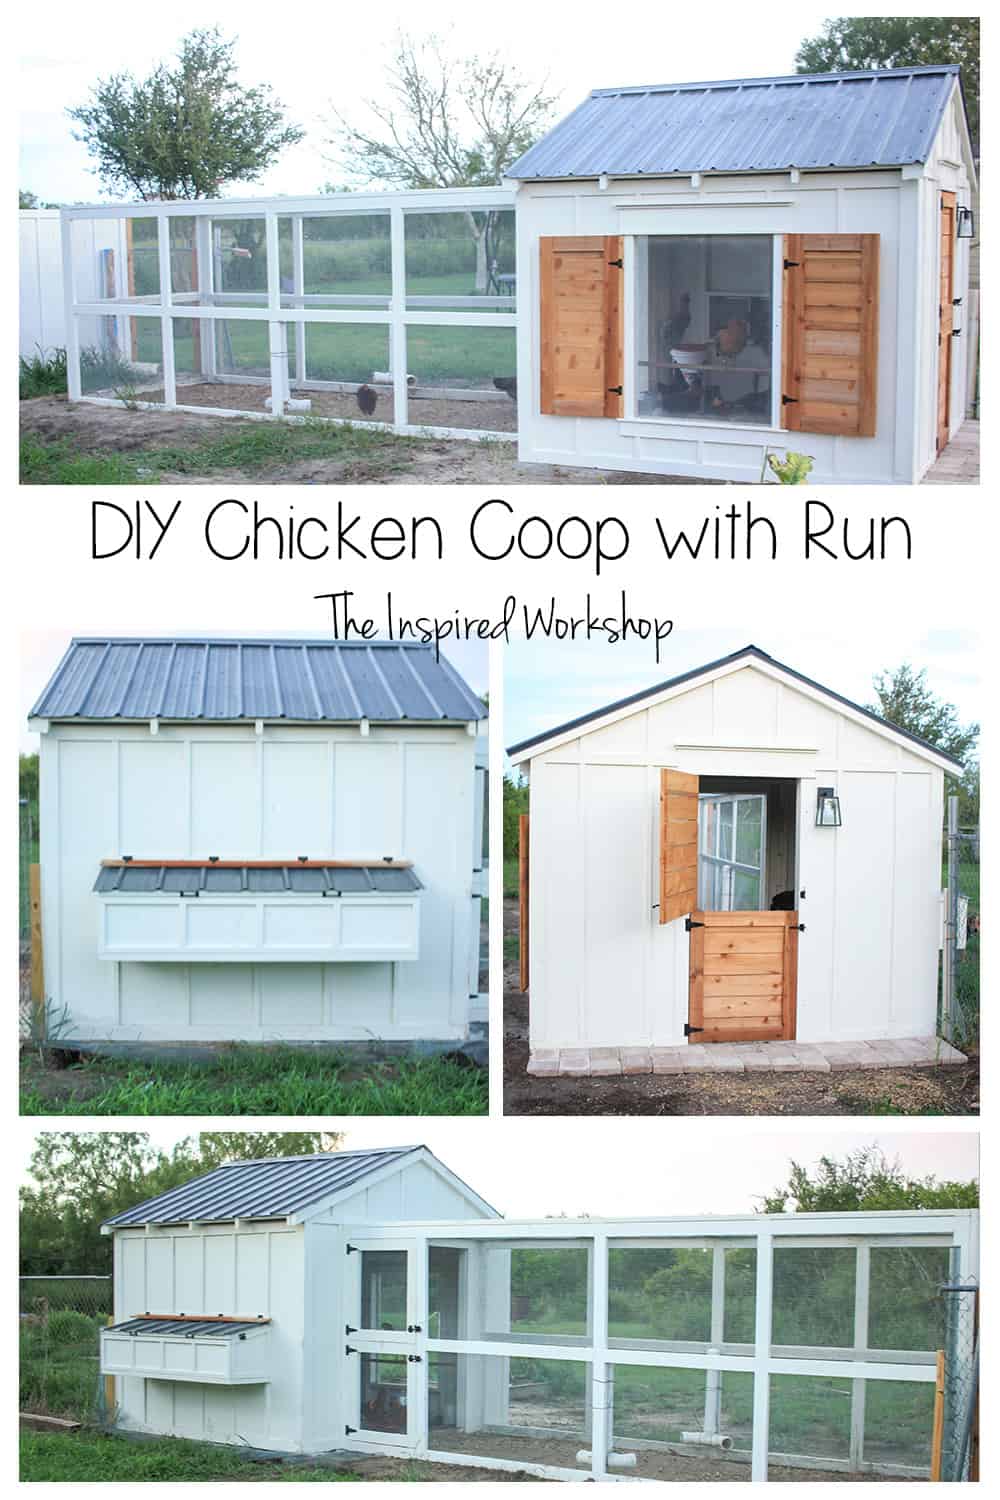
Our door wall faces the north and is solid so that in the winter the ladies can stay warm. The nesting box wall is blocked by our house so it really doesn’t get a breeze or rain or anything so it was a good wall to leave closed. The run wall is left wide open because that wall is facing south, which as I stated before is where our only summer breeze comes from! And last this window wall also gets a great deal of breeze in the summer because if the wind isn’t out of the south, the only other direction it comes from is the southeast! Lol!

When we get rain though, it is coming off the gulf, almost always in a southeast direction (except for in winter of course when it comes out of the north). When Hurricane Hanna hit recently we were able to keep the shutters closed for the week and the coop stayed dry! They are a lifesaver that you definitely don’t want to leave out!

Anyway, enough about the effectiveness of the DIY shutters, let’s build them!

Get the printable plans here: DIY Shutters for Chicken Coop

Get plans for the rest of the DIY Plans for Chicken Coop.

Materials for the DIY Shutters for Chicken Coop

*Amazon links below are AFFILIATE LINKS! Affiliate links are special links that contain my code, and when you make a purchase from one of those links, I receive a small commission at no extra cost to you! It is a real win-win, and I always appreciate the small ways you can help me keep bringing free content! Any links other than Amazon are not affiliate links.

-5 – 1x4x6′ cedar fence pickets

-6 – 1x6x6′ cedar fence pickets

–2 sets of 3″ t-hinges

–2 sets of hook and eye latches

–1″ wafer head screws

–1″ Kreg screws

–Kreg Jig

–saw

–drill

–wood glue

Cut List for DIY Shutters for Chicken Coop

-2 – 1×1 @ 45″

-4 – 1×4 @ 44 3/4″

-4 – 1×4 @ 13 7/8″

-16 – 1×6 @ 20 7/8″

Building the DIY Shutters for Chicken Coop

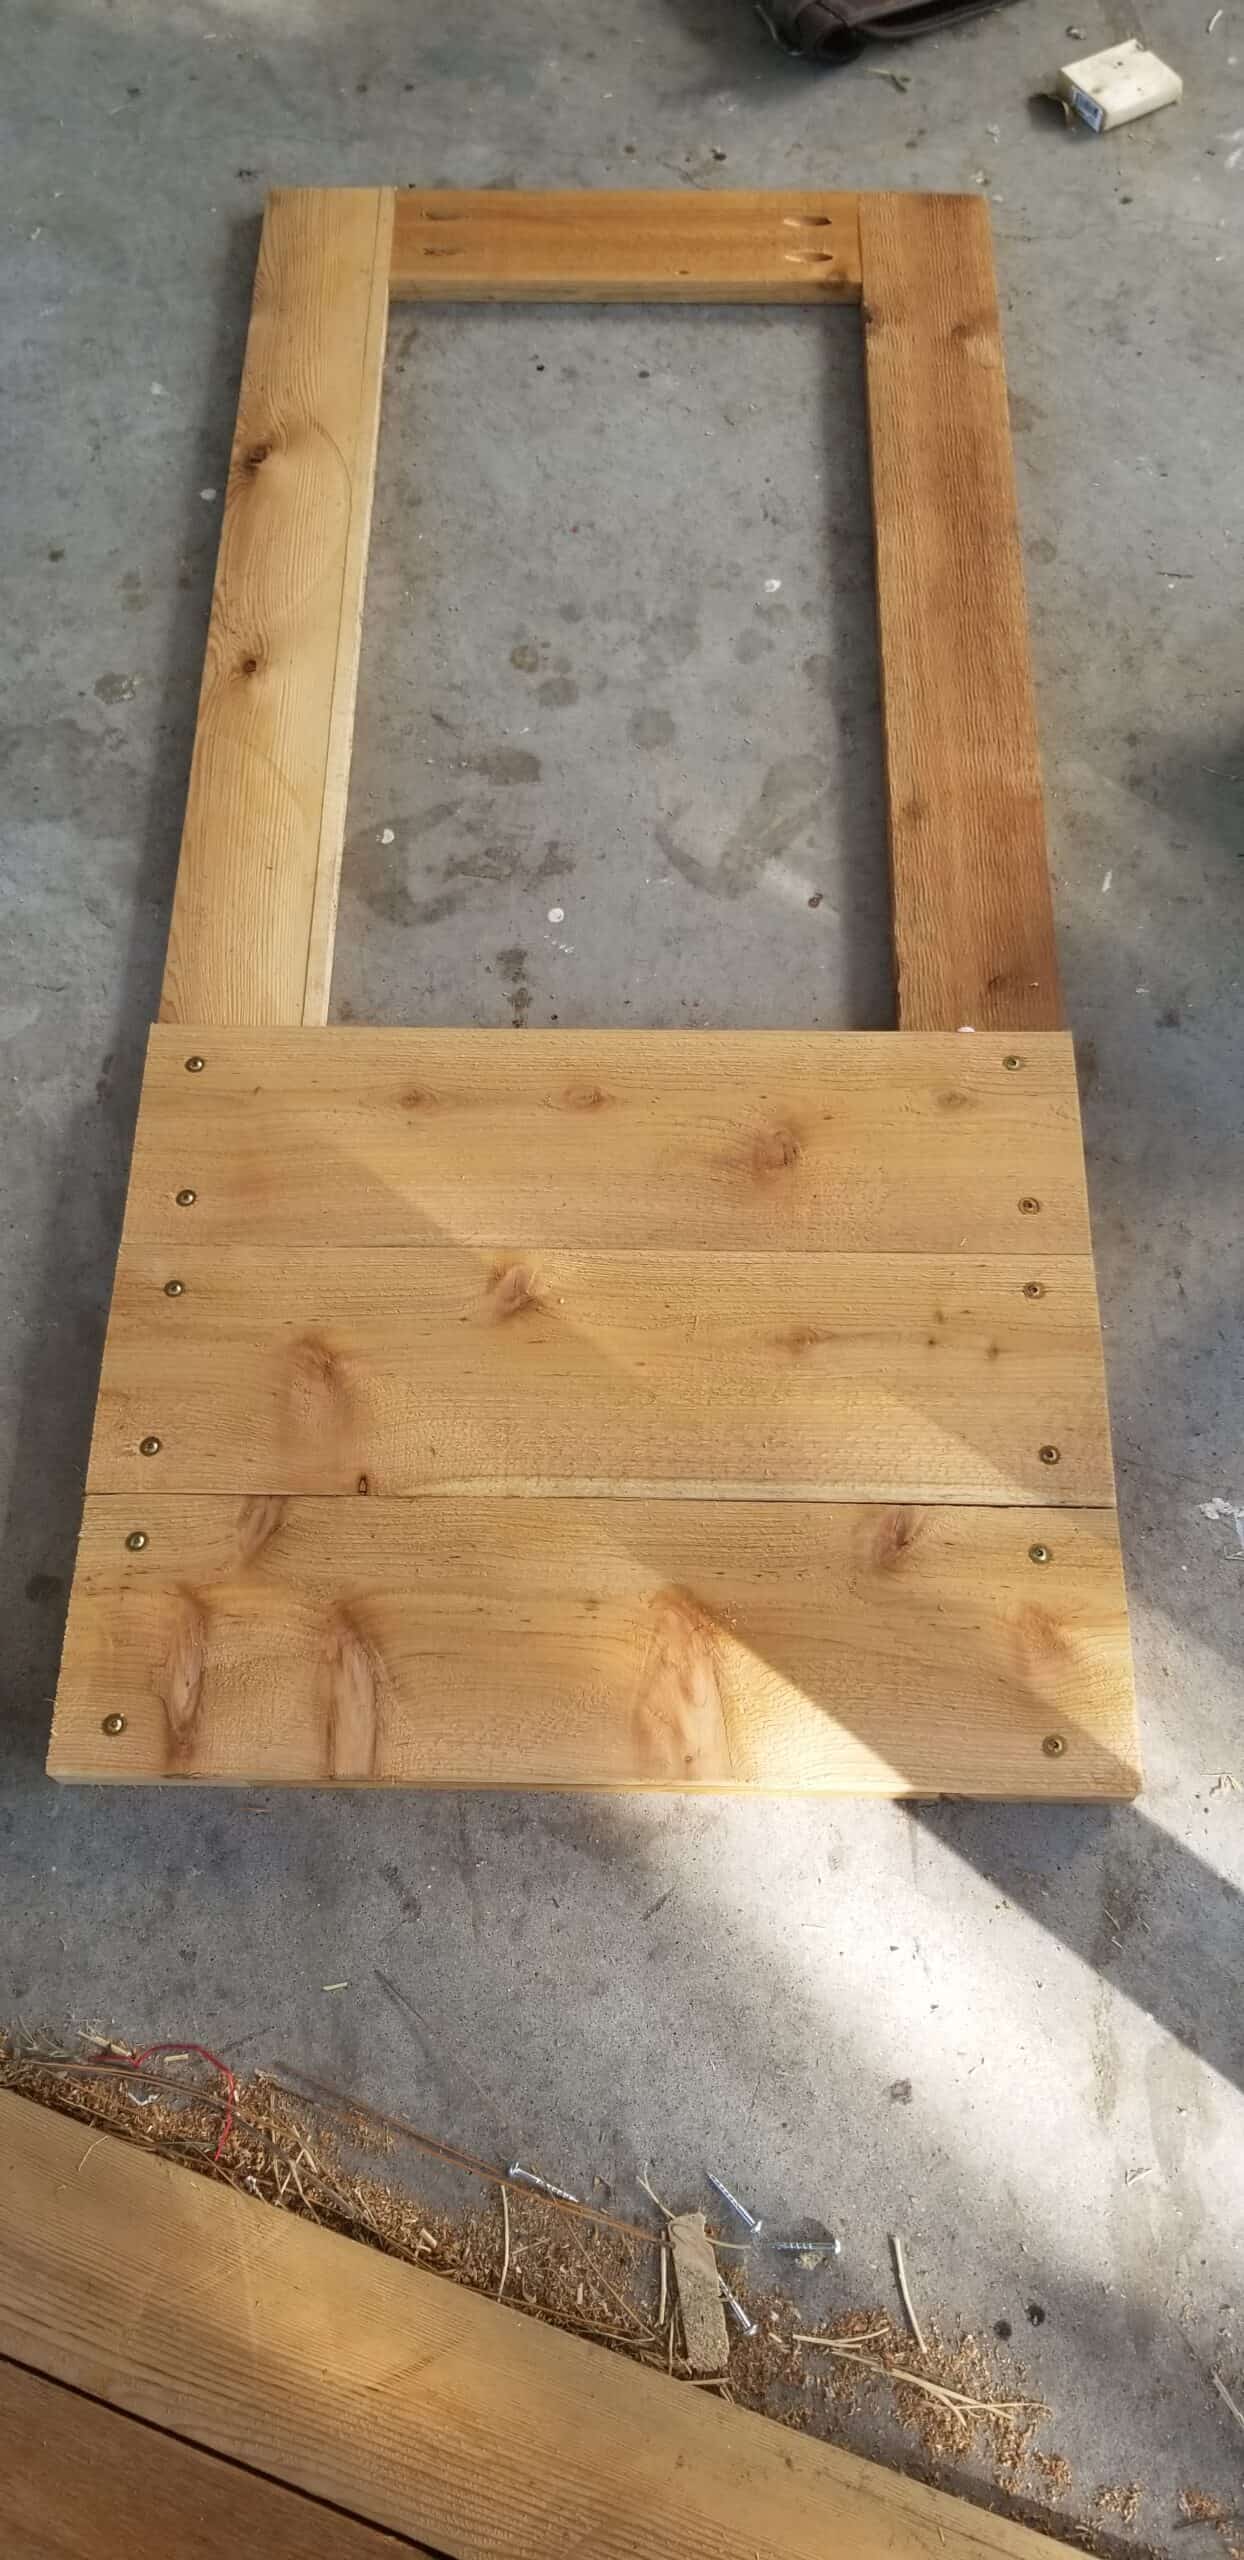
The shutters are built with the same simple method as the DIY Dutch Door for Chicken Coop! It is basically building a frame, then attaching boards to the back to give dimension but also create a thicker shutter without having to buy expensive wood!

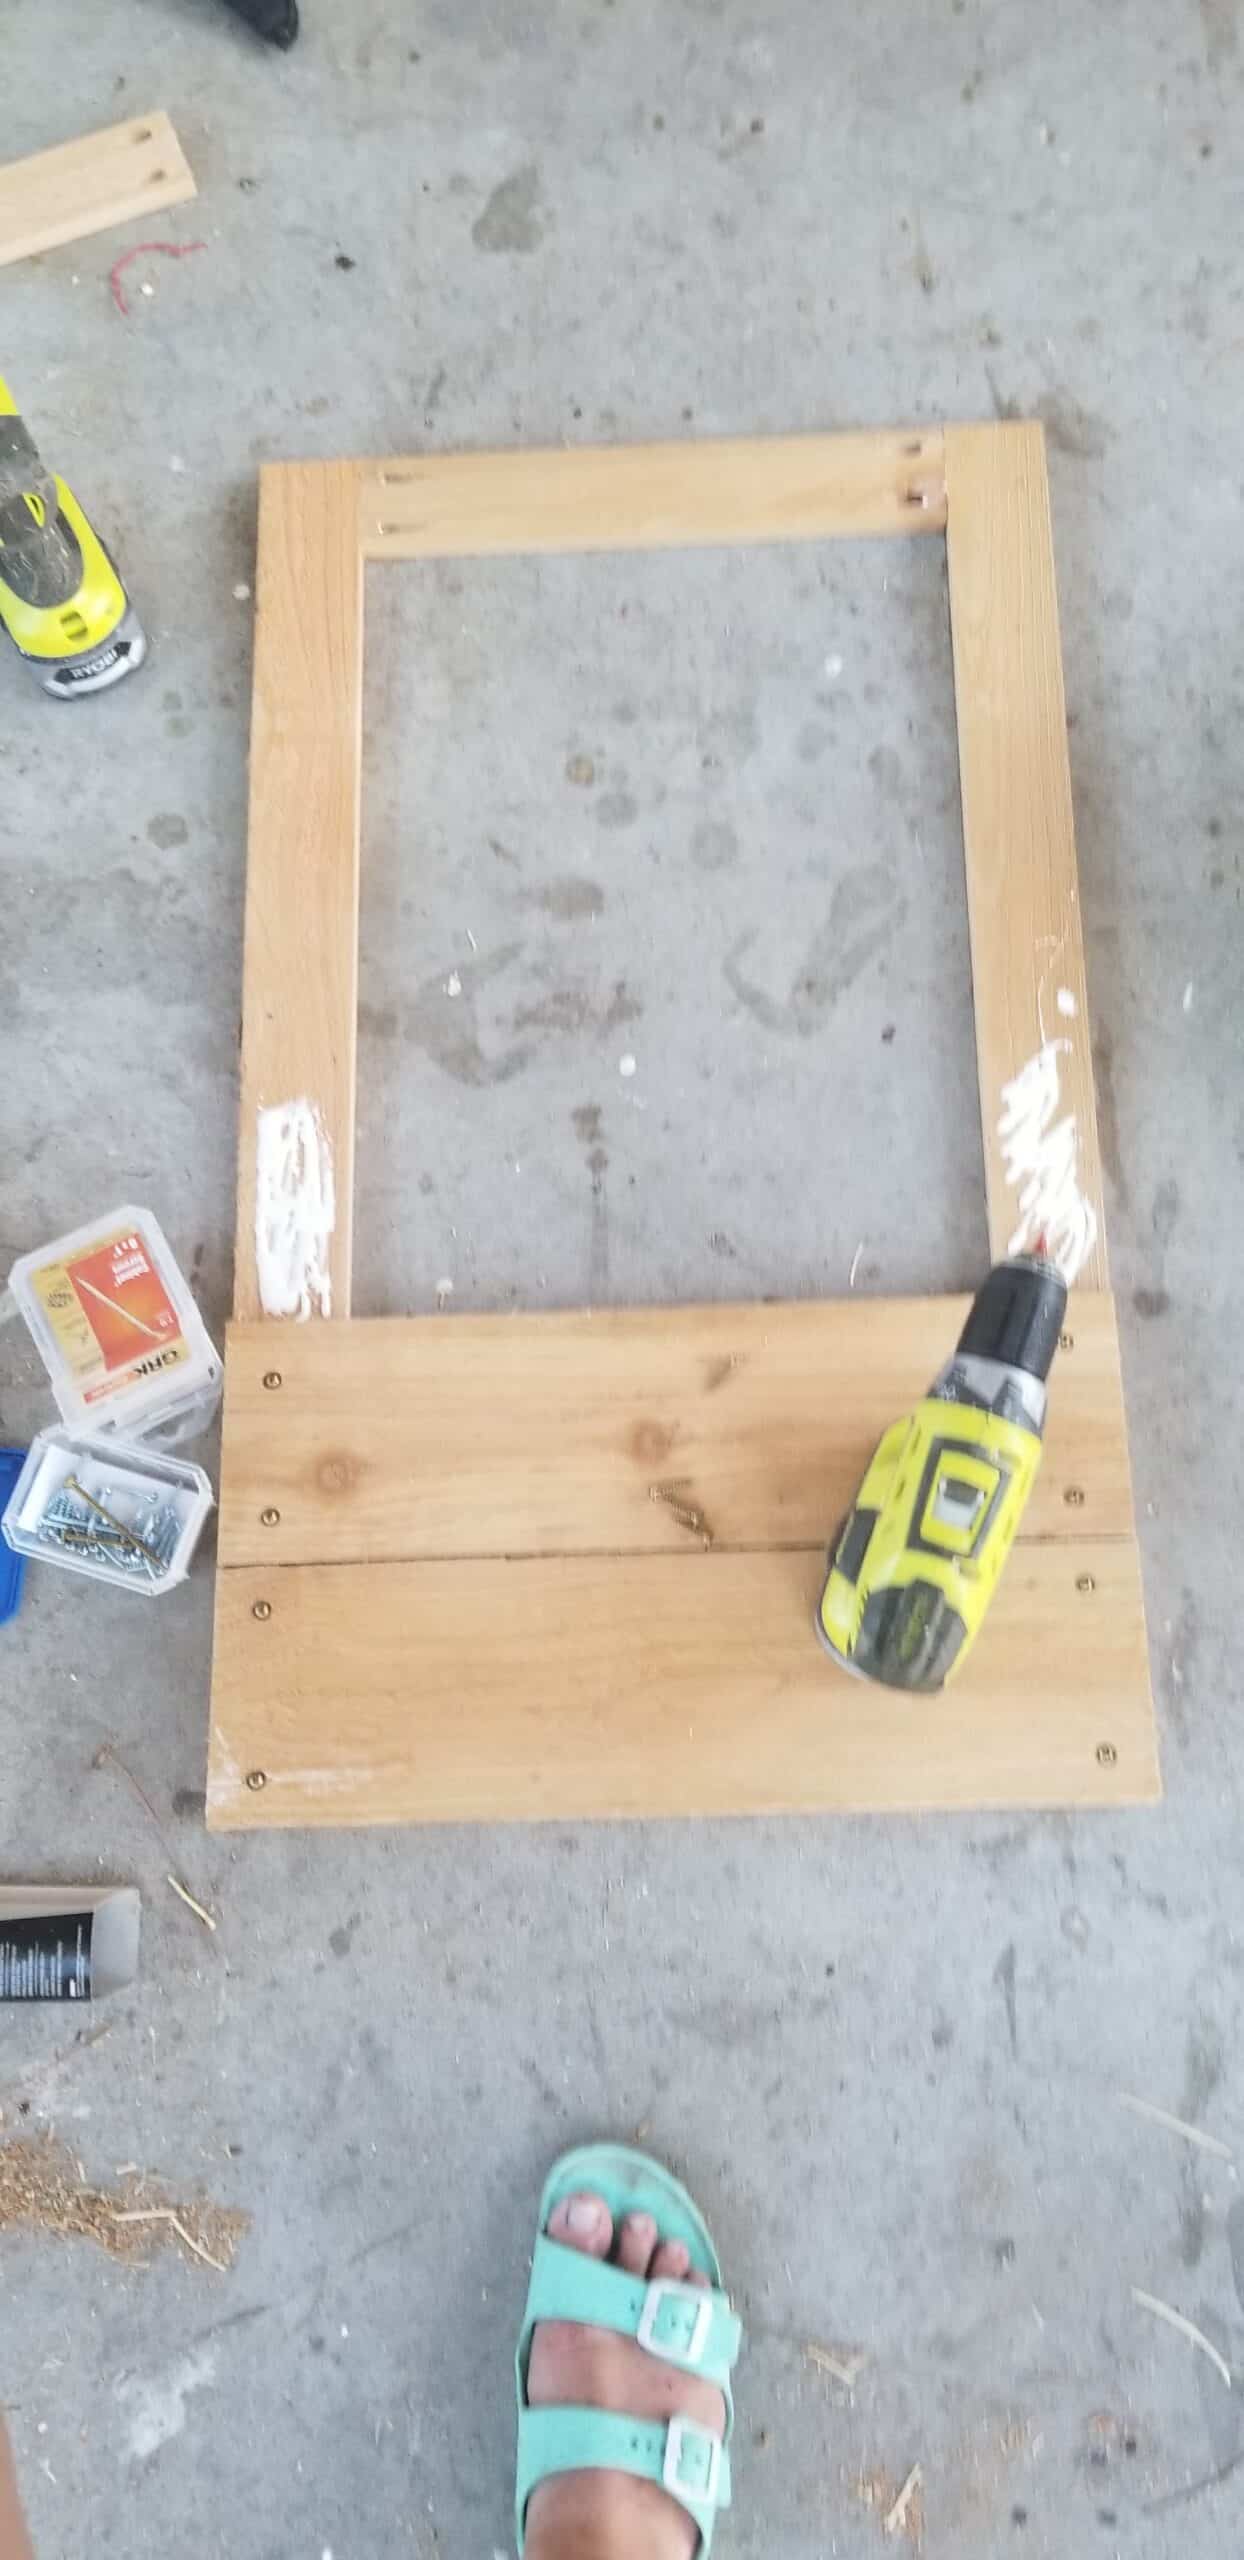
Start out by building the frame! Using your Kreg Jig, drill holes at 1/2″ deep (our fence pickets are 1/2″ thick)and then use wood glue and 1″ screws to attach.

DIY Shutters for Chicken Coop

Next, add the 1×6 @ 20 7/8″ fence pickets over the frame, they will be flush with the edges. Use wood glue on the frame, then screw the boards directly onto the frame. I used the same wafer head screws as with the doors so that the heads look decorative and not ugly when you see them!

DIY Shutters for Chicken Coop

DIY Shutters for Chicken Coop

DIY Shutters for Chicken Coop

DIY Shutters for Chicken Coop

Build two of those babies, and the shutters are DONE! Now you just need to add the 1×1 @ 45″ to the window frame so that you can attach the shutters to the coop… I realized after I walked them over there to put them up that the battens kept them from having room to lay flat when attached!

Adding this little board takes care of that problem without even being obvious! Lol!

I just screwed the board straight into the frame of the window flush with the outer edge of the window frame. Use 2″ screws or longer!

DIY Shutters for Chicken Coop

Attach the hinges onto this board!

DIY Shutters for Chicken Coop

Attach the eye and hook latches to the back of the shutters. If you do the opposite on each shutter, for instance, use the hook on the back of the right shutter, and the eye on the coop behind the right shutter. Then you use the eye on the back of the left shutter and use the hook on the coop behind the left shutter. When you close the shutters, you will have a hook to use in the eye to keep them closed. Repeat the same on the bottom of each shutter as well!

DIY Shutters for Chicken Coop

For some strange reason, I didn’t even bother to take a photo with them closed! LOL! It’s dark as of now so I will have to update the post to add the pictures! You can have this Sketchup rendering until then!

DIY Shutters for Chicken Coop

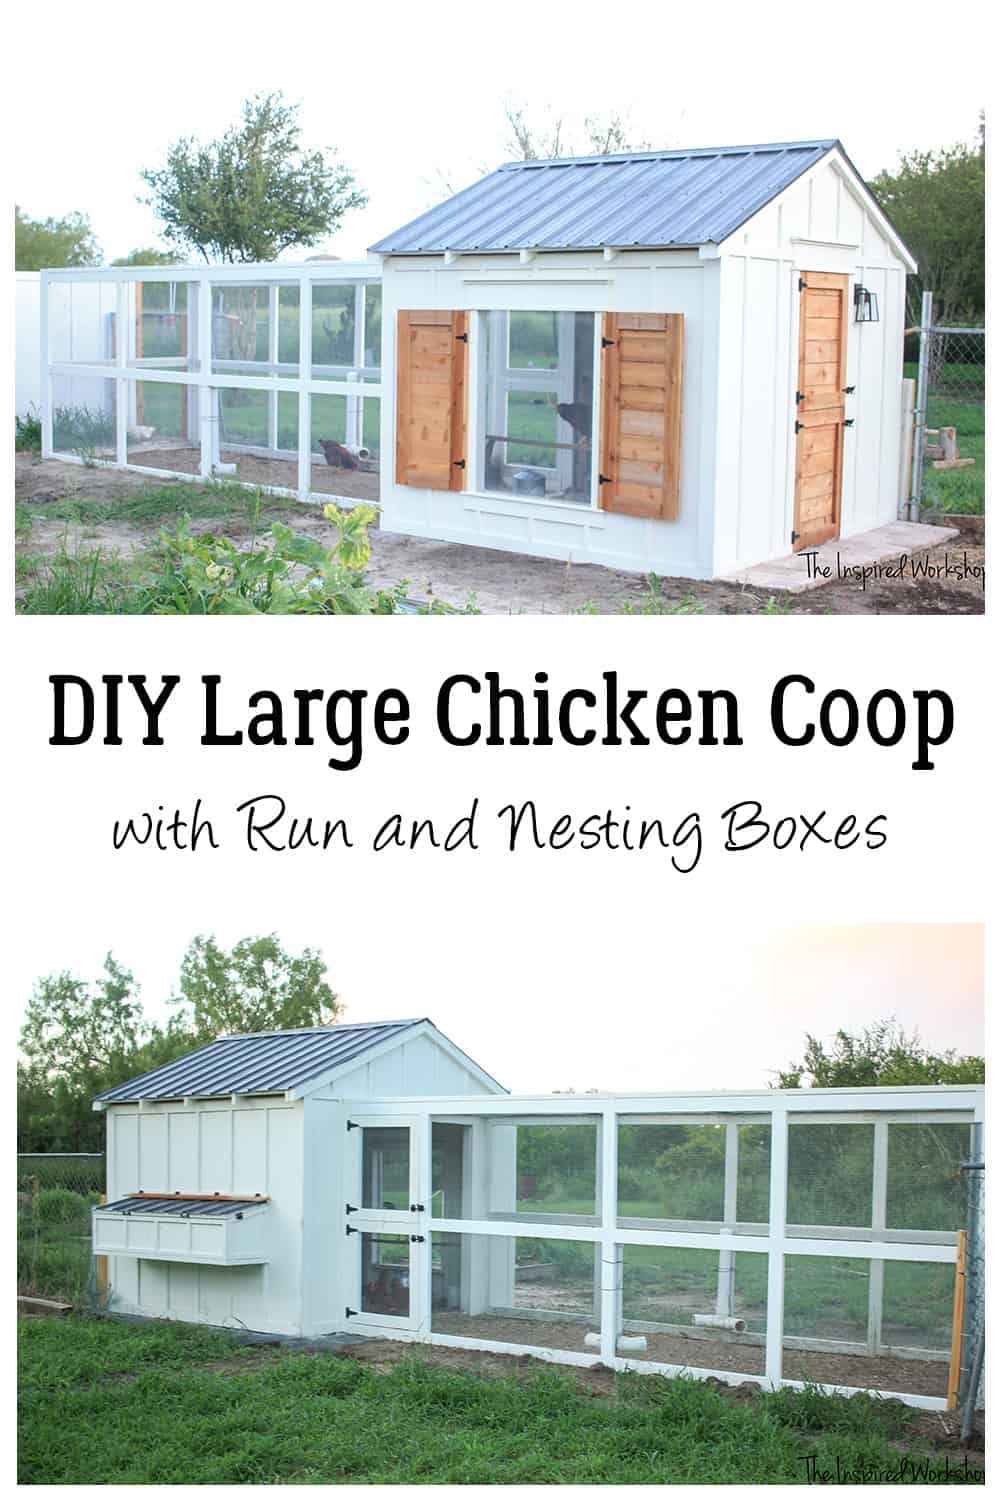
Super cute open or closed! I think its the perfect touch to make the coop just right! 😍

DIY Shutters for Chicken Coop

Make sure and check out the other posts on the chicken coop as well if you need help with any of the other accessories to dress up your chicken coop!

Thanks for stopping by, have a good one!

Wanna save the Chicken Coop Posts for later? PIN it!

DIY Chicken Coop Plans

DIY Chicken Coop Run Plans

DIY Large Chicken Coop Plans - Coop has run and nesting boxes

12 Shares
Pin12
Tweet
Share

Primary Sidebar

Connect with me!

  • Email
  • Facebook
  • Instagram
  • Pinterest
  • Twitter
  • YouTube

Search

Welcome

Hey there! Welcome to the place I share all my diy adventures in hopes of inspiring you to pick up a hammer or drill and get to work building, crafting or renovating your dreams! I will show you step by step instructions on every project to help you see how easy it can be! I’m so glad to have you here! Look around, hopefully you will enjoy what you see!

New Posts Sent Straight to Your Inbox!

Sign up to receive new posts directly in your inbox! Don't miss a single post or FREE plans!

Please wait...

Thank you for signing up! Can't wait to keep in touch!

Recent Posts

  • DIY Gold Hexagon Napkin Rings
  • DIY Marble Epoxy Pumpkin Chargers
  • DIY Hinges Made From Dowel and Pipe
  • DIY TV Stand / Media Console
  • DIY Neutral Fall Wreath

Latest Pins

  • Whether you are serving wine at a holiday gathering, your wedding or just every night when you watch Netflix, this DIY Wine Dispenser is the perfect way to dispense boxed wine but make it look great! No one will even care that it was out of a box! The modern design can lend itself to any decor style. Perfect for giving as a gift to all the wine lovers in your life! #boxedwine #winestorageideas #winerack #winedispenser #giftforwinelover via @theinspiredworkshop
  • This beautiful DIY media console is not only GORGEOUS, but it has a well thought out interior to house all your tv watching and video gaming needs! There are DVD and game drawers, shelves that are perfectly spaced to hold gaming consoles of all sizes, and plenty of space for all the accessories such as headphones, controllers and even an amp! Don't need gaming storage, change the drawers to shelves and use it as a buffet in the dinning room! The beauty of this media cabi via @theinspiredworkshop
  • DIY Outdoor Planter made with scrap wood. #diyoutdoor #diyoutdoorprojects #diyplanters #scrapwood #diyprojects #diyideas #diyinspiration #diycrafts #diytutorial #diy
  • Pour in Place Concrete Countertops - Diy tutorial shows you how to pour  your own white or gray concrete countertops! Filled with helpful video snippets of what to expect when working with concrete for countertops! #diykitchenrenovation #diyconcretecountertops #concretecountertops
Follow Me on Pinterest

I have been featured at

Archives

Copyright

It makes me happy when we all share… but please keep in mind that all images & text on this site are property of The Inspired Workshop. I love seeing my photos on other websites, just as long as there are no more than two per post, and they are linked back to my site! Please do not remove any watermarks, crop or edit any photos, or copy text off of this site without obtaining written permission from me first! Pinning is always welcome and appreciated! Thanks!

SiteLock

Popular Posts

DIY Scrap Wood Outdoor PlanterDIY Scrap Wood Outdoor Planter
DIY Ring Toss GameDIY Ring Toss Game
DIY Concrete Countertops – Pour in PlaceDIY Concrete Countertops – Pour in Place
DIY Dog Bed – Pottery Barn KnockoffDIY Dog Bed – Pottery Barn Knockoff
DIY Vent Hood Plans and Kitchen UpdateDIY Vent Hood Plans and Kitchen Update

Footer

Privacy Policy

Rest assured that The Inspired Workshop will never sell or distribute your name or email address! Please be aware though that we do offer advertisements and in order to place relevant ads for your viewing, tracking cookies are used. Tracking cookies are small text files that are stored on your computer, which are only used to analyze your viewing preferences while on this site! You do not have to allow tracking cookies to enjoy this site and you may disable them in your web browser! Thanks!

Disclosure

Although I am sometimes given free product to review or am paid to help promote certain products/websites, all opinions on this website are 100% my OWN!! I only work with brands that I truly use and LOVE, and I have no problem turning down offers from brands that I do not feel are great quality, or would not use!! I promote many brands without incentive as well, I just enjoy sharing anything and everything I have found in hopes of make building/crafting simple enough everyone can do it!! You can be certain that if I am promoting it, I truly LOVE it!!

Tags

barn door bathroom bench chevron Christmas Decor concrete console table countertops dining bench dining table distressed finish diy fall decor farmhouse bench fireplace gift ideas holiday decor Home Depot industrial kitchen reno kitchen renovation knockoff makeover mantle media cabinet one room challenge outdoor furniture painting cabinets pallet wood playroom pottery barn Restoration Hardware review rope storage table table settings vanity wall art wall decor wall hanging wardrobe west elm winter decor wreath

Copyright © 2021 · Lifestyle Pro on Genesis Framework · WordPress · Log in

We use cookies to ensure that we give you the best experience on our website. If you continue to use this site we will assume that you are happy with it.OkNo