DIY Craft Storage Cart

Do you enjoy crafting but don’t have a lot of space to store all your supplies? This craft storage cart is the perfect solution to storing all your crafting supplies! Whether you make t shirts, wreaths, resin crafts, leather goods, or laser crafts, this will hold and organize all the materials you have!
***NOTE: This post contains affiliate links! Affiliate links are links that should you click over to an external website and make a purchase, I may make a small commission at no extra cost you! I always appreciate you shopping my links as it keeps me being able to bring you free content and plans!
I built this craft storage cart for all my laser craft supplies, I don’t know if you know how many different materials you can utilize when using your laser engraver, but there are SO many!
I have wood sheets, acrylic sheets, rubber stamp sheets, plus all the paints and glitter and glue you need! Lol! And, the M1 has a blade function as well so I have all the materials you can cut with a blade like fabric, leather, and vinyl! And then add in the “in progress” projects and man I needed some organization!
Check out how unruly my craft supplies were! Lol!

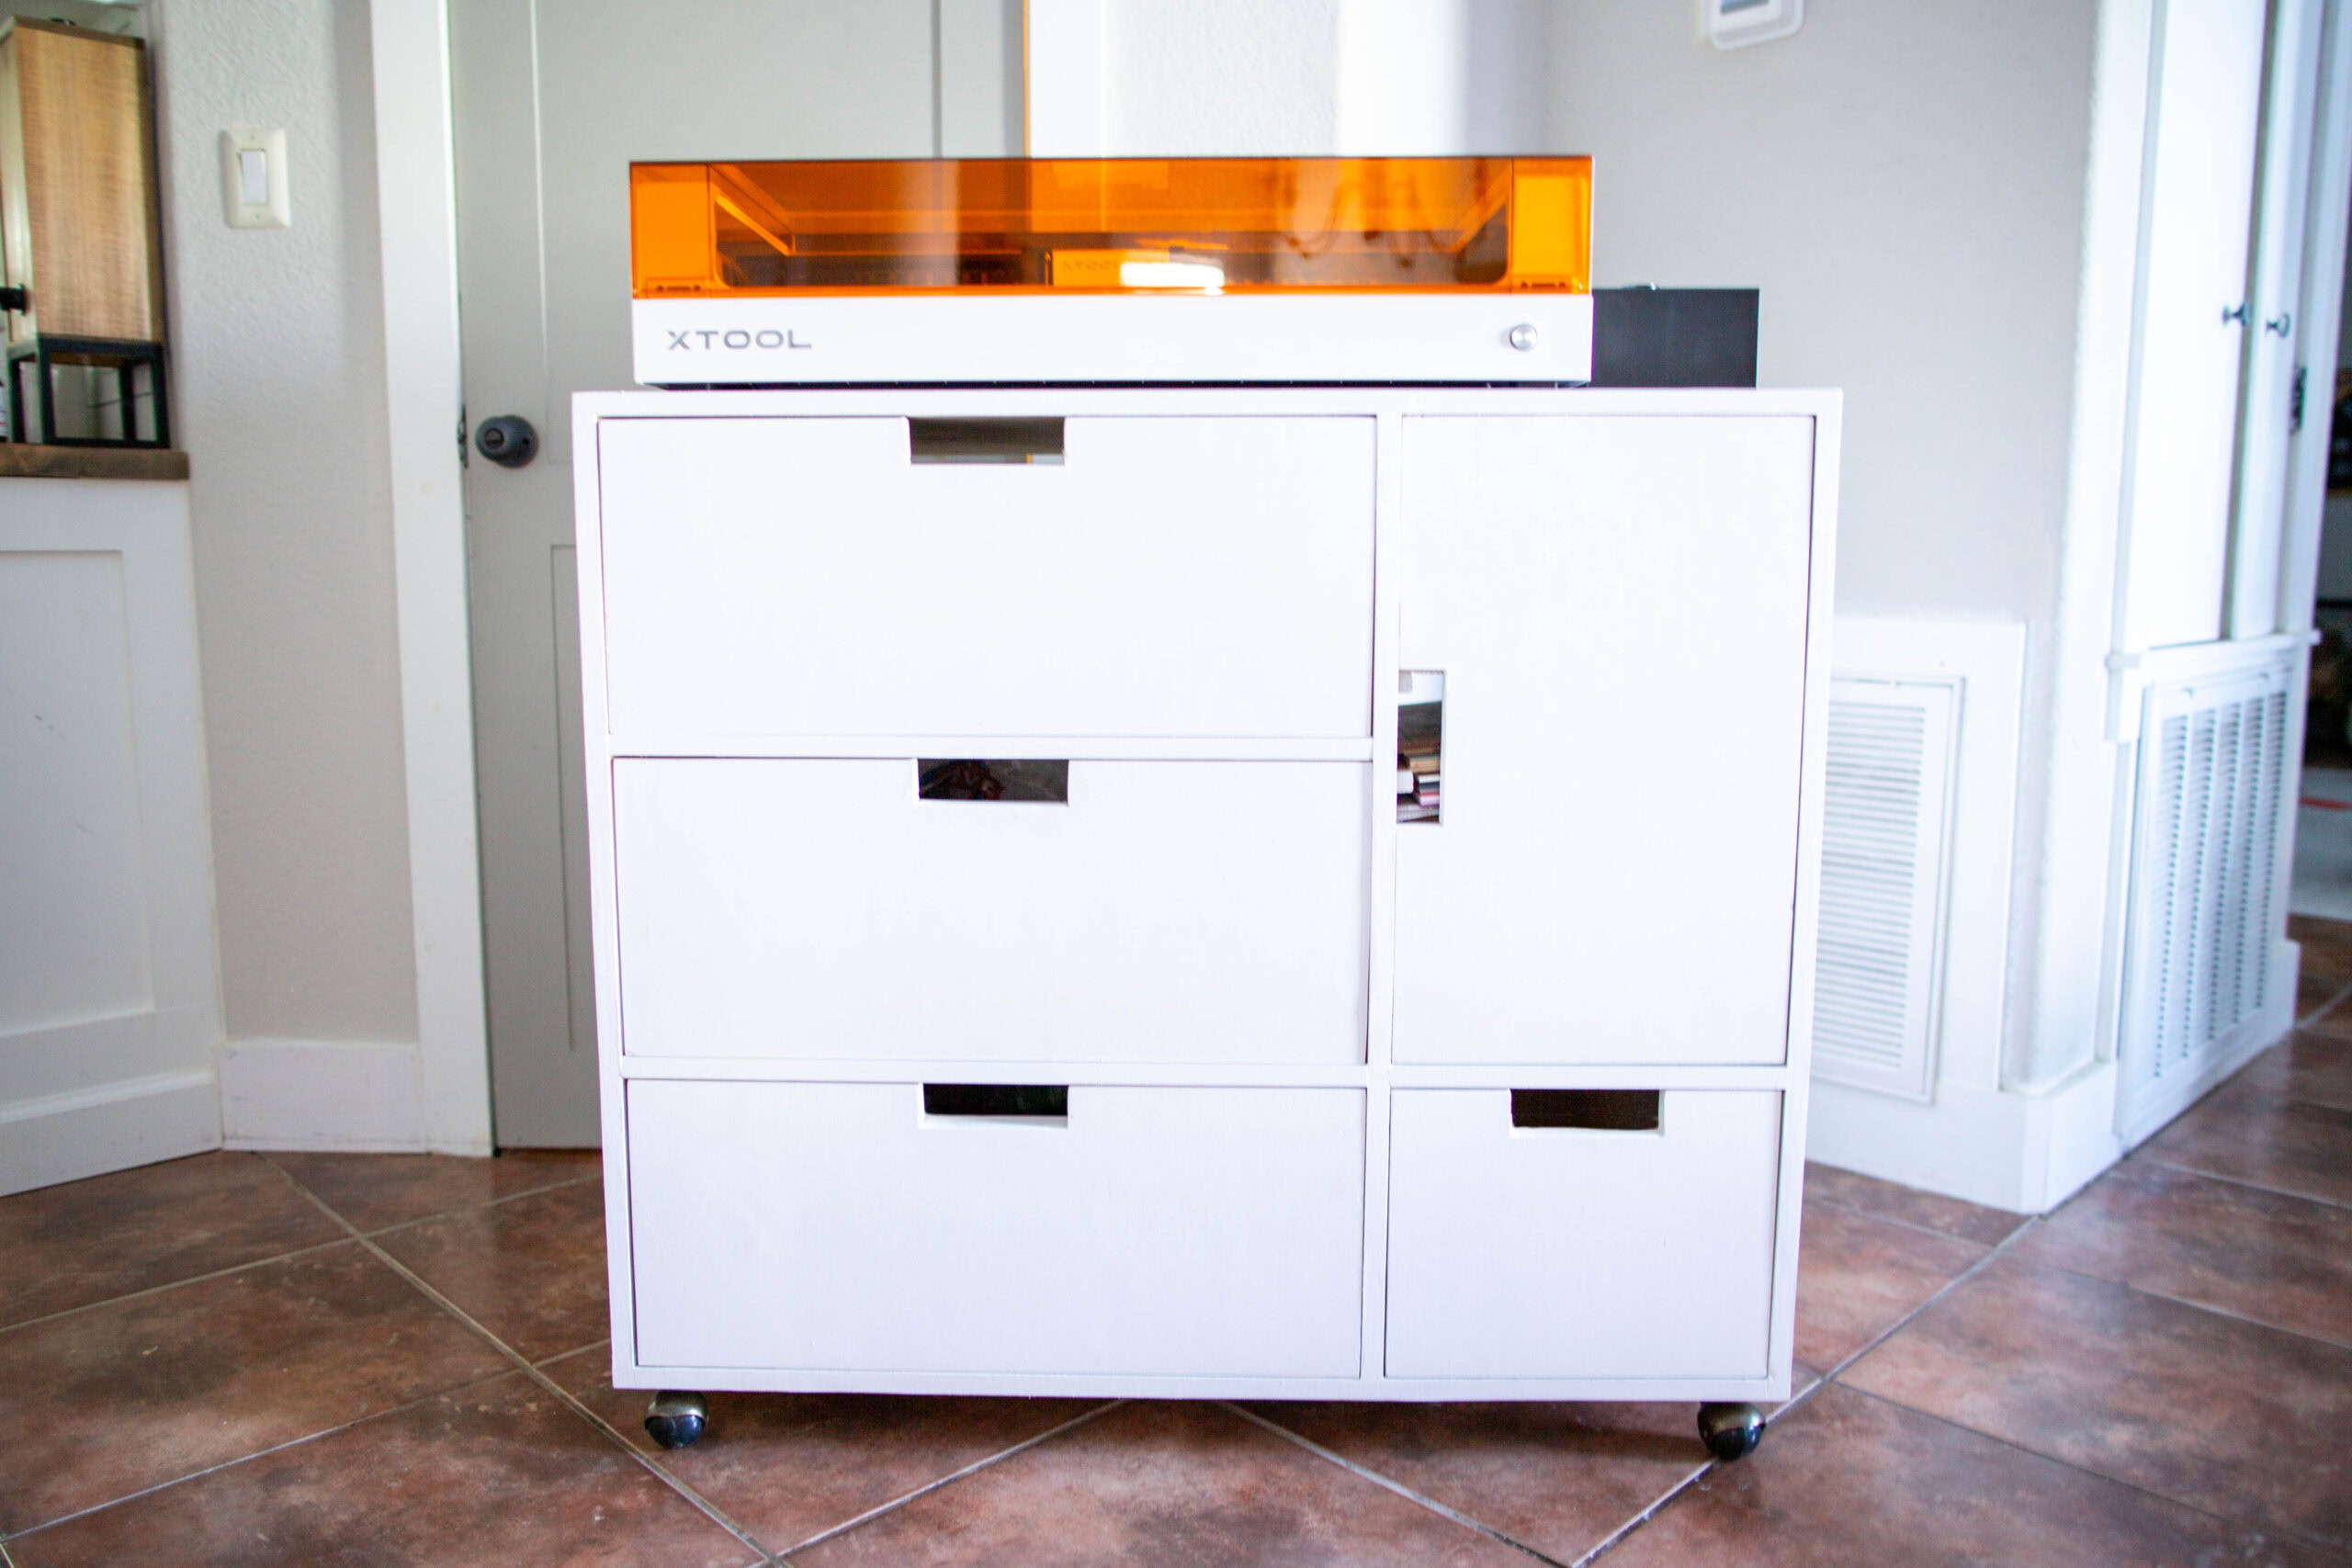
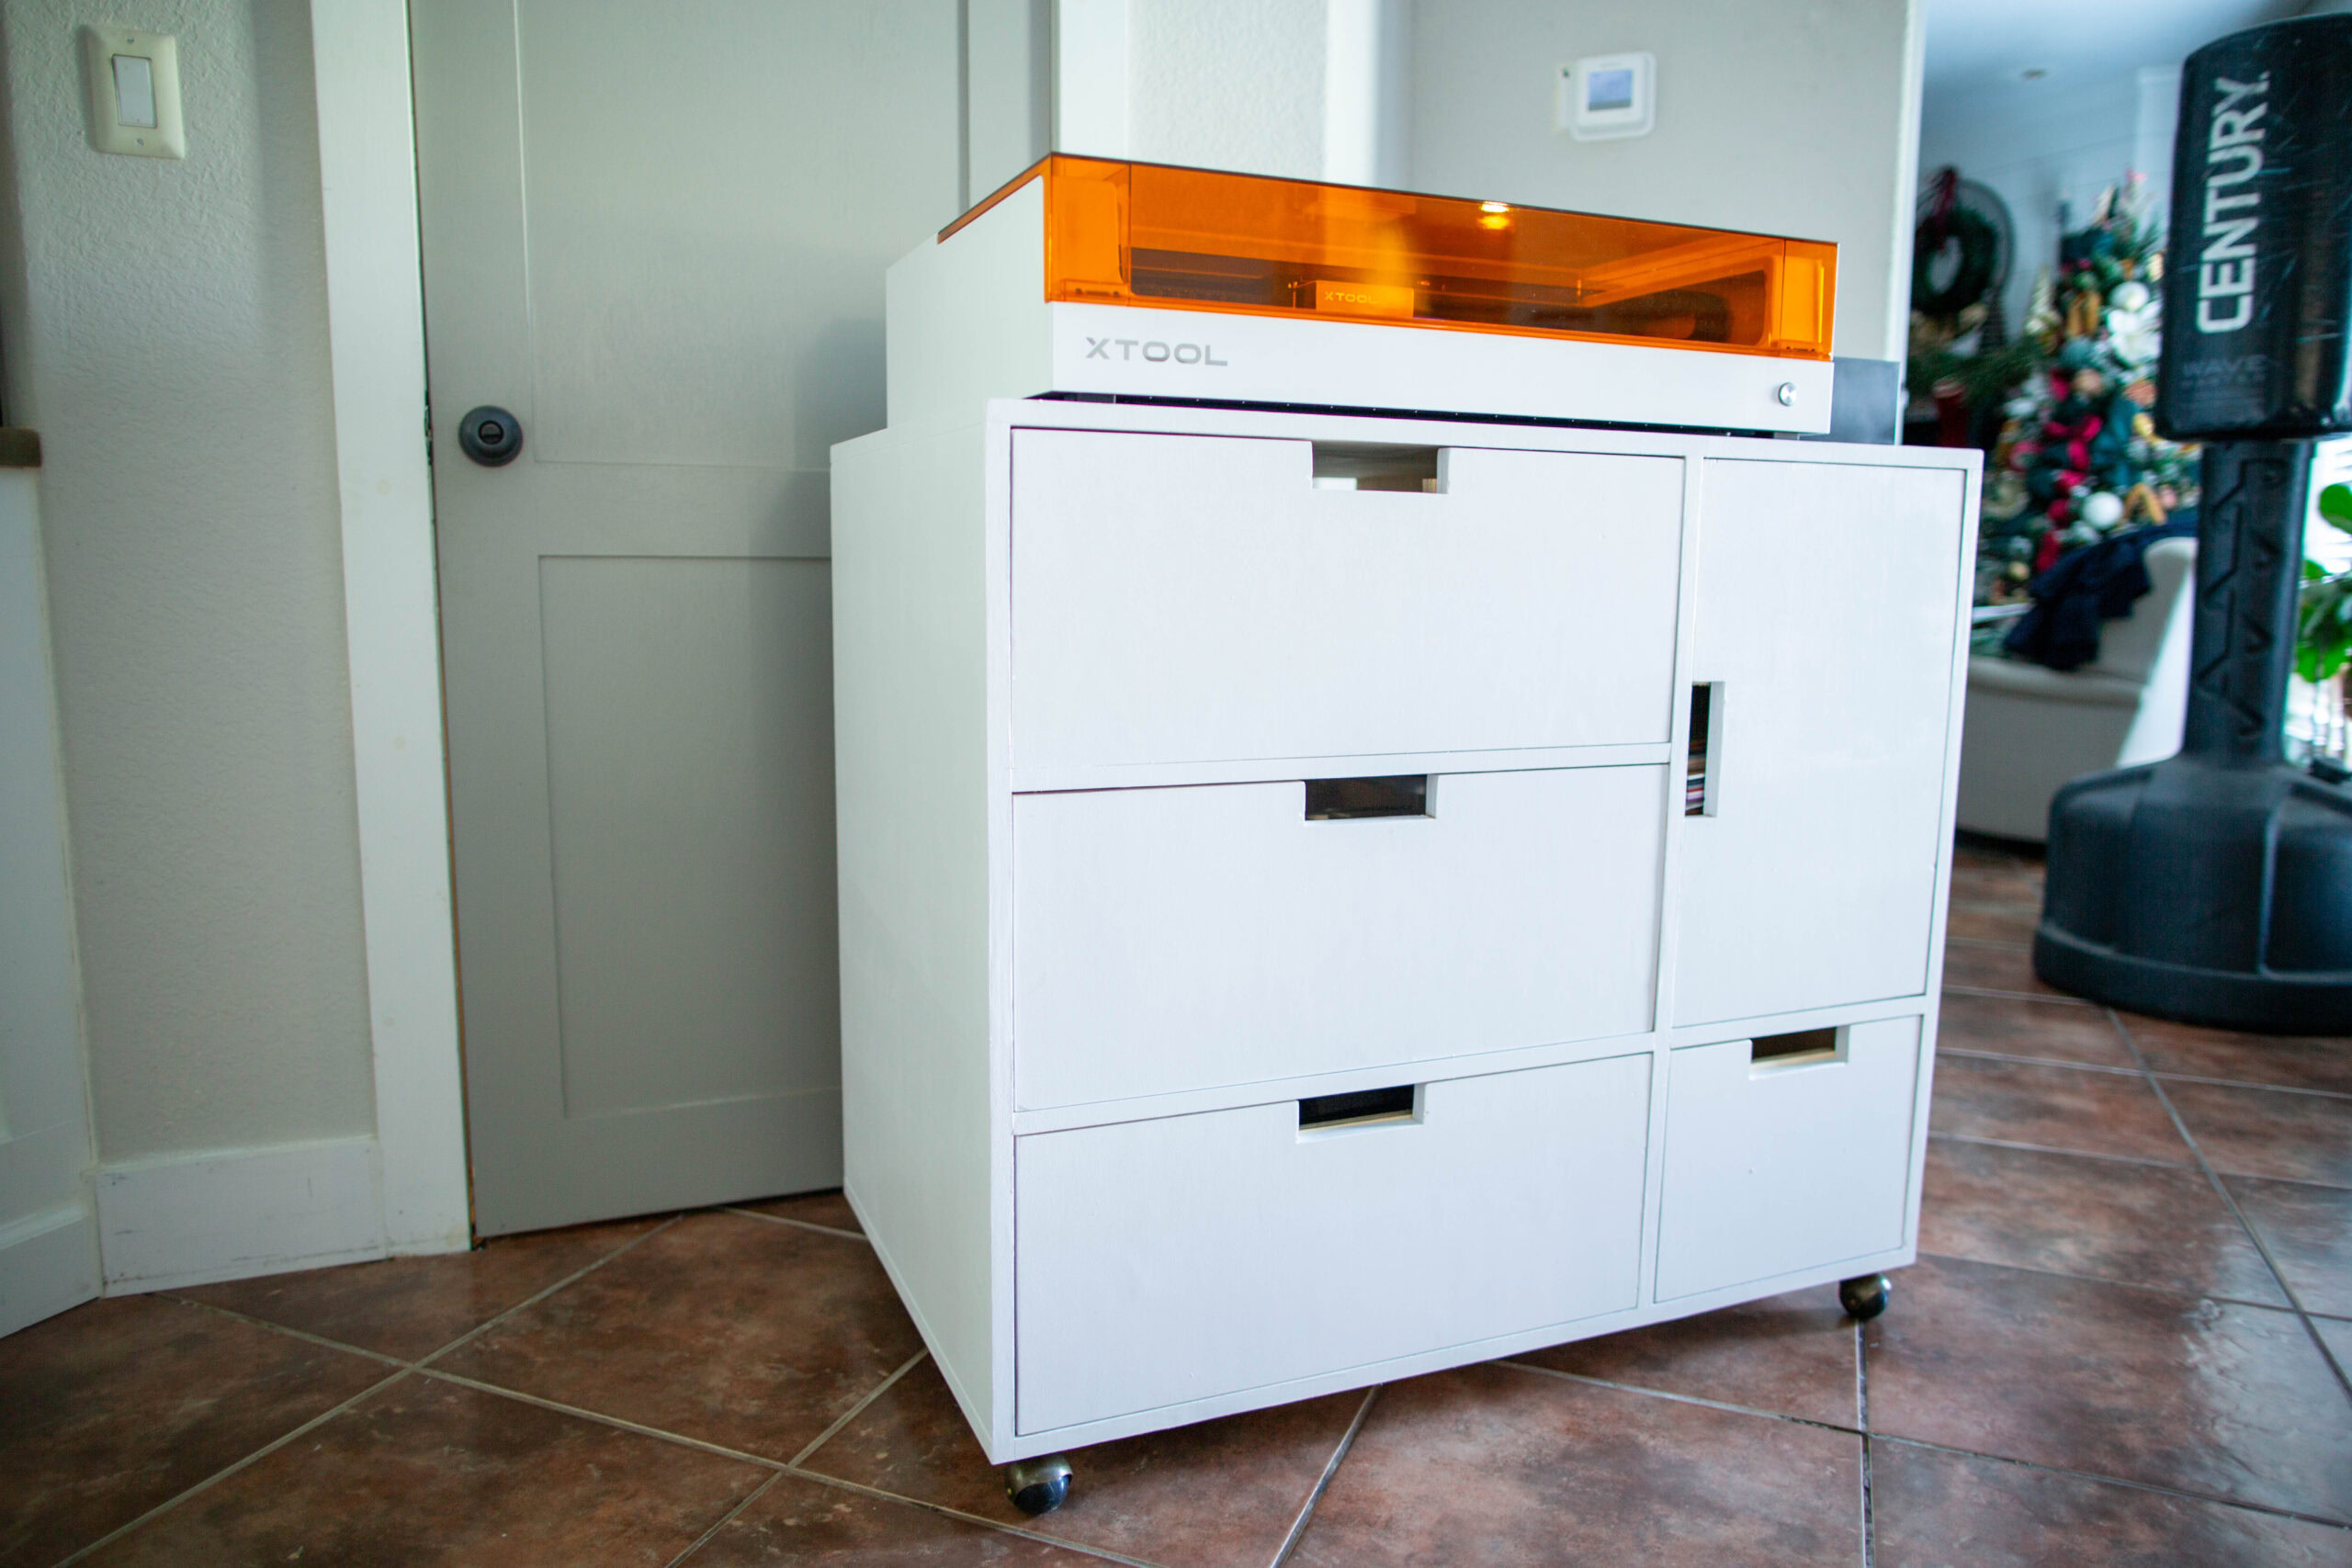
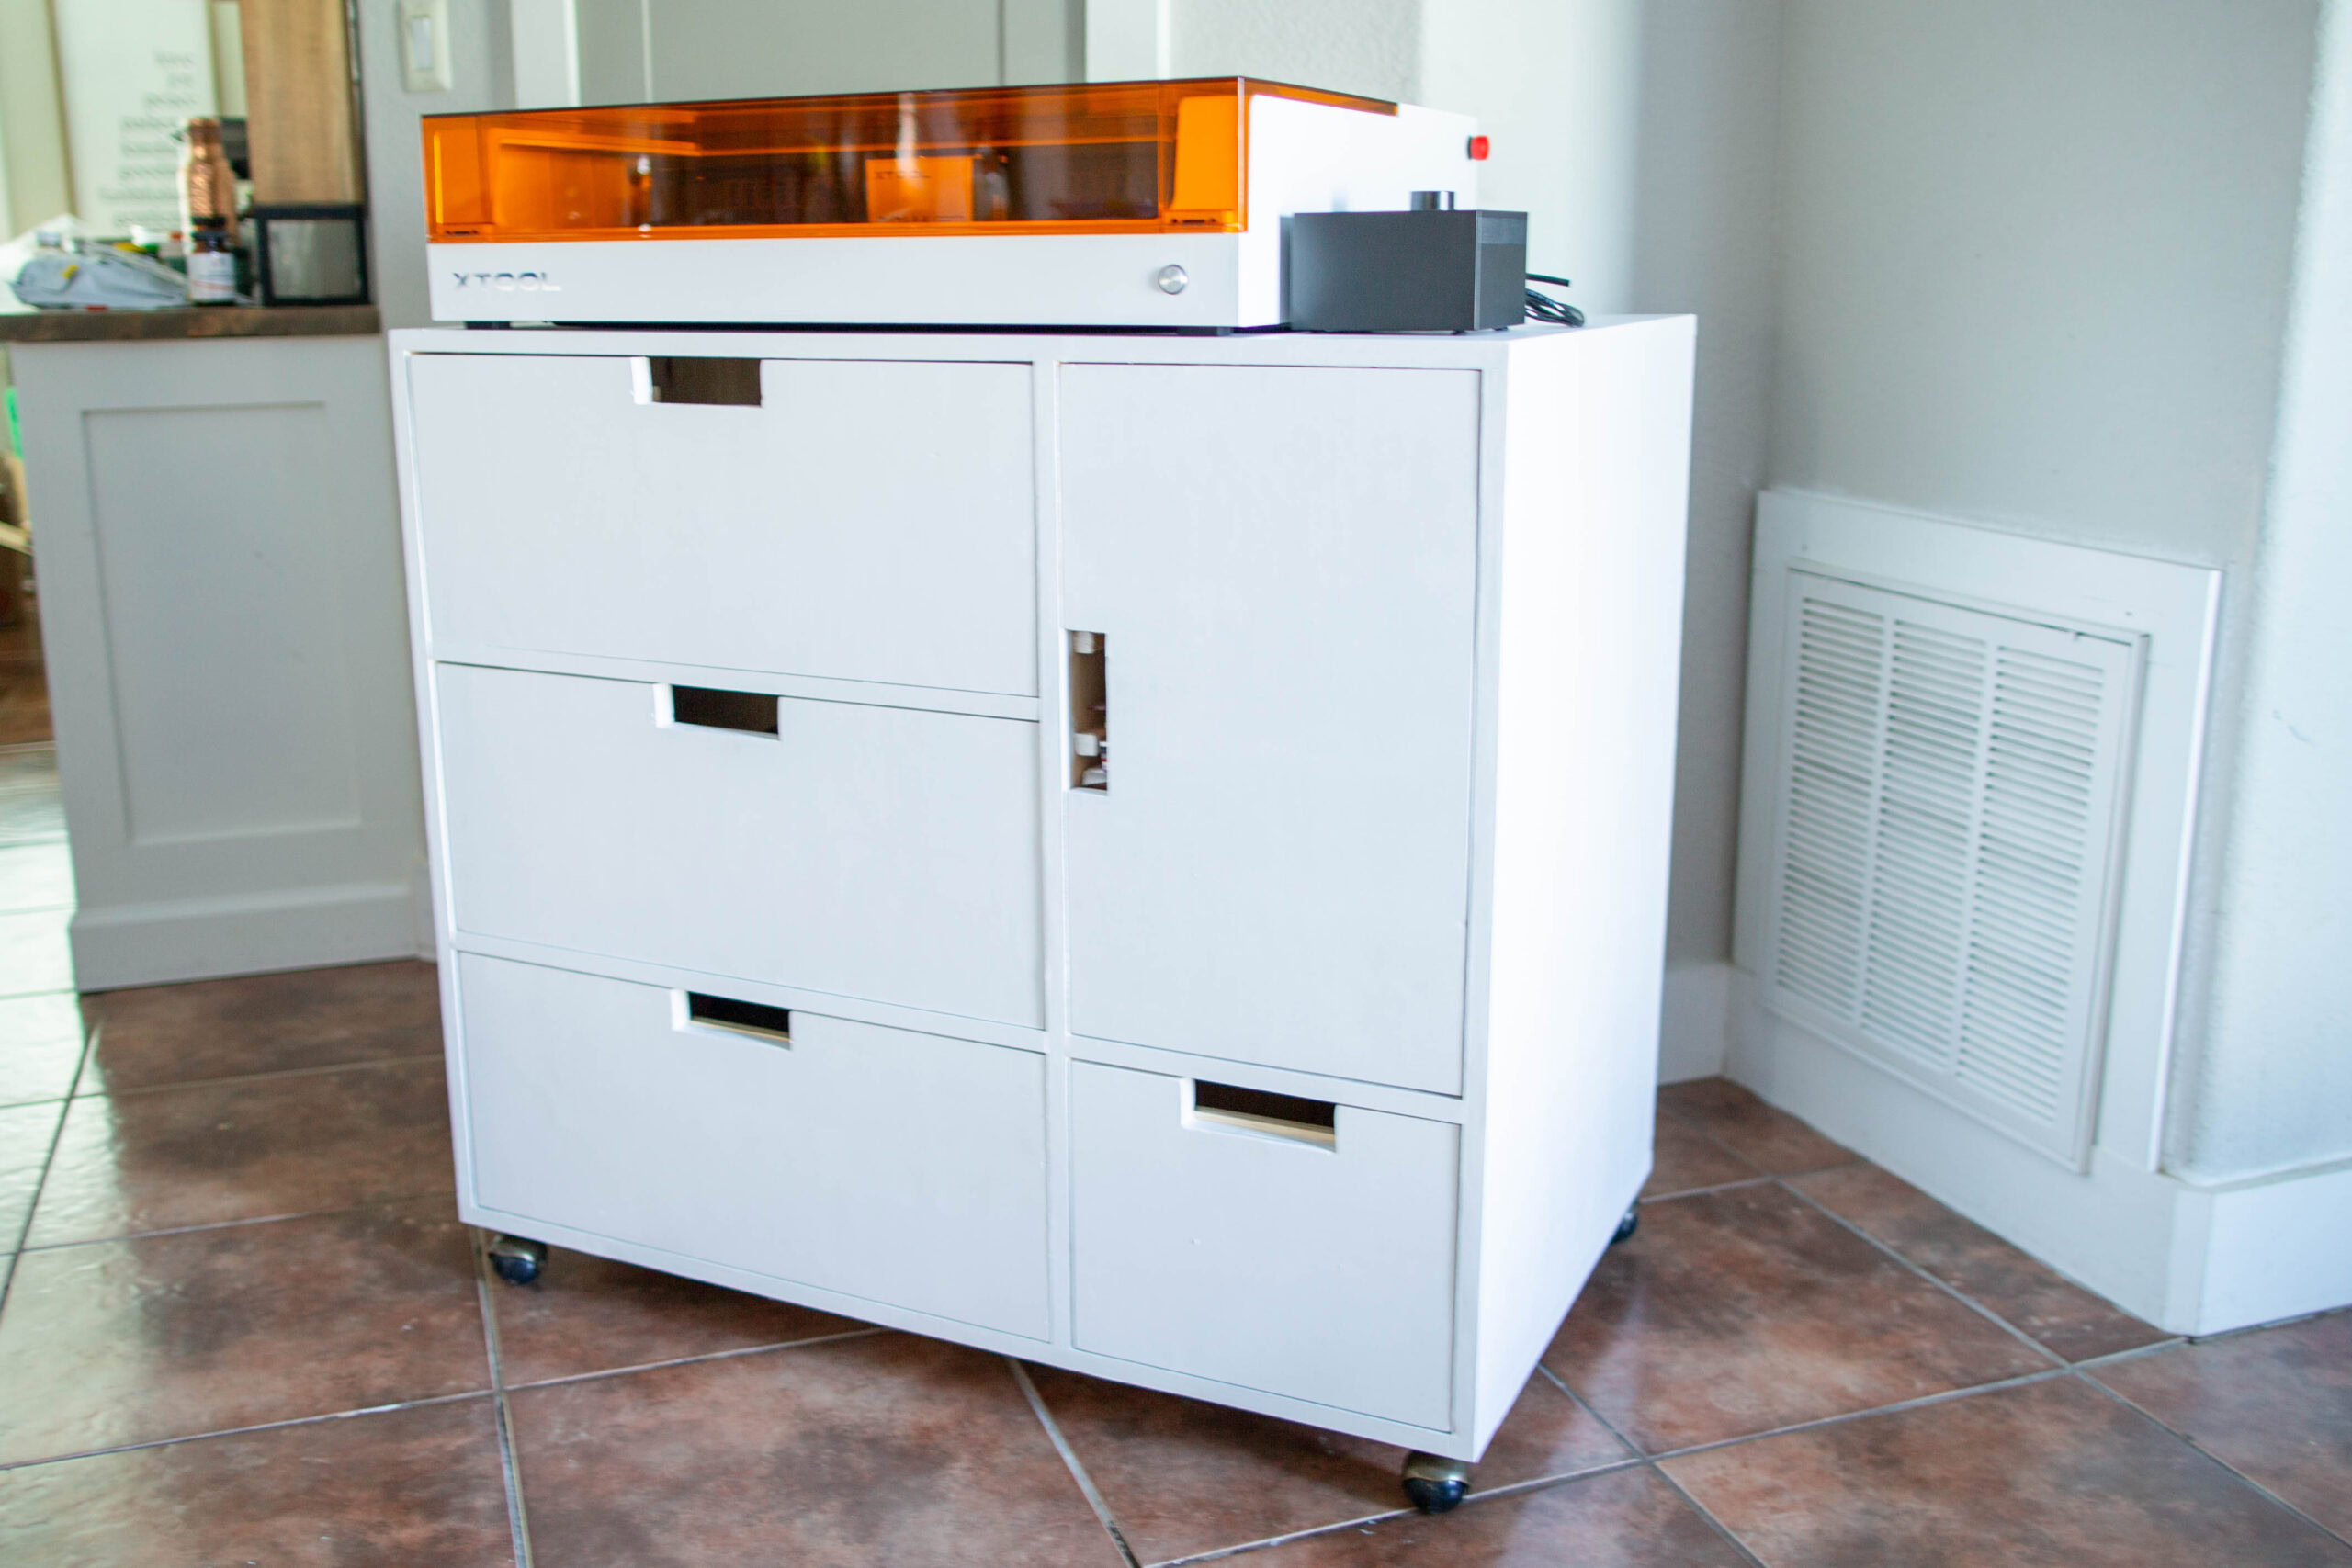
Woah! That was pretty bad, and I am embarrassed to say, it was like that for over three months! Lol! But not anymore! Now it is all inside this craft storage cart and I can use my table again! (Well let’s be honest, the stuff to the left is not crafting supplies and it is still there🫣) This craft cart can hold the M1 or the S1 and all the craft supplies just look at all the drawers and compartments! Plus I can wheel it outside when I am cutting something smelly!


I am addicted to laser crafts and I am not ashamed to say it!🤭 If you want to read all about the xTool M1, I did a review of it, and if you want to see all the amazing projects I have done with it, see them here: Laser Projects! I cannot RAVE about my M1 enough! BUT I am so excited to share review of the S1 tomorrow, and you will be able to see it here, xTool S1 review!
Get ready for soooooo many more laser crafts files! And even an xTool screen printer review! Y’all xTool is insane with the new products that they are constantly coming out with! I am in LOVE! 🥰
Anyway, let’s get to it, let’s build a craft storage cart!
Gathering Supplies for Craft Storage Cart
The total cost of this craft cart for me was a little over $230, I used nice cabinet grade plywood for the outside and saved a little money by using pine plywood on the inside! Completely worth the cost considering the cheapest craft storage carts I could find on Amazon and Wayfair were the same price or more expensive and all the reviews said they were cheaply made! This baby is NOT cheaply made! Lol!
I built this large enough to house my S1 laser on top, but if you have a smaller laser like the M1, you can make it smaller by ripping your plywood that is 24″ down to 20″ and then the other widths will need to be adjusted as well!
MATERIALS LIST:
- 2 – 3/4″ 4×8 sheets of plywood
- 1 – 1/4″ 4×8 sheet of plywood
- 1 – 1x4x8
- 1 pair of 21″ heavy duty under-mount drawer slides – you only need these if you are adding the screen printer as I did, otherwise the set linked below contains 6 sets so you won’t need this set!
- 3 – 22″ set of drawer slides (these are my favorite without breaking the bank but getting great quality!)
- 1 – set of 4 wheels
- edge banding – this is the one I bought so I could use it on many projects, but you can get a smaller roll! Lol!
- Kreg Jig
- Kreg Rip cut
- circular saw – I LOVE my cheap little Ryobi battery operated saw with the Diablo blade, it cut the plywood cleaner than my Rigid table saw and they both had brand new Diablo blades!
- 1 1/4″ Kreg screws
- 1 1/2″ screws
- brad nailer and brad nails
- wood glue
CUT LIST:
- 2 – 3/4″ plywood cut @ 24″ x 32 3/4″ (sides)
- 1 – 3/4″ plywood @ 24″ x 40″ (top)
- 3 – 3/4″ plywood @ 24″ x 38 1/2″ (bottom)
- 1 – 3/4″ plywood @ 24″ x 32″ (divider)
- 1 – 3/4″ plywood @ 24″ x 13″ (shelf)
- 1 – 3/4″ plywood @ 23 1/4″ x 13″ (shelf)
- 2 – 3/4″ x 3/4″ @ 24 3/4″ (dividers in between drawers – left side)
- 8 – 3/4″ x 1″ @ 23 1/4″ (supports – right side)
- 2 – 3/4″ plywood @ 10″ x 24 1/2″ (right drawer fronts – top and bottom drawer)
- 1 – 3/4″ plywood @ 9 3/4″ x 24 1/2″ (right drawer front – middle drawer)
- 1 – 3/4″ plywood @ 10″ x 12 3/4″ (right drawer front)
- 1 – 3/4″ plywood @ 12 3/4″ x 20 3/4″ (right side door)
- 1 – 1/4″ plywood @ 39 3/4″ x 34 1/4″ (back)
Drawer Boxes:
**I built the top drawer to house the screen printer but it did not fit and cannot fit without changing a lot of things, so I made the plans with all three drawers the same, not the screen printer pullout! I will update the plans once I have modified it!
7 1/2″ is slightly smaller than I cut mine but it will keep you from having to cut the plywood of the drawers when you cut the handles of the drawer fronts!
- 8 – 3/4″ plywood @ 7 1/2″ x 23″ (drawer box sides)
- 6 – 3/4″ plywood @ 7 1/2″ x 22 1/4″ (large drawer box front and back)
- 2 – 3/4″ plywood @ 7 1/2″ x 10 1/2″ (small drawer box front and back)
- 3 – 1/4″ plywood @ 23″ x 23 3/4″ (large drawer bottoms)
- 1 – 1/4″ plywood @ 12″ x 23″ (small drawer bottoms)
Building the Craft Storage Cart
So funny little story about the building of this craft storage cart, I designed and designed for a couple of weeks because I could not get the design just right! When I think I was four or five designs in, I was like, okay, that has enough storage and I can live with the look of it, let’s do it!
Well, life happened and then it was a couple of months before I actually started building the craft storage cart so I looked at all my files and couldn’t find the one I thought I settled on building so I started building an earlier plan that I didn’t really like because I couldn’t wait any longer, I needed to get all these supplies off of my table! Lol!
Well, I was this far along when low and behold the plan was not working out because there was sagging which I could not remedy and was only going to get worse when I added the heavy screen printer to the middle drawer!

Then randomly looking for a picture on my computer, in a random folder I came across a craft storage cart plan that was saved to the wrong folder, and it was the one I was looking for originally! Yay! BUT with plywood so expensive I was not willing to completely waste the plywood! I was able to salvage everything but the 10″ dividers!! WOOHOO! I was so happy! I was even able to cut the drawer box down and reuse it into the two bottom drawers!
Anyway, sorry, we can start building now! 😅
Building the Frame of the Craft Storage Cart
Using 2 – 24″x 32 3/4″ (sides) and the 24″x 40″ (top), and the 24″ x 38 1/2″ (bottom) pieces of plywood you can easily build the frame of the craft storage cart!
I had to improvise this part because I cut my side boards too short and hadn’t cut my bottom board yet so in an effort to remedy the situation, I made my bottom board the same as my top board! I swear if there was a mistake to be made, I was going to make it on this build! Lol! But you will cut your boards correctly, so use the cut list and the 3d printed plans to build it correctly!
Using the Kreg Jig, since this plywood is 3/4″ thick, you will drill pocket holes at 3/4″ depth along one short end of the 32 3/4″ boards that are the sides. You will also drill pocket holes on both short ends of the bottom board which is 38 1/2″.

Set the drill bit at 3/4″ as well!

Drill them holes!

Once the pocket holes are drilled, we can build the frame! It is easiest, I think, to flip the top upside down to attach the sides so you are drilling downward with your screws! Use wood glue along with 1 1/4″ screws to attach! The side boards are flush with the edges of the top!

Alright, now add the bottom board, you can either turn it on it’s side if you want the pocket holes to the bottom, but since there are going to be drawer boxes you can actually leave them showing to the inside because no one will ever see them! Since I did mine incorrectly, I won’t show you a real pic only the 3d rendering of the completed frame! Lol!

Next add the divider, this is the 24″x32″ board, it will also have pocket holes drilled at 3/4″ along both short ends! You will again use 1 1/4″ screws and wood glue to attach. It will be placed 13″ from the right side, 24 3/4″ from the left! I placed the pocket holes to the right side and they aren’t visible in the pic!

Okay, a few of the steps will not need to be done since the screen printer didn’t fit in the top drawer pullout! So ignore the 2x2s that are near the top, you will not need these since you can just use regular drawer slides!
Add the drawer divider boards, these are 3/4″ boards ripped from the 1×4! They are 3/4″ x 3/4″ and you will drill one pocket hole (same depth and screw size) one each end to attach them!

Ignore the drawer boxes in the photo below, and just center in on that one pocket hole on the bottom of that divider!

Next add the shelf on the right side. Use the piece of plywood that is 24″x 13″ and it is 3/4″ plywood so same pocket holes, place the bottom of the board at 10 1/4″ and place the pocket holes on the bottom along the long sides!

Building the Drawers of the Craft Storage Cart
At this point I went ahead and built the drawer boxes, you will build three of the drawer boxes for the left! You will use 2 of the 7 1/2″x23″, 2 of the 7 1/2″ x 22 1/4″ boards, and the 1/4″ plywood cut at 23″ x 23 3/4″ to make each drawer box! These measurements are for MOST drawer slides, if you use drawer slides that are larger than 1″ wide, you will need to adjust the measurements!

Use ample glue and brad nails to attach the drawer bottoms!

Once you have all three large drawer boxes made, you can then install the drawer slides in the craft storage cart. On the bottom drawer I just used a 3/4″ scrap piece of wood to raise the drawer slides slightly! Then if you make sure the bottom drawer slides go in level, then you can just use another spacer as shown below for the next set of drawer slides!
I apologize that I was so horrible about getting pictures, but between me building it wrong, the top drawer not working, and being in a rush, I didn’t manage as many pics as usual! Sorry!
Make sure the drawer slides are set back 3/4″ to account for the drawer fronts!

I really want to do a whole post or video on drawer slides because I have built and installed a bunch of drawers lately and FINALLY feel like drawers are easy! Lol! I want to share all the tricks!
Once the drawer slides are attached to the cabinet, you can attach them to the drawer boxes as well! Ignore the top drawer in my photo, yours will not look like this!

Next build the small drawer box! Again pocket holes and screws will be the same since we are still working with 3/4″ material!

Add the 1/4″ plywood to the bottom with glue and brad nails!

Install drawer slides to the craft storage cart, and then attach them to the drawer box!

Now that all the drawers are installed, we can add our shelf slats, supports, whatever you would call them!
Mine are only 1/2″ and they slide off of them very easily since most sheets for laser crafts are cut to 12″ width and they JUST fit my slats, so in the cut list I changed them to 1″ each and I am going to change mine out to 1″ pieces as well!
I just screwed them into place without any glue just in case I want to change the spacing at any point! They are spaced at 2 1/2″ apart! Now, you may want to space them differently if you don’t want them showing through the handles…I don’t like it, but after all the heck this build has put me through, I can live with it! Lol!
Make sure these boards are set back 3/4″ so the door has room to be inset!

The board on top of the slats is loose sitting, I didn’t attach it in any way, it is just laying there! You can attach it if you want, I want to get a feel for the spacing before I commit to anything! It is the board in the cut list that is 23 1/4″ x 13″!
Now it is time to cut the drawer fronts! I cut them down to size, then marked the handles and cut them out with the jigsaw!

middle drawer front


Now that we have all the faces and doors cut, we are ready for finishing!
Finishing the Craft Storage Cart
Before attaching any of the drawer fronts or the door, I wanted to paint everything since I wasn’t painting the interior! I added the edge banding quickly with an iron and lightly sanded away the tiny little edge that was slightly hanging over the edge! I purchased an edge band cutter but it only works if you edge band each piece before attaching any of them, which I then realized would have been a brilliant idea to have done that first! Lol!
I used Behr paint in the color of Blank Canvas, it’s a soft white that is warm but doesn’t have any yellow undertones! I love it and used it in my recent bathroom reno that I can’t wait to share with you all!
Anyway, I just rolled it on with a sponge roller and lightly sanded after two coats, then applied a third!


Once everything was dry, I attached the drawer fronts!
The easiest way to do this is start your screws inside your drawer so your screw doesn’t keep falling off your drill while you are trying to attach the fronts!

Then use playing cards to get the spacing how you want it! I used 5 cards of humanity to get them where I wanted them!

Very carefully pull the top of the drawer front away from the drawer box and squeeze a little superglue in there to help hold the drawer front in place while you screw it in from inside the drawer!
I also used the super glue trick on the hinges for the door! I used inset hinges which can be tricky but using the super glue and a scrap piece of 3/4″ plywood, it was simple! I super glued the hinge where I wanted them on the cabinet first, then screw them into place! Make sure you get the placement you want by lining up the scrap plywood with the edge of the cart!

Once the hinges are attached to the cart, add a little super glue to the hinges again and quickly get the door placed where you want it and hold! This gave enough hold that I could go around back and while holding the door with counter pressure from the front I screwed them into place on the door! I am short and my arms were able to reach all the way around to do this so you can too! 🤭
Now everything is in place on the front, we need a back and some wheels and this baby is ready to be filled with all the craft supplies!
Flip it over to attach the wheels! I placed them 1 1/8″ from the sides, and 1″ from the front and back!

Brad nail the 1/4″ plywood into place! Bam! DONE!!!!

It isn’t perfect but it surely beats the mess that I had everywhere from my craft supplies, it only takes up minimal space, and it is easily moveable since it is on wheels! Woot woot!

What do you think, do you have enough craft supplies to fill this baby up?! If not, you should maybe pick up a laser and then you will for sure! Lol!
I’m off to make some fun laser crafts to show you all how amazing the xTool S1 is! Talk to ya soon!
Thanks for stopping by!

Want to save this Craft Storage Cart for later? Pin It!


