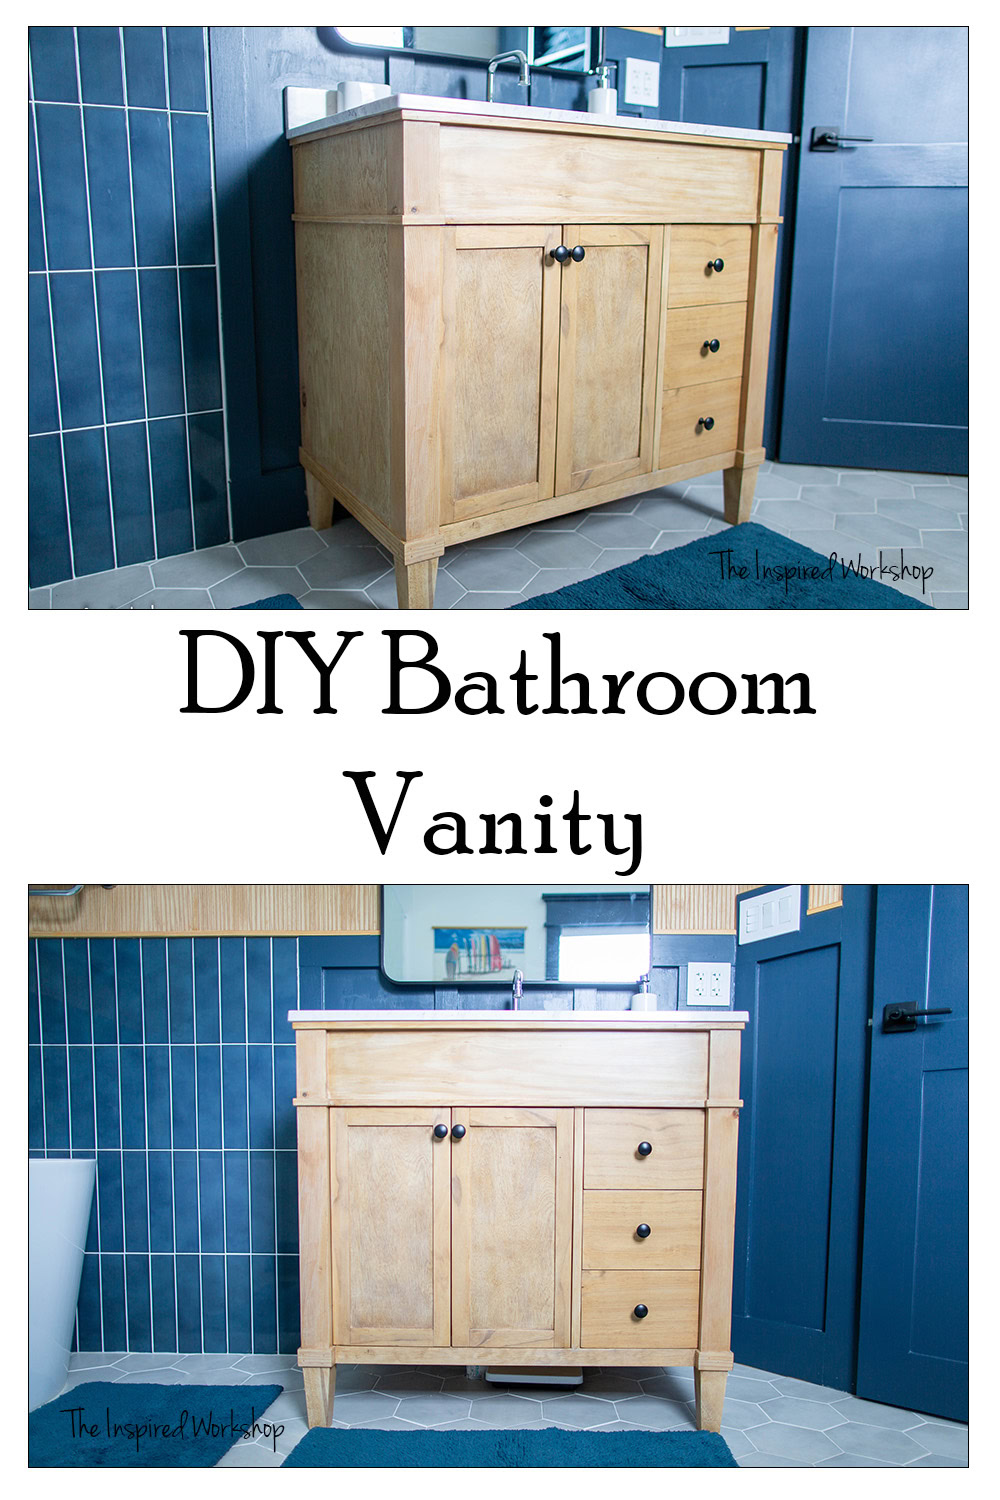
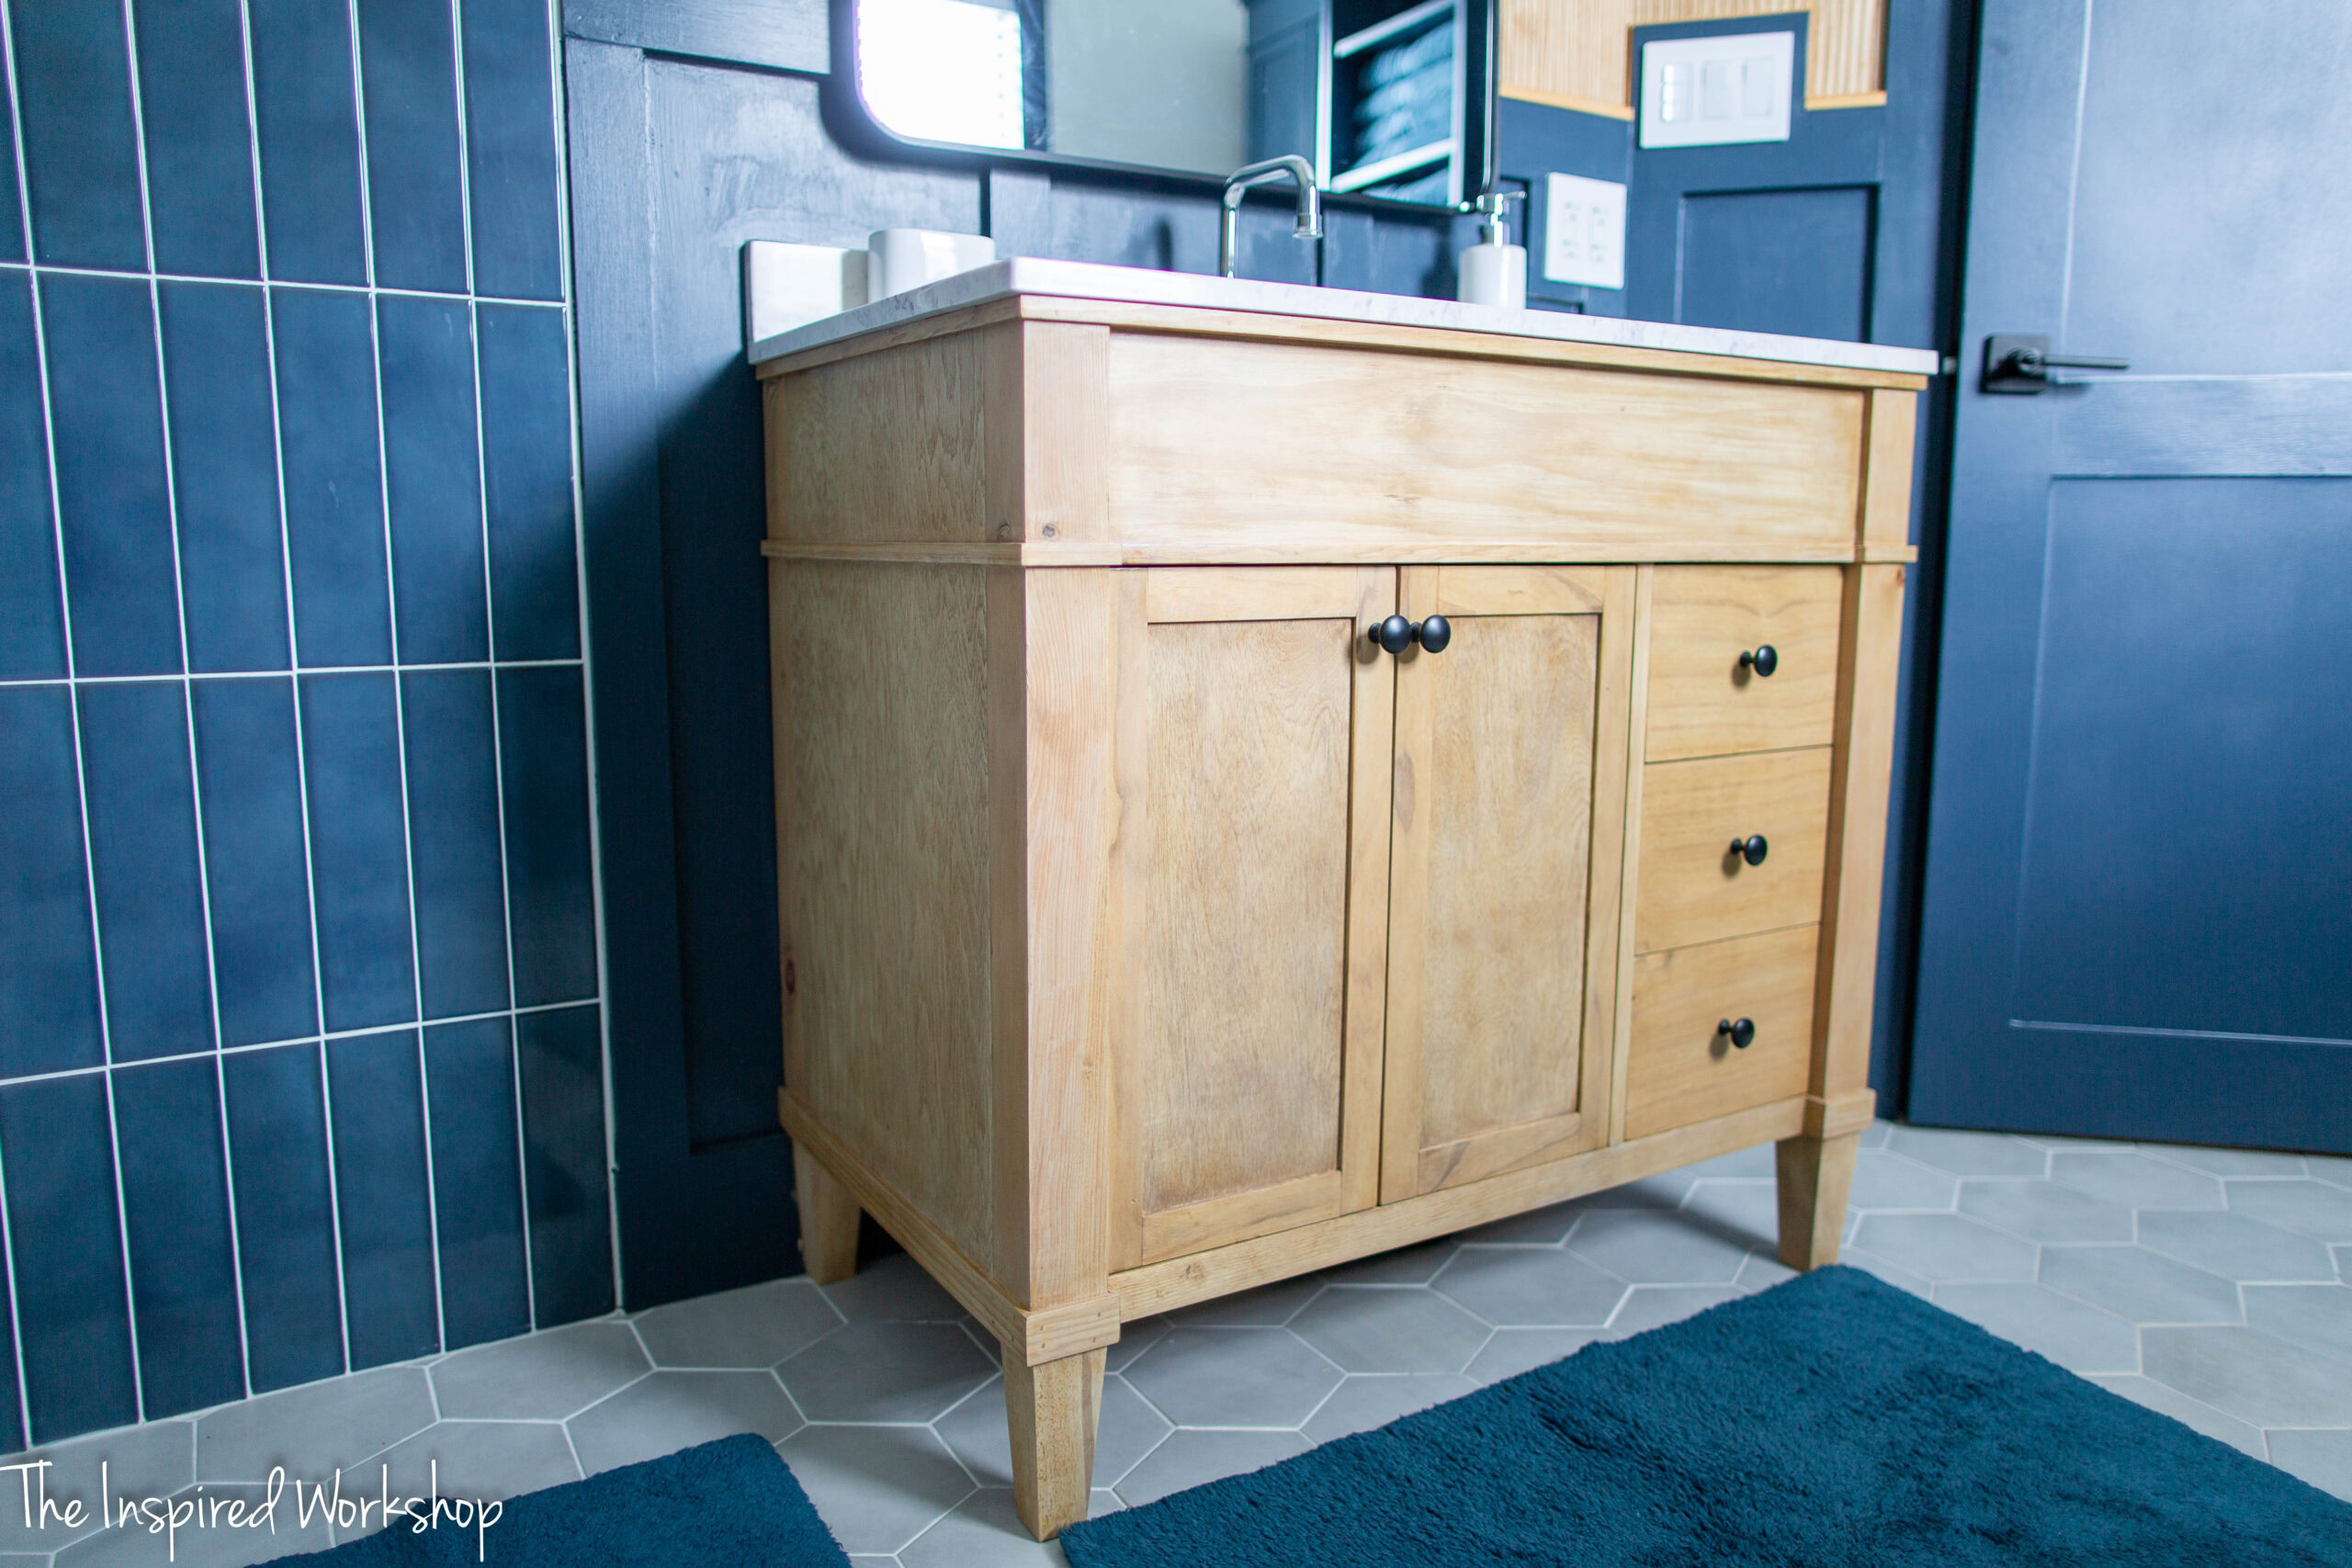
36 Inch Bathroom Vanity
The vanity is the hub of the bathroom, where the simple, everyday things are done such as brushing the teeth, but the design can make or break the space! This 36 inch bathroom vanity is the perfect simple vanity that can be dressed up or down based on your bathroom design! With it’s small size you can use it in a small bathroom or build two of them and use them in a large master bathroom!
When I first started planning my boys’ bathroom remodel, I found this vanity from Signature Hardware and loved it, but it had a price tag of $2400 without a top! Ugh, no thank you that would have been a 50% increase on my bathroom remodel and I don’t know about you but I enjoy saving all the money I can, I mean everything keeps going up drastically in price and so I never know when I could use that money somewhere else!! Lol!
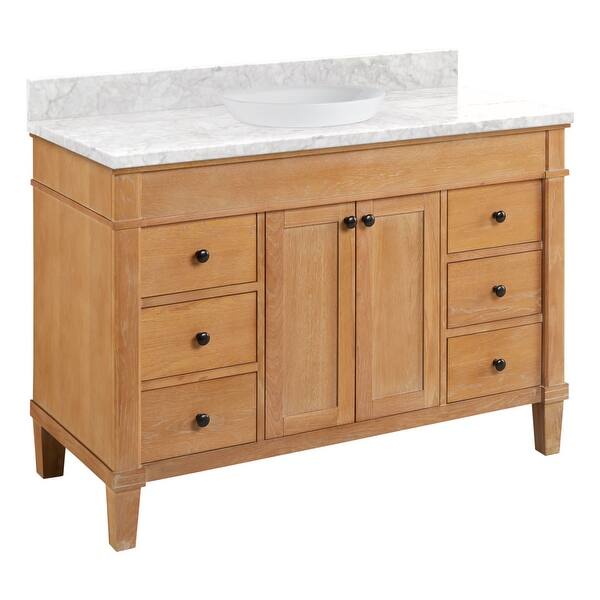
Plus, it didn’t come in a 36″ model… and, when it came time to decide on a bathroom vanity, it was discontinued, so no matter what, if I wanted this vanity, I had to build it! Not a problem, say no more, I went to the garage to start building!
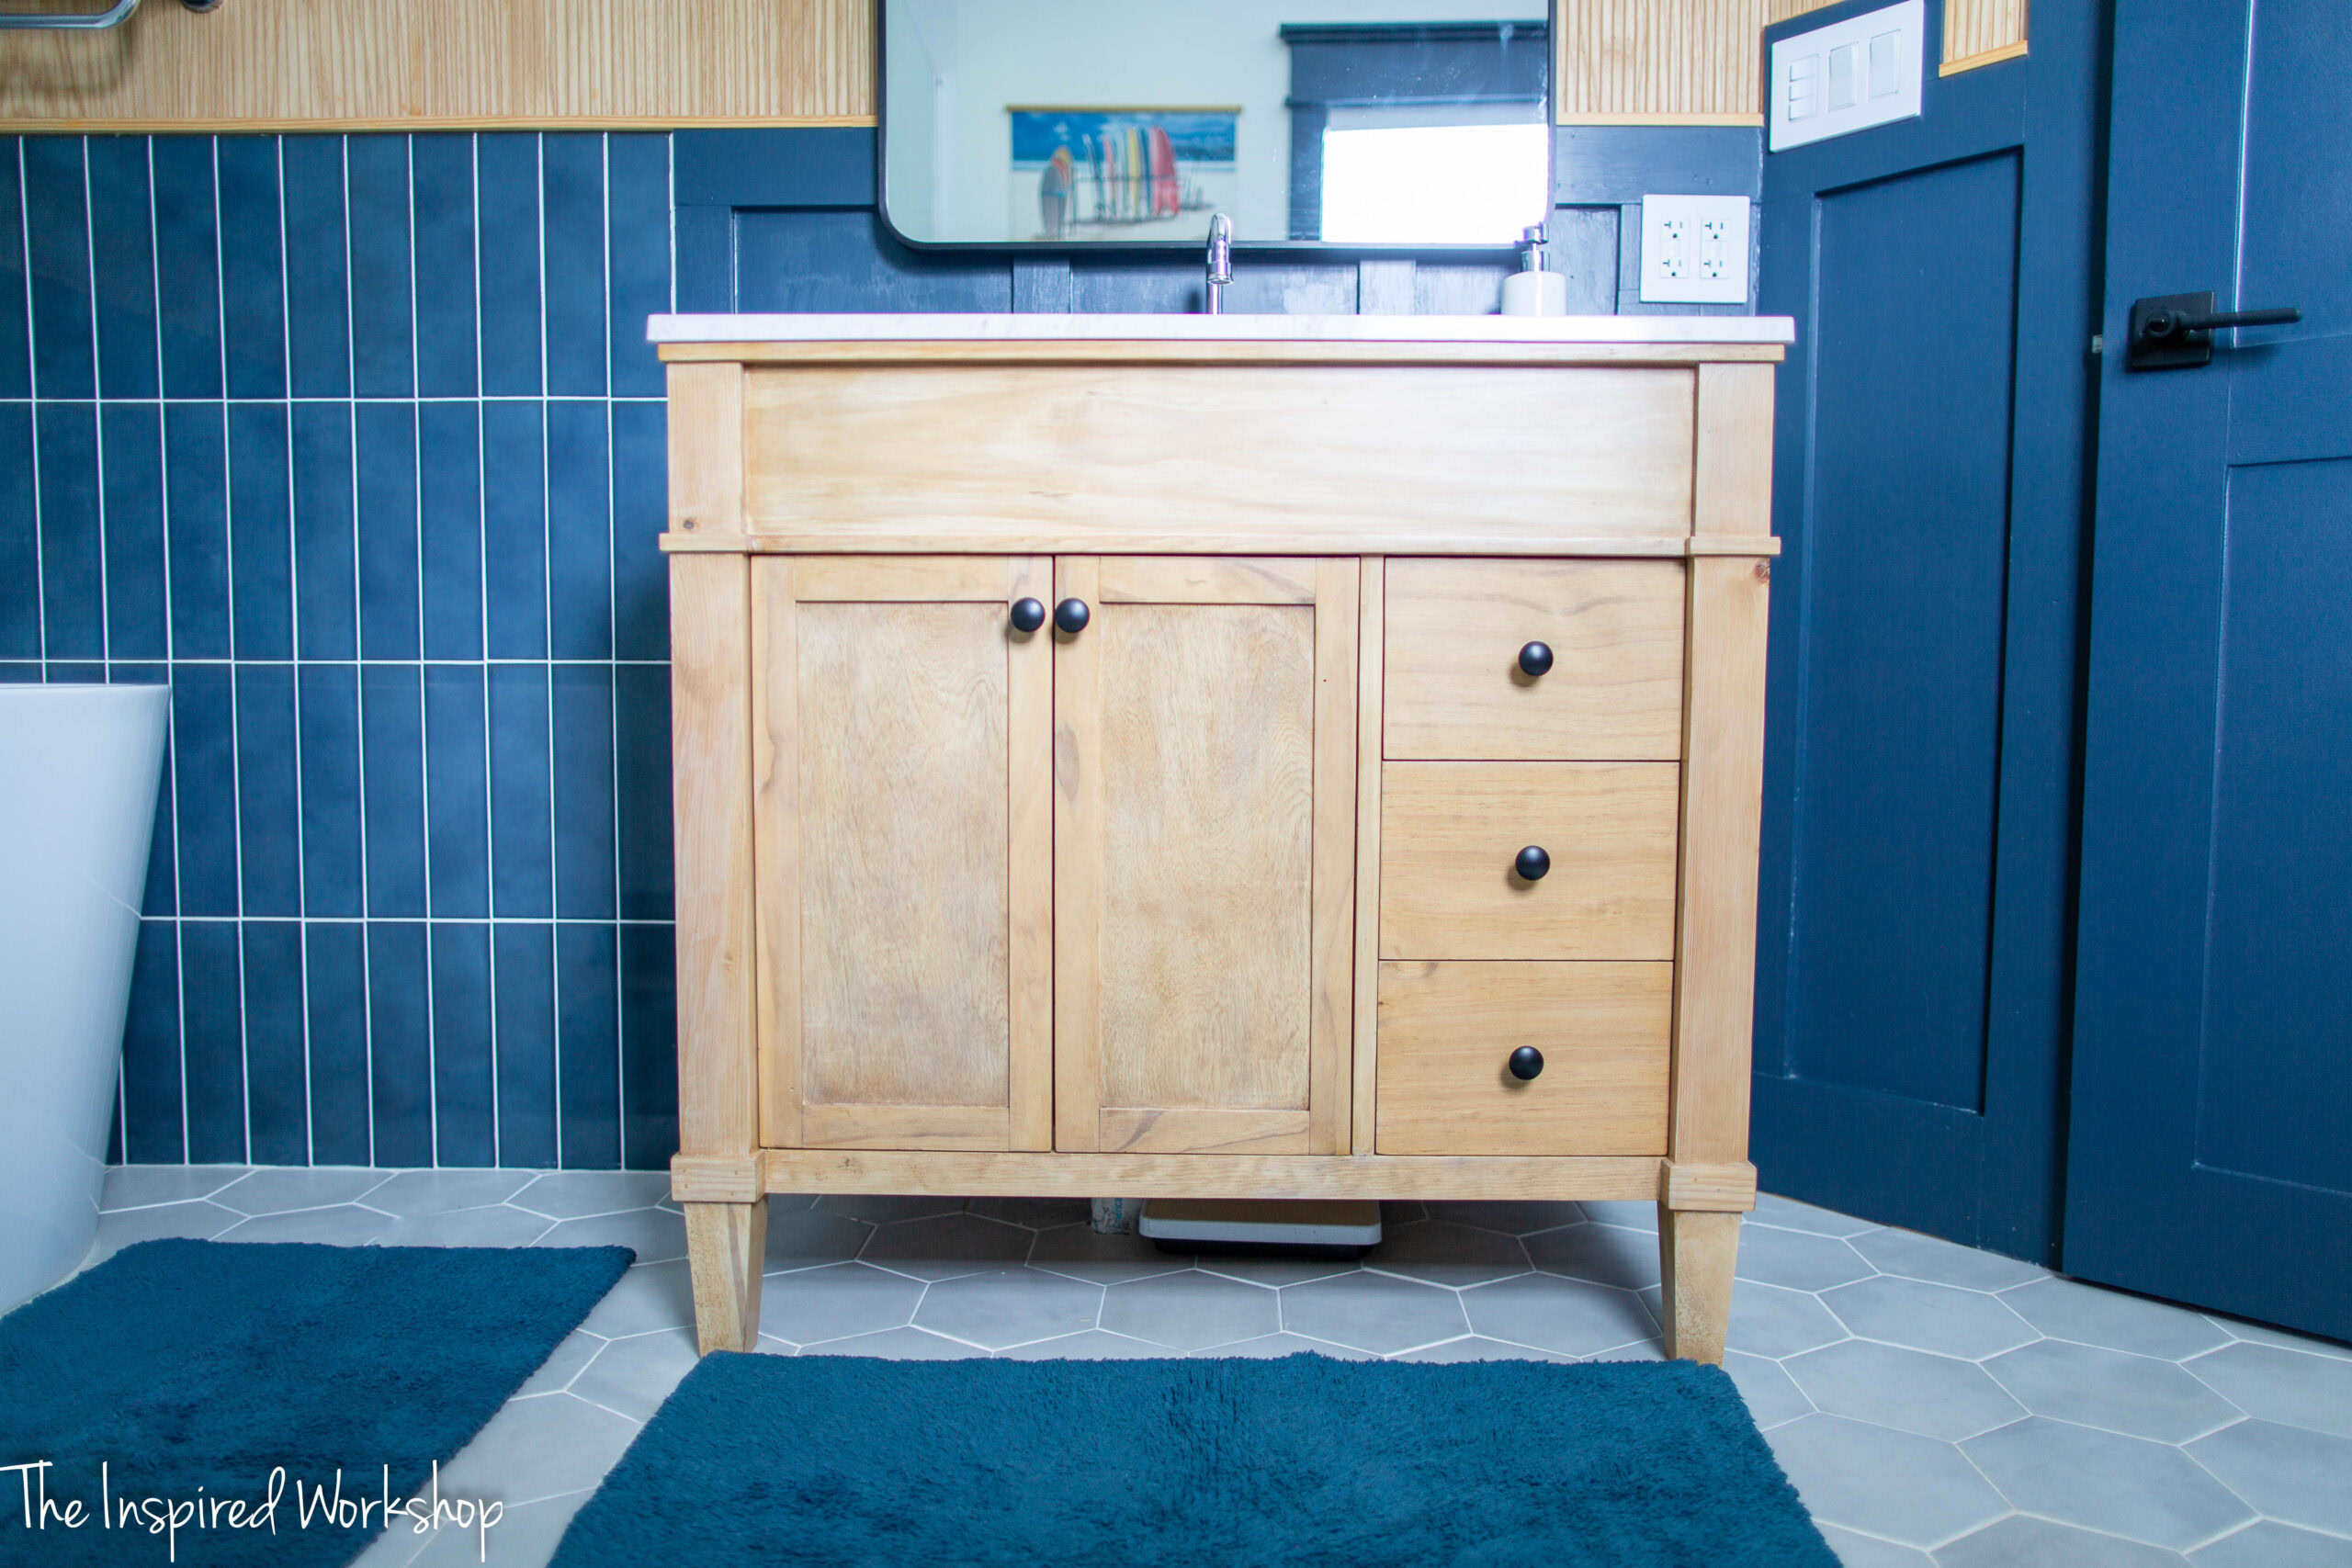
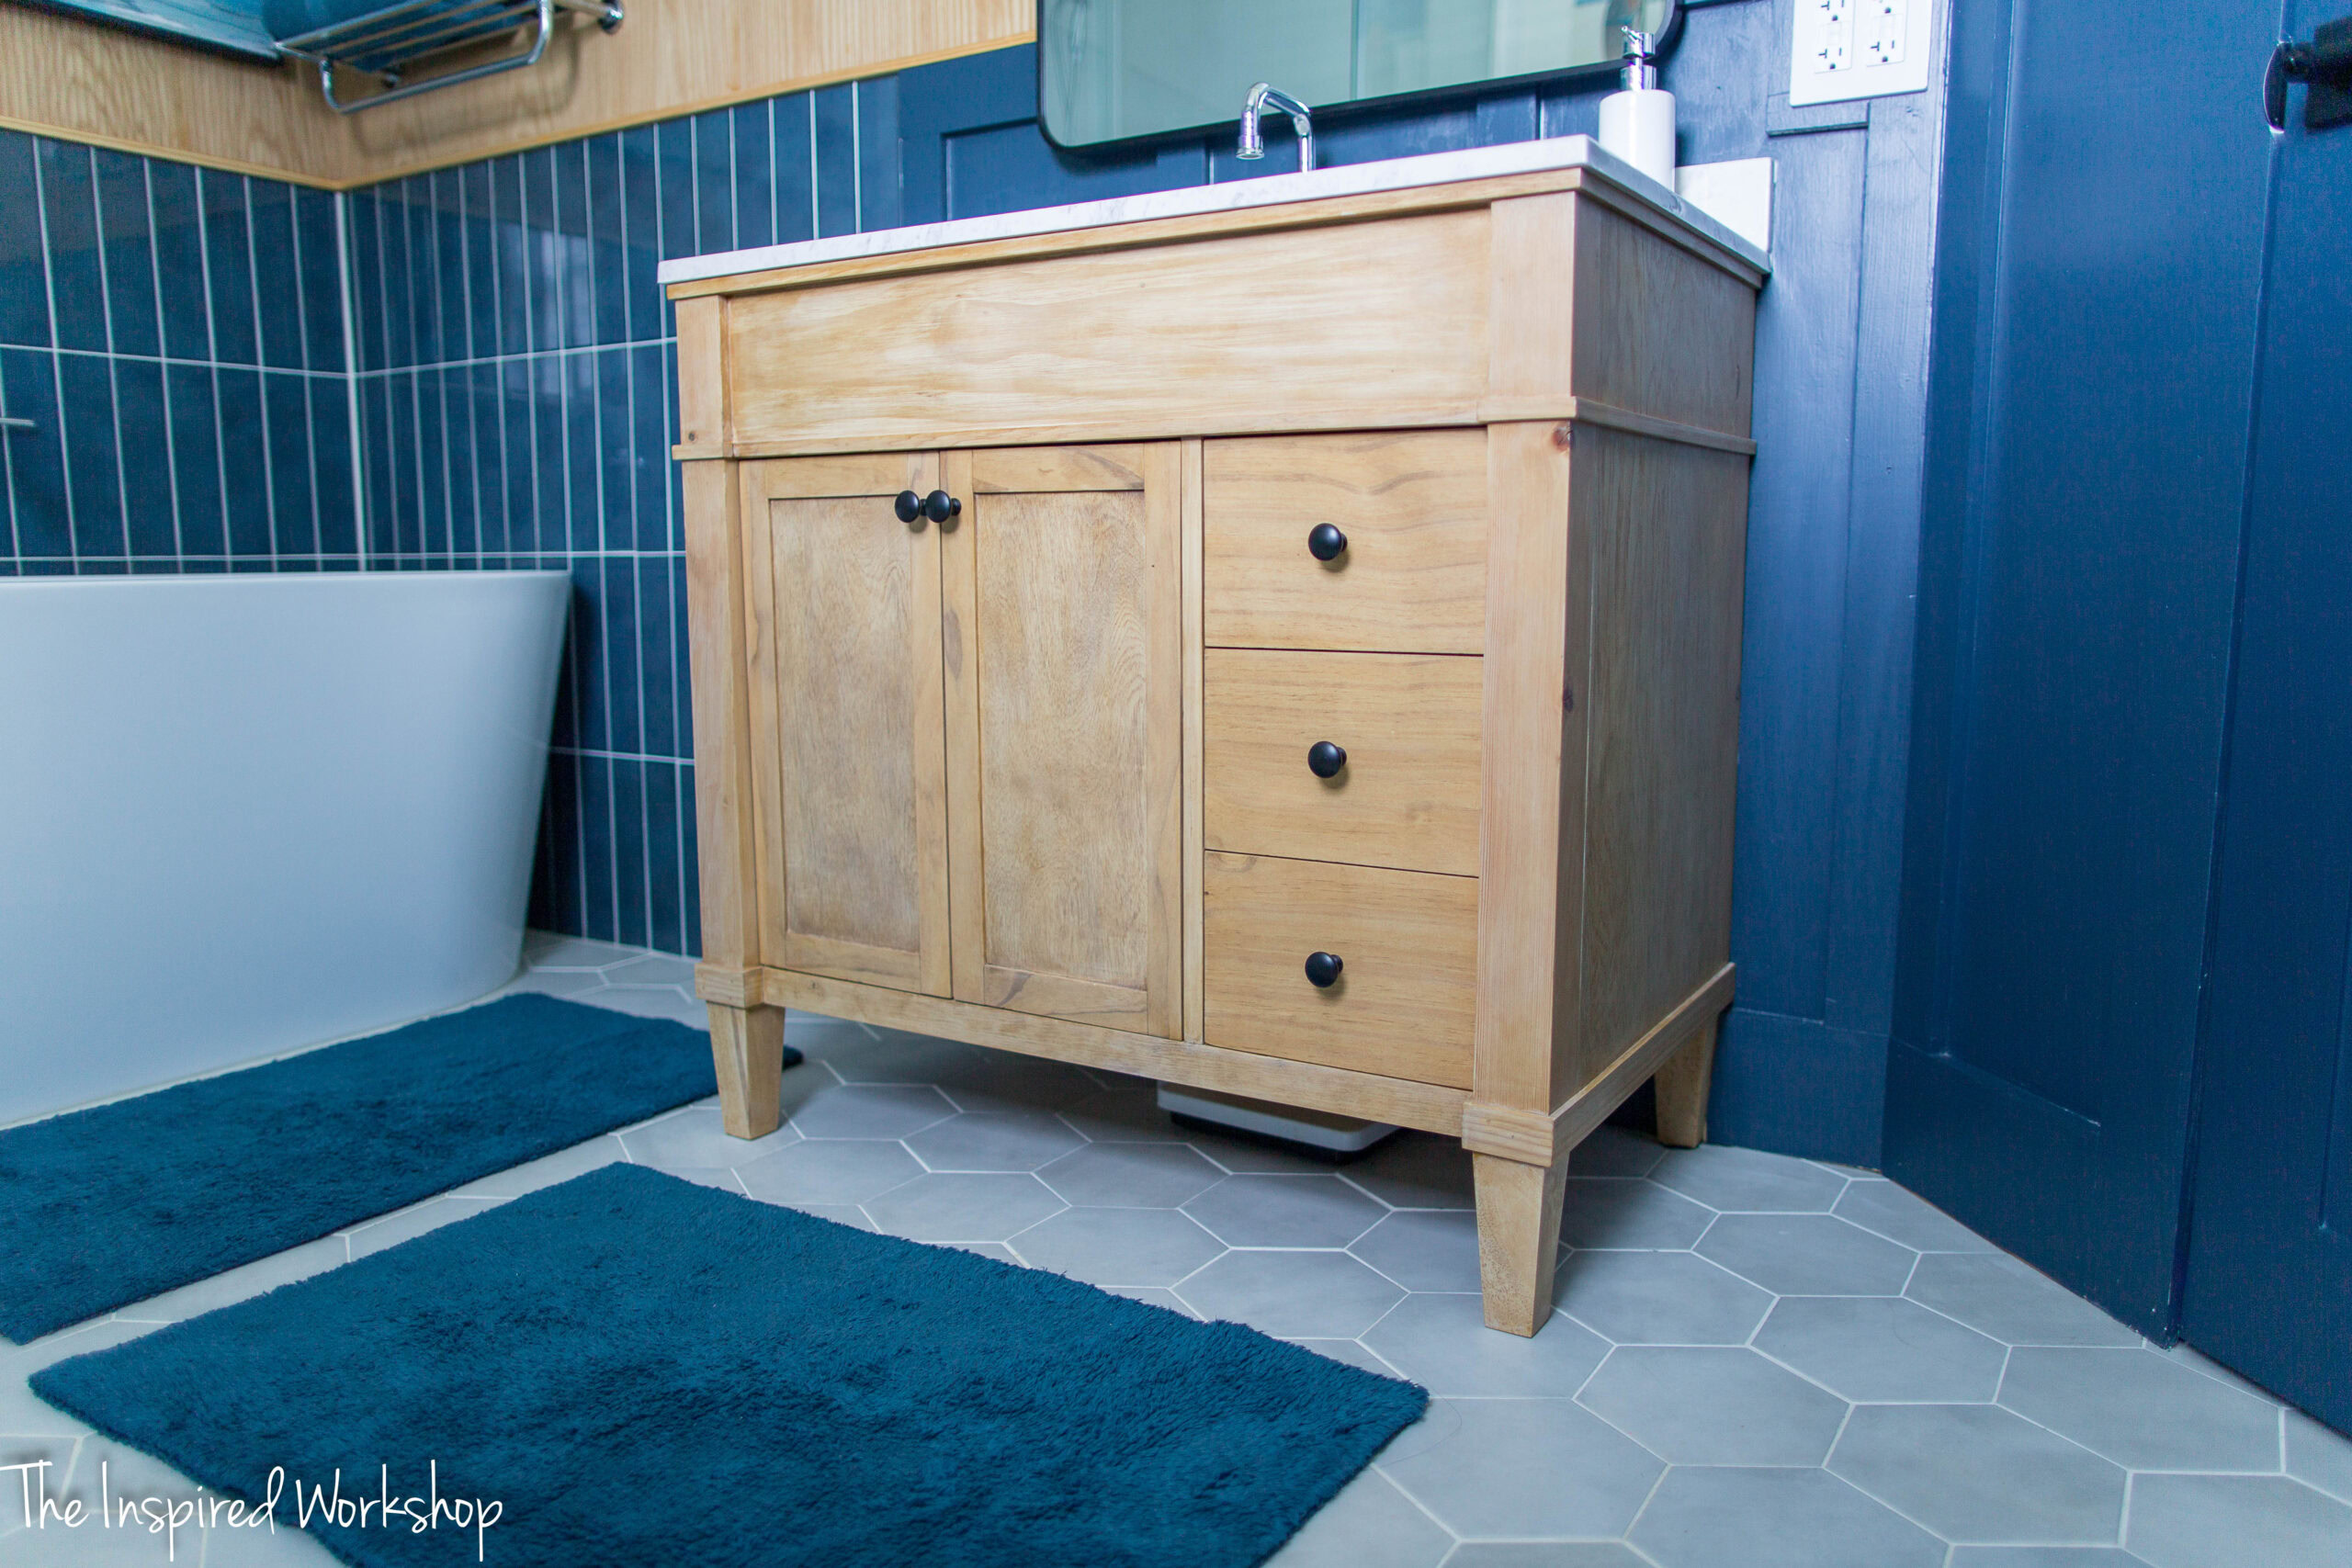
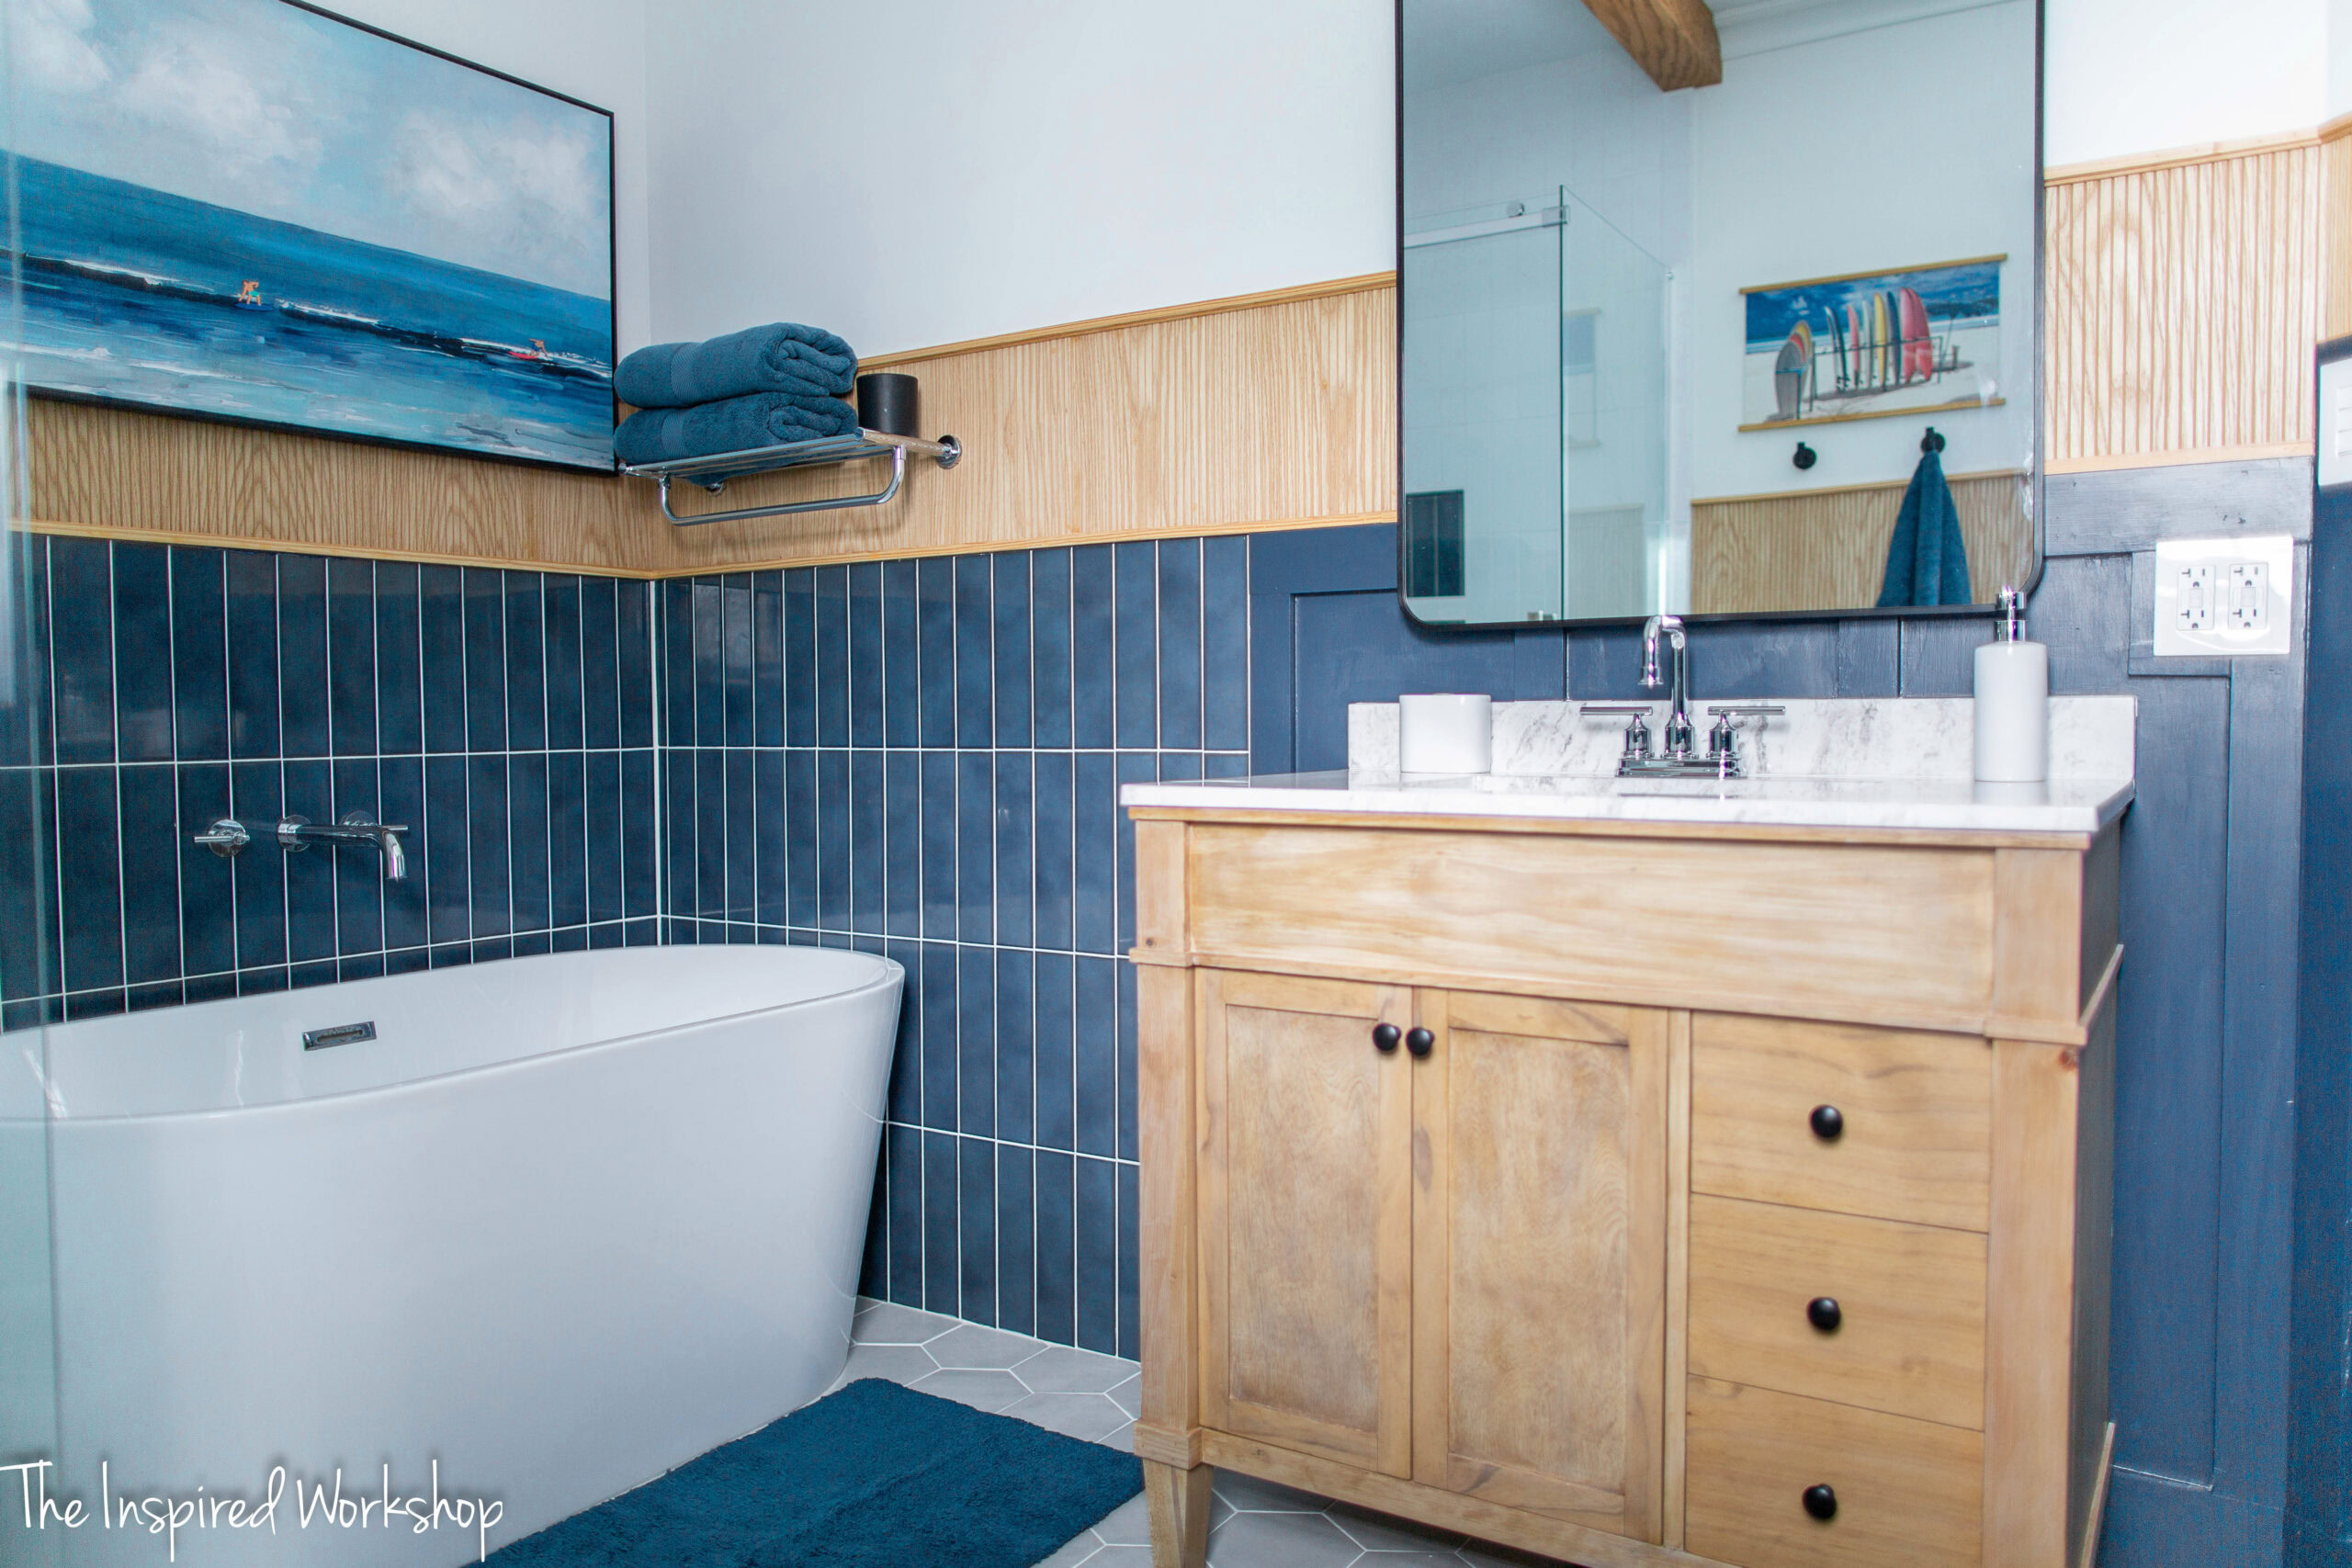
The pictures make the vanity look more grayish than it actually is, it is 10x’s better in person, I swear! But alas, I cannot have everyone of you over to see it in person, so you just have to trust me! Lol!
I thought I was going to build it so quickly that weekend, silly me, always thinking that…and here we are two years later, but I was going to use wood I already had so I had some oak plywood and pine trim! Not the best idea to mix wood species, I know, but I did it anyway, and yes I did regret it! Lol! If I were to build it today, I would just splurge and purchase the oak since I had used the oak pole wrap! If I hadn’t used the oak pole wrap, I would have purchased birch plywood that would stain more like the pine!
All in all I after bleaching the wood for the vanity, I think it turned out great and matches the pole wrap on the wall pretty dang well, and I saved a ton of money opting for the pine 4x4s that I milled into 3x3s vs purchasing oak 3x3s!
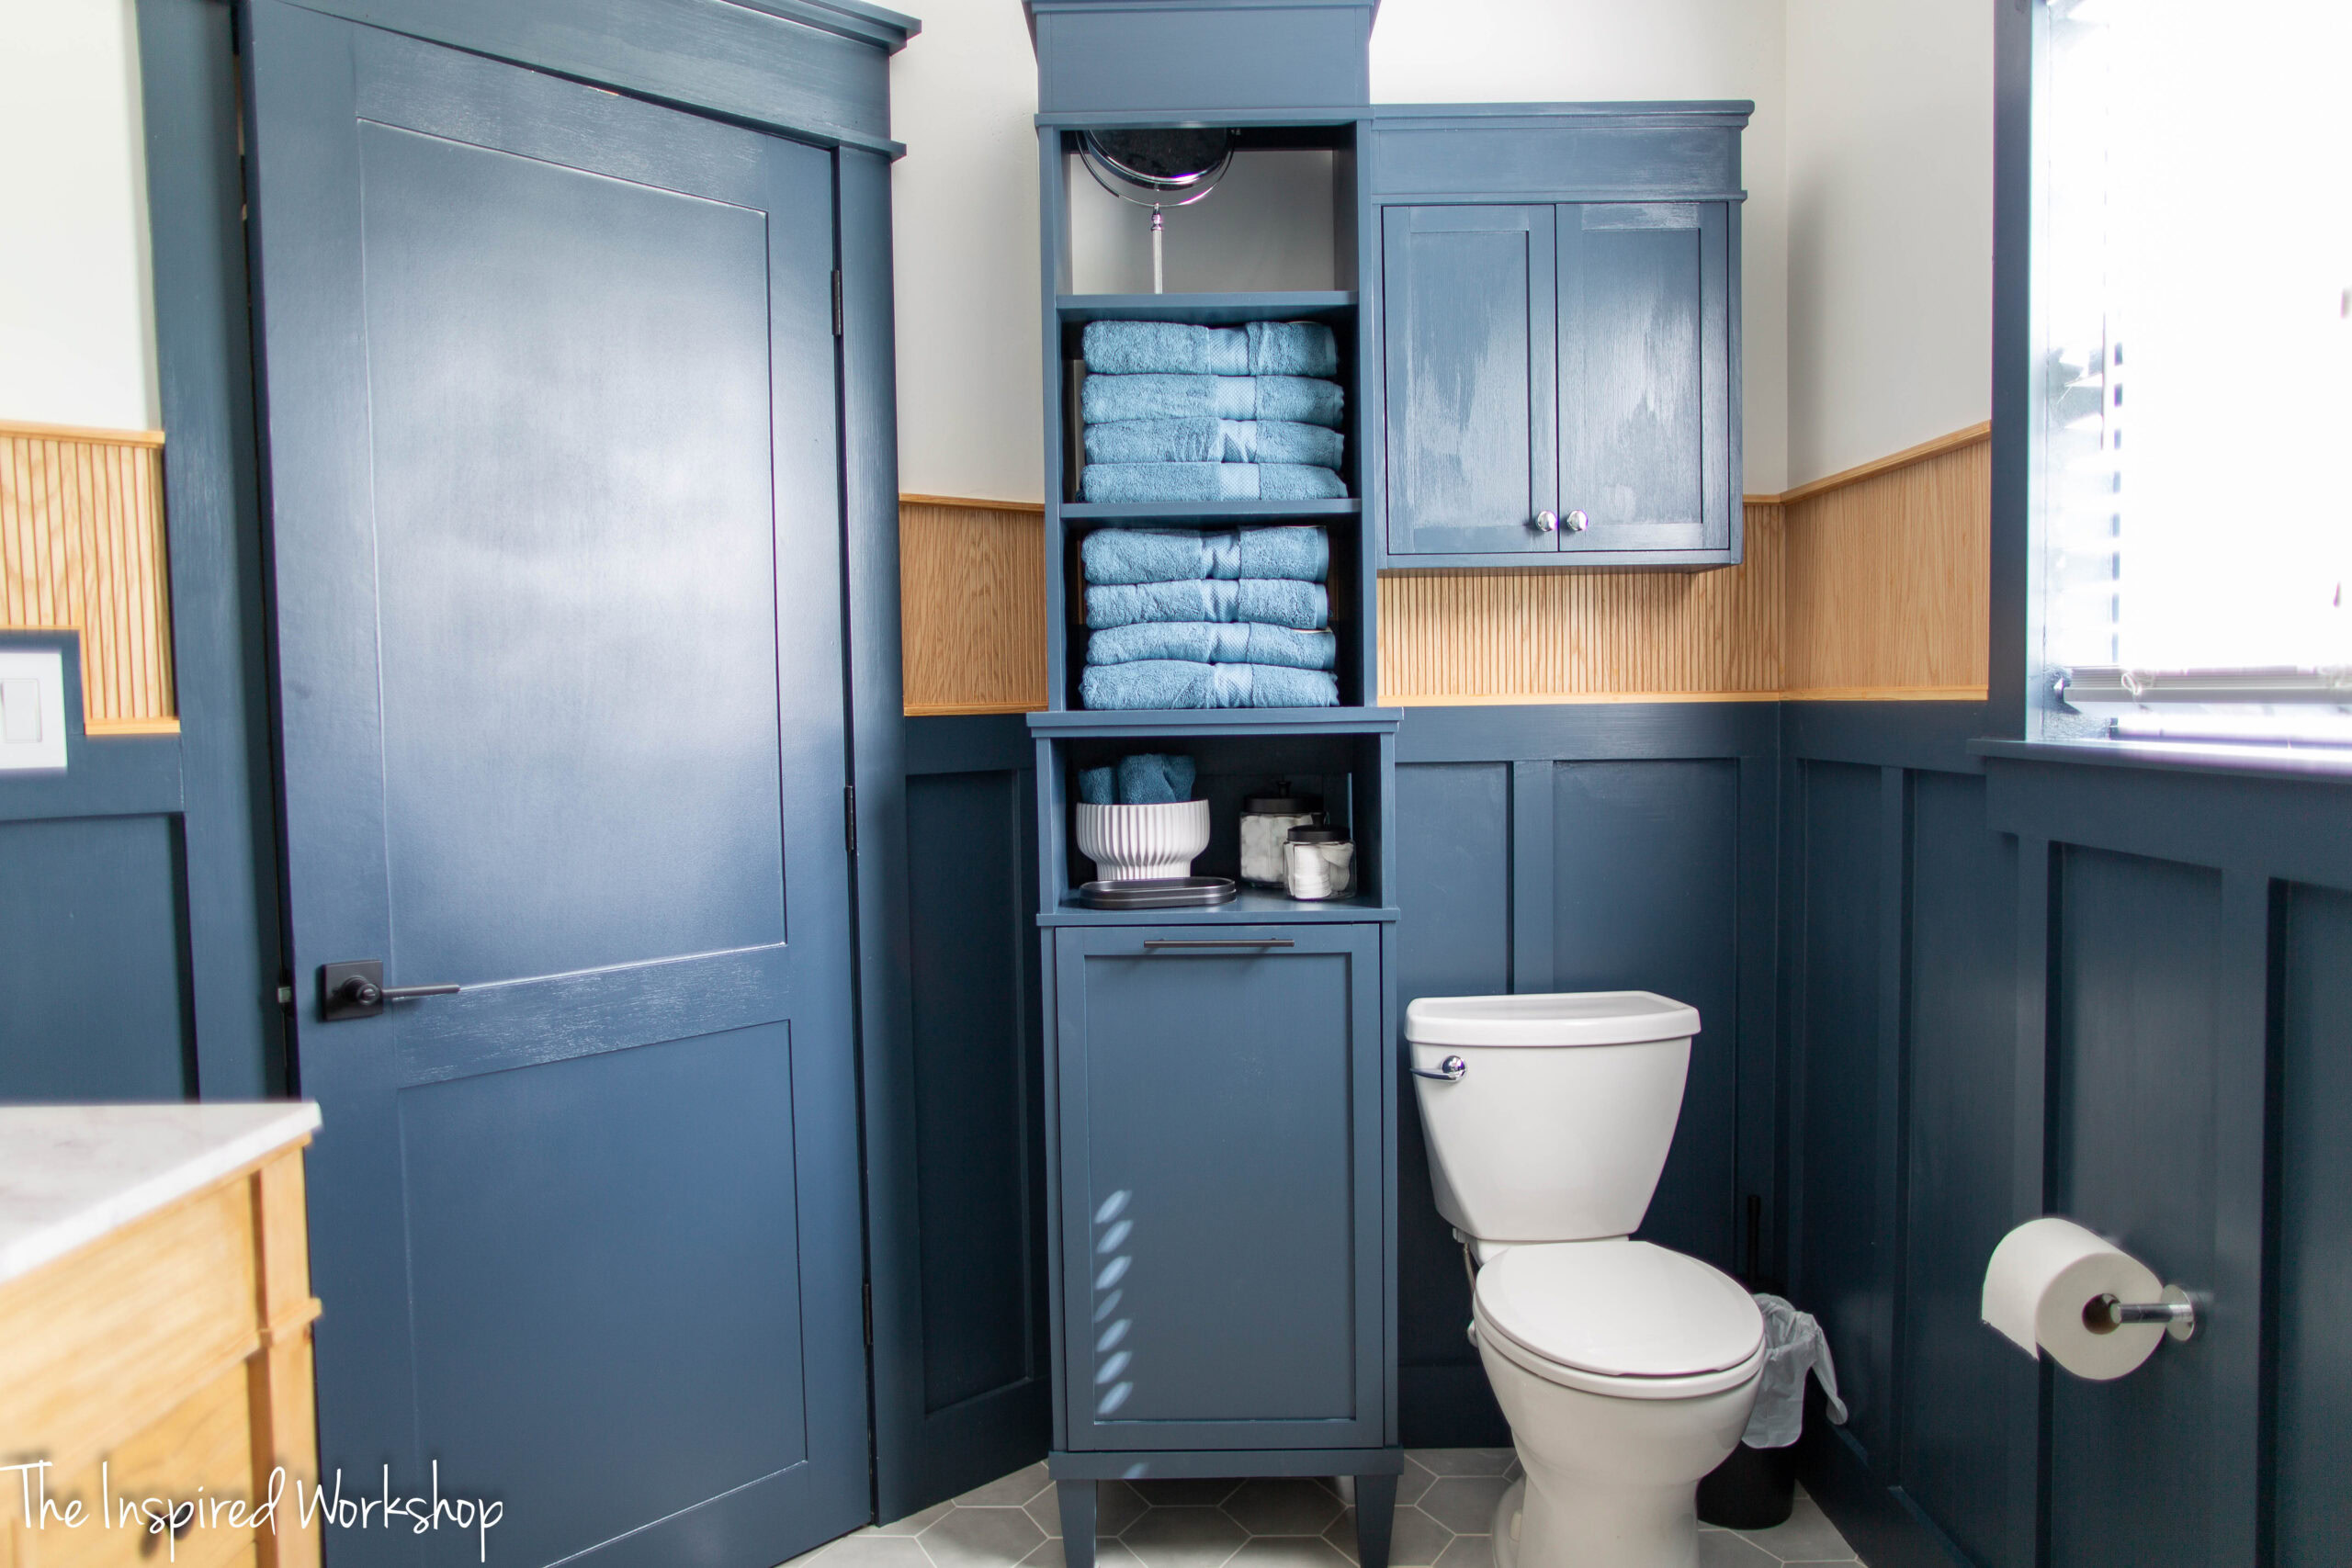
Make sure and check out the coordinating linen cabinet, and over toilet cabinet as well, to make your bathroom the masterpiece you deserve!
Gathering Supplies for the 36 Inch Bathroom Vanity
Okay, so I talked about how I would have just built this 36 inch bathroom vanity out of oak, but I will give you the cost of building it out of all oak and out of pine to compare prices! Although you will need to use the materials list to get a better idea of cost in your area as the cost can vary greatly! Pine will cost about $230 (using select pine) and oak will cost round about $440, that cost is without the vanity top.
It is so crazy to me, I still have plywood that I purchased before 2021 when Purebond plywood was only 48 bucks, and oh how I miss those days because a sheet is 90 bucks now! Ugh! Not only that but when I picked up the vanity top at Home Depot, it was 119, now this same exact vanity top is 239! I swear DIYing is almost becoming too expensive for me!
Ultimately, as upset as I may get at the rising cost of EVERYTHING, DIYing is still cheaper because even though you can grab a melamine or particle board vanity at Home Depot for the same price as building this one, this one will last whereas the other one will not! So, grab the printable plans for the bathroom vanity below if you want a sturdy and long lasting vanity that you have to put in a little extra work for, and keep reading for the tutorial with my real life photos of the build process!
PLANS FOR THE 36 INCH BATHROOM VANITY
Materials List:
***Note: Links below are affiliate links, affiliate links pay me a small commission at no extra cost to you should you click the link and then make a purchase! I always appreciate you shopping my links as it helps allow me to keep bringing you projects for free!
- 1 – 3/4″ 4×8 sheet of plywood
- 1 – 1/2″ 2×4 sheet of plywood
- 1 – 1/4″ 2×4 sheet of plywood
- 2 – 4x4x8 (I ripped these down to 2 1/2″ x 2 1/2″ or you can purchase 3x3x3 oak at Lowe’s, it’s quite a bit more expensive though)
- 1 – 2x2x8
- 1 – 1x8x8
- 2 – 1x2x8
- 1 – 1/4″x 1 1/2″x 14′ – that is 14 feet not inches – it is trim that you cut yourself at home depot, you can cut a 6ft and an 8ft piece for easy maneuvering
- 1 – 2x4x8 – this is not going to be seen, it is for structural support so don’t purchase oak even if you are building the rest of the vanity out of oak!
- 1 set of 6″ furniture feet – these are not the exact ones I used on the vanity, as they are out of stock, but these are the ones I used on the linen tower and I actually like them more!
- miter saw
- circular saw – this tiny little battery operated circular saw cut the plywood way better than my table saw with this blade!
- table saw
- Kreg jig
- drill
- Kreg screws – 2 1/2″, 1 1/2″, 1 1/4″ and 1″
- super glue
- sander and sand paper
- stain or paint of your choice – I bleached the vanity as well bc pine 4x4s are so pink and they stain ugly – there is a whole section about that below! I used the hydrogen peroxide 27% from a pool supply store (known as Baquacil) and a sodium hydroxide 50/50 solution from Hobby Lobby in the soap making section.
- Vanity Top
- Kreg Hinge Jig
- Soft close hinges
- Drawer slides
***I linked the items I purchased, but after seeing which items they are, I would do a search for that item before purchasing to make sure there isn’t another option at a better price! I looked for the best price at the time I made the purchase but that could have been several years ago, you may find a better price at a later date!
Cut List:
- 4 – 3×3 @ 28 1/2″ – legs
- 2 – 1×8 @ 31″ – I ripped this board down to 6 3/4″ – front and back top board
- 2 – 2×2 @ 31″ – front and back bottom board
- 2 – 1×2 @ 20 1/4″ – front and back middle divider
- 1 – 1/2″ x 3/4″ @ 31″ – (ripped this from 1×2, or you can purchase in the trim section) – front top board
- 2 – 3/4″ pieces of plywood cut @ 16 1/2″ x 28 1/2″ – side boards
- 1 – 3/4″ piece of plywood cut @ 17 5/8″ x 34 1/4″ – notches will be cut around the legs – bottom board
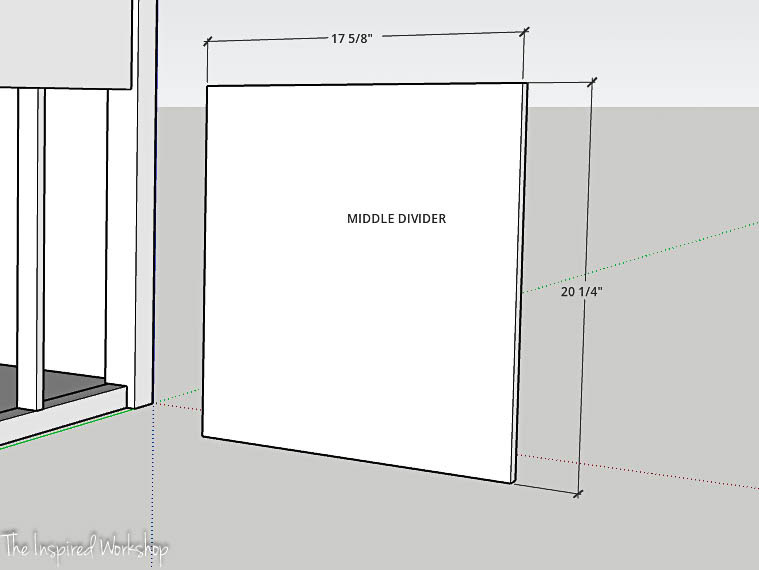
- 1 – 3/4″ piece of plywood cut @ 17 5/8″ x 20 1/4″ – middle divider
- 2 – 1/4″ x 1 1/2″ @ 21 1/2″ – beveled on one end at 45 degrees off square – bottom side trim
- 2 – 1/4″ x 1 1/2″ @ 2 7/8″ – beveled on both ends at 45 degrees off square, ends not parallel – bottom front trim
- 2 – 1/4″ x 1 1/2″ @ 7/8″ – beveled on one end at 45 degrees off square – bottom front trim
- 4 – 1/4″ x 1/2″ @ 21 1/2″ – beveled on one end at 45 degrees off square – top side trim
- 1 – 1/4″ x 1/2″ @ 36 1/4″ – beveled on both ends at 45 degrees off square, ends parallel – top front trim
- 2 – 1/4″ x 1/2″ @ 2 7/8″ – beveled on both ends at 45 degree off square, ends not parallel – top lower front trim
- 2 – 1/4″ x 1/2″ @ 13/16″ – beveled on both ends at 45 degrees off square, ends parallel – top lower front trim
- 1 – 1/4″ x 1/2″ @ 31″ – beveled on both ends at 45 degrees off square, ends not parallel – top lower front trim
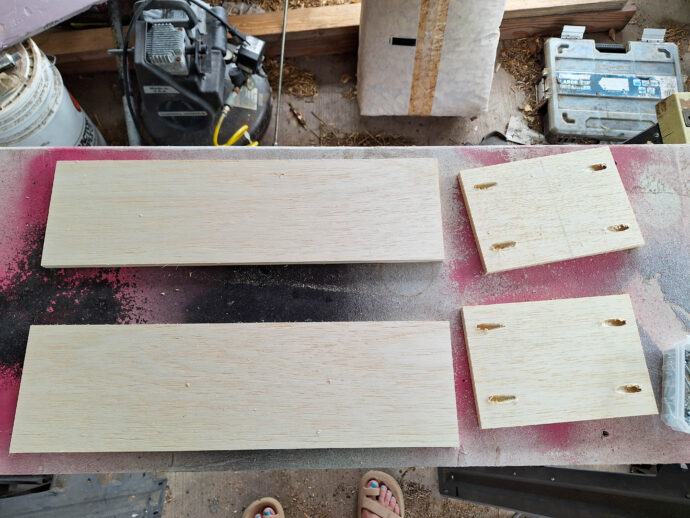
- 6 – 1/2″ plywood pieces cut @ 5 1/2″ x 19 1/4″ – drawer box sides
- 6 – 1/2″ plywood pieces cut @ 5 1/2″ x 8″ drawer box front and back
- 3 – 1×8 ripped down to 6 5/8″ and cut @ 9 3/4″ – drawer fronts
- 1/4″ plywood cut @ 19 1/4″ x 9″ – drawer bottoms
- 4 – 1×2 @ 20″ – rails of doors
- 4 – 1×2 @ 7 1/2″ stiles of doors
- 2 – 1/4″ plywood cut @ 17 1/2″ x 8″ – door panels
- 1 – 1×3 @ 20″ – this can be a scrap piece of wood, it is just to make a spot for the hinges to attach on the left side of the vanity – it can even be two small pieces just big enough for the hinges.
Building the 36 inch Bathroom Vanity
This 36 inch bathroom vanity is such a straightforward build that doesn’t take much skill or talent! Just small additions made to the base cabinet elevates it so much!
Let’s jump right into building the bathroom vanity! Now I am going to start the vanity build here in the post with making the legs but you will see in the PDF plans that I don’t show adding the feet to the legs because it is too hard for me to draw that up in Sketchup! Lol! So if you are using the plans, you will not see the feet on the vanity until the end, and you will not see how to attach them at all in the plans only here in the post!
Grab the plans if you haven’t already! ** 36 Inch Vanity Plans **
******Make sure you allow pop-ups or you will not receive the plan link, also you must allow links to open in a new tab or else your plans will not come up when you click the links!****** I receive so many emails about not getting the plans, this is usually why you don’t receive them, and unfortunately, I cannot spend hours every day emailing them to those who don’t get them, I do my best but can’t get to them all!
Making the Legs for the Vanity
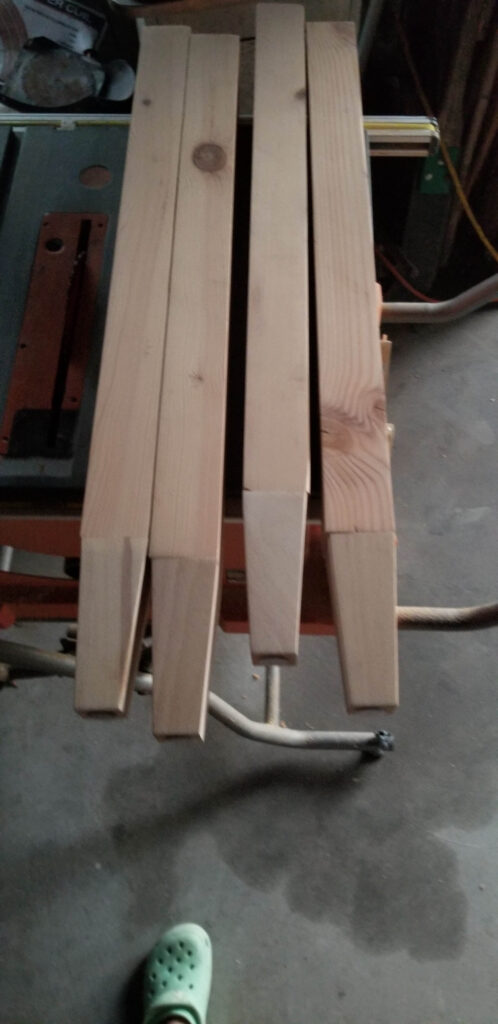
First thing, to make the legs for the vanity, I had to rip the 4x4s which are actually 3 1/2″ x 3 1/2″, down to 2 1/2″ x 2 1/2″ which is sketchy on a table saw, to do this safely, you should use a band saw, but I don’t have a band saw, so the table saw it was…very dangerously! ***If you choose to rip them on your table saw, do so at your own risk!*** I took a half inch off on each side as I ripped it and rolled it and sent it back through!
Once you have the 4x4s ripped down to size, or you purchased the oak 3x3s, they will need to be cut down to size! The 3x3s will be cut 30″ long! I don’t have any pictures of the ripping them down to size, sorry!
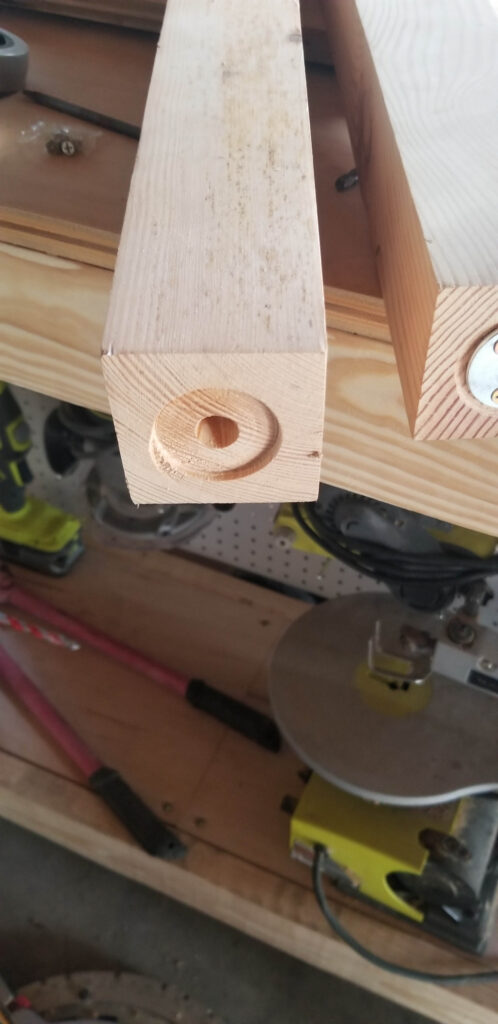
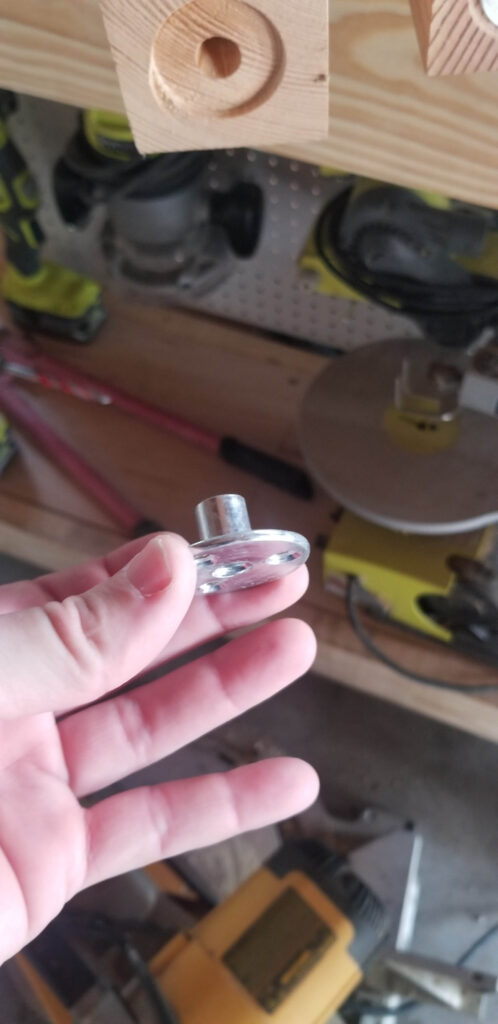
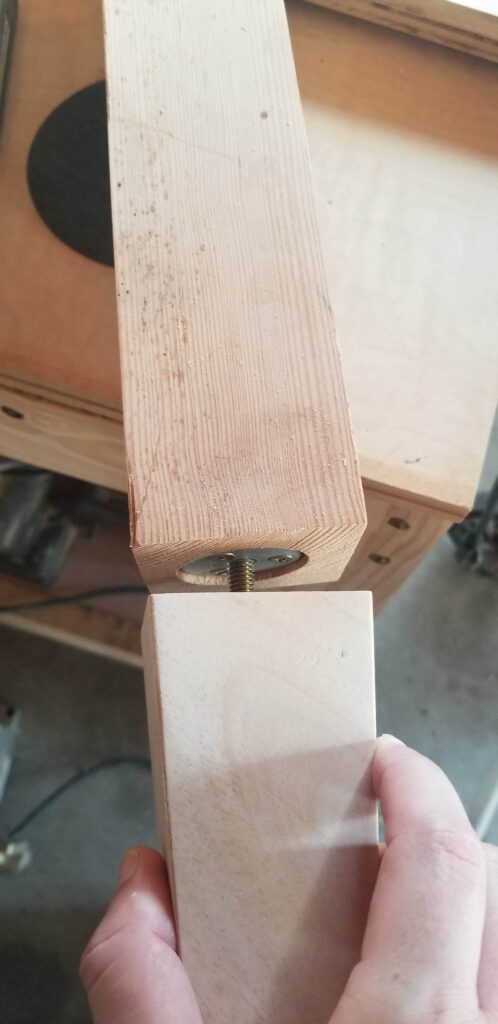
Now that they are cut down to size, you will need to add the furniture feet (affiliate link), they come with all the hardware to attach them! You will need to use a Forstner bit to drill a large hole to attach the mounting pad and let it look like one solid leg instead of having a slight gap! Plus, I wanted them to be flush so I could glue them in place as well (this is not necessary but it is how I did it)!
I used a 1 1/2″ Forstner bit, which I have a whole set of them and you won’t regret investing in a Forstner bit set (affiliate link) or you can grab the individual one you need for half the price of a set! There are so many uses for them once you have them!
After drilling the large hole with the Forstner bit, you will drill a hole in the center with the included drill bit!
Now you will place the mounting pad in the hole and secure it with the provided screws!
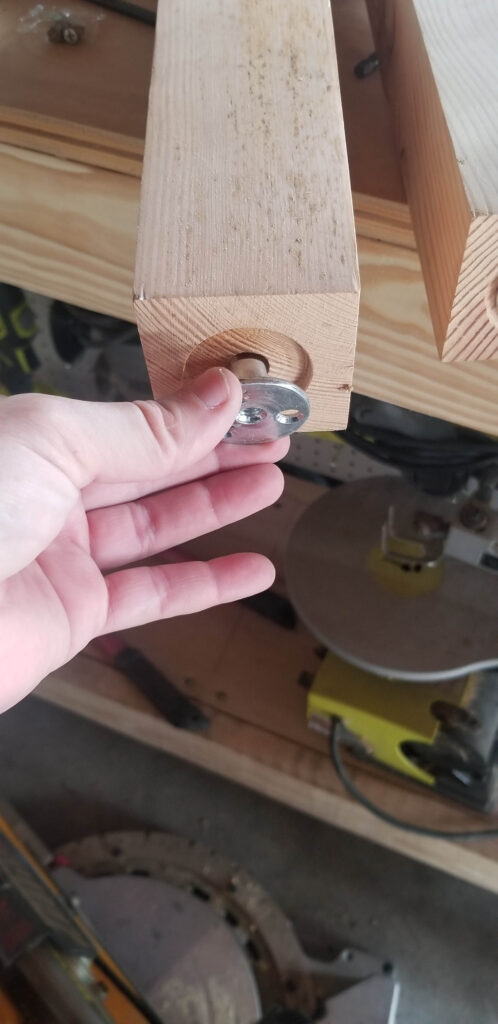

Now you will screw the furniture foot into this mounting pad!
Repeat this process to create four legs!
If your legs have a small lip hanging over as mine do, just make sure to turn them all toward the inside, facing each other where the plywood attaches because the decorative trim will cover this!
Building the Base of the Bathroom Vanity
Taking two of the vanity legs, one 1×8 @ 31″ (ripped down to 6 3/4″) and 1 of the 2×2 @ 31″, build the front frame of the vanity! I used scrap boards to set the board back 3/4″ of an inch, place them under the 1×8 but not the legs.
Use pocket holes drilled on both ends of the 1×8 at a depth of 3/4″ and use wood glue and 1 1/2″ pocket hole screws to attach!
Moving down to the bottom, attach the 2×2 the same way, setting it back 3/4″, but this time the pocket holes will be drilled at 1 1/2″ and you will need to use 2 1/2″ pocket hole screws along with the wood glue to attach!
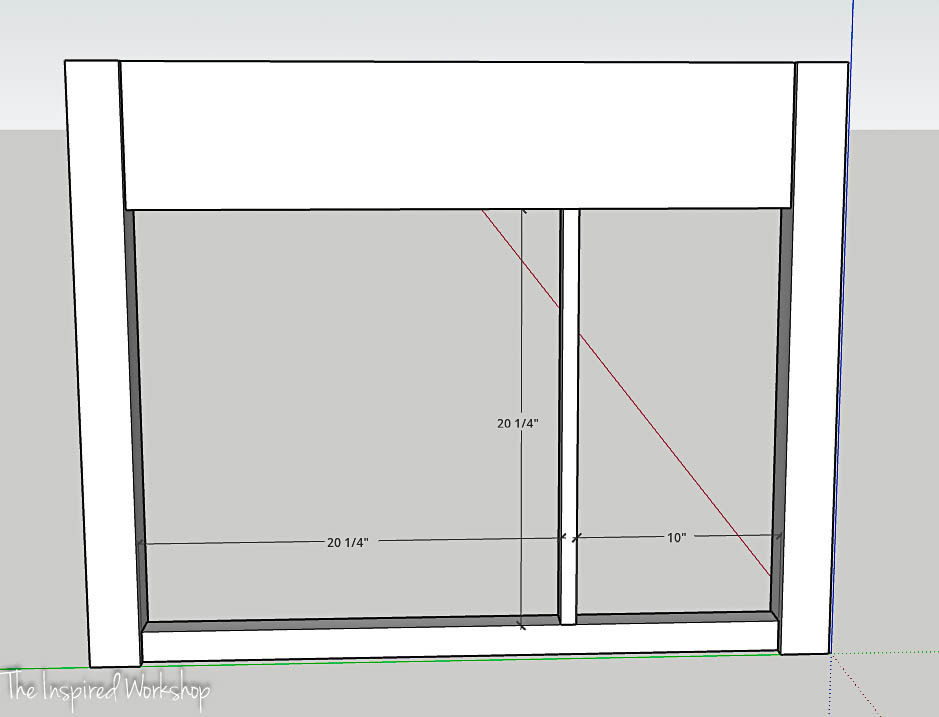
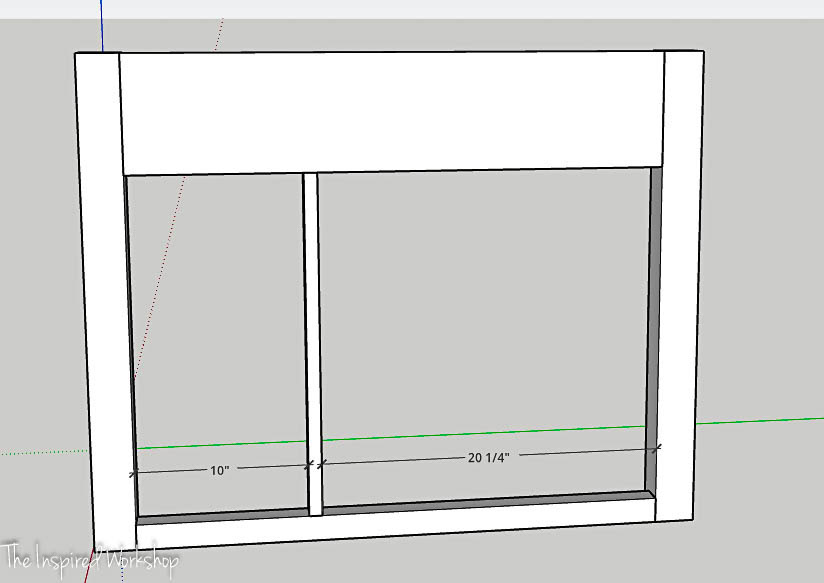
Next you will attach the middle 1×2 to finish off this part of the front frame of the 36 inch bathroom vanity! It is placed 10″ from the right leg!
It is pocket holed into place with holes drilled at 3/4″ and 1 1/2″ screws along with wood glue! You will want to turn the pocket holes to the right so they are hidden by the drawers!
Now on to the back frame!
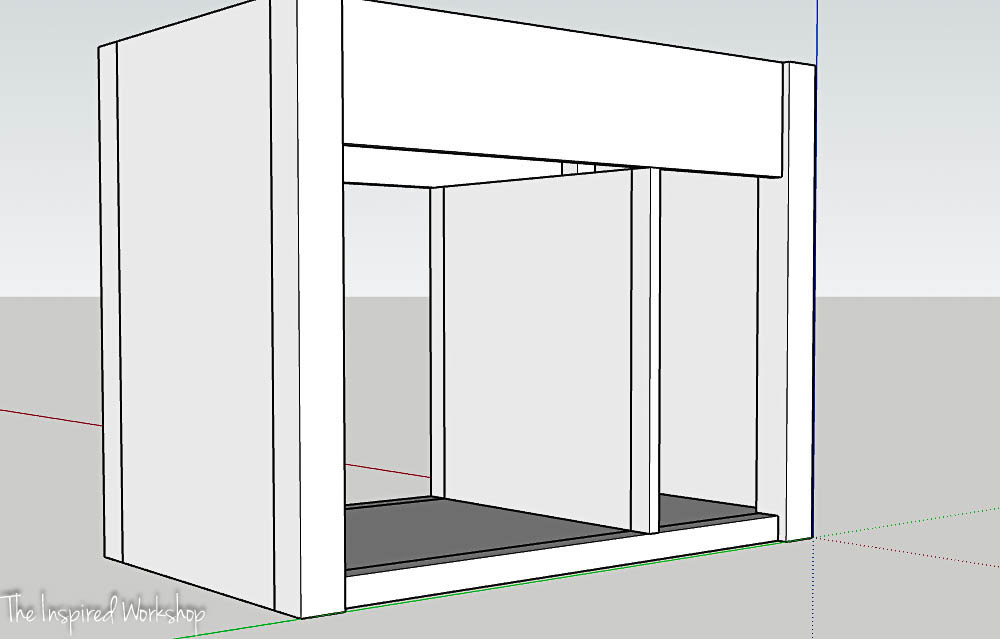
The back frame is built almost the same as the front, using the same boards, 2 – 3×3 @ 28 1/2″, 1 – 1×8 @ 31″ (ripped to 6 3/4″) and 1 – 2×2 @ 31″ but the 1×8 and the 2×2 will be flush with the legs so it can be attached to the wall by screwing through these boards when we install it later! Or set them in 1/4″ to allow for a piece of 1/4″ plywood as a back…I didn’t add the plywood back even though I left the 1/4″ in case I wanted to! LoL!
I also didn’t realize at this point that the back frame also needed a 1×2 @ 20 1/4″ but it did, I attached it later, you can attach it now though, or you can cut your plywood 1 1/2″ wider and run it straight to the back, but I prefer it the way I did it, but entirely up to you!
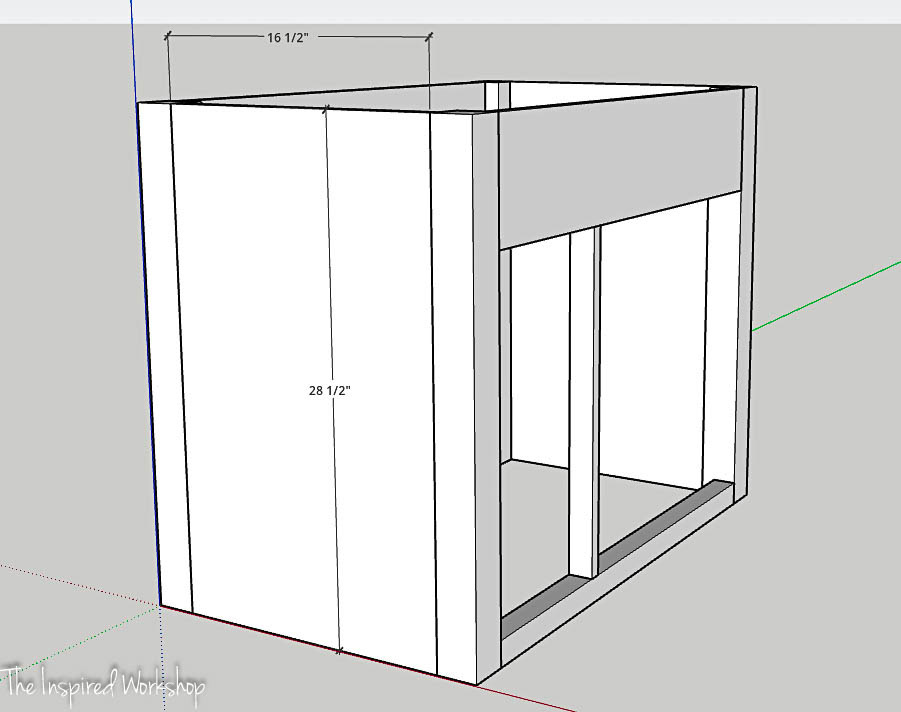
I realize that at this point my 3d renderings don’t have the furniture feet as your real build will, it is hard for me to design stuff like that in Sketchup so I leave it for the very end! Lol! This does not affect any of the measurements or anything.
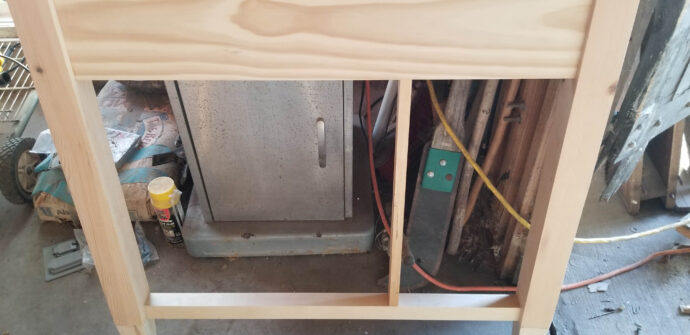
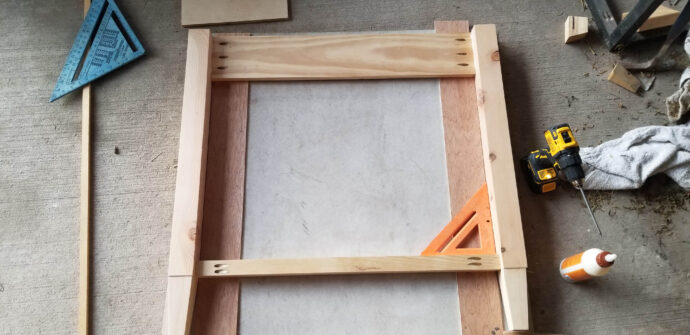
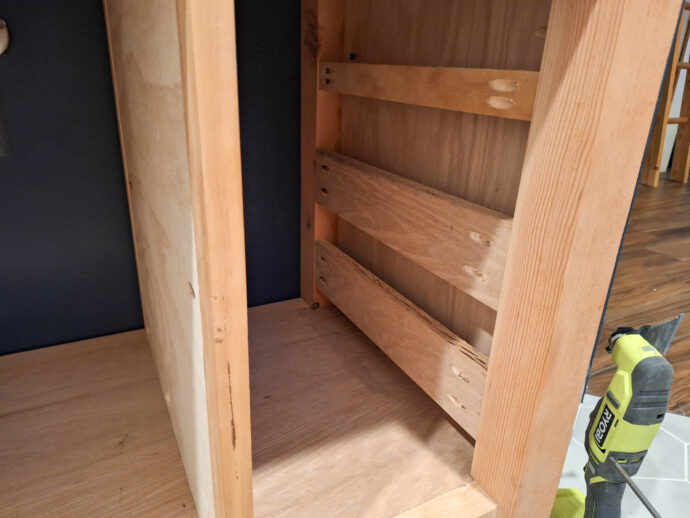
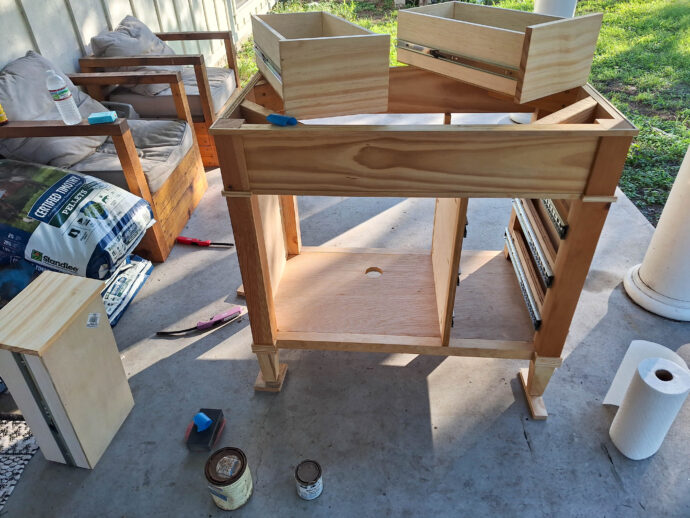
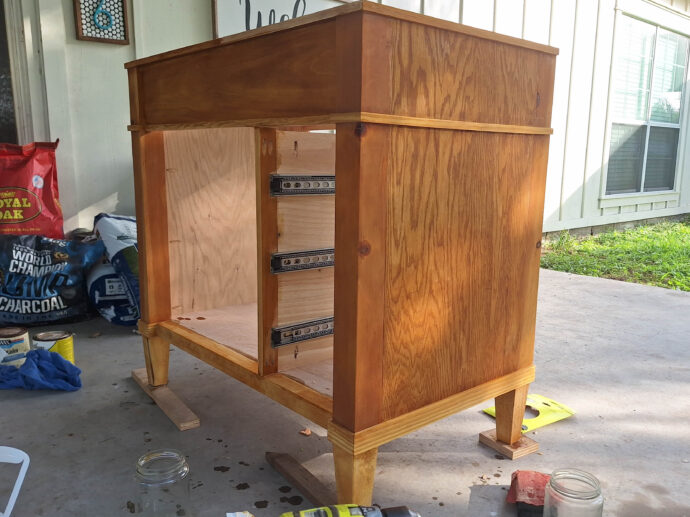
Once the front and back frames are built, you can bring them together with the side plywood pieces! I took a break from working on the vanity, and then when I worked on it, I didn’t upload the pictures and my phone crashed! I had had that phone for 8 years!! Luckily all my photos were uploaded to my computer from the beginning of December but I lost everything from Christmas until April that I hadn’t uploaded, so I lost a few vanity pics, so I will use the Sketchup pics to show those steps!
The 3/4″ plywood will have pocket holes drilled along both sides, drilled at 3/4″ depth, and use 1 1/2″ screws to attach (1 1/2″ screws are being used since we are screwing the plywood into the legs which are 2 1/2″ wide)! Also, use wood glue!
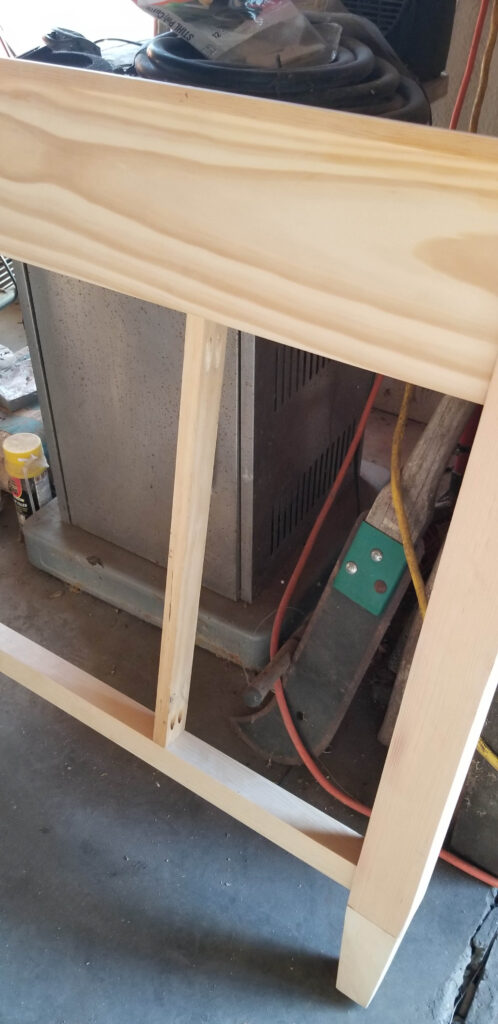
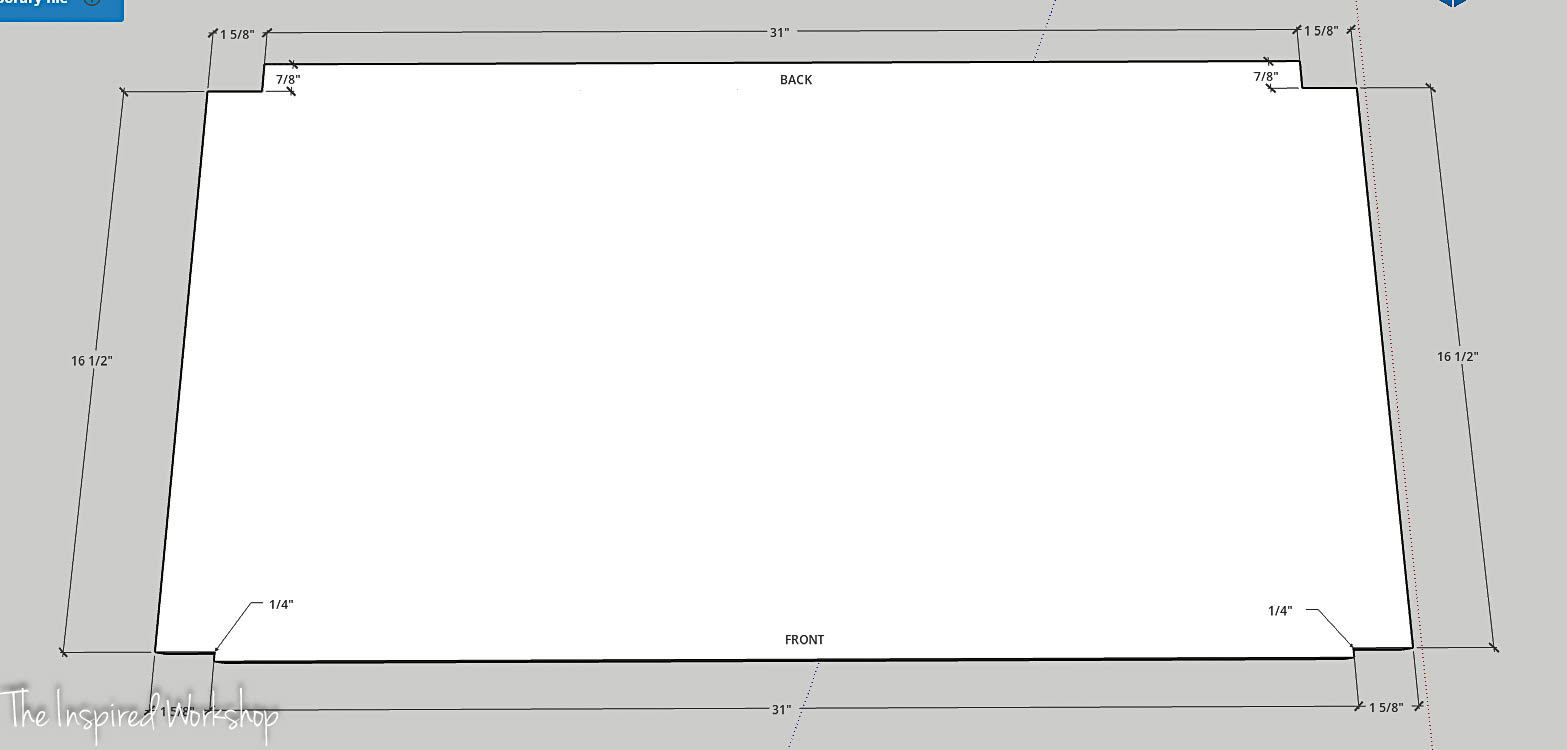
Once you have the side plywood screwed into place, you will have to cut the bottom piece of plywood to fit around the legs! The cutouts are 1/4″ x 1 5/8″ to the bottom of the image (where it says front) and 7/8″ x 1 5/8″ to the top of the image (where it says back).
This piece of plywood will be pocket holed into place from the under side, you will drill pocket holes along the front, back, and both sides of the underside of the plywood. You will drill the pocket holes at a depth of 3/4″ and use 1 1/2″ screws along with wood glue to attach.
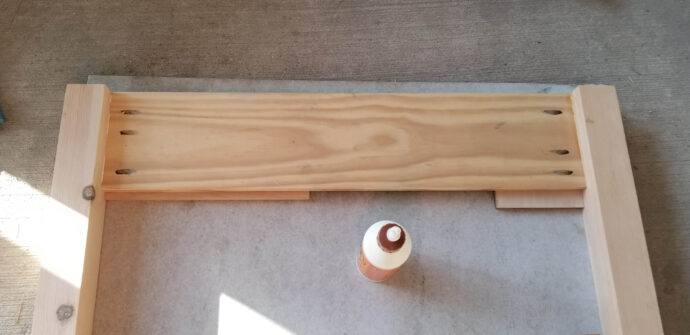
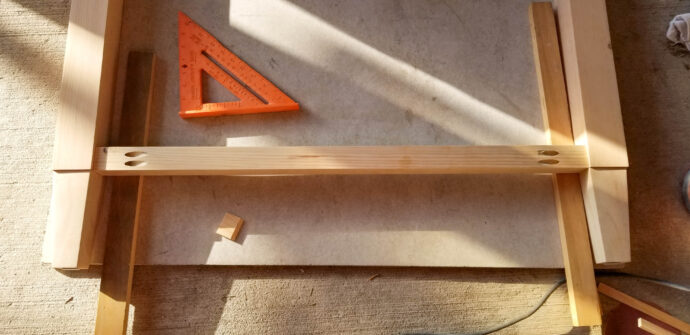
Next, you will cut and attach the plywood divider so we have a place to attach our drawer slides to! This time, you will drill 3/4″ pocket holes, but use 1 1/4″ screws and wood glue. You will notice earlier we used 1 1/2″ screws but here we are using 1 1/4″ screws! You can use 1 1/2″ screws anytime your 3/4″ wood is being attached to any wood wider than 3/4″, but you will use 1 1/4″ screws anytime you’re attaching 3/4″ material to 3/4″ material (here we are attaching 3/4″ plywood to a 1×2 which measures 3/4″ actual width which is why we are using 1 1/4″ screws).
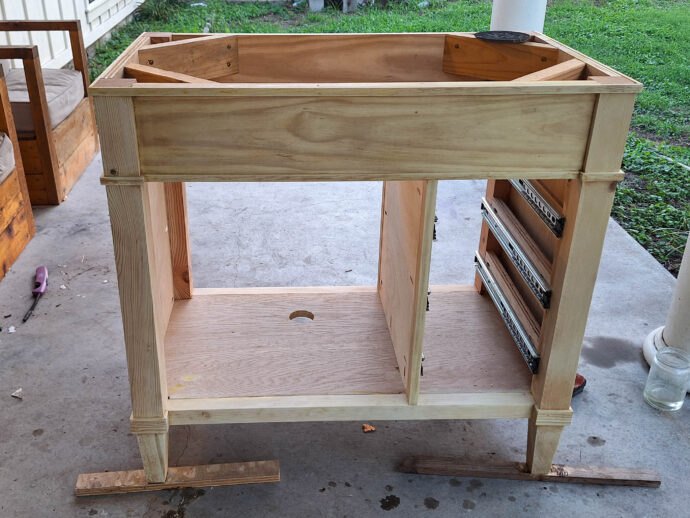
Now we just need some doors and drawers baby! You can add a back out of 1/4″ plywood, I did not because there really isn’t a need for it, only a preference, but I did inset the boards 1/4″ on the back frame so you can easily add one if you would like without it being seen from the side. It will measure 30 1/2″ x 28 1/2″ if you want to cut one for it.
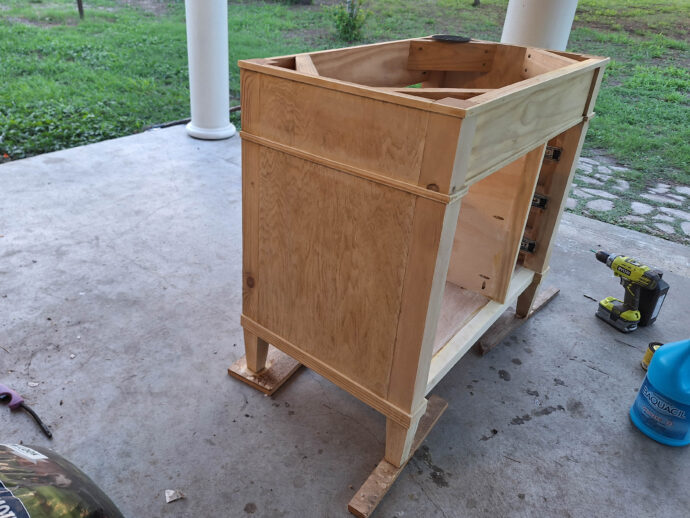
Adding the Molding to the 36 Inch Bathroom Vanity
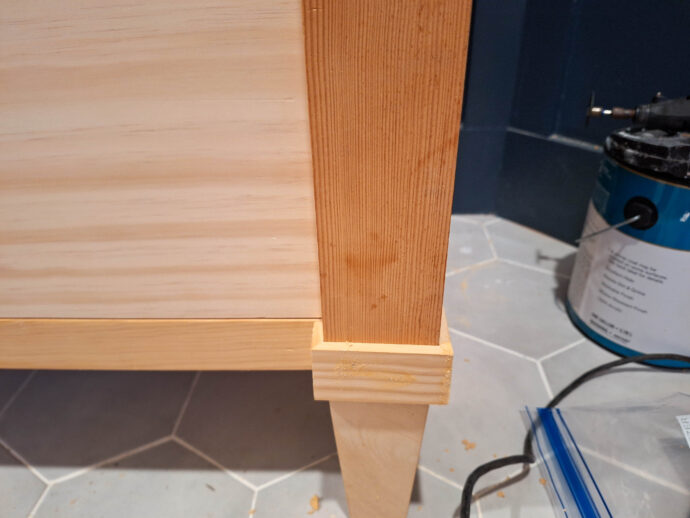
The vanity doesn’t have fancy molding but it does have the simplest molding that elevates the vanity from just a box to a real beauty! The molding isn’t expensive since it is just 1/4″ x 1 1/2″ lattice that I used at full size along the bottom and ripped down to 1/2″ around the top. This picture is a little blurry but you can see the small molding along the top and bottom.
Again, the pics were lost for this step even though I had done a really good job of documenting this for you! Ugh! Anyway, after splitting the small molding with my brad nailer, I used super glue to attach this top molding, and it worked FAR BETTER than trying to brad nail it, and there were no holes to fill when it was attached!
Along the very top, there is a piece of 1/2″x1/2″ trim in between the legs under the trim you see so that it can run straight across the front without dipping inside the legs like the bottom (but still top trim). That is really confusing without pictures and I apologize! You can see it thought sandwiched between the trim in the Sketchup pic below.
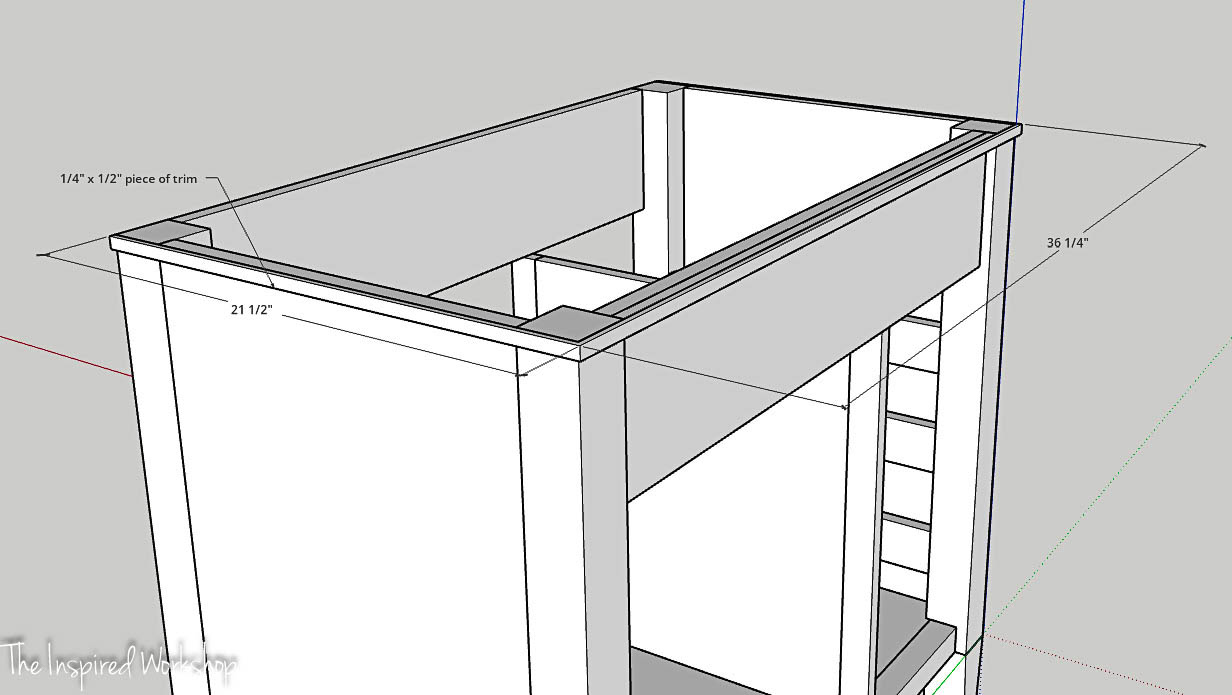
The very top molding goes straight across the front but the bottom (top) molding, conforms to the legs, it is not hard, it just takes a couple of more cuts than the top pieces! I started from the back of the vanity with one flat and one end beveled at 45 degrees off square, then the piece over the leg is beveled on both ends at 45 degrees off square and continue this process around the vanity at the bottom of the 1×8.
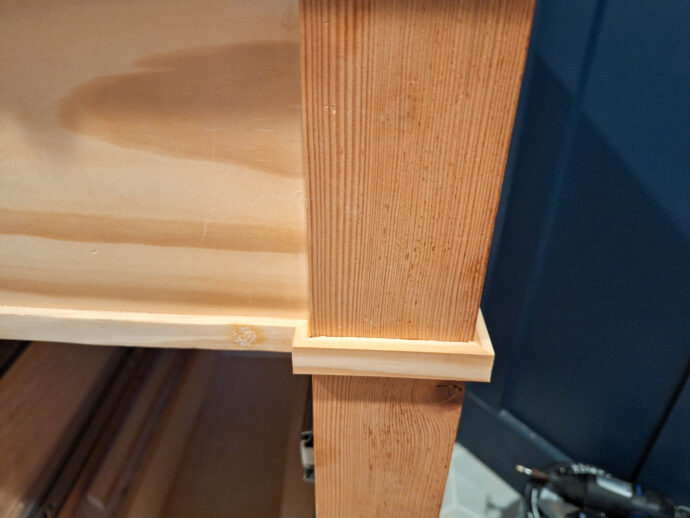
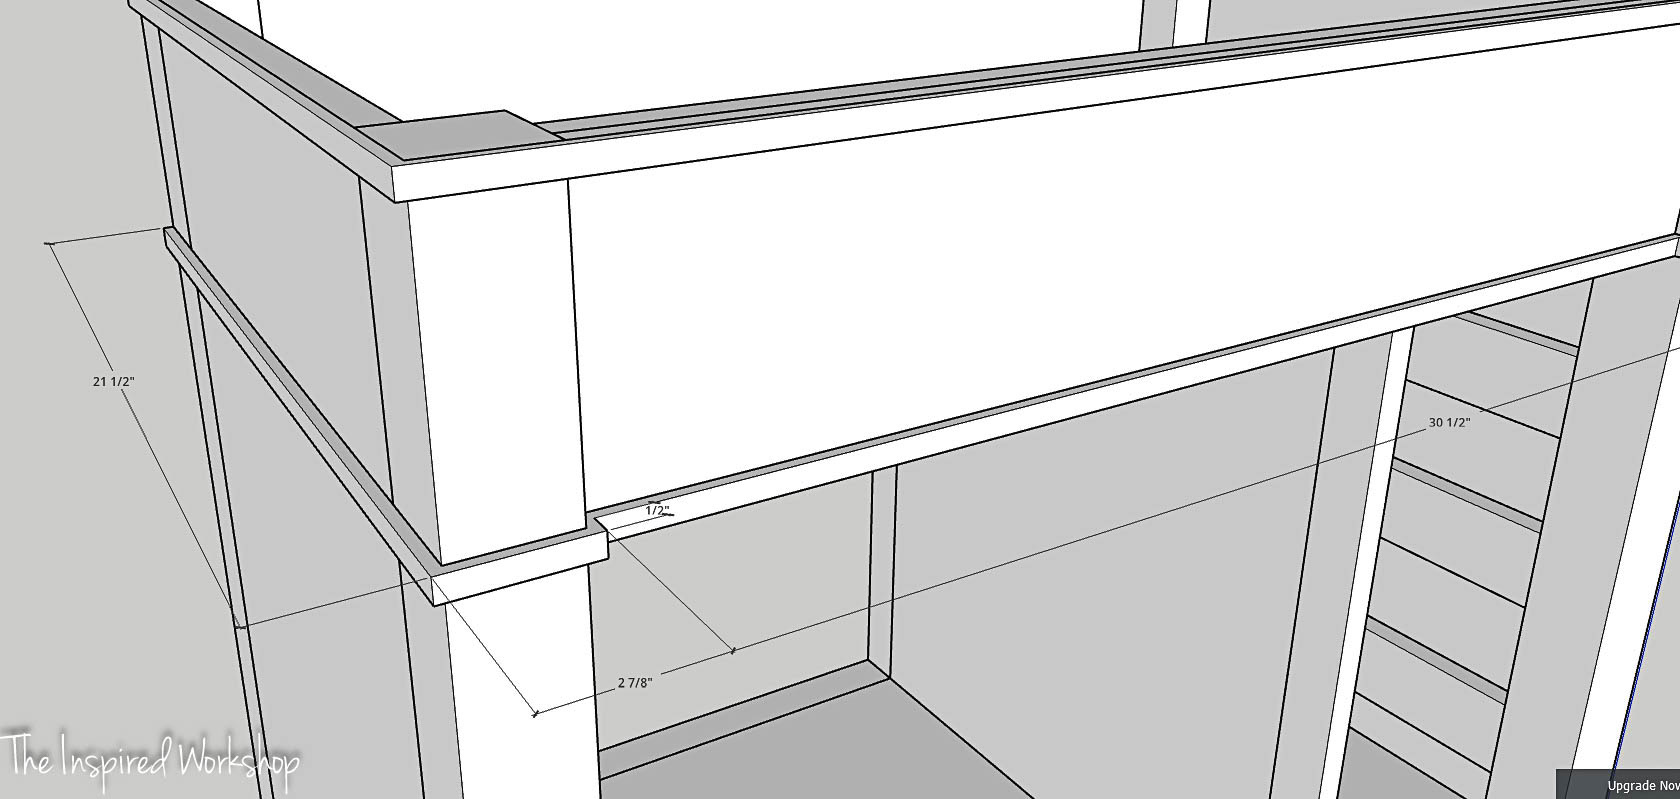
The bottom trim does the same as the bottom (top) trim, conforming to the legs, it is just a larger piece of trim measuring 1/4″ x 1 1/2″.
The base of the vanity is complete! Now it just needs a couple of doors and drawers!
Building the Doors of the 36 Inch Bathroom Vanity
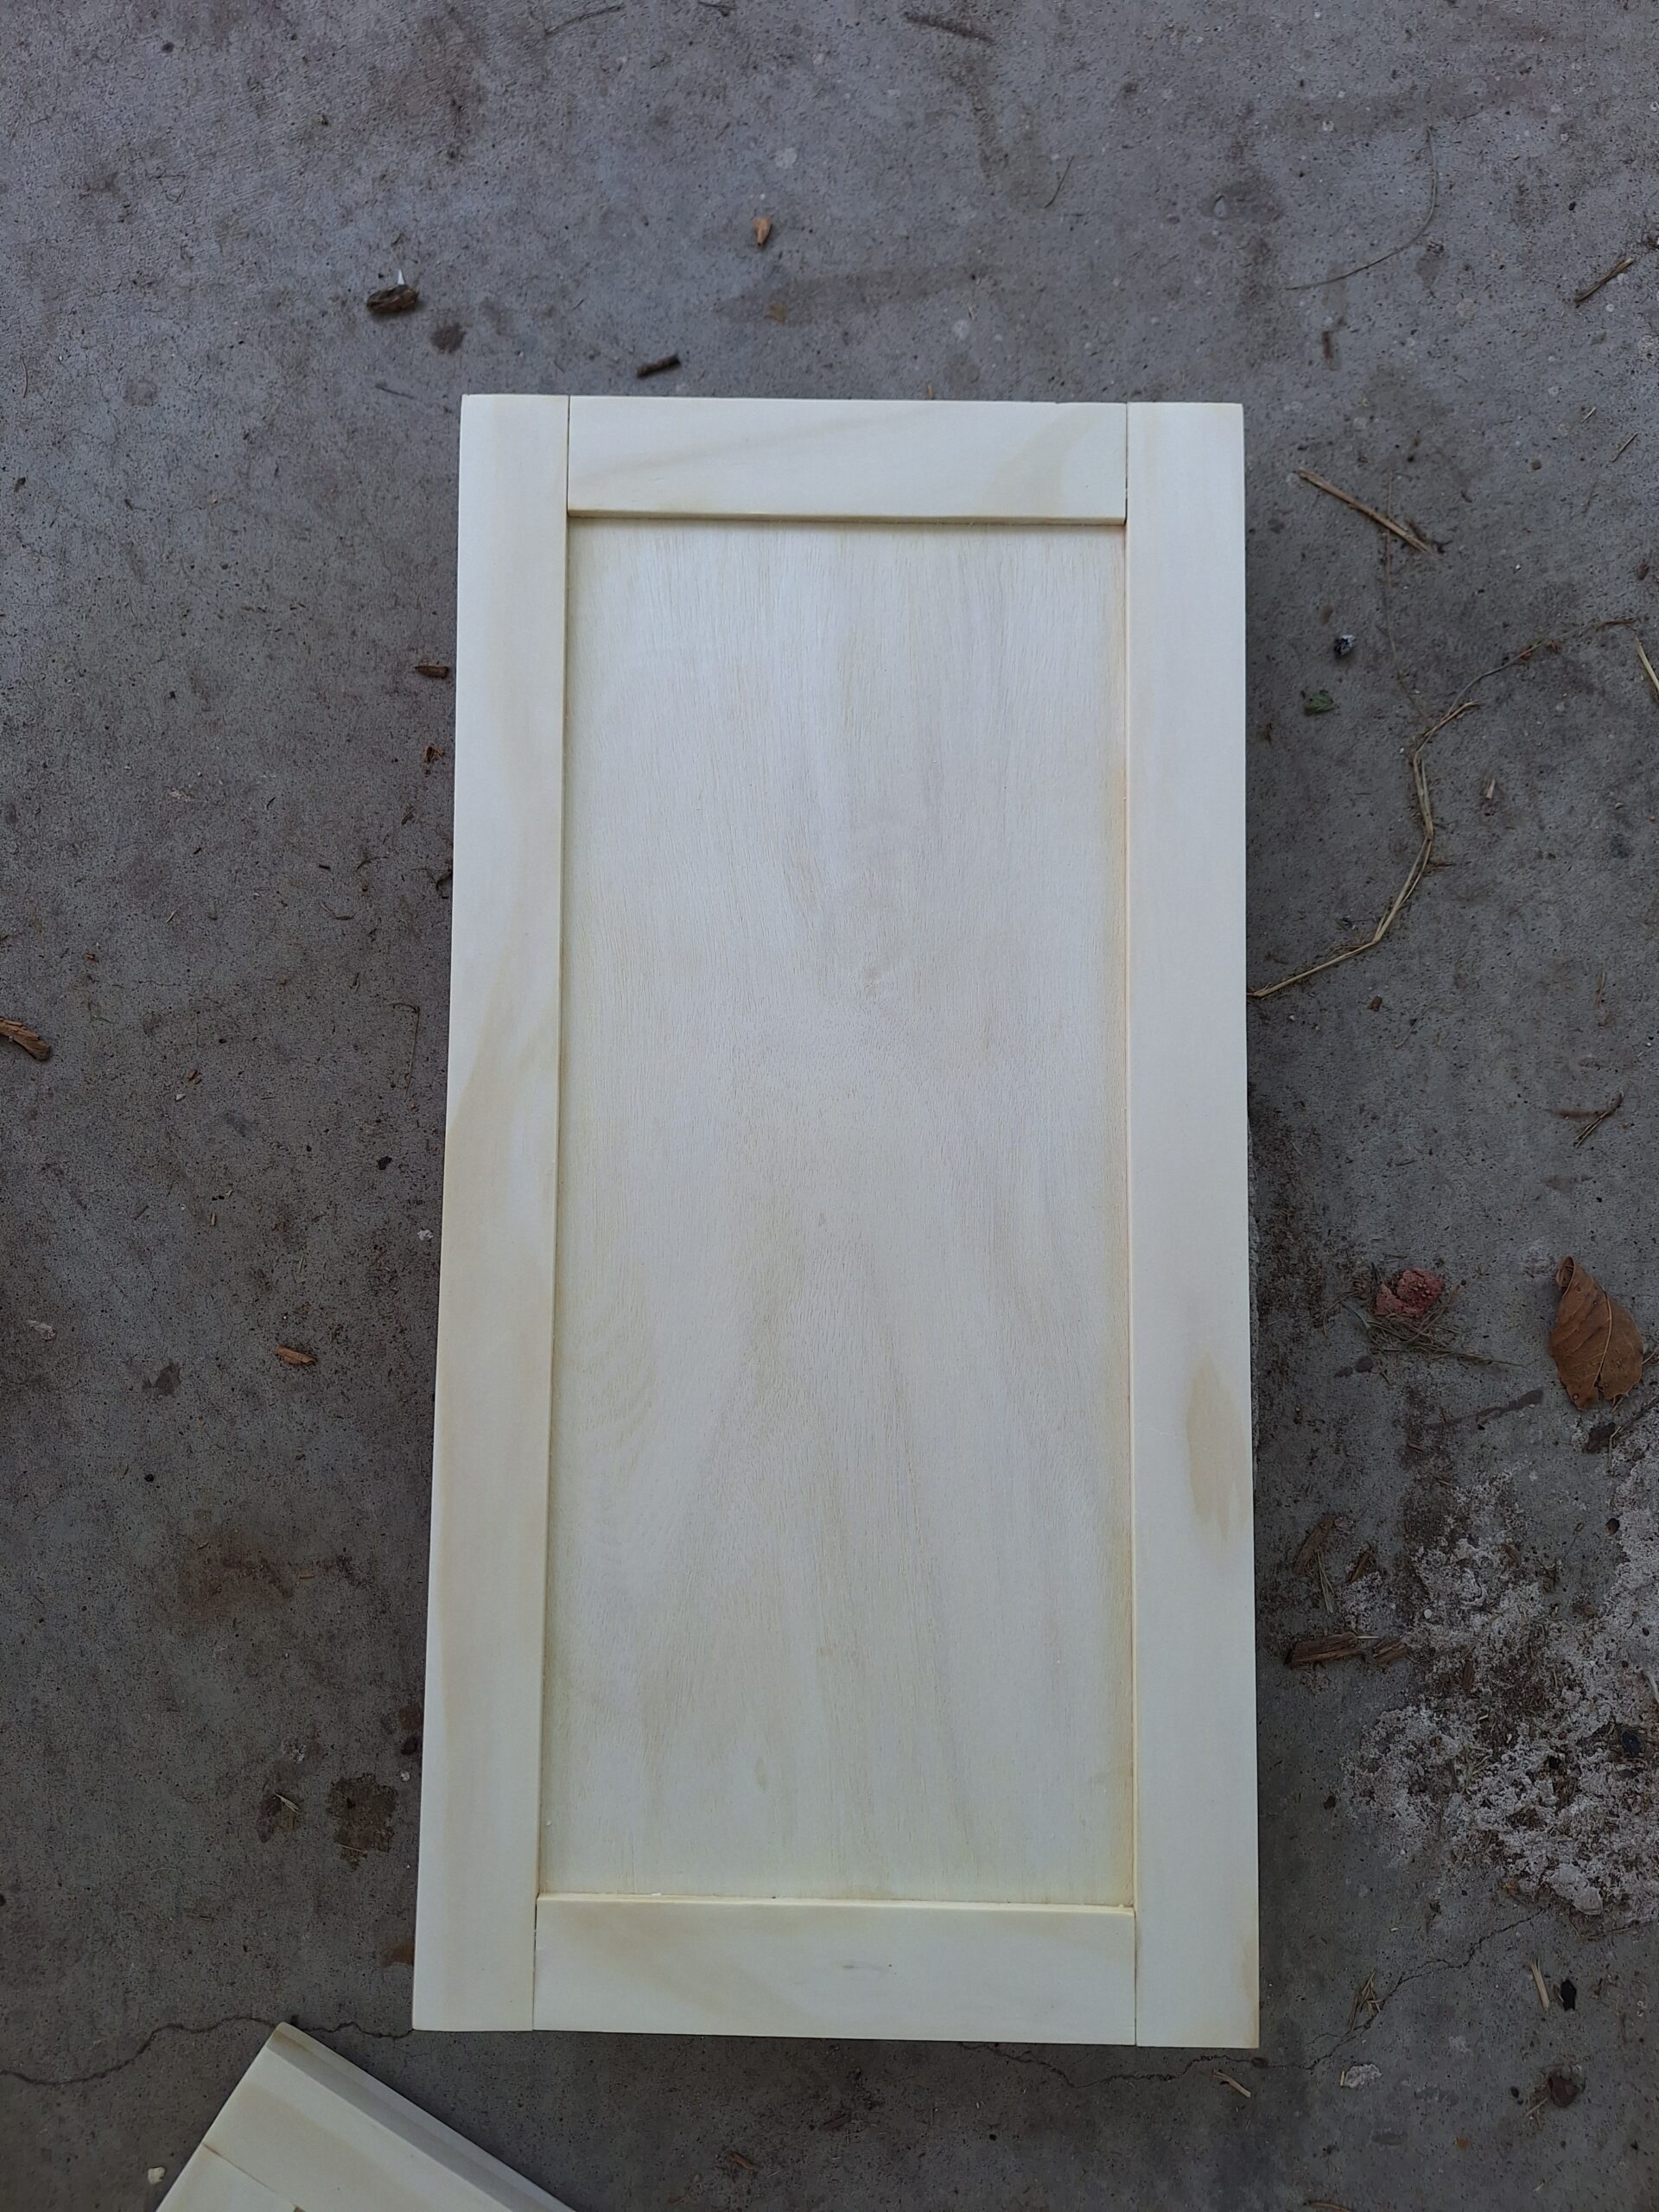
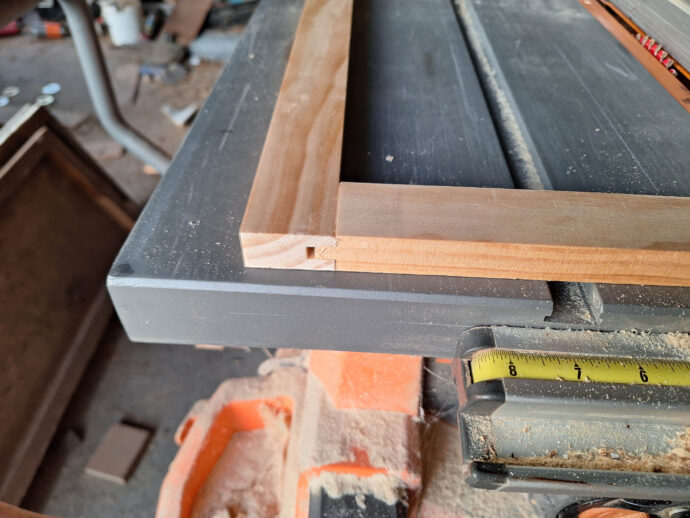
I built the doors of this vanity with tongue and groove construction because I know people will be opening and closing the doors of the vanity and I didn’t want pocket holes showing on the inside as I wanted it to look more professional! Now, does that mean my woodworking was perfect on these doors, NO! But do they look better than most other doors I have made, YES!! Lol!
Here is one of the doors right after I bleached it, it is the only picture I have some how of the assembled doors before they were stained and placed on the vanity! (The bleach method is shared below)
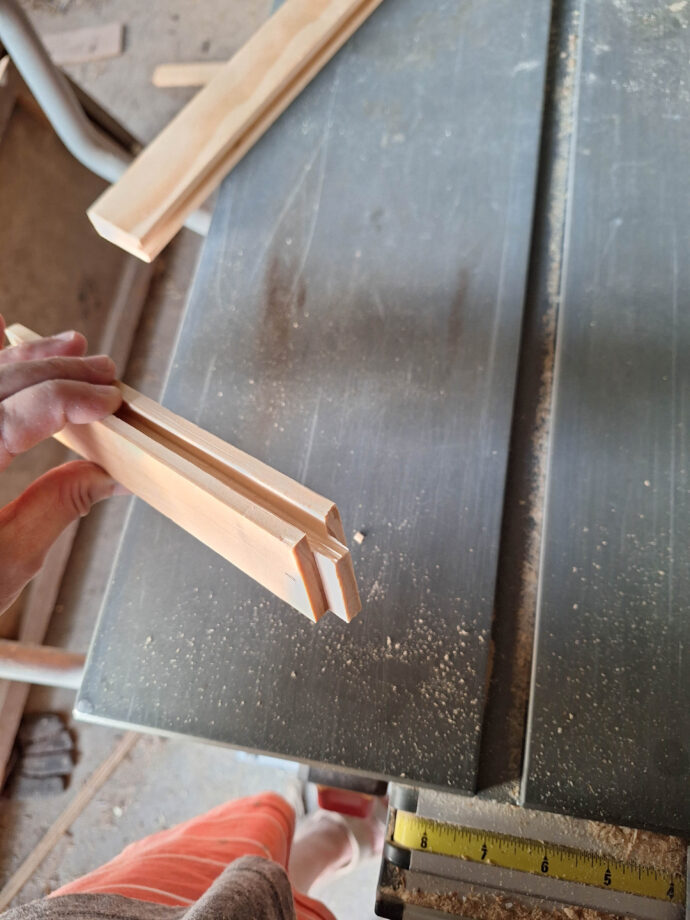
I realized after making three sets of doors with this method that my table saw throat plate is too flimsy which is why the grooves are not solid, there are random spots that are deeper than the others, so I am either going to order a better plate or rig something up to keep it from being able to do this.
**Update: I ordered a really nice throat plate that was in fact not for my saw, although I thought it was, and I very clearly read that there were no returns for a plate that didn’t fit based on incorrect model before purchasing said plate! Lol! *Forehead in palm* So I am still working with a bendy throat plate! Oy!
The door frame above has too deep of a groove cut so this was one of my doors I had to redo…could I have used it, probably, but I wanted a tighter fit! Typically, your shorter boards will be cut a 1/2″ longer than needed for the door frame so that you have the extra needed to create the tongue on each side at 1/4″. If you need a really good tutorial on tongue and groove doors, my girl Shara, Woodshop Diaries, has one you can watch here: 7 Ways to Build a Cabinet Door.
To create a tongue and groove door, we need to create grooves and then tongues to insert into the grooves. This will create a strong joint and allow a space for our plywood so we don’t see staples or the edges of the plywood.
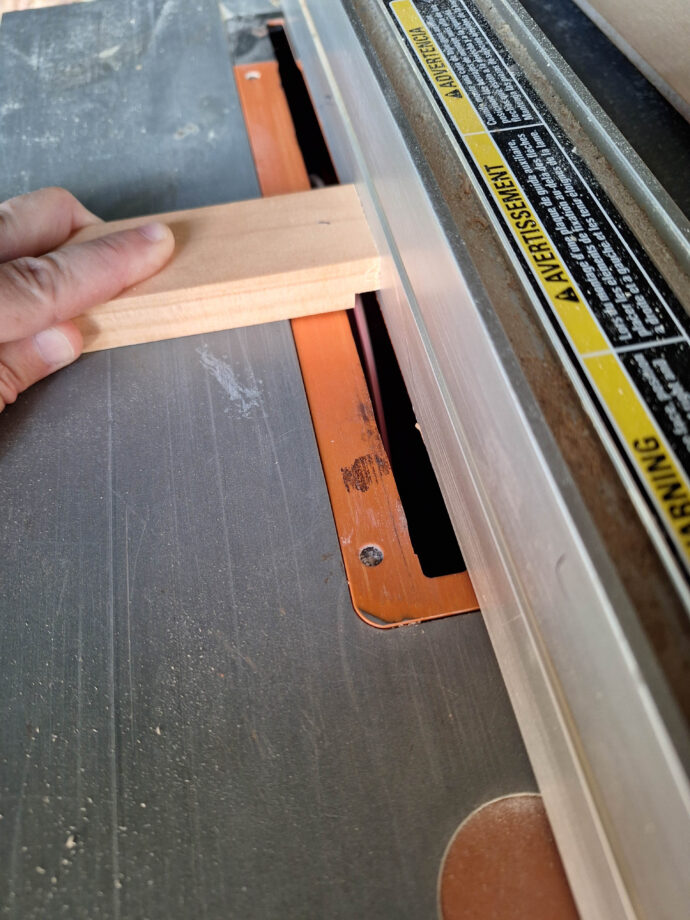
To make the grooves, I run all the boards through the table saw with the blade set at the height I need the groove to be, which in my case is 1/4″ deep. Just know, this is my generic explanation and the proper terms will probably not be used! 🤭 The rip fence is set 1/4″ from the blade as well so that we start the groove 1/4″ from one side of the board and cutting a 1/4″ groove we should end with 1/4″ on the opposite side, which makes our groove right in the middle.
You can cut your groove closer to one side than the other if you prefer, for instance if you want more of a reveal around the front, you can create that by cutting your groove closer to one side instead of in the middle.
All boards for the cabinets will be ran through before moving the fence. Once they are all ran through, then you can move the rip fence over an 1/8″ and run all the boards through again.
The groove will be 1/4″ wide (to accommodate the plywood) and I usually make mine 1/4″ deep. The boards we are using are 3/4″ wide, so we want to center the 1/4″ in the middle as best we can. This is where you should be setting the rip fence to, where the blade will be cutting 1/4″ inside the board. Hopefully that makes sense! 🫠
***DISCLAIMER: Using power tools come with risks, make sure and follow all manufacturer instructions for your tools. I show how I accomplished the project but that is not always the safest method available, you must use your tools at your own risk! No liability here!
If you would rather use your router to accomplish this, you can! I ordered this router bit set (affiliate link) to make it easier to cut the tongue and groove of the rails and stiles of the doors, but then realized without a router table, they are next to impossible to use (for me), others manage to use a router without a router table no problem, me, I cannot make it work well at all! Lol!
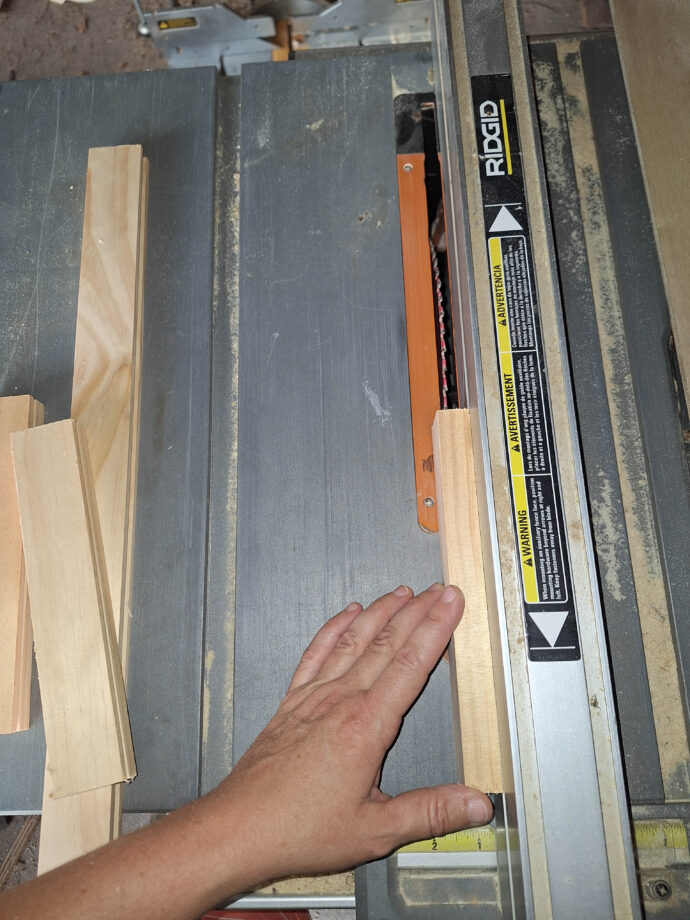
Next, when you have all the grooves cut, you will take the shorter boards and lay them flat on the table, adjusting the height of the blade to the same height of the groove, you want the blade height set exactly the same as where the groove starts.
Cut that on both ends of all the short boards (should be 4 boards so 8 sides) and then flip them over and adjust the height for the other side, if your 1/4″ groove is perfectly centered, you won’t need to adjust it, but that is not always how it happens, so it will work out either way as long as you set the blade at the height of the groove.
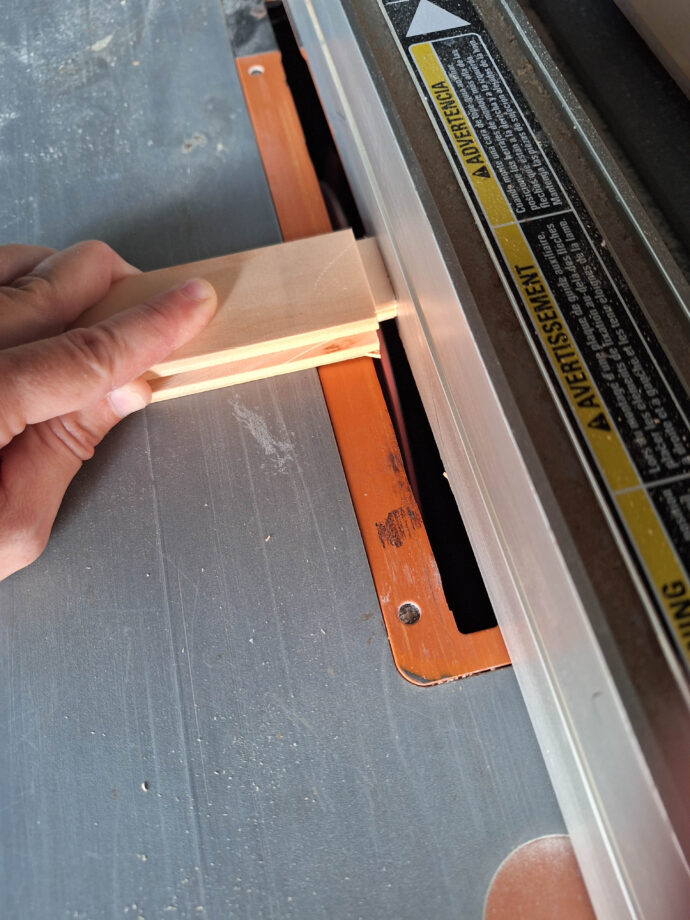
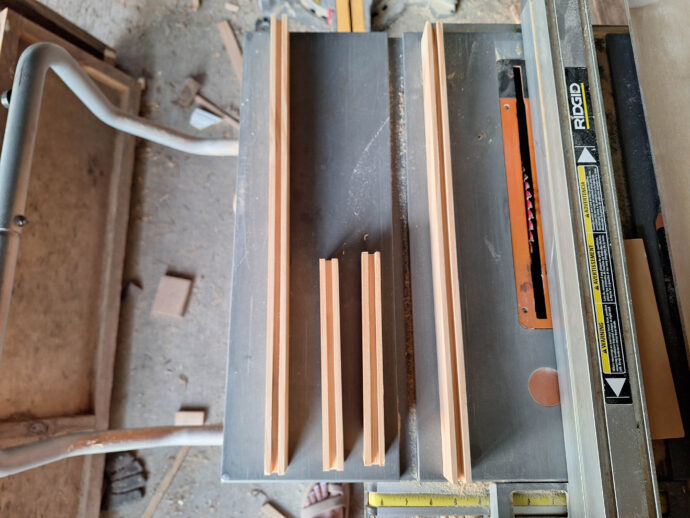
Now this will fit into the grooves on the longer boards to create the door frame, you will only need glue to attach them, but before gluing them, you will slide your plywood into the groove (plywood should be cut 1/4″-3/8″ larger than the door frame in length and width) after sliding the plywood into the grooves and using glue in all the grooves, I used painter’s tape to “clamp” it together.
Here’s a view of one of the joints on the actual vanity door since I forgot to take one after it was finished…my joint is is not perfect, but it is still really strong!
And vavoom…here it is all ready for stain!
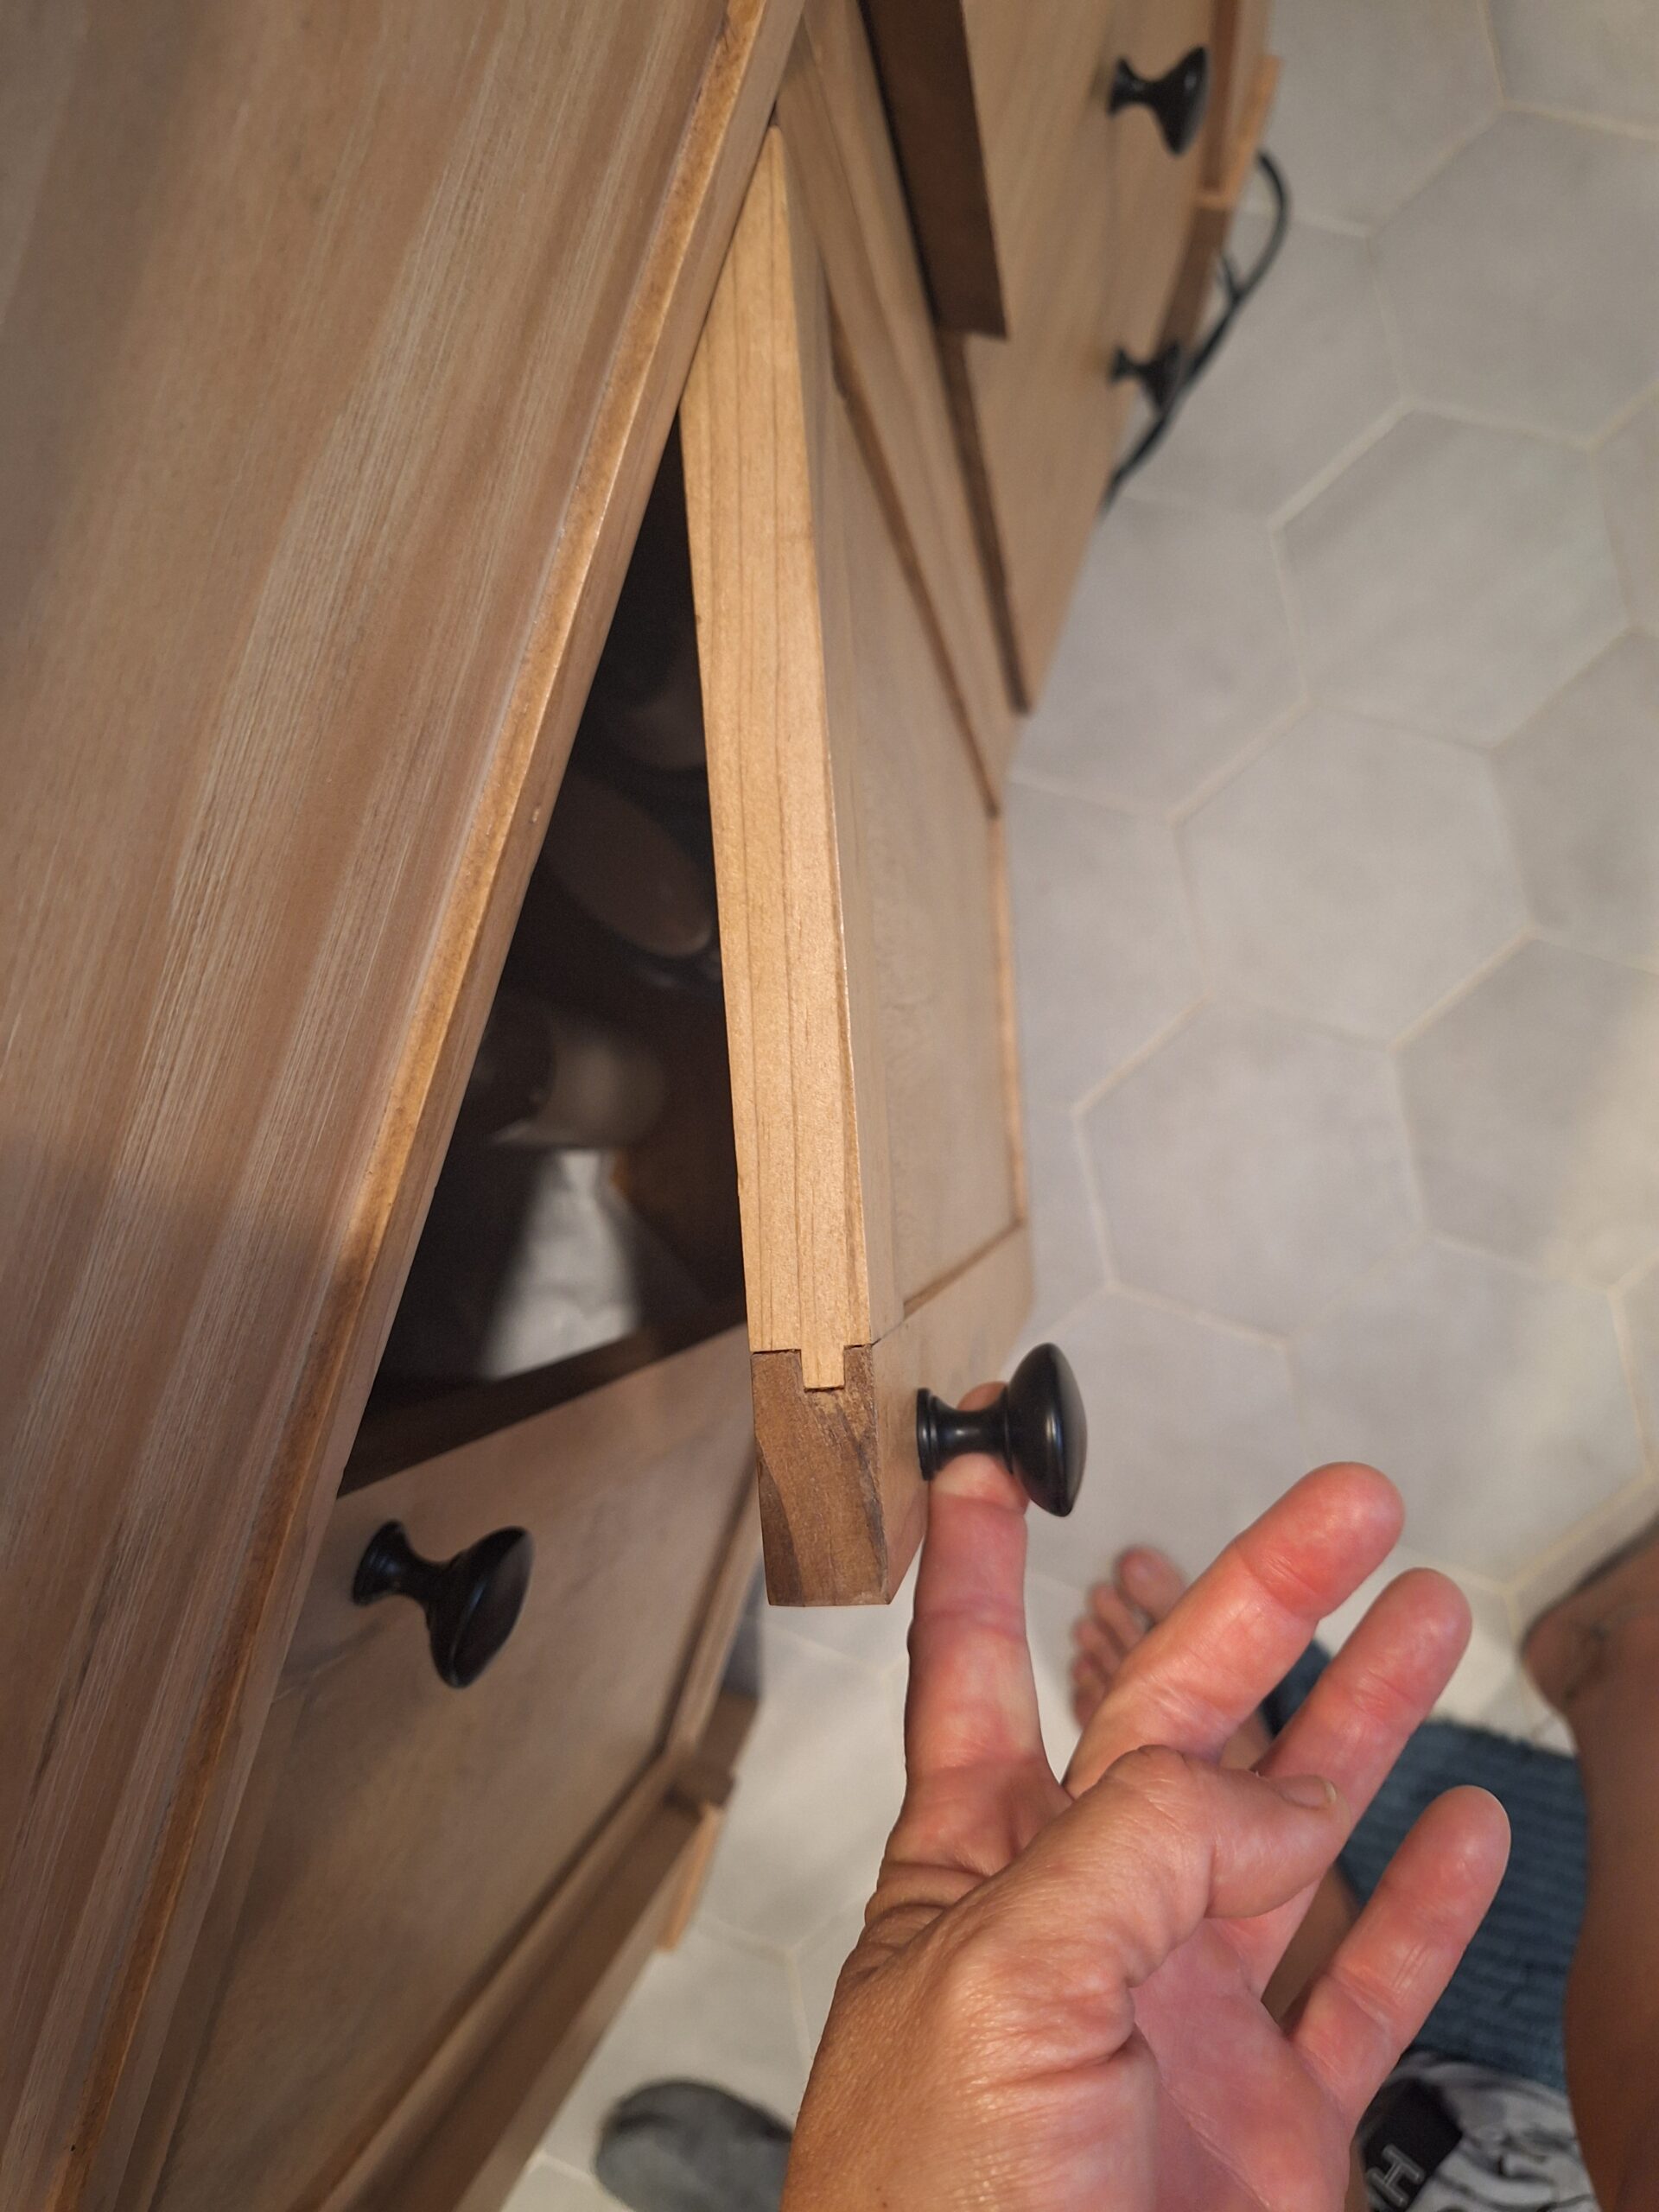
To attach the doors to the vanity, you will need to use a scrap board to make a level spot for the hinges on the left side. The vanity legs create an indention between the leg and the plywood side, so in order to give the hinge a place to be attached, you will need to add a board! I pocket holed it because you would need an odd width board to fit well in there, and this was much easier! Lol!
Don’t mind the horrible lighting as I took this picture at night with my phone!
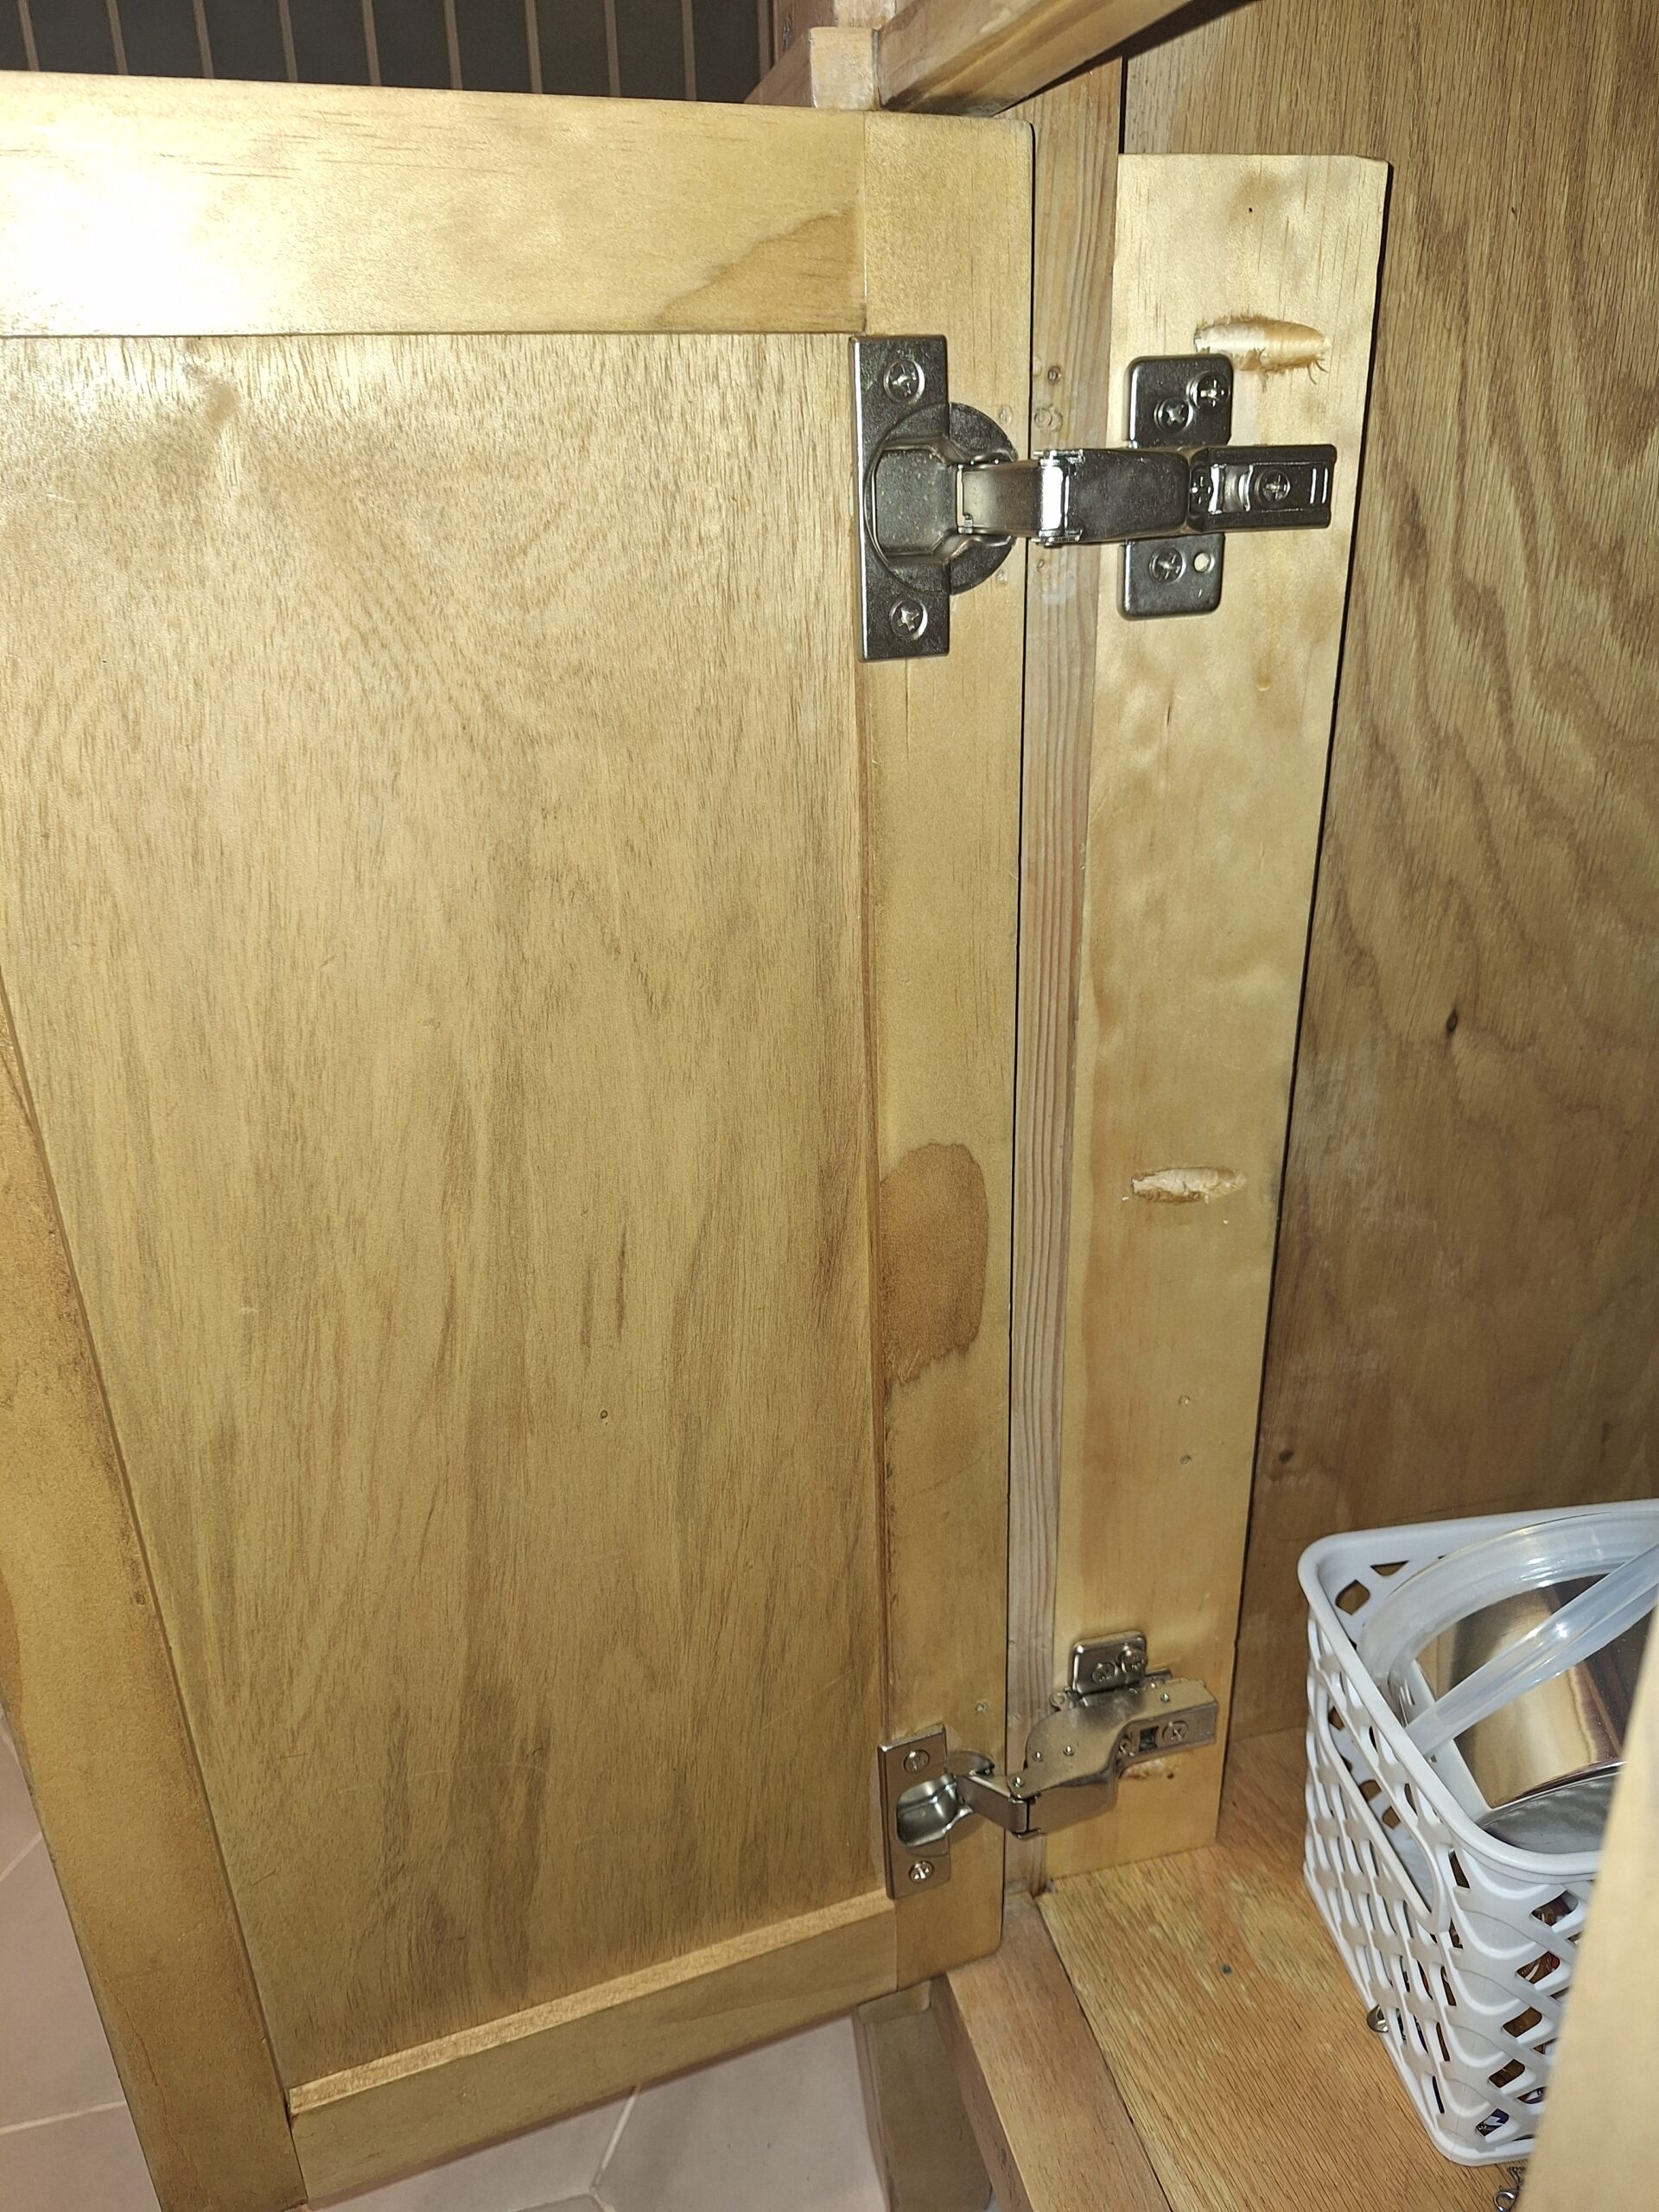
I used the Kreg cabinet hinge jig for the hinges because it truly does make the process easier for the recessed soft close hinges, and these soft close hinges!
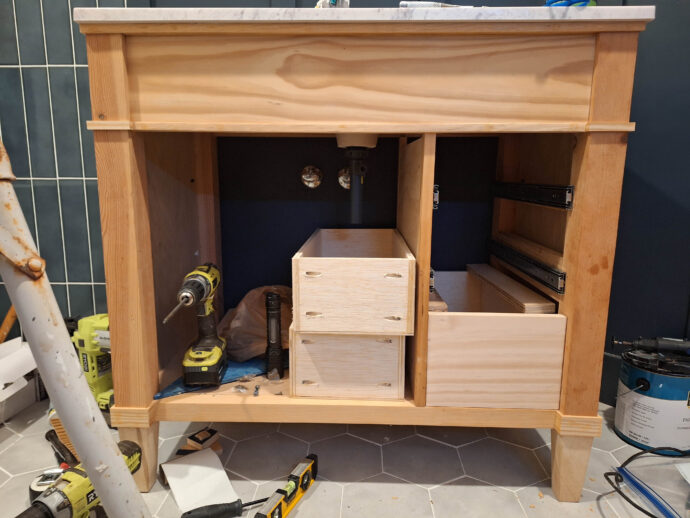
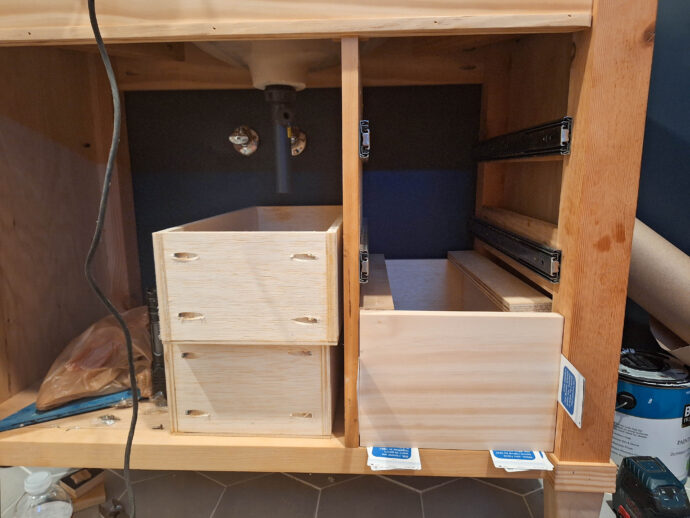
Building the Drawers for the Vanity
Drawers are essential in a vanity to make storage plentiful and keep you organized which is why I love that this vanity has 3 drawers!
Drawers are a simple box with a board added as a “front” the only reason people tend to despise them is because they are hard to measure for and one little mistake can keep them from fitting properly! I have built so many drawers and just recently was the 1st time I measured wrong and they didn’t fit! Lol! It was complete carelessness on my part though, luckily there are ways to save them even when this happens!
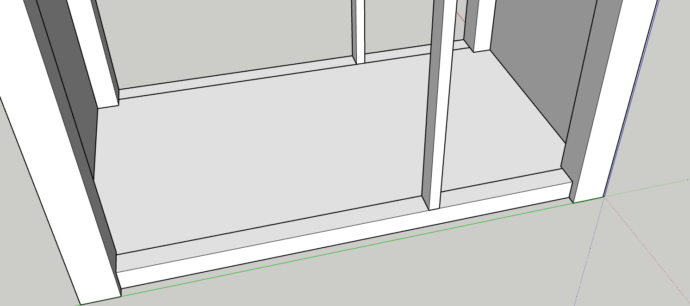
Now, where were we — oh yeah, we are making the drawer boxes! You will need spacers on the right side of the vanity to make the drawer slides have a spot to be flush with the leg! This can be scrap wood that you rip down, or you can add an extra piece of plywood to cover the whole area! Totally up to you, I think plywood is too expensive, so I chose scrap wood! Lol! The left side is already flush so you do not have to worry about doing anything on this side!
Here’s a picture to show what I mean.
I just used scrap wood as you can see in the image above — pocket holed into the place that the drawer slides would go. I attach my drawer slides before measuring for my drawer boxes so that I know they will fit! Once you have the measurements, you can built the boxes!
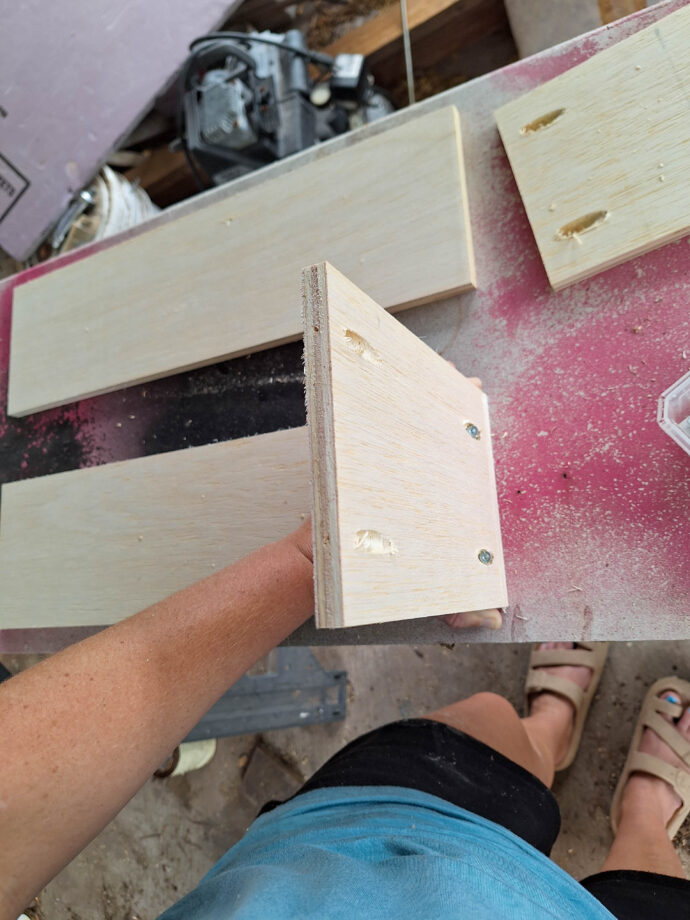
My measurement was 10″ for the space, but when you add the drawer slides, they measure 1/2″ each, so 1″ comes off the measurement for that so we are now at 9″ width for the drawers boxes. I prefer to have my drawer boxes be pocket holed along the front and back so that there are no visible pocket holes once the drawer front is attached.
I used 1/2″ plywood so I need to take another 1/2″ off each side for the front and back boards, so the front and back drawer box boards are cut at 8″ wide. The side boards are running the full length of the drawer, so they are cut at 19 1/4″.
To put the drawer boxes together, all the boards need to be cut and the front and back boards are pocket holed with 1/2″ pocket hole depth and 1″ screws, make sure and use wood glue!
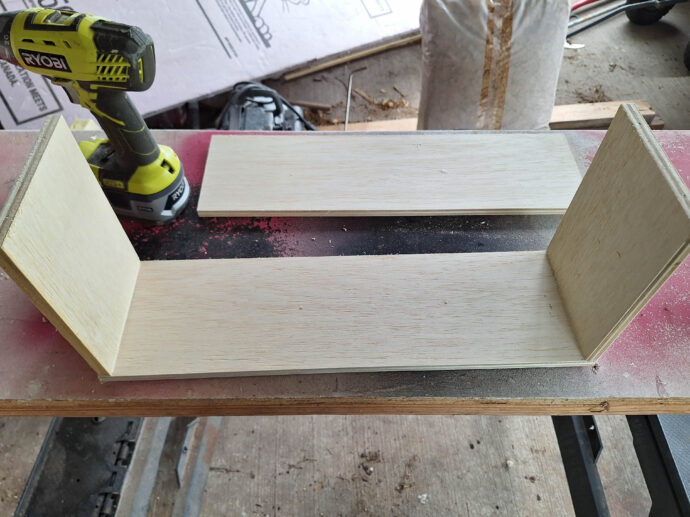
Once the other side of the box is added, you can add the bottom 1/4″ plywood. I used wood glue and brad nails — make sure that you do not let the brad nailer lean one way or the other as that will cause the brad nailer to shoot nails through the side of the plywood!
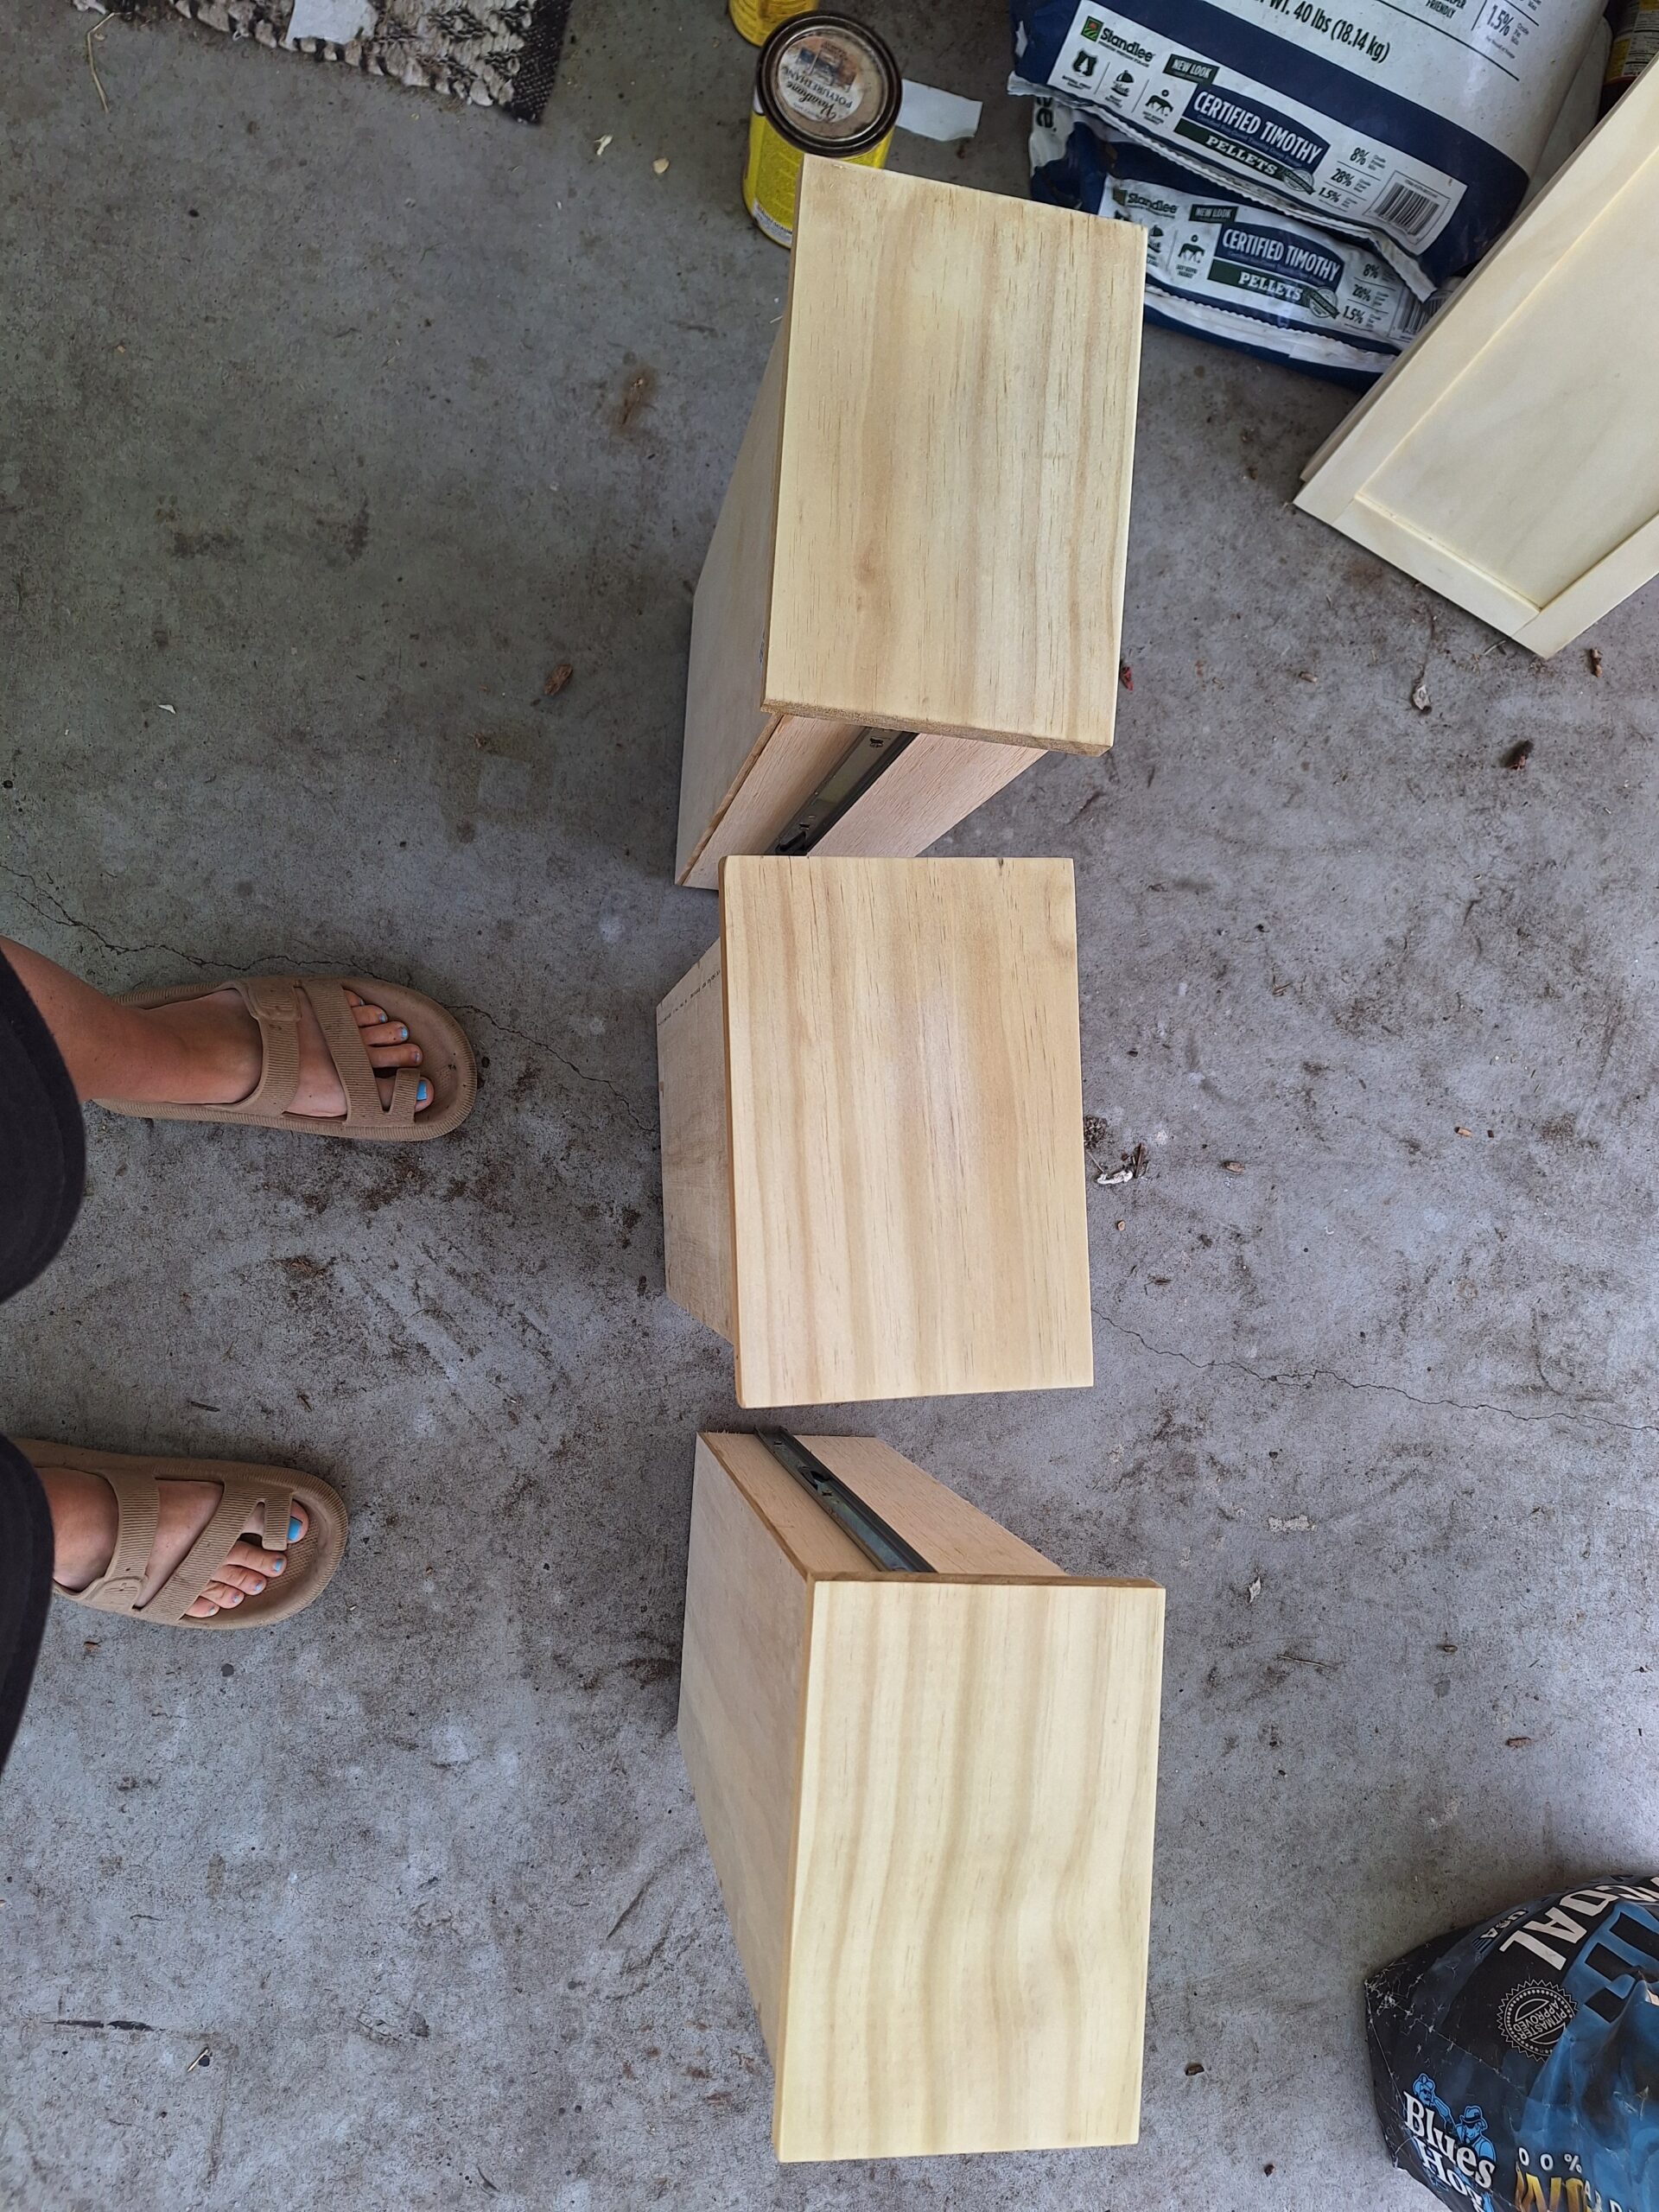
I don’t have an image of a completed drawer box, but here they are awaiting installation!
I always install my drawer boxes before adding drawer fronts, but I was fitting this drawer front after installing the drawer boxes because I was not sure of exactly where to place the bottom of the next drawer box until figuring out where the top was on this drawer box! So I did install one drawer box, attach it’s face frame and then move on to the next drawer box.
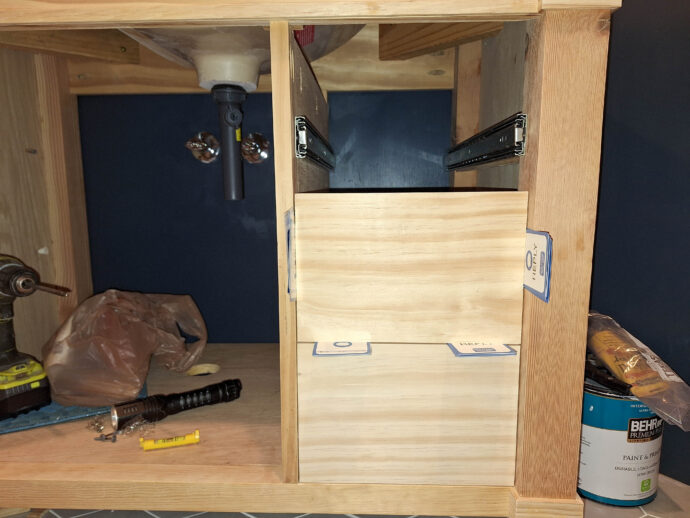
Once the drawers are installed, you can easily remove them using the drawer slides for painting, staining, or bleaching as we are going to go over in the next section!
Bleaching the Wood for Staining
Since I used three or four different species of wood on this vanity, it was imperative that I get the awful pink out of the legs and tone down the gold of the regular pine so that we had a chance at the pine staining somewhat close to the oak and underlayment, or whatever that is I used for the doors! Lol!
Using Baquacil Oxidizer, which is a 27% hydrogen peroxide solution for pools, and cheaper to buy it this way rather than purchasing a 25-30% peroxide by any other company! Combining that with sodium hydroxide 50/50 solution from Hobby Lobby in the soap making section did a wonderful job of quickly whitening all of the wood and making it stain far more uniform than without bleaching it!
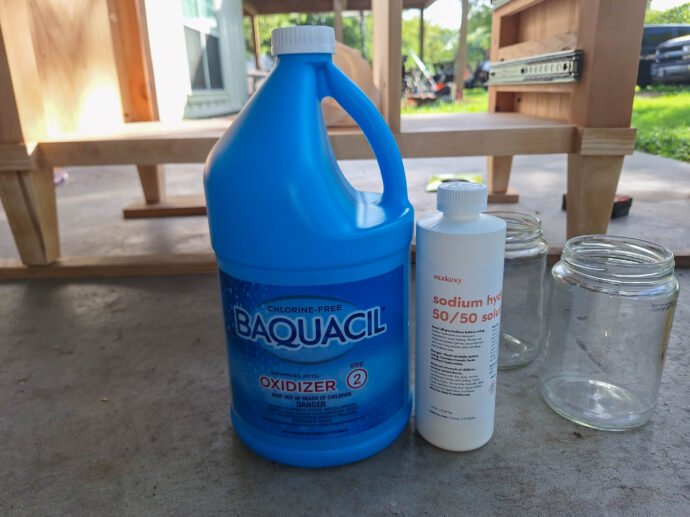
I could not believe how well this worked and I believe it only cost about 35 bucks, and I will be able to bleach many more pieces with the leftovers, the vanity used very little of the two!
If you read online about using sodium hydroxide, it mentions mixing with distilled water, this 50/50 mix is already mixed with water for you, hence the 50/50, it is 50% sodium hydroxide and 50% water! You can purchase a two part wood bleach such as Zinsser Wood Bleach (affiliate link).
You will need 2 glass jars and two paint brushes as well, one jar and paint brush for the peroxide and one set for the sodium hydroxide. I used the method of painting the sodium hydroxide first, and then painting the peroxide over it and letting it dry. At first it looked really dark when I first painted the two of them on it, but rest assured, the chemical reaction does take place and it does lighten!
Here is the vanity after one coating of the two but it isn’t dry yet.
See how dark that is…it had me scared at this point! Lol!
After that coat dried enough, I knew I wanted to do another coat! Here is the vanity mostly dried and ready for the next coat. I did not bleach the inside of the vanity as I did not really care if it matched the walls of the bathroom or not!
And then I started the second coat.
I don’t have a final after picture, but once the wood had dried, I did take water and wipe the vanity really well to make sure the bleach wouldn’t alter my stain.
Here are the drawers before the wood bleach! Now, just so you don’t think the wood was naturally this color, I had tested a stain on the drawers that I did not like, it was too orange, which is what you are seeing here.
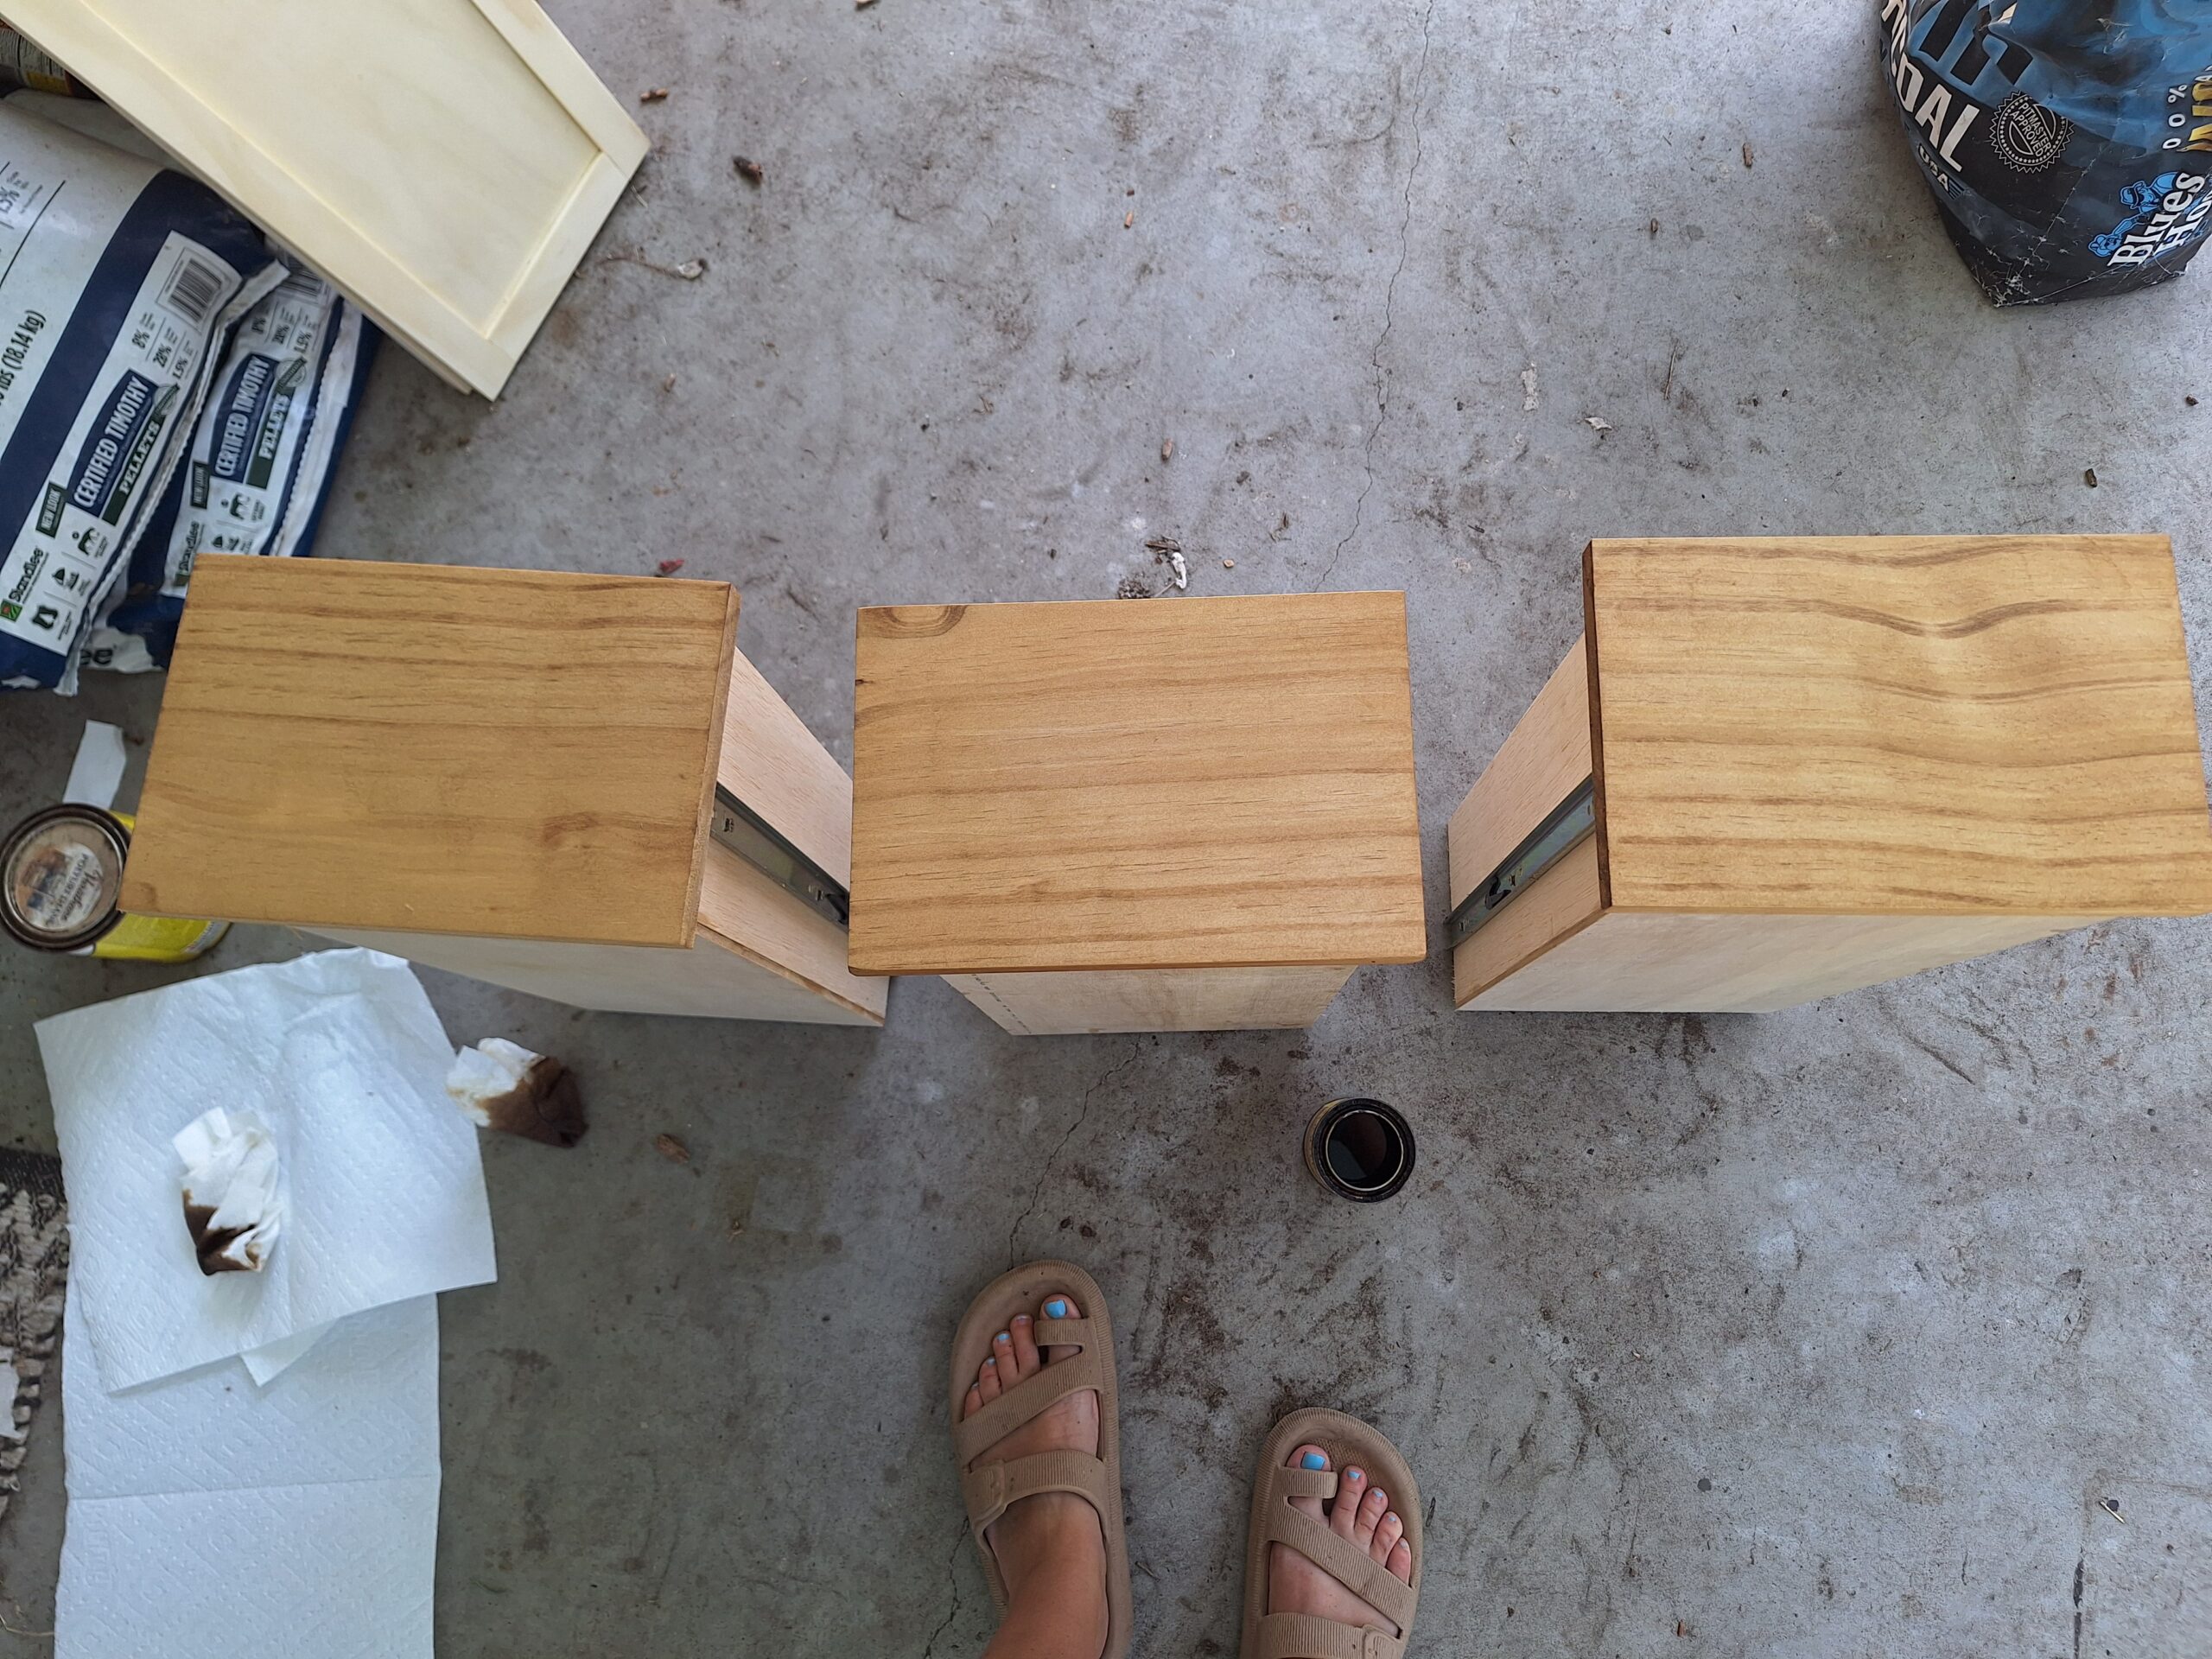
After the wood bleach, this is the after color on the first round, even though I did not sand off the stain or remove the stain in any way!
I did apply a second coat to the drawers as well, but don’t have pictures! I get so into the projects when I am working on them, it is easy to finish and then realize all I missed!
Once it was all fully dry, the vanity, drawers, and doors, I moved it all back into the bathroom and stained it!
Staining the Bathroom Vanity
I stained the bathroom vanity with a water based stain by Sherwin Williams called, . Then I sealed it with a water based sealer, by Minwax!
It has been 2 years since the vanity has been in use and it still looks the exact same as the day I took these photos!
Overall it was so worth it to build the vanity myself to get a well-built, long lasting vanity that I do not have to worry about falling apart on me when a little water hits it! It is a really nice addition to the room! Want to check out all the other bathroom builds, such as the Laundry Hamper Tower or the Over the Toilet Cabinet, get all the details for them here: Bathroom Remodel.
I really love this bathroom! Do you have a room in your home that you put some real blood, sweat, and tears into? Is there a room that you want to renovate? Let me know in the comments below!
Want to save this DIY Bathroom Vanity for later? Pin it!