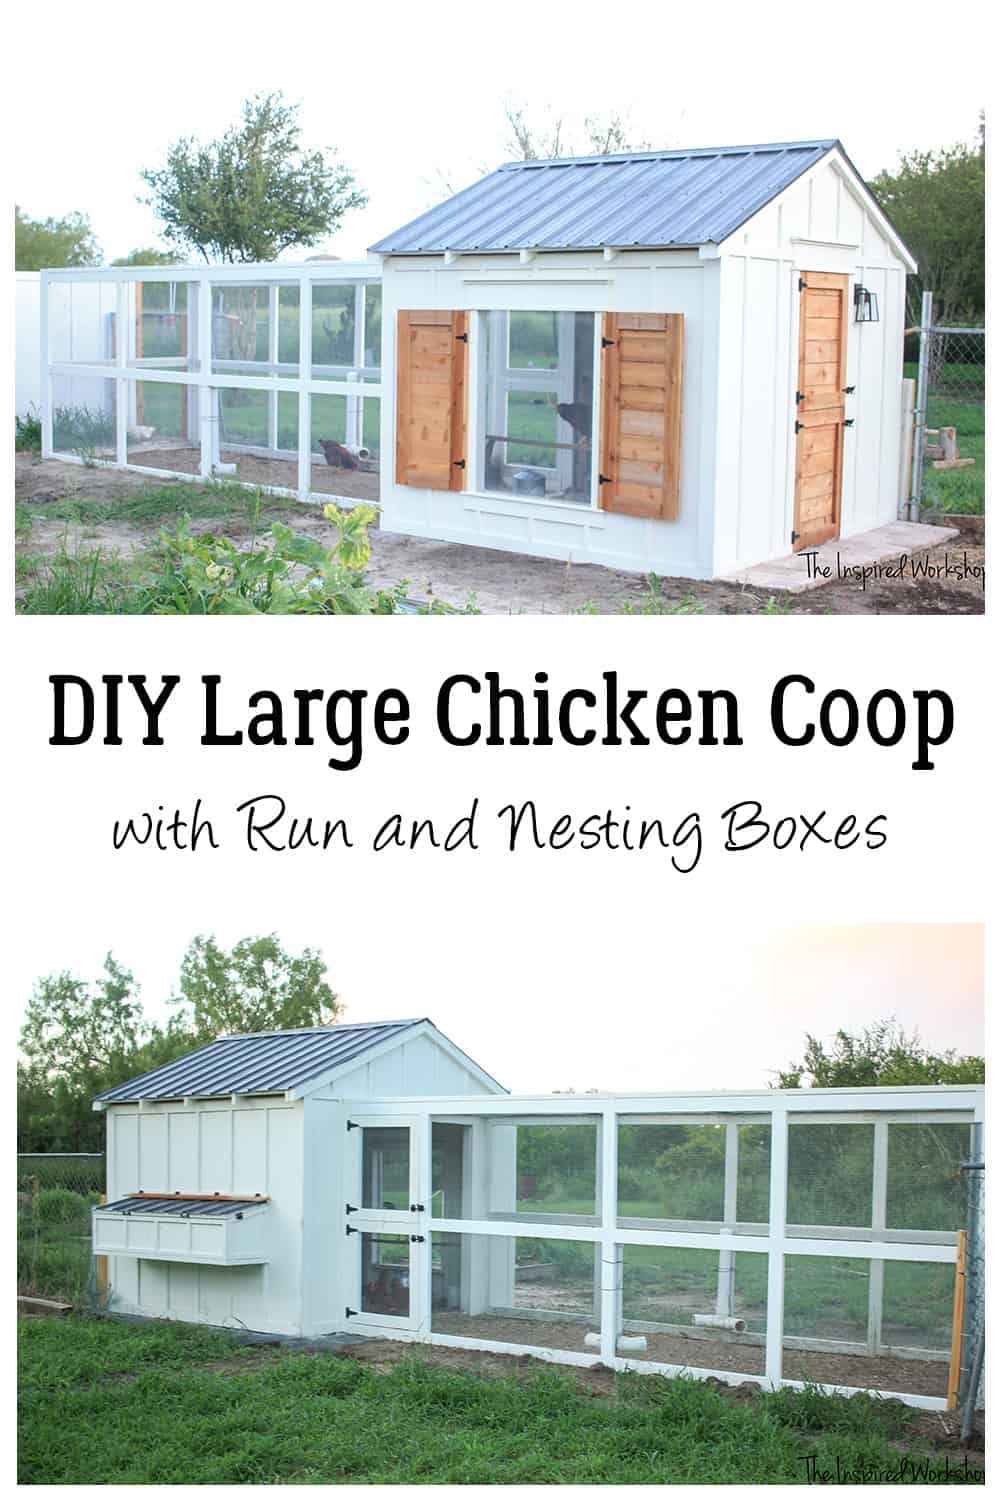
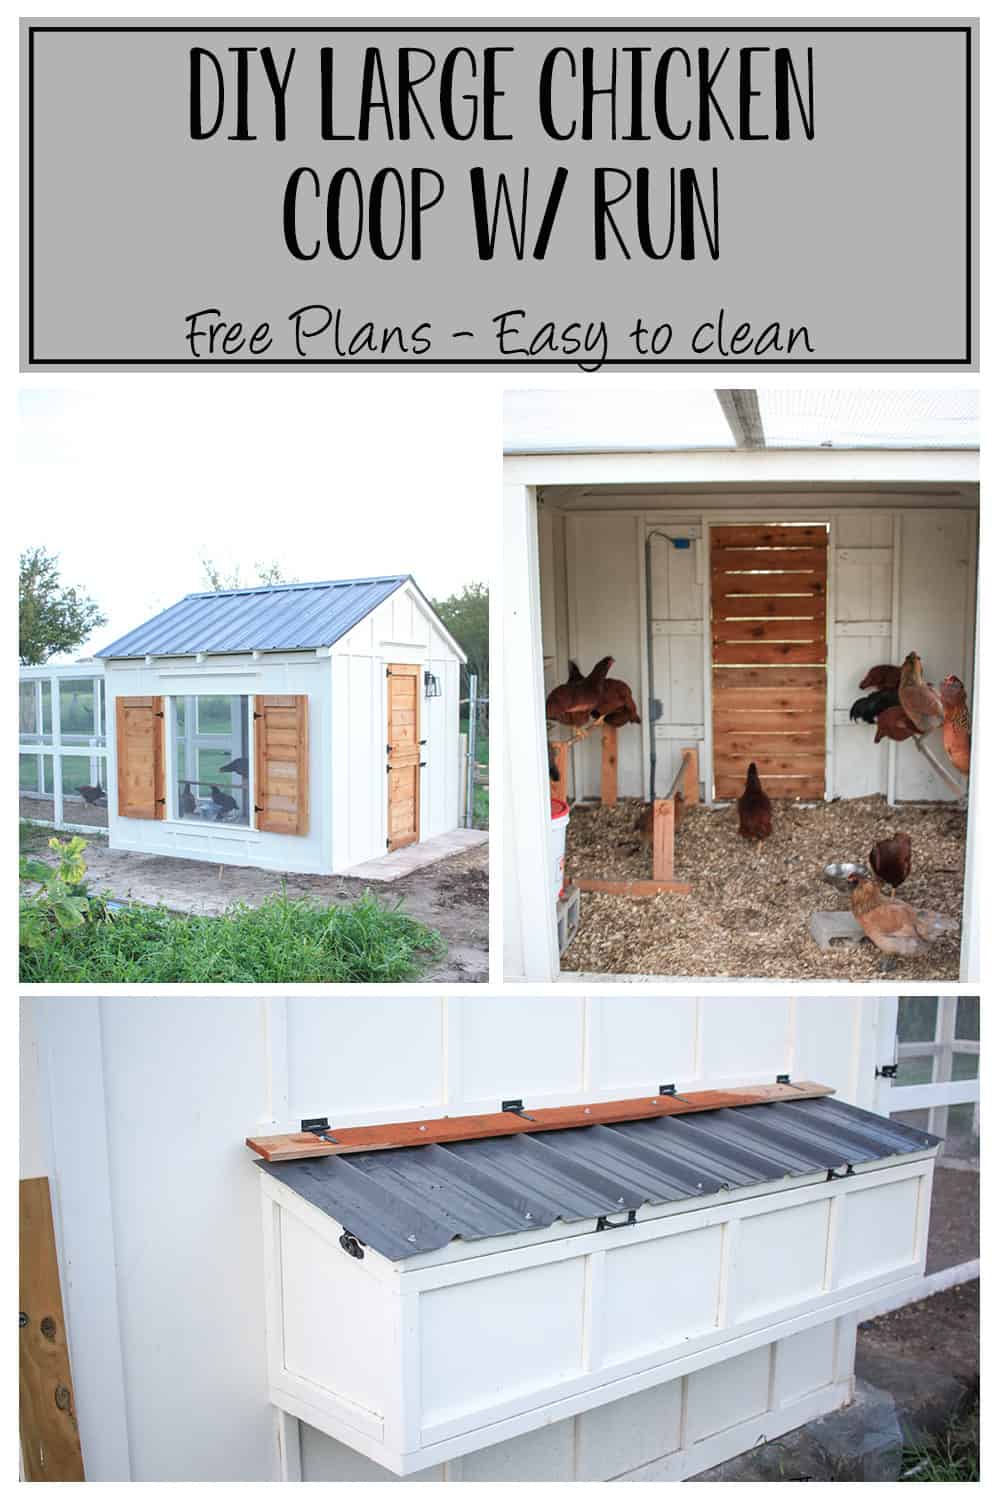
DIY Nesting Boxes for Chicken Coop
One of my absolute favorite parts of this chicken coop is that it has this set of DIY nesting boxes that are easily accessible to us in the backyard without ever having to go in the chicken coop!
I tried to put a ton of thought into this chicken coop to keep from wanting to build another one right away! Lol! I think I have succeeded so far since I haven’t come up with any else that I feel like I should have added!
I am so happy we got chickens and built them this adorable coop! You guys, I know I said it in the other post as well, but seriously you need some chickens in your life…I NEVER wanted chickens and now I don’t know what I would do without my cackling ladies every morning greeting me and showing off their egg for me! Lol! Okay, only a couple are laying at this point, but I think that is why they think they are cooler than the rest! 😂
I love this DIY chicken coop so much that I would LOVE for you to share it with family and friends of yours that may appreciate it as well! #shamelessplug😅
[social_warfare]
Alright, this is a little bit more complex build but nothing that you can’t figure out just as I did! I sat around putting it off for a whole week before I FINALLY decided I HAD to get it done or else it was going to be MY FAULT we didn’t get to go on vacation! Lol!
If you need any of the other plans to the chicken coop find them here: DIY PLANS FOR CHICKEN COOP
And here are the plans for the nesting boxes: DIY NESTING BOXES FOR CHICKEN COOP
Material List for DIY Nesting Boxes
-scrap pieces of 1/2″ plywood from your chicken coop build (or 1 sheet of 1/2″x4’x8′ plywood if you are not building the coop from my plans)
-4 – 2x2x8 (I used furring strips)
-4 – 2x4x8
-3 – 1x2x8 (I used furring strips)
-1 – 1x4x6 cedar fence picket
-leftover steel roofing from the chicken coop
-2 latches – I cannot find the ones I used on Home Depot’s website
–saw
Cut List for DIY Nesting Boxes
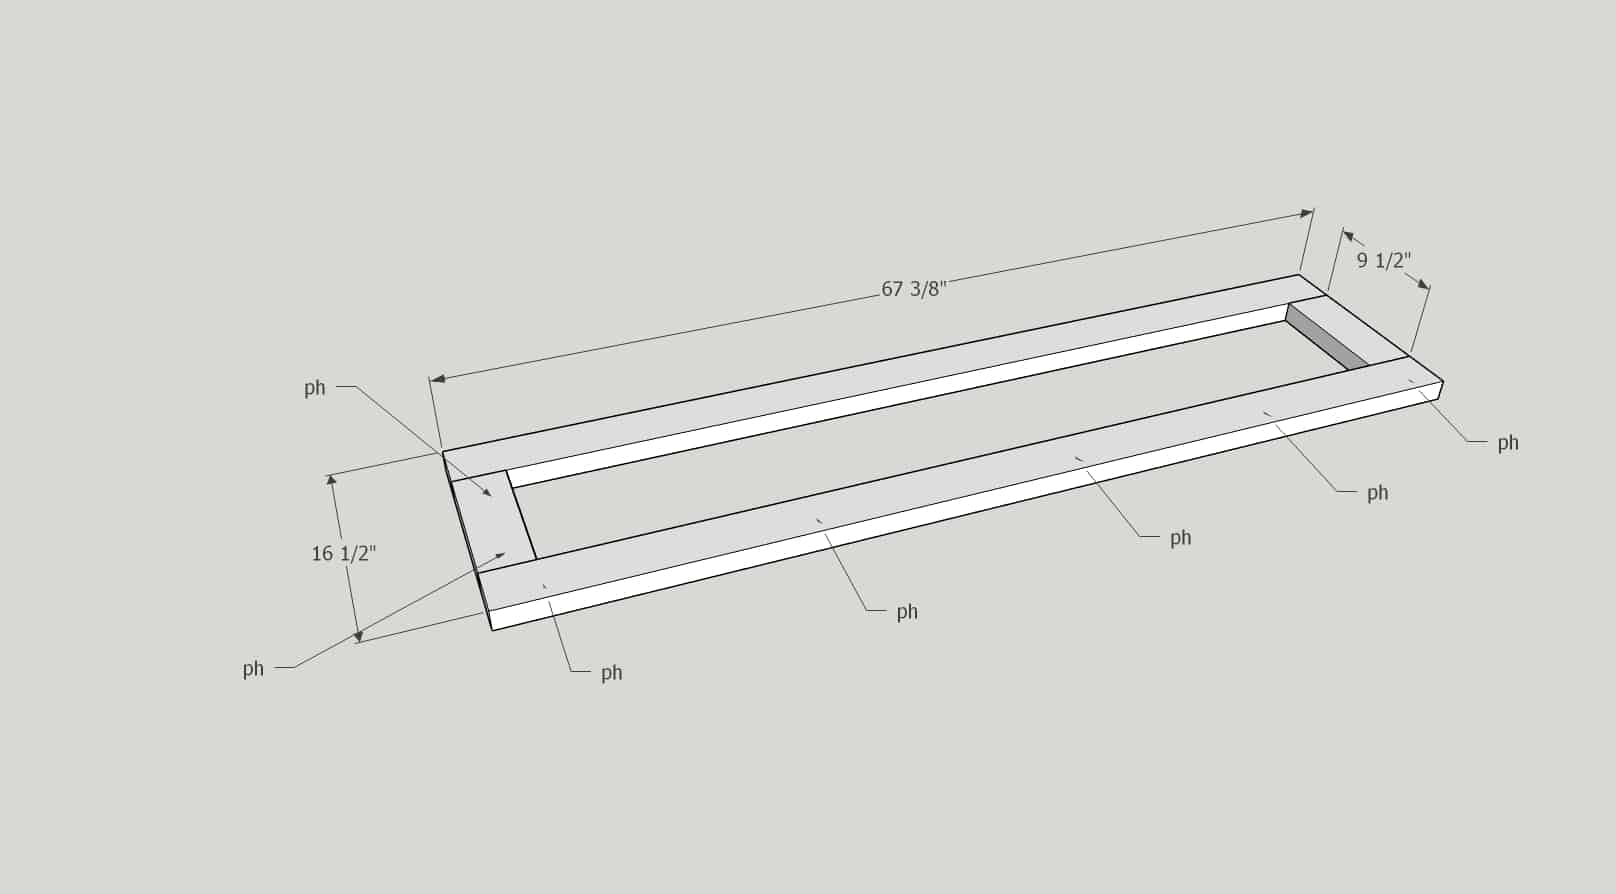
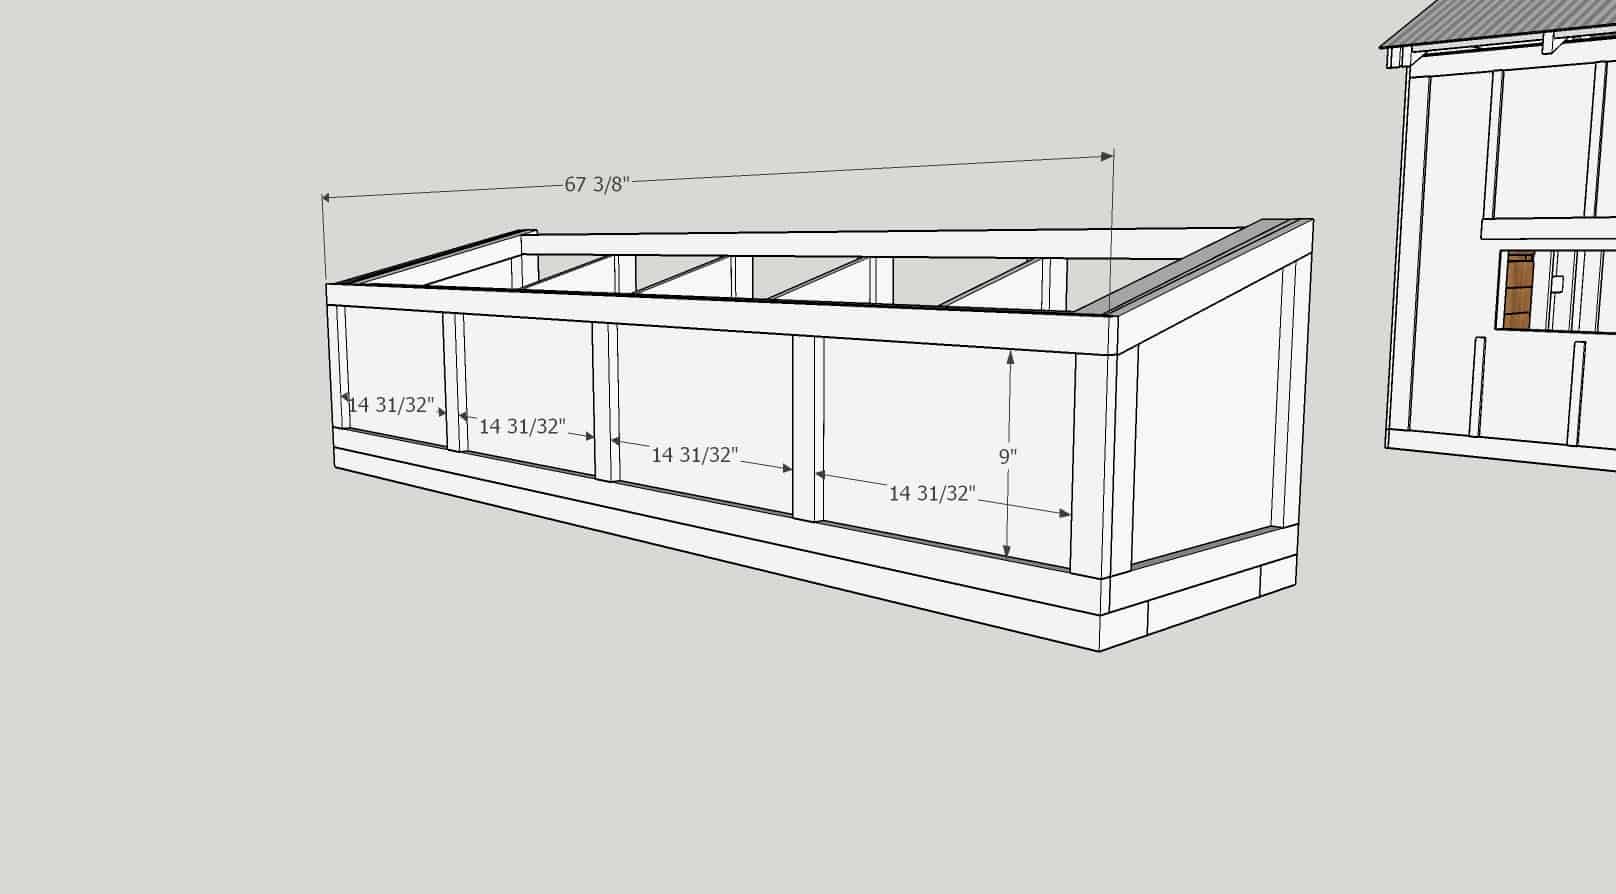
-4 – 2×4 @ 67 3/8″ (bottom frame and roof frame)
-2 – 2×4 @ 9 1/2″ (bottom frame)
-5 – 2×4 @ 9 5/32″ (roof frame)
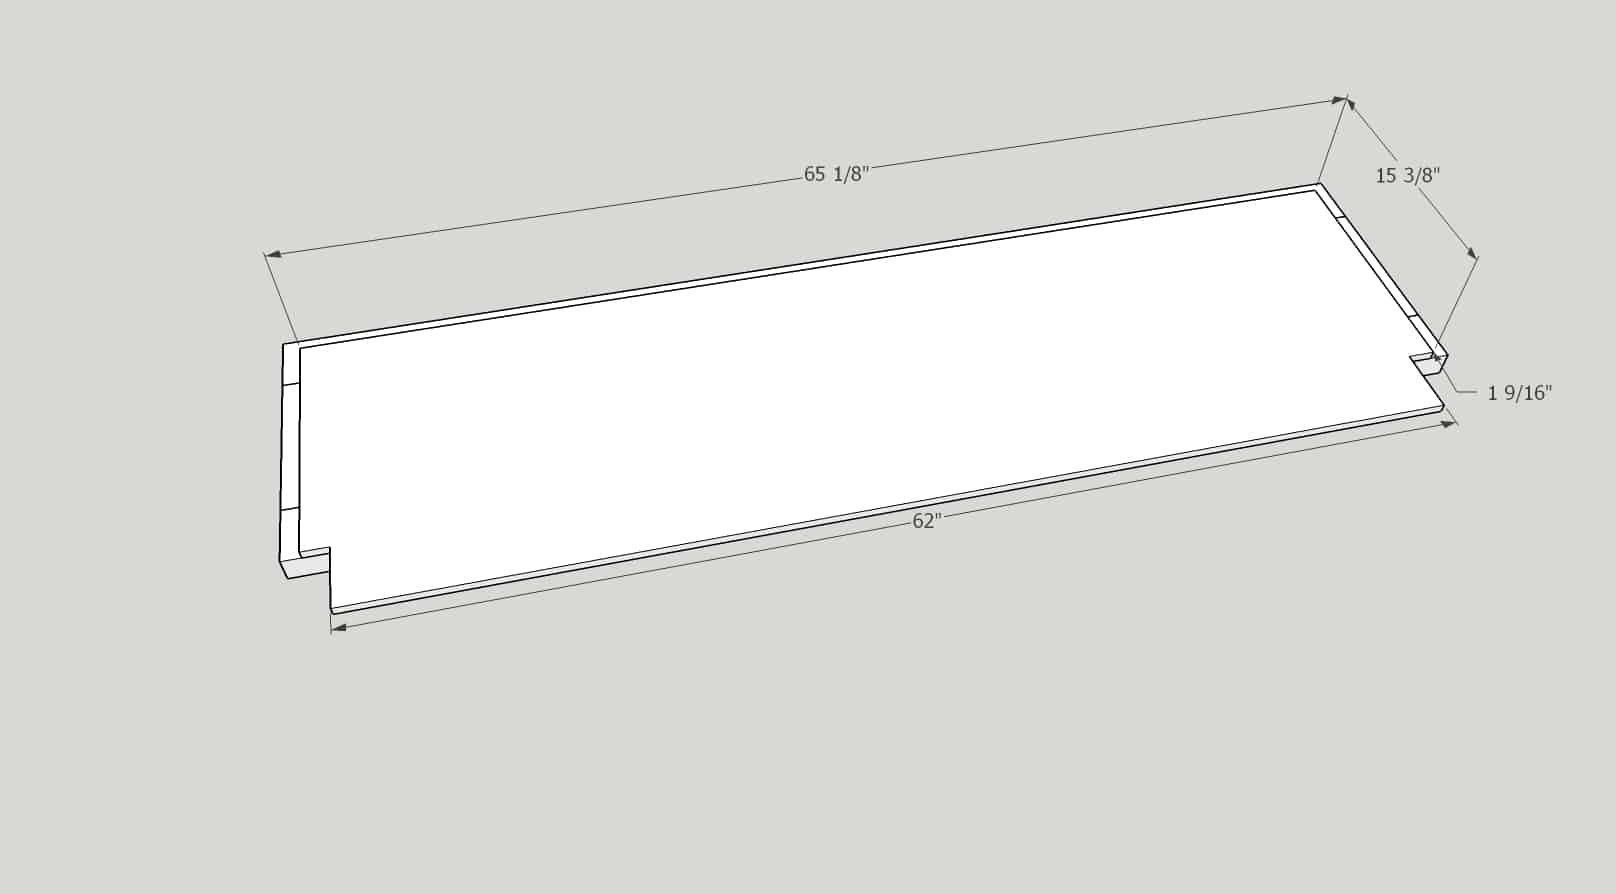
-1 – 1/2″ plywood piece @ 19 3/8″ x 65 1/8″ (notches cut out as shown below)(bottom)
-2 – 1/2″ plywood pieces @ 15 3/8″ x 16″ (cut down to 12″ on opposite side – see below)(side walls)
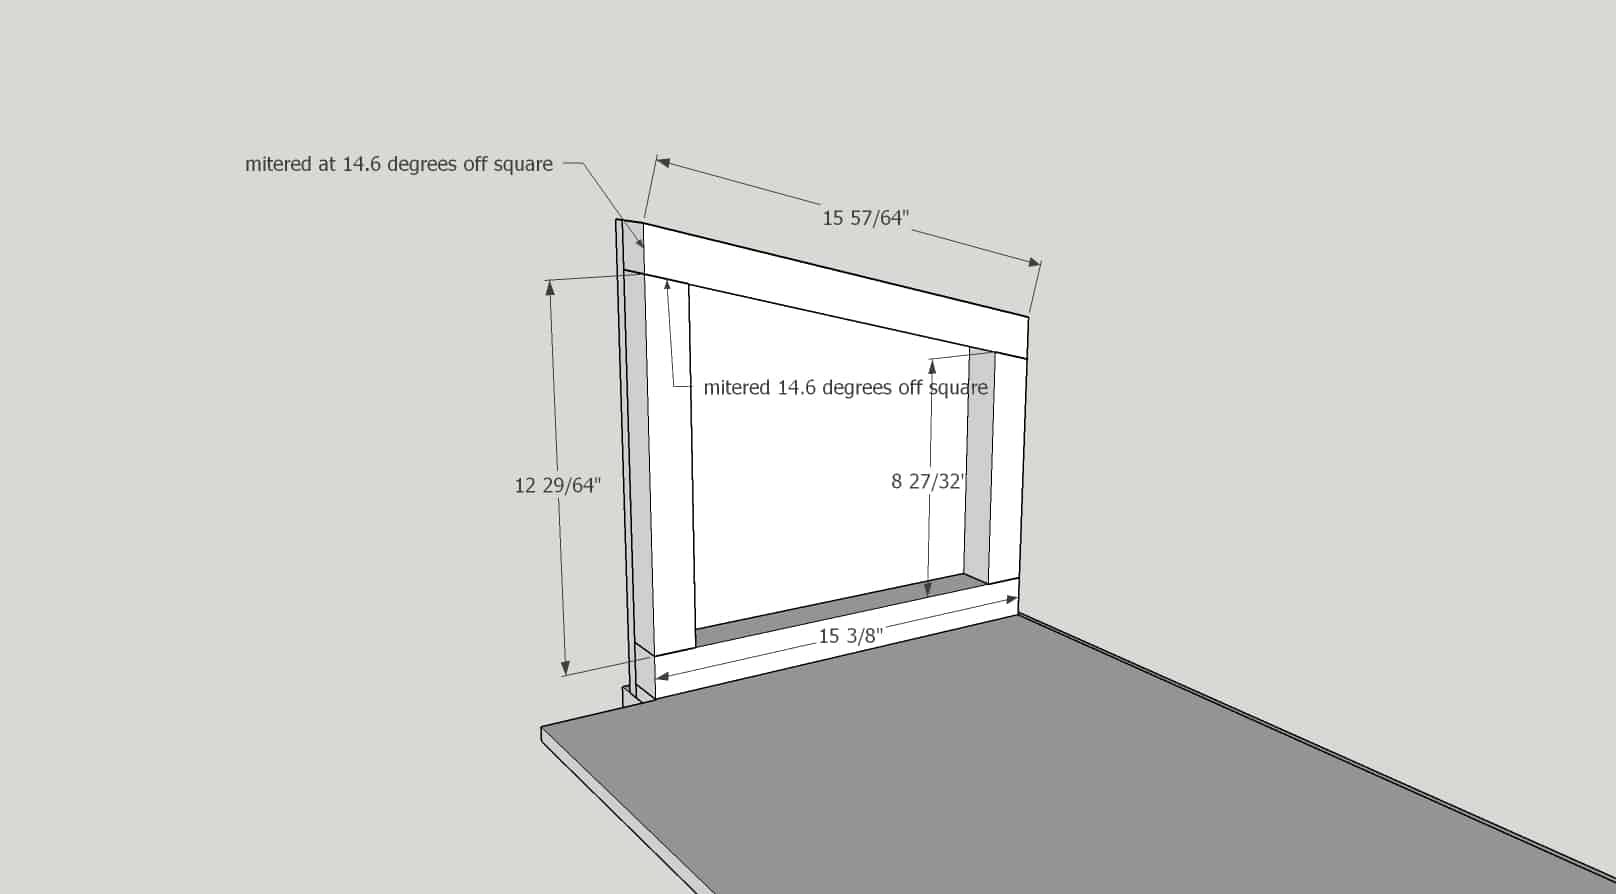
-2 -2×2 @ 15 57/64″ mitered at 14.6 degrees off square, ends parallel (inner sidewall frame)
-2 – 2×2 @ 12 29/64″ mitered at 14.6 degrees off square on one end (inner sidewall frame)
-2 – 2×2 @ 15 3/8″ (inner sidewall frame)
-2 – 2×2 @ 8 27/32″ mitered 14.6 degrees off square on one end (inner sidewall frame)
-2 – 2×2 @ 62 1/8″ (top front and back frame)
-4 – 2×2 @ 9 61/64″ (back divider frame)
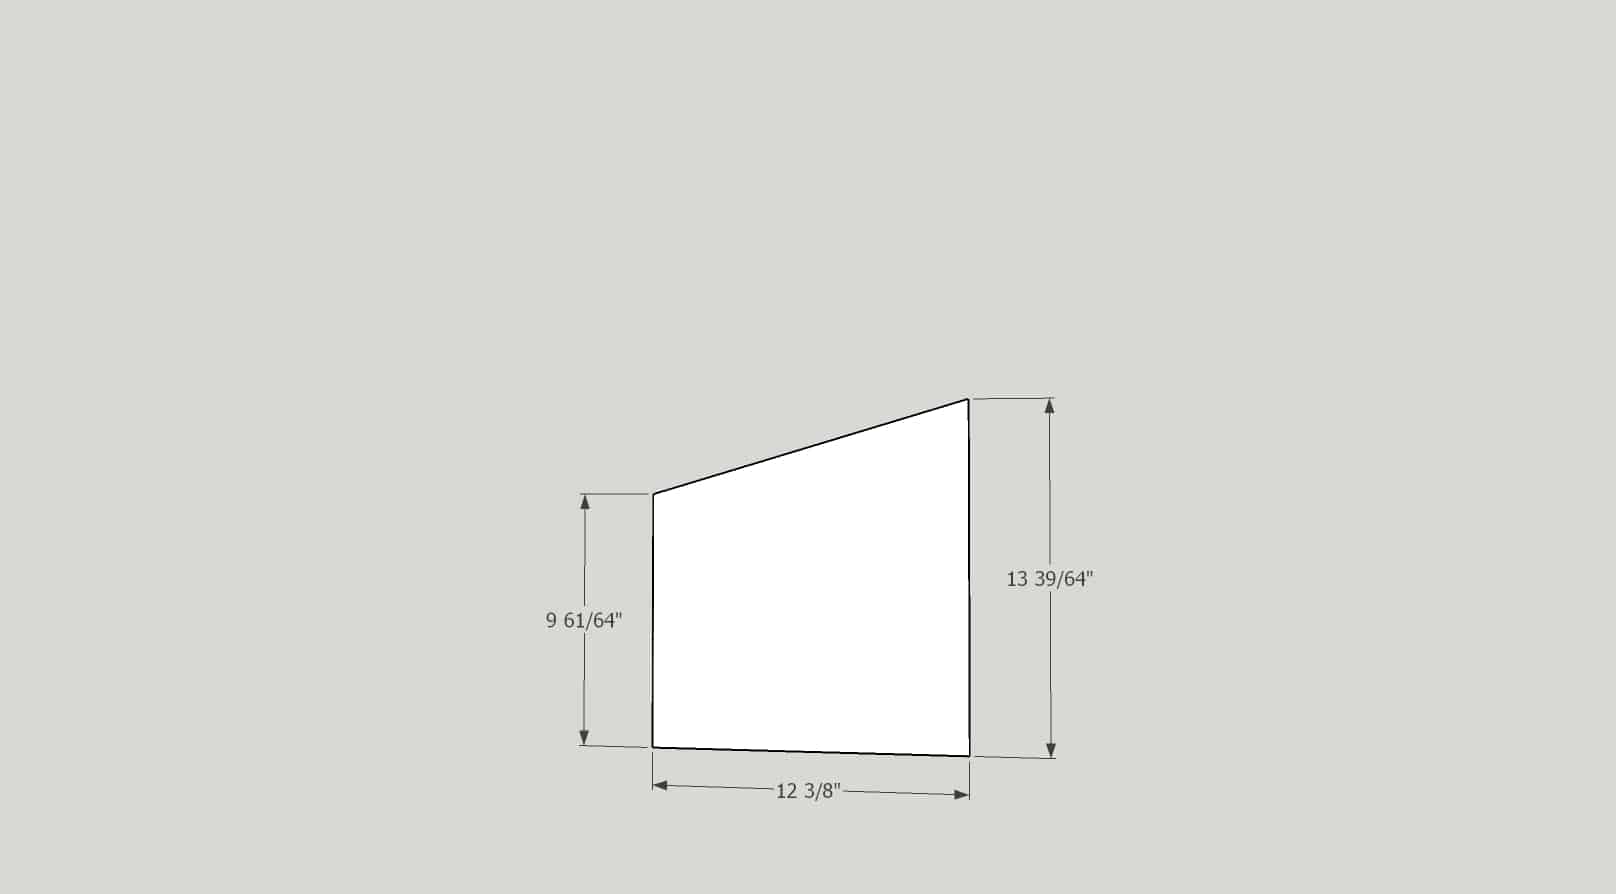
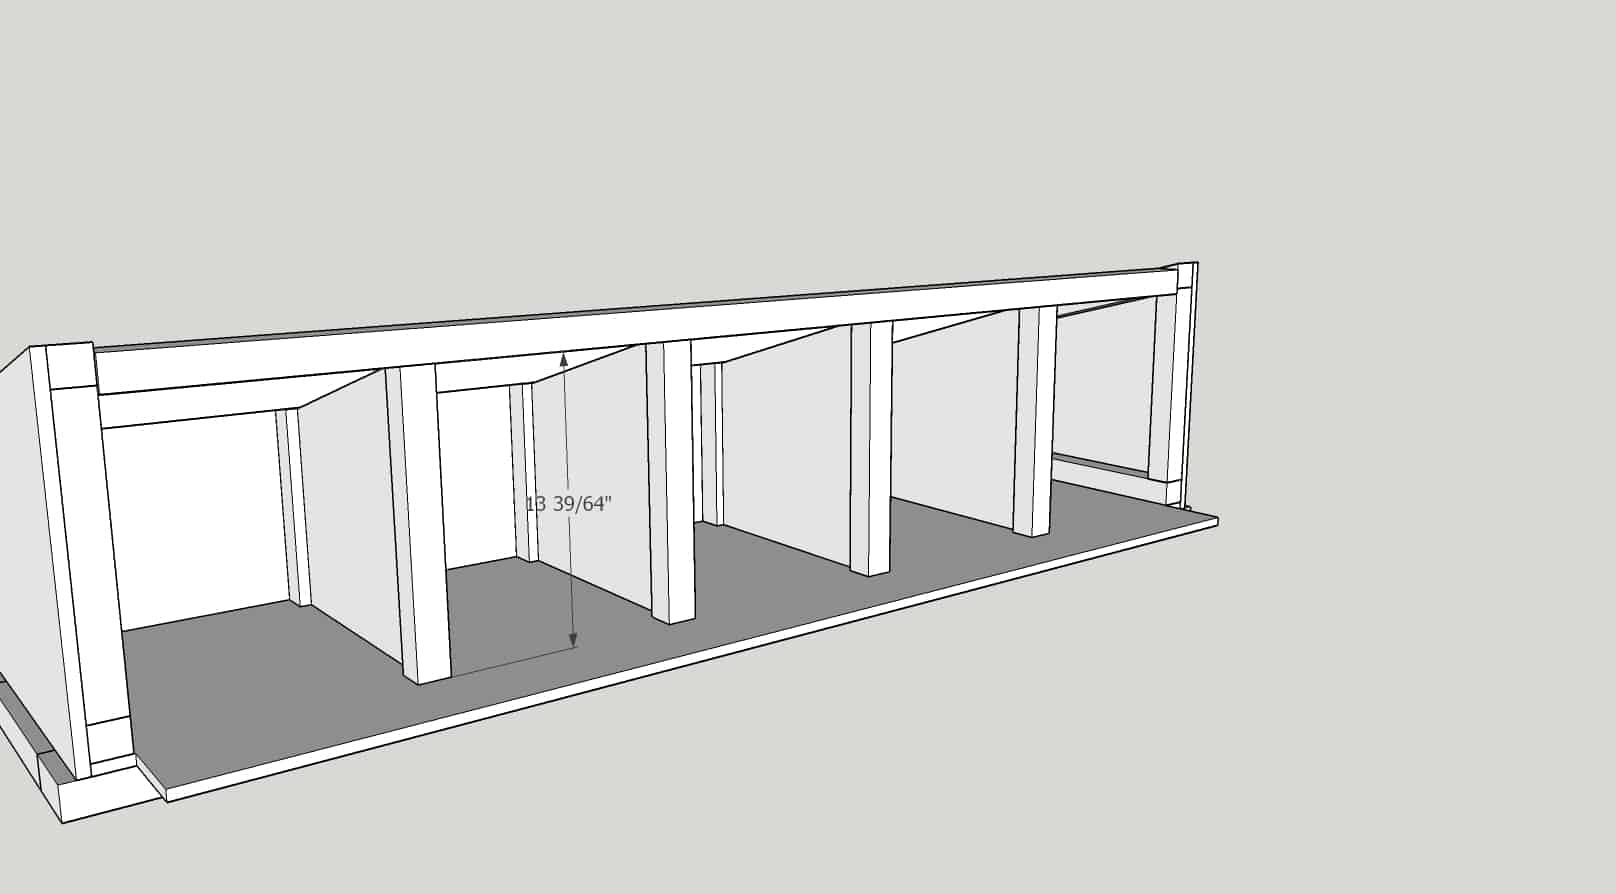
-4 – 1/2″ plywood pieces @ 12 3/8″ x 13 39/64″ (angled down to 9 61/64″ on opposite end) (dividers)
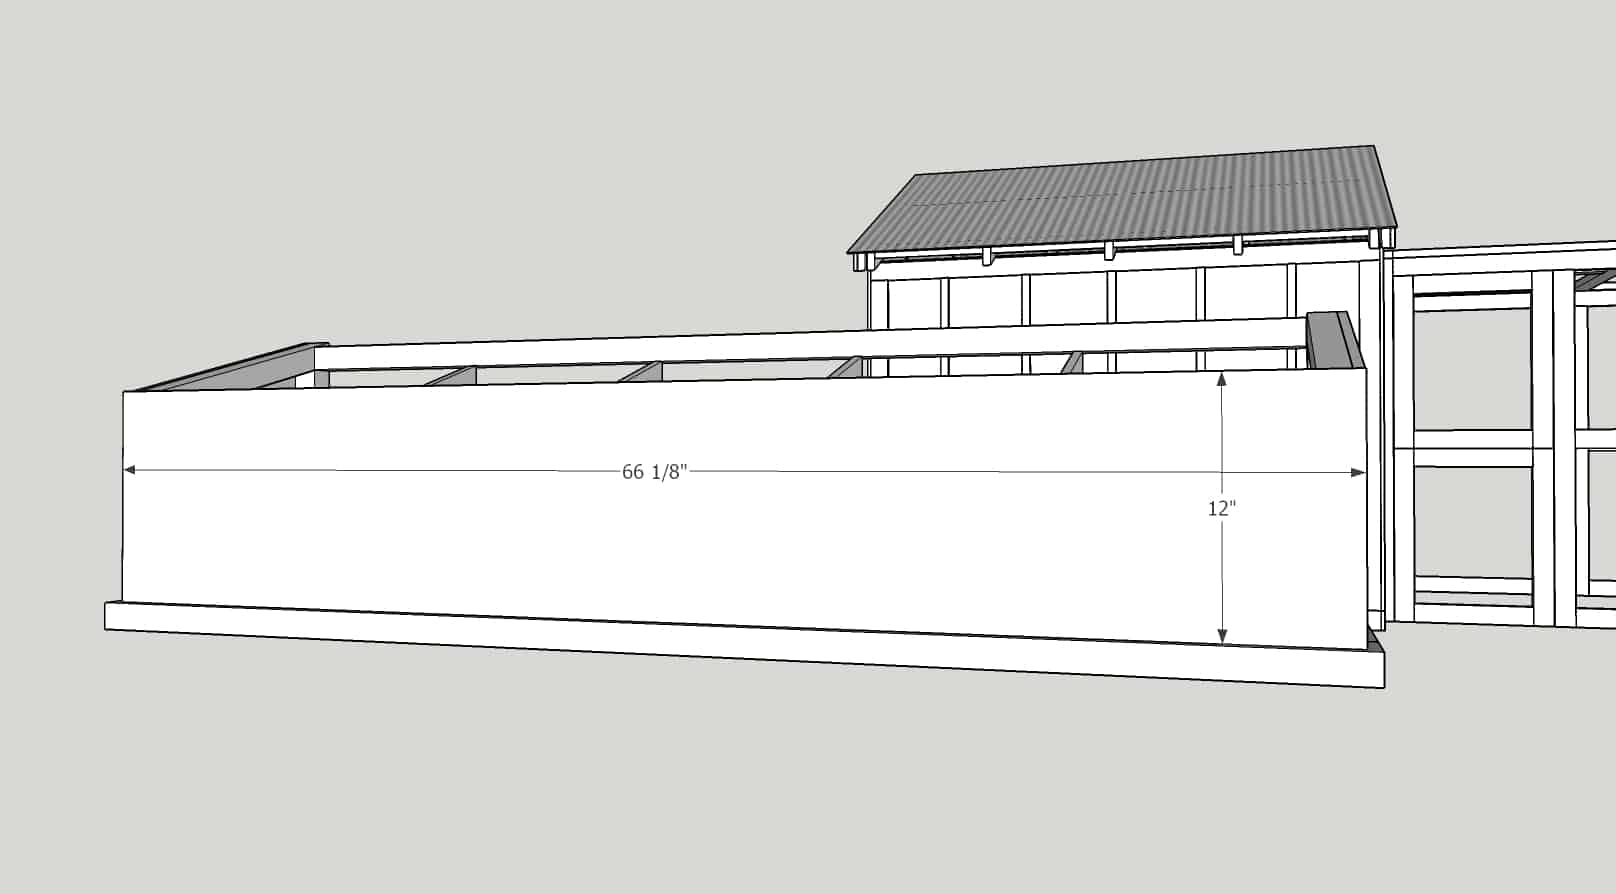
-1 – 1/2″ piece of plywood @ 66 1/8″ x 12″ (back plywood)
-4 – 2×2 @13 39/64″ (front divider frame)
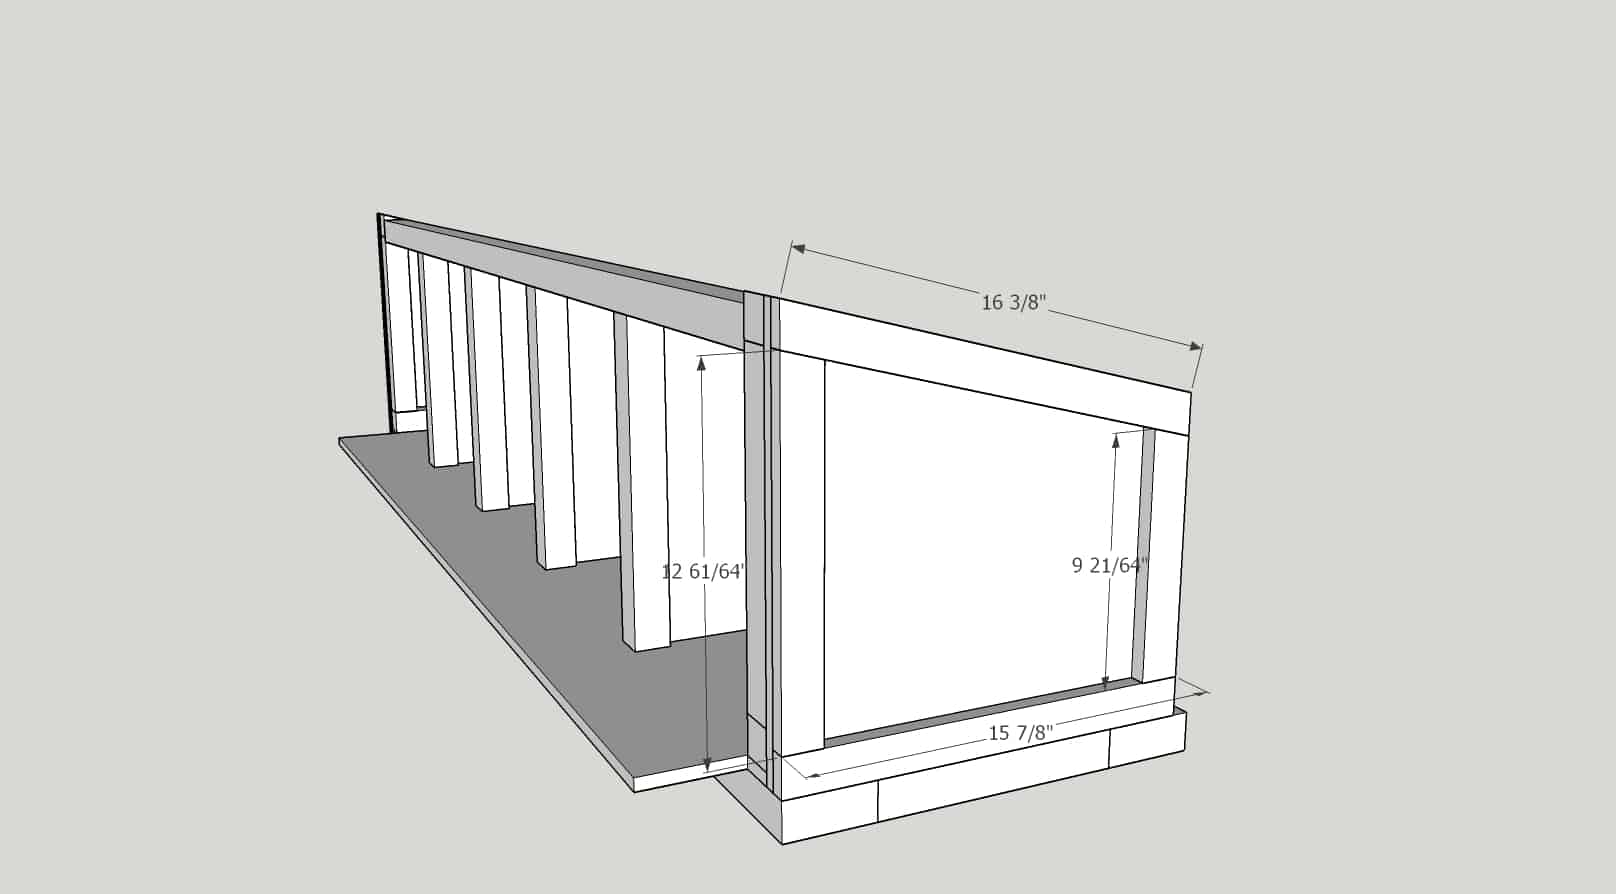
-2 – 1×2 @ 16 3/8″ mitered at 14.6 degrees off square, ends parallel (top side trim)
-2 – 1×2 @ 15 7/8″ (bottom side trim)
-2 – 1×2 @ 12 61/64″ mitered on one end at 14.6 degrees off square (front side trim)
-2 – 1×2 @ 9 21/64″ mitered on one end at 14.6 degrees off square (back side trim)
-2 – 1×2 @ 67 3/8″ (back horizontal trim)
-5 – 1×2 @ 9″ (back vertical trim)
Building the DIY Nesting Boxes for Chicken Coop
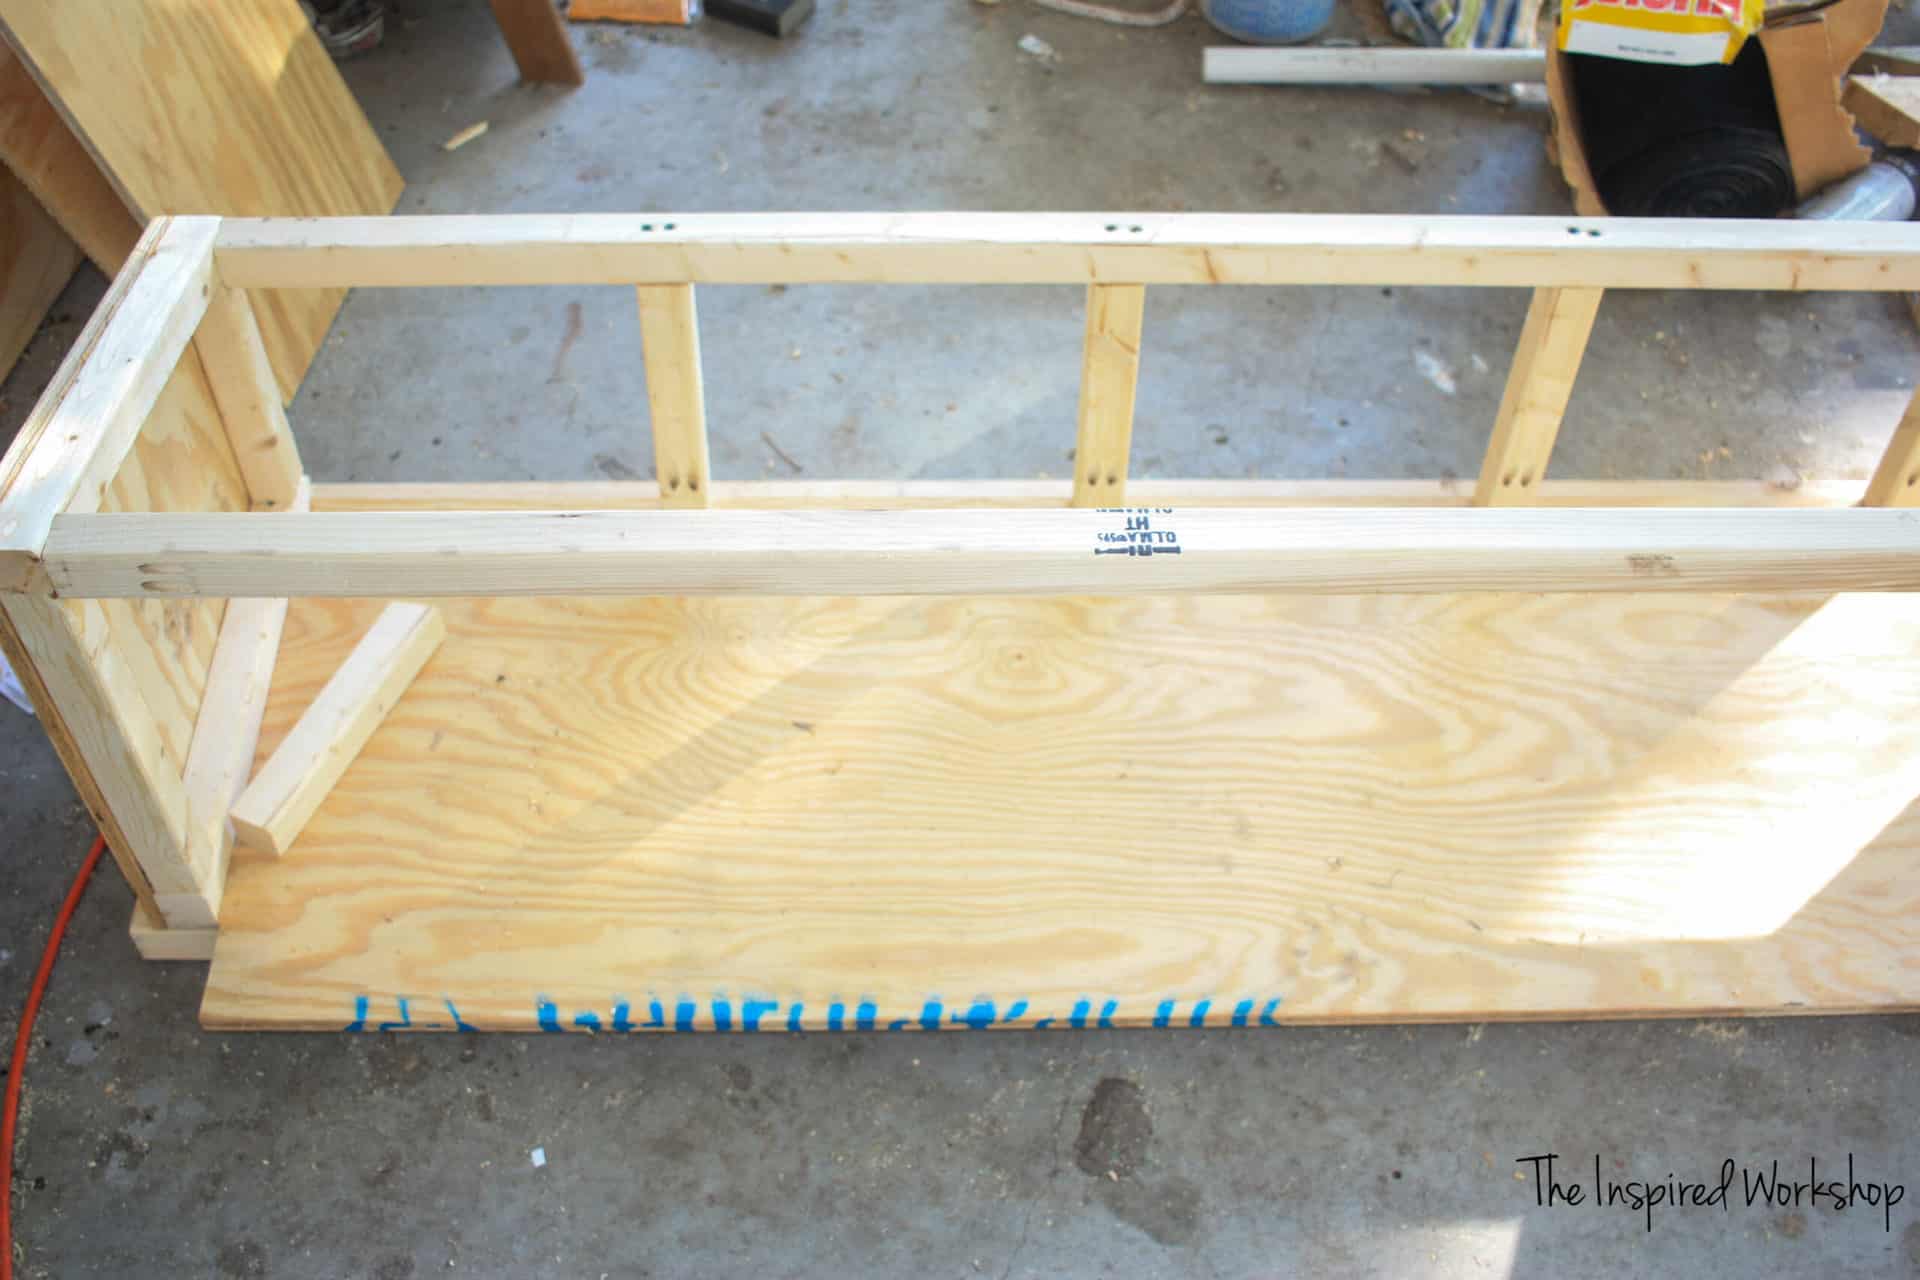
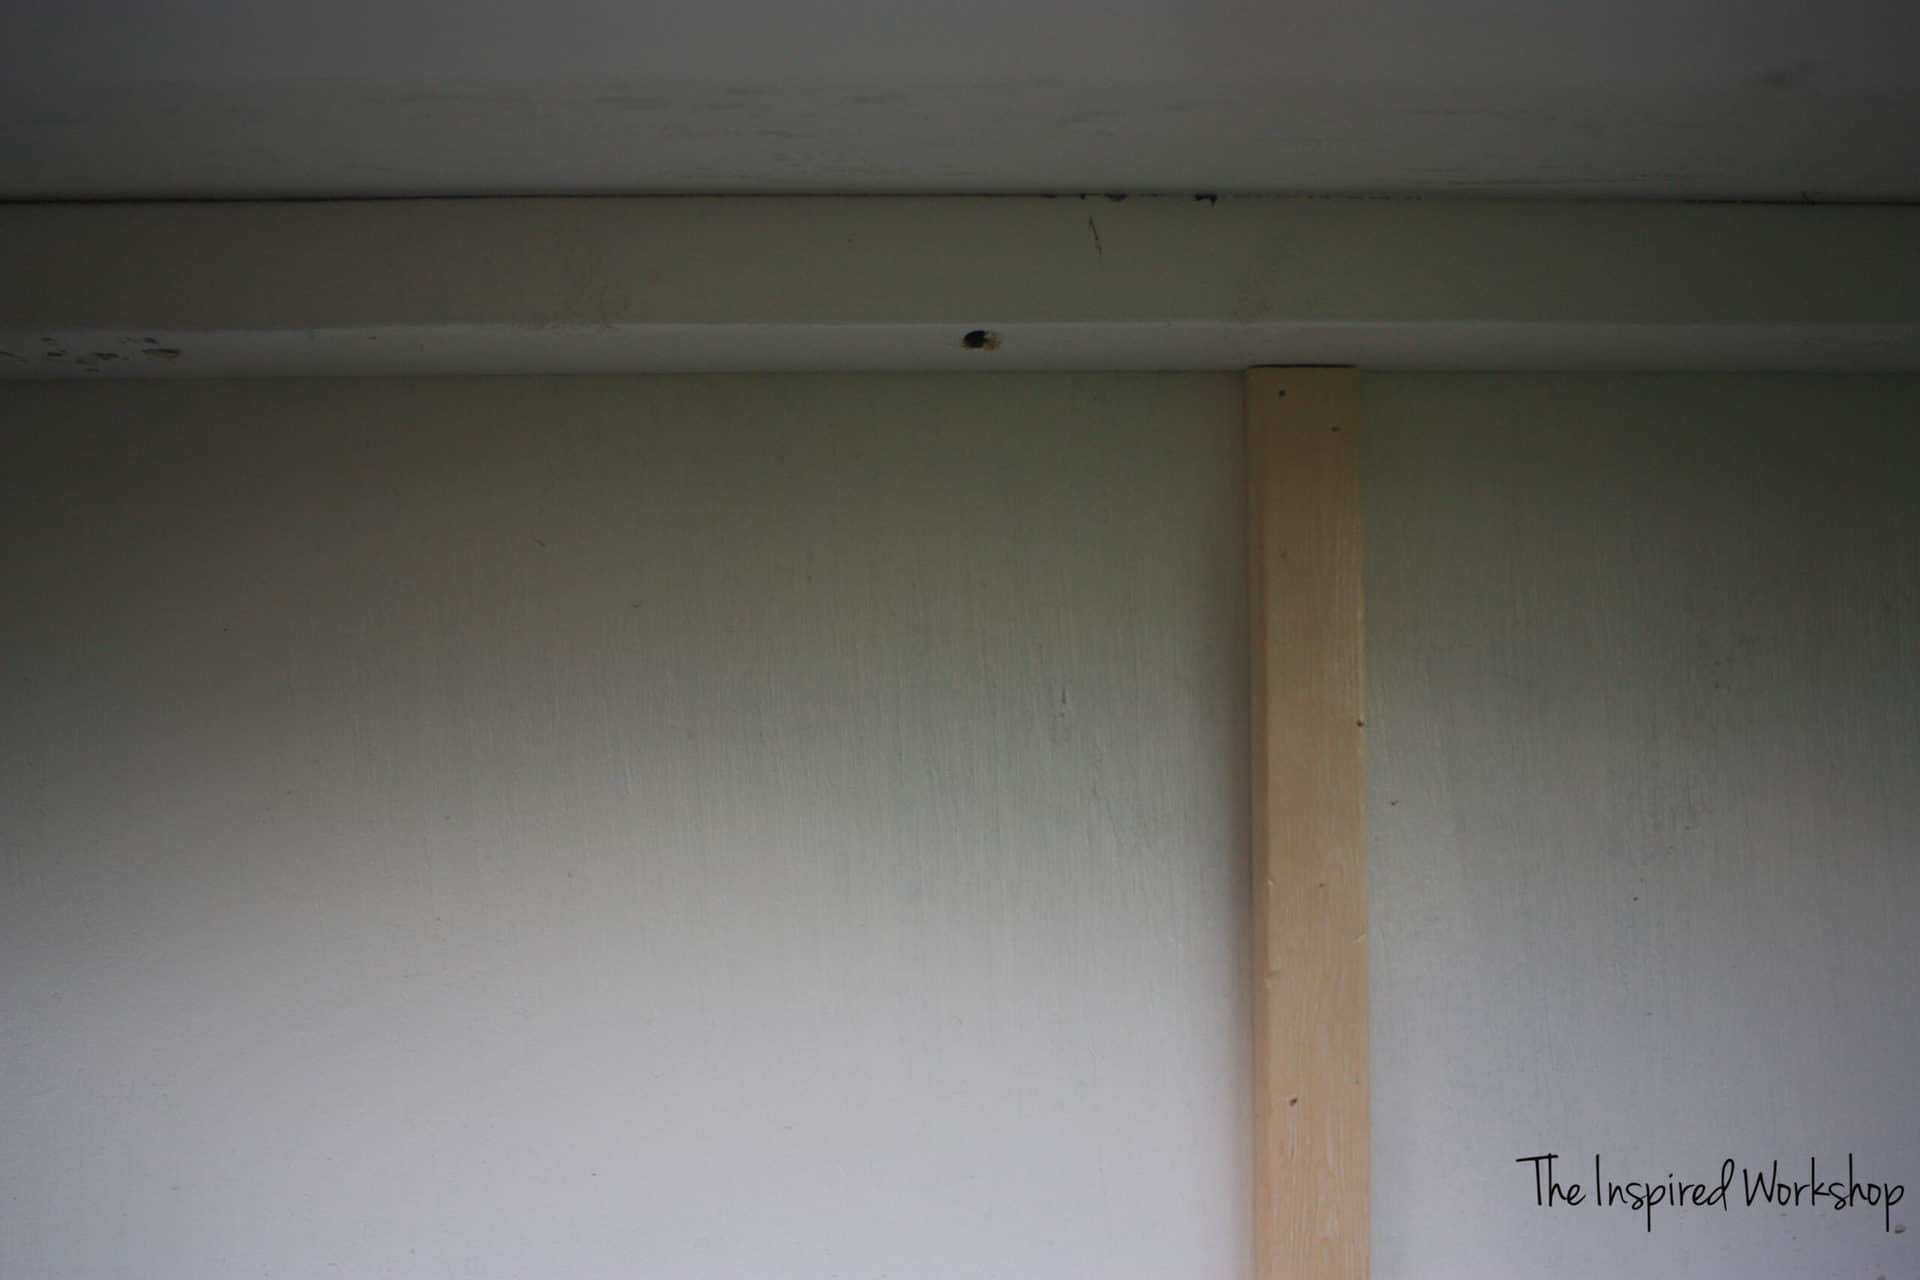
To get started building the nesting boxes, you are going to want to build a 2×4 frame to support the nesting box since it is suspended without legs! You will drill pocket holes in the small boards at 1 1/2″ deep, and you will use 2 1/2″ screws to attach.
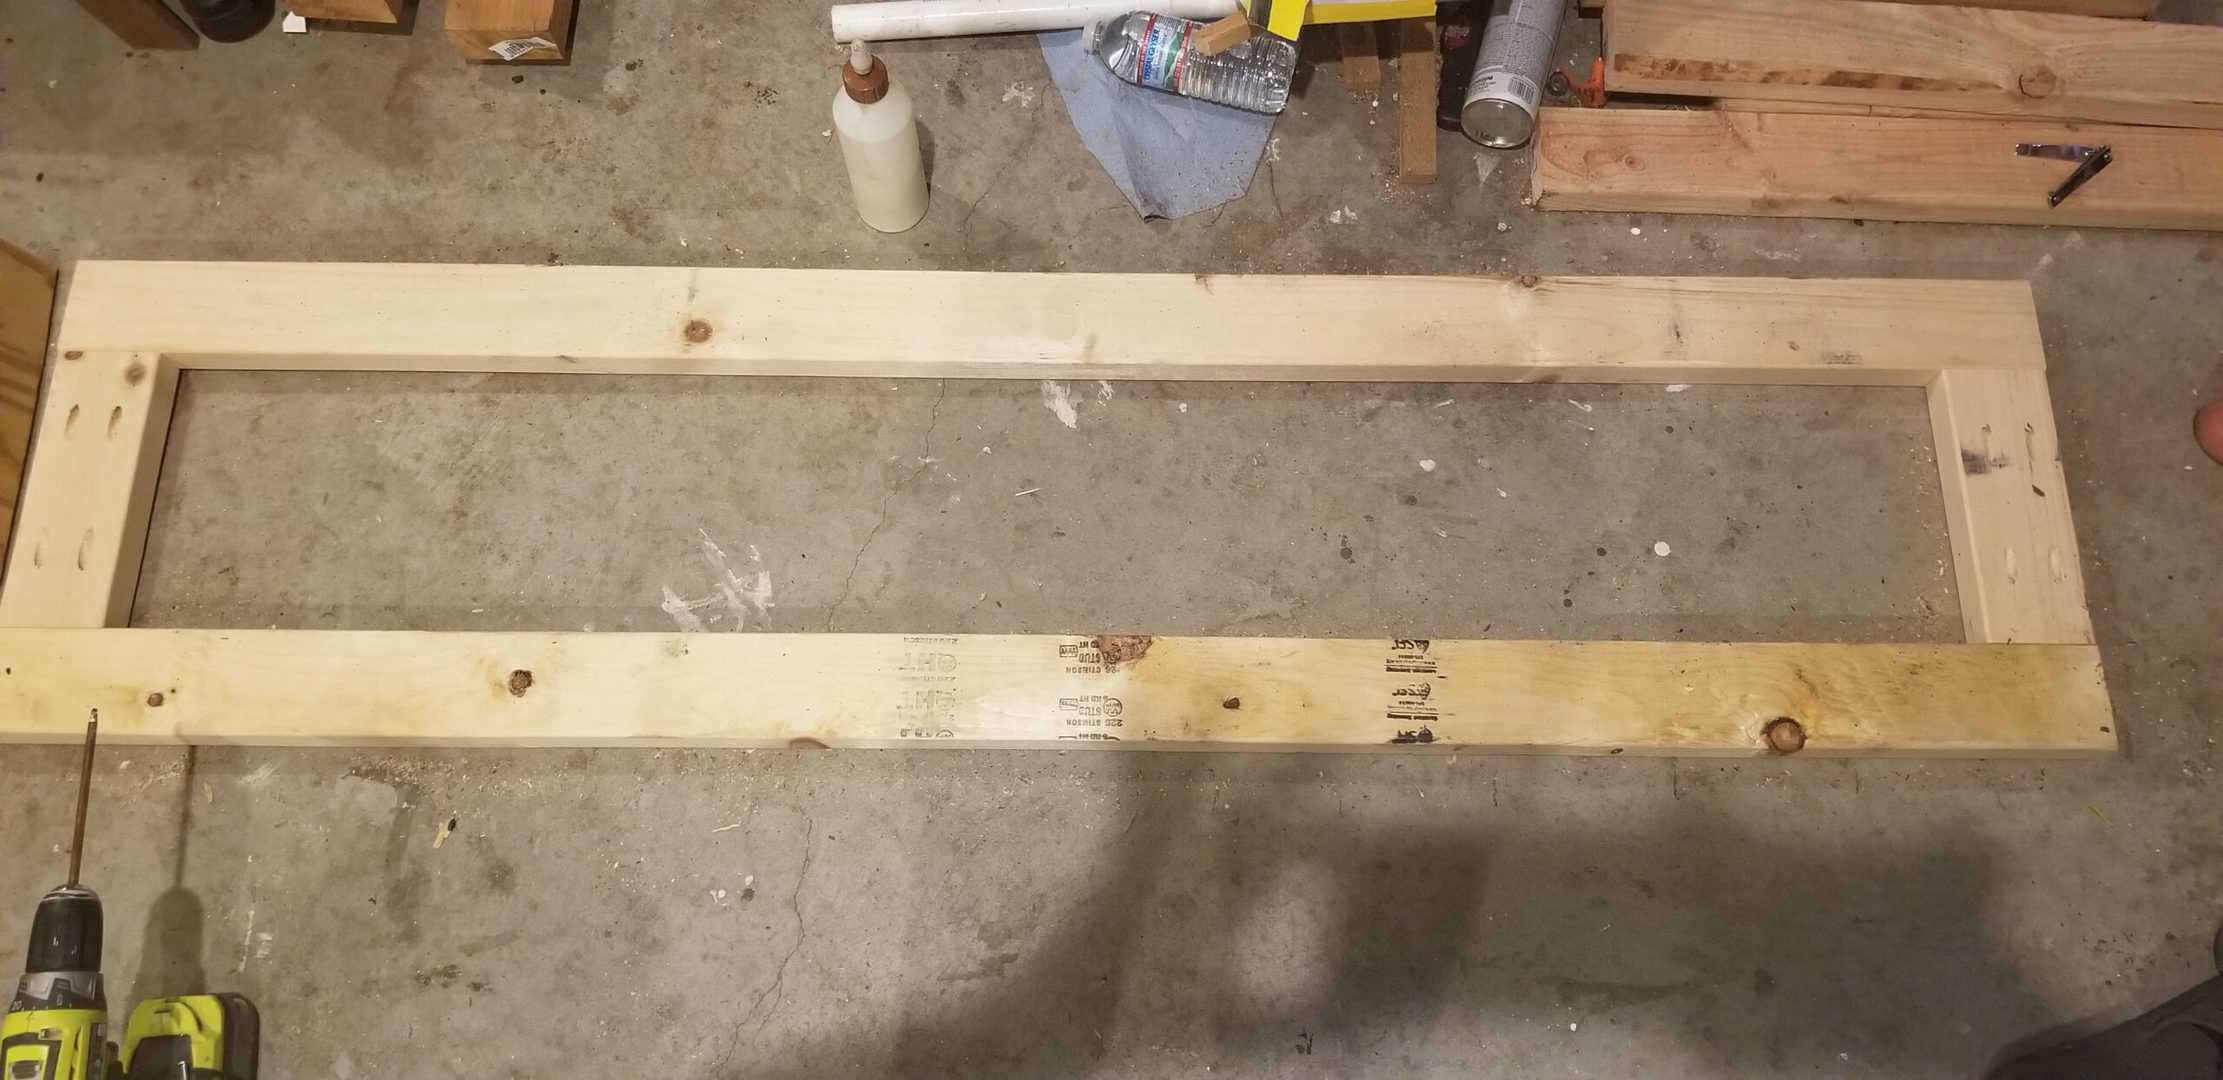
Now, the one thing that I did after taking this picture, is I drilled pocket holes (at 1 1/2″) along the front (I am calling the board that is going to be closest to the coop wall the ‘front’). When we attach it to the coop later, we will use the pocket holes as one of three places we will attach it! Here’s the best I could do since I didn’t take actual photos of it! The holes would be drilled in the opposite direction of the arrows, though the placement is correct! Hope that makes sense!😬
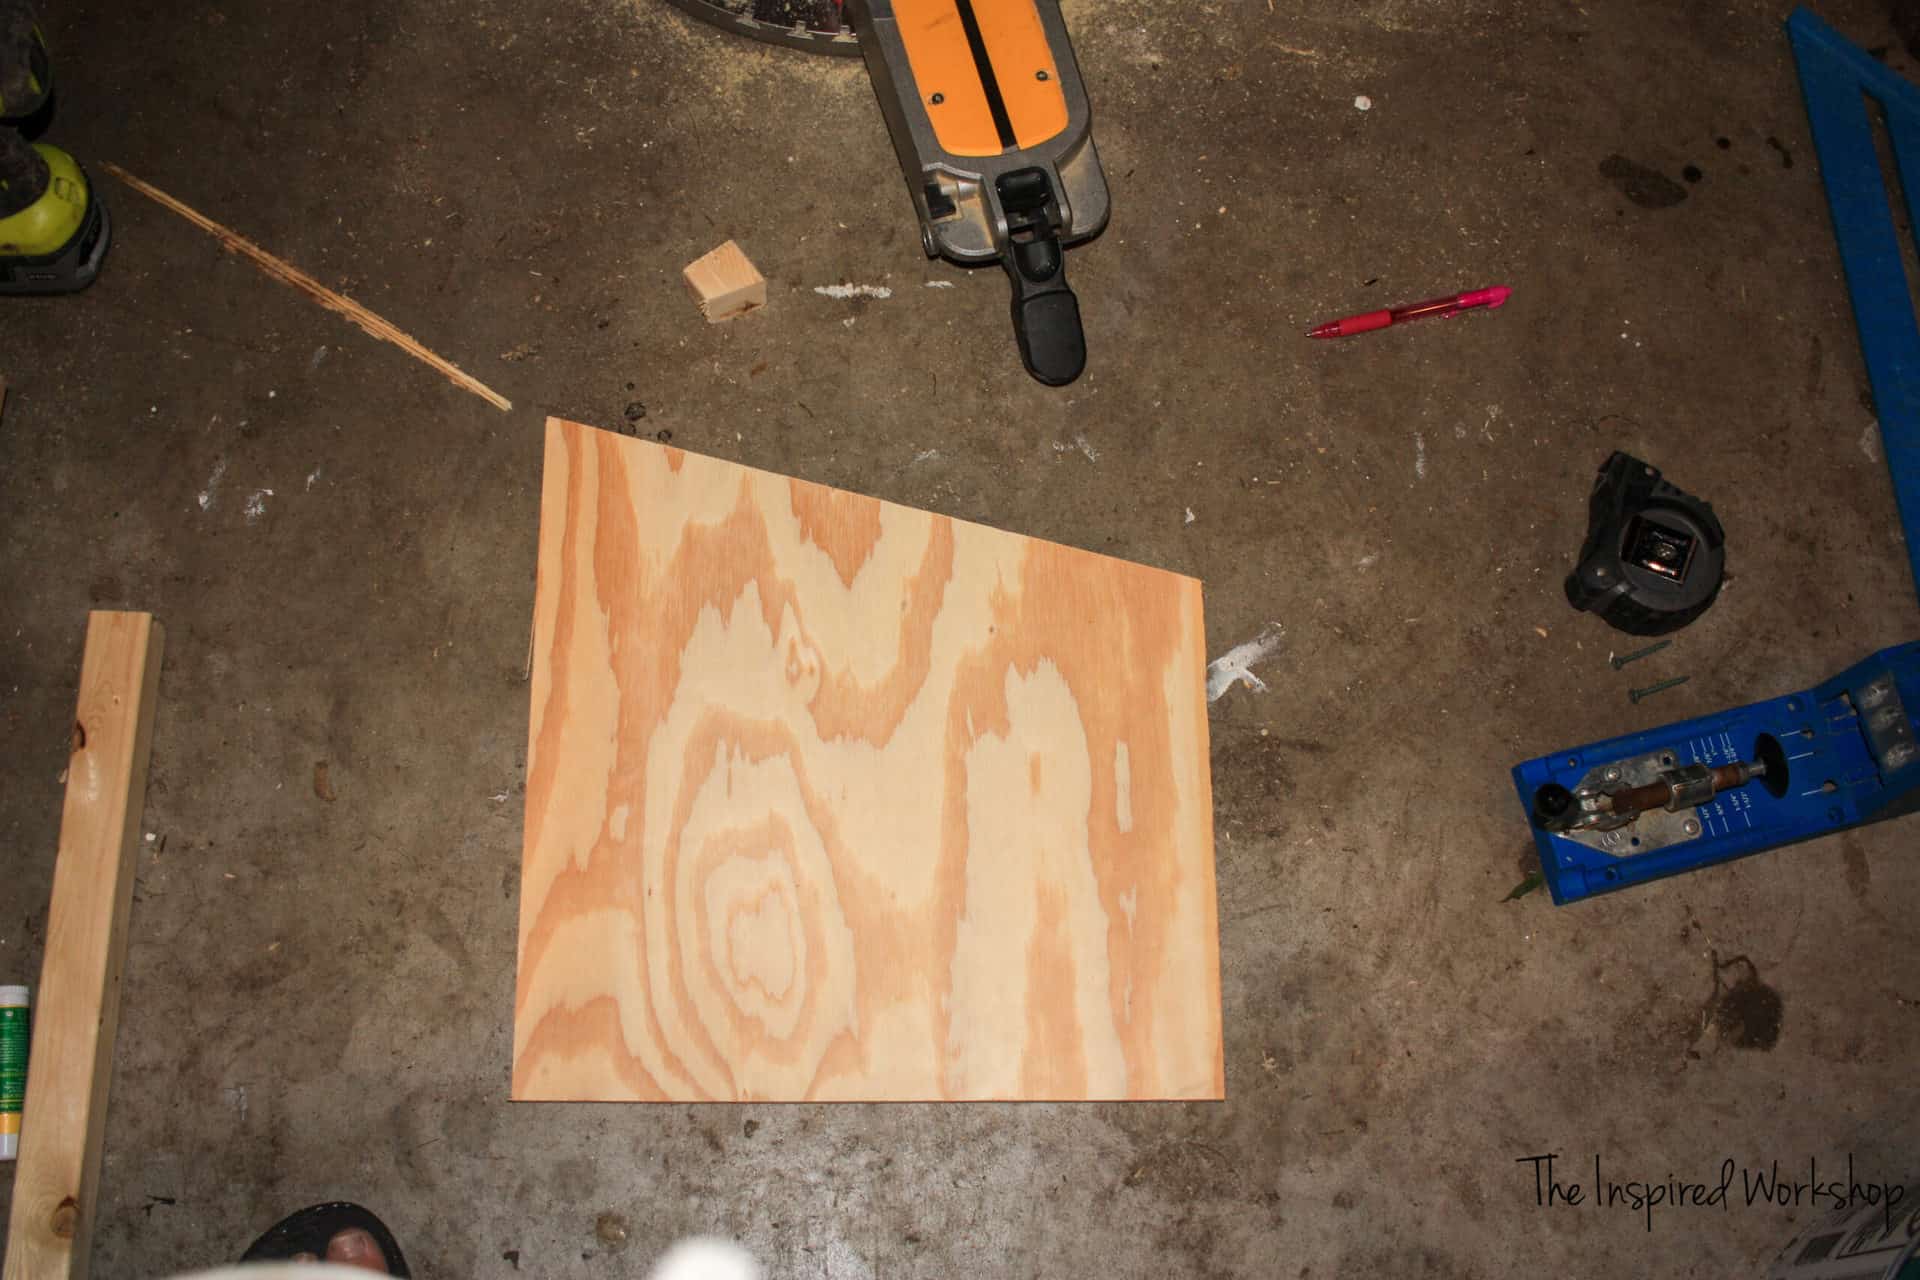
Cut the 1/2″ plywood piece with these cutouts! The lip to the front is 4″, not sure how I missed labeling that one.
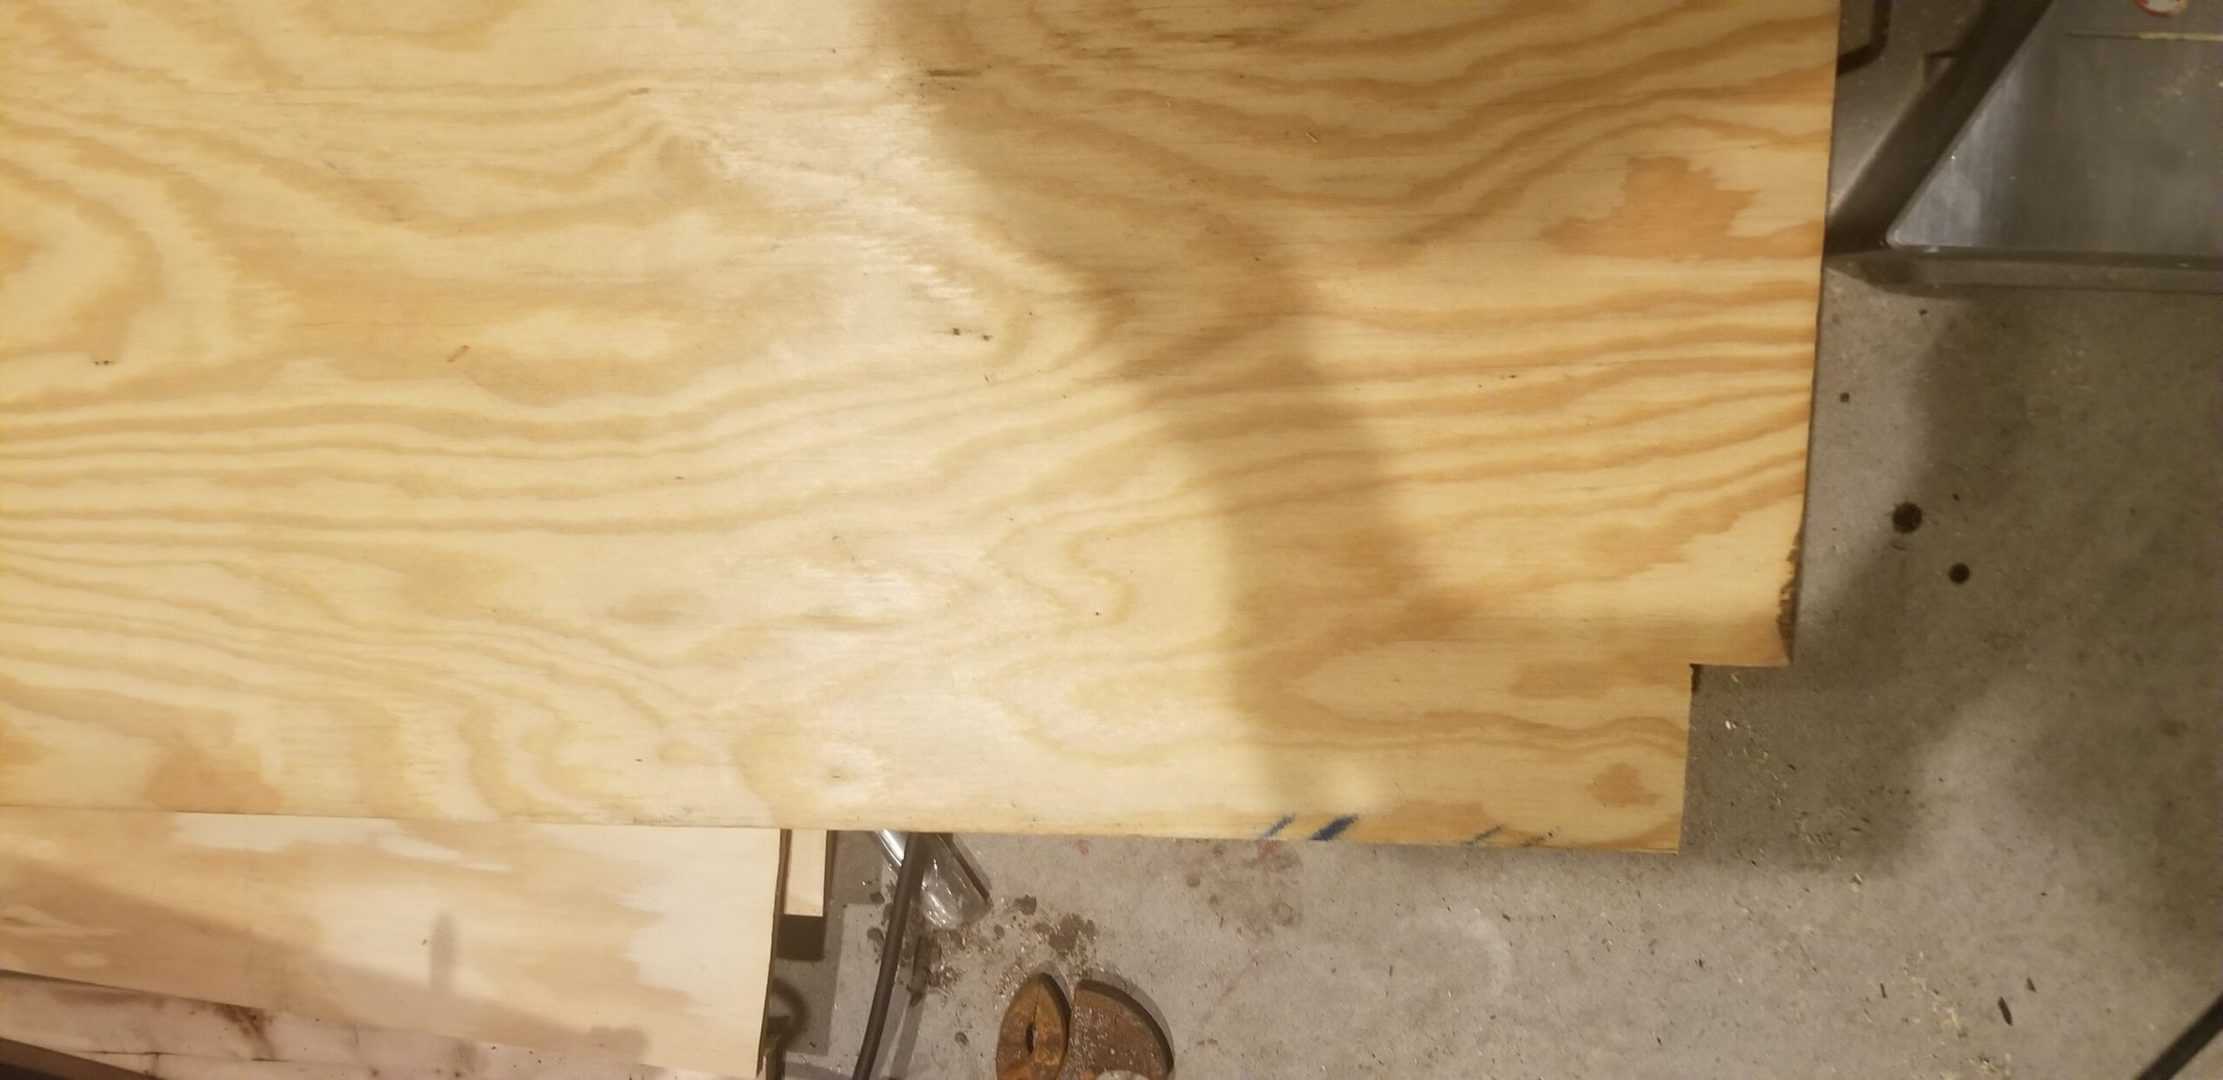
Make sure and leave 1 1/8″ on each side and the back. This leaves room for the 1/2″ plywood and 5/8″ furring strip trim…if you use regular lumber, you will want to cut the plywood a hair smaller to allow for the additional width of a 1×2 (3/4″).
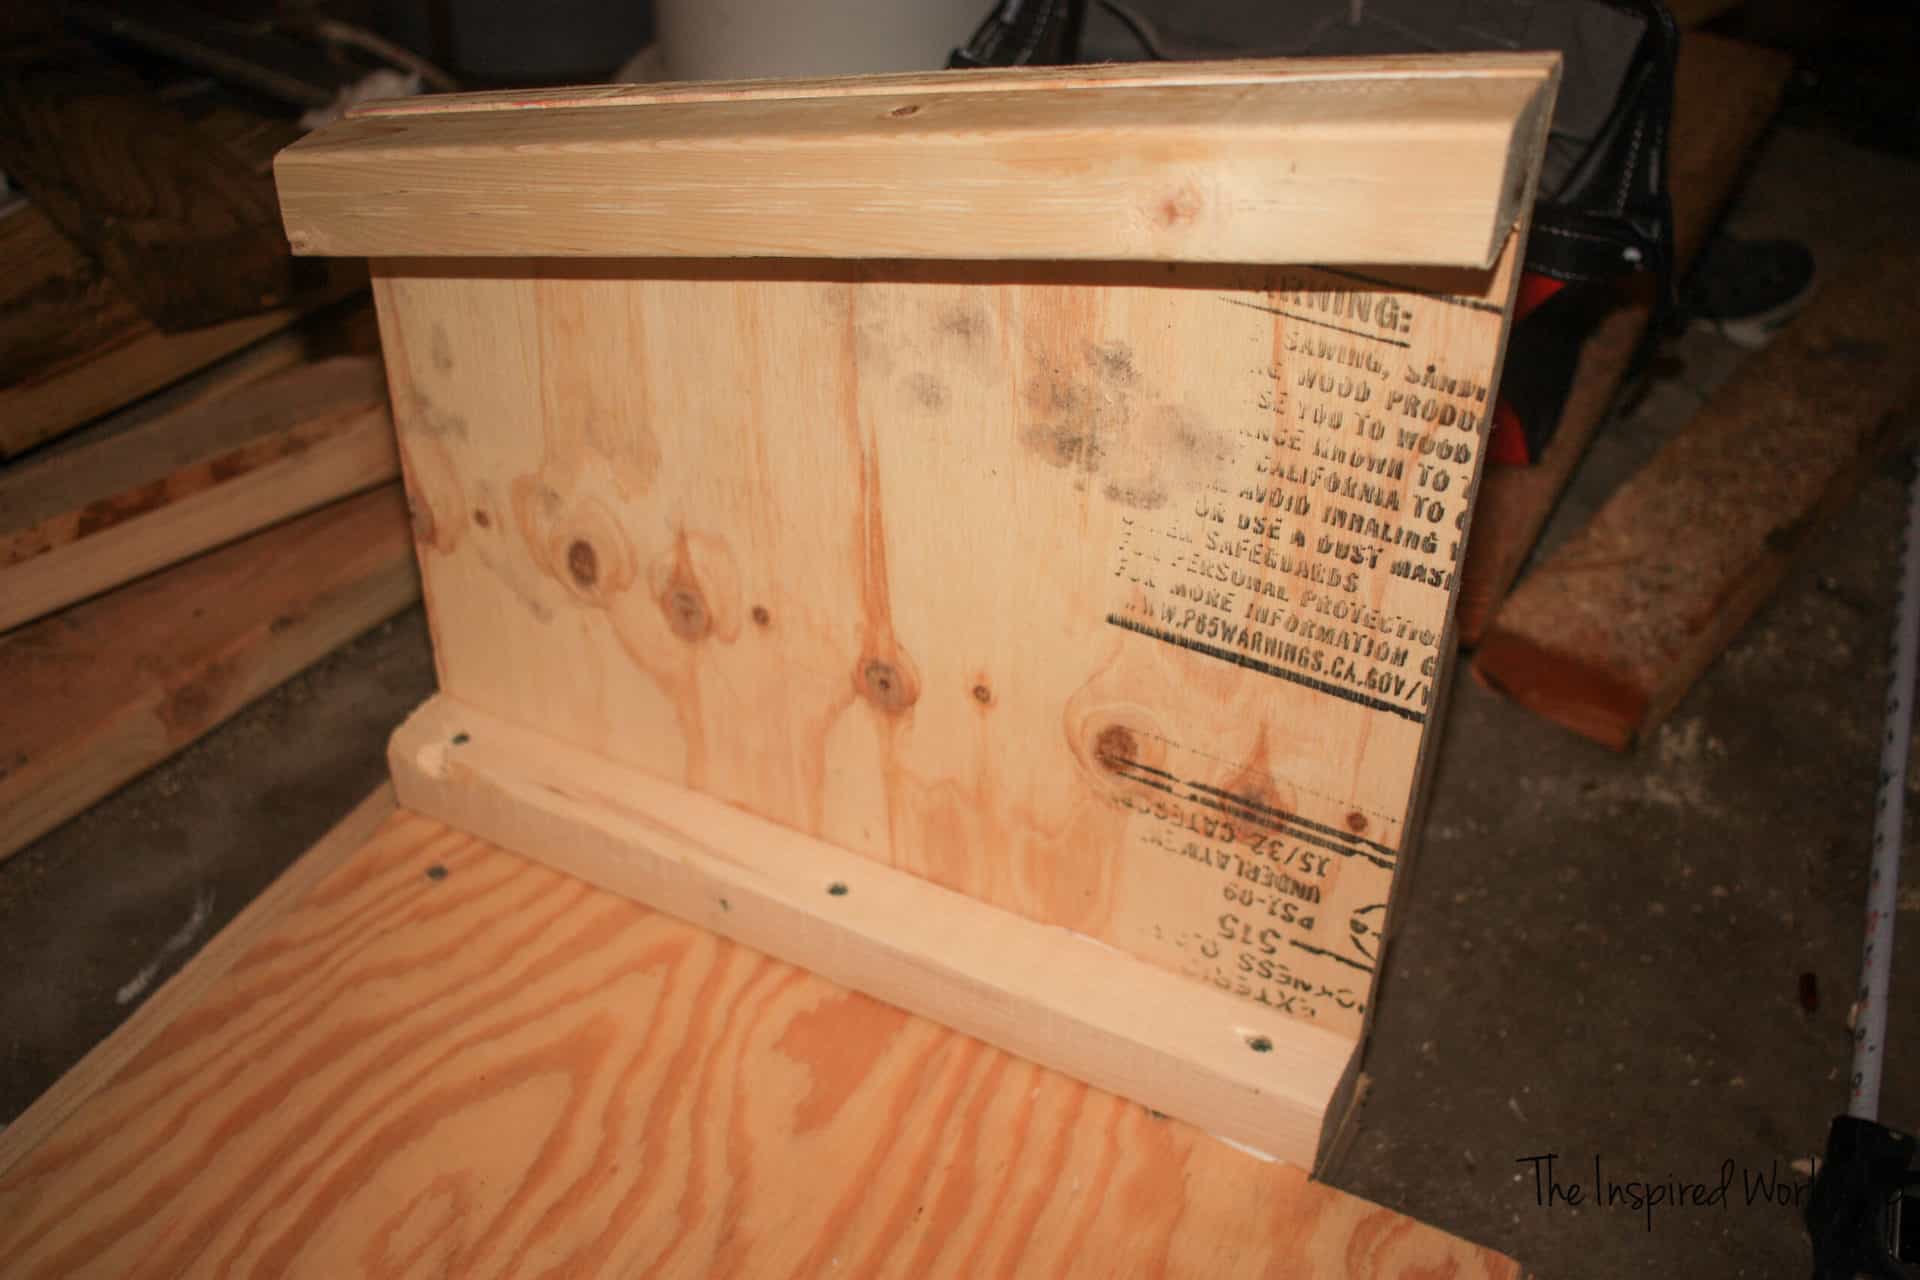
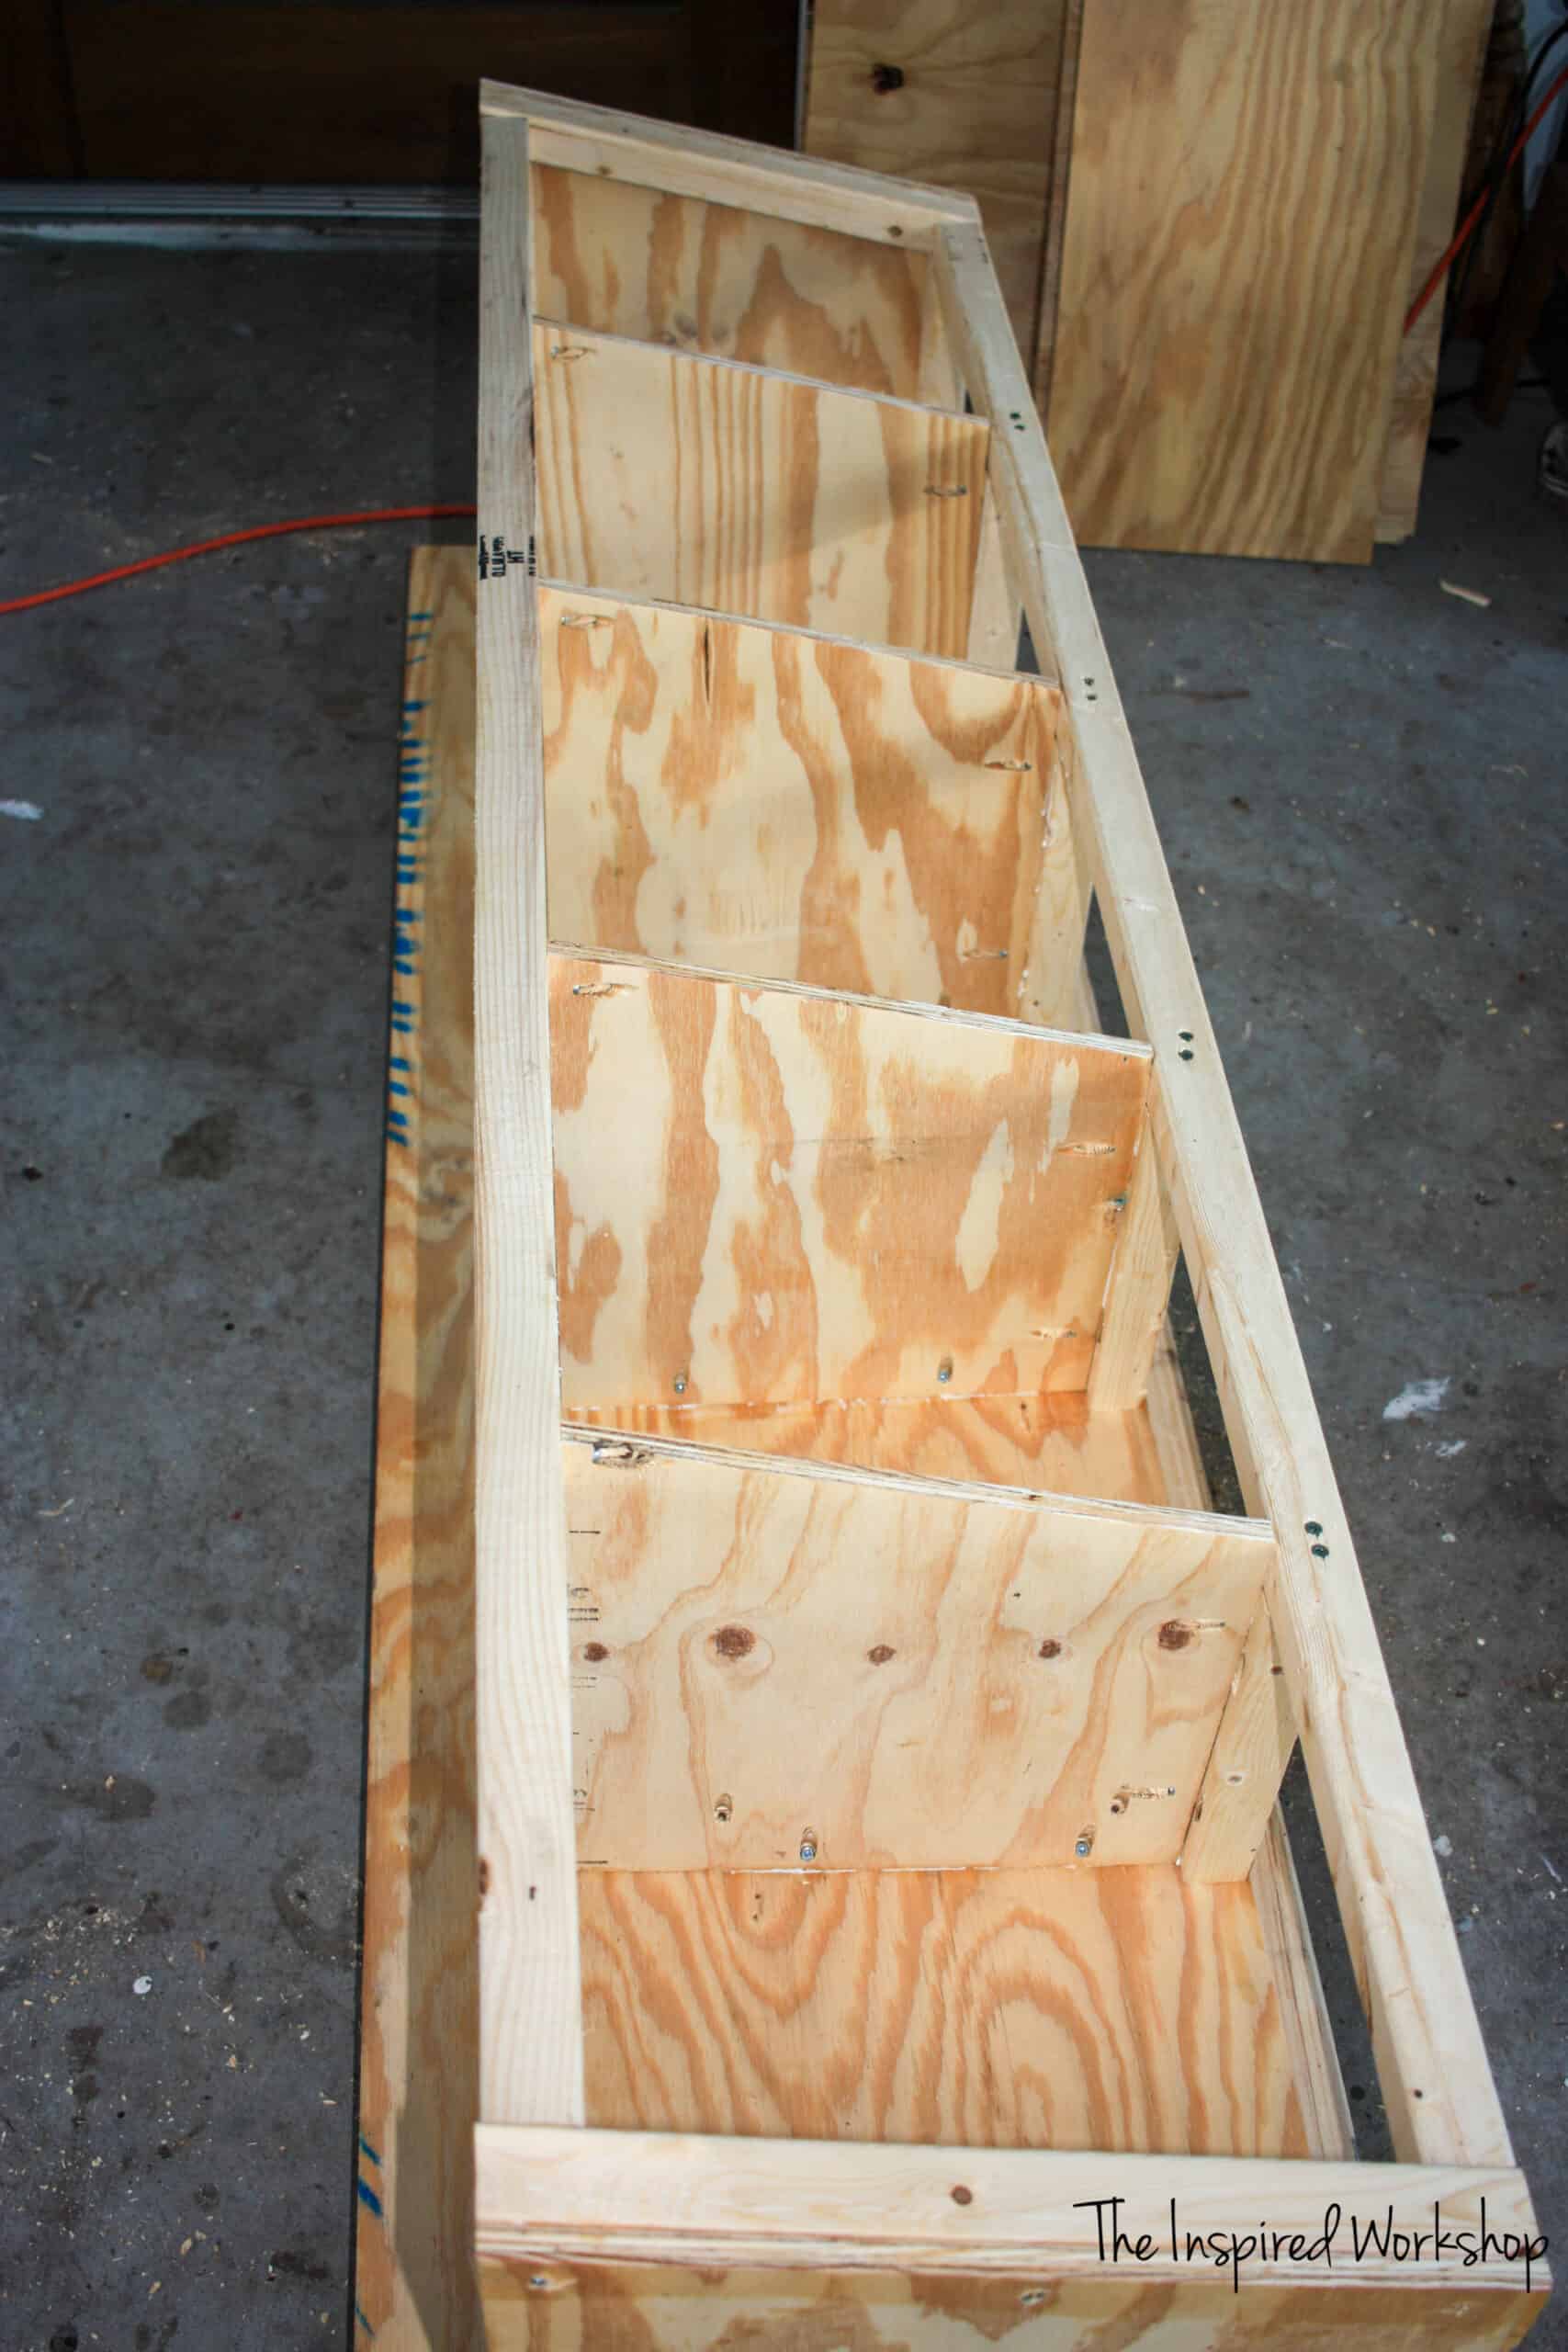
Next, cut the plywood for the sides. This is the plywood that is cut at 15 3/8″ x 16″ on the one side, angling down to 12″ on the other. You will cut 2 of these!

In order to attach this to the frame, you will need to attach the inner sidewall frame to give you something to easily screw into!
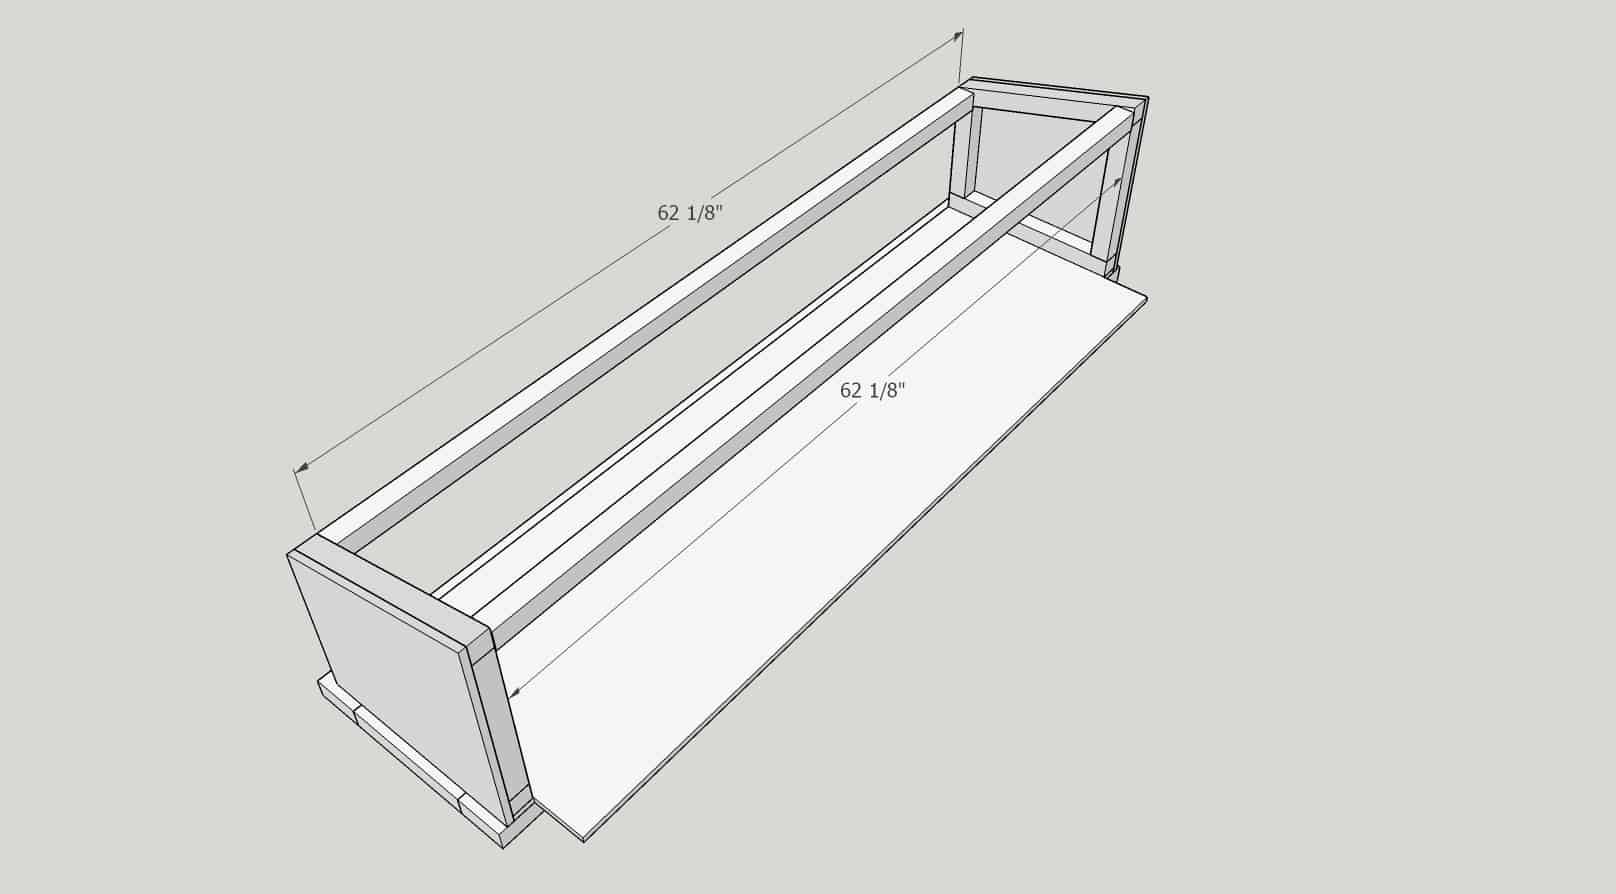
Add the front and back frame boards (2×2 @ 62 1/8″). They will be pocket holed on the ends, holes drilled at 1 1/2″ deep, and using 2 1/2″ screws to attach! Make sure to use wood glue!
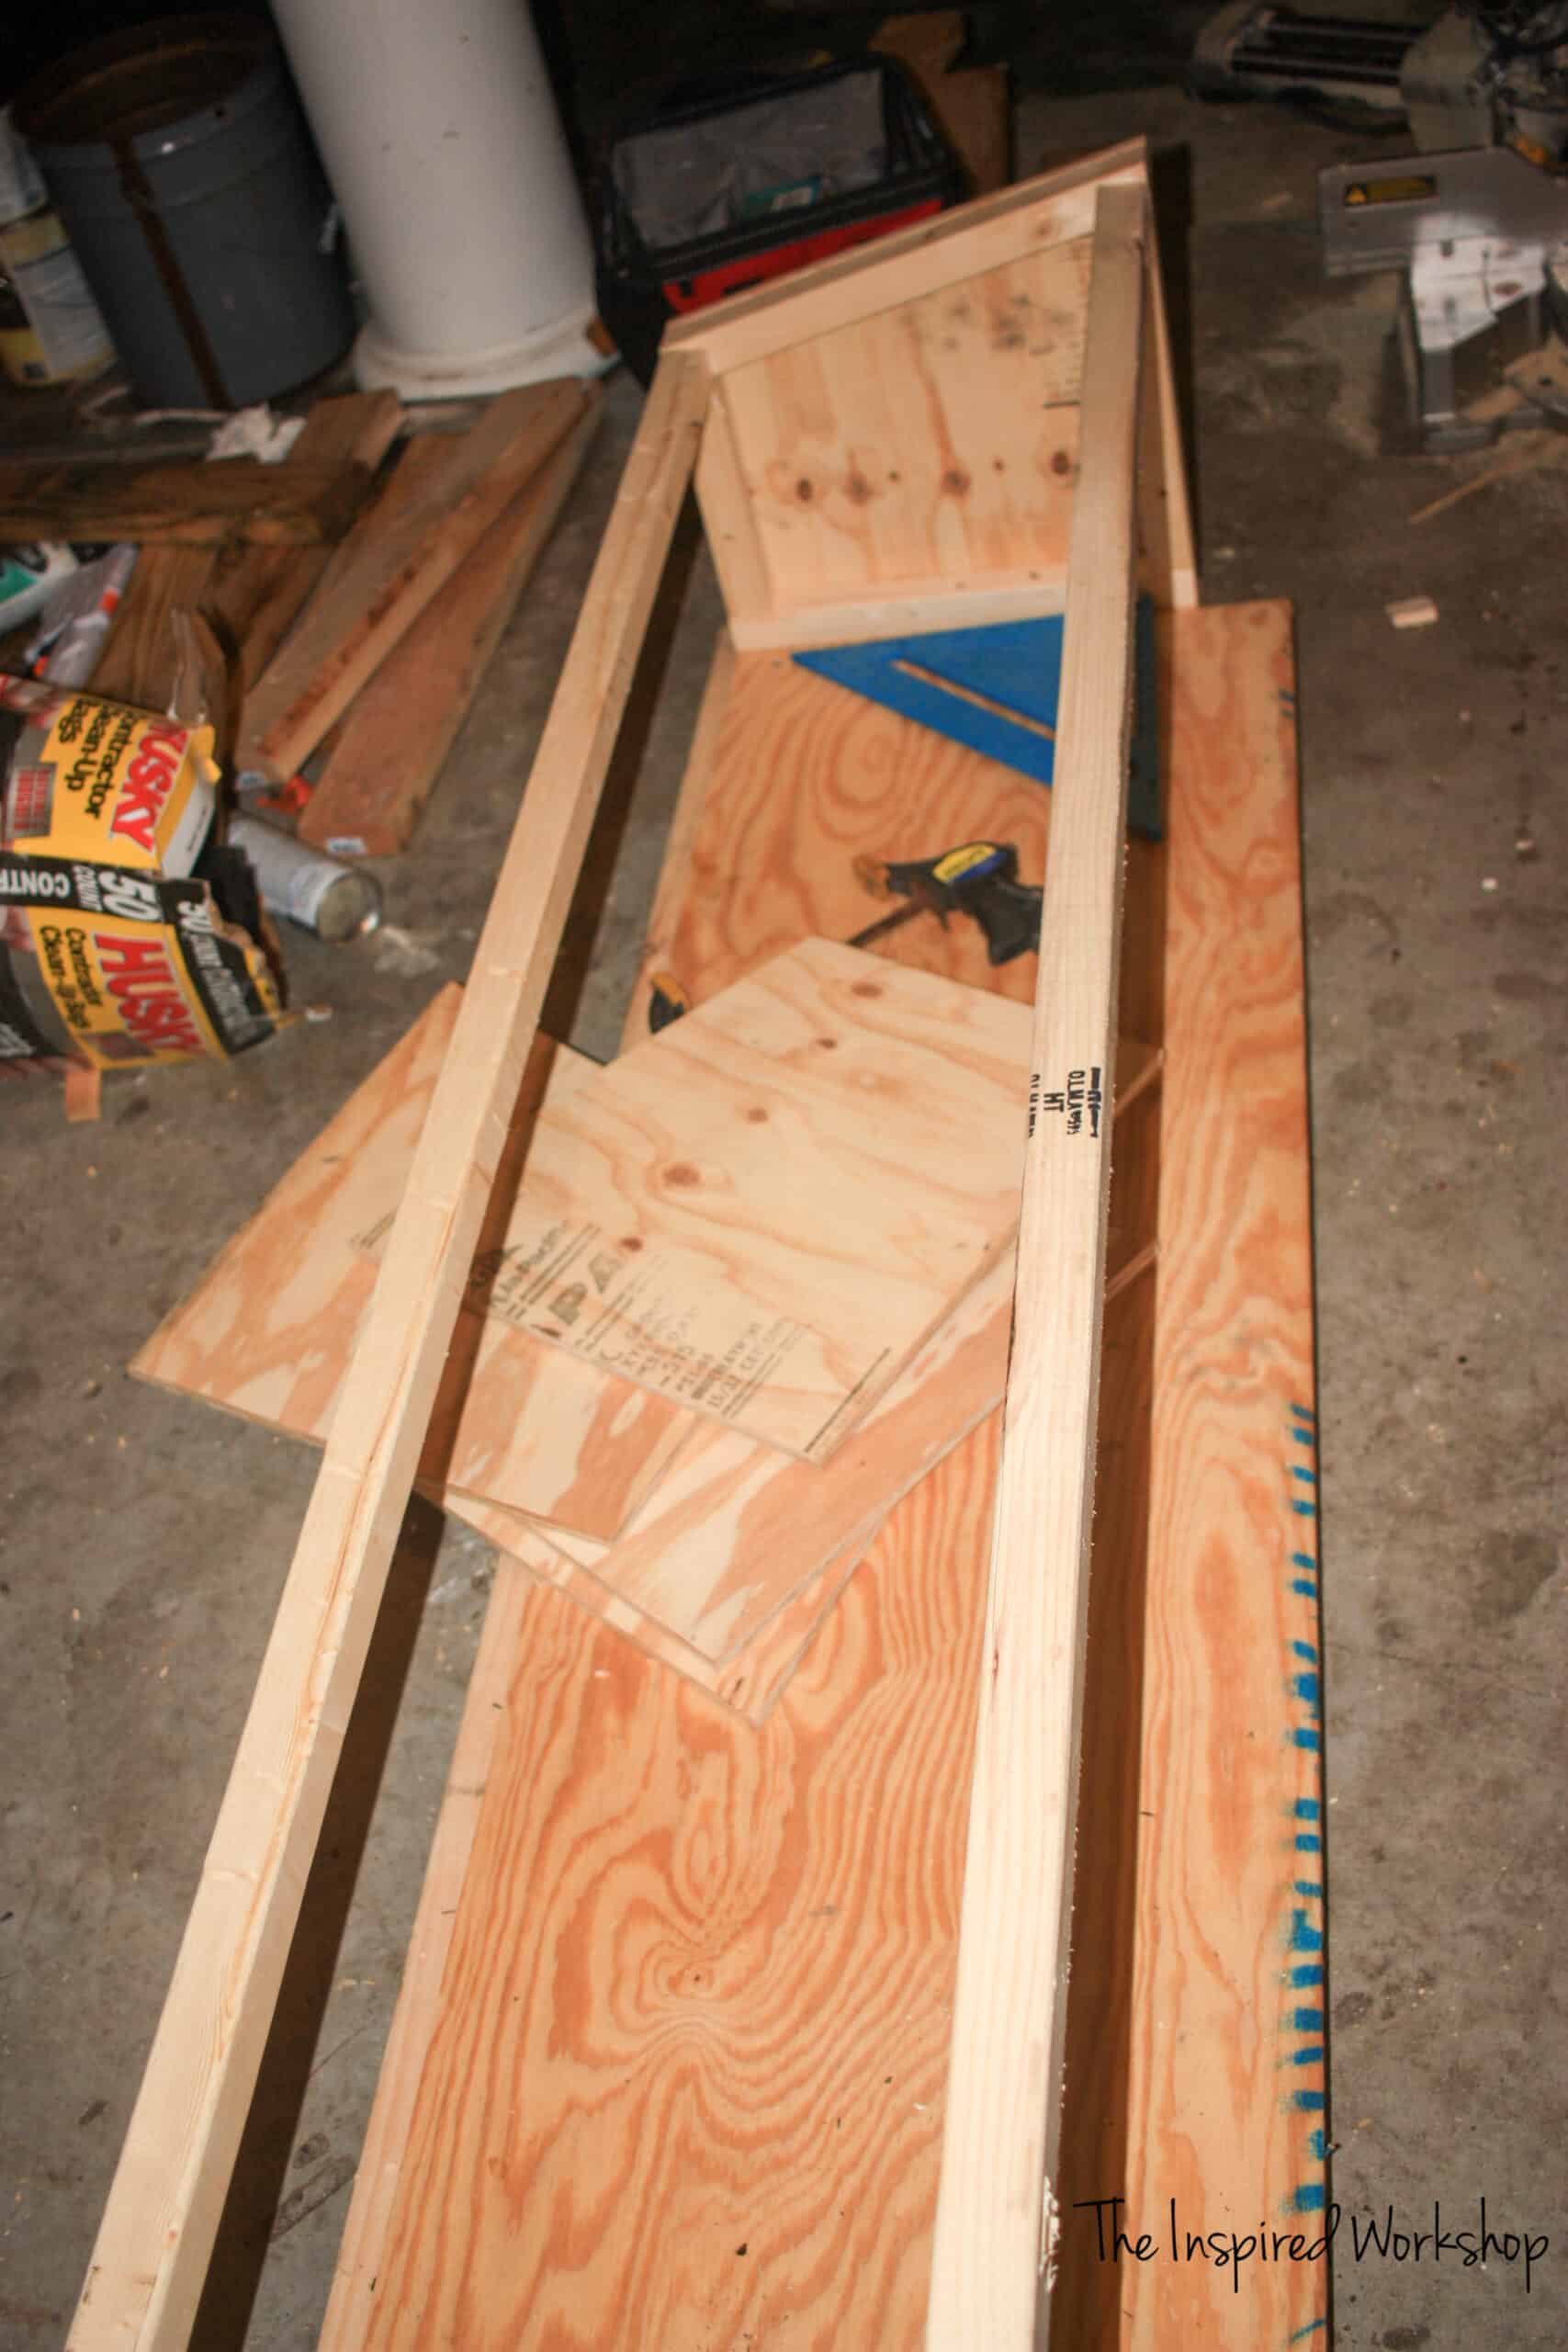
It’s not really clear in the above photo, but you want to make sure the 2×2 in the ‘front’ will sit flush against the coop, so don’t put them flush with the top, as that will tilt them. Slide it down a little from the top to attach. You can see it a little better below.
Add your back divider frame boards. They will be pocket holed on the bottom, but you can’t get your drill in there to use pocket holes on top…ask me how I know?! 🙈 You will need to screw through the top of the 2×2 with 3 1/8″ screws. Use wood glue!

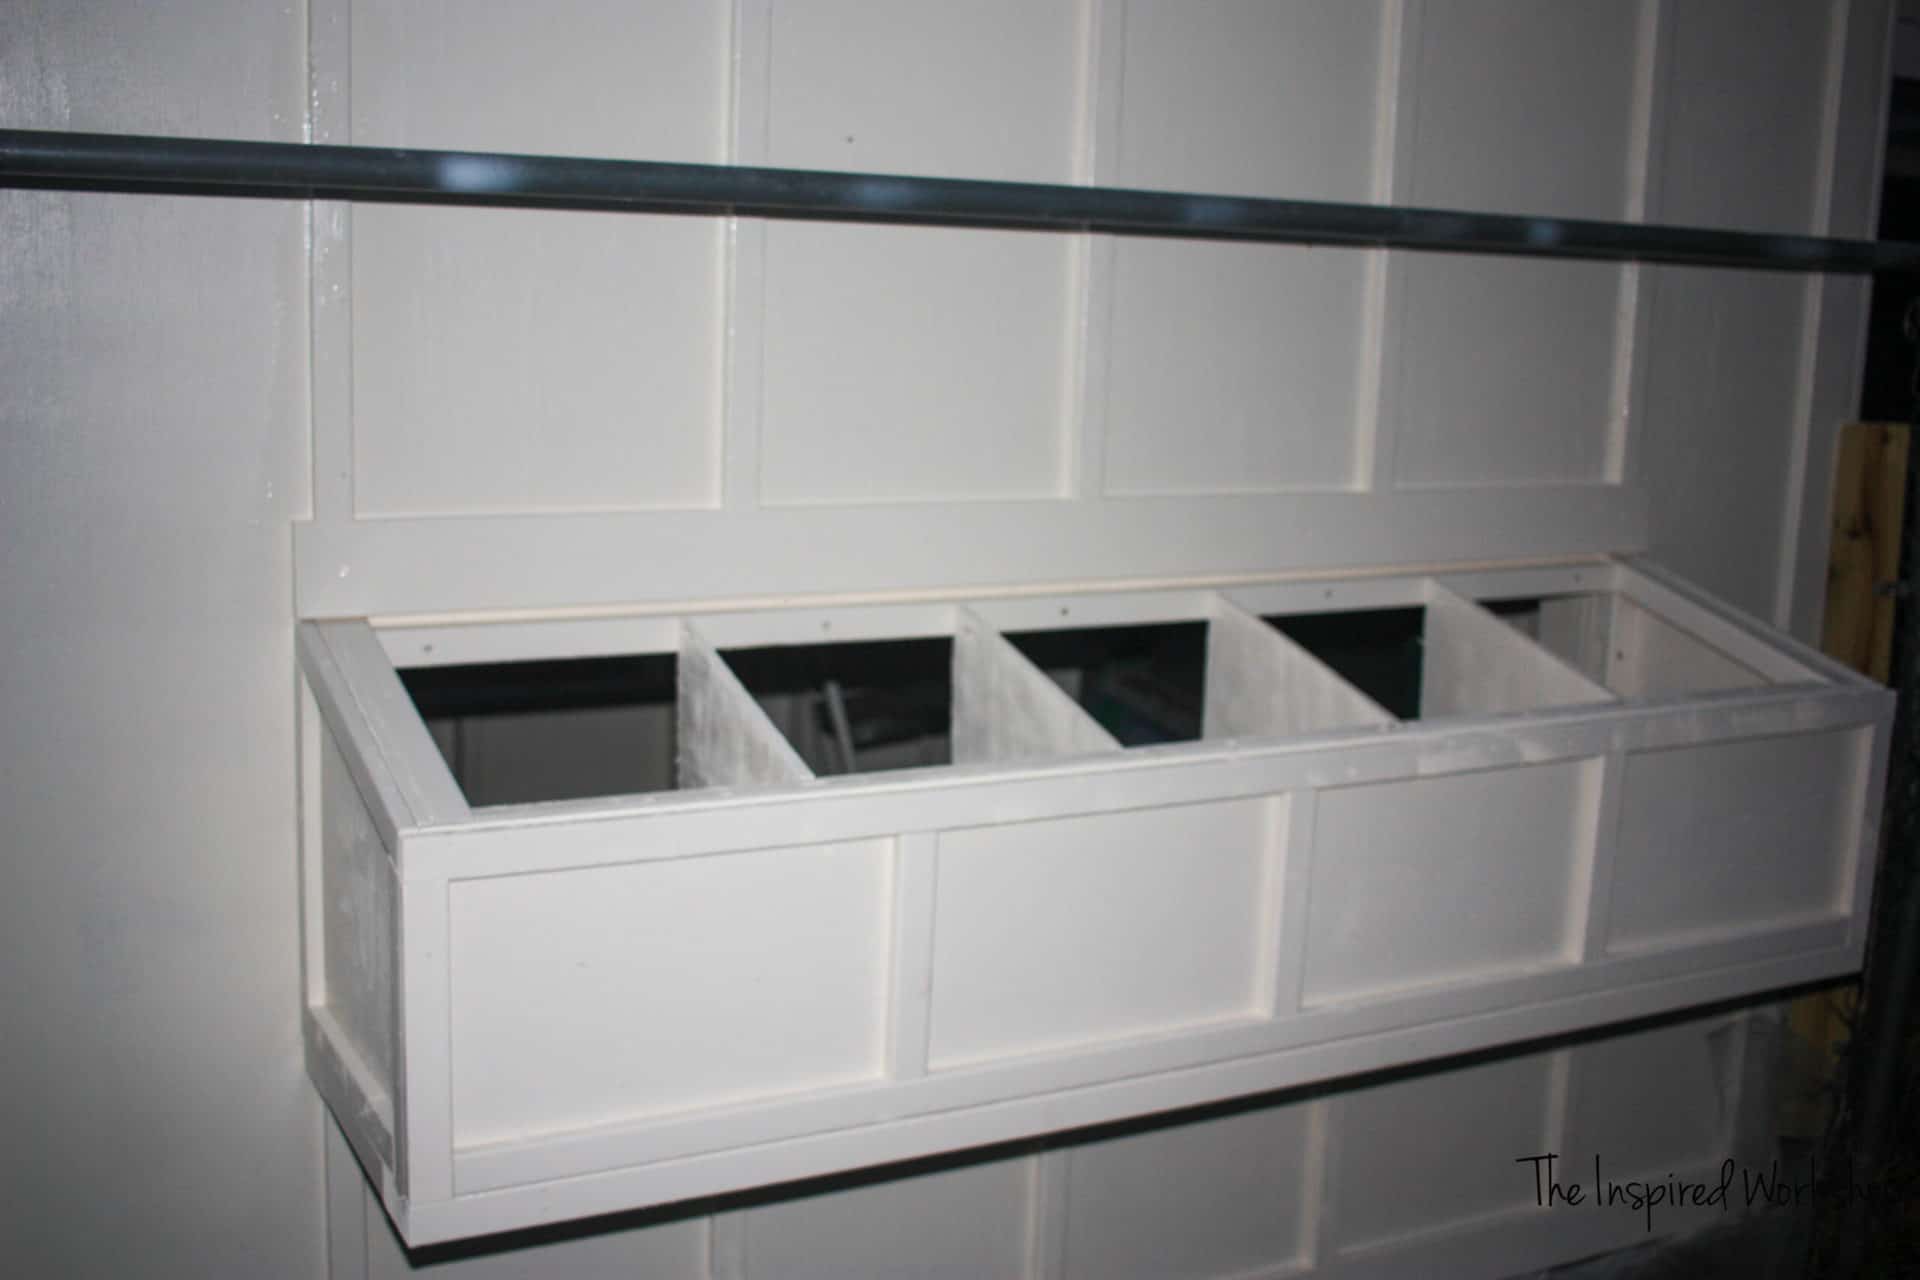
Cut the middle dividers. Use pocket holes to attach as shown drilled in the pic. They will be drilled at 1/2″ depth and you will use 1″ Kreg screws to attach.
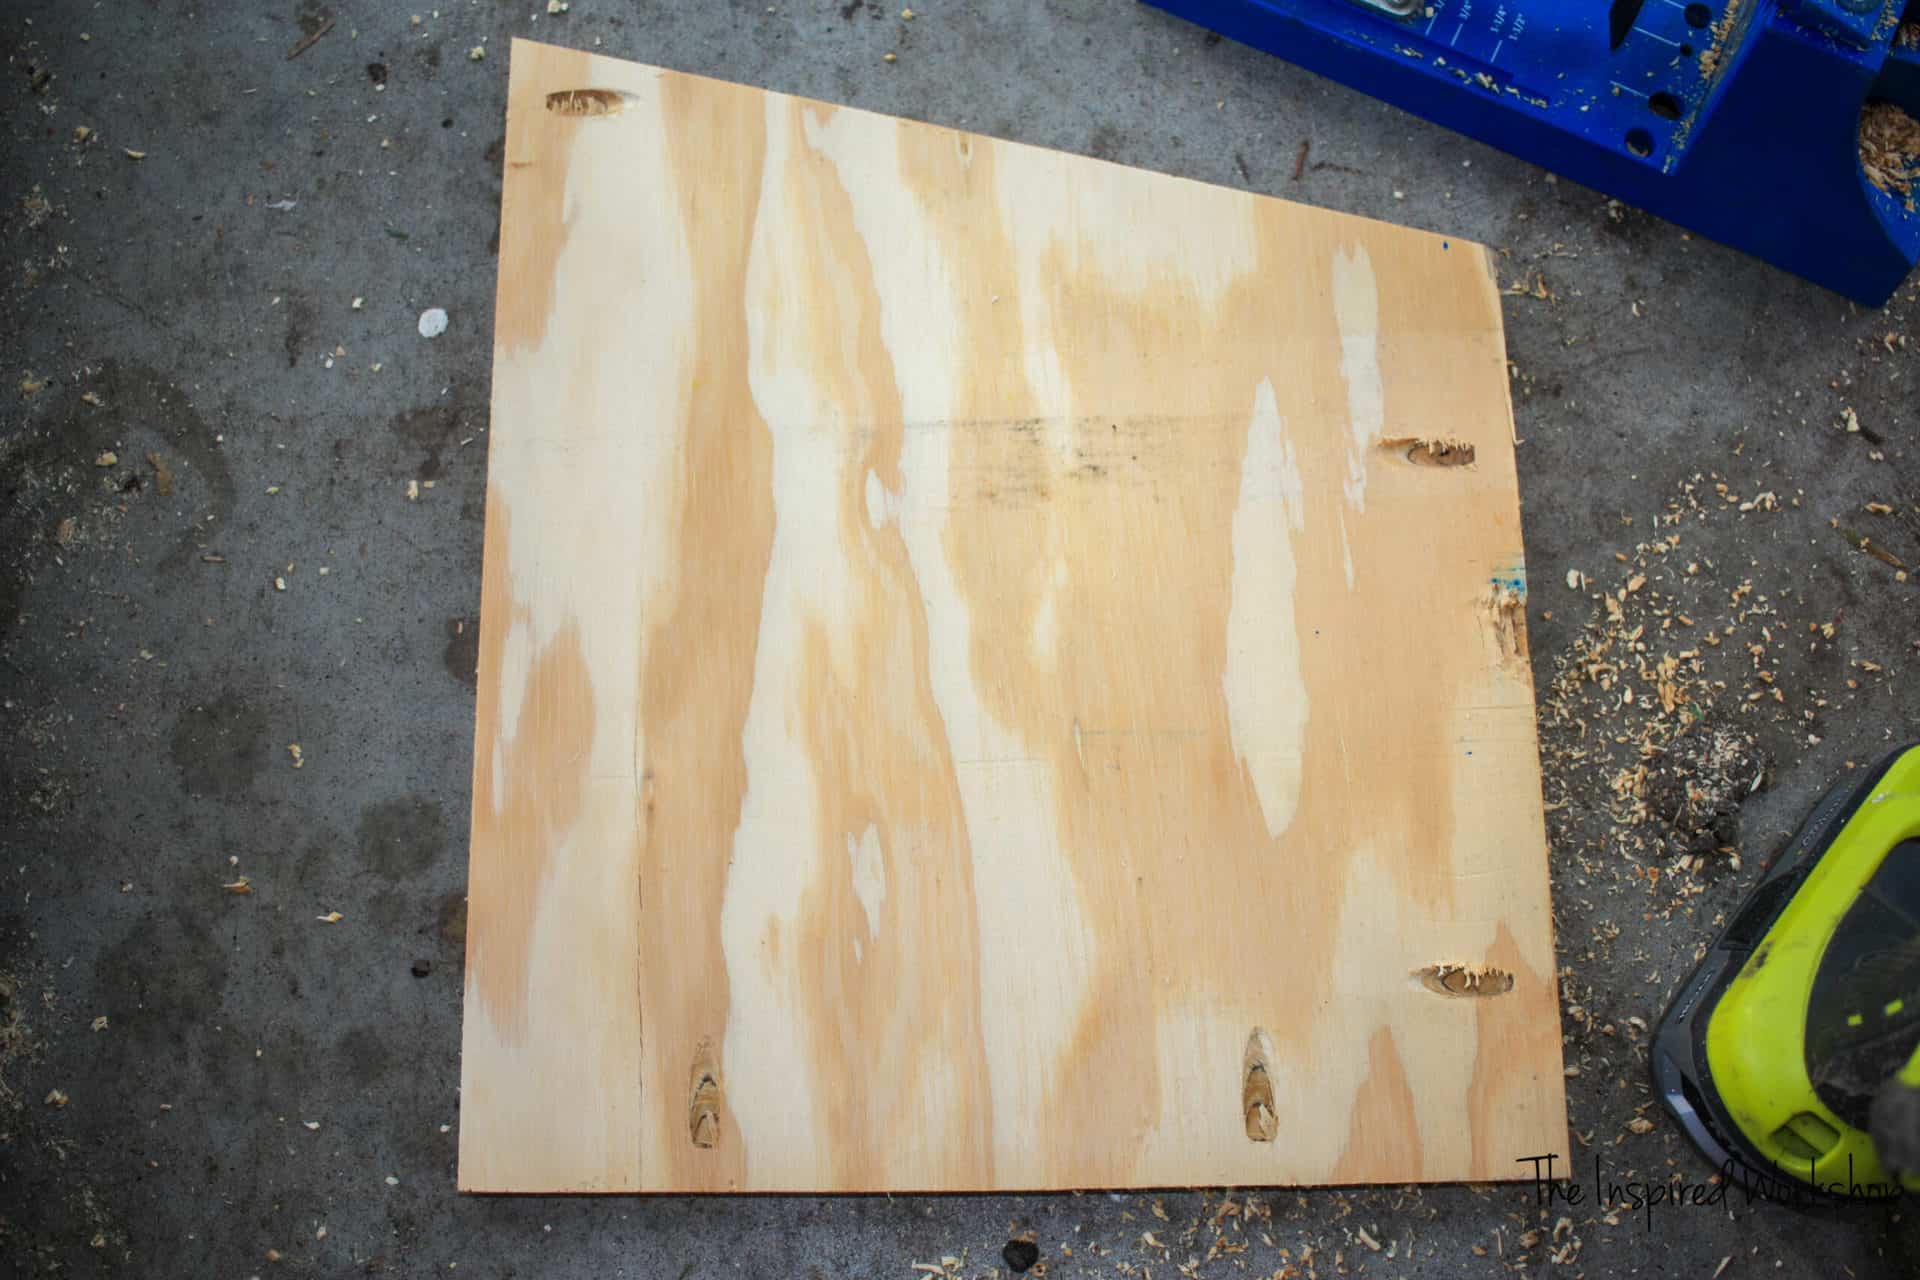
Attach the dividers to the nesting box frame.
Add the plywood to the backside of the nesting box. Just screw it straight into the 2x2s with 2″ screws.
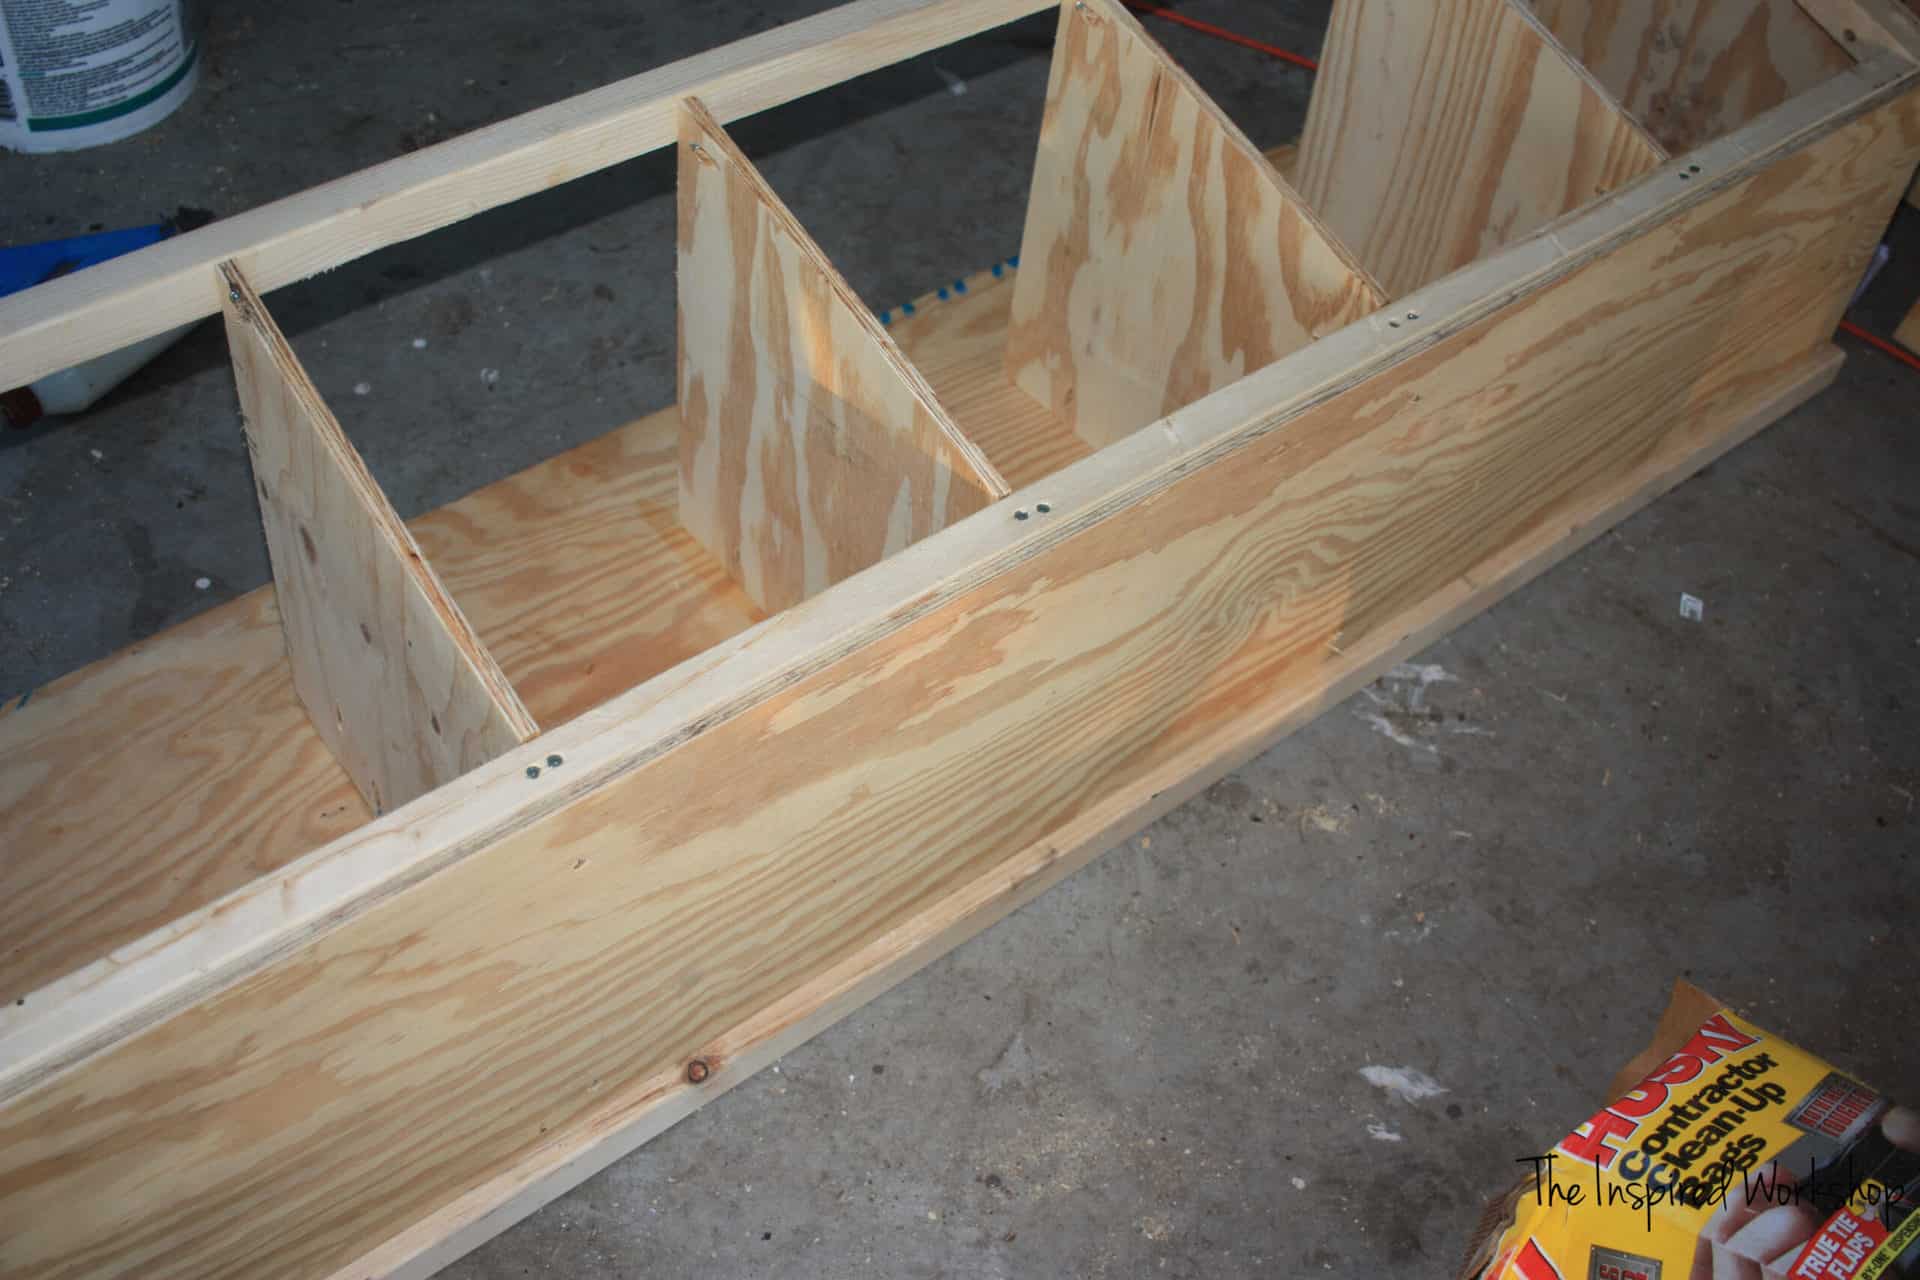
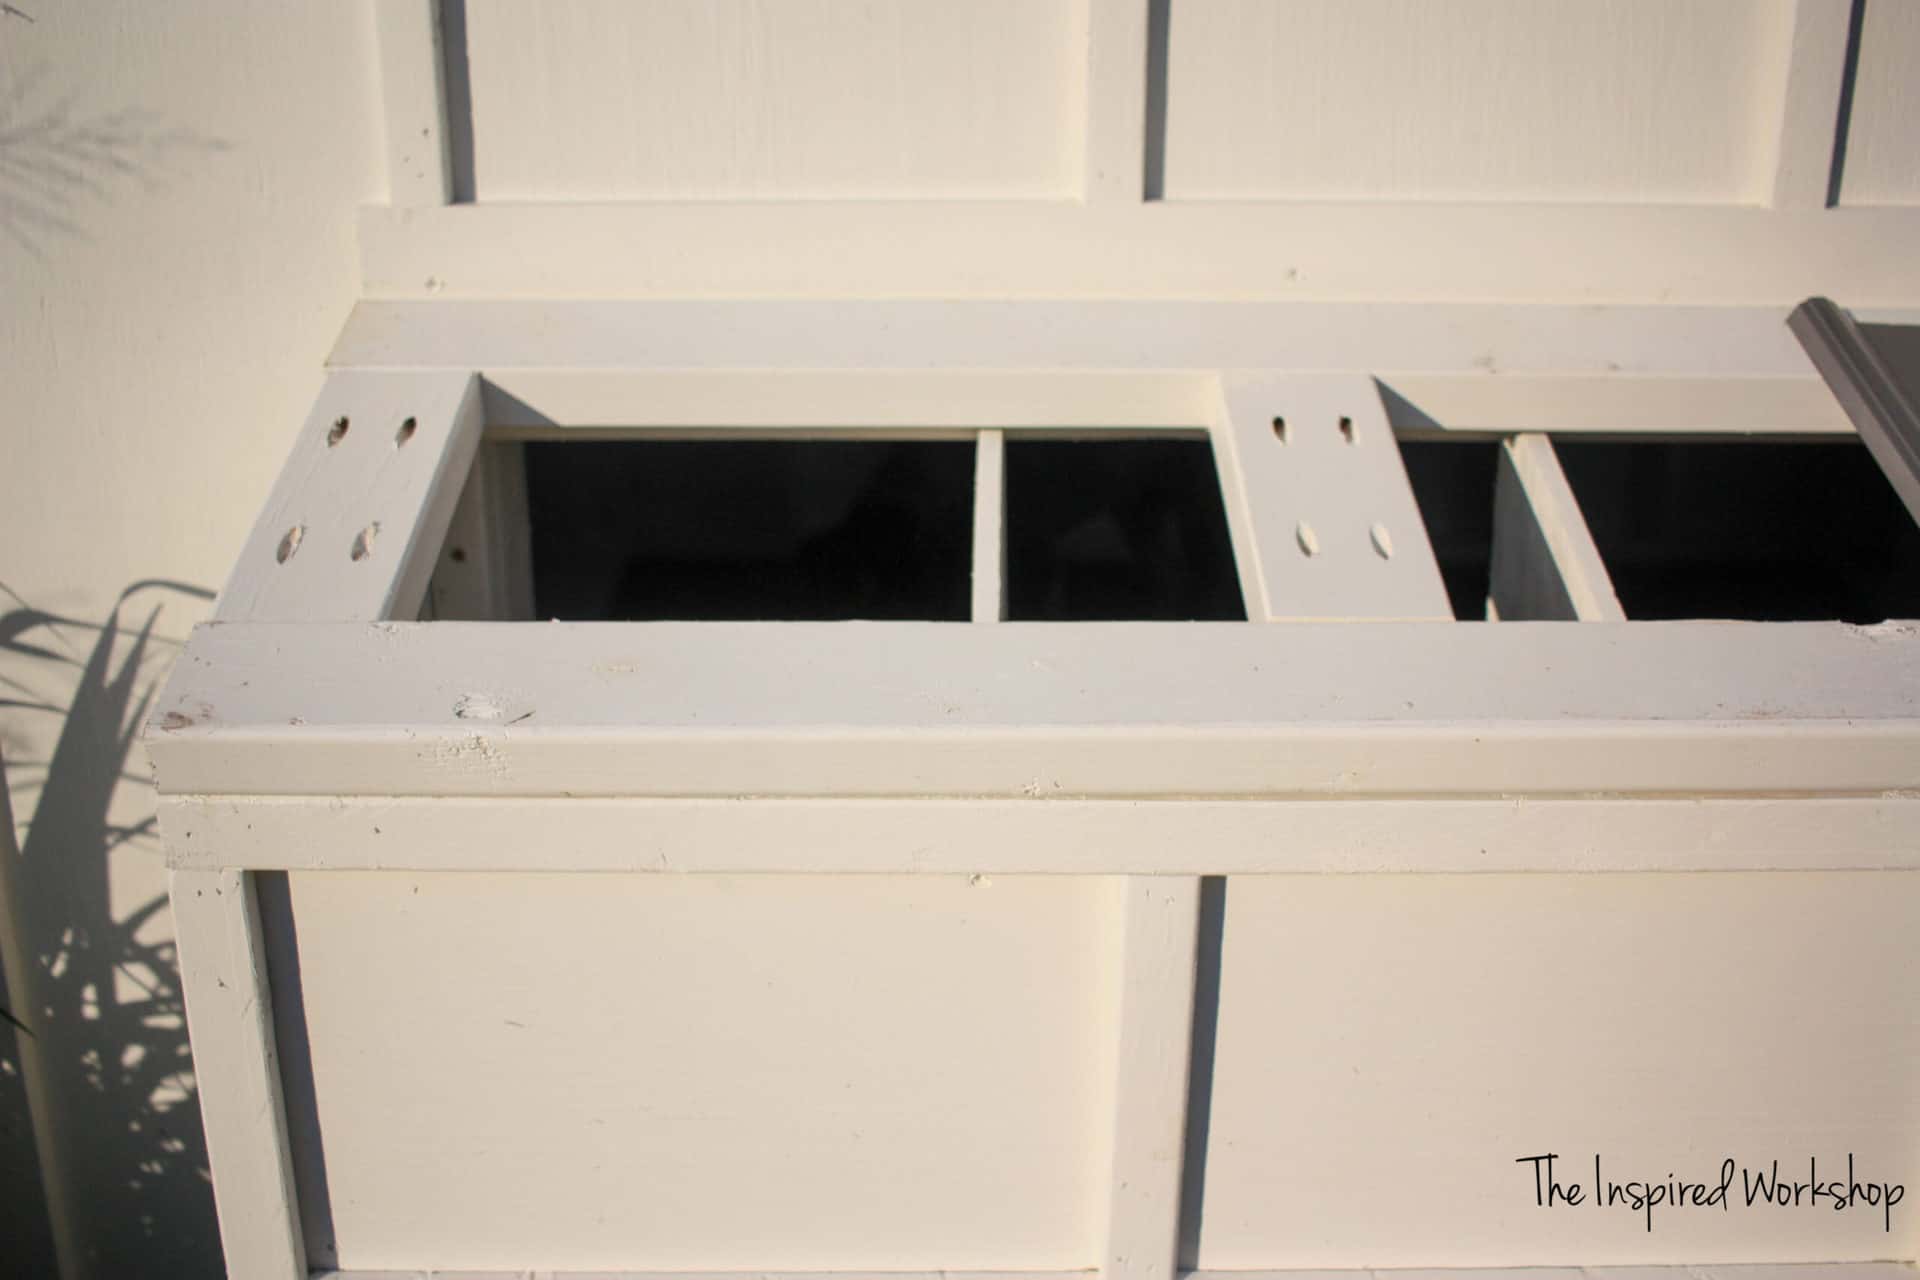
Add the front divider frames. You will have to do the same as with the back divider 2x2s, pocket hole the bottoms, and screw through the top 2×2 to attach on top!
Funny thing…I JUST NOW REALIZED that I never actually put those boards in! 😂😂🙈 So you can skip that step if you want…I did! Psssht I am NOT going to let me tell myself how to build something…no way, not happening!😂😳
Okay so if you WANT to add them, have at it!
I can’t believe I did that! Lol! Anyway, the next step is adding the trim. Starting with the sides and then moving to the back. Angled boards pictured below are mitered at 14.6 degrees off square!
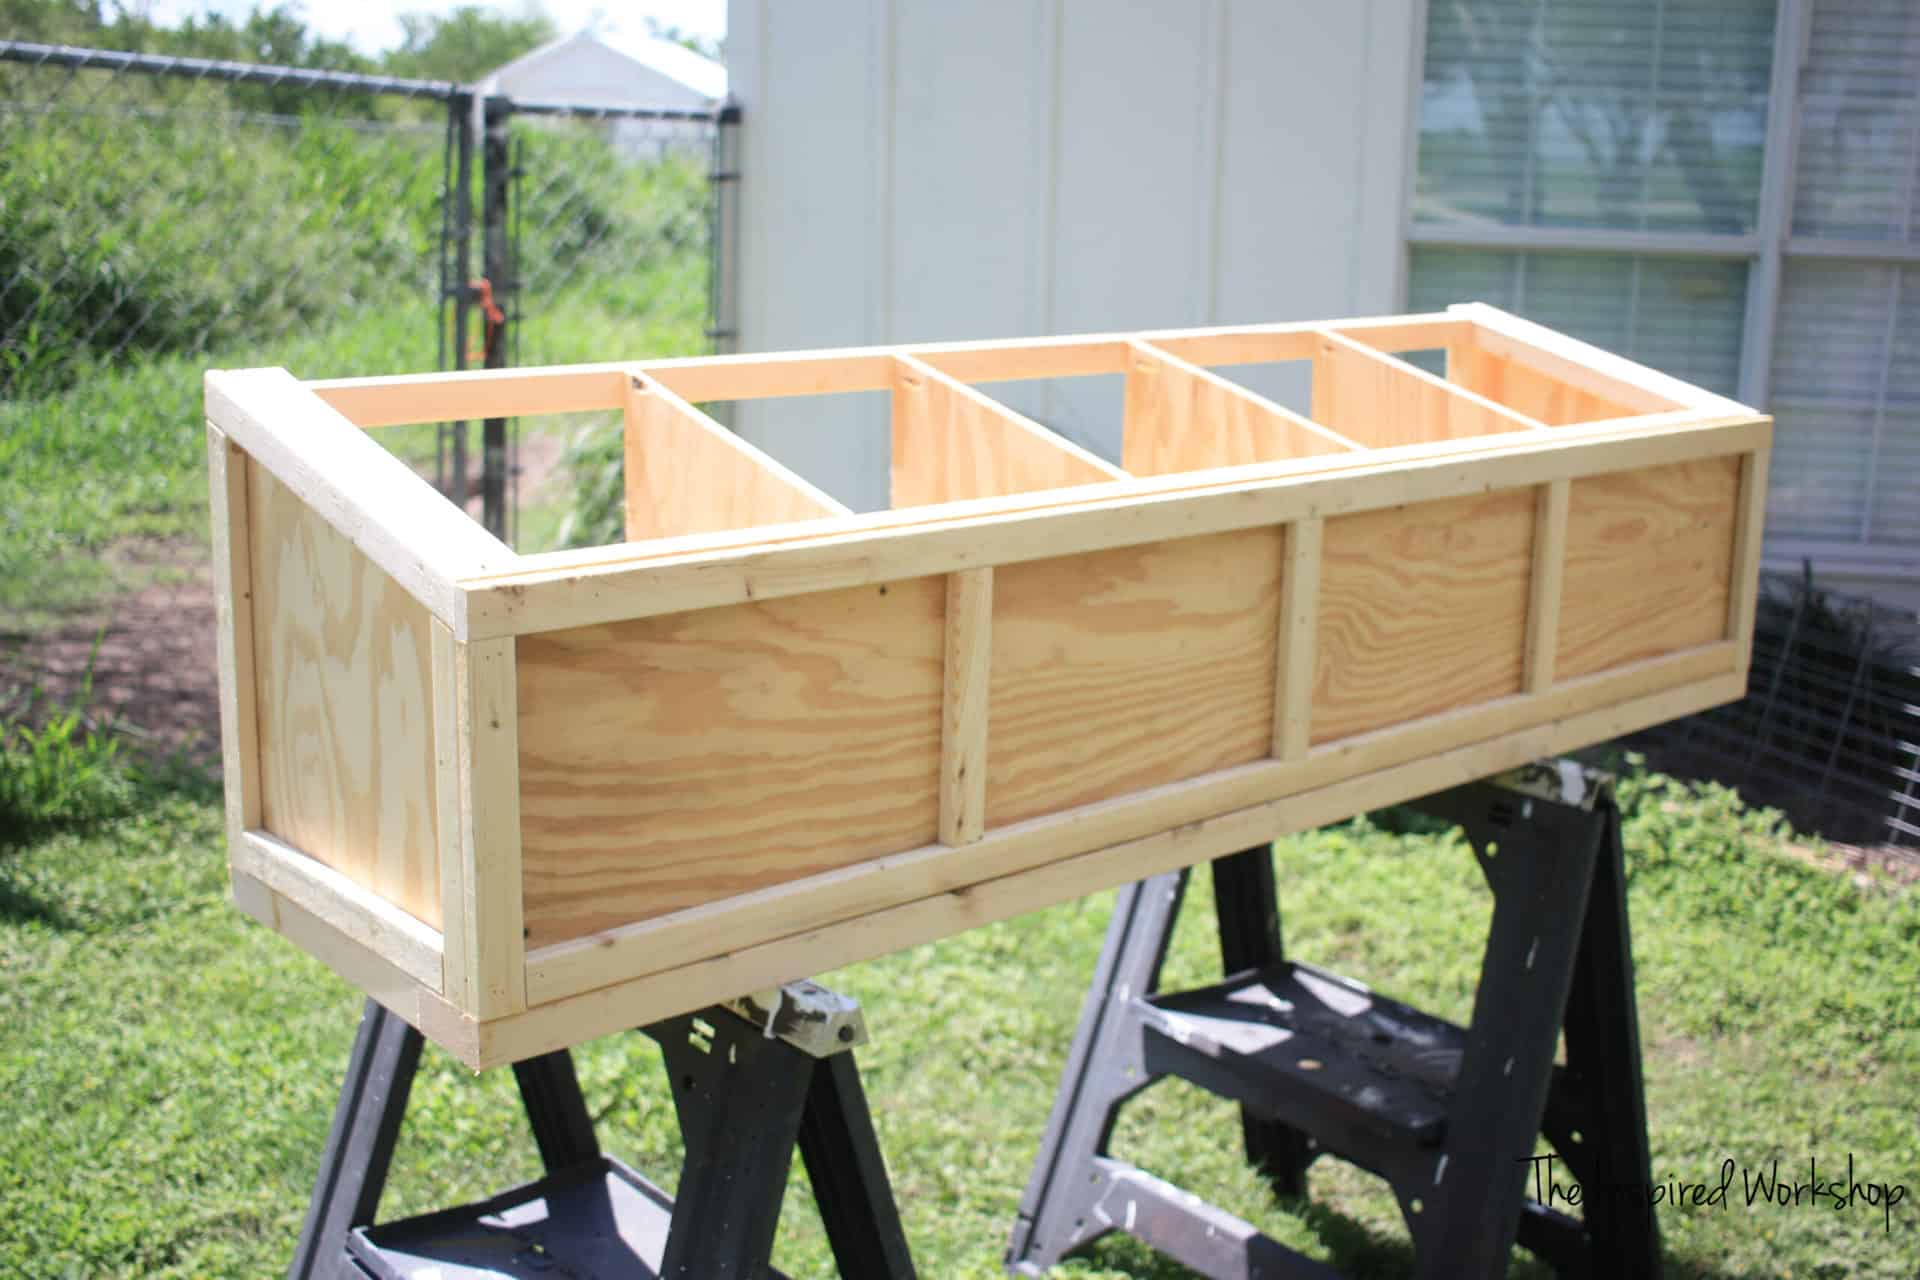
I went ahead and painted it before I attached it to the coop.
Time to attach it to the coop! EEEKKK!! I love it when I get to about this part in a project, and you can really see it coming together…and actually being completed! Lol!
When you attach it to the chicken coop, you will use the 4″ lip and slide that into the opening you have on the nesting box wall. Screw through that plywood and into the 2×4 below. You will also use the pocket holes you drilled on the bottom to attach it and screw along the 2×2 on the top and sides in the front!
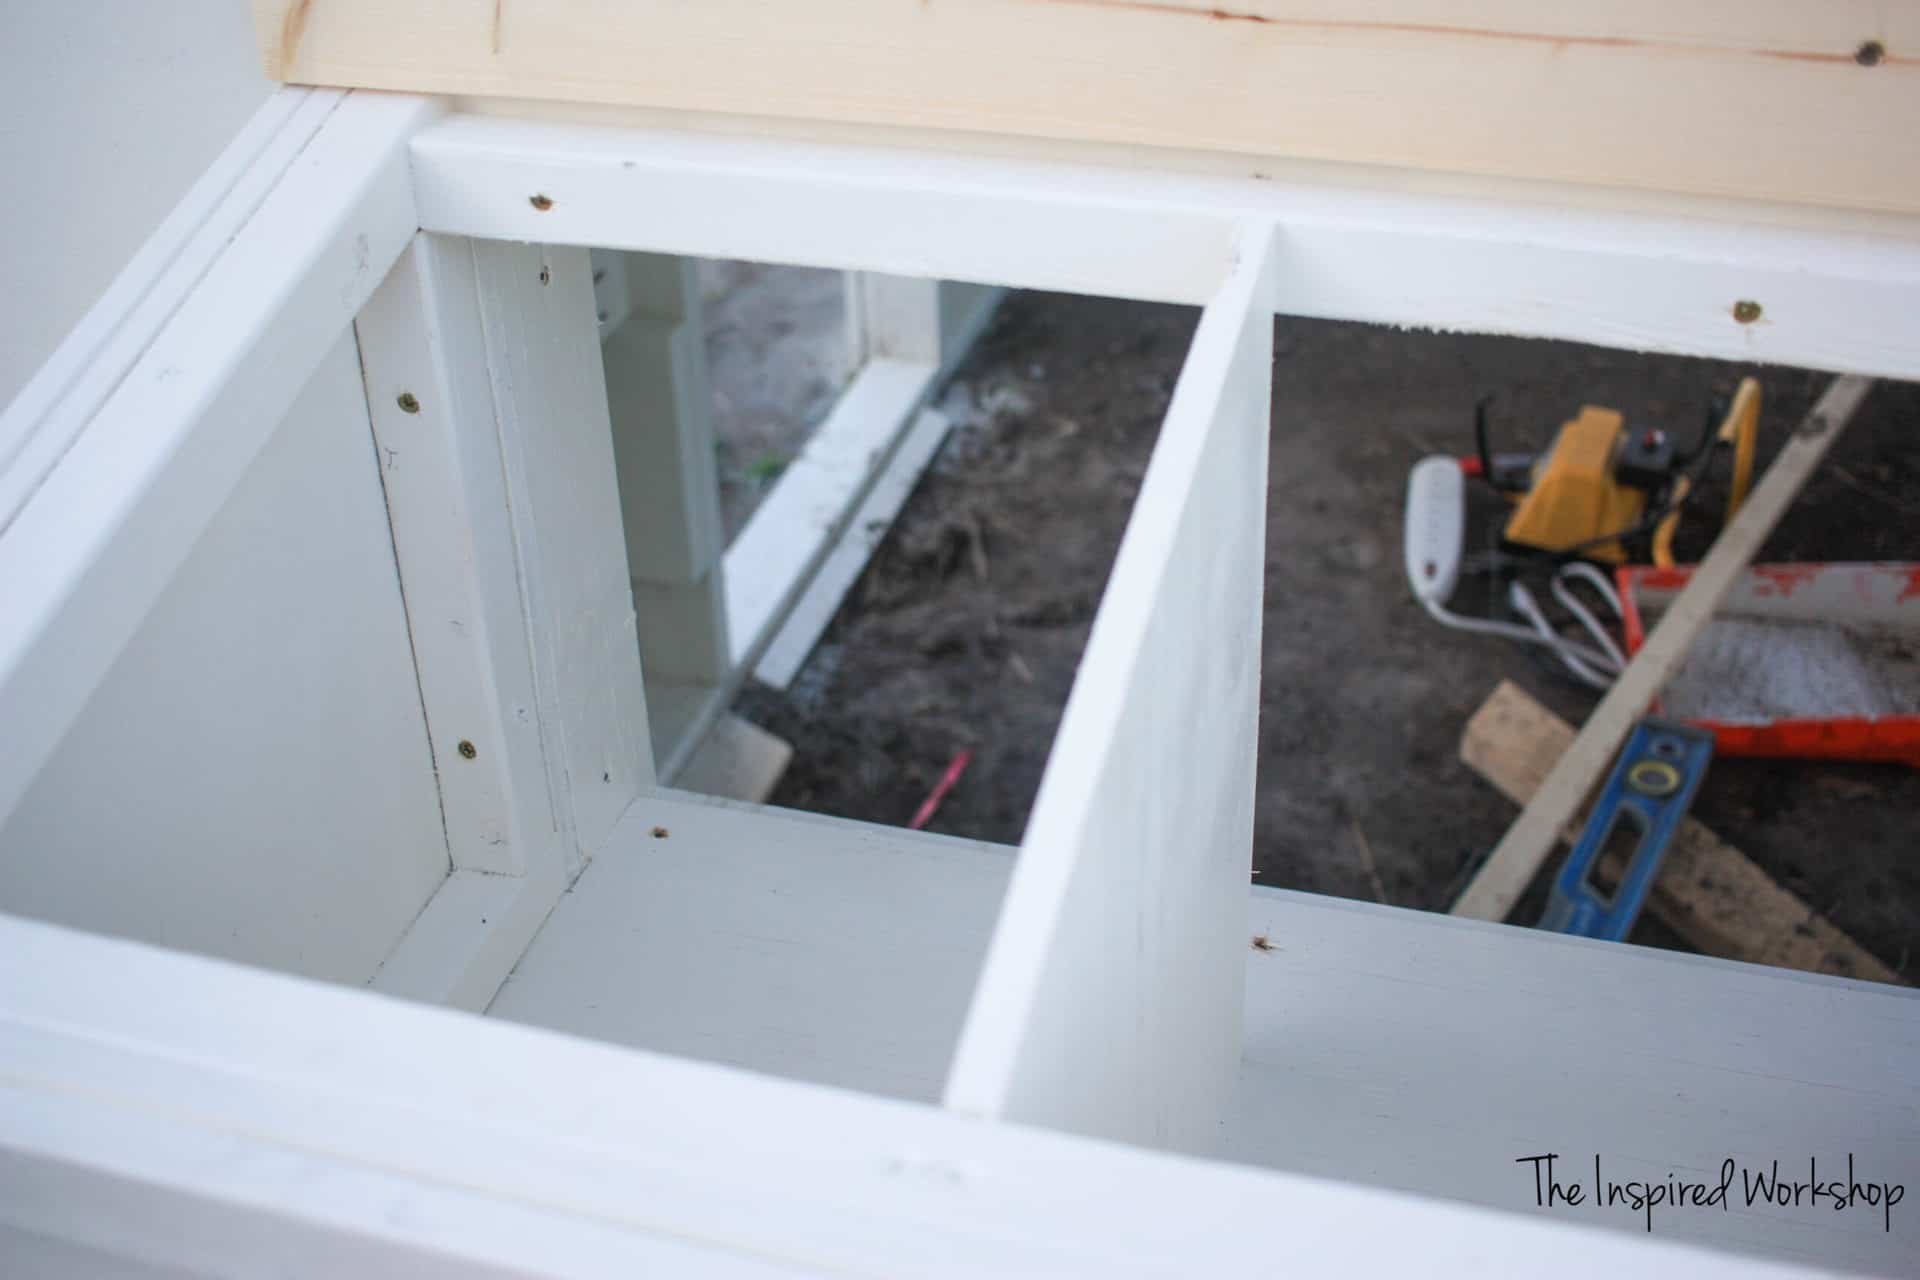
Up underneath, you can see a pocket hole!
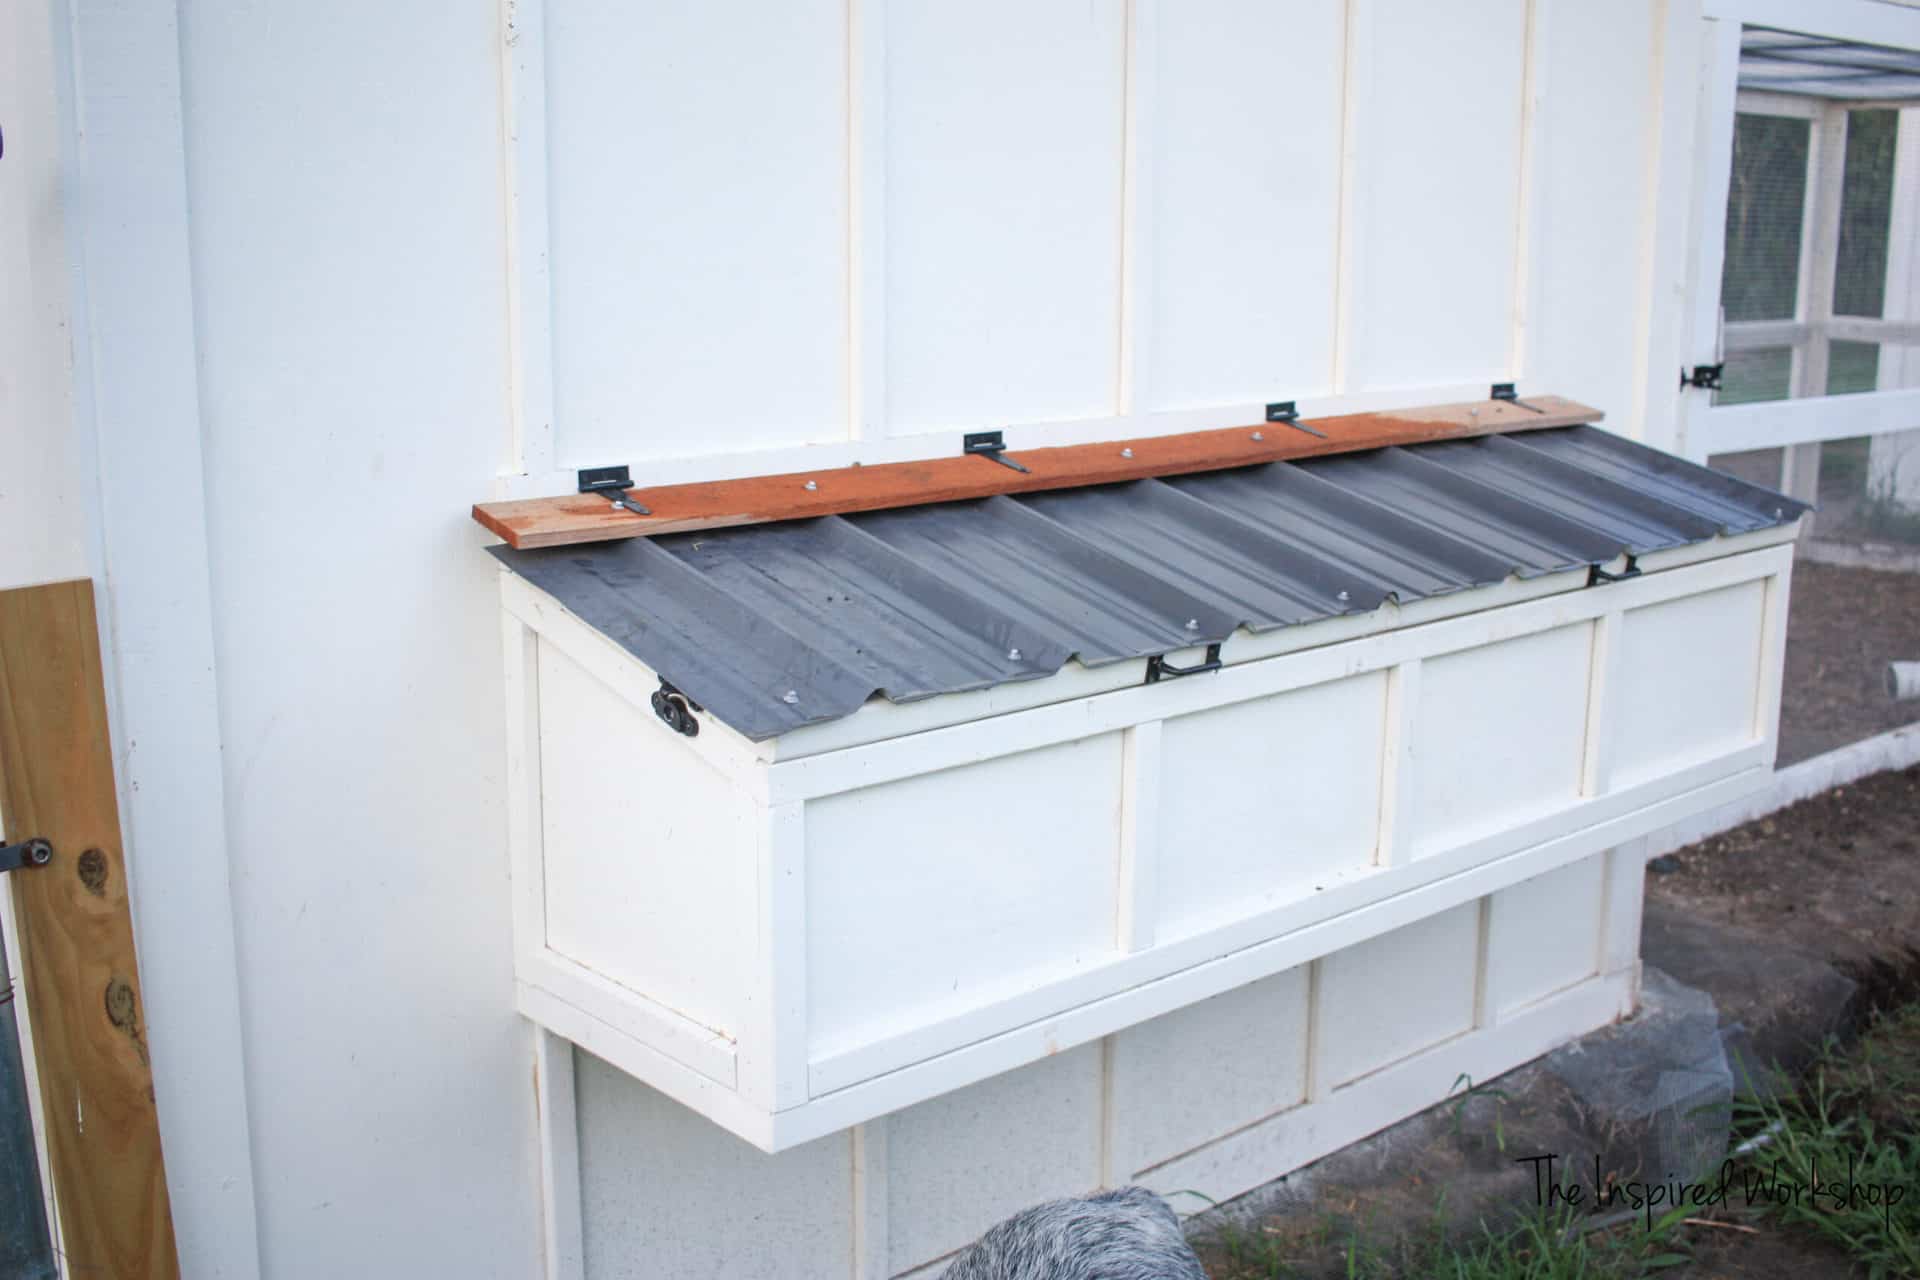
Once you have the nesting boxes installed, we just need a roof for them!
Build a frame to attach your steel roofing panels to. You will pocket hole the small boards 1 1/2″ deep and use 2 1/2″ screws along with wood glue to assemble.
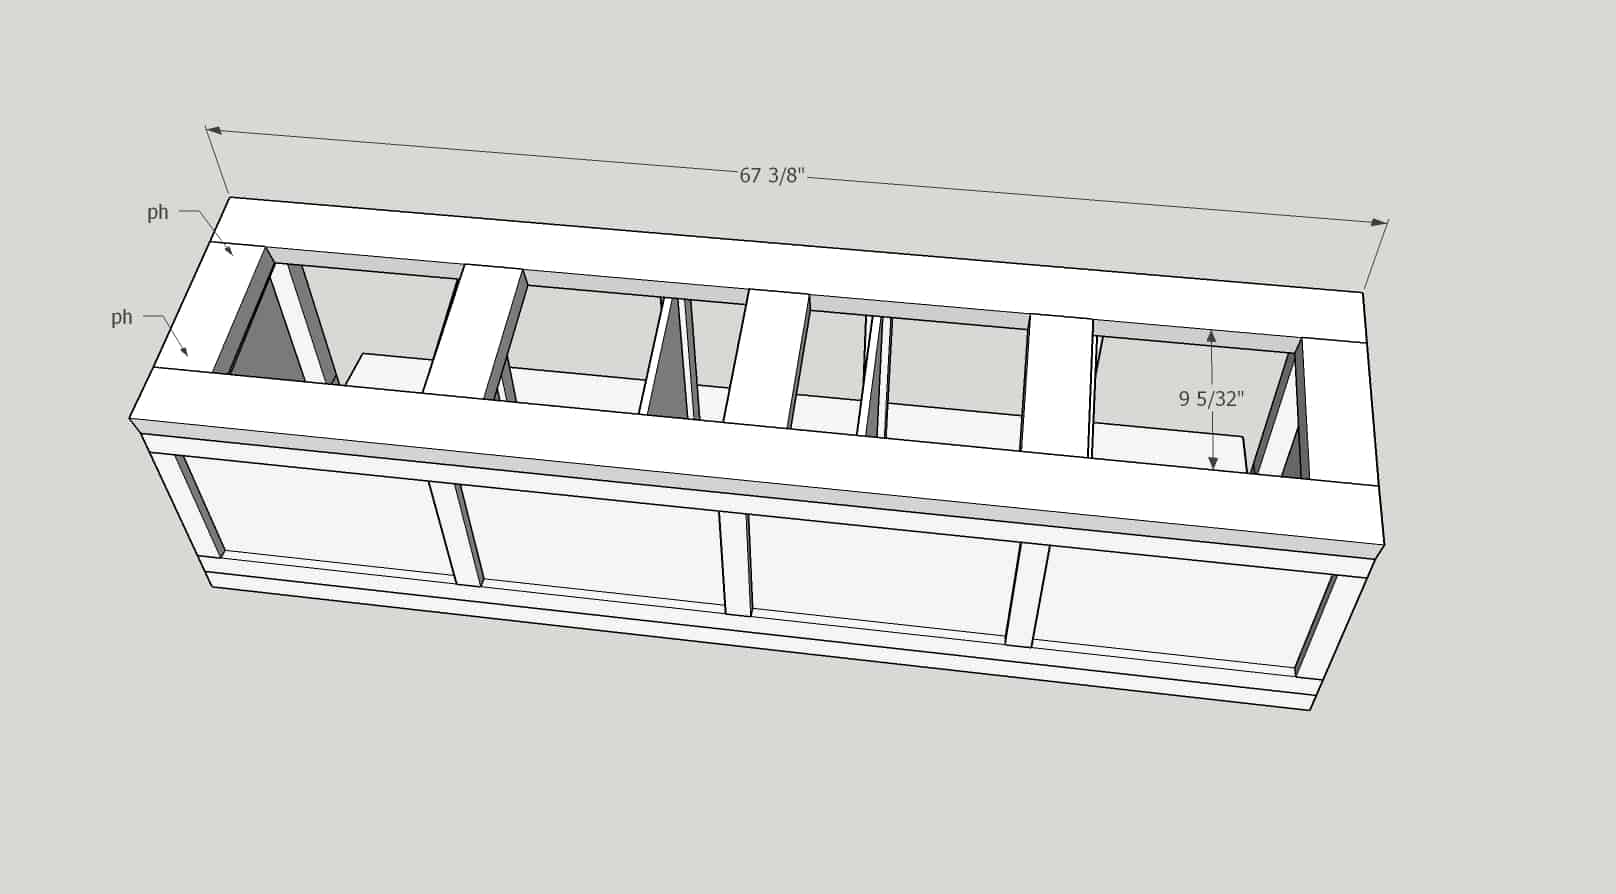
One thing I stated in the printable plans is that you don’t actually need the three extra boards, I was thinking I was going to need to attach the roof there, but along the top and bottom board was plenty, it’s not long enough to need more screws. So you can actually just build the rectangle if you’d like.
Add the roofing panels using the screws that are made for this that have a gasket on them to keep water from getting in when you screw through the metal.

Once the roofing panels are screwed down, using 2 1/2″ roofing screws, screw the 1×4 cedar fence picket into place. You will screw it to the high ridges to give a flat surface to attach the hinges to!
Add your handles and latches! And guess what, IT. IS. DONE. Woohoo! Looks great and works great too!

Alright, that wraps up another part of our DIY chicken coop build! Make sure and get any other posts you need here: DIY CHICKEN COOP PLANS
Thanks again for stopping by! Hope to see you again soon! Have a good one!

Wanna save this post for later? PIN IT!