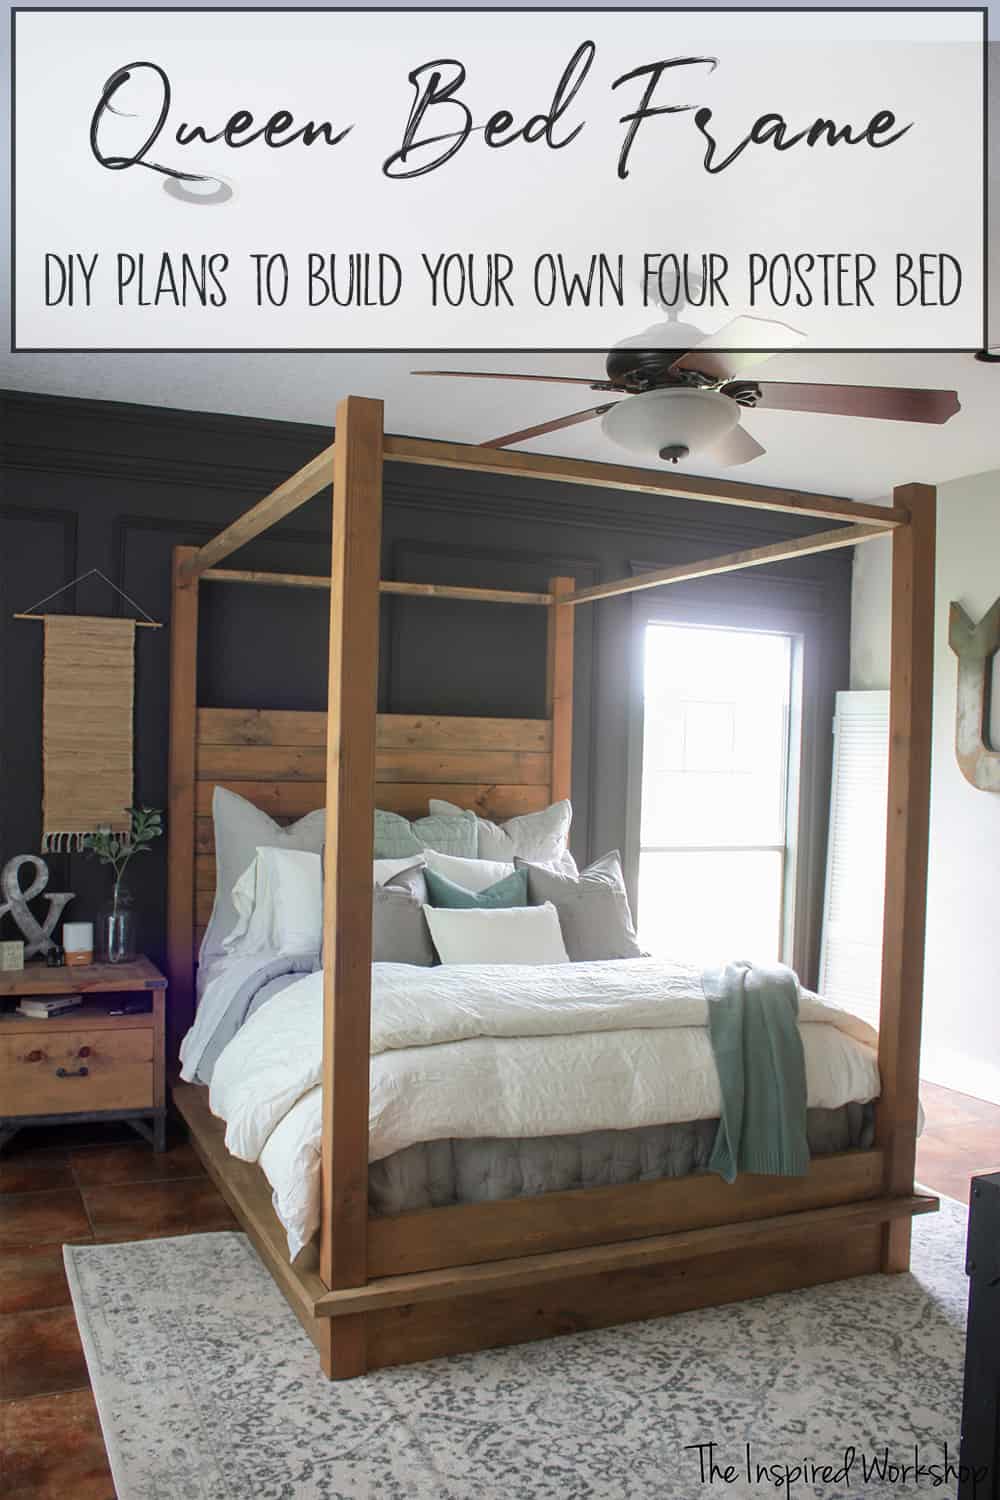
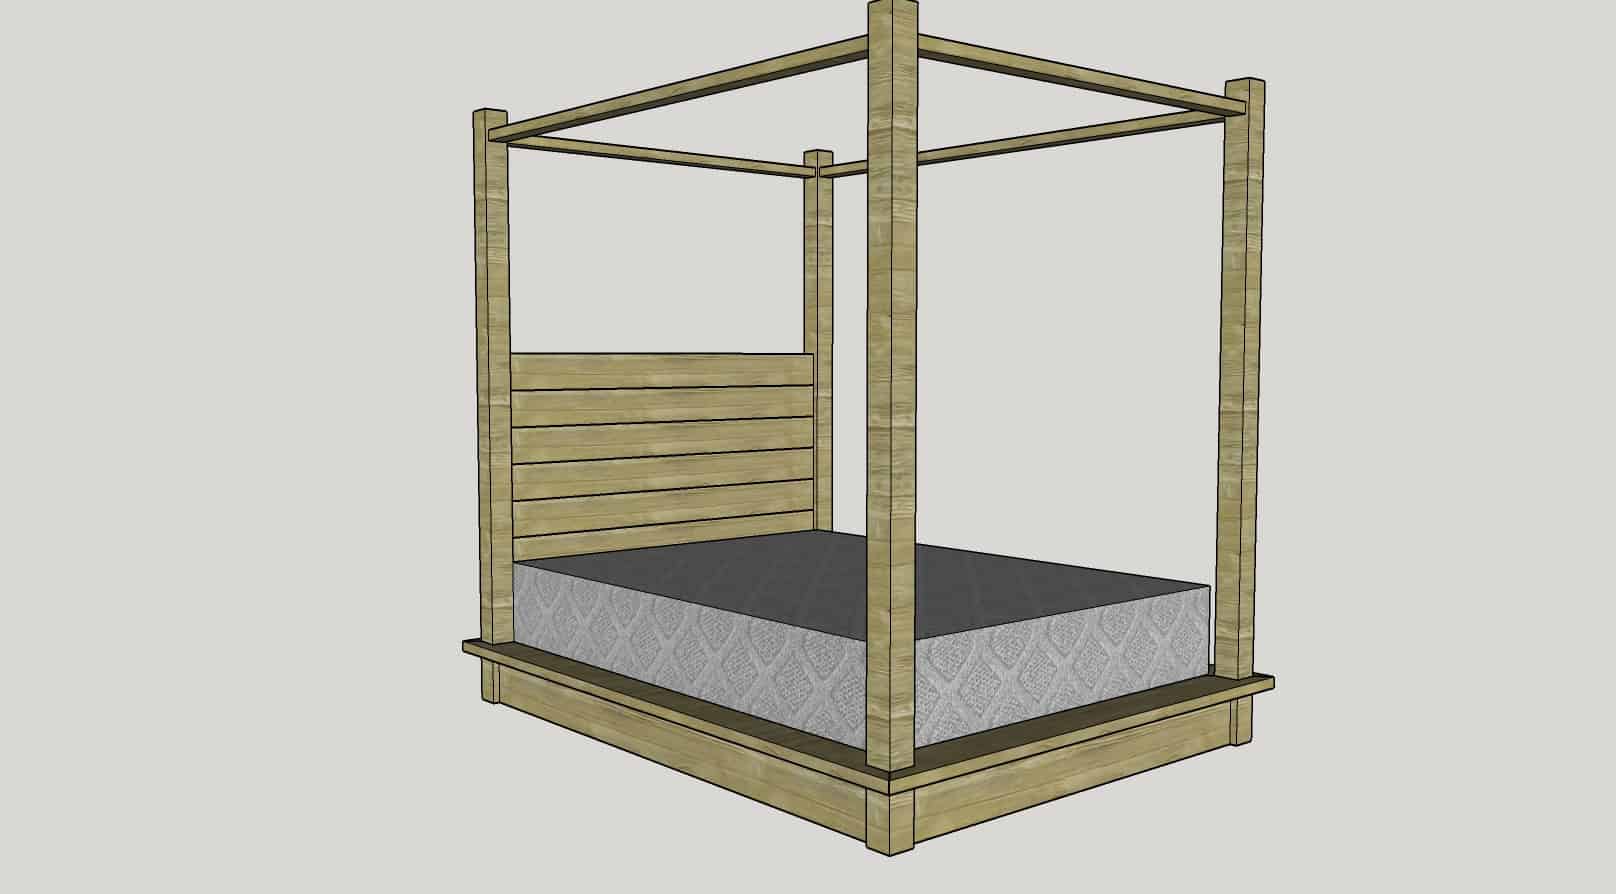
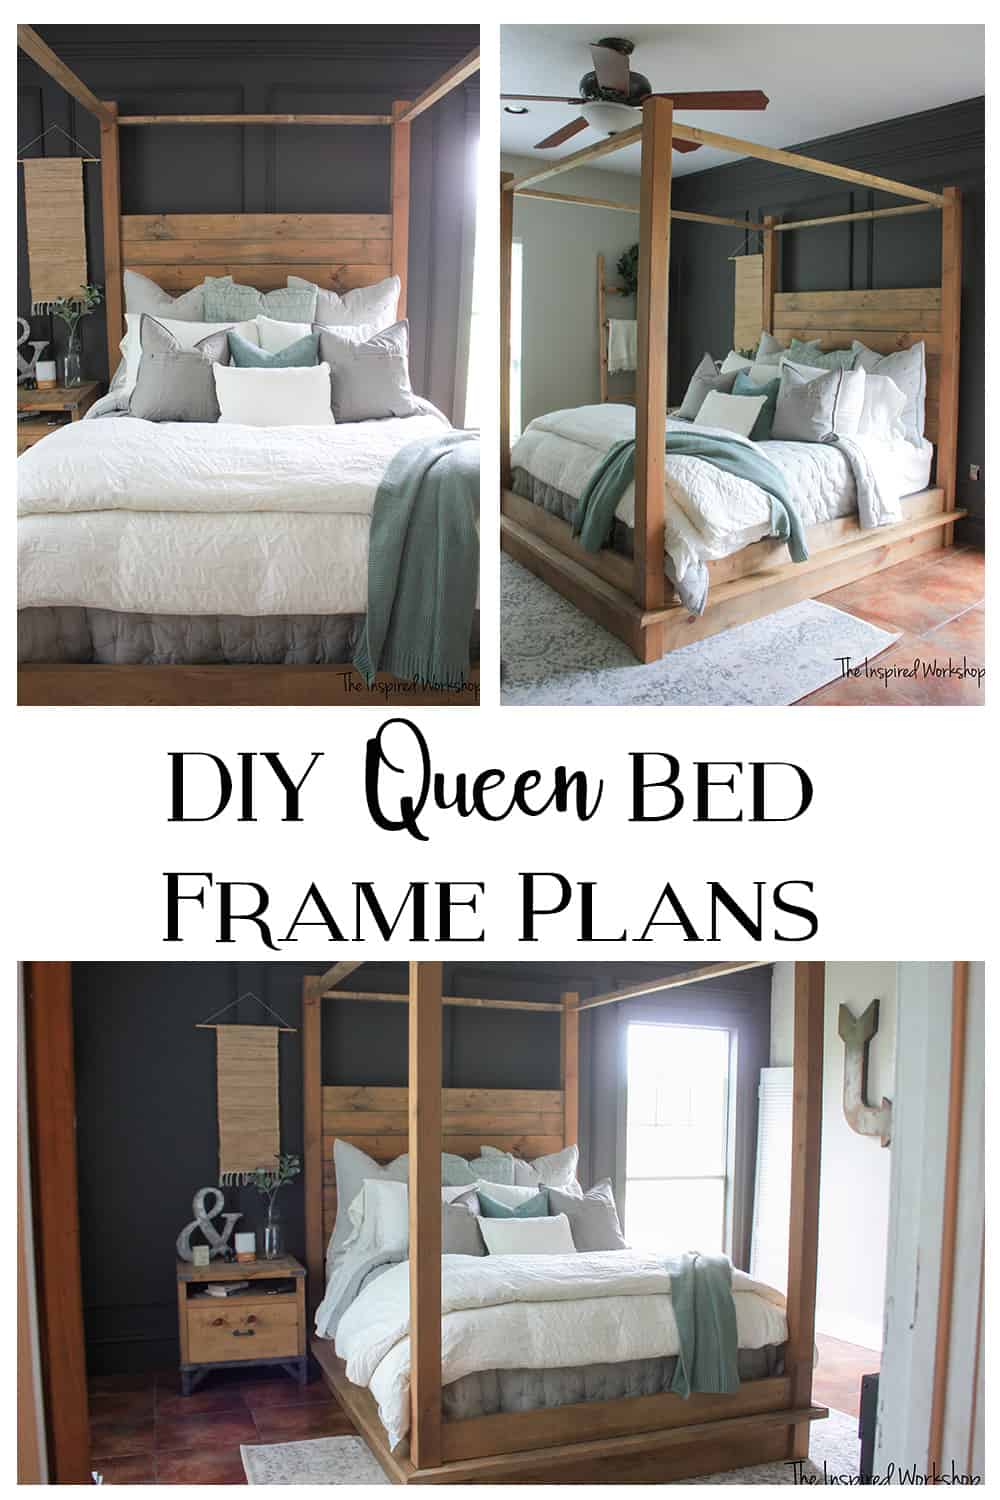
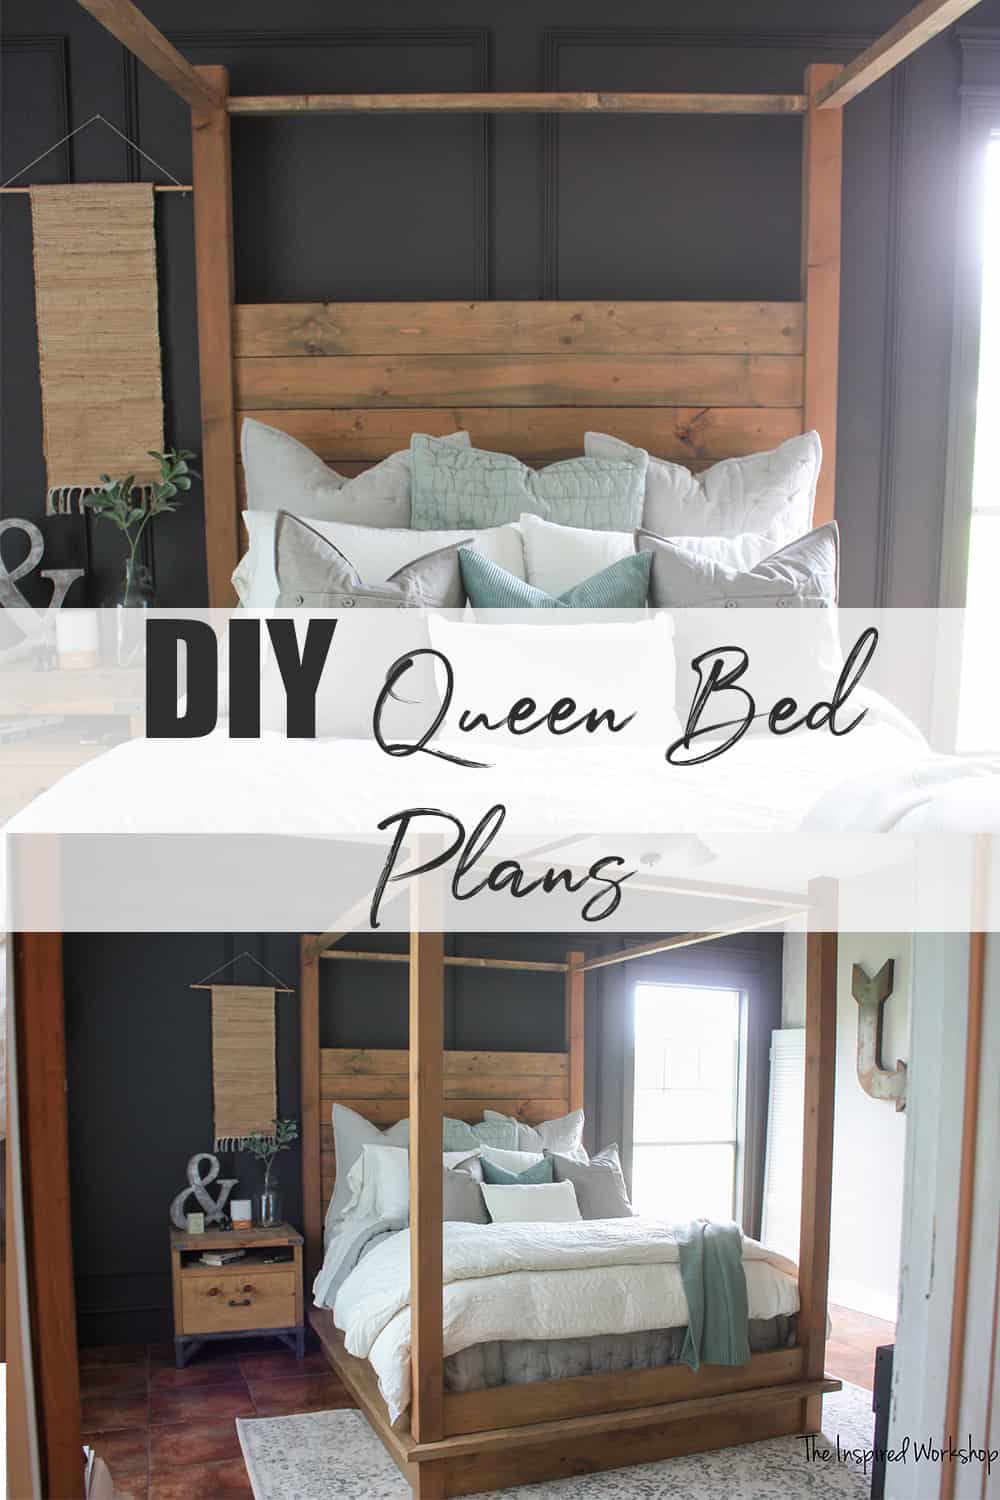
DIY Queen Bed Frame
This gorgeous queen bed frame is a Restoration Hardware Knockoff that demands to be the center of attention in any bedroom! Easy to build even with very few tools and experience! Build yourself a DIY queen bed frame to sleep in absolute luxury at an economical price tag!
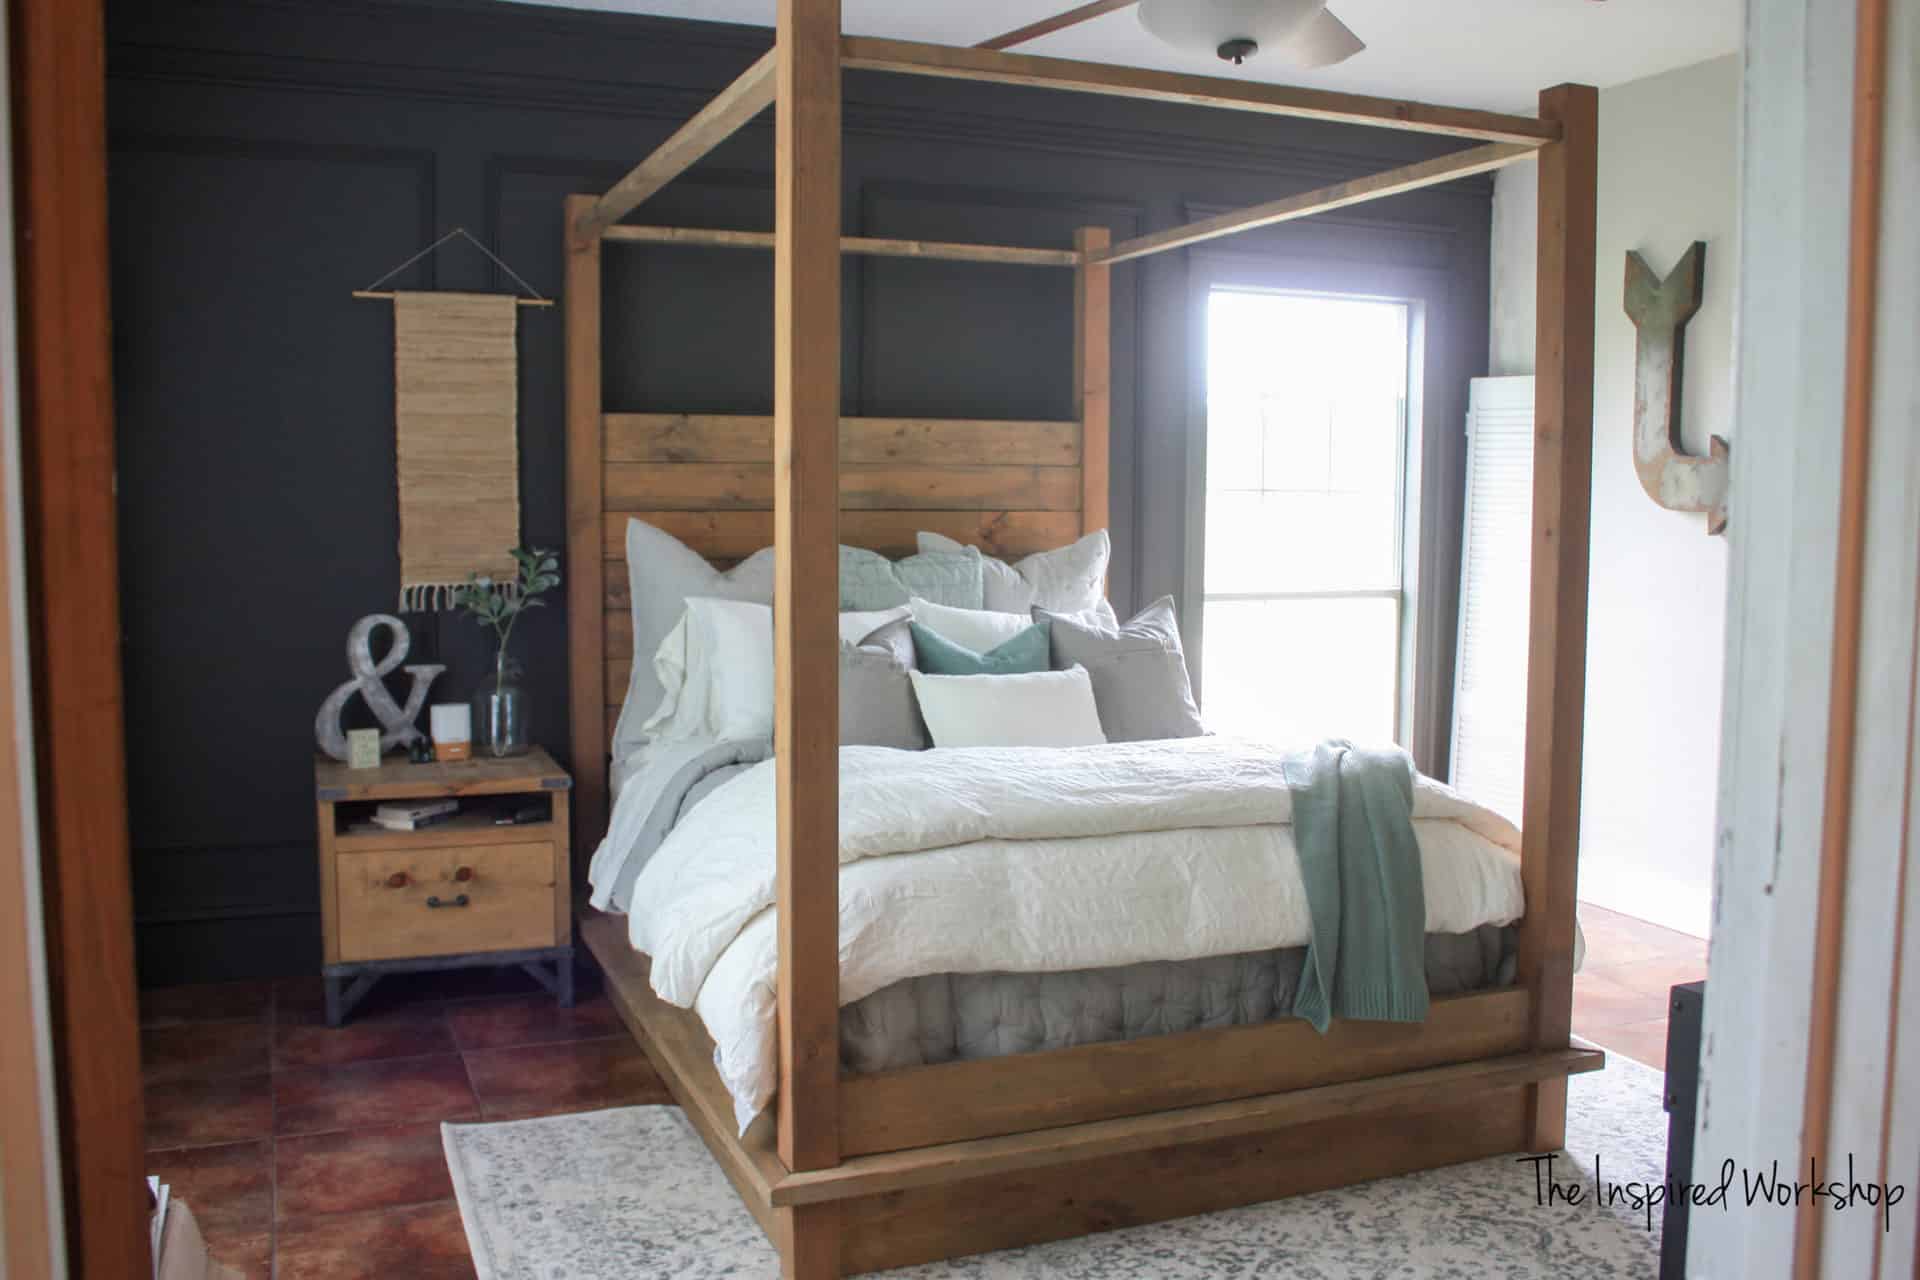
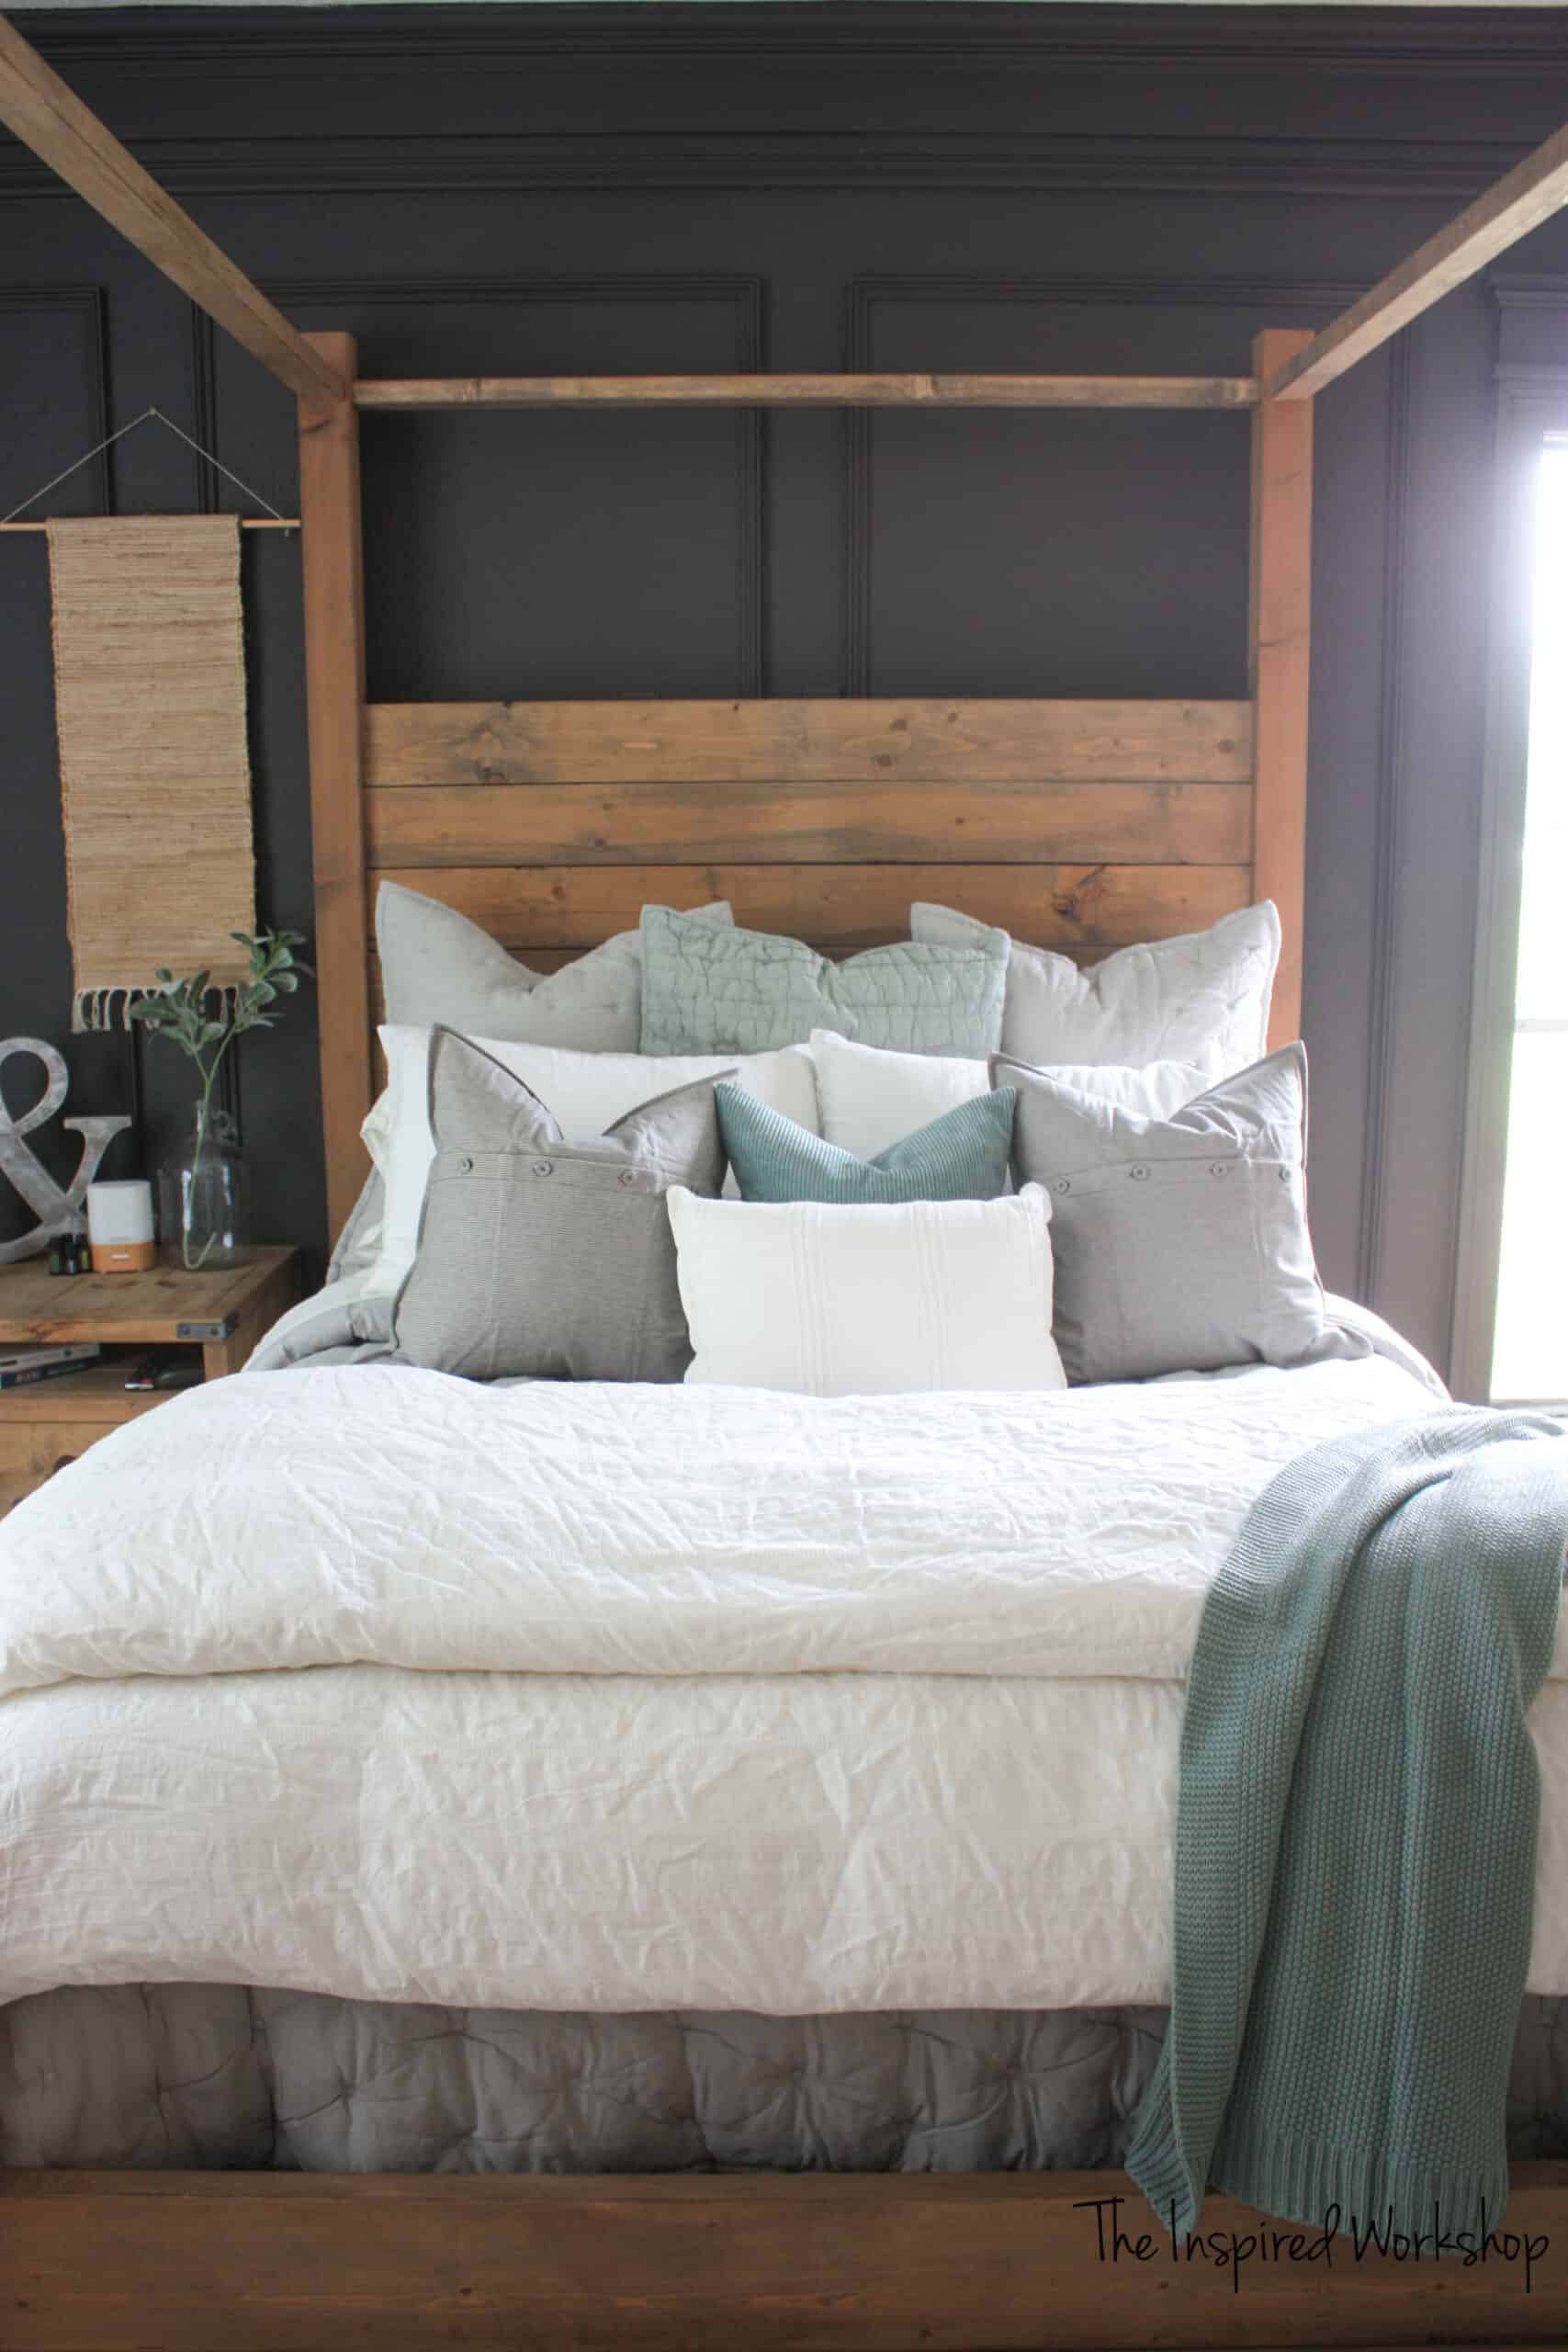
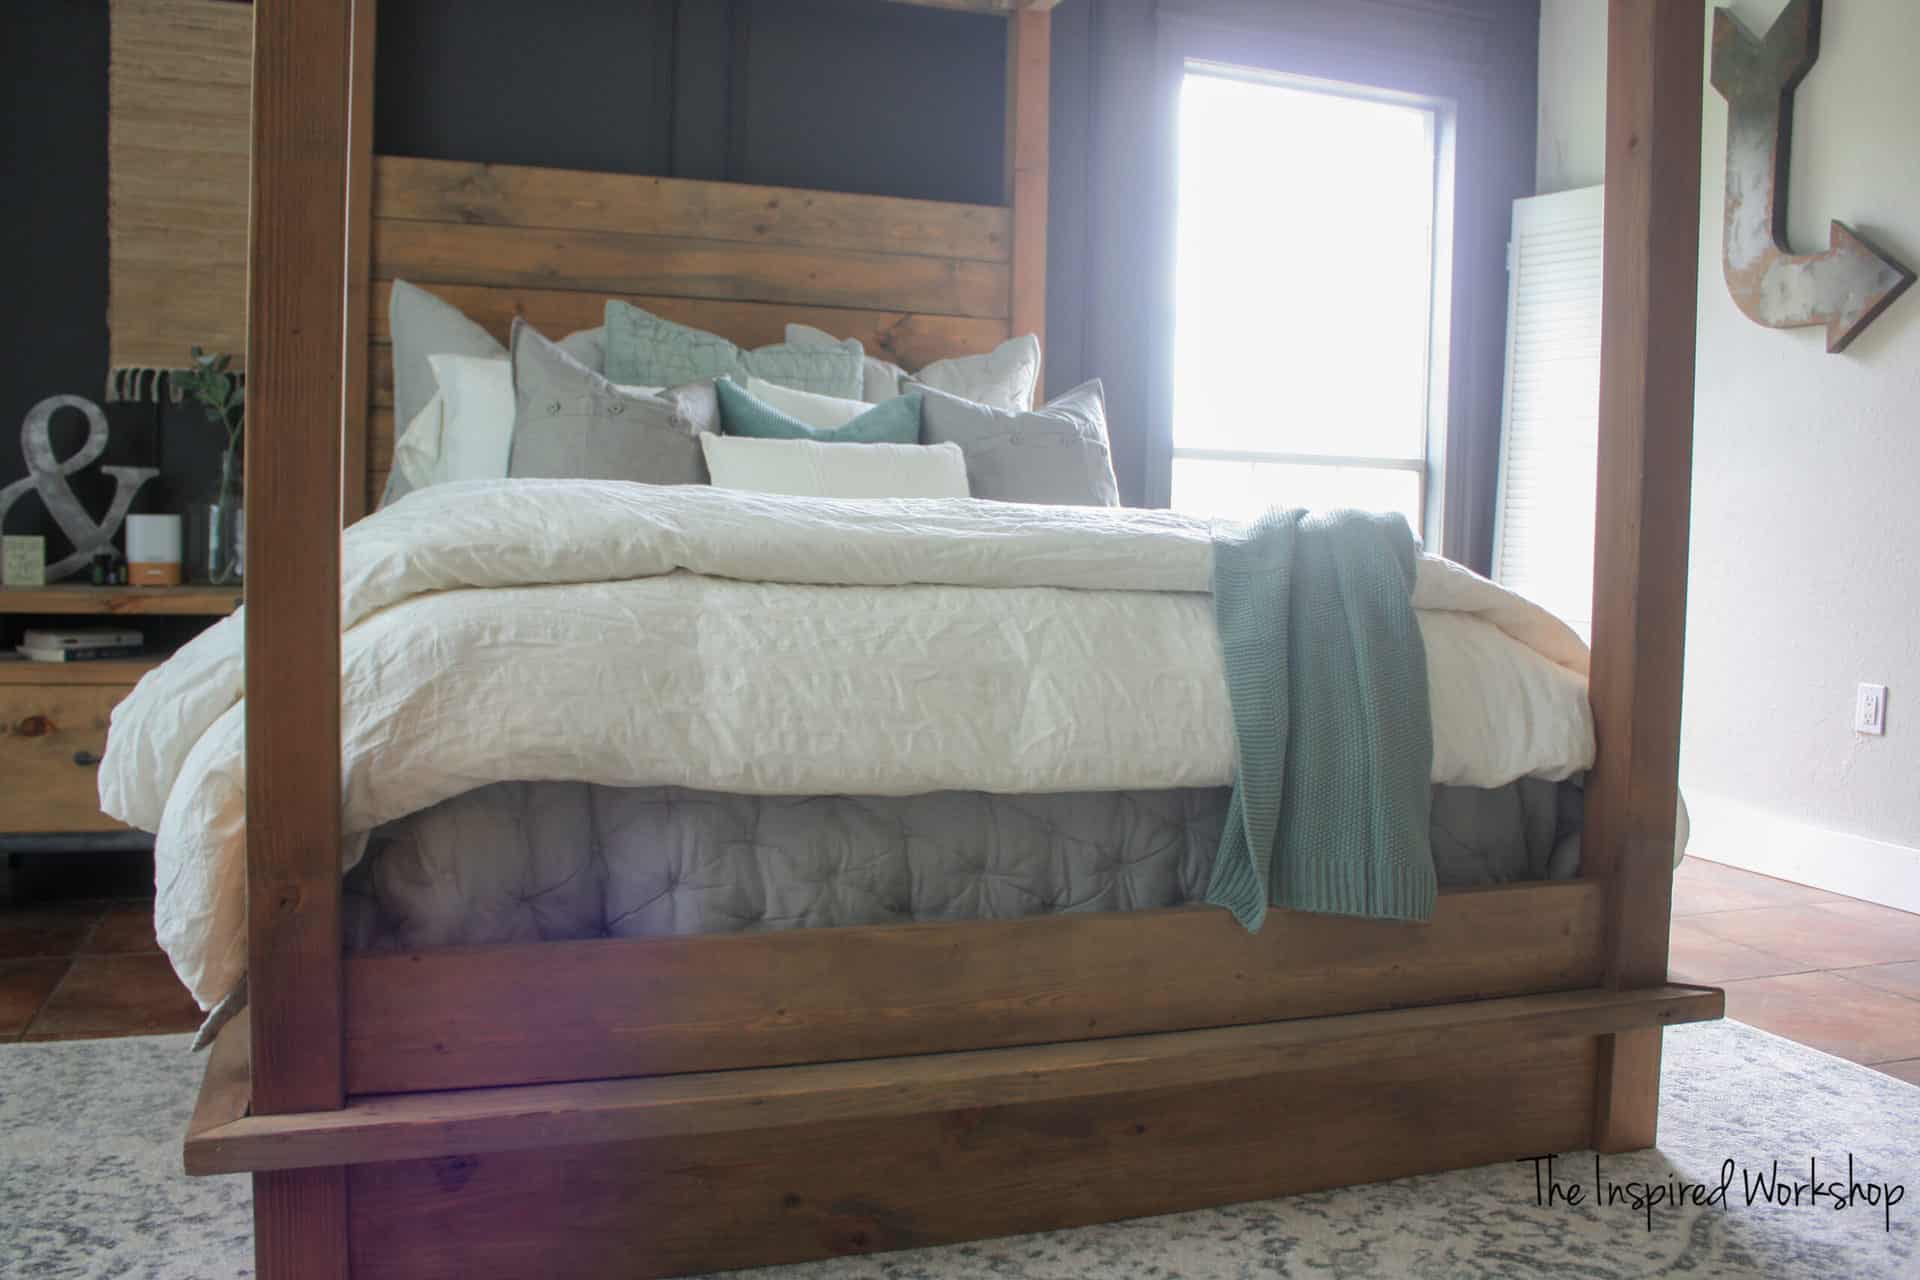
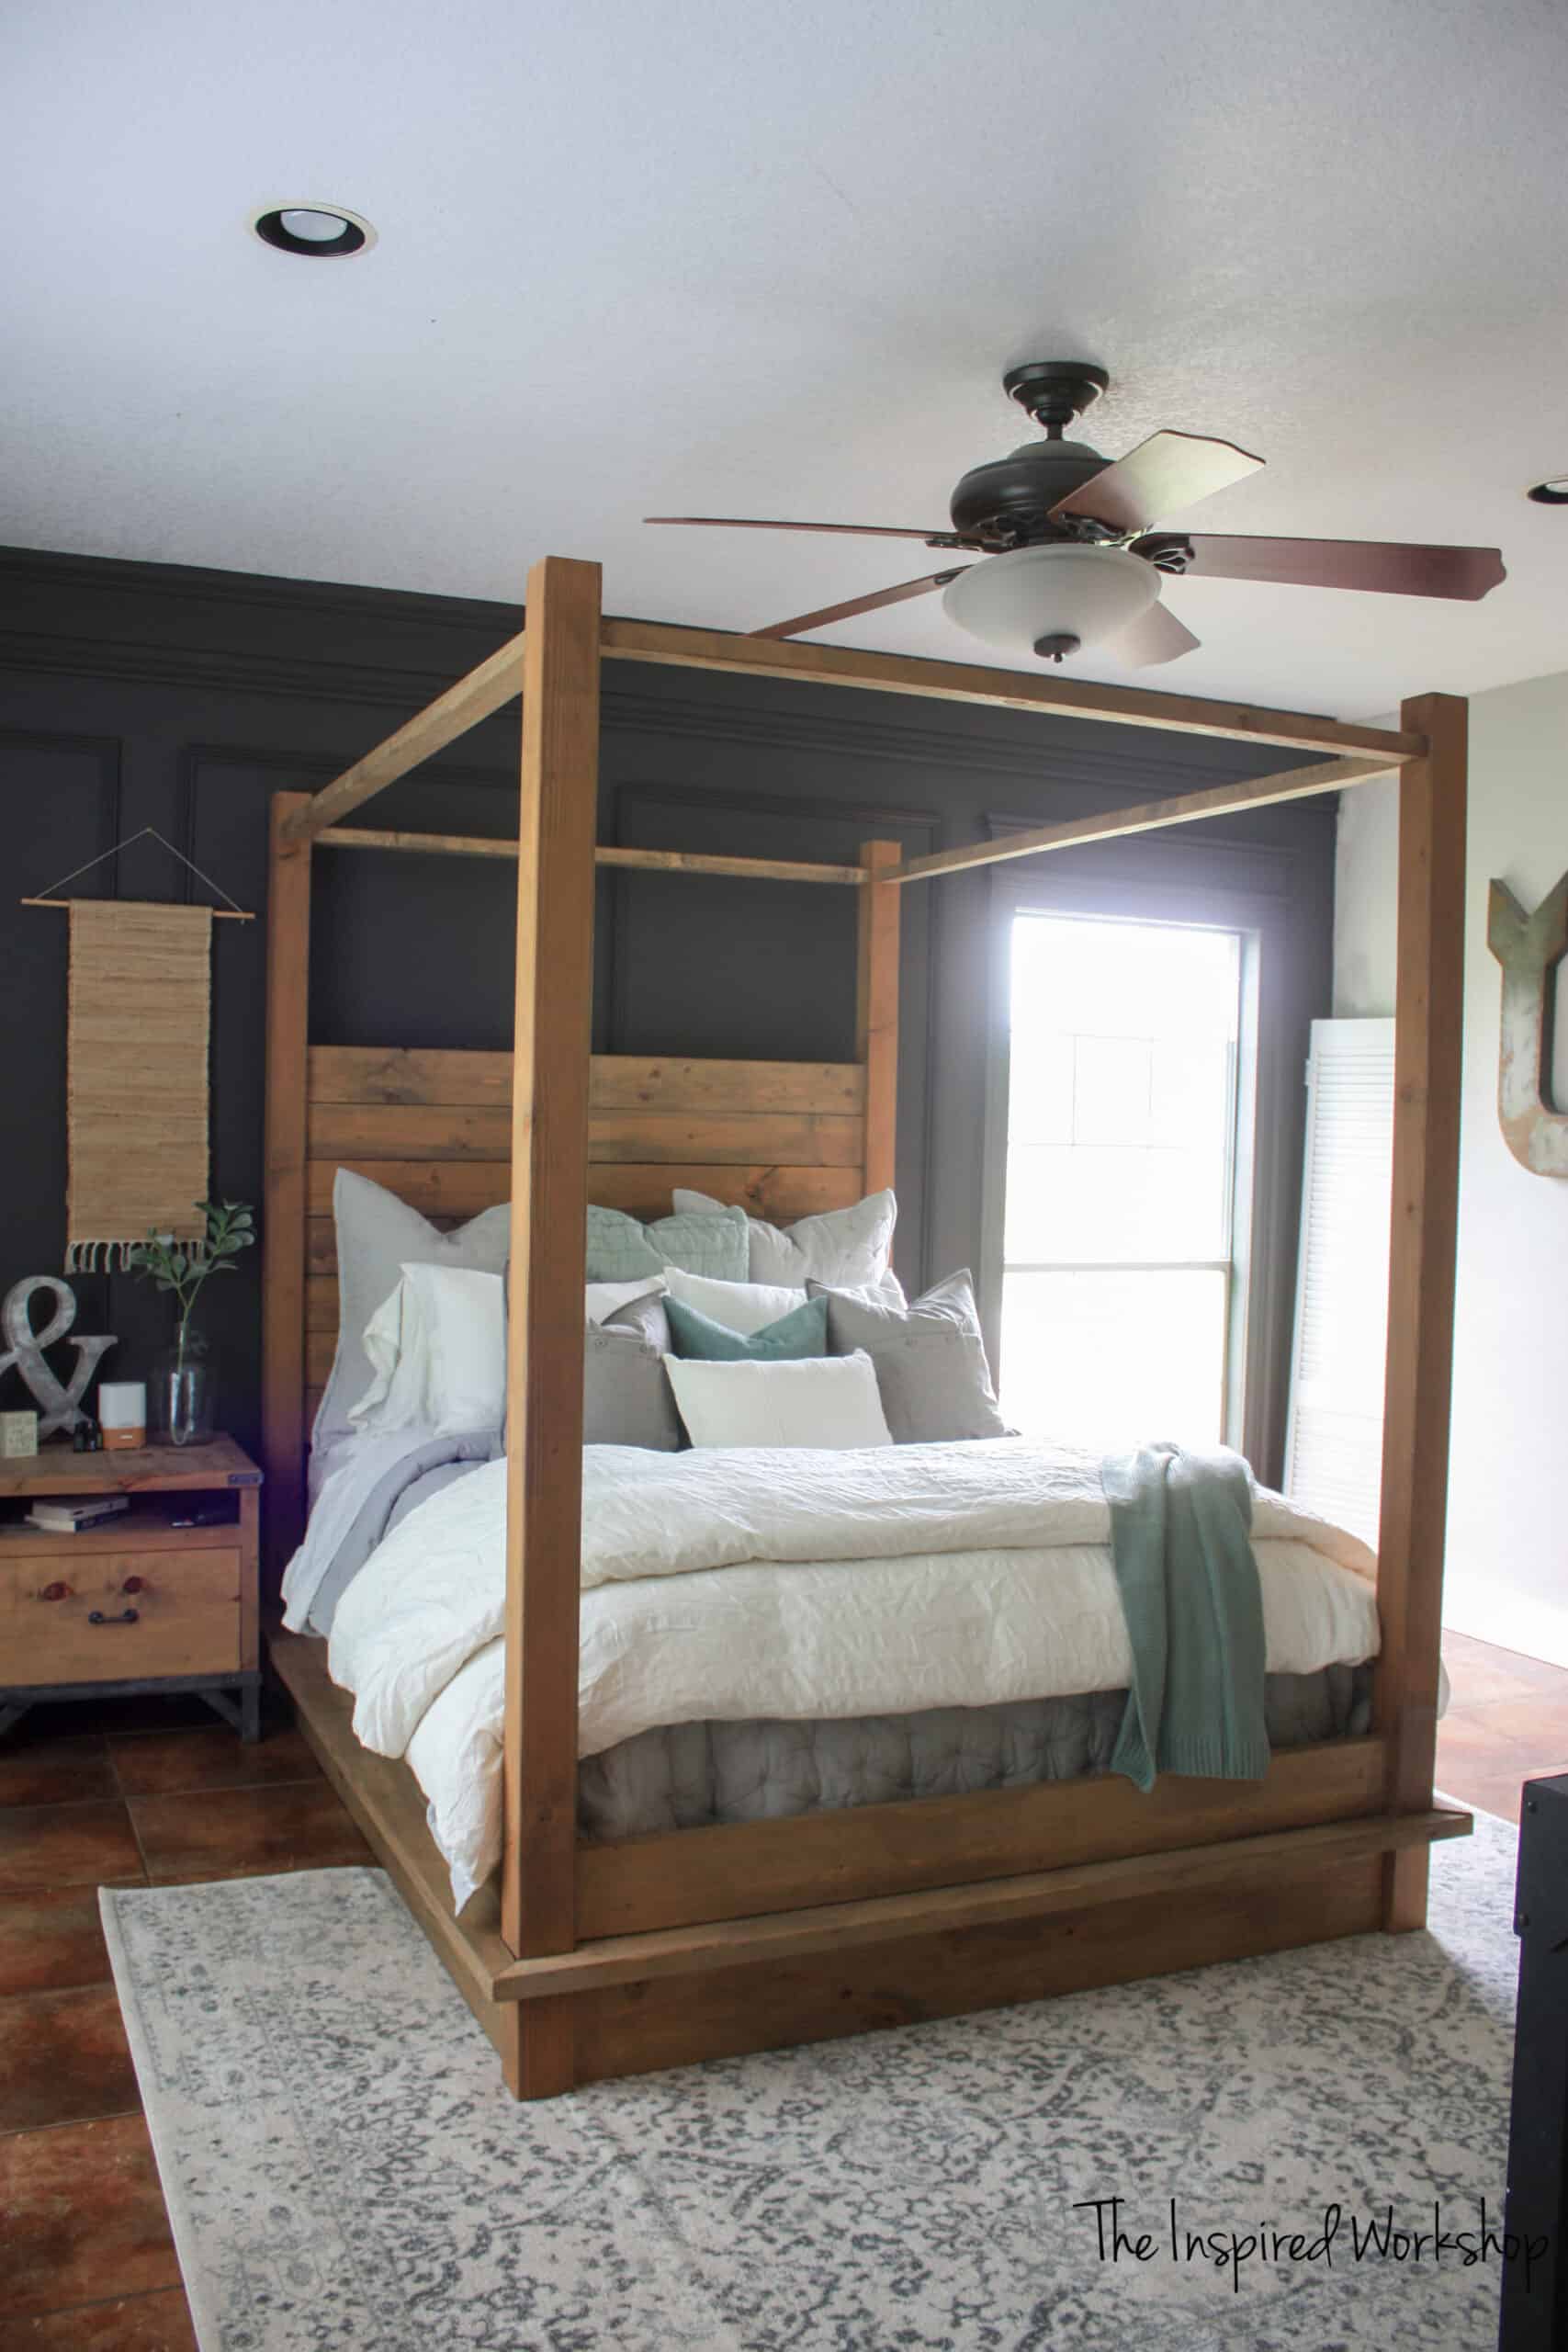
I started this bed FIVE YEARS AGO, and just finished it the other day! Lol! This beautiful, DIY queen bed that I built looks like one straight out of the Restoration Hardware catalog! Isn’t this DIY four-poster bed just the perfect addition to any master bedroom?! Maybe it’s just because my bed has been mattresses on the floor for FAR too long, 😂 but I am LOVING walking into my room and seeing this beauty! And so of course, I want to share the plans with you all!
Oh yeah, that’s my bed folks…and my clean room…I have to brag because it doesn’t happen that often! Lol!
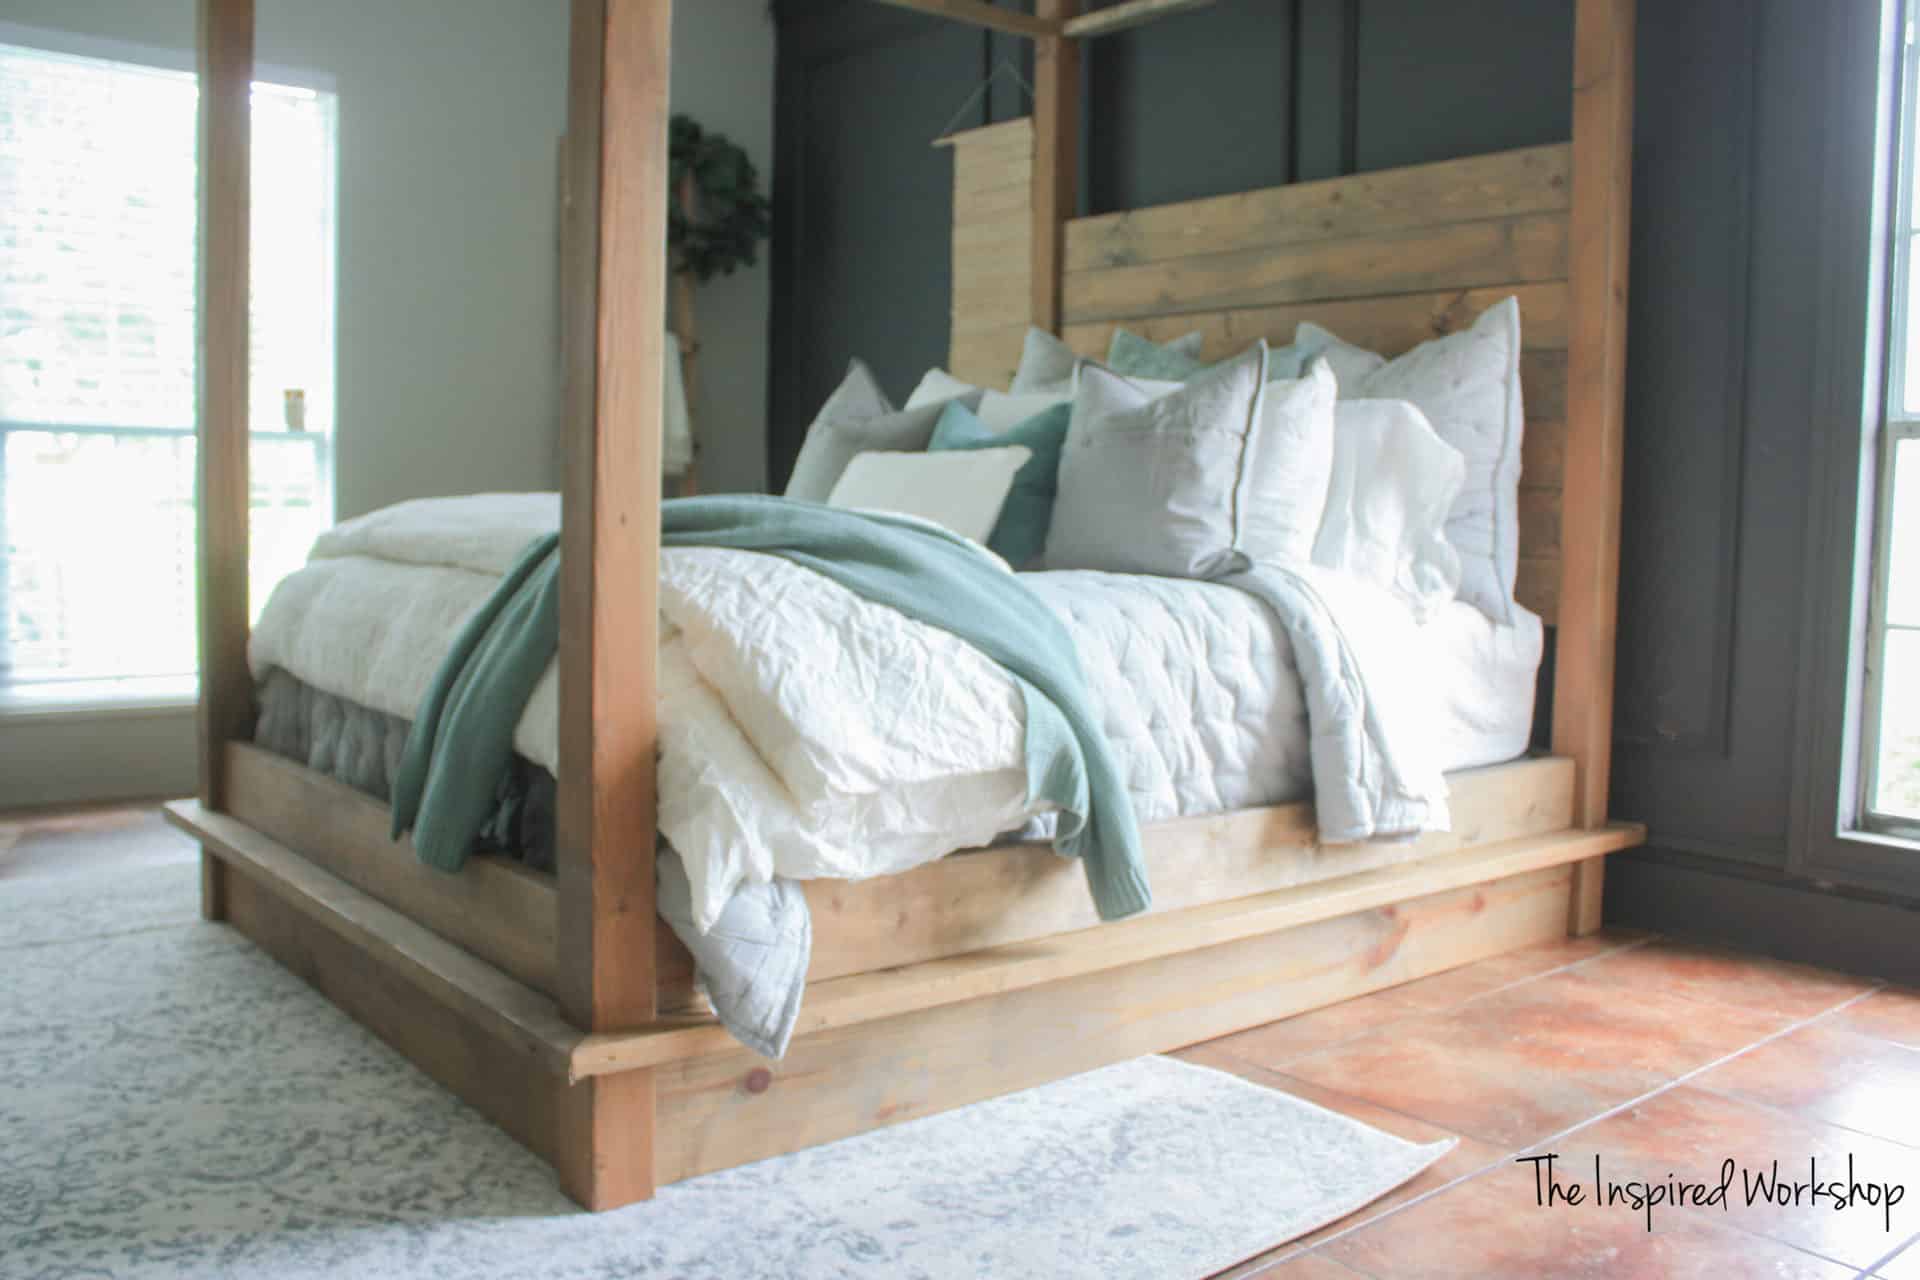
The really cool thing about the plans for this bed is that they are easily altered to create a platform bed if you have a more modern style! The Restoration Hardware version was a platform bed, I just added the 2×6 to cover the box spring because I am old school and love a taller bed, but you can build to suit your needs and wants…and I say it every time…but, that’s the beauty of DIY!!!
(Ignore the wrinkles😂☝)
This bed will cost around 350 bucks to build today (prices in your area may be slightly higher or lower) with the INSANE lumber prices that we currently have, but if they happen to fall back down to where they were 5 years ago, I paid a little less than $150 when I bought the wood and hardware to build it! Man alive I want lumber prices back to normal!🤑🙃 Even with the crazy lumber prices, 350 still sounds AMAZINGLY low when compared to RH’s cost of 5200 bucks if you are a member…and 7000 if you aren’t!!!😲
So, you ready to get your hands dirty…or should I say sawdusty😜…and build your own? Here’s the download link for the free plans!
Download Link for Queen Bed Frame Plans
Don’t have time to build it right now? PIN IT for later!
Gathering Supplies for the DIY Queen Bed Frame
Materials for DIY Queen Bed
**Amazon links below are affiliate links! If you make a purchase after clicking a link below, I will make a small percentage of the cost of that purchase at no extra cost to you! I appreciate it when you use affiliate links as it helps me keep my plans coming to you free of charge! Thanks in advance!
- 4 – 4x4x8
- 5 – 2x8x8
- 2 – 2x8x10
- 2 – 2x6x8
- 5 – 2x6x10
- 3 – 2x4x10
- 4 – 2x3x8
- 2 – sets of Rockler Hardware Bed Rail Connectors (needed for the installation of the hardware: 1 3/8″ Forstner bit, 5/8″ drill bit, 17/32″ drill bit)
- 2 1/2″ pocket hole screws
- wood glue
- drill
- miter saw
- jigsaw
- Kreg Jig
- stain or paint of your choice (I used Old Barn Living Stain in Weathered)
Cut List for DIY Queen Bed
- 4 – 4×4 @ 87″ bed posts
- 2 – 2×8 @ 81″ very bottom bed rails (sides)
- 2 – 2×8 @ 60″ very bottom bed rails (headboard and footboard)
- 1 – 2×8 @ 83″ mattress support board
- 2 – 2×8 @ 71″ ends mitered at 45 degrees off square, ends not parallel (flat boards that encompass the bedposts on headboard and footboard)
- 2 – 2×8 @ 92″ ends mitered at 45 degrees off square, ends not parallel (flat boards that encompass the bedposts on the sides)
- 9 – 2×6 @ 60″ headboard boards and footboard top board
- 2 – 2×6 @ 81″ top board on sides
- 2 – 2×3 @ 81″ very top post connectors
- 2 – 2×3 @ 60″ very top post connectors
- 4 – 2×4 @ 56 1/2″ mattress supports
Building the DIY Queen Bed Frame
Oh man, I am seriously excited to share the plans for this queen bed because it is really the most simple build EVER, but the bed rail hardware gave me a scare so of course, I left it sitting forever in the garage working around it for the longest time until I was FINALLY brave enough to just do it! And then guess what happened…I did the first side, no problem, worked so easy and was perfect!! But I got cocky thinking it was so easy, and I messed the second one up! LOL! It was horrible and guess what I did…left it sitting a long while longer!
So don’t get scared when you read that it took me five years to finish this baby, it was just because I was a big chicken and then screwed it up! 😅 The actual building only took me a day, and by day I mean, I started at 2 o’clock in the afternoon and worked until 10!
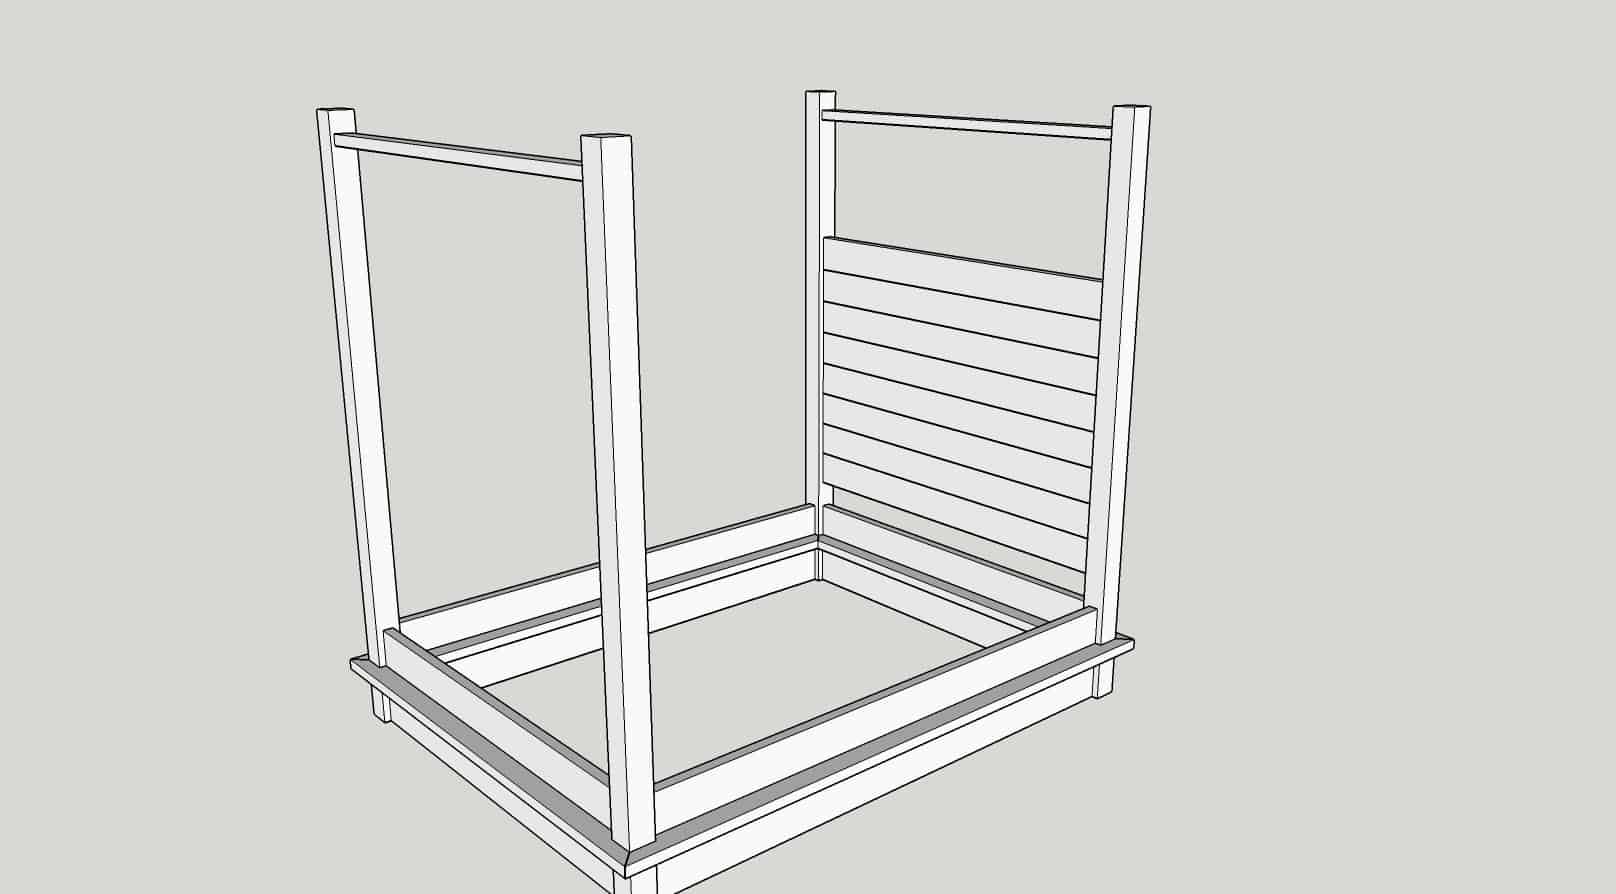
Building the Footboard for the Queen Bed Frame
The footboard and headboard are essential the same build, you’ll just add a few extra 2x6s to the headboard! The builds are simple, straightforward, and easy! The mitered 2x8s that fit around the 4×4 look complex but they really aren’t, I promise!
The boards you will need to make the footboard are:
- 2 – 4×4 @ 87″
- 1 – 2×8 @ 60″
- 1 – 2×8 @ 71″ ends mitered at 45 degrees off square, ends not parallel
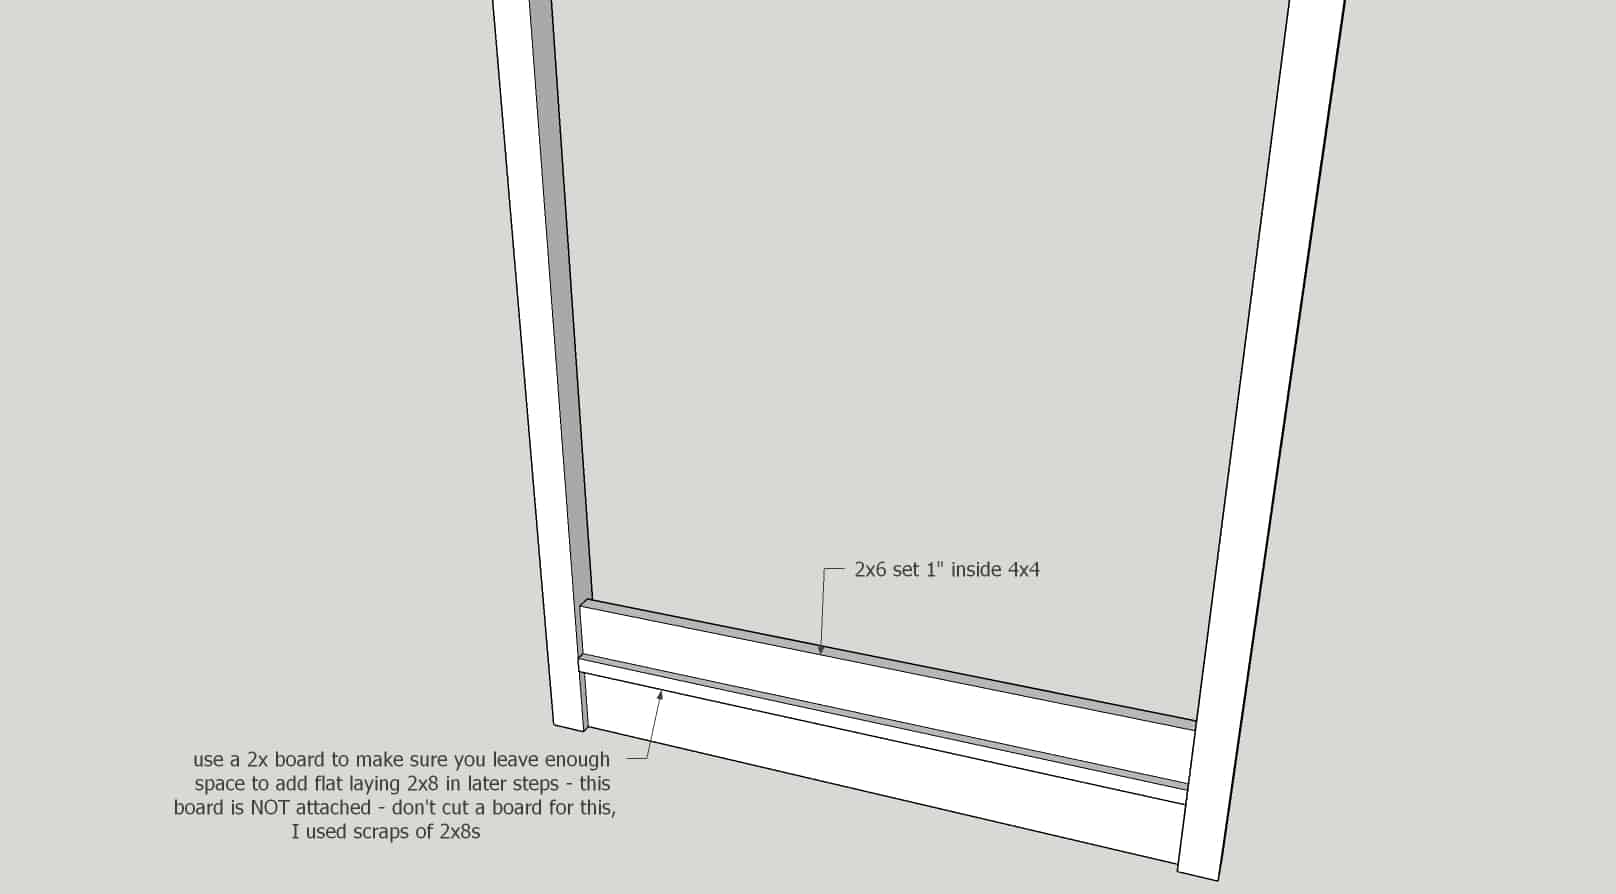
- 1 – 2×6 @ 60″
- 1 – 2×3 @ 60″
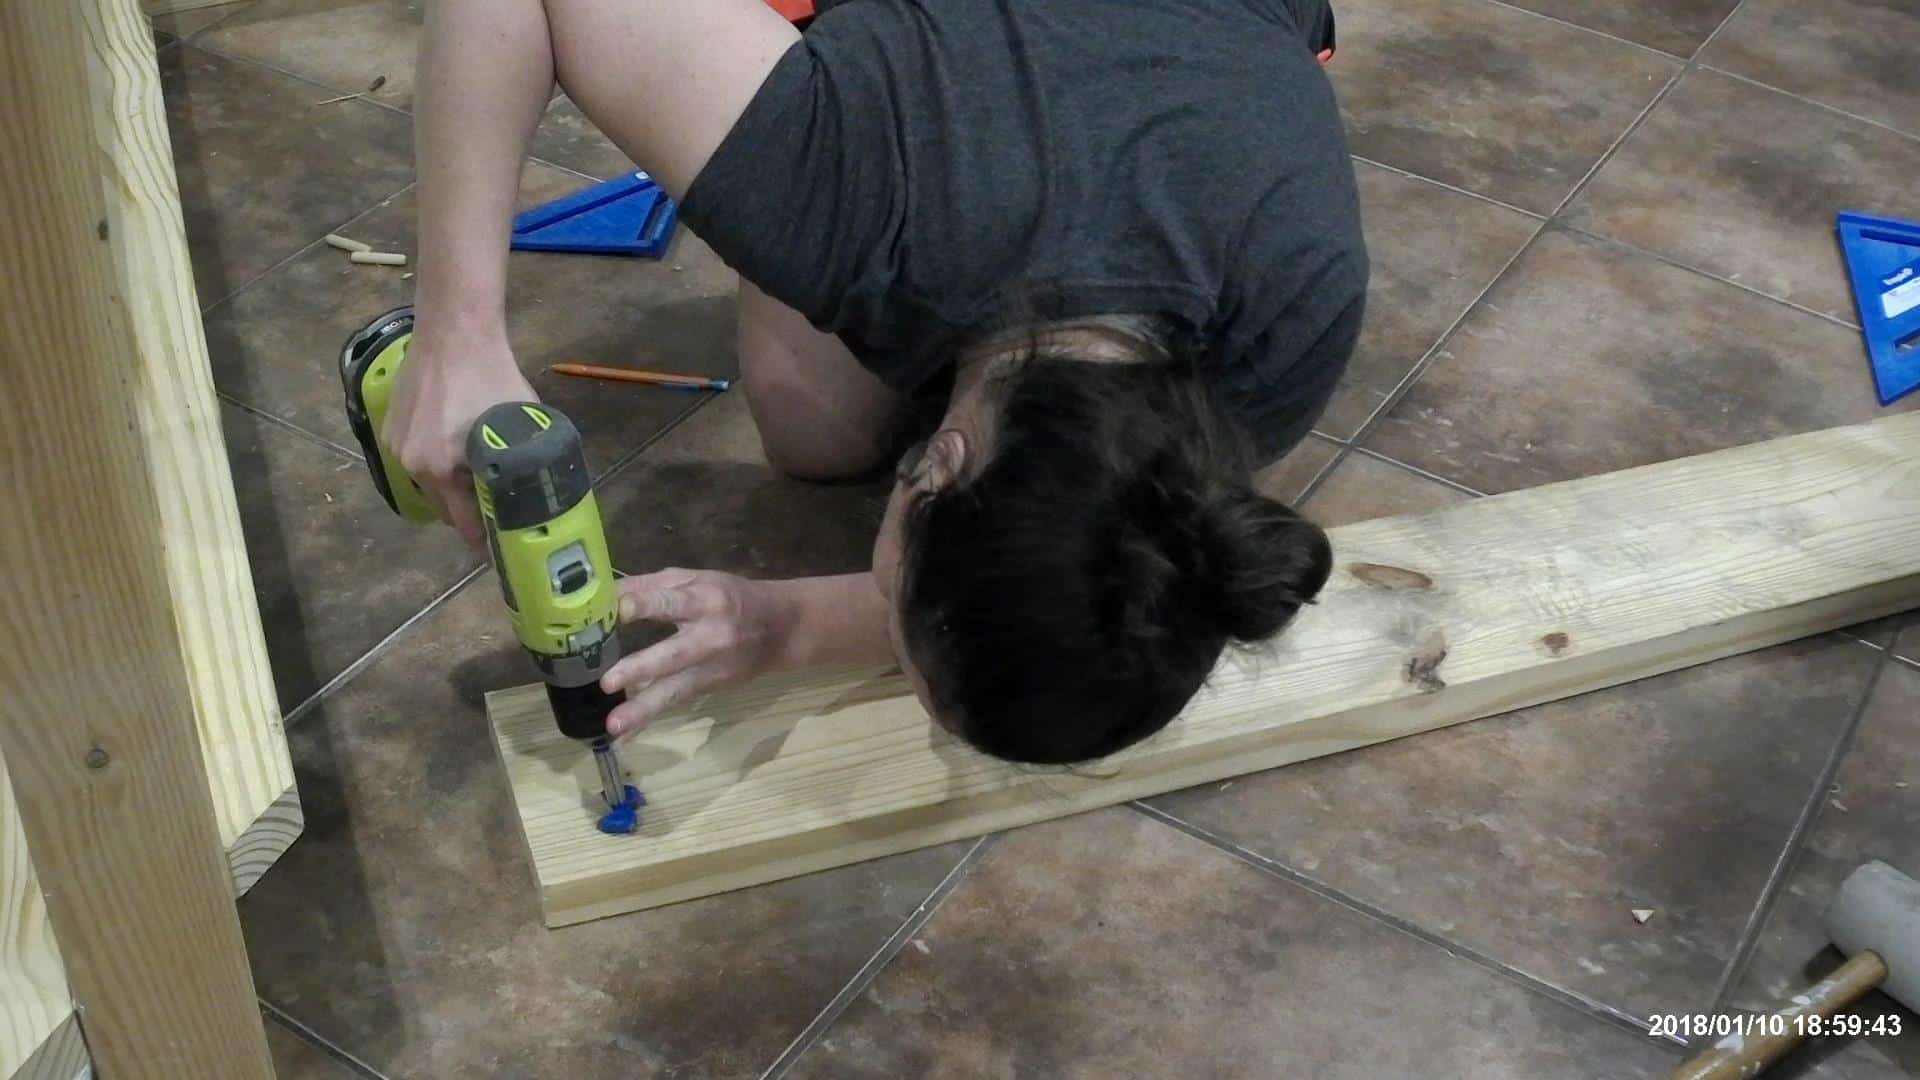
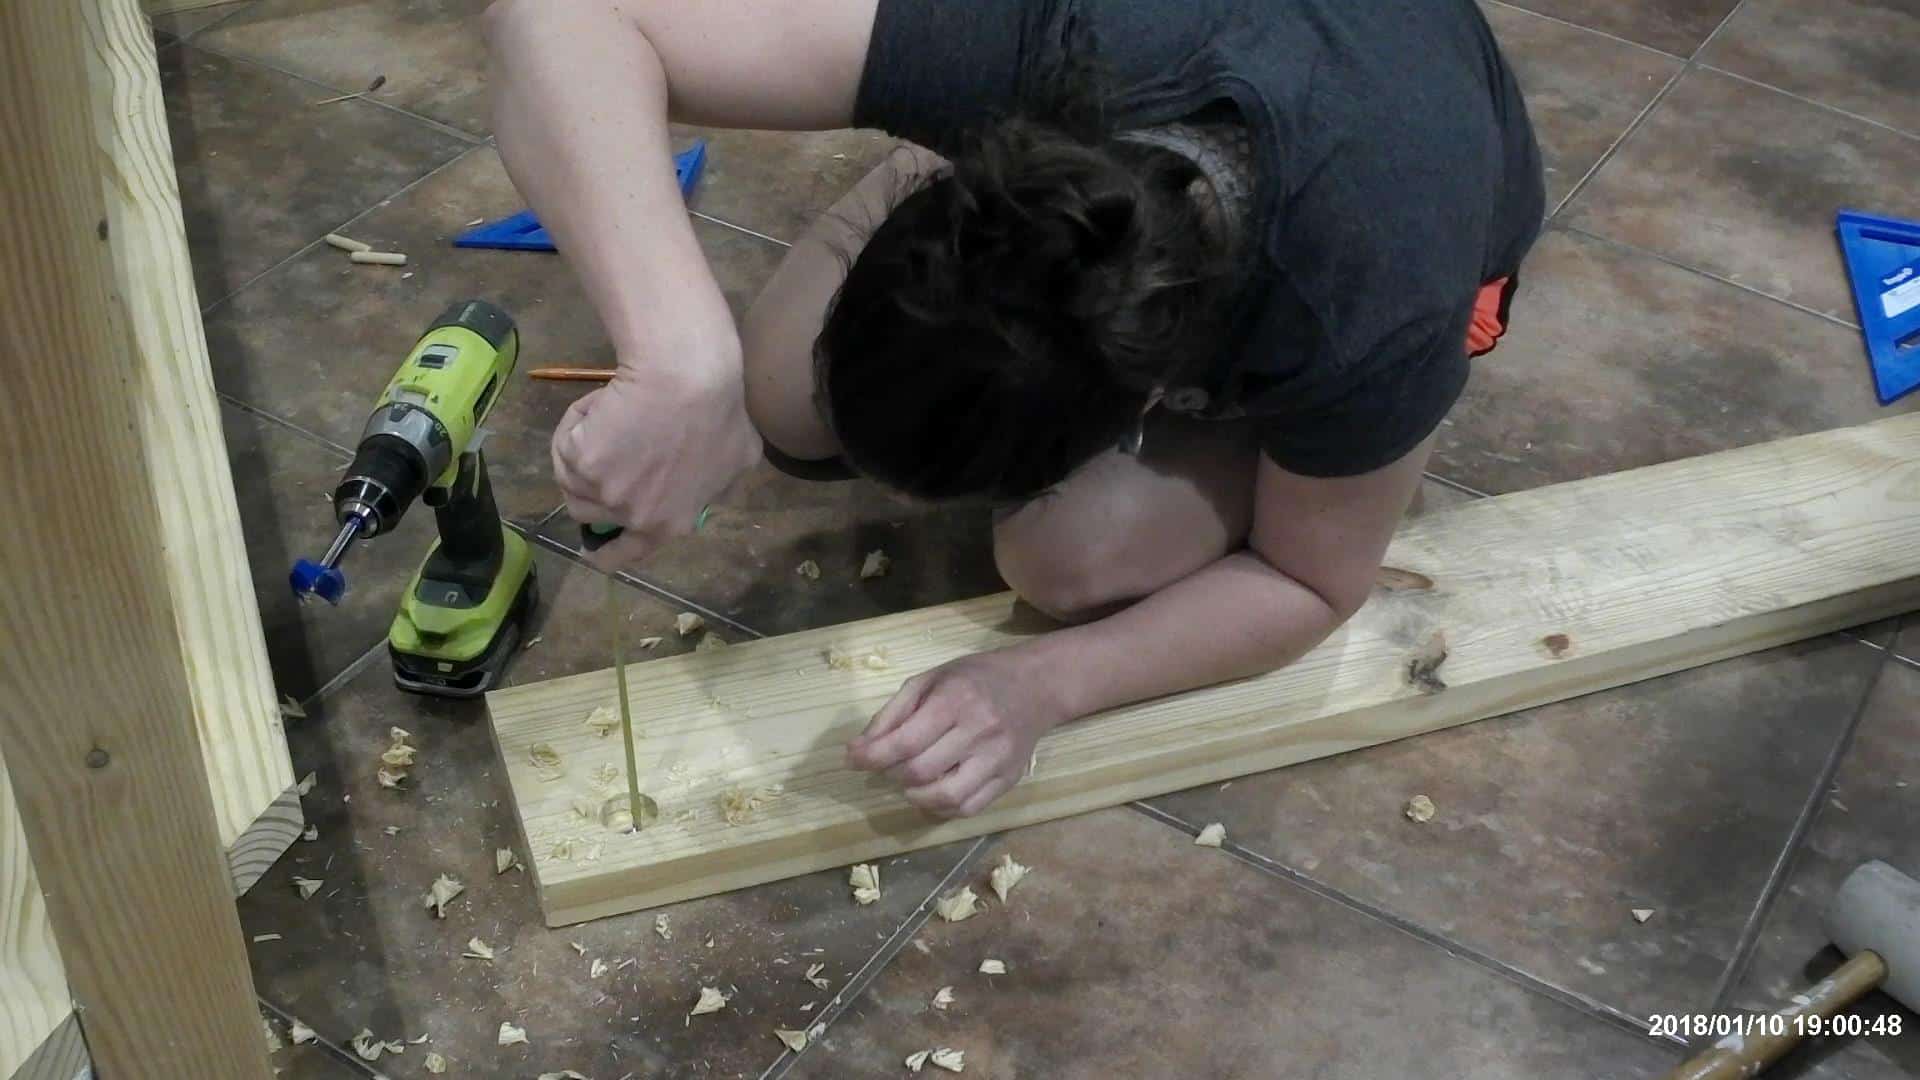
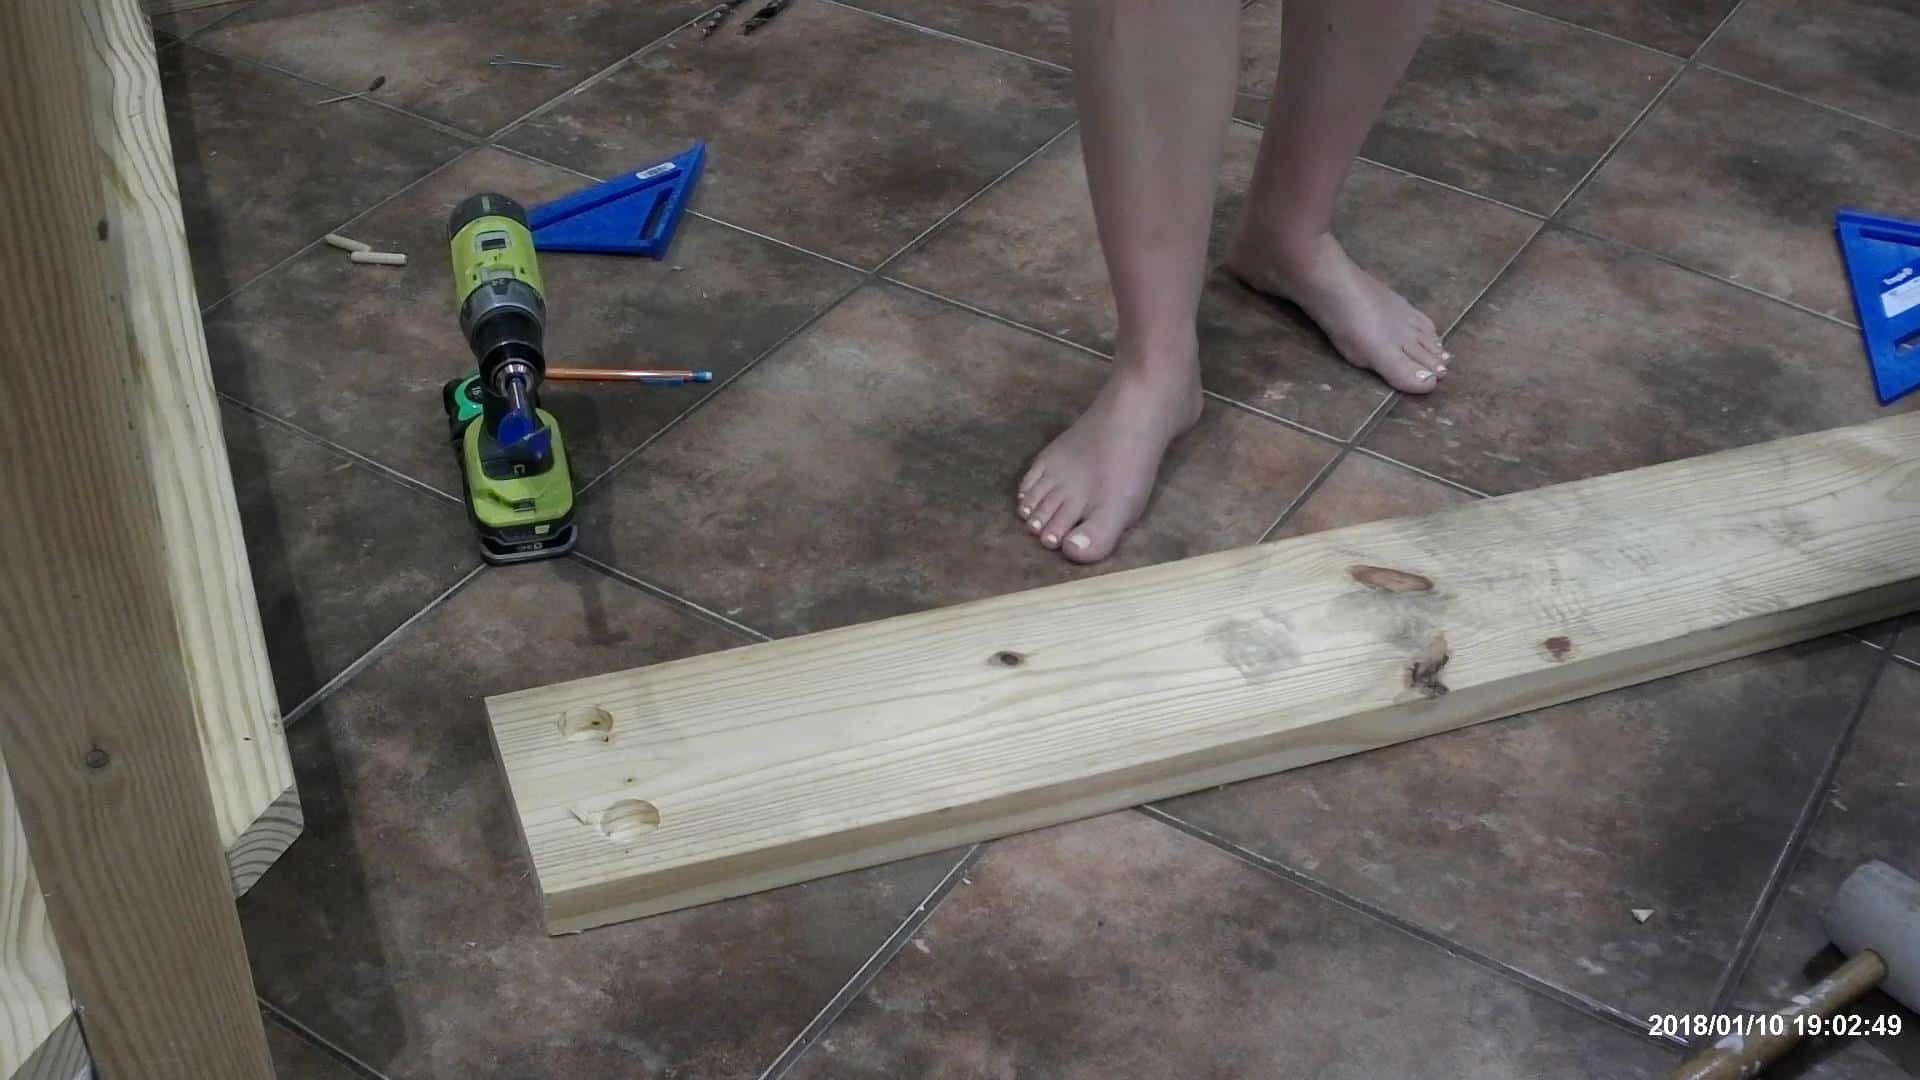
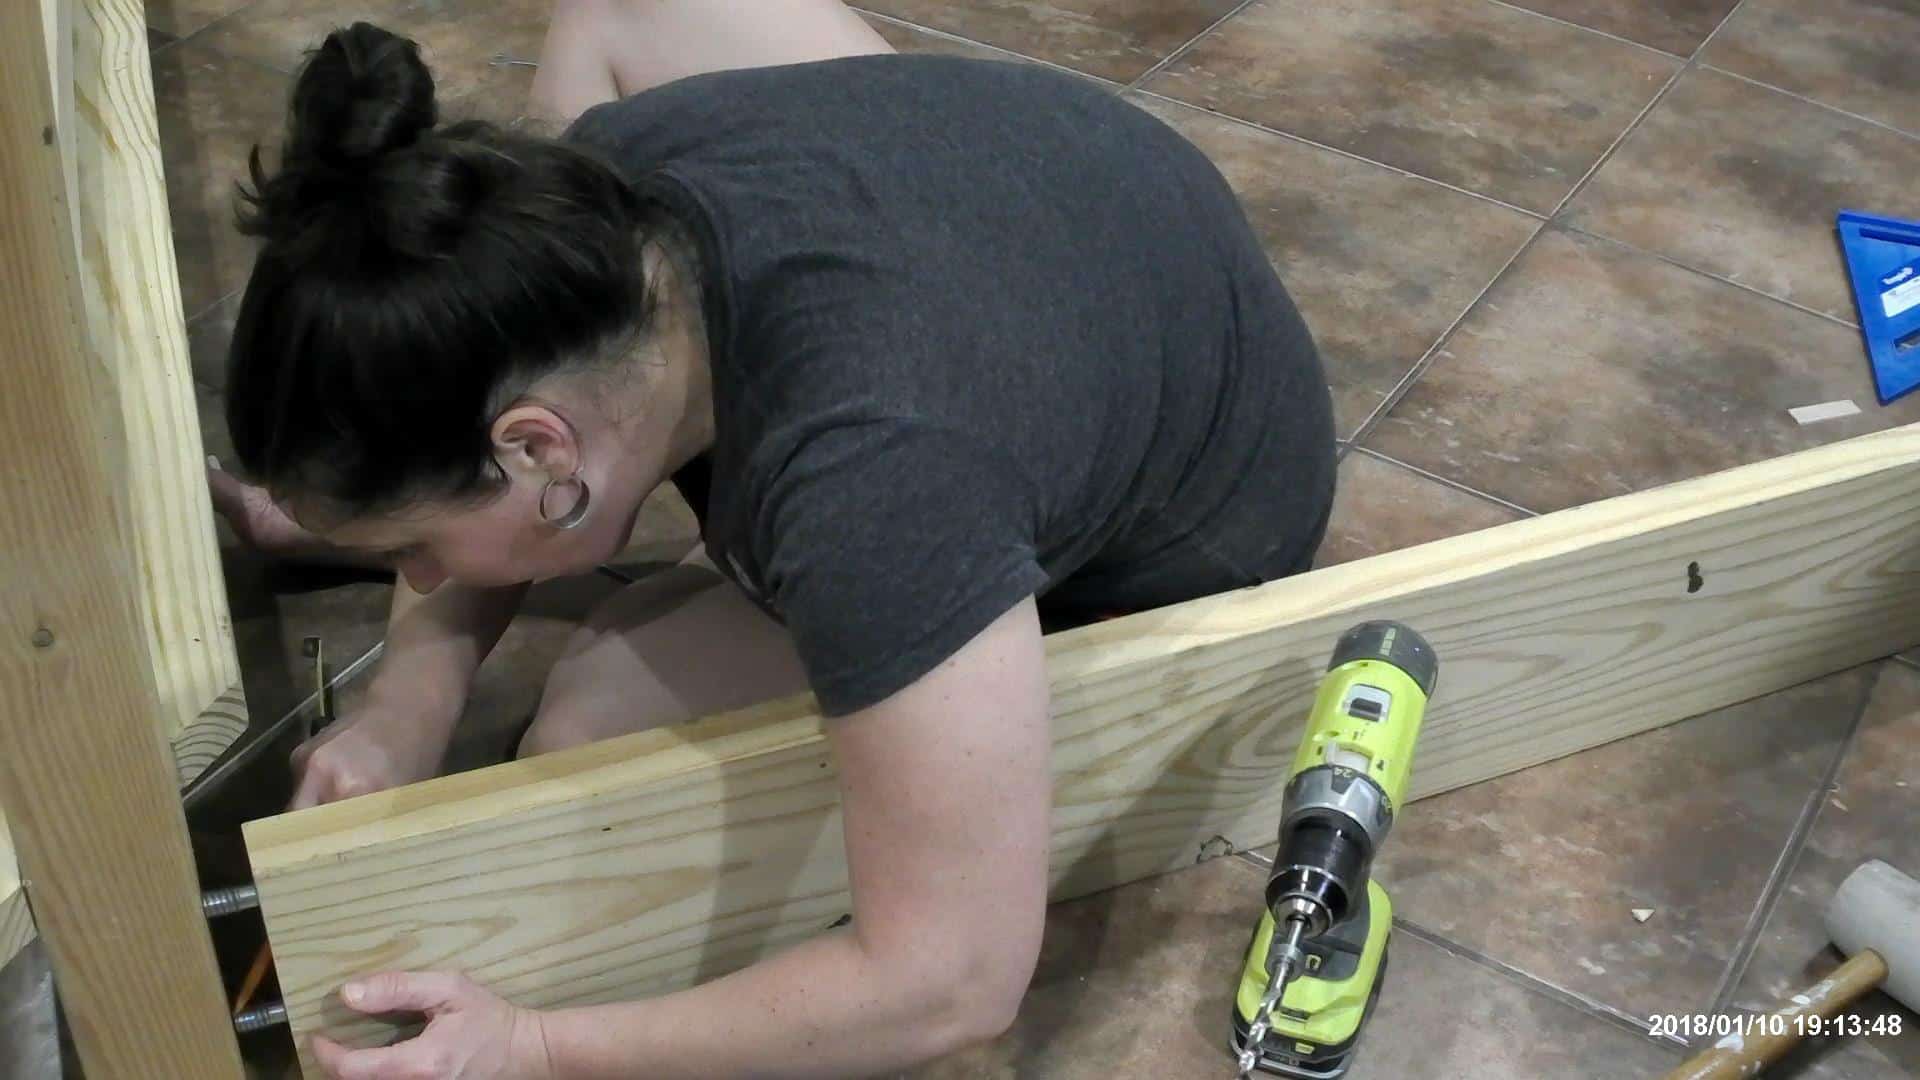
After cutting all boards down to size for the footboard, you will need to drill pocket holes at a depth of 1 1/2″…if you aren’t sure how to use the Kreg Jig to drill pocket holes, check out this post that shows the step by step how to set it up and drill them! West Elm Emmerson Dining Bench Drill the pocket holes in the ends of the boards, I drilled 3 holes at each end of the boards since they are pretty wide boards. On the 2×3 I only drilled two holes.
On the 2×8 @ 60″ you will also need to drill pocket holes along one edge, this will need to be the top of the board when you attach it to the 4x4s. You will use 2 1/2″ screws along with wood glue to attach! **Use wood glue on all the boards of the headboard and footboards, only the sideboards will be removable for moving the bed!
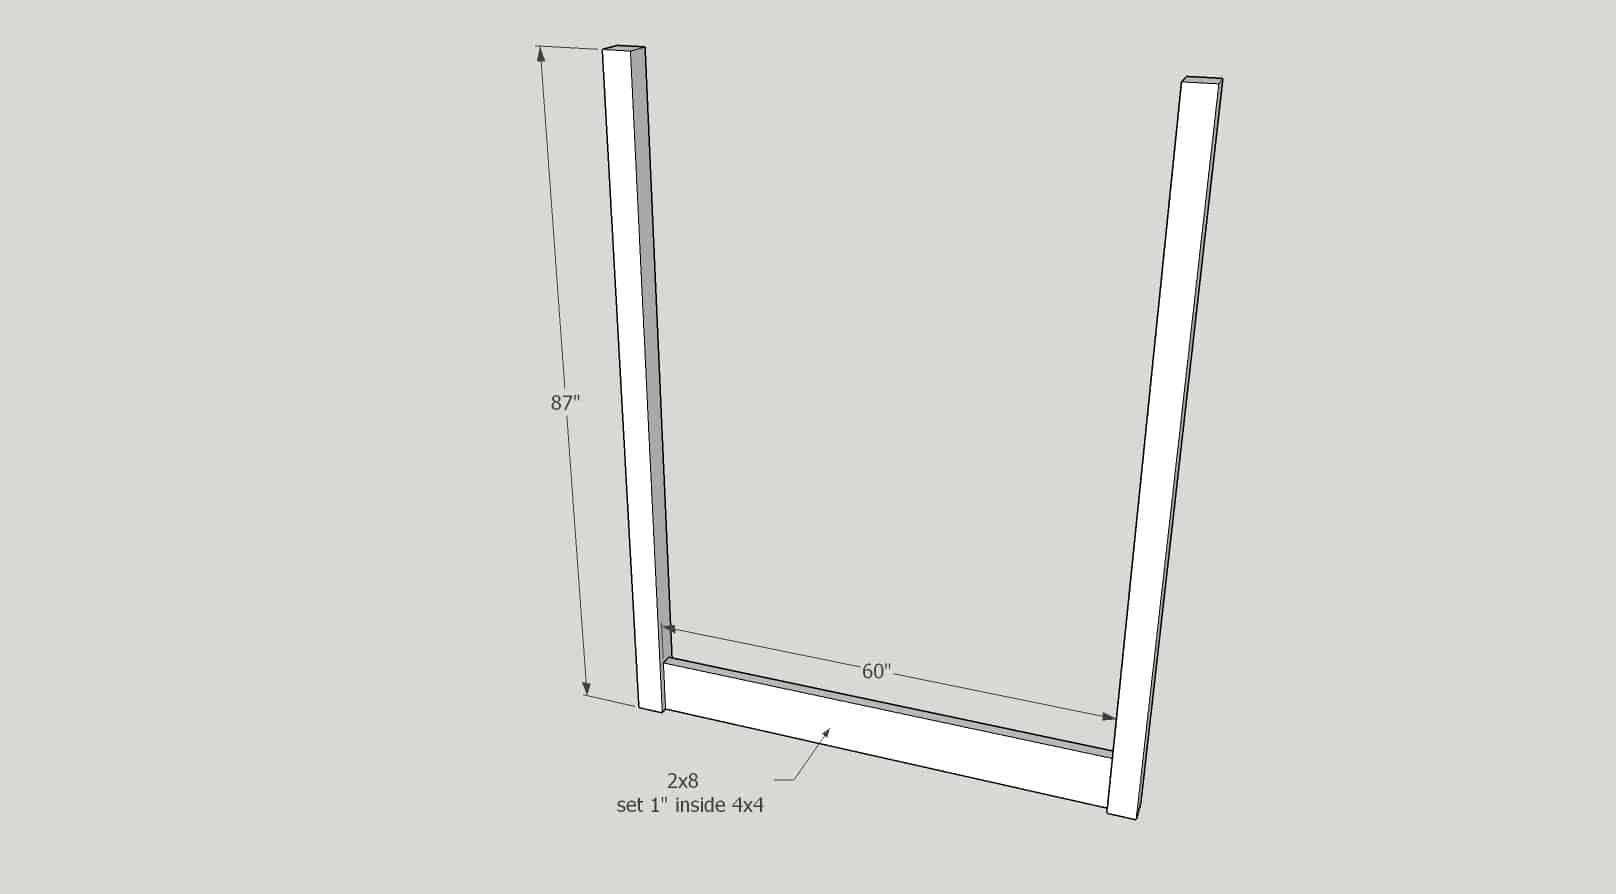
Use a scrap piece of 2×8 (or any 2x board) as a spacer when putting the 2×6 into place…I cut the mitered board later so it wouldn’t fit right now (hence why I used a scrap piece of 2×8), but you can scroll on down and see how to cut it if you’d like to cut it now and put it in place first!
Add the 2×3 at the top, I turned the pocket holes up toward the ceiling so you won’t see them…unless you are like 8 feet tall! Lol! The 2×3 is set down 3″ from the top of the post.
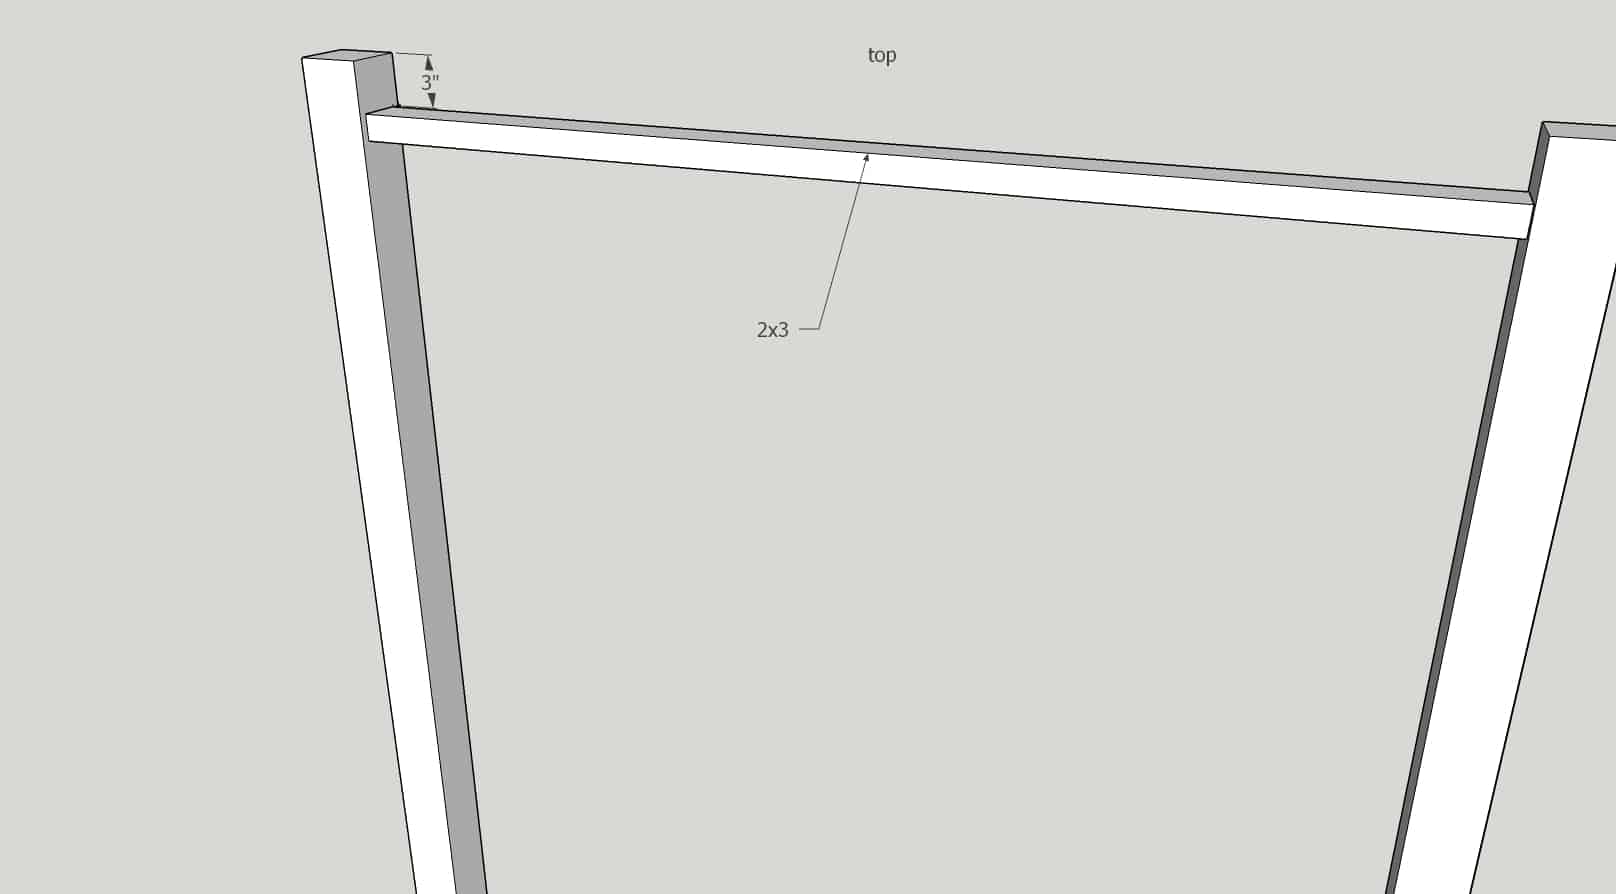
I used a 3″ block to set all the top boards at the same height without having to have extra hands!
After attaching the 2×3, your footboard is done for now!
Also, just a note, I sanded the boards as I went just so that each piece was ready to be stained as soon as I had it all together! I felt like I would put off staining if I had to sand the whole thing at the end…it would seem like a huge job, but sanding as I went made it feel manageable! Lol! Just the crazy way my brain works! 😅
Moving on to the headboard!
Building the Headboard for the Queen Bed Frame
The boards needed for the headboard are:
- 2 – 4×4 @ 87″
- 8 – 2×6 @ 60″
- 1 – 2×8 @ 60″
- 1 – 2×8 @ 71″ends mitered at 45 degrees off square, ends not parallel
- 1 – 2×3 @ 60″
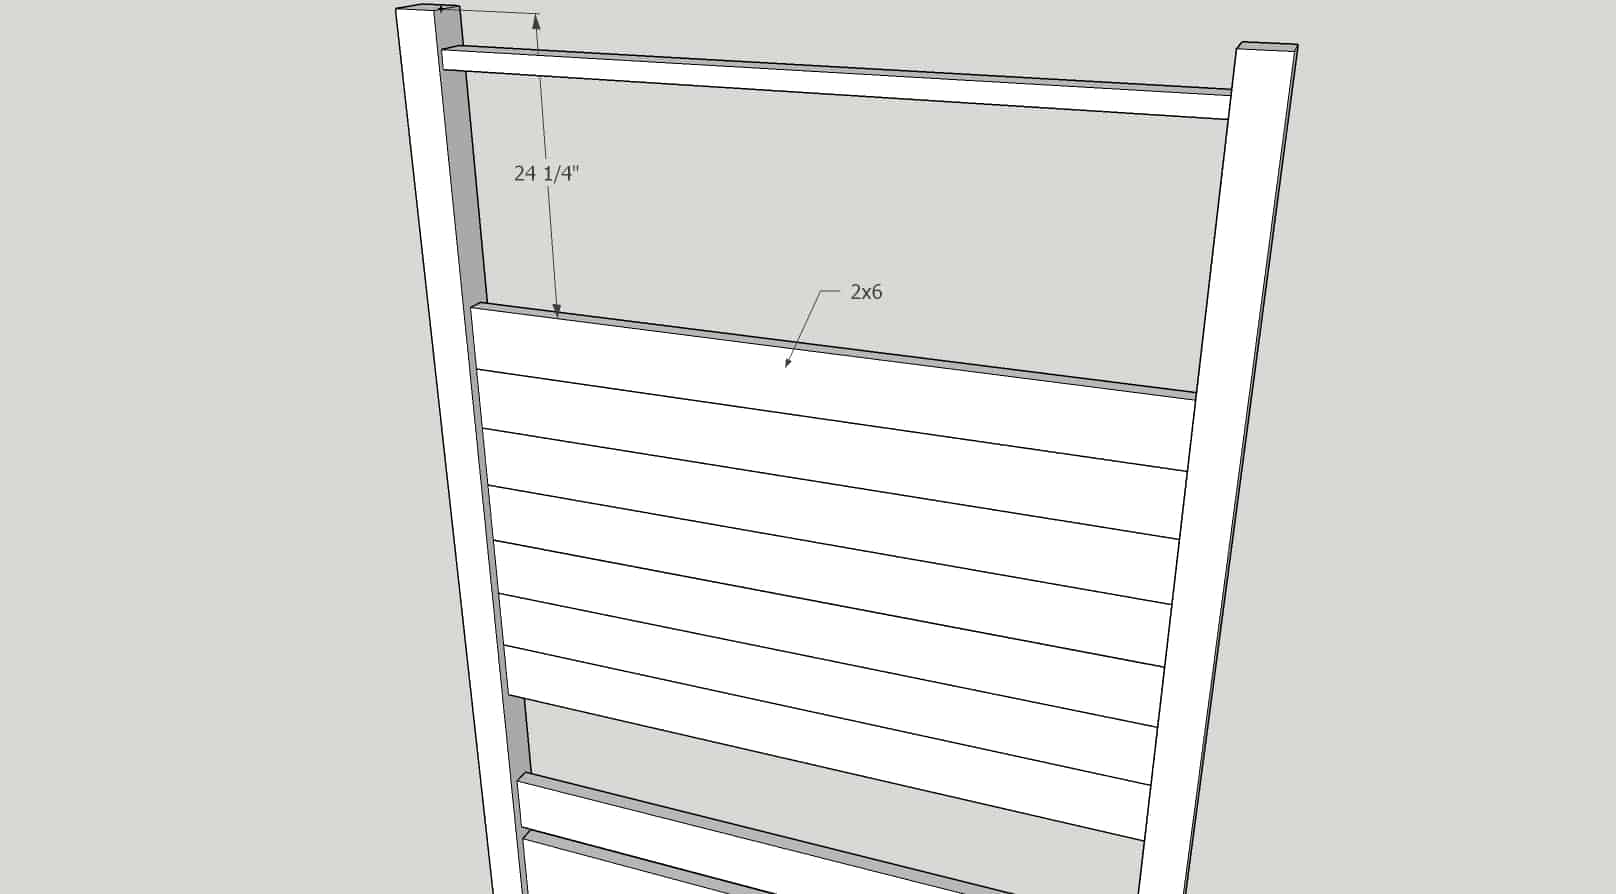
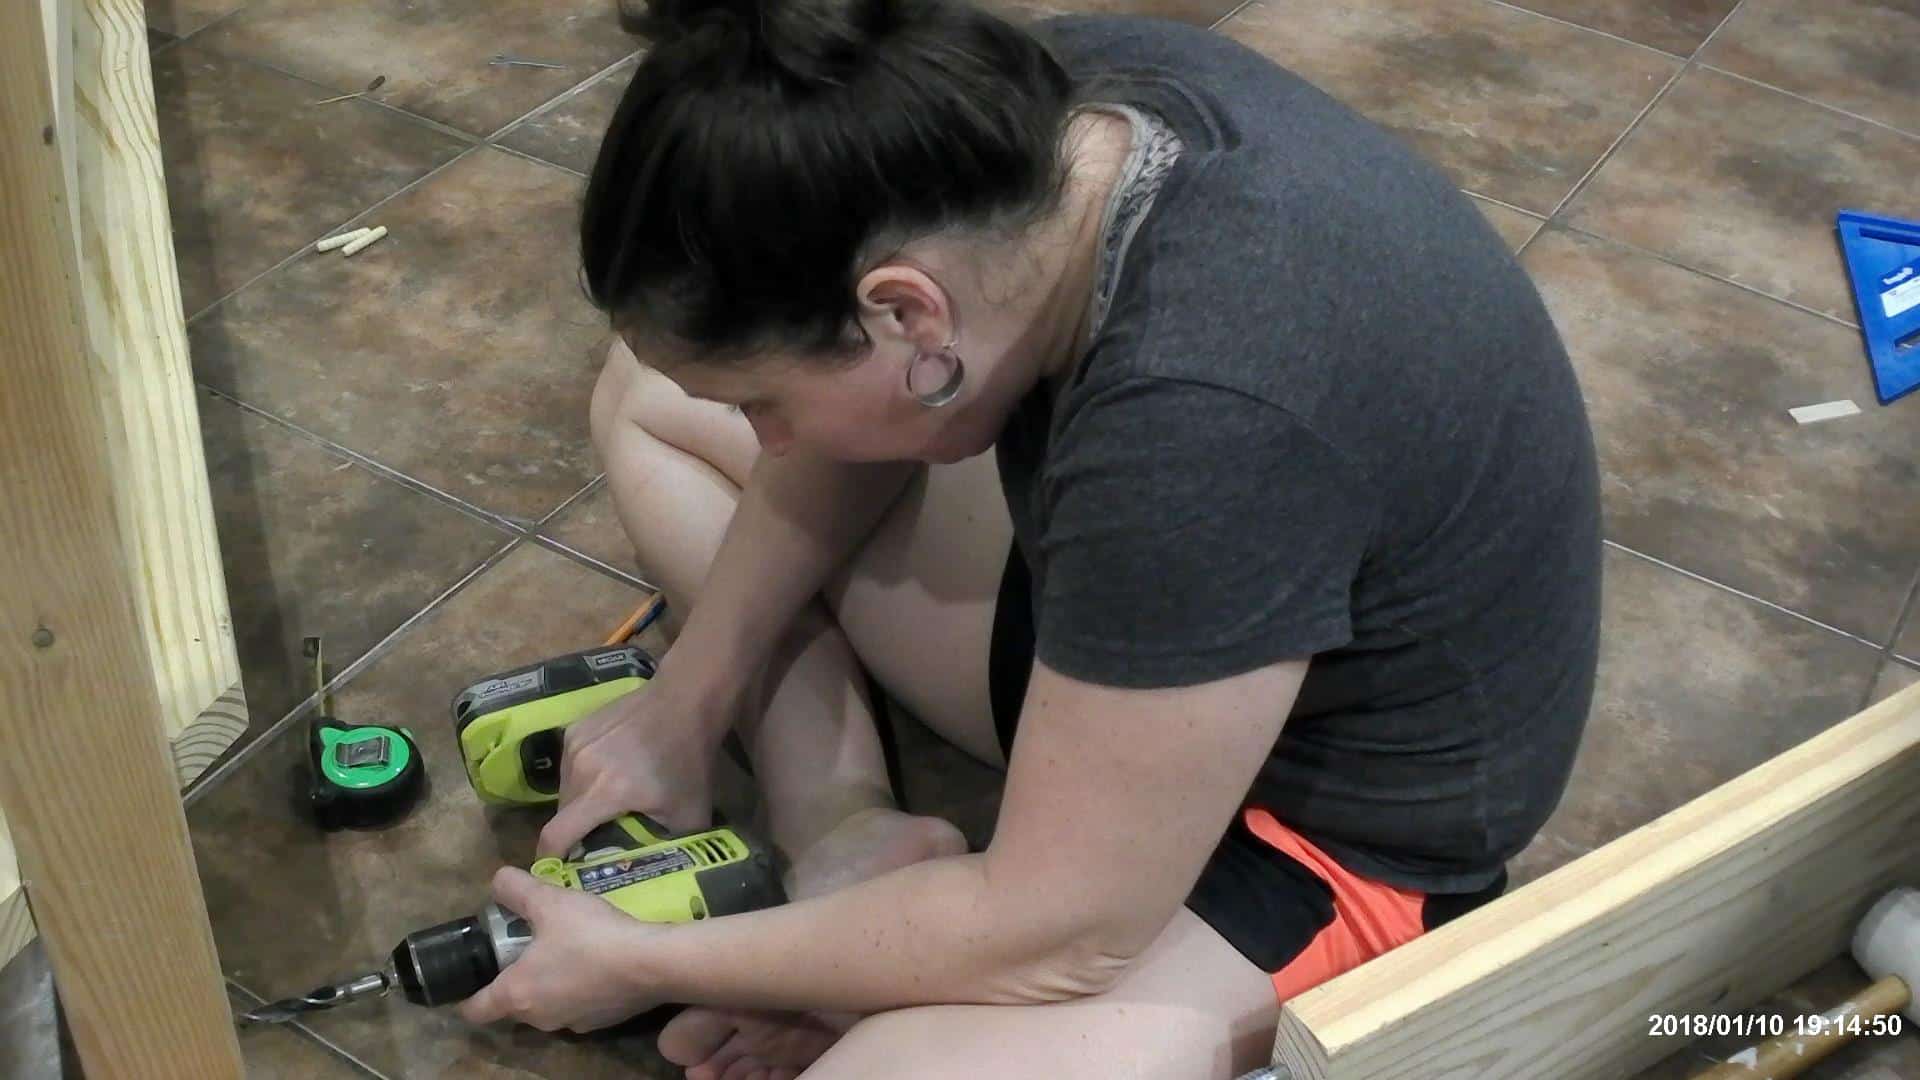
You will repeat the steps of the footboard, and then add 7 extra 2x6s through the midsection, starting 24 1/4″ down from the top of the post ! Pocket holes drilled at 1 1/2″ on ends. Use 2 1/2″ screws and wood glue to attach them.
The headboard is almost complete! Now you can cut the mitered boards for the little slot we left at the bottom!
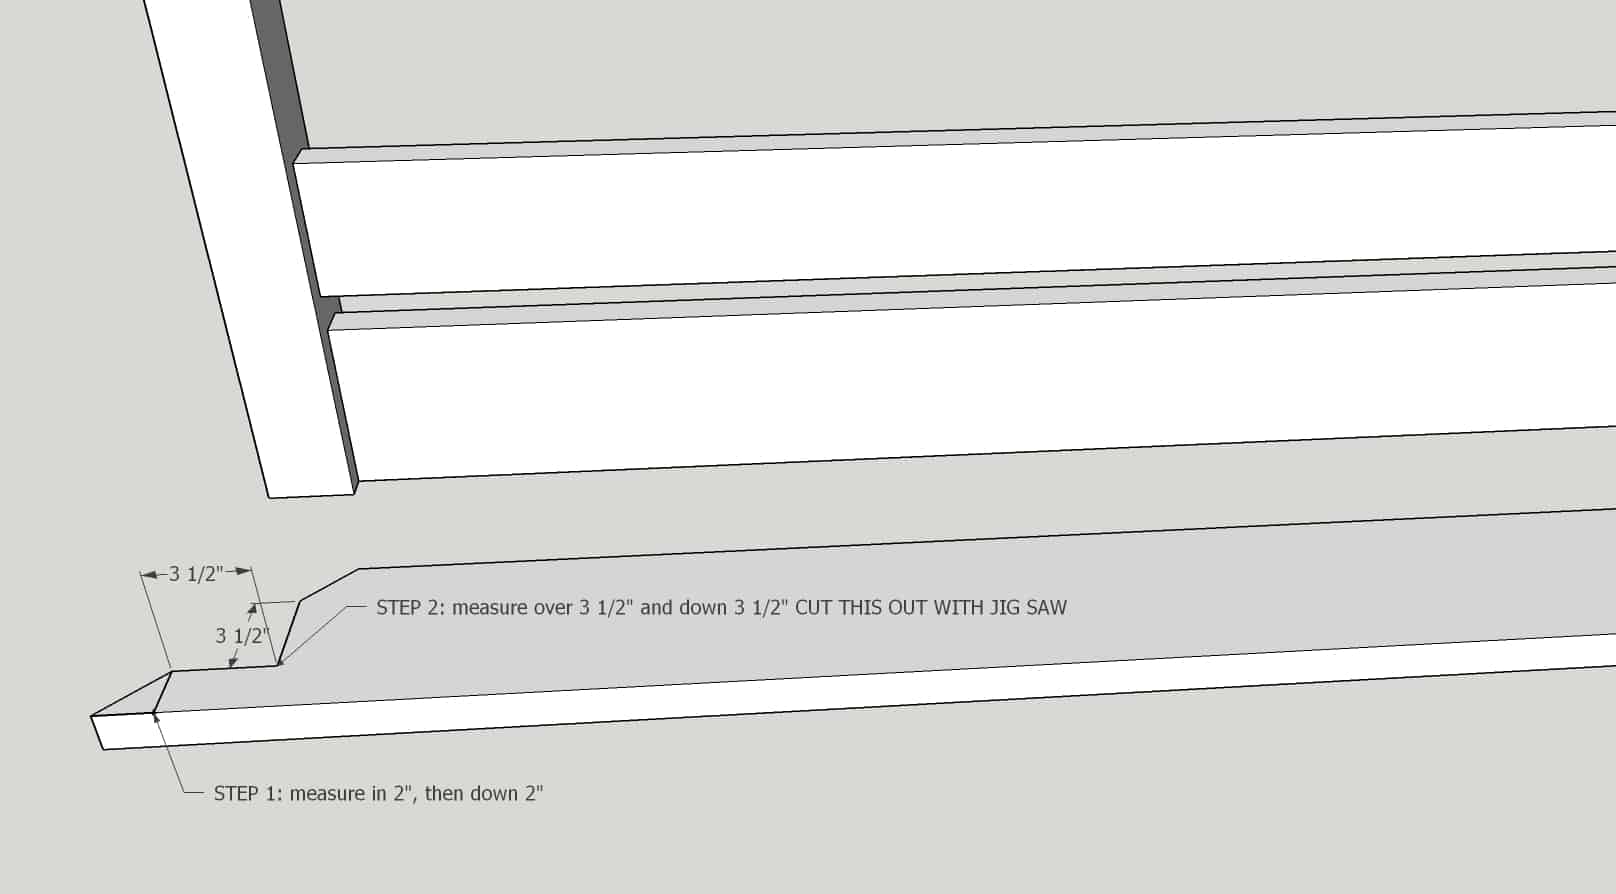
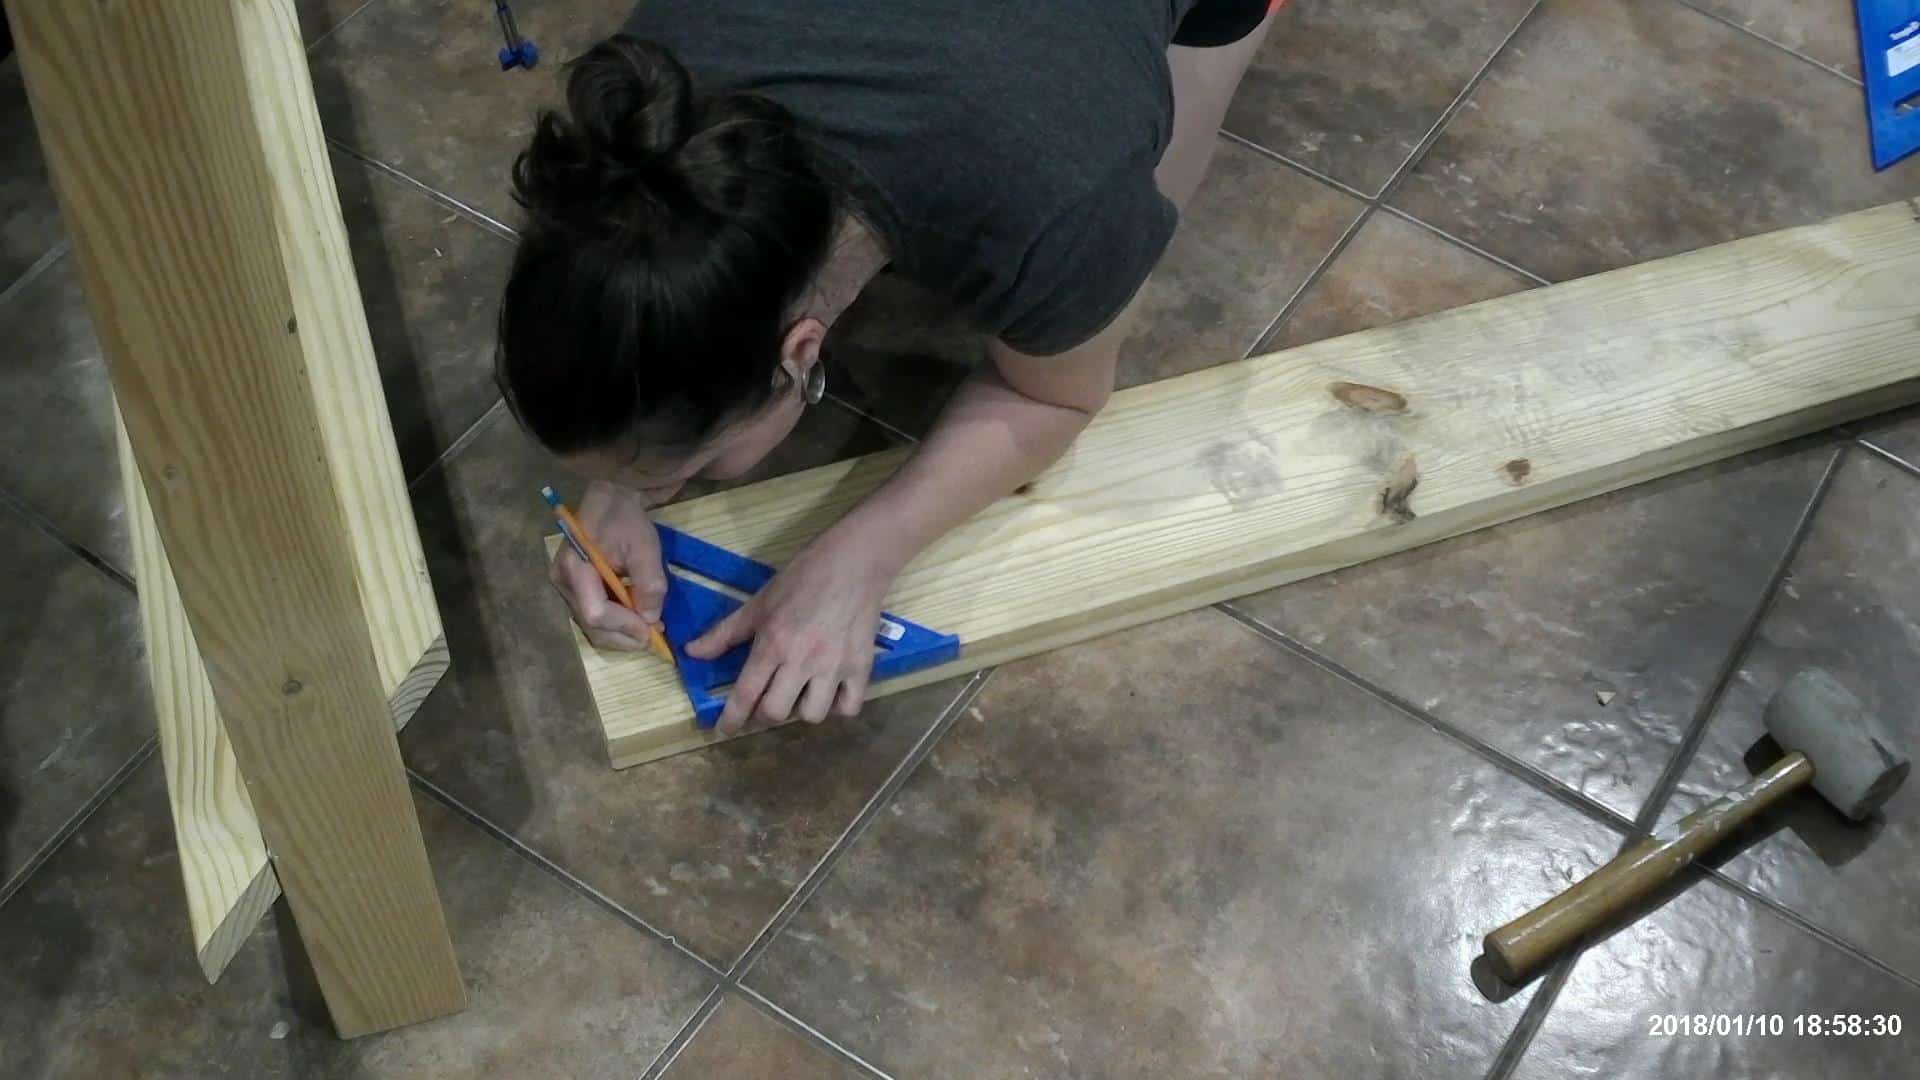
The 2×8 board is cut at 71″ on the longest end, and mitered at 45 degrees off square.

To cut the indentions for the 4x4s, from the longest ends, measure over 2″ from each edge, then down 2″. Then measure over 3 1/2″ and down 3 1/2″…the two lines that are 3 1/2″ are the ones to cut with your jigsaw. Just a tip, use a thicker blade in your jigsaw when cutting the sections out. A small scrolling blade will bend too much and will end up making beveled cuts, which won’t line up when you go to attach them! The cuts are straight so a large blade will work perfectly!
You will follow the same steps for the footboard, and even the sideboards later on…only the sideboards will be 92″ long as opposed to 71″.
Once you have the cuts made on the ones for the headboard and footboard, you can slide them into place and make sure they fit! You can use the pocket holes you drilled in the bottom 2×8 to attach ONE of the boards at this time, DO NOT ATTACH THEM BOTH, you will need to fit a board in later steps FIRST…BEFORE attaching the other one!
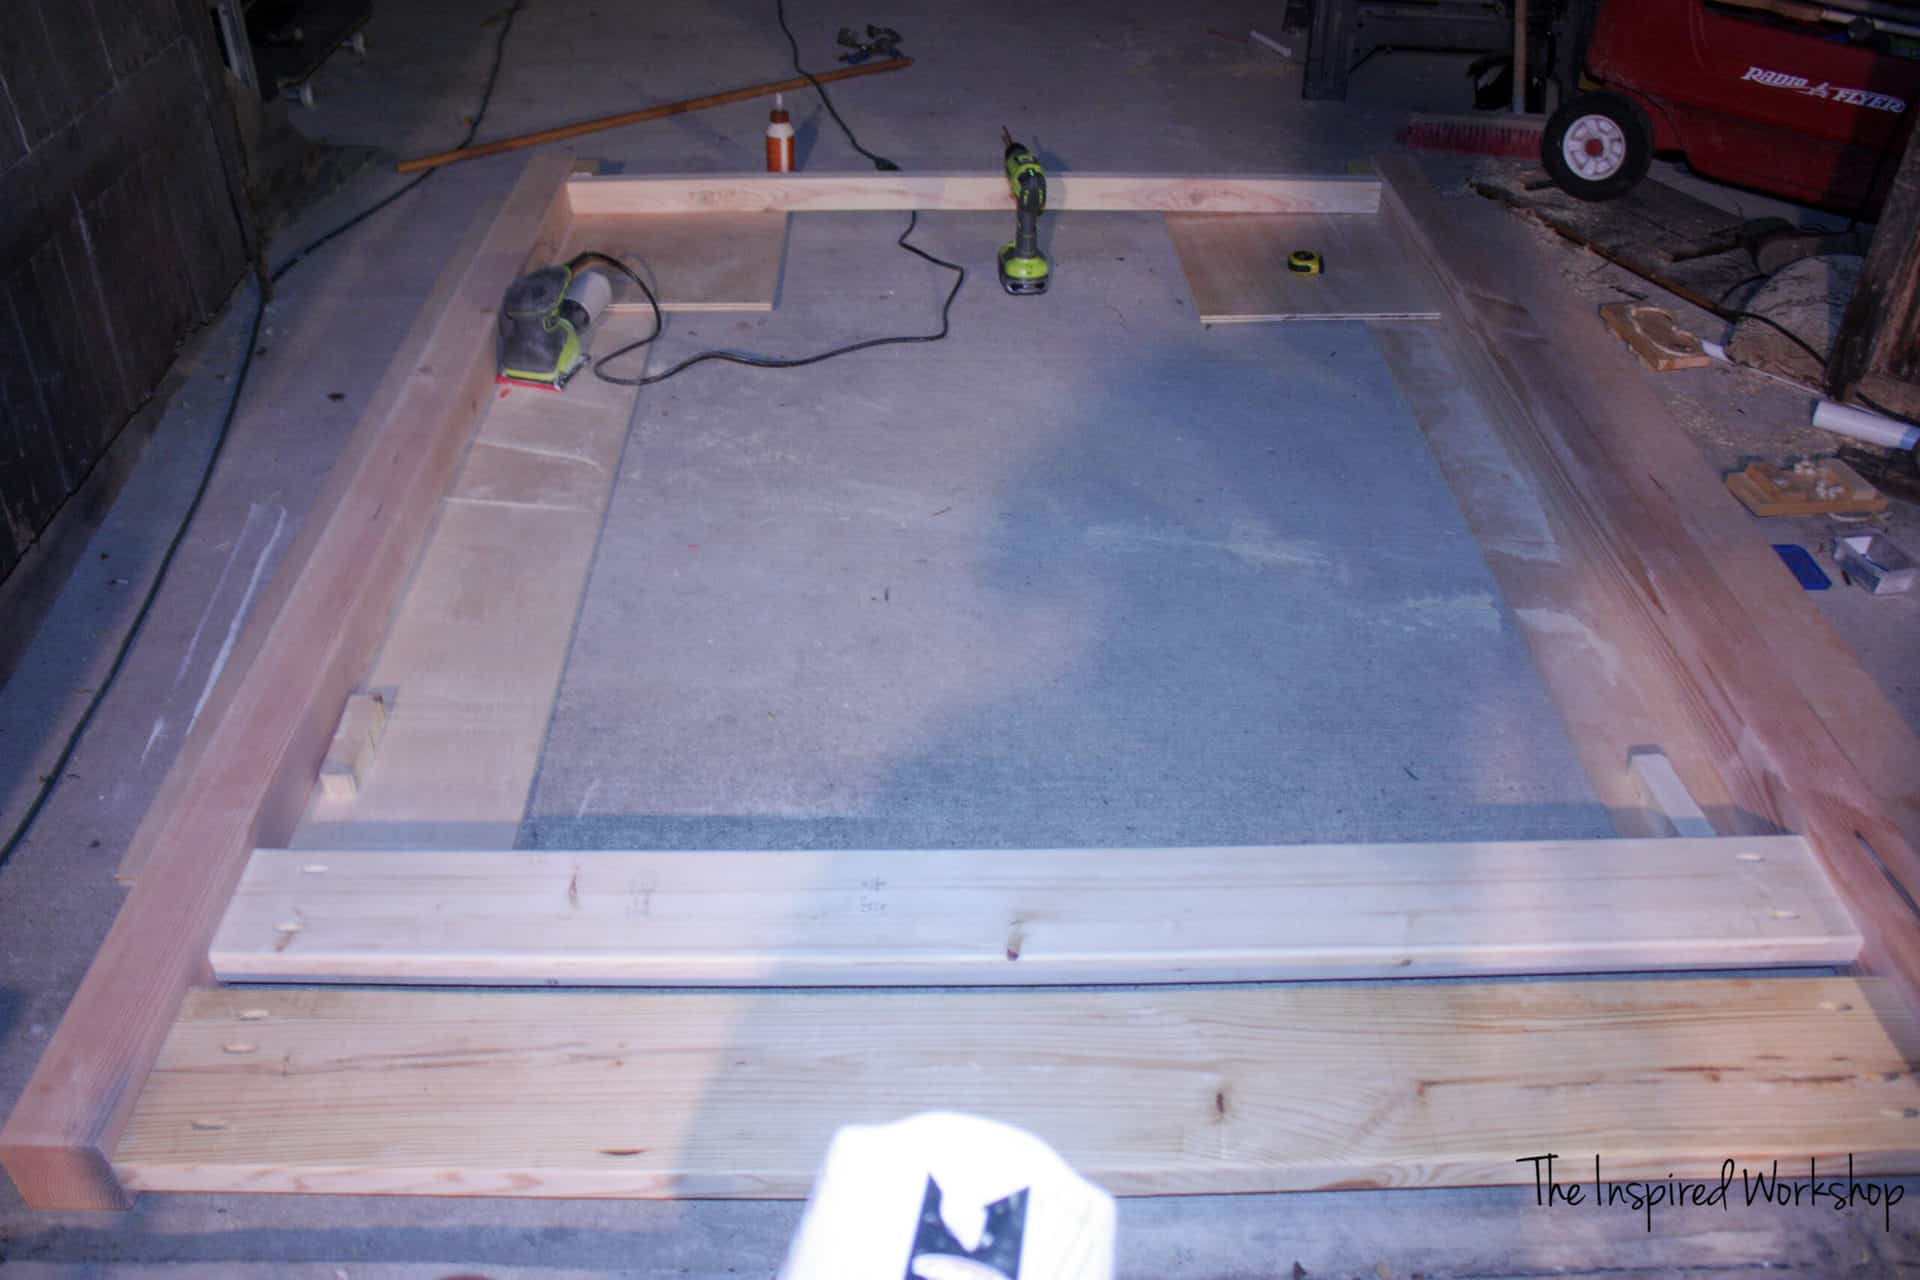
Building the Sides of the DIY Queen Bed Frame
The next few steps will bring our headboard together with our footboard to build our bed frame! JUST A NOTE: NONE OF THE SIDEBOARDS WILL BE GLUED INTO PLACE; ONLY SCREWED!
Boards needed for the sides:
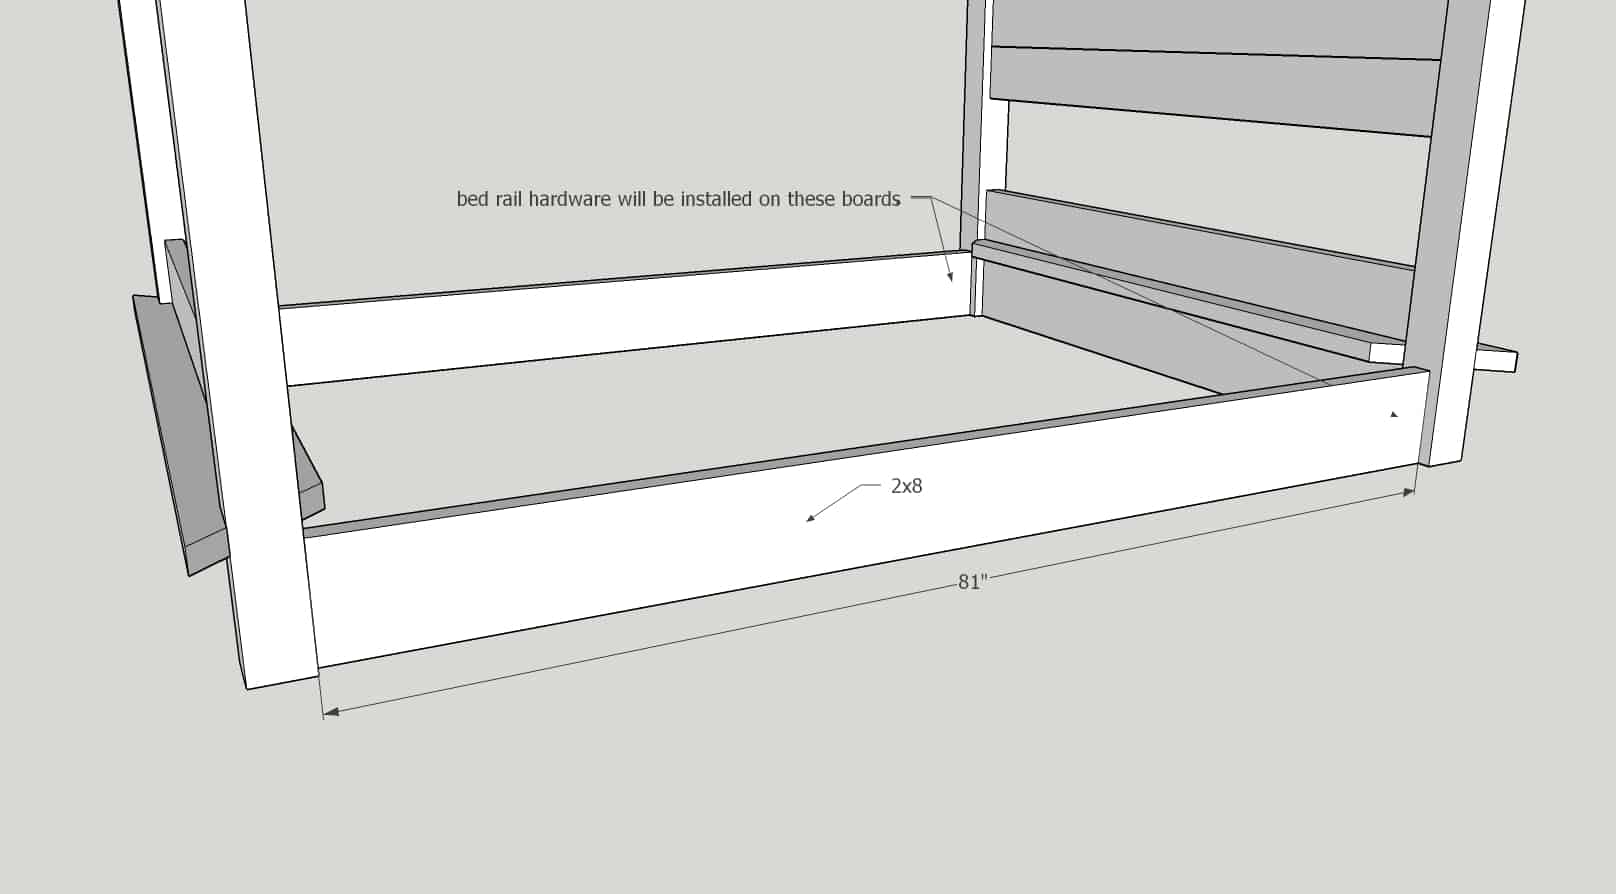
- 2 – 2×8 @ 81″
- 2 – 2×8 @ 92″ mitered at 45 degrees off square, ends not parallel
- 2 – 2×6 @ 81″
- 2 – 2×3 @ 81″
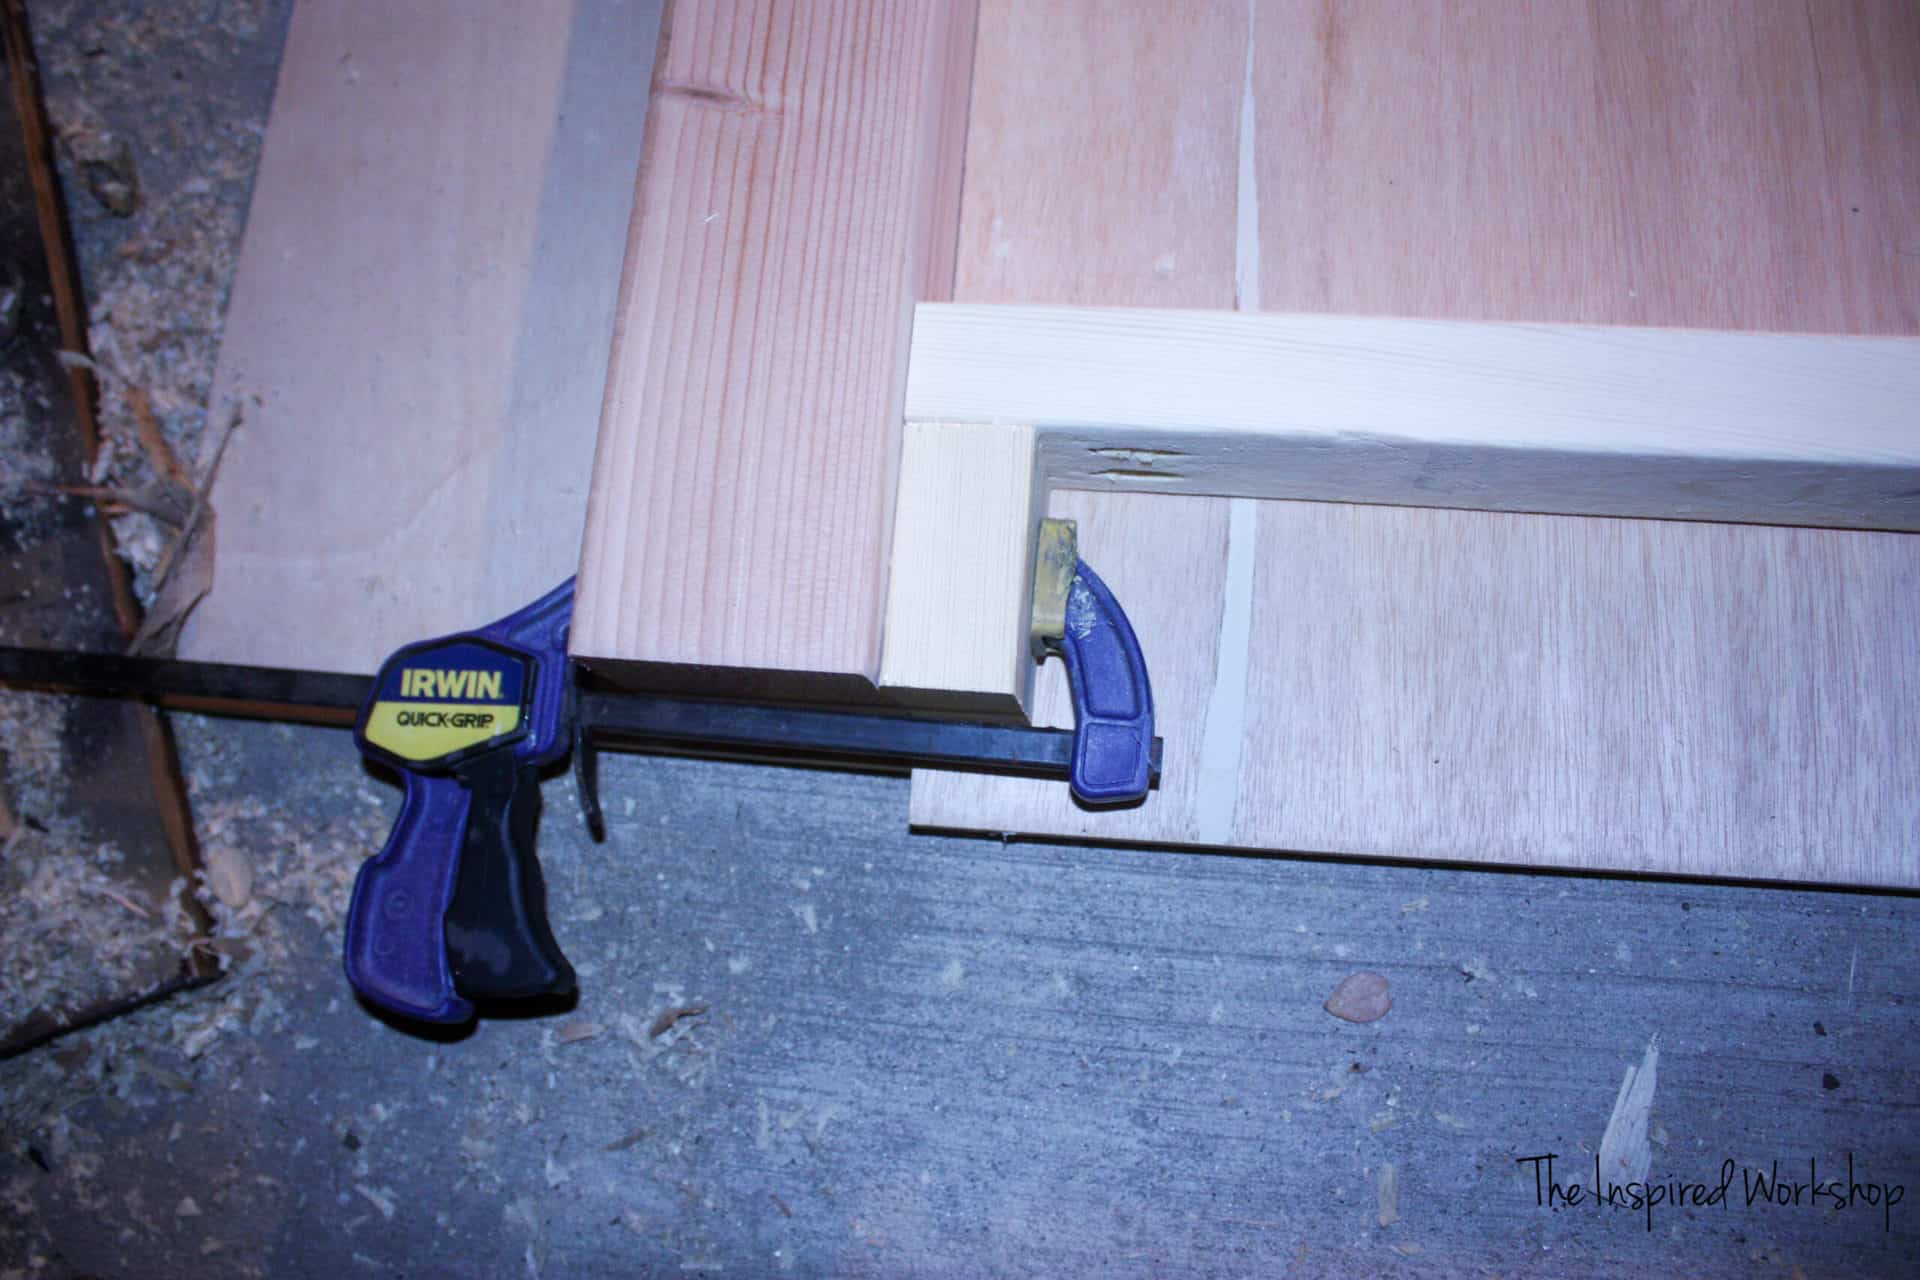
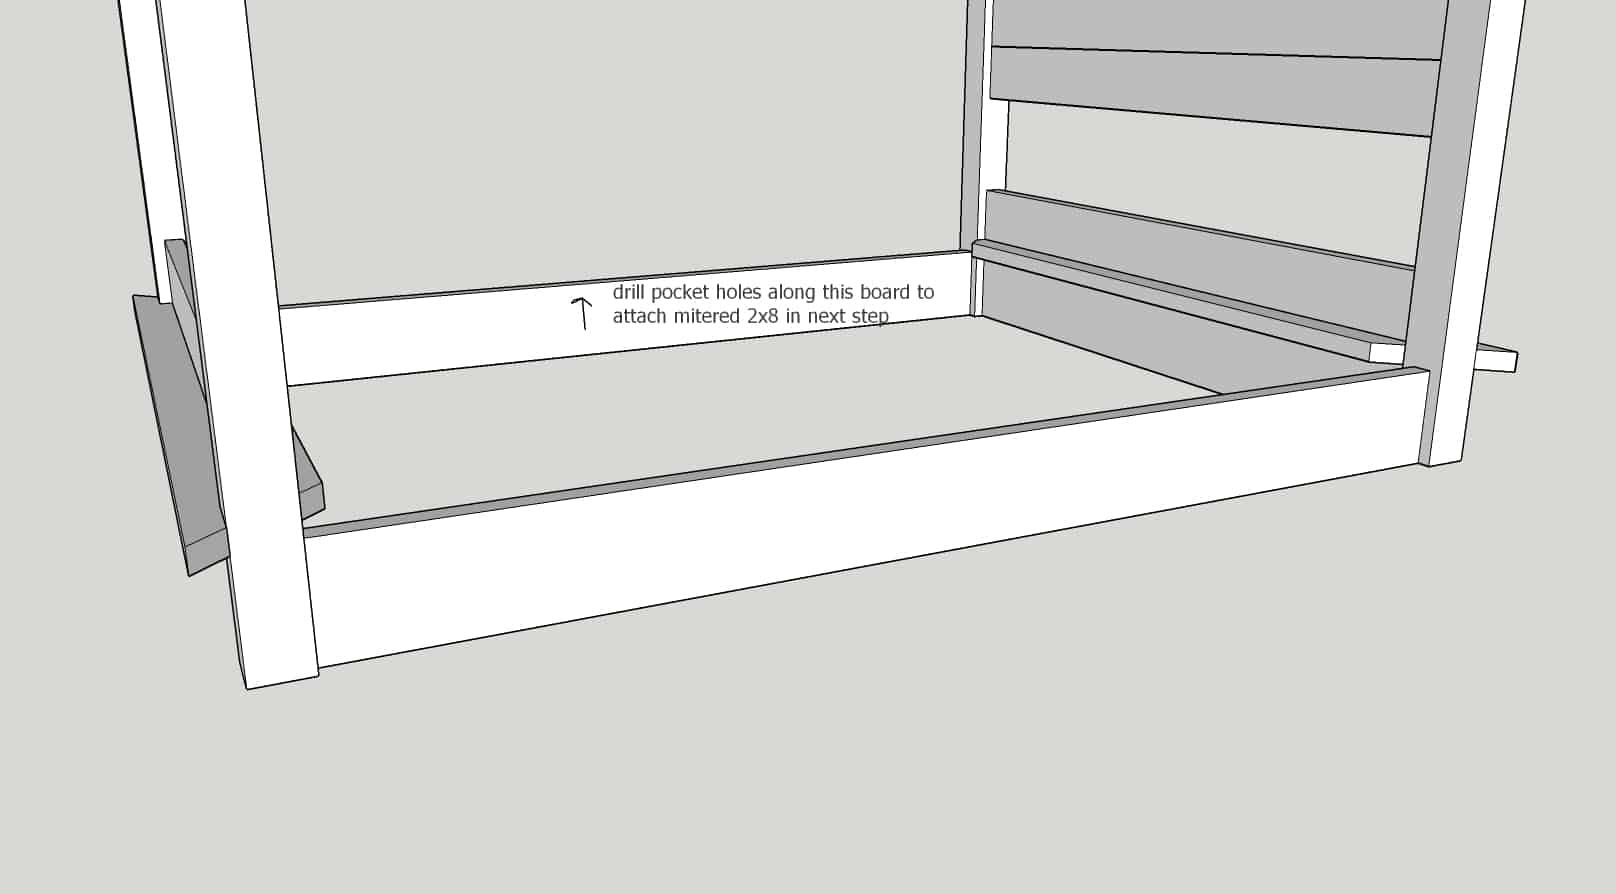
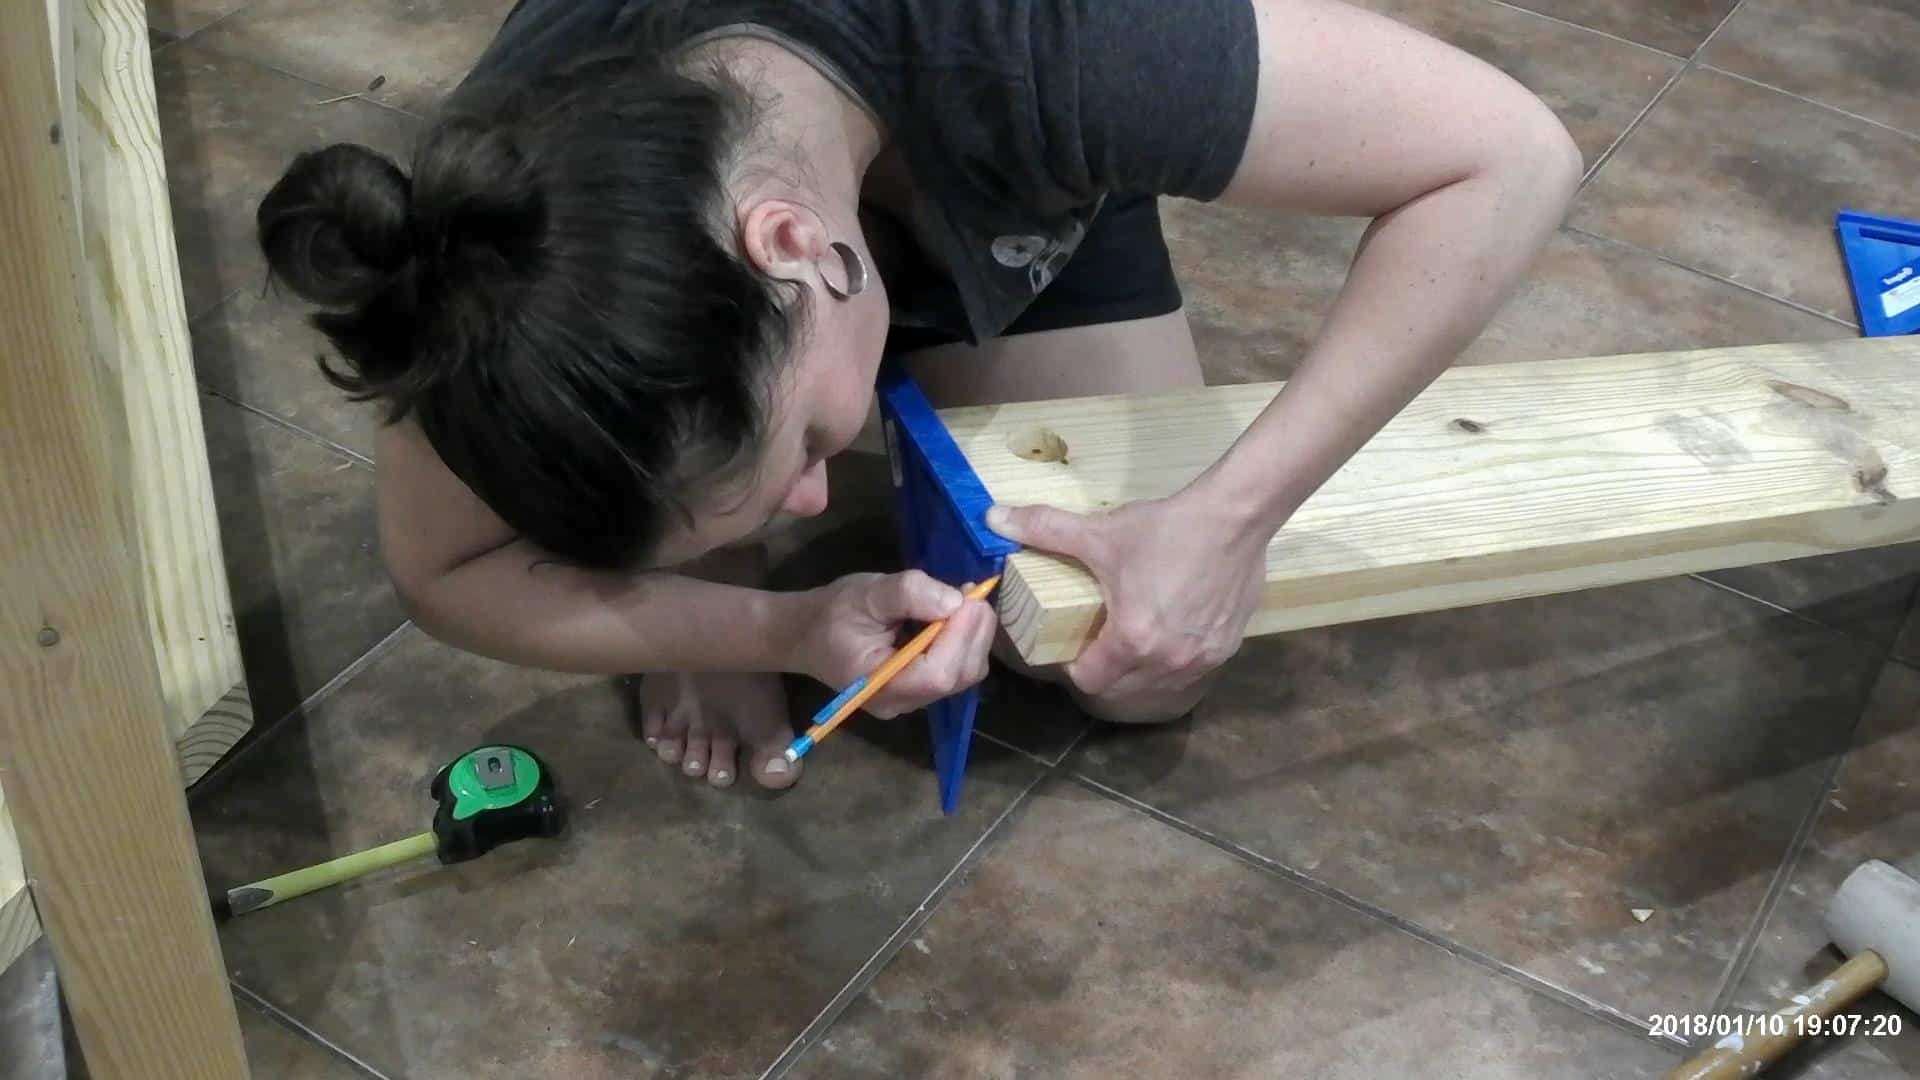
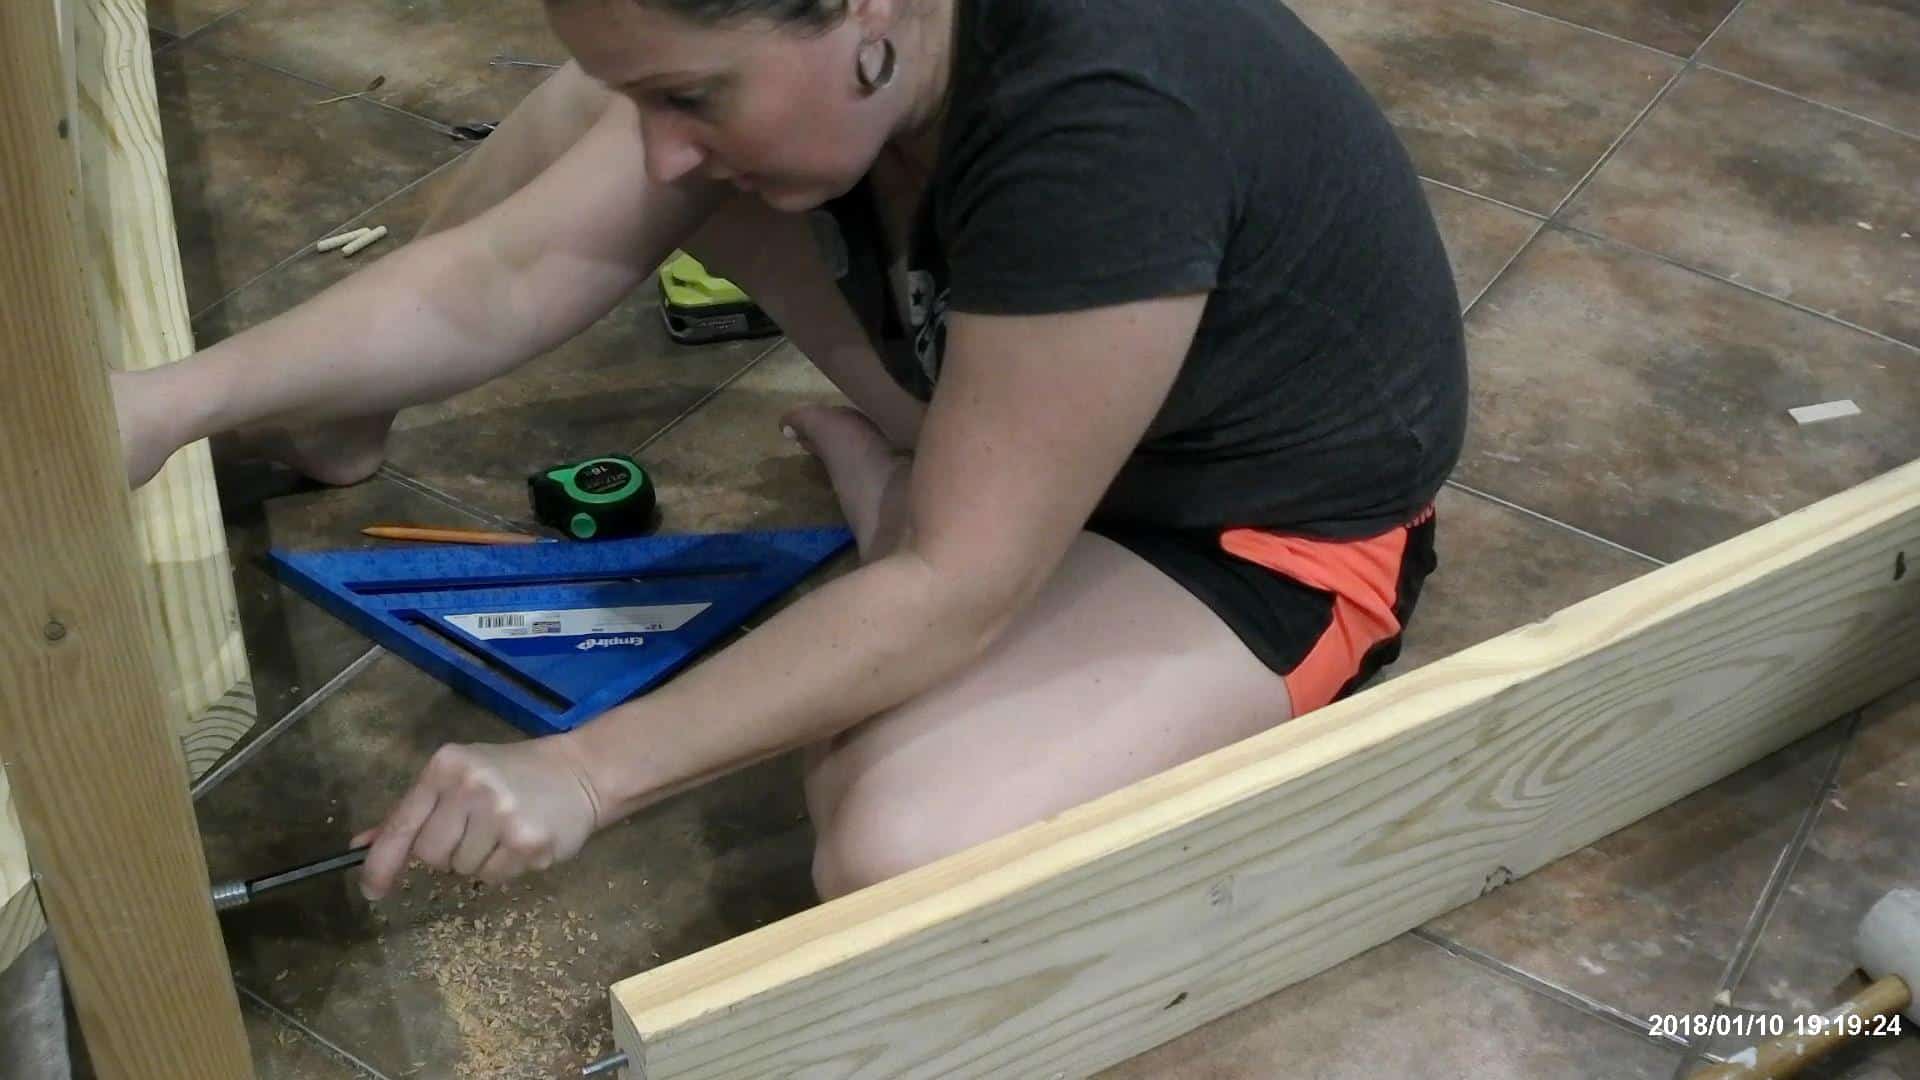
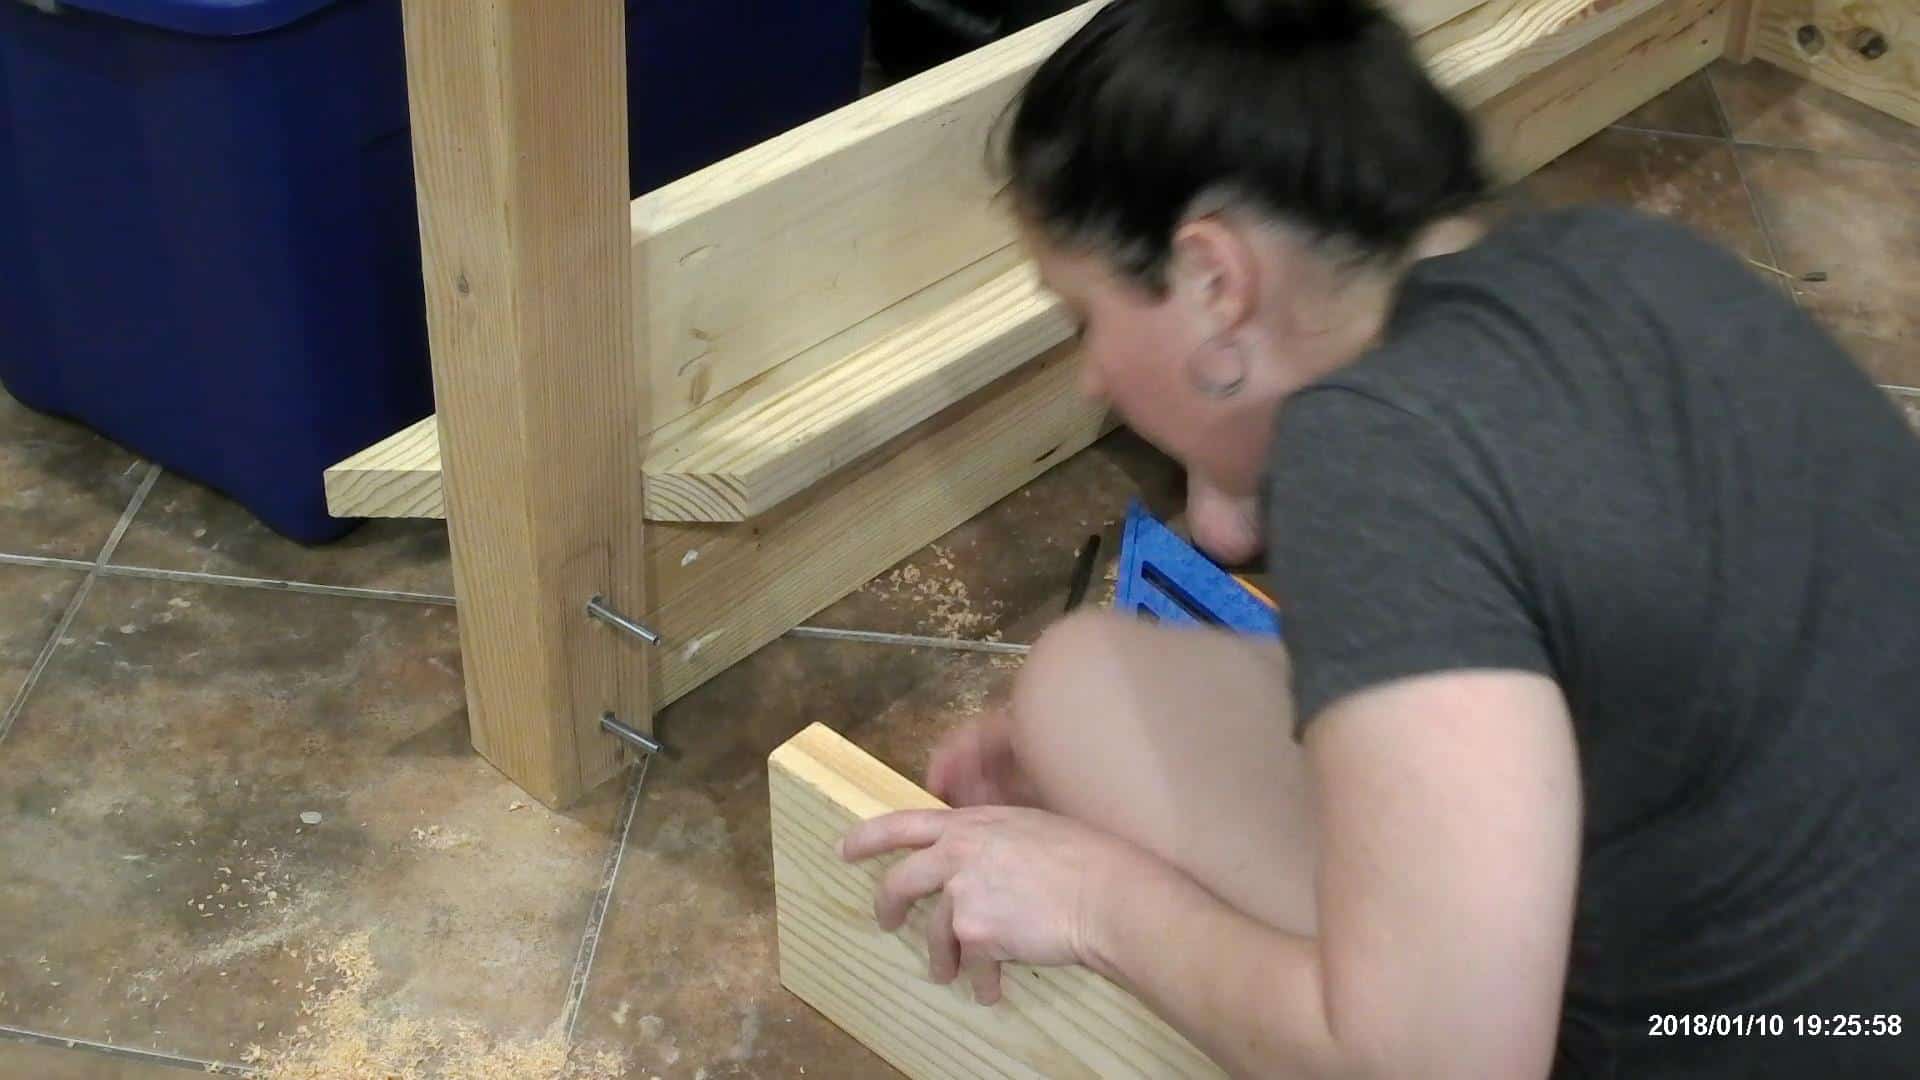
The first board you will cut is the 2×8 @ 81″. This will be the board that you use the bed rail connectors on. I used two sets of bed rail connectors on this one board to make sure it was super sturdy and NOT moving…no matter what goes on!😳😂 Before starting all the bed rail connector drilling, drill 4 or 5 pocket holes along the top edge of the board to attach your mitered board later!
Follow the instructions that come with the bed rail connector kit. You will want to measure everything very precisely so that everything lines up properly in the end! Lol!
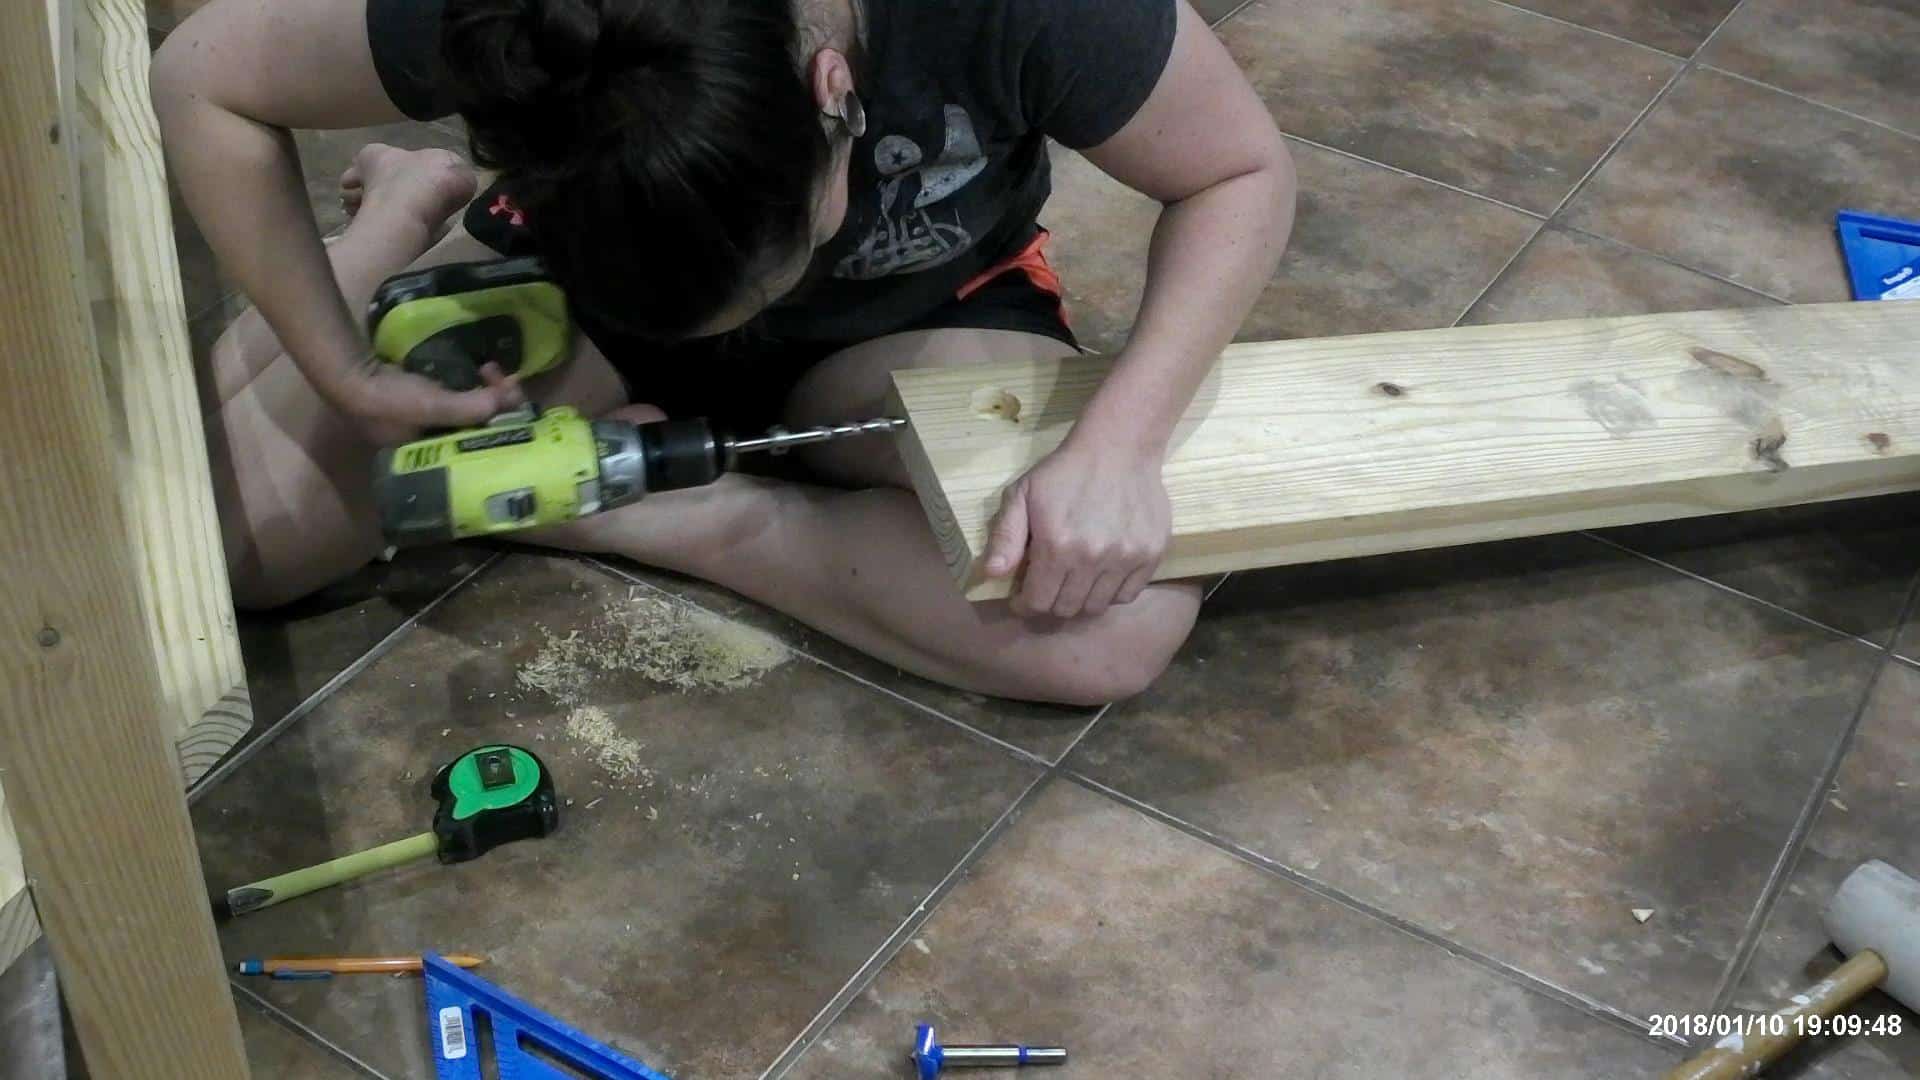
Drill 2 – 1 3/8″ holes in the 2×8 on each inside (end) of the board, it gives you the exact measurements and everything on where to drill them and how deep…I can’t remember off hand what they were! I recorded a video on my old phone, but of course, it crashed and I couldn’t retrieve anything from it! Oy! But I had emailed myself a few shots from the video before it crashed! Luckily, the instructions are pretty clear and easy to follow!
Make sure they are as deep as they need to be!
After drilling your 1 3/8″ holes, you will drill a hole through the END of the board that meets this hole with a 5/8″ drill bit! Drill both at this time. Make sure and measure precisely!
Make sure your drill is straight and level…unlike in my photo! Lol! I didn’t start drilling yet, I’m sure I leveled it out first! 😏
Once those holes are drilled, set the bolts in place and add the nuts, then add the insert pieces you are going to screw into the posts onto the ends so you can see right where they will need the holes drilled on the posts.


Trace where the inserts go so you know where to drill them.
Drill the holes for the inserts and screw the connectors into the place on the posts.
Screw the bolts into the inserts in the post.
Test your holes and see if they line up by adding the bolts and tightening them! I’m crossing my fingers for you! I hope they work! Lol!
That’s all there is to it! Continue this on the other 3 ends! Boom! Your bed will now stay together…and it’s looking JUST LIKE A BED!!😍 Happy Dance!
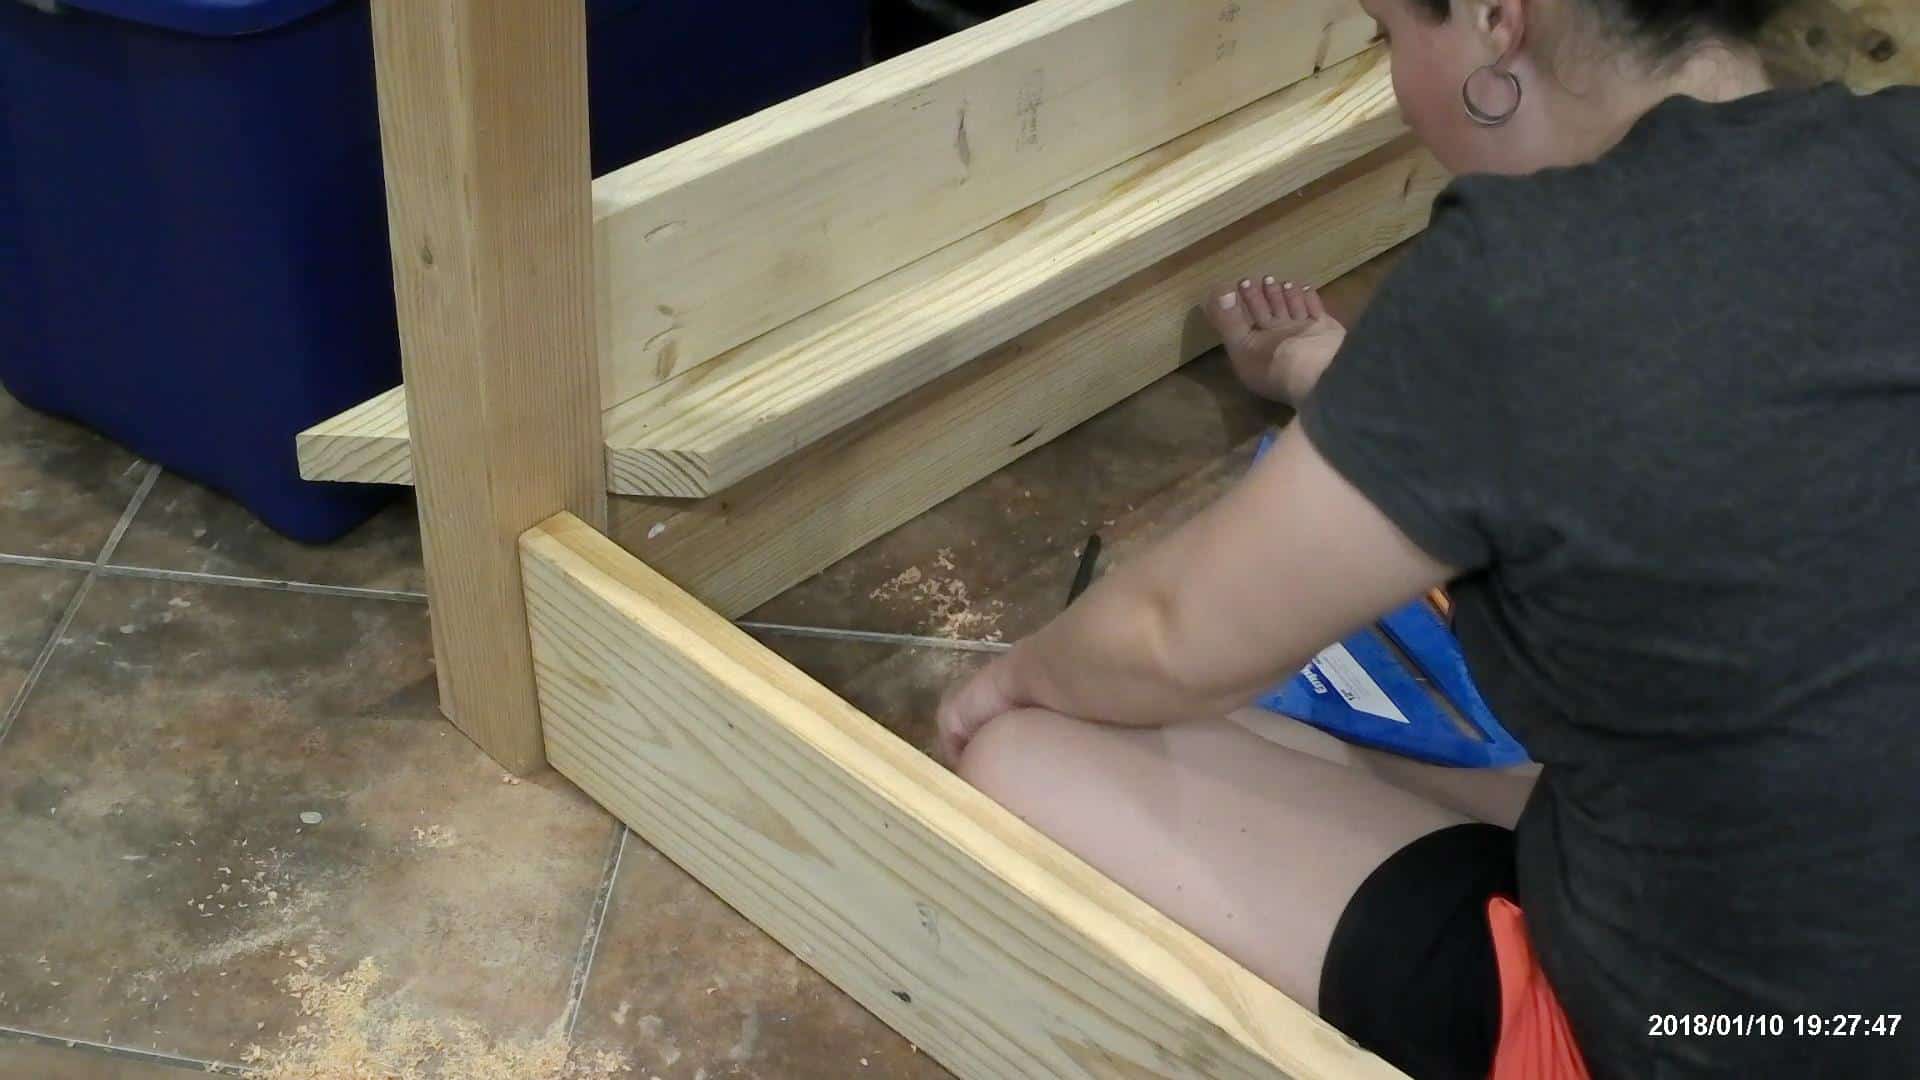
If you already cut the mitered boards for the sides, you can attach them now! I would put all the connectors in place and tighten them before attaching this board. Make sure it lines up well with the footboard and headboard mitered boards before attaching it! REMINDER: one of the footboard or headboard mitered boards is still not attached yet! Have someone help hold it in place if need be while you attach the sideboards!

Once those boards are on, you can add the 2×6 that goes on top. Now, you can purchase another set of bed rail connectors if you want to make this professional-looking! I originally bought another kit, but I ended up just using pocket-holes to attach this board. It isn’t the main strength of holding the bed together, so even if I have to take the bed apart to move, I don’t fear the screw holes becoming weak and stripped!
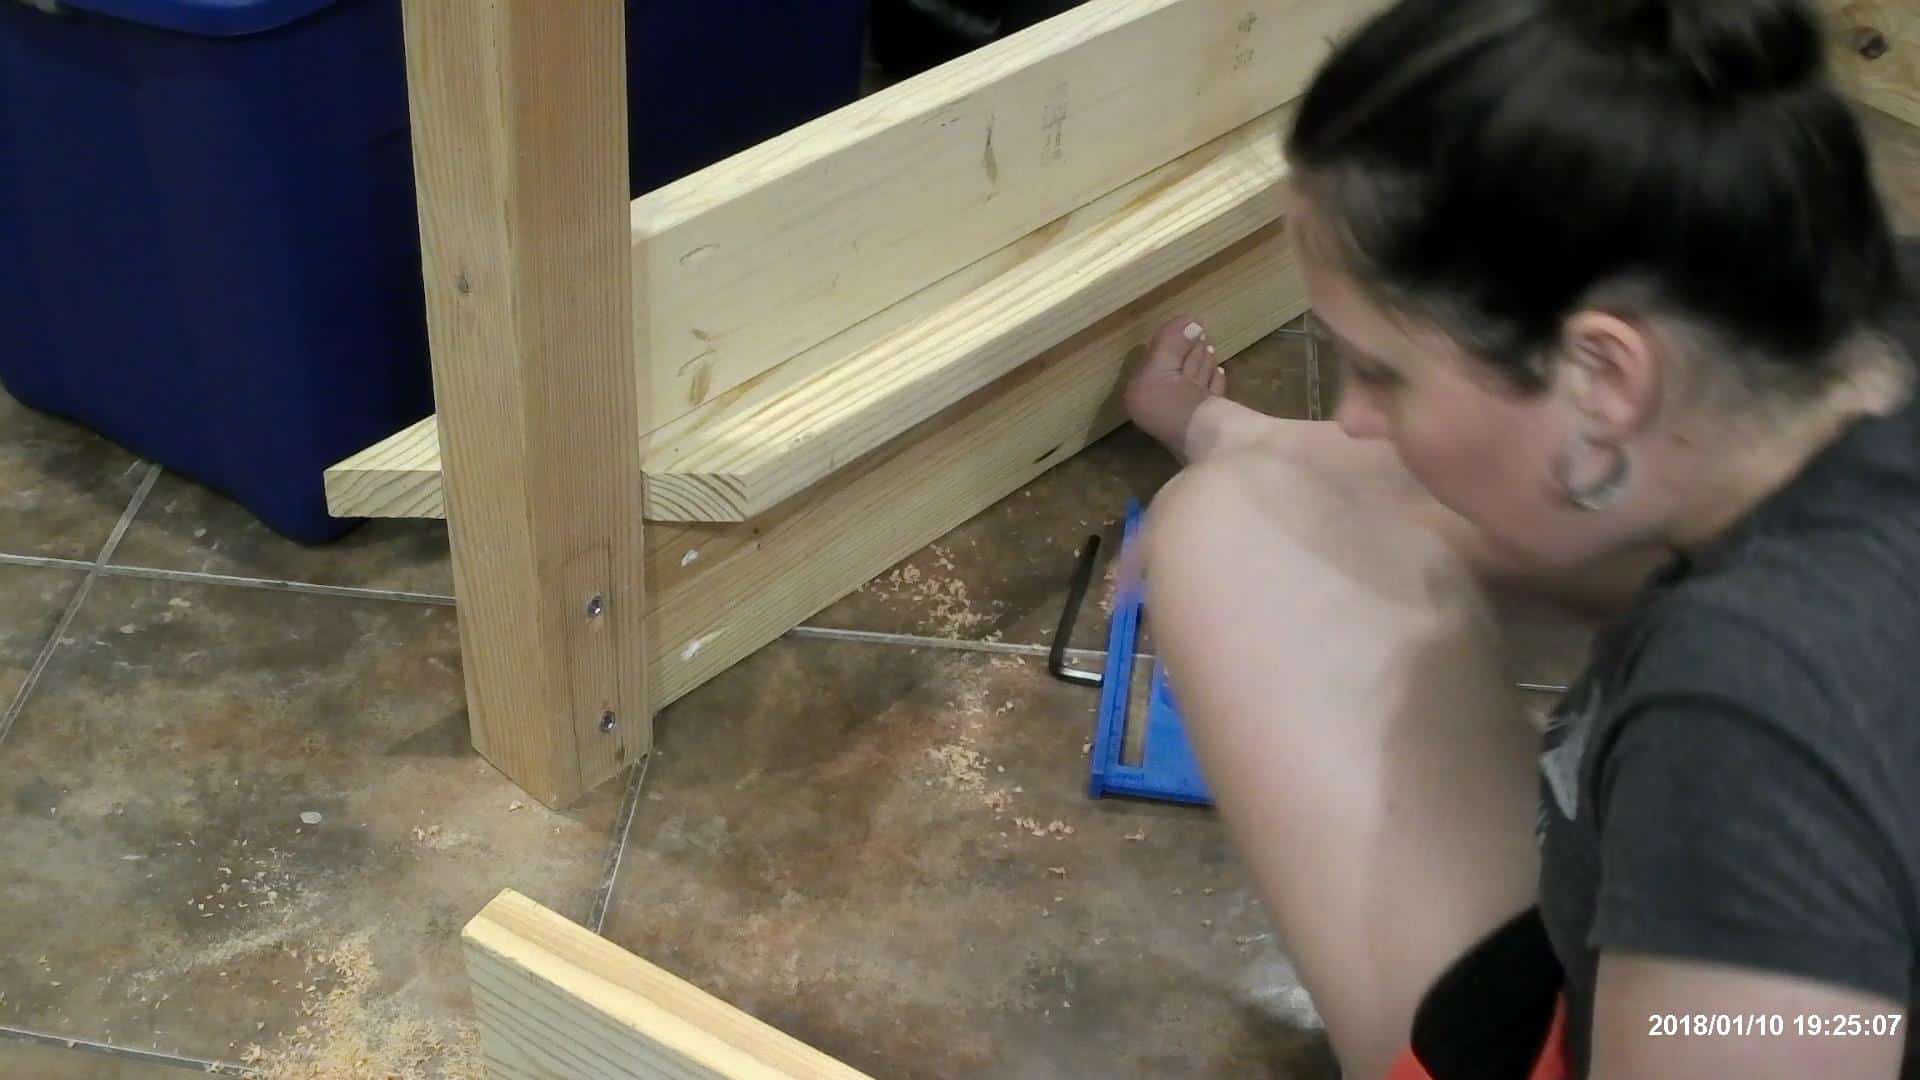
The last sideboard is the 2×3 @ 81″ along the top! It is placed 3″ down just like the ones on the footboard and headboard. Pocket holes are turned up towards the ceiling so they aren’t seen!

Look how good it looks! Stand back and marvel at your fancy work that looks SOOO GOOD!!!
Alright, let’s finish up the last couple of boards so that the bed can be slept on tonight!
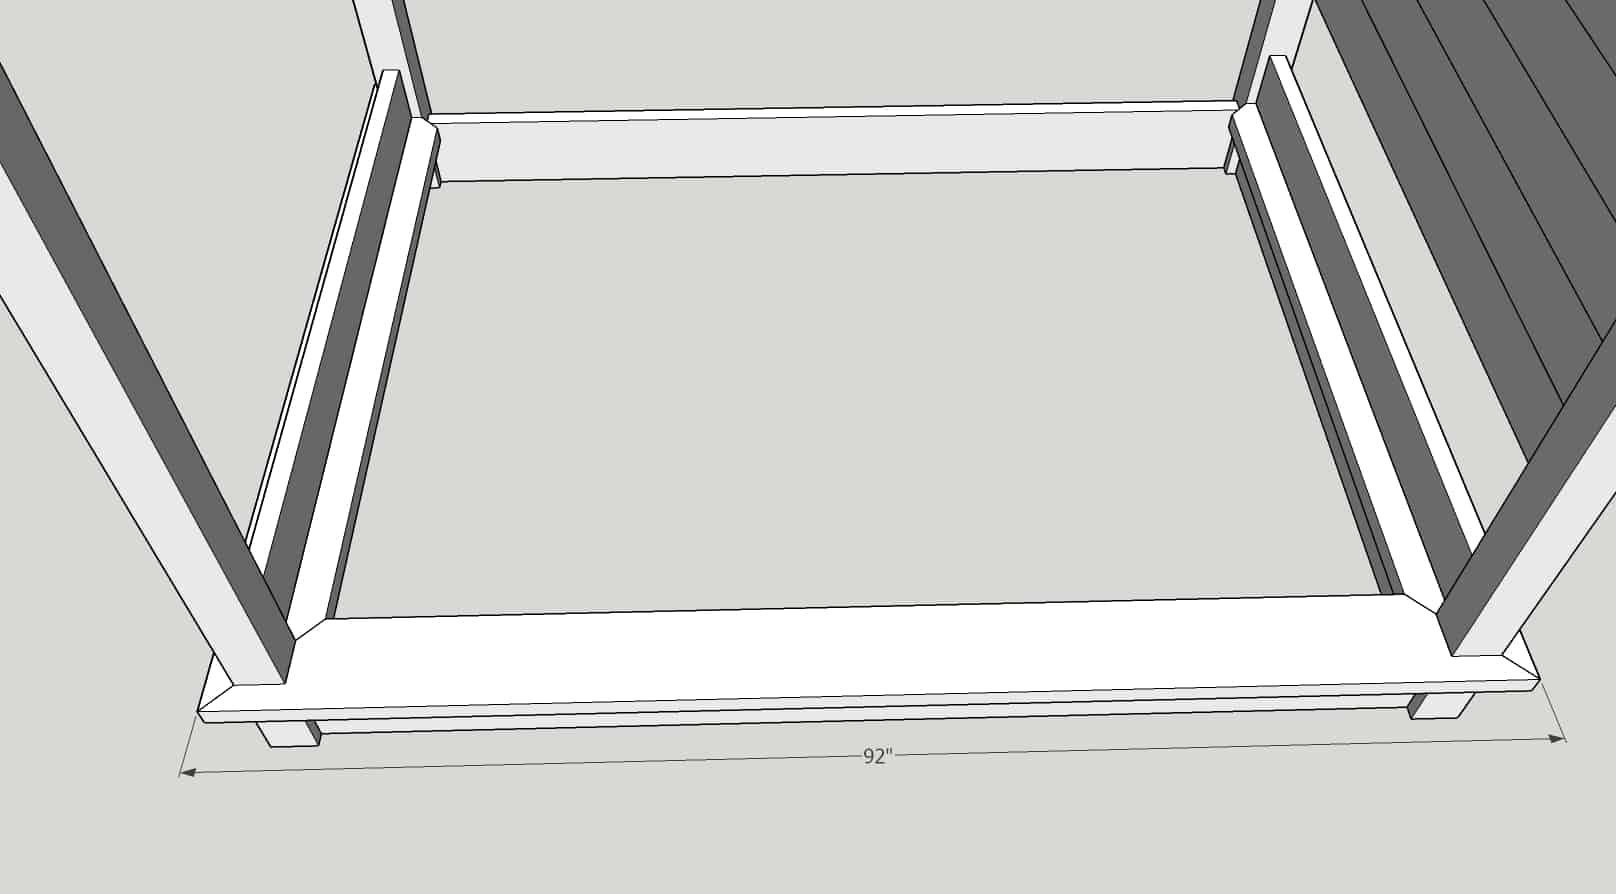
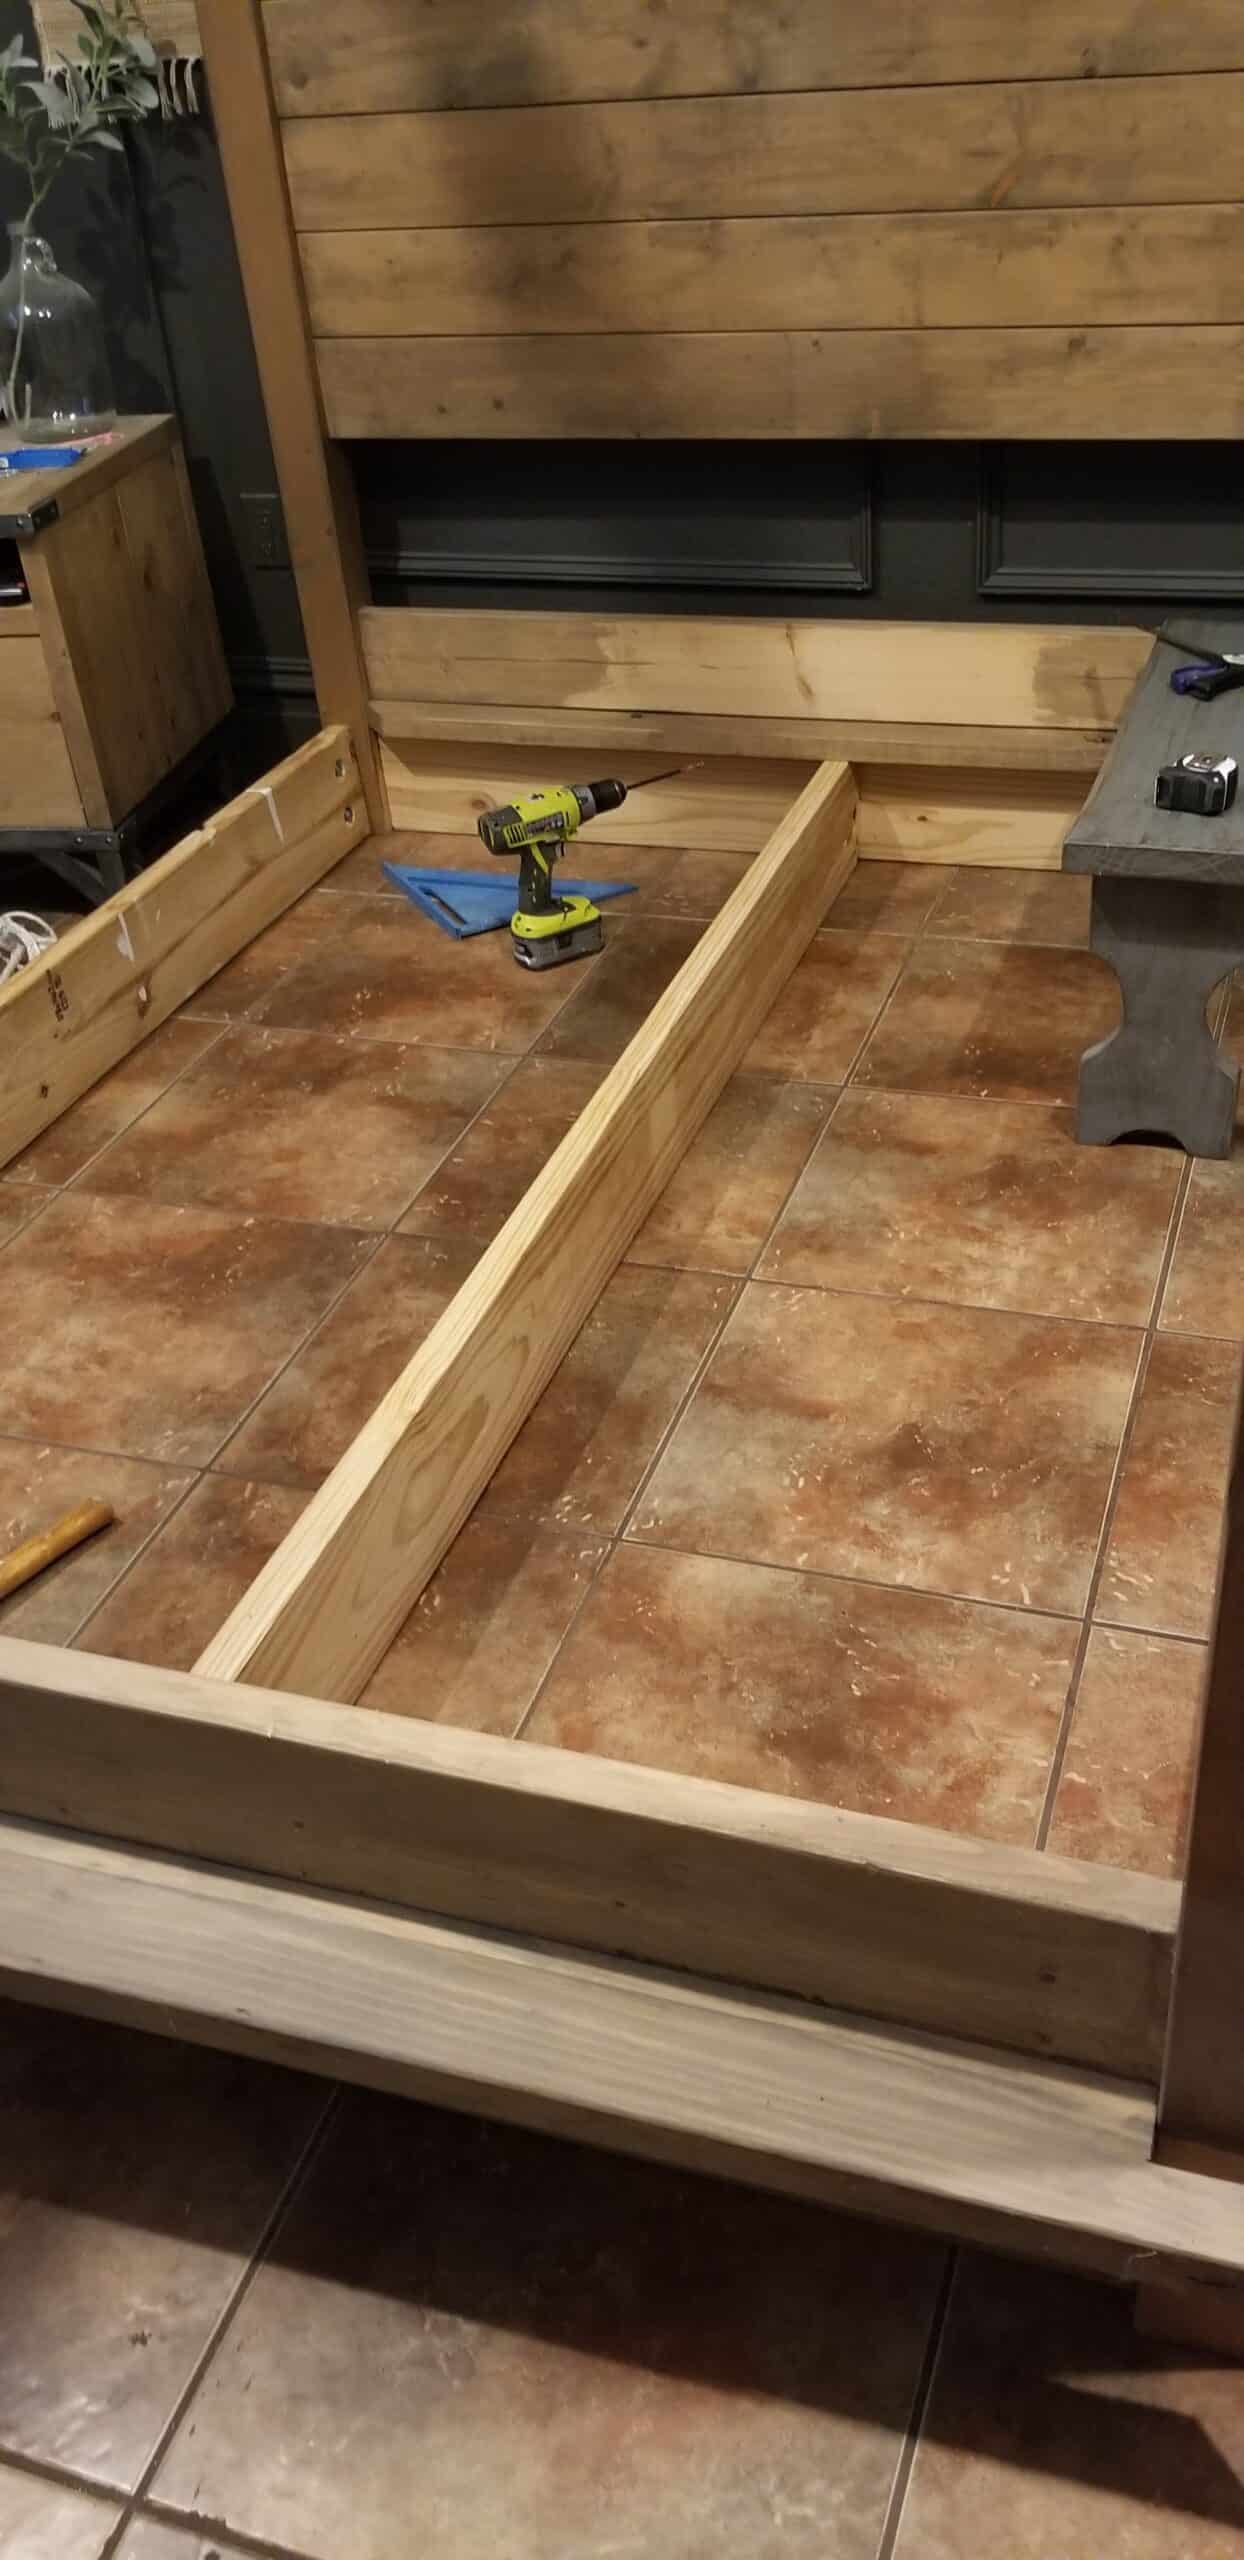
Building the Bed Supports for the Queen Bed Frame
Boards needed for the bed supports:
- 1 – 2×8 @ 83″
- 3 – 2×4 @ 56 1/2″
The 2×8 @ 81″ will be the center support that will run along the length of the bed! I just pocket holed this board in place as it is only to hold the mattress supports up! Pocket holes will be drilled at 1 1/2″ deep and using 2 1/2″ screws (NO WOOD GLUE) to attach!
Don’t pay attention to the way I don’t stain anything that isn’t seen! Lol!
After screwing this 2×8 into place, you can now attach the headboard or footboard mitered board (that we left unattached earlier)! You can see mine isn’t attached in the bottom right corner in the photo above!
Now add the 2x4s across the top of the 2×8 attaching them to the mitered 2x8s and pocket hole them into place!
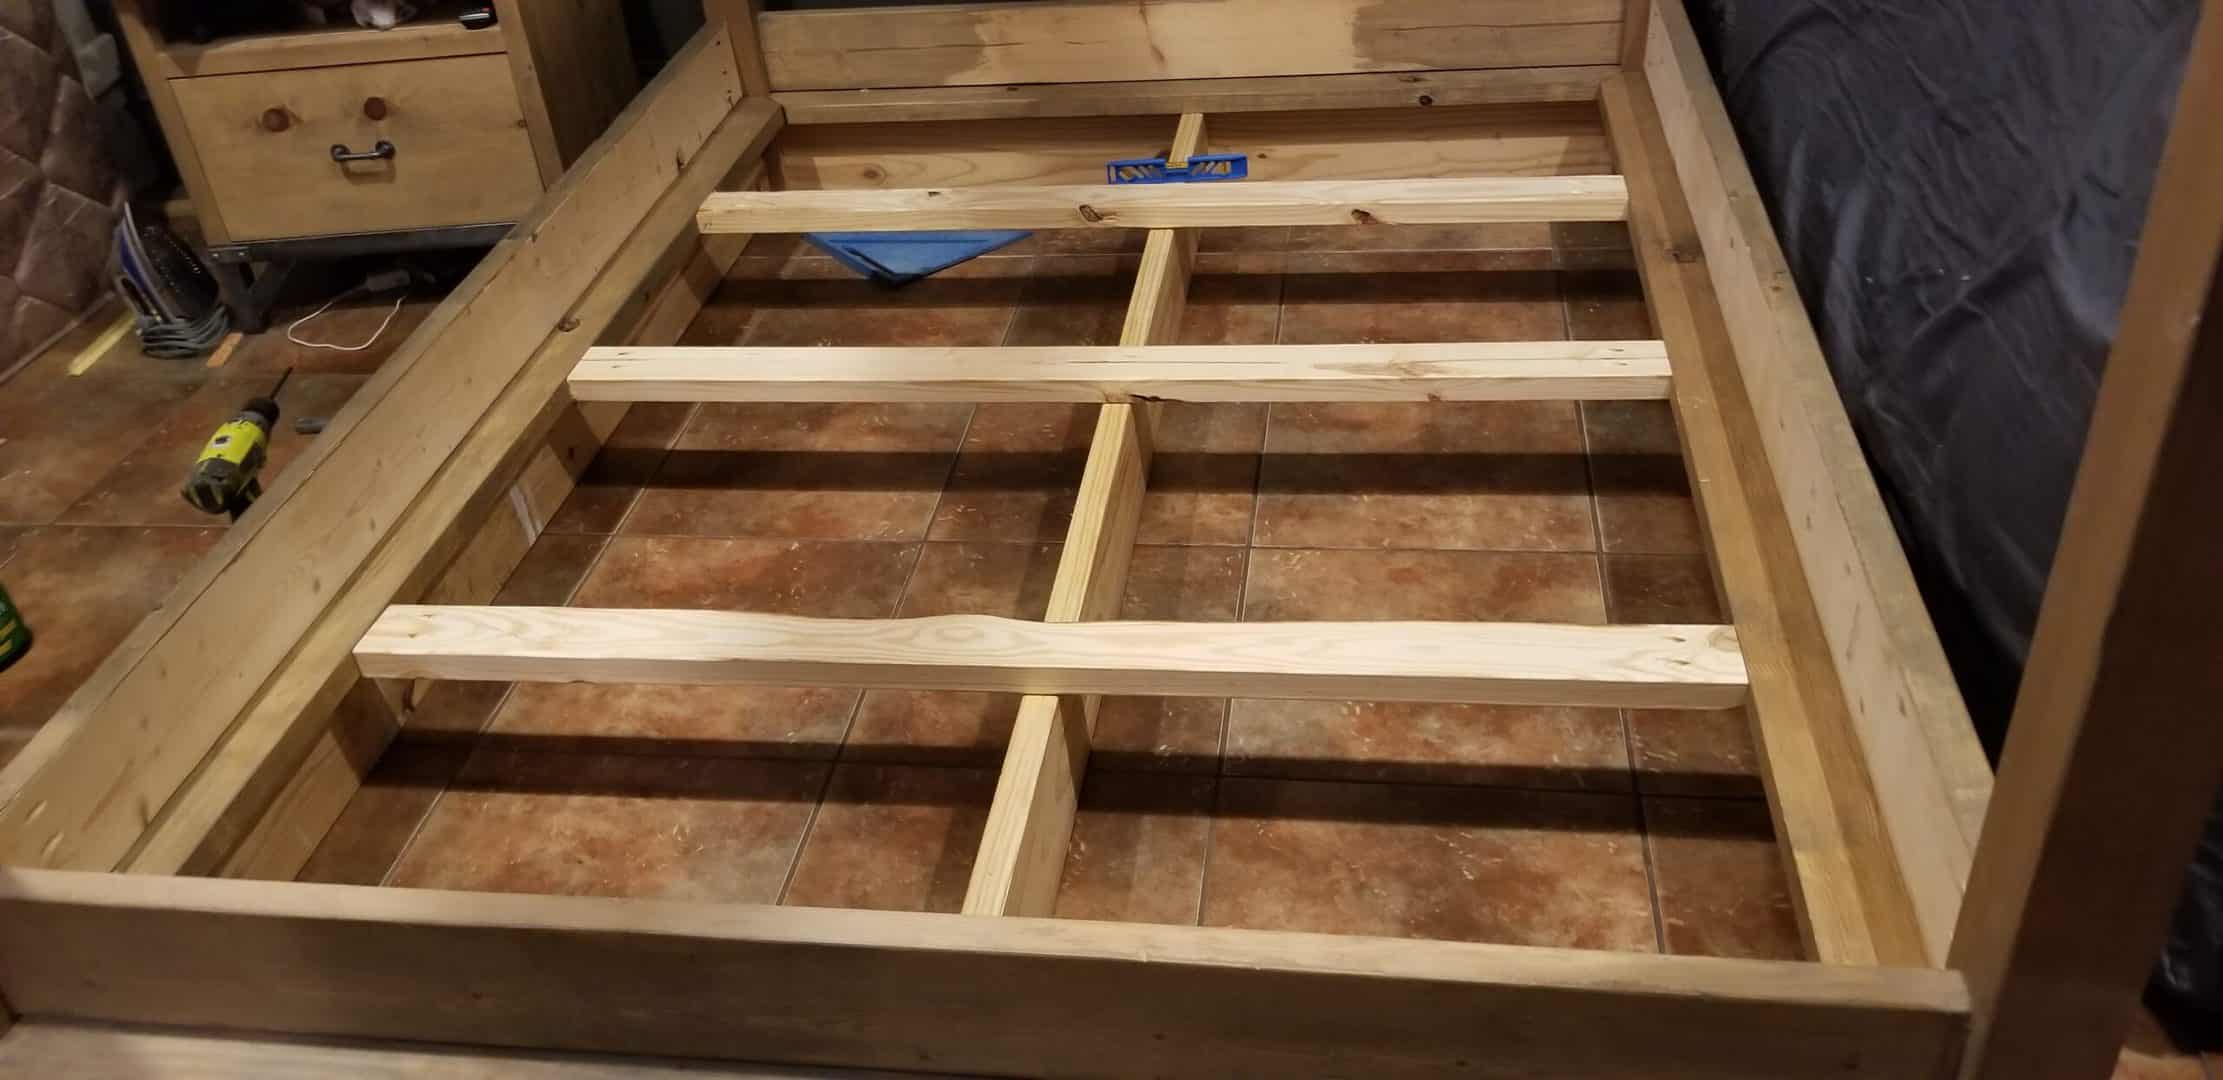
Screw the 2x4s down into the 2×8 with 3″ screws down the middle.
And now…your bed is DONE!!! Your bed is DONE!!! Yes, yes, yes…it’s done!! Throw them mattresses into place and enjoy!
Building the Queen Bed Frame as a Platform Bed
Alright, the slight modifications I mentioned to make this into a platform bed, are basically removing the 2x6s along the bottom of the bed frame. Also, you will need to lower the 2x6s on the headboard and leave one out…using a total of 6 boards to make the headboard and leave a gap of 12″ from the bottom 2×8 to where you will start the first 2×6! Hope that makes sense!
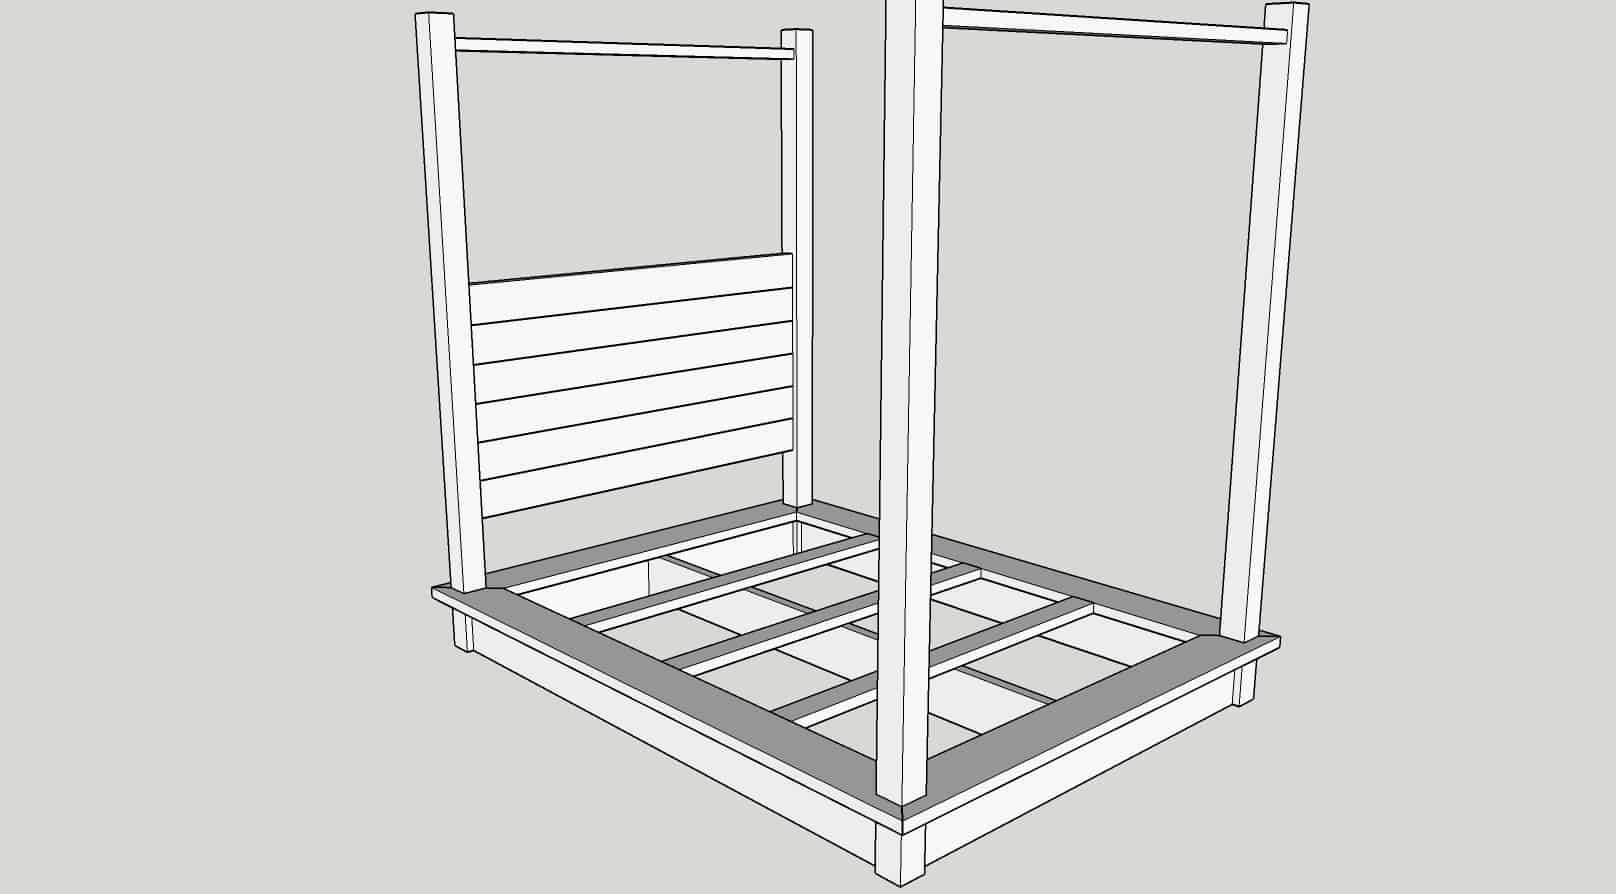
It will look like this! Still beautiful, just lower to the ground!
Hope you like the Queen Bed Frame Plans! I would LOVE for you to share them if you do!
Have a good one, and HAPPY BUILDING!

Want to save this DIY Queen Bed Frame for later? PIN IT!


Wow! Your bed turned out amazing! It’s crazy how much cheaper it is to DIY furniture. Thank you for your great tutorial.
I love Restoration Hardware furniture, but couldn’t believe the difference in price between DIY’ing this and buying in the store. Great instructions. Easy to follow.
I know, I love their stuff too…but dang it’s pretty crazy how much you can save getting the same look with a little time and elbow grease! Lol! Thank you so much for your kind words! I appreciate it!