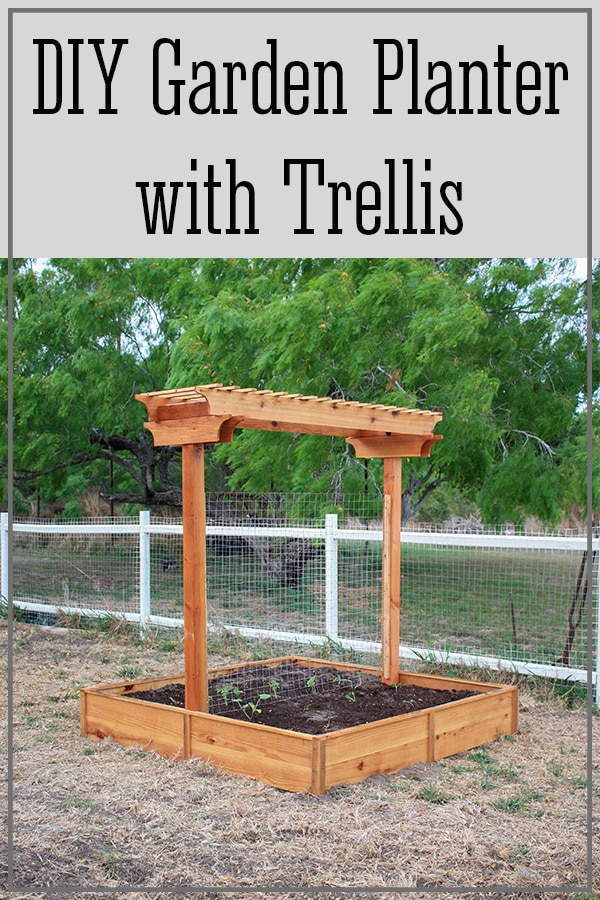
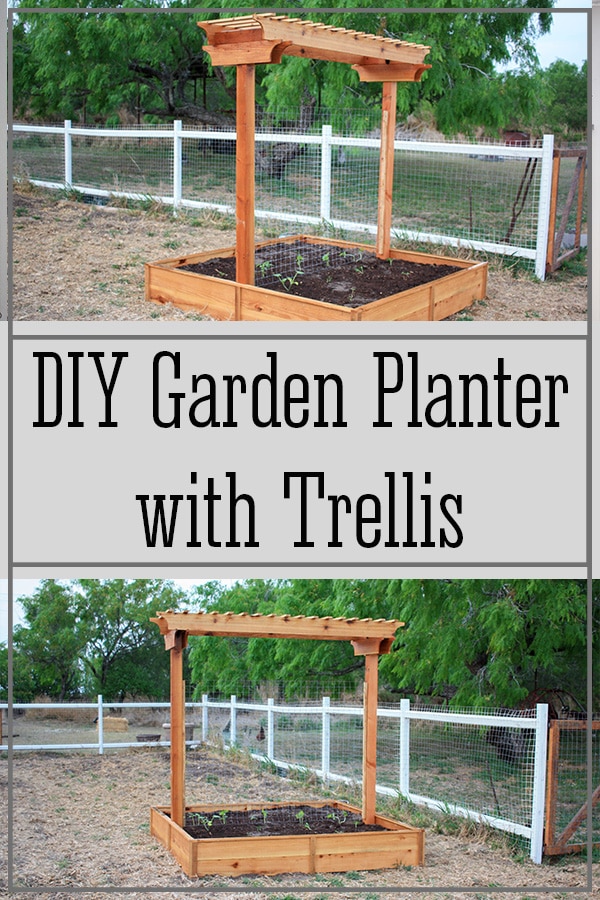
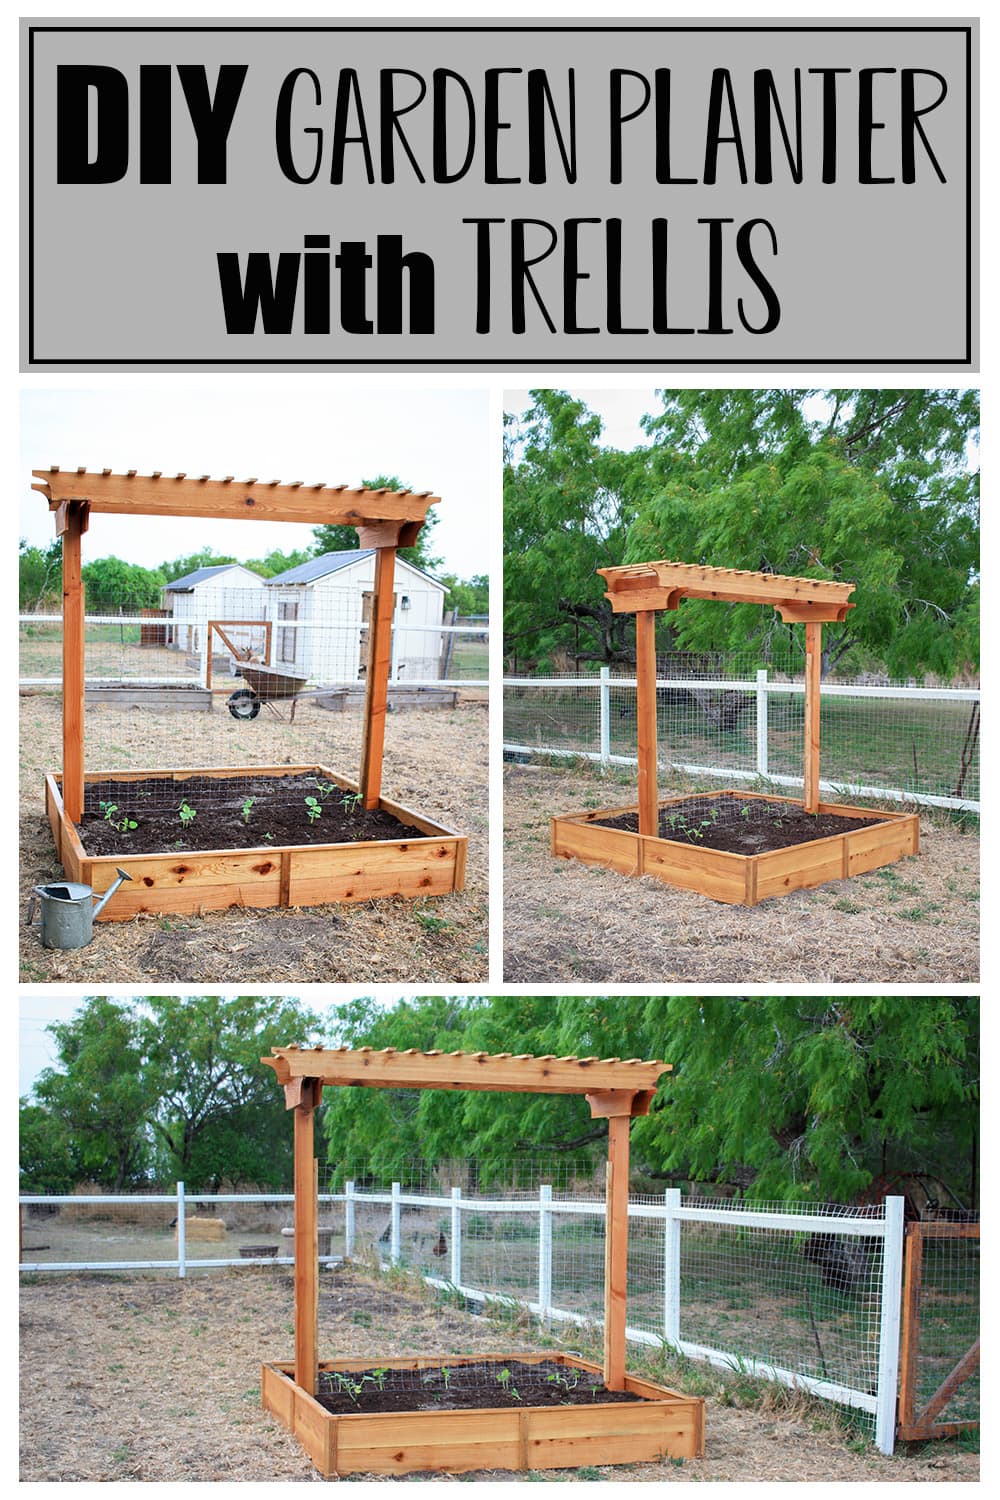
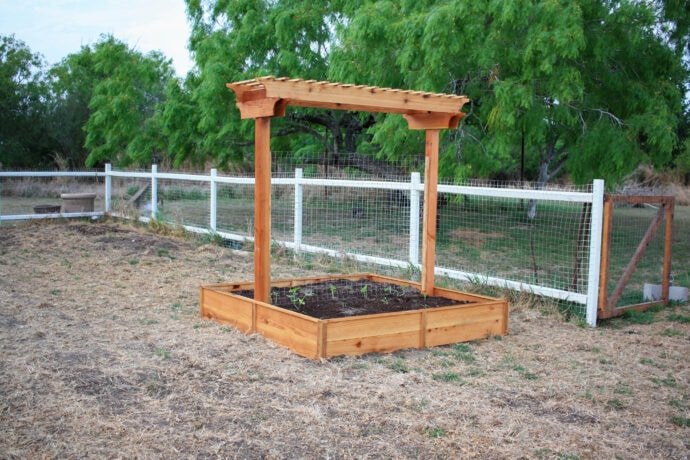
DIY Garden Planter with Trellis
Gardening can be tough and isn’t always easy straight out of the gate for beginners. This beautiful DIY garden planter with trellis is a beginner build though and will help you quickly and easily start learning and growing more vegetables even in the smallest of spaces while utilizing vertical space!
If you have a large garden or a tiny space you are trying to grow this spring, this garden planter with trellis is going to be perfect even if it’s the only raised bed you have space to grow in! Growing vertically opens up the lower space for smaller bush-style vegetables or root vegetables.
I find all this gardening and homesteading stuff so interesting and exciting, but man it is a lot of work and it surely isn’t easy! I hope to share everything with you all as I learn it if you are interested! But for now, let’s keep it simple, and this garden planter with trellis is just that!
Thirty-six square feet of pure goodness for growing vegetables, and another 24 square feet of verticle space on the trellis! I hope to have it filled with watermelon, cucumber, squash, and maybe grapes if my grapevine is still alive! 😬😂

I actually found the idea of the base for the raised garden planter from Ana White, she came up with the design and brilliant idea to use inexpensive fence pickets to build raised beds, I changed the dimensions and added the trellis, so I will share the complete plans below! If you like this planter but want a smaller size go check out the link above where she gives her plans!
If you are interested in more gardening/homesteading/outdoor projects, you may like these projects as well! DIY Wall Planter for Herbs – DIY Outdoor Scrap Wood Planter – Chicken Coop – Goat House and there are so many more! Gardening/Homesteading – Outdoor
Gathering Supplies to Build the DIY Planter with Trellis
The total cost to build yourself one large 6’x6′ planter with trellis is around $150. Now that is using pine for the 4x4s because cedar is so expensive where I am, 48-56 dollars a 4×4 now…they were only 30 dollars AFTER last year’s increase! Oy! I just want lumber to be reasonable again, is that too much to ask?🙄
Grab the printable plans here to take out to the garage with you!
Materials for Planter with Trellis
**Note: Amazon links below are affiliate links, affiliate links pay me a small commission (at no extra cost to you) should you make a purchase after clicking a link! I am forever grateful for any purchases made at my links, as it helps pay the operating costs of bringing you these free plans!😉 So thanks in advance for shopping my links!😊
- 14 – 1x6x6 fence pickets
- 4 – 1x6x8 fence pickets
- 2 – 4x4x8
- 1 – 2x2x8
- 1 1/2″ screws
- wood glue
- drill
- table saw – this is not the table saw I have, I have the Rigid job site saw but I cannot recommend that saw, this one has great reviews and my sister owns it and has not had any issues with it!
- miter saw
- brad nailer
- 1 1/2″ brad nails
- angle brackets set
Cut List for DIY Planter with Trellis
- 8 – 1x6x6 fence pickets completely uncut – leave the dog ears and everything
- 6 – 2×2@11″ inside supports
- 2 – 1 1/2″ wide fence picket @ 73″ (1x6x8 fence picket ripped down to 1 1/2″)
- 2 – 1 1/2″ wide fence picket @ 70 1/2″
- 12 – 1 1/2″ wide fence pickets @ 11″
- 2 – 4×4 @ 72″
- 2 – 4×4 @ 19″
- 2 – 1×6 fence pickets @ 83″ with decorative ends
- 4 – 1×6 fence pickets @ 30″ with decorative ends
- 18 – 1 1/4″ wide ripped fence pickets @ 23.5″
Building the DIY Garden Planter with Trellis
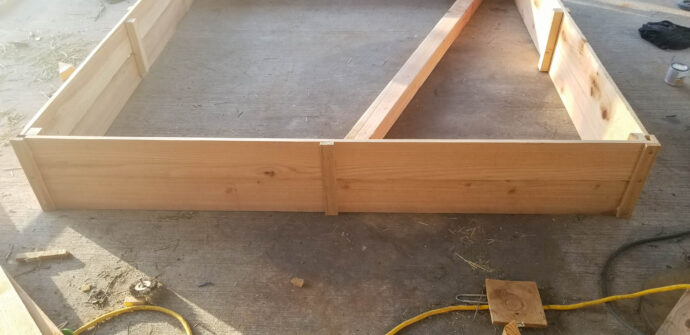
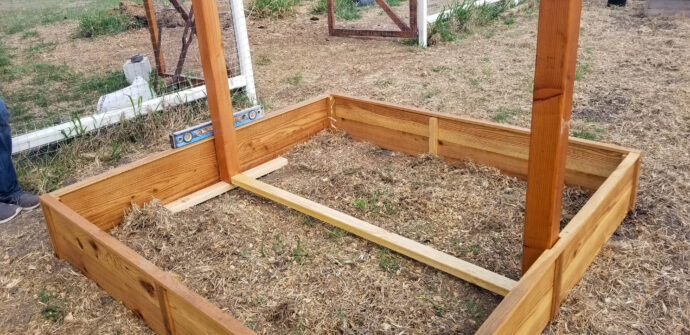
The main raised garden planter box is easy to throw together, no cutting down your fence pickets or anything! Ana White doesn’t use the 2x2s as inside supports as I did, and you don’t have to either, but since I wasn’t building it in place and had to carry it, I opted to add the additional strength!
Building the Raised Garden Planter
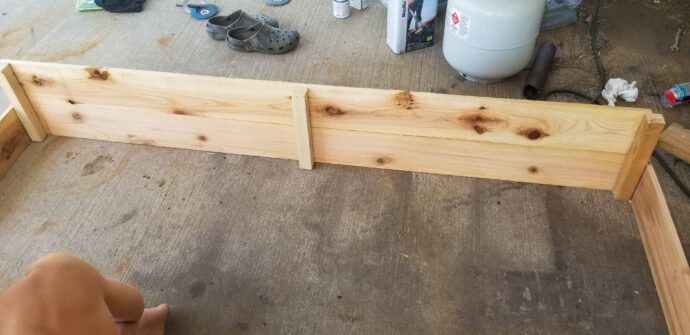
Throw them boards together! Use 2 of the 2x2s @11″ on the ends, glue and brad nail on the ends of the fence pickets! I built the first two sides as so.
You can add the middle 2×2 @ 11″ when you are doing the step above, I did it after I picked it up!
Once you have two of the above sides built, you can attach them to each other! The simplest of building right here, gluing and brad nailing baby!
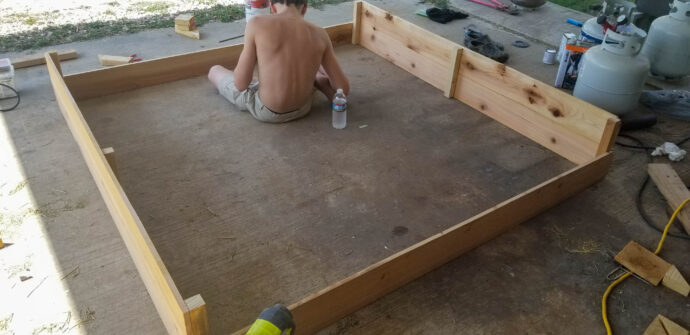
My son was very helpful, sitting in my box reading while I was working! LoL! On these two sides, I did not add the middle support board because the trellis will be attached to the sides instead. Add the second one on top of the bottom one just as when the sides were built. Now the basic box is built!
Adding Trim to the Garden Planter Box
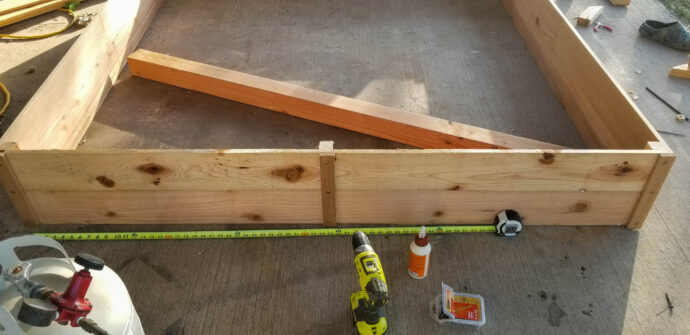
Once you have the box built, start adding the trim work! Not only does it make the planter look good, but it also helps add a little support as well!
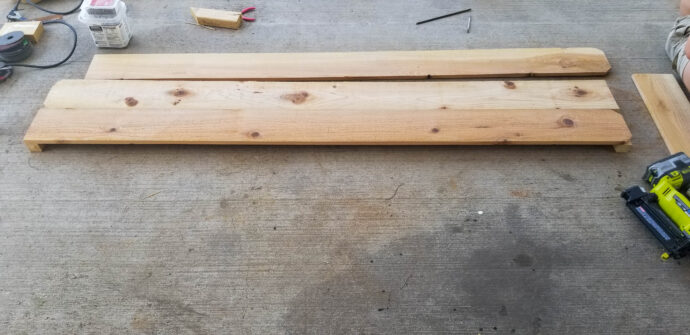
Rip down one of the 1x6x8 fence pickets along with 4 – 1x6x6 fence pickets into 1 1/4″ strips to use as your trim. Using the strips from the 1x6x6 – use the 1 1/4″ @ 11″, wood glue, and 1 1/2″ screws, and attach the trim pieces on two opposite sides.
Once two sides are done, overlap those sides with trim on the other two sides.
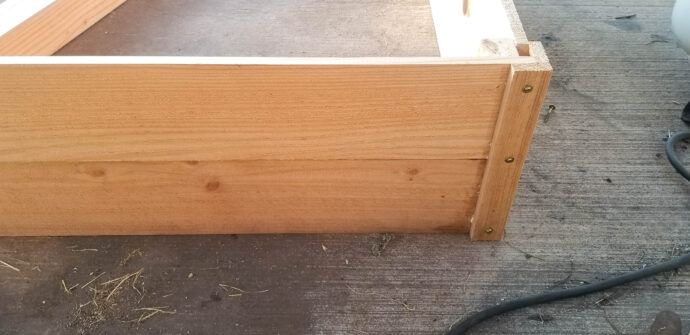
I just brad nailed the trim into place in the middle on these two sides that the trellis will be attached to, I will add the long 3 1/8″ screws through these trim boards and into the 4x4s once the trellis is done.
Now add the top trim, this is where you will want to use the 1x6x8 fence pickets that you ripped down, two ends will be 73″ long and you will need the extra length. I didn’t miter them or anything, just cut, glued, and brad nailed.
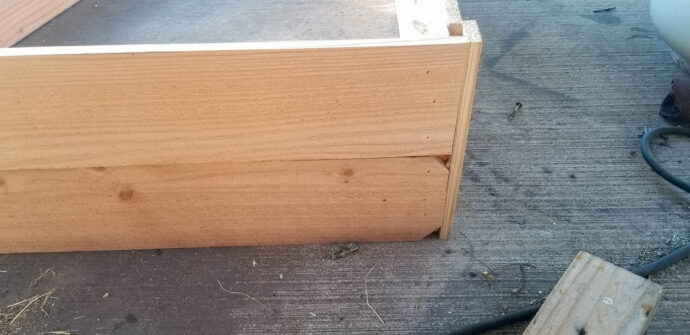
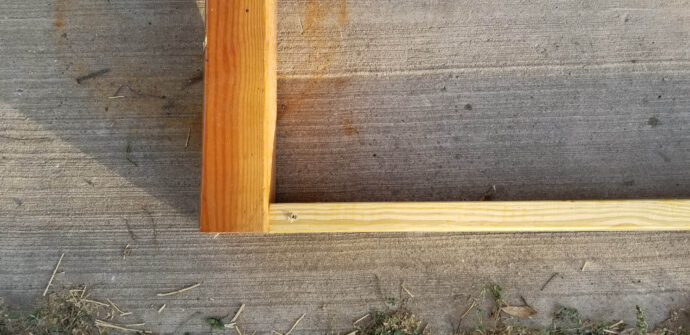
The sides that will have the trellis attached will have cutouts that allow the 4x4s to be flush with the sides of the box.
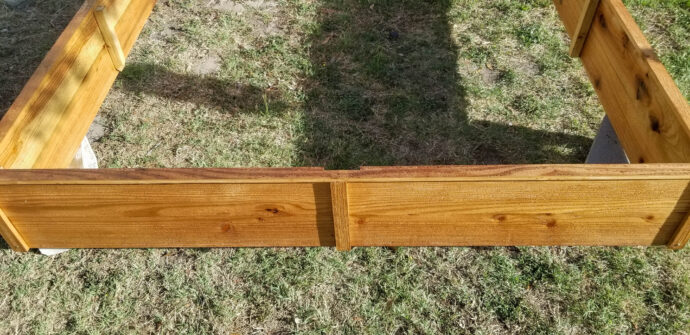
The top trim is flush with the small side trim pieces.
I sealed everything with spar urethane before assembling the trellis.
Building the Trellis for the Garden Planter
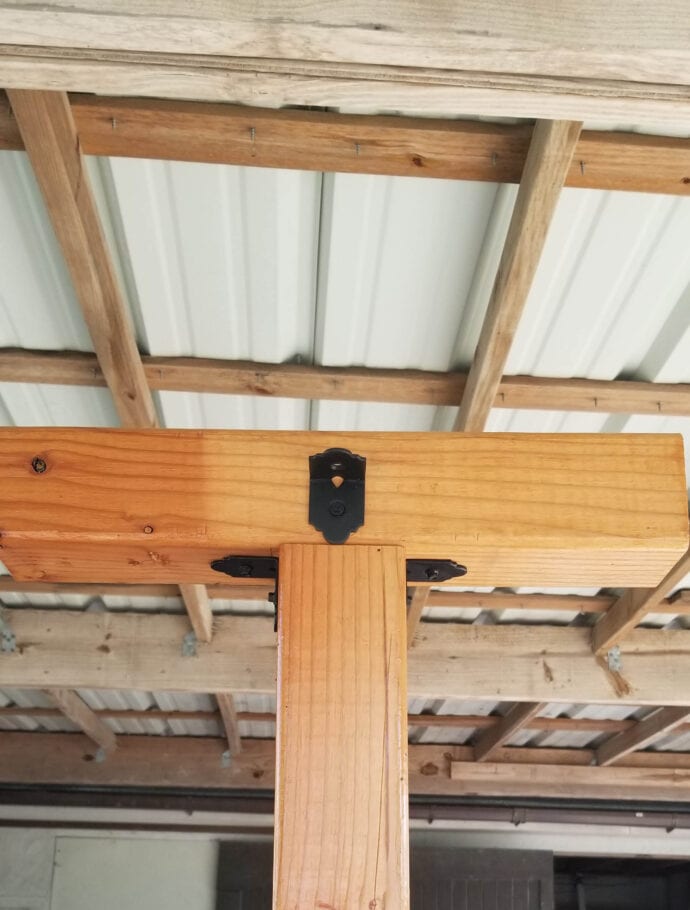
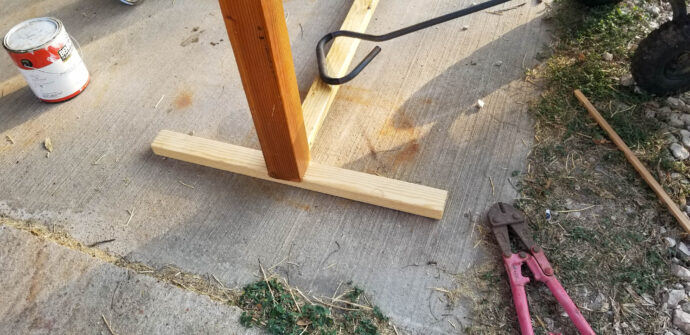
Cut the 4x4s down to 72″. The remaining off cut of the 4×4 is cut down to 19″ and attached to the top of the 4×4 @ 72″.
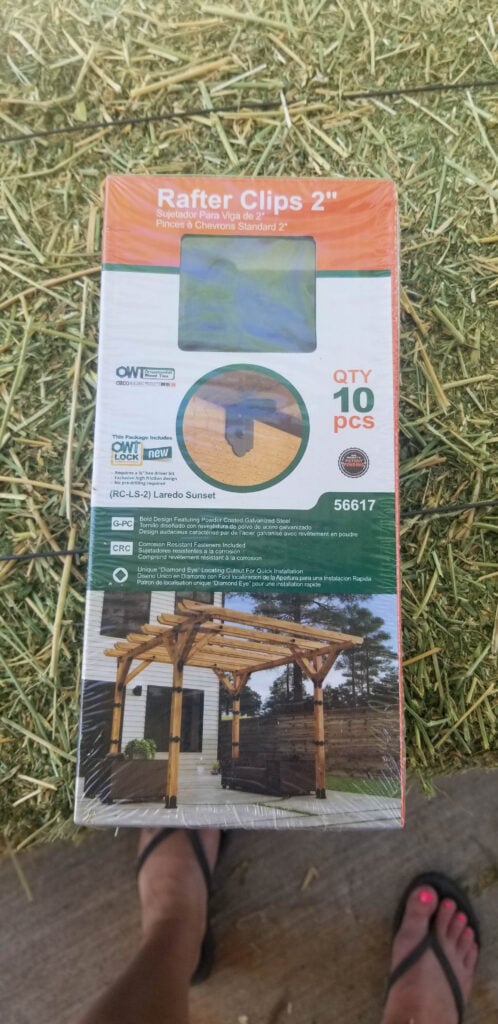
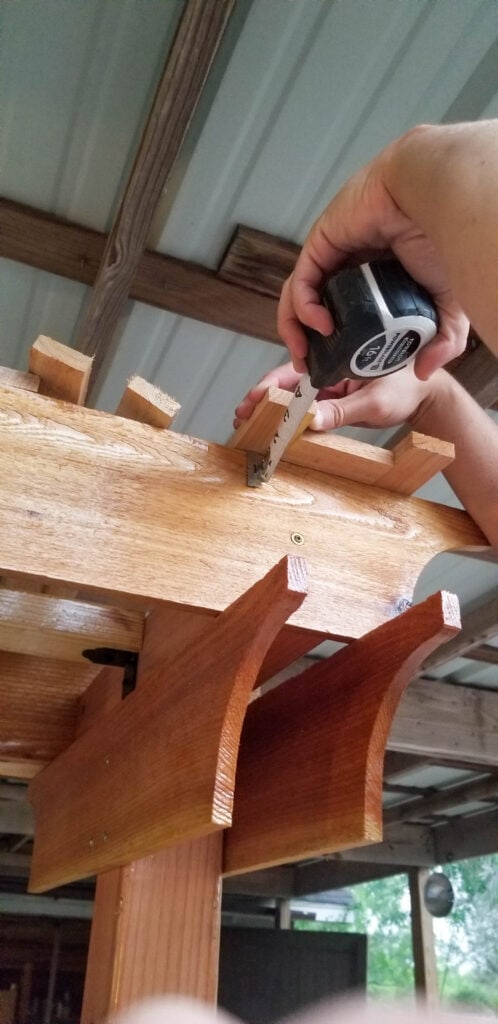
I found these ornamental rafter clips which cost 20 bucks, it is a 10 pack! When I was at Home Depot looking at the regular galvanized ones, they are somehow 4 dollars and some change EACH. So needing 6 of them plus screws was over the 20 bucks for this set that came with screws…and they look beautiful…and I have extras! Woot woot!
Attach the 4x4s using these rafter clips!
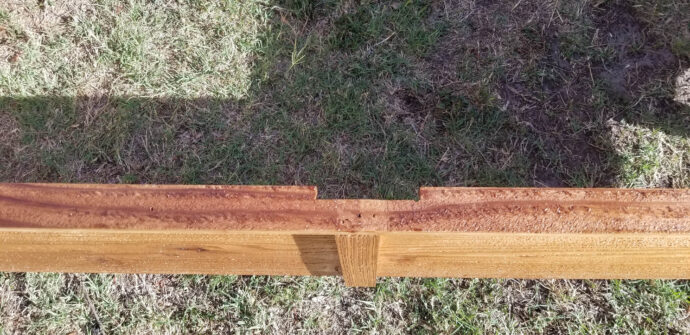
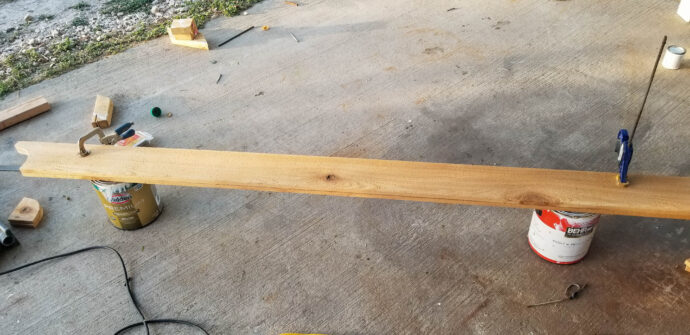
I sealed the 4x4s and moved on to cutting the decorative edges on the fence pickets that are at the top of the trellis.
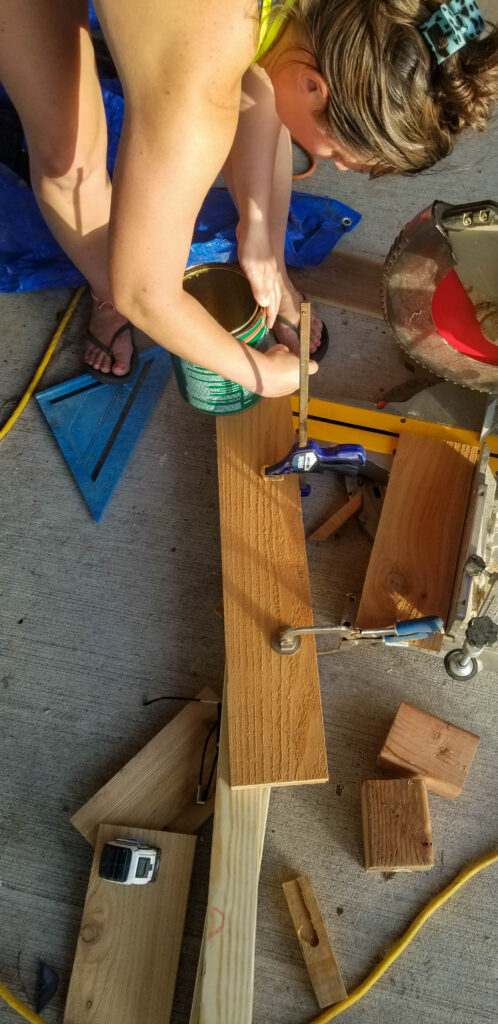
I just used a paint can to trace a round section to cut off. I set the paint can down 1 1/4″ from the top of the board, and over 3 5/8″ then traced!
Cut along the line with a jigsaw! I clamped two together at a time so I could cut them quicker and they would look the same on the ends that were closest to each other!
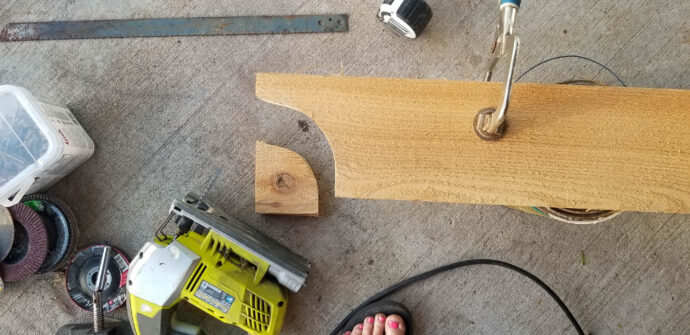
You will cut a total of six boards with this decorative edge.
Again, I sealed everything as I went, before assembly to make sure it was covered well!
I cut 2 – 2x3s @ 65″ to go in between the 4x4s on top and bottom to hold it steady, plus burying the bottom one under the soil of the raised bed helps to ensure the wind won’t run off with the trellis! LoL! We have had some FIERCE wind lately! Ugh!
I attached the top 2×3 with the same rafter clips, and for the bottom, I just shot screws in at an angle.
Top
Bottom
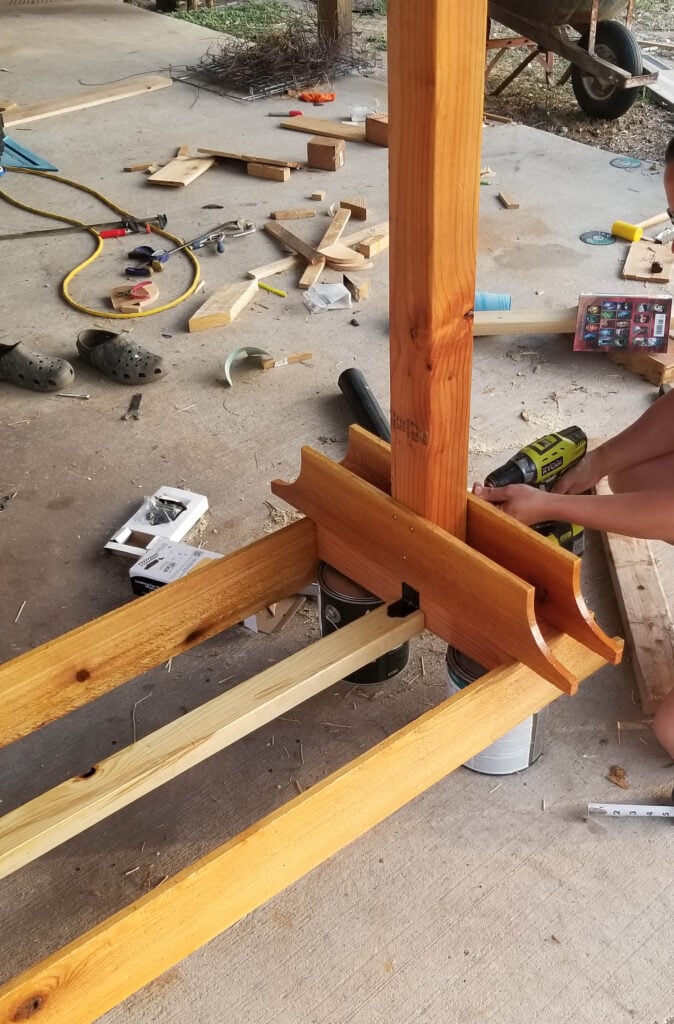
Once you have this basic square structure, you can start adding the fence pickets to make it perfect!
First, add the fence pickets @ 84″ with decorative ends to the front ends of the 4x4s. They are flush with the bottom of the 4x4s, so they stick up over the to of the 4x4s. Screw them into place!
Next, attach the 28″ fence pickets with decorative ends with the top parallel with the bottom of the 4×4. Screw them into place on both sides of each 4×4.
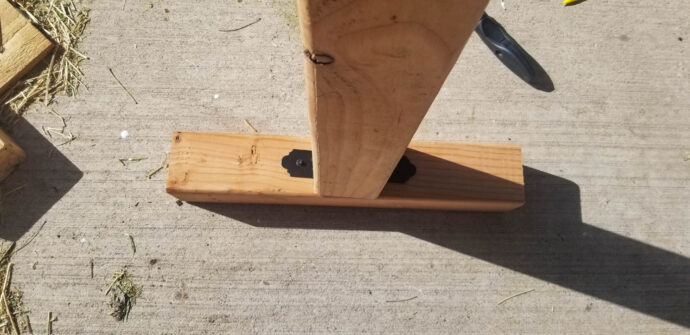
Now flip it back right side up! When I did this, I realized, I needed some ‘feet’ to make it a wee bit sturdier when in the garden! I just used the off cut 2x3s and screwed them in through the bottom of them!
Now, brad nail all the 1 1/4″ strips into place on top of the 84″ fence pickets! I used two spacers to keep them spaced the same all the way down without having to measure every time!
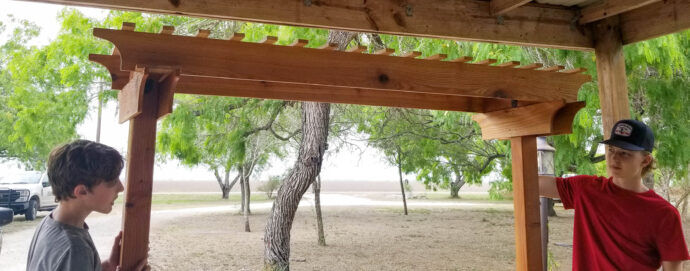
Check out my help…pretty sure they are arguing over how to carry it to move it! Lol!😂🤦🏼♀️
Attaching the Trellis to the Planter
Now carry the trellis over to where you are using the garden planter with trellis and level your planter box, and attach the trellis to the planter box. Use 3 1/8″ screws through the sides of the box and into the 4x4s.
Now the trellis is built, it just needs wire or something for the vines to climb…and dirt to fill it up!😉
You can use whatever you want as wire on this depending on what you are going to be growing! I am growing cucumbers on this one, so I opted for a decently strong wire, but not nearly as strong as the wire I am using on the trellis for watermelons!
I had some leftover wire from my garden fence which is a 2×2 wrapped wire for garden, yard, and kennel fences, it seems to be sold out everywhere right now and I am not sure why?! You can use any wire though, or even wood strips if you would rather!
I ripped down some fence pickets to 3/4″ wide, which I will say was too thin, so make sure and go with 1″ at the least, I put 1 1/2″ in the cut list just to be safe! You can also use 1x2s instead! Whatever you want, and just pinch the wire in between two of them, screw them together, and then screw the 1 1/2″ boards into the 4x4s of the trellis!
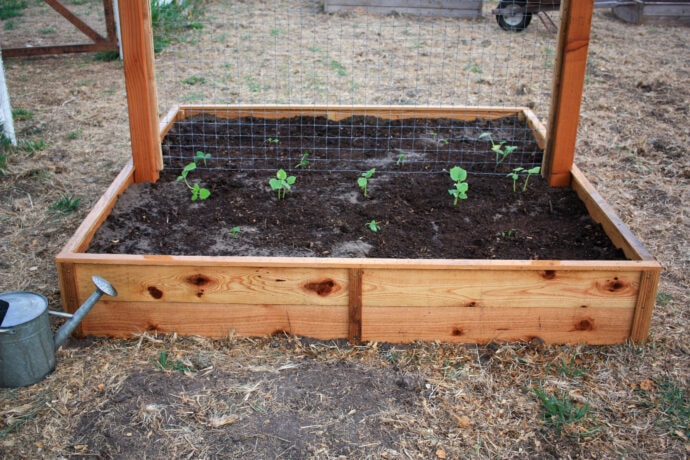
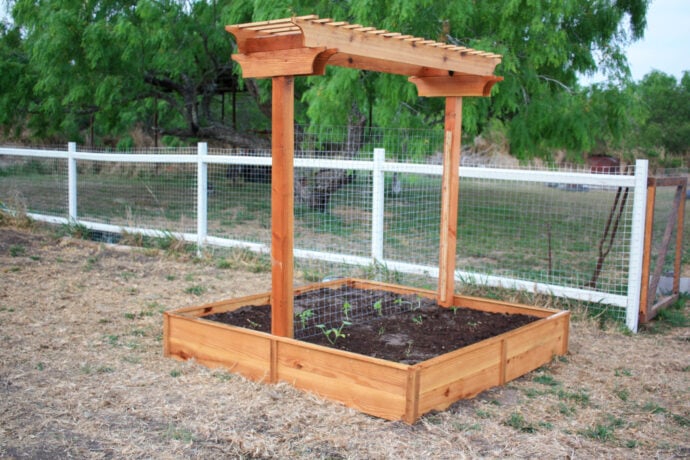
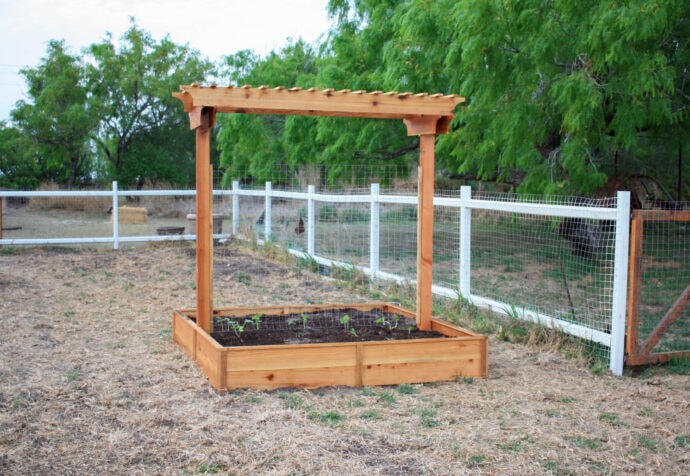
AND….it’s DONE! How beautiful! Fill that baby with some rich soil and some flowers or vegetables that love climbing, or maybe even some fruit like a grapevine!
My chicken coop in the photo is still going strong 2 years later! Want the free plans I offer for that? DIY Chicken Coop Or how about that goat shed further down the way? Gotcha covered with free plans for that as well! DIY Goat House
I really can’t get enough of it, but…I need to build at least 6 more raised beds so I better go get to work! Are you planting anything this year? Let me know in the comments below!
Thanks for stopping by! Happy Gardening!

Want to Save this Garden Planter with Trellis for later? Pin It!